Vanilla and Spice Nuts 19 May 2012 7:05 PM (12 years ago)
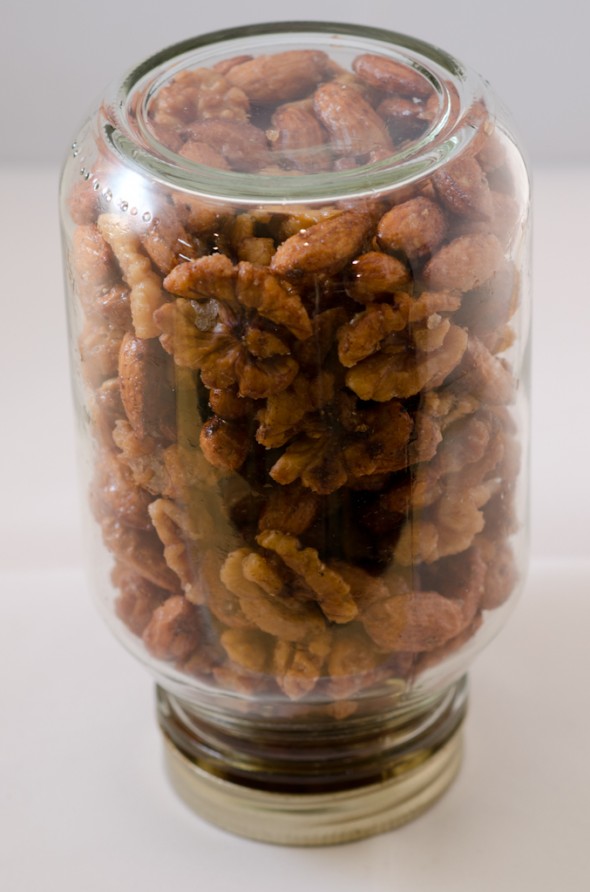
Every year around Christmas I make spiced nuts. LOTS of spiced nuts. Everyone gets a jar — family, friends, co-workers, third cousins three times removed… For about a week in December every flat surface in my apartment is covered with cooling spiced nuts. I make lots of different varieties — some sweet, some fiery hot, some spiked with bourbon, some mixed with candied ginger, some herby, some fruity, and the list goes on… A few stand out as favorites. These vanilla spiced nuts are definitely one of them.
Last night I was thinking, why do I only make spiced nuts during the holidays? They’re so good and so easy there’s no reason not to have them all year round. Cocktail party? dinner with friends? lazy saturday afternoon? These spiced nuts would compliment any and all of these occasions.
Feel free to experiment here — all walnuts, all almonds, throw in a few pecans or hazelnuts… toasty nuts plus sugar and spices rarely fail to please.
On a different note, it’s been a long time since I last updated Modern Beet. Lots of great things have happened since my last post nearly a year and a half ago — Steven and I got married , work is great, and our cat continues to be as cute as ever. Hopefully I’ll be able to find more time to post some of my food adventures here on Modern Beet. Thanks for reading!
Vanilla and Spice Nuts
Adapted from The Frog Commisary Cookbook1 lb mixed raw walnuts and almonds
1/2 c. sugar
2 1/2 T. vegetable oil
1 T. vanilla extract
1/4 t. salt
1/8 t. pepper
1/4 t. ground coriander
1/4 t. ground cinnamon
1/4 t. nutmeg
1/4 t. allspicePreheat oven to 325 degrees. Blanch nuts for 1 minute in boiling water. Drain well. White still hot, put in a bowl and toss with sugar and vegetable oil. Let stand 10 minutes.
Arrange nuts on a baking tray. Bake for about 30 minutes, turning every 5-10 minutes until brown and crispy.
Combine the vanilla, salt, pepper, coriander, cinnamon, nutmeg, & allspice. Put the still hot nuts in a bowl and toss with the seasoning mix. Spread in a single layer to cool. Enjoy!
The post Vanilla and Spice Nuts first appeared on Modern Beet.
No related posts.
Cornbread Smothered Pinto Beans 15 Nov 2010 9:21 PM (14 years ago)
I have a list about five miles long of recipes I have marked as ‘to-make’. It’s not a strict and systematic first-in-first-out queue, but more or less I try to start at the beginning and end at the end. I add to it fairly often, and try to consult it at least every month or so to remind myself of all the recipes that at one point or another inspired me enough to add it to my list. I’ll admit that I am better at adding things than I am at checking them off, but I do fully intend to make my way through each and every recipe on my ‘to-make’ list at some point in my life.
The list resides in an elastic bound moleskine that dates back to when I first got interested in cooking in 2006. It’s a collection of recipes from cookbooks, food blogs, newspapers, and friends. If it’s from a cookbook I note the title and the page number; if it’s from a blog or a newspaper I note the url; if it’s a recipe from a friend I either attach the recipe itself or make a note of the title of the email in which I received it. I like to think of it as my modern equivalent of the wooden recipe box that many of our grandmothers used to keep.
This is one of the recipes on my ‘to-make’ list, and comes from the lovely and very approachable cookbook “Cider Beans, Wild Greens, and Dandelion Jelly” by Joan E. Aller, which is all about cooking in southern Appalachia, focusing especially on B&Bs. Though the recipe seems lovely on its own, once I started making it, I couldn’t help but add a little this and that, especially to the beans since I love the humble pinto and wanted them to shine.
Whether you make this now or add it to your own ‘to-make’ list, I hope you enjoy it!
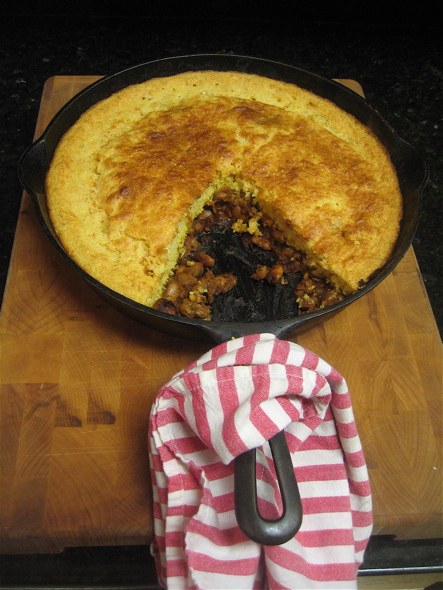
Cornbread Smothered Pinto Beans
Inspired by “Tennessee Style Corn Pone” in “Cider Beans, Wild Greens, and Dandelion Jelly” by Joan E. AllerPinto Beans
2 1/2 c. cooked pinto beans (homemade, from about 1 c. dried beans, or store bought)
2 T. rendered bacon fat, butter, or oil
1 small (fist-sized or smaller) onion, chopped
3 large cloves garlic, chopped
2 T. tomato paste
1 T. molasses
1/2 t. cayenne
1/2 t. chili powder
1/2 t. salt
1/4 t. black pepper
1/4 -1/2 c. bean cooking liquid or water
1 1/2 t. red wine vinegarCornbread Topping
1 c. cornmeal
1/4 c. flour
1/2 t. salt
1 t. baking soda
2 c. buttermilk
1 egg, lightly beaten
2 T. butter, melted.Special Equipment: 9 inch cast iron skillet
Preheat the oven to 400.
Melt the bacon fat, butter, or oil in the cast iron skillet over medium heat. Add onions and garlic and saute until translucent, about 4 minutes. Add the tomato paste, molasses, cayenne, chili powder, salt, and pepper and mix well. Add enough bean cooking liquid or water so that the mixture is slightly soupy. Reduce the heat to low and simmer mixture for about 8-10 minutes. Add the red wine vinegar, and adjust seasonings. Remove from heat and spread the beans into an even layer in the skillet.
Mix the cornmeal, flour, salt, and baking soda in a mixing bowl and stir to combine. In a separate bowl, whisk together the buttermilk, egg, and melted butter. Pour the wet ingredients into the dry ingredients and stir until thoroughly combined. The batter will be soupy. Pour batter over the beans in the skillet and smooth the top.
Transfer skillet to oven and bake for about 30 minutes, until the top is golden, the cornbread starts to pull away from the skillet at the sides, and a toothpick inserted into the center of the cornbread comes out clean. Allow to cool for about 10 minutes, then slice into wedges and serve. Enjoy!
 |
The post Cornbread Smothered Pinto Beans first appeared on Modern Beet.
Still Hungry? Try one of these:
Early Girl Tomato Sauce 18 Oct 2010 10:23 PM (14 years ago)
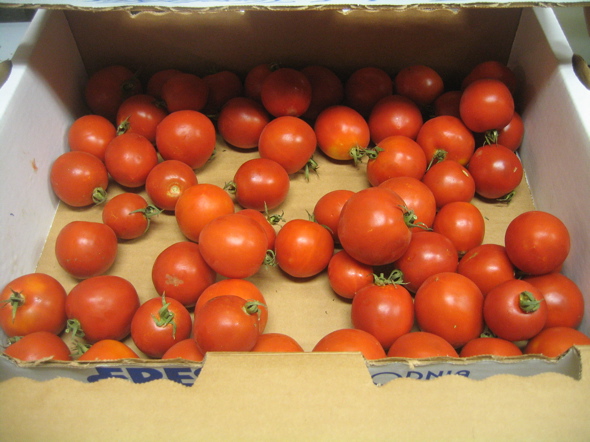
A whole lot of Early Girl Tomatoes — about 30% of what I originally had!
Early Girl Tomato Sauce with Roasted Onions and Garlic
make about 4 – 5 pints8 lbs early girl tomatoes, stems removed
salt
pepper
2 T. dried herbs (Italian seasoning blend, or a mixture of rosemary, thyme, basil, marjoram, and sage)
1 head garlic
olive oil
1 sweet onion
2 yellow onionsBring a large pot of water to a rolling boil. Prepare a large bowl of ice water and set aside.
Cut a small X in the bottom of each tomato, then add tomatoes in batches to the boiling water. Blanch for about 30-45 seconds, or until the skin starts to peel away from the tomato flesh. The blanching time depends on the ripeness of your tomatoes. Remove from the boiling water and place into the ice water. Repeat until all tomatoes are blanched.
Place a fine mesh strainer over a large pot (a 5 qt dutch oven works well). Remove the tomatoes from the ice water and peel the skins off and discard. Squeeze each tomato over the strainer so that the juices go into the pot but not the seeds. Add the de-seeded tomatoes to the pot. They will break down while cooking, so there is no need to chop them.
Add about 1 t. each salt and pepper to the tomatoes, as well as the dried herbs, then bring to a boil over medium heat. Reduce the heat to low and simmer for about 1.5 hours, stirring occasionally and scraping the bottom of the pan to dislodge any stuck bits, until the tomato sauce has thickened, but is still a little more watery than you’d like for the final product.
Meanwhile, preheat the oven to 400 degrees. Slice the top quarter off the head of garlic, drizzle with olive oil, then wrap loosely in foil. Loosely wrap the un-peeled onions individually in foil, then put them along with the garlic into the oven and roast for about 1 hour. Remove from oven, open foil, and allow to cool. Once cool, peel and chop the onions, and squeeze the garlic cloves out of their skins. and mash into a paste
Add the onions and garlic to the tomato mixture, mix well, and gently simmer for another 45 minutes or so Taste and season with more salt, pepper, herbs, or even a little acid (balsamic vinegar, for example). Use immediately, refrigerate for up to a week, or freeze in small portions for future use. Enjoy!
* * * * * * * * * * * * * * * * * * * *
I lack self control when it comes to buying vegetables from Mariquita Farms. In no way, shape, or form did I need twelve pounds of early girl tomatoes. But something — my vision of delicious ripe tomatoes paired with a lack of vegetable self control, most likely — made me check the box ‘1 flat Early Girl Tomatoes’ on the online order form. A few days later I found myself at Piccino picking up not only the twelve pounds of tomatoes, but also ten pound of apples and a 15-20 lb “Mystery Box” of vegetables (including more tomatoes!)… Delicious, yes. But we’re just two people! What was I thinking?
From the moment I picked up the tomatoes, the whole thing seemed like an ill-fated endeavor. To start, I couldn’t carry the 40 lbs of vegetables to my car by myself and had to have someone help me (which she did very graciously!). Next, there was no way I was going to fit that much produce into my fridge. Really? 40 lbs? that’s like if I tried to put my cat into the fridge four times over… or maybe my entire left leg… you get my point — that’s a lot of produce. After that, I discovered that fruit flies LOVE tomatoes. Since I couldn’t put them in the fridge both because of space constraints and the fact that one should never put tomatoes in the fridge, I left them on the counter only to find the box swarming with fruit flies the next morning… ugh. What was I thinking?
Ok. I know what I was thinking. I was thinking — these Mariquita Farms tomatoes are SO GOOD and they are only available for a few short weeks every year! I missed tomato season last year because I was in the process of moving back from Germany, and I absolutely didn’t want to miss it this year. That’s what I was thinking. So what if I had 14 lbs of tomatoes staring me in the face? I vowed to make good use of them.
And make good use of them I did! I dried about 4 lbs of them (cut in half, dry in a 200 degree oven on oiled cookie racks until dry but still pliable, about 4 hours), saved one lb, and made the rest into this awesome, simple tomato sauce. I’ve been using it for all sorts of things since I made it this weekend — as a dipping sauce for cheesy bread, as pizza sauce, mixed with sauteed greens, eating it straight from the jar with a spoon… you know, the usual :)
The most time consuming part of this recipe is blanching and peeling the tomatoes. If you have a food mill, you can ENTIRELY skip this step! I didn’t use my food mill this time since I desired a chunky sauce, but I discovered the tomatoes break down so much while cooking that it would have been a wash texture-wise between blanching & skinning the tomatoes versus roughly chopping them with the skin and seeds and passing the mixture through a food mill (which removes skins and seeds) after cooking (but before adding the onions). Next time I have this many tomatoes I’ll definitely use the food mill and save myself about an hour of blanching and skinning. Live and learn.
Well, tomato season is upon us for probably 3-4 more weeks, and if you find you cannot exercise tomato self-control (similar to me) when confronted with a case of beautiful dry-farmed tomatoes, try this recipe and know that you will have delicious tomato sauce for weeks, months to come. Enjoy!
Roasted onions and garlic — I roasted one too many onions, but have been making great use of it on other things!
The post Early Girl Tomato Sauce first appeared on Modern Beet.
Still Hungry? Try one of these:
“Potsticker” Radishes 12 Oct 2010 10:05 PM (14 years ago)
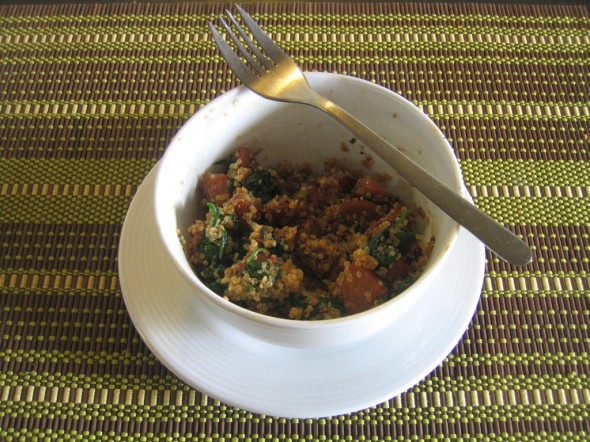
Apologies for the not-so-great picture — I didn’t expect it to be so delicious and hadn’t planned on photographing it! A good thing, I suppose!
1 bunch Watermelon radishes, peeled, cut into 1 inch chunks
1 – 1 1/2 T. olive oil
salt and pepper
water
1 T. maple syrup (optional)Mix radish chunks with olive oil in a bowl and toss to coat. The radishes should be generously coated in oil. Season well with salt and pepper.
Heat a nonstick skillet over medium-high heat. Add the radishes and cook for 1-2 minutes, stirring once or twice. Add enough water to come up about two thirds the height of the radishes, and add the maple syrup if using. Cover and simmer until the water is mostly absorbed, about 7-10 minutes. Uncover and boil off the rest of the water. Fry the radishes in the remaining oil until the edges become crisp. Turn once or twice after one side is crisp to allow the other sides of the radish chunks to develop a crisp crust. Remove from pan and serve immediately. Enjoy!
My favorite type of radish is — hands-down — the french breakfast radish. Oblong, fading from white to pink, mostly mild with a slight peppery bite, I can eat pounds of them if they are slathered with high-quality butter and garnished with flakey sea salt… They are one of life’s small pleasures.
But life doesn’t always give you french breakfast radishes. In fact, sometimes it gives you watermelon radishes when you are expecting beets. This afternoon I pulled out a bag of white-ish root vegetables from my refrigerator thinking it was a bag of white beets from a recent Mariquita Farms Mystery Box. I cut the inch or so of stem from the ‘beets’, then proceeded to cut off the tail in preparation for roasting, only to discover a bright magenta center — not exactly the white beets I was expecting! Slightly perplexed, I cut into one and discovered it was not a white beet at all, but rather a watermelon radish! Que sera, sera… The two are almost identical on the exterior when the greens aren’t attached, so I can forgive myself for confusing the two…
But although I could forgive my vegetable confusion, it really threw my lunch plans for a loop. I was planning roasted white beets with sauteed spinach atop quinoa. What could I do with watermelon radishes instead?
Though I typically eat watermelon radishes raw (julienned with soy, mirin, sesame oil, sesame seeds, and rice vinegar), today I wanted something hot. Roasted radishes seemed… not so appetizing… so I decided to experiment. I decided to cook these radishes how I typically cook potstickers — a quick saute in oil, a medium-length steam, and finally another fry to crisp the edges.
Wary, I flipped on the burner and started cooking. Worse comes to worst I could always scrap my lunch and visit the American Grilled Cheese Kitchen… oh the joys of working from home on Tuesdays.
After about 15 minutes the “potsticker” radishes were done, and I spooned them atop my quinoa and spinach. I took one bite, then another, and deemed the grilled cheese kitchen completely unnecessary. The radishes were DELICIOUS! Who’d have thought? I guess, when life gives you radishes………
On a different note, things have been pretty quiet around Modern Beet as of late. I haven’t been cooking much, or at least not things that are really worth sharing. But something else exciting is going on — my big news is that I got an awesome new job! You might have heard of the company… they do awesome things, have lots of awesome people, and generally just exude awesomeness… Wish me luck!
The post “Potsticker” Radishes first appeared on Modern Beet.
No related posts.
Homemade Wild Blackberry Jam 5 Sep 2010 8:56 PM (14 years ago)
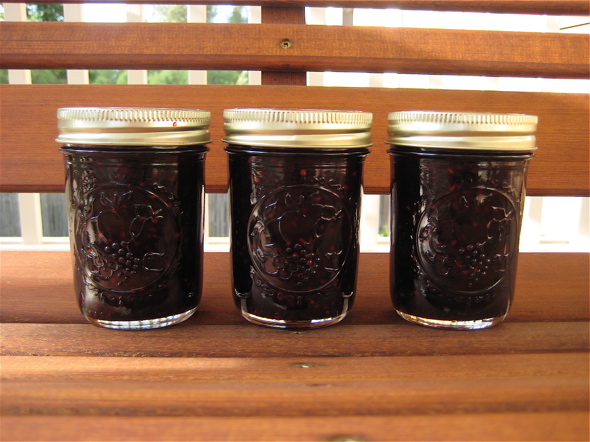
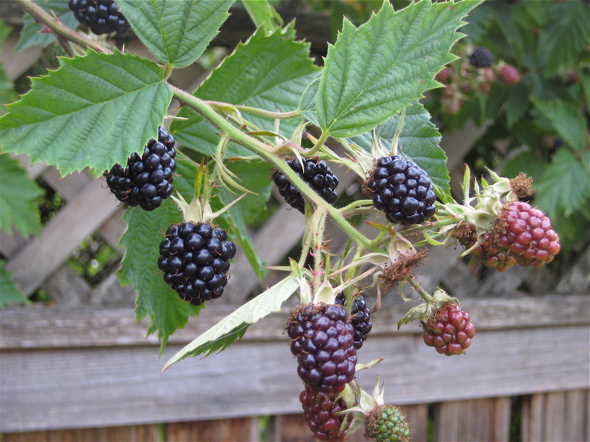
Picking wild blackberries is something I truly miss about living in the Pacific Northwest. Blackberry bushes hang heavy with ripe fruit in late August and early September all over the state of Washington. After I finished my year of traveling and before I left for California, I spent an August and a September living in rural Pierce county (which is even more rife with blackberry bushes than the average Washington county) and I took every opportunity possible to go outside and pick them. Blackberry cobbler, blackberry jam, blackberry puree, blackberry pancakes — if I could add blackberries, you name it, I made it.
My most frequent foraging ground was (conveniently) my dad’s backyard. Blackberry bushes wildly spill over his back fence, offering gallons of berries for the picking. And when I’d picked every ripe berry offered there I only had to travel a few hundred feet down the road to another fruitful thicket. Ah, Edgewood.
Anyhow, a couple of weeks ago I went up to Washington for a visit with my family (and the IFBC). I arrived early in the afternoon on a Saturday, and Dad and I spent most of the afternoon sitting on his deck sipping local micro brew and catching up with each others’ lives. From the deck you can spy the myriad blackberry bushes that spill over the fence that marks his property boundary. Perhaps having these heavy, ripe, prickly blackberry bushes in my visual periphery all afternoon reminded me of simpler times past (before I went to grad school and started my ‘adult life’), and inspired me to make jam. I mean, what else does one do on vacation than make jam?
Making jam is a labor of love. No bones about it. For most people, there’s absolutely no way that making your own jam is more cost-effective or time-efficient than buying even the fanciest jam available at Whole Foods or the like. It usually costs more to make your own, and certainly takes more time, but still, there is something just lovely about the exercise. It’s a quiet, thoughtful activity, good for the soul I’d say. And I swear it tastes better! :)
Anyhow, next time you find yourself with access to wild blackberries, consider taking a few hours out of your life to make this delicious and simple blackberry jam. Your quiet side will thank you for taking the time.
* * * * * * * * * * * * * * * * * * * *
Wild Blackberry Jam
from Christine Ferber’s Mes Confitures
Makes 6 – 7 half pints1 kg wild blackberries (2.2 lbs), picked over and well rinsed
800 g sugar
juice of 1 medium lemon
1/2 t vanilla extract (optional)Combine berries, sugar, and lemon juice in a large saucepan. Bring to a boil over medium-high heat, pour mixture into a ceramic or glass bowl, cover with parchment, refrigerate and let stand overnight.
The next day, pour the berry mixture into a preserving pan. Add vanilla if using. Bring to a boil and cook for about 10 minutes until the jam is set (I use the wrinkle test*). Pour into sterilized jars** and seal***.
Let the jam cool. It is ready to use immediately. Enjoy!
* The Wrinkle Test = put a small plate in the freezer to chill for at least 10 minutes. When you think the jam is done, pour about 1/2 t. of the jam onto the chilled plate, then replace in the freezer for 90 seconds. Remove the plate and push the jam with your finger; if it wrinkles, the jam is done; if the jam doesn’t wrinkle (imagine pushing your finger through honey), continue cooking the jam and re-test in 4-5 minutes.
**The easiest way to sterilize jars is to place them (without rings or lids) into a 250 degree oven for 10 minutes. Sterilize rings and lids by boiling for 5 minutes. Leave rings and lids in hot water until ready to use.
*** To properly seal canned jam, boil jars in a large pot of water for 7-10 minutes. The water should cover the jars by at least 2 inches.
The post Homemade Wild Blackberry Jam first appeared on Modern Beet.
No related posts.
Swiss Chard with Indian Lime Pickle 2 Aug 2010 6:54 PM (14 years ago)
Poor chard. People seem to get it in their CSA boxes week after week after week (after week). This abundance (some might say excess) can cause a proclaimed chard lover to mutter, “chard… again…” and can lead even those with the deepest vegetable love to develop a mild disdain, an overwhelmed antipathy, or even an outright hatred towards chard!
I love chard but often find myself at a dead end when trying to come up with new ways to prepare the humble green after weeks, months, years of getting it my CSA boxes. How many different ways are there to saute, braise, broil, bake, or cream a leafy green? Sure, I’ll add a little spice, perhaps some candied ginger, an extra dollop of butter, but at the end of the day, I feel like I have exhausted all the possibilities.
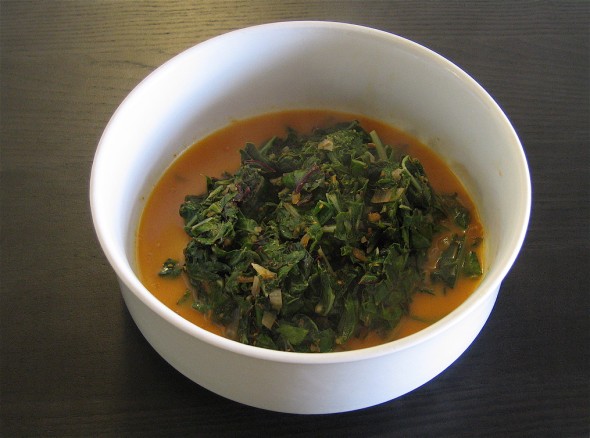
This chard preparation, however, is REALLY different. It’s not that often that I find a vegetable dish that tastes nothing like anything I’ve ever made before, and it’s even less frequent that I actually like (let alone love) that vegetable dish! With the first bite of this, I knew I had stumbled on something different, and more importantly, something remarkably delicious. Who’d have thought it would all be thanks to lime pickle?
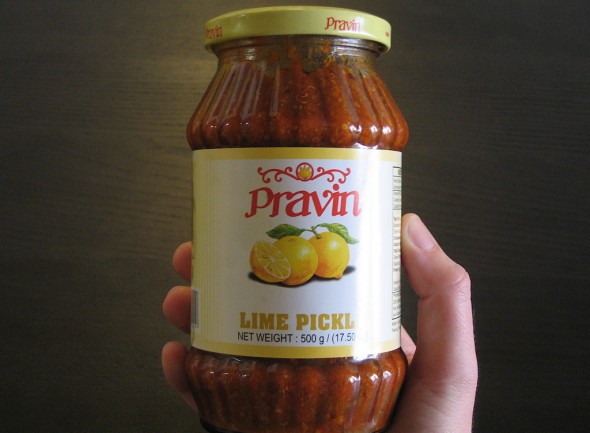
Indian lime pickle is a very pungent, salty, mildly spicy, incredibly unique condiment made with mustard oil. I first tasted it back in 2001 when I spent a few months living in Jaipur, India. The first time I put Indian pickle in my mouth, I’m pretty sure I spit it out and puckered my face with disgust. Ewww! But somehow I’ve come to love the pungent condiment, and it’s my favorite part of any Indian dining experience (and the fennel/sugar palate cleanser at the end).
Since lime pickle is decidedly an acquired taste, I don’t really recommend you try this recipe unless you know you like Indian pickles. The taste of the pickle in this dish is assertive and unmistakable. Never tried lime pickle or can’t remember if you have? Pick up a jar at an Indian grocery store, or ask for a side dish of pickle the next time you eat at an Indian restaurant. If you get it in a restaurant, it’ll probably be mixed pickle (with mango, lime, carrots, and other vegetables), but the taste is 95% the same. If it turns out you like pungent pickles as much as I do, then by all means, make this easy, unique chard dish and be excited that the world of leafy green vegetables is wider than you might have thought. :)
Swiss Chard with Indian Lime Pickle
Adapted from Epicurious.com
Serves 21 1/2 T. Indian Lime Pickle
1-2T. olive oil
juice from half a lemon
1 t. salt
1 T. butter
1 shallot, minced
2 T. water
1 bunch swiss chard, stems removed and reserved for another use, chopped into bite size piecesFinely mince the lime pickle. Combine with olive oil, lemon juice, and salt in a small bowl and mix. Set aside. Heat butter in a saute pan over medium heat. Add shallot and saute until translucent. Add chard and toss to coat with butter. Add water, then cover pan to steam the chard, lifting the lid and stirring occasionally until the chard is wilted, about 3-4 minutes total. Add the lime pickle mixture and stir to combine. Cook an addition 30-40 seconds. Serve atop brown rice or as a side dish for an Indian meal. Enjoy!
The post Swiss Chard with Indian Lime Pickle first appeared on Modern Beet.
Still Hungry? Try one of these:


