A Year in Review 31 Dec 2025 3:00 PM (3 months ago)
It’s been a long, long year. So much has changed and so much has stayed the same. If you’re like me, you likely stayed up late to watch 2025 die a happy death.
But, in the world of technology and software — there was lots to talk about too. From my perspective, I have some opinions about what the last year brought us. Let’s talk a look:
Front-end Web Development
We began 2025 with four technologies used the most as front-ends:
- React
- Angular
- Vue
- Svelte
This hasn’t changed a lot. Each of the libraries have incrementally changed. If you’re using one of these platforms, you’re in a good stead of common web projects.
Meta-Frameworks
What has changed this year is that it feels like development is moving more towards meta-frameworks like Next, Nuxt, and Analog. But it has to be said, it matters a lot what you’re building, but meta-frameworks are a great solution for building line-of-business apps.
Plain JavaScript
The other solution for web development that is gaining in popularity is Plain JavaScript. The browser JavaScript version are incredibly well heeled at this point, and it is possible to create complex apps without platforms or meta-frameworks. Though, I think it still involves a lot of work.
Vite
One winner this year continues to be Vite. More and more, Vite is the center of most platforms and meta-frameworks. With it’s great development experience, and pluggable system for using your own compilation step (i.e. replacing Rollup if you want), Vite continues to thrive.
What About Web Components?
Lastly, I wanted to mention Web Components. Every year, it seems, Web Components are set to take over front-end development. But again, a year has gone by and it continues to be a small community around it. I still think it’s got a lot to offer, but there isn’t a single, great solution to building them.
Mobile Development
I’ll admit, I don’t really build anything for mobile devices any longer, but I continue to keep my ear to the ground as it’s so important to most architectures.
As many know, you can no longer deploy iOS apps with Xamarin now that it’s at end-of-life. For many Xamarin developers, MAUI is the obvious choice. While Microsoft has been making big strides in making MAUI work for mobile developers, I think it has upset a lot of them.
I’ve heard many of these people just moving to other platforms like React Native and Flutter. While both of these require a completely re-write, them seem more mature for experienced mobile developers.
I don’t work with many developers that work with the tons of other platforms for mobile (e.g. Swift), so I don’t know how those have changed this year.
.NET Got a New Version
In it’s usual cadence, Microsoft released a new version of .NET 10 (and C#). This is a long-term supported version, so many projects are upgrading to the latest version. There are too many features to outline here (I did do a talk at OreDev that you can watch here).
There are a couple features I’ll mention here that are important but maybe missed by some:
- The new Garbage Collector (DATAS) that handles smaller workloads much better, is now the default. It seems to fit containers much better since those loads are often running on limited memory.
- New support for Contains clause in Entity Framework 10. (Coverts collection of values to an
INclause). - Validation support in Minimal APIs.
- C# adds Extension members and the new
fieldkeyword.
Aspire Matured
Aspire got a lot more mature this year. It finally broke out of it’s .NET shell and now works in other ecosystems. Some of the changes that Aspire brought this year that I love include:
- Aspire CLI support.
- Single-File App support for AppHost.
- Python app support.
- Improved Node/JavaScript app support.
- MCP Support for CoPilot.
- More deployment targets.
Artificial Intelligence (mostly LLMs)
This is probably the biggest changes this year. AI has promised a lot for developers and the general public. But in some ways it’s started to fulfill those promises for developers.
In 2024, the idea of prompt engineering replacing developers was all the talk. Lots of companies took these promises to heart and started to cut developer headcount. But I think in 2025, they started to see the real benefits of using AI in software development.
From the developer’s perspective, lots of us have been using Agent-Mode to help us build, refactor, and modify our codebases. Has it removed the need for developers? No. But, like every page in the history of software, it has made us more productive.
Just like higher level languages (e.g. C++), garbage collected languages (e.g. Java, C#), and even containers have made it much easier to build complex systems. We no longer think of these as reducing the number of developers, but enabling us to build better systems. We take these advances for granted. We just use these tools without thinking. I suspect that AI agents will be part of our tool chain for some time.
I shared my thoughts on this two years ago in one of my Rant Videos. Ultimately, I haven’t changed my mind much. Code generated by AI models still needs to be validated. Once we generate code, we own it. Just like you’d do a code review before developers check in code; we should be treating generated code the same.
Final Thoughts
There is a lot of fear among developers right now. I don’t think this is going away in 2026. This reminds of of 2008 and 2000 when there were big developer purges. I’m hearing of a lot of people that have been without work for over a year. This is a scary time.
My only advice is to keep in touch with your community. It’s time to go back to user groups. Keep up with your friends from prior jobs. I think that’s key to most of us to survive other year of chaotic hiring.
What do you think?

Based on a work at wildermuth.com.


A Small Update 26 Oct 2025 4:00 PM (5 months ago)
 It's been a long year. In January, my wife and I moved to The Hague in the Netherlands. My goal was to get settled and be back at producing content pretty quickly. But It's been tough to get back on schedule.
I think I underestimated the culture shock and integration that would take so much of my time. Learning a new language, getting setup to work legally, finding a social circle with my limited Dutch, and a big change of life to live a walking lifestyle; they’ve all taken a toll on my ability to get back to doing what I love.
Ten months in and things are starting to settled down. All our furniture is finally here. We’ve gotten almost all the repairs/changes we needed to do on our new home. (The previous owners have lived there since 1984 - so there were some meaningful upgrades and maintenance to be done).
I think I’m ready to start again. In the rest of the year, you should see my YouTube videos, blog posts, and updates to my Pluralsight courses all get back to normal. Cross your fingers with me.
In case you’re curious, I am glad we made the move but it hasn’t come with it’s own share of stress, breakdowns, and conflict. Overall, it is a positive. I’m losing weight now that I’ve extracated myself from a car. Walking and using public transit only has made a real benefit to my health, happiness and wellness.
Keep tuned for more in November.
Based on a work at wildermuth.com.
.%3C/p%3E%0A%3Cp%3EI%20think%20I%E2%80%99m%20ready%20to%20start%20again.%20In%20the%20rest%20of%20the%20year,%20you%20should%20see%20my%20YouTube%20videos,%20blog%20posts,%20and%20updates%20to%20my%20Pluralsight%20courses%20all%20get%20back%20to%20normal.%20Cross%20your%20fingers%20with%20me.%3C/p%3E%0A%3Cp%3EIn%20case%20you%E2%80%99re%20curious,%20I%20am%20glad%20we%20made%20the%20move%20but%20it%20hasn%E2%80%99t%20come%20with%20it%E2%80%99s%20own%20share%20of%20stress,%20breakdowns,%20and%20conflict.%20Overall,%20it%20is%20a%20positive.%20I%E2%80%99m%20losing%20weight%20now%20that%20I%E2%80%99ve%20extracated%20myself%20from%20a%20car.%20Walking%20and%20using%20public%20transit%20only%20has%20made%20a%20real%20benefit%20to%20my%20health,%20happiness%20and%20wellness.%3C/p%3E%0A%3Cp%3EKeep%20tuned%20for%20more%20in%20November.%3C/p%3E%0A%0A%20%20%20%20%20%20%3Cdiv%3E%0A%20%20%20%20%20%20%20%20%3Cdiv%3E%0A%20%20%20%20%20%20%20%20%20%20%3Ca%20rel%3D%22license%22%20href%3D%22http://creativecommons.org/licenses/by-nc-nd/3.0/%22%3E%0A%20%20%20%20%20%20%20%20%20%20%20%20%3Cimg%20alt%3D%22Creative%20Commons%20License%22%20style%3D%22border-width:%200%22%20src%3D%22http://i.creativecommons.org/l/by-nc-nd/3.0/88x31.png%22%20/%3E%3C/a%3E%3C/div%3E%0A%20%20%20%20%20%20%20%20%3Cdiv%3E%0A%20%20%20%20%20%20%20%20%20%20This%20work%20by%20%3Ca%20xmlns:cc%3D%22http://creativecommons.org/ns%23%22%20href%3D%22http://wildermuth.com%22%20property%3D%22cc:attributionName%22%20rel%3D%22cc:attributionURL%22%3EShawn%20Wildermuth%3C/a%3E%20is%0A%20%20%20%20%20%20%20%20%20%20licensed%20under%20a%20%3Ca%20rel%3D%22license%22%20href%3D%22http://creativecommons.org/licenses/by-nc-nd/3.0/%22%3E%0A%20%20%20%20%20%20%20%20%20%20%20%20Creative%20Commons%20Attribution-NonCommercial-NoDerivs%203.0%20Unported%20License%3C/a%3E.%3Cbr%20/%3E%0A%20%20%20%20%20%20%20%20%20%20Based%20on%20a%20work%20at%20%3Ca%20xmlns:dct%3D%22http://purl.org/dc/terms/%22%20href%3D%22http://wildermuth.com%22%20rel%3D%22dct:source%22%3Ewildermuth.com%3C/a%3E.%3C/div%3E%0A%20%20%20%20%20%20%20%20%3C/div%3E%0A%20%20%20%20%20%20%20%20%3Chr/%3E%3Cdiv%3EIf%20you%20liked%20this%20article,%20see%20Shawn's%20courses%20on%20%3Ca%20href%3D%22http://shawnw.me/pscourses%22%3EPluralsight%3C/a%3E.%3C/div%3E)
Pondering About Using AI for Coding 30 Jun 2025 4:00 PM (9 months ago)
In the start of my career, the most valuable tool I had was a text editor. I used the amazing QEdit (later called SemWare Editor) that I wrote code from 1985 till I moved to Windows development in the 1990s.
This editor influenced the rest of my career. I expected every editor after qedit to be instantly responsive and defer to my typing instead of helping me along. This meant, I have always been resistant to having an IDE help me code.
For my C# projects, Visual Studio has always been a little busy with Intellisense. I’ve actually got a video on how to quiet Visual Studio.
But it’s not just Visual Studio, Resharper is a go-to tool that many C# developers use to help them code and refactor. It’s a great tool, but reducing it’s noise was harder than it should be. So, like Intellisense, I shunned Resharper in my IDE for the most part.
When I started to use VS Code, I really liked that the editor was very slim and fast — but over time, plugins and additions to the tool made it more an more uncomfortable.
Then came Copilot. By default, I really hated the integration with Copilot. I was never interested in typing a few characters and build an entire function. The number of popups in Visual Studio and Code as they tried to help me was constantly in my way. My cry was “Just Let Me Type!” So, it’s taken me a while to come to terms with it all.
Let me say that I believe, unequivocally, that AI code models are here to stay.
The integrating of AI models into tooling can help developers in some really great ways. But…for me…I want to keep the AI tools out of the editor; kinda.
Vibe coding; prompt engineering; and the end of developers — I think are all hyperbole. I think we’re getting away from how these tools can really help us. But, I think that AI chats are way more effective to help me build apps.
AI Chats allow me to ask questions and build code or make changes to my code in a really effective way. I still think the AI is best at building the start of a project (in lieu of scaffolding) and refactoring a project than actually building full-fledged solutions.
Just because you can describe a whole system and have it generated (and then, hopefully validated by humans) doesn’t mean you should. It reminds me of how we were building code earlier in my career.
In the early 1990s, building code was expensive. Planning was crucial to successful projects. Because we didn’t have reliable garbage collection and security validation (and the use of unmanaged pointers), we needed to plan out or projects very carefully.
This was the era of Waterfall Development. You spent a significant amount of time writing a specification. You spent more time to validate the assumptions in those specifications. Only then, did you actually start writing code. Because of the limitations in the languages, tooling, and talent, this worked well. Not perfect, but well.
In the mean time, we’ve moved beyond that to be able to write code and refactor changes as the tooling has improved. Write code and break things as well as writing tests and validating the code, not the spec is now the norm. Many readers of this blog probably can’t imagine how any projects got finished. They’re not completely wrong.
That brings us to today. By embracing vibe coding and prompt engineering, we’re back to writing specs. If you want the AI to build the project, you really have to know what you are building and how you are building it in order to have a decent shot generating the right kind of code. Is that really what we want? I am not sure.
So, what do you think? Am I just an old dude with antiquated ideas? Maybe. Let’s have that discussion (either by reaching out on Bluesky or commenting on this post). I’m ready to learn. I am not convinced I am correct.
Based on a work at wildermuth.com.
%3C/a%3E%20that%20I%20wrote%20code%20from%201985%20till%20I%20moved%20to%20Windows%20development%20in%20the%201990s.%3C/p%3E%0A%3Cdiv%3E%0A%20%20%3Cimg%20class%3D%22aspect-video%22%20src%3D%22https://blog.wildermuth.com/img/qedit.gif%22%20alt%3D%22qedit%20editor%22%20/%3E%0A%3C/div%3E%0A%3Cp%3EThis%20editor%20influenced%20the%20rest%20of%20my%20career.%20I%20expected%20every%20editor%20after%20qedit%20to%20be%20instantly%20responsive%20and%20defer%20to%20my%20typing%20instead%20of%20helping%20me%20along.%20This%20meant,%20I%20have%20always%20been%20resistant%20to%20having%20an%20IDE%20help%20me%20code.%3C/p%3E%0A%3Cp%3EFor%20my%20C%23%20projects,%20Visual%20Studio%20has%20always%20been%20a%20little%20busy%20with%20Intellisense.%20I%E2%80%99ve%20actually%20got%20a%20%3Ca%20href%3D%22https://youtu.be/JjGTSJ_P1uI%22%3Evideo%20on%20how%20to%20quiet%20Visual%20Studio%3C/a%3E.%3C/p%3E%0A%3Cp%3EBut%20it%E2%80%99s%20not%20just%20Visual%20Studio,%20Resharper%20is%20a%20go-to%20tool%20that%20many%20C%23%20developers%20use%20to%20help%20them%20code%20and%20refactor.%20It%E2%80%99s%20a%20great%20tool,%20but%20reducing%20it%E2%80%99s%20noise%20was%20harder%20than%20it%20should%20be.%20So,%20like%20Intellisense,%20I%20shunned%20Resharper%20in%20my%20IDE%20for%20the%20most%20part.%3C/p%3E%0A%3Cp%3EWhen%20I%20started%20to%20use%20VS%20Code,%20I%20really%20liked%20that%20the%20editor%20was%20very%20slim%20and%20fast%20%E2%80%94%20but%20over%20time,%20plugins%20and%20additions%20to%20the%20tool%20made%20it%20more%20an%20more%20uncomfortable.%3C/p%3E%0A%3Cp%3EThen%20came%20Copilot.%20By%20default,%20I%20really%20hated%20the%20integration%20with%20Copilot.%20I%20was%20never%20interested%20in%20typing%20a%20few%20characters%20and%20build%20an%20entire%20function.%20The%20number%20of%20popups%20in%20Visual%20Studio%20and%20Code%20as%20they%20tried%20to%20help%20me%20was%20constantly%20in%20my%20way.%20My%20cry%20was%20%E2%80%9CJust%20Let%20Me%20Type!%E2%80%9D%20So,%20it%E2%80%99s%20taken%20me%20a%20while%20to%20come%20to%20terms%20with%20it%20all.%3C/p%3E%0A%3Cblockquote%3E%0A%3Cp%3ELet%20me%20say%20that%20I%20believe,%20unequivocally,%20that%20AI%20code%20models%20are%20here%20to%20stay.%3C/p%3E%0A%3C/blockquote%3E%0A%3Cp%3EThe%20integrating%20of%20AI%20models%20into%20tooling%20can%20help%20developers%20in%20some%20really%20great%20ways.%20But%E2%80%A6%3Cstrong%3Efor%20me%3C/strong%3E%E2%80%A6I%20want%20to%20keep%20the%20AI%20tools%20out%20of%20the%20editor;%20kinda.%3C/p%3E%0A%3Cp%3EVibe%20coding;%20prompt%20engineering;%20and%20the%20end%20of%20developers%20%E2%80%94%20I%20think%20are%20all%20hyperbole.%20I%20think%20we%E2%80%99re%20getting%20away%20from%20how%20these%20tools%20can%20really%20help%20us.%20But,%20I%20think%20that%20AI%20chats%20are%20way%20more%20effective%20to%20help%20me%20build%20apps.%3C/p%3E%0A%3Cp%3EAI%20Chats%20allow%20me%20to%20ask%20questions%20and%20build%20code%20or%20make%20changes%20to%20my%20code%20in%20a%20really%20effective%20way.%20I%20still%20think%20the%20AI%20is%20best%20at%20building%20the%20start%20of%20a%20project%20(in%20lieu%20of%20scaffolding)%20and%20refactoring%20a%20project%20than%20actually%20building%20full-fledged%20solutions.%3C/p%3E%0A%3Cp%3EJust%20because%20you%20can%20describe%20a%20whole%20system%20and%20have%20it%20generated%20(and%20then,%20hopefully%20validated%20by%20humans)%20doesn%E2%80%99t%20mean%20you%20should.%20It%20reminds%20me%20of%20how%20we%20were%20building%20code%20earlier%20in%20my%20career.%3C/p%3E%0A%3Cp%3EIn%20the%20early%201990s,%20building%20code%20was%20expensive.%20Planning%20was%20crucial%20to%20successful%20projects.%20Because%20we%20didn%E2%80%99t%20have%20reliable%20garbage%20collection%20and%20security%20validation%20(and%20the%20use%20of%20unmanaged%20pointers),%20we%20needed%20to%20plan%20out%20or%20projects%20very%20carefully.%3C/p%3E%0A%3Cp%3EThis%20was%20the%20era%20of%20Waterfall%20Development.%20You%20spent%20a%20significant%20amount%20of%20time%20writing%20a%20specification.%20You%20spent%20more%20time%20to%20validate%20the%20assumptions%20in%20those%20specifications.%20Only%20then,%20did%20you%20actually%20start%20writing%20code.%20Because%20of%20the%20limitations%20in%20the%20languages,%20tooling,%20and%20talent,%20this%20worked%20well.%20Not%20perfect,%20but%20well.%3C/p%3E%0A%3Cp%3EIn%20the%20mean%20time,%20we%E2%80%99ve%20moved%20beyond%20that%20to%20be%20able%20to%20write%20code%20and%20refactor%20changes%20as%20the%20tooling%20has%20improved.%20Write%20code%20and%20break%20things%20as%20well%20as%20writing%20tests%20and%20validating%20the%20code,%20not%20the%20spec%20is%20now%20the%20norm.%20Many%20readers%20of%20this%20blog%20probably%20can%E2%80%99t%20imagine%20how%20any%20projects%20got%20finished.%20They%E2%80%99re%20not%20completely%20wrong.%3C/p%3E%0A%3Cp%3EThat%20brings%20us%20to%20today.%20By%20embracing%20vibe%20coding%20and%20prompt%20engineering,%20we%E2%80%99re%20back%20to%20writing%20specs.%20If%20you%20want%20the%20AI%20to%20build%20the%20project,%20you%20really%20have%20to%20know%20what%20you%20are%20building%20%3Cstrong%3Eand%3C/strong%3E%20how%20you%20are%20building%20it%20in%20order%20to%20have%20a%20decent%20shot%20generating%20the%20right%20kind%20of%20code.%20Is%20that%20really%20what%20we%20want?%20I%20am%20not%20sure.%3C/p%3E%0A%3Cp%3ESo,%20what%20do%20you%20think?%20Am%20I%20just%20an%20old%20dude%20with%20antiquated%20ideas?%20Maybe.%20Let%E2%80%99s%20have%20that%20discussion%20(either%20by%20reaching%20out%20on%20%3Ca%20href%3D%22https://bsky.app/profile/wildermuth.com%22%3EBluesky%3C/a%3E%20or%20commenting%20on%20this%20post).%20I%E2%80%99m%20ready%20to%20learn.%20I%20am%20not%20convinced%20I%20am%20correct.%3C/p%3E%0A%0A%20%20%20%20%20%20%3Cdiv%3E%0A%20%20%20%20%20%20%20%20%3Cdiv%3E%0A%20%20%20%20%20%20%20%20%20%20%3Ca%20rel%3D%22license%22%20href%3D%22http://creativecommons.org/licenses/by-nc-nd/3.0/%22%3E%0A%20%20%20%20%20%20%20%20%20%20%20%20%3Cimg%20alt%3D%22Creative%20Commons%20License%22%20style%3D%22border-width:%200%22%20src%3D%22http://i.creativecommons.org/l/by-nc-nd/3.0/88x31.png%22%20/%3E%3C/a%3E%3C/div%3E%0A%20%20%20%20%20%20%20%20%3Cdiv%3E%0A%20%20%20%20%20%20%20%20%20%20This%20work%20by%20%3Ca%20xmlns:cc%3D%22http://creativecommons.org/ns%23%22%20href%3D%22http://wildermuth.com%22%20property%3D%22cc:attributionName%22%20rel%3D%22cc:attributionURL%22%3EShawn%20Wildermuth%3C/a%3E%20is%0A%20%20%20%20%20%20%20%20%20%20licensed%20under%20a%20%3Ca%20rel%3D%22license%22%20href%3D%22http://creativecommons.org/licenses/by-nc-nd/3.0/%22%3E%0A%20%20%20%20%20%20%20%20%20%20%20%20Creative%20Commons%20Attribution-NonCommercial-NoDerivs%203.0%20Unported%20License%3C/a%3E.%3Cbr%20/%3E%0A%20%20%20%20%20%20%20%20%20%20Based%20on%20a%20work%20at%20%3Ca%20xmlns:dct%3D%22http://purl.org/dc/terms/%22%20href%3D%22http://wildermuth.com%22%20rel%3D%22dct:source%22%3Ewildermuth.com%3C/a%3E.%3C/div%3E%0A%20%20%20%20%20%20%20%20%3C/div%3E%0A%20%20%20%20%20%20%20%20%3Chr/%3E%3Cdiv%3EIf%20you%20liked%20this%20article,%20see%20Shawn's%20courses%20on%20%3Ca%20href%3D%22http://shawnw.me/pscourses%22%3EPluralsight%3C/a%3E.%3C/div%3E)
Pragmatic Architecture for .NET Core Workshop on June 16th in The Hague 6 May 2025 4:00 PM (11 months ago)
Are you in Europe like me? Do you want me to be a better architect? I might be able to help!
I’m holding my Pragmatic Architecture for .NET Core in-person for the first time. If you can get to Den Haag (The Hague), Netherlands on June 16th, you can join me for a one-day event exploring the kinds of architectural decisions that make for great applications.
In this course, I’m covering:
- Learning the basics of software architecture
- Monoliths, microservices and everything in between
- Components of a distributed application
- Messaging between components
- Monitoring distributed applications
This course includes understanding how to plan and build distributed applications with .NET including how to use .NET Aspire in your own applications.
Normally, €199 - you can now get an early-bird price of €139 (including VAT). In fact, I’ll throw in a discount code to get the price down to just €99! Sign up with the discount code “WILDERMUTH-EARLYBIRD”. You can register with this link as well:
Course Outline
What is Architecture?
- Building Before You Have a Plan
- Archetypes of Software Architectures
- How Do You Choose?
- Plans Are Meant to Be Changed
Structuring Your Application
- Project Structure in .NET Core
- Layers, Onions, and Parfaits
- Separating Concerns
- Architecting Blazor Applications
- Integrating with JavaScript, TypeScript and SPAs
Coordinating Architectural Components
- Synchronous Communication
- Using Messaging
- Buses and Queues
- Transactional Difficulties in Distributed Systems
- Using Event Sourcing
Health and Safety in Distributed Systems
- Monitoring Distributed Systems
- Telemetry
- Capturing Logs
- Acting on Problems
- Errors vs. Performance
If you have any questions, please feel free to reach out at https://wildermuth.com/en/#contact!
Based on a work at wildermuth.com.
,%20Netherlands%20on%20June%2016th,%20you%20can%20join%20me%20for%20a%20one-day%20event%20exploring%20the%20kinds%20of%20architectural%20decisions%20that%20make%20for%20great%20applications.%3C/p%3E%0A%3Cp%3EIn%20this%20course,%20I%E2%80%99m%20covering:%3C/p%3E%0A%3Cul%3E%0A%3Cli%3ELearning%20the%20basics%20of%20software%20architecture%3C/li%3E%0A%3Cli%3EMonoliths,%20microservices%20and%20everything%20in%20between%3C/li%3E%0A%3Cli%3EComponents%20of%20a%20distributed%20application%3C/li%3E%0A%3Cli%3EMessaging%20between%20components%3C/li%3E%0A%3Cli%3EMonitoring%20distributed%20applications%3C/li%3E%0A%3C/ul%3E%0A%3Cp%3EThis%20course%20includes%20understanding%20how%20to%20plan%20and%20build%20distributed%20applications%20with%20.NET%20including%20how%20to%20use%20.NET%20Aspire%20in%20your%20own%20applications.%3C/p%3E%0A%3Cp%3ENormally,%20%E2%82%AC199%20-%20you%20can%20now%20get%20an%20early-bird%20price%20of%20%E2%82%AC139%20(including%20VAT).%20In%20fact,%20I%E2%80%99ll%20throw%20in%20a%20discount%20code%20to%20get%20the%20price%20down%20to%20just%20%E2%82%AC99!%20%20Sign%20up%20with%20the%20discount%20code%20%E2%80%9CWILDERMUTH-EARLYBIRD%E2%80%9D.%20You%20can%20register%20with%20this%20link%20as%20well:%3C/p%3E%0A%3Cdiv%3E%3Ca%20href%3D%22https://www.eventbrite.com/e/1352779252159/?discount%253DWILDERMUTH-EARLYBIRD%22%3EEnroll%20for%20just%20%E2%82%AC99!%3C/a%3E%3C/div%3E%0A%3Ch2%20tabindex%3D%22-1%22%3ECourse%20Outline%3C/h2%3E%0A%3Cp%3E%3Cstrong%3EWhat%20is%20Architecture?%3C/strong%3E%3C/p%3E%0A%3Cul%3E%0A%3Cli%3EBuilding%20Before%20You%20Have%20a%20Plan%3C/li%3E%0A%3Cli%3EArchetypes%20of%20Software%20Architectures%3C/li%3E%0A%3Cli%3EHow%20Do%20You%20Choose?%3C/li%3E%0A%3Cli%3EPlans%20Are%20Meant%20to%20Be%20Changed%3C/li%3E%0A%3C/ul%3E%0A%3Cp%3E%3Cstrong%3EStructuring%20Your%20Application%3C/strong%3E%3C/p%3E%0A%3Cul%3E%0A%3Cli%3EProject%20Structure%20in%20.NET%20Core%3C/li%3E%0A%3Cli%3ELayers,%20Onions,%20and%20Parfaits%3C/li%3E%0A%3Cli%3ESeparating%20Concerns%3C/li%3E%0A%3Cli%3EArchitecting%20Blazor%20Applications%3C/li%3E%0A%3Cli%3EIntegrating%20with%20JavaScript,%20TypeScript%20and%20SPAs%3C/li%3E%0A%3C/ul%3E%0A%3Cp%3E%3Cstrong%3ECoordinating%20Architectural%20Components%3C/strong%3E%3C/p%3E%0A%3Cul%3E%0A%3Cli%3ESynchronous%20Communication%3C/li%3E%0A%3Cli%3EUsing%20Messaging%3C/li%3E%0A%3Cli%3EBuses%20and%20Queues%3C/li%3E%0A%3Cli%3ETransactional%20Difficulties%20in%20Distributed%20Systems%3C/li%3E%0A%3Cli%3EUsing%20Event%20Sourcing%3C/li%3E%0A%3C/ul%3E%0A%3Cp%3E%3Cstrong%3EHealth%20and%20Safety%20in%20Distributed%20Systems%3C/strong%3E%3C/p%3E%0A%3Cul%3E%0A%3Cli%3EMonitoring%20Distributed%20Systems%3C/li%3E%0A%3Cli%3ETelemetry%3C/li%3E%0A%3Cli%3ECapturing%20Logs%3C/li%3E%0A%3Cli%3EActing%20on%20Problems%3C/li%3E%0A%3Cli%3EErrors%20vs.%20Performance%3C/li%3E%0A%3C/ul%3E%0A%3Cp%3EIf%20you%20have%20any%20questions,%20please%20feel%20free%20to%20reach%20out%20at%20%3Ca%20href%3D%22https://wildermuth.com/en/%23contact%22%3Ehttps://wildermuth.com/en/%23contact%3C/a%3E!%3C/p%3E%0A%0A%20%20%20%20%20%20%3Cdiv%3E%0A%20%20%20%20%20%20%20%20%3Cdiv%3E%0A%20%20%20%20%20%20%20%20%20%20%3Ca%20rel%3D%22license%22%20href%3D%22http://creativecommons.org/licenses/by-nc-nd/3.0/%22%3E%0A%20%20%20%20%20%20%20%20%20%20%20%20%3Cimg%20alt%3D%22Creative%20Commons%20License%22%20style%3D%22border-width:%200%22%20src%3D%22http://i.creativecommons.org/l/by-nc-nd/3.0/88x31.png%22%20/%3E%3C/a%3E%3C/div%3E%0A%20%20%20%20%20%20%20%20%3Cdiv%3E%0A%20%20%20%20%20%20%20%20%20%20This%20work%20by%20%3Ca%20xmlns:cc%3D%22http://creativecommons.org/ns%23%22%20href%3D%22http://wildermuth.com%22%20property%3D%22cc:attributionName%22%20rel%3D%22cc:attributionURL%22%3EShawn%20Wildermuth%3C/a%3E%20is%0A%20%20%20%20%20%20%20%20%20%20licensed%20under%20a%20%3Ca%20rel%3D%22license%22%20href%3D%22http://creativecommons.org/licenses/by-nc-nd/3.0/%22%3E%0A%20%20%20%20%20%20%20%20%20%20%20%20Creative%20Commons%20Attribution-NonCommercial-NoDerivs%203.0%20Unported%20License%3C/a%3E.%3Cbr%20/%3E%0A%20%20%20%20%20%20%20%20%20%20Based%20on%20a%20work%20at%20%3Ca%20xmlns:dct%3D%22http://purl.org/dc/terms/%22%20href%3D%22http://wildermuth.com%22%20rel%3D%22dct:source%22%3Ewildermuth.com%3C/a%3E.%3C/div%3E%0A%20%20%20%20%20%20%20%20%3C/div%3E%0A%20%20%20%20%20%20%20%20%3Chr/%3E%3Cdiv%3EIf%20you%20liked%20this%20article,%20see%20Shawn's%20courses%20on%20%3Ca%20href%3D%22http://shawnw.me/pscourses%22%3EPluralsight%3C/a%3E.%3C/div%3E)
Health Checks in nginx 3 May 2025 4:00 PM (11 months ago)
As some of you know, I create YouTube videos called Coding Shorts. Ironically, they are not YouTube shorts (they predate them), but are 10-ish minute videos on topics I like. I’ve been doing a number of these on Aspire, but I’ve been stuck on my “Aspire Deployment” video for a while now.
One of the things I missed was that we need health checks on most of different elements of the app. Most examples out there use ASP.NET Core + Blazor. As I’m not that keen on Blazor, I’ve been doing them with JavaScript frontends. But I didn’t want to deploy them as part of the API or worker processes, but instead just deploy them as separate containers. For this I use nginx.
Essentially, I just create a container to host the frontend like so:
FROM nginx:alpine

# Copy the built site to the root of the webserver
COPY ./_site /var/nginx/www/

# Add a config as necessary
ADD ./default.conf /etc/nginx/conf.d/default.conf

# expose the default port
EXPOSE 80/tcp

# Run the server
CMD ["/usr/sbin/nginx", "-g", "daemon off;"]
This works great and is tiny in size. In fact, I use it for my blog as well (as Static Websites didn’t like the sheer size of my site as I have 20+ years of blog posts).
One small problem, how to have a healthcheck so that the Azure Container App or Kubernetes knows that it is up? After some Googling, I found a solution, but it involves the nginx config file. So, let’s start with a simple configuration file:
# default.conf
server {
    listen       80;
    server_name  localhost;
    gzip on;
    access_log  /var/log/nginx/host.access.log  main;
    root /var/nginx/www/;

    index index.html index.htm;

    error_page  404 /404/;
}
This configuration just specifies:
- What directory the content is contained in (see the copy in the docker file)
- Turn on gzip compression
- Specify that any url that does not contain an extension, will attempt to use index.{html,htm} for the default name.
- Specifies the error page to go to a static page at /404/.
But here is where we can add our own healthcheck:
    location = /health {
            access_log off;
            add_header 'Content-Type' 'application/json';
            return 200 '{"status":"UP"}';
    }
Adding this just reutrns a simple status when /health is called. That’s it. Obviously, you can modify what is returned, but as long as the server is up, it will return on /health.
What are you thoughts? Can it be improved? Let me know in the comments!
Based on a work at wildermuth.com.
,%20but%20are%2010-ish%20minute%20videos%20on%20topics%20I%20like.%20I%E2%80%99ve%20been%20doing%20a%20number%20of%20these%20on%20Aspire,%20but%20I%E2%80%99ve%20been%20stuck%20on%20my%20%E2%80%9CAspire%20Deployment%E2%80%9D%20video%20for%20a%20while%20now.%3C/p%3E%0A%3Cp%3EOne%20of%20the%20things%20I%20missed%20was%20that%20we%20need%20health%20checks%20on%20most%20of%20different%20elements%20of%20the%20app.%20Most%20examples%20out%20there%20use%20%3Ca%20href%3D%22http://asp.net/%22%3EASP.NET%3C/a%3E%20Core%20+%20Blazor.%20As%20I%E2%80%99m%20not%20that%20keen%20on%20Blazor,%20I%E2%80%99ve%20been%20doing%20them%20with%20JavaScript%20frontends.%20But%20I%20didn%E2%80%99t%20want%20to%20deploy%20them%20as%20part%20of%20the%20API%20or%20worker%20processes,%20but%20instead%20just%20deploy%20them%20as%20separate%20containers.%20For%20this%20I%20use%20nginx.%3C/p%3E%0A%3Cp%3EEssentially,%20I%20just%20create%20a%20container%20to%20host%20the%20frontend%20like%20so:%3C/p%3E%0A%3Cpre%3E%3Ccode%3E%3Cspan%3E%3Cspan%3EFROM%3C/span%3E%20nginx:alpine%3C/span%3E%0A%0A%3Cspan%3E%23%20Copy%20the%20built%20site%20to%20the%20root%20of%20the%20webserver%3C/span%3E%0A%3Cspan%3E%3Cspan%3ECOPY%3C/span%3E%20./_site%20/var/nginx/www/%3C/span%3E%0A%0A%3Cspan%3E%23%20Add%20a%20config%20as%20necessary%3C/span%3E%0A%3Cspan%3E%3Cspan%3EADD%3C/span%3E%20./default.conf%20/etc/nginx/conf.d/default.conf%3C/span%3E%0A%0A%3Cspan%3E%23%20expose%20the%20default%20port%3C/span%3E%0A%3Cspan%3E%3Cspan%3EEXPOSE%3C/span%3E%2080/tcp%3C/span%3E%0A%0A%3Cspan%3E%23%20Run%20the%20server%3C/span%3E%0A%3Cspan%3E%3Cspan%3ECMD%3C/span%3E%20%5B%3Cspan%3E%22/usr/sbin/nginx%22%3C/span%3E,%20%3Cspan%3E%22-g%22%3C/span%3E,%20%3Cspan%3E%22daemon%20off;%22%3C/span%3E%5D%3C/span%3E%3C/code%3E%3C/pre%3E%0A%3Cp%3EThis%20works%20great%20and%20is%20tiny%20in%20size.%20In%20fact,%20I%20use%20it%20for%20my%20blog%20as%20well%20(as%20Static%20Websites%20didn%E2%80%99t%20like%20the%20sheer%20size%20of%20my%20site%20as%20I%20have%2020+%20years%20of%20blog%20posts).%3C/p%3E%0A%3Cp%3EOne%20small%20problem,%20how%20to%20have%20a%20healthcheck%20so%20that%20the%20Azure%20Container%20App%20or%20Kubernetes%20knows%20that%20it%20is%20up?%20After%20some%20Googling,%20I%20found%20a%20solution,%20but%20it%20involves%20the%20nginx%20config%20file.%20So,%20let%E2%80%99s%20start%20with%20a%20simple%20configuration%20file:%3C/p%3E%0A%3Cpre%3E%3Ccode%3E%3Cspan%3E%23%20default.conf%3C/span%3E%0Aserver%20%7B%0A%20%20%20%20%3Cspan%3Elisten%3C/span%3E%20%20%20%20%20%20%2080;%0A%20%20%20%20server_name%20%20localhost;%0A%20%20%20%20gzip%20on;%0A%20%20%20%20access_log%20%20/var/log/nginx/host.access.log%20%20main;%0A%20%20%20%20root%20/var/nginx/www/;%0A%0A%20%20%20%20index%20index.html%20index.htm;%20%0A%0A%20%20%20%20error_page%20%20404%20/404/;%0A%7D%3C/code%3E%3C/pre%3E%0A%3Cp%3EThis%20configuration%20just%20specifies:%3C/p%3E%0A%3Cul%3E%0A%3Cli%3EWhat%20directory%20the%20content%20is%20contained%20in%20(see%20the%20copy%20in%20the%20docker%20file)%3C/li%3E%0A%3Cli%3ETurn%20on%20gzip%20compression%3C/li%3E%0A%3Cli%3ESpecify%20that%20any%20url%20that%20does%20not%20contain%20an%20extension,%20will%20attempt%20to%20use%20index.%7Bhtml,htm%7D%20for%20the%20default%20name.%3C/li%3E%0A%3Cli%3ESpecifies%20the%20error%20page%20to%20go%20to%20a%20static%20page%20at%20/404/.%3C/li%3E%0A%3C/ul%3E%0A%3Cp%3EBut%20here%20is%20where%20we%20can%20add%20our%20own%20healthcheck:%3C/p%3E%0A%3Cpre%3E%3Ccode%3E%20%20%20%20location%20%3D%20/health%20%7B%0A%20%20%20%20%20%20%20%20%20%20%20%20access_log%20off;%0A%20%20%20%20%20%20%20%20%20%20%20%20add_header%20%3Cspan%3E'Content-Type'%20'application/json'%3C/span%3E;%0A%20%20%20%20%20%20%20%20%20%20%20%20return%20200%20%3Cspan%3E'%7B%22status%22:%22UP%22%7D'%3C/span%3E;%0A%20%20%20%20%7D%3C/code%3E%3C/pre%3E%0A%3Cp%3EAdding%20this%20just%20reutrns%20a%20simple%20status%20when%20%3Ccode%3E/health%3C/code%3E%20is%20called.%20That%E2%80%99s%20it.%20Obviously,%20you%20can%20modify%20what%20is%20returned,%20but%20as%20long%20as%20the%20server%20is%20up,%20it%20will%20return%20on%20%3Ccode%3E/health%3C/code%3E.%3C/p%3E%0A%3Cp%3EWhat%20are%20you%20thoughts?%20Can%20it%20be%20improved?%20Let%20me%20know%20in%20the%20comments!%3C/p%3E%0A%0A%20%20%20%20%20%20%3Cdiv%3E%0A%20%20%20%20%20%20%20%20%3Cdiv%3E%0A%20%20%20%20%20%20%20%20%20%20%3Ca%20rel%3D%22license%22%20href%3D%22http://creativecommons.org/licenses/by-nc-nd/3.0/%22%3E%0A%20%20%20%20%20%20%20%20%20%20%20%20%3Cimg%20alt%3D%22Creative%20Commons%20License%22%20style%3D%22border-width:%200%22%20src%3D%22http://i.creativecommons.org/l/by-nc-nd/3.0/88x31.png%22%20/%3E%3C/a%3E%3C/div%3E%0A%20%20%20%20%20%20%20%20%3Cdiv%3E%0A%20%20%20%20%20%20%20%20%20%20This%20work%20by%20%3Ca%20xmlns:cc%3D%22http://creativecommons.org/ns%23%22%20href%3D%22http://wildermuth.com%22%20property%3D%22cc:attributionName%22%20rel%3D%22cc:attributionURL%22%3EShawn%20Wildermuth%3C/a%3E%20is%0A%20%20%20%20%20%20%20%20%20%20licensed%20under%20a%20%3Ca%20rel%3D%22license%22%20href%3D%22http://creativecommons.org/licenses/by-nc-nd/3.0/%22%3E%0A%20%20%20%20%20%20%20%20%20%20%20%20Creative%20Commons%20Attribution-NonCommercial-NoDerivs%203.0%20Unported%20License%3C/a%3E.%3Cbr%20/%3E%0A%20%20%20%20%20%20%20%20%20%20Based%20on%20a%20work%20at%20%3Ca%20xmlns:dct%3D%22http://purl.org/dc/terms/%22%20href%3D%22http://wildermuth.com%22%20rel%3D%22dct:source%22%3Ewildermuth.com%3C/a%3E.%3C/div%3E%0A%20%20%20%20%20%20%20%20%3C/div%3E%0A%20%20%20%20%20%20%20%20%3Chr/%3E%3Cdiv%3EIf%20you%20liked%20this%20article,%20see%20Shawn's%20courses%20on%20%3Ca%20href%3D%22http://shawnw.me/pscourses%22%3EPluralsight%3C/a%3E.%3C/div%3E)
DevNetNoord Talks 12 Apr 2025 4:00 PM (11 months ago)
Earlier this week, I travelled to Groningen, NL to participate in DevNetNoord. Little did I know I was the only English speaker, but it did get me a chance to practice my four sentences of Dutch that I’ve learned.
I did a talk that is close to my heart:
Nullable Reference Types: It’s Actually About Non-Nullable Reference Types
In this talk, I show how Nullable Reference Types work and why I think it’s important for many projects to switch over to them. This includes:
- Consistency with value types
- Makes your intention explicit
- Less boilerplate code for nulls
- Can opt into it for parts of a codebase
You can see my code and slides here if you missed it:
Also, I did a Coding Short that explores some of the same ideas:
Nullable Reference Types: Or, Why Do I Need to Use the ? So Much!
Based on a work at wildermuth.com.

Build or Adopt: Stop Building Your Own Plumbing 16 Mar 2025 4:00 PM (last year)
Once upon a time, I worked with Chris Sells and the software arm of DevelopMentor (trip down memory lane, huh). We built a developer tool and it was my first experience working on a product where developers were our primary customer. It left me with a bad taste in my mouth.
It was a great experience working with titan’s of our industry. Without a doubt, one of my best professional experience. This was marred by learning about how developers think about products that they could use.
I think this is true whether it is an open source project, or a commercial product. It has felt like developers can get focused on “How hard could it be?”. This has led many developers to eschew “other people’s code” and want to build it themselves. I think this is a mistake. Let’s talk about it.
We used to say Buy vs. Build but it isn’t always about money. Whether you buy a tool/framework or adopt an open source solution, the decision is similar. Do you allot time to build the code you need; or do you adopt another technology that will require time to get used to and learn. I think there are two schools of thought:
- Adopt what we need so we can focus on the domain and it’s challenges instead of the plumbing.
- Build it all in-house so that we can manage change, features, and lessen risk if a tool or company is no longer maintained.
If you’re making a conscious decision about this, then good for you. But, I’ve noticed that often companies will make decisions based on fear. Sure, there are risks to having dependencies.
But, adopting solutions come with what I like to call “old code”. When you’re not the only consumer of foundational code, you can have a higher confidence that it is a stable product (for the most part). Do you really want to take ownership of fundamental parts of your architecture.
Let’s take the example of messaging. You could choose to save money on using Azure ServiceBus by building your own message queuing solution. But, what is the benefit? I think we tend to forget about the real costs of building systems. If you have a $100K/yr developer and that one developer could create something in-house in 4-6 months, that is front loaded costs of $50K. While adopting a service or dependency would save you that, though there are costs in adopting too.
You can still make solid decisions about the range of the solutions you need. For example, instead of Azure ServiceBus - using RabbitMQ, or NServiceBus and MassTransit might be better.
Another example of this is when I run into developers who insist on Vanilla JavaScript/DOM instead of using frameworks like Vue, Angular, Svelte and React. Sure, you don’t have to learn anything new, but building your own reactivity and manipulating the DOM directly can be really difficult. I’d rather spend my time on the domain problems than building a framework. That’s just me.
Building from scratch is hard…and can be costly in other ways. What do you think?
Based on a work at wildermuth.com.
.%20We%20built%20a%20developer%20tool%20and%20it%20was%20my%20first%20experience%20working%20on%20a%20product%20where%20developers%20were%20our%20primary%20customer.%20It%20left%20me%20with%20a%20bad%20taste%20in%20my%20mouth.%3C/p%3E%0A%3Cp%3EIt%20was%20a%20great%20experience%20working%20with%20titan%E2%80%99s%20of%20our%20industry.%20Without%20a%20doubt,%20one%20of%20my%20best%20professional%20experience.%20This%20was%20marred%20by%20learning%20about%20how%20developers%20think%20about%20products%20that%20they%20could%20use.%3C/p%3E%0A%3Cp%3EI%20think%20this%20is%20true%20whether%20it%20is%20an%20open%20source%20project,%20or%20a%20commercial%20product.%20It%20has%20felt%20like%20developers%20can%20get%20focused%20on%20%E2%80%9CHow%20hard%20could%20it%20be?%E2%80%9D.%20This%20has%20led%20many%20developers%20to%20eschew%20%E2%80%9Cother%20people%E2%80%99s%20code%E2%80%9D%20and%20want%20to%20build%20it%20themselves.%20I%20think%20this%20is%20a%20mistake.%20Let%E2%80%99s%20talk%20about%20it.%3C/p%3E%0A%3Cp%3EWe%20used%20to%20say%20%3Cstrong%3EBuy%20vs.%20Build%3C/strong%3E%20but%20it%20isn%E2%80%99t%20always%20about%20money.%20Whether%20you%20buy%20a%20tool/framework%20or%20adopt%20an%20open%20source%20solution,%20the%20decision%20is%20similar.%20Do%20you%20allot%20time%20to%20build%20the%20code%20you%20need;%20or%20do%20you%20adopt%20another%20technology%20that%20will%20require%20time%20to%20get%20used%20to%20and%20learn.%20I%20think%20there%20are%20two%20schools%20of%20thought:%3C/p%3E%0A%3Cul%3E%0A%3Cli%3EAdopt%20what%20we%20need%20so%20we%20can%20focus%20on%20the%20domain%20and%20it%E2%80%99s%20challenges%20instead%20of%20the%20plumbing.%3C/li%3E%0A%3Cli%3EBuild%20it%20all%20in-house%20so%20that%20we%20can%20manage%20change,%20features,%20and%20lessen%20risk%20if%20a%20tool%20or%20company%20is%20no%20longer%20maintained.%3C/li%3E%0A%3C/ul%3E%0A%3Cp%3EIf%20you%E2%80%99re%20making%20a%20conscious%20decision%20about%20this,%20then%20good%20for%20you.%20But,%20I%E2%80%99ve%20noticed%20that%20often%20companies%20will%20make%20decisions%20based%20on%20fear.%20Sure,%20there%20are%20risks%20to%20having%20dependencies.%3C/p%3E%0A%3Cp%3EBut,%20adopting%20solutions%20come%20with%20what%20I%20like%20to%20call%20%E2%80%9Cold%20code%E2%80%9D.%20When%20you%E2%80%99re%20not%20the%20only%20consumer%20of%20foundational%20code,%20you%20can%20have%20a%20higher%20confidence%20that%20it%20is%20a%20stable%20product%20(for%20the%20most%20part).%20Do%20you%20really%20want%20to%20take%20ownership%20of%20fundamental%20parts%20of%20your%20architecture.%3C/p%3E%0A%3Cp%3ELet%E2%80%99s%20take%20the%20example%20of%20messaging.%20You%20could%20choose%20to%20save%20money%20on%20using%20Azure%20ServiceBus%20by%20building%20your%20own%20message%20queuing%20solution.%20But,%20what%20is%20the%20benefit?%20I%20think%20we%20tend%20to%20forget%20about%20the%20real%20costs%20of%20building%20systems.%20If%20you%20have%20a%20$100K/yr%20developer%20and%20that%20one%20developer%20could%20create%20something%20in-house%20in%204-6%20months,%20that%20is%20front%20loaded%20costs%20of%20$50K.%20While%20adopting%20a%20service%20or%20dependency%20would%20save%20you%20that,%20though%20there%20are%20costs%20in%20adopting%20too.%3C/p%3E%0A%3Cp%3EYou%20can%20still%20make%20solid%20decisions%20about%20the%20range%20of%20the%20solutions%20you%20need.%20For%20example,%20instead%20of%20Azure%20ServiceBus%20-%20using%20RabbitMQ,%20or%20NServiceBus%20and%20MassTransit%20might%20be%20better.%3C/p%3E%0A%3Cp%3EAnother%20example%20of%20this%20is%20when%20I%20run%20into%20developers%20who%20insist%20on%20Vanilla%20JavaScript/DOM%20instead%20of%20using%20frameworks%20like%20Vue,%20Angular,%20Svelte%20and%20React.%20Sure,%20you%20don%E2%80%99t%20have%20to%20learn%20anything%20new,%20but%20building%20your%20own%20reactivity%20and%20manipulating%20the%20DOM%20directly%20can%20be%20really%20difficult.%20I%E2%80%99d%20rather%20spend%20my%20time%20on%20the%20domain%20problems%20than%20building%20a%20framework.%20That%E2%80%99s%20just%20me.%3C/p%3E%0A%3Cp%3EBuilding%20from%20scratch%20is%20hard%E2%80%A6and%20can%20be%20costly%20in%20other%20ways.%20What%20do%20you%20think?%3C/p%3E%0A%0A%20%20%20%20%20%20%3Cdiv%3E%0A%20%20%20%20%20%20%20%20%3Cdiv%3E%0A%20%20%20%20%20%20%20%20%20%20%3Ca%20rel%3D%22license%22%20href%3D%22http://creativecommons.org/licenses/by-nc-nd/3.0/%22%3E%0A%20%20%20%20%20%20%20%20%20%20%20%20%3Cimg%20alt%3D%22Creative%20Commons%20License%22%20style%3D%22border-width:%200%22%20src%3D%22http://i.creativecommons.org/l/by-nc-nd/3.0/88x31.png%22%20/%3E%3C/a%3E%3C/div%3E%0A%20%20%20%20%20%20%20%20%3Cdiv%3E%0A%20%20%20%20%20%20%20%20%20%20This%20work%20by%20%3Ca%20xmlns:cc%3D%22http://creativecommons.org/ns%23%22%20href%3D%22http://wildermuth.com%22%20property%3D%22cc:attributionName%22%20rel%3D%22cc:attributionURL%22%3EShawn%20Wildermuth%3C/a%3E%20is%0A%20%20%20%20%20%20%20%20%20%20licensed%20under%20a%20%3Ca%20rel%3D%22license%22%20href%3D%22http://creativecommons.org/licenses/by-nc-nd/3.0/%22%3E%0A%20%20%20%20%20%20%20%20%20%20%20%20Creative%20Commons%20Attribution-NonCommercial-NoDerivs%203.0%20Unported%20License%3C/a%3E.%3Cbr%20/%3E%0A%20%20%20%20%20%20%20%20%20%20Based%20on%20a%20work%20at%20%3Ca%20xmlns:dct%3D%22http://purl.org/dc/terms/%22%20href%3D%22http://wildermuth.com%22%20rel%3D%22dct:source%22%3Ewildermuth.com%3C/a%3E.%3C/div%3E%0A%20%20%20%20%20%20%20%20%3C/div%3E%0A%20%20%20%20%20%20%20%20%3Chr/%3E%3Cdiv%3EIf%20you%20liked%20this%20article,%20see%20Shawn's%20courses%20on%20%3Ca%20href%3D%22http://shawnw.me/pscourses%22%3EPluralsight%3C/a%3E.%3C/div%3E)
What's Up with Tech's Job Crunch? 8 Feb 2025 3:00 PM (last year)
In the past couple of years, I’ve been looking at my career and my impending future. As many of you might know, I was contemplating moving from independent to employee. I’ve been independent since about 2007 (and this is my 40th year in software). It was a big question I had to ask for myself. It was a matter of trading flexibility for security and healthcare. But that is just the background.
I hadn’t interviewed or performed a job search in many years. I thought I could just jump in like I did when I was younger. I couldn’t. Everything seemed to have changed.
A combination of mass layoffs in tech and the irrational thought that AI was going to replace many of us (see my Coding Short)- and the job market was far tighter than I’d ever seen it before. Where was I to fit in. Ultimately, I decided to make a big life change and start a new company in the Netherlands. But that did not leave me with some observations about the job crunch. Let’s talk about it.
How Did It Used to Work?
We used to view resumes and use the interviews to work out whether people were a good match. Recruiters have always used achronym-based bias when matching people and companies, but ultimately that also missed lots of great candidates.
But even these interviews were rife with bad ideas. Coding on whiteboards; abstract thinking tests (e.g. “How many manhole covers are in the US?”); and gotcha questions, were all bad ideas.
Ultimately, hiring someone was a risk but we tried to mitigate that risk by looking for people who fit the ‘culture’. That’s actually why I used to get jobs easily, I look the part. I look like someone out of central casting for the “Comic Book Guy”. I fit the impression of a good developer.
It wasn’t perfect, but I feel like it relied less on the perfect resume. How does it work now?
What’s Changed?
I think the industry has changed completely how we evaluate possible employees. Using Robot Automation Processing (RPA) and Application Tracking Systems (ATS). Essentially, this jargon for using machine learning to filter out resumes that do not fit into a narrow focus.
This has led an industry of ATS-beating tools (e.g. JobScan) that represent an “arms race” as the ATS improves to counter-act the ATS-Beating software. Both sides of this battle seem to do little to help companies find the right people. But, it means that most resumes submitted electronically (directly to a company’s website or through LinkedIn), are outright rejected almost immediately.
What frustrates me about this is that these technologies force potential employees to be good at creating resumes with far too many buzz words instead of their actual experience. Great people are falling through the cracks.
It also encourages people to write/modify their resume for each and every position. For many of us, that means have two base resumes (one that is scanned easily by ATS systems) and a good looking resume (which usually rejected by ATS systems). Then, to require us to add/remove items to match some magical set of skills is a waste of everyone’s time.
Some companies are also trying to test developers in other ways:
- GitHub Contributions: This only will highlight public development. Most developers work on private software - not all on GitHub. This is leaving so many people off the rolls.
- Coding Tests: I usually call this “Free Work”. The idea of sending a developer away to write some piece of code to evaluate them is not only somewhat unethical (in my opinion), but doesn’t really evaluate the way they think.
This doesn’t seem better and is leaving wide swaths of great developers looking for jobs for months/years.
Some of this may be attributed to the Bootcamp-ification of the workforce. By adding a lot of entry-level developers while promising them that jobs are easy to get, we’ve accidently excluded good developers and lied to newly trained developers about the state of our industry.
What Do I Think?
I do not have a magic bullet. But I do have some opinions:
Stop hiring people for skills: You’re hiring for the ability to learn and adapt. The tech industry is too volitile to think that today’s skills are going to be what you need in 1, 2, or 5 years.
Stop Testing Syntax: Interview people for how they think instead of how to solve a task. Remembering syntax is unimportant in today’s development environment.
Find People Who Are Adaptable: The worst thing that happens in an interview these days is when a developer refuses to admit they do not know something. This is a result of the 10x developer, super start developer, or even everyone is a senior software dev. The ability to find the answer is so much more important than knowing the answer. If our software processes are iterative, I expect developers to be good at the
"fail->learn from failure->try again"workflow. If they can’t admit they are wrong, there is no room for trial and error.
Do we need resumes? Of course. But I think resumes should represent the person not an application for the job. If we’re going to use resume evaluation software, making them smarter and with a lower bar of entry is important. I know that hiring managers want to wittle down 1,000 resumes to three people to interview. But this incredibly short-sighted.
Will it get better? I have my doubts.
What do you think?
Based on a work at wildermuth.com.
How We're Doing It - New Dutch Lives 28 Jan 2025 3:00 PM (last year)
We’re three weeks into our new lives in The Netherlands. So much is happening, it’s been an anxiety laden experience. We’ve started Dutch lessons (Dank u wel), planned for our furniture to arrive, and started the emigration process. So far, so good.
As I’ve been talking about this adventure a lot, I want to apologize if you want me to get back to technical content — it’s coming, I promise. We’ve been asked quite a bit how we’re able to emigrate to The Netherlands. Let me share what we know so far.
There are several ways to be allowed to stay in the Netherlands and I am not an expert at all. For us, we’re taking advantage of the Dutch American Friendship Treaty (DAFT). The treaty allows for permission to come to the Netherlands to do one of two things:
- Start a Dutch business
- Work as a Self-Employed Artist
In both of these cases, your work must have essential interest in the Dutch Economy or the Dutch Culture.
For us, we wanted to create a Dutch version of our company Wilder Minds. We could have just created a DBA (Doing Business As), but I am so used to having a company as an umbrella to the work I do; it seemed like the obvious choice.
For the Dutch company, we needed to invest €4500 in the new company. (We actually ended up with €9000 since my wife and I are co-owners). My wife could have registered as my wife, but I didn’t want two tiered access for us. That investment needs to essentially sit in the bank account for the length of our Visa. I think we also needed to show some amount of cash reserves to confirm we can pay our own way for a while - I can’t quite remember.
There are several steps before you can complete the approval process:
- Get to the Netherlands
- Get a V-Number (essentially an immigrant number)
- Register with city hall to get a BSN (essentially a Social Security number).
- Wait for the Visa to be approved.
That BSN is kind of a gateway to a lot of other steps to normalization. Once we have it (soon I hope), we’ll be able to open bank accounts and get Dutch phone numbers. The bank account is crucial as much of payments are done through your bank card. Retailers will take credit cards, but for many of the kinds of services you need (Internet, Phone, Electric, etc.) all require a Dutch bank account.
Finally, once we get approval (hopefully by April), we’ll be able to stay in the country for two years. After that, we’ll be able to ask for a renewal for an additional two years. After those four years, we can start the process for a permanent residence permit. This is the avenue we’re taking.
I’ve been asked a lot about getting Dutch Citizenship. I doubt either of us qualify, but I actually want to keep my US citizenship (voting, etc.)
From here, we’re waiting for our house to sell in the US (let me know if you’re looking for a place in Atlanta) ;) Once that is complete, we’ll be looking for an apartment/house to buy. But that’s a longer story I’ll share later.
Until next update!
Based on a work at wildermuth.com.
,%20planned%20for%20our%20furniture%20to%20arrive,%20and%20started%20the%20emigration%20process.%20So%20far,%20so%20good.%3C/p%3E%0A%3Cp%3EAs%20I%E2%80%99ve%20been%20talking%20about%20this%20adventure%20a%20lot,%20I%20want%20to%20apologize%20if%20you%20want%20me%20to%20get%20back%20to%20technical%20content%20%E2%80%94%20it%E2%80%99s%20coming,%20I%20promise.%20We%E2%80%99ve%20been%20asked%20quite%20a%20bit%20how%20we%E2%80%99re%20able%20to%20emigrate%20to%20The%20Netherlands.%20Let%20me%20share%20what%20we%20know%20so%20far.%3C/p%3E%0A%3Cp%3EThere%20are%20several%20ways%20to%20be%20allowed%20to%20stay%20in%20the%20Netherlands%20and%20I%20am%20not%20an%20expert%20at%20all.%20For%20us,%20we%E2%80%99re%20taking%20advantage%20of%20the%20%3Ca%20href%3D%22https://ind.nl/en/residence-permits/work/residence-permit-self-employed-person%22%3EDutch%20American%20Friendship%20Treaty%3C/a%3E%20(DAFT).%20The%20treaty%20allows%20for%20permission%20to%20come%20to%20the%20Netherlands%20to%20do%20one%20of%20two%20things:%3C/p%3E%0A%3Cul%3E%0A%3Cli%3EStart%20a%20Dutch%20business%3C/li%3E%0A%3Cli%3EWork%20as%20a%20Self-Employed%20Artist%3C/li%3E%0A%3C/ul%3E%0A%3Cp%3EIn%20both%20of%20these%20cases,%20your%20work%20must%20have%20essential%20interest%20in%20the%20Dutch%20Economy%20or%20the%20Dutch%20Culture.%3C/p%3E%0A%3Cp%3EFor%20us,%20we%20wanted%20to%20create%20a%20Dutch%20version%20of%20our%20company%20%3Ca%20href%3D%22https://wilderminds.nl/%22%3EWilder%20Minds%3C/a%3E.%20We%20could%20have%20just%20created%20a%20DBA%20(Doing%20Business%20As),%20but%20I%20am%20so%20used%20to%20having%20a%20company%20as%20an%20umbrella%20to%20the%20work%20I%20do;%20it%20seemed%20like%20the%20obvious%20choice.%3C/p%3E%0A%3Cp%3EFor%20the%20Dutch%20company,%20we%20needed%20to%20invest%20%E2%82%AC4500%20in%20the%20new%20company.%20(We%20actually%20ended%20up%20with%20%E2%82%AC9000%20since%20my%20wife%20and%20I%20are%20co-owners).%20My%20wife%20could%20have%20registered%20as%20my%20wife,%20but%20I%20didn%E2%80%99t%20want%20two%20tiered%20access%20for%20us.%20That%20investment%20needs%20to%20essentially%20sit%20in%20the%20bank%20account%20for%20the%20length%20of%20our%20Visa.%20I%20think%20we%20also%20needed%20to%20show%20some%20amount%20of%20cash%20reserves%20to%20confirm%20we%20can%20pay%20our%20own%20way%20for%20a%20while%20-%20I%20can%E2%80%99t%20quite%20remember.%3C/p%3E%0A%3Cp%3EThere%20are%20several%20steps%20before%20you%20can%20complete%20the%20approval%20process:%3C/p%3E%0A%3Cul%3E%0A%3Cli%3EGet%20to%20the%20Netherlands%3C/li%3E%0A%3Cli%3EGet%20a%20V-Number%20(essentially%20an%20immigrant%20number)%3C/li%3E%0A%3Cli%3ERegister%20with%20city%20hall%20to%20get%20a%20BSN%20(essentially%20a%20Social%20Security%20number).%3C/li%3E%0A%3Cli%3EWait%20for%20the%20Visa%20to%20be%20approved.%3C/li%3E%0A%3C/ul%3E%0A%3Cp%3EThat%20BSN%20is%20kind%20of%20a%20gateway%20to%20a%20lot%20of%20other%20steps%20to%20normalization.%20Once%20we%20have%20it%20(soon%20I%20hope),%20we%E2%80%99ll%20be%20able%20to%20open%20bank%20accounts%20and%20get%20Dutch%20phone%20numbers.%20The%20bank%20account%20is%20crucial%20as%20much%20of%20payments%20are%20done%20through%20your%20bank%20card.%20Retailers%20will%20take%20credit%20cards,%20but%20for%20many%20of%20the%20kinds%20of%20services%20you%20need%20(Internet,%20Phone,%20Electric,%20etc.)%20all%20require%20a%20Dutch%20bank%20account.%3C/p%3E%0A%3Cp%3EFinally,%20once%20we%20get%20approval%20(hopefully%20by%20April),%20we%E2%80%99ll%20be%20able%20to%20stay%20in%20the%20country%20for%20two%20years.%20After%20that,%20we%E2%80%99ll%20be%20able%20to%20ask%20for%20a%20renewal%20for%20an%20additional%20two%20years.%20After%20those%20four%20years,%20we%20can%20start%20the%20process%20for%20a%20permanent%20residence%20permit.%20This%20is%20the%20avenue%20we%E2%80%99re%20taking.%3C/p%3E%0A%3Cp%3EI%E2%80%99ve%20been%20asked%20a%20lot%20about%20getting%20Dutch%20Citizenship.%20I%20doubt%20either%20of%20us%20qualify,%20but%20I%20actually%20want%20to%20keep%20my%20US%20citizenship%20(voting,%20etc.)%3C/p%3E%0A%3Cp%3EFrom%20here,%20we%E2%80%99re%20waiting%20for%20our%20house%20to%20sell%20in%20the%20US%20(let%20me%20know%20if%20you%E2%80%99re%20looking%20for%20a%20place%20in%20Atlanta)%20;)%20Once%20that%20is%20complete,%20we%E2%80%99ll%20be%20looking%20for%20an%20apartment/house%20to%20buy.%20But%20that%E2%80%99s%20a%20longer%20story%20I%E2%80%99ll%20share%20later.%3C/p%3E%0A%3Cp%3EUntil%20next%20update!%3C/p%3E%0A%0A%20%20%20%20%20%20%3Cdiv%3E%0A%20%20%20%20%20%20%20%20%3Cdiv%3E%0A%20%20%20%20%20%20%20%20%20%20%3Ca%20rel%3D%22license%22%20href%3D%22http://creativecommons.org/licenses/by-nc-nd/3.0/%22%3E%0A%20%20%20%20%20%20%20%20%20%20%20%20%3Cimg%20alt%3D%22Creative%20Commons%20License%22%20style%3D%22border-width:%200%22%20src%3D%22http://i.creativecommons.org/l/by-nc-nd/3.0/88x31.png%22%20/%3E%3C/a%3E%3C/div%3E%0A%20%20%20%20%20%20%20%20%3Cdiv%3E%0A%20%20%20%20%20%20%20%20%20%20This%20work%20by%20%3Ca%20xmlns:cc%3D%22http://creativecommons.org/ns%23%22%20href%3D%22http://wildermuth.com%22%20property%3D%22cc:attributionName%22%20rel%3D%22cc:attributionURL%22%3EShawn%20Wildermuth%3C/a%3E%20is%0A%20%20%20%20%20%20%20%20%20%20licensed%20under%20a%20%3Ca%20rel%3D%22license%22%20href%3D%22http://creativecommons.org/licenses/by-nc-nd/3.0/%22%3E%0A%20%20%20%20%20%20%20%20%20%20%20%20Creative%20Commons%20Attribution-NonCommercial-NoDerivs%203.0%20Unported%20License%3C/a%3E.%3Cbr%20/%3E%0A%20%20%20%20%20%20%20%20%20%20Based%20on%20a%20work%20at%20%3Ca%20xmlns:dct%3D%22http://purl.org/dc/terms/%22%20href%3D%22http://wildermuth.com%22%20rel%3D%22dct:source%22%3Ewildermuth.com%3C/a%3E.%3C/div%3E%0A%20%20%20%20%20%20%20%20%3C/div%3E%0A%20%20%20%20%20%20%20%20%3Chr/%3E%3Cdiv%3EIf%20you%20liked%20this%20article,%20see%20Shawn's%20courses%20on%20%3Ca%20href%3D%22http://shawnw.me/pscourses%22%3EPluralsight%3C/a%3E.%3C/div%3E)
I'm Back to Work! 9 Jan 2025 3:00 PM (last year)
It’s been a wild couple of months for the Wildermuth family! In the space of just a couple of months, we’ve relocated to The Hague in the Netherlands. It’s been a scant 36 hours since we arrived, and there is so much to do.
Now that we’re getting settled, I can get back to work teaching and creating content! Coming up (hopefully next week), I’ll be resuming my weekly Coding Shorts YouTube videos.
In addition, I’m happy to announce a new instance of my Virtual ASP.NET Architecture Course. In this course, I’m covering:
- Learning the basics of software architecture
- Monoliths, microservices and everything in between
- Components of a distributed application
- Messaging between components
- Monitoring distributed applications
This course includes understanding how to plan and build distributed applications with .NET including how to use .NET Aspire in your own applications.
For more information:
I’m also still available for coaching, training and consulting. Feel free to reach out at https://wildermuth.com/en/#contact!
Based on a work at wildermuth.com.
,%20I%E2%80%99ll%20be%20resuming%20my%20weekly%20%3Ca%20href%3D%22https://shawnl.ink/codingshorts%22%3ECoding%20Shorts%20YouTube%20videos%3C/a%3E.%3C/p%3E%0A%3Cp%3EIn%20addition,%20I%E2%80%99m%20happy%20to%20announce%20a%20new%20instance%20of%20my%20Virtual%20%3Ca%20href%3D%22http://asp.net/%22%3EASP.NET%3C/a%3E%20Architecture%20Course.%20In%20this%20course,%20I%E2%80%99m%20covering:%3C/p%3E%0A%3Cul%3E%0A%3Cli%3ELearning%20the%20basics%20of%20software%20architecture%3C/li%3E%0A%3Cli%3EMonoliths,%20microservices%20and%20everything%20in%20between%3C/li%3E%0A%3Cli%3EComponents%20of%20a%20distributed%20application%3C/li%3E%0A%3Cli%3EMessaging%20between%20components%3C/li%3E%0A%3Cli%3EMonitoring%20distributed%20applications%3C/li%3E%0A%3C/ul%3E%0A%3Cp%3EThis%20course%20includes%20understanding%20how%20to%20plan%20and%20build%20distributed%20applications%20with%20.NET%20including%20how%20to%20use%20.NET%20Aspire%20in%20your%20own%20applications.%3C/p%3E%0A%3Cp%3EFor%20more%20information:%3C/p%3E%0A%3Cblockquote%3E%0A%3Cp%3E%3Ca%20href%3D%22https://blog.wildermuth.com/en/training/virtual/architecting%22%3ECourse%20Overview%3C/a%3E%3C/p%3E%0A%3C/blockquote%3E%0A%3Cp%3EI%E2%80%99m%20also%20still%20available%20for%20coaching,%20training%20and%20consulting.%20Feel%20free%20to%20reach%20out%20at%20%3Ca%20href%3D%22https://wildermuth.com/en/%23contact%22%3Ehttps://wildermuth.com/en/%23contact%3C/a%3E!%3C/p%3E%0A%0A%20%20%20%20%20%20%3Cdiv%3E%0A%20%20%20%20%20%20%20%20%3Cdiv%3E%0A%20%20%20%20%20%20%20%20%20%20%3Ca%20rel%3D%22license%22%20href%3D%22http://creativecommons.org/licenses/by-nc-nd/3.0/%22%3E%0A%20%20%20%20%20%20%20%20%20%20%20%20%3Cimg%20alt%3D%22Creative%20Commons%20License%22%20style%3D%22border-width:%200%22%20src%3D%22http://i.creativecommons.org/l/by-nc-nd/3.0/88x31.png%22%20/%3E%3C/a%3E%3C/div%3E%0A%20%20%20%20%20%20%20%20%3Cdiv%3E%0A%20%20%20%20%20%20%20%20%20%20This%20work%20by%20%3Ca%20xmlns:cc%3D%22http://creativecommons.org/ns%23%22%20href%3D%22http://wildermuth.com%22%20property%3D%22cc:attributionName%22%20rel%3D%22cc:attributionURL%22%3EShawn%20Wildermuth%3C/a%3E%20is%0A%20%20%20%20%20%20%20%20%20%20licensed%20under%20a%20%3Ca%20rel%3D%22license%22%20href%3D%22http://creativecommons.org/licenses/by-nc-nd/3.0/%22%3E%0A%20%20%20%20%20%20%20%20%20%20%20%20Creative%20Commons%20Attribution-NonCommercial-NoDerivs%203.0%20Unported%20License%3C/a%3E.%3Cbr%20/%3E%0A%20%20%20%20%20%20%20%20%20%20Based%20on%20a%20work%20at%20%3Ca%20xmlns:dct%3D%22http://purl.org/dc/terms/%22%20href%3D%22http://wildermuth.com%22%20rel%3D%22dct:source%22%3Ewildermuth.com%3C/a%3E.%3C/div%3E%0A%20%20%20%20%20%20%20%20%3C/div%3E%0A%20%20%20%20%20%20%20%20%3Chr/%3E%3Cdiv%3EIf%20you%20liked%20this%20article,%20see%20Shawn's%20courses%20on%20%3Ca%20href%3D%22http://shawnw.me/pscourses%22%3EPluralsight%3C/a%3E.%3C/div%3E)
Netherlands Here We Come 26 Nov 2024 3:00 PM (last year)
 Back in 1993, I moved to Amsterdam with a guitar and $70. Not my brightest move. I spent much of the next two years playing music on the street (e.g. Busking) in and out of Amsterdam. It was an amazing part of my life. I don't regret a minute of it.
Since the day I came back from Amsterdam to be ‘an adult’, I’ve held a torch for the Dutch and the Netherlands. Any conference anywhere near northern Europe has been my excuse to head back to the country. The pie-in-the-sky dream has been to move back and start a company.
Guess what? It’s happening! Recently, my wife and I have been discussion a change of life. As I get older, it’s been important to me and my wife that we stay active, enjoy more of our time, and live out our dreams. This means that we can go back to a car-free, walking/biking lifestyle that the Netherlands makes possible that is really difficult here in the States.
 Starting early next year, we’re moving to The Hague (Den Haag) to start a new life there. While my wife and I will be out of the US, I’ll still be doing the same things I’ve always done including my training (e.g. Pluralsight et al.), creating YouTube videos, and my consulting work. Being in Europe will let me expand my company’s (Wilder Minds) reach.
I want to thank all of my readers, students, viewers, and clients for following me across my career journey. This change doesn’t mean anything different, just a different time zone!
If you’re in or around the Netherlands, please don’t hesitate to contact me with opportunities: https://wildermuth.com/contact
Based on a work at wildermuth.com.
%20in%20and%20out%20of%20Amsterdam.%20It%20was%20an%20amazing%20part%20of%20my%20life.%20I%20don't%20regret%20a%20minute%20of%20it.%20%0A%3Cbr%20/%3E%3Cbr%20/%3E%0A%3Cp%3ESince%20the%20day%20I%20came%20back%20from%20Amsterdam%20to%20be%20%E2%80%98an%20adult%E2%80%99,%20I%E2%80%99ve%20held%20a%20torch%20for%20the%20Dutch%20and%20the%20Netherlands.%20Any%20conference%20anywhere%20near%20northern%20Europe%20has%20been%20my%20excuse%20to%20head%20back%20to%20the%20country.%20The%20pie-in-the-sky%20dream%20has%20been%20to%20move%20back%20and%20start%20a%20company.%3C/p%3E%0A%3Cp%3EGuess%20what?%20It%E2%80%99s%20happening!%20%20Recently,%20my%20wife%20and%20I%20have%20been%20discussion%20a%20change%20of%20life.%20As%20I%20get%20older,%20it%E2%80%99s%20been%20important%20to%20me%20and%20my%20wife%20that%20we%20stay%20active,%20enjoy%20more%20of%20our%20time,%20and%20live%20out%20our%20dreams.%20This%20means%20that%20we%20can%20go%20back%20to%20a%20car-free,%20walking/biking%20lifestyle%20that%20the%20Netherlands%20makes%20possible%20that%20is%20really%20difficult%20here%20in%20the%20States.%3C/p%3E%0A%3Cp%3E%3Cimg%20class%3D%22float-left%20m-2%20w-1/2%20md:w-1/4%22%20src%3D%22https://wilderminds.blob.core.windows.net/img/2024/11/27/_busking-again.jpg%22%20alt%3D%22Busking%20on%20a%20Terrace%22%20/%3EStarting%20early%20next%20year,%20we%E2%80%99re%20moving%20to%20The%20Hague%20(Den%20Haag)%20to%20start%20a%20new%20life%20there.%20While%20my%20wife%20and%20I%20will%20be%20out%20of%20the%20US,%20I%E2%80%99ll%20still%20be%20doing%20the%20same%20things%20I%E2%80%99ve%20always%20done%20including%20my%20training%20(e.g.%20Pluralsight%20et%20al.),%20creating%20YouTube%20videos,%20and%20my%20consulting%20work.%20Being%20in%20Europe%20will%20let%20me%20expand%20my%20company%E2%80%99s%20(Wilder%20Minds)%20reach.%3C/p%3E%0A%3Cp%3EI%20want%20to%20thank%20all%20of%20my%20readers,%20students,%20viewers,%20and%20clients%20for%20following%20me%20across%20my%20career%20journey.%20This%20change%20doesn%E2%80%99t%20mean%20anything%20different,%20just%20a%20different%20time%20zone!%3C/p%3E%0A%3Cp%3EIf%20you%E2%80%99re%20in%20or%20around%20the%20Netherlands,%20please%20don%E2%80%99t%20hesitate%20to%20contact%20me%20with%20opportunities:%20%3Ca%20href%3D%22https://wildermuth.com/contact%22%3Ehttps://wildermuth.com/contact%3C/a%3E%3C/p%3E%0A%0A%20%20%20%20%20%20%3Cdiv%3E%0A%20%20%20%20%20%20%20%20%3Cdiv%3E%0A%20%20%20%20%20%20%20%20%20%20%3Ca%20rel%3D%22license%22%20href%3D%22http://creativecommons.org/licenses/by-nc-nd/3.0/%22%3E%0A%20%20%20%20%20%20%20%20%20%20%20%20%3Cimg%20alt%3D%22Creative%20Commons%20License%22%20style%3D%22border-width:%200%22%20src%3D%22http://i.creativecommons.org/l/by-nc-nd/3.0/88x31.png%22%20/%3E%3C/a%3E%3C/div%3E%0A%20%20%20%20%20%20%20%20%3Cdiv%3E%0A%20%20%20%20%20%20%20%20%20%20This%20work%20by%20%3Ca%20xmlns:cc%3D%22http://creativecommons.org/ns%23%22%20href%3D%22http://wildermuth.com%22%20property%3D%22cc:attributionName%22%20rel%3D%22cc:attributionURL%22%3EShawn%20Wildermuth%3C/a%3E%20is%0A%20%20%20%20%20%20%20%20%20%20licensed%20under%20a%20%3Ca%20rel%3D%22license%22%20href%3D%22http://creativecommons.org/licenses/by-nc-nd/3.0/%22%3E%0A%20%20%20%20%20%20%20%20%20%20%20%20Creative%20Commons%20Attribution-NonCommercial-NoDerivs%203.0%20Unported%20License%3C/a%3E.%3Cbr%20/%3E%0A%20%20%20%20%20%20%20%20%20%20Based%20on%20a%20work%20at%20%3Ca%20xmlns:dct%3D%22http://purl.org/dc/terms/%22%20href%3D%22http://wildermuth.com%22%20rel%3D%22dct:source%22%3Ewildermuth.com%3C/a%3E.%3C/div%3E%0A%20%20%20%20%20%20%20%20%3C/div%3E%0A%20%20%20%20%20%20%20%20%3Chr/%3E%3Cdiv%3EIf%20you%20liked%20this%20article,%20see%20Shawn's%20courses%20on%20%3Ca%20href%3D%22http://shawnw.me/pscourses%22%3EPluralsight%3C/a%3E.%3C/div%3E)
My Recent Talk at the Atlanta .NET Users' Group about Aspire 12 Nov 2024 3:00 PM (last year)
I’ve been remiss. I recently gave a talk at the Atlanta .NET Users’ Group and promised to post the source code. About time I got to this ;)
I gave a talk on how to use Aspire in .NET 8/9. We walked through how to add Aspire to an existing project and make use of this new technology. If you have/had questions, please don’t hesitate to comment below!
Here are the slides and code:
The talk wasn’t recorded, but I have similar content on my YouTube Channel.
Other questions, feel free to contact via Contact Me.
Based on a work at wildermuth.com.
%3C/p%3E%0A%3Cp%3EI%20gave%20a%20talk%20on%20how%20to%20use%20%3Ca%20href%3D%22https://shawnl.ink/aspire%22%3EAspire%3C/a%3E%20in%20.NET%208/9.%20We%20walked%20through%20how%20to%20add%20%3Ca%20href%3D%22https://shawnl.ink/aspire%22%3EAspire%3C/a%3E%20to%20an%20existing%20project%20and%20make%20use%20of%20this%20new%20technology.%20If%20you%20have/had%20questions,%20please%20don%E2%80%99t%20hesitate%20to%20comment%20below!%3C/p%3E%0A%3Cp%3EHere%20are%20the%20slides%20and%20code:%3C/p%3E%0A%3Cblockquote%3E%0A%3Cp%3E%3Ca%20href%3D%22https://github.com/shawnwildermuth/codingexamples/tree/main/Aspire.AtlantaUG%22%3ECode%3C/a%3E%3Cbr%20/%3E%0A%3Ca%20href%3D%22https://github.com/shawnwildermuth/codingexamples/blob/main/Aspire.AtlantaUG/Aspire.pdf%22%3ESlides%3C/a%3E%3C/p%3E%0A%3C/blockquote%3E%0A%3Cp%3EThe%20talk%20wasn%E2%80%99t%20recorded,%20but%20I%20have%20similar%20content%20on%20my%20%3Ca%20href%3D%22https://shawnl.ink/yt%22%3EYouTube%20Channel%3C/a%3E.%3C/p%3E%0A%3Cp%3EOther%20questions,%20feel%20free%20to%20contact%20via%20%3Ca%20href%3D%22https://wildermuth.com/%23contact%22%3EContact%20Me%3C/a%3E.%3C/p%3E%0A%0A%20%20%20%20%20%20%3Cdiv%3E%0A%20%20%20%20%20%20%20%20%3Cdiv%3E%0A%20%20%20%20%20%20%20%20%20%20%3Ca%20rel%3D%22license%22%20href%3D%22http://creativecommons.org/licenses/by-nc-nd/3.0/%22%3E%0A%20%20%20%20%20%20%20%20%20%20%20%20%3Cimg%20alt%3D%22Creative%20Commons%20License%22%20style%3D%22border-width:%200%22%20src%3D%22http://i.creativecommons.org/l/by-nc-nd/3.0/88x31.png%22%20/%3E%3C/a%3E%3C/div%3E%0A%20%20%20%20%20%20%20%20%3Cdiv%3E%0A%20%20%20%20%20%20%20%20%20%20This%20work%20by%20%3Ca%20xmlns:cc%3D%22http://creativecommons.org/ns%23%22%20href%3D%22http://wildermuth.com%22%20property%3D%22cc:attributionName%22%20rel%3D%22cc:attributionURL%22%3EShawn%20Wildermuth%3C/a%3E%20is%0A%20%20%20%20%20%20%20%20%20%20licensed%20under%20a%20%3Ca%20rel%3D%22license%22%20href%3D%22http://creativecommons.org/licenses/by-nc-nd/3.0/%22%3E%0A%20%20%20%20%20%20%20%20%20%20%20%20Creative%20Commons%20Attribution-NonCommercial-NoDerivs%203.0%20Unported%20License%3C/a%3E.%3Cbr%20/%3E%0A%20%20%20%20%20%20%20%20%20%20Based%20on%20a%20work%20at%20%3Ca%20xmlns:dct%3D%22http://purl.org/dc/terms/%22%20href%3D%22http://wildermuth.com%22%20rel%3D%22dct:source%22%3Ewildermuth.com%3C/a%3E.%3C/div%3E%0A%20%20%20%20%20%20%20%20%3C/div%3E%0A%20%20%20%20%20%20%20%20%3Chr/%3E%3Cdiv%3EIf%20you%20liked%20this%20article,%20see%20Shawn's%20courses%20on%20%3Ca%20href%3D%22http://shawnw.me/pscourses%22%3EPluralsight%3C/a%3E.%3C/div%3E)
My Recent Talks 25 Sep 2024 4:00 PM (last year)
I just finished giving my two talks at TechBash in Pennsylvania. Great to visit the Poconos this time of year. I also attended and spoke at the Atlanta Developers Conference last Saturday. Great audiences and great questions.
I wanted to share some of the examples and slides from these talks:
@ AtlDevCon: Aspire to Connect - A talk where I showed the attendees how to add Aspire to an existing app with ASP.NET Core API, A Vue App, Redis server and RabbitMQ for a queue.
@ TechBash: Aspire to Connect - A talk where I showed the attendees how to add Aspire to an existing app with ASP.NET Core API, A Vue App, Redis server and RabbitMQ for a queue.
@ TechBash: Lock It Down:
Using Azure Entra for .NET APIs and SPAs - A talk where I demonstrated how to hook up Azure Entra ID to login using a JavaScript front end and how to validate the JWT on the back-end.
Other questions, feel free to contact via Contact Me or on Twitter.
Based on a work at wildermuth.com.

Disabling Google Sign-in Popup 21 Jul 2024 4:00 PM (last year)
I recently was inundated with Chrome injecting into many websites a little pop-up to encourage you to sign-in with your Google account. I hate it. After a lot of searching (and a heroic Twitter user) - I got it to go away.
I’m mostly adding this here so I can find it next time, but I hope it helps others.
Here is the problem:
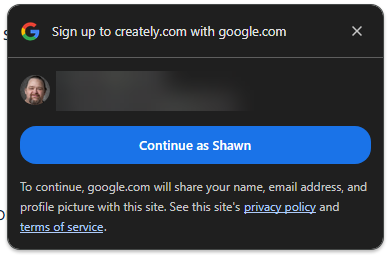
I don’t use my Google Account as my main identity, so I never want this. After delving into my Google account and Chrome settings, I was close to just signing out of Chrome entirely when I asked Twitter. I got an answer from Terry Beard:
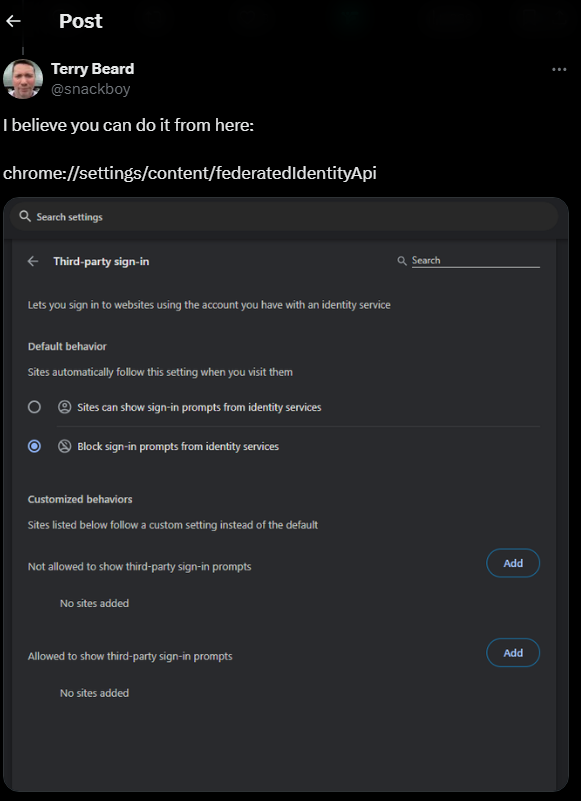
To use this, just copy this to the address bar of your Chrome:
chrome://settings/content/federatedIdentityApi
Hope this helps and that it shows up in my search results next time I forget how to do this.
Based on a work at wildermuth.com.
%20-%20I%20got%20it%20to%20go%20away.%3C/p%3E%0A%3Cp%3EI%E2%80%99m%20mostly%20adding%20this%20here%20so%20I%20can%20find%20it%20next%20time,%20but%20I%20hope%20it%20helps%20others.%3C/p%3E%0A%3Cp%3EHere%20is%20the%20problem:%3C/p%3E%0A%3Cp%3E%3Cimg%20src%3D%22https://wilderminds.blob.core.windows.net/img/2024/07/22/gtgfg83woaakeap.png%22%20alt%3D%22The%20Popup%22%20/%3E%3C/p%3E%0A%3Cp%3EI%20don%E2%80%99t%20use%20my%20Google%20Account%20as%20my%20main%20identity,%20so%20I%20never%20want%20this.%20After%20delving%20into%20my%20Google%20account%20and%20Chrome%20settings,%20I%20was%20close%20to%20just%20signing%20out%20of%20Chrome%20entirely%20when%20I%20asked%20Twitter.%20I%20got%20an%20answer%20from%20%3Ca%20href%3D%22https://twitter.com/snackboy%22%3ETerry%20Beard%3C/a%3E:%3C/p%3E%0A%3Cp%3E%3Cimg%20src%3D%22https://wilderminds.blob.core.windows.net/img/2024/07/22/heroic-twitter.png%22%20alt%3D%22Terry%20Beard%20is%20my%20Hero%22%20/%3E%3C/p%3E%0A%3Cp%3ETo%20use%20this,%20just%20copy%20this%20to%20the%20address%20bar%20of%20your%20Chrome:%3C/p%3E%0A%3Cblockquote%3E%0A%3Cp%3Echrome://settings/content/federatedIdentityApi%3C/p%3E%0A%3C/blockquote%3E%0A%3Cp%3EHope%20this%20helps%20and%20that%20it%20shows%20up%20in%20my%20search%20results%20next%20time%20I%20forget%20how%20to%20do%20this.%3C/p%3E%0A%0A%20%20%20%20%20%20%3Cdiv%3E%0A%20%20%20%20%20%20%20%20%3Cdiv%3E%0A%20%20%20%20%20%20%20%20%20%20%3Ca%20rel%3D%22license%22%20href%3D%22http://creativecommons.org/licenses/by-nc-nd/3.0/%22%3E%0A%20%20%20%20%20%20%20%20%20%20%20%20%3Cimg%20alt%3D%22Creative%20Commons%20License%22%20style%3D%22border-width:%200%22%20src%3D%22http://i.creativecommons.org/l/by-nc-nd/3.0/88x31.png%22%20/%3E%3C/a%3E%3C/div%3E%0A%20%20%20%20%20%20%20%20%3Cdiv%3E%0A%20%20%20%20%20%20%20%20%20%20This%20work%20by%20%3Ca%20xmlns:cc%3D%22http://creativecommons.org/ns%23%22%20href%3D%22http://wildermuth.com%22%20property%3D%22cc:attributionName%22%20rel%3D%22cc:attributionURL%22%3EShawn%20Wildermuth%3C/a%3E%20is%0A%20%20%20%20%20%20%20%20%20%20licensed%20under%20a%20%3Ca%20rel%3D%22license%22%20href%3D%22http://creativecommons.org/licenses/by-nc-nd/3.0/%22%3E%0A%20%20%20%20%20%20%20%20%20%20%20%20Creative%20Commons%20Attribution-NonCommercial-NoDerivs%203.0%20Unported%20License%3C/a%3E.%3Cbr%20/%3E%0A%20%20%20%20%20%20%20%20%20%20Based%20on%20a%20work%20at%20%3Ca%20xmlns:dct%3D%22http://purl.org/dc/terms/%22%20href%3D%22http://wildermuth.com%22%20rel%3D%22dct:source%22%3Ewildermuth.com%3C/a%3E.%3C/div%3E%0A%20%20%20%20%20%20%20%20%3C/div%3E%0A%20%20%20%20%20%20%20%20%3Chr/%3E%3Cdiv%3EIf%20you%20liked%20this%20article,%20see%20Shawn's%20courses%20on%20%3Ca%20href%3D%22http://shawnw.me/pscourses%22%3EPluralsight%3C/a%3E.%3C/div%3E)
Composing Linq Queries 19 Jul 2024 4:00 PM (last year)
At one of my clients (he’ll be thrilled he made it in another blog post), I was showing him how to structure a complex Linq query. This came as a surprise to him and I thought it was worth a quick blog entry.
We’ve all been taught how Linq queries should look (using the Query syntax):
// Query Syntax
IEnumerable<int> numQuery1 =
    from num in numbers
    where num % 2 == 0
    orderby num
    select num;
This works fine, but like many of us, we’re used to the method syntax:
// Method Syntax
IEnumerable<int> numQuery1 = numbers
  .Where(n => n % 2 == 0)
  .OrderBy(n => n)
  .ToList();
They both accomplish the same thing but I tend to prefer the method syntax. For me, the biggest difference is being able to compose the query. What I mean is this:
// Composing Linq
var qry = numbers.Where(n => n % 2 == 0);

if (excludeFours)
{
  // Extend the Query
  qry = qry.Where(n => n % 4 != 0);
}

// Add more linq operations
qry = qry.OrderBy(n => n);

var noFours = qry.ToList();
I think this is useful in a couple of ways. First, when you need to modify a query from input, this is less clunky that two completely different queries. But, more importantly I think, by breaking up a complex query into individual steps, it can help the readability of the query. For example:
  // Using Entity Framework
  IQueryable<Order> query = ctx.Orders
    .Include(o => o.Items);

  if (dateOrder) query = query.OrderByDescending(o => o.OrderDate);

  var result = await query.ToListAsync();
While I think we’ve failed at talking about how linq is really working, I’m hoping this helps a little bit.
Based on a work at wildermuth.com.
,%20I%20was%20showing%20him%20how%20to%20structure%20a%20complex%20Linq%20query.%20This%20came%20as%20a%20surprise%20to%20him%20and%20I%20thought%20it%20was%20worth%20a%20quick%20blog%20entry.%3C/p%3E%0A%3Cp%3EWe%E2%80%99ve%20all%20been%20taught%20how%20Linq%20queries%20should%20look%20(using%20the%20Query%20syntax):%3C/p%3E%0A%3Cpre%3E%3Ccode%3E%3Cspan%3E//%20Query%20Syntax%3C/span%3E%0A%3Cspan%3EIEnumerable%3Cspan%3E%26lt;%3C/span%3E%3Cspan%3Eint%3C/span%3E%3Cspan%3E%3E%3C/span%3E%3C/span%3E%20numQuery1%20%3Cspan%3E%3D%3C/span%3E%0A%20%20%20%20%3Cspan%3Efrom%3C/span%3E%20num%20%3Cspan%3Ein%3C/span%3E%20numbers%0A%20%20%20%20%3Cspan%3Ewhere%3C/span%3E%20%3Cspan%3Enum%3C/span%3E%20%3Cspan%3E%25%3C/span%3E%20%3Cspan%3E2%3C/span%3E%20%3Cspan%3E%3D%3D%3C/span%3E%20%3Cspan%3E0%3C/span%3E%0A%20%20%20%20%3Cspan%3Eorderby%3C/span%3E%20num%0A%20%20%20%20%3Cspan%3Eselect%3C/span%3E%20num%3Cspan%3E;%3C/span%3E%3C/code%3E%3C/pre%3E%0A%3Cp%3EThis%20works%20fine,%20but%20like%20many%20of%20us,%20we%E2%80%99re%20used%20to%20the%20method%20syntax:%3C/p%3E%0A%3Cpre%3E%3Ccode%3E%3Cspan%3E//%20Method%20Syntax%3C/span%3E%0A%3Cspan%3EIEnumerable%3Cspan%3E%26lt;%3C/span%3E%3Cspan%3Eint%3C/span%3E%3Cspan%3E%3E%3C/span%3E%3C/span%3E%20numQuery1%20%3Cspan%3E%3D%3C/span%3E%20numbers%0A%20%20%3Cspan%3E.%3C/span%3E%3Cspan%3EWhere%3C/span%3E%3Cspan%3E(%3C/span%3En%20%3Cspan%3E%3D%3E%3C/span%3E%20n%20%3Cspan%3E%25%3C/span%3E%20%3Cspan%3E2%3C/span%3E%20%3Cspan%3E%3D%3D%3C/span%3E%20%3Cspan%3E0%3C/span%3E%3Cspan%3E)%3C/span%3E%0A%20%20%3Cspan%3E.%3C/span%3E%3Cspan%3EOrderBy%3C/span%3E%3Cspan%3E(%3C/span%3En%20%3Cspan%3E%3D%3E%3C/span%3E%20n%3Cspan%3E)%3C/span%3E%0A%20%20%3Cspan%3E.%3C/span%3E%3Cspan%3EToList%3C/span%3E%3Cspan%3E(%3C/span%3E%3Cspan%3E)%3C/span%3E%3Cspan%3E;%3C/span%3E%3C/code%3E%3C/pre%3E%0A%3Cp%3EThey%20both%20accomplish%20the%20same%20thing%20but%20I%20tend%20to%20prefer%20the%20method%20syntax.%20For%20me,%20the%20biggest%20difference%20is%20being%20able%20to%20compose%20the%20query.%20What%20I%20mean%20is%20this:%3C/p%3E%0A%3Cpre%3E%3Ccode%3E%3Cspan%3E//%20Composing%20Linq%3C/span%3E%0A%3Cspan%3E%3Cspan%3Evar%3C/span%3E%3C/span%3E%20qry%20%3Cspan%3E%3D%3C/span%3E%20numbers%3Cspan%3E.%3C/span%3E%3Cspan%3EWhere%3C/span%3E%3Cspan%3E(%3C/span%3En%20%3Cspan%3E%3D%3E%3C/span%3E%20n%20%3Cspan%3E%25%3C/span%3E%20%3Cspan%3E2%3C/span%3E%20%3Cspan%3E%3D%3D%3C/span%3E%20%3Cspan%3E0%3C/span%3E%3Cspan%3E)%3C/span%3E%3Cspan%3E;%3C/span%3E%0A%0A%3Cspan%3Eif%3C/span%3E%20%3Cspan%3E(%3C/span%3EexcludeFours%3Cspan%3E)%3C/span%3E%0A%3Cspan%3E%7B%3C/span%3E%0A%20%20%3Cspan%3E//%20Extend%20the%20Query%3C/span%3E%0A%20%20qry%20%3Cspan%3E%3D%3C/span%3E%20qry%3Cspan%3E.%3C/span%3E%3Cspan%3EWhere%3C/span%3E%3Cspan%3E(%3C/span%3En%20%3Cspan%3E%3D%3E%3C/span%3E%20n%20%3Cspan%3E%25%3C/span%3E%20%3Cspan%3E4%3C/span%3E%20%3Cspan%3E!%3D%3C/span%3E%20%3Cspan%3E0%3C/span%3E%3Cspan%3E)%3C/span%3E%3Cspan%3E;%3C/span%3E%0A%3Cspan%3E%7D%3C/span%3E%0A%0A%3Cspan%3E//%20Add%20more%20linq%20operations%3C/span%3E%0Aqry%20%3Cspan%3E%3D%3C/span%3E%20qry%3Cspan%3E.%3C/span%3E%3Cspan%3EOrderBy%3C/span%3E%3Cspan%3E(%3C/span%3En%20%3Cspan%3E%3D%3E%3C/span%3E%20n%3Cspan%3E)%3C/span%3E%3Cspan%3E;%3C/span%3E%0A%0A%3Cspan%3E%3Cspan%3Evar%3C/span%3E%3C/span%3E%20noFours%20%3Cspan%3E%3D%3C/span%3E%20qry%3Cspan%3E.%3C/span%3E%3Cspan%3EToList%3C/span%3E%3Cspan%3E(%3C/span%3E%3Cspan%3E)%3C/span%3E%3Cspan%3E;%3C/span%3E%3C/code%3E%3C/pre%3E%0A%3Cp%3EI%20think%20this%20is%20useful%20in%20a%20couple%20of%20ways.%20First,%20when%20you%20need%20to%20modify%20a%20query%20from%20input,%20this%20is%20less%20clunky%20that%20two%20completely%20different%20queries.%20But,%20more%20importantly%20I%20think,%20by%20breaking%20up%20a%20complex%20query%20into%20individual%20steps,%20it%20can%20help%20the%20readability%20of%20the%20query.%20For%20example:%3C/p%3E%0A%3Cpre%3E%3Ccode%3E%20%20%3Cspan%3E//%20Using%20Entity%20Framework%3C/span%3E%0A%20%20%3Cspan%3EIQueryable%3Cspan%3E%26lt;%3C/span%3EOrder%3Cspan%3E%3E%3C/span%3E%3C/span%3E%20query%20%3Cspan%3E%3D%3C/span%3E%20ctx%3Cspan%3E.%3C/span%3EOrders%0A%20%20%20%20%3Cspan%3E.%3C/span%3E%3Cspan%3EInclude%3C/span%3E%3Cspan%3E(%3C/span%3Eo%20%3Cspan%3E%3D%3E%3C/span%3E%20o%3Cspan%3E.%3C/span%3EItems%3Cspan%3E)%3C/span%3E%3Cspan%3E;%3C/span%3E%0A%0A%20%20%3Cspan%3Eif%3C/span%3E%20%3Cspan%3E(%3C/span%3EdateOrder%3Cspan%3E)%3C/span%3E%20query%20%3Cspan%3E%3D%3C/span%3E%20query%3Cspan%3E.%3C/span%3E%3Cspan%3EOrderByDescending%3C/span%3E%3Cspan%3E(%3C/span%3Eo%20%3Cspan%3E%3D%3E%3C/span%3E%20o%3Cspan%3E.%3C/span%3EOrderDate%3Cspan%3E)%3C/span%3E%3Cspan%3E;%3C/span%3E%0A%0A%20%20%3Cspan%3E%3Cspan%3Evar%3C/span%3E%3C/span%3E%20result%20%3Cspan%3E%3D%3C/span%3E%20%3Cspan%3Eawait%3C/span%3E%20query%3Cspan%3E.%3C/span%3E%3Cspan%3EToListAsync%3C/span%3E%3Cspan%3E(%3C/span%3E%3Cspan%3E)%3C/span%3E%3Cspan%3E;%3C/span%3E%3C/code%3E%3C/pre%3E%0A%3Cp%3EWhile%20I%20think%20we%E2%80%99ve%20failed%20at%20talking%20about%20how%20linq%20is%20really%20working,%20I%E2%80%99m%20hoping%20this%20helps%20a%20little%20bit.%3C/p%3E%0A%0A%20%20%20%20%20%20%3Cdiv%3E%0A%20%20%20%20%20%20%20%20%3Cdiv%3E%0A%20%20%20%20%20%20%20%20%20%20%3Ca%20rel%3D%22license%22%20href%3D%22http://creativecommons.org/licenses/by-nc-nd/3.0/%22%3E%0A%20%20%20%20%20%20%20%20%20%20%20%20%3Cimg%20alt%3D%22Creative%20Commons%20License%22%20style%3D%22border-width:%200%22%20src%3D%22http://i.creativecommons.org/l/by-nc-nd/3.0/88x31.png%22%20/%3E%3C/a%3E%3C/div%3E%0A%20%20%20%20%20%20%20%20%3Cdiv%3E%0A%20%20%20%20%20%20%20%20%20%20This%20work%20by%20%3Ca%20xmlns:cc%3D%22http://creativecommons.org/ns%23%22%20href%3D%22http://wildermuth.com%22%20property%3D%22cc:attributionName%22%20rel%3D%22cc:attributionURL%22%3EShawn%20Wildermuth%3C/a%3E%20is%0A%20%20%20%20%20%20%20%20%20%20licensed%20under%20a%20%3Ca%20rel%3D%22license%22%20href%3D%22http://creativecommons.org/licenses/by-nc-nd/3.0/%22%3E%0A%20%20%20%20%20%20%20%20%20%20%20%20Creative%20Commons%20Attribution-NonCommercial-NoDerivs%203.0%20Unported%20License%3C/a%3E.%3Cbr%20/%3E%0A%20%20%20%20%20%20%20%20%20%20Based%20on%20a%20work%20at%20%3Ca%20xmlns:dct%3D%22http://purl.org/dc/terms/%22%20href%3D%22http://wildermuth.com%22%20rel%3D%22dct:source%22%3Ewildermuth.com%3C/a%3E.%3C/div%3E%0A%20%20%20%20%20%20%20%20%3C/div%3E%0A%20%20%20%20%20%20%20%20%3Chr/%3E%3Cdiv%3EIf%20you%20liked%20this%20article,%20see%20Shawn's%20courses%20on%20%3Ca%20href%3D%22http://shawnw.me/pscourses%22%3EPluralsight%3C/a%3E.%3C/div%3E)
Separating Concerns with Pinia 30 Jun 2024 4:00 PM (last year)
In my job as a consultant, I often code review Vue applications. Structuring a Vue app (or Nuxt) can be a challenge as your project grows. It is common to me to see views with a lot of business logic and computed values. This isn’t necessarily a bad thing, but can incur technical debt. Let’s talk about it!
For example, I have a simple address book app that i’m using:
Let’s start with the easy part, I’ve got a component:
<div class="mr-6">
  <entry-list @on-loading="onLoading"
              @on-error="onError"/>
</div>
In order to react to any state it needs, we’re using emits (e.g. events). So when the wait cursor is needed, we get an event emited to show or hide the cursor. Same for errors. So we have to communicate through props and emits. But, I’m getting ahead of myself, let’s look at the component’s properties that it binds to:
const router = useRouter();
const currentId = ref(0);
const entries = reactive(new Array<EntryLookupModel>());
const filter = ref("");
Then it binds the entries (et al.):
<div class="h-[calc(100vh-14rem)] overflow-y-scroll bg-yellow">
  <ul class="menu text-lg">
    <li v-for="e in entries"
        :key="e.id">
      <div @click="onSelected(e)"
           :class="{
            'text-white': currentId === e.id,
            'font-bold': currentId === e.id
           }">{{ e.displayName }}</div>
    </li>
  </ul>
</div>
Simple, huh? Just like most Vue projects you’ve seen, especially examples (like I write too). But to serve this data, we need some business logic:
function onSelected(item: EntryLookupModel) {
  router.push(`/details/${item.id}`);
  currentId.value = item.id;
}

onMounted(async () => {
  await loadLookupList();
})

async function loadLookupList() {
  if (entries.length === 0) {
    try {
      emits("onLoading", true);
      const result = await http.get<Array<EntryLookupModel>>(
        "/api/entries/lookup");
      entries.splice(0, entries.length, ...result);
      sortEntities();
    } catch (e: any) {
      emits("onError", e);
    } finally {
      emits("onLoading", false);
    }
  }
}

function sortEntities() {
  entries.sort((a, b) => {
    return a.displayName < b.displayName ? -1 :
      (a.displayName > b.displayName ? 1 : 0)
  });
}
Not too bad, but it makes this simple view complex. And, if we wanted to test this component, we’d have to do an integration test and fire up something like Playwright to test the actual code generation. This works, but your tests are much more fragile and take a long time to run.
Enter Pinia (or any shared objects). Pinia allows you to create a store that, essentially, creates a shared object that can hold your business logic. By removing the business logic form the components, we can also unit test them. I’m a fan. Let’s see what we would do to change this.
Note, this isn’t really a tutorial on how to use Pinia, but if you want the details look here:
First, let’s create a store:
export const useStore = defineStore("main", {
  state: () => {
    return {
      entries: new Array<EntryLookupModel>(),
      filter: "",
      errorMessage: "",
      isBusy: false
    };
  },
}
You create a store using defineStore and expose it as a composable so the first person who retrieves the store, creates the instance. But, importantly, every other calling of useStore will retrieve that same instance. So, in our component we’d just use the useStore to load the main store:
const store = useStore();And to bind to the store, you’d just use the store. For example, in the component:
<div class="h-[calc(100vh-14rem)] overflow-y-scroll bg-yellow">
  <ul class="menu text-lg">
    <li v-for="e in store.entries"
        :key="e.id">
        <div @click="onSelected(e)"
           :class="{
            'text-white': currentId === e.id,
            'font-bold': currentId === e.id
           }">{{ e.displayName }}</div>
    </li>
  </ul>
</div>
All the same data binding happens, it’s just wrapped up in the store. But what about that business logic? Pinia handles that with actions:
export const useStore = defineStore("main", {
  state: () => {
    return {
      entries: new Array<EntryLookupModel>(),
      filter: "",
      errorMessage: "",
      isBusy: false
    };
  },
  actions: {
    async loadLookupList() {
      if (this.entries.length === 0) {
        try {
          this.startRequest();
          const result = await http.get<Array<EntryLookupModel>>(
            "/api/entries/lookup");
          this.entries.splice(0, this.entries.length, ...result);
          this.sortEntities();
        } catch (e: any) {
          this.errorMessage = e;
        } finally {
          this.isBusy = false;
        }
      }
    },
...
}
If we push the loading of the data into the actions member, we are adding any functions we need to be exposing to the applicaiton. For example, instead of using a local function, we can just access it from the store:
onMounted(async () => {
  await store.loadLookupList();
})
Again, we’re just deferring to the store. You might be asking why? This centralizes the data and logic into a shared object. To show this, notice that the store also has members for errorMessage and isBusy. As a reminder, we were using events to tell the App.vue that the loading or error message has changed. But since we’re just using a reactive object in the store, we can skip all that plumbing and instead just use the store from the App.vue:
<script setup lang="ts">

const store = useStore();

// const errorMessage = ref("");
// const isBusy = ref(false);

// function onLoading(value: boolean) { isBusy.value = value}
// function onError(value: string) { errorMessage.value = value}

...
</script>
<template>
...
  <div class="mr-6">
    <entry-list/>
  </div>
</section>

<section class="flex-grow">

  <div class="flex gap-2 h-[calc(100vh-5rem)]">
    <div class="p-2 flex-grow">
      <div class="bg-warning w-full p-2 text-xl"
           v-if="store.errorMessage">
        {{
          errorMessage
        }}
      </div>
      <div class="bg-primary w-full p-2 text-xl"
           v-if="store.isBusy">
        Loading...
      </div>
...
</template>
So, the logic of errors and isBusy (et al.) is contained in this simple store. My component now has only cares about local state that it might need (e.g. currentId is picked and shows the other pane):
<script setup lang="ts">
...

const store = useStore();
const router = useRouter();
const currentId = ref(0);

function onSelected(item: EntryLookupModel) {
  router.push(`/details/${item.id}`);
  currentId.value = item.id;
}

onMounted(async () => {
  await store.loadLookupList();
})

watch(router.currentRoute, () => {
  if (router.currentRoute.value.name === "home") {
    currentId.value = 0;
  }
})
</script>
But what if we need some computed values? Pinia handles this as getters:
  getters: {
    entryList: (state) => {
      if (state.filter) {
        return state.entries
          .filter((e) => e.displayName
            .toLowerCase()
            .includes(state.filter));
      } else {
        return state.entries;
      }
    }
  }
Each getter is a computed value. So when the state of the store changes, this is computed and can be bound to. You may have noticed a filter property. To handle the change, we’re just binding to an input:
<input class="input join-item caret-neutral text-sm"
       placeholder="Search..."
       v-model="store.filter" />
Since this is bound to the filter, when a user types into it, our entryList will change. You’ll notice that in the getter, we’re just filtering the list of entries based on the filter. So, if we switch the binding to the entryList, we’ll be binding to the computed value:
<ul class="menu text-lg">
  <!-- was "store.entries" -->
  <li v-for="e in store.entryList"
      :key="e.id">
    <div @click="onSelected(e)"
         :class="{
          'text-white': currentId === e.id,
          'font-bold': currentId === e.id
         }">{{ e.displayName }}</div>
  </li>
</ul>
Except for binding to the filter and to the entryList, the component doesn’t need to know about any of this.
So why are we doing this? So we can unit test the store itself. Make sense?
Based on a work at wildermuth.com.
Health Checks in Your OpenAPI Specs 16 Jun 2024 4:00 PM (last year)
I recently was working on a project where the client wanted the health checks to be part of the OpenAPI specification. Here’s how you can do it.
Annoucement: In case you’re new here, I’ve just launched my blog with a new combined website. Take a gander around and tell me what you think!
ASP.NET Core supports health checks out of the box. You can add them to your project by adding the Microsoft.AspNetCore.Diagnostics.HealthChecks NuGet package. Once you’ve added the package, you can add health checks dependencies to your project by adding them to the ServiceCollection:
builder.Services.AddHealthChecks();Once you’ve added the health checks, you need to map the health checks to an endpoint (usually /health ). You do that by calling MapHealthChecks:
app.MapHealthChecks("/health");This works great. If you need to use the health checks, you can just call the /health endpoint.
At the client, our APIs were were generated via some tooling by reading the OpenApPI spec. The client wanted the health checks to be part of the OpenAPI specification so that the client could call it with the same generated code. But how to get it to work?
The solution is to not use the MapHealthChecks method, but instead to build an API (in my case, Minimal APIs) use perform the health checks. Here’s how you can do it:
builder.MapGet("/health", async (HealthCheckService healthCheck,
  IHttpContextAccessor contextAccessor) =>
{
    var report = await healthCheck.CheckHealthAsync();
    if (report.Status == HealthStatus.Healthy)
    {
        return Results.Ok(new { Success = true });
    }
    else
    {
        return Results.Problem("Unhealthy", statusCode: 500);
    }
}); //  ...
This works great. One of the reasons I decided to do it this way, is that instead of just a string, I wanted to return some context about the health check. This way, the client can know what is wrong with the health check.
NOTE: Returning reasons for the failure can be a security risk. Be careful not to return any sensitive information.
I found the best way to do this is to create a problem report with some information:
var report = await healthCheck.CheckHealthAsync();
if (report.Status == HealthStatus.Healthy)
{
  return Results.Ok(new { Success = true });
}
else
{
  var failures = report.Entries
    .Select(e => e.Value.Description)
    .ToArray();

  var details = new ProblemDetails()
  {
      Instance = contextAccessor.HttpContext.Request.GetServerUrl(),
      Status = 503,
      Title = "Healthcheck Failed",
      Type = "healthchecks",
      Detail = string.Join(Environment.NewLine, failures)
  };
  return Results.Problem(details);
}
By creating a problem detail, I can specify what the URL was used, the status code to use (503 in this case), and a list of the failures. The report that the CheckHealthAsync method returns has a dictionary of the health checks. I’m just using the description of the health check as the failure reason. Remember when you call AddHealthChecks you can add additional checks like this one for testing the DbContext connection string:
builder.Services.AddhealthChecks()
  // From the
  // Microsoft.Extensions.Diagnostics.HealthChecks.EntityFrameworkCore
  //package
  .AddDbContextCheck<ShoeContext>();
Then you can add some additional information for the OpenAPI specification:
builder.MapGet("/health", async (HealthCheckService healthCheck,
  IHttpContextAccessor contextAccessor) => { ... })
            .Produces(200)
            .ProducesProblem(503)
            .WithName("HealthCheck")
            .WithTags("HealthCheck")
            .AllowAnonymous();
Make sense? Let me know what you think!
Based on a work at wildermuth.com.
Minimal APIs Nuget Packages 20 Apr 2024 4:00 PM (last year)
I’ll make this post pretty quick. I’ve been looking at my Nuget packages and they’re kinda a mess. Not just the packages, but the naming and branding. To start this annoying process, I’ve decided to move all my Nuget packages that support Minimal APIs to a common GitHub repo and package naming.
MinimalApis.Discovery
This package is to help you organize your Minimal APIs by using a code generator to automate registration of your APIs by implementing an IApi interface. You can read more about it here: Docs.
If you’ve been using my package to organize your Minimal APIs, the name of the package has been changed:
Was: WilderMinds.MinimalApiDiscovery
Now: MinimalApis.Discovery
The old package has been depreciated, and you can install the new package by simply:
> dotnet remove package WilderMinds.MinimalApiDiscovery
> dotnet add package MinimalApis.Discovery
MinimalApis.FluentValidation
The second package in this repository is MinimalApis.FluentValidation. I’m a big fan of how Fluent Validation works, but as I was teaching Minimal APIs - it was tedious to add validation. In .NET 7, Microsoft introduced Endpoint Filters as a good solution. You can read more about how this works at: Docs
This package hasn’t changed name, but has been moved from beta to release. You can update or install this package:
> dotnet add package MinimalApis.FluentValidationLet me know what you think!
Based on a work at wildermuth.com.

My Nuget Packages 28 Jan 2024 3:00 PM (2 years ago)
It’s been a while, huh? I haven’t been blogging much (as I’ve been dedicating my time to my YouTube channel) - so I thought it was time to give you a quick update. I have a series of Nuget packages that I’ve created to help with .NET Core development. Let’s take a look:
MinimalApis.FluentValidation
This is my newest package. It adds support to use FluentValidation as an endpointfilter in Minimal APIs. To install:
> dotnet add package MinimalApis.FluentValidationMinimalApiDiscovery
I created this package to support structuring your Minimal APIs. It has a sourcegenerator that will register all your Minimal APIs with one call in startup. The strategy here was to avoid having to put anything in the DI layer, since Minimal APIs are static lambas. To install:
> dotnet add package WilderMinds.MinimalApiDiscoveryAzureImageStorageService
This is a small package I created so I create a wrapper around the complexity of writing images to Azure Blog Storage. Take a look! To install:
> dotnet add package WilderMinds.AzureImageStorageServiceMetaWeblog
This is an older package I wrote to handle the MetaWeblog API in my own blog. This API is used for some tools to post new blog entries. To install it:
> dotnet add package WilderMinds.MetaWeblogRssSyndication
Another package I wrote to support my blog, but some people find it useful. In early .NET Core, there wasn’t a solution for exposing a RSS feed from some content. This package does just that: To install it:
> dotnet add package WilderMinds.RssSyndicationWilderMinds.SwaggerHierarchySupport
Finally, a small Nuget package to allow you to inject the Swagger Heirarchy plugin for Swagger/OpenAPI to create levels of hierarchies in your swagger conigurations. Install it here:
> dotnet add package WilderMinds.SwaggerHierarchySupportBased on a work at wildermuth.com.
%20-%20so%20I%20thought%20it%20was%20time%20to%20give%20you%20a%20quick%20update.%20I%20have%20a%20series%20of%20Nuget%20packages%20that%20I%E2%80%99ve%20created%20to%20help%20with%20.NET%20Core%20development.%20Let%E2%80%99s%20take%20a%20look:%3C/p%3E%0A%3Ch2%20tabindex%3D%22-1%22%3EMinimalApis.FluentValidation%3C/h2%3E%0A%3Cp%3EThis%20is%20my%20newest%20package.%20It%20adds%20support%20to%20use%20FluentValidation%20as%20an%20endpointfilter%20in%20Minimal%20APIs.%20To%20install:%3C/p%3E%0A%3Cpre%3E%3Ccode%3E%3Cspan%3E%3E%3C/span%3E%20dotnet%20%3Cspan%3Eadd%3C/span%3E%20package%20MinimalApis%3Cspan%3E.%3C/span%3EFluentValidation%3C/code%3E%3C/pre%3E%0A%3Cp%3E%3Ca%20href%3D%22https://github.com/shawnwildermuth/minimalapis.fluentvalidation?tab%253Dreadme-ov-file%23minimalapisfluentvalidation%22%3ERead%20more%E2%80%A6%3C/a%3E%3C/p%3E%0A%3Ch2%20tabindex%3D%22-1%22%3EMinimalApiDiscovery%3C/h2%3E%0A%3Cp%3EI%20created%20this%20package%20to%20support%20structuring%20your%20Minimal%20APIs.%20It%20has%20a%20sourcegenerator%20that%20will%20register%20all%20your%20Minimal%20APIs%20with%20one%20call%20in%20startup.%20The%20strategy%20here%20was%20to%20avoid%20having%20to%20put%20anything%20in%20the%20DI%20layer,%20since%20Minimal%20APIs%20are%20static%20lambas.%20To%20install:%3C/p%3E%0A%3Cpre%3E%3Ccode%3E%3Cspan%3E%3E%3C/span%3E%20dotnet%20%3Cspan%3Eadd%3C/span%3E%20package%20WilderMinds%3Cspan%3E.%3C/span%3EMinimalApiDiscovery%3C/code%3E%3C/pre%3E%0A%3Cp%3E%3Ca%20href%3D%22https://github.com/wilder-minds/MinimalApiDiscovery?tab%253Dreadme-ov-file%23minimalapidiscovery%22%3ERead%20more%E2%80%A6%3C/a%3E%3C/p%3E%0A%3Ch2%20tabindex%3D%22-1%22%3EAzureImageStorageService%3C/h2%3E%0A%3Cp%3EThis%20is%20a%20small%20package%20I%20created%20so%20I%20%20create%20a%20wrapper%20around%20the%20complexity%20of%20writing%20images%20to%20Azure%20Blog%20Storage.%20Take%20a%20look!%20To%20install:%3C/p%3E%0A%3Cpre%3E%3Ccode%3E%3Cspan%3E%3E%3C/span%3E%20dotnet%20%3Cspan%3Eadd%3C/span%3E%20package%20WilderMinds%3Cspan%3E.%3C/span%3EAzureImageStorageService%3C/code%3E%3C/pre%3E%0A%3Cp%3E%3Ca%20href%3D%22https://github.com/wilder-minds/AzureImageStorageService?tab%253Dreadme-ov-file%23wildermindsazureimagestorageservice%22%3ERead%20more%E2%80%A6%3C/a%3E%3C/p%3E%0A%3Ch2%20tabindex%3D%22-1%22%3EMetaWeblog%3C/h2%3E%0A%3Cp%3EThis%20is%20an%20older%20package%20I%20wrote%20to%20handle%20the%20%3Ca%20href%3D%22https://en.wikipedia.org/wiki/MetaWeblog%22%3EMetaWeblog%20API%3C/a%3E%20in%20my%20own%20blog.%20This%20API%20is%20used%20for%20some%20tools%20to%20post%20new%20blog%20entries.%20To%20install%20it:%3C/p%3E%0A%3Cpre%3E%3Ccode%3E%3Cspan%3E%3E%3C/span%3E%20dotnet%20%3Cspan%3Eadd%3C/span%3E%20package%20WilderMinds%3Cspan%3E.%3C/span%3EMetaWeblog%3C/code%3E%3C/pre%3E%0A%3Cp%3E%3Ca%20href%3D%22https://github.com/shawnwildermuth/MetaWeblog?tab%253Dreadme-ov-file%23wildermindsmetaweblog%22%3ERead%20more%E2%80%A6%3C/a%3E%3C/p%3E%0A%3Ch2%20tabindex%3D%22-1%22%3ERssSyndication%3C/h2%3E%0A%3Cp%3EAnother%20package%20I%20wrote%20to%20support%20my%20blog,%20but%20some%20people%20find%20it%20useful.%20In%20early%20.NET%20Core,%20there%20wasn%E2%80%99t%20a%20solution%20for%20exposing%20a%20RSS%20feed%20from%20some%20content.%20This%20package%20does%20just%20that:%20To%20install%20it:%3C/p%3E%0A%3Cpre%3E%3Ccode%3E%3Cspan%3E%3E%3C/span%3E%20dotnet%20%3Cspan%3Eadd%3C/span%3E%20package%20WilderMinds%3Cspan%3E.%3C/span%3ERssSyndication%3C/code%3E%3C/pre%3E%0A%3Cp%3E%3Ca%20href%3D%22https://github.com/shawnwildermuth/RssSyndication?tab%253Dreadme-ov-file%23rsssyndication%22%3ERead%20more%E2%80%A6%3C/a%3E%3C/p%3E%0A%3Ch2%20tabindex%3D%22-1%22%3EWilderMinds.SwaggerHierarchySupport%3C/h2%3E%0A%3Cp%3EFinally,%20a%20small%20Nuget%20package%20to%20allow%20you%20to%20inject%20the%20Swagger%20Heirarchy%20plugin%20for%20Swagger/OpenAPI%20to%20create%20levels%20of%20hierarchies%20in%20your%20swagger%20conigurations.%20Install%20it%20here:%3C/p%3E%0A%3Cpre%3E%3Ccode%3E%3Cspan%3E%3E%3C/span%3E%20dotnet%20%3Cspan%3Eadd%3C/span%3E%20package%20WilderMinds%3Cspan%3E.%3C/span%3ESwaggerHierarchySupport%3C/code%3E%3C/pre%3E%0A%3Cp%3E%3Ca%20href%3D%22https://github.com/wilder-minds/SwaggerUIHierarchySupport?tab%253Dreadme-ov-file%23swaggerhierarchysupport%22%3ERead%20more%E2%80%A6%3C/a%3E%3C/p%3E%0A%0A%20%20%20%20%20%20%3Cdiv%3E%0A%20%20%20%20%20%20%20%20%3Cdiv%3E%0A%20%20%20%20%20%20%20%20%20%20%3Ca%20rel%3D%22license%22%20href%3D%22http://creativecommons.org/licenses/by-nc-nd/3.0/%22%3E%0A%20%20%20%20%20%20%20%20%20%20%20%20%3Cimg%20alt%3D%22Creative%20Commons%20License%22%20style%3D%22border-width:%200%22%20src%3D%22http://i.creativecommons.org/l/by-nc-nd/3.0/88x31.png%22%20/%3E%3C/a%3E%3C/div%3E%0A%20%20%20%20%20%20%20%20%3Cdiv%3E%0A%20%20%20%20%20%20%20%20%20%20This%20work%20by%20%3Ca%20xmlns:cc%3D%22http://creativecommons.org/ns%23%22%20href%3D%22http://wildermuth.com%22%20property%3D%22cc:attributionName%22%20rel%3D%22cc:attributionURL%22%3EShawn%20Wildermuth%3C/a%3E%20is%0A%20%20%20%20%20%20%20%20%20%20licensed%20under%20a%20%3Ca%20rel%3D%22license%22%20href%3D%22http://creativecommons.org/licenses/by-nc-nd/3.0/%22%3E%0A%20%20%20%20%20%20%20%20%20%20%20%20Creative%20Commons%20Attribution-NonCommercial-NoDerivs%203.0%20Unported%20License%3C/a%3E.%3Cbr%20/%3E%0A%20%20%20%20%20%20%20%20%20%20Based%20on%20a%20work%20at%20%3Ca%20xmlns:dct%3D%22http://purl.org/dc/terms/%22%20href%3D%22http://wildermuth.com%22%20rel%3D%22dct:source%22%3Ewildermuth.com%3C/a%3E.%3C/div%3E%0A%20%20%20%20%20%20%20%20%3C/div%3E%0A%20%20%20%20%20%20%20%20%3Chr/%3E%3Cdiv%3EIf%20you%20liked%20this%20article,%20see%20Shawn's%20courses%20on%20%3Ca%20href%3D%22http://shawnw.me/pscourses%22%3EPluralsight%3C/a%3E.%3C/div%3E)
Is it Time to Panic? Suddenly, Everyone Seems to Need a Job 14 Aug 2023 4:00 PM (2 years ago)
In my last blog post, I mentioned that I was pivoting to what I’m doing next. It feels a lot of people are going through an upheaval. Is it systemic?
To be clear, I have no idea what’s happening but it looks like a lot of organizations have taken the current landscape to trim their rolls. Of course, some of you might think AI is the culprit but I talked about that in one of my rants if you want to go flame me there ;)
Over the past month or so, I’ve watched as Pluralsight, LinkedIn, Plex, Microsoft and I am sure more that I haven’t noticed. Earlier in the year, the announcement from Facebook, Alphabet, Twitter and Microsoft already left some people worried.
A lot of these jobs seem to be more about developer relations. This seems like a pattern. Sure, startups like SourceGraph are hiring, but can they absorb the other layoffs? I don’t know.
Am I concerned? For my own future, sure. I’m 54 and ageism exists, but I have faith in my abilities. The real concern for me, is that Developer Advocates are being cut. There is a real movement towards Discord as documentation and developer relationships. I think this trend is newer than the pandemic.
The other side of the coin is that overall the unemployment rate is actually pretty low. For me, that meant I wasn’t looking at jobs outside of the tech companies. Sometimes I forget that most tech jobs aren’t in tech companies like Ford, Geico, and Wells Fargo. So, if you’re looking, don’t forget that tons of other companies have openings (in fact, reach out if you are a Vue developer that can work remote, I know of a job or two).
Lastly, I wanted to highlight a few people that I know are looking and that I think are genuinely great. Here are their LinkedIn links:
- David Neal: https://www.linkedin.com/in/davidneal/
- Joe Guadagno: https://www.linkedin.com/in/josephguadagno/
- Ted Neward: https://www.linkedin.com/in/tedneward/
- Lars Klint: https://www.linkedin.com/in/lklint/
I am not sure I’m looking for a job yet, but I’m still writing courses and working with clients for the time being. This fall may tell a different tale.
Based on a work at wildermuth.com.
%3C/p%3E%0A%3Cdiv%3E%0A%20%20%20%20%0A%3C/div%3E%0A%3Cp%3EOver%20the%20past%20month%20or%20so,%20I%E2%80%99ve%20watched%20as%20Pluralsight,%20LinkedIn,%20Plex,%20Microsoft%20and%20I%20am%20sure%20more%20that%20I%20haven%E2%80%99t%20noticed.%20Earlier%20in%20the%20year,%20the%20announcement%20from%20Facebook,%20Alphabet,%20Twitter%20and%20Microsoft%20already%20left%20some%20people%20worried.%3C/p%3E%0A%3Cp%3EA%20lot%20of%20these%20jobs%20seem%20to%20be%20more%20about%20developer%20relations.%20This%20seems%20like%20a%20pattern.%20Sure,%20startups%20like%20SourceGraph%20are%20hiring,%20but%20can%20they%20absorb%20the%20other%20layoffs?%20I%20don%E2%80%99t%20know.%3C/p%3E%0A%3Cp%3EAm%20I%20concerned?%20For%20my%20own%20future,%20sure.%20I%E2%80%99m%2054%20and%20ageism%20exists,%20but%20I%20have%20faith%20in%20my%20abilities.%20The%20real%20concern%20for%20me,%20is%20that%20Developer%20Advocates%20are%20being%20cut.%20There%20is%20a%20real%20movement%20towards%20Discord%20as%20documentation%20and%20developer%20relationships.%20I%20think%20this%20trend%20is%20newer%20than%20the%20pandemic.%3C/p%3E%0A%3Cp%3EThe%20other%20side%20of%20the%20coin%20is%20that%20overall%20the%20unemployment%20rate%20is%20actually%20pretty%20low.%20For%20me,%20that%20meant%20I%20wasn%E2%80%99t%20looking%20at%20jobs%20outside%20of%20the%20tech%20companies.%20Sometimes%20I%20forget%20that%20most%20tech%20jobs%20aren%E2%80%99t%20in%20tech%20companies%20like%20Ford,%20Geico,%20and%20Wells%20Fargo.%20So,%20if%20you%E2%80%99re%20looking,%20don%E2%80%99t%20forget%20that%20tons%20of%20other%20companies%20have%20openings%20(in%20fact,%20reach%20out%20if%20you%20are%20a%20Vue%20developer%20that%20can%20work%20remote,%20I%20know%20of%20a%20job%20or%20two).%3C/p%3E%0A%3Cp%3ELastly,%20I%20wanted%20to%20highlight%20a%20few%20people%20that%20I%20know%20are%20looking%20and%20that%20I%20think%20are%20genuinely%20great.%20Here%20are%20their%20LinkedIn%20links:%3C/p%3E%0A%3Cul%3E%0A%3Cli%3EDavid%20Neal:%20%3Ca%20href%3D%22https://www.linkedin.com/in/davidneal/%22%3Ehttps://www.linkedin.com/in/davidneal/%3C/a%3E%3C/li%3E%0A%3Cli%3EJoe%20Guadagno:%20%3Ca%20href%3D%22https://www.linkedin.com/in/josephguadagno/%22%3Ehttps://www.linkedin.com/in/josephguadagno/%3C/a%3E%3C/li%3E%0A%3Cli%3ETed%20Neward:%20%3Ca%20href%3D%22https://www.linkedin.com/in/tedneward/%22%3Ehttps://www.linkedin.com/in/tedneward/%3C/a%3E%3C/li%3E%0A%3Cli%3ELars%20Klint:%20%3Ca%20href%3D%22https://www.linkedin.com/in/lklint/%22%3Ehttps://www.linkedin.com/in/lklint/%3C/a%3E%3C/li%3E%0A%3C/ul%3E%0A%3Cp%3EI%20am%20not%20sure%20I%E2%80%99m%20looking%20for%20a%20job%20yet,%20but%20I%E2%80%99m%20still%20writing%20courses%20and%20working%20with%20clients%20for%20the%20time%20being.%20This%20fall%20may%20tell%20a%20different%20tale.%3C/p%3E%0A%0A%20%20%20%20%20%20%3Cdiv%3E%0A%20%20%20%20%20%20%20%20%3Cdiv%3E%0A%20%20%20%20%20%20%20%20%20%20%3Ca%20rel%3D%22license%22%20href%3D%22http://creativecommons.org/licenses/by-nc-nd/3.0/%22%3E%0A%20%20%20%20%20%20%20%20%20%20%20%20%3Cimg%20alt%3D%22Creative%20Commons%20License%22%20style%3D%22border-width:%200%22%20src%3D%22http://i.creativecommons.org/l/by-nc-nd/3.0/88x31.png%22%20/%3E%3C/a%3E%3C/div%3E%0A%20%20%20%20%20%20%20%20%3Cdiv%3E%0A%20%20%20%20%20%20%20%20%20%20This%20work%20by%20%3Ca%20xmlns:cc%3D%22http://creativecommons.org/ns%23%22%20href%3D%22http://wildermuth.com%22%20property%3D%22cc:attributionName%22%20rel%3D%22cc:attributionURL%22%3EShawn%20Wildermuth%3C/a%3E%20is%0A%20%20%20%20%20%20%20%20%20%20licensed%20under%20a%20%3Ca%20rel%3D%22license%22%20href%3D%22http://creativecommons.org/licenses/by-nc-nd/3.0/%22%3E%0A%20%20%20%20%20%20%20%20%20%20%20%20Creative%20Commons%20Attribution-NonCommercial-NoDerivs%203.0%20Unported%20License%3C/a%3E.%3Cbr%20/%3E%0A%20%20%20%20%20%20%20%20%20%20Based%20on%20a%20work%20at%20%3Ca%20xmlns:dct%3D%22http://purl.org/dc/terms/%22%20href%3D%22http://wildermuth.com%22%20rel%3D%22dct:source%22%3Ewildermuth.com%3C/a%3E.%3C/div%3E%0A%20%20%20%20%20%20%20%20%3C/div%3E%0A%20%20%20%20%20%20%20%20%3Chr/%3E%3Cdiv%3EIf%20you%20liked%20this%20article,%20see%20Shawn's%20courses%20on%20%3Ca%20href%3D%22http://shawnw.me/pscourses%22%3EPluralsight%3C/a%3E.%3C/div%3E)
Where Have I Been? 30 Jul 2023 4:00 PM (2 years ago)
I went to my blog the other day and noticed my last story here was in February. I guess I got a little distracted. So, what have I been up to? Let’s talk about it.
Over the last couple of years, like many blogs, I’ve seen the readership dwindle. This doesn’t mean I think it’s time to abandon the blog. But with so many other things taking my time, I suspect I won’t be blogging quite as regularly as I have in the past. After 1730 blog posts, this blog has been really important to me. I’d never abandon it.
So, if I’m not blogging, what am I doing?
The Film
 The most obvious answer to this is the film I’ve been working on since the beginning of Covid: Man Enough to Heal. The film post-production wrapped in May. Since then, I’ve submitted it to film festivals and engaged a sales agent to find distribution. I’m quite happy with the results and can’t wait to share here when it’s available to watch!
Pluralsight Courses
Since the beginning of the year, I’ve working full-time updating and creating new courses for Pluralsight. Right now, I’m in the middle of updating my long ASP.NET Core, End-to-End course for .NET 6 (and .NET 8 when it ships). The other courses I’ve released or updated this year include:
Coding Shorts
While blogging has waned, I’ve been focused on doing short videos I’m calling “Coding Shorts”. These videos are ten or so minutes long so I can teach one, discrete skill or technology. I’ve made 67 of these so far. Here’s one of my recent ones if you’re interested in getting a taste of them:
I’ve also authored a handful of “Rants” where I talk about the industry and my opinions about what is important. You can find all the videos at my channel:
The Pivot
Lastly, I’ve been spending time thinking about what is next. Every once in a while (~10 years), I find the need to change the direction of my career. Teaching and training have been great, but I think I’m ready for another challenge. In the past, these pivots have been about what things I’ve focused on. Some of these include:
- xBase development that pivoted to C++
- C++ pivoted to COM and ActiveX
- COM and ActiveX that pivoted to ASP.NET and C#
- ASP.NET/C# pivoted to desktop development with WPF/XAML
- WPF/XAML pivoted to Silverlight training
- And lastly, Silverlight pivoted back to ASP.NET and .NET Core
But where do I go next? I have no idea. But I realize that this is likely my last pivot. This means I’m looking to do something that excites me and that I think is important to do. But who knows what that is. I’m scaling back my training and doing more client work, but I’d love to find some clients that are doing important things. If you think you’re one of those companies, feel free to reach out on my work site:
Last Thing…
In case you don’t know, I release a newsletter every week with the articles that I find useful — both software related and other tech (e.g. Space, Science). If you want to subscribe, feel free to visit:
Based on a work at wildermuth.com.
.%20The%20other%20courses%20I%E2%80%99ve%20released%20or%20updated%20this%20year%20include:%3C/p%3E%0A%3Cul%3E%0A%3Cli%3E%3Ca%20href%3D%22https://www.pluralsight.com/courses/javascript-modules%22%3EModules%20in%20JavaScript%3C/a%3E%3C/li%3E%0A%3Cli%3E%3Ca%20href%3D%22https://www.pluralsight.com/courses/javascript-proxy-objects-reflect%22%3EProxy%20Objects%20in%20JavaScript%3C/a%3E%3C/li%3E%0A%3Cli%3E%3Ca%20href%3D%22https://www.pluralsight.com/courses/vue-3-forms%22%3EVue%203%20Forms%3C/a%3E%3C/li%3E%0A%3C/ul%3E%0A%3Ch2%20tabindex%3D%22-1%22%3ECoding%20Shorts%3C/h2%3E%0A%3Cp%3EWhile%20blogging%20has%20waned,%20I%E2%80%99ve%20been%20focused%20on%20doing%20short%20videos%20I%E2%80%99m%20calling%20%E2%80%9CCoding%20Shorts%E2%80%9D.%20These%20videos%20are%20ten%20or%20so%20minutes%20long%20so%20I%20can%20teach%20one,%20discrete%20skill%20or%20technology.%20I%E2%80%99ve%20made%2067%20of%20these%20so%20far.%20Here%E2%80%99s%20one%20of%20my%20recent%20ones%20if%20you%E2%80%99re%20interested%20in%20getting%20a%20taste%20of%20them:%3C/p%3E%0A%3Cdiv%3E%0A%20%20%20%20%0A%3C/div%3E%0A%3Cbr%20/%3E%0A%3Cp%3EI%E2%80%99ve%20also%20authored%20a%20handful%20of%20%E2%80%9CRants%E2%80%9D%20where%20I%20talk%20about%20the%20industry%20and%20my%20opinions%20about%20what%20is%20important.%20You%20can%20find%20all%20the%20videos%20at%20my%20channel:%3C/p%3E%0A%3Cul%3E%0A%3Cli%3E%3Ca%20href%3D%22https://shawnl.ink/yt%22%3Ehttps://shawnl.ink/yt%3C/a%3E%3C/li%3E%0A%3C/ul%3E%0A%3Ch2%20tabindex%3D%22-1%22%3EThe%20Pivot%3C/h2%3E%0A%3Cp%3ELastly,%20I%E2%80%99ve%20been%20spending%20time%20thinking%20about%20what%20is%20next.%20Every%20once%20in%20a%20while%20(~10%20years),%20I%20find%20the%20need%20to%20change%20the%20direction%20of%20my%20career.%20Teaching%20and%20training%20have%20been%20great,%20but%20I%20think%20I%E2%80%99m%20ready%20for%20another%20challenge.%20In%20the%20past,%20these%20pivots%20have%20been%20about%20what%20things%20I%E2%80%99ve%20focused%20on.%20Some%20of%20these%20include:%3C/p%3E%0A%3Cul%3E%0A%3Cli%3ExBase%20development%20that%20pivoted%20to%20C++%3C/li%3E%0A%3Cli%3EC++%20pivoted%20to%20COM%20and%20ActiveX%3C/li%3E%0A%3Cli%3ECOM%20and%20ActiveX%20that%20pivoted%20to%20ASP%3Carea%20/%3E.NET%20and%20C%23%3C/li%3E%0A%3Cli%3EASP%3Carea%20/%3E.NET/C%23%20pivoted%20to%20desktop%20development%20with%20WPF/XAML%3C/li%3E%0A%3Cli%3EWPF/XAML%20pivoted%20to%20Silverlight%20training%3C/li%3E%0A%3Cli%3EAnd%20lastly,%20Silverlight%20pivoted%20back%20to%20ASP%3Carea%20/%3E.NET%20and%20.NET%20Core%3C/li%3E%0A%3C/ul%3E%0A%3Cp%3EBut%20where%20do%20I%20go%20next?%20I%20have%20no%20idea.%20But%20I%20realize%20that%20this%20is%20likely%20my%20last%20pivot.%20This%20means%20I%E2%80%99m%20looking%20to%20do%20something%20that%20excites%20me%20and%20that%20I%20think%20is%20important%20to%20do.%20But%20who%20knows%20what%20that%20is.%20I%E2%80%99m%20scaling%20back%20my%20training%20and%20doing%20more%20client%20work,%20but%20I%E2%80%99d%20love%20to%20find%20some%20clients%20that%20are%20doing%20important%20things.%20If%20you%20think%20you%E2%80%99re%20one%20of%20those%20companies,%20feel%20free%20to%20reach%20out%20on%20my%20work%20site:%3C/p%3E%0A%3Cul%3E%0A%3Cli%3E%3Ca%20href%3D%22https://shawn.wildermuth.com/%22%3Ehttps://shawn.wildermuth.com%3C/a%3E%3C/li%3E%0A%3C/ul%3E%0A%3Ch3%20tabindex%3D%22-1%22%3ELast%20Thing%E2%80%A6%3C/h3%3E%0A%3Cp%3EIn%20case%20you%20don%E2%80%99t%20know,%20I%20release%20a%20newsletter%20every%20week%20with%20the%20articles%20that%20I%20find%20useful%20%E2%80%94%20both%20software%20related%20and%20other%20tech%20(e.g.%20Space,%20Science).%20If%20you%20want%20to%20subscribe,%20feel%20free%20to%20visit:%3C/p%3E%0A%3Cul%3E%0A%3Cli%3E%3Ca%20href%3D%22https://shawnl.ink/newsletter%22%3Ehttps://shawnl.ink/newsletter%3C/a%3E%3C/li%3E%0A%3C/ul%3E%0A%0A%20%20%20%20%20%20%3Cdiv%3E%0A%20%20%20%20%20%20%20%20%3Cdiv%3E%0A%20%20%20%20%20%20%20%20%20%20%3Ca%20rel%3D%22license%22%20href%3D%22http://creativecommons.org/licenses/by-nc-nd/3.0/%22%3E%0A%20%20%20%20%20%20%20%20%20%20%20%20%3Cimg%20alt%3D%22Creative%20Commons%20License%22%20style%3D%22border-width:%200%22%20src%3D%22http://i.creativecommons.org/l/by-nc-nd/3.0/88x31.png%22%20/%3E%3C/a%3E%3C/div%3E%0A%20%20%20%20%20%20%20%20%3Cdiv%3E%0A%20%20%20%20%20%20%20%20%20%20This%20work%20by%20%3Ca%20xmlns:cc%3D%22http://creativecommons.org/ns%23%22%20href%3D%22http://wildermuth.com%22%20property%3D%22cc:attributionName%22%20rel%3D%22cc:attributionURL%22%3EShawn%20Wildermuth%3C/a%3E%20is%0A%20%20%20%20%20%20%20%20%20%20licensed%20under%20a%20%3Ca%20rel%3D%22license%22%20href%3D%22http://creativecommons.org/licenses/by-nc-nd/3.0/%22%3E%0A%20%20%20%20%20%20%20%20%20%20%20%20Creative%20Commons%20Attribution-NonCommercial-NoDerivs%203.0%20Unported%20License%3C/a%3E.%3Cbr%20/%3E%0A%20%20%20%20%20%20%20%20%20%20Based%20on%20a%20work%20at%20%3Ca%20xmlns:dct%3D%22http://purl.org/dc/terms/%22%20href%3D%22http://wildermuth.com%22%20rel%3D%22dct:source%22%3Ewildermuth.com%3C/a%3E.%3C/div%3E%0A%20%20%20%20%20%20%20%20%3C/div%3E%0A%20%20%20%20%20%20%20%20%3Chr/%3E%3Cdiv%3EIf%20you%20liked%20this%20article,%20see%20Shawn's%20courses%20on%20%3Ca%20href%3D%22http://shawnw.me/pscourses%22%3EPluralsight%3C/a%3E.%3C/div%3E)
A Minimal API Discovery Tool for Large APIs 21 Feb 2023 3:00 PM (3 years ago)
I’ve been posting and making videos about ideas I’ve had for discovering Minimal APIs instead of mapping them all in Program.cs for a while. I’ve finally codified it into an experimental nuget package. Let’s talk about how it works.
I also made a Coding Short video that covers this same topic, if you’d rather watch than read:
How It Works
The package can be installed via the dotnet tool:
dotnet add package WilderMinds.MinimalApiDiscoveryOnce it is installed, you can use an interface called IApi to implement classes that can register Minimal APIs. The IApi interface looks like this:
/// <summary>
/// An interface for Identifying and registering APIs
/// </summary>
public interface IApi
{
  /// <summary>
  /// This is automatically called by the library to add your APIs
  /// </summary>
  /// <param name="app">The WebApplication object to register the API </param>
  void Register(WebApplication app);
}
Essentially, you can implement classes that get passed the WebApplication object to map your API calls:
public class StateApi : IApi
{
  public void Register(WebApplication app)
  {
    app.MapGet("/api/states", (StateCollection states) =>
    {
      return states;
    });
  }
}
This would allow you to register a number of related API calls. I think one class per API is too restrictive. When used in .NET 7 and later, you could make a class per group:
  public void Register(WebApplication app)
  {
    var group = app.MapGroup("/api/films");

    group.MapGet("", async (BechdelRepository repo) =>
    {
      return Results.Ok(await repo.GetAll());
    })
      .Produces(200);

    group.MapGet("{id:regex(tt[0-9]*)}",
      async (BechdelRepository repo, string id) =>
    {
      Console.WriteLine(id);
      var film = await repo.GetOne(id);
      if (film is null) return Results.NotFound("Couldn't find Film");
      return Results.Ok(film);
    })
      .Produces(200);

    group.MapGet("{year:int}", (BechdelRepository repo,
        int year,
        bool? passed = false) =>
        {
          var results = await repo.GetByYear(year, passed);
          if (results.Count() == 0)
          {
            return Results.NoContent();
          }

          return Results.Ok(results);
        })
      .Produces(200);

    group.MapPost("", (Film model) =>
    {
      return Results.Created($"/api/films/{model.IMDBId}", model);
    })
      .Produces(201);

  }
Because of lambdas missing some features (e.g. default values), you can always move the lambdas to just static methods:
public void Register(WebApplication app)
{
  var grp = app.MapGroup("/api/customers");
  grp.MapGet("", GetCustomers);
  grp.MapGet("", GetCustomer);
  grp.MapPost("{id:int}", SaveCustomer);
  grp.MapPut("{id:int}", UpdateCustomer);
  grp.MapDelete("{id:int}", DeleteCustomer);
}

static async Task<IResult> GetCustomers(CustomerRepository repo)
{
  return Results.Ok(await repo.GetCustomers());
}

//...
The reason for the suggestion of using static methods (instance methods would work too) is that you do not want these methods to rely on state. You might think that constructor service injection would be a good idea:
public class CustomerApi : IApi
{
  private CustomerRepository _repo;

  // MinimalApiDiscovery will log a warning because
  // the repo will become a singleton and lifetime
  // will be tied to the implementation methods.
  // Better to use method injection in this case.
  public CustomerApi(CustomerRepository repo)
  {
    _repo = repo;
  }

// ...
This doesn’t work well as the call to Register happens once at startup and since this class is sharing that state, the injected service becomes a singleton for the lifetime of the server. The library will log a warning if you do this to help you avoid it. Because of that I suggest that you use static methods instead to prevent this from accidently happening.
NOTE: I considered using static interfaces, but that requires that the instance is still a non-static class. It would also limit this library to use in .NET 7/C# 11 - which I didn’t want to do. It works in .NET 6 and above.
When you’ve created these classes, you can simple make two calls in startup to register all IApi classes:
using UsingMinimalApiDiscovery.Data;
using WilderMinds.MinimalApiDiscovery;

var builder = WebApplication.CreateBuilder(args);

// Add services to the container.
builder.Services.AddTransient<CustomerRepository>();
builder.Services.AddTransient<StateCollection>();

// Add all IApi classes to the Service Collection
builder.Services.AddApis();

var app = builder.Build();

// Call Register on all IApi classes
app.MapApis();

app.Run();
The idea here is to use reflection to find all IApi classes and add them to the service collection. Then the call to MapApis() will get all IApi from the service collection and call Register.
How it works
The call to AddApis simply uses reflection to find all classes that implement IApi and add them to the service collection:
  var apis = assembly.GetTypes()
    .Where(t => t.IsAssignableTo(typeof(IApi)) &&
                t.IsClass &&
                !t.IsAbstract)
    .ToArray();

  // Add them all to the Service Collection
  foreach (var api in apis)
  {
    // ...
    coll.Add(new ServiceDescriptor(typeof(IApi), api, lifetime));
  }
Once they’re all registered, the call to MapApis is pretty simple:
var apis = app.Services.GetServices<IApi>();

foreach (var api in apis)
{
  if (api is null) throw new InvalidProgramException("Apis not found");

  api.Register(app);
}
Futures
While I’m happy with this use of Reflection since it is only a ‘startup’ time cost, I have it on my list to look at using a Source Generator instead.
If you have experience with Source Generators and want to give it a shot, feel free to do a pull request at https://github.com/wilder-minds/minimalapidiscovery.
I’m also considering removing the AddApis and just have the MapApis call just reflect to find all the IApis and call register since we don’t actually need them in the Service Collection.
You can see the complete source and example here:
Based on a work at wildermuth.com.
I'm Hosting Two New Online Courses 16 Feb 2023 3:00 PM (3 years ago)
As you likely know if you’ve read my blog before, I have spent the last decade or so creating courses to be viewed on Pluralsight. I love making these kinds of video-based courses, but I’ve decided to get back to instructor led training a bit.
While my video courses really benefit a lot of learners, I’ve realized that some people learn better with direct interaction with a live teacher. In addition, I have missed the direct impact of working with students.
I’m proud to announce that my first two instructor-led courses:
ASP.NET Core: Building Sites and APIs - April 11-13, 2023
Building Apps with Vue, Vite and TypeScript - May 9-11, 2023
These courses will be taught online (via Zoom). This sort of remote teaching can be taxing for many people, so I am teaching it as three 1/2 days. Each day, I’ll hold the class from noon to 5pm (Eastern Time Zone).
Early Bird Pricing until March 24th: $699
I hope you’ll join me at these new courses!
Based on a work at wildermuth.com.
.%20This%20sort%20of%20remote%20teaching%20can%20be%20taxing%20for%20many%20people,%20so%20I%20am%20teaching%20it%20as%20three%201/2%20days.%20Each%20day,%20I%E2%80%99ll%20hold%20the%20class%20from%20noon%20to%205pm%20(Eastern%20Time%20Zone).%3C/p%3E%0A%3Cblockquote%3E%0A%3Cp%3EEarly%20Bird%20Pricing%20until%20March%2024th:%20$699%3C/p%3E%0A%3C/blockquote%3E%0A%3Cp%3EI%20hope%20you%E2%80%99ll%20join%20me%20at%20these%20new%20courses!%3C/p%3E%0A%0A%20%20%20%20%20%20%3Cdiv%3E%0A%20%20%20%20%20%20%20%20%3Cdiv%3E%0A%20%20%20%20%20%20%20%20%20%20%3Ca%20rel%3D%22license%22%20href%3D%22http://creativecommons.org/licenses/by-nc-nd/3.0/%22%3E%0A%20%20%20%20%20%20%20%20%20%20%20%20%3Cimg%20alt%3D%22Creative%20Commons%20License%22%20style%3D%22border-width:%200%22%20src%3D%22http://i.creativecommons.org/l/by-nc-nd/3.0/88x31.png%22%20/%3E%3C/a%3E%3C/div%3E%0A%20%20%20%20%20%20%20%20%3Cdiv%3E%0A%20%20%20%20%20%20%20%20%20%20This%20work%20by%20%3Ca%20xmlns:cc%3D%22http://creativecommons.org/ns%23%22%20href%3D%22http://wildermuth.com%22%20property%3D%22cc:attributionName%22%20rel%3D%22cc:attributionURL%22%3EShawn%20Wildermuth%3C/a%3E%20is%0A%20%20%20%20%20%20%20%20%20%20licensed%20under%20a%20%3Ca%20rel%3D%22license%22%20href%3D%22http://creativecommons.org/licenses/by-nc-nd/3.0/%22%3E%0A%20%20%20%20%20%20%20%20%20%20%20%20Creative%20Commons%20Attribution-NonCommercial-NoDerivs%203.0%20Unported%20License%3C/a%3E.%3Cbr%20/%3E%0A%20%20%20%20%20%20%20%20%20%20Based%20on%20a%20work%20at%20%3Ca%20xmlns:dct%3D%22http://purl.org/dc/terms/%22%20href%3D%22http://wildermuth.com%22%20rel%3D%22dct:source%22%3Ewildermuth.com%3C/a%3E.%3C/div%3E%0A%20%20%20%20%20%20%20%20%3C/div%3E%0A%20%20%20%20%20%20%20%20%3Chr/%3E%3Cdiv%3EIf%20you%20liked%20this%20article,%20see%20Shawn's%20courses%20on%20%3Ca%20href%3D%22http://shawnw.me/pscourses%22%3EPluralsight%3C/a%3E.%3C/div%3E)
Minimal API Talk from .NET Sheffield User Group 15 Feb 2023 3:00 PM (3 years ago)
Based on a work at wildermuth.com.

Digging Into Nullable Reference Types in C# 12 Feb 2023 3:00 PM (3 years ago)
This topic has been on my TODO: list for quite a while now. As I work with clients, many of them are just ignoring the warnings that you get from Nullable Reference Types. When Microsoft changed to make them the default, some developers seemed to be confused by the need. Here is my take on them:
I also made a Coding Short video that covers this same topic, if you’d rather watch than read:
Before Nullable Reference Types
There has always been two different types of objects in C#: value types and reference types. Value types are created on the stack (therefore they go away without needing to be garbage collected); and Reference Types are created by the heap (needing to be garbage collected). Primitive types and structs are value types, and everything else is a reference type, including strings. So we could do this:
int x = 5;
string y = null;
By it’s design, value-types couldn’t be null. They just where:
int x = null;  // Error
string y = null;
There were occasions that we needed null on value types. So they introduced the Nullable<T> struct. Essentially, this allowed you to make value types nullable:
Nullable<int> x = null; // No problemThey did add some syntactical sugar for Nullable<T> by just using a question mark:
int? x = null; // Same as Nullable<int>But why nullability? So you can test for whether a value exists:
int? x = null;

if (x.HasValue) Write(x);
While this works, you could test for null as well:
int? x = null;

if (x is not null) Write(x);
OK, this is what Nullable value types are, but reference types already support null. Reference types do support being null, but do not support not allowing null. That’s the difference. By enabling Nullable Reference Types, all reference types (by default) do not support Null unless you use the define them with the question-mark:
object x = null // Doesn't workBut utilizing the null type definition:
object? x = null // worksAs C# developers, we spend a lot of time worrying about whether an object is null (since anyone can pass a null for parameters or properties). So, enabling Nullable Reference Types makes that impossible. By default, new projects (since .NET 6) have enabled Nullable Reference Types by default. But how?
Enabling Nullable Reference Types
In C# 8, they added the ability to enable Nullable Reference Types. There are two ways to enable it: file-based declaration or a project level flag. For projects that want to opt into Nullable Reference Types slowly, you can use the file declarations:
#nullable enable
object x = null; // Doesn't work, null isn't supported
#nullable disable
But for most projects, this is done at the project level:
<!--csproj-->
<Project Sdk="Microsoft.NET.Sdk">

  <PropertyGroup>
    <OutputType>Exe</OutputType>
    <TargetFramework>net7.0</TargetFramework>
    <ImplicitUsings>enable</ImplicitUsings>
    <Nullable>enable</Nullable>
  </PropertyGroup>

</Project>
The <Nullable/> property is what enables the feature.
When you enable this, it will produce warnings for applying null to reference types. But you can even turn these into errors to force a project to address the changes:
<WarningsAsErrors>Nullable</WarningsAsErrors>Using Nullable Reference Types
So, you’ve gotten this far so let’s talk some basics. When defining a variable, you can opt-into nullability by defining the type with nullability:
string? x = null;That means anywhere you’re just defining the type (without inferring the type), C# will assume that null isn’t a valid value:
string x = "Hello";

if (x is null) // No longer necessary, this can't be null
{
  // ...
}
But what happens when we infer the type? For value types, it is assumed to be a non-nullable type, but for reference type…nullable:
var u = 15;                  // int
var s = "";                  // string?
var t = new String('-', 20); // string?
This is actually one of the reasons I’m moving to the new syntax for creating objects:
object s = new(); // object - not nullableNot exactly about nullable reference types, but in this case, the object is not null because we’re making sure it’s not nullable.
Classes and Nullable Reference Types
When clients have moved here, the biggest pain they seem to run into is with classes (et al.). After spending so many years writing simple data classes like so:
public class Customer
{
  public int Id { get; set;}
  public string Name { get; set;} // Warning
  public DateOnly Birthdate { get; set;}
  public string Phone { get;set;} // Warning
}
Properties that aren’t nullable are expected to be set before the end of the constructor. There are two ways to address make them nullable; and initialize the properties.
Making the properties nullable has the benefit of being more descriptive of the actual usage of the property:
public class Customer
{
  public int Id { get; set;}
  public string? Name { get; set;} // null unless you set it
  public DateOnly Birthdate { get; set;}
  public string? Phone { get;set;} // null unless you set it
}
Alternatively, you can set the value:
public class Customer
{
  public int Id { get; set;}
  public string Name { get; set;} = "";
  public DateOnly Birthdate { get; set;}
  public string Phone { get;set;} = "";
}
Or,
public class Customer
{
  public int Id { get; set;}
  public string Name { get; set;}
  public DateOnly Birthdate { get; set;}
  public string Phone { get;set;}

  public Customer(string name, string phone)
  {
    Name = name;
    Phone = phone;
  }
}
It may, at first, seem like trouble for certain types of classes. In fact, it’s is not uncommon to opt-out of nullability for entity classes:
#nullable disable
public class Customer
{
  public int Id { get; set;}
  public string Name { get; set;} // No Warning
  public DateOnly Birthdate { get; set;}
  public string Phone { get;set;} // No Warning
}
#nullable enable
Testing for Null
When you start using nullable properties on objects, you quickly run into warnings:
Customer customer = new();

WriteLine($"Name: {customer.Name}"); // Warning
The warning is because the compiler can’t confirm it is not null (Name is nullable). This is one of the uncomfortable parts of using Nullable Reference Types. So we can wrap it with a test for null (like you’ve probably been doing for a long time):
Customer customer = new();

if (customer.Name is not null)
{
  WriteLine($"Name: {customer.Name}");
}
At that point, the compiler can be sure it’s not null because you tested it. But this seems a lot of work to determine null. Instead we can use some syntactical sugar to shorten this:
Customer customer = new();

WriteLine($"Name: {customer?.Name}"); // Warning
The ?. is simply a shortcut. If customer is null, it just returns a null. This allows you to deal with nested nullable types pretty easily:
Customer customer = new();

WriteLine($"Name: {customer.Name?.FirstName?}"); // Warning
In this example, you can see that the ? is used at multiple places in the code as Name could be null and FirstName could also be null.
This also affects how you will allocate a variable that might be null. For example:
Customer customer = new();

string name = customer.Name; // Warning, Name might be null
The null coalescing operator can be used here to define a default:
Customer customer = new();

string name = customer.Name ?? "No Name Specified"; // Warning, Name might be null
The ?? operator allows for the fallback in case of null. which should simplify some common scenarios.
But sometimes we need to help the compiler figure out whether something is null. You might know that a particular object is not null even if it is a nullable property. There is an additional syntax that supports telling the compiler that you know better. Just use the ! syntax.
Customer customer = new();

string name = customer.Name!; // I know it's never null
This just tells the compiler what you expect. If the Name is null, it will throw an exception…so only use it when you’re sure. The bang symbol (e.g. !) is used at the end of the variable. So if you need to string these, you’ll put the bang at each level:
Customer customer = new();

string name = customer.Name!.FirstName!; // I know they're never null
While using Nullable Reference Types could be seen as a way to over-complicate your code, these bits of syntactical sugar can simplify dealing with nullables.
Generics and Nullable Reference Types
Just like any other code, you can use the question-mark to specify that a value is nullable:
public class SomeEntity<TKey>
{
  public TKey? Key { get; set; }
}
The problem with this is that the type specified in TKey could also be nullable:
SomeEntity<string?> entity = new();But this results in a warning because you can’t have a nullable of a nullable. The generated type might look like this:
public class SomeEntity<string?>
{
  public string?? Key { get; set; }
}
Notice the double question-mark. It also suggests that the generic class doesn’t quite know whether to initialize it or not since it doesn’t know about the nullability. To get around this, you can use the notnull constraint:
public class SomeEntity<TKey> where : notnull
{
  public TKey? Key { get; set; }
}
That way the generic type can be in control of the nullability instead of the caller.
Conclusion
I hope that this quick intro into Nullable Reference Types helps you get your head around the ‘why’ and ‘how’ of Nullable Reference Types. Please comment if you have more questions and/or complaints!
Based on a work at wildermuth.com.