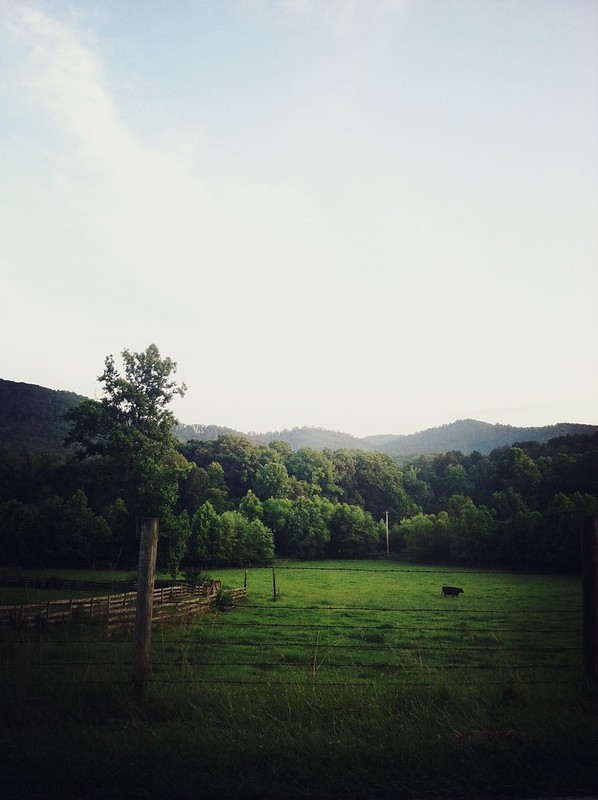
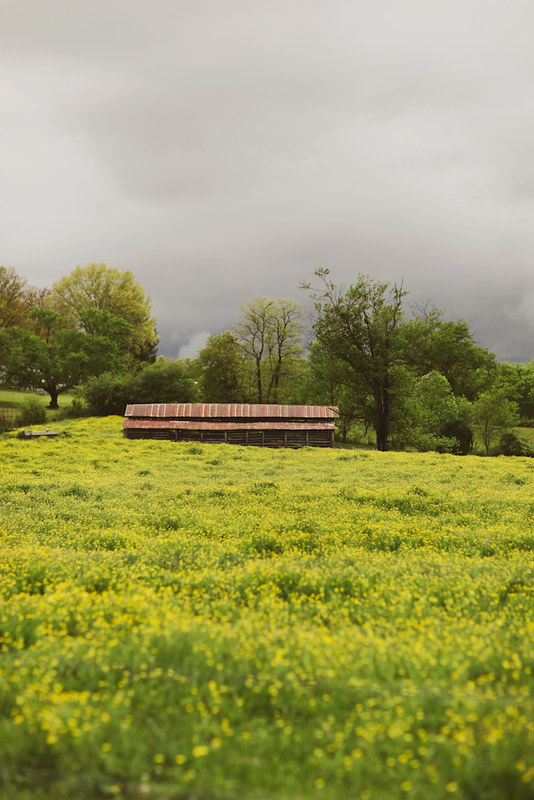
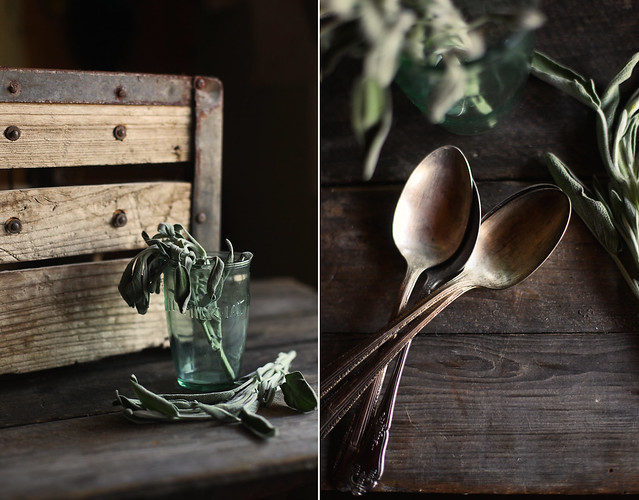
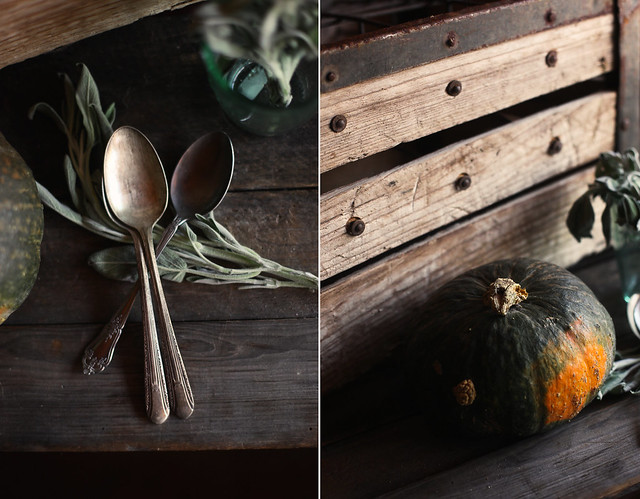
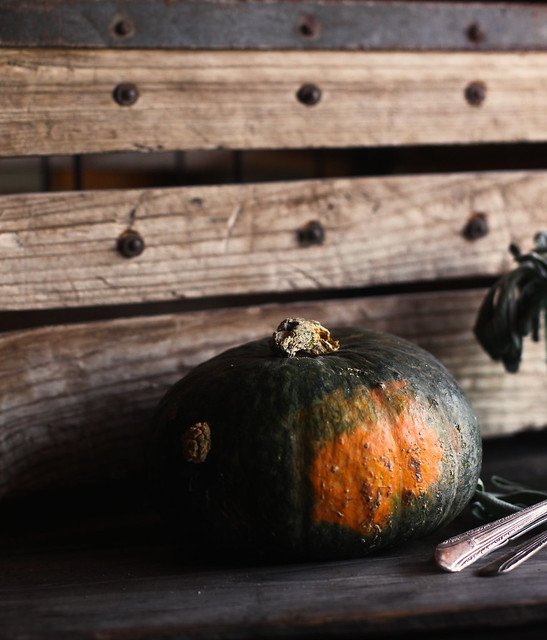
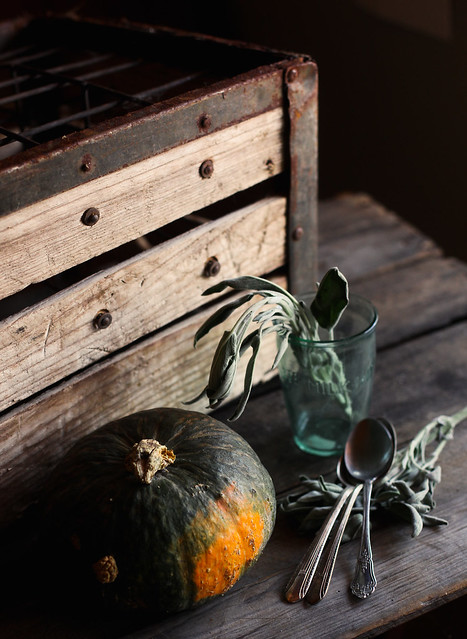
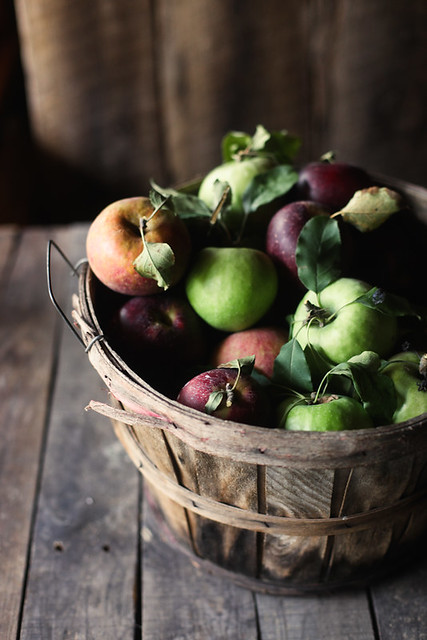
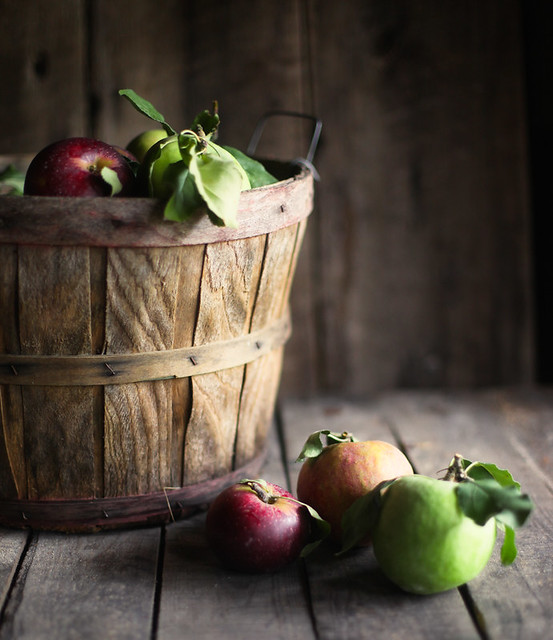
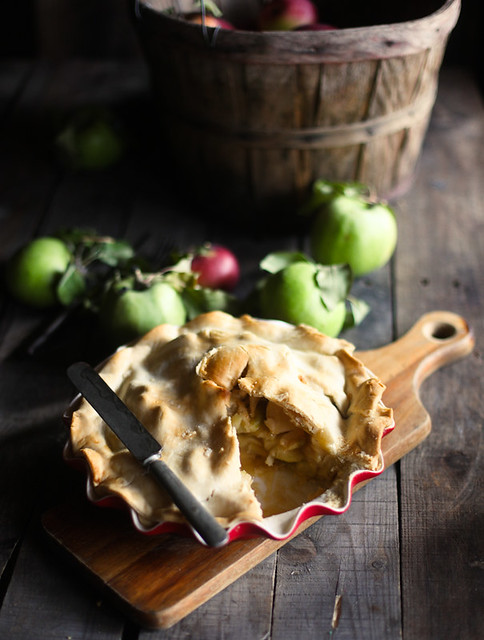
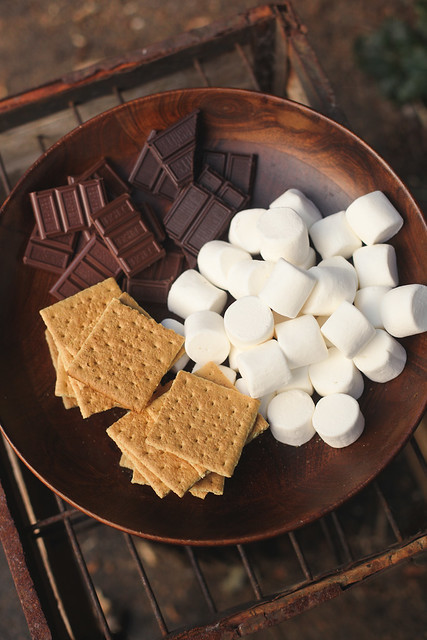
Coffee & Spice Pumpkin Cake with Coffee Caramel 2 Oct 2018 12:14 PM (6 years ago)
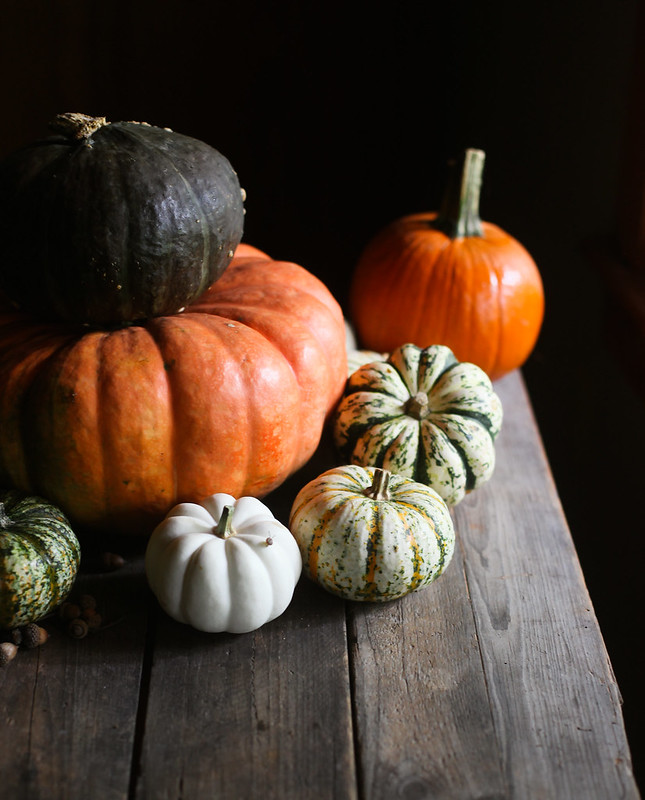
Last fall I was walking through the grocery store when I saw a bottle of ginger beer. It’s label was bright orange with beautiful calligraphy. I put it in my cart and started formulating ideas. I could reduce it down and make a glaze! I could add some to a pot of soup and see how that would taste.
By the time I got home I’d talked myself out of creating anything new with that ginger beer. I stuck in a cabinet and forgot about it.
So goes the last 3 years of my life.

This is scary to talk about and it makes me feel vulnerable but here's the thing: I want to bake stuff and I want to share it again. So I need to share this first. The last three-nearly-four years have been thread through with anxiety and depression and grief. It stripped me of my ability to create and some days even my ability to think clearly. It's darn near impossible for me to work up the energy to artfully drizzle caramel and photograph it when I feel bad. Lately though, the urge to return to this space has been stronger than ever.
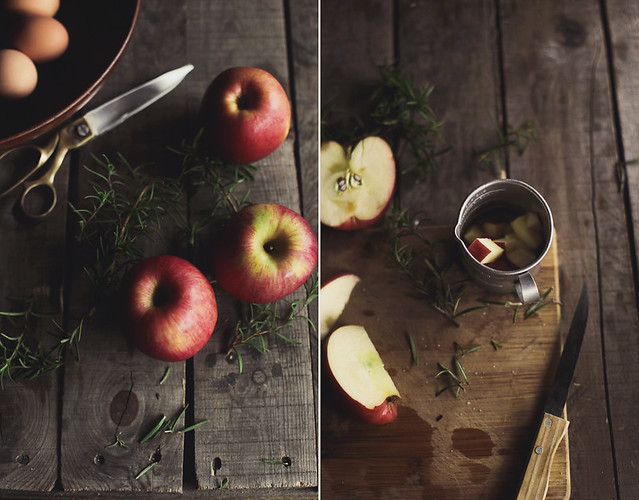
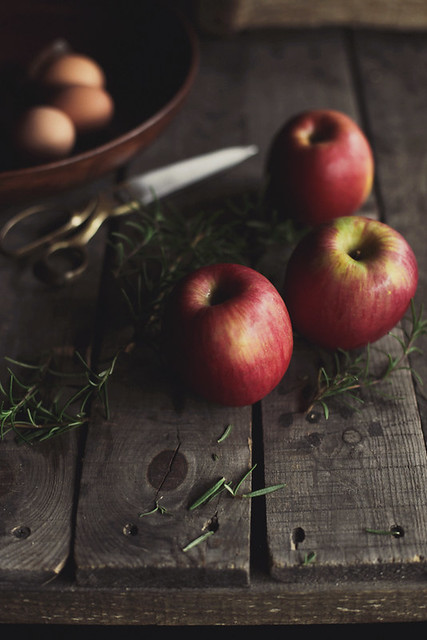
I woke up this morning thinking about that cake again. I wanted to bake it and photograph it and share it with y’all. I started talking myself out of it again. No one reads blogs anymore! What if your pictures suck? Maybe you should just go back to bed. But I didn’t! I tied on my apron and got to work. I cut my finger twice on the can of pumpkin and I spilled sugar all over my kitchen floor but I baked this cake and it’s delicious. That feels a bit like a victory. They say you can't go home again but maybe you can blog again. I want to talk to you about recipes and the seasons and (feeling like) failing at being a cookbook author and plenty of other stuff. First, let's talk about this cake in particular.

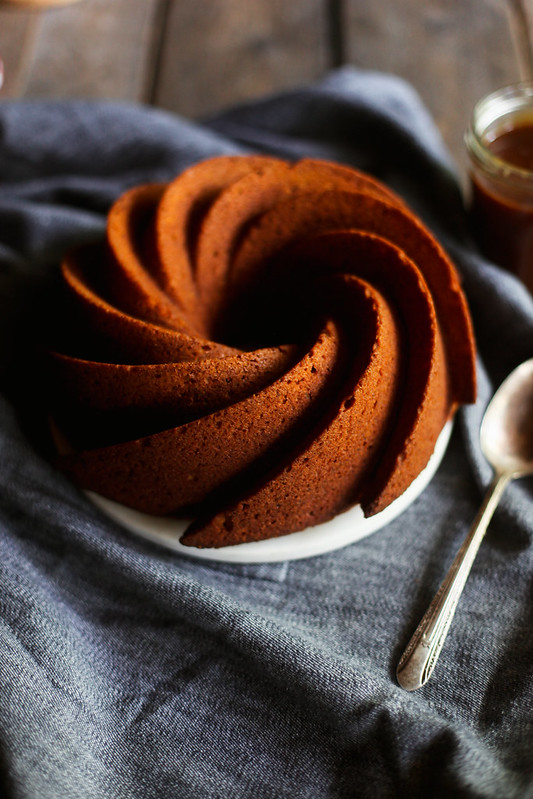
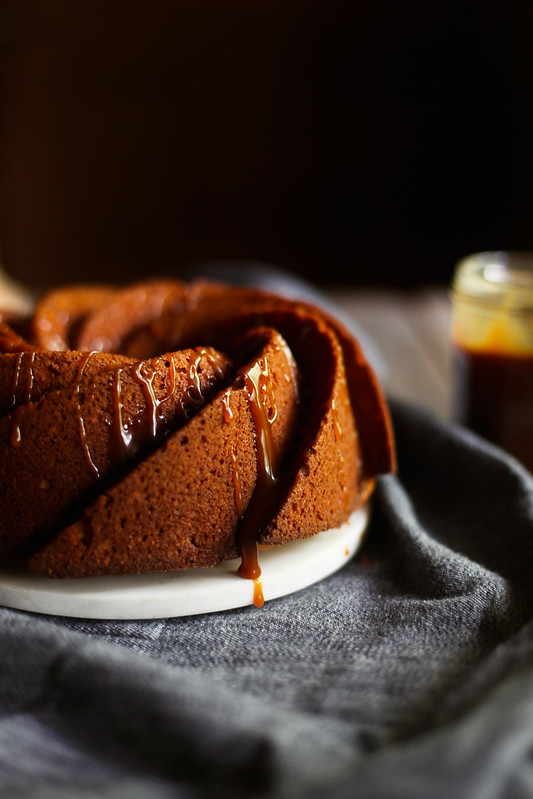
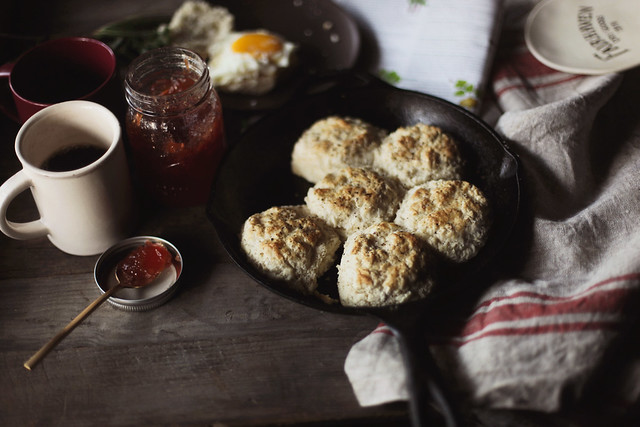
It's a play on that old favorite, the pumpkin spice latte. I put some espresso powder in with the cinnamon, ginger and nutmeg and I made a coffee caramel sauce that I want to pour on absolutely everything from now on. I baked it in my fancy swirl bundt pan but I think it would make a really great layer cake frosted with spiced cream cheese and drizzled with the sauce too.
Coffee & Spice Pumpkin Cake with Coffee Caramel Sauce
For the cake:
2 cups all purpose flour
1 tablespoon espresso powder
2 teaspoons baking powder
1 teaspoon salt
1 teaspoon ground cinnamon
1 teaspoon ground ginger
1/2 teaspoon ground nutmeg
1 1/2 cups pumpkin puree
3 large eggs
3/4 cup vegetable oil
1 cup brown sugar, packed
3/4 cup granulated sugar
Preheat oven to 350 degrees. Butter a 10 cup bundt pan and set aside.
In a medium bowl, whisk together flour, espresso powder, baking powder, salt and spices.
In a large bowl, whisk together the pumpkin puree, eggs, vegetable oil, brown sugar and granulated sugar. Stir in flour mixture until just combined.
Pour mixture into greased bundt pan and bake until a toothpick inserted into the middle comes out clean, 45-50 minutes. Allow to cool in pan for 10 minutes before turning out and allowing to cool completely.
While the cake is baking, make the coffee caramel sauce:
1/2 cup heavy cream
2 teaspoons espresso powder
1 cup granulated sugar
1/2 cup water
2 tablespoons butter, softened
a pinch of salt
Warm the heavy cream slightly and stir in the espresso powder. Set aside.
In a heavy sauce pan, stir together the sugar and water. Heat and stir until the sugar dissolves. Stop stirring and bring to a boil. Allow to boil until it turns amber in color. Remove from heat and slowly pour in the warmed cream, stirring as you do. Be careful, it will bubble up! Stir in the butter until melted. Allow to cool slightly and pour over cake.


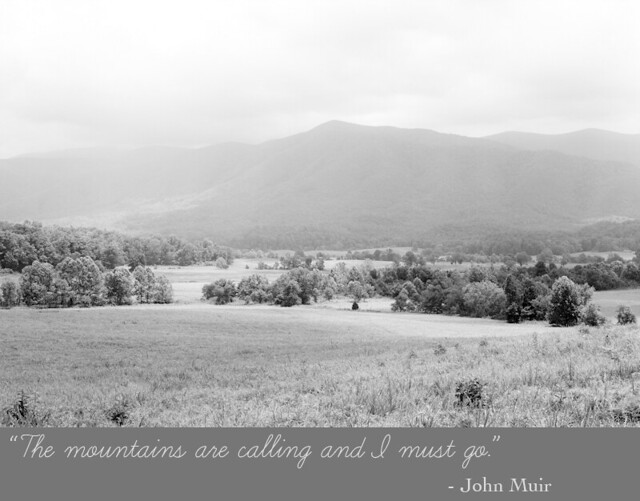
autumn, grace, peace. 31 Aug 2015 8:15 PM (9 years ago)
As I sat there I keep thinking the same words, over and over: I’m not ready for this.
%20I%20feel%20lost%20without%20it.%20Who%20am%20I%20without%20her%20encouragement%20and%20her%20laughter%20and%20her%20love?%20In%20%E2%80%9CA%20Grief%20Observed%E2%80%9D%20CS%20Lewis%20says%20the%20death%20of%20a%20beloved%20is%20an%20amputation.%20It%20changes%20your%20way%20of%20life%20forever%20and%20it%20takes%20a%20long%20time%20to%20acclimate%20to%20that%20change.%20The%20struggle%20is%20woven%20into%20my%20every%20day.%20I%20haven%E2%80%99t%20got%20it%20figured%20out%20yet.%20But%20I%E2%80%99m%20trying.%26nbsp;%3C/div%3E%0A%3Cdiv%3E%0A%3Cbr%20/%3E%3C/div%3E%0A%3Cdiv%3E%0A%3Ca%20data-flickr-embed%3D%22true%22%20href%3D%22https://www.flickr.com/photos/honeyandjam/20287062384/in/dateposted/%22%20nbsp%3D%22%22%20title%3D%22Untitled%22%3E%3Cimg%20alt%3D%22Untitled%22%20height%3D%22640%22%20src%3D%22https://farm6.staticflickr.com/5672/20287062384_16feb95a91_z.jpg%22%20width%3D%22480%22%20/%3E%3C/a%3E%3C/div%3E%0A%3Cdiv%3E%0A%3Cbr%20/%3E%3C/div%3E%0A%3Cdiv%3E%0APeople%20said%20it%20would%20get%20easier,%20and%20it%20has,%20I%20guess.%20Easier%20feels%20like%20the%20wrong%20word%20most%20days,%20though.%20It%E2%80%99s%20different.%20Grief%20is%20an%20ever%20evolving%20thing.%20I%E2%80%99m%20learning%20to%20live%20with%20that%20evolution%20and%20accept%20the%20changes%20when%20they%20come.%20To%20accept%20the%20days%20when%20a%20memory%20can%20knock%20me%20over,%20breathless.%20And%20to%20also%20accept%20the%20days%20when%20those%20memories%20make%20me%20laugh%20until%20I%20cry.%20Honestly,%20sometimes%20that%E2%80%99s%20even%20more%20painful.%20I'm%20learning%20to%20pray%20for%20peace%20and%20accept%20it.%20To%20give%20myself%20grace%20when%20I%20need%20to%20wallow.%3Cbr%20/%3E%0A%3Cbr%20/%3E%20%3C/div%3E%0A%3Cdiv%3E%0A%3C/div%3E%0A%3Cdiv%3E%0A%26nbsp;Grace%20%26amp;%20Peace.%20That's%20all%20we%20can%20ask%20for.%20%3C/div%3E%0A%3Cdiv%3E%0A%3Cbr%20/%3E%3C/div%3E)
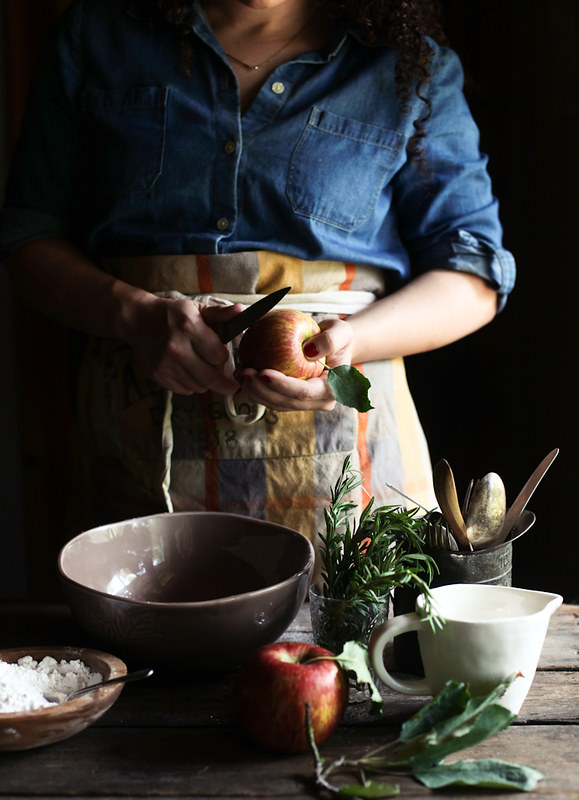
Honey & Jam: Seasonal Baking from My Kitchen in the Mountains 16 Apr 2015 9:03 AM (10 years ago)
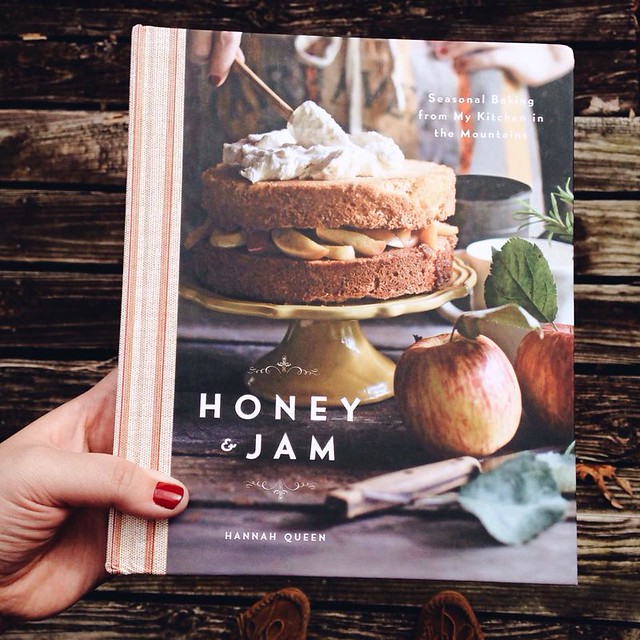
In a little under a month, my first cookbook will be on book shelves. Actual book shelves in actual bookstores. I can’t say how crazy that is to me. This book, filled with recipes created in my kitchen and photos taken on my little table by the window, will soon be in your hands.
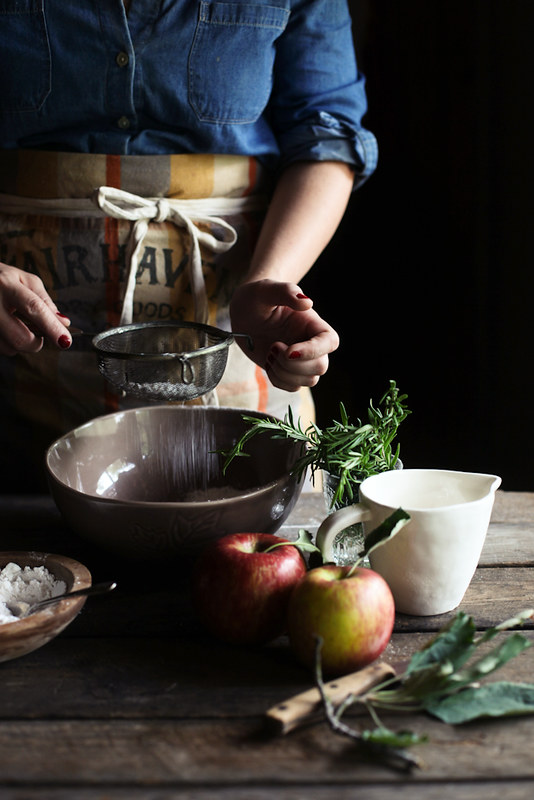
Mostly, I feel thankful. Thankful that I got this opportunity. That I got to create recipes I love, and take pictures of the place I love, and now I get to share them with you. The book is a personal one, it's not only a baking book, but also a love letter to the southern Appalachians, the place that inspires me. We tried to include as many photos as possible, and I'm so happy with how it came together.
I’m excited (and nervous!) to share this with you - I hope it brings a some goodness into your day and leaves you with a kitchen full of cake and a little taste of my home.

If you’d like to preorder, here a few of ways of going about that:
amazon
barnes and noble
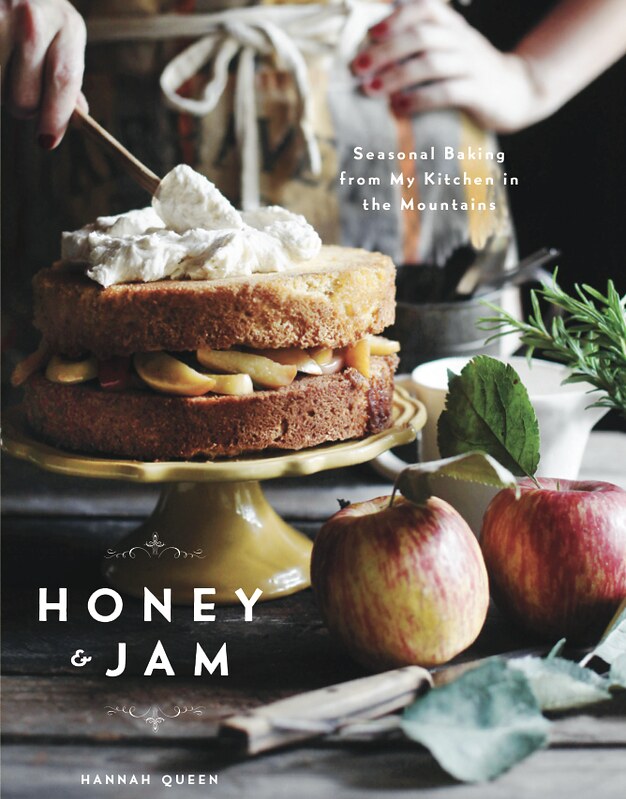
Honey & Jam: Seasonal Baking from My Kitchen in the Mountains will be available in bookstores May 12th.
%20to%20share%20this%20with%20you%20-%20I%20hope%20it%20brings%20a%20some%20goodness%20into%20your%20day%20and%20leaves%20you%20with%20a%20kitchen%20full%20of%20cake%20and%20a%20little%20taste%20of%20my%20home.%3Cbr%20/%3E%3Cbr%20/%3E%3Ca%20href%3D%22https://www.flickr.com/photos/honeyandjam/16770120578%22%20title%3D%22honey%20and%20jam%20seasonal%20baking%20from%20my%20kitchen%20in%20the%20mountains%20by%20Hannah%20Queen,%20on%20Flickr%22%3E%3Cimg%20alt%3D%22honey%20and%20jam%20seasonal%20baking%20from%20my%20kitchen%20in%20the%20mountains%22%20height%3D%22800%22%20src%3D%22https://farm9.staticflickr.com/8744/16770120578_bc1ddb882b_c.jpg%22%20width%3D%22642%22%20/%3E%3C/a%3E%3Cbr%20/%3E%3Cbr%20/%3E%3Cspan%3EIf%20you%E2%80%99d%20like%20to%20preorder,%20here%20a%20few%20of%20ways%20of%20going%20about%20that:%3C/span%3E%3Cbr%20/%3E%3Cbr%20/%3E%3Cb%3E%3Ca%20href%3D%22http://www.amazon.com/Honey-Jam-Seasonal-Kitchen-Mountains/dp/1617690910/ref%3Dsr_1_1?ie%253DUTF8%2526qid%253D1427571578%2526sr%253D8-1%2526keywords%253Dhoney+and+jam%22%3Eamazon%20%3C/a%3E%3Cbr%20/%3E%3Cbr%20/%3E%3Ca%20href%3D%22http://www.barnesandnoble.com/w/honey-and-jam-hannah-queen/1120391466?ean%253D9781617690914%22%3Ebarnes%20and%20noble%20%3C/a%3E%3C/b%3E%3C/div%3E%0A%3Cdiv%3E%0A%3Cbr%20/%3E%3C/div%3E%0A%3Cdiv%3E%0A%3Cb%3E%26nbsp;%3Ca%20href%3D%22http://www.indiebound.org/book/9781617690914%22%3Eindiebound%20%3C/a%3E%3C/b%3E%3C/div%3E%0A%3Cdiv%3E%0A%3C/div%3E%0A%3Cdiv%3E%0A%3C/div%3E%0A%3Cdiv%3E%0A%3C/div%3E%0A%3Cdiv%3E%0A%3C/div%3E%0A%3Cdiv%3E%0A%3Cbr%20/%3E%3Cbr%20/%3E%3Ca%20href%3D%22https://www.flickr.com/photos/honeyandjam/16337390023%22%20title%3D%22honey%20and%20jam%20seasonal%20baking%20from%20my%20kitchen%20in%20the%20mountains%20by%20Hannah%20Queen,%20on%20Flickr%22%3E%3Cimg%20alt%3D%22honey%20and%20jam%20seasonal%20baking%20from%20my%20kitchen%20in%20the%20mountains%22%20height%3D%22800%22%20src%3D%22https://farm8.staticflickr.com/7602/16337390023_f12a56d577_c.jpg%22%20width%3D%22626%22%20/%3E%3C/a%3E%3C/div%3E%0A%3Cdiv%3E%0A%3Cbr%20/%3EHoney%20%26amp;%20Jam:%20Seasonal%20Baking%20from%20My%20Kitchen%20in%20the%20Mountains%20will%20be%20available%20in%20bookstores%20May%2012th.%3Cbr%20/%3E%3Cbr%20/%3E%3C/div%3E)
love & loss 15 Jan 2015 7:05 AM (10 years ago)
Six weeks ago my mom passed away. I’ve been trying to think of a more eloquent way to start this, but that’s all I’ve got. It’s the overwhelming truth that has defined each and every day since. My mama is gone and I’m not sure how to start. It’s the first thing on my mind when I wake up and the last thing I think of before I fall asleep. My mom, my anchor, my best friend isn’t here with me anymore. One day I was eating pizza with her and the next she was gone.
There’s so much I want to say about her. I don’t know how. I don’t know how to convey her spirit to you. Anything less seems not enough. I wish I could share with you her laugh, a laugh so loud it’s how I found her in the grocery store as a kid. I can’t seem to talk about her to anyone yet, other than my family. And most of the time, it’s just whispers of memories and tears and nodding our heads in understanding. One day I’ll be able to share more, but for know, let me say this: There was nothing better than being loved by her.
The one thing I can talk about - need to talk about, is grief. It’s something I knew nothing of. I don’t have a big extended family and I lost both my grandmothers and my mom’s father before I was born or before I could understand. I had no idea what was coming.
I didn’t know, as CS Lewis said, that grief would feel so much like fear. Or even more so, that it's not a singular feeling at all. It's not just sadness because someone's gone. It's multifaceted in the worst way. You feel it in everything you do. It's anxiousness and loneliness and fear and longing for someone so much your body actually aches and so much more.
It feels like a curtain that separates you from the normal world. Last week I was checking out at the grocery store and the nice older man at the register smiled at me, commented on how beautiful the day was and asked me how I was doing. I felt so irrationally angry and confused. How can people be happy? I thought. How is it possible that the world is still spinning? Each new day spins me farther and farther away from her and that feels impossibly cruel.
There are moments it still makes no sense to me. How is it that the woman I love so much, who was so full of love and strength and opinions and humor and intelligence is no longer here? How is she not around to bug me about updating this blog and make really bad pie and plant pansies in her garden? How can it be that my dad is without his wife and my brother and sister their mother? Sometimes the weight of it is so overwhelming I feel my body physically can't take it.
And made my eyes o'erflow;
"'Tis grace has kept me to this day,
And will not let me go."
I have plans to be around a lot more in 2015. My mom was honey & jam's biggest fan and would be so mad if I didn't continue writing here. I have lots of things I want to tell you about - the biggest being that cookbook I have coming out in May. I'll be back soon.
Bits of summer + blackberry hazelnut galette 6 Mar 2014 11:35 AM (11 years ago)


Mine has been very full and very good: recipe writing, live music and birthday celebrations for the books, day trips further into the mountains, evenings spent contra dancing and plenty of coffee shop sitting with friends. I'm feeling nostalgic for it and it's not even gone yet. I can't help but think it's been one of those seasons I'll look back on and think "oh, those were the good ol' days."
Blackberry Galette with Hazelnut Crust and Thyme
For the crust:
(from Martha Stewart)
1 3/4 cups all-purpose flour
1/2 cup ground toasted, skinned hazelnuts
Salt
2 sticks unsalted butter, cut into pieces
fresh thyme
Stir together blackberries, sugar, ground hazelnuts and flour in a medium bowl.
Spread berry mixture evenly over the dough to within 2 inches of the edge.
Fold the edge of the dough up over the plums to create a 2-inch border. Sprinkle with raw sugar.
Bake for about 45 minutes, until the fruit is soft and the crust is browned.
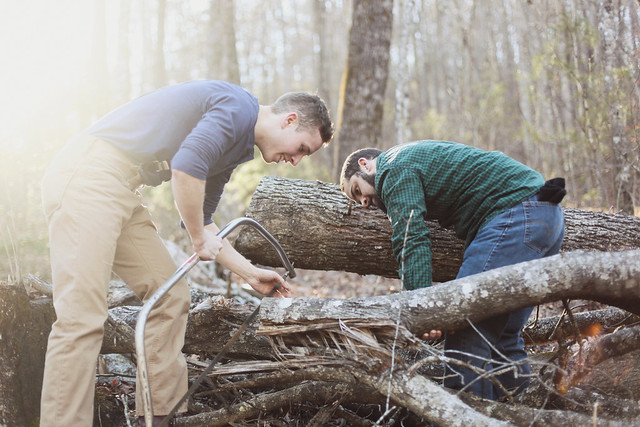
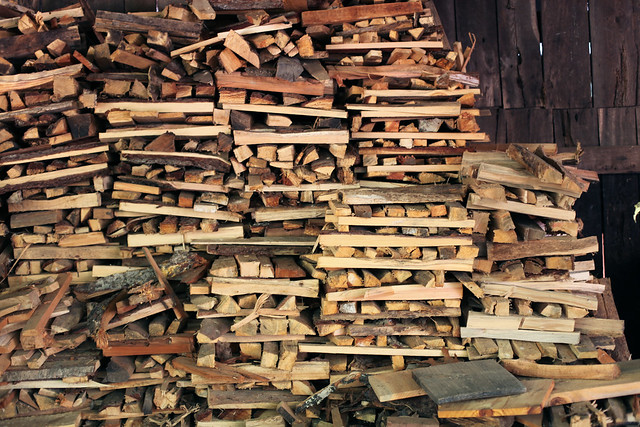
John C. Campbell Folk School 6 Mar 2014 11:35 AM (11 years ago)


.%20%3Cbr%20/%3E%0A%3Cbr%20/%3E%0A%3Cbr%20/%3E%0A%3Cbr%20/%3E%3C/div%3E)
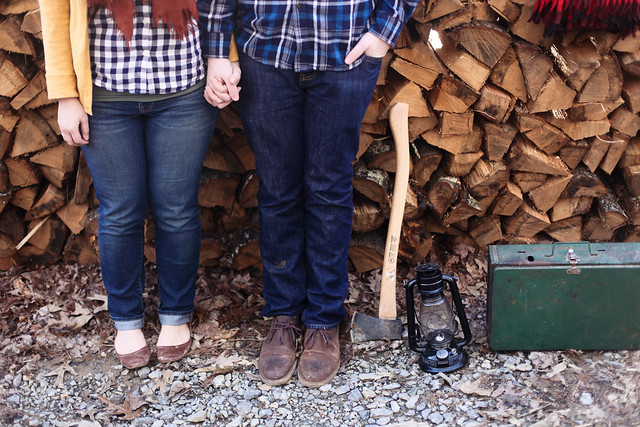
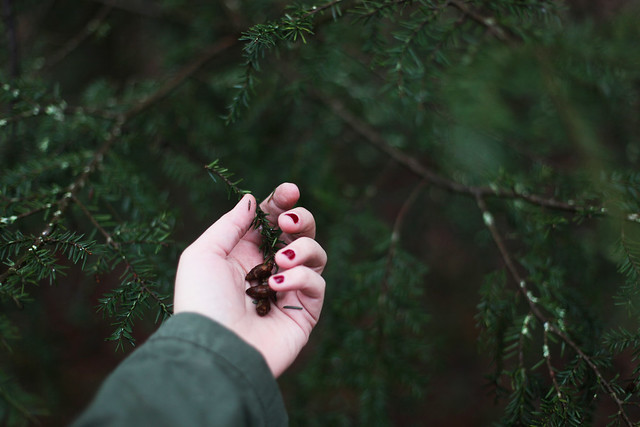
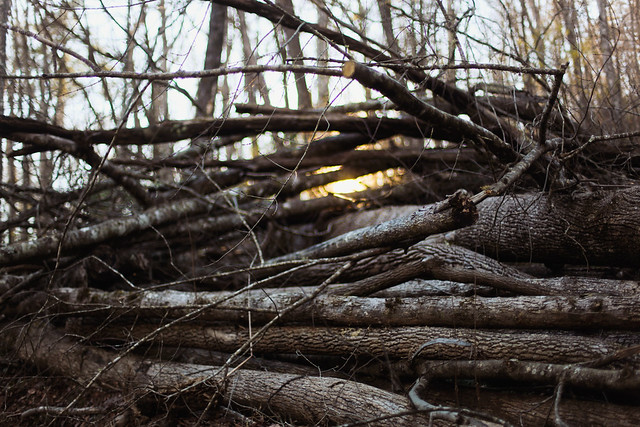
the woods are lovely, dark and deep. 17 Feb 2014 9:23 AM (11 years ago)


winter & black pepper buttermilk biscuits. 15 Jan 2014 3:38 PM (11 years ago)
Black Pepper Buttermilk Biscuits
makes 12
3 cups all purpose flour, (white lily if you can get it.)
1 tablespoon baking powder
1 teaspoon salt
1 teaspoon freshly ground black pepper
1/2 cup cold salted butter
1 1/4 cup buttermilk
Preheat oven to 400.
Grate butter into a small bowl with large side of a cheese grater. Stick in the freezer.
In a large bowl, whisk together flour, baking powder, salt and pepper.
Add in butter and cut it in with a fork. Pour in buttermilk and stir until dough comes together in a shaggy dough. Knead a 5-7 times in the bowl, then turn out on a floured work surface. Pat dough down to 1/4 inch thick, then fold over and pat down again. Fold over once again, then cut out rounds using a biscuit cutter or floured glass.
Place biscuits side by side in a cast iron skillet. Top with more black pepper. Bake for 15-18 minutes, or until golden brown.
%3Cbr%20/%3E%0A1%20tablespoon%20baking%20powder%3Cbr%20/%3E%0A1%20teaspoon%20salt%3Cbr%20/%3E%0A1%20teaspoon%20freshly%20ground%20black%20pepper%3Cbr%20/%3E%0A1/2%20cup%20cold%20salted%20butter%3Cbr%20/%3E%0A1%201/4%20cup%20buttermilk%3Cbr%20/%3E%0A%3Cbr%20/%3E%0APreheat%20oven%20to%20400.%3Cbr%20/%3E%0A%3Cbr%20/%3E%0AGrate%20butter%20into%20a%20small%20bowl%20with%20large%20side%20of%20a%20cheese%20grater.%20Stick%20in%20the%20freezer.%3Cbr%20/%3E%0A%3Cbr%20/%3E%0AIn%20a%20large%20bowl,%20whisk%20together%20flour,%20baking%20powder,%20salt%20and%20pepper.%3Cbr%20/%3E%0A%3Cbr%20/%3E%0AAdd%20in%20butter%20and%20cut%20it%20in%20with%20a%20fork.%20Pour%20in%20buttermilk%20and%20stir%20until%20dough%20comes%20together%20in%20a%20shaggy%20dough.%20Knead%20a%205-7%20times%20in%20the%20bowl,%20then%20turn%20out%20on%20a%20floured%20work%20surface.%20Pat%20dough%20down%20to%201/4%20inch%20thick,%20then%20fold%20over%20and%20pat%20down%20again.%20Fold%20over%20once%20again,%20then%20cut%20out%20rounds%20using%20a%20biscuit%20cutter%20or%20floured%20glass.%3Cbr%20/%3E%0A%3Cbr%20/%3E%0APlace%20biscuits%20side%20by%20side%20in%20a%20cast%20iron%20skillet.%20Top%20with%20more%20black%20pepper.%20Bake%20for%2015-18%20minutes,%20or%20until%20golden%20brown.%3C/div%3E)
merry & bright 24 Dec 2013 4:07 AM (11 years ago)
Honeysuckle Syrup 3 Jun 2013 4:03 PM (11 years ago)

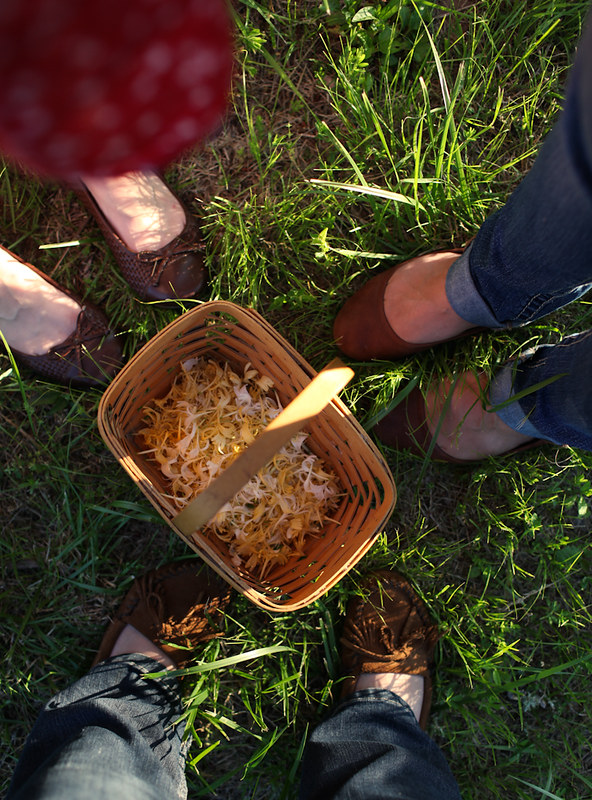
Forget memorial day weekend, the scent of honeysuckle in the breeze is the first sign of summer for me. Sweet and floral, it has to be one of the most gorgeous smells of all time.

Last week, my friend Bethany and I were standing in the woods, picking honeysuckle flowers and tasting the sweet nectar and laughing and discussing life and it was one of those perfect moments that don't come along very often. I know that from now on, when I smell that first whiff of honeysuckle, I'll think of that moment.
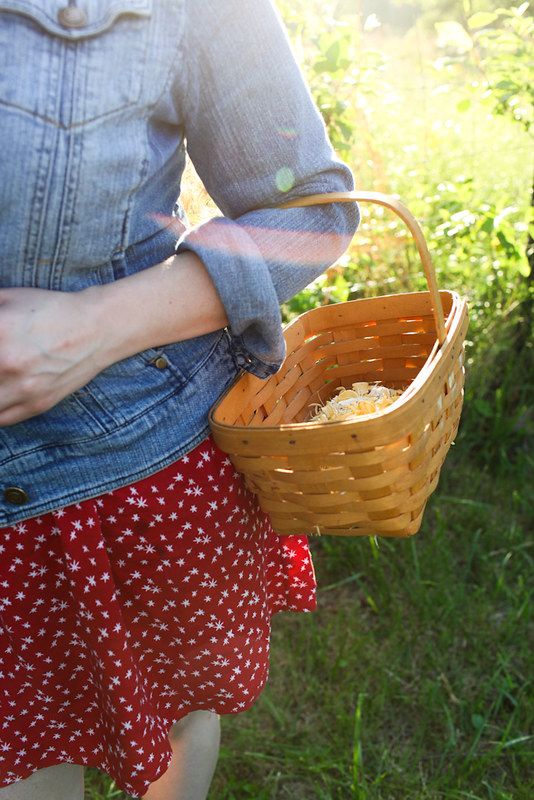
I'll also think of Bethany and my sister Sarah happily rambling through the thickets and briars and poison ivy with me a few days later when I decided I needed a whole bunch of the blossoms to make up this syrup. You know you've got good friends when they'll put up with plenty of bug bites for your crazy recipe ideas.
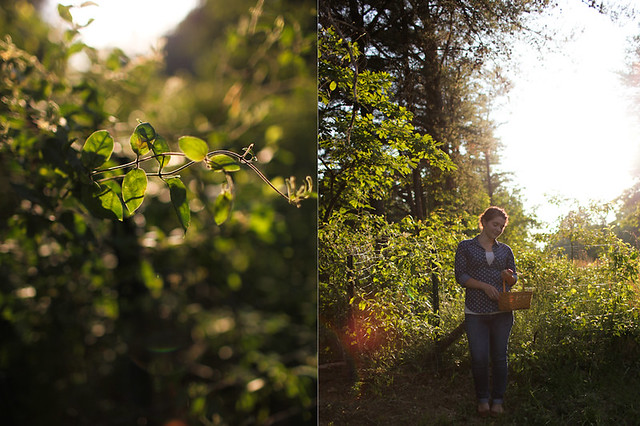
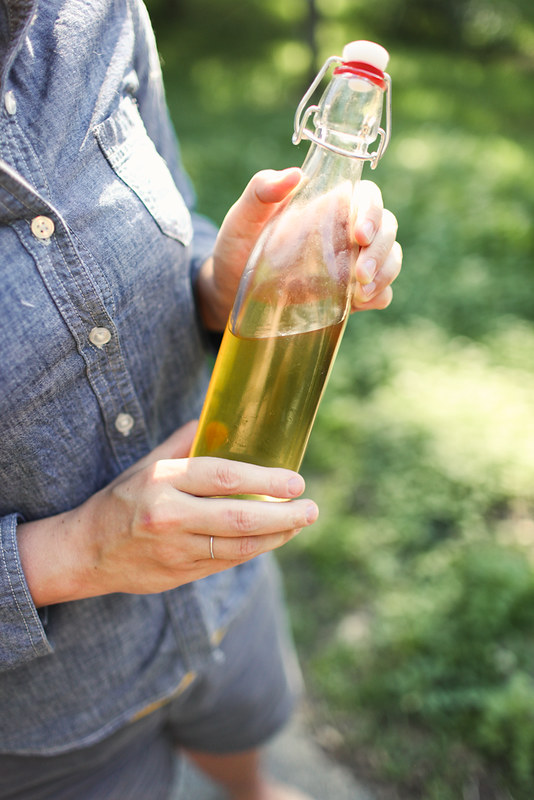
Honeysuckle syrup might just be the best thing ever. It's like concentrated nectar, bottled summertime. I made sweet tea with it and brought it to bible study, and everyone loved it. I can't wait until I have time to make honeysuckle sorbet.
Honey, honeysuckle breeze, and Lord, release my wild soul.
Honeysuckle Simple Syrup
4 cups honeysuckle blossoms, lightly packed
water
sugar
Place blossoms in a bowl, pour over just enough boiling water to cover them. Cover, and let sit on the counter over night, up to 24 hours.
After steeping the flowers (they will look totally gross and brown, but smell amazing), strain the liquid into a large bowl, discarding the blossoms. Measure the liquid and place into a large saucepan. For each cup of water, use one cup of sugar. Bring sugar and water to a boil and simmer until the sugar is dissolved, 3 minutes. Remove from the heat and let cool completely.
The syrup should keep for up to a month in the fridge.
,%20strain%20the%20liquid%20into%20a%20large%20bowl,%20discarding%20the%20blossoms.%20Measure%20the%20liquid%20and%20place%20into%20a%20large%20saucepan.%20For%20each%20cup%20of%20water,%20use%20one%20cup%20of%20sugar.%26nbsp;%20%3Cspan%20itemscope%3D%22%22%20itemtype%3D%22http://schema.org/Recipe%22%3EBring%20sugar%20and%20water%20to%20a%20boil%20and%20simmer%20until%20the%20%0Asugar%20is%20dissolved,%203%20minutes.%20Remove%20from%20the%20heat%20and%20let%20cool%20%0Acompletely.%26nbsp;%3C/span%3E%3Cbr%20/%3E%0A%3Cbr%20/%3E%0A%3Cspan%20itemscope%3D%22%22%20itemtype%3D%22http://schema.org/Recipe%22%3EThe%20syrup%20should%20keep%20for%20up%20to%20a%20month%20in%20the%20fridge.%3C/span%3E%3C/div%3E)
Appalachian Spring & Strawberry Balsamic Black Pepper Jam 13 May 2013 7:25 AM (11 years ago)

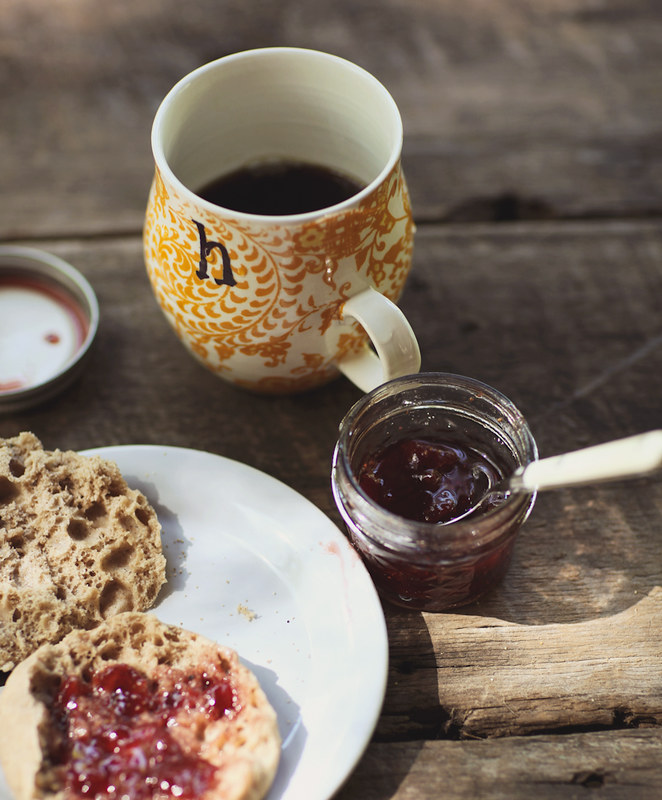
Spring is here full force in the south, glorious and green. I'm making the most of the bounty it brings by standing over my stove and making far too much jam. Last week it was this sweet-savory strawberry balsamic. It's lovely on an english muffin with few strips of bacon. I'm trying out rhubarb vanilla today, fingers crossed it's just as good!
Strawberry Balsamic Black Pepper Jam
Adapted from Epicurious
4 cups strawberries, chopped
3 cups sugar
5 tablespoons balsamic vinegar
1 1/2 teaspoon cracked black pepper
In a small heavy saucepan bring all ingredients to a boil, stirring, and skim surface. Simmer mixture, stirring and skimming foam occasionally, 15 minutes, or until thickened and translucent. Remove pan from heat and cool preserves completely. Jam will keep, covered and chilled, 1 month.
%20by%20hannah%20*%20honey%20%26amp;%20jam,%20on%20Flickr%22%3E%3Cimg%20alt%3D%22spring%20(7%20of%208)%22%20height%3D%22800%22%20src%3D%22http://farm8.staticflickr.com/7290/8732993031_37b428c2ed_c.jpg%22%20width%3D%22534%22%20/%3E%3C/a%3E%3C/div%3E%0A%3Cdiv%3E%0A%3Cbr%20/%3E%3C/div%3E%0A%3Cdiv%3E%0A%3Cbr%20/%3E%0A%3Ca%20href%3D%22http://www.flickr.com/photos/honeyandjam/8734109024/%22%20title%3D%22spring%20(6%20of%208)%20by%20hannah%20*%20honey%20%26amp;%20jam,%20on%20Flickr%22%3E%3Cimg%20alt%3D%22spring%20(6%20of%208)%22%20height%3D%22800%22%20src%3D%22http://farm8.staticflickr.com/7314/8734109024_b700e9b85a_c.jpg%22%20width%3D%22534%22%20/%3E%3C/a%3E%3C/div%3E%0A%3Cdiv%3E%0A%3Cbr%20/%3E%0A%3Ca%20href%3D%22http://www.flickr.com/photos/honeyandjam/8733035001/%22%20title%3D%22IMG_0367%20copy-2%20by%20hannah%20*%20honey%20%26amp;%20jam,%20on%20Flickr%22%3E%3Cimg%20alt%3D%22IMG_0367%20copy-2%22%20height%3D%22438%22%20src%3D%22http://farm8.staticflickr.com/7317/8733035001_76d4938898_z.jpg%22%20width%3D%22640%22%20/%3E%3C/a%3E%3Cbr%20/%3E%0A%3Cbr%20/%3E%3C/div%3E%0A%3Cdiv%3E%0A%3Cbr%20/%3E%0A%3Ca%20href%3D%22http://www.flickr.com/photos/honeyandjam/8734109590/%22%20title%3D%22spring%20(5%20of%208)%20by%20hannah%20*%20honey%20%26amp;%20jam,%20on%20Flickr%22%3E%3Cimg%20alt%3D%22spring%20(5%20of%208)%22%20height%3D%22800%22%20src%3D%22http://farm8.staticflickr.com/7315/8734109590_6ca189c1b0_c.jpg%22%20width%3D%22534%22%20/%3E%26nbsp;%3C/a%3E%3Cbr%20/%3E%0A%3Cbr%20/%3E%0A%3Ca%20href%3D%22http://www.flickr.com/photos/honeyandjam/8733042719/%22%20title%3D%22IMG_0034%20copy-3%20by%20hannah%20*%20honey%20%26amp;%20jam,%20on%20Flickr%22%3E%3Cimg%20alt%3D%22IMG_0034%20copy-3%22%20height%3D%22800%22%20src%3D%22http://farm8.staticflickr.com/7294/8733042719_ac61b9d6dd_c.jpg%22%20width%3D%22534%22%20/%3E%3C/a%3E%3C/div%3E%0A%3Cdiv%3E%0A%3Cbr%20/%3E%3C/div%3E%0A%3Cdiv%3E%0A%3Ca%20href%3D%22http://www.flickr.com/photos/honeyandjam/8734169382/%22%20title%3D%22IMG_0071%20copy%20by%20hannah%20*%20honey%20%26amp;%20jam,%20on%20Flickr%22%3E%3Cimg%20alt%3D%22IMG_0071%20copy%22%20height%3D%22800%22%20src%3D%22http://farm8.staticflickr.com/7301/8734169382_05135ea385_c.jpg%22%20width%3D%22534%22%20/%3E%3C/a%3E%3Cbr%20/%3E%0A%3Cbr%20/%3E%3C/div%3E%0A%3Cdiv%3E%0A%3Ca%20href%3D%22http://www.flickr.com/photos/honeyandjam/8734110640/%22%20title%3D%22spring%20(3%20of%208)%20by%20hannah%20*%20honey%20%26amp;%20jam,%20on%20Flickr%22%3E%3Cimg%20alt%3D%22spring%20(3%20of%208)%22%20height%3D%22800%22%20src%3D%22http://farm8.staticflickr.com/7297/8734110640_b3a4fbfa15_c.jpg%22%20width%3D%22534%22%20/%3E%3C/a%3E%3C/div%3E%0A%3Cdiv%3E%0A%3Cbr%20/%3E%3C/div%3E%0A%3Cdiv%3E%0A%3Ca%20href%3D%22http://www.flickr.com/photos/honeyandjam/8734111030/%22%20title%3D%22spring%20(2%20of%208)%20by%20hannah%20*%20honey%20%26amp;%20jam,%20on%20Flickr%22%3E%3Cimg%20alt%3D%22spring%20(2%20of%208)%22%20height%3D%22800%22%20src%3D%22http://farm8.staticflickr.com/7322/8734111030_fae49acdff_c.jpg%22%20width%3D%22534%22%20/%3E%3C/a%3E%3C/div%3E%0A%3Cdiv%3E%0A%3Cbr%20/%3E%3C/div%3E%0A%3Cdiv%3E%0A%3Ca%20href%3D%22http://www.flickr.com/photos/honeyandjam/8734111602/%22%20title%3D%22spring%20(1%20of%208)%20by%20hannah%20*%20honey%20%26amp;%20jam,%20on%20Flickr%22%3E%3Cimg%20alt%3D%22spring%20(1%20of%208)%22%20height%3D%22800%22%20src%3D%22http://farm8.staticflickr.com/7284/8734111602_527cb8c91a_c.jpg%22%20width%3D%22620%22%20/%3E%3C/a%3E%3C/div%3E%0A%3Cdiv%3E%0A%3Cbr%20/%3E%3C/div%3E%0A%3Cdiv%3E%0A%3Ca%20href%3D%22http://www.flickr.com/photos/honeyandjam/8734610919/%22%20title%3D%22IMG_1239%20copy%20by%20hannah%20*%20honey%20%26amp;%20jam,%20on%20Flickr%22%3E%3Cimg%20alt%3D%22IMG_1239%20copy%22%20height%3D%22800%22%20src%3D%22http://farm8.staticflickr.com/7314/8734610919_ff96700315_c.jpg%22%20width%3D%22662%22%20/%3E%3C/a%3E%3Cbr%20/%3E%0A%3Cbr%20/%3E%0A%26nbsp;Spring%20is%20here%20full%20force%20in%20the%20south,%20glorious%20and%20green.%20I'm%20making%20the%20most%20of%20the%20bounty%20it%20brings%20by%20standing%20over%20my%20stove%20and%20making%20far%20too%20much%20jam.%20Last%20week%20it%20was%20this%20sweet-savory%20strawberry%20balsamic.%20It's%20lovely%20on%20an%20english%20muffin%20with%20few%20strips%20of%20bacon.%26nbsp;%20I'm%20trying%20out%20rhubarb%20vanilla%20today,%20fingers%20crossed%20it's%20just%20as%20good!%3Cbr%20/%3E%0A%3Cbr%20/%3E%0A%3Cb%3EStrawberry%20Balsamic%20Black%20Pepper%20Jam%3C/b%3E%3Cbr%20/%3E%0AAdapted%20from%20%3Ca%20href%3D%22http://www.epicurious.com/recipes/food/views/Strawberry-Preserves-with-Black-Pepper-and-Balsamic-Vinegar-14034%22%20target%3D%22_blank%22%3EEpicurious%20%3C/a%3E%3Cb%3E%3C/b%3E%3Cbr%20/%3E%0A%3Cb%3E%3Cbr%20/%3E%3C/b%3E%0A4%20cups%20strawberries,%20chopped%3Cbr%20/%3E%0A3%20cups%20sugar%3Cbr%20/%3E%0A5%20tablespoons%20balsamic%20vinegar%3Cbr%20/%3E%0A1%201/2%20teaspoon%20cracked%20black%20pepper%3Cbr%20/%3E%0A%26nbsp;%20%3Cbr%20/%3E%0A%26nbsp;In%20a%20small%20heavy%20saucepan%20bring%20all%20ingredients%20to%20a%20boil,%20stirring,%20and%20skim%20surface.%20Simmer%20mixture,%20stirring%20and%20skimming%20foam%20occasionally,%2015%20minutes,%20or%20until%20thickened%20and%20translucent.%20Remove%20pan%20from%20heat%20and%20cool%20preserves%20completely.%20Jam%20will%20keep,%20covered%20and%20chilled,%201%20month.%26nbsp;%20%3Cbr%20/%3E%0A%3Cbr%20/%3E%0A%3Cbr%20/%3E%3C/div%3E%0A%3Cdiv%3E%0A%3Cbr%20/%3E%3C/div%3E)


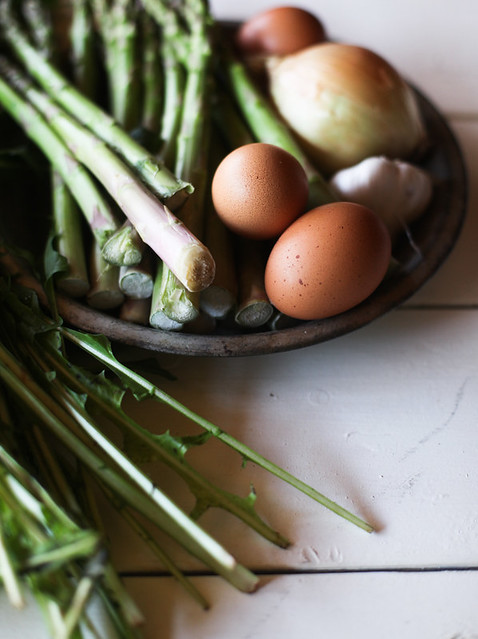
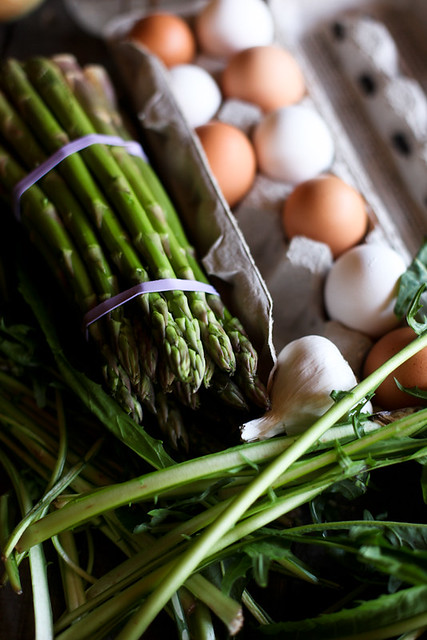
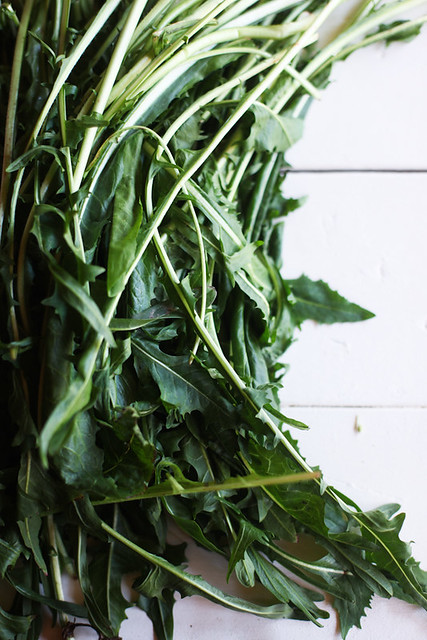
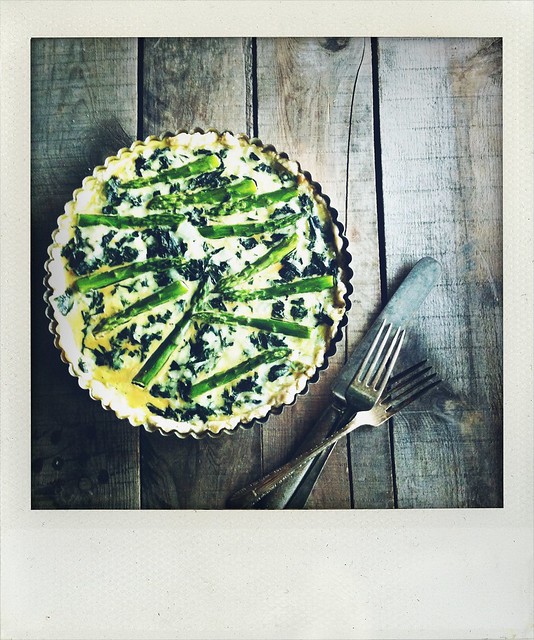
Dandelion Green & Asparagus Tart, filled with disaster. 18 Apr 2013 10:28 AM (12 years ago)
And then I dropped the tart on the floor.
And I laughed, because really, what else can you do?
But let me back up.
I’m a morning person. I can see that look you're giving me right now. A morning person? And you don’t even drink coffee? Yup. I’m that annoying person who is stupidly cheerful first thing. I love the early morning light and the birds chirping and dewy grass and a cuppa tea.
This morning, I was not that person. I was cranky as all get out. There were dishes piled up in my sink, ones I needed to wash before I could get to work. I couldn’t find the bottom of my tart pan. The one I’m always losing, because some people (me), should not be allowed to buy things with multiple parts, because they will lose them. I get down on my knees, body half way into the dark cabinet, rooting around for said tart pan, when the dogs start barking, scaring the wits out of me, so I bang my head on the top of the cabinet. I found the pan, though!
Then my stove top won’t light. There will be no sautéing of the onions. Okay, I’ll microwave them to soften em up a bit. No big. My crust looks weird. I think I pre-baked it too long. Am I out of milk? I should plan better.
I finally get it in the oven. I check on it and see it’s leaking. I go to yank it out and the rack moves, sending it careening towards the back of the oven. I let out a “NOO!!!”, and grab it with my bare hands. I hop around, hand in the air, doing a “it hurts!” dance. I get it back in, on a cookie sheet this time.
My kitchen starts smelling like overcooked egg, thanks to the bit of filling the hit my oven floor. I gag a bit. Can we all agree that’s one of the worst smells ever?
It comes out and it looks beautiful. I run it down to my little table by the window, nearly falling down the stairs on the way, to take photos. My camera dies. I put my battery on to charge and take the tart back upstairs, cut out a piece to try, and then drop the thing on the floor.
Asparagus everywhere. A cute little puppy licking the floor, happy as a clam to clean up 10 bucks worth of cheese for me.
And I laugh. Because seriously?!
(The tart was delicious. I’d totally be eating another piece right now if it weren’t for the whole floor thing. I'd never had dandelion greens before, I bought them because my new philosophy is this: “if you see something in the produce section you’ve never tried, buy it!”, and turns out really really like them. They’re kinda bitter and that’s my jam. My crust sucked, though, so I won’t be providing the recipe I used here. Just use your favorite savory tart dough! I obviously didn’t go the sauteeing of the onions, garlic, greens and asparagus way, but I suggest you do.)
(Sorry about the iphone photo.)
Dandelion Green & Asparagus Tart
Slightly adapted from The New York Times
1 generous bunch dandelion greens, about 12 ounces
Salt to taste
2 tablespoons extra virgin olive oil
1 small onion, chopped
1 bunch of asparagus
1 or 2 garlic cloves (to taste), green shoots removed, minced
4 large or extra large eggs
3/4 cup low-fat milk
Freshly ground pepper
3/4 cup Gruyère cheese, grated (3 ounces)
1 tart crust
Cut the tough stems from the dandelion greens, about 1 inch from the bottom, and wash in two changes of water. Bring a large pot of water to a boil, and fill a bowl with ice water. When the water comes to a boil, salt generously and add the dandelion greens. Blanch four minutes and transfer to the ice water. Drain, squeeze out excess water and chop.
Preheat the oven to 375 degrees. Heat the olive oil in a large nonstick skillet over medium heat, and add the onion. Cook, stirring, until tender, about five minutes, and add a pinch of salt and the asparagus. Cook, stirring, for seven or eight minutes, until the asparagus have softened and the onions are golden. Add the garlic and cook for another minute, then stir in the dandelion greens. Stir together for a minute, and remove from the heat. Season to taste with salt and pepper.
Beat the eggs in a large bowl. Brush the bottom of the pastry shell, and place in the preheated oven for five minutes. Remove from the oven. Whisk the milk into the eggs, add 1/2 teaspoon salt, freshly ground pepper to taste and stir in the cooked vegetables and cheese. Turn into the crust. Bake 35 to 40 minutes, until set and the top is lightly browned. Remove from the heat and allow to sit for 15 minutes before serving. Serve hot or warm.
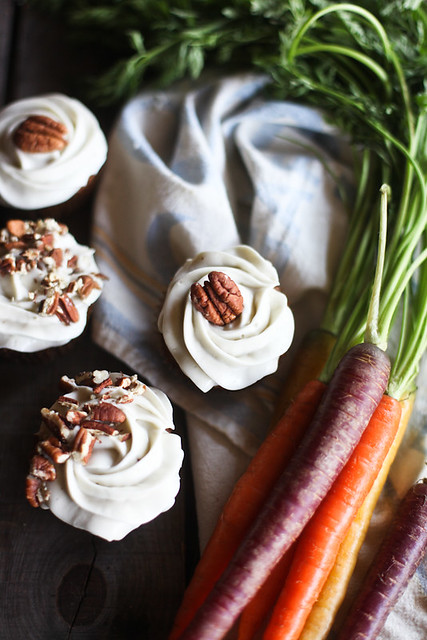
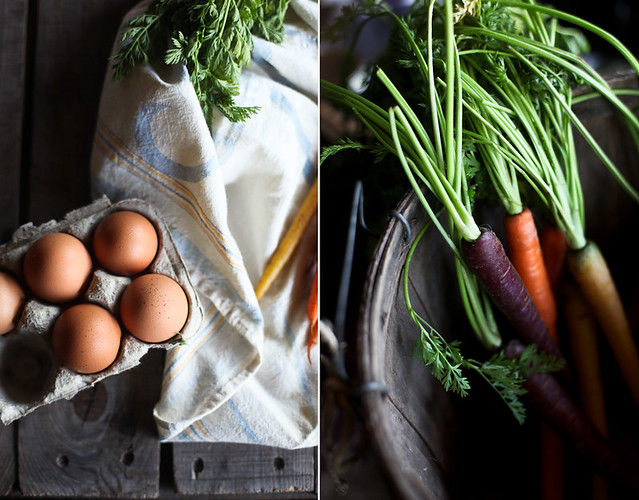
Carrot Cake with Honey Cream Cheese Frosting + A Cookbook 28 Mar 2013 11:42 AM (12 years ago)
When I sat down at my kitchen table one night in November of 2008 and started honey & jam, I had no idea what I was doing. I was a directionless 18 year old in need of a creative outlet. Real talk: I was a bit of a mess.
I started baking things and taking photos, posting them here, even though I was sure no one would ever read it. I hadn't baked much before, and hadn’t taken photos in years, but the more I did it, the more I loved it. One day, I realized “hey, this is my thing!”.
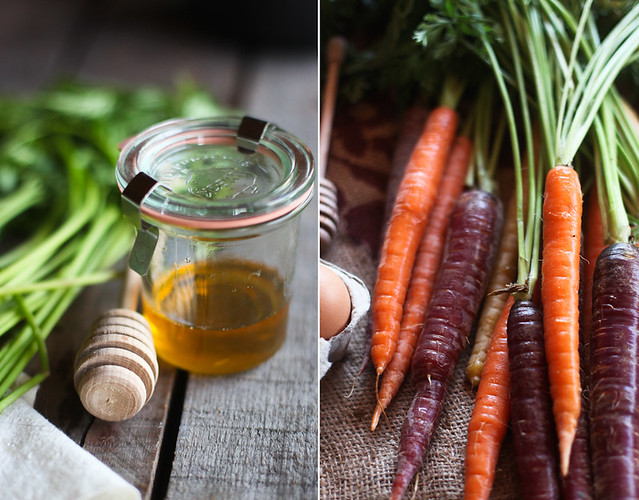
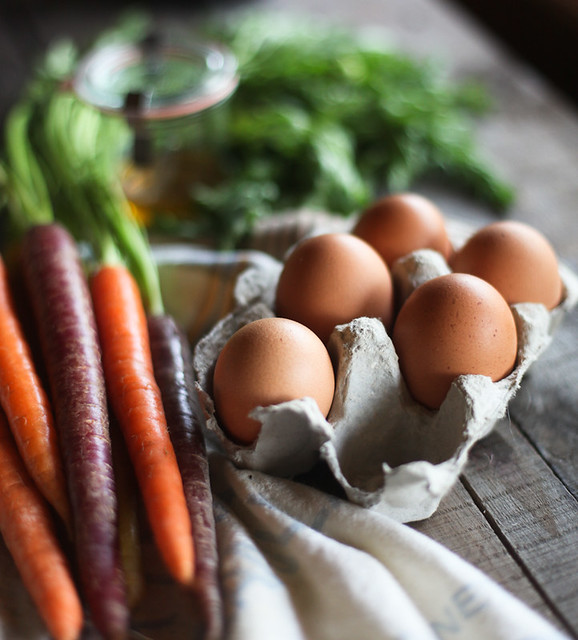
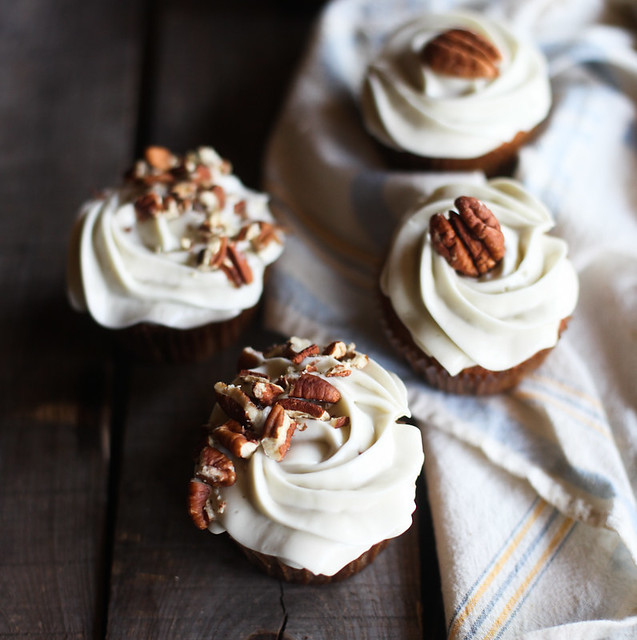
I made us cupcakes to celebrate - simple, tasty ones, which just might find themselves in the cookbook. The frosting is what makes these special, the honey flavor comes through strongly and pairs so well with the spiced carrot cake.
Carrot Cake with Honey Cream Cheese Frosting
makes one 2 layer cake or 24 cupcakes
I made cupcakes, but this recipe would make a great layer cake too. If you go that route, just use 2 9-inch round cake pans and bake them for 30-35 minutes.
For the Cake:
2 cups all purpose flour
1 teaspoon baking soda
1 teaspoon baking powder
1 teaspoon salt
1 teaspoon ground cinnamon
1 teaspoon ground ginger
2 cups dark brown sugar, packed
1 cup vegetable oil
4 large eggs
3 cups grated carrots (about 6 large carrots)
1 cup pecan halves, plus more for garnish
For the frosting:
2 8 ounce packages cream cheese, room temperature
1/2 cup unsalted butter, room temperature
2/3 cup honey
1/2 cup powdered sugar
Preheat oven to 350 degrees. Line 12 muffin cups with paper liners.
Spread read pecans in a single layer on a baking pan and toast them in the oven just until they become aromatic, about 6 minutes. Roughly chop and set aside.
In a medium bowl, whisk together flour, baking soda, baking powder, salt, cinnamon and ginger.
In the bowl of an electric mixer, beat sugar, oil and eggs until well blended. Add in flour mixture, beat until just blended. Stir in carrots and pecans. Divide batter among muffin cups. Bake until a toothpick inserted in center comes out clean, about 20 minutes.
While cupcakes are cooling, make frosting. In the bowl of an electric mixer, Beat cream cheese, butter and honey until light and fluffy. Add in powdered sugar and beat until you reach desired consistency.
Frost the cooled cupcakes and sprinkle with chopped pecans.
Oh! And while I'm announcing exciting things, I recently had the honor of being featured on Savuer's "Sites We Love". You can see that here.
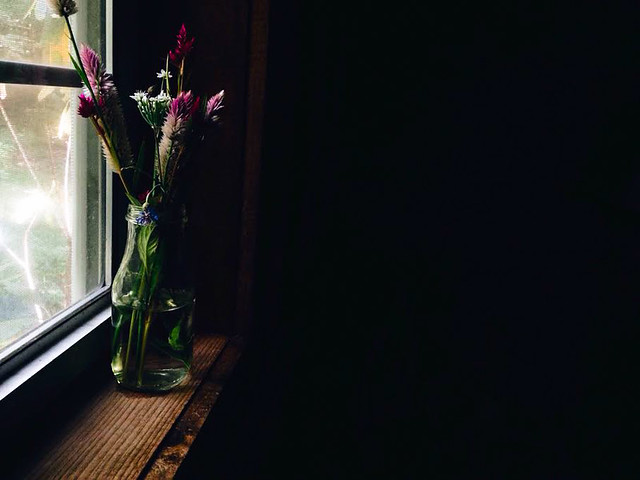
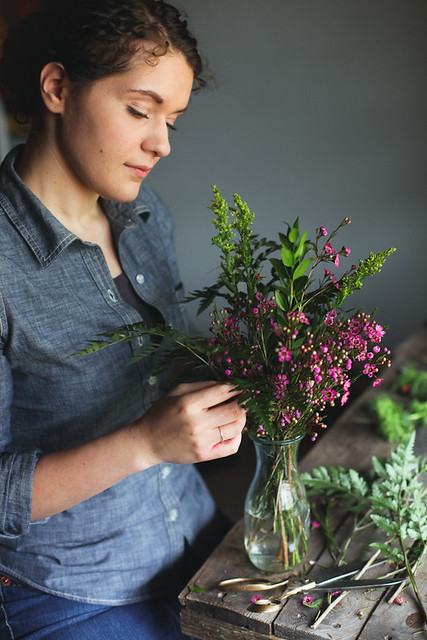
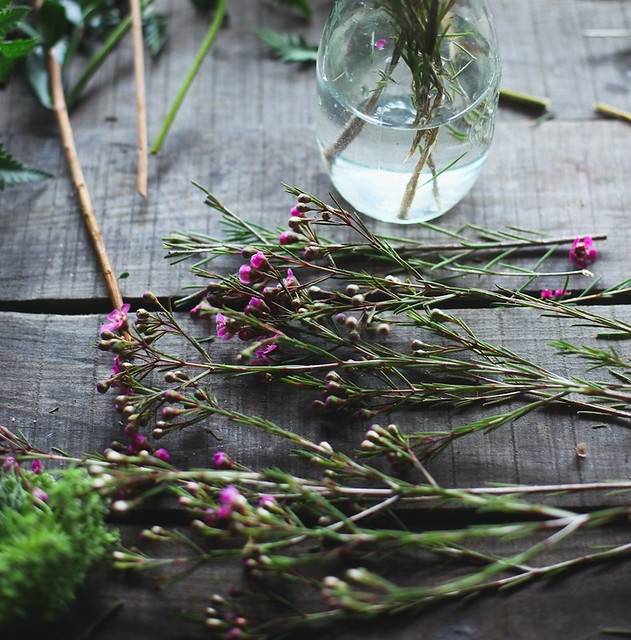
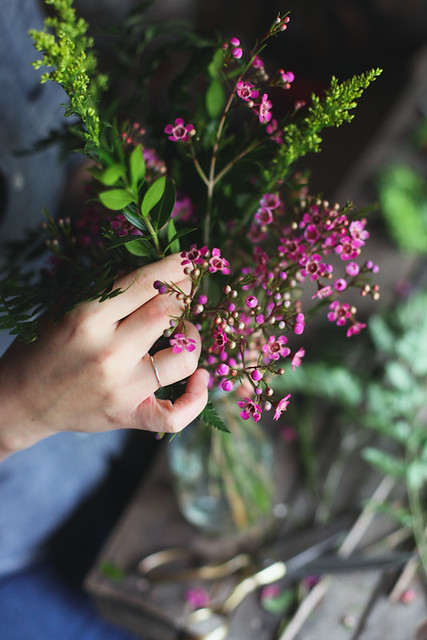
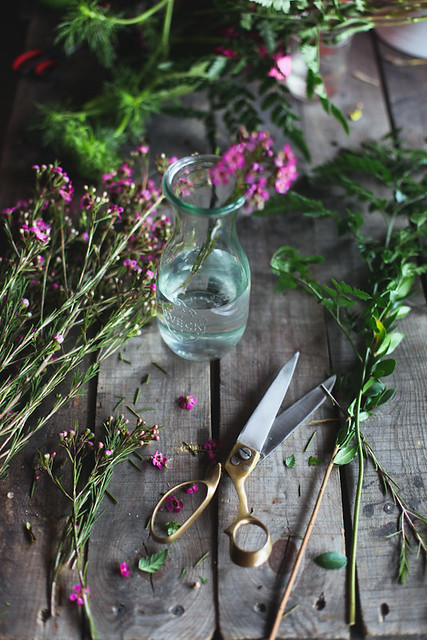
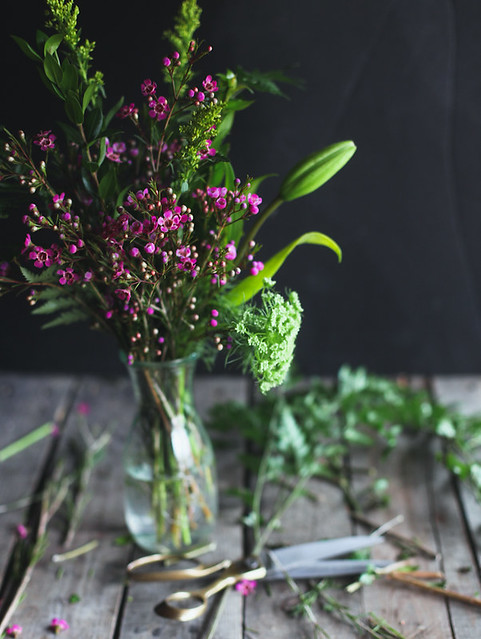
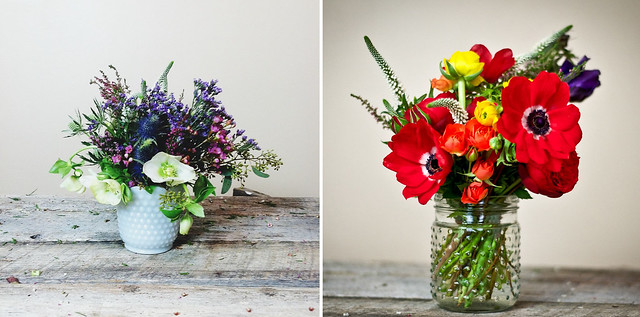
A Saturday Bouquet 9 Mar 2013 11:41 AM (12 years ago)


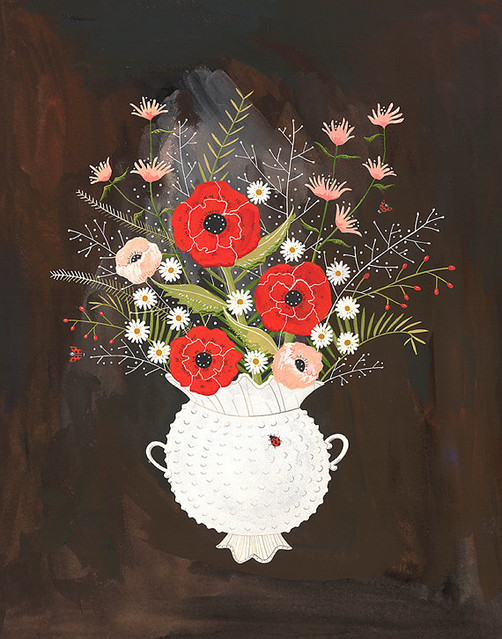
Things I'm Loving 27 Feb 2013 12:44 PM (12 years ago)

Caroline at wild folk creates some of the most beautiful floral arrangements I’ve ever seen. She makes me want to move to Boston so I can have them delivered to my house each week!
"As the years pass, I am coming more and more to understand that it is the common, everyday blessings of our common everyday lives for which we should be particularly grateful." Laura Ingalls Wilder (found via Shanna’s gorgeous watercolor note cards, which I am also loving.)
Lately I’ve been listening to these songs almost non-stop:
Birmingham by Shovels and Rope
You Never Need Nobody by The Lone Bellow
Untitled by The Lumineers

Gorgeous photos of the Pacific NW from Jordan Voth.
February's Flowers from Rebekka Seale
Wendell Berry’s Wild Spirit from Garden and Gun
Beautiful and heartbreaking photos from 1960’s Appalachia
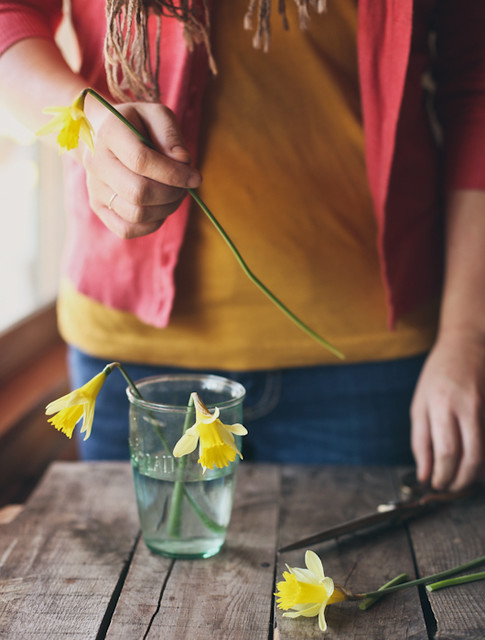
Daffodils. The first signs of spring, popping up everywhere!
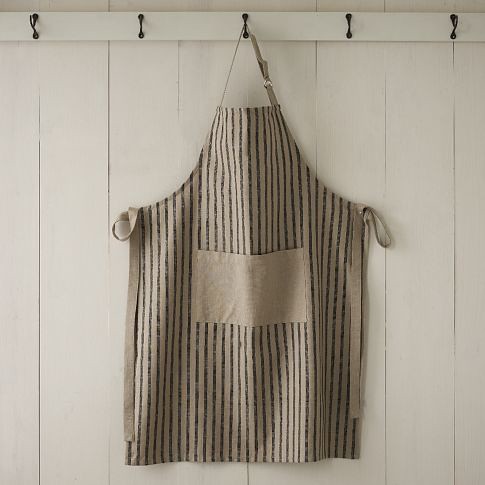
%20%3Cbr%20/%3E%3Cbr%20/%3ELately%20I%E2%80%99ve%20been%20listening%20to%20these%20songs%20almost%20non-stop:%3Cbr%20/%3E%3Cbr%20/%3E%3Cbr%20/%3EBirmingham%20by%20Shovels%20and%20Rope%3Cbr%20/%3E%3Cbr%20/%3E%3Cbr%20/%3EYou%20Never%20Need%20Nobody%20by%20The%20Lone%20Bellow%3Cbr%20/%3E%3Cbr%20/%3E%3Cbr%20/%3EUntitled%20by%20The%20Lumineers%3Cbr%20/%3E%3Cbr%20/%3E%3Ca%20href%3D%22http://www.flickr.com/photos/honeyandjam/8514344878/%22%20title%3D%221550_image_169916%20by%20hannah%20*%20honey%20%26amp;%20jam,%20on%20Flickr%22%3E%3Cimg%20alt%3D%221550_image_169916%22%20height%3D%22412%22%20src%3D%22http://farm9.staticflickr.com/8530/8514344878_692f87f627_z.jpg%22%20width%3D%22640%22%20/%3E%3C/a%3E%3Cbr%20/%3EGorgeous%20photos%20of%20the%20Pacific%20NW%20from%20%3Ca%20href%3D%22http://www.jordanvoth.com/the-hoh-rain-forest%22%20target%3D%22_blank%22%3EJordan%20Voth%3C/a%3E.%3Cbr%20/%3E%3Cbr%20/%3E%3Ca%20href%3D%22http://www.flickr.com/photos/honeyandjam/8514365350/%22%20title%3D%22il_570xN.428137874_da4y%20by%20hannah%20*%20honey%20%26amp;%20jam,%20on%20Flickr%22%3E%3Cimg%20alt%3D%22il_570xN.428137874_da4y%22%20height%3D%22640%22%20src%3D%22http://farm9.staticflickr.com/8517/8514365350_8300fd40a4_z.jpg%22%20width%3D%22502%22%20/%3E%3C/a%3E%3Cbr%20/%3E%3Ca%20href%3D%22http://www.etsy.com/listing/123775722/februarys-flowers-archival-art-print%22%20target%3D%22_blank%22%3EFebruary's%20Flowers%20from%20Rebekka%20Seale%20%3C/a%3E%3C/div%3E%0A%3Cdiv%3E%0A%3C/div%3E%0A%3Cdiv%3E%0A%3Cbr%20/%3E%3Ca%20href%3D%22http://gardenandgun.com/article/wendell-berrys-wild-spirit%22%20target%3D%22_blank%22%3EWendell%20Berry%E2%80%99s%20Wild%20Spirit%20from%20Garden%20and%20Gun%20%3C/a%3E%3Cbr%20/%3E%3Cbr%20/%3E%3Ca%20href%3D%22http://life.time.com/history/life-in-appalachia-photos-from-a-valley-of-poverty-1964/%231%22%20target%3D%22_blank%22%3EBeautiful%20and%20heartbreaking%20photos%20from%201960%E2%80%99s%20Appalachia%20%3C/a%3E%3C/div%3E%0A%3Cdiv%3E%0A%3C/div%3E%0A%3Cdiv%3E%0A%3C/div%3E%0A%3Cdiv%3E%0A%3C/div%3E%0A%3Cdiv%3E%0A%3C/div%3E%0A%3Cdiv%3E%0A%3C/div%3E%0A%3Cdiv%3E%0A%3C/div%3E%0A%3Cdiv%3E%0A%3Cbr%20/%3E%3C/div%3E%0A%3Cdiv%3E%0A%3Ca%20href%3D%22http://www.thefirstmess.com/2013/02/27/raw-vegan-chocolate-cake-recipe-earl-grey-chocolate-mousse/%22%20target%3D%22_blank%22%3EEarl%20Grey%20Chocolate%20Mousse%20from%20Laura%20at%20The%20First%20Mess%3C/a%3E%3C/div%3E%0A%3Cdiv%3E%0A%3Cbr%20/%3E%3C/div%3E%0A%3Cdiv%3E%0A%3Ca%20href%3D%22http://rosencrown.blogspot.com/%22%20target%3D%22_blank%22%3ERose%20%26amp;%20Crown%20%3C/a%3E%3C/div%3E%0A%3Cdiv%3E%0A%3C/div%3E%0A%3Cdiv%3E%0A%3Cbr%20/%3E%3Ca%20href%3D%22http://www.flickr.com/photos/honeyandjam/8514371926/%22%20title%3D%22img54b%20by%20hannah%20*%20honey%20%26amp;%20jam,%20on%20Flickr%22%3E%3Cimg%20alt%3D%22img54b%22%20height%3D%22485%22%20src%3D%22http://farm9.staticflickr.com/8511/8514371926_eb9a9cf01a.jpg%22%20width%3D%22485%22%20/%3E%3C/a%3E%3Cbr%20/%3E%3Ca%20href%3D%22http://www.westelm.com/products/mrk-cotton-apron-chefs-stripe-d458/?pkey%253Dckitchen-linens%2526cm_src%253Dkitchen-linens%257C%257CNoFacet-_-NoFacet-_--_-%22%20target%3D%22_blank%22%3EThis%20cotton%20apron%3C/a%3E%20from%20west%20elm%20is%20pretty%20much%20my%20dream%20apron.%20%3C/div%3E%0A%3Cdiv%3E%0A%3C/div%3E%0A%3Cdiv%3E%0A%3C/div%3E%0A%3Cdiv%3E%0A%3Cbr%20/%3E%3Cbr%20/%3E%3Ca%20href%3D%22http://www.flickr.com/photos/honeyandjam/8489321319/%22%20title%3D%22daffodils%20by%20hannah%20*%20honey%20%26amp;%20jam,%20on%20Flickr%22%3E%3Cimg%20alt%3D%22daffodils%22%20height%3D%22640%22%20src%3D%22http://farm9.staticflickr.com/8391/8489321319_1bd87b8113_z.jpg%22%20width%3D%22485%22%20/%3E%3C/a%3E%3Cbr%20/%3EDaffodils.%20The%20first%20signs%20of%20spring,%20popping%20up%20everywhere!%3C/div%3E%0A%3Cdiv%3E%0A%3Cbr%20/%3E%3C/div%3E%0A%3Cdiv%3E%0ATell%20me,%20what%20have%20you%20been%20loving%20lately?%3C/div%3E)
beauty & terror & apple skillet cake with rosemary crumb 11 Feb 2013 8:11 AM (12 years ago)
Just keep going.
No feeling is final."
Rainer Maria Rilke
This process, the one of growing up, it's hard. You don't know the right decisions to make - you've never done this before. Trying to create a career, or to even figure out what you want that career to be, meeting new people, becoming a full, interesting and interested person, to fill your life with good things and keep going through the beauty and terror can feel so overwhelming.
It's stopped me in my tracks for a while. The little fears, ones that go something like this: "what if people don't like what I do anymore?" "what if this blog post isn't as good as the last?" "what if they don't like what I have to say?", they started getting to me. I forgot that those feelings weren't final. I dealt with them as I'm apt to do - I ignored them and stopped moving.
I came across the quote above from Rilke the other day; I had read it before, but this time it took my breath away. Let it happen. But keep going.
I wasn't letting it happen, I was pushing it away. I was trying to pretend it didn't exist and also letting those feeling be final. But I realized you have to live these things out, the beauty and the confusion, to change and grow. You have to keep moving. I'm working on that.
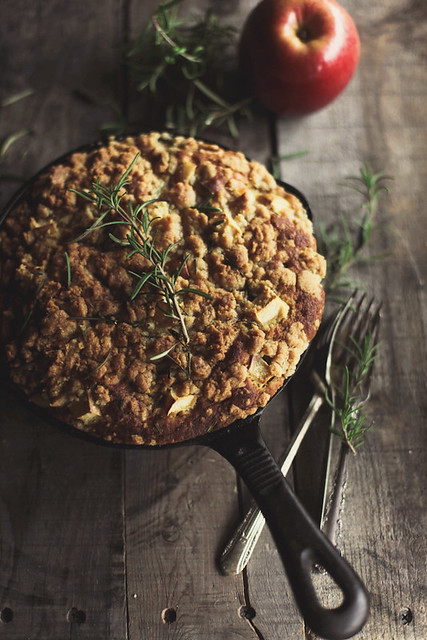
Apple Skillet Cake with Rosemary Crumb
Apples and rosemary are often paired together with pork, but they work really well in sweet dishes, too. This cake is so simple and tasty, the earthiness of the rosemary really makes it.
For rosemary crumb:
1/2 cup all purpose flour
1/3 cup granulated sugar
1/4 cup light brown sugar
pinch of salt
1/4 cup cold unsalted butter, cut into cubes
2 tablespoons roughly chopped rosemary
1-2 tablespoon water
For Cake:
1 3/4 cup all purpose flour
2 teaspoons baking powder
1/2 teaspoon fine sea salt
1/3 cup salted butter
1 cup light brown sugar
2 eggs
1 teaspoon vanilla extract
1/2 cup whole milk
1 cup apple, diced
Preheat oven to 350. Butter a 9 inch cast iron skillet.
To prepare crumb topping: Combine the flour, sugar, salt, butter and rosemary in the bowl of stand mixer fitted with the paddle attachment. Combine on low speed, until it becomes the texture of coarse crumbs, add in water and mix until crumb comes together. Set aside.
To prepare cake: In a medium bowl, whisk together flour, baking powder and salt. Using a stand mixer with the paddle attachment, cream butter and sugar together, on medium-high speed for 3-5 minutes, until light and fluffy. Add eggs one at a time, scraping down the sides of bowl after each addition. Stir in vanilla. Add in the flour mixture in 3 additions, alternating with the milk. Fold in the apples.
Pour mixture into prepared pan and sprinkle crumb on top.
Bake for 40-45 minutes, until lightly golden and firm to the touch.

have yourself a merry little christmas 24 Dec 2012 12:00 PM (12 years ago)
Merry Christmas, friends. I'll see you in the new year with lots of new recipes to share.

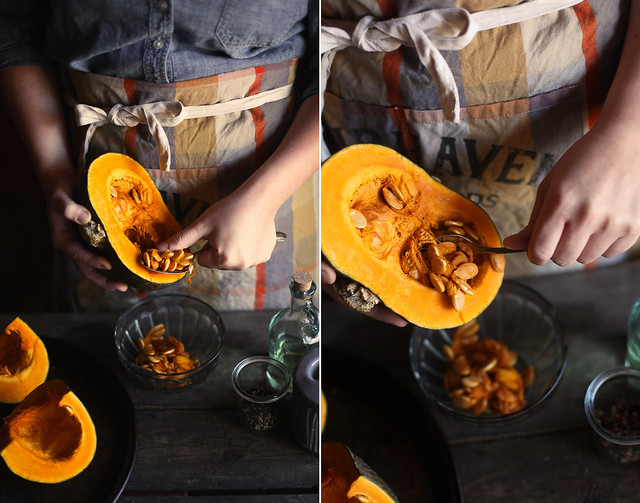
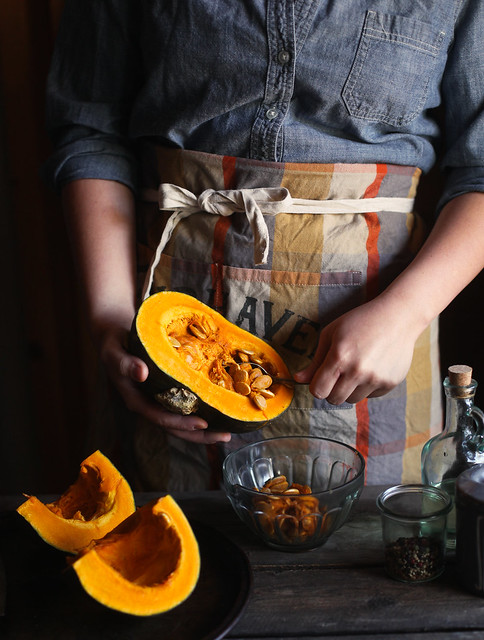
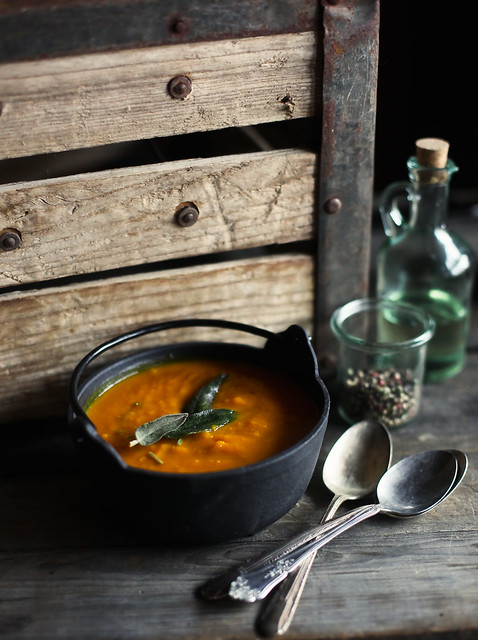
Roasted Kabocha Squash Soup 19 Nov 2012 9:47 AM (12 years ago)
Confession: I'm a thanksgiving traditionalist. I'm happy to try new recipes all year long, but when it comes to that Thursday in November, I want nothing more than turkey, cornbread & biscuit dressing, green bean casserole, sweet potatoes topped with marshmallows, and cranberry sauce out of a can.
I love thanksgiving to taste like home. It might be my favorite thing about the holiday, actually. The ritual of same. I love making the same pie, the one I know my dad loves, I love the familiar taste of each dish. While I know it's far from the most important thing about the day - it's a part that makes me happy.
This soup? Most definitely won't be on my thanksgiving table. But it's perfect for these chilly days just before.
I originally picked up a kabocha squash at the market because I loved the color, dark green with splotches of orange, but now is my new favorite thing. It's sweet and creamy, and wonderful roasted. I had some sad-looking sage hanging around at the back of fridge that needed to be used, so I added it in and I love how the flavors combine.
What about you? Thanksgiving traditionalist or are you all about trying new methods & flavors?
Roasted Kabocha Squash Soup
from epicurious
1 (4-lb) kabocha squash halved and seeded
1 cup vegetable oil
20 whole fresh sage leaves plus 1 1/2 teaspoons chopped fresh sage
1/4 lb sliced pancetta coarsely chopped
1 tablespoon olive oil
1 large onion chopped
2 garlic cloves minced
3 1/2 cups chicken broth
3 1/2 cups water
1 tablespoon red-wine vinegar
Roast squash:
Preheat oven to 400°F. Roast squash, cut sides down, in an oiled roasting pan in middle of oven until tender, about 1 hour. When cool enough to handle, scrape flesh from skin.
Fry sage leaves while squash roasts:
Heat vegetable oil in a deep small saucepan until it registers 365°F on a deep-fat thermometer. Fry sage leaves in 3 batches until crisp, 3 to 5 seconds. Transfer leaves with a slotted spoon to paper towels to drain.
Cook pancetta and make soup:
Cook pancetta in a 4-quart heavy pot over moderate heat, stirring, until browned. Transfer pancetta with slotted spoon to paper towels to drain. Add olive oil to pancetta fat remaining in pot, then cook onion, stirring, until softened.
Stir in garlic and chopped sage and cook, stirring, until fragrant, about 1 minute. Add squash, broth, and water and simmer 20 minutes to blend flavors.
Purée soup in batches in a blender, transferring to a bowl. (Use caution when blending hot liquids.) Return soup to pot and reheat. If necessary, thin to desired consistency with water. Stir in vinegar and salt and pepper to taste.
Serve sprinkled with pancetta and fried sage leaves.
%20kabocha%20squash%20halved%20and%20seeded%20%3Cbr%20/%3E%0A%E2%80%A81%20cup%20vegetable%20oil%20%3Cbr%20/%3E%0A%E2%80%A820%20whole%20fresh%20sage%20leaves%20plus%201%201/2%20teaspoons%20chopped%20fresh%20sage%3Cbr%20/%3E%0A%26nbsp;%E2%80%A81/4%20lb%20sliced%20pancetta%20coarsely%20chopped%20%E2%80%A8%3Cbr%20/%3E%0A1%20tablespoon%20olive%20oil%20%E2%80%A8%3Cbr%20/%3E%0A1%20large%20onion%20chopped%3Cbr%20/%3E%0A%26nbsp;%E2%80%A82%20garlic%20cloves%20minced%3Cbr%20/%3E%0A%26nbsp;%E2%80%A83%201/2%20cups%20chicken%20broth%3Cbr%20/%3E%0A%26nbsp;%E2%80%A83%201/2%20cups%20water%3Cbr%20/%3E%0A%26nbsp;%E2%80%A81%20tablespoon%20red-wine%20vinegar%3Cbr%20/%3E%0A%3Cbr%20/%3E%0A%3Cbr%20/%3E%0A%26nbsp;Roast%20squash:%E2%80%A8%E2%80%A8%3Cbr%20/%3E%0APreheat%20oven%20to%20400%C2%B0F.%E2%80%A8%20Roast%20squash,%20cut%20sides%20down,%20in%20an%20oiled%20roasting%20pan%20in%20middle%20of%20oven%20until%20tender,%20about%201%20hour.%20When%20cool%20enough%20to%20handle,%20scrape%20flesh%20from%20skin.%E2%80%A8%E2%80%A8%3Cbr%20/%3E%0A%3Cbr%20/%3E%0AFry%20sage%20leaves%20while%20squash%20roasts:%E2%80%A8%E2%80%A8%3Cbr%20/%3E%0AHeat%20vegetable%20oil%20in%20a%20deep%20small%20saucepan%20until%20it%20registers%20365%C2%B0F%20on%20a%20deep-fat%20thermometer.%20Fry%20sage%20leaves%20in%203%20batches%20until%20crisp,%203%20to%205%20seconds.%20Transfer%20leaves%20with%20a%20slotted%20spoon%20to%20paper%20towels%20to%20drain.%E2%80%A8%E2%80%A8%3Cbr%20/%3E%0A%3Cbr%20/%3E%0ACook%20pancetta%20and%20make%20soup:%3Cbr%20/%3E%0A%E2%80%A8%E2%80%A8Cook%20pancetta%20in%20a%204-quart%20heavy%20pot%20over%20moderate%20heat,%20stirring,%20until%20browned.%20Transfer%20pancetta%20with%20slotted%20spoon%20to%20paper%20towels%20to%20drain.%E2%80%A8%E2%80%A8%20Add%20olive%20oil%20to%20pancetta%20fat%20remaining%20in%20pot,%20then%20cook%20onion,%20stirring,%20until%20softened.%20%3Cbr%20/%3E%0A%3Cbr%20/%3E%0AStir%20in%20garlic%20and%20chopped%20sage%20and%20cook,%20stirring,%20until%20fragrant,%20about%201%20minute.%20Add%20squash,%20broth,%20and%20water%20and%20simmer%2020%20minutes%20to%20blend%20flavors.%E2%80%A8%E2%80%A8%20%3Cbr%20/%3E%0A%3Cbr%20/%3E%0APur%C3%A9e%20soup%20in%20batches%20in%20a%20blender,%20transferring%20to%20a%20bowl.%20(Use%20caution%20when%20blending%20hot%20liquids.)%20Return%20soup%20to%20pot%20and%20reheat.%20If%20necessary,%20thin%20to%20desired%20consistency%20with%20water.%E2%80%A8%E2%80%A8Stir%20in%20vinegar%20and%20salt%20and%20pepper%20to%20taste.%20%3Cbr%20/%3E%0A%3Cbr%20/%3E%0AServe%20sprinkled%20with%20pancetta%20and%20fried%20sage%20leaves.%3C/div%3E)
of apple orchards and pie parties. 16 Oct 2012 7:12 AM (12 years ago)
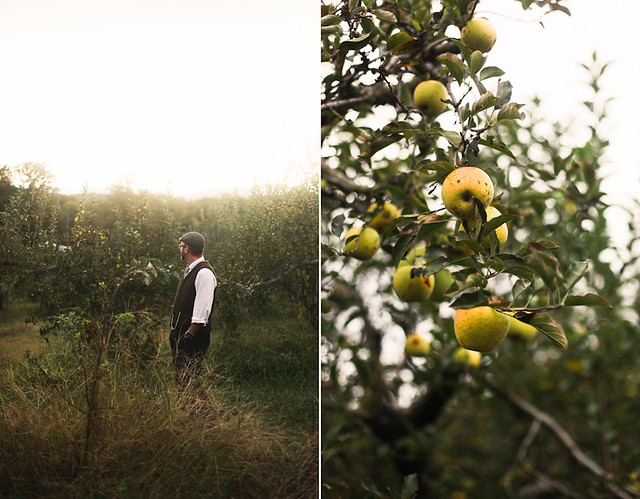
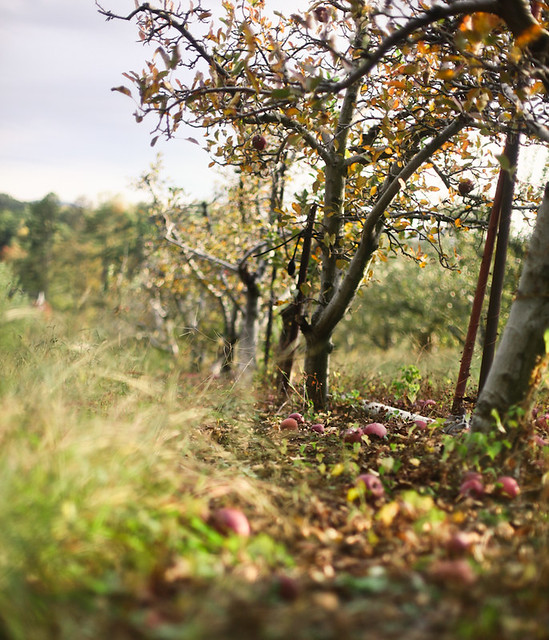
I consider myself lucky to live in the place I do. I'm surrounded by beauty - mountains, rivers, trees and good, generous people. There's an apple orchard not too far down the road, and when I received an invitation to visit, to explore, I knew it was something I couldn't pass up.
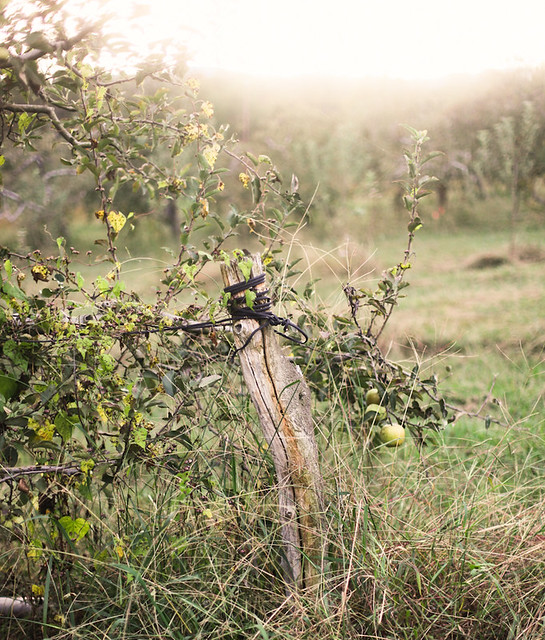
Luke at Mountain View Orchards is one of those good people. We stomped around, stepping over the high grass and fallen apples, taking in the last of the days sunlight, shining and glittering around the trees, apples heavy on their branches, their scent perfuming the air. He told me all about the orchard in a way only a man passionate about a place can. Not all fact, but feeling.
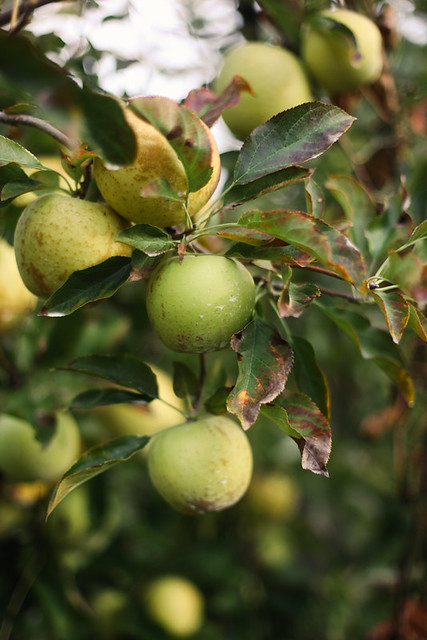
He lamented that the old variety of apples, the tasty, imperfect sort, were being passed over for the shiny, flawless-on-the-outside, less flavorful varieties. He told me about his passion for Appalachian culture, and we agreed that this, growing real things in a place they are meant to be grown, is far more interesting and cultural than the new Starbucks in town. All while we snacked on apples, freshly picked. It's a truth universally acknowledged that fruit plucked straight from the tree just tastes better.

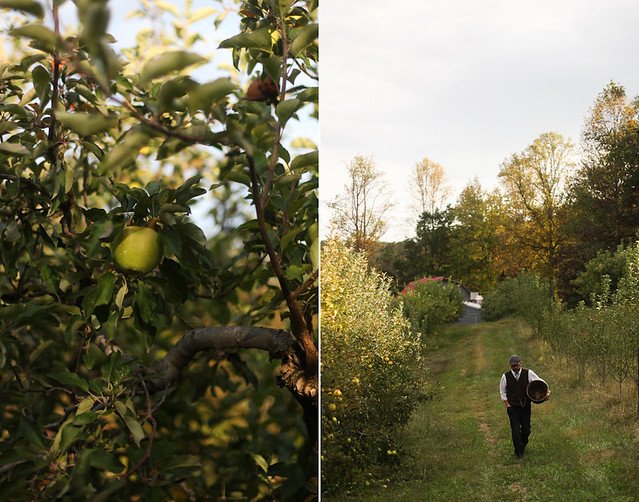
Luke sent me off with a basket full of apples we'd picked, and I came home with a plan. A pie plan. As much as I love this place I call home, I also love this community, this microcosm we call the food blogging world. It's full of the same sort of good people. People like Stephanie, Beth and Sarah, who, when I sent out a tweet about needing pie, all understood and excitedly passed emails back and forth about a virtual pie party. Ladies, I cannot wait to sit down and share a slice with you one day.
This pie is bare bones, as simple and stripped down as possible. It’s just apples, sugar, salt, and a bit of brown butter. Not even a dash of cinnamon. These are the sort of apples my autumn daydreams are made of and I wanted them to shine. It's best served up with a side of The Avett Brothers (particularly this track and this one) - their new album has been my constant companion since it's release, and was playing as I baked this up. Be sure to check out Sarah, Beth, and Stephanie's posts for their lovely pies & music picks.
Brown Butter Apple Pie
pie crust (crust recipe from Martha Stewart):
2 1/2 cups all-purpose flour
1 teaspoon salt
1 teaspoon sugar
1 cup (2 sticks) unsalted butter, chilled and cut into small pieces
1/4 to 1/2 cup ice water
In the bowl of a food processor, combine flour, salt, and sugar. Add butter, and process until the mixture resembles coarse meal, 8 to 10 seconds.
With machine running, add ice water in a slow, steady stream through feed tube. Pulse until dough holds together without being wet or sticky; be careful not to process more than 30 seconds. To test, squeeze a small amount together: If it is crumbly, add more ice water, 1 tablespoon at a time.
Divide dough into two equal balls. Flatten each ball into a disc and wrap in plastic. Transfer to the refrigerator and chill at least 1 hour.
Filling:
6 medium-large apples, I used granny smith, peeled, cored and sliced thinly
3/4 cup brown sugar
1/2 teaspoon salt
3 tablespoons flour
5 tablespoons butter
Preheat oven to 400 degrees. On a lightly floured surface, roll one disc of dough into a 12-inch round, 1/8-inch thick. Fit into a 9-inch pie plate. Set aside in the refrigerator.
In a pan, melt butter over medium-high heat and cook until it begins to brown, it will smell nutty and fragrant.
In a large bowl, combine the apples, brown sugar, salt, flour and brown butter. Pour into pie plate, mounding in the center. Roll second disc of dough into a 12-inch round, 1/8 inch thick. Wet edges of the crust in the plate, then lay dough on top, pressing at edges to seal. Cut vents into top crust.
Place on a parchment paper lined baking sheet. Bake at 400 for 15 minutes, until crust is browned at edges. Turn oven down to 350, bake for another 40-50 minutes.
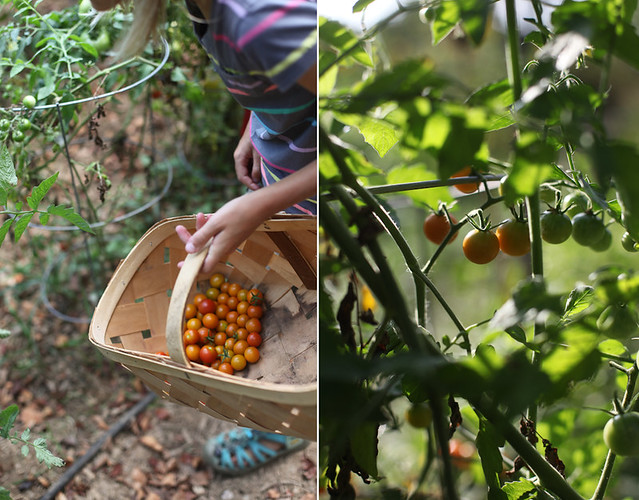
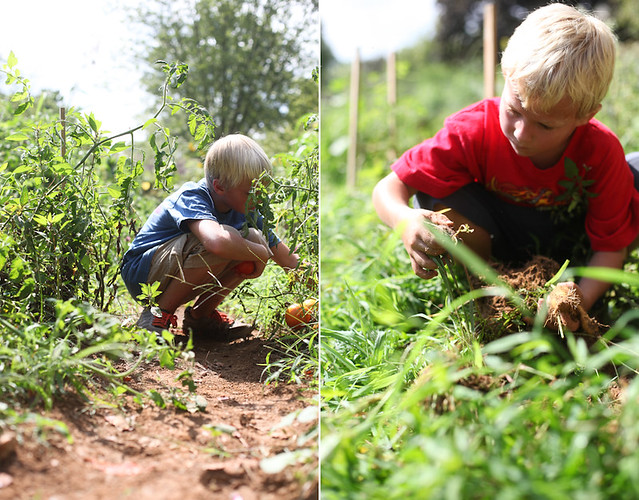
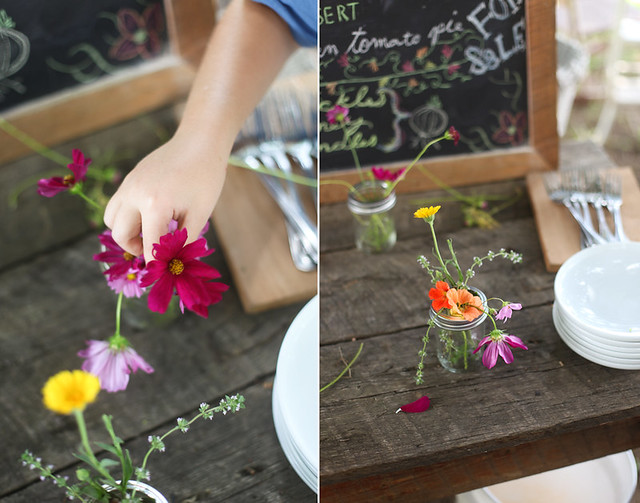
Green Tomato Pie + Kids Farm to Table Camp 5 Sep 2012 4:24 PM (12 years ago)
"Where do potatoes grow?" That's how last week started for me. I had the opportunity to work at a kids farm to table camp, hosted by The Cook's Farm, which is run by the owners of my favorite local restaurant, Harvest on Main. It was a week full of dirt, tomatoes, beet juice stains and smiles.
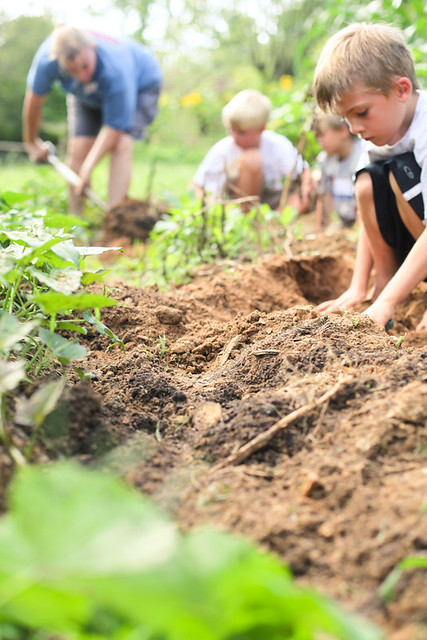
Each day, we headed down to the garden to pick what we were having for lunch that day. Potatoes, beets, corn, carrots, tomatoes, each vegetable was dug up or picked off the vine by the kids. I loosened up dirt so they could yank up carrots, smiling at the giggles when they realized a huge carrot top didn't equal a huge carrot.
"This purple one, it's a carrot too? I thought they were supposed to be orange!" It is!
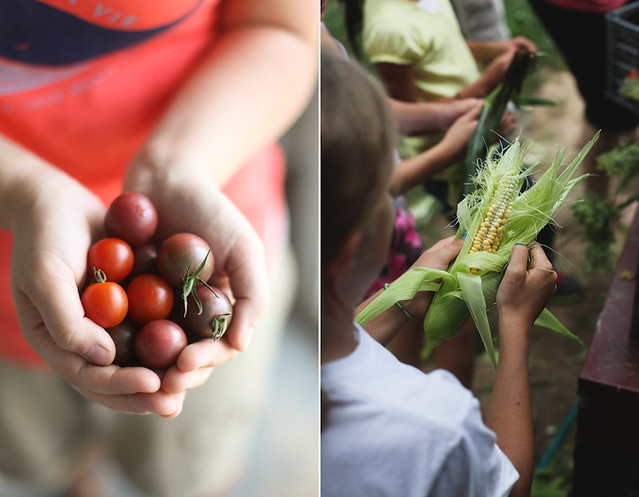
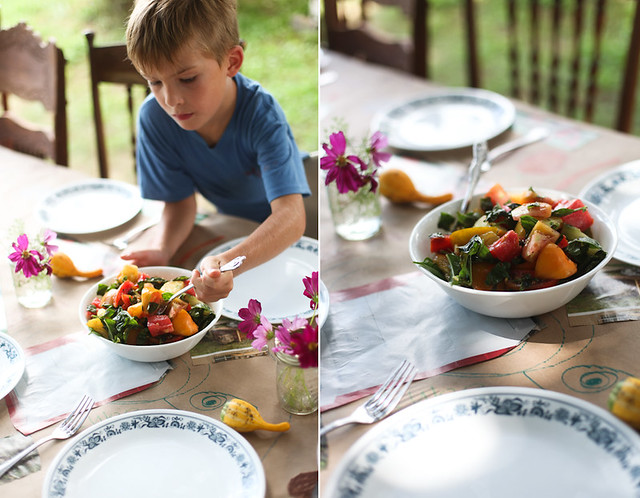
We'd head to the kitchen, dirt on our hands, (and faces, and pants, everywhere!). The kids would scrub & peel, chop & whisk. We made potato salad, frittata with fresh eggs, tomato salad. Corn salsa, quiche, pie. Something new each day. Everything fresh from the garden.
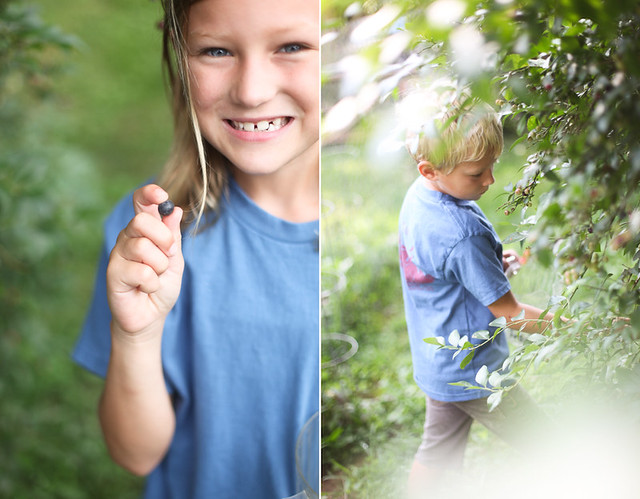
They picked blueberries for smoothies, popping more in their mouths than into their bowls.
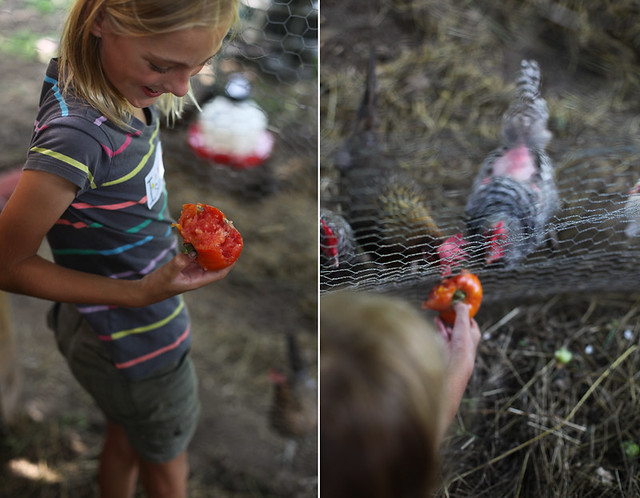
"Can we feed the chickens?" "Can we collect the eggs?!" had to be the words I heard most. They'd sit down outside the coop and feed them through the wire, holding up tomatoes so the chickens could peck. "This one is greedy!" they'd laugh. "Oh, they don't like the green tomatoes." They learned how to shoo away roosting chickens to grab warm eggs.
The kids loved tasting each thing they had made & picked. The last day, the parents came for lunch.
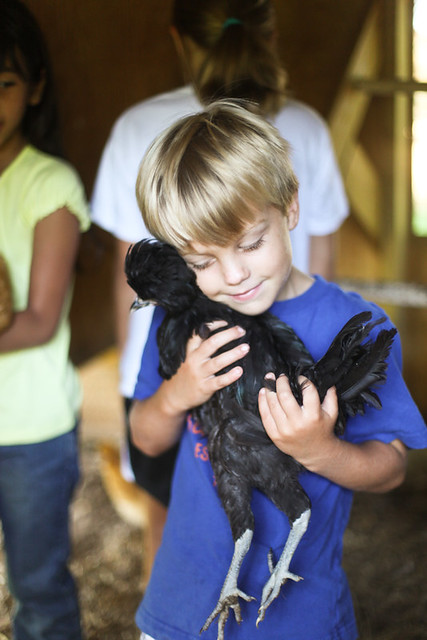
Seeing these kids so excited about food & where it comes from was inspiring. Little ones holding chickens & digging in the dirt? Bliss.
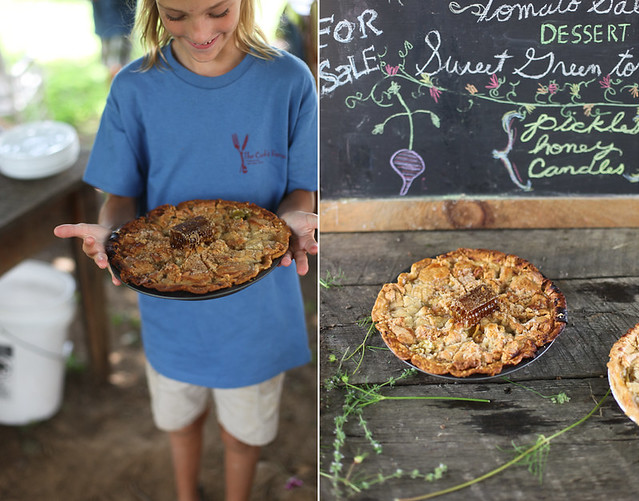
This recipe is my favorite from the week - and the kids too. It tastes a bit like apple pie, but with a tang from the green tomatoes. If you can get a hold of some, it's fantastic with honey comb. If not, vanilla ice cream works well.
Green Tomato Pie
recipe by Michelle at Harvest
3/4 cup packed light brown sugar
1/2 cup plus 1/2 teaspoon granulated sugar
6 tablespoons all-purpose flour
1 teaspoon ground cinnamon
1/8 teaspoon salt
4 cups finely chopped green tomatoes
1 tablespoon fresh lemon juice
2 tablespoons unsalted butter, cut into pieces
Directions
Preheat the oven to 425 degrees F.
Make the pie crust and let rest in the refrigerator for at least 30 minutes. Divide the dough in half. Place 1 piece of the dough on a lightly floured surface and roll out to an 11-inch circle, about 1/8-inch thick. Transfer to a 9-inch pie pan. Trim the crust with scissors or a sharp knife to within 1/2-inch of the outer rim.
In a large bowl, mix together the brown sugar, 1/2 cup granulated sugar, flour, cinnamon, salt, and pepper. Sprinkle 2 tablespoons of the flour mixture across the bottom of the prepared piecrust.
Add the tomatoes and lemon juice to the bowl with the remaining flour mixture and toss to coat. Spoon the tomato mixture into the pie shell, and dot with the butter.
Placed remaining crust on top of the tomato filling and tuck the overlapping crusts into the pan, forming a thick edge. Crimp the edges to seal and cut small 1/2-inch long vents in a decorative pattern along the top crust. Sprinkle with the remaining 1/2 teaspoon of sugar.
Bake 15 minutes in the preheated oven. Reduce the temperature to 350 degrees F. Continue baking for 35 to 45 minutes.
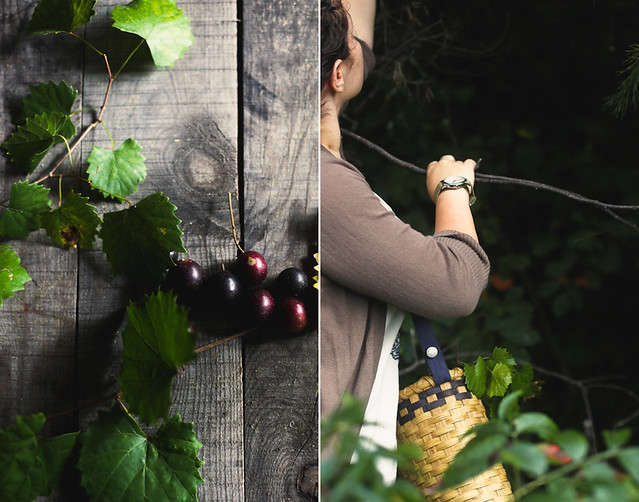
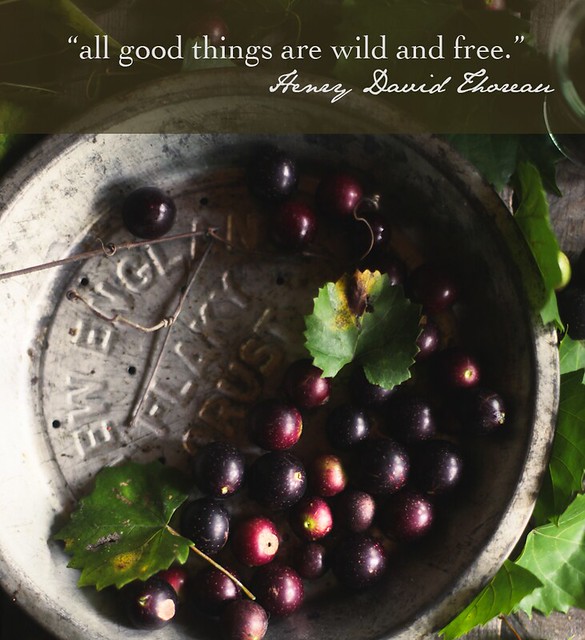
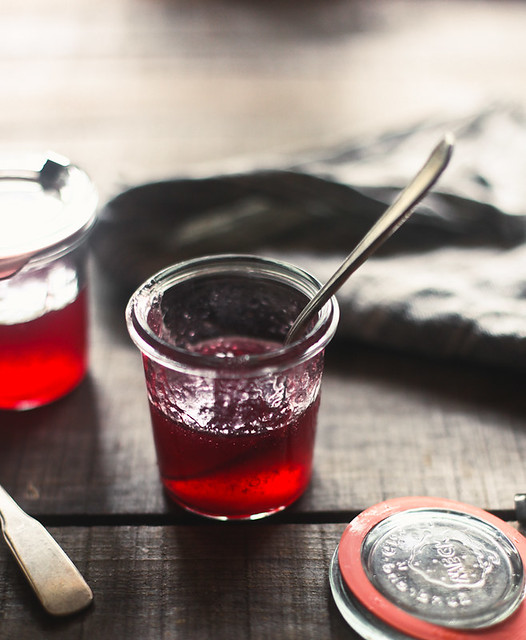
oh my darling muscadine 4 Sep 2012 7:02 AM (12 years ago)
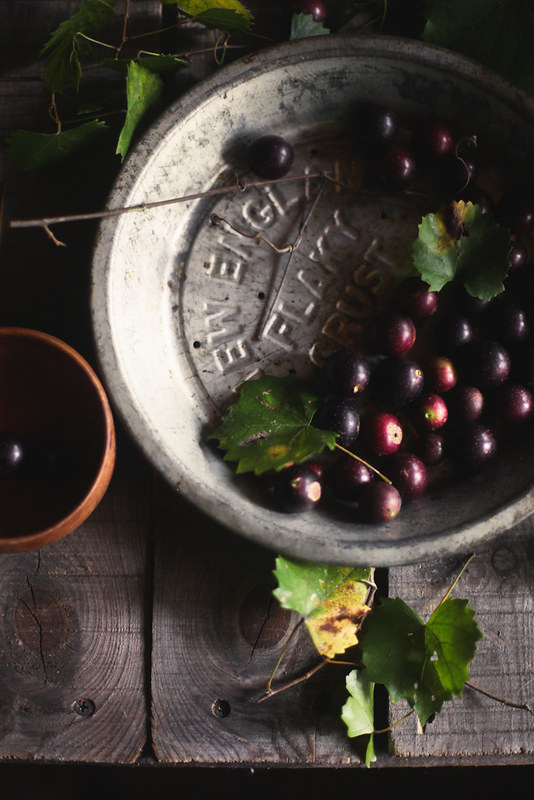
There was a fine drizzle of rain as we walked down the dirt road that runs in front of our house, looking for the muscadines that grow wild this time of year.
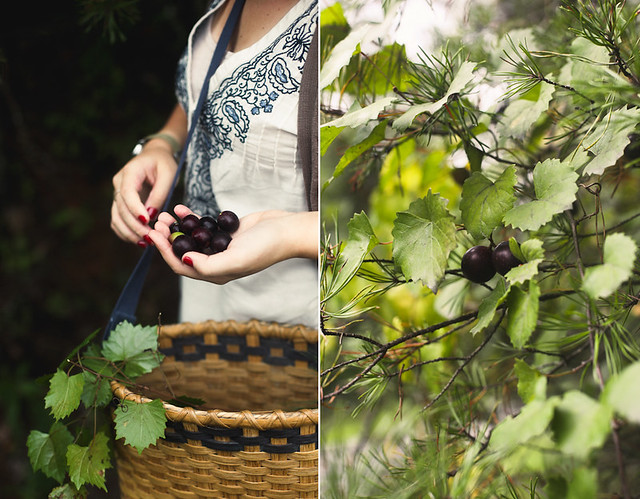
The vines were tangled high in the evergreen trees, we stood up on our tiptoes to grab handfuls, tumbling them into our basket. Their colors vary from nearly black to the prettiest shade of purple I've ever seen.
Muscadines are so fragrant, deep and rich, vaguely winey. I brought them inside, cut them open, and set them to simmer down into a syrup, the scent filling the house, lingering in every corner.
My mom has been telling me about her grandmothers muscadine jelly since I was a little girl. She waxes poetic about the sweet stuff, but I never had the chance to meet my great-grandmother, or taste her jelly. As I was standing over the bubbling pot, I felt connected to this woman I never met. It's funny (and wonderful) how food can do that.
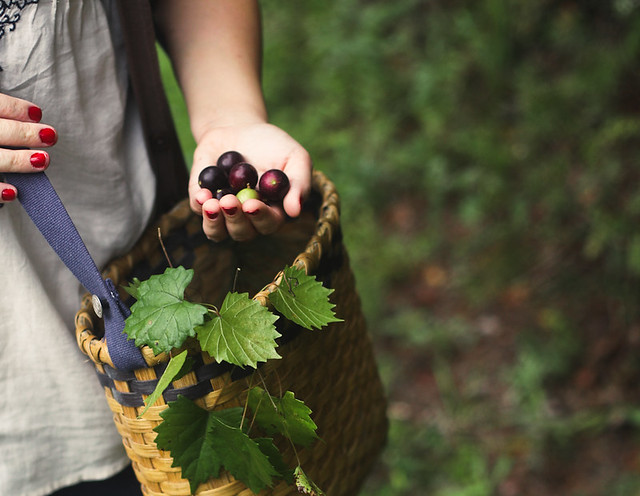
I didn't have quite enough juice to make jelly, so I decided on a syrup, ruby red & sweet. It'd be great over biscuits or pancakes, even ice cream. I stirred a spoonful into a cup of hot black tea. Next time I'm going to turn it into muscadine sorbet.
Muscadine Syrup
1 cup muscadine juice*
1 cup sugar
1 tablespoon lemon juice
To release the juice, cut open your muscadines and place in a stock pot. Fill pot with water, just covering the muscadines. Simmer for 15 minutes, mashing occasionally with a potato masher. Pour fruit through a mesh strainer, pressing hard on the solids, (I then placed the skins in a lemon juicer, to extract as much juice as possible), into another stock pot. Add sugar and lemon juice, and bring the juice to a boil, then allow to simmer. Cook until it coats the back of a spoon. Pour into clean jar. Can be kept in the fridge for up to 2 weeks.
*You want equal parts juice & sugar. If you have more/less juice, just add the same amount of sugar. I started with about 4 cups of muscadines and got 1 cup of juice.
%20how%20food%20can%20do%20that.%20%3Cbr%20/%3E%0A%3Cbr%20/%3E%0A%3Ca%20href%3D%22http://www.flickr.com/photos/honeyandjam/7925251792/%22%20title%3D%22IMG_5116-2%20by%20hannah%20*%20honey%20%26amp;%20jam,%20on%20Flickr%22%3E%3Cimg%20alt%3D%22IMG_5116-2%22%20height%3D%22496%22%20src%3D%22http://farm9.staticflickr.com/8462/7925251792_2024d5802c_z.jpg%22%20width%3D%22640%22%20/%3E%3C/a%3E%3Cbr%20/%3E%0A%3Cbr%20/%3E%0AI%20didn't%20have%20quite%20enough%20juice%20to%20make%20jelly,%20so%20I%20decided%20on%20a%20syrup,%20ruby%20red%20%26amp;%20sweet.%20It'd%20be%20great%20over%20biscuits%20or%20pancakes,%20even%20ice%20cream.%20I%20stirred%20a%20spoonful%20into%20a%20cup%20of%20hot%20black%20tea.%20Next%20time%20I'm%20going%20to%20turn%20it%20into%20muscadine%20sorbet.%3Cbr%20/%3E%0A%3Cbr%20/%3E%0A%3Ca%20href%3D%22http://www.flickr.com/photos/honeyandjam/7930158616/%22%20title%3D%22IMG_5437-2%20by%20hannah%20*%20honey%20%26amp;%20jam,%20on%20Flickr%22%3E%3Cimg%20alt%3D%22IMG_5437-2%22%20height%3D%22640%22%20src%3D%22http://farm9.staticflickr.com/8301/7930158616_b3845102f7_z.jpg%22%20width%3D%22526%22%20/%3E%3C/a%3E%3Cbr%20/%3E%0A%3Cbr%20/%3E%0A%3Cb%3EMuscadine%20Syrup%3C/b%3E%3Cbr%20/%3E%0A%3Cbr%20/%3E%0A1%20cup%20muscadine%20juice*%3Cbr%20/%3E%0A1%20cup%20sugar%3Cbr%20/%3E%0A1%20tablespoon%20lemon%20juice%3Cbr%20/%3E%0A%3Cbr%20/%3E%0ATo%20release%20the%20juice,%20cut%20open%20your%20muscadines%20and%20place%20in%20a%20stock%20pot.%20Fill%20pot%20with%20water,%20just%20covering%20the%20muscadines.%20Simmer%20for%2015%20minutes,%20mashing%20occasionally%20with%20a%20potato%20masher.%20Pour%20fruit%20through%20a%20mesh%20strainer,%20pressing%20hard%20on%20the%20solids,%20(I%20then%20placed%20the%20skins%20in%20a%20lemon%20juicer,%20to%20extract%20as%20much%20juice%20as%20possible),%20into%20another%20stock%20pot.%20Add%20sugar%20and%20lemon%20juice,%20and%20bring%20the%20juice%20to%20a%20boil,%20then%20allow%20to%20simmer.%20Cook%20until%20it%20coats%20the%20back%20of%20a%20spoon.%20Pour%20into%20clean%20jar.%20Can%20be%20kept%20in%20the%20fridge%20for%20up%20to%202%20weeks.%3Cbr%20/%3E%0A%3Cbr%20/%3E%0A*You%20want%20equal%20parts%20juice%20%26amp;%20sugar.%20If%20you%20have%20more/less%20juice,%20just%20add%20the%20same%20amount%20of%20sugar.%20I%20started%20with%20about%204%20cups%20of%20muscadines%20and%20got%201%20cup%20of%20juice.%20%3Cbr%20/%3E%0A%3Cbr%20/%3E%3C/div%3E)
Hello, September. 1 Sep 2012 12:19 PM (12 years ago)

Here's to changing leaves, warm cups of tea, golden autumn sunlight, fresh apples, bonfires & toasted marshmallows.


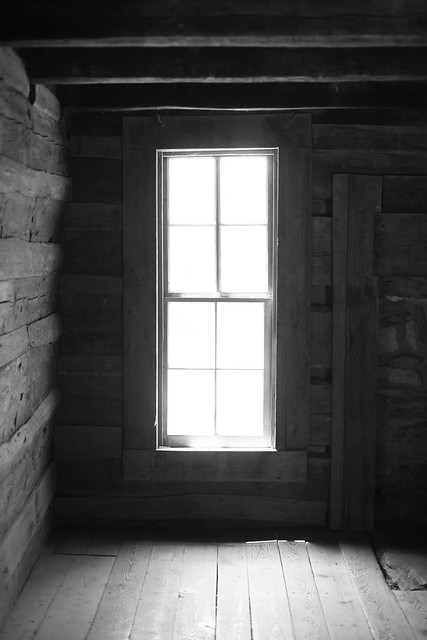
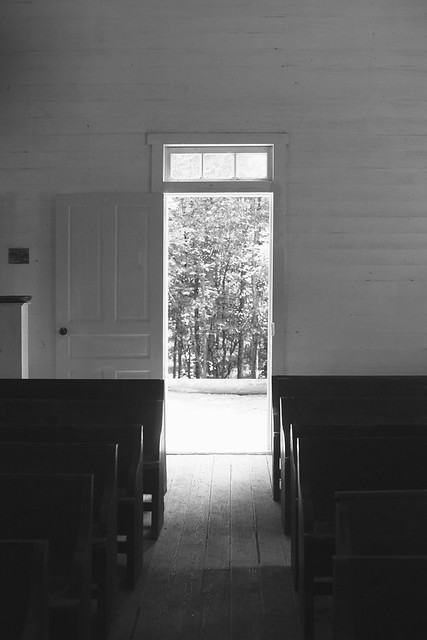
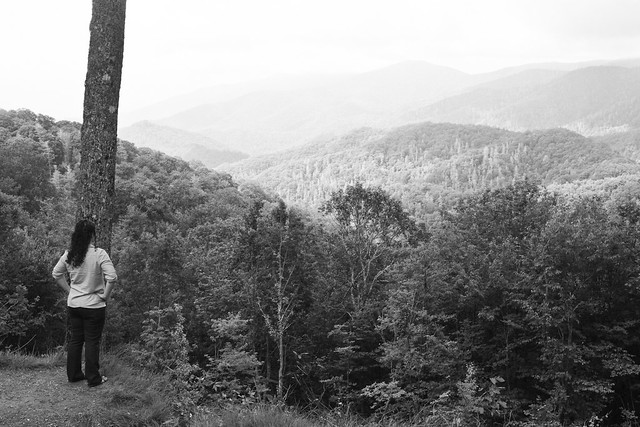
Cades Cove 26 Jul 2012 11:17 AM (12 years ago)
Cades Cove is one of those places that feel like magic. Deep in the Smoky Mountains, it feels as though it shouldn't exist or at the very least, shouldn't be disturbed. It makes you nostalgic for a time you didn't experience, a place you never lived.
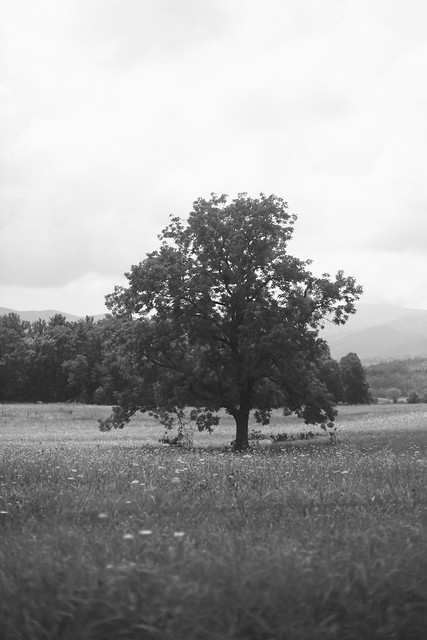


It's all rolling hills, soft peaks & well worn paths. Deer grazing & bees buzzing.

The part I love most are the cabins & churches. The floors creak, along with the doors.

I'm always drawn to the windows. Oh, that light.

?%3C/div%3E%0A%3Cdiv%3E%0A%3Cbr%20/%3E%3C/div%3E%0A%3Cdiv%3E%0A%3Ca%20href%3D%22http://www.flickr.com/photos/honeyandjam/7625495202/%22%20title%3D%22IMG_1602%20by%20hannah%20*%20honey%20%26amp;%20jam,%20on%20Flickr%22%3E%3Cimg%20alt%3D%22IMG_1602%22%20height%3D%22427%22%20src%3D%22http://farm9.staticflickr.com/8019/7625495202_4c134f325c_z.jpg%22%20width%3D%22640%22%20/%3E%3C/a%3E%3C/div%3E)
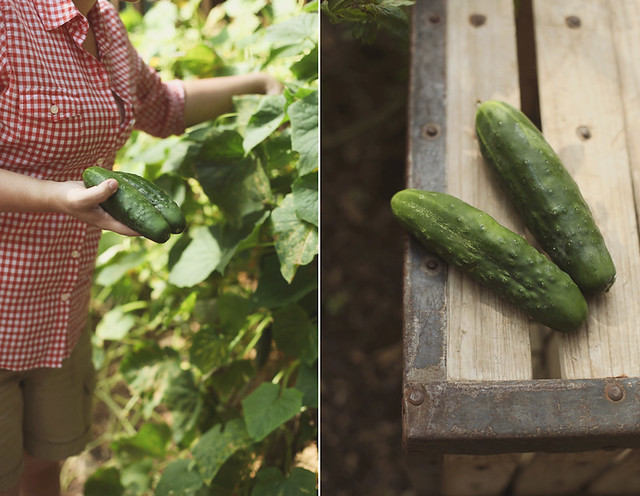
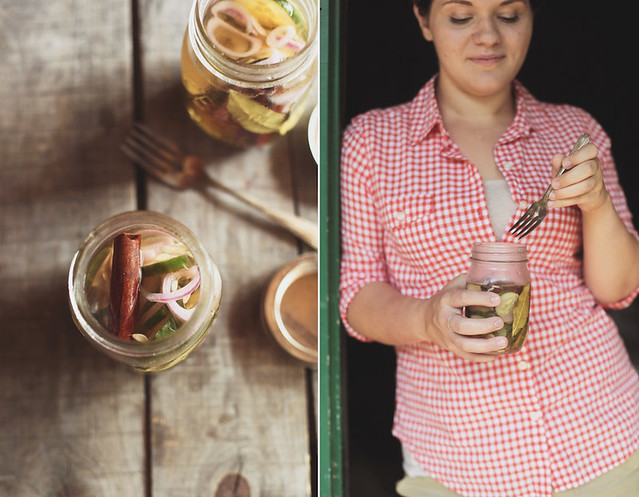
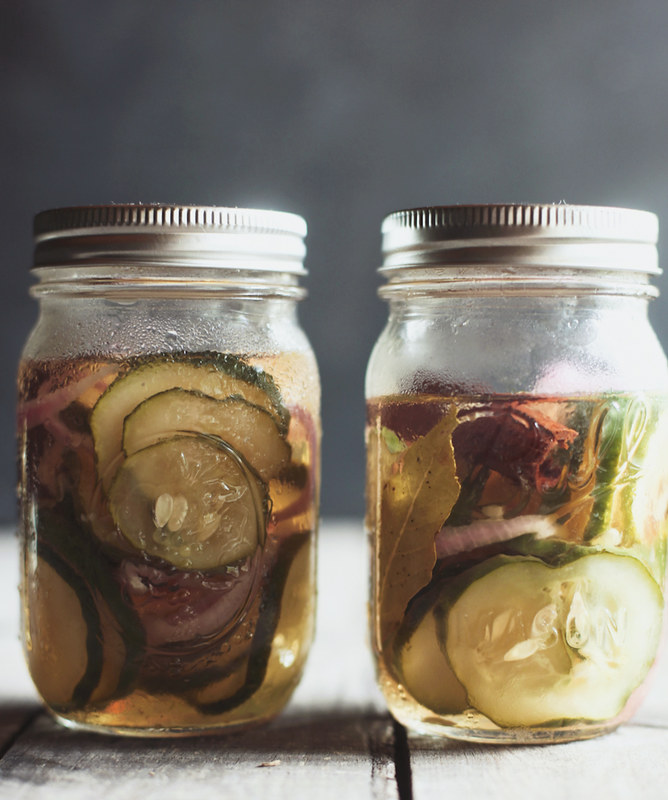
Quick Sweet Pickles 20 Jul 2012 1:17 PM (12 years ago)
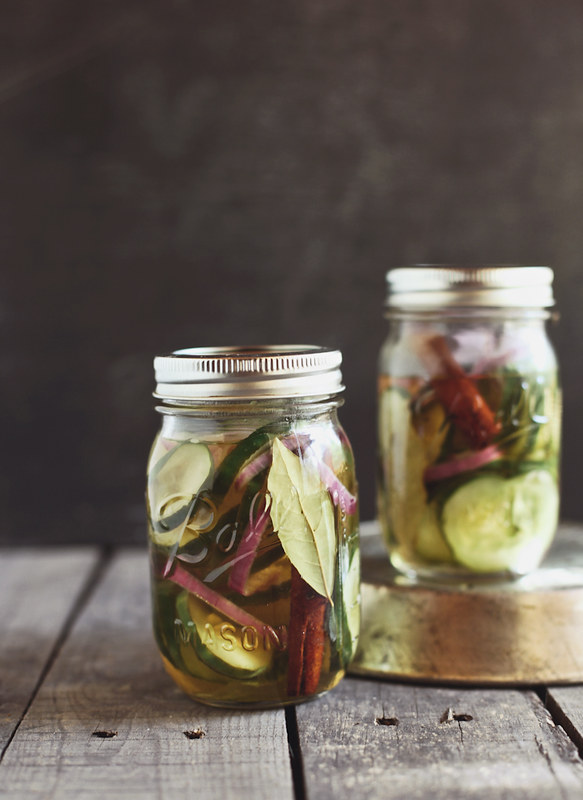
Yesterday, I made pickles for the first time. With cucumbers grown right outside my door, meticulously cared for by my sister. Happy, happy things.
My oven has been broken for weeks now so I haven’t been baking. I’ve missed it and I had a hankering to get back in the kitchen. I looked at all the cucumbers piled up on my counter and thought about the pickles I’d had at a little cafe a few days before. I wanted to try and recreate the flavor. They were sweet & a little tangy, so I added some sugar, cinnamon & red onions. I stuck them in the fridge overnight, excited to see how they’d turn out.
This morning I opened them up and had a taste. They are so good! I may have done a little jig. A perfect birthday present to myself (22 today!).
If you’ve got some free time this weekend and you’ve never made pickles before, I say give it a try. It’s much easier than you think.
Quick Sweet Pickles
Adapted from here
Ingredients
6 kirby cucumbers or 2 regular cucumbers
1/4 cup kosher salt
1 cup water
1 cup apple cider vinegar
1/2 cup sugar
1 tablespoon mustard seed
1 cinnamon stick
3 cloves
1 bay leaf
Directions
Wash and dry the cucumbers. Using a sharp knife or a mandolin, slice the cucumbers thinly and place in a colander. Sprinkle with the salt and toss to coat. Place the colander over a bowl and allow it to sit, covered, for about 1 hour. Rinse off the salt and dry the cucumber slices well. Place them into a sterilized quart jar, along with the onion.
In a small saucepan add the remaining ingredients. Stir to dissolve sugar and bring to a boil. Remove from heat and allow it to cool. Pour the brine over the cucumbers in jar. Cover and refrigerate at least 4 hours, preferably overnight. Will keep, refrigerated, for about 2 weeks.
Sterilizing Jars
Properly handled sterilized equipment will keep canned foods in good condition for years. Sterilizing jars is the first step of preserving foods.
Sterilizing Tips:
Jars should be made from glass and free of any chips or cracks. Preserving or canning jars are topped with a glass, plastic or metal lid, which has a rubber seal. Two piece lids are best for canning, as they vacuum seal when processed.
Before filling with jams, pickles or preserves, wash jars and lids with hot, soapy water. Rinse well and arrange jars and lids open sides up, without touching, on a tray. Leave in a preheated 175 degree F oven for 25 minutes. Or boil the jars and lids in a large saucepan, covered with water, for 15 minutes.
Use tongs when handling hot sterilized jars, to move them from either boiling water or the oven. Be sure tongs are sterilized too, by dipping the ends in boiling water for a few minutes.
As a rule, hot preserves go into hot jars and cold preserves go into cold jars. All items used in the process of making jams, jellies and preserves must be clean. This includes any towels used, and especially your hands.
After the jars are sterilized, you can preserve the food. It is important to follow any canning and processing instructions included in the recipe and refer to USDA guidelines about the sterilization of canned products.
.%3Cbr%20/%3E%3Cbr%20/%3E%3Ca%20href%3D%22http://www.flickr.com/photos/honeyandjam/7611569962/%22%20title%3D%22asarah%20by%20hannah%20*%20honey%20%26amp;%20jam,%20on%20Flickr%22%3E%3Cimg%20alt%3D%22asarah%22%20height%3D%22497%22%20src%3D%22http://farm9.staticflickr.com/8162/7611569962_213023c8d0_z.jpg%22%20width%3D%22640%22%20/%3E%3C/a%3E%3Cbr%20/%3E%3Cbr%20/%3EIf%20you%E2%80%99ve%20got%20some%20free%20time%20this%20weekend%20and%20you%E2%80%99ve%20never%20made%20pickles%20before,%20I%20say%20give%20it%20a%20try.%20It%E2%80%99s%20much%20easier%20than%20you%20think.%20%3Cbr%20/%3E%3Cbr%20/%3E%3Ca%20href%3D%22http://www.flickr.com/photos/honeyandjam/7611567654/%22%20title%3D%22IMG_1539%20copy%20by%20hannah%20*%20honey%20%26amp;%20jam,%20on%20Flickr%22%3E%3Cimg%20alt%3D%22IMG_1539%20copy%22%20height%3D%22800%22%20src%3D%22http://farm9.staticflickr.com/8292/7611567654_6ceebc9f45_c.jpg%22%20width%3D%22668%22%20/%3E%3C/a%3E%3Cbr%20/%3E%3Cbr%20/%3EQuick%20Sweet%20Pickles%3Cbr%20/%3EAdapted%20from%20here%3Cbr%20/%3E%3Cbr%20/%3EIngredients%3Cbr%20/%3E%26nbsp;%26nbsp;%26nbsp;%206%20kirby%20cucumbers%20or%202%20regular%20cucumbers%3Cbr%20/%3E%26nbsp;%26nbsp;%26nbsp;%201/4%20cup%20kosher%20salt%3Cbr%20/%3E%26nbsp;%26nbsp;%26nbsp;%201%20cup%20water%3Cbr%20/%3E%26nbsp;%26nbsp;%26nbsp;%201%20cup%20apple%20cider%20vinegar%3Cbr%20/%3E%26nbsp;%26nbsp;%26nbsp;%201/2%20cup%20sugar%3Cbr%20/%3E%26nbsp;%26nbsp;%26nbsp;%201%20tablespoon%20mustard%20seed%3Cbr%20/%3E1%20cinnamon%20stick%3Cbr%20/%3E%26nbsp;%26nbsp;%26nbsp;%203%20cloves%3Cbr%20/%3E%26nbsp;%26nbsp;%26nbsp;%201%20bay%20leaf%3C/div%3E%0A%3Cdiv%3E%0A1%20small%20red%20onion,%20sliced%20thinly%3Cbr%20/%3E%3Cbr%20/%3EDirections%3Cbr%20/%3EWash%20and%20dry%20the%20cucumbers.%20Using%20a%20sharp%20knife%20or%20a%20mandolin,%20slice%20the%20cucumbers%20thinly%20and%20place%20in%20a%20colander.%20Sprinkle%20with%20the%20salt%20and%20toss%20to%20coat.%20Place%20the%20colander%20over%20a%20bowl%20and%20allow%20it%20to%20sit,%20covered,%20for%20about%201%20hour.%20Rinse%20off%20the%20salt%20and%20dry%20the%20cucumber%20slices%20well.%20Place%20them%20into%20a%20sterilized%20quart%20jar,%20along%20with%20the%20onion.%3C/div%3E%0A%3Cdiv%3E%0A%3Cbr%20/%3EIn%20a%20small%20saucepan%20add%20the%20remaining%20ingredients.%20Stir%20to%20dissolve%20sugar%20and%20bring%20to%20a%20boil.%20Remove%20from%20heat%20and%20allow%20it%20to%20cool.%20Pour%20the%20brine%20over%20the%20cucumbers%20in%20jar.%20Cover%20and%20refrigerate%20at%20least%204%20hours,%20preferably%20overnight.%20Will%20keep,%20refrigerated,%20for%20about%202%20weeks.%3Cbr%20/%3E%3Cbr%20/%3ESterilizing%20Jars%3Cbr%20/%3E%3Cbr%20/%3EProperly%20handled%20sterilized%20equipment%20will%20keep%20canned%20foods%20in%20good%20condition%20for%20years.%20Sterilizing%20jars%20is%20the%20first%20step%20of%20preserving%20foods.%3Cbr%20/%3E%3Cbr%20/%3ESterilizing%20Tips:%3Cbr%20/%3EJars%20should%20be%20made%20from%20glass%20and%20free%20of%20any%20chips%20or%20cracks.%20Preserving%20or%20canning%20jars%20are%20topped%20with%20a%20glass,%20plastic%20or%20metal%20lid,%20which%20has%20a%20rubber%20seal.%20Two%20piece%20lids%20are%20best%20for%20canning,%20as%20they%20vacuum%20seal%20when%20processed.%3Cbr%20/%3E%3Cbr%20/%3EBefore%20filling%20with%20jams,%20pickles%20or%20preserves,%20wash%20jars%20and%20lids%20with%20hot,%20soapy%20water.%20Rinse%20well%20and%20arrange%20jars%20and%20lids%20open%20sides%20up,%20without%20touching,%20on%20a%20tray.%20Leave%20in%20a%20preheated%20175%20degree%20F%20oven%20for%2025%20minutes.%20Or%20boil%20the%20jars%20and%20lids%20in%20a%20large%20saucepan,%20covered%20with%20water,%20for%2015%20minutes.%3Cbr%20/%3E%3Cbr%20/%3EUse%20tongs%20when%20handling%20hot%20sterilized%20jars,%20to%20move%20them%20from%20either%20boiling%20water%20or%20the%20oven.%20Be%20sure%20tongs%20are%20sterilized%20too,%20by%20dipping%20the%20ends%20in%20boiling%20water%20for%20a%20few%20minutes.%3Cbr%20/%3E%3Cbr%20/%3EAs%20a%20rule,%20hot%20preserves%20go%20into%20hot%20jars%20and%20cold%20preserves%20go%20into%20cold%20jars.%20All%20items%20used%20in%20the%20process%20of%20making%20jams,%20jellies%20and%20preserves%20must%20be%20clean.%20This%20includes%20any%20towels%20used,%20and%20especially%20your%20hands.%3Cbr%20/%3E%3Cbr%20/%3EAfter%20the%20jars%20are%20sterilized,%20you%20can%20preserve%20the%20food.%20It%20is%20important%20to%20follow%20any%20canning%20and%20processing%20instructions%20included%20in%20the%20recipe%20and%20refer%20to%20USDA%20guidelines%20about%20the%20sterilization%20of%20canned%20products.%3Cbr%20/%3E%3C/div%3E)