Creating Podcasts – Southend Course 13 Feb 2012 3:52 AM (13 years ago)
A podcast is a great way to get your message out to the masses. Whether you’re planning to create a podcast for business or for pleasure, it may be tricky working out how to get started.
One of our team runs a course called “Creating Podcasts” in Southend-on-Sea, and if you’re interested in getting started in the world of podcasting, this course might be of help.
On the course, you will learn how to create your first podcast and how to build a loyal audience. The course explores today’s podcasting community, and helps with creation and marketing of your podcast.
Course Information:
The course is run by an award-winning podcaster, and takes place either on a weekday evening, or on a Saturday morning. Here is a summary of what’s covered on the “Creating Podcasts” course:
- Overview of Podcasting
- Podcast Equipment – What you need to get started
- Recording a podcast (using Audition and Audacity)
- Packaging a podcast (audio tagging)
- Publishing a podcast
- Podcast Promotion
- Podcasting Q&A
Course Details:
The course is one of the many Weekend and Evening courses run at South Essex College in Southend-on-Sea.
- Price: At the time of writing, the course is £65
- Course duration (Evenings): 4 weeks, start time 7pm, ending at 9:30pm. Normally on a Monday
- Course duration (Saturday): 3 weeks, start time 10am to 1pm
- Location: South Essex College, Luker Road, Southend-on-Sea. Next to Southend Central Station (Liverpool Street line)
For information on the next course, please contact us.
The post Creating Podcasts – Southend Course first appeared on Podcast Advice.Podcasts on the iPhone 2 Oct 2011 11:40 AM (13 years ago)
If you’re an avid podcast listener and have an iPhone, you’ll probably be using iTunes on your PC or Mac. Here are a few notes on getting podcasts on your iPhone
Via your desktop computer
The most common way top get podcasts on your iPhone is to get your PC or Mac computer to handle podcast subscriptions, download shows from your home broadband connection, and then transfer them to your iPhone when you sync your iPhone to your desktop computer.
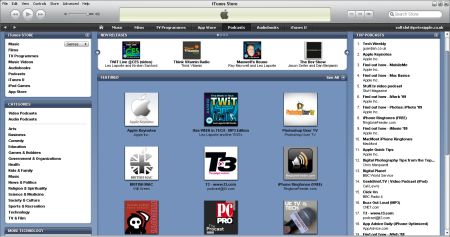
You’ll find a detailed explanation of how to find, subscribe and manage your podcasts in our article: Using iTunes for Podcasts
iTunes on the iPhone
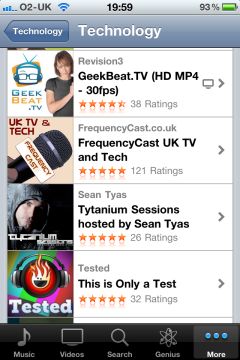
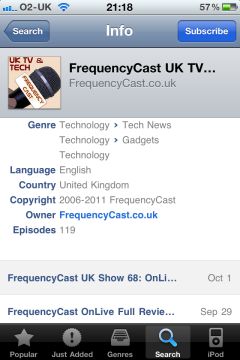
If you prefer not to use iTunes on a PC / Mac, or you want to download a podcast when you’re out-and-about and away from your computer, you’ll be pleased to know that you can download podcasts direct onto your iPhone using the built-in iTunes app. You may think that iTunes on the iPhone is just for buying songs, but it handles podcasts too. Here’s a quick guide:
- Open the iTunes app
- Press the “More” button
- Select “Podcasts” – From here, you can select “hot” podcasts, top ten podcasts, or browse categories. Let’s go for the latter
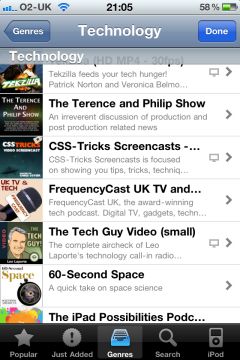
- Select “Categories”, and pick a category you’re interested in – You should get categories for “New and Noteworthy” and “What’s Hot”
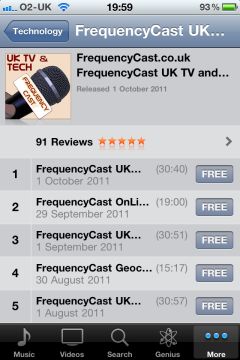
- Pick a podcast. It will open up the episode list view
- Select a show to download. Press the “Free” button, which will change to “Download”
- The download will start using your current Internet connection
- When it’s being downloaded, it will appear in iTunes > More > Downloads
Once downloaded, the podcast will be available in the iPod application under ‘Podcasts’
|
|
|
Alternatives to iTunes
In the event you’re not a fan of iTunes, or you want a little more control of your podcasts, you might want to give the excellent Instacast podcast management application.
Here’s what Instacast lets you do:
- Stream or pre-load podcasts in the background
- Control playback speed
- integrated web browser for show notes
- Podcast directory with over 22,000 podcasts
- Import podcasts from your iTunes subscription
- Add a podcast manually by typing or pasting in the podcast feed URL
- Sharing via email, Facebook and Twitter
Here are a couple of screenshots of Instacast in action:
|
|
|
If you fancy a more powerful podcasting application for your iPhone – this is the one! More details: Instacast on the App Store
Related links
The post Podcasts on the iPhone first appeared on Podcast Advice.
Copying audio from cassette 1 Jun 2011 9:21 AM (13 years ago)
If you’re looking to include audio from your old archive of cassettes in your podcast, you need to find a way to get the audio copied over to your PC.
You may be able to connect the audio output of a cassette machine to a “line in” socket on your computer’s soundcard, but this is often tricky, and there may be an issue with sound quality. A better option may be to use a dedicated audio cassette player that connects to your computer using USB.
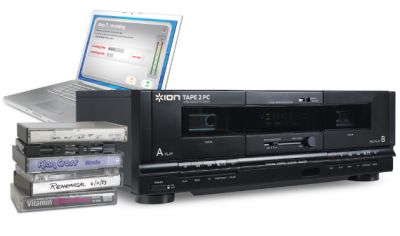
One product that’s worth a look is the Tape 2 PC desktop USB cassette player, available from Maplin and Play.com. Pictured below, this has two cassette drives, for dual-dubbing, and you can connect it either to a computer for archiving, or to your hi-fi for playback of cassettes on a home audio system. It comes with software to allow easy conversion to MP3 and WAV formats.
As an alternative, there’s the ION Tape Express, which in our experience is less good, but does the job. This is a Walkman-sized cassette player that runs on batteries. It has auto-reverse so that you can dub both sides of a cassette in one go, and has a headphone socket so you can use it as a portable cassette player. Tape Express is available from I want One Of Those and Maplin.
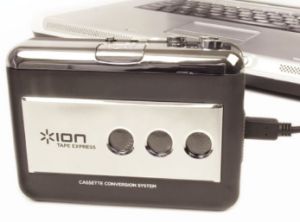
If you’re only interested in transferring a handful of cassettes, the smaller Tape Express will do the job, but the “Tape 2 PC” makes for a better tool if you have lots of cassettes to archive.
The Record U Option
There’s one other product that can be very handy for converting audio tapes (including micro cassettes), as well as converting your old vinyl. A product called Record U is a small box that connects to your computer’s USB and allows you to connect an existing player (a hi-fi cassette deck, Walkman, dictation machine, record deck, etc). This can be very handy if you have a recorder or player, and just want to transfer off audio into a digital format.
The Record U has two phono sockets, and a Recording Volume control, so that you can adjust the levels that get recorded onto your machine.
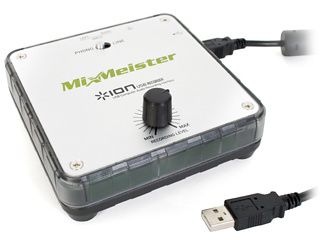
The Record U is available from Firebox and Maplin
Recording Software
As one of our commenters suggests below, once the cassette audio has been copied to your computer, you might want to use the Audacity package to “tidy up” the recordings – perhaps removing hiss and silence between tracks.
The post Copying audio from cassette first appeared on Podcast Advice.Podcast Audio Meta Tags 9 Apr 2011 12:58 PM (14 years ago)
Once you’ve created your audio podcast, there’s one step before you release the podcast, and that’s adding a few tags to the audio file.
What are MP3 tags?
These are bits of information (text and images) that are embedded in the MP3 file.
Tagging an mp3 file adds extra information that helps the listener, and helps identify the podcast when it’s been downloaded and played.
The important tags to add to your podcast are:
- Title – The name of the show
- Album – The name of the podcast brand
- Genre – Set to “Podcast”
- Cover Art – A picture of your podcast brand
- Lyrics – Handy for adding your show notes
Tagging Tool (Windows 7 / Windows Vista)
Our tool of choice is the excellent MP3Tag, which is free!
Tagging Tool (Windows XP)
If you’re a Windows XP user, then there’s a must-get tool to allow you to tag your podcast – AudioShell.
Install it, and then when you right-click on any MP3 file, you can edit the file’s ID3 meta tags. All of the important podcasting tags are supported.
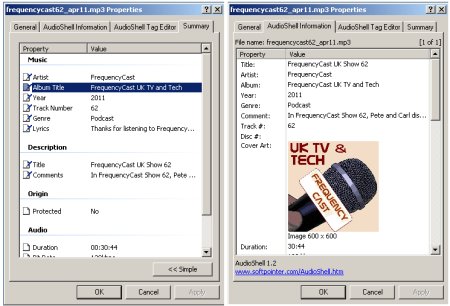
We’d highly recommend AudioShell to all Windows podcasters – and best of all, it’s free. You can download AudioShell from www.softpointer.com
If you’re running Wondows
The post Podcast Audio Meta Tags first appeared on Podcast Advice.SE Project Reflexion Filter Review 4 Apr 2011 3:42 AM (14 years ago)
There’s one big issue that affects podcasters recording their voice at home, and that’s the “sound” of the room, or the room’s acoustics.
In a home recording studio, there are frequently noises that are noticeable on recordings – the fan on your PC, people in other rooms, noise from outside (such as traffic, or birds twittering outside your window). one of the other big pitfalls is sound reflection – where your voice bounces off the painted walls, windows or fixtures in the room, meaning that you can “hear” the room that you’re recording in.
Fixes for problems with room acoustics isn’t cheap – you’re either looking at buying expensive soundproofing material, or getting a voice booth (a soundproofed cupboard) for your recording. Neither are cheap.
DIY solutions such as hanging your duvet on the wall behind you can make a difference, as can using thick wallpaper, not paint, to decorate your room, but thanks to the product we’re looking at on this page, there is a decent compromise – The sE Electronics Reflexion Project Filter.
Before we look at this in-depth, note that there are two products out there from SE. There’s their full-price Reflexion Filter (costing over £200), or their “Project” version, which is almost as good and available for just over the £100 mark.
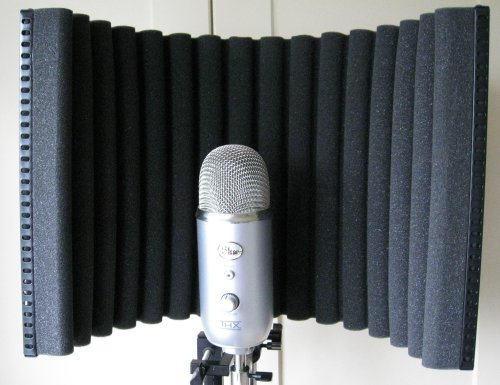
We’ve been using the Reflexion Project to record some of our podcast content recently, and have been very impressed with the way it works. Effectively, it’s a portable “voice booth” that surrounds your mic with 180 degrees of high quality sound diffusing and absorbing material. The practical upshot is if you use this for recording your voice, you will dramatically reduce the amount of room ambience that gets recorded.
The science bit:
The Reflexion works using various layers – acoustic absorptive material at the front, a layer of punched aluminium to allow sound through and diffuse it, absorptive wool, aluminium foil to dissipate energy and break up the LF, plus an air gap as an acoustic barrier. The Reflexion prevents reflected sound from reflecting back from the rear and sides of the mic, without adversely affecting the polar pattern of the microphone.
The Reflexion Project is extremely well-made. The makers have been blatant in pointing out that, due to the number of cheaper imitations out there, they’ve brought out the “Project” as a budget alternative to their £200 flagship product. For us, this budget version doesn’t disappoint.
Fitting the Reflexion
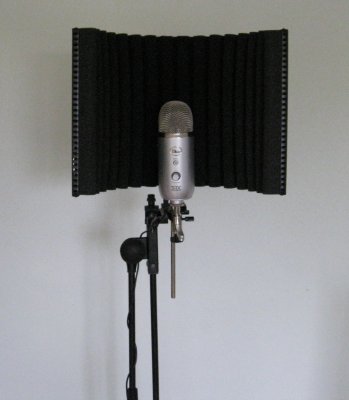
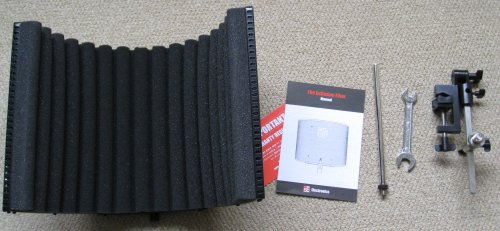
The Reflexion Project kit comes with all of the required stuff to mount it on an existing mic stand (even including the spanner). Getting it connected is fairly straightforward. Essentially, you clamp the main bracket onto your mic stand, then attached the mic to the bracket. There’s a track that allows you to slide the mic backwards and forwards – the further back, the less reflections. Once put together, it does look slightly unwieldy, but at the end of the day, it’s there to do a job, and not to look pretty.
We’re using ours with a basic adjustable mic stand, a pop shield, and with our mic of choice (for the moment), the Blue Yeti USB Microphone.
Summary
We’re very impressed with the SE Reflexion Project Filter. We’re actively using this on our podcasts at the moment, and it’s great for largely killing problematic room acoustics for us, as well as killing computer fan noise on our recordings.
We got ours from Absolute Music, but as they haven’t let us join their online promotion scheme, we’re offering links to the Reflexion range from two alternative equipment sellers. For more details check out the Reflexion at Gears for Music.
Other links
The post SE Project Reflexion Filter Review first appeared on Podcast Advice.Home Studio Kit Suppliers 16 Mar 2011 1:36 AM (14 years ago)
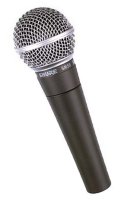 If you’re looking to record your voice at home, there are a number of things you may need. These include:
- A microphone
- Headphones
- A mic stand
- A pop shield
- Soundproofing
- A mixer
If you’re looking for a UK supplier for the various bits of kit you need, here are our recommendations:
For the basics, such as mic stands, cables, pop shields and a selection of mics, there’s maplin.co.uk
For the more professional end of the market, you’ll find a top selection of recording equipment at Gear 4 Music
The post Home Studio Kit Suppliers first appeared on Podcast Advice.Measuring Your Podcast Stats 6 Jan 2011 7:18 AM (14 years ago)
Once your podcast has been released to a waiting world, you’ll no doubt be wanting to see how popular your podcast is, and find out who’s downloading it.
The problem with podcast stats
There are several reasons why getting accurate information on your show’s listeners isn’t easy:
- The most popular podcast platform, iTunes, doesn’t provide stats to publishers
- Not everyone uses iTunes – either they use another podcast ‘podcatcher’ application, or they download the podcast direct from your site
- Rather than downloading shows, many people “stream” the shows from a web browser, mobile phone or an Internet radio. Streaming vs downloads is not easy to track and differentiate
- Using downloads as a statistic doesn’t always help – some may set software to automatically download a range of shows that they don’t listen to, some may download the same show many times, and some podcast distribution services host audio and share it from their servers, not yours, making it harder to track
- When stats show a download, it’s not clear if the person started to download the show and cancelled, perhaps only hearing a few seconds.
In many cases, it’s best to keep two sets of stats – how many times shows have been downloaded, and how many people subscribe to your podcast feed. You can use this information to view trends (increase/ decrease) as opposed to an actual fixed audience size.
Here’s our recommended list of the ways that you can keep an eye on your podcast download stats:
Subscriber stats with Feedburner
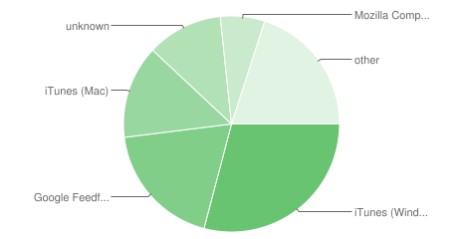
This is our top recommendation. By using the free Feedburner service to distribute your podcast’s RSS feed, you can get some excellent information about how many active subscribers you have, how your users interact with your feed, what software people are using to download your podcast, and where in the world your clicks are coming from.
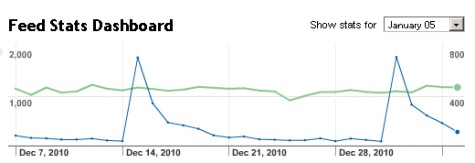
Feedburner is owned by Google, free to podcasters, and highly recommended. Sign up at www.feedburner.com, put in your podcast RSS feed, and it will give you a Feedburner address (e.g. http://feeds.feedburner.com/frequencycast). Use this feed address with iTunes and on your website, and you’ll be able to get free stats from the Feedburner website.
Podcast stats with Podtrac and BluBrry
If you’re after another source of information your podcast downloads, it’s also worth taking a look at Podtrac or Blubrry. These are free web-based service and essentially, you prefix your podcast file address with their tracking code. For example, your podcast address http://www.mypodcast/show1.mp3 would become http://www.podtrac.com/pts/redirect.mp3/www.mypodcast/show1.mp3
Use this new address for each podcast on your website, or in your podcast RSS feed, and each time that a download request is made, that request goes through the service and they track downloads for you.
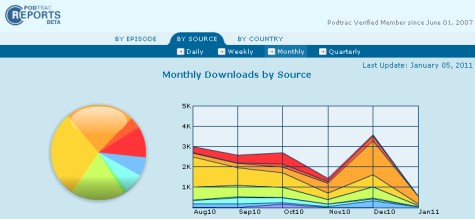
With Podtrac, you get to see the following:
- Downloads by day / week / month / quarter
- Download source (how people are downloading shows – from iTunes or direct from your site)
- Download locations – Which countries are the most popular downloaders of your shows
With Blubrry, you can have stats mailed to regularly, or view them online. Stats on offer include:
- Browsers, Clients and Platforms
- Top countries
- Top referring sites
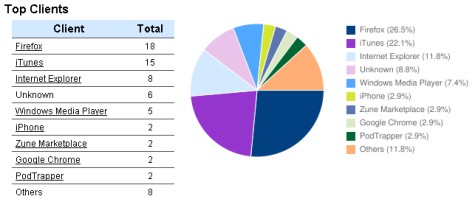
You can sign up for free at www.podtrac.com or at www.blubrry.com (with Blubrry, the basic service is free and a premium service requires subscription)
Download stats from your site
One of the best indicators of stats is how many times each show is downloaded from your website. In many ways, this is the best way to keep track of how many people are accessing shows. Assuming your podcast is hosted on your own website, then that site should have some tracking software as part of the hosting package. Many sites use AWStats, some use Webalizer, and there are other packages out there.
Web stats software is most commonly used to generate information about how many people visit your website and which pages are the most popular. They measure how many HTML web pages have been requested from the server. This software is also able to measure how many requests have been made for each mp3 podcast, so is a good guide to each show’s popularity.


Check out your web hosting stats and see if you can use these to get a feel for downloads. It’s also helpful to see how many people are visiting your podcast’s webpages and show notes too.
iTunes Ranking
As we mentioned above, iTunes don’t release podcast stats to podcasters. What you can get though, is a listing of top rated podcasts in the iTunes podcast charts. This is only helpful if your podcast is fairly popular.
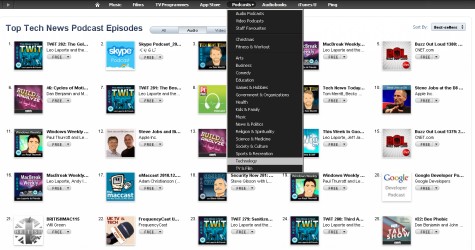
The iTunes podcast charts are a little tucked away. To find the, open iTunes, go to the Podcast Directory and at the top, select the pulldown from Podcasts (see screenshot:)

Select the category, then look in the right-hand column for the “Podcast” category of “Charts” and select “See All”. You’ll now see a numbered list of podcasts in that category.
Got a tip about podcast stats? Let us know below…
The post Measuring Your Podcast Stats first appeared on Podcast Advice.Creating Podcast RSS Feeds 6 Jan 2011 5:26 AM (14 years ago)
What is an RSS feed?
This is a single text file containing data that’s used by podcast distribution services (like iTunes), and podcast ‘catching’ software used by end-users.
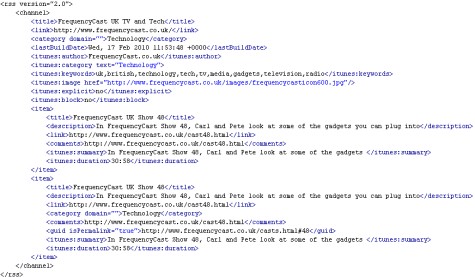
The RSS feed contains information on the podcast’s title, episodes, location of downloads, description, category and location of image files associated with the podcast
Here’s what an RSS podcast feed looks like:
How do I create a podcast RSS feed?
The RSS feed is a text file, you if you were adventurous, you could code it by hand using a text editor like Windows Notepad, although because the syntax has to be 100% right, you’ll really want to be using a tool.
A podcast RSS feed contains two sets of information – details of the podcast as a whole, then details of each individual episode of the podcast.
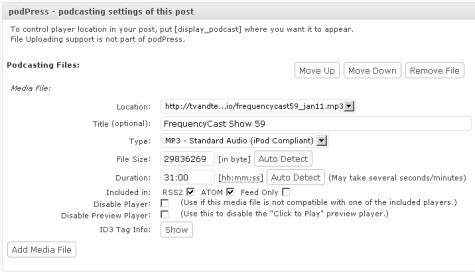
If you’re using WordPress (the leading free content management software) for your website or podcast, then there’s a great plug-in that makes releasing a podcast easy. For more details on the PodPress plug-in, see the PodPress website. It’s free.
Alternatively, there’s a rather handy application called FeedForAll, which does a great job of handling podcast feeds – You can download a trial at download a free trial, or get a copy from Feedforall
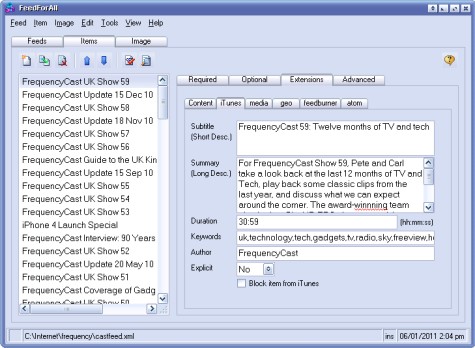
Once you have your RSS feed text file, upload it to your website.
iTunes and RSS feeds
If you’re submitting your podcast – and you really want to be doing that, as iTunes is the number 1 podcasting platform, then you’ll need to make sure that your podcast RSS feed contains some specific iTunes tags, including a tag for the iTunes store artwork, iTunes categories and keywords, as well as good descriptions for your podcast and for each episode of your podcast. Both PodPress and FeedForAll have built-in support for the iTunes tags.
You can find full details f what’s required on the Apple iTunes Podcast Tech Specs page.
Managing your RSS feed
Once you have your RSS feed, you need to check that is works. To do this, use an XML validator. Go to http://validator.w3.org/ and paste in your feed’s address – this will check for errors. The results can be a little complex, but running a validation is important to ensure that your feed isn’t broken. The FeedForAll app mentioned above includes a built-in validator, which makes feed creation a lot easier.
One other thing worth considering, is using the Feedburner service. This is a free RSS management service run by Google. Using this service, you set up a free account, and submit your feed (or feeds). Each feed will have a unique address, such as http://feeds.feedburner.com/frequencycast – and this is the address that you use to tell the world about your podcast. The advantage of using this service is that you can get information and stats about who’s using your podcast feed, and the service has a bunch of other tools to help you enhance and promote your feed. Sign up free at www.feedburner.com
Other links
The post Creating Podcast RSS Feeds first appeared on Podcast Advice.Pop Shields and Podcasting 11 Aug 2010 10:38 AM (14 years ago)
If you’re recording voice for podcasts, you need to be aware of the dreaded “Pops”.
What is a “pop”?
This is very easy to demonstrate. Hold the palm of your hand an inch away from your mouth and say “Peter Piper Picked a Peck of Pickled Peppers”. You should be able to “feel” each of the “p” sounds hitting your hand. These are known as “plosives”, and when you say words starting with a “p” or a “b” into a microphone, the diaphragm in the microphone reacts much is your hand does, causing an unwanted popping sound in your recording.
Pop Shields
The quick and cheap way to stop getting the pop effect, is to equip your microphone with a pop shield. These reduce breath noises pops, and in some cases sibilance (a hissing noise on the letter “s”).
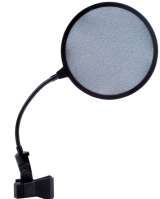 A few decades ago, pop shields were made by its stretching nylon stockings across a coat hanger and positioning that in front of a microphone. For under £10, you can get a large pop shield, which is a piece of acoustically transparent material attached to a flexible gooseneck. This is clamped onto your microphone stand, and can be angled to achieve the perfect position, which is normally an inch or so away from the microphone.
Pop shields are great at removing unwanted “P” and “B” sounds, as well as in some cases, sibilance, without losing sound quality.
Maplin offer two pop shields – the large one has a diameter of 169 mm, and the small has a diameter of 118 mm. Pop Shields @ Maplin
Wind Shields
These pop Shields are fine for studio and home recording, but if you are out on location, you may need a shield of a different kind of protection – a Windshield.
 The microphone windshield is a foam covering for the main part of your microphone. These are ideal for suppressing wind noise, as well as dealing with closely the breath sounds and pops. That can supply a small and large microphone windshields for just a few pounds.
For Pop Shields and Windshields, visit the Maplin website at www.maplin.co.uk
See also:
- Sound-proofing and acoustics – Better quality home recordings
Soundproofing and acoustics for podcasters 11 Aug 2010 10:28 AM (14 years ago)
Talk to any home podcaster or voiceover artist, and they will tell you that one of the perils of recording at home is that of the acoustics of the room used for recording.
Professional recording studios are equipped, at great expense, with special soundproofing material, but the cost of such soundproofing is out of the reach of home podcasters and voiceover talent, and many homes are not best suited for recording voice – painted walls, reflective windows, and non-absorbent wall-coverings will all result in sound waves being bounced around your room and picked up by your microphone.
The second hazard in home recording is background noise – your PC fan, other people in the house, passing traffic, and even a purring cat can all be picked up by your mic, and with many listners using inner-ear headphones, extraneous background noise can be a serious distraction.
So what is the answer? Putting your walls in non-reflective material, closing your curtains and covering your noisy PC with something that absorbs fan noise can all lessen these effects.
A Voice Booth
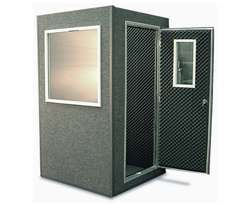
If you’re serious about recording at home, you may find that a sound booth, is the answer – you can buy a rather snazzy home walk-in voiceover booth from Dolphin Music, but priced at over £3,000 this may be out of your reach.
Portable Reflection Filter
Rather than going to the expense of treating your room acoustically, there’s a rather handy solution from SE Electronics, the portable Reflexion Filter. Our podcast team’s using one of these at the moment, and reaping the benefits.
Effectievly, this fixes to your mic stand, and near-on eliminates reflection from behind and to the sides of a microphone. It’s great for reducing reflections, echoes and background noise. If you’re recording in a room that has not been acoustically treated, this product could be the answer.

There are two products in the Reflexion family, the Professional and Project versions, the latter being around half the price. These have been scientically created to reduce nasty room noise, and are surprising effective. We’ve reviewed ours here: Reflexion Project Acosutic Filter Review.
We alos note that Maplin has brought out a similar solution – their Portable Microphone Absorber and Diffuser, whch claim to surround your microphone and reduce the transmission of unwanted room influences such as reflections. At the time of writing, this audio diffuser is only available via the Maplin website, and not in Maplin branches. We’ve not tried it.
For more details on the Reflexion Project Filter, see Reflexion at Dolphin Music or Reflexion at Gears for Music.
On a budget
If your budget doesn’t stretch to the Absorber and Diffuser the minimum that you should invest in is a pop shield for your microphone to reduce breath noises as much as possible, and do what you can to “dampen” the sound in your room using curtains, or strategic draping of a duvet (as one of our team did in their early podcasting career!).
