Google Translate! 16 Jun 2023 8:53 PM (2 years ago)

Bạn,
Google Translate thật tài ba, không những nó giúp mình dịch, mà mình có thể tải lên một tài liệu dạng doc hay pdf, dưới 10MB, và dưới 400 trang nó sẽ dùng AI dịch và gửi về doc hoặc pdf cho mình tải về !!!
Cái lợi nhất là cho việc học. Nếu mình viết bản gốc bằng tiếng Việt, rồi nói nó dịch qua thứ tiếng mình muốn học, mình rất dễ nhận diện từ vựng mới của bản dịch, vì mình đã rành rọt chữ mình viết xuống từ bản gốc:
Pháp:
https://drive.google.com/file/d/1tKvC9hc3UbGYqBbBHpeG-jRyYXaHa6z8/view?usp=drive_link
Ý:
https://drive.google.com/file/d/1cRlV6CEnxceyYGgeyhV-8z2g8FTqQeox/view?usp=drive_link
Anh Mỹ:
https://drive.google.com/file/d/118D-9nH4eehl_z6AVrGrSrlbeXHnfH1p/view?usp=drive_link
Việt:
https://drive.google.com/file/d/1VOuLpSKrRBLvBeisLM-aSbaYEsks-IlS/view?usp=drive_link
Thí dụ:
Quyển ebook bạn sắp xem là tuyển chọn lại những bài viết và mà tôi đã đăng rải rác trên liên mạng và trên trang blog từ năm 2006 đến năm 2019. Từ khi sách Ebook này chào đời đến nay là tái bản lần thứ bảy.
thì tiếng Ý là:
L'ebook che state per vedere è una selezione di articoli che ho pubblicato
sparsi per internet e sui blog dal 2006 al 2019. Da quando è nato questo
Ebook, è la settima edizione.
Mời vào trang này để tải văn bản lên cho Google Translate nó dịch:


Archived Post: What is a widget, after all? (Part1) 19 Sep 2008 4:58 AM (17 years ago)

Dear Friend,
Widget, widget, widget. You can't stop talking about the New Blogger without mentioning the buzzword "widget." So what is it really, and what can we do with it? This two-part article provides a gentle, non-programming-jargon introduction to Widget.
Widget as visual component
One of the main selling point of the New Blogger over Classic is the introduction of the drag-and-drop Page Elements. I still remember vividly the first time I played around with it. I had seen and used similar visual layouts before (Visual Basic or Visual C++ GUI tools,) but to me it was such a great experience, and still is.
Like your labels to show up on the main area instead of on the sidebar? No problem, just drag, save, and see the result. Dragging back to its own place is just as easy! How about moving it up or down, sneaking between two other widgets? Again the visual interface is just so simple - yet elegant, it moves gently all other widgets down and make a blank dotted window for the dragging widget to fit in. This visual interface makes the act of moving "things" around your webpage really easy now, as it helps speed up the designing process quite a bit. 
moving the "Label" widget from the sidebar ...
... to the main area.
Widget as textual component
Two weeks into introducing the Page Elements (around August 2006,) Blogger finally revealed the code behind the scene. For the first time, hackers alike could investigate what made the widget worked the way it was. In my opinion, the template itself has an ingenious design philosophy. The template allows code to be packaged in a neat and isolated way, sophisticated enough to expose data in myriad yet easy-to-guess and organized fashion. The extraction-of-data process could be achieved with just several simple loops and if statements over a clever way of accessing data based on their widget type only.
The Blogger Help line documents this very well, along with the data exposed of each kind of widget. Unfortunately, I think the way Blogger explains is a tad difficult to completely understand what the system is all about.
In the next section, I will try to explain to you the inner working of the "Label" as a sample of a typical widget. This article, thus, is a continuation of my explanations about template code:
- Understanding the New Blogger Template (1)
- Understanding the New Blogger Template (2)
- Understanding the New Blogger Template (3)
I hope you have had a chance to look at all three of them before moving on to the next section. At the end of the third article, we were seeing lots of widgets in their simplified (declaration) form. Now, let's open up one of the easiest but very useful one, namely the "Label" widget.
Going inside the Label Widget
Below is the code of the widget. I put the line number at the start of each line so I could talk about it in a more effective way.
01. <b:widget id='Label1' locked='false' title='Labels' type='Label'>
02. <b:includable id='main'>
03. <b:if cond='data:title'>
04. <h2><data:title/></h2>
05. </b:if>
06. <div class='widget-content'>
07. <ul>
08. <b:loop values='data:labels' var='label'>
09. <li>
10. <b:if cond='data:blog.url == data:label.url'>
11. <data:label.name/>
12. <b:else/>
13. <a expr:href='data:label.url'><data:label.name/></a>
14. </b:if>
15. (<data:label.count/>)
16. </li>
17. </b:loop>
18. </ul>
19.
20. <b:include name='quickedit'/>
21. </div>
22. </b:includable>
23. </b:widget>
Before getting in some more details in the second part of the article, let's find out what's going on here in general. I will explain what the widget does line by line.
Explaining the internal code
Line 1 declares that this is a widget of type "Label," with its unique identification id='Label1' (to be stored somewhere inside one of Google's servers,) with the title "Labels" to be seen by viewers. Also, the "locked" setting is set to "false", meaning you could freely drag this widget to anywhere inside the Page Elements.
Line 23 closes the widget. This means that any line from 2 to 22, the data exposed will be of type "Label". From the Blogger help line, we see that we could only retrieve four distinct kind of data: first the title of the widget (data:title); and, for each found label of your entire hompage, we can access its name (data:label.name), the post count for each label (data:label.count), and the url of the link to a page displaying posts with this label (data: label.url).
Each widget allows many subordinate functions to stay inside. For example, you could consolidate redundant code into a function, to be called many times during the widget's lifetime. I have an example of such creation of function here.
By default, each widget must always have a special function with identification id='main'. It's sort of like your house's front door. Everybody enters your house must go though this front door, even yourself. There's no shortcut allowed, such as the garage door, the back door, or anything like that. It's just a rule that we must simply obey.
Line 2 starts the main includable and line 22 closes it. This means that the widget only contains within itself one function only, that is the "main" function ( it is acually is called includable in Blogger's terminology.)
This function does several things.
Line 3 through 5 checks to see if the title has text, if so, it displays the text inside a pair of h2 tags.
Next, line 6 and line 21 opens and closes a pair of "div" tags with the class "widget-content." This setting, (in conjunction with the widget's name, which will turn into another id tag) allows us to have unique presentation settings for the label contents using CSS rules.
Line 7 and line 18 opens and closes a pair of ul tags. This allows the labels displayed as a bullet list.
Line 8 and line 17 opens and closes a pair of special template tags b:loop. This loop is reponsible for exposing each label data one at a time from start til end of the set of available labels.
Inside the "b:loop", there are some texts which are going to be put inside a pair of li tags. For example, if we have five labels, we should have a list with a core layout like this:
<ul>
<li>(some text here for label 1)</li>
<li>(some text here for label 2)</li>
<li>(some text here for label 3)</li>
<li>(some text here for label 4)</li>
<li>(some text here for label 5)</li>
</ul>
Indeed, line 10 and line 11 say that if the current page is the same as the label's url (line 10,) which means that you are already in that label querying page, then just show the name only, but not with the link under it. (line 11)
Otherwise, or "else", in computer's lingo (line 12), shows a link and the text represents it ( line 13)- which is the label itself.
Along with the label, the widget shows the head count (in a pair of parentheses) of how many posts the current label (in the loop) is assigned to.
Finally, line 21 shows the widget's edit button, allowing you to edit the contents or settings of the widget while viewing the page live. This function is a kind of global and hidden function, since it could be place anywhere, yet not a single line of code on how this widget button actually composed of.
You are at the end of part 1 of this "Widget 101" article. On the second part, I will delve more into the internal working of a widget, as well as offering you some simple "tweaks" (or "hacks") on changing the widget's appearance. I will also provide proofs to my assertions why the new template is indeed an ingenious design. Finally, I will talk about how I (and other people) have been extending these widgets to provide more functionalities with the help of the JavaScript programming language and JSON callback technique.
Have a wonderful day.
Hoctro
1/26/07

Archived Post: Adding Google Text Search Utility with Custom Tab Results 19 Sep 2008 4:58 AM (17 years ago)

Dear Friend,
Google Search itself with tabs turns out to be a straight-to-the-point tool, allowing readers to have many tabs to choose results from the same (one) search entry. Based on a request from Phoenix, one of my readers, I have modified the lately revised post on Ajax Search API, yet again, for you to install only this core functionality.
A simple Google Search on my blog gives results from many different sources
Here are the simple instructions:
Step 1: Get the API key from http://code.google.com/apis/ajaxsearch/signup.html. It's quite simple to get one, really.
Step 2: Add the CSS and code to the header, right after the ] ] ></b:skin> tag.
Replace the text in bold in 2 places with you own API key.
<script
src='http://www.google.com/maps?file=api&v=2&key=wW9cday6o7K3g' type='text/javascript'/>
<script
src='http://www.google.com/uds/api?file=uds.js&v=1.0&key=wW9cday6o7K3g' type='text/javascript'/>
<link href='http://www.google.com/uds/css/gsearch.css' rel='stylesheet' type='text/css'/>
<link href='http://www.google.com/uds/css/gsearch_darkgrey.css' rel='stylesheet' type='text/css'/>
<style type='text/css'>
/* primary colors */
.app_gsvsc { color : rgb(153, 170, 221); }
.search-form-complete_gsvsc div.search-form-save_gsvsc { color : rgb(170, 221, 153); }
div.search-form-save_gsvsc { color : #202020; }
/* selected tag */
div.tag-selected_gsvsc { color : rgb(170, 221, 153); }
/* hover colors */
div.more_gsvsc:hover { color : rgb(170, 221, 153); }
div.tag-control_gsvsc:hover { color : rgb(170, 221, 153); }
.search-form-complete_gsvsc div.search-form-save_gsvsc:hover { color : rgb(170, 221, 153); }
.footerBox_gsvsc a:hover { color : rgb(170, 221, 153); }
.playerBox_gsvsc a.title_gsvsc:hover { color : rgb(170, 221, 153); }
/* secondary colors */
div.more_gsvsc { color : rgb(204, 204, 204); }
div.tag-control_gsvsc { color : rgb(204, 204, 204); }
.searchForm_gsvsc { color : rgb(204, 204, 204); }
.search-form-input_gsvsc { color : rgb(204, 204, 204); }
td.edit-form-input_gsvsc input { color : rgb(204, 204, 204); }
div.edit-form-submit-box_gsvsc { color : rgb(204, 204, 204); }
.footerBox_gsvsc a { color : rgb(204, 204, 204); }
.playerBox_gsvsc a.title_gsvsc { color : rgb(204, 204, 204); }
div.edit-tag_gsvsc { color : rgb(204, 204, 204); }
/* special settings, not called out in standard color overrides */
.tiny-results_gsvsc div.tiny-video-result_gsvsc { border-color : #000000; }
.results_gsvsc div.video-result_gsvsc { border-color : #000000; }
.search-form-input_gsvsc {
color : #676767;
background-color : #e0e0e0;
}
.gsc-control {
width: 100%;
}
</style>
<script type='text/javascript'>
var coreSearch;
function SolutionLoad() {
var controlRoot = document.getElementById("searchControl");
// create the search control
coreSearch = new GSearchControl();
coreSearch.setLinkTarget(GSearch.LINK_TARGET_SELF);
coreSearch.setResultSetSize(GSearch.LARGE_RESULTSET);
// prep for decoupled search form
var searchFormElement = document.getElementById("searchform");
var drawOptions = new GdrawOptions();
drawOptions.setSearchFormRoot(searchFormElement);
drawOptions.setDrawMode(GSearchControl.DRAW_MODE_TABBED);
// populate - web, this blog, all blogs
var searcher = new GwebSearch();
searcher.setUserDefinedLabel("The Web");
coreSearch.addSearcher(searcher);
searcher = new GblogSearch();
searcher.setUserDefinedLabel("Blogsphere");
coreSearch.addSearcher(searcher);
searcher = new GblogSearch();
searcher.setSiteRestriction("http://hoctro.blogspot.com/");
searcher.setUserDefinedLabel("Hoctro's Place");
coreSearch.addSearcher(searcher);
searcher = new GblogSearch();
searcher.setSiteRestriction("http://googleblog.blogspot.com/");
searcher.setUserDefinedLabel("Google Blog");
coreSearch.addSearcher(searcher);
searcher = new GwebSearch();
searcher.setSiteRestriction("http://www.blogger.com/");
searcher.setUserDefinedLabel("Blogger");
coreSearch.addSearcher(searcher);
coreSearch.draw(controlRoot, drawOptions);
}
function doCoreSearch(q) {
coreSearch.execute(q);
}
registerLoadHandler(SolutionLoad);
function registerLoadHandler(handler) {
var node = window;
if (node.addEventListener) {
node.addEventListener("load", handler, false);
} else if (node.attachEvent) {
node.attachEvent("onload", handler);
} else {
node['onload'] = handler;
}
return true;
}
</script>
Step 3: Add these new 2 widgets to your blog, following instructions here, section B.4.
<b:widget id='HTML41' locked='false' title='Search Bar' type='HTML'>
<b:includable id='main'>
<b:if cond='data:title != ""'>
<h2 class='title'><data:title/></h2>
</b:if>
<div class='widget-content'>
<div id='searchform'>Loading...</div>
</div>
<b:include name='quickedit'/>
</b:includable>
</b:widget>
<b:widget id='HTML42' locked='false' title='' type='HTML'>
<b:includable id='main'>
<b:if cond='data:title != ""'>
<h2 class='title'><data:title/></h2>
</b:if>
<div class='widget-content'>
<div id='searchControl'>Loading...</div>
</div>
<b:include name='quickedit'/>
</b:includable>
</b:widget>
Step 4: Move around the two just installed widgets, (one for the input of the search, one for the result) in Page Elements. This is how we have a little freedom in moving the search widgets around if need be. 
Notice sometimes you'll see this prompt, don't worry, just click OK.
Notice I could even have a tab as my blog to show the results of the search you are looking for. You could replace my blog with yours by changing the two bold texts to reflect the name and the location of your blog/webpage.
searcher = new GblogSearch();
searcher.setSiteRestriction("http://hoctro.blogspot.com/");
searcher.setUserDefinedLabel("Hoctro's Place");
coreSearch.addSearcher(searcher);
That's it! We're done!
Cheers,
Hoctro
10 December 2006
Blog: http://hoctro.blogspot.com/
Archived Post: Understanding the New Blogger Template 19 Sep 2008 4:58 AM (17 years ago)
Dear Friend,
In an effort to document the inner working of the new Beta templating system, I will try to explain to you in slightly-above everyday language how it works. In my opinion, the new templating system is more straight-forward than the classic one, in that it uses simple logic such as the b:if and the b:loop; but more importantly, it allows the seamlessly mixing of code between Beta and JavaScript, thus provides new possibilities in generating interesting templates.
I assume my target audience has only the very basic knowledge of the code of a simple HTML, and some very basic knowledge of what is an if statement, or a loop statement, in general (I will review what it means though, so don't be scared.) If you know a little bit about CSS, that's great too, but it is not required - since I don't know much either, aside from some simple tweakings of existing CSS code.
1. How Things Work
I remember the first time I ever wrote a simple HTML file. It's really nice to see that you can write something on the body part, and it shows/renders on the page right away. If I put a pair of <b> and </b> around that text, it becomes a bold text, and so on. Then, as I create more and more documents, I have to make links for the user to click on them to jump to other articles.
The problem is, every time I create a new file, I have to go back to every single of my existing files to add a link to this new file. Not only that, if I want to change my site's visual look, I have to edit all these files without exception. You could imagine how chaotic and inconsistent of these files' code after a while.
Templating system to the rescue! Imagine that you have a file that would take care of all the nitty-gritty of maintaining links to all the posts, yet powerful enough so that a simple change to this file such as the site's title would update all the files to appear with the same new look. Well, Blogger Classic did just that, and its users are quite happy with this templating design, along with its free hosting service. (Didn't Blogger just celelebrate its seven-years-in-existence a month ago?)
To be fair, Blogger is probrably not the first nor the only solution out there that offers its users this kind of templating. But along with the new Blogger Beta, the much anticipated templating design does follow Goggle's simplicity trademark by providing a more simple, XML (almost)-compliant version, yet flexible enough that you can extend its functionalities by allowing integration with JavaScript.
2. Beta's template is a HTML file
Let us now looking at Blogger's Beta template by unfolding one layer at a time its very basic structure. To so this, I save one of its design to my desktop, then drag it onto Internet Explorer, and click on the minus (-) red symbols at the front of several div tags until I reach this basic level as seen below,
I will not go into details here but will only touch on the basic facts. First of all, this is a XHTML file. It has the xml tag at its very fisrt line, with an encoding parameter UTF-8. This is very important, it means I can store both ASCII (western) characters, as well as other unicode characters such as Vietnamese one. This is great, because it allows me to target two audiences while sharing the same internal working and filing system.
As with any HTML file, our template has a head section, and a body section. The head part is for showing the file's title, storing the CSS code, and some common scripting functions, if any. The body is for storing instructions on how to display/undisplay widget elements, as we shall review next.
One important fact to point out is, even at this high-level design, as with any well thought-out system, we have already seen a basic software engineering design of "separating of concerns." Indeed, the CSS part - controlling the look of the site, is separated from the logical code in the body part. The body should not have any instructions on how to layout the visual look of the webpage.
Because this is a XHTML file, users whom are familiar with HTML know right away on how to use HTMl tags. More important, if you're not follow the HTML rules, your website will not work at all! This XHTML compliant feature gives a strong clue on how to make the template runs indeed. It's either worked or not worked, and nothing in between.
3. The head section
As noted above, the head has nothing more than the title's name, CSS instructions, and some JavaScript functions.
Based on Beta's online Help, a b:include tag allows us to run something with the function named all-head-content. My best guess is that, after this line, you can start to access global variables such as the homepage's blog name, its url, and some other common data, as specified in the Layout's Data Tags online document.
Indeed, the title uses the blog's page title for showing in the upper left corner of the viewer's browser.
<title>
<data:blog.pageTitle />
</title>
Inside the skin tag, there are CSS instructions, as well-documented in the help article entitled Fonts and Colors Tags for Layouts
If you wish to add JavaScript code, then put them right before the </head> tag. You probably have seen some (if not most) of my hacks use this appending approach.
As for the body section, there are so much to discuss about, indeed. In my next article, I will start to peel off and discuss each layer of the body section at a time. Stay tune.
Cheers,
Hoctro (9/26/2006)
Blog: http://hoctro.blogspot.com/
***************
Dear Friend,
Following what have been left off from the first article in the series, this time I will talk about the body section. As you will see, the beta template contains both ordinary HTML tags such as <div> and <span> and special tags of its own such as <b:includable> or <b:if>. But first, a little explanation on an important XML/XHTML rule.
Nowadays, the two acronyms HTML and XHTML mean almost the same thing: a tagged document that can be shown on any modern browser such as Firefox or IE6. But the "X" in front of "HTML" means that this is a well-formed XML document. What does this means? It means that the tags are (almost) always come in the form of a pair of tags, an opening one, and a closing one. For example, this is a correct XML pair: <div> and </div>. The backlash "/" in front of a tag always represents the equivalent closing tag. Usually, in between these two tags, there are either texts or more well-formed tags.
In some cases where the tag is self-sufficient, a "/" is always added at the end, right before the > sign. An example would be the new-line tag: <br />
Since the new beta template is a well-formed document as declared by its very first line:
<?xml version="1.0" encoding="UTF-8" ?>
the template must obey the well-formed characteristic of an XML document. This is both a good thing and not-so-convenient thing. The good thing is that being a well-formed document, it is going to be much easier for desktop or web programs to be able to read in and process data in an expected manner, using shared and/or open source parser programs. The bad thing is, amateur web coders will have much tougher time trying to write/hack a decent program and not missing a > sign, a closing tag, or mixing tags together in an unorder fashion.
But enough of XML definitions. Let us take a look at what is inside the next level down of the body tag.
Div Tags, more div tags, and some more div tags
After clicking on the pluses and minuses while opening the template inside IE6 for a while, this is what I have:
If you try to ignore the "div" tags and some other minor tags, but concentrate on the ids, you will see that the body section is made up of these main components:
*outer-wrapper
---header-wrapper
---content-wrapper
......main-wrapper
......sidebar-wrapper
---footer-wrapper
Basically, what we have is a header section, a content section composed of a main and a sidebar, and a footer section. Sound familiar? Have you seen this layout visually before? Of course you did!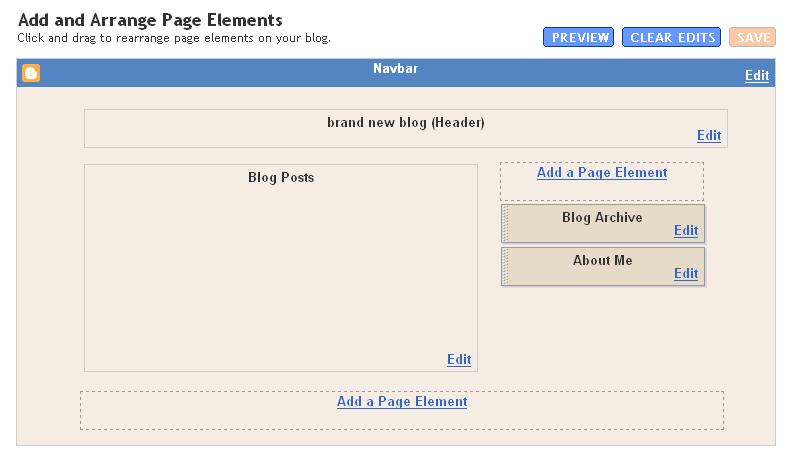
As you can see, the Page Element follows very closely, and in fact it is the visual representation of the textual template!
Knowing this one-to-one relationship, now you can start to understand why and how a three-column template can be made: by adding a new sidebar-wrapper div to the content-wrapper section. The same concept apply if you want a 4 or 5 column template.
Here is the link to my own solution illustrating how to quickly add a new column. This solution is never added to my official hacks, since my friend Ramani has already found out how to do it far earlier time than I did and publish also the solution on his site.
What's next
But wait a minute! Where are the two rectangulars (Blog Archived and About Me) represented textually inside the template, you ask?
It's there, of course, just one level down. 
These beta tags will be our focus point of the next article.
Have a wonderful day and see you next time.
Hoctro (9/28/2006)
Blog: http://hoctro.blogspot.com/
*************
Dear Friend,
Continuing on our quest of understanding the new Blogger in Beta template upside down, inside and out, top-down approach, and so on :-) this time we will take a closer look at how Blogger's data could be seamlessly embedded inside regular HTML tags, and as a consequence, proving that any exiting CSS blogging template could be retooled to work with the new Beta template system.
Here is the picture I showed you at the end of the previous article,
We've got that far without revealing any blogger tags. Using the same technique of hiding and displaying the div, this time I uncover the next level. I also added all possible widgets that Blogger offers. Here is the result,
It looks kind of more complex, but still understandable somewhat, right? Underneath each of the "xxxx-wrapper" tags, there is one b:section tag. Under each of this special tag, there are one or more of the widget tags, each with its own identification and other things. Now if I click on the + sign of each widget, I will get to see the actual beta coding for this widget. But those internal code would be the subjects of many follow-up articles. The scope of this article is therefore limited to only discussing about the two levels that i've just mentioned, namely b:section and b:widget.
The equivalent visual representation of the code I just show you would be like this,

and when you view the blog in action, it would look like this,

Next, let us discuss about each section - the header, the main post area, the sidebar, and the footer - in details.
1. The Header Section
In this section, we know that it has to somehow show the title and the description of the blog. Because there is only one widget, those info must reside in it. But first, there are also other information and/or settings as part the header section,
<div id='header-wrapper'>
<b:section class='header' id='header' maxwidgets='1' showaddelement='no'>
<b:widget id='Header1' locked='true' title='brand new blog (Header)' type='Header'/>
</b:section>
</div>
We see that a section has a class, and we have four classes representing four sections. They are the header, the main, the sidebar, and the footer classes. (Also, according to Blogger, at runtime each b:section will become a div, so you could use your CSS markup to enhance the look of those.) The section also has its own id, namely "header". The parameter maxwidgets="1" signifies that there is only one widget that could be added to this section. The parameter showaddelement="no" means that you will not see a "Add a Page Element" box in this section. (Why need it when you already set the max widget to be of one widget only?)
Inside the b:section, there is only one widget, with the id of "Header1". The parameter locked="true" means that you cannot drag this widget to anywhere else. The title on the widget to be shown in the box of the layout (and not our real web page) was the next parameter, while the last parameter tells Blogger this is a header type.
We will explore the contents of this widget in another article.
2. The Main Section
The Main section obviously is for displaying the contents of a page. This varies drastically, from one post only to possibly every posts in the blog. Even for the "one item" case, there are a lot of information to display, such as the time created, the title of the post, the contents, all the comments for the post, backlinks, navigation system, etc. In the "Expand Template" view, the portion of the code is about 80% (not counting CSS code)! This section probably is the one that scares off people from looking into tweaking the template to suit their sites. But it doesn't have to be that way. One could just ignore the section and only revisit it when they feel more confident.
Below is the code for the section in simplified form,
<div id='main-wrapper'>
<b:section class='main' id='main' showaddelement='no'>
<b:widget id='Blog1' locked='true' title='Blog Posts' type='Blog'/>
</b:section>
</div>
As you can see, under the (id = ) main section, there is only one widget named Blog1, with other minor parameters similar to the Header section.
3. The Sidebar section
Hopefully, by now you are already feel at home with identifying where is the section tag and all the widget tags it contains. I purposedly attach every single Page Element that Blogger offers with the "Add Page Element" option to show you the syntax of each widget. As you can see, the parameters are pretty much self-explanatory, as one can easily guess which widget corresponds to which line of code. If you happen to want two widgets of the same type, just make sure they have unique IDs, such as Label1 and Label2, and you will be fine.
<div id='sidebar-wrapper'>
<b:section class='sidebar' id='sidebar' preferred='yes'>
<b:widget id='BloggerButton1' locked='false' title='' type='BloggerButton'/>
<b:widget id='Label1' locked='false' title='Labels' type='Label'/>
<b:widget id='Feed1' locked='false' title='Hoctro"s Place' type='Feed'/>
<b:widget id='HTML1' locked='false' title='html code' type='HTML'/>
<b:widget id='Text1' locked='false' title='a text' type='Text'/>
<b:widget id='Image1' locked='false' title='pic' type='Image'/>
<b:widget id='LinkList1' locked='false' title='link list' type='LinkList'/>
<b:widget id='TextList1' locked='false' title='list' type='TextList'/>
<b:widget id='BlogArchive1' locked='false' title='Blog Archive' type='BlogArchive'/>
<b:widget id='Profile1' locked='false' title='About Me' type='Profile'/>
</b:section>
</div>
Again, I will get into details of these widgets one by one, hopefully in the next article.
4. The Footer section
There is no special about this section at all, except for the fact that when the section has no widget, it appears in just one line, like so <b:section .... />
<div id='footer-wrapper'>
<b:section class='footer' id='footer'/>
</div>
5. What makes it so great about Beta Templates?
We are at the end of our little trip of visiting the sections and widgets at their simplest form. The great thing about the code I've just shown you is that it's not there for nothing, it actually works. Indeed, if you have any new template with this kind of simplified Blogger code, then cut-and-paste that code into the HTML Edit window and save it, it would show you a blog, however simple or complex you want it to be.
This fact is very important if you want to start creating customized beta templates for yourself and for others. You don't have to cut-and-paste the long form and try to fit it in a well-designed, existing HTML design. You can simply embed the internal (whatever inside and including of the two b:section tags) of the four sections I described above to the proper locations in your design, and your blogger data will magically show up! Only then, you start to tweak your CSS design to match the divs' names of the Blogger sections for the text to show correctly.
I will prove this point to you right away.
First, create a new test blog, then go to Template->Edit HTML. Save your current design to your desktop, then cut and paste this code below,
<?xml version="1.0" encoding="UTF-8" ?>
<!DOCTYPE html PUBLIC "-//W3C//DTD XHTML 1.0 Strict//EN" "http://www.w3.org/TR/xhtml1/DTD/xhtml1-strict.dtd">
<html xmlns='http://www.w3.org/1999/xhtml' xmlns:b='http://www.google.com/2005/gml/b' xmlns:data='http://www.google.com/2005/gml/data' xmlns:expr='http://www.google.com/2005/gml/expr'>
<head>
<b:include data='blog' name='all-head-content'/>
<title><data:blog.pageTitle/></title>
<b:skin><![CDATA[
/* Variable definitions
====================
<Variable name="bgcolor" description="Page Background Color"
type="color" default="#fff" value="#ffffff">
<Variable name="textcolor" description="Text Color"
type="color" default="#333" value="#333333">
*/
body {
background:$bgcolor;
margin:0;
color:$textcolor;
font:x-small Georgia Serif;
font-size/* */:/**/small;
font-size: /**/small;
text-align: center;
}
]]></b:skin>
</head>
<body>
<div id='outer-wrapper'><div id='wrap2'>
<!-- skip links for text browsers -->
<span id='skiplinks' style='display:none;'>
<a href='#main'>skip to main </a> |
<a href='#sidebar'>skip to sidebar</a>
</span>
<div id='header-wrapper'>
<b:section class='header' id='header' maxwidgets='1' showaddelement='no'>
<b:widget id='Header1' locked='true' title='brand new blog (Header)' type='Header'/>
</b:section>
</div>
<div id='content-wrapper'>
<div id='main-wrapper'>
<b:section class='main' id='main' showaddelement='no'>
<b:widget id='Blog1' locked='true' title='Blog Posts' type='Blog'/>
</b:section>
</div>
<div id='sidebar-wrapper'>
<b:section class='sidebar' id='sidebar' preferred='yes'>
<b:widget id='BloggerButton1' locked='false' title='' type='BloggerButton'/>
<b:widget id='Label1' locked='false' title='Labels' type='Label'/>
<b:widget id='Feed1' locked='false' title='Hoctro"s Place' type='Feed'/>
<b:widget id='HTML1' locked='false' title='html code' type='HTML'/>
<b:widget id='Text1' locked='false' title='a text' type='Text'/>
<b:widget id='Image1' locked='false' title='pic' type='Image'/>
<b:widget id='LinkList1' locked='false' title='link list' type='LinkList'/>
<b:widget id='TextList1' locked='false' title='list' type='TextList'/>
<b:widget id='BlogArchive1' locked='false' title='Blog Archive' type='BlogArchive'/>
<b:widget id='Profile1' locked='false' title='About Me' type='Profile'/>
</b:section>
</div>
<!-- spacer for skins that want sidebar and main to be the same height-->
<div class='clear'> </div>
</div> <!-- end content-wrapper -->
<div id='footer-wrapper'>
<b:section class='footer' id='footer'/>
</div>
</div></div> <!-- end outer-wrapper -->
</body>
</html>
Here is what you will probably see after saving the template and view the result,

There are two things that are worth mentioning here:
1.If you follow my three articles in the "Understanding Beta Template" series closely, and if you ignore the CSS part (between the b:skin tags), you should be able to understand 100% the body section of the template! It's fairly identical to what I've been explaining to you in term of the meaning of the header, main, sidebar, and footer sections.
2. In the head section, I keep two variables and the CSS commands for the body tag. You could even carefully leave this part out and the template would still work. My point is the Blogger contents do exist independently from their presentation counterparts.
6. The Road Ahead
There are actually two roads ahead of us! For the ones who have artistic minds, you can apply what we have been discussing and create your own templates for your own use, and hopefully for others to use (for free, I might insist :-) as well. A great place to start is at the Open Source Web Design homepage.
The other road to explore would be to "hack" the inside of the widgets. And of course this is fun too, I might add :-)
Have a wonderful day and see you next time.
Hoctro (10/2006)
Blog: http://hoctro.blogspot.com/
Archived Post: Showing Headlines by Labels 19 Sep 2008 4:58 AM (17 years ago)
 Important Update: Labels now suppose to support unicode label. Please give it a try.
***
Dear Friend,
I have a pretty long "grown-up Xmas" list, and in term of Blogging hacks, one of my wish is to find time to continue hacking with the new JSON format :-))) (Just kidding).
After struggling for two weeks, here is the first of many more JSON hackings to come: a "Contents by Category" widget.
This is what it looks like on the side bar:
And with a simple drag-n-drop (that's how I love the new Blogger!) here it is on the main column:
Of course with some simple CSS twists you could make it looks more fancier, if you wish.
To install, first follow the instructions from this article Hacking Technique: How To Modify a Template, in particular section B.4.
Then, cut this code below and paste it in between any two "b:widget" tags, save the template, and you're done with the installing part.
<b:widget id='HTML50' locked='false' title='Contents By Category' type='HTML'>
<b:includable id='main'>
<!-- *****************http://hoctro.blogspot.com*****Dec,2006****************** -->
<!-- <b:if cond='data:blog.pageType == "item"'> -->
<!-- only display title if it's non-empty -->
<b:if cond='data:title != ""'>
<h2 class='title'><data:title/></h2>
</b:if>
<div class='widget-content'>
<div id='data2006'/>
<script type='text/javascript'>
var homeUrl2 = "hoctro.blogspot.com";
var labels = ["Killer Hacks","Simple Hacks",
"3 Column Templates", "Ajax Hacks","Custom Widgets", "Hacking Techniques"];
// Given a json label search, this function return the decoded label.
function getLabelFromURL(json) {
for (var l = 0; l < json.feed.link.length; l++) {
if (json.feed.link[l].rel == 'alternate') {
var raw = json.feed.link[l].href;
// The next two lines are borrowed from Ramani's Neo Template
// code. Thanks Ramani!
var label = raw.substr(raw.lastIndexOf('/')+1);
return decodeURIComponent(label);
}
}
}
function listEntries2(json) {
var ul = document.createElement('ul');
for (var i = 0; i < json.feed.entry.length; i++) {
var entry = json.feed.entry[i];
var alturl;
for (var k = 0; k < entry.link.length; k++) {
if (entry.link[k].rel == 'alternate') {
alturl = entry.link[k].href;
break;
}
}
var li = document.createElement('li');
var a = document.createElement('a');
a.href = alturl;
var txt = document.createTextNode(entry.title.$t);
a.appendChild(txt);
li.appendChild(a);
ul.appendChild(li);
}
for (var l = 0; l < json.feed.link.length; l++) {
if (json.feed.link[l].rel == 'alternate') {
var raw = json.feed.link[l].href;
var label = raw.substr(homeUrl2.length+21);
var label = getLabelFromURL(json);
var txt = document.createTextNode(label);
var h = document.createElement('h4');
h.appendChild(txt);
var div1 = document.createElement('div');
div1.appendChild(h);
div1.appendChild(ul);
document.getElementById('data2006').appendChild(div1);
}
}
}
function search2(query, label) {
var script = document.createElement('script');
script.setAttribute('src', 'http://' + query + '/feeds/posts/default/-/' + encodeURIComponent(label) +
'?alt=json-in-script&callback=listEntries2');
script.setAttribute('type', 'text/javascript');
document.documentElement.firstChild.appendChild(script);
}
for (var i=0; i < labels.length; i++)
if (labels[i])search2(homeUrl2, labels[i]);
</script>
</div>
<b:include name='quickedit'/>
<!-- </b:if> -->
</b:includable>
</b:widget>
Now, those settings in bold are for my blog! So, if you would like to do some free advertisements for me, then I wouldn't mind :) But I guess not.
To change the code to your blog, along with the listing of your featured labels/categories, modify the bold texts below in the code:
var homeUrl2 = "hoctro.blogspot.com";
var labels = ["Killer Hacks","Simple Hacks",
"3 Column Templates", "Ajax Hacks","Custom Widgets", "Hacking Techniques"];
The second line is actually an array, separated by commas, and inside the double quotes. Replace those with yours, and feel free to add more if you like.
Until next time,
Hoctro
12/13/06
Thanks.
***
Update:
1/17/07: Fixed bug of labels not having the right child posts. A new div will make sure the label header and its posts stays in one place.
var div1 = document.createElement('div');
div1.appendChild(h);
div1.appendChild(ul);
document.getElementById('data2007').appendChild(div1);
Archived Post: Showing Labels as Vertical Tabs 19 Sep 2008 4:58 AM (17 years ago)
Dear Friend,
This is soooo exciting! I'm happy to tell you we have another great help from our friend, The Exploding Boy yet again! Yesterday by luck I came across his vertical tab designs. These are indeed very good looking and professional designs. The first thing came to my mind was, of course, downloading and examining the code to see if I could re-use the horizontal tab hack to use for both vertical and horizontal cases.
My initial thought was true, that a list is a list, and that it doesn't know if it is a vertical or a horizontal bar! Therefore, to change from horizontal to vertical, we just have to add the appropriate CSS code, then change the tab name, and you'll have vertical tabs!
After tweaking it a while, I was able to integrate them into Beta. Please see the demo on my test site:
http://csspicstock.blogspot.com/2006/09/this-is-pic-stock-for-project-exploding.html
Following are the instructions on how to install:
1. Follow the instructions from the original Tab hack.
2.Add this code to the end of the CSS part, before the ] ] > sign:, change the CSS menu name from menu1 to menux (x varies from 1 to 14 [designs].)
#menu1 li{
margin:0;
padding:0 0 .25em 0;
text-indent:0px;
line-height:1.5em;
}
3. Add the right CSS code next. I include the first one here, you can go to the demo site to grab the one you like the most
#menu1 {
width: 200px;
margin: 10px;
border-style: solid solid none solid;
border-color: #3D261D;
border-size: 1px;
border-width: 1px;
}
#menu1 li a {
height: 32px;
voice-family: "\"}\"";
voice-family: inherit;
height: 24px;
text-decoration: none;
}
#menu1 li a:link, #menu1 li a:visited {
color: #E4D6CD;
display: block;
background: url(http://photos1.blogger.com/blogger2/3729/970792021505273/1600/menu1.gif);
padding: 8px 0 0 10px;
}
#menu1 li a:hover {
color: #FFF;
background: url(http://photos1.blogger.com/blogger2/3729/970792021505273/1600/menu1.gif) 0 -32px;
padding: 8px 0 0 10px;
}
4. Finally, change the div inside your widget to say "menu1" instead of "tabsF" like instructed in the original article. Keep the widget at the sidebar, and you should be able to see your vertical tabs.
(Another amazing thing is, Beta automatically detects and updates the widgets internally. I didn't have to visually create my 14 labels, I cut and paste the template code 14 times, change the label names and div names, then save the design, and it works!)
That's it! Enjoy your vertical tabs and don't forget to thank the Exploding Boy personally. I'm going there to thank him right after I'm done w/ typing this post.
Cheers,
Hoctro (9/2006)
Blog: http://hoctro.blogspot.com/
%3Cbr%20/%3E%3Cbr%20/%3E%23menu%3Cstrong%3E1%3C/strong%3E%20li%7B%3Cbr%20/%3Emargin:0;%3Cbr%20/%3Epadding:0%200%20.25em%200;%3Cbr%20/%3Etext-indent:0px;%3Cbr%20/%3Eline-height:1.5em;%3Cbr%20/%3E%7D%20%3Cbr%20/%3E%3Cbr%20/%3E%3Cstrong%3E3.%3C/strong%3E%20Add%20the%20right%20CSS%20code%20next.%20I%20include%20the%20first%20one%20here,%20you%20can%20go%20to%20the%20demo%20site%20to%20grab%20the%20one%20you%20like%20the%20most%3Cbr%20/%3E%3Cbr%20/%3E%3Cbr%20/%3E%23menu1%20%7B%3Cbr%20/%3Ewidth:%20200px;%3Cbr%20/%3Emargin:%2010px;%3Cbr%20/%3Eborder-style:%20solid%20solid%20none%20solid;%3Cbr%20/%3Eborder-color:%20%233D261D;%3Cbr%20/%3Eborder-size:%201px;%3Cbr%20/%3Eborder-width:%201px;%3Cbr%20/%3E%7D%3Cbr%20/%3E%3Cbr%20/%3E%23menu1%20li%20a%20%7B%3Cbr%20/%3Eheight:%2032px;%3Cbr%20/%3Evoice-family:%20%22%5C%22%7D%5C%22%22;%20%3Cbr%20/%3Evoice-family:%20inherit;%3Cbr%20/%3Eheight:%2024px;%3Cbr%20/%3Etext-decoration:%20none;%3Cbr%20/%3E%7D%20%3Cbr%20/%3E%3Cbr%20/%3E%23menu1%20li%20a:link,%20%23menu1%20li%20a:visited%20%7B%3Cbr%20/%3Ecolor:%20%23E4D6CD;%3Cbr%20/%3Edisplay:%20block;%3Cbr%20/%3Ebackground:%20url(http://photos1.blogger.com/blogger2/3729/970792021505273/1600/menu1.gif);%3Cbr%20/%3Epadding:%208px%200%200%2010px;%3Cbr%20/%3E%7D%3Cbr%20/%3E%3Cbr%20/%3E%23menu1%20li%20a:hover%20%7B%3Cbr%20/%3Ecolor:%20%23FFF;%3Cbr%20/%3Ebackground:%20url(http://photos1.blogger.com/blogger2/3729/970792021505273/1600/menu1.gif)%200%20-32px;%3Cbr%20/%3Epadding:%208px%200%200%2010px;%3Cbr%20/%3E%7D%20%3Cbr%20/%3E%3Cbr%20/%3E%3Cbr%20/%3E%3Cbr%20/%3E%3Cstrong%3E4.%3C/strong%3E%20Finally,%20change%20the%20div%20inside%20your%20widget%20to%20say%20%22%3Cstrong%3Emenu1%3C/strong%3E%22%20instead%20of%20%22%3Cstrong%3EtabsF%3C/strong%3E%22%20like%20instructed%20in%20the%20original%20article.%20Keep%20the%20widget%20at%20the%20sidebar,%20and%20you%20should%20be%20able%20to%20see%20your%20vertical%20tabs.%20%3Cbr%20/%3E%3Ci%3E%3Cbr%20/%3E(Another%20amazing%20thing%20is,%20Beta%20automatically%20detects%20and%20updates%20the%20widgets%20internally.%20I%20didn't%20have%20to%20visually%20create%20my%2014%20labels,%20I%20cut%20and%20paste%20the%20template%20code%2014%20times,%20change%20the%20label%20names%20and%20div%20names,%20then%20save%20the%20design,%20and%20it%20works!)%3C/i%3E%3Cbr%20/%3E%3Cbr%20/%3EThat's%20it!%20Enjoy%20your%20vertical%20tabs%20and%20don't%20forget%20to%20thank%20the%20Exploding%20Boy%20personally.%20I'm%20going%20there%20to%20thank%20him%20right%20after%20I'm%20done%20w/%20typing%20this%20post.%3Cbr%20/%3E%3Cbr%20/%3ECheers,%3Cbr%20/%3E%3Cbr%20/%3EHoctro%20(9/2006)%3Cbr%20/%3EBlog:%20http://hoctro.blogspot.com/%3Cbr%20/%3E%3C/span%3E)
Archived Post: What is a widget, after all? (Part 2) 19 Sep 2008 4:58 AM (17 years ago)

Dear Friend,
This is the second part of my article,in which I explain what consists of a widget. Below is again the code from the last time.
01. <b:widget id='Label1' locked='false' title='Labels' type='Label'>
02. <b:includable id='main'>
03. <b:if cond='data:title'>
04. <h2><data:title/></h2>
05. </b:if>
06. <div class='widget-content'>
07. <ul>
08. <b:loop values='data:labels' var='label'>
09. <li>
10. <b:if cond='data:blog.url == data:label.url'>
11. <data:label.name/>
12. <b:else/>
13. <a expr:href='data:label.url'><data:label.name/></a>
14. </b:if>
15. (<data:label.count/>)
16. </li>
17. </b:loop>
18. </ul>
19.
20. <b:include name='quickedit'/>
21. </div>
22. </b:includable>
23. </b:widget>
Now that we know a little bit what that does, what can we do to alter its appearance, or improve it to make the widget looks different?
1. Omit a feature:
As a simplest hack of all, just remove line 15, where the line tells Blogger to print the label count along with the label name, and you're done.
As a good precaution, if you're not sure if you really want to remove the line or not, you could comment it out, so Blogger could ignore the line (or lines) while reading the template. to do that, put these special code <-- and --> in front and at the end of the line
<!-- (<data:label.count/>) -->
Here's the result:
2. A simple change of appearance:
Instead of a list, we can simply make it a paragraph, consists of many labels, separated by a character. To do that, change the code between line 7 and 18 to become:
07. <div>
08. <b:loop values='data:labels' var='label'>
09. <span>
10. <b:if cond='data:blog.url == data:label.url'>
11. <data:label.name/>
12. <b:else/>
13. <a expr:href='data:label.url'><data:label.name/></a>
14. </b:if>
15. <!--(<data:label.count/>) -->
16. </span> *
17. </b:loop>
18. </div>
Here's the result:
What we've done is to rename the "ul" (unordered list) tags to become "div" tags, and to rename "li" tags for each label to become "span" tags. Finally, the " * " at the end of line 16 is to separate labels with "*"
A much improvement of this code would be to add JavaSript code to dynamically examine the label count, then adjust the span tag to show different text height per label, and other extra twists such as color, or font, to make this little hack become a label cloud.
3. Adding a simple tweak to existing code:
Suppose you want your reader to open a new window every time he or she clicks on the label, simply add this code to line 13:
13. <a expr:href='data:label.url' target='_blank'><data:label.name/></a>
You can apply this trick to other widget as well. One of the question I got recently from a reader is how to create a new window every time the user clicks on a link for the link list widget. To do so, look for the widget:
<b:widget id='LinkList1' locked='false' title='Link List' type='LinkList'>
then this line,
<li><a expr:href='data:link.target'><data:link.name/></a></li>
and alter it to become:
<li><a expr:href='data:link.target' target='_blank' ><data:link.name/></a></li>
4. Mixing of the above:
Yet, there are also ways to mix and match elements to create new solutions. For example, suppose we like our "tags/labels/categories" naming, but we're not sure if the rest of the world have similar names. One way to quickly check that is to use our labels, but the link background is a combination of technorati syntax (http://www.technorati.com/tag/)instead of the default blogger tag search, and our label. Simply change line 13 to show like this, and the result is sweet:
<a expr:href='"http://www.technorati.com/tag/" + data:label.name'><data:label.name/></a>
5. Reorganizing code and add CSS to turn the label widget into a completely different thing:
This takes more thinking upfront, but the result is sweet. You can see a demonstration of such hack here:
http://hoctro.blogspot.com/2006/09/tweaking-new-blogger-turning-labels.html.
6. Combining with JSON callback technique:
Since we know the label name, we can send the name to blogger to receive data back on all the posts belong to each label. The result would be like a site map, where each label shows its belonging post headers. I might implement this hack in the future, as all the background code is already existed in my other JSON hacks.
Altering the logic code of a widget
Surprisingly enough, it takes only two major language constructs to convey most of the blog's data and transforming it into a webpage, and another two constructs to organize code into understandable chunks and to call them. They are:
1. The If statement
2. The Loop statement
3. The includable/include statements
- I think this is a major achievement of the template designers. Even though this is not a new idea, as it is already implemented in other languages such as PHP, and even the old blogger, it is still a very interesting and remarkable achievement.
- The new Blogger template indeed uses XHTML extensively, so that when the page loads, what it sees in term of HTML tags, it will render exactly like that to the sceen. When it encounters a b:if and b:loop tags, on the other hand, it will render the suitable chunk of HTML or yet other template code based on the situation at hand. This fact alone makes great use of existing HTML tags, as the template designers safely ignore basic language features such as file I/O access, math, database retrieval syntax and command, etc.
- Each widget also acts in its own isolated island, as none of the code from one widget could be accessed from another. To do that, you need to cut and paste the code. This way, bugs are isolated and easier to debug.
- In Blogger template, as the same case with Classic Blogger, there is no construct on how to write data back to the server. I think this is such an excellent idea, as the blogger doesn't have to deal with another yet level of complexity.
- Another thing that I like about the New Blogger template is that names are broken down into understandable "sub" names, instead of the Classic Blogger way. This makes it easier to work with, or at least to guess the possible name for the feature.
The future of Widgets
Widgets, except the "Blog Posts" and "Archived" ones, are relatively easy to understand and to hack, once you know the concepts. They are also very limited for "tweaking" activities, since there are not much data inside them, and there are basically two mentioned simple constructs: if and loop. But once they are combined with the power of JavaScript and JSON, as seen in the NEO template from Ramani and from some other recent hacks, they are getting really interesting to think about and to implement.
And don't count Blogger out either. There might be other new widgets already in store for us, they are just waiting for the green light to see the day.
The future of the New Blogger template and its wonderful widgets, in my mind, looks pretty good as there are plenty of room to play with and to improve.
Cheers,
Hoctro.
Archived Post: Showing Link List or Label Widgets as Tabs 19 Sep 2008 4:58 AM (17 years ago)
Dear Friend,
User interaction/feedback once again proved to be a great source of new ideas. Gareth Doutch, one of my tab's hack reader, asks me if I can turn the "Link List Widget" to show up first as a horizontal link list (like Hans' Beautiful Beta link at the top of his blog,) then possibly also as horizontal or vertical tabs, exactly like the way the popular hacks "Labels as horizontal/vertical tabs" present. My initial thought was that this could be done, and it sure does.
Without further ado, below are the instructions on how to apply the mod to your blog.
Instructions:
Step 0: Link List without any modifications
Here is a picture of an implemented link list widget without any modifications, I thought it would be nice to show it here so my readers know where I'm coming from, and the desire to make it more versatile by turning it into the three new versions:
Step 1: Adding the Link List code
In your "Edit template" window, add the code to the sidebar, where a line is highlighted, somewhere below the line
< b:section class='sidebar' ...
as shown: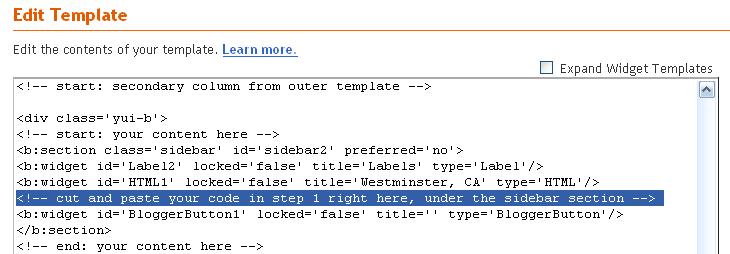
<b:widget id='LinkList1' locked='false' title='' type='LinkList'>
<b:includable id='main'>
<div id='tabsF'>
<ul>
<li><a expr:href='data:blog.homepageUrl'>
<span>Home</span></a></li>
<b:loop values='data:links' var='link'>
<li><a expr:href='data:link.target'><span>
<data:link.name/></span></a></li>
</b:loop>
</ul>
</div>
</b:includable>
</b:widget>
For example, if I add the above code to under the HTML1 widget, once I save the template, I will see only this one highlighted line (since Blogger hides the code unless you "expand" the "expand widget template" checkbox".)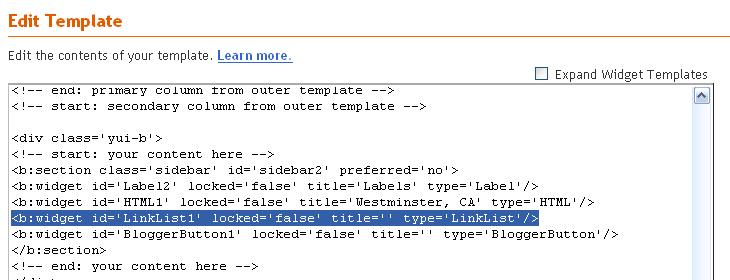
The widget is created, now we need some contents. (Or in my case, the baby is born, now he needs milk! :-)
Step 2: Adding links to your new Widget
After you've done with set 1, don't forget to add things to your new link list widget for it to show up. To do that, choose "Edit" on the "Link List" box: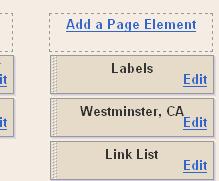
Now add your links and their titles: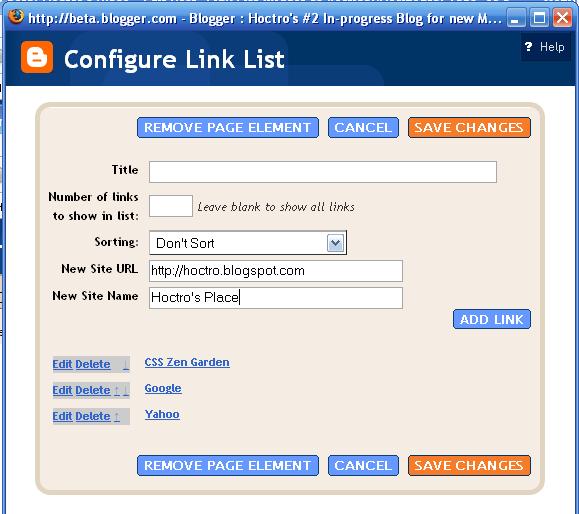
Important Note:
To have horizontal tabs for your favorite labels, copy the link you click when selecting a label as your URL. It should look like this format:
http://yourblog.blogspot.com/search/label/your label
For example, here's the URL for my Simple Hacks label:
http://hoctro.blogspot.com/search/label/Simple%20Hacks
Now you are ready to turn your regular list in to Tabs, or a horizontal list. Again, the "cute" thing about this hack, I think, is that it allows you to add, remove, or edit your links without going inside the template code.
Step 3: Turning Link List into Tabs
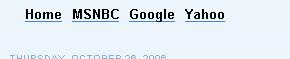
a. Making a Link List Widget as Horizontal Tabs
Adding the CSS code to the template for the linklist to turn into tabs. You can read here on how to add. Remember, everything about the CSS is the same, we just want to add our own links as tabs, instead of using labels. hence disregard all the instructions about "labels" on that post. Don't forget to change the id="tabsF" in step 2 to whatever tab you like.
b. Making a Link List Widget as Vertical Tabs
Adding the CSS code to the template. You can read here on how to add it. Remember, everything about the CSS is the same, we just want to add our own links as tabs, instead of using labels. Don't forget to change the id="tabsF" in step 2 to whatever tab you like.
c. Link List Widget as Horizontal List of Items
Paste this code to the CSS portion of your template (above the end skin tag,) then change the div id in the horizontal portion above from "tabsF" to "horiz".
#horiz {
float:left;
width:100%;
}
#horiz ul {
margin:0;
list-style:none;
}
#horiz li {
display:inline;
}
#horiz a {
float:left;
}
#horiz a span {
float:left;
display:block;
padding:30px 5px 30px 5px;
color:#000;
}
Cheers,
Hoctro
(10/31/06)
Archived Post: Adding a Breadcrumb Trail to your Blogger Post 16 Sep 2008 5:11 AM (17 years ago)

Dear Friend,
Have you ever experienced after searching and googling to a comprehensive website, then lose track of where you are, and what you are really looking for? I did, many times. To quote a page on the Yahoo's Design Pattern Library: "When the page displayed is within a hierarchy of pages and is not the topmost page," the reader needs some sort of "understanding of where she is in relation to the rest of the site."
The breadcrumb trail at the top of a post provides a nice solution to this problem. In a breadcrumb, you can always click on the label/category before it, or click the "Home" link to go back to the front page. More importantly, the user knows where she is, something that other navigation widgets such as the out-of-the box label, or my previous "tab hack" are not able to address (yet.)
Below are two easy steps to install the "Breadcrumbs Hack" on your blog.
Step1: Embedding Function Definition and Function Call.
Go to Template->Edit HTML, then check the Expand Widget Templates checkbox.
Look for the Blog1 widget (<b:widget id="Blog1" locked="false" title="Blog Posts" type="Blog">), then locate the main includable:
Put the below code right in front of the highlighted text:
<b:includable id='breadcrumbs' var='post'>
<!-- Breadcrumbs hack. By Hoctro 9/11/2006 http://hoctro.blogspot.com -->
<b:if cond='data:blog.pageType == "item"'>
<p class='breadcrumbs'>
<span class='post-labels'>
<b:if cond='data:post.labels'>
You are here:
<a expr:href='data:blog.homepageUrl' rel='tag'>Home</a> >
<b:loop values='data:post.labels' var='label'>
<b:if cond='data:label.isLast == "true"'>
<a expr:href='data:label.url' rel='tag'> <data:label.name/></a>
</b:if>
</b:loop>
<b:if cond='data:post.title'>
> <b><data:post.title/></b>
</b:if>
</b:if>
</span>
</p>
</b:if>
<!-- End of Breadcrums Hack -->
</b:includable>
Next, add this line:
<b:include data='post' name='breadcrumbs'/>
right in front of the line <b:if cond='data:post.dateHeader'>. (Since you're already located the line <b:includable id='main' var='top'>, once you add this new line, it is now part of blog1 widget.)
Step 2: Add CSS code
Add this code at the end of the CSS portion (between the pair skin tags (see picture)
.breadcrumbs {
border-bottom:1px dotted #000;
margin:2em 0 0.5em;
padding:0 0 0.5em;
}
(Feel free to modify the first & third parameters of the last two lines (in bold) to expand/shorten the top & bottom heights.)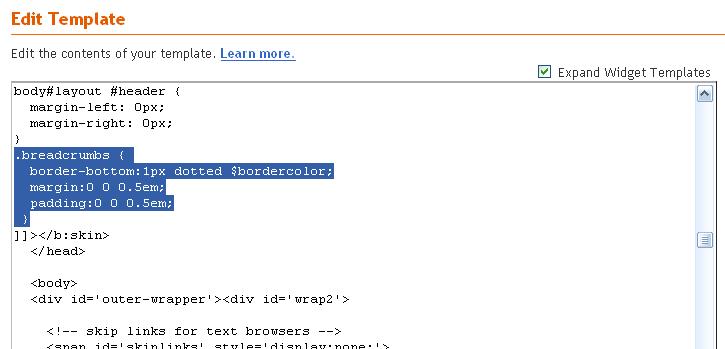
Save your editing, and you should see the breadcrumb only when you view an item page.
I hope you will enjoy this hack and find it useful. Have a wonderful day,
Hoctro (9/11/2006)
Blog: http://hoctro.blogspot.com/
Archived Post: Yet another TabView Application: Latest Posts of Favorite Blogs 16 Sep 2008 4:41 AM (17 years ago)
 Dear Friend,
With a simple twist of Tabview - Part 2 tutorial, you can collect all of your fav blogs into one nice view.
Here is the code, I'll let you figure out how to add it to the TabView widget :-)
var tabView2 = new YAHOO.widget.TabView('multiTab2');
function listLatestPostsTab2a(json) {
listOneTab(json, tabView2, "Hackosphere", true);}
cb.search( "hackosphere.blogspot.com", "posts", 1, 25, 'listLatestPostsTab2a');
function listLatestPostsTab2b(json) {
listOneTab(json, tabView2, "Beautiful Beta", false);}
cb.search( "beautifulbeta.blogspot.com", "posts", 1, 25, 'listLatestPostsTab2b');
function listLatestPostsTab2c(json) {
listOneTab(json, tabView2, "Blogger Hacked", false);}
cb.search( "blogger-hacked.blogspot.com", "posts", 1, 25, 'listLatestPostsTab2c');
function listLatestPostsTab2d(json) {
listOneTab(json, tabView2, "Phydeaux", false);}
cb.search( "phydeaux3.blogspot.com", "posts", 1, 25, 'listLatestPostsTab2d');
function listLatestPostsTab2e(json) {
listOneTab(json, tabView2, "Blog U", false);}
cb.search( "bloggeruniversity.blogspot.com", "posts", 1, 25, 'listLatestPostsTab2e');
function listLatestPostsTab2f(json) {
listOneTab(json, tabView2, "Purple Moggy", false);}
cb.search( "purplemoggy.blogspot.com", "posts", 1, 25, 'listLatestPostsTab2f');
function listLatestPostsTab2h(json) {
listOneTab(json, tabView2, "The Last Word", false);}
cb.search( "lastword.blogspot.com", "posts", 1, 25, 'listLatestPostsTab2h');
Have a wonderful day,
Update:
*26 May 07: Wai Yan Lin translated part 1 and 2 of the TabView widget and this post to Burmese here:
http://waiyanlinn.blogspot.com/2007/05/tabview-widget.html
%3Cbr%20/%3E%3Cbr%20/%3E%3Cbr%20/%3Evar%20tabView2%20%3D%20new%20YAHOO.widget.TabView(%26%2339;multiTab2%26%2339;);%3Cbr%20/%3E%3Cbr%20/%3Efunction%20listLatestPostsTab2a(json)%20%7B%3Cbr%20/%3ElistOneTab(json,%20tabView2,%20%26quot;Hackosphere%26quot;,%20true);%7D%3Cbr%20/%3Ecb.search(%20%26quot;hackosphere.blogspot.com%26quot;,%20%26quot;posts%26quot;,%201,%2025,%20%26%2339;listLatestPostsTab2a%26%2339;);%3Cbr%20/%3E%3Cbr%20/%3Efunction%20listLatestPostsTab2b(json)%20%7B%3Cbr%20/%3ElistOneTab(json,%20tabView2,%20%26quot;Beautiful%20Beta%26quot;,%20false);%7D%3Cbr%20/%3Ecb.search(%20%26quot;beautifulbeta.blogspot.com%26quot;,%20%26quot;posts%26quot;,%201,%2025,%20%26%2339;listLatestPostsTab2b%26%2339;);%3Cbr%20/%3E%3Cbr%20/%3Efunction%20listLatestPostsTab2c(json)%20%7B%3Cbr%20/%3ElistOneTab(json,%20tabView2,%20%26quot;Blogger%20Hacked%26quot;,%20false);%7D%3Cbr%20/%3Ecb.search(%20%26quot;blogger-hacked.blogspot.com%26quot;,%20%26quot;posts%26quot;,%201,%2025,%20%26%2339;listLatestPostsTab2c%26%2339;);%3Cbr%20/%3E%3Cbr%20/%3Efunction%20listLatestPostsTab2d(json)%20%7B%3Cbr%20/%3ElistOneTab(json,%20tabView2,%20%26quot;Phydeaux%26quot;,%20false);%7D%3Cbr%20/%3Ecb.search(%20%26quot;phydeaux3.blogspot.com%26quot;,%20%26quot;posts%26quot;,%201,%2025,%20%26%2339;listLatestPostsTab2d%26%2339;);%3Cbr%20/%3E%3Cbr%20/%3Efunction%20listLatestPostsTab2e(json)%20%7B%3Cbr%20/%3ElistOneTab(json,%20tabView2,%20%26quot;Blog%20U%26quot;,%20false);%7D%3Cbr%20/%3Ecb.search(%20%26quot;bloggeruniversity.blogspot.com%26quot;,%20%26quot;posts%26quot;,%201,%2025,%20%26%2339;listLatestPostsTab2e%26%2339;);%3Cbr%20/%3E%3Cbr%20/%3Efunction%20listLatestPostsTab2f(json)%20%7B%3Cbr%20/%3ElistOneTab(json,%20tabView2,%20%26quot;Purple%20Moggy%26quot;,%20false);%7D%3Cbr%20/%3Ecb.search(%20%26quot;purplemoggy.blogspot.com%26quot;,%20%26quot;posts%26quot;,%201,%2025,%20%26%2339;listLatestPostsTab2f%26%2339;);%3Cbr%20/%3E%3Cbr%20/%3Efunction%20listLatestPostsTab2h(json)%20%7B%3Cbr%20/%3ElistOneTab(json,%20tabView2,%20%26quot;The%20Last%20Word%26quot;,%20false);%7D%3Cbr%20/%3Ecb.search(%20%26quot;lastword.blogspot.com%26quot;,%20%26quot;posts%26quot;,%201,%2025,%20%26%2339;listLatestPostsTab2h%26%2339;);%3Cbr%20/%3E%3Cbr%20/%3E%3Cbr%20/%3EHave%20a%20wonderful%20day,%3Cbr%20/%3E%3Cbr%20/%3E%3Cb%3E%3Cu%3EUpdate:%3C/u%3E%3C/b%3E%3Cbr%20/%3E%3Cbr%20/%3E*26%20May%2007:%20Wai%20Yan%20Lin%20translated%20part%201%20and%202%20of%20the%20TabView%20widget%20and%20this%20post%20to%20Burmese%20here:%3Cbr%20/%3E%3Ca%20href%3D%22http://waiyanlinn.blogspot.com/2007/05/tabview-widget.html%22%3Ehttp://waiyanlinn.blogspot.com/2007/05/tabview-widget.html%3C/a%3E)
Archived Post: TabView Application: A Blogger Hack Directory 16 Sep 2008 4:37 AM (17 years ago)
 Dear Friend,
Here is an application of the TabView widget, a "Blogger Hack Directory". Of course, you would have different interests, once you decide to make a directory for yourself.
http://hoctro-bloggerhackdir.blogspot.com/
For your convenience, you could download the template from the link below:
http://hoctro2007.googlepages.com/bloggerdirectory.xml
Then, create a new blog, and upload the template. Once you know how to alter the contents, you'll be able to create your own version.
For information on how to upload a template, please follow the instructions from this article: Hacking Technique - How To Modify a Template or from "Blogger-Templates" blog.
Have a wonderful day.

Archived Post: Tab View (Part 2) 16 Sep 2008 4:27 AM (17 years ago)
 Dear Friend,
My next step in perfecting the TabView widget is to add two default tabs to show a blog's latest posts and comments. I also modify the code so that you can have multiple blogs shown in different views.

But first, a quick explanation on "commenting out" things from a Blogger template.
If you want to exclude a section of code inside the two <script> and </script>, you can either use // for a single line, or /* */ for multiple lines.
For template code outside Javascript such as html tags, use this notation instead <!-- -->
Now, to see the effect of multiple tab views, in step 3 from "Introducing TabView Widget - Part 1" tutorial, remove the <!-- in front of and --> after the bold code below so the code looks like this
<div>
<h2>Hoctro's Place</h2>
<div class='yui-navset' id='multiTab1'/>
</div>
<div>
<h2>Hackosphere</h2>
<div class='yui-navset' id='multiTab2'/>
</div>
and also near the end remove the /* in front of and and */ after the bold code below so the segment now looks like this:
// Preferred Labels
for (var i=0; i < labels1.length; i++)
if (labels1[i]) cb.searchLabel(blog1, labels1[i], 'listTab1');
var blog2 = "hackosphere.blogspot.com";
var tabView2 = new YAHOO.widget.TabView('multiTab2');
var labels2 = ['Neo','Widgets', "Blogger Power"];
function listTab2(json) {
listOneTab(json, tabView2, "", false);
}
function listLatestPostsTab2(json) {
listOneTab(json, tabView2, "Latest Posts", true);
}
function listLatestCommentsTab2(json) {
listOneTab(json, tabView2, "Latest Comments", false);
}
// Activating calls!
// Latest Posts
cb.search( blog2, "posts", 1, 25, 'listLatestPostsTab2');
// Latest Comments
cb.search( blog2, "comments", 1, 25, 'listLatestCommentsTab2');
// Preferred Labels
for (var i=0; i < labels2.length; i++)
if (labels2[i]) cb.searchLabel("hackosphere.blogspot.com", labels2[i], 'listTab2');
</script>
</b:includable>
</b:widget>
What you will see now is the appearance of another tab view, showing Hackosphere's latest posts, comments, and are watch list of interesting labels.
As you can see, I make it a little bit easier for you to have the ability to add a new tab view, simply by removing the comments. But the process to add a new view from scratch is quite involved, so you need to pay extra attention to make it right. I believe if you interested in reading this article, you already have enough knowledge to proceed. (I wish I can use the ultimate solution, that is writing a pseudocope class, but I have not enough experience to pass value such as json and array to a parameter by reference. So you have to live with the less convenient solution such as this.)
Adding a new tab view to the widget is a three step process, and I will carefully walk you through each step.
Step 1.
If you have not already installed the TabView widget, please do so.
We are adding yet another third view for the purpose of tracking latest development on Hans' Beautiful Beta blog, and it's going to involve a lot of cut-and-paste, modifying and also common sense. Let's name the id of the "div" that will store it as multiTab3.
Step 2: Adding the HTML code to house the title and tabview
This step allows you to configure the appearance of the tab views, either vertically, or as a 2 column table, or anything you like.
In step 3's code of part 1, cut and paste this code below right next to it.
<div>
<h2>Hoctro's Place</h2>
<div class='yui-navset' id='multiTab1'/>
</div>
then change h2 content and the id to become (in bold):
<div>
<h2>Beautiful Beta</h2>
<div class='yui-navset' id='multiTab3'/>
</div>
Step 3: Adding Javascript code to create a new view
In step 3's code of part 1, cut and paste this code below right next to it.
var blog1 = "hoctro.blogspot.com";
var tabView1 = new YAHOO.widget.TabView('multiTab1');
var labels1 = ['JSON Hacks', 'Label Hacks','Free Templates'];
function listTab1(json) {
listOneTab(json, tabView1, "", false);
}
function listLatestPostsTab1(json) {
listOneTab(json, tabView1, "Latest Posts", true);
}
function listLatestCommentsTab1(json) {
listOneTab(json, tabView1, "Latest Comments", false);
}
// Activating calls!
// Latest Posts
cb.search( blog1, "posts", 1, 25, 'listLatestPostsTab1');
// Latest Comments
cb.search( blog1, "comments", 1, 25, 'listLatestCommentsTab1');
// Preferred Labels
for (var i=0; i < labels1.length; i++)
if (labels1[i]) cb.searchLabel(blog1, labels1[i], 'listTab1');
This is labor-intensive, as we want to duplicate everything from "1" to "3", or rename the blog, such as
blog1 -> blog3
hoctro.blogspot.com -> beautifulbeta.blogspot.com
tabView1 -> tabView3
multiTab1 -> multiTab3
labels1 -> labels3
and so on.
Below is my solution to that replacing process, with changed values in bold:
var blog3 = "beautifulbeta.blogspot.com";
var tabView3 = new YAHOO.widget.TabView('multiTab3');
var labels3 = ['hacks', 'tutorials','widgets', 'gadgets']; // These are Hans' labels.
function listTab3(json) {
listOneTab(json, tabView3, "", false);
}
function listLatestPostsTab3(json) {
listOneTab(json, tabView3, "Latest Posts", true);
}
function listLatestCommentsTab3(json) {
listOneTab(json, tabView3, "Latest Comments", false);
}
// Activating calls!
// Latest Posts
cb.search( blog3, "posts", 1, 25, 'listLatestPostsTab3');
// Latest Comments
cb.search( blog3, "comments", 1, 25, 'listLatestCommentsTab3');
// Preferred Labels
for (var i=0; i < labels3.length; i++)
if (labels3[i]) cb.searchLabel(blog3, labels3[i], 'listTab3');
I also just realize that the html code from step 2 can be placed anywhere, so I just moved my hoctro.blogspot.com tab view to the front of the blog's widget, and it works as expected.
That's all! Please give it a try.
Have a wonderful day.
Update:
* 24 May 07: A translation of this article to indonesian by Bikin is available here:
http://bikinblogger.blogspot.com/2007/05/tabview-widget-bagian-2.html
*26 May 07: Wai Yan Lin translated also part 1, 2 & fav blogs application to Burmese here:
http://waiyanlinn.blogspot.com/2007/05/tabview-widget.html
Archived Post: a Widget to Show Thumbnail Pictures 14 Sep 2008 5:29 AM (17 years ago)
Dear Friend,
I'm very proud to show you my original and truly first Blogger Beta Hack.
In a nutshell, the hack takes advantage of the Page Element's Link List and turns it into a Thumbnail Picture List element. As you might know, the link list allows the page owner to quickly add a bunch of urls for quick links to other interesting sites. My hack takes advantage of the GUI interface to quickly add/erase/arrange these links but pushes it further to upload image addresses instead.
Here are the steps to setup this hack. You are also required to know some HTML & CSS to further enhance this hack to make it your own unique version of it.
First, go to Template->Add Elements, then select sidebar's Add Page Elements. Select Link List option at top right corner: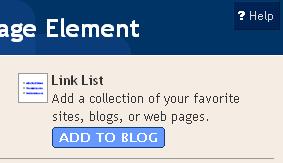
Next, add some sample pictures: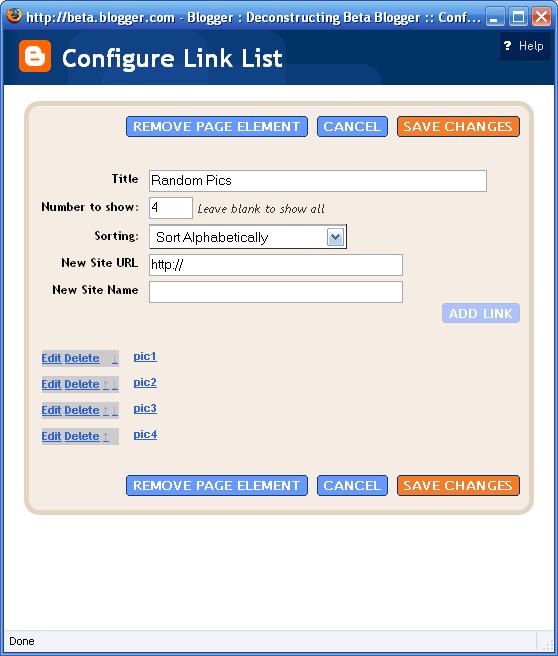
Then, drag-n-drop the newly created link-list from sidebar to post body area. (You can always move it back later.)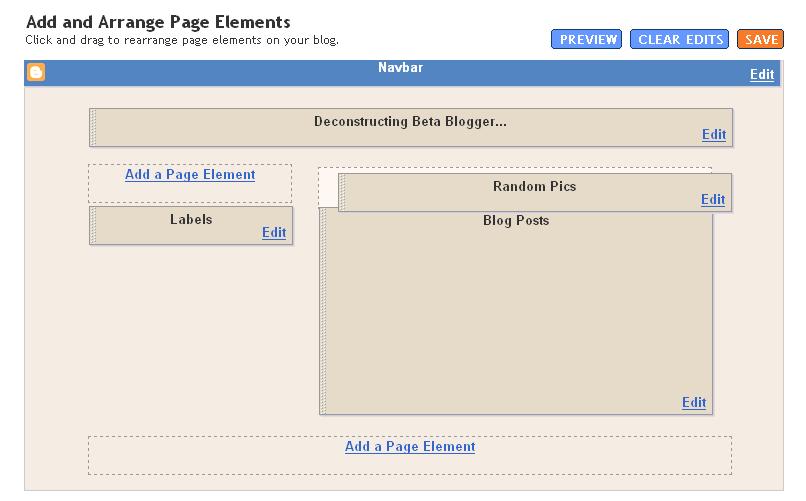
Go to Template->Edit HTML. Make sure to check the Expand Widget Template check box. Then look for the LinkList1 widget. It should be in front of all the other widgets, and right after the CSS portion of the code. 
Then replace that widget with this one, make sure they have the same name (LinkList1):
<b:widget id='LinkList1' locked='false' title='Random Pics' type='LinkList'>
<b:includable id='main'>
<b:if cond='data:title'><h2><data:title/></h2></b:if>
 <div class='widget-content'>
   <div class='hoctro_spacer'>
     <b:loop values='data:links' var='link'>
        <a expr:href='data:link.target' onblur='try {parent.deselectBloggerImageGracefully();} catch(e) {}'><img alt='' border='0'
expr:src='data:link.target' height='100' style='display:inline; margin:0px auto 10px; ;cursor:pointer;' width='100'/></a>
     </b:loop>
   </div>
   <b:include name='quickedit'/>
 </div>
</b:includable>
</b:widget>
As you can see, I use the same code that Blogger provides when it successfully upload an image as a mean to show the image itself. You can use whatever it best fits your purpose.
  <a expr:href='data:link.target'
    onblur='try {parent.deselectBloggerImageGracefully();} catch(e) {}'>
    <img alt='' border='0'
    expr:src='data:link.target' height='100'
    style='display:inline; margin:0px auto 10px; ;cursor:pointer;'
    width='100'/>
  </a>
Feel free to change this portion of code to anything you like. Just make sure the src and href parameters must be written as expr:src and expr:href respectively. 
Hope you will enjoy this new hack.
Hoctro (9/2006)
Blog: http://hoctro.blogspot.com/
%3Cbr%20/%3E%3Cbr%20/%3E%3Ca%20href%3D%22http://photos1.blogger.com/blogger/1916/3748/1600/h-2b.jpg%22%3E%3Cimg%20style%3D%22display:block;%20margin:0px%20auto%2010px;cursor:pointer;%20cursor:hand;%22%20src%3D%22http://photos1.blogger.com/blogger/1916/3748/320/h-2b.jpg%22%20border%3D%220%22%20alt%3D%22%22%20/%3E%3C/a%3E%3Cbr%20/%3E%3Cbr%20/%3EGo%20to%20%3Cspan%3ETemplate-%3EEdit%20HTML%3C/span%3E.%20Make%20sure%20to%20check%20the%20%3Cspan%3EExpand%20Widget%20Template%3C/span%3E%20check%20box.%20Then%20look%20for%20the%20%3Cspan%3ELinkList1%3C/span%3E%20widget.%20It%20should%20be%20in%20front%20of%20all%20the%20other%20widgets,%20and%20right%20after%20the%20CSS%20portion%20of%20the%20code.%20%3Cbr%20/%3E%3Cbr%20/%3E%3Ca%20href%3D%22http://photos1.blogger.com/blogger/1916/3748/1600/h-3.jpg%22%3E%3Cimg%20style%3D%22display:block;%20margin:0px%20auto%2010px;cursor:pointer;%20cursor:hand;%22%20src%3D%22http://photos1.blogger.com/blogger/1916/3748/320/h-3.jpg%22%20border%3D%220%22%20alt%3D%22%22%20/%3E%3C/a%3E%3Cbr%20/%3E%3Cbr%20/%3EThen%20replace%20that%20widget%20with%20this%20one,%20make%20sure%20they%20have%20the%20same%20name%20(LinkList1):%3Cbr%20/%3E%3Cbr%20/%3E%3Ccode%3E%3Cbr%20/%3E%26lt;b:widget%26nbsp;id%3D'LinkList1'%26nbsp;locked%3D'false'%26nbsp;title%3D'Random%26nbsp;Pics'%26nbsp;type%3D'LinkList'%26gt;%3Cbr%20/%3E%26lt;b:includable%26nbsp;id%3D'main'%26gt;%3Cbr%20/%3E%26lt;b:if%26nbsp;cond%3D'data:title'%26gt;%26lt;h2%26gt;%26lt;data:title/%26gt;%26lt;/h2%26gt;%26lt;/b:if%26gt;%3Cbr%20/%3E%26nbsp;%26lt;div%26nbsp;class%3D'widget-content'%26gt;%3Cbr%20/%3E%26nbsp;%26nbsp;%26nbsp;%26lt;div%26nbsp;class%3D'hoctro_spacer'%26gt;%3Cbr%20/%3E%26nbsp;%26nbsp;%26nbsp;%26nbsp;%26nbsp;%26lt;b:loop%26nbsp;values%3D'data:links'%26nbsp;var%3D'link'%26gt;%3Cbr%20/%3E%26nbsp;%26nbsp;%26nbsp;%26nbsp;%26nbsp;%26nbsp;%26nbsp;%26nbsp;%26lt;a%26nbsp;expr:href%3D'data:link.target'%26nbsp;onblur%3D'try%26nbsp;%7Bparent.deselectBloggerImageGracefully();%7D%26nbsp;catch(e)%26nbsp;%7B%7D'%26gt;%26lt;img%26nbsp;alt%3D''%26nbsp;border%3D'0'%26nbsp;%3Cbr%20/%3Eexpr:src%3D'data:link.target'%26nbsp;height%3D'100'%26nbsp;style%3D'display:inline;%26nbsp;margin:0px%26nbsp;auto%26nbsp;10px;%26nbsp;;cursor:pointer;'%26nbsp;width%3D'100'/%26gt;%26lt;/a%26gt;%3Cbr%20/%3E%26nbsp;%26nbsp;%26nbsp;%26nbsp;%26nbsp;%26lt;/b:loop%26gt;%3Cbr%20/%3E%26nbsp;%26nbsp;%26nbsp;%26lt;/div%26gt;%3Cbr%20/%3E%26nbsp;%26nbsp;%26nbsp;%26lt;b:include%26nbsp;name%3D'quickedit'/%26gt;%3Cbr%20/%3E%26nbsp;%26lt;/div%26gt;%3Cbr%20/%3E%26lt;/b:includable%26gt;%3Cbr%20/%3E%26lt;/b:widget%26gt;%3Cbr%20/%3E%3Cbr%20/%3E%3C/code%3E%3Cbr%20/%3E%3Cbr%20/%3EAs%20you%20can%20see,%20I%20use%20the%20same%20code%20that%20Blogger%20provides%20when%20it%20successfully%20upload%20an%20image%20as%20a%20mean%20to%20show%20the%20image%20itself.%20%20You%20can%20use%20whatever%20it%20best%20fits%20your%20purpose.%3Cbr%20/%3E%3Cbr%20/%3E%3Cspan%3E%3Ccode%3E%3Cbr%20/%3E%26nbsp;%26nbsp;%26lt;a%26nbsp;expr:href%3D'data:link.target'%26nbsp;%3Cbr%20/%3E%26nbsp;%26nbsp;%26nbsp;%26nbsp;onblur%3D'try%26nbsp;%7Bparent.deselectBloggerImageGracefully();%7D%26nbsp;catch(e)%26nbsp;%7B%7D'%26gt;%3Cbr%20/%3E%26nbsp;%26nbsp;%26nbsp;%26nbsp;%26lt;img%26nbsp;alt%3D''%26nbsp;border%3D'0'%26nbsp;%3Cbr%20/%3E%26nbsp;%26nbsp;%26nbsp;%26nbsp;expr:src%3D'data:link.target'%26nbsp;height%3D'100'%26nbsp;%3Cbr%20/%3E%26nbsp;%26nbsp;%26nbsp;%26nbsp;style%3D'display:inline;%26nbsp;margin:0px%26nbsp;auto%26nbsp;10px;%26nbsp;;cursor:pointer;'%26nbsp;%3Cbr%20/%3E%26nbsp;%26nbsp;%26nbsp;%26nbsp;width%3D'100'/%26gt;%3Cbr%20/%3E%26nbsp;%26nbsp;%26lt;/a%26gt;%3Cbr%20/%3E%3C/code%3E%3C/span%3E%3Cbr%20/%3E%3Cbr%20/%3EFeel%20free%20to%20change%20this%20portion%20of%20code%20to%20anything%20you%20like.%20Just%20make%20sure%20the%20%3Cspan%3Esrc%3C/span%3E%20and%20%3Cspan%3Ehref%3C/span%3E%20parameters%20must%20be%20written%20as%20%3Cspan%3Eexpr:src%3C/span%3E%20and%20%3Cspan%3Eexpr:href%3C/span%3E%20respectively.%20%3Cbr%20/%3E%3Cbr%20/%3E%3Ca%20href%3D%22http://photos1.blogger.com/blogger/1916/3748/1600/image%25231.jpg%22%3E%3Cimg%20style%3D%22display:block;%20margin:0px%20auto%2010px;cursor:pointer;%20cursor:hand;%22%20src%3D%22http://photos1.blogger.com/blogger/1916/3748/320/image%25231.jpg%22%20border%3D%220%22%20alt%3D%22%22%20/%3E%3C/a%3E%3Cbr%20/%3E%3Cbr%20/%3EHope%20you%20will%20enjoy%20this%20new%20hack.%20%3Cbr%20/%3E%3Cbr%20/%3EHoctro%20(9/2006)%3Cbr%20/%3EBlog:%20http://hoctro.blogspot.com/%3Cbr%20/%3E%3C/span%3E)
Archived Post: My First Blogger Template Attempt 13 Sep 2008 11:20 AM (17 years ago)
Dear Friend,
I'm happy to announce my first hack that I improved based on the original hack from Hackosphere (http://hackosphere.blogspot.com/). Many thanks to Mr. Ramani for his hacking ability and his willingness to share with the rest of us.
My hack is based on his hack of showing the "titles only" if you click on a monthly or label listing. Instead of showing the content of all the posts, it'll only show the titles. My improved hack is based upon that by not even showing the date that a post is created, and I also make the posts indented as a nice bulleted list (that you can use CSS to change its appearance, btw.)
Below is the complete code of the hack. I also fixed the bug of the date not showing up in the Main Page / and the Main Page not lined up with the latest comments/posts - Thanks a bunch Vivek/ you're a great tester! pls see the line that is bold, and two other ul tags being commented out at front and back. (7 Sep 06)
<!-- posts -->
<div id='blog-posts'>
<b:loop values='data:posts' var='post'>
<!--Improved hack from Hackosphere By: Hoctro http://hoctro.blogspot.com - 6 Sep 2006 -->
<!-- This hack allows posts to be shown without dates and as a bullet list -->
<b:if cond='data:post.dateHeader'>
<b:if cond='data:blog.pageType == "item"'>
<h2 class='date-header'><data:post.dateHeader/></h2>
</b:if>
<!--Fix Bug for not showing the date on main page - 7 Sep 2006 -->
<b:if cond='data:blog.homepageUrl == data:blog.url'>
<h2 class='date-header'><data:post.dateHeader/></h2>
</b:if>
</b:if>
<!--Hack by Hackosphere - 6 Sep 2006 -->
<b:if cond='data:blog.homepageUrl != data:blog.url'>
<b:if cond='data:blog.pageType != "item"'>
<b:else/>
<b:include data='post' name='post'/>
</b:if>
<b:else/>
<b:include data='post' name='post'/>
</b:if>
<!--End of Hack by Hackosphere - 6 Sep 2006 -->
<b:if cond='data:blog.pageType == "item"'>
<b:if cond='data:post.allowComments'>
<b:include data='post' name='comments'/>
</b:if>
</b:if>
<!--End of Improved hack from Hackosphere By: Hoctro -->
</b:loop>
</div>
Basically, you need to replace the <div id='blog-posts'> portion with the code above. Also, the original hack is here, please refer to it on how to hack the relevant portion.
I predict it's gonna be very much fun hacking Blogger, since the new way of hacking is very much like XSLT, the one I am already familiar with. It's actually much simpler than XSLT, as far as I can tell. I hope I will have many more hacks to share with you in the future.
Thanks for your time and have a nice day!
Hoctro (9/2006)
Blog: http://hoctro.blogspot.com/
.%20Many%20thanks%20to%20Mr.%20Ramani%20for%20his%20hacking%20ability%20and%20his%20willingness%20to%20share%20with%20the%20rest%20of%20us.%3Cbr%20/%3E%3Cbr%20/%3EMy%20hack%20is%20based%20on%20his%20hack%20of%20showing%20the%20%22titles%20only%22%20if%20you%20click%20on%20a%20monthly%20or%20label%20listing.%20Instead%20of%20showing%20the%20content%20of%20all%20the%20posts,%20it'll%20only%20show%20the%20titles.%20My%20improved%20hack%20is%20based%20upon%20that%20by%20not%20even%20showing%20the%20date%20that%20a%20post%20is%20created,%20and%20I%20also%20make%20the%20posts%20indented%20as%20a%20nice%20bulleted%20list%20(that%20you%20can%20use%20CSS%20to%20change%20its%20appearance,%20btw.)%3Cbr%20/%3E%3Cbr%20/%3E%3Ca%20href%3D%22http://photos1.blogger.com/blogger2/7393/928438932984448/1600/test.jpg%22%3E%3Cimg%20style%3D%22margin:%200px%20auto%2010px;%20display:%20block;%20text-align:%20center;%20cursor:%20pointer;%22%20src%3D%22http://photos1.blogger.com/blogger2/7393/928438932984448/400/test.jpg%22%20alt%3D%22%22%20border%3D%220%22%20/%3E%3C/a%3E%3Cbr%20/%3E%3Cbr%20/%3E%3Cbr%20/%3EBelow%20is%20the%20complete%20code%20of%20the%20hack.%20%3Cstrong%3EI%20also%20fixed%20the%20bug%20of%20the%20date%20not%20showing%20up%20in%20the%20Main%20Page%20/%20and%20the%20Main%20Page%20not%20lined%20up%20with%20the%20latest%20comments/posts%20-%20Thanks%20a%20bunch%20Vivek/%20you're%20a%20great%20tester!%20pls%20see%20the%20line%20that%20is%20bold,%20and%20two%20other%20ul%20tags%20being%20commented%20out%20at%20front%20and%20back.%20(7%20Sep%2006)%3C/strong%3E%3Cbr%20/%3E%3Cbr%20/%3E%3Ccode%3E%3Cbr%20/%3E%26nbsp;%26lt;!--%26nbsp;posts%26nbsp;--%26gt;%3Cbr%20/%3E%3Cspan%26nbsp;%3E%26nbsp;%26nbsp;%3Cspan%26nbsp;%3E%26lt;!--%26nbsp;%26lt;ul%26gt;--%26gt;%3C/span%3E%3C/span%3E%3Cbr%20/%3E%26nbsp;%26lt;div%26nbsp;id%3D'blog-posts'%26gt;%3Cbr%20/%3E%26nbsp;%26nbsp;%26nbsp;%26lt;b:loop%26nbsp;values%3D'data:posts'%26nbsp;var%3D'post'%26gt;%3Cbr%20/%3E%26nbsp;%26nbsp;%26nbsp;%26lt;!--Improved%26nbsp;hack%26nbsp;from%26nbsp;Hackosphere%26nbsp;By:%26nbsp;Hoctro%26nbsp;http://hoctro.blogspot.com%26nbsp;-%26nbsp;6%26nbsp;Sep%26nbsp;2006%26nbsp;--%26gt;%3Cbr%20/%3E%26nbsp;%26nbsp;%26nbsp;%26lt;!--%26nbsp;This%26nbsp;hack%26nbsp;allows%26nbsp;posts%26nbsp;to%26nbsp;be%26nbsp;shown%26nbsp;without%26nbsp;dates%26nbsp;and%26nbsp;as%26nbsp;a%26nbsp;bullet%26nbsp;list%26nbsp;--%26gt;%3Cbr%20/%3E%3Cbr%20/%3E%26nbsp;%26nbsp;%26nbsp;%26nbsp;%26nbsp;%26nbsp;%26nbsp;%26lt;b:if%26nbsp;cond%3D'data:post.dateHeader'%26gt;%3Cbr%20/%3E%26nbsp;%26nbsp;%26nbsp;%26nbsp;%26nbsp;%26nbsp;%26nbsp;%26nbsp;%26nbsp;%26lt;b:if%26nbsp;cond%3D'data:blog.pageType%26nbsp;%3D%3D%26nbsp;%22item%22'%26gt;%3Cbr%20/%3E%26nbsp;%26nbsp;%26nbsp;%26nbsp;%26nbsp;%26nbsp;%26nbsp;%26nbsp;%26nbsp;%26nbsp;%26nbsp;%26lt;h2%26nbsp;class%3D'date-header'%26gt;%26lt;data:post.dateHeader/%26gt;%26lt;/h2%26gt;%3Cbr%20/%3E%26nbsp;%26nbsp;%26nbsp;%26nbsp;%26nbsp;%26nbsp;%26nbsp;%26nbsp;%26nbsp;%26lt;/b:if%26gt;%3Cbr%20/%3E%26nbsp;%26nbsp;%26nbsp;%26nbsp;%26nbsp;%26nbsp;%26nbsp;%26nbsp;%26nbsp;%26lt;!--Fix%26nbsp;Bug%26nbsp;for%26nbsp;not%26nbsp;showing%26nbsp;the%26nbsp;date%26nbsp;on%26nbsp;main%26nbsp;page%26nbsp;-%26nbsp;7%26nbsp;Sep%26nbsp;2006%26nbsp;--%26gt;%3Cbr%20/%3E%26nbsp;%26nbsp;%26nbsp;%26nbsp;%26nbsp;%26nbsp;%26nbsp;%26nbsp;%26nbsp;%26lt;b:if%26nbsp;cond%3D'data:blog.homepageUrl%26nbsp;%3D%3D%26nbsp;data:blog.url'%26gt;%3Cbr%20/%3E%26nbsp;%26nbsp;%26nbsp;%26nbsp;%26nbsp;%26nbsp;%26nbsp;%26nbsp;%26nbsp;%26nbsp;%26nbsp;%26lt;h2%26nbsp;class%3D'date-header'%26gt;%26lt;data:post.dateHeader/%26gt;%26lt;/h2%26gt;%3Cbr%20/%3E%26nbsp;%26nbsp;%26nbsp;%26nbsp;%26nbsp;%26nbsp;%26nbsp;%26nbsp;%26nbsp;%26lt;/b:if%26gt;%3Cbr%20/%3E%26nbsp;%26nbsp;%26nbsp;%26nbsp;%26nbsp;%26nbsp;%26nbsp;%26lt;/b:if%26gt;%3Cbr%20/%3E%3Cbr%20/%3E%26nbsp;%26nbsp;%26nbsp;%26nbsp;%26nbsp;%26lt;!--Hack%26nbsp;by%26nbsp;Hackosphere%26nbsp;-%26nbsp;6%26nbsp;Sep%26nbsp;2006%26nbsp;--%26gt;%3Cbr%20/%3E%26nbsp;%26nbsp;%26nbsp;%26nbsp;%26nbsp;%26lt;b:if%26nbsp;cond%3D'data:blog.homepageUrl%26nbsp;!%3D%26nbsp;data:blog.url'%26gt;%26nbsp;%26nbsp;%26nbsp;%26nbsp;%3Cbr%20/%3E%26nbsp;%26nbsp;%26nbsp;%26nbsp;%26nbsp;%26nbsp;%26nbsp;%26lt;b:if%26nbsp;cond%3D'data:blog.pageType%26nbsp;!%3D%26nbsp;%22item%22'%26gt;%26nbsp;%26nbsp;%26nbsp;%26nbsp;%26nbsp;%26nbsp;%26nbsp;%26nbsp;%3Cbr%20/%3E%3Cb%3E%26nbsp;%26nbsp;%26nbsp;%26nbsp;%26nbsp;%26nbsp;%26nbsp;%26nbsp;%26nbsp;%26nbsp;%26nbsp;%3Cspan%26nbsp;%3E%26lt;ul%26gt;%26lt;li%26gt;%26lt;a%26nbsp;expr:href%3D'data:post.url'%26gt;%26nbsp;%26lt;data:post.title/%26gt;%26nbsp;%26lt;/a%26gt;%26lt;/li%26gt;%26lt;/ul%26gt;%3C/span%3E%3C/b%3E%3Cbr%20/%3E%26nbsp;%26lt;b:else/%26gt;%26nbsp;%26nbsp;%26nbsp;%26nbsp;%26nbsp;%26nbsp;%26nbsp;%26nbsp;%3Cbr%20/%3E%26nbsp;%26nbsp;%26nbsp;%26nbsp;%26nbsp;%26nbsp;%26nbsp;%26nbsp;%26nbsp;%26nbsp;%26lt;b:include%26nbsp;data%3D'post'%26nbsp;name%3D'post'/%26gt;%26nbsp;%26nbsp;%26nbsp;%26nbsp;%3Cbr%20/%3E%26nbsp;%26nbsp;%26nbsp;%26nbsp;%26nbsp;%26nbsp;%26nbsp;%26nbsp;%26lt;/b:if%26gt;%3Cbr%20/%3E%26nbsp;%26nbsp;%26nbsp;%26nbsp;%26nbsp;%26nbsp;%26nbsp;%26nbsp;%26nbsp;%26nbsp;%26lt;b:else/%26gt;%26nbsp;%26nbsp;%26nbsp;%26nbsp;%3Cbr%20/%3E%26nbsp;%26nbsp;%26nbsp;%26nbsp;%26nbsp;%26nbsp;%26nbsp;%26lt;b:include%26nbsp;data%3D'post'%26nbsp;name%3D'post'/%26gt;%3Cbr%20/%3E%26nbsp;%26nbsp;%26nbsp;%26nbsp;%26nbsp;%26lt;/b:if%26gt;%3Cbr%20/%3E%26nbsp;%26nbsp;%26nbsp;%26nbsp;%26nbsp;%26lt;!--End%26nbsp;of%26nbsp;Hack%26nbsp;by%26nbsp;Hackosphere%26nbsp;-%26nbsp;6%26nbsp;Sep%26nbsp;2006%26nbsp;--%26gt;%3Cbr%20/%3E%26nbsp;%26nbsp;%26nbsp;%3Cbr%20/%3E%26nbsp;%26nbsp;%26nbsp;%26nbsp;%26nbsp;%26lt;b:if%26nbsp;cond%3D'data:blog.pageType%26nbsp;%3D%3D%26nbsp;%22item%22'%26gt;%3Cbr%20/%3E%26nbsp;%26nbsp;%26nbsp;%26nbsp;%26nbsp;%26nbsp;%26nbsp;%26lt;b:if%26nbsp;cond%3D'data:post.allowComments'%26gt;%3Cbr%20/%3E%26nbsp;%26nbsp;%26nbsp;%26nbsp;%26nbsp;%26nbsp;%26nbsp;%26nbsp;%26nbsp;%26lt;b:include%26nbsp;data%3D'post'%26nbsp;name%3D'comments'/%26gt;%3Cbr%20/%3E%26nbsp;%26nbsp;%26nbsp;%26nbsp;%26nbsp;%26nbsp;%26nbsp;%26lt;/b:if%26gt;%3Cbr%20/%3E%26nbsp;%26nbsp;%26nbsp;%26nbsp;%26nbsp;%26lt;/b:if%26gt;%3Cbr%20/%3E%26nbsp;%26nbsp;%26nbsp;%26lt;!--End%26nbsp;of%26nbsp;Improved%26nbsp;hack%26nbsp;from%26nbsp;Hackosphere%26nbsp;By:%26nbsp;Hoctro%26nbsp;%26nbsp;--%26gt;%3Cbr%20/%3E%3Cspan%26nbsp;%3E%26nbsp;%26nbsp;%3Cspan%26nbsp;%3E%26lt;!--%26nbsp;%26lt;/ul%26gt;--%26gt;%3C/span%3E%3C/span%3E%3Cbr%20/%3E%26nbsp;%26nbsp;%26nbsp;%26lt;/b:loop%26gt;%3Cbr%20/%3E%26nbsp;%26lt;/div%26gt;%3Cbr%20/%3E%3C/code%3E%3Cbr%20/%3E%3Cbr%20/%3E%3Cbr%20/%3EBasically,%20you%20need%20to%20replace%20the%20%26lt;div%20id%3D'blog-posts'%26gt;%20portion%20with%20the%20code%20above.%20Also,%20the%20original%20hack%20is%20%3Ca%20href%3D%22http://hackosphere.blogspot.com/3006/08/new-hack-to-improve-your-labelsearch.html%22%3Ehere%3C/a%3E,%20please%20refer%20to%20it%20on%20how%20to%20hack%20the%20relevant%20portion.%3Cbr%20/%3E%3Cbr%20/%3E%3Cbr%20/%3E%3Cbr%20/%3EI%20predict%20it's%20gonna%20be%20very%20much%20fun%20hacking%20Blogger,%20since%20the%20new%20way%20of%20hacking%20is%20very%20much%20like%20XSLT,%20the%20one%20I%20am%20already%20familiar%20with.%20It's%20actually%20much%20simpler%20than%20XSLT,%20as%20far%20as%20I%20can%20tell.%20I%20hope%20I%20will%20have%20many%20more%20hacks%20to%20share%20with%20you%20in%20the%20future.%3Cbr%20/%3E%3Cbr%20/%3EThanks%20for%20your%20time%20and%20have%20a%20nice%20day!%3Cbr%20/%3E%3Cbr%20/%3EHoctro%20(9/2006)%3Cbr%20/%3EBlog:%20http://hoctro.blogspot.com/)
Archived Post: How To Modify the Blogger Template - The Core Javacript Library for JSON Widgets 13 Sep 2008 11:16 AM (17 years ago)

This post explains how to make modifications to your New Blogger template, and also houses the latest Javascript JSON library code. This will make it easier for my others articles (and ultimately my readers) as those articles will be referring to this post on how to open the template and add new code.
I. Installing Steps
A. Accessing the "Template" tab
1. If you're from your blog, and you're logged in, click on "Customize"
2. If you're from one blog, and you want to alter the template of another blog, click on "Dashboard"
3. If you're already on "Dashboard", click on "Layout"
4. if you're already inside the Setting page, click on the "Template" tab
B. Change to "Edit HTML" page
To see the template, click on Edit HTML. By default, the template does not expose the internal structure of each widget, so what you see actually is the short form of it. This is indeed a great thing, since you can see quickly how the template is made up from, in textual form. You could also insert the complete widget code of my hack (as instructed in the referred tutorials) right from this collapsed mode.
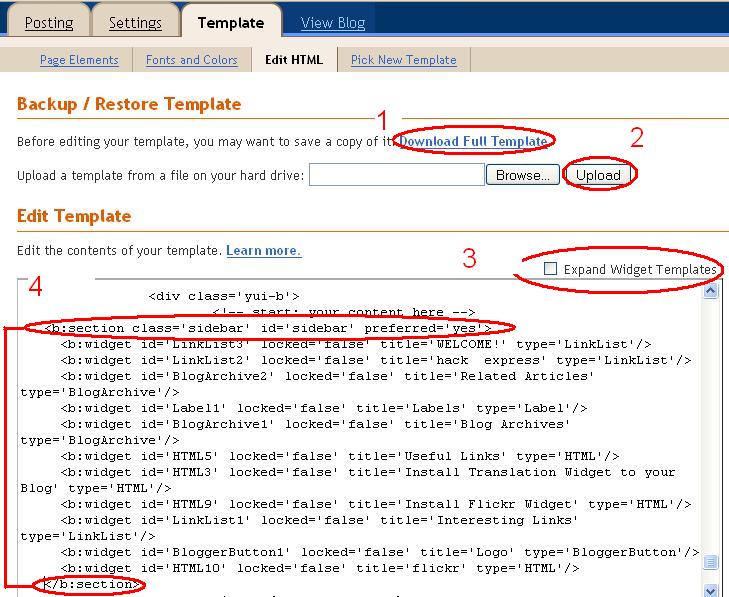
1) Before you make any serious modifications, it's best to save a copy to your hard drive.
2) Later on, you could always upload a good template up, overriding the current template.
3) This is the toggle that switches between "collapsed" and "explanded widget templates" modes.
4) To insert a new widget, enter the code inside the pair of "b:section" tags with id='sidebar', anywhere in between any two singly "b:widget" lines. Later on, once the code is accepted, it's very easy to visually drag the widget from one place to another, in "Page Element" view.
C. To add CSS or JavaScript code:
1) The preferred place to add CSS code is right in front of the closing b:skin tag
2) The preferred place to add JavaScript code is right between the closing b:skin tag and the closing head tag.
Also, if the hack is labeled as a "JSON Hack", make sure your feed setting is either "short" or "full", but not "None". Let me elaborate on this one:
a. Make sure your feed settings look like this:
b. and not like this:
Also, make sure in "Settings"->"Archiving", "Enable Post Pages?" is set to "Yes"
II. Installing the core Javacript library object
This is the only location where the Core Library will be posted. The reason I do this instead of making a link line to an external js file is because I don't want my users to have a bad feeling of not sure what's going on with the js. I want you to be in control on when you decide to update your existing library version with this latest code.
You only need to place the code below once in your template, as the code is going to be shared among the calling widgets such as TabView, Unlimited Posts, and Unlimited Comments.
Cut and paste the code and paste it between the closing </b:skin> tag and the closing </head> tag :
<script type='text/javascript'>
// Developed by Hoctro - All rights reserved 2007
// This credit must be included in all your derived usages.
// "cb" is intended to be a common library, where different widgets would
// utitlize the shared operations such as getTitle, getLink, etc. from a json object.
var cb = {
// search function requires these parameters:
// 1. query: a blogger address, such as "hoctro.blogspot.com",
// 2. type: type of return data, either "comments" or "posts",
// 3. start: the start-index parameter (where to start extracting data)
// 4. increment: the number of elements the json will get back. (the smaller value, the faster time to travel back)
// 5. func: the returned function the json object will feed.
search: function(query, type, start, increment, func) {
var script = document.createElement('script');
script.setAttribute('src', 'http://' + query + '/feeds/' + type + '/default?alt=json-in-script&start-index='
+ start + '&max-results=' + increment + '&callback=' + func + '&orderby=published');
script.setAttribute('type', 'text/javascript');
document.documentElement.firstChild.appendChild(script);
},
// searchLabel function return a result of posts w/ a label query
// it requires these parameters:
// 1. query: a blogger address, such as "hoctro.blogspot.com",
// 2. an array of labels
// 3. func: the returned function the json object will feed.
searchLabel: function(query, label, func) {
var script = document.createElement('script');
script.setAttribute('src', 'http://' + query + '/feeds/posts/default/-/' + encodeURIComponent(label) +
'?alt=json-in-script&callback=' + func + '&orderby=published');
script.setAttribute('type', 'text/javascript');
document.documentElement.firstChild.appendChild(script);
},
// getTotalResults needs the json object, and it'll return the total number of comments (or posts) of the blog.
getTotalResults: function(json) {
return json.feed.openSearch$totalResults.$t;
},
// getStartIndex gets the start index of a search inside an json object.
getStartIndex: function(json) {
return json.feed.openSearch$startIndex.$t;
},
// getLink return a href link if "name" matches the content inside "a" tags) of the link
getLink: function(entry, name) {
var alturl;
for (var k = 0; k < entry.link.length; k++) {
if (entry.link[k].rel == name)
alturl = entry.link[k].href;
}
return alturl;
},
// getTitle gets the title of the title of an entry of a json object.
getTitle: function(entry) {
return entry.title.$t;
},
// getContent gets the content inside an entry of a json object.
getContent: function(entry) {
return entry.content.$t;
},
// getCommentAuthor: gets the commenter name inside an entry of a json object.
getCommentAuthor: function(entry) {
return entry.author[0].name.$t;
},
// Given a json label search, this function return the decoded label.
getLabelFromURL: function(json) {
for (var l = 0; l < json.feed.link.length; l++) {
if (json.feed.link[l].rel == 'alternate') {
var raw = json.feed.link[l].href;
// The next two lines are borrowed from Ramani's Neo Template
// code. Thanks Ramani!
var label = raw.substr(raw.lastIndexOf('/')+1);
return decodeURIComponent(label);
}
}
},
txt : function (s) {
return s + " Widget by <a href='http://hoctro.blogspot.com" + "'>Hoctro</a>";
}
};
</script>
Thank you for reading.
Archived Post: Tab View 13 Sep 2008 11:10 AM (17 years ago)
 Dear Friend,
Now that I have the new framework for making widgets in store, I feel confident and start trying to create a new tab widget - using labels as tabs, similar to this Yahoo! widget.

With the wonderful help of Yahoo! TabView widget, the programming time reduces quite a bit.
You can see the result from my homepage:

If you want to install this onto your blog, follow these instructions.
Step 1: Installing the core Javacript library object
First, follow the instructions from this article Hacking Technique: How To Modify a (Beta) Template, in particular section C.2 (for step 1 & 2) and B.4 (for step 3).
Next, install the latest version of the Javacsript Core Library.
Save the template.
Step 2: Installing Yahoo! Tab View requirements
Cut and paste this code below right after step 1's code (such that these code still stay before the closing </head> tag.). See instruction here if you're still not sure.
<link href='http://yui.yahooapis.com/2.3.0/build/tabview/assets/tabview.css' rel='stylesheet' type='text/css'/>
<link href='http://yui.yahooapis.com/2.3.0/build/tabview/assets/border_tabs.css' rel='stylesheet' type='text/css'/>
<script src='http://yui.yahooapis.com/2.3.0/build/yahoo-dom-event/yahoo-dom-event.js' type='text/javascript'/>
<script src='http://yui.yahooapis.com/2.3.0/build/element/element-beta-min.js' type='text/javascript'/>
<script src='http://yui.yahooapis.com/2.3.0/build/tabview/tabview-min.js' type='text/javascript'/>
<style type='text/css'>
.yui-content {
padding:1em; /* pad content container */
}
.yui-navset .yui-content {
border:1px solid #ccc;
}
.yui-navset .yui-nav .selected a, .yui-navset .yui-nav a:hover {
background-color:#fff;
}
.yui-navset .yui-nav li a {
background:#e5e5e5 url(http://developer.yahoo.com/yui/examples/tabview/img/round_4px_trans_gray.gif) no-repeat;
}
.yui-navset .yui-nav li a em {
background:transparent url(http://developer.yahoo.com/yui/examples/tabview/img/round_4px_trans_gray.gif) no-repeat top right;
padding:0.5em;
}
/* top oriented */
.yui-navset-top .yui-nav { margin-bottom:-1px; } /* for overlap, based on content border-width */
.yui-navset-top .yui-nav li a {
border-bottom:1px solid #ccc;
}
.yui-navset-top .yui-nav .selected a { border-bottom:0; }
.yui-navset-top .yui-nav .selected a em { padding-bottom:0.6em; } /* adjust height */
</style>
Save the template.
Step 3: Installing the widget
Add this code between any two "b:widget" tags, save the template, and you're almost done.
<b:widget id='HTML102' locked='false' title='MultiTab Widget' type='HTML'>
<b:includable id='main'>
<div class='widget-content'>
<!-- only display title if it's non-empty -->
<b:if cond='data:title != ""'>
<h2 class='title'
>
</b:if>
<div id='doc'>
<div>
<h2>Hoctro's Place</h2>
<div class='yui-navset' id='multiTab1'/>
</div>
<!--
<div>
<h2>Hackosphere</h2>
<div class='yui-navset' id='multiTab2'/>
</div>
-->
</div>
<div id='103'/>
</div>
<script type='text/javascript'>
// Developed by Hoctro - All rights reserved 2007
// This credit must be included in all your derived usages.
var p1 = document.createElement('h6');
document.getElementById('103').appendChild(p1);
p1.innerHTML = cb.txt('TabView');
function listOneTab(json, tabView, title, act) {
var label = '';
var text = '';
var nPost = 10;
if (title == "")
label += cb.getLabelFromURL(json);
else
label += title;
text += "<div id='" + label + "'><ul>";
var numberPost = (json.feed.entry.length <= nPost) ?
json.feed.entry.length : nPost;
for (var i = 0; i < numberPost; i++) {
var entry = json.feed.entry[i];
text += "<li>" + "<a href='" + cb.getLink(entry, "alternate")
+ "'>" + cb.getTitle(entry) + "</li>";
}
text += '</ul></div>';
tabView.addTab( new YAHOO.widget.Tab({
label: label,
content: text,
active : act
}));
}
var blog1 = "hoctro.blogspot.com";
var tabView1 = new YAHOO.widget.TabView('multiTab1');
var labels1 = ['JSON Hacks', 'Label Hacks','Free Templates'];
function listTab1(json) {
listOneTab(json, tabView1, "", false);
}
function listLatestPostsTab1(json) {
listOneTab(json, tabView1, "Latest Posts", true);
}
function listLatestCommentsTab1(json) {
listOneTab(json, tabView1, "Latest Comments", false);
}
// Activating calls!
// Latest Posts
cb.search( blog1, "posts", 1, 25, 'listLatestPostsTab1');
// Latest Comments
cb.search( blog1, "comments", 1, 25, 'listLatestCommentsTab1');
// Preferred Labels
for (var i=0; i < labels1.length; i++)
if (labels1[i]) cb.searchLabel(blog1, labels1[i], 'listTab1');
/*
var blog2 = "hackosphere.blogspot.com";
var tabView2 = new YAHOO.widget.TabView('multiTab2');
var labels2 = ['Neo','Widgets', "Blogger Power"];
function listTab2(json) {
listOneTab(json, tabView2, "", false);
}
function listLatestPostsTab2(json) {
listOneTab(json, tabView2, "Latest Posts", true);
}
function listLatestCommentsTab2(json) {
listOneTab(json, tabView2, "Latest Comments", false);
}
// Activating calls!
// Latest Posts
cb.search( blog2, "posts", 1, 25, 'listLatestPostsTab2');
// Latest Comments
cb.search( blog2, "comments", 1, 25, 'listLatestCommentsTab2');
// Preferred Labels
for (var i=0; i < labels2.length; i++)
if (labels2[i]) cb.searchLabel("hackosphere.blogspot.com", labels2[i], 'listTab2');
*/
</script>
</b:includable>
</b:widget>
Save the template.
After you install the above three easy steps, just change these things found in step 3' code:
a. To change the title, look for this line:
<h2>Hoctro's Place</h2>
b. modify the label tabs to become yours:
var labels1 = ["JSON Hacks", "Label Hacks",
"Free Templates", "Notable Hacks"];
c. Change value below from 10 to any value you want for the maximum of posts per tab
var nPost = 10;
d. then replace mine with your blog's name
blog1 = "hoctro.blogspot.com";
For advanced bloggers who would like to manipulate the CSS, "step 2" contains the information to do so. Also consult the Yahoo! TabView widget tutorials and examples for other variations of these tab options.
To add another tabview to this widget such as the picture below, please see part 2.
Until next time.
Update:
* 24 May 07: A translation of this article to Indonesian by Bikin is available here:
http://bikinblogger.blogspot.com/2007/05/tabview-widget-pengantar.html
*26 May 07: Wai Yan Lin translated also part 1, 2 & fav blogs application to Burmese here:
http://waiyanlinn.blogspot.com/2007/05/tabview-widget.html
Archived Post: Some small tricks 13 Sep 2008 10:23 AM (17 years ago)
Dear Friend,
This post is a collection of all the little tweaks I've learned thoughout my last 5-month experience with the (then) Blogger in Beta, and now the New Blogger. Some I've learned from the Blogger tutorial, some from the other hackers, and some from reading the template. I think it would be useful for certain people. I'll update this post as needed. Thanks.
Question #1: What is the URL to get 99 latest posts?
Answer:
Have a linklist widget, and put this URL as the link (replacing "hoctro" with your blog's name):
http://hoctro.blogspot.com/search/label/?max-results=99
Question #2: How to get 99 latest posts by clicking on an item of the "label" widget?
Answer:
You need to open the template in expanded mode, then first look for this line:
<b:widget id='Label1' locked='false' title='Labels' type='Label'>
then look for this line about 10+ lines below it
<a expr:href='data:label.url'><data:label.name/></a>
change that to this
<a expr:href='data:label.url + "?max-results=99"'><data:label.name/></a>
Question #3: I can't drag a widget to my header. How do I make it appendable, just like on the sidebar?
Answer:
From dashboard, go to Layout->Template->Edit HTML and look for this line:
<b:section class='header' id='header' maxwidgets='1' showaddelement='no'>
You need to change it to:
<b:section class='header' id='header' maxwidgets='10' showaddelement='yes'>
Now you can add 9 more widgets to your header, besides the default header itself.
Question #4: How do I change the title of the blog with a banner?
This below example is for the Minima template
1. Go to Edit Html page, collapsed mode, look for the line:
#header-wrapper
then replace that rule and one next to it to look like this:
#header-wrapper {
width:57.69em;
*width:56.3em; /* IE */
min-width:750px;
margin:0 auto 10px;
//border:1px solid $bordercolor;
min-height:200px;
background:url("http://lh6.google.com/_h/5xBoc/s1600/baby.jpg") no-repeat left top;
}
#header {
margin: 5px;
//border: 1px solid $bordercolor;
text-align: center;
display: none;
}
The URL you see there - in bold - is the address of the picture. You could use Blogger to upload a picture, click on it to view the real size, then right click->properties to cut the URL from there.
Below is the discussion on some other tweaks made to make things look right:
1. For #header-wrapper
min-width:750px; - the minimum width shown would be 750px - you should set this to your picture size.
//border:1px solid $bordercolor; - // means commenting things out, in this case we don't want to show the box around the text
min-height:200px; - the minimum height shown would be 200px - you should set this to your picture height size.
2. For #header
//border: 1px solid $bordercolor; - leave out the inner box.
display: none; - not to display header texts by commenting them out.
%20%3Cspan%3EBlogger%20in%20Beta%3C/span%3E,%20and%20now%20the%3Cspan%3E%20New%20Blogger%3C/span%3E.%20Some%20I've%20learned%20from%20the%20Blogger%20tutorial,%20some%20from%20the%20other%20hackers,%20and%20some%20from%20reading%20the%20template.%20I%20think%20it%20would%20be%20useful%20for%20certain%20people.%20I'll%20update%20this%20post%20as%20needed.%20Thanks.%3Cbr%20/%3E%3Cbr%20/%3E%3Ch4%3EQuestion%20%231:%20What%20is%20the%20URL%20to%20get%2099%20latest%20posts?%3C/h4%3E%3Cbr%20/%3E%3Cbr%20/%3E%3Cspan%3EAnswer:%3C/span%3E%3Cbr%20/%3EHave%20a%20linklist%20widget,%20and%20put%20this%20URL%20as%20the%20link%20(replacing%20%22hoctro%22%20with%20your%20blog's%20name):%3Cbr%20/%3E%3Cbr%20/%3E%3Cbr%20/%3Ehttp://%3Cspan%3Ehoctro%3C/span%3E.blogspot.com/search/label/?max-results%3D99%3Cbr%20/%3E%3Cbr%20/%3E%3Cbr%20/%3E%3Ch4%3EQuestion%20%232:%20How%20to%20get%2099%20latest%20posts%20by%20clicking%20on%20an%20item%20of%20the%20%22label%22%20widget?%3C/h4%3E%3Cbr%20/%3E%3Cbr%20/%3E%3Cspan%3EAnswer:%3C/span%3E%3Cbr%20/%3EYou%20need%20to%20open%20the%20template%20in%20expanded%20mode,%20then%20first%20look%20for%20this%20line:%3Cbr%20/%3E%3Cbr%20/%3E%3Cbr%20/%3E%26lt;b:widget%20id%3D'Label1'%20locked%3D'false'%20title%3D'Labels'%20type%3D'Label'%26gt;%3Cbr%20/%3E%3Cbr%20/%3E%3Cbr%20/%3Ethen%20look%20for%20this%20line%20about%2010+%20lines%20below%20it%3Cbr%20/%3E%3Cbr%20/%3E%3Cbr%20/%3E%20%20%20%20%20%20%20%20%20%20%26lt;a%20expr:href%3D'data:label.url'%26gt;%26lt;data:label.name/%26gt;%26lt;/a%26gt;%3Cbr%20/%3E%3Cbr%20/%3Echange%20that%20to%20this%3Cbr%20/%3E%3Cbr%20/%3E%3Cbr%20/%3E%20%20%20%20%20%20%20%20%20%20%26lt;a%20expr:href%3D'data:label.url%20+%20%22?max-results%3D99%22'%26gt;%26lt;data:label.name/%26gt;%26lt;/a%26gt;%3Cbr%20/%3E%3Cbr%20/%3E%3Cbr%20/%3E%3Cbr%20/%3E%3Ch4%3EQuestion%20%233:%20I%20can't%20drag%20a%20widget%20to%20my%20header.%20How%20do%20I%20make%20it%20appendable,%20just%20like%20on%20the%20sidebar?%3C/h4%3E%3Cbr%20/%3E%3Cbr%20/%3E%3Cspan%3EAnswer:%3C/span%3E%3Cbr%20/%3EFrom%20dashboard,%20go%20to%20Layout-%3ETemplate-%3EEdit%20HTML%20and%20look%20for%20this%20line:%3Cbr%20/%3E%3Cbr%20/%3E%3Cbr%20/%3E%26lt;b:section%20class%3D'header'%20id%3D'header'%20maxwidgets%3D'1'%20showaddelement%3D'no'%26gt;%3Cbr%20/%3E%3Cbr%20/%3E%3Cbr%20/%3EYou%20need%20to%20change%20it%20to:%3Cbr%20/%3E%3Cbr%20/%3E%3Cbr%20/%3E%26lt;b:section%20class%3D'header'%20id%3D'header'%20maxwidgets%3D'%3Cspan%3E10%3C/span%3E'%20showaddelement%3D'yes'%26gt;%3Cbr%20/%3E%3Cbr%20/%3E%3Cbr%20/%3ENow%20you%20can%20add%20%3Cspan%3E9%3C/span%3E%20more%20widgets%20to%20your%20header,%20besides%20the%20default%20header%20itself.%3Cbr%20/%3E%3Cbr%20/%3E%3Cbr%20/%3E%3Ch4%3EQuestion%20%234:%20How%20do%20I%20change%20the%20title%20of%20the%20blog%20with%20a%20banner?%3C/h4%3E%3Cbr%20/%3E%3Cbr%20/%3EThis%20below%20example%20is%20for%20the%20Minima%20template%3Cbr%20/%3E%3Cbr%20/%3E1.%20Go%20to%20Edit%20Html%20page,%20collapsed%20mode,%20look%20for%20the%20line:%3Cbr%20/%3E%3Cbr%20/%3E%3Cspan%3E%23header-wrapper%3C/span%3E%3Cbr%20/%3E%3Cbr%20/%3Ethen%20replace%20that%20rule%20and%20one%20next%20to%20it%20to%20look%20like%20this:%3Cbr%20/%3E%3Cbr%20/%3E%23header-wrapper%20%7B%3Cbr%20/%3E%20%20width:57.69em;%3Cbr%20/%3E%20%20*width:56.3em;%20/*%20IE%20*/%3Cbr%20/%3E%20%20min-width:750px;%3Cbr%20/%3E%3Cbr%20/%3E%20%20margin:0%20auto%2010px;%3Cbr%20/%3E%20%20//border:1px%20solid%20$bordercolor;%3Cbr%20/%3E%20%20%20min-height:200px;%3Cbr%20/%3Ebackground:url(%22%3Cspan%3Ehttp://lh6.google.com/_h/5xBoc/s1600/baby.jpg%3C/span%3E%22)%20no-repeat%20left%20top;%3Cbr%20/%3E%20%20%7D%3Cbr%20/%3E%3Cbr%20/%3E%23header%20%7B%20%3Cbr%20/%3E%20%20margin:%205px;%3Cbr%20/%3E%20%20//border:%201px%20solid%20$bordercolor;%3Cbr%20/%3E%20%20text-align:%20center;%3Cbr%20/%3E%20%20display:%20none;%3Cbr%20/%3E%7D%3Cbr%20/%3E%3Cbr%20/%3EThe%20URL%20you%20see%20there%20-%20in%20bold%20-%20is%20the%20address%20of%20the%20picture.%20You%20could%20use%20Blogger%20to%20upload%20a%20picture,%20click%20on%20it%20to%20view%20the%20real%20size,%20then%20right%20click-%3Eproperties%20to%20cut%20the%20URL%20from%20there.%3Cbr%20/%3E%3Cbr%20/%3EBelow%20is%20the%20discussion%20on%20some%20other%20tweaks%20made%20to%20make%20things%20look%20right:%3Cbr%20/%3E%3Cbr%20/%3E%3Cspan%3E1.%20For%20%23header-wrapper%3C/span%3E%3Cbr%20/%3E%3Cbr%20/%3E%3Cspan%3Emin-width:750px;%3C/span%3E%20-%20the%20minimum%20width%20shown%20would%20be%20750px%20-%20you%20should%20set%20this%20to%20your%20picture%20size.%3Cbr%20/%3E%20%20%3Cbr%20/%3E%3Cspan%3E//border:1px%20solid%20$bordercolor;%3C/span%3E%20-%20//%20means%20commenting%20things%20out,%20in%20this%20case%20we%20don't%20want%20to%20show%20the%20box%20around%20the%20text%3Cbr%20/%3E%20%20%20%3Cbr%20/%3E%3Cspan%3Emin-height:200px;%3C/span%3E%20%20-%20the%20minimum%20height%20shown%20would%20be%20200px%20-%20you%20should%20set%20this%20to%20your%20picture%20height%20size.%3Cbr%20/%3E%3Cbr%20/%3E%3Cspan%3E2.%20For%20%23header%3C/span%3E%3Cbr%20/%3E%3Cbr%20/%3E%3Cspan%3E//border:%201px%20solid%20$bordercolor;%3C/span%3E%20-%20leave%20out%20the%20inner%20box.%3Cbr%20/%3E%3Cbr%20/%3E%3Cspan%3Edisplay:%20none;%3C/span%3E%20-%20not%20to%20display%20header%20texts%20by%20commenting%20them%20out.)
Getting to know your readers through FeedBurner 7 Feb 2007 4:57 PM (19 years ago)
 Dear Friend,
As some of you might have noticed, recently I have a new feed - courtesy of Feedburner - from my sidebar that says: Subscribe in a reader. To be honest with you, I didn't see the purpose of having yet another feed, besides the default one we all have from Blogger (mine is http://hoctro.blogpost.com/feeds/posts/default .) But a recent feature from FeedBurner makes it all worthwhile. Feedburner now allows you to see who is coming to your site, what are they interested in reading, so on and so forth.
To start with, you need to go to their site:
http://www.feedburner.com/fb/a/home
Next, register an account with FeedBurner by clicking on the "Register" at the top right of its homepage:
Once you're done with registration, you'll be greeted with the Dashboard. Next, you need to enter your blog address in the box, and follow the instructions.
This is my dashboard's look at the moment, after Hoctro's Place is added:
After clicking on your feed's title, the "Analyze" tab is opened. Next, click on "Standard Stats", under "Services" on the left sidebar. The Standard Stats settings appear. In the "Choose One" dropdown, select Blogger:
A tutorial opens in a new popup window, you need to follow exactly what it says:
Essentially, what you have to do is to embed a piece of javascript code to your template, under the Blog widget, so FeedBurner could collect data on your blog.
Once you successfully embedded the code, leave it there for a couple of days, and you'll be able to see collected data later in a nice and easy-to-understand manner, through the newly added "Site stats" submenu. For example, from the Dashboard option, I know how many people visit my blog today, and what are the most popular posts:
There's a lot more in store, so if you have time, then register and see for yourself. You'll be amazed at the wealth of information FeedBurner could offer.
Have a wonderful day,
Hoctro
%20But%20a%20recent%20feature%20from%20FeedBurner%20makes%20it%20all%20worthwhile.%20Feedburner%20now%20allows%20you%20to%20see%20who%20is%20coming%20to%20your%20site,%20what%20are%20they%20interested%20in%20reading,%20so%20on%20and%20so%20forth.%3Cbr%20/%3E%3Cbr%20/%3ETo%20start%20with,%20you%20need%20to%20go%20to%20their%20site:%3Cbr%20/%3E%3Cbr%20/%3E%3Ca%20href%3D%22http://www.feedburner.com/fb/a/home%22%3Ehttp://www.feedburner.com/fb/a/home%3C/a%3E%3Cbr%20/%3E%3Cbr%20/%3ENext,%20register%20an%20account%20with%20FeedBurner%20by%20clicking%20on%20the%20%22Register%22%20at%20the%20top%20right%20of%20its%20homepage:%3Cbr%20/%3E%3Cbr%20/%3E%3Ca%20href%3D%22http://1.bp.blogspot.com/_hO0v-S1ryQ8/RcqGUkWO2uI/AAAAAAAAARk/NzQROzB-yUA/s1600-h/feed3.jpg%22%3E%3Cimg%20style%3D%22display:block;%20margin:0px%20auto%2010px;%20text-align:center;cursor:pointer;%20cursor:hand;%22%20src%3D%22http://1.bp.blogspot.com/_hO0v-S1ryQ8/RcqGUkWO2uI/AAAAAAAAARk/NzQROzB-yUA/s400/feed3.jpg%22%20border%3D%220%22%20alt%3D%22%22id%3D%22BLOGGER_PHOTO_ID_5028979621825010402%22%20/%3E%3C/a%3E%3Cbr%20/%3E%3Cbr%20/%3EOnce%20you're%20done%20with%20registration,%20you'll%20be%20greeted%20with%20the%20%3Cspan%3EDashboard%3C/span%3E.%20Next,%20you%20need%20to%20enter%20your%20blog%20address%20in%20the%20box,%20and%20follow%20the%20instructions.%3Cbr%20/%3E%3Cbr%20/%3E%3Ca%20href%3D%22http://1.bp.blogspot.com/_hO0v-S1ryQ8/RcqQQkWO2zI/AAAAAAAAASo/HOgN-OQoFaE/s1600-h/feed8.jpg%22%3E%3Cimg%20style%3D%22display:block;%20margin:0px%20auto%2010px;%20text-align:center;cursor:pointer;%20cursor:hand;%22%20src%3D%22http://1.bp.blogspot.com/_hO0v-S1ryQ8/RcqQQkWO2zI/AAAAAAAAASo/HOgN-OQoFaE/s400/feed8.jpg%22%20border%3D%220%22%20alt%3D%22%22id%3D%22BLOGGER_PHOTO_ID_5028990548221811506%22%20/%3E%3C/a%3E%3Cbr%20/%3E%3Cbr%20/%3EThis%20is%20my%20dashboard's%20look%20at%20the%20moment,%20after%20%3Cspan%3EHoctro's%20Place%3C/span%3E%20is%20added:%3Cbr%20/%3E%3Cbr%20/%3E%3Ca%20href%3D%22http://1.bp.blogspot.com/_hO0v-S1ryQ8/RcqG3kWO2vI/AAAAAAAAARs/pruhlNSnCXY/s1600-h/feed4.jpg%22%3E%3Cimg%20style%3D%22display:block;%20margin:0px%20auto%2010px;%20text-align:center;cursor:pointer;%20cursor:hand;%22%20src%3D%22http://1.bp.blogspot.com/_hO0v-S1ryQ8/RcqG3kWO2vI/AAAAAAAAARs/pruhlNSnCXY/s400/feed4.jpg%22%20border%3D%220%22%20alt%3D%22%22id%3D%22BLOGGER_PHOTO_ID_5028980223120431858%22%20/%3E%3C/a%3E%3Cbr%20/%3E%3Cbr%20/%3EAfter%20clicking%20on%20your%20feed's%20title,%20the%20%22%3Cspan%3EAnalyze%3C/span%3E%22%20tab%20is%20opened.%20Next,%20click%20on%20%3Cspan%3E%22Standard%20Stats%3C/span%3E%22,%20under%20%22%3Cspan%3EServices%3C/span%3E%22%20on%20the%20left%20sidebar.%20The%20%3Cspan%3EStandard%20Stats%3C/span%3E%20settings%20appear.%20In%20the%20%22%3Cspan%3EChoose%20One%3C/span%3E%22%20dropdown,%20select%20%3Cspan%3EBlogger%3C/span%3E:%3Cbr%20/%3E%3Cbr%20/%3E%3Ca%20href%3D%22http://3.bp.blogspot.com/_hO0v-S1ryQ8/RcqNIEWO2wI/AAAAAAAAASE/y8EMfMc-Ycs/s1600-h/feed5.jpg%22%3E%3Cimg%20style%3D%22display:block;%20margin:0px%20auto%2010px;%20text-align:center;cursor:pointer;%20cursor:hand;%22%20src%3D%22http://3.bp.blogspot.com/_hO0v-S1ryQ8/RcqNIEWO2wI/AAAAAAAAASE/y8EMfMc-Ycs/s400/feed5.jpg%22%20border%3D%220%22%20alt%3D%22%22id%3D%22BLOGGER_PHOTO_ID_5028987103658040066%22%20/%3E%3C/a%3E%3Cbr%20/%3E%3Cbr%20/%3EA%20tutorial%20opens%20in%20a%20new%20popup%20window,%20you%20need%20to%20follow%20exactly%20what%20it%20says:%3Cbr%20/%3E%3Cbr%20/%3E%3Ca%20href%3D%22http://4.bp.blogspot.com/_hO0v-S1ryQ8/RcqNaUWO2xI/AAAAAAAAASM/_fGS0yWbXVk/s1600-h/feed6.jpg%22%3E%3Cimg%20style%3D%22display:block;%20margin:0px%20auto%2010px;%20text-align:center;cursor:pointer;%20cursor:hand;%22%20src%3D%22http://4.bp.blogspot.com/_hO0v-S1ryQ8/RcqNaUWO2xI/AAAAAAAAASM/_fGS0yWbXVk/s400/feed6.jpg%22%20border%3D%220%22%20alt%3D%22%22id%3D%22BLOGGER_PHOTO_ID_5028987417190652690%22%20/%3E%3C/a%3E%3Cbr%20/%3E%3Cbr%20/%3EEssentially,%20what%20you%20have%20to%20do%20is%20to%20embed%20a%20piece%20of%20javascript%20code%20to%20your%20template,%20under%20the%20Blog%20widget,%20so%20FeedBurner%20could%20collect%20data%20on%20your%20blog.%3Cbr%20/%3E%3Cbr%20/%3EOnce%20you%20successfully%20embedded%20the%20code,%20leave%20it%20there%20for%20a%20couple%20of%20days,%20and%20you'll%20be%20able%20to%20see%20collected%20data%20later%20in%20a%20nice%20and%20easy-to-understand%20manner,%20through%20the%20newly%20added%20%22%3Cspan%3ESite%20stats%3C/span%3E%22%20submenu.%20For%20example,%20from%20the%20%3Cspan%3EDashboard%20%3C/span%3Eoption,%20I%20know%20how%20many%20people%20visit%20my%20blog%20today,%20and%20what%20are%20the%20most%20popular%20posts:%3Cbr%20/%3E%3Cbr%20/%3E%3Ca%20href%3D%22http://2.bp.blogspot.com/_hO0v-S1ryQ8/RcqOn0WO2yI/AAAAAAAAASU/Oh-NZb2tmV0/s1600-h/feed7.jpg%22%3E%3Cimg%20style%3D%22display:block;%20margin:0px%20auto%2010px;%20text-align:center;cursor:pointer;%20cursor:hand;%22%20src%3D%22http://2.bp.blogspot.com/_hO0v-S1ryQ8/RcqOn0WO2yI/AAAAAAAAASU/Oh-NZb2tmV0/s400/feed7.jpg%22%20border%3D%220%22%20alt%3D%22%22id%3D%22BLOGGER_PHOTO_ID_5028988748630514466%22%20/%3E%3C/a%3E%3Cbr%20/%3E%3Cbr%20/%3EThere's%20a%20lot%20more%20in%20store,%20so%20if%20you%20have%20time,%20then%20register%20and%20see%20for%20yourself.%20You'll%20be%20amazed%20at%20the%20wealth%20of%20information%20FeedBurner%20could%20offer.%3Cbr%20/%3E%3Cbr%20/%3EHave%20a%20wonderful%20day,%3Cbr%20/%3E%3Cbr%20/%3EHoctro)
Corrrecting Anchoring Tags 10 Nov 2006 6:20 PM (19 years ago)
Dear Friend,
Every one of my posts has a story with it, whether it is a request from an user, or a need of myself to tweak something to look more interesting or at least to make it right. This time is no different :)
Some of my readers will notice that I just recently abandon the comment approval option. You could post a comment, and will see it instantly. Well, that comes with a price. I have to monitor the Latest Comments Feed more often, or my blog will be bombarding with spamming comments.
One of the things I notice, because of this new change-of-mind, is that the comment link only sends me to the top of the post. However, I know that in HTML you could have a tag with an unique name and the link will lead to the right place. Come to find out, the link is correctly formatted, such as this:
http://hoctro.blogspot.com/2006/share.html#3190550298489538229
but the actual HTML code in the content of the comment looks like this
<a name='comment-3190550298489538229'></a>
where it should be coded as
<a name='3190550298489538229'></a>
Looks like the right hand doesn't talk to the left hand, or in this case the person who codes the post widget doen't talk to the guy who codes the feed widget. Just kidding, we love you Blogger guys, really!!!
Now that I know what to fix, I need to find where to fix. After a while, I find the culprit :-)
If you want to fix this problem too, then follow these steps:
1. Open Template->Edit HTML. Turn the option "Expand Widget Templates" on.
2a. Locate the widget named Blog1, by looking for this line:
<b:widget id='Blog1' locked='false' title='Blog Posts' type='Blog'>
2b. Locate this line (a function[includable]) with id='comments'
<b:includable id='comments' var='post'>
2c. Look for this line about 10+ lines below:
<a expr:name='"comment-" + data:comment.id'/>
and just simply take out the ["comment-" + ] for the line to become:
<a expr:name='data:comment.id'/>
and you're done.
You can see a sample by clicking on any "latest comment" in my blog's feed (or try this one out, it goes to the end of my "killer post") and it'll take you right to where the comment is located. Now I can check out the users' comment more effectively.
Cheers,
Hoctro
%3Cbr%20/%3E%3Cbr%20/%3ESome%20of%20my%20readers%20will%20notice%20that%20I%20just%20recently%20abandon%20the%20comment%20approval%20option.%20You%20could%20post%20a%20comment,%20and%20will%20see%20it%20instantly.%20Well,%20that%20comes%20with%20a%20price.%20I%20have%20to%20monitor%20the%20%3Cspan%3ELatest%20Comments%20Feed%3C/span%3E%20more%20often,%20or%20my%20blog%20will%20be%20bombarding%20with%20spamming%20comments.%20%3Cbr%20/%3E%3Cbr%20/%3EOne%20of%20the%20things%20I%20notice,%20because%20of%20this%20new%20change-of-mind,%20is%20that%20the%20comment%20link%20only%20sends%20me%20to%20the%20top%20of%20the%20post.%20However,%20I%20know%20that%20in%20HTML%20you%20could%20have%20a%20tag%20with%20an%20unique%20name%20and%20the%20link%20will%20lead%20to%20the%20right%20place.%20Come%20to%20find%20out,%20the%20link%20is%20correctly%20formatted,%20such%20as%20this:%3Cbr%20/%3E%3Cbr%20/%3Ehttp://hoctro.blogspot.com/2006/share.html%3Cspan%3E%233190550298489538229%3C/span%3E%3Cbr%20/%3E%3Cbr%20/%3Ebut%20the%20actual%20HTML%20code%20in%20the%20content%20of%20the%20comment%20looks%20like%20this%3Cbr%20/%3E%3Cbr%20/%3E%26lt;a%20name%3D%3Cspan%3E'comment-3190550298489538229'%3C/span%3E%26gt;%26lt;/a%26gt;%3Cbr%20/%3E%3Cbr%20/%3Ewhere%20it%20should%20be%20coded%20as%3Cbr%20/%3E%3Cbr%20/%3E%26lt;a%20name%3D%3Cspan%3E'3190550298489538229'%3C/span%3E%26gt;%26lt;/a%26gt;%3Cbr%20/%3E%3Cbr%20/%3ELooks%20like%20the%20right%20hand%20doesn't%20talk%20to%20the%20left%20hand,%20or%20in%20this%20case%20the%20person%20who%20codes%20the%20%20post%20widget%20doen't%20talk%20to%20the%20guy%20who%20codes%20the%20feed%20widget.%20Just%20kidding,%20we%20love%20you%20Blogger%20guys,%20really!!!%20%3Cbr%20/%3E%3Cbr%20/%3ENow%20that%20I%20know%20what%20to%20fix,%20I%20need%20to%20find%20where%20to%20fix.%20After%20a%20while,%20I%20find%20the%20culprit%20:-)%3Cbr%20/%3E%3Cbr%20/%3EIf%20you%20want%20to%20fix%20this%20problem%20too,%20then%20follow%20these%20steps:%3Cbr%20/%3E%3Cbr%20/%3E%3Cspan%3E1.%20Open%20Template-%3EEdit%20HTML.%3C/span%3E%20Turn%20the%20option%20%22Expand%20Widget%20Templates%22%20on.%3Cbr%20/%3E%3Cbr%20/%3E%3Cspan%3E2a.%20Locate%20the%20widget%20named%20Blog1%3C/span%3E,%20by%20looking%20for%20this%20line:%3Cbr%20/%3E%3Cbr%20/%3E%26lt;b:widget%20id%3D'Blog1'%20locked%3D'false'%20title%3D'Blog%20Posts'%20type%3D'Blog'%26gt;%3Cbr%20/%3E%3Cbr%20/%3E%3Cspan%3E2b.%20Locate%20this%20line%20(a%20function%5Bincludable%5D)%20with%20id%3D'comments'%3C/span%3E%3Cbr%20/%3E%3Cbr%20/%3E%26lt;b:includable%20id%3D'comments'%20var%3D'post'%26gt;%3Cbr%20/%3E%3Cbr%20/%3E%3Cspan%3E2c.%20Look%20for%20this%20line%20about%2010+%20lines%20below:%3C/span%3E%3Cbr%20/%3E%3Cbr%20/%3E%26lt;a%20expr:name%3D'%22comment-%22%20+%20data:comment.id'/%26gt;%3Cbr%20/%3E%3Cbr%20/%3Eand%20just%20simply%20take%20out%20the%20%3Cspan%3E%5B%22comment-%22%20+%20%5D%3C/span%3E%20for%20the%20line%20to%20become:%3Cbr%20/%3E%3Cbr%20/%3E%26lt;a%20expr:name%3D'data:comment.id'/%26gt;%3Cbr%20/%3E%3Cbr%20/%3E%3Cbr%20/%3E%3Ca%20href%3D%22http://photos1.blogger.com/blogger2/1410/800/1600/link1.jpg%22%3E%3Cimg%20style%3D%22display:block;%20margin:0px%20auto%2010px;%20text-align:center;cursor:pointer;%20cursor:hand;%22%20src%3D%22http://photos1.blogger.com/blogger2/1410/800/400/link1.jpg%22%20border%3D%220%22%20alt%3D%22%22%20/%3E%3C/a%3E%3Cbr%20/%3E%3Cbr%20/%3Eand%20you're%20done.%3Cbr%20/%3E%3Cbr%20/%3EYou%20can%20see%20a%20sample%20by%20clicking%20on%20any%20%22latest%20comment%22%20in%20my%20blog's%20feed%20(or%20%3Ca%20href%3D%22http://hoctro.blogspot.com/2006/09/tweaking-new-blogger-turning-labels.html%234552285736464303992%22%3Etry%20this%20one%20out%3C/a%3E,%20it%20goes%20to%20the%20end%20of%20my%20%22killer%20post%22)%20and%20it'll%20take%20you%20right%20to%20where%20the%20comment%20is%20located.%20Now%20I%20can%20check%20out%20the%20users'%20comment%20more%20effectively.%3Cbr%20/%3E%3Cbr%20/%3ECheers,%3Cbr%20/%3E%3Cbr%20/%3EHoctro)
To Show or not to Show your template message 7 Nov 2006 1:53 PM (19 years ago)
Dear Friend,
Phoenix, one of my readers, noticed that there is some sort of a message bar showing, whenever he clicks on one of the "Label" search. I noticed that too, and knowing Beta code, I thought they must have embedded this new piece of code somewhere on the Blog1 widget. 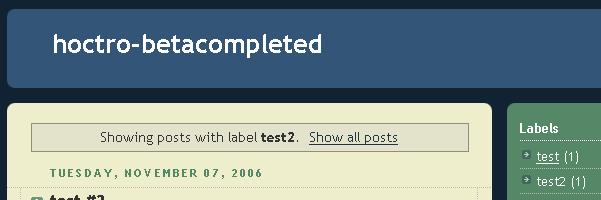
Indeed it does, and this new feature only happens to blogs that are created recently. I think this is some sort of a "wrapped-up" feature as part of their "Blogger Beta: Feature Complete!".
Here it is, the single function call which causes the message to display:
So you see, the line is inside the Blog1 widget, under the "main" includable. Turning it off is quite simple if you want to. You can either erase the line or put a pair of comment code like so:
<!-- <b:include data='top' name='status-message'/> -->
and the message will disappear from then on.
Cheers,
Hoctro
Update: Please see the comments of this post to have more info on this Beta's message usage. Thanks a bunch, Phydeaux3 & Bravery Onions!

Showing Hint under the Title to View a Page With Comments 10 Oct 2006 5:06 AM (19 years ago)
Dear Friend,
My friend Carlos asks me how to let readers to see posts with comments. I think this is not possible while a viewer is seeing a label or archived query, or if he or she is looking at the home page. I guess the technical reason why Blogger in Beta didn't implement that, is just simply try to avoid a potentially large stream of data to arrive to the viewer's PC. Imagine a situation where you query a category that has 20 posts in each, each post with 20-30 comments. It'll take quite a while to display that page to your screen.
My work-around to this would be to give a hint to the reader to click on the title of the post in order for him or her to read both the full post and the comments.
If you like this solution, then follow these simple steps:
1. Locate the Blog1 widget
<b:widget id='Blog1' locked='false' title='Blog Posts' type='Blog'>
then the includable named "post"
<b:includable id='post' var='post'>
2. Insert the seven lines in bold to the code. What this does is to check if you're allowing comment for a post, your post has at least one comment ( !=0 ), and you are not on the full post (item) page, then insert the hint. Feel free to use your HTML expertise to alter the simple tags I have, or change the text to become clearer.
<b:includable id='post' var='post'>
<div class='post uncustomized-post-template'>
<a expr:name='data:post.id'/>
<b:if cond='data:post.title'>
<h3 class='post-title'>
<b:if cond='data:post.url'>
<a expr:href='data:post.url'><data:post.title/></a>
<b:else/>
<data:post.title/>
</b:if>
</h3>
<b:if cond='data:post.allowComments'>
<b:if cond='data:post.numComments != 0'>
<b:if cond='data:blog.pageType != "item"'>
<div><i>(For full text with comments please click on the title)</i></div>
</b:if>
</b:if>
</b:if>
</b:if>
I apply this fix to my webpage, so you can see how this works.
Have a wonderful day,
Hoctro
Blogger Hack: Adding Introductions 8 Oct 2006 8:56 PM (19 years ago)
Dear Friend,
Sometimes a little introductory paragraph or two helps "break the ice" between you and your readers, so they know what they are about to read, rather than just guessing based on one or two "label" words. You can see the new hack in effect on my site. Select on "Blogger Beta"->"My Hacks", for example, will display a little introduction first, then all the hack articles.
Below are the steps on how to implement this hack. As usual, make a template backup copy, then try it on your test blog first. Also, remember to check on "Expand Widget Templates."
Step 1: Add "introduction" function to Blog1 widget
First, locate the widget by looking for this line:
<b:widget id='Blog1' locked='false' title='Blog Posts' type='Blog'>
Once you see it, look for this line:
<b:includable id='main' var='top'>
Then paste this code right in front of it:
<b:includable id='sub-introduction' var='data:posts'>
<!-- **Introduction Hack - by Hoctro 10/2006 hoctro.blogspot.com ** Step 1 **
**** -->
<b:if cond='data:blog.pageType != "item"'>
<b:loop values='data:posts' var='post'>
<!-- Check for Homepage case -->
<b:if cond='data:blog.url == data:blog.homepageUrl'>
<b:if cond='data:post.title == "Introduction"'>
<div class='post'>
<div class='post-body'>
<p><data:post.body/></p>
</div>
</div>
</b:if>
</b:if>
<!-- Check for matched labels -->
<b:loop values='data:post.labels' var='label'>
<b:if cond='data:post.title == data:label.name'>
<div class='post'>
<div class='post-body'>
<p><data:post.body/></p>
</div>
</div>
</b:if>
</b:loop>
</b:loop>
</b:if>
</b:includable>
Step 2: Modify the main includable of Blog1 widget
Scroll down to this line again,
<b:includable id='main' var='top'>
then look for the portion of code that starts and ends with these lines,
<div id='blog-posts'>
...
<!-- navigation -->
<b:include name='nextprev'/>
You are going to replace everything in between with these lines,
<!-- **Introduction Hack - by Hoctro 10/2006 hoctro.blogspot.com ** Step 2 **
**** -->
<b:include name='sub-introduction' values='data:posts'/>
<b:loop values='data:posts' var='post'>
<b:if cond='data:post.title == "Introduction"'>
<b:if cond='data:blog.pageType == "item"'>
<b:include data='post' name='postQuickEdit'/>
<b:include data='post' name='post'/>
</b:if>
<b:else/>
<b:if cond='data:post.dateHeader'>
<h2 class='date-header'><data:post.dateHeader/></h2>
</b:if>
<b:include data='post' name='postQuickEdit'/>
<b:include data='post' name='post'/>
<b:if cond='data:blog.pageType == "item"'>
<b:if cond='data:post.allowComments'>
<b:include data='post' name='comments'/>
</b:if>
</b:if>
</b:if>
</b:loop>
</div>
Step 3: Name your new introductory posts with "special" titles
Name your "special" new introductory posts' titles with exactly the same label names. for example, for the introductory post of "My Hack" to show correctly on my homepage, I had to name the title as "Blogger_Beta*My_Hacks" (I use my own's two level tab hack, hence the star (*) symbol in the middle) Also, after composing this special post, you need to change the date to some time in the past, so it will not show up as the latest. Also, if your introductory post has more than one label (which you shouldn't do,) make sure the last label is the same as the post's title. 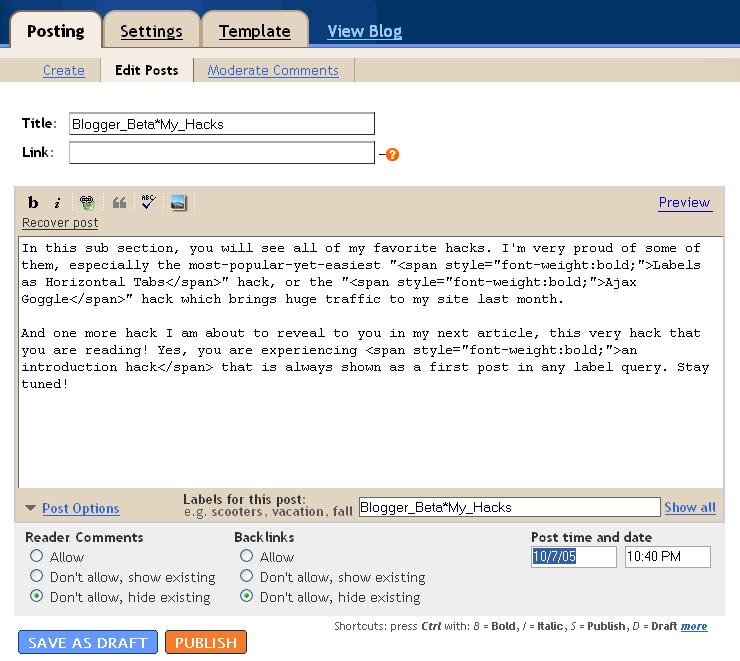
here is the result,
For an introduction in your homepage, you will need something different. You need to create a post with the title "Introduction", do not assign a label (leave it blank), and set the date to a distant future! (I owe Hans from "Beautiful Beta" for this "set-in-a-future-date", by the way. Thanks! Hans.) This will make sure the post always includes in the homepage's post collection, thus it will show up. When displayed, this post will not show a title nor allow any comment from the readers.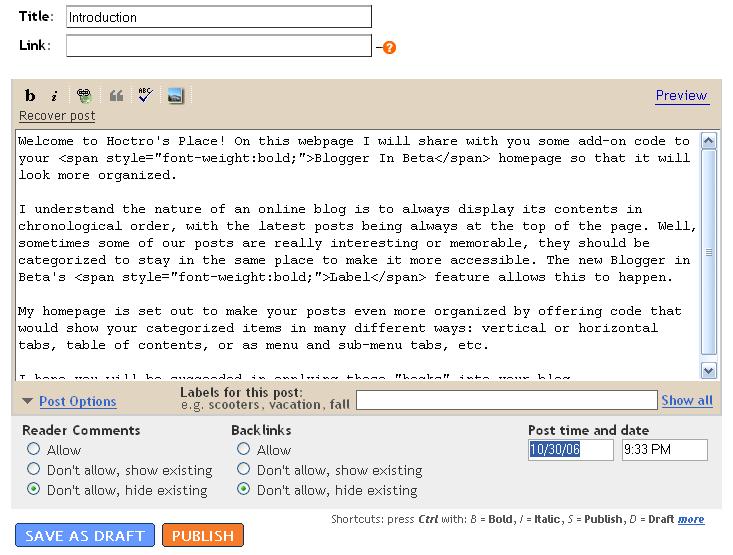
Here is the result,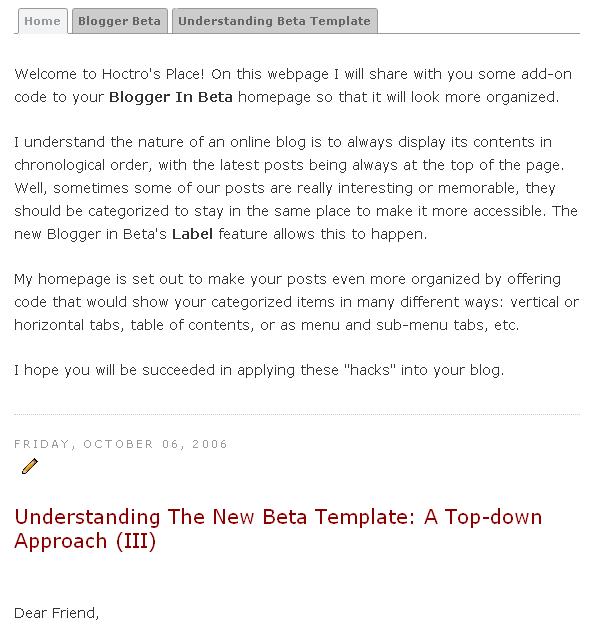
That's all it takes to have introductory paragraphs to show up on your blog. I hope you will able to make use of this hack.
Technical Comments:
Below are my technical comments, explaining the hack's logic. If you are interested in then read on. You're not required to understand my explanations to make it work on your blog.
1. I'm glad I am finally able to write another hack without the help of JavaScript. There is nothing wrong with JavaScript, it's just that stretching beta's own simple language is really fun. Indeed, beta's template doesn't need any Javascript at all, and it still looks great.
2. In Step 1: the "introduction" function, I create a loop, thus in effect make Blog1 loops through its post collection twice. That's how the introductory post can bubble up to be the first in the list. Inside the loop, I have two cases:
-If the reader is at homepage, then check to see if one of the post has the title of "Introduction." If so, prints the body only. This post must not have a label assigned.
- Next, I create another loop to go thru all the labels, and if one of them match the post's title, then also prints the body.
3. In Step 2, the goal is completely different. We want the introduction not to show up twice, yet at the same time it must be visible in the item page, if someone clicks on it from the archived list, hence the if-then-else structure.
I hope you will find some good use of both the hack and its source code as well.
Have a wonderful day.
Hoctro
(10/8/2006)
How to add a new CSS parameter to your Blogger template 3 Oct 2006 4:53 AM (19 years ago)
Dear Friend,
Cecilia left a comment asking me if I know anything about changing the default background of the blog. As usual, I go looking for answers in several of my CSS books (Bulletproof Web Design, CSS CookBook, Eric Meyer on CSS, etc.) For this one, the answer is right on Chapter 1 of the "Bulletproof Web Design" book. So here it is, if you have one of the Minima designs, please alter the equivalent tags of the template's CSS portion like this:
body {
/*background:$bgcolor;*/
margin:0;
color:$textcolor;
font:x-small Georgia Serif;
font-size/* */:/**/small;
font-size: /**/small;
text-align: center;
background: $bgcolor url(http://photos1.blogger.com/blogger2/7873/821550570340913/1600/bg.gif) repeat-x top left;
}
/* Header
-----------------------------------------------
*/
#header-wrapper {
width:660px;
margin:0 auto 10px;
border-bottom:1px solid $bordercolor;
}
#header {
margin: 5px;
/*border: 1px solid $bordercolor;*/ text-align: center;
color:$pagetitlecolor;
}
/* Outer-Wrapper
----------------------------------------------- */
#outer-wrapper {
width: 660px;
margin:0 auto;
padding:10px;
text-align:left;
border: 1px solid $bordercolor;
font: $bodyfont;
background: #fff;
}
Discussion:
* In CSS, if you want some effects to be temporary disabled, use this /* xxxxxx */ format. Notice that a comment inside another comment is not acceptable, such as
/* xxx /* xxxxxx */ xxx */
*This line, in particular, adds a faded yellow picture to the top-left of the screen, and repeats that picture in the horizontal (x) direction.
background: $bgcolor url(http://photos1.blogger.com/blogger2/7873/821550570340913/1600/bg.gif) repeat-x top left;
* In addition, I tweak some code so that instead of the default two boxes around my title, now I only have a line at the bottom. Since the line is added with same color as the border's, I can change it visually with the "Font and Color" Editing option.
#header-wrapper {
width:660px;
margin:0 auto 10px;
border-bottom:1px solid $bordercolor;
}
* You can add more font and color variables to the template, and they will show up in the "Font and Color" design tab. What this means is that you will have many more options to play around with, not just the default ones from Blogger templates.
For example, I could create a new color variable (inside the <b:skin> tag at the front of the template):
<Variable name="commenttextcolor" description="Comment Text Color"
type="color" default="#999" value="#999999">
and it would show up in the "Font and Color" tab,
This new variable has a name so you can add later as $commenttextcolor in the actual CSS code, a description name for it to show up in "Font and Color" design tab, the type of "color", and a default and actual value. I think Blogger will write whatever your choice back to this "value" so your template is always up-to-date and independent of Blogger's database.
Now that you have a variable, you can apply that to the CSS code, just like any other default variables.
* For my Vietnamese blog, I have used the same code showing in this article to modify its appearance. Please take a look.
Have a nice day,
Hoctro (10/2006)
Blog: http://hoctro.blogspot.com/
%20For%20this%20one,%20the%20answer%20is%20right%20on%20Chapter%201%20of%20the%20%22Bulletproof%20Web%20Design%22%20book.%20So%20here%20it%20is,%20if%20you%20have%20one%20of%20the%20Minima%20designs,%20please%20alter%20the%20equivalent%20tags%20of%20the%20template's%20CSS%20portion%20like%20this:%3Cbr%20/%3E%3Cbr%20/%3E%3Cbr%20/%3E%3Cbr%20/%3Ebody%20%7B%3Cbr%20/%3E%20%20%3Cstrong%3E/*background:$bgcolor;*/%3C/strong%3E%3Cbr%20/%3E%20%20margin:0;%3Cbr%20/%3E%20%20color:$textcolor;%3Cbr%20/%3E%20%20font:x-small%20Georgia%20Serif;%3Cbr%20/%3E%20%20font-size/*%20*/:/**/small;%3Cbr%20/%3E%20%20font-size:%20/**/small;%3Cbr%20/%3E%20%20text-align:%20center;%3Cbr%20/%3E%20%20%3Cstrong%3Ebackground:%20$bgcolor%20url(http://photos1.blogger.com/blogger2/7873/821550570340913/1600/bg.gif)%20repeat-x%20top%20left;%3C/strong%3E%3Cbr%20/%3E%20%20%7D%3Cbr%20/%3E%3Cbr%20/%3E%3Cbr%20/%3E/*%20Header%3Cbr%20/%3E-----------------------------------------------%3Cbr%20/%3E%20*/%3Cbr%20/%3E%3Cbr%20/%3E%23header-wrapper%20%7B%3Cbr%20/%3E%20%20width:660px;%3Cbr%20/%3E%20%20margin:0%20auto%2010px;%3Cbr%20/%3E%20%20border-bottom:1px%20solid%20%3Cstrong%3E$bordercolor%3C/strong%3E;%3Cbr%20/%3E%20%20%7D%3Cbr%20/%3E%3Cbr%20/%3E%23header%20%7B%20%3Cbr%20/%3E%20%20margin:%205px;%3Cbr%20/%3E%20%3Cstrong%3E%20/*border:%201px%20solid%20$bordercolor;*/%3C/strong%3E%20%20text-align:%20center;%3Cbr%20/%3E%20%20color:$pagetitlecolor;%3Cbr%20/%3E%7D%3Cbr%20/%3E%3Cbr%20/%3E%3Cbr%20/%3E/*%20Outer-Wrapper%3Cbr%20/%3E-----------------------------------------------%20*/%3Cbr%20/%3E%23outer-wrapper%20%7B%3Cbr%20/%3E%20%20width:%20660px;%3Cbr%20/%3E%20%20margin:0%20auto;%3Cbr%20/%3E%20%20padding:10px;%3Cbr%20/%3E%20%20text-align:left;%3Cbr%20/%3E%20%20border:%201px%20solid%20%3Cstrong%3E$bordercolor%3C/strong%3E;%3Cbr%20/%3E%20%20font:%20$bodyfont;%3Cbr%20/%3E%20%20%3Cspan%3Ebackground:%20%23fff;%3C/span%3E%3Cbr%20/%3E%20%20%7D%3Cbr%20/%3E%3Cbr%20/%3E%20%20%3Cbr%20/%3E%3Cbr%20/%3E%3Cu%3E%3Cstrong%3EDiscussion:%3C/strong%3E%3C/u%3E%3Cbr%20/%3E%3Cbr%20/%3E%3Cspan%3E*%3C/span%3E%20In%20CSS,%20if%20you%20want%20some%20effects%20to%20be%20temporary%20disabled,%20use%20this%20/*%20xxxxxx%20*/%20format.%20Notice%20that%20a%20comment%20inside%20another%20comment%20is%20not%20acceptable,%20such%20as%3Cbr%20/%3E%3Cbr%20/%3E/*%20xxx%20%3Cstrong%3E/*%20xxxxxx%20*/%20%3C/strong%3Exxx%20*/%20%3Cbr%20/%3E%3Cbr%20/%3E%3Cbr%20/%3E%3Cspan%3E*%3C/span%3EThis%20line,%20in%20particular,%20adds%20a%20faded%20yellow%20picture%20to%20the%20top-left%20of%20the%20screen,%20and%20repeats%20that%20picture%20in%20the%20horizontal%20(x)%20direction.%20%3Cbr%20/%3E%3Cbr%20/%3E%20%20%3Cstrong%3Ebackground:%20$bgcolor%20url(http://photos1.blogger.com/blogger2/7873/821550570340913/1600/bg.gif)%20repeat-x%20top%20left;%3C/strong%3E%3Cbr%20/%3E%3Cbr%20/%3E%3Cbr%20/%3E%3Cspan%3E*%3C/span%3E%20In%20addition,%20I%20tweak%20some%20code%20so%20that%20instead%20of%20the%20default%20two%20boxes%20around%20my%20title,%20now%20I%20only%20have%20a%20line%20at%20the%20bottom.%20Since%20the%20line%20is%20added%20with%20%3Cstrong%3Esame%20color%20%3C/strong%3Eas%20the%20border's,%20I%20can%20change%20it%20visually%20with%20the%20%3Cstrong%3E%22Font%20and%20Color%22%3C/strong%3E%20Editing%20option.%3Cbr%20/%3E%3Cbr%20/%3E%23header-wrapper%20%7B%3Cbr%20/%3E%20%20width:660px;%3Cbr%20/%3E%20%20margin:0%20auto%2010px;%3Cbr%20/%3E%3Cstrong%3E%20%20border-bottom:1px%20solid%20%3Cstrong%3E$bordercolor%3C/strong%3E;%3C/strong%3E%3Cbr%20/%3E%20%20%7D%3Cbr%20/%3E%3Cbr%20/%3E%3Cbr%20/%3E%3Ca%20href%3D%22http://photos1.blogger.com/blogger2/1410/800/1600/css.jpg%22%3E%3Cimg%20style%3D%22display:block;%20margin:0px%20auto%2010px;%20text-align:center;cursor:pointer;%20cursor:hand;%22%20src%3D%22http://photos1.blogger.com/blogger2/1410/800/400/css.jpg%22%20border%3D%220%22%20alt%3D%22%22%20/%3E%3C/a%3E%3Cbr%20/%3E%3Cbr%20/%3E%3Cspan%3E*%3C/span%3E%20You%20can%20add%20more%20font%20and%20color%20variables%20to%20the%20template,%20and%20they%20will%20show%20up%20in%20the%20%22Font%20and%20Color%22%20design%20tab.%20What%20this%20means%20is%20that%20you%20will%20have%20many%20more%20options%20to%20play%20around%20with,%20not%20just%20the%20default%20ones%20from%20Blogger%20templates.%3Cbr%20/%3E%3Cbr%20/%3EFor%20example,%20I%20could%20create%20a%20new%20color%20variable%20(inside%20the%20%26lt;b:skin%26gt;%20tag%20at%20the%20front%20of%20the%20template):%3Cbr%20/%3E%3Cbr%20/%3E%20%20%20%26lt;Variable%20name%3D%22commenttextcolor%22%20description%3D%22Comment%20Text%20Color%22%3Cbr%20/%3E%20%20%20%20%20%20%20%20%20%20%20%20%20type%3D%22color%22%20default%3D%22%23999%22%20value%3D%22%23999999%22%26gt;%3Cbr%20/%3E%3Cbr%20/%3E%3Cbr%20/%3Eand%20it%20would%20show%20up%20in%20the%20%22Font%20and%20Color%22%20tab,%3Cbr%20/%3E%3Cbr%20/%3E%3Ca%20href%3D%22http://photos1.blogger.com/blogger2/1410/800/1600/comment.0.jpg%22%3E%3Cimg%20style%3D%22display:block;%20margin:0px%20auto%2010px;%20text-align:center;cursor:pointer;%20cursor:hand;%22%20src%3D%22http://photos1.blogger.com/blogger2/1410/800/400/comment.0.jpg%22%20border%3D%220%22%20alt%3D%22%22%20/%3E%3C/a%3E%3Cbr%20/%3E%3Cbr%20/%3EThis%20new%20variable%20has%20a%20name%20so%20you%20can%20add%20later%20as%20%3Cstrong%3E$commenttextcolor%3C/strong%3E%20in%20the%20actual%20CSS%20code,%20a%20description%20name%20for%20it%20to%20show%20up%20in%20%22Font%20and%20Color%22%20design%20tab,%20the%20type%20of%20%22color%22,%20and%20a%20default%20and%20actual%20value.%20%3Ci%3EI%20think%20Blogger%20will%20write%20whatever%20your%20choice%20back%20to%20this%20%22value%22%20so%20your%20template%20is%20always%20up-to-date%20and%20independent%20of%20Blogger's%20database.%3C/i%3E%3Cbr%20/%3E%3Cbr%20/%3ENow%20that%20you%20have%20a%20variable,%20you%20can%20apply%20that%20to%20the%20CSS%20code,%20just%20like%20any%20other%20default%20variables.%3Cbr%20/%3E%20%3Cbr%20/%3E%3Cspan%3E*%3C/span%3E%20For%20my%20Vietnamese%20blog,%20I%20have%20used%20the%20same%20code%20showing%20in%20this%20article%20to%20modify%20its%20appearance.%20Please%20%3Ca%20href%3D%22http://hoctroviet.blogspot.com%22%3Etake%20a%20look.%3C/a%3E%3Cbr%20/%3E%3Cbr%20/%3EHave%20a%20nice%20day,%20%3Cbr%20/%3E%3Cbr%20/%3EHoctro%20(10/2006)%3Cbr%20/%3EBlog:%20http://hoctro.blogspot.com/)
Showing a Hint on Where to Post a Comment 1 Oct 2006 7:17 PM (19 years ago)
Dear Friend,
Nanny22girls from Google Help Groups: Customizing Templates
asks if she could reword the comment line at the end of each post in index pages to say "Leave a comment here", along with the number of comments.
After looking into it, here is my quick fix:
In Template->Edit Html, check on "Expand Widget Templates" to view the entire template. Then, locate <b:includable id='post' var='post'>, and keep scrolling down to see this:
<span class='post-comment-link'>
<b:if cond='data:blog.pageType != "item"'>
<b:if cond='data:post.allowComments'>
<a class='comment-link'
expr:href='data:post.addCommentUrl' expr:onclick='data:post.addCommentOnclick'>
<b:if cond='data:post.numComments == 1'>1
<data:top.commentLabel/><b:else/><data:post.numComments/>
<data:top.commentLabelPlural/></b:if></a>
</b:if>
</b:if>
</span>
You are going to replace the code in bold with this code:
<b:if cond='data:post.allowComments'>
<b:if cond='data:post.numComments == 1'>1
Comment<!--<data:top.commentLabel/>-->
<b:else/><data:post.numComments/>
<data:top.commentLabelPlural/>
</b:if>
<a class='comment-link' expr:href='data:post.addCommentUrl'
expr:onclick='data:post.addCommentOnclick'>Leave your comment here</a>
</b:if>
Notice there is a space at the end of "1" before the code goes to the next line, and the same thing happens with the <data:post.numComments/>. If you don't leave a space, then there won't be a space between the number and the word comment (or comments.) Notice I fix the "1 Comments" bug too.
Here is the result:
and the "1 comments" bug:
I think this enhancement really makes commenting more easier, since the link on where to add your comment now is easier to look for.
Have a nice day,
Hoctro (9/2006)
Blog: http://hoctro.blogspot.com/
%20Notice%20I%20fix%20the%20%22%3Cspan%3E1%20Comments%3C/span%3E%22%20bug%20too.%3Cbr%20/%3E%3Cbr%20/%3EHere%20is%20the%20result:%3Cbr%20/%3E%3Cbr%20/%3E%3Ca%20href%3D%22http://photos1.blogger.com/blogger2/1410/800/1600/quickfix.jpg%22%3E%3Cimg%20style%3D%22display:block;%20margin:0px%20auto%2010px;%20text-align:center;cursor:pointer;%20cursor:hand;%22%20src%3D%22http://photos1.blogger.com/blogger2/1410/800/400/quickfix.jpg%22%20border%3D%220%22%20alt%3D%22%22%20/%3E%3C/a%3E%3Cbr%20/%3E%3Cbr%20/%3Eand%20the%20%22%3Cspan%3E1%20comments%3C/span%3E%22%20bug:%3Cbr%20/%3E%3Cbr%20/%3E%3Ca%20href%3D%22http://photos1.blogger.com/blogger2/1410/800/1600/comment.jpg%22%3E%3Cimg%20style%3D%22display:block;%20margin:0px%20auto%2010px;%20text-align:center;cursor:pointer;%20cursor:hand;%22%20src%3D%22http://photos1.blogger.com/blogger2/1410/800/400/comment.jpg%22%20border%3D%220%22%20alt%3D%22%22%20/%3E%3C/a%3E%3Cbr%20/%3E%3Cbr%20/%3EI%20think%20this%20enhancement%20really%20makes%20commenting%20more%20easier,%20since%20the%20link%20on%20where%20to%20add%20your%20comment%20now%20is%20easier%20to%20look%20for.%3Cbr%20/%3E%3Cbr%20/%3EHave%20a%20nice%20day,%3Cbr%20/%3E%3Cbr%20/%3EHoctro%20(9/2006)%3Cbr%20/%3EBlog:%20http://hoctro.blogspot.com/)
Hacking Technique: On Making a New Hack 30 Sep 2006 9:39 PM (19 years ago)
Dear Friend,
This weekend I was working on a brand new hack code name "Site Map", that would let you see all of your posts (theoretically up to 999 possible posts) as a list of all labels and their belonging posts. Here is an example of such a list:
...
Art
*Picasso's Guernica
*Da Vinci's Mona Lisa
*Dali: What do we know about his works?
Math
*How to solve a quadratic equation?
*Math in College: how tough it is?
*Math in everyday use.
Soccer
*The Italians Wins the World Cup for the fourth time!
and so on.
Well, things go really well, and I'm at a good stopping point. What I have at the moment is a list of all the possible posts in a blog, in chronological order. You can click on this link, or look at my beta playground and click on the "Listing of All Posts" to see the effect.
I would not consider this as a hack, but I'd like to make some comments on the code on the technical side of things, in a hope that some of my readers would be interested in this and turn it into completely unexpected new hack(s). So, if you are interested, please read on.
Here is my logic. First, I'm going to get all the posts in a blog. I think Blogger allows to retrieve up to 999 posts on a query.
Now, the return data would be as a part of the Blog in the form of data:posts. This means I cannot create a new widget to retrieve and process the data, but I have to get it from the Blog1 widget itself. To have a clean cut between the new code and the old one, I will sub-out all the code to a function (Blogger calls this an includable), then in Blog1's main includable I will call this function to do the job. Later on I have to do something so the rest of the full (999) posts' contents will not show up and slow down your computer, but for testing purpose, it's fine to see both new and current code.
Here is the call to the new "siteMap" function:
...
<b:includable id='main' var='top'>
<div id='blog-posts'>
<b:include name='siteMap' values='data:posts'/>
...
Below is the current listing of the function. I will explain more in details. (If you want to try this of course you must edit away all the numbers at the front of each line.)
1 :<b:includable id='siteMap' var='data:posts'>
2 :
3 : <div class='sitemapHack'>
4 : <div id='siteMapList'>
5 : </div>
6 : </div>
7 :<script language='javascript' type='text/javascript'>
8 :
9 : var currentUrl = "<data:blog.url/>";
10: if (currentUrl.search("max-results=999") != -1) {
11: var firstLine = "";
12: var tempLabel = "";
13: <b:if cond='data:blog.pageType == "index"'>
14: <b:if cond='data:blog.url != data:blog.homepageUrl'>
15:<!-- second part : filling in data based on tags -->
16: firstLine = firstLine + "<ul>";
17: <b:loop values='data:posts' var='post'>
18: <b:if cond='data:post.title'>
19: firstLine = firstLine + "<li><a expr:href='data:post.url'><data:post.title/></a></li>";
20: </b:if>
21: </b:loop>
22: firstLine = firstLine + "</ul>";/*1st line*/
23: </b:if>
24: </b:if>
25: obj = document.getElementById('siteMapList');
26: obj.innerHTML = firstLine;
27:}
28:</script>
29:</b:includable>
Line 1 declares the function as siteMap, with the passing value is the collection of all the posts.
Line 3 thru 6 contain the placeholder of the hack's contents. We will keep adding text to a variable declared in line 11, and at the end write all data to this div. As mentioned in my previous article entitled "JavaScript, you completed me!", this portion of the code I follow exactly from Ramani of Hackosphere.
Line 7 declares that we are entering Javascript, and line 27 exits this effect. While we are in JavaScript, you cannot write something like <li> and expect the code to pick this up and turn it into real html code. What you have to do is to write all of that HTML code to a string variable, as we shall see shortly.
Line 9 contains the secret of JavaScript/Beta integration. Whatever inside the two double quotes will turn into a string and is assigned to the variable currentURL. A look at the runtime code confirms this fact.
In fact, by reading the generated source code, I was able to find out many bugs, while programming the code in Beta's HTML edit tool.
Line 10 performs a search to see if the text max-results=999 is inside the currentURL variable (if it's different than -1 then it is, because the returning value indicated the location of the first occurence if there is a match.)
Now that it's matched, line 11 & 12 define some blank texts, while line 13 & 14 perform the checks to see if this is the archive/label kind of returned posts. As you might have known, there are three possible kinds of data that data:posts collection represents. If you are in homepage, data:posts represents the contents of all the posts you decided to show in the front page, whether it is one or ten posts. On the other hand, if you select on a label or a month/day/year archived link, data:posts represents all the possible posts resulting from that query. Finally, if you click on a link to the post, data:posts represents the actual post, so there would be exactly one (1) post in the collection.
In Beta templating language, there aren't any AND or OR logic for you to combine the two conditions into one if statement, so I had to make two if statements as shown in line 13 & 14. If the current page is an indexed type AND it's not at the same time the front page, then we hit the gold mine!
Line 16 starts the string text with an ul tag.
Line 17 thru line 21 set up a nice loop where each post's name is tugged inside its link, in order for you to be able to click on it to lead you to the right item post. In line 19 firstLine variable keeps adding more titles onto itself. In the generated code, the result is super lightweight chunk of code, since we only add Blogger to pass back titles and url only. You will also notice that the b:loop logic is executed on the server side, since what we see on the client side (our generated code) is the result of the content of each loop.
Noticed in line 18, the title is drawn only if it exists.
Once the loop is completed, we close the ul tag and the ifs as in line 21 thru 24.
As previously noted, we look for the unique id siteMapList, then write the content to it in line 25 & 26.
Now that the code is completed, to call it we use this link:
http://blogger-beta-from-ground-up.blogspot.com/search/label/?max-results=999
That was all I did for the posts to show. My next step for this little hack project is to look for all the unique labels contained in the posts, then have a for-loop going through all the found labels and prints all all the posts that match it. Because of this, if you have multiple labels for a particular post, it will show up many times, one for each label. That is acceptable, I think. I personally only assign one label per post right now in my main blog, but in the future, if I find a good benefit, I won't hesistate to add more labels.
Wow! I finally did it! I'm at the end of my explanations!
Have a wonderful day and see you next time, when I present you the completed "Site map" hack.
Hoctro (9/30/2006)
Blog: http://hoctro.blogspot.com/