SYTYC has moved!!! 12 Jul 2010 3:00 AM (15 years ago)
Hello All!


And the winner is.... 28 Jun 2010 6:14 AM (15 years ago)

AMAZING Craft Retreat Deal 23 Jun 2010 10:57 AM (15 years ago)


.%20%20Make%20sure%20you%20look%20at%20the%20%3Ca%20href%3D%22http://www.desertspringsresort.com/%22%3EResort%20%3C/a%3Eand%20%3Ca%20href%3D%22http://spa.desertspringsresort.com/%22%3ESpa%3C/a%3E%20websites%20too.%3C/div%3E%3Cdiv%3E%3Cbr%20/%3E%3C/div%3E%3Cdiv%3EI%20hope%20I'll%20get%20to%20see%20you%20there!%3C/div%3E)
Interview with Chris!! 23 Jun 2010 10:53 AM (15 years ago)


.%3C/div%3E%3Cdiv%3EMy%20professional%20coworkers%20have%20no%20idea%20I%20also%20have%20a%20secret%20identity%20as%20a%20craft%20blogger!%20I%20work%3C/div%3E%3Cdiv%3E5-10%20hours%20a%20week%20outside%20of%20our%20home%20to%20keep%20my%20license%20and%20skill%20set%20current.%20My%3C/div%3E%3Cdiv%3Eintroduction%20to%20blogging%20began%20after%20my%20baby%20was%20born%20in%202008.%20I%20began%20a%20family%20blog%20to%20share%3C/div%3E%3Cdiv%3Ephotos%20with%20our%20extended%20family.%20Last%20summer%20during%20a%20break%20from%20school%20and%20work,%20I%20began%3C/div%3E%3Cdiv%3Emy%20craft%20blog.%20It%20started%20as%20just%20a%20place%20to%20track%20great%20ideas%20for%20the%20future,%20and%20has%20evolved%20into%3C/div%3E%3Cdiv%3Ewhat%20it%20is%20now.%20My%20goal%20is%20to%20make%20it%20a%20place%20for%20real%20moms%20to%20find%20inspiration%20to%20spark%20their%3C/div%3E%3Cdiv%3Eown%20creativity,%20and%20the%20creativity%20of%20their%20children.%20Check%20the%20blog%20out%20at%20%3Ca%20href%3D%22http://pickupsomecreativity.blogspot.com/%22%3EPickup%20Some%20Creativity%3C/a%3E.%3C/div%3E%3Cdiv%3E%3Cbr%20/%3E%3C/div%3E%3Cdiv%3E2%20.%20%3Cb%3EHow%20and%20when%20did%20you%20start%20crafting?%3C/b%3E%3C/div%3E%3Cdiv%3EI%20have%20had%20the%20love%20of%20creating%20instilled%20in%20me%20since%20I%20was%20a%20tiny%20girl.%20My%20mom%20says%20she%20put%20a%3C/div%3E%3Cdiv%3Epencil%20in%20my%20hand%20when%20I%20was%20one,%20and%20I%20immediately%20started%20drawing%20circles.%20Since%20then,%20I%3C/div%3E%3Cdiv%3Ehave%20explored%20many%20different%20mediums%20including%20graphite,%20prisma%20pencils,%20water%20colors,%20and%3C/div%3E%3Cdiv%3Eoil%20paints.%20I%20have%20also%20enjoyed%20sewing%20since%20I%20was%20four,%20thanks%20to%20my%20mom.%20The%20advent%20of%20my%3C/div%3E%3Cdiv%3Echildren%20has%20given%20me%20a%20lot%20of%20incentive%20to%20hone%20my%20sewing%20skills.%20Now,%20most%20of%20my%20creating%3C/div%3E%3Cdiv%3Eis%20done%20with%20fabric%20and%20my%20sewing%20machine.%20However,%20I%20am%20always%20wanting%20to%20branch%20out%20into%3C/div%3E%3Cdiv%3Eother%20mediums%20or%20combining%20mediums.%3C/div%3E%3Cdiv%3E%3Cbr%20/%3E%3C/div%3E%3Cdiv%3E3%20.%20%3Cb%3EHow%20often%20do%20you%20craft?%3C/b%3E%3C/div%3E%3Cdiv%3EI%20craft%20every%20chance%20I%20get.%20I%20have%20to%20set%20rules%20for%20myself,%20or%20I'd%20do%20it%20ALL%20the%20time.%20(My%20list%20of%3C/div%3E%3Cdiv%3Efuture%20crafts%20I%20want%20to%20tackle%20is%20really%20long!)%20I%20have%20to%20get%20a%20load%20of%20laundry%20folded%20or%20the%20floor%3C/div%3E%3Cdiv%3Eswept%20before%20I%20can%20make%20time%20for%20some%20crafting.%20I%20try%20to%20limit%20my%20crafting%20to%20when%20my%20little%20ones%3C/div%3E%3Cdiv%3Eare%20sleeping%20and%20the%20older%20kids%20are%20at%20school.%20I%20also%20tend%20to%20craft%20late%20at%20night,%20when%20everyone%20is%3C/div%3E%3Cdiv%3Easleep...especially%20around%20Christmas%20time.%3C/div%3E%3Cdiv%3E%3Cbr%20/%3E%3C/div%3E%3Cdiv%3E4%20.%20%3Cb%3EWhere%20do%20you%20get%20your%20inspiration?%3C/b%3E%3C/div%3E%3Cdiv%3EMost%20of%20my%20inspiration%20comes%20from%20a%20specific%20need.%20For%20example,%20my%20fabric%20Easter%20baskets%3C/div%3E%3Cdiv%3Ewere%20created%20because%20I%20needed%20something%20I%20could%20pack%20away%20easily%20after%20the%20holiday%20was%20over.%3C/div%3E%3Cdiv%3EI%20also%20get%20excited%20when%20I%20see%20a%20cute%20outfit,%20and%20then%20figure%20out%20how%20I%20can%20put%20something%20similar%3C/div%3E%3Cdiv%3Etogether.%20I've%20started%20to%20make%20patterns%20from%20existing%20things%20my%20kids%20have,%20like%20a%20cute%20dress%20or%3C/div%3E%3Cdiv%3Eshirt.%20Of%20course,%20I%20began%20this%20whole%20adventure%20because%20I%20was%20inspired%20by%20other%20crafters%20I%20found%3C/div%3E%3Cdiv%3Eonline.%3C/div%3E%3Cdiv%3E%3Cbr%20/%3E%3C/div%3E%3Cdiv%3E5%20.%20%3Cb%3EWhat%20is%20your%20favorite%20medium%20to%20work%20in?%3C/b%3E%3C/div%3E%3Cdiv%3EFor%20now,%20it%20is%20fabric.%20I%20love%20to%20sew%20just%20about%20anything%20these%20days.%20When%20my%20children%20are%20older,%3C/div%3E%3Cdiv%3EI'd%20like%20to%20start%20painting%20again...other%20than%20my%20walls!%3C/div%3E%3Cdiv%3E%3Cbr%20/%3E%3C/div%3E%3Cdiv%3E6%20.%20%3Cb%3EWhat%20is%20your%20guilty%20pleasure?%3C/b%3E%3C/div%3E%3Cdiv%3EReading%20books.%20Once%20I%20begin%20a%20book,%20I%20have%20a%20hard%20time%20putting%20it%20down...so%20I%20have%20to%20be%20careful%3C/div%3E%3Cdiv%3Eabout%20beginning%20a%20new%20one!%3C/div%3E%3Cdiv%3E%3Cbr%20/%3E%3C/div%3E%3Cdiv%3E7%20.%20%3Cb%3EWhat%20makes%20you%20smile?%3C/b%3E%3C/div%3E%3Cdiv%3EHearing%20my%20husband%20hum%20as%20he%20gets%20ready%20in%20the%20morning,%20getting%20spontaneous%20hugs%20from%20my%3C/div%3E%3Cdiv%3Ekiddos,%20watching%20my%20children%20enjoy%20something%20I've%20made%20for%20them,%20spending%20time%20in%20beautiful%3C/div%3E%3Cdiv%3Eplaces%20like%20Yellowstone%20and%20the%20Grand%20Canyon%20with%20my%20family.%3C/div%3E%3Cdiv%3E%3Cbr%20/%3E%3C/div%3E%3Cdiv%3E8%20.%20%3Cb%3EWhat%20is%20your%20favorite%20thing%20to%20do%20(other%20than%20crafting)?%3C/b%3E%3C/div%3E%3Cdiv%3ESpending%20time%20with%20my%20kids.%20I%20LOVE%20the%20summer%20because%20everyone%20is%20home,%20and%20we%20can%20go%20on%3C/div%3E%3Cdiv%3Eadventures%20together,%20even%20if%20it's%20just%20in%20the%20backyard.%20We%20watched%20the%20Leonid%20meteor%20shower%20last%3C/div%3E%3Cdiv%3Esummer%20snuggled%20in%20blankets%20on%20our%20lawn%20with%20the%20dog%20around%20our%20feet.%20It's%20one%20of%20my%20favorite%3C/div%3E%3Cdiv%3Ememories.%20I%20also%20love%20sitting%20together%20and%20reading%20to%20them.%20This%20summer%20we're%20going%20to%20read%3C/div%3E%3Cdiv%3Ethe%20Chronicles%20of%20Narnia.%20I'm%20so%20excited!%3C/div%3E%3Cdiv%3E%3Cbr%20/%3E%3C/div%3E)
Finale & Season 4 Crafters 20 Jun 2010 9:01 PM (15 years ago)


.jpg)
.jpg)
When you unsnap the top, you can see how nicely organized all of your picnic items are.
.jpg)
This is not just any tote, however. The sides of the tote snap in the back to easily access the items for your picnic.
.jpg)
There are elastic straps to hold your wine glasses (cute plastic ones from Walmart), pockets for your plates and silverware, and a pocket for your picnic blanket.
.jpg)
The picnic blanket has a waterproof bottom, which is easy to clean (a simple modification of the outdoor play mat). It is a great way to enjoy your spouse. And if you really want to keep it cheap, put the kids to bed and have a picnic in the backyard. Just the two of you!
The cute fabric is curtousy of Danielle from Draw String Studio.
Season 4 Auditions!! 13 Jun 2010 5:17 PM (15 years ago)


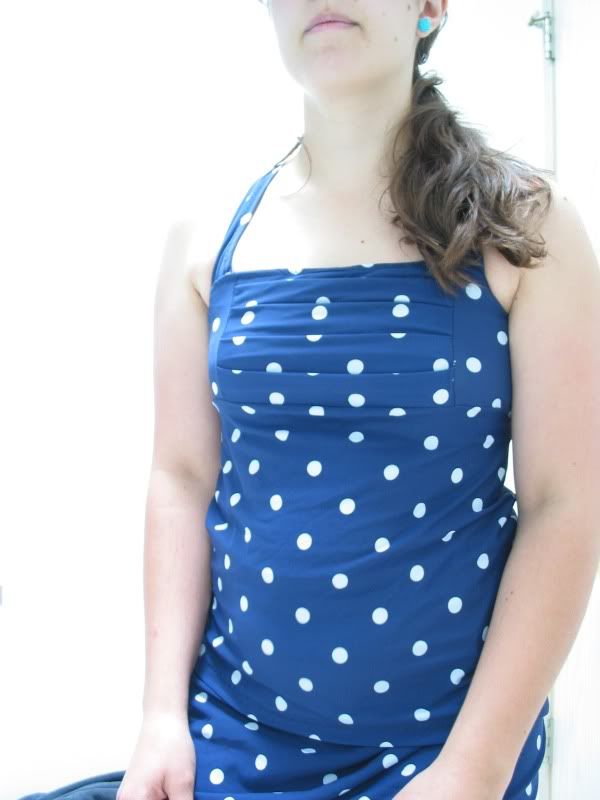
This darling swimsuit was self drafted based on a RTW suit. Perfect for Summer time!

I don't know about you, but we have tons of business magnets on our fridge. You know, those flimsy magnets covered with business logos you get at the fair or with a purchase. I am tired of looking at them. So here is what I did with mine:


This gorgeous bed runner is Queen size. The perfect fit to give your bedroom a little bit of color.


I went to my local Payless Shoe Store and bought these small white ballet slippers. I'm not going to lie... I love how they smell. So fresh and new :)

I took of the price tag ($16.99) and picked out my embroidery thread. I went with pinks and green. Then I picked out pearls to hand sew on.


Sunny days, mini vacations, long car rides....and missing sunglasses! NO MORE I SAY! Ever since my first car I have had a clip for my sunglasses but as our family grew I couldn't find more so they ended up in the cup holders, on the floor, you name it, which then leads to broken and lost glasses. Thats where this little project that took no more than 45 minutes to complete came in handy!


I have been wanting to make something with a old cupboard door that I found at Ikea. I added a ledge to hold chalk and eraser.......but mainly to catch the chalk dust;)

The perfect chalk board for little love notes to hubby or messages about what I {heart}.

I made a bag to hold the chalk and eraser. I added rooshing to give dress it up a little.


the back view--had to add a doggy door .

thr roof is corrugated trim I got from a bulletin board store.
($3.25--the most expensive thing I bought.)

Your welcome to come and play....as long as you aren't selling stuff!!!
When I was little my Mom sewed a red Superman cape for my older brother. He was just one year older than me so we both wore that cape until it was in tatters. When we strapped on that cape and felt like superheroes. My brother even chose to jump off our 2nd story roof with that cape on to try out its flying powers (don't worry, he came away un-hurt, but my poor Mother probably aged ten years that day!)
Nothing makes a kid feel empowered like dawning the persona of a super-hero! Now little tykes can feel that same power by the pool.


I also made this coordinating Robot Bag so that my son can take his outer space friends with him on his adventures. The bag is made out of a Japanese canvas fabric and the straps are out of my new favorite material... Nylon Webbing.
This wreath has been a bit of a work in progress for me...an evolving work of art if you will. The idea came to me while clearing the table after a family night of planting window boxes, I had these all these little seed packets left over! They were just too pretty to be considered trash!

The whole project was almost free too. That is always a plus! The wreath form is recycled from another wreath. And I used my favorite stuff in the whole world to age and distress the seed packets, can you guess what I used? Old English furniture polish! Fabulous stuff!
The flowers are strips of an old sheet, and they are stuck onto the wreath with straight pins that I can reuse if I take them off. I put them on next. The colorful heads of the straight pins are like the bright centers of flowers! And they add a little shot of color to the white on white flowers!
The Welcome sign is actually a little chalkboard that can be personalized to spell out whatever fits the situation! I can't wait to show you what the back of this sign says! LOL! I used some chalkboard wallpaper that I bought at the dollar store.

If you were to ask me my favorite part of the wreath I would have to tell you that it is the fact that it can be switched up so easily! The seed packets are held in place by clothespins and can quickly be switched for the different seasons. I can totally see this wreath surrounded by birthday cards in August when we have three birthdays at our house! Or proudly displaying our Chrismtas cards in December. I also think this would be grand holding fall leaves picked up after a crisp day at the park. Or how about little Valentines Day notes tucked all around? I am getting super excited thinking about all the possibilities. How about you, this litte wreath whips up so easily, will you be making one for your house?

I love to adorn myself and my home with things that have meaning to me. I purchased this necklace and then embellished it with leather leaves.


Interview with Cheryl 9 Jun 2010 12:51 PM (15 years ago)
Tell us a little about you and your blog. I'm a 28 year old stay at home mom to two little boys, ages 3 and 1, and I love the days we spend together at home. I also love making stuff. I sew, craft, assemble, decorate, re-decorate, bake and build on a daily basis. Our house is messy and we eat too much carry out, but I love creating. My husband lovingly supports my projects and has the decency to wait until I leave the room before rolling his eyes at my latest hair-brained idea. My blog is an attempt to share my projects and maybe even make some connections with similar people. I also have a shop, www.justpretty.etsy.com, where I sell many of my finished projects, custom items, and other little goodies. How and when did you start crafting? For as long as I can remember, I've enjoyed making things. From braiding friendship bracelets out of embroidery floss until now, I've always been in the middle of something creative. How often do you craft? Every day! Naptimes are my chance to get crafty and I stay up way too late sitting at my sewing machine. I wouldn't have it any other way. Where do you get your inspiration? All over...stacks of pretty fabric, colorful paper, sprinkles, ribbons, yarn, polka dots, gingham, little chairs, dishes, spray paint, tools...I could lose myself for hours in flea markets, IKEA and antique and thrift shops. All of those pretty things send my mind racing with potential and new projects. Of course, lurking around the blog world doesn't hurt, either. There are so many creative and talented people out there! What is your favorite medium to work in? Fabric! I have stacks and stacks of it...I don't think I'll ever get through it all! What is your guilty pleasure? I have a serious sweet tooth. I could eat candy by the bagful. What makes you smile? The things that my boys find hilarious always make me smile. Their laughter is so sweet and full of life. What is your favorite thing to do (other than crafting)? Buy more craft supplies! Just kidding. I just enjoy spending time with my husband and boys. Go check her out at her blog, A Pretty Cool Life!

?%3C/b%3E%3C/p%3E%3Cp%3E%3Ci%3EBuy%20more%20craft%20supplies!%3C/i%3E%3C/p%3E%3C/div%3E%3Cp%3E%3Ci%3E%3C/i%3E%3Ci%3EJust%20kidding.%20%20I%20just%20enjoy%20spending%20time%20with%20my%20husband%20and%20boys.%20%3C/i%3E%3C/p%3E%3Cp%3E%3Ci%3E%3Cspan%3E%3Cb%3EGo%20check%20her%20out%20at%20her%20blog,%20%3C/b%3E%3C/span%3E%3Ca%20href%3D%22http://www.aprettycoollife.com/%22%3E%3Cspan%3E%3Cb%3EA%20Pretty%20Cool%20Life%3C/b%3E%3C/span%3E%3C/a%3E%3Cspan%3E%3Cb%3E!%3C/b%3E%3C/span%3E%3C/i%3E%3C/p%3E%3Cdiv%3E%3Ci%3E%3Cbr%20/%3E%3C/i%3E%3C/div%3E%3Cdiv%3E%3C/div%3E%3C/span%3E)
Week 8 - Re-purposed 6 Jun 2010 8:27 PM (15 years ago)


I'm was so excited about this week's theme because I had the perfect excuse to complete a project I've wanted to do for a while. Last winter I found this pretty Ralph Lauren sweater at a local thrift store.

I instantly pictured it as a toddler's cardigan. I used a sweater we had on hand as pattern, and was able to use the sleeves in tact. I just cut them down from the shoulders. I was also able to reuse the hem from the sweater, reserved from the length I had to cut off.

I used some grosgrain ribbon as facing for the button placket.

I noticed some old pink lace and a button from my great-grandmother's stash that I used to make a flower brooch...which fit with repurposing items.

And the result is this sweet little cardigan, ready for my toddler to wear in the fall.

.jpg)
I picked up this wool suit jacket for 50% off at a total cost of $1.50!!!
.jpg)
Made from a mens wool suit jacket, this scarf provides a feminine flare to a classic accessory. The scarf is lined with a mustard colored cotton fabric to prevent itch and add color.
.jpg)
The tag on the front was originally on the inside of the suit jacket. It had the name of a nearby town printed on it, so I used it to give a more personal feel, add a little detail, and to remember it's roots.
.jpg)
The most unique part of this scarf is the pocket, made from one of the existing pockets on the suit jacket, on the backside behind the tag. The pocket provides a great way to carry your wallet and cellphone when out shopping. It's functional, beautiful, and warm. Perfect for fall!
Interview with Shilo 3 Jun 2010 6:49 AM (15 years ago)

I started a family blog two years ago. Just a way of keeping track of all the little things that happen in our day to day life's. My mom started her blog, Rosy Cheeks, which inspired me to start a craft blog also. I love sharing ideas with everyone in blogger land.
How and when did you start crafting?
Technically I started crafting when I was about 10. My mom was part of that 1980's tole painting craze and she would have my brother and I baste all of her wood. But on a personal level it was when I was on bed rest with my oldest son. I was so bored, so I started scrap booking as away to entertain myself and it has been a hobby ever sense.
How often do you craft?
I usually craft a little each day. Even if it is just assembling charms for my latest swap while watching House or Top Chef. Once a month my mom, aunt, sisters and cousins have a crafty day that is an entire Saturday of food, fun and crafting. Even my 7 year old daughter, 4 year old niece and 6 year old cousin have started insisting on joining us with projects of their own that they work on.
Where do you get your inspiration?
All the wonderful blogs out there are a huge inspiration. I love seeing what others have made and then tweaking it to make it my own. Also my kids. Recently my 11 year old came to me and asked me to create something for him to display all of his scouting pins on. What a great idea! And I never would have thought of it, had he not asked.
What is your favorite medium to work in?
This on is hard, because there are so many. But I have to return to my original love and say paper .Although, lately fabric is a close second.
What is your guilty pleasure?
Oh no, I don't want to admit this out loud...but I would say watching the shows 16 and pregnant or South Park while enjoying a diet busting sherbet float.
What makes you smile?
My Kids and my sweet hubby of 13 ears for sure! But also seeing a project I made enjoyed by someone. I recently made my kids and nieces and nephew fabric snakes...really easy, took like 15 minutes...but the played with them for days!
What is your favorite thing to do (other than crafting)?
My hubby and I are movie watchers, we own more movies than I want to admit out loud. I also enjoy camping, 4 wheeling and being outside. I love to cook and bake, even though I will probably never master the mysteries art of the yeast bread....I think even my poor mom has given up on me!
Thanks for taking a minute to get to know me. Stop by and visit my blog if you get a chance!
?%3C/b%3E%3Cbr%20/%3EMy%20hubby%20and%20I%20are%20movie%20watchers,%20we%20own%20more%20movies%20than%20I%20want%20to%20admit%20out%20loud.%20I%20also%20enjoy%20camping,%204%20wheeling%20and%20being%20outside.%20I%20love%20to%20cook%20and%20bake,%20even%20though%20I%20will%20probably%20never%20master%20the%20mysteries%20art%20of%20the%20yeast%20bread....I%20think%20even%20my%20poor%20mom%20has%20given%20up%20on%20me!%3Cbr%20/%3E%3Cbr%20/%3EThanks%20for%20taking%20a%20minute%20to%20get%20to%20know%20me.%20Stop%20by%20and%20visit%20%3Ca%20href%3D%22http://craftyfuntime.blogspot.com/%22%3Emy%20blog%3C/a%3E%20if%20you%20get%20a%20chance!%3Cbr%20/%3E%3C/span%3E%3C/span%3E%3C/div%3E%3C/div%3E)
New Sponsor - PhotoJewelryMaking.com 2 Jun 2010 6:10 AM (15 years ago)


%3C/div%3E)
Week 7 - Paper 30 May 2010 9:20 PM (15 years ago)
.jpg)
.jpg)
.jpg)
.jpg)

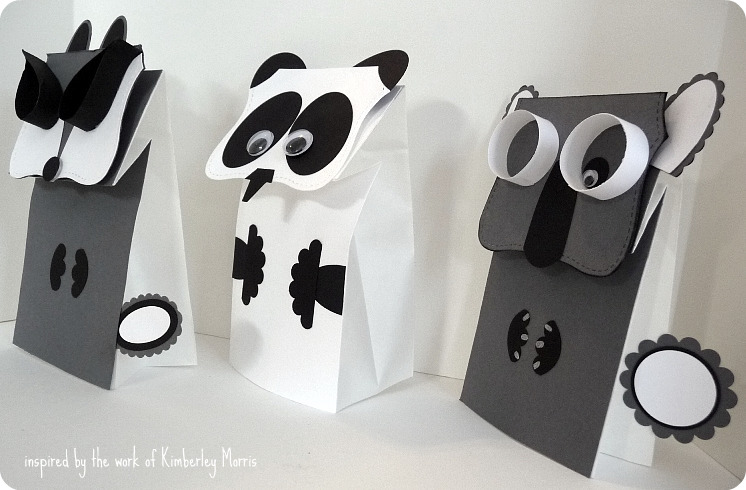
They are made using punches and dies. If you don't want to use them as puppets, you can put them inside shadow boxes and hang them on your child's bedroom wall.

I used tiny lunch bags so the puppets are the perfect size for tiny hands. The three-dimensional eyes can really help a child's imagination run wild!

I found a shadow box frame I liked, and then using cardstock paper and craft foam, made a diorama of this house. In the tutorial, I'll show you the steps I took, so you can create your own. I printed out an 8x10 photo of the house, and then used it as a guide. I divided the house into layers, and then traced and transferred the layers to the paper. This was created using common scrapbooking tools and supplies, and an exacto knife.

Here in the cross-section view, you can get an idea of how the diorama is put together.

Pictures only tell part of the story. It's hard to get a feel for it in the photo, but the details literally pop out, and create a striking art piece.


Consider creating a diorama and you will make a keepsake that will be cherished.
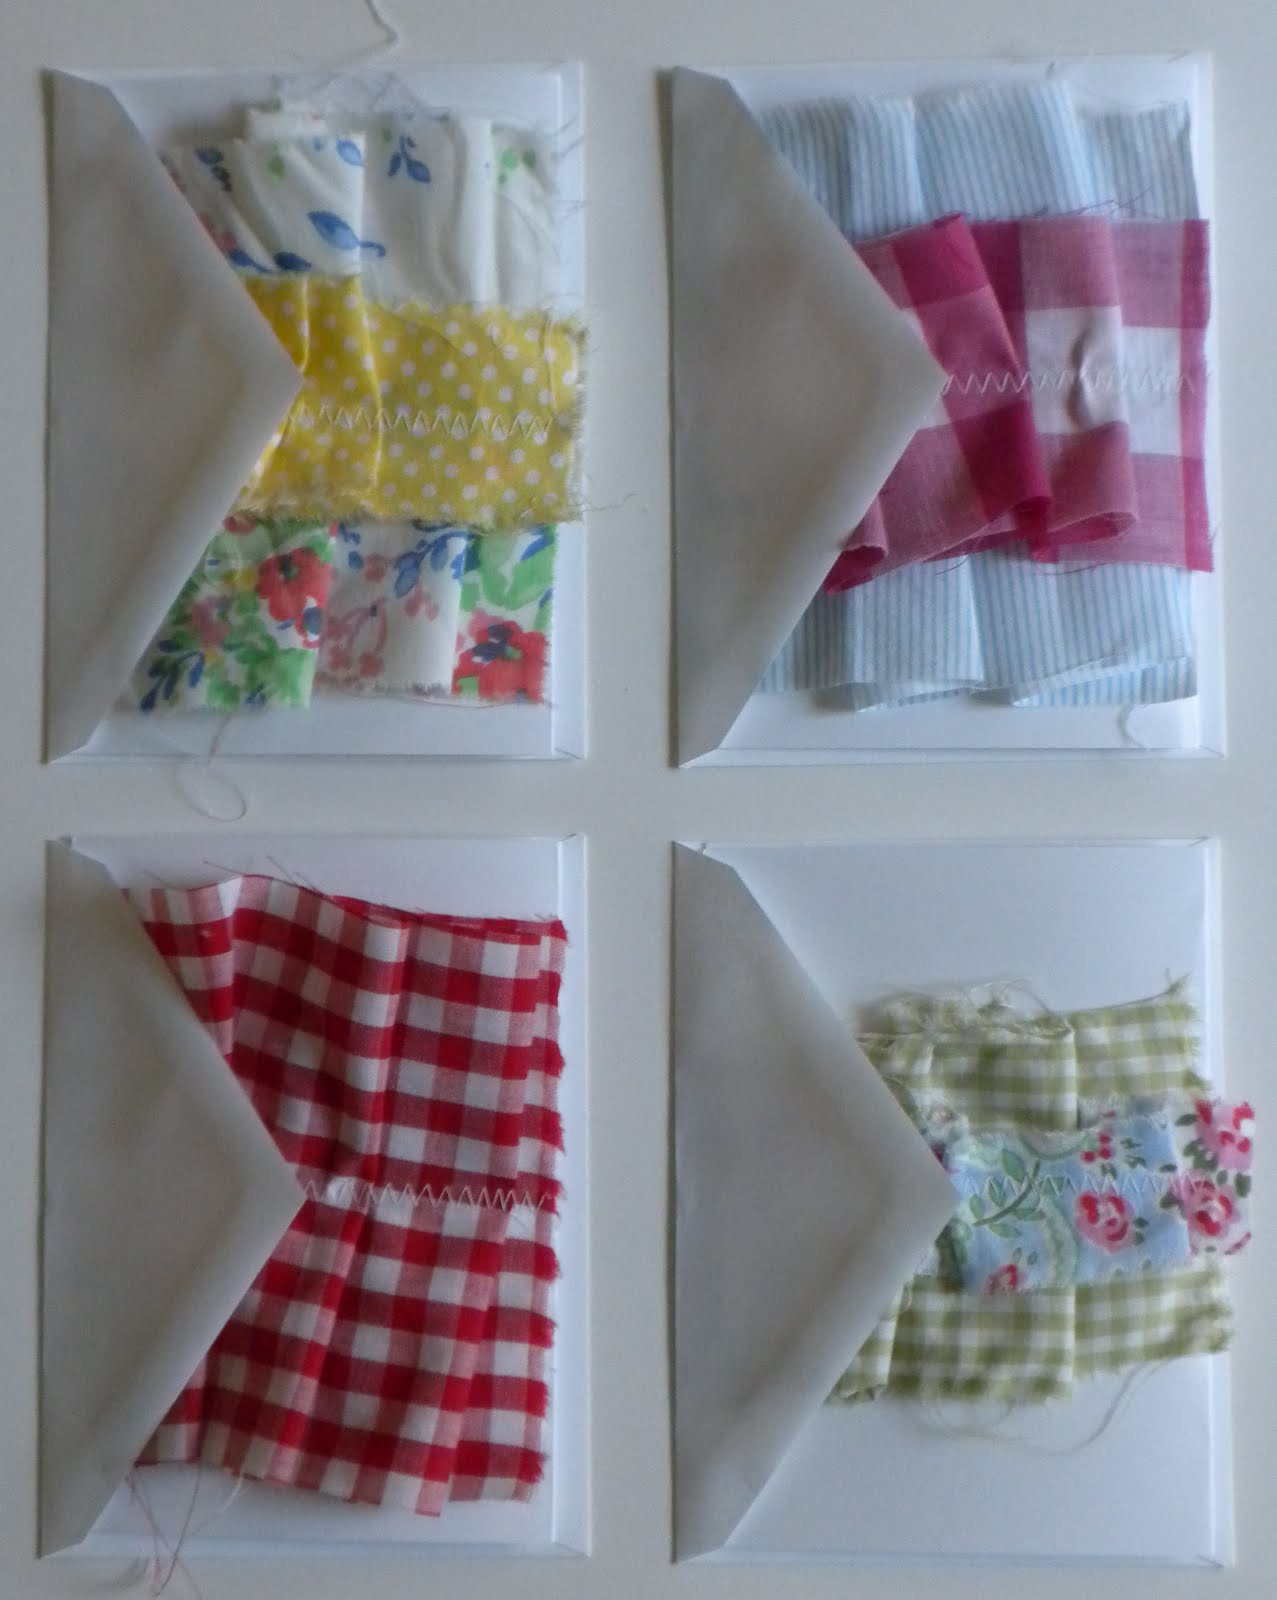
These ruffled note cards would be the perfect addition to any gift for a flea market lovin' girl. Perfectly imperfect, they're made from a combination of new and vintage fabrics sewn to white note cards for a simple and lovely style.


Interview with Jessica! 25 May 2010 9:42 AM (15 years ago)

-------------------------------------------------
As promised, this week I will be featuring the few crafters that I was wasn't able to while we had no internet access. First up it's Jessica from Running with Scissors!

- How and when did you start crafting? My mom is very creative very talented, from a young age she'd include us in her projects and I think just watching her create so much from wedding gowns to stained glass windows, and even furniture, the passion for creating and projects rubbed off
- How often do you craft? daily pretty much. I do my best to restrict it to during naps or after my son's asleep at night. There are very few nights when all the chores are done that I'm not working on a project. If I'm not able to actually work on one, I am usually sketching ideas.
- Where do you get your inspiration? anywhere really: other blogs, nature, magazines, a piece of fabric, childhood memories, wrapping paper, a cool color of spray paint, junk that needs a new life
- What is your favorite medium to work in? I get bored of one area, so I don't know that I have a favorite. I try to switch it up between painting, crafty (paper/glue/ribbon/etc), woodworking. But most of the time I am sewing.
- What is your guilty pleasure? watching chick flicks
- What makes you smile? brownies, fresh flowers, appreciation
- What is your favorite thing to do (other than crafting)? lay on the grass outside in warm weather and do nothing at all
,%20woodworking.%20%20But%20most%20of%20the%20time%20I%20am%20sewing.%3Cbr%20/%3E%3Cbr%20/%3E%3C/i%3E%3C/li%3E%3Cli%3E%3Cspan%3EWhat%20is%20your%20guilty%20pleasure?%3C/span%3E%20%3Ci%3Ewatching%20chick%20flicks%3Cbr%20/%3E%3Cbr%20/%3E%3C/i%3E%3C/li%3E%3Cli%3E%3Cspan%3EWhat%20makes%20you%20smile?%3C/span%3E%20%3Ci%3Ebrownies,%20fresh%20flowers,%20appreciation%3Cbr%20/%3E%3Cbr%20/%3E%3C/i%3E%3C/li%3E%3Cli%3E%3Cspan%3EWhat%20is%20your%20favorite%20thing%20to%20do%20(other%20than%20crafting)%3C/span%3E?%20%3Ci%3Elay%20on%20the%20grass%20outside%20in%20warm%20weather%20and%20do%20nothing%20at%20all%3C/i%3E%3C/li%3E%3C/ol%3E%3Cbr%20/%3E%3Cbr%20/%3E%3C/div%3E)
Summer Time - Week 6 23 May 2010 9:59 AM (15 years ago)

.JPG)
.JPG)
The outdoor play mat has a waterproof backing to prevent wetness and allowing for easy clean up. Just wipe it off!
.JPG)
Best of all, it's portable! It fits nicely in the diaper bag or easy and light enough for little hands to carry.

I remember summer time as a kid and selling kool aid and cookes out in the yard to friends, neighbors and passer buyers.
My kids are the same way. They love selling stuff, cookies, lemonade...even rocks!

But it seemed like the hardest part of selling their wares... was setting up...finding a table, making a banner, getting the price in and having a sturdy area to set out all their cups, napkins and other fun stuff.

But with this cute stand setting up for the big sale is a breeze! It has a banner were you can spell out that special offering. And theres a sleeve just right for adding a price.

And with the bright colors you'll attract the attention of all the customers.

When the kids are done, this cute stand comes a part for easy storage. The best part, it is all made with inexpensive materials from your local hardware store
Sun, shade & Lemonade...what a great way to spend summer.
Summer just wouldn't be summer without a trip to the beach. Bring a little bit of the ocean back home with a fun seashell wreath.


Kids will love this fun box of camping gear. It makes a fun addition to a summertime backyard campout.

Just fill the box with fun camping goodies. Your kids can snuggle under the fuzzy blanket and enjoy delicious Smores.

The box lid doubles as a Tic-Tac-Toe board. Use plastic glow-in-the-dark bugs as the game pieces, and keep score in the little score book.

What kid wouldn't love making this and camping under the stars on a warm summer night?
Oh what do you do in the summertime when baby needs something simple to wear?
I saw a sweet one piece romper in a store, and with that as inspiration, designed a new pattern for toddlers. Made with less than a yard of fabric, this little romper can be customized and accessorized in many ways. Here are just a few ideas:

With simple snap diaper access and buttons in back, this pattern can be for a girl or boy. The version for girls features elasticized arms, legs, and neckline. The boy version has a simple faced neckline, rolled hems for the sleeves, and tiny cuffs for the legs.

Made to be comfy and non-restrictive, the Summer Romper will help baby feel ready to play, despite the summer heat, all the way until nap time.

The PDF pattern will include two sizes, 18-24 months and 2T-3T. The tutorial will show you how to make a simple button placket and how to add easy facings. It can be put together in one afternoon. The design possibilities are almost endless. The pink example has a ruched panel. The boy version has a pocket and froggy applique. The third girly example has bias cut appliques. Recommended fabrics are woven shirting fabrics or soft thinner woven cotton fabrics.
The Summer Romper is a great way to keep your child comfy and stylishly cute during the hot summer months.
 I'm still not going to be able to get everything that I wanted up this week either guys. But good news...the internet guy comes tomorrow! (How did I make it a week without checking my email or the votes or anything even once?!?) So over the next few days I should get all the links and tutorials and everything up from the last few weeks.
The winner of our "dress up" challenge was Shilo with her Magnetic Paper Dolls. I have those at the top of my "To Do" list for a quiet activity for Abbi.
But we had to say goodbye to Ann @ DecoMod Studio. If you haven't been to her site yet, go now and keep checking back. Her stuff is super cool. I love all of it!
This weeks theme is "Scientific". Vote for your favorite on the poll in the sidebar before Friday night at 9 pm MST.
------------------------------
Craft #1 - Fab Science lab
Kids will love pretending they are scientists with this fun and easy-to-make science lab.
Best part? The whole thing cost less than $10 to make!
All you need is a tri-fold science fair board, some decorative paper, and a bunch of empty cardboard boxes.
The science fair board cost just under $5. In addition, I set a budget of $5 for "scientific" items to add to the board. I let whatever items I found dictate what I put on the board.

The "test tubes" are bubble wands that I cleaned and filled with colored water. The "test tube holder" is an empty Capri Sun box. I already had the "potion" bottles. You could also use empty soda bottles. I already had masks and gloves.

I purchased the "tubes" for 29 cents. They were a part of a sand art kit. I already had droppers. I think the notepad adds a nice touch.

I used a scrap piece of cork for the note board. The "probes" are knitting needles that I found on clearance for 99 cents for the whole set. The "specimen" tray is a mini shoe box lid.
This makes a great project for the summer months. Kids can spend hours and hours using their imagination in their very own lab!

Get your kids interested in science right from the beginning! Get them their own pair of binoculars (onesie) and let them go out searching for different species of birds!

It's never too early to teach them about the world we live in and what better way than exploring things up close with these binoculars.

Okay, so maybe kids can be too young to use these binoculars, but this fun onesie is a unique way to share your love of nature with your new baby.
Craft #3 - Toddlers Science Discovery Toy
Introducing scientific concepts to children should be fun. I have designed an activity toy for young children that lets them practice shape identification, counting, colors, and using their hands for fine motor skills. Math skills are the basis of all science. Why not start early to instill a love of learning?

This toy has four pieces, which all nest inside each other. Each piece is labeled with the shape's name. The star fits into the triangle, which is opened with button tabs. The triangle fits into the circle which has 3 snaps to keep it closed (which serendipitously are also circles). The circle fits into the square which has a zipper closure.


I designed simple appliques on the back of the square and circle which reinforce the shape concept, and provide opportunities to count and identify colors. All three larger shape pouches are fully lined. The star has batting sandwiched inside it, and a fun grommet detail with grosgrain ribbon pull.
The Toddler's Science Discovery Toy is perfect to take to church, appointments, or anytime you need a quiet activity that will keep your child's attention for a while. Make a set for a child in your life today, and help them learn the foundational concepts of science for tomorrow.
Craft #4 - Felt Learning Mat
The felt learning mat is a great way to incorporate learning and fun! The base of the mat is white felt, allowing felt pieces to adhere. It is the same as a felt board except that it is portable and easy to store!
.jpg)
The felt tree pieces are perfect for teaching the changing seasons. The leaves, snow at the base of the winter tree, and the snowflakes are all separate pieces to allow your child to set up the seasons on their own.
.jpg)
The above photo shows the next two sets, weather matching and the growth of a flower. On the left side of the mat are three pockets for storing each of the three sets. Don't stop with just these three sets, either. How about the life cycle of a frog or a butterfly? Or a matching game for the 5 senses? The versatility of the felt learning mat is ENDLESS!
.jpg)
The felt learning mat rolls up and ties for easy portability. You could also use velcro for younger children.
Craft #5 - Periodic Table of Craftyness
Is your nerdery in need of some sprucing up?
This crafty artwork will be sure to show off your inner dork.


Craft #6 - Finger Print Pendant
Put your love in print...finger print that is!
With this cute pendant made with yours and your honey's fingerprints. Add a verse from "your song" and you have a one of kind keep sake!


Or swap out your sweeties finger prints for the kids and you have a unique Mothers necklace.

As a bonus, you always have your child's fingerprint handy...just in case.
Dress Up 9 May 2010 5:49 PM (15 years ago)
 It's just going to be another minimal post this week. The move is made, now we're just waiting on the internet people (I've only had a few minutes to use the internet in the past week and it's going to be like that again this week too :( )I will be able to fill in the details then. Thanks for your patience!
The winner of the Teacher Gift Challenge was Deidre with her Teacher Tote! How cool was that? The tutorial will be up shortly.
This week it's Jessica @ Running with Scissors. Her stuff is amazing! I love her blog and her crafting style. Keep checking up on her.
This weeks theme is Dress Up and there are some great ones. Vote for your favorite on the poll in the sidebar before Friday night at 9 pm MST.
------------------------------------------------------
Craft #1 - Hula Doll Dress Up
Who says little girls and boys are the only ones who can play dress-up?
Dolls are people, too! (Just watch "Toy Story!")
This hula costume is so easy and fun to make!


Doesn't "Lindsey" look so adorable and ready to hula in her sparkly "grass" skirt, vibrant lei, stunning hair piece, bracelet and anklet?

What little girl wouldn't just love, love, love this adorable dress-up hula costume for their doll?! Plus, it's so easy to make! You can make it together. A girl is never too young to start crafting!
Craft #2 - Boudoir Dress Up
I love staying at a nice bed and breakfast. It's a special night out. The centerpiece of the room is usually the comfy bed, spread with beautiful decorative pillows. I wanted to "dress up" my bed, and bring a little of that bed and breakfast feeling to our bedroom. Hence, the Boudoir Pillows.


Craft #3 - Finger Dress Up
Ever notice fingers always get left out of dress up? Not anymore.


Craft #4 - Magician Dress Up
.jpg)
.jpg)
.jpg)
Craft #5 - Animal Tails


Fancy, pretty, feminine. I love the sculptural look!

These headpieces are fun and super dressy, but to add a little more function to the "everyday", I made the main flower on a clip. Unclip it from the headpiece, throw it on a cute side pony and your bridesmaids can be wearing these around town with a t-shirt and jeans.

The best part???This project is made from scraps of fabric left from all of the other wedding projects. If you've got a few squares left, a headband and a couple of clips, this project won't add a dime to your wedding budget.
As a little girl I loved playing with paper dolls. With this cute tin, the little girl in your life will love playing paper dolls too...but with a personal twist...the doll is her and the clothes are all her favorite outfits!

There is an out fit for play, an outfit for school and even a pair of pj's! Plus, some fun accessories to dress up anything she wears!

And...it's all magnetic and contained in a cute, upcycled metal cookie tin, so when its time to head to a friends or on a long car ride, just grab this cute tin and she can play paper dolls anywhere!

*These photos have been altered to blurry out the "dolls" face, the actual dress up tin does not have the face blurred.
Interview with Holly! 5 May 2010 6:56 AM (15 years ago)
I love spending time with my family and friends.  Hey everybody. They move is still in progress (and the internet people won't be able to come until the end of next week!?!) so I won't be able to get the past craft links or tutorial or anything up for a little bit longer. Sorry!
But in the mean-time I'd like you all to get to know Holly a little bit better. She's one amazing lady. Can you believe she did her whole wedding by her self!? To learn even more about her that's not in this interview and to see her crafts click here. (this week's challenge is in the previous post...just scroll down a bit)
I'm a 26 year old Midwestern newlywed who has a serious love for all things pretty. I love sewing, making jewelry, and learning how to use my camera. I work full time as a biomedical engineer during the day, and spend most of my nights in our guest room at the sewing machine. I prefer dreaming up my own designs over following a pattern. I think figuring out how to put things together satisfies the engineer in me! My blog bijou lovely was created as a place to document my creations, inspiration, and tutorials.
I have always loved being creative and making things, but planning my wedding really triggered the need for me to craft more often. I wanted to make sure our wedding was a true reflection of my husband and I, so I handmade everything from the invitations to the table runners on my own. After spending a year creating something almost every night, I needed a place to channel all of that creative energy once the wedding was over, and that's when I started bijou lovely.
work on some sort of craft project almost every night of the week! Even when we're on weekend road trips, I figure out something I can make in the car. I do try to take one night off a week to spend away from the craft room!
I get my inspiration from a lot of different places. A lot of my ideas just pop into my head as I'm doing other things. I have a running list of ideas written down so I won't forget them! Blogs are a wonderful place to look for inspiration. I have an excessive amount of blogs in my google reader! Magazines, catalogs, and stores are also some of my main sources. If I'm ever feeling uninspired, a trip to Anthropologie or a quick look through a J.Crew catalog can have my head spinning with ideas in no time!
I love to sew, and I'm addicted to fabric!
Gossip Girl and diet soda! Not necessarily together.
My husband! He's wonderful.
Teacher Gifts - Week 3 2 May 2010 5:37 PM (15 years ago)

It's just going to be a bare-bones post this week. We're in the middle of a move and we don't have internet yet (thanks wonderful in-laws for letting me mooch the www from you!). I'm hoping to have it by the middle of the week so I will be able to fill in the details then. Thanks for your patience!
I still have not heard from the winner fo the Lisa Leonard $50 giveaway. If it was you (check here) I need to hear from you by Friday or I will pick a new winner.
The winner of the Bath Time Challenge was Jessica with her Washcloth Sock Puppets! Weren't those adorable? The tutorial will be up shortly.
But that means someone has to go home. This week it's Holly @ Bijou Lovely. She's got some fantastic things over there at the Bijou. She even does custom baby bedding (the quilt she has pictured in awesome!). Keep checking up on her.
This weeks theme is Teacher Gifts and there are some great ones. Vote for your favorite on the poll in the sidebar before Friday night at 9 pm MST.
--------------------------------
I'm sure the gift a teacher really wants is a big wad of cash. But, since that isn't very crafty, I thought they might like something to organize a few of their numerous supplies. Whether they're at their desk at the front of the room or at a far table in the back of the classroom, they can put this Chair Back Organizer where ever they need quick access to some much needed supplies.

There are lots of pockets and spaces for all sorts of things! There are pockets for notebooks and folders....pencils and pens...little treats...even a place to hook your keys!


Craft #2 - Teacher Cover-All Apron
I asked my favorite first grade teacher what she'd REALLY like to receive as a gift. She explained how she'd ruined a few pairs of pants during craft time when little hands pull at her legs. She told me she'd love an apron that covered her pants from front to back. The result is Teacher's Cover-All Apron:


The apron is made with a gray denim, to give it lots of durability. The trim is a pretty white cotton with modern red flowers and wide red ricrac. The skirt covers all around the leg, and includes two large pleated pockets to keep craft supplies within reach. The wide double thick neck strap has d-rings to allow it to be adjustable as well as comfortable. The waist ties are long enough to tie in front, and allow for a customized and sturdy fit. The result is both pretty and functional. This apron could be customized for your favorite teacher in many ways, and the tutorial will teach you an innovative way to construct your apron without any visible seams. Help your favorite teacher look her best, especially after craft time, with the Cover-All Apron.
Craft #3 - Teacher Tote
.jpg)
It is no secret that every teacher takes work home to do on their free time. Why not give them a tote to carry that work home in style?
.jpg)
At first sight, it looks like a traditional tote, but the zippers on the side make it far more functional for any teacher!
.jpg)
Once the zippers on both sides are open, items in the many pockets are easily accessible. It also makes a handy place to do work when at Starbucks or any outing for that matter. On the right is a large pocket to hold a pad of paper (or to use to carry the grade book). On the left are 5 pockets plus 4 pen pockets to keep everything (including papers that need to be graded) organized and easy to reach. Any teacher would be thrilled to have this!
Craft #4 - Apple for your Teacher

 You'll need a sturdy box, 9 cubes, and a printer! Tutorial comes with a printable .pdf to make your own apple game in whatever size you'd like. You might want one to give and one to keep! Don't miss the cute box, lined with the graphic apple print. Perfect finishing touch.
Craft #5 - Stationary Box with Pencil Holder
Every teacher I know just loves fun stationary! Imagine how excited your child's teacher will be when she (or he) receive this handmade stationary box filled with cards...and pencils, too!
This is the perfect gift for kids of all ages to give to their teachers, from pre-school all the way up through high school.
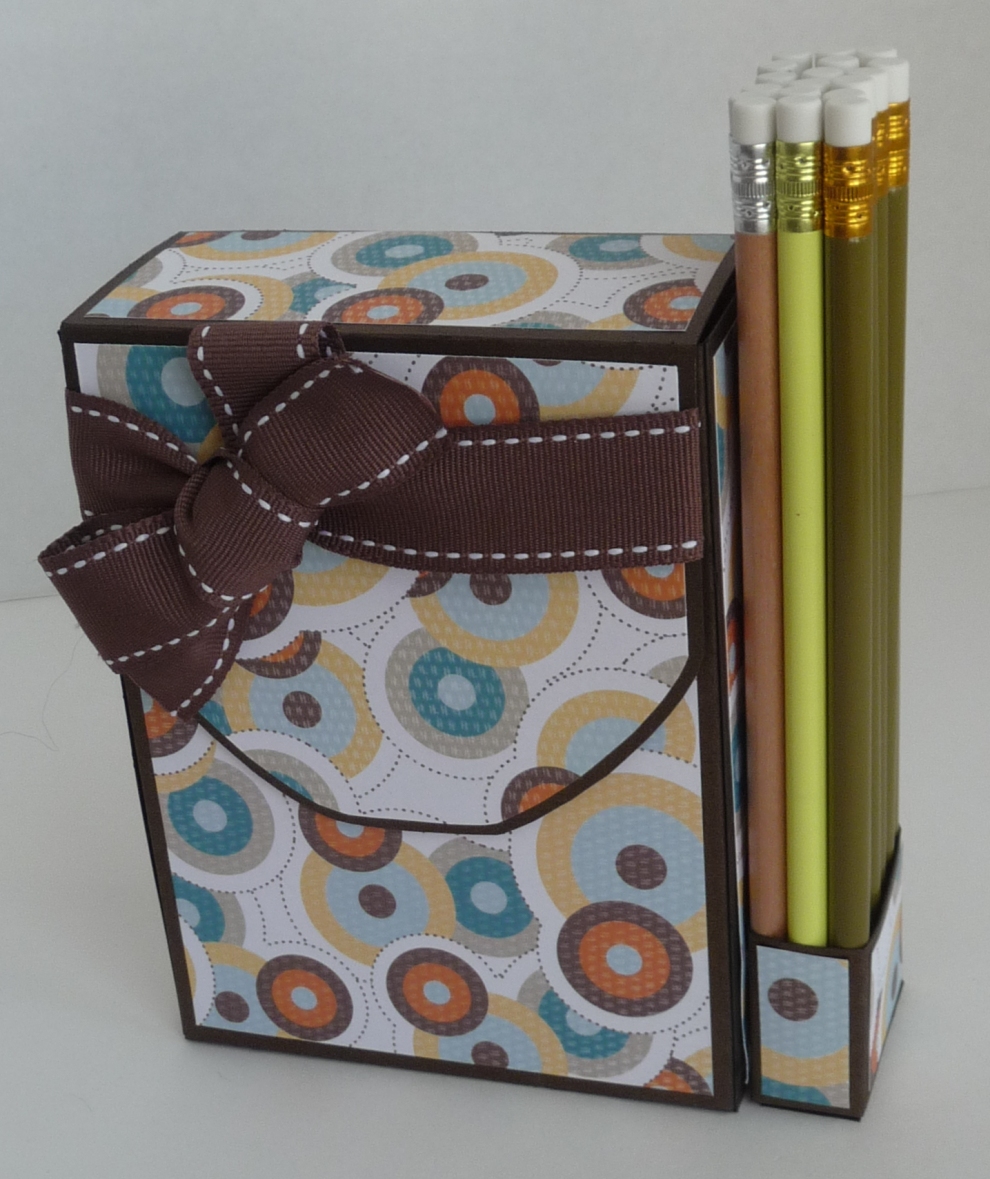
The inside of the box has a divider to separate the cards and envelopes. Once the cards are all used up, the teacher can use the box as an index card holder for students to use when they check books out of the classroom library.


This tote was inspired by my 6th grade teacher. I remember her always carrying her purse, and this large navy blue tote that was kind of ugly and worn out. So here is a fun, colorful tote for the teacher that always has binders, graded papers, and other items to carry to and from their classroom.


Craft #7 - Custom Notebook Cover
It seems a teachers to do list is endless: Grade papers, Call parents, Meet with the principal, and on, and on...!
So lets give teacher a special place to write all those endless to do lists, sketch out lesson plans and jot down a quick note...

with a custom made composition notebook cover.
Having your child design and draw a special picture of his/her teacher

will make him/her proud to give their teacher this one of a kind gift. And the teacher will love the unique and reusable gift, when the notebooks full all she has to do is slip off the cover and slip it on an empty notebook.

You will be surprised how easily and quickly this cute cover comes together...you may just end up making one for yourself, cause lets face it, us moms and dads are pretty busy too!
Craft #8 - Ruffled Clutch
At the end of each school year, teachers get more mugs, candles, lotions and picture frames than they know what to do with. Break free from the norm and give a gift Junior's teacher might actually pick out for herself, like this lovely little clutch.

Perfectly sized for essentials for trips to the teachers' lounge, but pretty enough to use after school and on weekends as a purse...

Made from vintage linens, lined with fun red and white polka dots and accented with a yellow ruffle, it's an out of the ordinary gift you know she'll love!

Interview with Marjorie! 29 Apr 2010 7:33 AM (15 years ago)

(PS... the Banjo strap tutorial is now up in the tutorial tab)
We had to say goodbye to Marjorie last week, but I wasn't ready to yet. I wanted to know more about her and I bet you did too. Here are a few more fun facts about her. To read her bio and see her crafts click here.

- Tell us a little about you and your blog.
Hi! My name is Marjorie. I am the mother of three beautiful children (Ramona-8, Charles-6 and Sienna-3). My blog is called "living with threemoonbabies". It is mostly a crafting blog...with some of my life as the mother of three moon babies mixed in! - How and when did you start crafting?
I've been crafting as long as I can remember. I come from a family of artists. My main influences being my Mom and Aunt Christy. I am mostly self taught, learning from books...and now the internet! - How often do you craft?
Whenever I find the time! Crafting is like therapy for me! - Where do you get your inspiration?
Since having kids, I definitely get a lot of my inspiration from them! I also am inspired by nature (I think that the moon is the most beautiful creation ever), and love this new recycling/upcyling trend! - What is your favorite medium to work in?
I'm a clay artist, creating with both polymer and ceramic clay. But, I also have a deep love for seed beads! I love and appreciate all art forms...so you might see a little bit of everything from me! - What is your guilty pleasure?
Semi-sweet chocolate chips! I buy the big bag at Costco, and keep them in my freezer! - What makes you smile?
My kids...and listening to Eddie Vedder sing! - What is your favorite thing to do (other than crafting)?
I really like to bake, especially sweet treats! I would also love to travel someday, and have many dream destinations and trips already planned in my head.
%3C/span%3E.%20I'll%20post%20them%20here%20so%20you%20can%20get%20to%20know%20them%20a%20little%20better!%20%20Just%20scroll%20down%20tot%20the%20next%20post%20for%20this%20week's%20crafts.%3Cbr%20/%3E%3Cbr%20/%3E(PS...%20the%20Banjo%20strap%20tutorial%20is%20now%20up%20in%20the%20%3Ca%20href%3D%22http://soyouthinkyourecrafty.blogspot.com/2009/11/tutorials.html%22%3Etutorial%3C/a%3E%20tab)%3Cbr%20/%3E%3Cbr%20/%3E%3Cspan%3EWe%20had%20to%20say%20goodbye%20to%20Marjorie%20last%20week,%20but%20I%20wasn't%20ready%20to%20yet.%20I%20wanted%20to%20know%20more%20about%20her%20and%20I%20bet%20you%20did%20too.%20Here%20are%20a%20few%20more%20fun%20facts%20about%20her.%20To%20read%20her%20bio%20and%20see%20her%20crafts%20%3Ca%20href%3D%22http://soyouthinkyourecrafty.blogspot.com/1999/04/hi-my-name-is-marjorie.html%22%3Eclick%20here%3C/a%3E.%3C/span%3E%3Cbr%20/%3E%3C/div%3E%3Cspan%3E%3Cbr%20/%3E%3C/span%3E%3Ca%20href%3D%22https://blogger.googleusercontent.com/img/b/R29vZ2xl/AVvXsEgMqgJM56np-eLzZNpRHpZv44FfRGbWBZOiqZlv_UcfYWShBGEoneNU5sEHBQCknosQBgiMuO3EWGkHYndlHoFaxy8J2s6XSxb2TNkvK8xecnlZiUW1eJoBx1m5nmxrF2sBiqyPAP3DCew/s1600/sytyc+marjorie.jpg%22%3E%3Cimg%20style%3D%22margin:%200px%20auto%2010px;%20display:%20block;%20text-align:%20center;%20cursor:%20pointer;%20width:%20400px;%20height:%20400px;%22%20src%3D%22https://blogger.googleusercontent.com/img/b/R29vZ2xl/AVvXsEgMqgJM56np-eLzZNpRHpZv44FfRGbWBZOiqZlv_UcfYWShBGEoneNU5sEHBQCknosQBgiMuO3EWGkHYndlHoFaxy8J2s6XSxb2TNkvK8xecnlZiUW1eJoBx1m5nmxrF2sBiqyPAP3DCew/s400/sytyc+marjorie.jpg%22%20alt%3D%22%22%20id%3D%22BLOGGER_PHOTO_ID_5465581065317397394%22%20border%3D%220%22%20/%3E%3C/a%3E%3Cbr%20/%3E%3Cspan%3E%20%3Col%3E%3Cli%3E%3Cspan%3ETell%20us%20a%20little%20about%20you%20and%20your%20blog.%3C/span%3E%3Cbr%20/%3E%3Cbr%20/%3EHi!%20My%20name%20is%20Marjorie.%20I%20am%20the%20mother%20of%20three%20beautiful%20children%20(Ramona-8,%20Charles-6%20and%20Sienna-3).%20My%20blog%20is%20called%20%22living%20with%20threemoonbabies%22.%20It%20is%20mostly%20a%20crafting%20blog...with%20some%20of%20my%20life%20as%20the%20mother%20of%20three%20moon%20babies%20mixed%20in!%3Cbr%20/%3E%3Cbr%20/%3E%3C/li%3E%3Cli%3E%3Cspan%3EHow%20and%20when%20did%20you%20start%20crafting?%20%3C/span%3E%3Cbr%20/%3E%3Cbr%20/%3EI've%20been%20crafting%20as%20long%20as%20I%20can%20remember.%20I%20come%20from%20a%20family%20of%20artists.%20My%20main%20influences%20being%20my%20Mom%20and%20Aunt%20Christy.%20I%20am%20mostly%20self%20taught,%20learning%20from%20books...and%20now%20the%20internet!%3Cbr%20/%3E%3Cspan%3E%3Cbr%20/%3E%3C/span%3E%3C/li%3E%3Cli%3E%3Cspan%3EHow%20often%20do%20you%20craft?%3C/span%3E%3Cbr%20/%3E%3Cbr%20/%3EWhenever%20I%20find%20the%20time!%20%20Crafting%20is%20like%20therapy%20for%20me!%3Cbr%20/%3E%3Cbr%20/%3E%3C/li%3E%3Cli%3E%3Cspan%3EWhere%20do%20you%20get%20your%20inspiration?%20%20%3C/span%3E%3Cbr%20/%3E%3Cbr%20/%3ESince%20having%20kids,%20I%20definitely%20get%20a%20lot%20of%20my%20inspiration%20from%20them!%20I%20also%20am%20inspired%20by%20nature%20(I%20think%20that%20the%20moon%20is%20the%20most%20beautiful%20creation%20ever),%20and%20love%20this%20new%20recycling/upcyling%20trend!%3Cbr%20/%3E%3Cspan%3E%3Cbr%20/%3E%3C/span%3E%3C/li%3E%3Cli%3E%3Cspan%3EWhat%20is%20your%20favorite%20medium%20to%20work%20in?%3C/span%3E%3Cbr%20/%3E%3Cbr%20/%3EI'm%20a%20clay%20artist,%20creating%20with%20both%20polymer%20and%20ceramic%20clay.%20But,%20I%20also%20have%20a%20deep%20love%20for%20seed%20beads!%20I%20love%20and%20appreciate%20all%20art%20forms...so%20you%20might%20see%20a%20little%20bit%20of%20everything%20from%20me!%3Cbr%20/%3E%3Cbr%20/%3E%3C/li%3E%3Cli%3E%3Cspan%3EWhat%20is%20your%20guilty%20pleasure?%3C/span%3E%3Cbr%20/%3E%3Cbr%20/%3ESemi-sweet%20chocolate%20chips!%20%20I%20buy%20the%20big%20bag%20at%20Costco,%20and%20keep%20them%20in%20my%20freezer!%3Cbr%20/%3E%3Cbr%20/%3E%3C/li%3E%3Cli%3E%3Cspan%3EWhat%20makes%20you%20smile?%20%3C/span%3E%3Cbr%20/%3E%3Cbr%20/%3EMy%20kids...and%20listening%20to%20Eddie%20Vedder%20sing!%3Cbr%20/%3E%3Cbr%20/%3E%3C/li%3E%3Cli%3E%3Cspan%3EWhat%20is%20your%20favorite%20thing%20to%20do%20(other%20than%20crafting)?%3C/span%3E%3Cbr%20/%3E%3Cbr%20/%3EI%20really%20like%20to%20bake,%20especially%20sweet%20treats!%20I%20would%20also%20love%20to%20travel%20someday,%20and%20have%20many%20dream%20destinations%20and%20trips%20already%20planned%20in%20my%20head.%3C/li%3E%3C/ol%3E%3C/span%3E%3Cbr%20/%3E%3C!--Session%20data--%3E%3Cdiv%3E%3C/div%3E%3C!--Session%20data--%3E%3Cdiv%3E%3C/div%3E%3C!--Session%20data--%3E%3Cdiv%3E%3C/div%3E)
Bath Time - Week 2 26 Apr 2010 5:19 AM (15 years ago)
Here are the crafters and their projects from this past week.
Quilted Strap Cover by Cheryl @ A Pretty Cool Life
Love Birds by Jess @ Running With Scissors
Checkers by Ann @ DecoMOD Studio
Ruffle Quilt by Holly @ Bijou Lovely
Guitar Dress by Lynette @ Get Your Craft On
Modern Quilt by Chris @ Pickup Some Creativity
Guest Book by Charlene @ eWillow
Pendant Lamp by Deidre @ A Craft A Day
Butterfly Shadows by Shilo @ "Toad"ly Crafts
Tile Trivets & Coasters by Marjorie @ Living With Three Moonbabies
It looks like Cheryl was our winner with the Banjo Strap Cover. The tutorial will be coming in the next few days, so keep your eyes out for it!
We have to say goodbye for the first time of the session to Marjorie. Her tiles were awesome weren't they though? Keep checking up on her over at Living With Three Moonbabies, and check back on Wednesday when we get to learn a little bit more about her.
And now for the winner of the Lisa Leonard $50 gift card giveaway. The lucky lady is announced over at the giveaway so go check to see if it was you!
Now for the this weeks theme...Bath Time! It's going to be another great hard week. But please remember to only vote for your favorite ONE. Like always, the voting will be open until Friday at 9 pm MST.
--------------------------------------
Craft #1 - Spa Bath Art
Did someone say bath time? Or was it RELAX TIME?


Modern, simple, soothing

Craft #2 - Modern Shower Curtain
A modern shower curtain with unique details will add a little visual interest to your bathroom.

Using a full-sized flat sheet as the base of the shower curtain cuts down on fabric costs and hemming.

The stitch and slash technique creates a bold graphic pattern, and the raw edge will fray nicely over time.

A winning tutorial will teach you the basics of making a shower curtain and how to perform the stitch and slash technique to add unique and interesting patterns to all kinds of projects.
Craft #3 - Bath Pad
.jpg)
Simply use the suction cups on the top to hold it in place and wash away. The bath pad is waterproof so there will be no issues with mold. Just wipe it off and store it.
.jpg)
No more soap bottles falling in the tub! The pocket in the middle is perfect for holding your child's bath needs.
.jpg)
And for Mom's safety, there is nonslip material on the bottom.
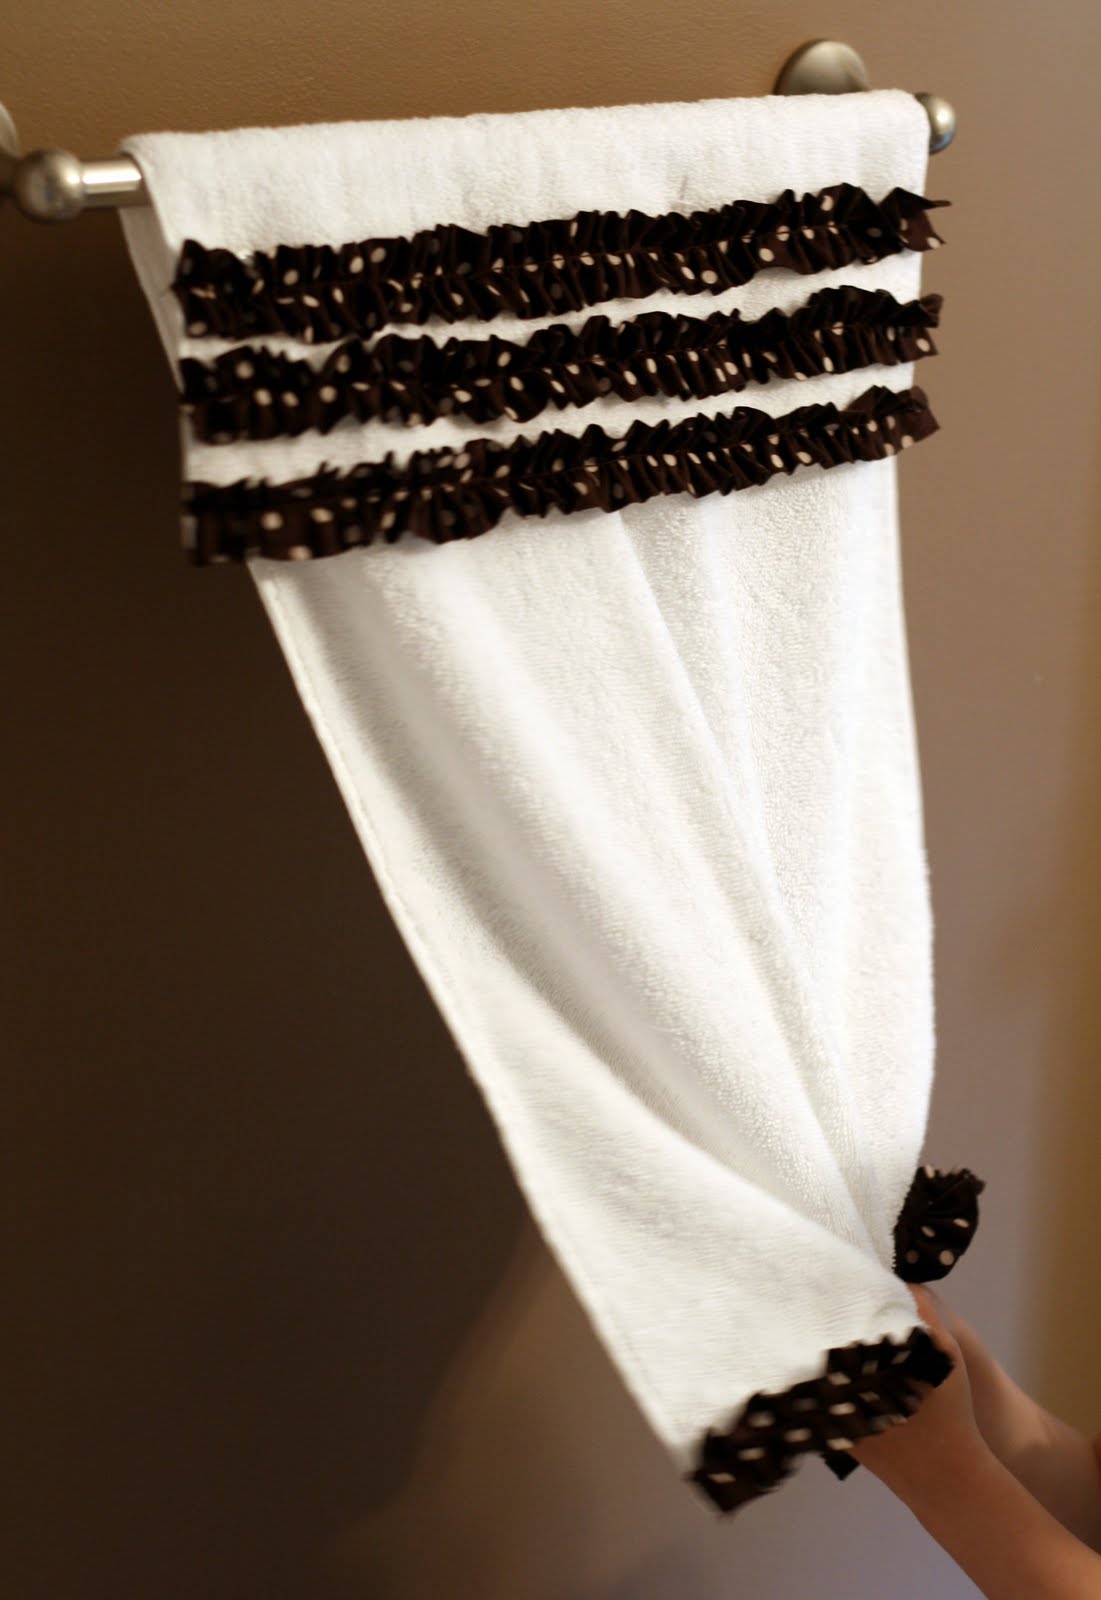
Craft #4 - Stay-Put Hand Towel


When I was given the theme "Bath Time", I immediately wanted to create something pampering for my mom. She works full time, takes care of my dad, and I wanted to do something to encourage her to relax. The result is the Pedicure Kit.

It includes a bag with a ruffle detail, which measures 10 by 12 inches, to hold all the important tools needed for a great pedicure. The kit is kept closed, when not in use, with two snaps. Inside, the bag has small pockets to hold tools, an inner zipper pocket for nail polish, and a stretchy pocket to hold another key part of the kit... a pair of spa slippers.

These slippers are styled like flip flops to prevent smearing the nail polish. They are made with soft terry, and use grosgrain ribbon for the toe hold. The bottoms are non-slip, and inside they have a soft foam insole. The side panel allows you to dress these slippers up any way you'd like to.

The pedicure kit would make a great gift for Mother's Day, or for any woman needing a reminder to make some time for herself.
Craft #6 - Birdbath Centerpiece
I think it's safe to say that birds are the only other creatures besides humans who have bathtubs designed just for them! And who doesn't like to glance out of their window and catch a glimpse a birds having fun playing in a bird bath? It's an adorable sight.
You can use this birdbath as a table centerpiece for a wedding or a baby or bridal shower.


You can make several birdbath centerpieces. They can double as the table decorations for your party and also be the prizes for the lucky winners of the shower games that everyone loves to play! Tweet tweet!

Craft #7 - Sugar Plum Bath Fizzies
Don't let these tasty looking cake slices fool you!

These delicious looking desserts are actually a pampering, skin softening bath fizzy!
The wedges were made with a "mold" that you can pick up at your local grocery store. A few ingredients, a sweet Sugar Plum scent, a layer of "frosting" and you have a delightful and unique party favor for all those summertime showers... that will do double duty as a fun center piece!

Or package them individually in a box or a cello bag...

(Be sure to notice in the bottom of this picture, the bath fizzy in action, softening your skin while it bubbles and dissolves in your bath tub!)
...tie with a pretty bow and
Craft #8 -
No one wants their overnight guests to struggle looking for essentials in the bathroom. These fabric storage bins not only keep everything in plain sight and within arm's reach, they're as pretty as they are functional.

Made from

And once your guests have returned home, they're perfect to use for your own bathrooom belongings.

Craft #9 - Washcloth Puppets

A great bath toy, and a functional way to wash the kids.
Kids wear the puppet.
Kids get washed!


Folksy - Week 1 18 Apr 2010 6:22 PM (15 years ago)
To help us kick things off, Lisa Leonard Designs is giving away a $50 gift card! Oh how I wish I could win. I've been drooling over her new "mama necklace". I wouldn't mind getting that for mothers day.
 Well, if you really want to get technical, I wouldn't mind getting anything she has in her shop :) To enter the giveaway you can find it in the "giveaway" tab, or just click here.
Now back to the matter at hand...Week 1. This week's theme was Folksy. Voting will be open until Friday night at 9 MST. Just as a reminder, here are the 10 ladies that will be showing off for you guys for the next 10 weeks.
Ann @ DecoMOD Studio
Lynette @ Get Your Craft On
Cheryl @ A Pretty Cool Life
Deidre @ A Craft A Day
Holly @ Bijou Lovely
Chris @ Pickup Some Creativity
Marjorie @ Living With Three Moonbabies
Jess @ Running With Scissors
Charlene @ eWillow
Shilo @ "Toad"ly Crafts
Good Luck Ladies!!!
ps - If you would still like to help out "Betty's for Boobies" or you missed my last post click here. They're still accepting donations for the Susan G. Koman 3 day walk. Every little bit helps save lives!!
-------------------------------------------
Craft #1 - Butterfly Shadows
"There is nothing in a caterpillar that tells you it's going to be a butterfly."
Richard Buckminster Fuller

I love butterflies! What girl doesn't? I have had a rough, unfinished shadow box in my craft room for quite sometime, begging to be filled with something....

The butterflies are hand cut from a

The single turquoise butterfly is a reminder to simply be yourself...that we are beautiful and unique in our own way. .
Craft #2 - Quilted Strap Cover
This strap cover is for the girl who has to look good when she's being all folksy and rockin' out on her banjo...


Craft #3 - Ribbon Rose Guest Room Welcome Sign Pass-Along Gift


You can use all different sizes, textures, and colors of ribbon to make ribbon roses to adorn the frame. By using several coordinating colors of cardstock, ribbon and embellishments, you can be sure the frame will blend with the interior of all of the houses where the frame gets passed along. Pop out the glass to give the frame three dimensions.

Craft #4 - Love Birds in a Cage
For this challenge, I thought a friendly little pair of love birds would compliment a little girl's room. I created

I wanted the birds to be a simple design with minimal details. Each chubby stuffed bird hangs permanently in the cage, the pink bird sitting on a perch.

To accent the twisty off-shoots of the grape vines, I added simple little butterflies.

Craft #5 - Tile Trivets & Coasters
Mexican folk art was the first thing that popped in my head when I saw this week's theme. I absolutely love the bright colors of hand painted Mexican tiles. So, I decided to create some of my own, and turn them into coasters and trivets! This is such simple and inexpensive project, with "WoW" results!

 A great addition to any home decor, they would make wonderful gifts too!
 I will provide you with the designs pictured, and show you how to transfer the images using a simple technique. You can also used your own designs. The possibilities are endless!
Craft #6 - Guitar Dress
Can you even have the folk without the music? Bring out the guitar and enjoy sitting on the porch and strummin' the strings.


Craft #7 - Pendant Lamp
Are you looking for a great light fixture for you child's bedroom? Maybe for the dining room? Then look no further!
.jpg)
.jpg)
Craft #8 - Ruffle Quilt

Colorful and full of ruffles. We all love ruffles!

Complete with a pieced back to showcase the gorgeous voile fabrics.

Of course this ruffle quilt could be made with other fabrics as well! Maybe all in white to further emphasize all the wonderful ruffly texture? Whatever fabrics you choose, this quilt is perfect for the ruffle lover in your life.
Craft #9 - Checkers

This game is a "simple sew" project and a fun way to use your "digi" skills. The game board is made from 4 sheets of printable canvas that I sent through my home printer. This tutorial includes a .png template for the game board. If Wolfie and Red aren't your tale, create a story of your own. Add some personalization, photos and designs, anything you'd like.

Tiny craft magnets, sewn in to the binding, holds the folded up game board together. Wolfie's furry pouch and Red's velvet purse, sit safely inside and keep all of the game pieces in place.

Perfect gift for a kitchy collector or story lover!
Craft #10 - Modern Quilt
As I researched "Folksy", I found beautiful quilts at the American Folk Art Museum. My favorite quilt pattern is the double wedding ring quilt. I love the symbolism of linking circles, linking families, and eternity that it embodies. Piecing a double wedding ring quilt is quite difficult. So, I designed a piece of art that honors the double wedding ring quilt pattern, but with a modern twist.

I hand drew a pattern, and made an applique that recreates the effect of a double wedding ring quilt square.

I machine quilted the applique, and also quilted where the rest of the rings would intersect with the applique. I wanted to symbolize my little family with the applique, and our ancestors that came before with the quilted rings.

The rustic frame, with simple modern lines, sets off the design and elevates everything to a piece of art. I'm so excited to have this piece of art in my home!
Blogging for Breast Cancer 14 Apr 2010 8:20 AM (15 years ago)


Today I am participating in a HUGE Breast Cancer Blogging Event! Hundreds of blogs around the globe today are encouraging our readers to take a moment out of your day and donate $5 or $10 to Jacqueline Reitz, a Breast Cancer 3 Day walker. Jackie is a fellow blogger based out of Dallas, and she's on the 3day
While
If just ONE of the readers from each of the 300 blogs takes a moment and donates $10, that will raise over $3,000.00 in the fight against Breast Cancer. AMAZING!
Let me explain why I decided to participate.
When I was about 10 years old my parents brought me and my siblings back to my their bedroom (a sister that was 20 & two brothers aged 15 and 5). My Dad tearfully told us that my Mom had just been diagnosed with extremely aggressive breast cancer. They had scheduled a double mastectomy for a few weeks in the future. The surgery went well and Mom completed a few rounds of chemo and was told she was in remission. About 7 years later my parents again called us into their bedroom. Moms cancer was back. This time though, nothing could be done about it. It had never really gone away in the first place. It had just been so aggressive that it had moved into her spine, hiding from any mammograms they preformed. They found it this time through MRI's to figure out why Mom was loosing feeling in her legs.
I was in my senior year of high school at the time. My younger brother was now 15 and had been home schooled by my mom for about 3/4 of his classes due to learning disabilities. I took it upon myself to take over that schooling and attend teacher conferences for my parents as much as I could. The cancer slowly spread into her ribs and skull over the next year and a half. I finished high school and my first 3 semesters of college, driving home every weekend to help out.
During that time my mom was on Hospice Care, refusing to be admitted to the hospital saying that she wanted to be where her family and friends were. She peacefully passed away on November 25, 2005, five days before her 55th birthday. Myself, my dad and my siblings were able to be with her until the very end. I wouldn't trade that experience for anything in the world.
I'm now 24 yrs old with a daughter of my own. As my own mother was a victim of breast cancer and her mother is a 15 year
So help us out. Let's make this a tremendous success. Head on over to Jackie's fund raising page (it's all tax deductible!) at http://www.the3day.org/goto/
.%26nbsp;%20My%20Dad%20tearfully%20told%20us%20that%20my%20Mom%20had%20just%20been%20diagnosed%20with%20extremely%20aggressive%20breast%20cancer.%26nbsp;%20They%20had%20scheduled%20a%20double%20mastectomy%20for%20a%20few%20weeks%20in%20the%20future.%26nbsp;%20The%20surgery%20went%20well%20and%20Mom%20completed%20a%20few%20rounds%20of%20chemo%20and%20was%20told%20she%20was%20in%20remission.%26nbsp;%20About%207%20years%20later%20my%20parents%20again%20called%20us%20into%20their%20bedroom.%26nbsp;%20Moms%20cancer%20was%20back.%26nbsp;%20This%20time%20though,%20nothing%20could%20be%20done%20about%20it.%26nbsp;%20It%20had%20never%20really%20gone%20away%20in%20the%20first%20place.%26nbsp;%20It%20had%20just%20been%20so%20aggressive%20that%20it%20had%20moved%20into%20her%20spine,%20hiding%20from%20any%20mammograms%20they%20preformed.%26nbsp;%20They%20found%20it%20this%20time%20through%20MRI's%20to%20figure%20out%20why%20Mom%20was%20loosing%20feeling%20in%20her%20legs.%3Cbr%20/%3E%0A%3Cbr%20/%3E%0AI%20was%20in%20my%20senior%20year%20of%20high%20school%20at%20the%20time.%26nbsp;%20My%20younger%20brother%20was%20now%2015%20and%20had%20been%20home%20schooled%20by%20my%20mom%20for%20about%203/4%20of%20his%20classes%20due%20to%20learning%20disabilities.%26nbsp;%20I%20took%20it%20upon%20myself%20to%20take%20over%20that%20schooling%20and%20attend%20teacher%20conferences%20for%20my%20parents%20as%20much%20as%20I%20could.%26nbsp;%20The%20cancer%20slowly%20spread%20into%20her%20ribs%20and%20skull%20over%20the%20next%20year%20and%20a%20half.%26nbsp;%20I%20finished%20high%20school%20and%20my%20first%203%20semesters%20of%20college,%20driving%20home%20every%20weekend%20to%20help%20out.%3Cbr%20/%3E%0A%3Cbr%20/%3E%0ADuring%20that%20time%20my%20mom%20was%20on%20Hospice%20Care,%20refusing%20to%20be%20admitted%20to%20the%20hospital%20saying%20that%20she%20wanted%20to%20be%20where%20her%20family%20and%20friends%20were.%26nbsp;%20She%20peacefully%20passed%20away%20on%20November%2025,%202005,%20five%20days%20before%20her%2055th%20birthday.%26nbsp;%20Myself,%20my%20dad%20and%20my%20siblings%20were%20able%20to%20be%20with%20her%20until%20the%20very%20end.%26nbsp;%20I%20wouldn't%20trade%20that%20experience%20for%20anything%20in%20the%20world.%3Cbr%20/%3E%0A%3Cbr%20/%3E%0AI'm%20now%2024%20yrs%20old%20with%20a%20daughter%20of%20my%20own.%26nbsp;%20As%20my%20own%20mother%20was%20a%20victim%20of%20breast%20cancer%20and%20her%20mother%20is%20a%2015%20year%20%3Cleo_highlight%20leohighlights_keywords%3D%22survivor%22%20leohighlights_underline%3D%22true%22%20leohighlights_url_bottom%3D%22http%253A//shortcuts.thebrowserhighlighter.com/leonardo/plugin/highlights/3_1/tbh_highlightsBottom.jsp?keywords%253Dsurvivor%2526domain%253Ddraft.blogger.com%22%20leohighlights_url_top%3D%22http%253A//shortcuts.thebrowserhighlighter.com/leonardo/plugin/highlights/3_1/tbh_highlightsTop.jsp?keywords%253Dsurvivor%2526domain%253Ddraft.blogger.com%22%3Esurvivor%3C/leo_highlight%3E,%20breast%20cancer%20prevention%20and%20awareness%20have%20become%20a%20large%20part%20of%20my%20life.%20I'd%20like%20to%20do%20something%20about%20it%20before%20it%20can%20further%20affect%20my%20own%20or%20my%20daughters%20life,%20or%20the%20life%20of%20any%20one%20else.%3Cbr%20/%3E%0A%3Cbr%20/%3E%0A%3Cbr%20/%3E%0ASo%20help%20us%20out.%20Let's%20make%20this%20a%20tremendous%20success.%20Head%20on%20over%20to%20Jackie's%20fund%20raising%20page%20(it's%20all%20tax%20deductible!)%20at%20%3Ca%20href%3D%22http://www.the3day.org/goto/jackier%22%20target%3D%22_blank%22%3Ehttp://www.the3day.org/goto/%3Cwbr%3E%3C/wbr%3Ejackier%3C/a%3E%20and%20send%20her%20some%20donation%20love!%20Totals%20will%20be%20posted%20on%20the%20%3Cleo_highlight%20leohighlights_keywords%3D%22team%22%20leohighlights_underline%3D%22true%22%20leohighlights_url_bottom%3D%22http%253A//shortcuts.thebrowserhighlighter.com/leonardo/plugin/highlights/3_1/tbh_highlightsBottom.jsp?keywords%253Dteam%2526domain%253Ddraft.blogger.com%22%20leohighlights_url_top%3D%22http%253A//shortcuts.thebrowserhighlighter.com/leonardo/plugin/highlights/3_1/tbh_highlightsTop.jsp?keywords%253Dteam%2526domain%253Ddraft.blogger.com%22%3Eteam%3C/leo_highlight%3E's%20blog%20tomorrow,%20to%20see%20what%20an%20impact%20we%20were%20all%20able%20to%20make!%3Cbr%20/%3E%0A%3Cbr%20/%3E%0A%3Cdiv%3E%3C/div%3E%3C!--Session%20data--%3E%3Cdiv%3E%3C/div%3E%3Cspan%3E%3Cdiv%3E%20%20%20%20%20%20%20%20%3C!--%20Top%20iFrame%20--%3E%20%20%20%20%20%20%20%20%20%20%20%20%20%20%20%20%3C!--%20Bottom%20iFrame%20--%3E%20%20%20%20%20%20%20%20%20%3C/div%3E%20%3C/span%3E)
Thanks for the interview Sara! I had fun!
And the winner is... 11 Apr 2010 12:58 PM (15 years ago)
Well Session 2 has come to an end. It's been a great session with so much talent. Before I officially announce the winner I'd like thank the 10 crafters.
Thank you so much for your participation! I love everything that you guys come up with. You're an amazing inspiration to us. I know that I'll continue to follow all your blogs and I'm sure many others will be too. I can't wait to see what you come up with next.
Congratulations Shannon! Your swim bag took the cake this week and made you the Session 2 Champion! The tutorial for her bag is in the tutorial section. It's a good one! Check up on her at Shannon Makes Stuff.
I'd also like to recognize Kalleen for her amazing projects this session. She was quite the contender this session. Of the nine weeks, Kalleen was the winner of 6. Great job! She'll continue to have fantastic things At Second Street.
Enjoy your week off while I get Session 3 all ready for you. We'll be back on Monday the 19th with the first challenge and a fantastic giveaway from one of our sponsors, Lisa Leonard!
If you would like to sponsor Session 3, I still have a few spots available. SYTYC is getting just over 10,000 views a week so it's an affordable way to get a lot of exposure. If you're interested send me an email at soyouthinkyourecrafty@gmail.com.