
 Buy Now →
New England Hot Dog Buns 1 Jul 2020 11:00 AM (4 years ago)
Independence Day is coming up. All the local festivities are cancelled, so we’re heading out on the road in our camper to see how the rest of America is doing. It’s been over 100 days spent within a few miles of our home, around family only, so this feels particularly adventurous.
Apparently, RV sales are insane right now as Americans pivot to socially distanced domestic travel. While it might make the campgrounds and roads more congested, I really think this is a good thing for us as humans.
We’ve been camping with our little Airstream for 7 years now, and one thing we noticed immediately is that American families don’t road trip anymore. We’ve camped from coast to coast, and especially in the southwest National Parks, most of the visitors are international travellers renting RVs or retired people. Very few families with kids.
Maybe American families work too much, maybe we take our National Parks for granted, maybe youth sports make family time difficult, maybe camping isn’t cool, maybe plane tickets are quicker and cheaper. Probably a combination of those things. But the pandemic might just change that.
Driving through our country, rather than fly over it, gives a very different perspective of who we are, how big and diverse our United States is. I remember one road trip where we took the kids up the coast from San Francisco, Portland, and Seattle….then over to the Cheyenne Frontier Days Rodeo and the Iowa State Fair. It was complete cultural whiplash, and it was wonderful.
I can’t help but think this stateside travel and camping boom will be good for our country and our nation’s kids. It’s good to see different parts of the country, good to see different people, good to see the outdoors. We have a strict no-digital-device rule when we road trip, so it will be good to disconnect too.
Which brings me back to the title of this post.
Regional food quirks are my favorite part of domestic travel. When you travel out of the country, you expect food adventures. But I’m telling you, travel a few states away, even simple groceries and farmer’s markets are different. It’s crazy.
Even the gas station foods are different: Midwest pop gives way to soda, peanuts get bigger as you travel South, and strange things like Whoopie Pies, Pepperoni Rolls, and Pasties are sold near the checkout counters.
But who knew HOT DOG BUNS are better in Maine? I did my residency in Maine, the girls were born in the hospital I trained in. I remember buying hot dog buns the first time and I was baffled.
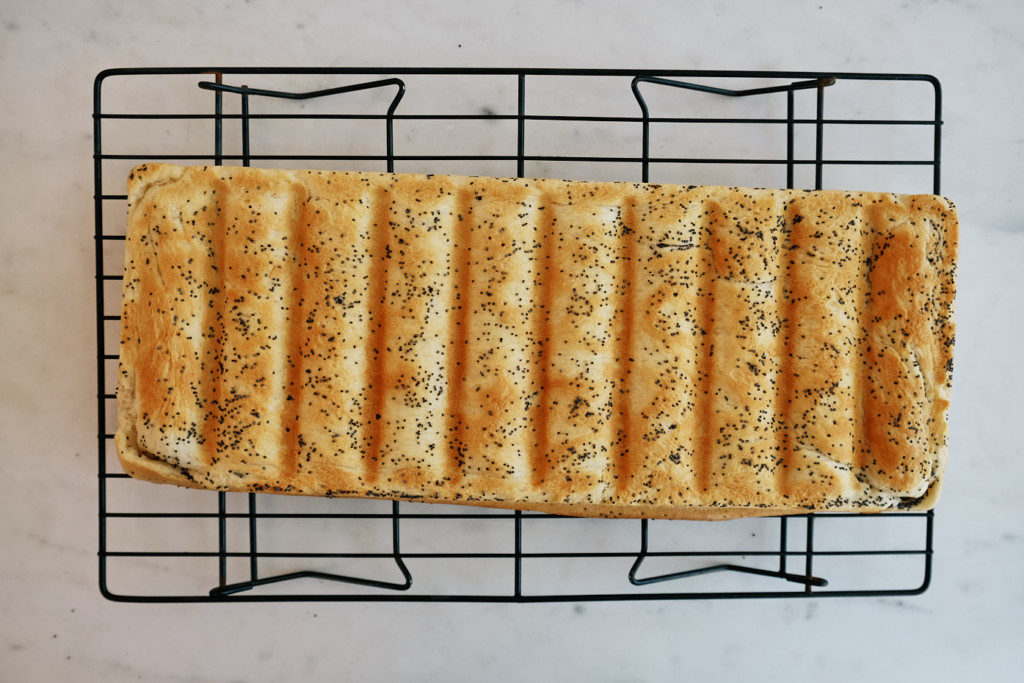
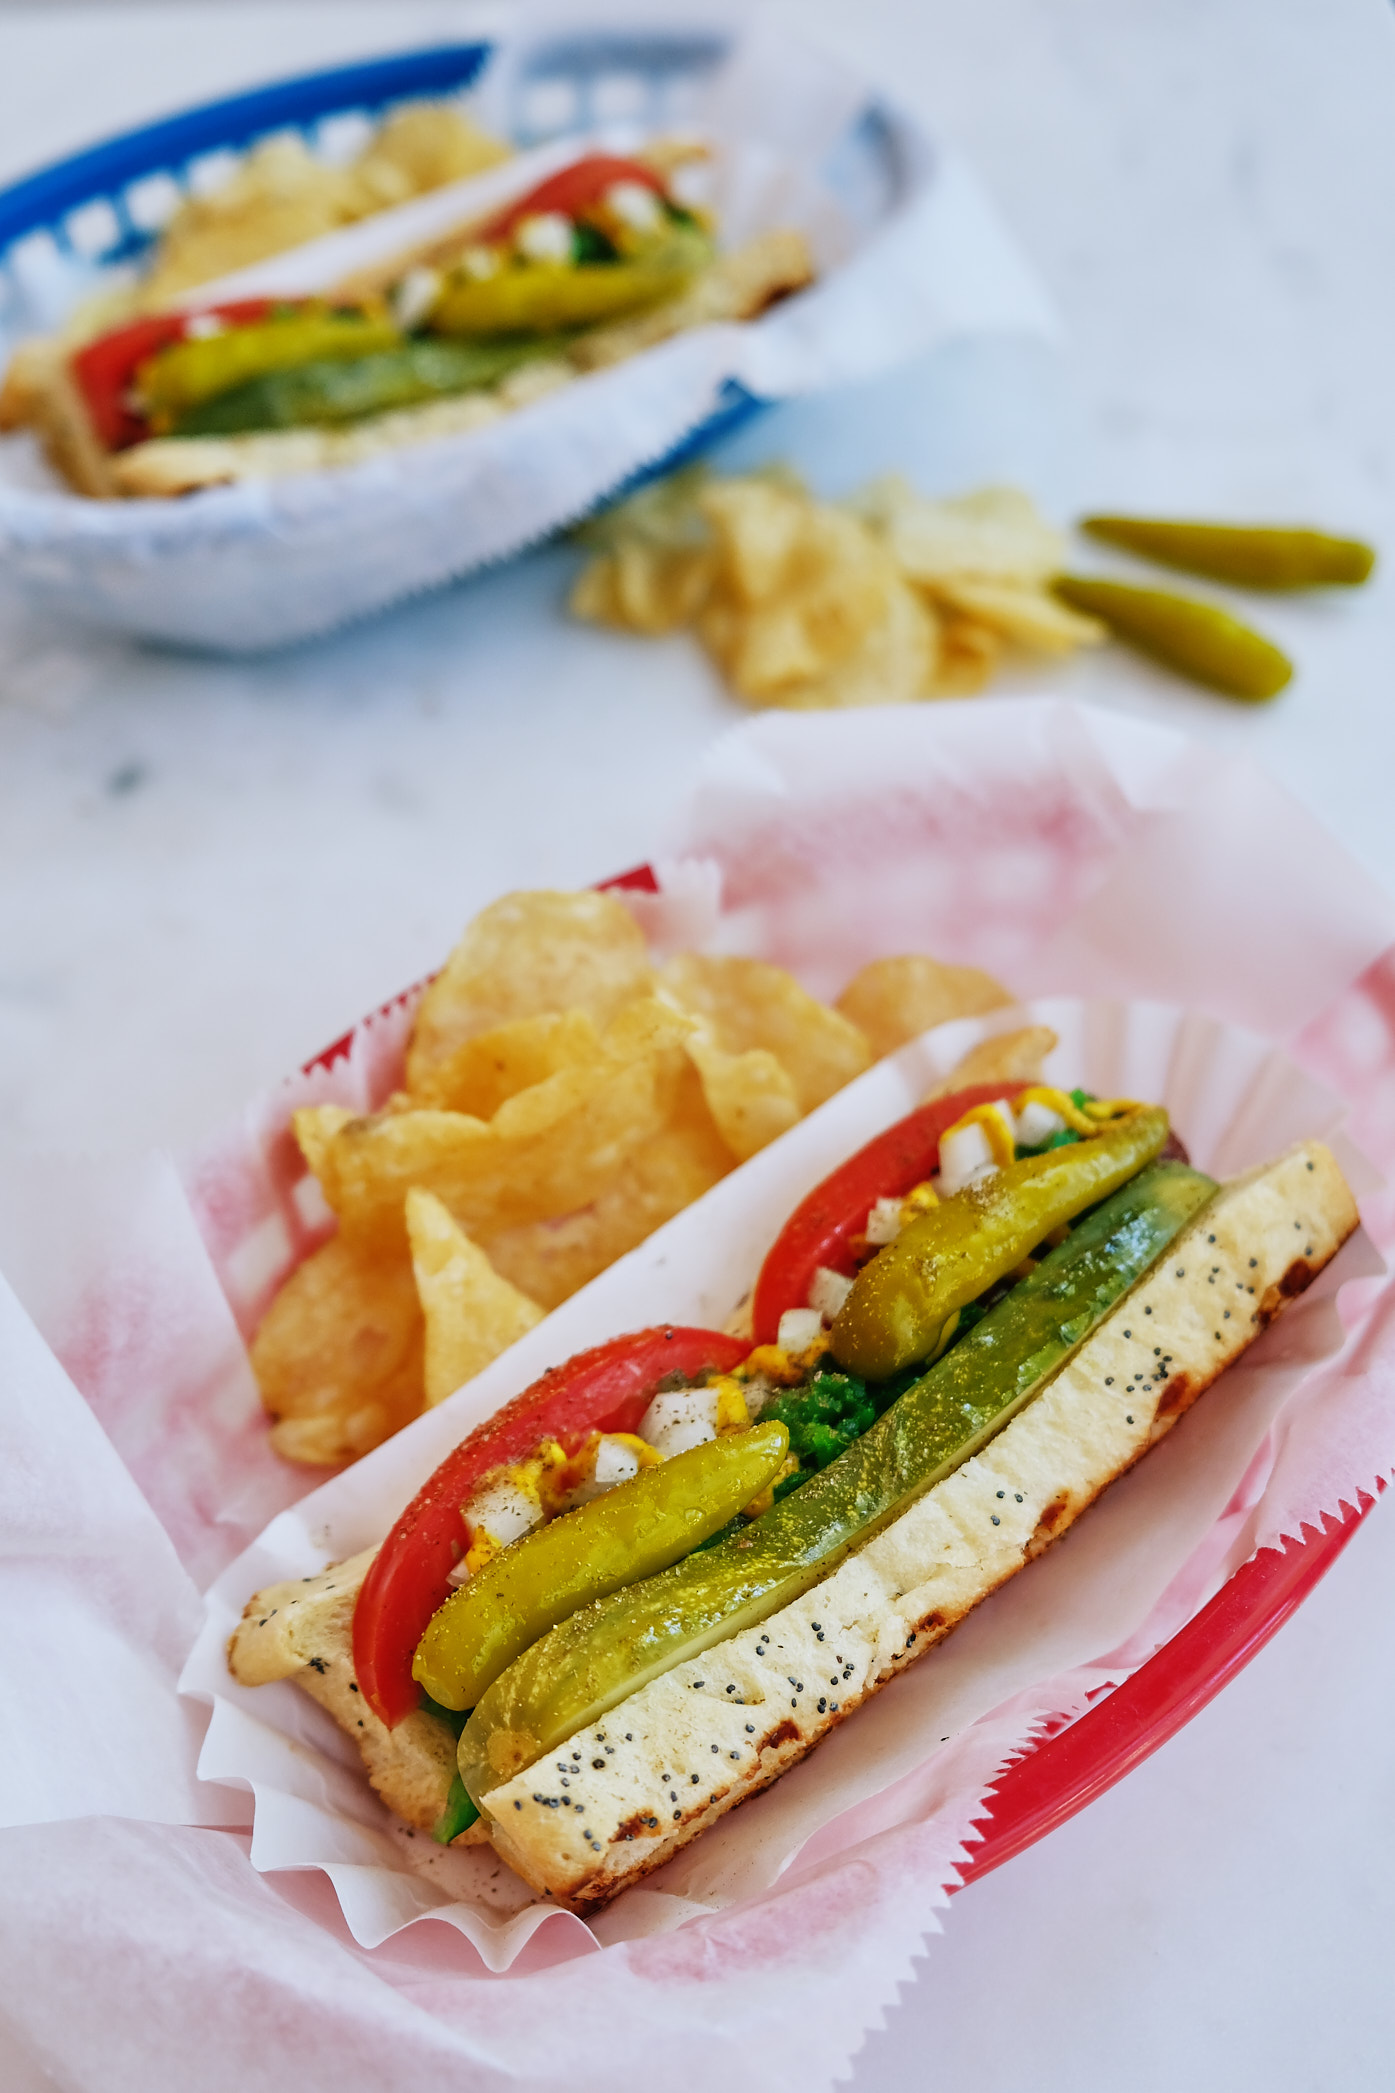
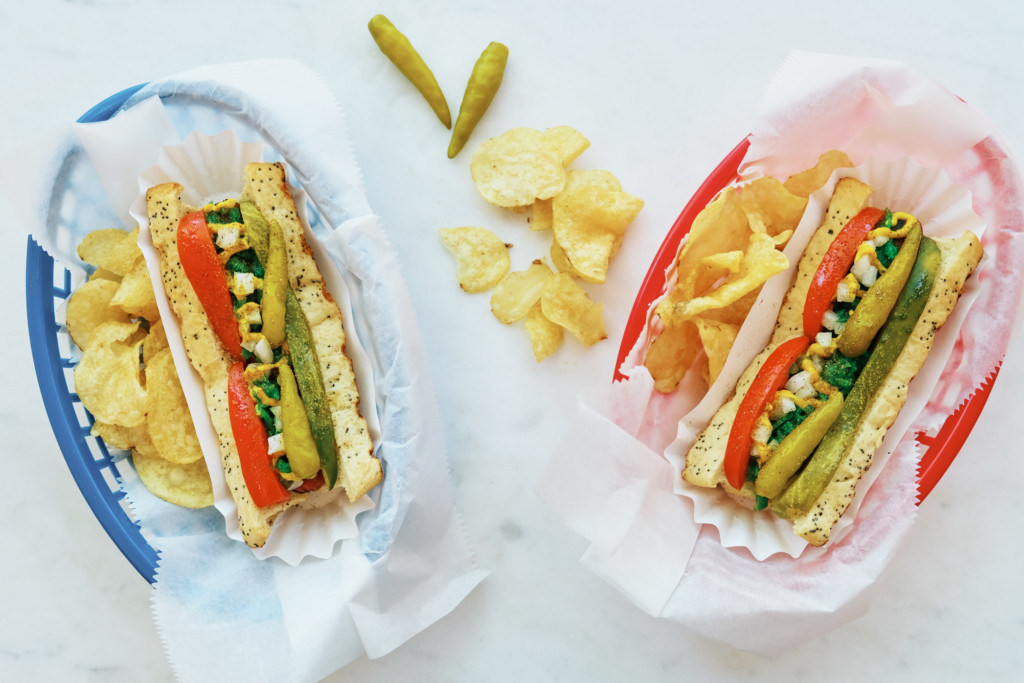
They come in a slab. A big slab of bread with partial cuts in the top.
It seemed like the laziest thing ever. And then I realized the Yankee Ingenuity of the whole situation–super easy to make, top-loading, self-standing, born-to-toast…brilliant.
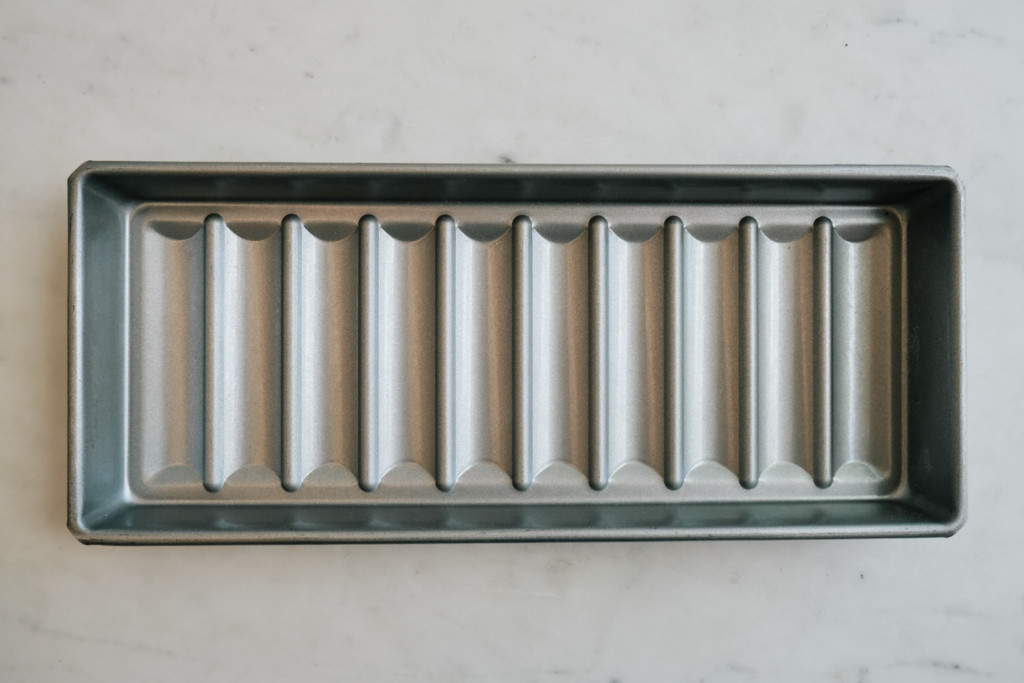
Now that we’re back in the Midwest, we have to make our own, which is very easy to do with the perfect pan. Upside of being back in the Midwest, it’s much easier to find the sport peppers and neon green relish to make the proper dog.
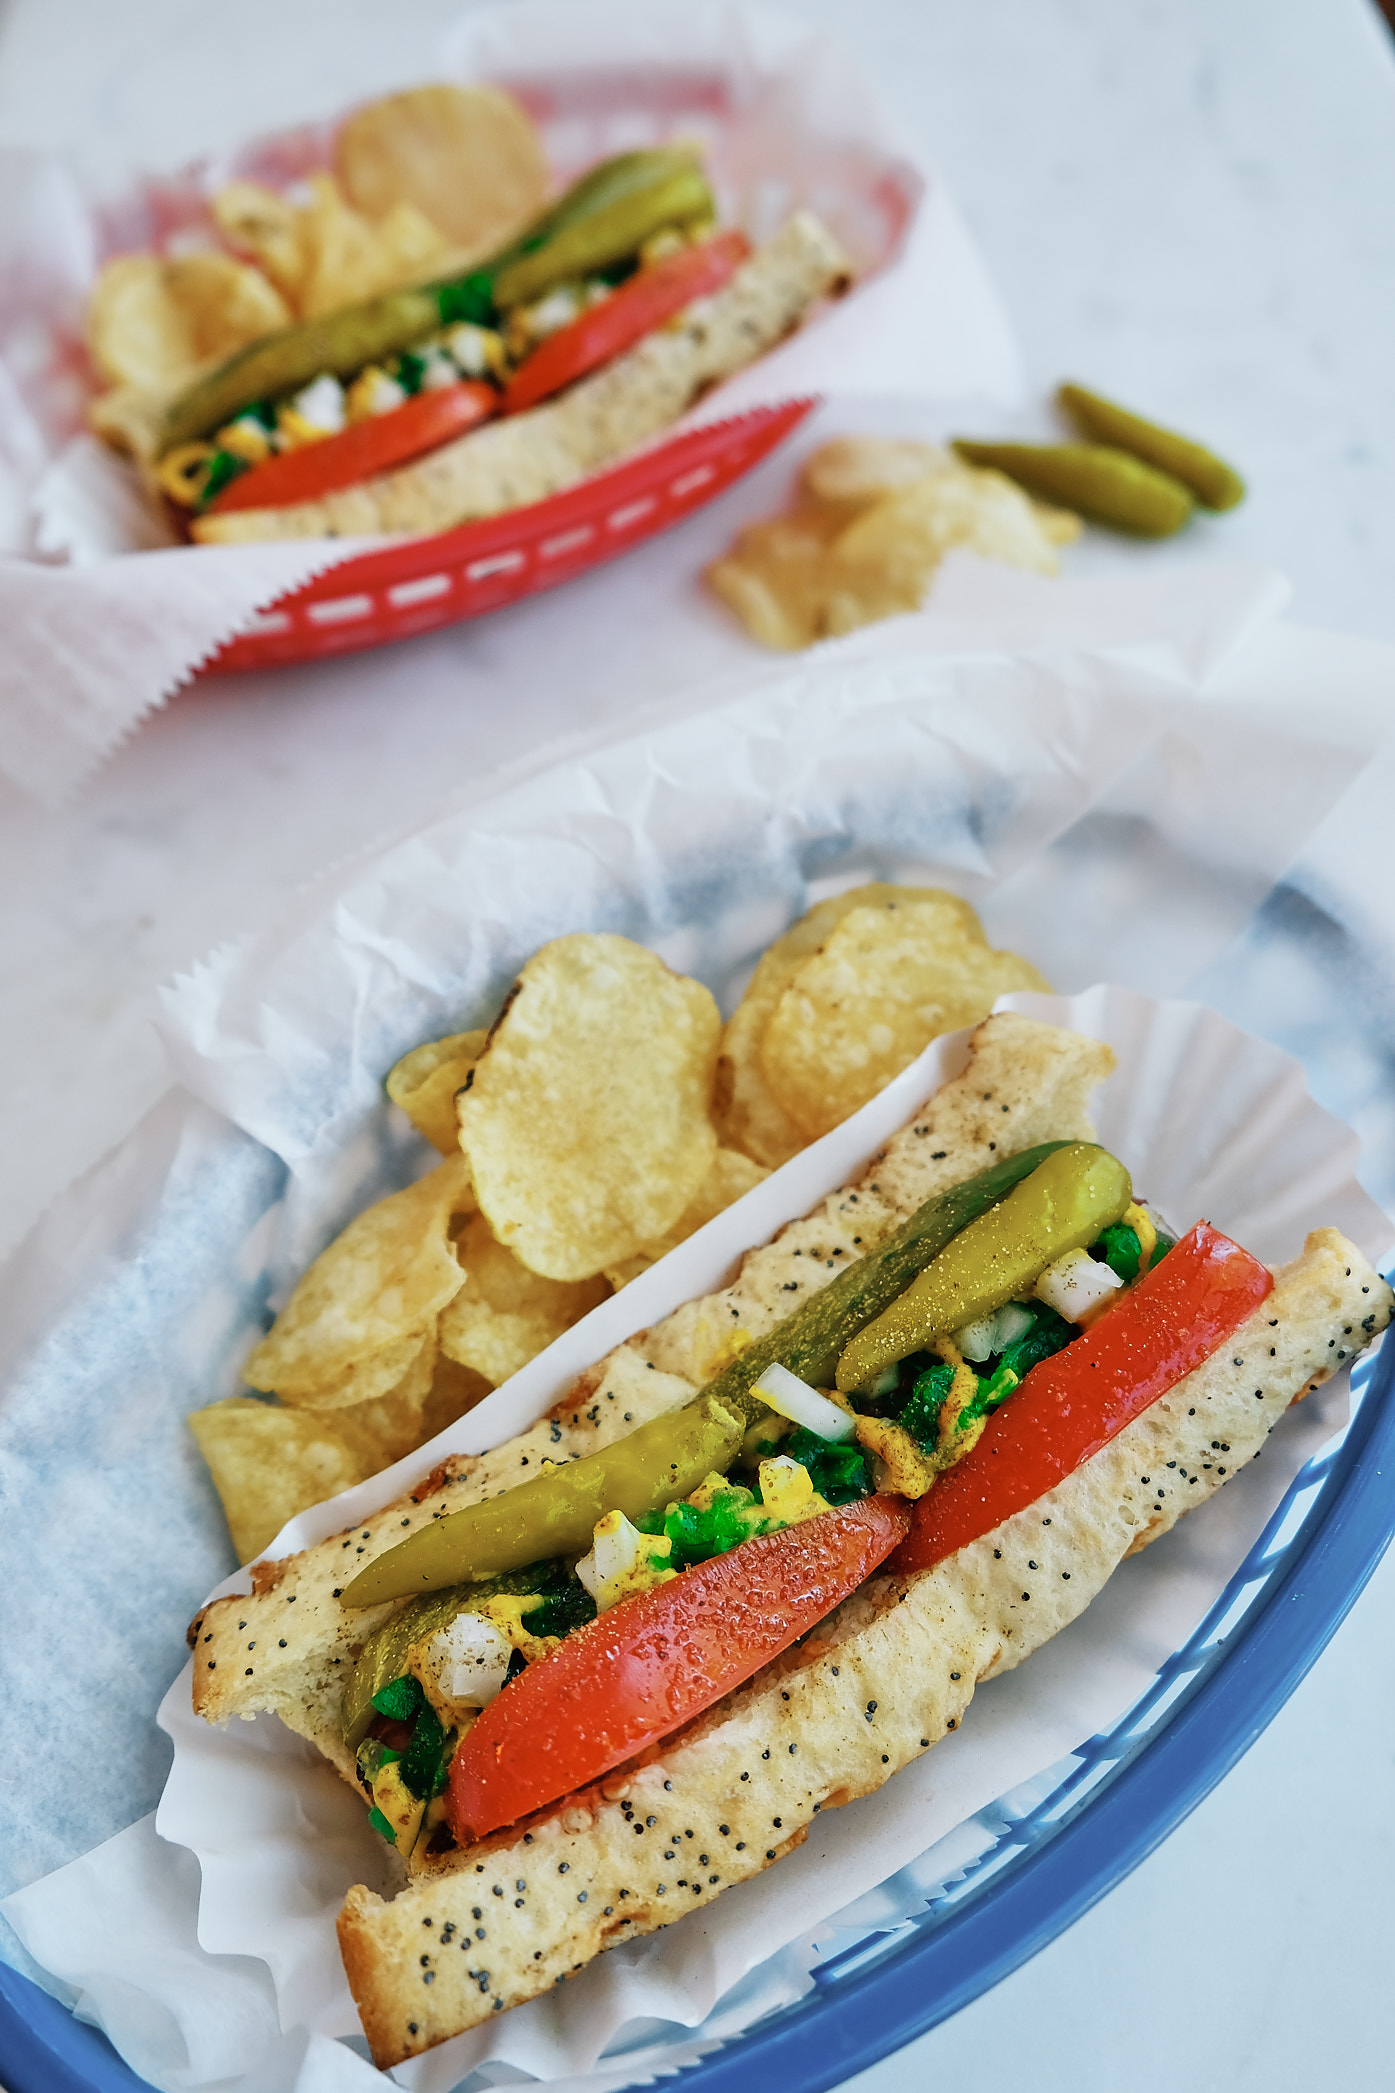
Because even though New England has the best buns, Chicago still has the best toppings. Combine the two and it’s the best of America in a hot dog.
Enjoy summer!
Print
New England Hot Dog Buns
-
 Prep Time: 2 1/2 hours
 -
Cook Time: 20 minutes
-
Total Time: 3 hours (mostly dough raising)
-
 Yield: 10
Description
This New England hot dog bun recipe is dairy-free and egg-free, it also happens to be vegan. The dough fits perfectly into the New England hot dog pan, no shaping of individual rolls needed!
Ingredients
- 2 1/2 cups All-Purpose Flour (about 360 grams)
- 2 teaspoons yeast
- 2 T. sugar
- 2/3 cup potato flakes
- 1 1/2 t. table salt
- 2 T. dairy-free margarine or oil
- 1 1/4 cups water
- Poppy seeds
Instructions
- Mix and knead all the ingredients together until you have a nice soft dough. I use a stand mixer, and knead for about 5 minutes. The dough should be nice and soft, but not sticky. Add more water if it’s too hard or dry, add more flour if it’s too sticky.
- Cover the bowl with plastic wrap or a towel and raise for 1 1/2 hours.
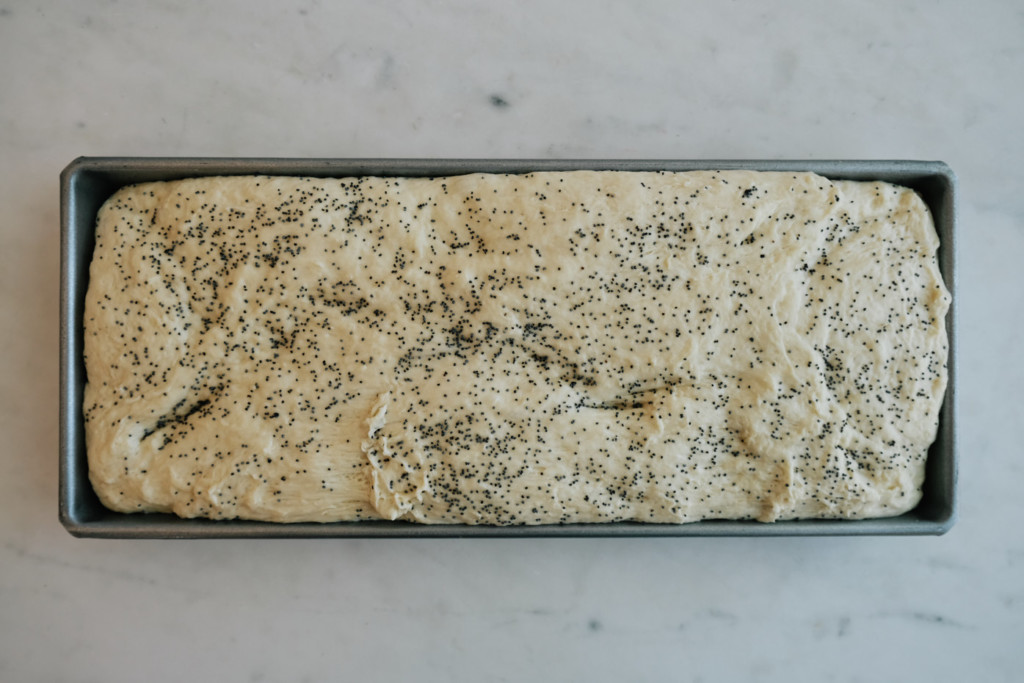
- Spray the hot dog pan with oil and sprinkle with poppy seeds.
- Gently stretch the dough out and press into the pan.
- Sprinkle the top of the dough with more poppy seeds.
- Cover the pan and allow to raise for 45 minutes.
- While the dough rises, preheat the oven to 375.
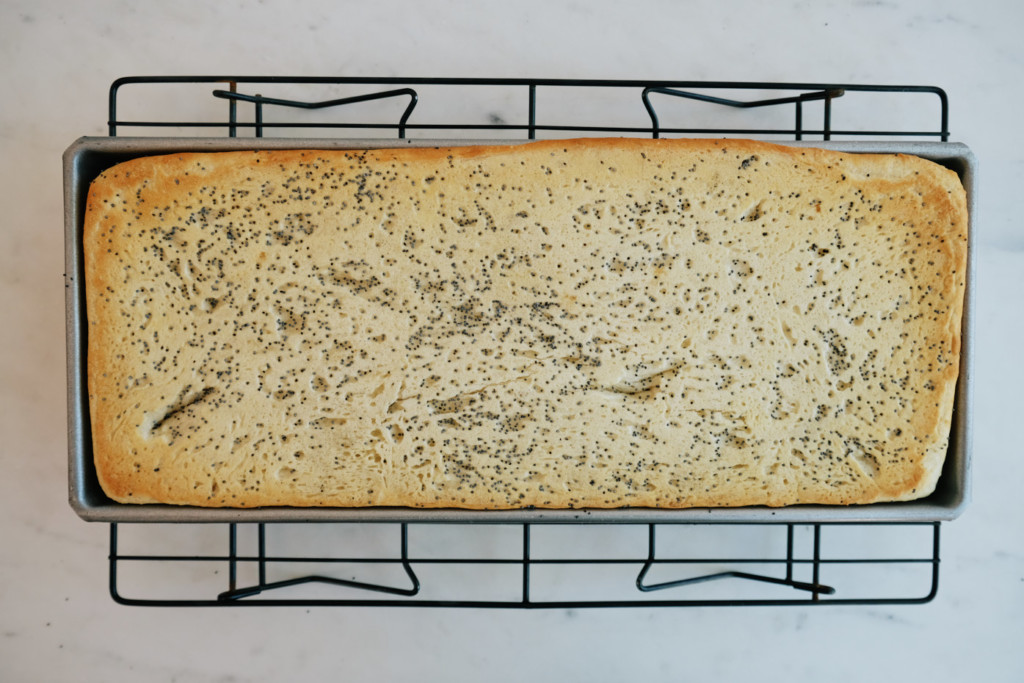
- When the dough has nearly reached the top of the hot dog pan, they’re ready to bake.
- Grease the bottom of a sheet pan and place the pan on top of the hot dog pan (this will cause the bottom of the buns to have the characteristic flat bottom).
- Bake for 18-20 minutes, remove the sheet pan and allow to bake a little more if the buns need to brown a bit more on top.
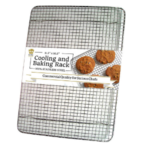
- Flip the buns out on cooling rack (the ridged side is the top of the bun). Cut the buns apart when cool, and make a half-way cut down the center when ready to fill).

Notes
In case you need directions on a Chicago Dog, it’s: sliced tomatoes, chopped onion, dill pickle spear, neon green relish, sport peppers, yellow mustard, celery salt.
Our hot dog of choice is Hebrew National, there’s been a shortage here lately so Nathan’s works in a pinch.
 Category: Bread
 Method: Baked
 Cuisine: American
Keywords: new england hot dog buns, vegan hot dog buns
Other Recipes You May Enjoy
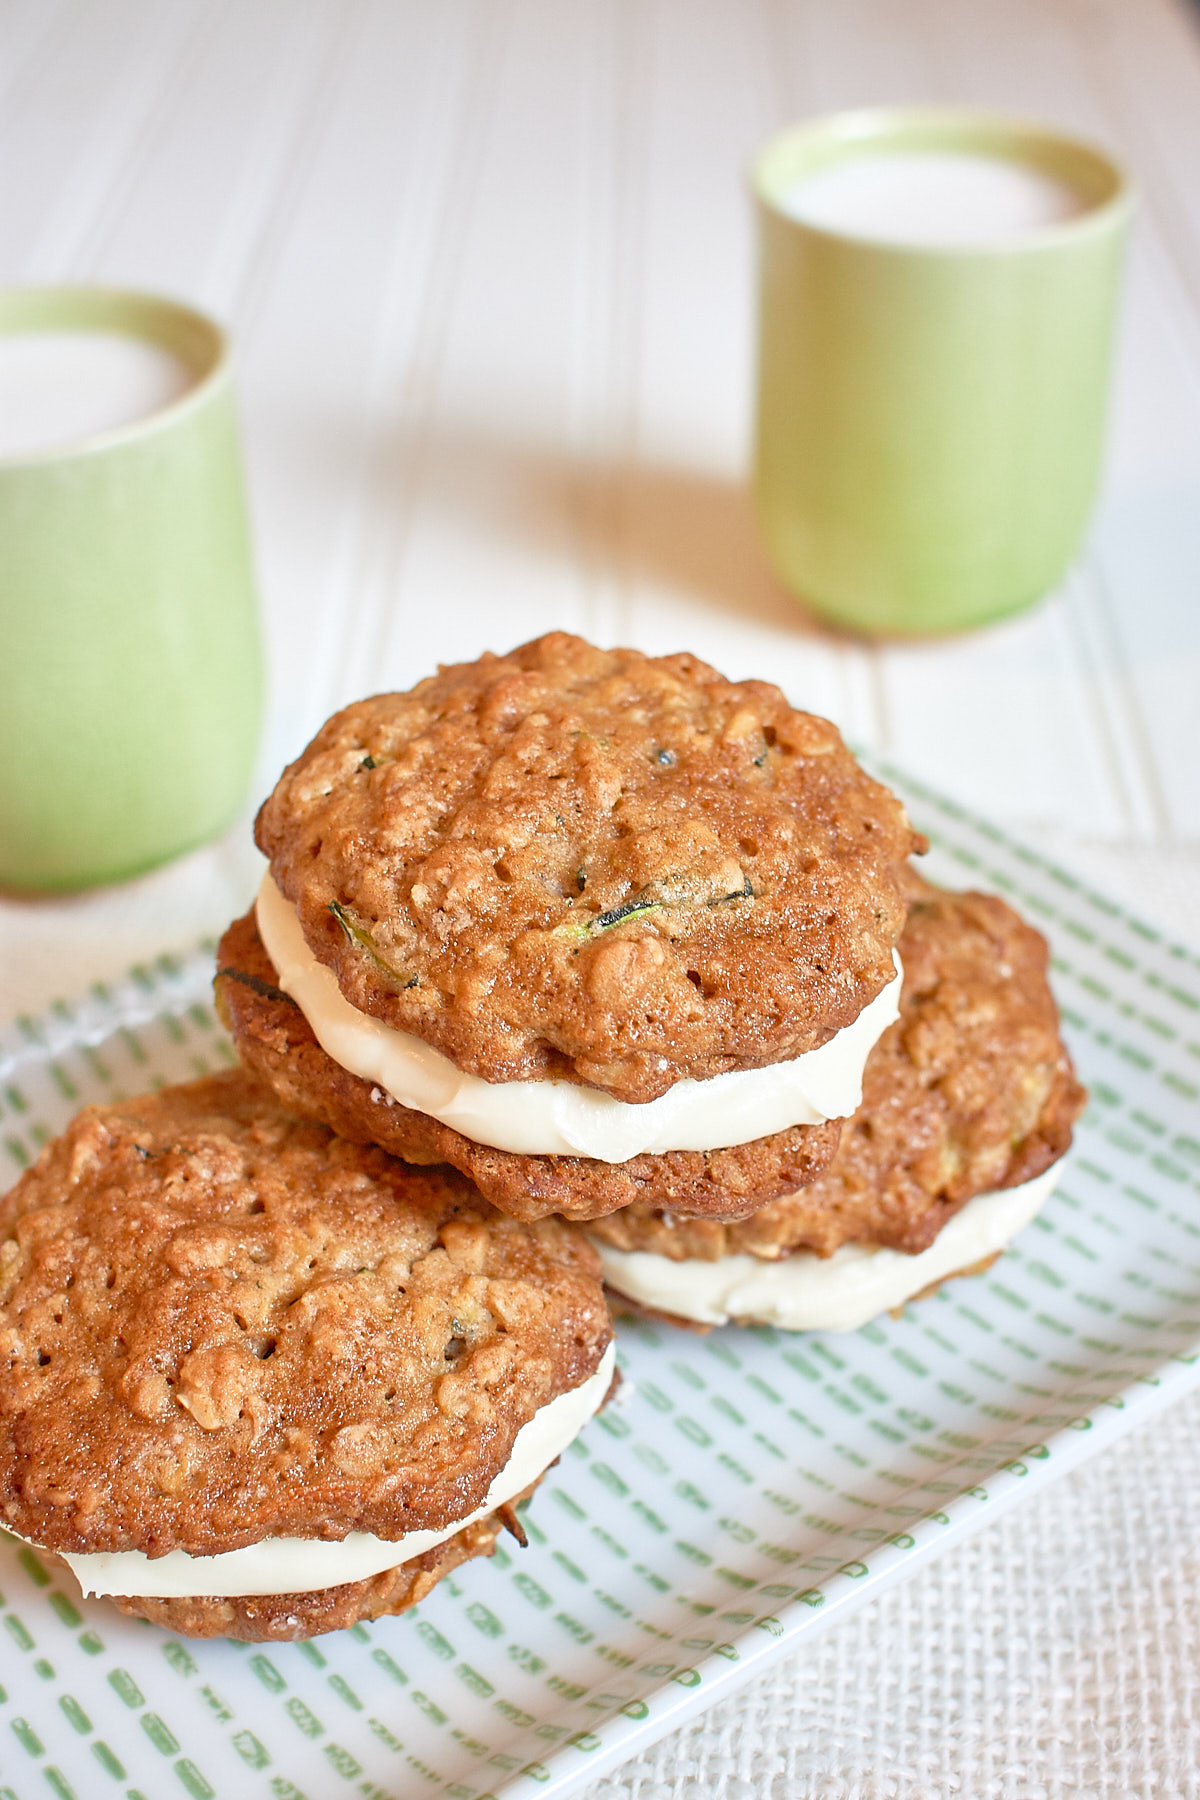
Zucchini Whoopie Pies

Blueberry Boy Bait
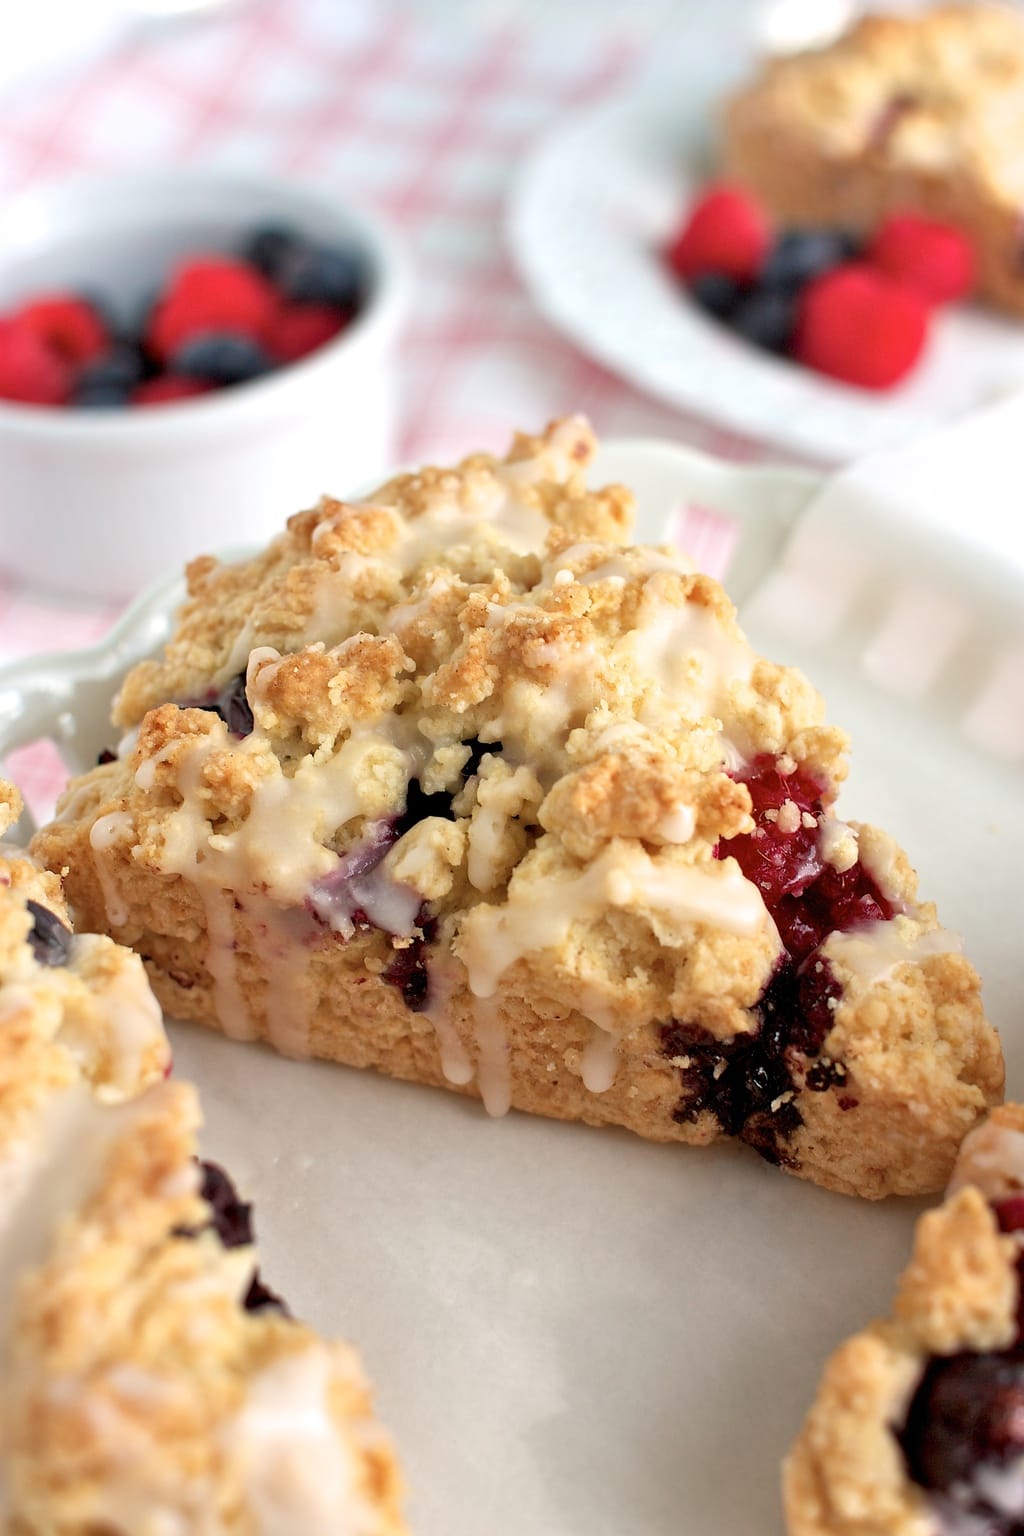
Red White & Blue Scones
The post New England Hot Dog Buns appeared first on Speedbump Kitchen.


Milk Bar Birthday Cake 6 May 2020 12:57 PM (4 years ago)
This is a ridiculous cake for ridiculous times. This past weekend marked 50 days into the Michigan stay at home order. Other than a daily walk around the neighborhood, the kids have not left the house for 50 days: no school, no church, no stores, no friends, no sports, no driving practice.
I’m still going to work seeing kids, and doing all the shopping. No one else at home has been to grocery store to see the dystopian scenes of empty shelves, people wearing makeshift masks and face shields, directional paths to walk through the stores, and 6-foot markers everywhere.
Sometimes, the ridiculousness is too much–like the couple I saw this weekend wearing bras as facemasks, and welding face shields—trying to make a decision on what box of tea to buy. Sometimes it’s just so sad– watching the elderly walk warily around stores, struggling to reach an item and feeling like you shouldn’t help.
Many items are in short supply, but one thing we have plenty of right now, is time. We have time to learn sourdough bread that takes 3 days, time to take a week making the nine components in a single bowl of Ivan Orkin’s Shio Ramen, time to learn how to juggle and play the harmonica. Time to watch Netflix, and Disney Plus, and PBS. Plenty of time.
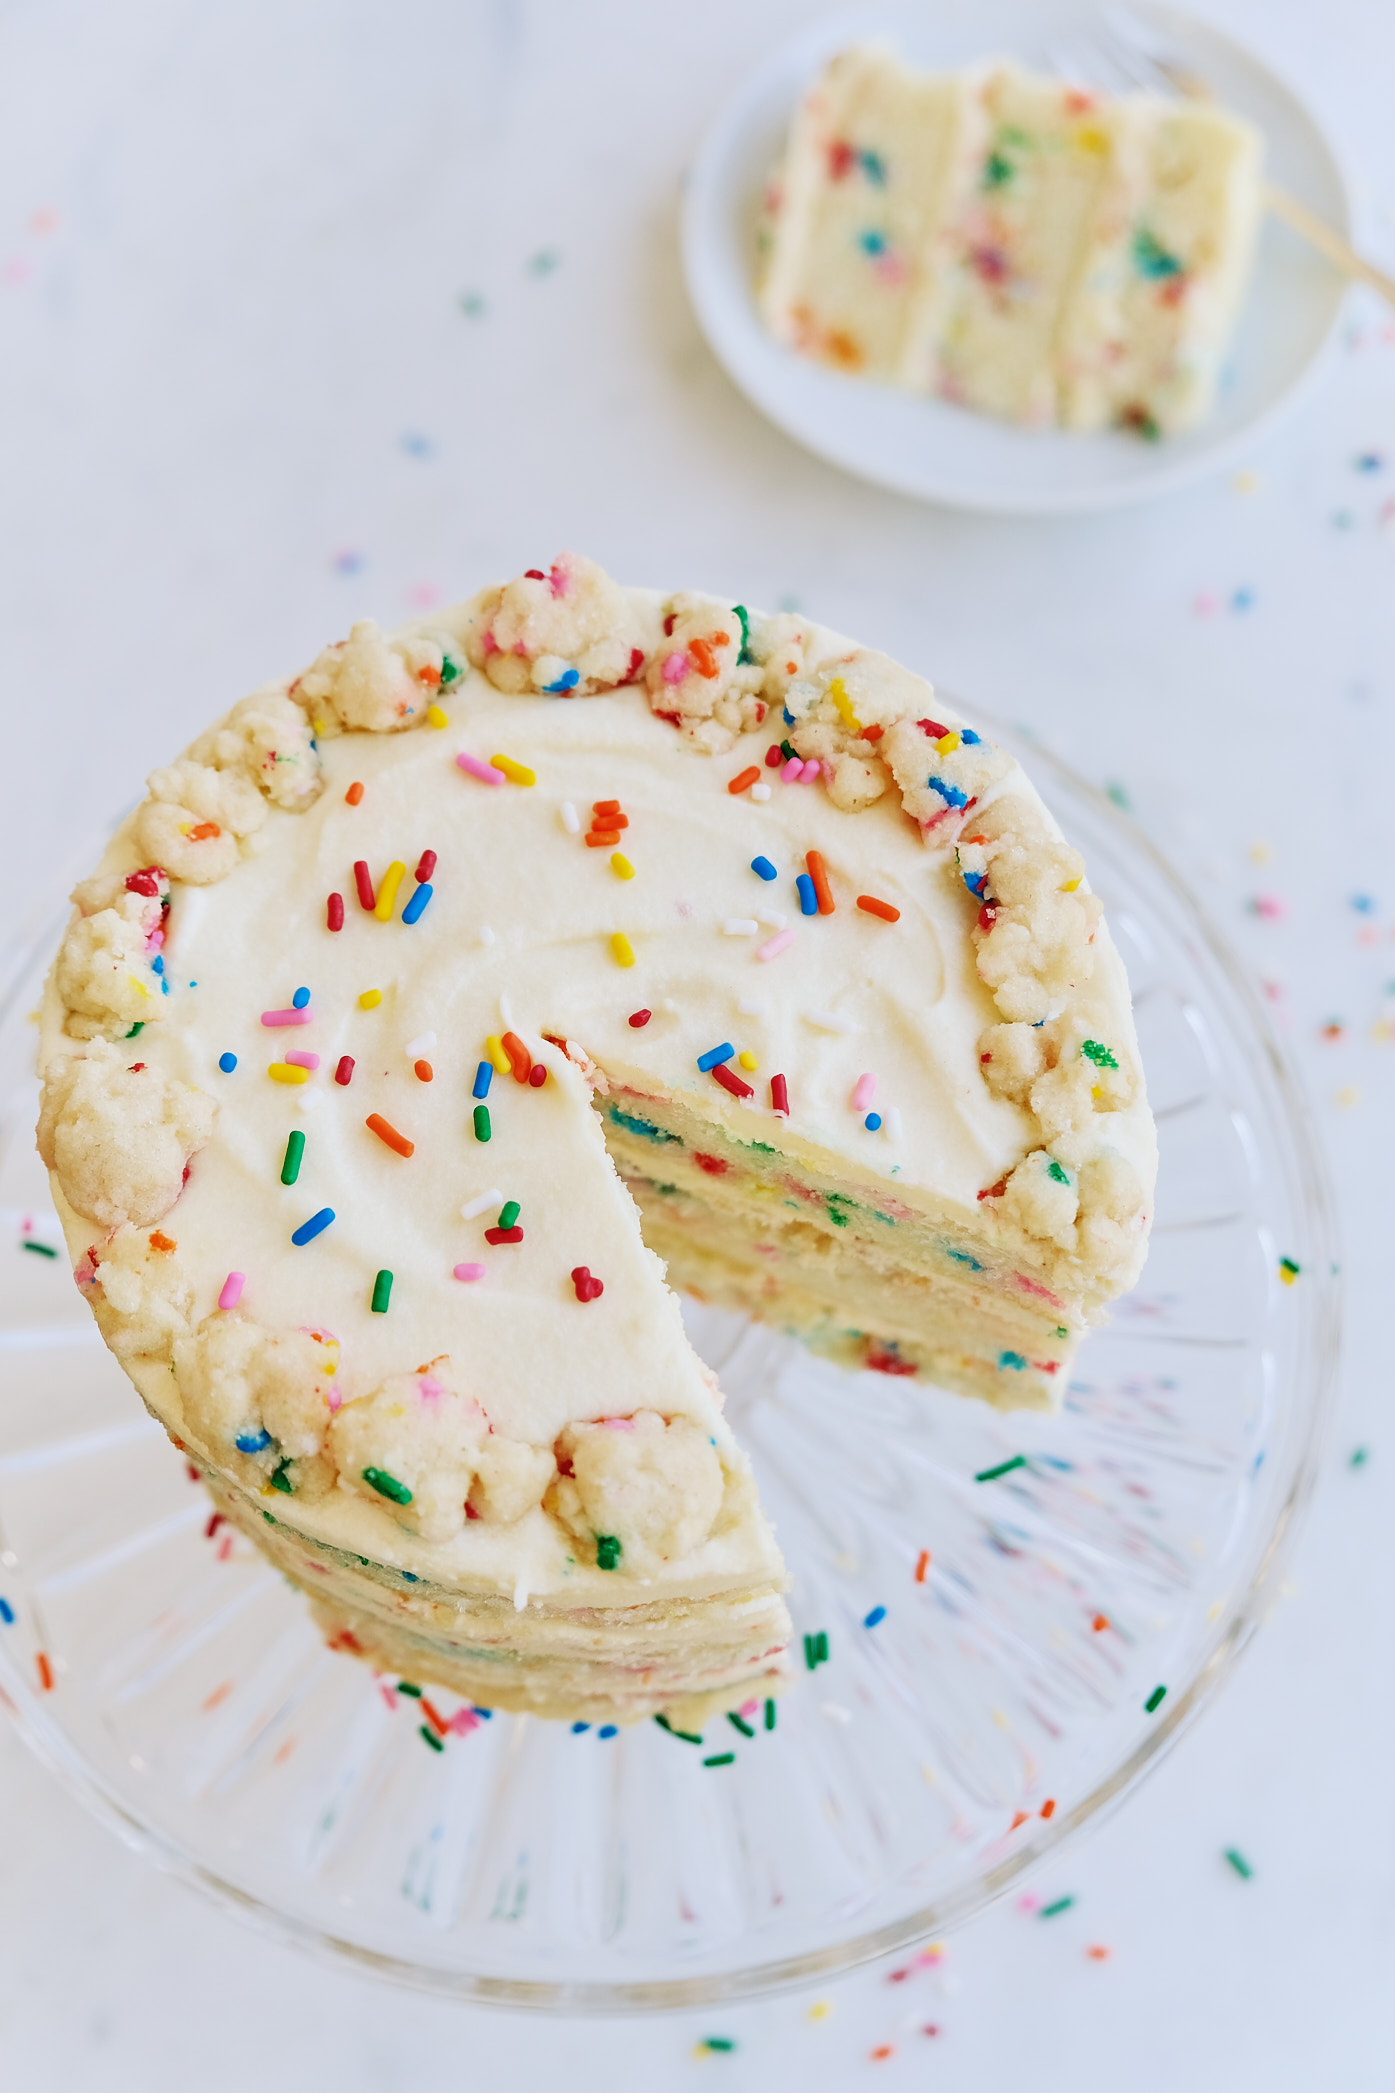
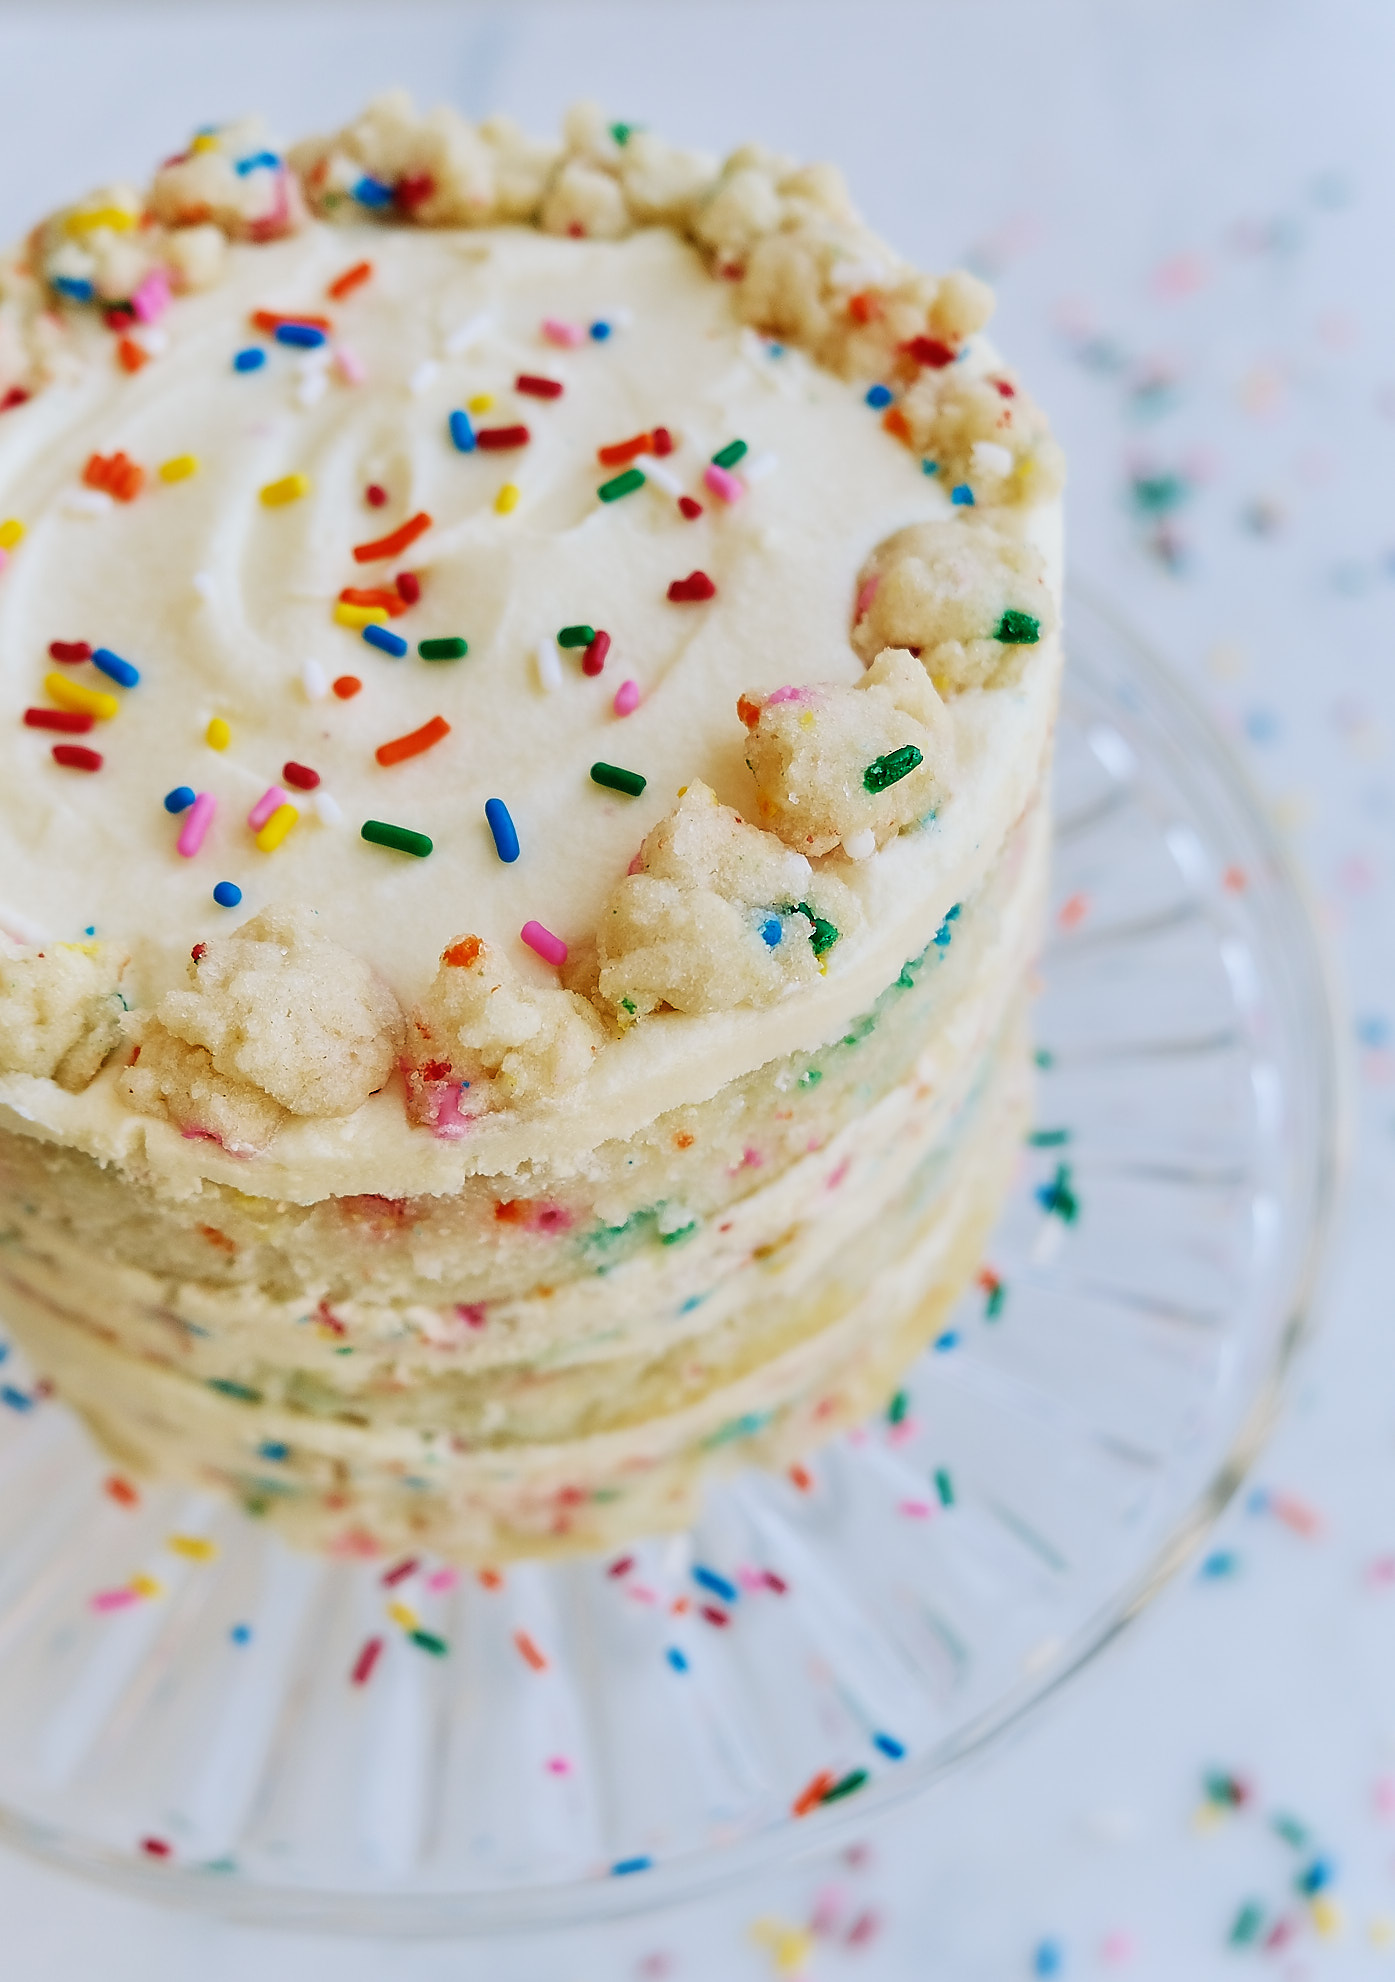
And time is all you need to make this cake. Christina Tosi’s Milk Bar Birthday Cake has to be the most Instagrammable Cake in America, but it’s not a technically difficult cake to make. You could completely mess every layer up, and it will still turn out fine. You just need time to order the oddball supplies, time to make the components, and time to let it sit.
If you’ve never heard about this cake, take a few minutes to watch Christina Tosi talk about her theory on cake. If you have Netflix, it’s worth watching her entire episode on Chef’s Table. Because you’ve got time right now.
The even crazier thing about this cake, and pretty much everything else sold in Milk Bar, is her transparency. She posts the recipes for everything in the bakery. She’s like the Penn and Teller of bakers. She openly shares her secrets, and somehow the magic is stronger.
So if you can eat dairy and egg, just head over to the Milk Bar website and follow her directions. If you can’t…then stay tuned for a dairy-free and egg-free version–a milk-free Milk Bar Birthday Cake–if you will.
So what do you think? It’s a really cute cake. It’s sweet, and salty, and crunchy, and homey. It has a Netflix episode devoted to it. You have time to order up the supplies from Amazon and putter around in the kitchen. And if you’re worried about gaining that COVID#19 pounds…it’s only a little 6 inch cake.
This is the perfect cake to celebrate….something. I don’t know what. Celebrate all the celebrations we’ve missed.
Have I made my case on why this is the perfect time to make this cake? Ok, let’s go!
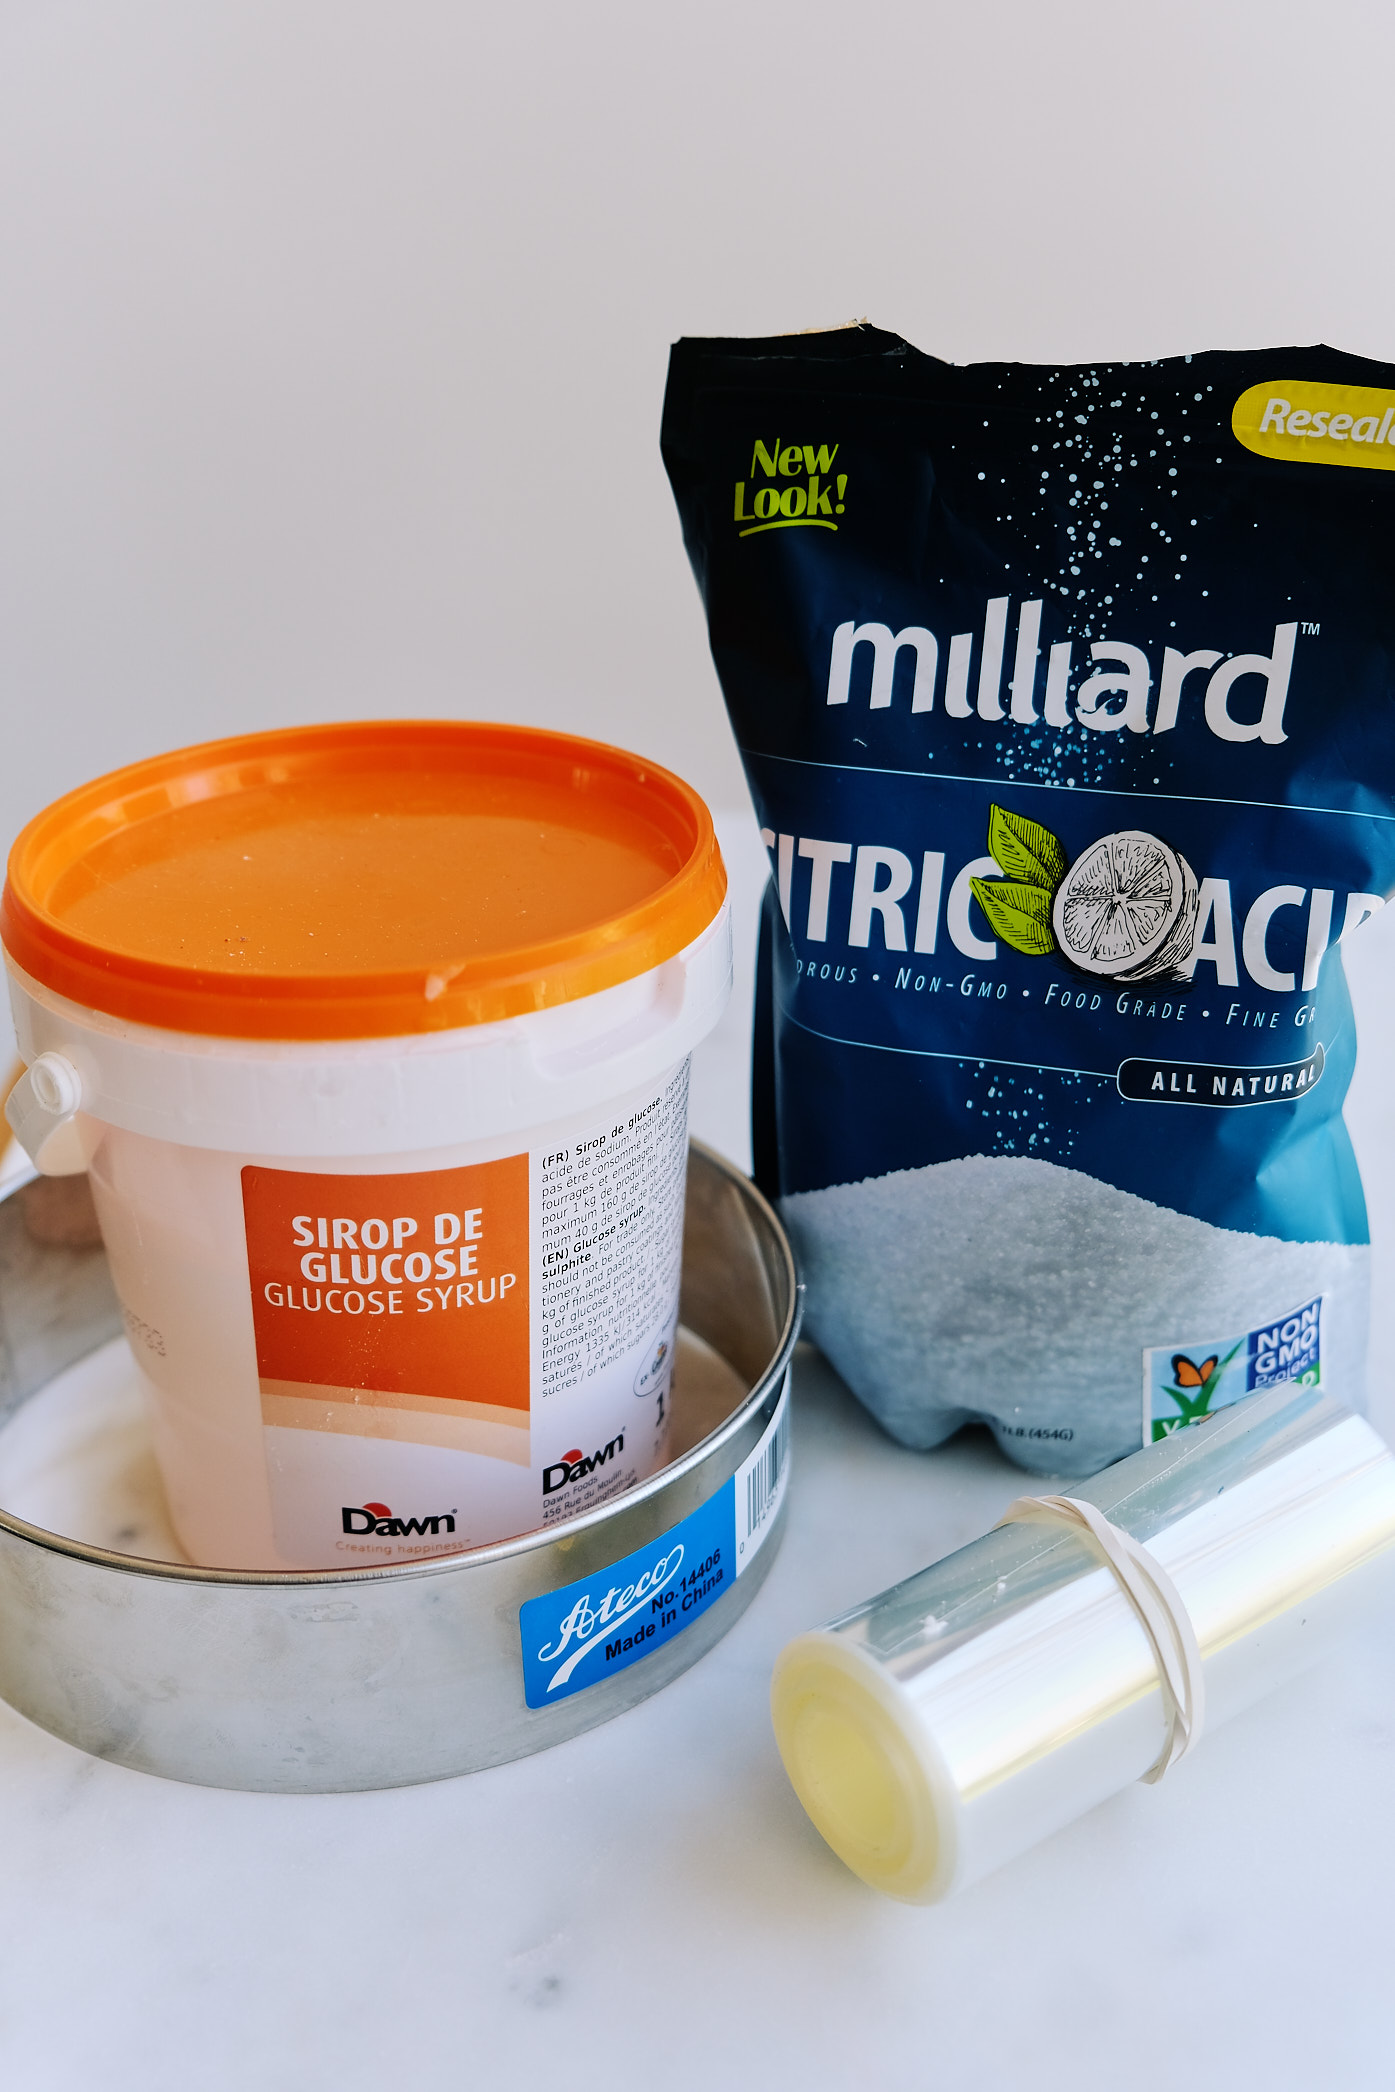
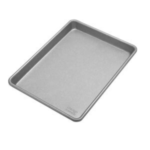
First off, you’re going to need to order some supplies, because this stuff is not normal. 1.) 1/4 sheet pan 2.) 6 inch cake cutter 3.) 4 inch acetate cake collars 4.) Glucose Syrup 5.) Citric Acid
Secondly, you’re going to need some slightly odd ingredients from the grocery: 1.) Sprinkles 2.) Cake Flour and 3.) Grapeseed oil.
You could swap out canola oil, but why not try something new? I found grapeseed oil in the olive oil section of my grocery. It’s a spacy green color, but doesn’t taste green.
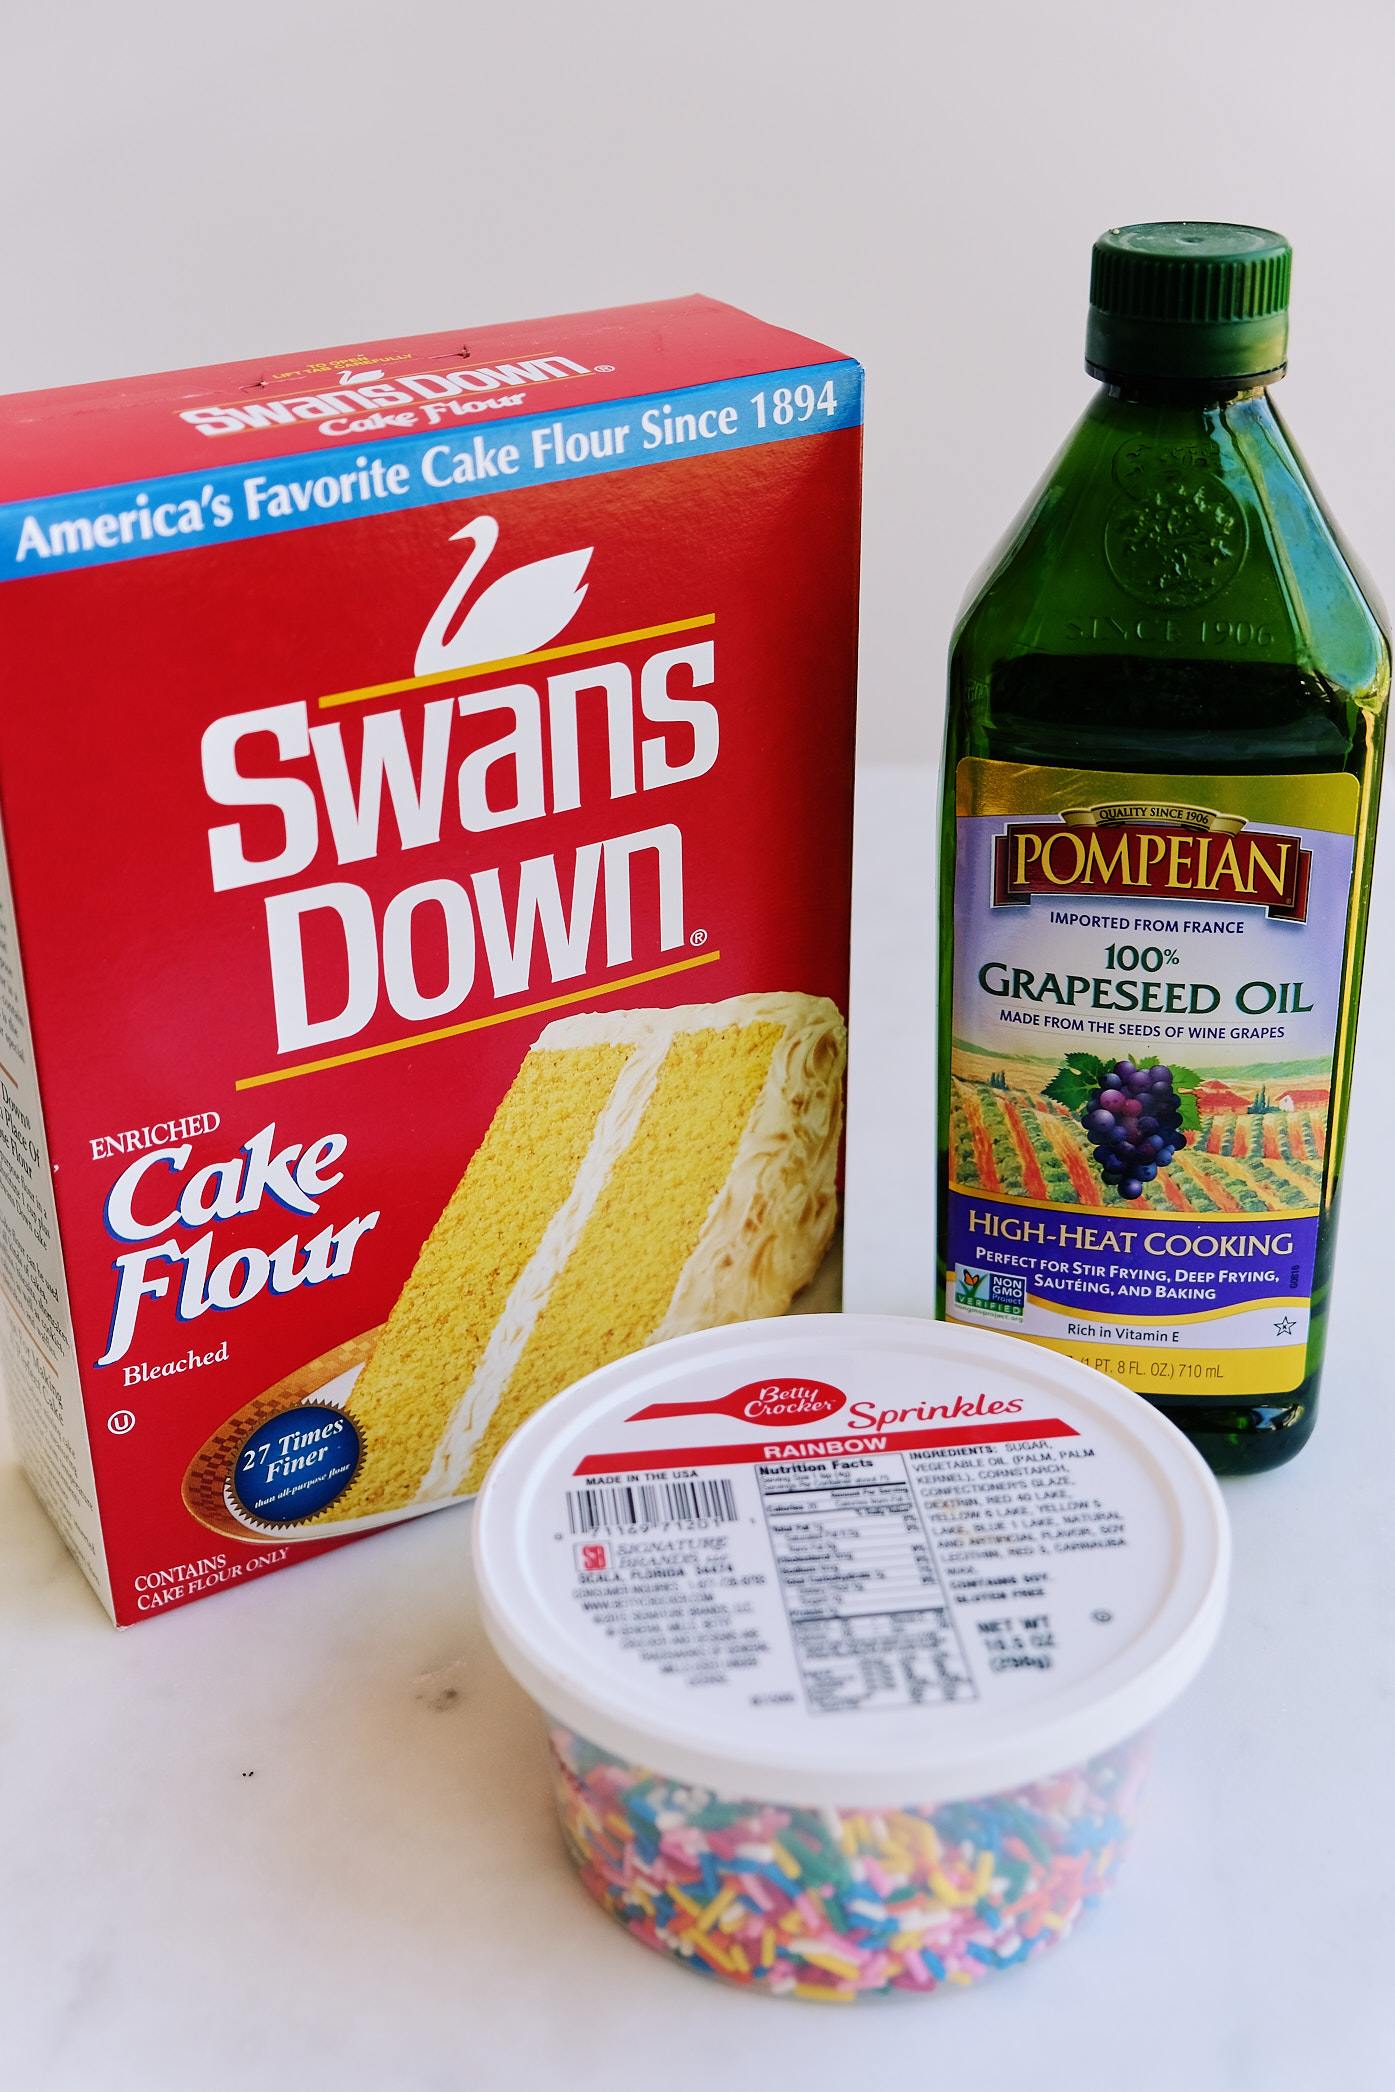
The rest of the ingredients are pretty basic pantry items.
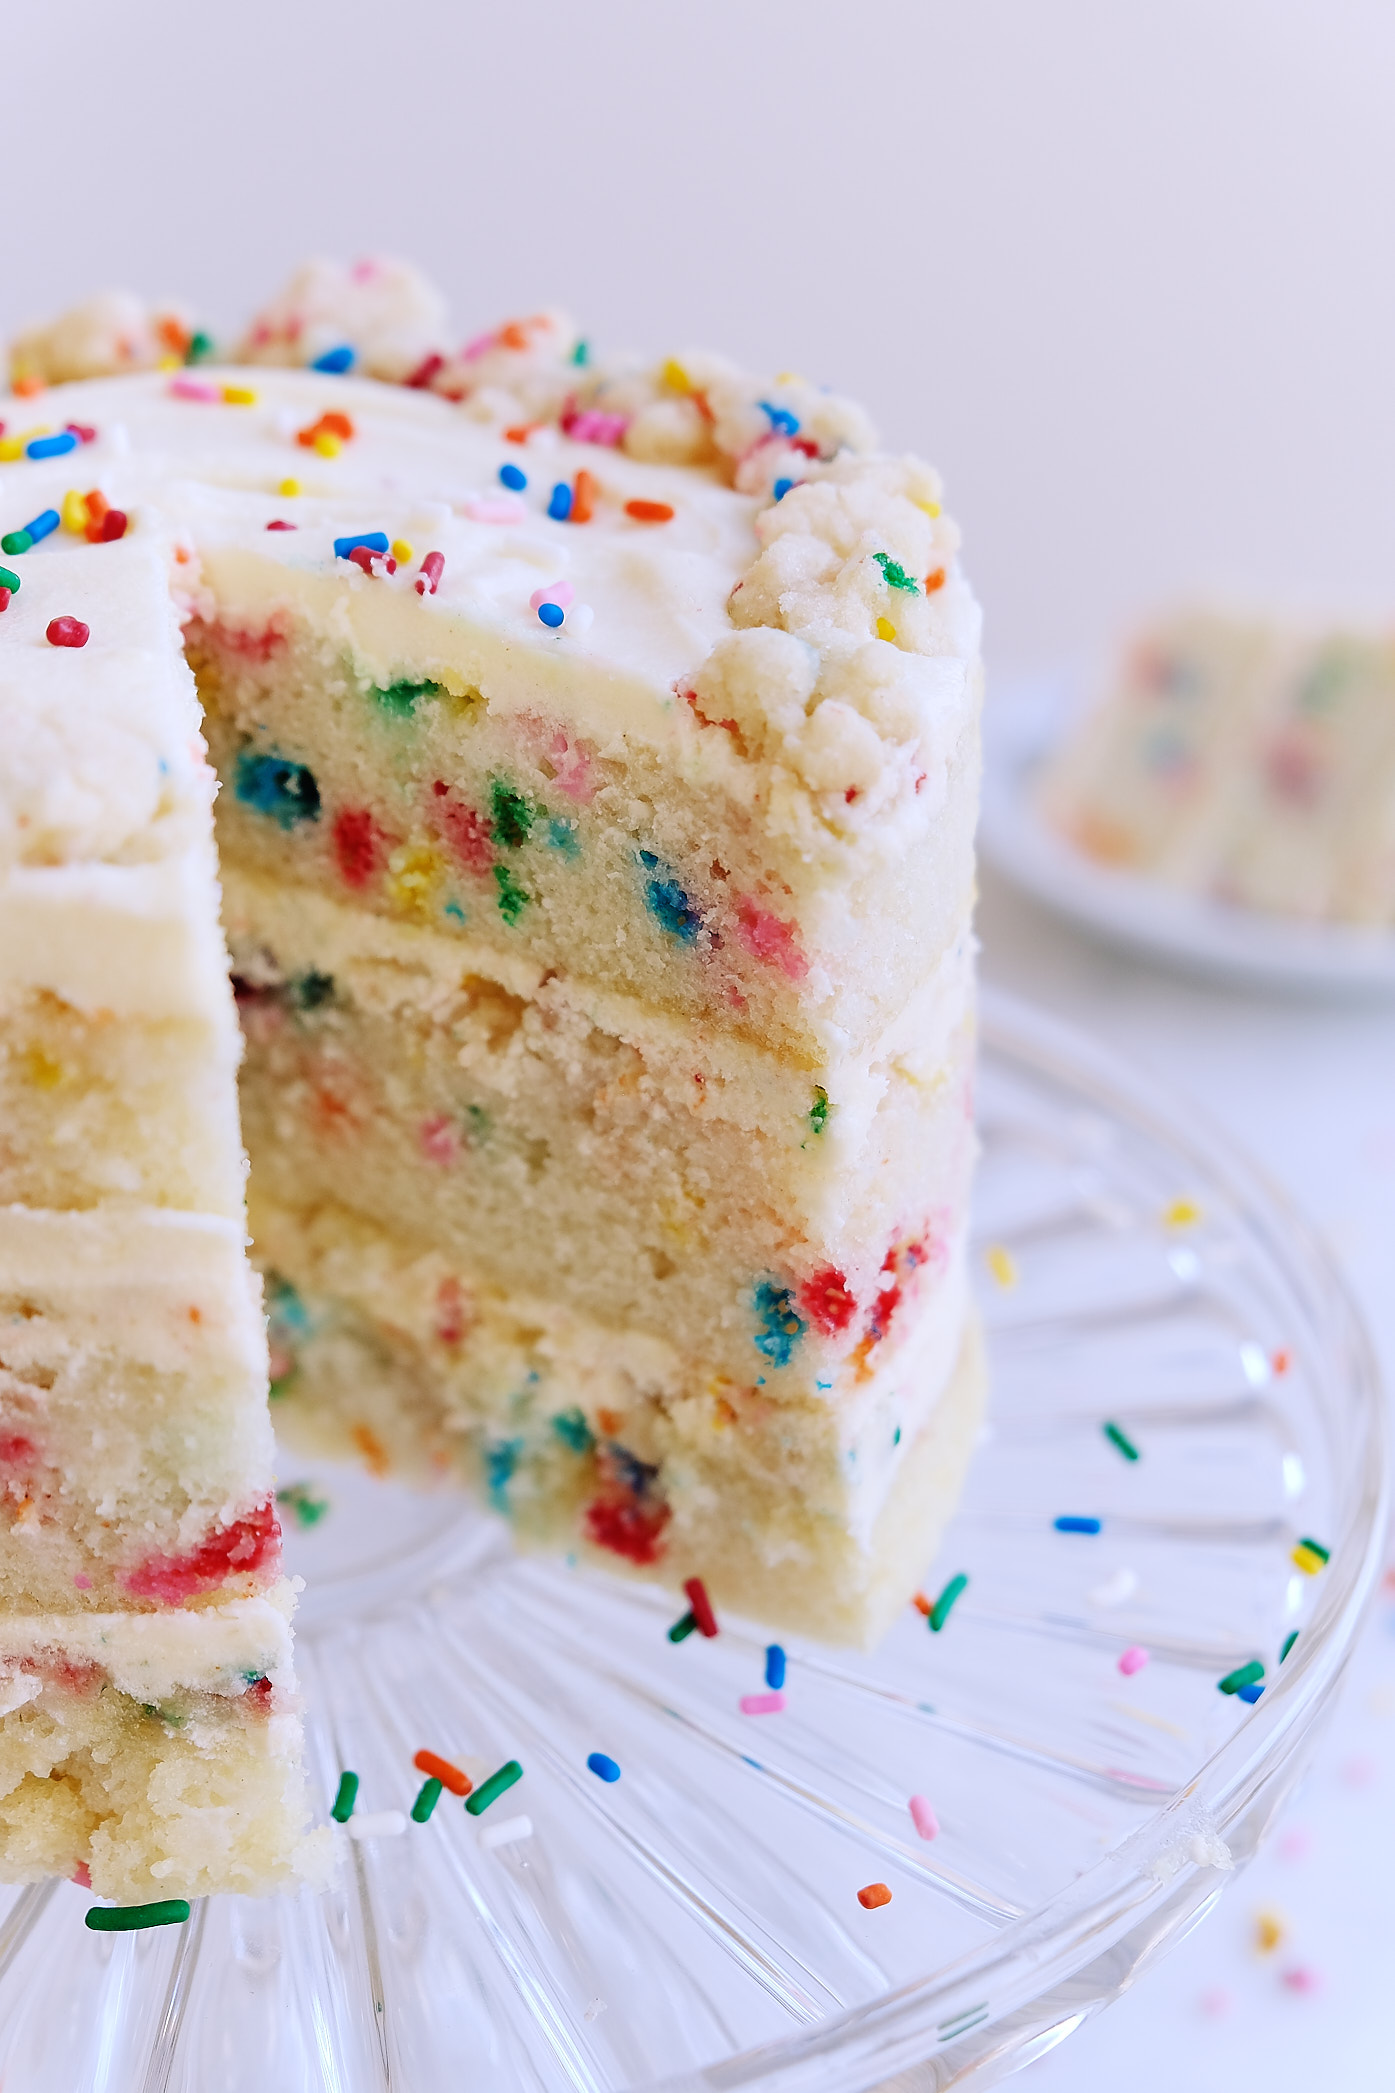
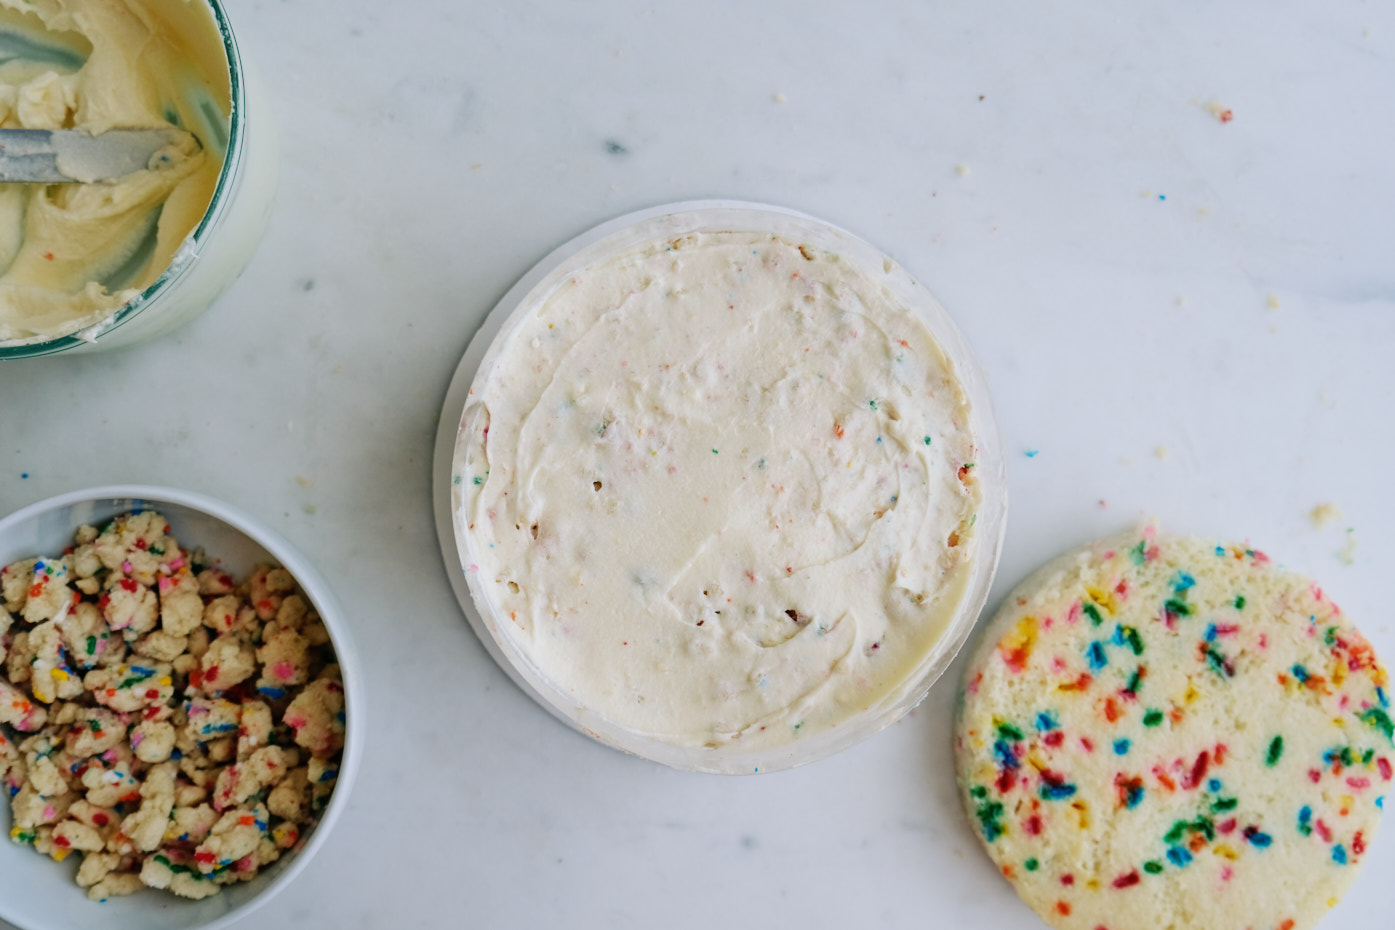
There are 4 components to the cake: the actual cake layer baked in a 1/4 sheet pan and cut into the round shape, the addictive crunchy cake crumbs, the cake soak, and the frosting. You can make all these components at your leisure and store them in the fridge until you are ready to assemble the cake.
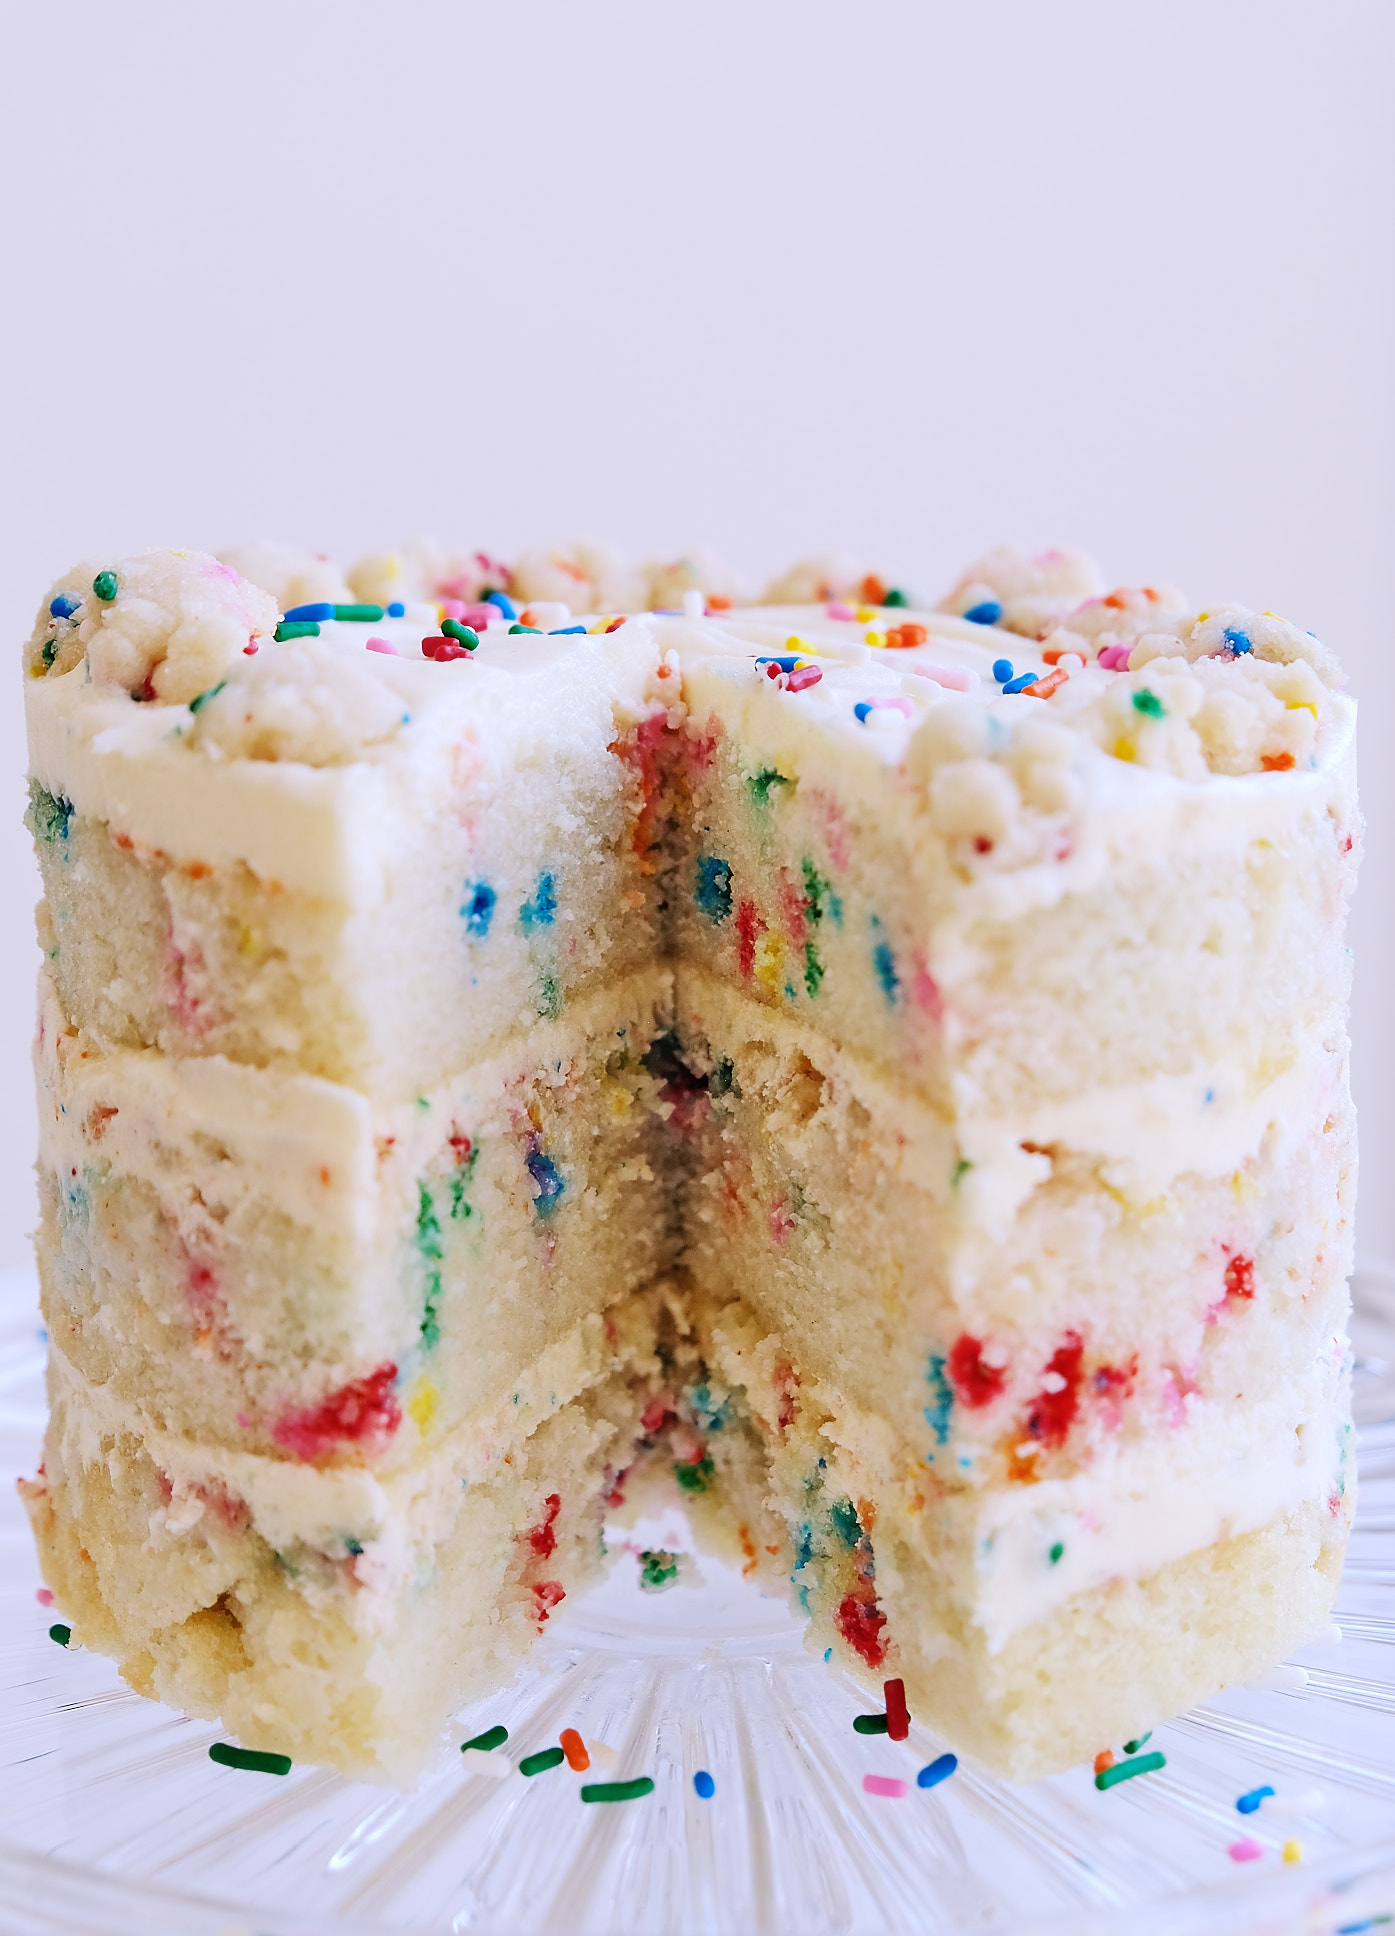
Once you assemble the cake, it freezes for at least 12 hours and then it thaws in the fridge for about 3 hours before eating.

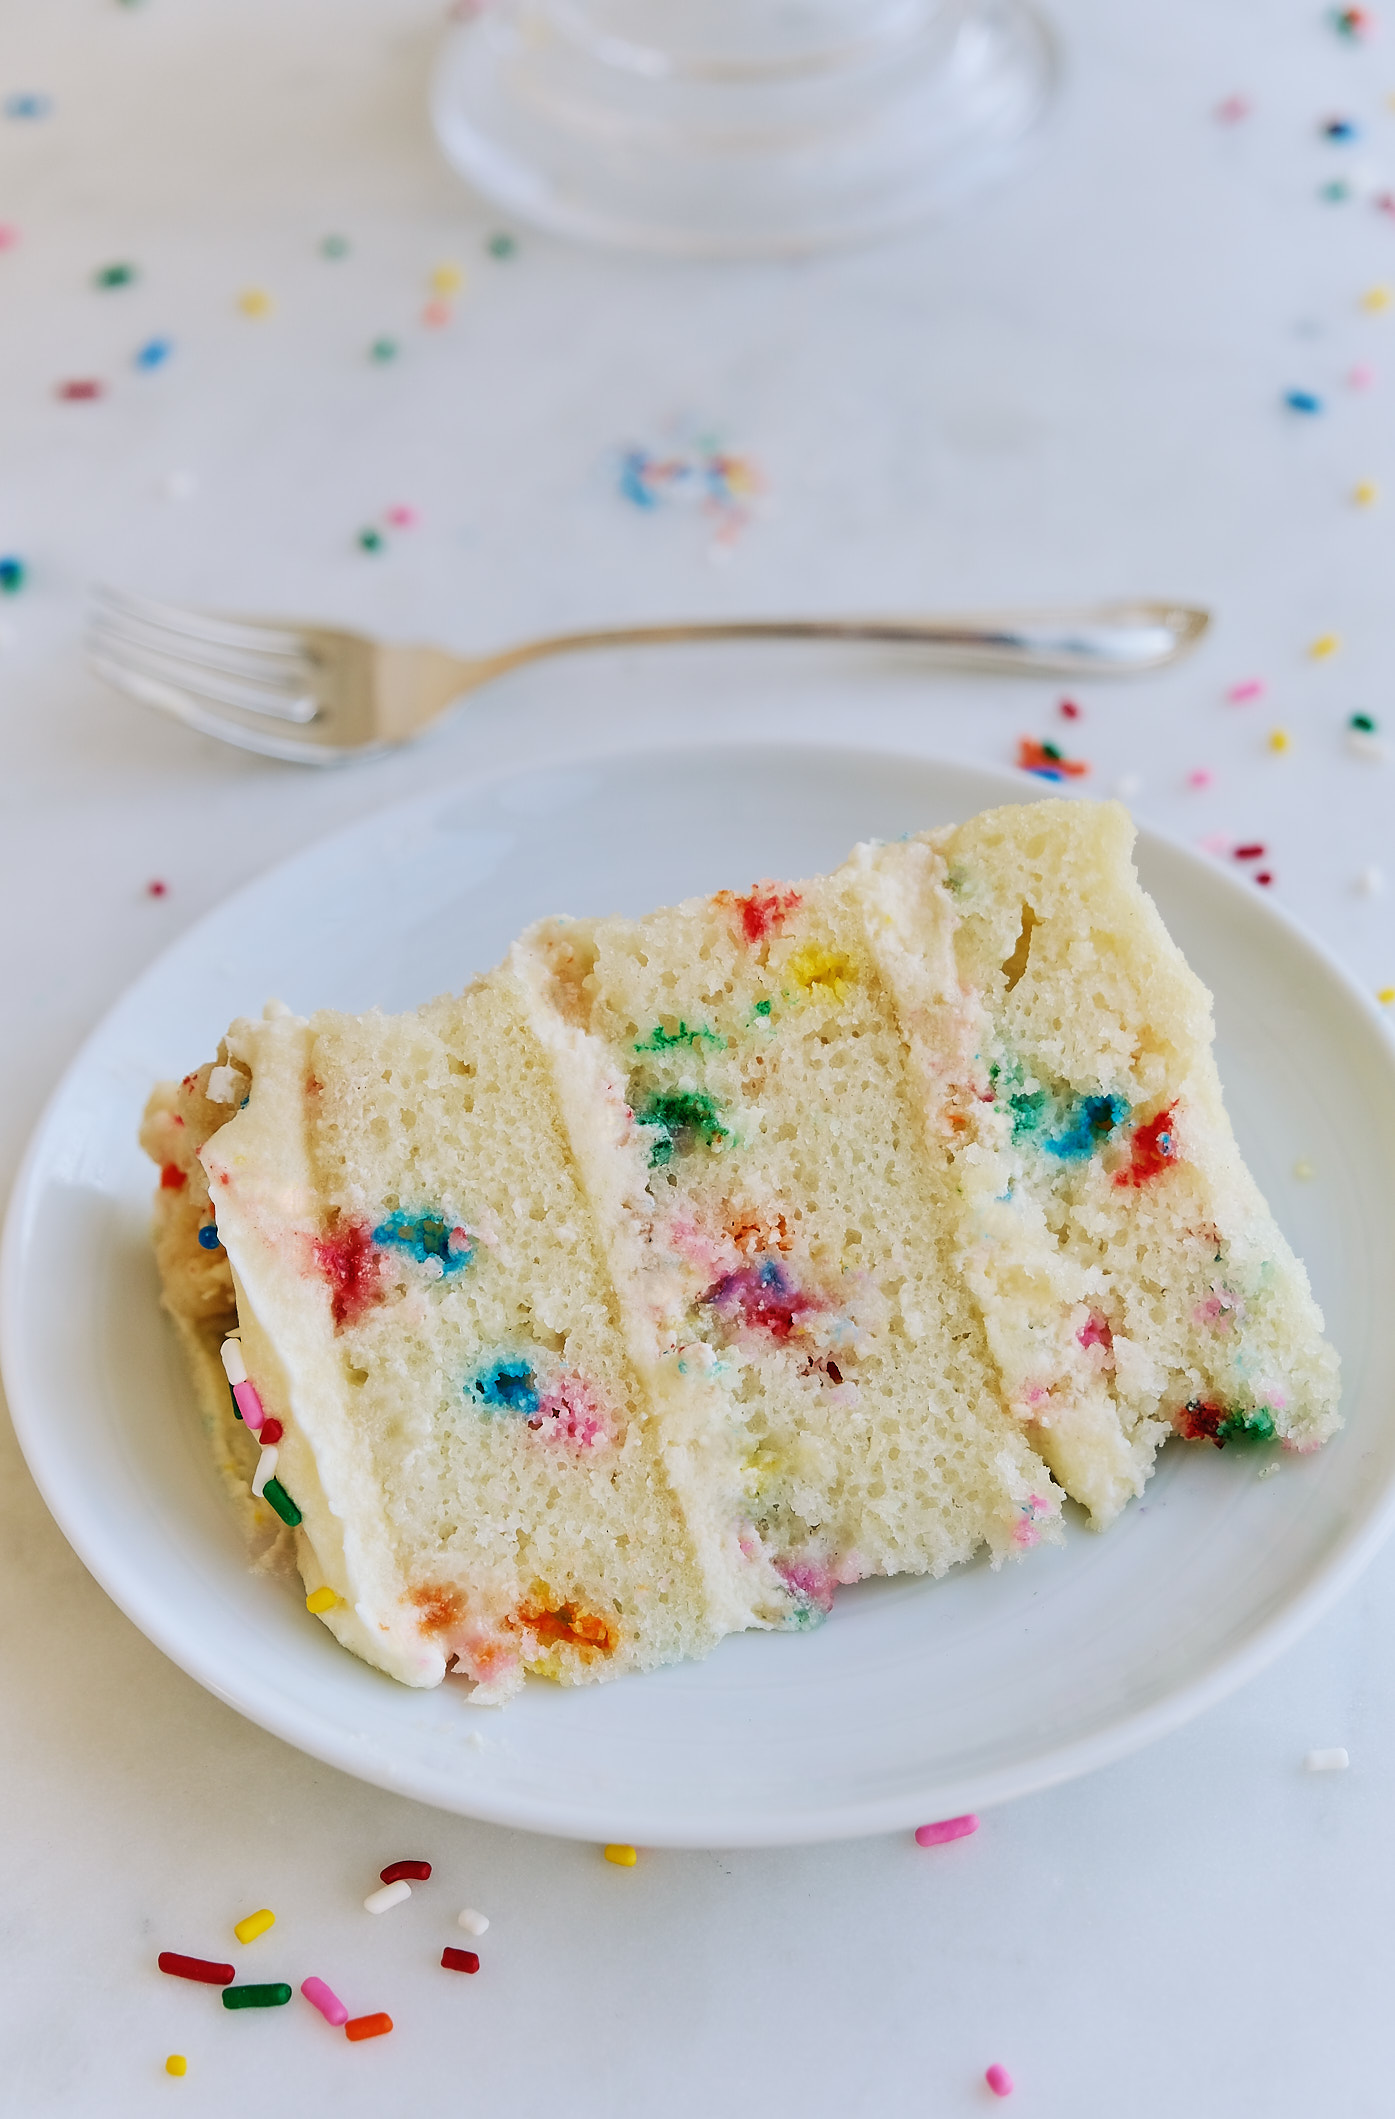
And if it weren’t enough…this cake actually tastes better with time. The first day, it’s great. Well actually, it’s ridiculous. It’s so sweet and silly, you mostly just laugh at it and yourself for making it.
But the next day around coffeetime, when the need for another taste of the sweet bomb starts haunting you, and the salty-sweet crunchy bits have soaked up some vanilla cake soak and the cake layers start melding into the tangy cream cheese frosting…oh man.
In that moment, the stay-at-home order is just a little easier to bear.
Print
Milk Bar Birthday Cake
-
Yield: 6 inch cake
Description
This is a dairy-free and egg-free version of the famous Milk Bar Birthday Cake, it also happens to be vegan. The cake has 4 components that are listed as individual recipes below. Make those 4 components and come back here for instructions on cake assembly. Or, head over to the official Milk Bar Recipe Page for building instructions.
Ingredients
- #1 Birthday Cake
- #2 Birthday Cake Crumbs
- #3 Birthday Cake Frosting
- #4 Birthday Cake Soak
Instructions
- Using the 6-inch cake cutter, cut the quarter sheet of birthday cake into two 6-inch rounds. The remaining “scraps” will be used to make the bottom cake layer, so don’t eat them all.
- Clean the cake ring, and place it on a sheet pan lined with parchment paper. Line the inside of the cake ring with a strip of the acetate cake collar.
- Layer the cake scraps inside the ring, press down gently to make a flat even layer.
- Spoon half of the Birthday Cake Soak over the cake layer and let it absorb in.
- Spread 1/5th of the frosting over the cake.
- Sprinkle 1/3 of the cake crumbs, press down.
- Spread another 1/5th of the frosting.
- Top with a cake round and repeat the process: rest of the cake soak, frosting layer, crumbs, frosting layer.
- By now, the cake is reaching near the top of the acetate cake collar, so you’ll have to add another circle of cake collar to increase the height. Just cut another length and tuck it in.
- Add the final cake round and the rest of the frosting. Decorate with remaining cake crumbs.
- Place the whole cake in the freezer for 12 hours to set. It’s ok if you leave it in the freezer for weeks!
- About 3 hours before you plan to serve the cake, remove it from the freezer. Pop it out of the cake ring, and peel off the acetate cake collars. Let it defrost in the fridge for 3 hours or a few days.
- Enoy!


Notes
If you want to read the official instructions, head over to the official Milk Bar Birthday Cake Recipe site.
This cake is a lot of up-front work, but it can sit in the freezer for weeks before serving, pretty cool.
- Category: Dessert
- Method: Baked
- Cuisine: American
Keywords: vegan birthday cake, dairy-free birthday cake
Milk Bar Birthday Cake– #1 The Cake Layer
-
Prep Time: 20
-
Cook Time: 25
-
Total Time: 45 minutes
-
Yield: 1 sheet pan
- Diet: Vegan
Description
This is a dairy-free and egg-free adaptation of The Cake Layer of the Milk Bar Birthday Cake, it also happens to be vegan. Make sure you’re using a 1/4 sheet pan, otherwise this will be a disaster, the cake batter will overflow the pan or be too thin.
Ingredients
Dry Ingredients
- 2 cups cake flour (I use Swan’s Down)
- 1 t. baking powder
- 3/4 t. baking soda
- 3/4 t. kosher salt
Wet Ingredients
- 1 1/2 cups dairy-free milk
- 2 t. cider vinegar
- 1/2 cup grapeseed oil
- 1 cup white sugar
- 1 Tablespoon clear vanilla extract
1/4 cup rainbow sprinkles
Instructions
- Preheat oven to 350.
- Line a 1/4 sheet pan with parchment paper, it’s ok if the paper hangs over the edge. It will help you lift the cake out later.
- Whisk the dry ingredients together in a large mixing bowl.
- Whisk the wet ingredients together in a medium mixing bowl.
- Add the wet ingredients into the dry ingredients and mix well, don’t overbeat though.
- Fold in half the sprinkles, and blend carefully. Don’t whisk, or you’ll break the sprinkles.
- Pour the cake batter into the sheet pan, and top with the remaining 2 T. of sprinkles.
- Bake for about 20-25 minutes, or until the top is browned and set.
- Lift out of the pan with the parchment, let it cool on a rack. If you’re not going to assemble the whole cake soon, just freeze the whole slab of cake.

Notes
I used grapeseed oil because I’d already purchased it for the Cake Crumbs, but you can use canola oil or another vegetable oil if you’d like.
I use Betty Crocker Rainbow Sprinkles, they come in a big tub.
I’ve stopped spending money on pure vanilla extract. It’s terribly expensive, and taste tests by food snobs even prove you can’t tell the difference between vanilla extract and vanilla flavoring in baked goods. I have some fancy vanilla beans I use for marmalade, but I bought a huge jug of McCormick’s clear vanilla extract for baking. But that’s just me. You can do what you want.
I used kosher salt in this recipe, specifically Diamond Crystal salt that I buy in big boxes at the restaurant food supply store. If you’re using regular table salt, you might want to use 1/2 teaspoon instead.
- Category: Dessert
- Method: Baked
- Cuisine: American
Keywords: dairy-free confetti cake, vegan confetti cake
Milk Bar Birthday Cake– #2 The Cake Crumb Layer
-
Prep Time: 10
-
Cook Time: 15
-
Total Time: 25 minutes
-
Yield: 2 cups
- Diet: Vegan
Description
I would make these cake crumbs even without the cake. They’re so good for snacking and sprinkling over ice cream.
Ingredients
- 1/2 cup white sugar
- 1 1/2 Tablespoons brown sugar
- 3/4 cup cake flour
- 1/2 teaspoon baking powder
- 1/2 teaspoon kosher salt
- 2 T. rainbow sprinkles
- 1/4 cup grapeseed oil
- 1 Tablespoon clear vanilla extract
Instructions
- Heat oven to 300°F.
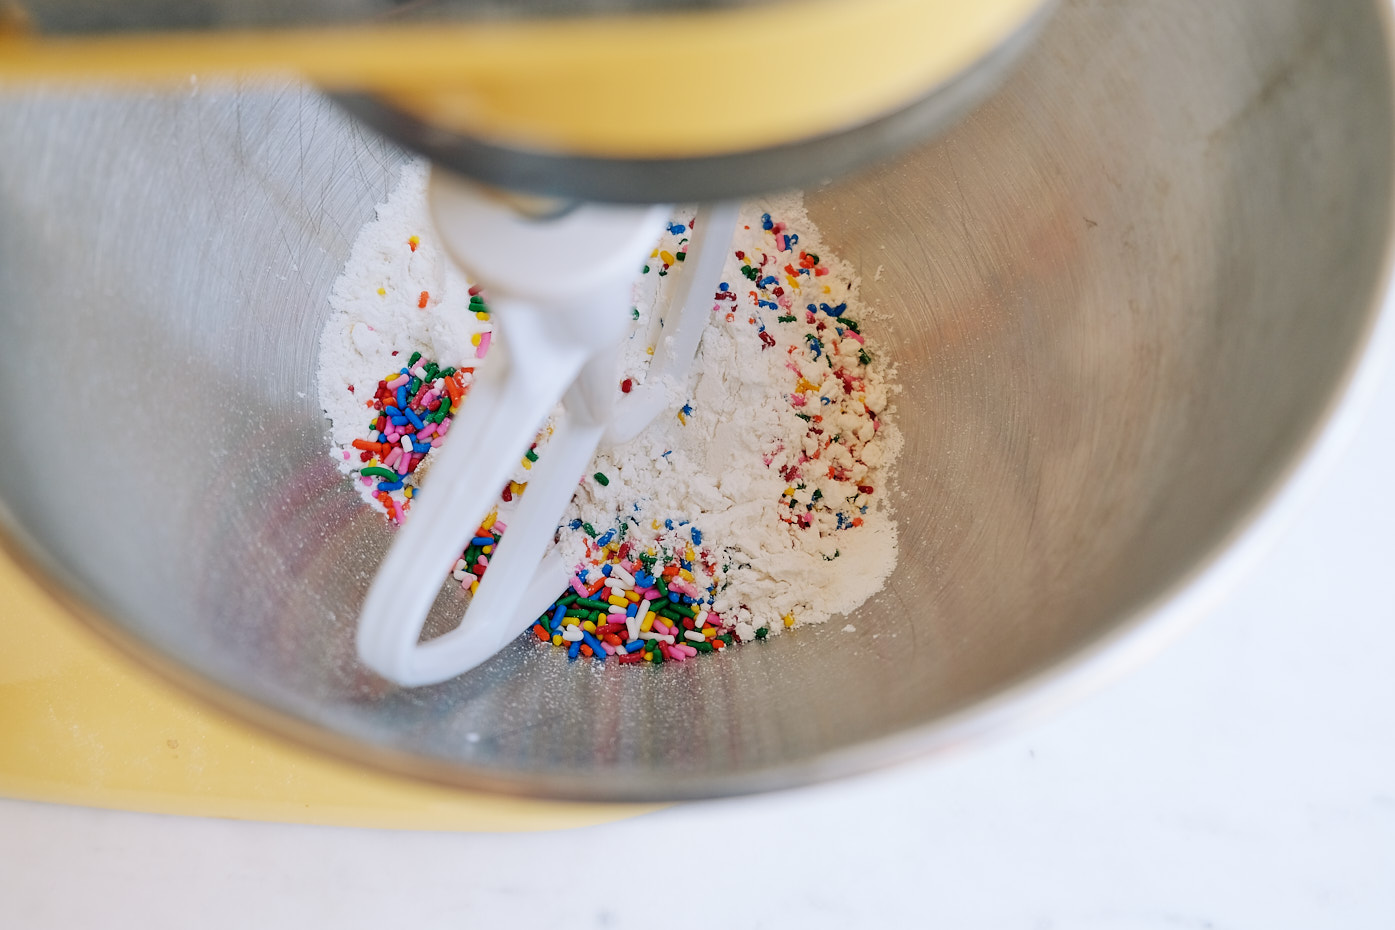
- Combine the sugars, flour, powder, salt and sprinkles in a mixer with the paddle attachment. Mix on low speed until combined.
- Add the oil and vanilla and mix with the paddle. It will form a large soft dough, then start to separate into smaller clusters. Once it’s forming the little round clusters, you can stop.
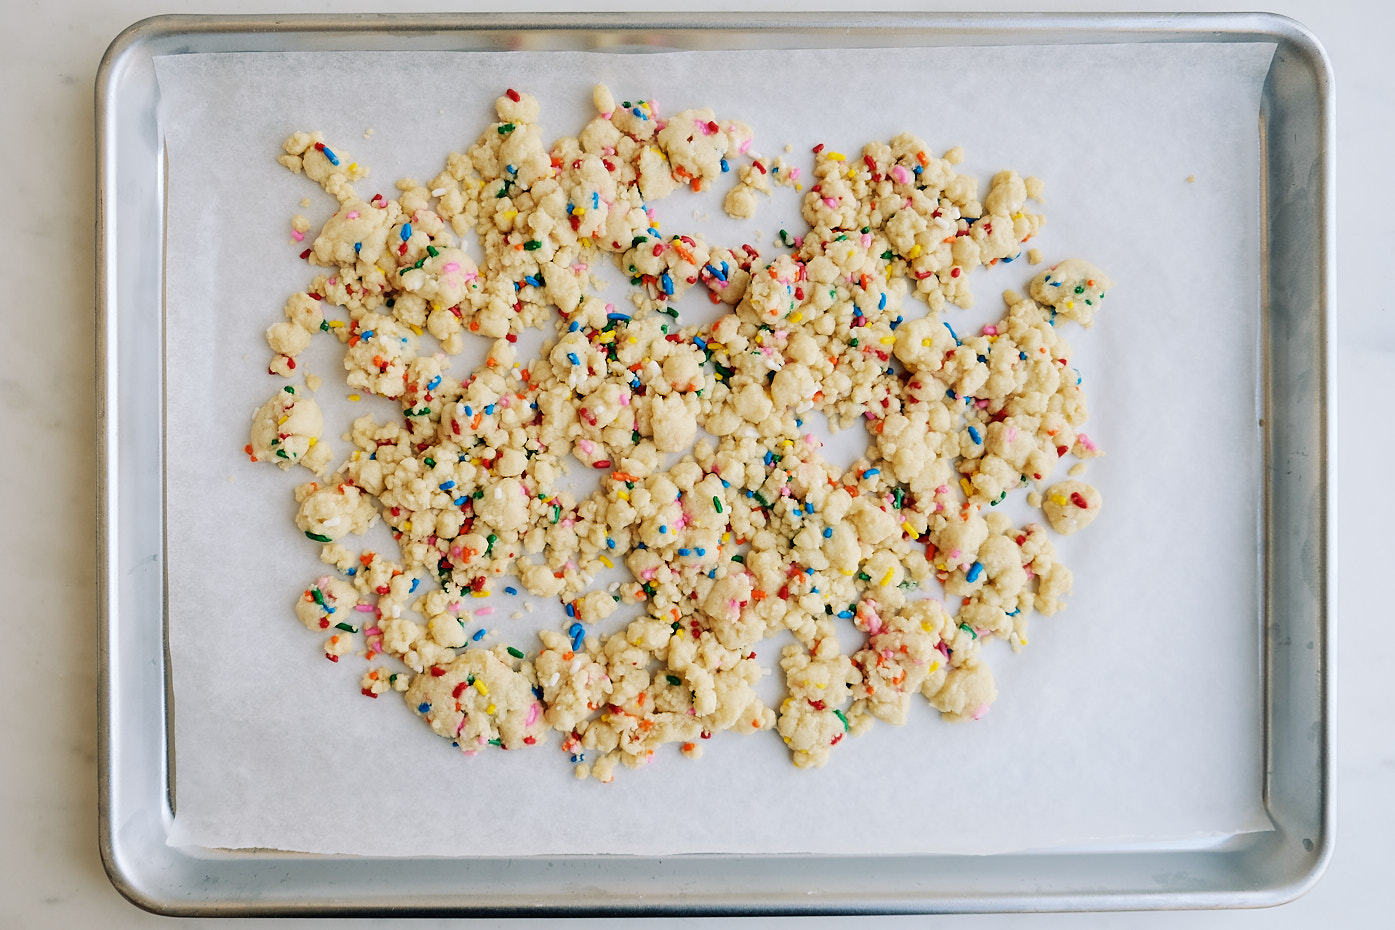
- Bake on a parchment lined baking sheet for 15 minutes until golden brown.
- Cool, then break into chunks and store in an airtight container.

- Category: Dessert
- Method: Baked
- Cuisine: American
Keywords: dairy-free cake crumbs,
Milk Bar Birthday Cake–#3 The Cake Frosting Layer
-
Cook Time: 10
-
Total Time: 10
-
Yield: 2 cups
- Diet: Vegan
Description
This frosting tastes just like the tubs of frosting from the grocery store…sweet, tart, a little salty. I suppose you could skip the glucose syrup or citric acid, but the weird ingredients are what make this fun.
Ingredients
- 8 tablespoons dairy-free margarine
- 1/4 cup shortening
- 1/4 cup dairy-free cream cheese
- 1 Tablespoon glucose syrup
- 1 Tablespoon corn syrup
- 1 1/2 cups powdered sugar
- 1/2 teaspoon kosher salt
- pinch of baking powder
- pinch of citric acid
- 1 T. clear vanilla extract
Instructions
- Beat the margarine, shortening, and cream cheese together in a mixing bowl with the paddle attachment until creamy.
- Beat in the glucose syrup and corn syrup until smooth.
- Add the powdered sugar, salt, baking powder, citric acid and vanilla extract.
- Mix until creamy and fluffy. If it seems really runny, you can add a little more powdered sugar.
- Store refrigerated for a week.


- Category: Dessert
- Method: Mixed
- Cuisine: American
Keywords: vegan cake frosting, vegan cream cheese frosting
Milk Bar Birthday Cake–#4 The Cake Soak Layer
-
Cook Time: 5
-
Total Time: 5
-
Yield: 1/4 cup
- Diet: Vegan
Description
This simple vanilla milk cake soak covers a mulititude of sins. If your cake is too dry or crumbly, or falls apart during the build…the cake soak puts it all back together.
Ingredients
- 1/4 cup dairy-free milk
- 1 teaspoon clear vanilla extract
Instructions
- Mix the milk and vanilla together in a small bowl. Store refrigerated until you build the cake.
- Category: Dessert
- Method: Mixed
- Cuisine: American
The post Milk Bar Birthday Cake appeared first on Speedbump Kitchen.
Hot Cross Buns 8 Apr 2020 12:04 PM (5 years ago)
First off, I don’t even know what to say, other than…the world is upside down. Kids have been home for 3 weeks now, school was just canceled for the rest of the year. I’m obviously still going to work, caring for kids. Babies are being born, kids still need their immunizations, but the majority of my visits are now telemedicine.
Thankfully, some local factories donated face masks to our office. I don’t know what we’d do otherwise, we can’t even order masks from our medical suppliers. It’s just so crazy, everywhere.
It’s Holy Week in lockdown, without services to attend, just adding to how odd this whole situation is. Just…keep…swimming, right?
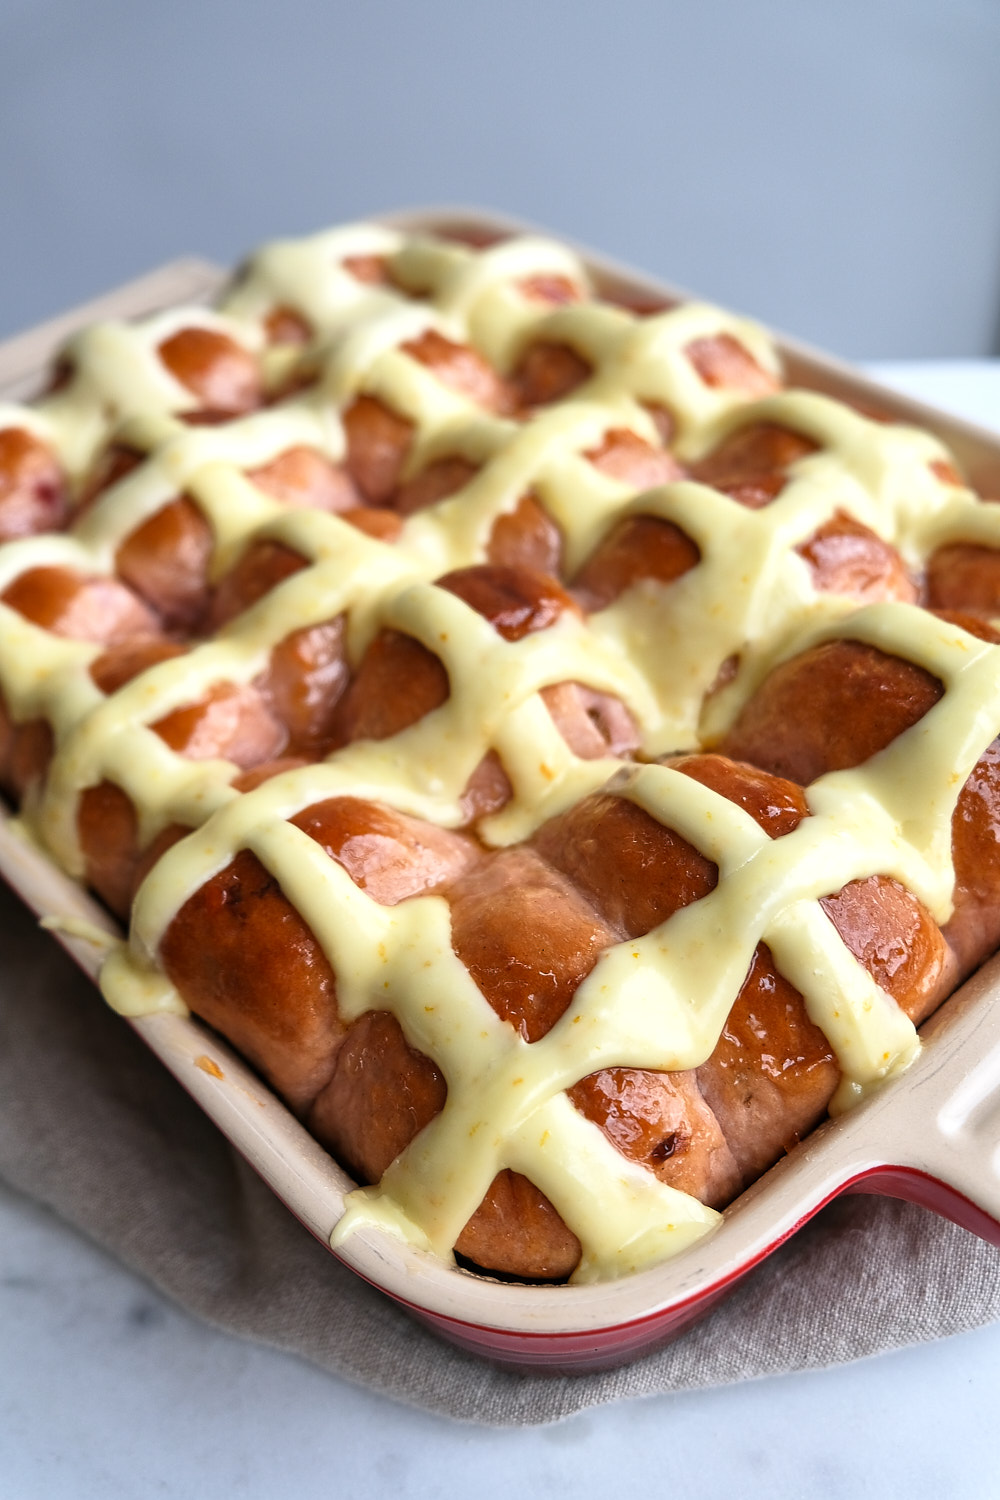
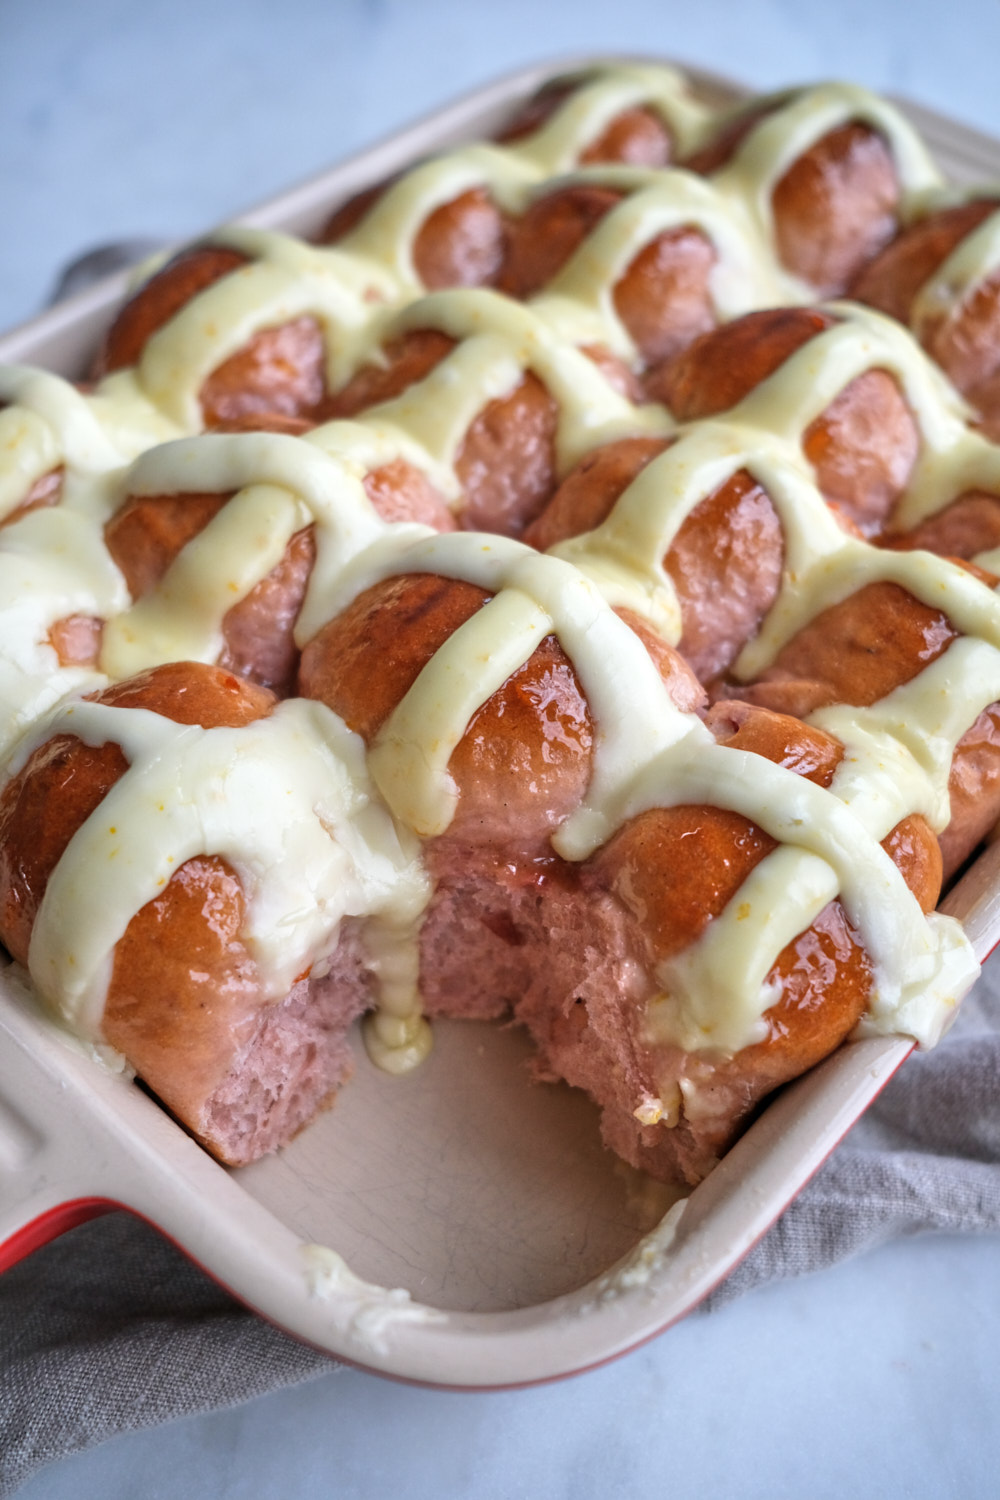
Anyway, today I taught kid #2 how to make our egg-free, dairy-free hot cross buns and she did a really good job.
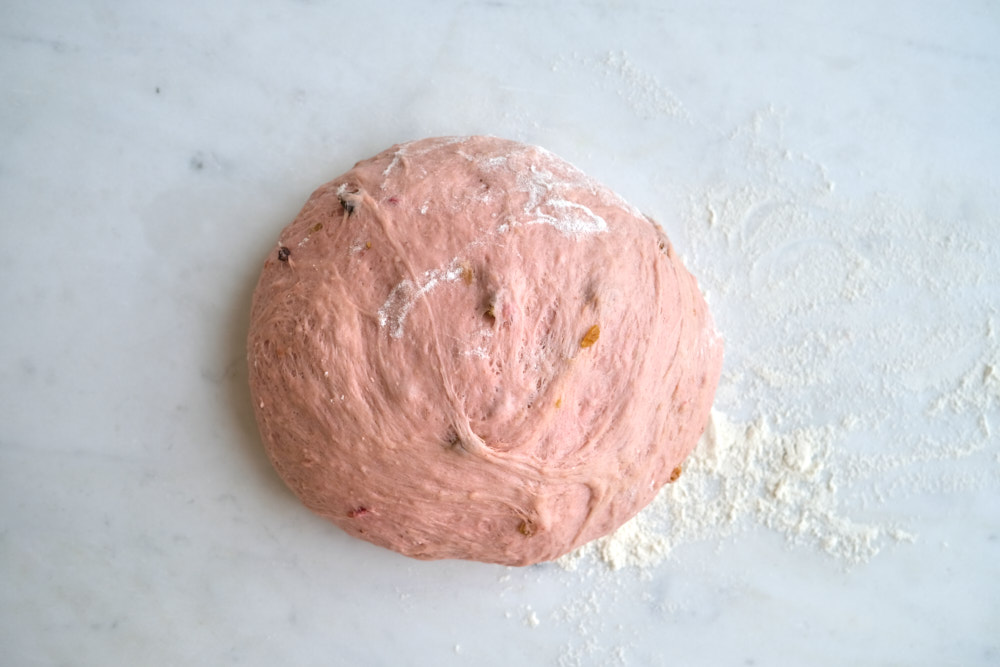
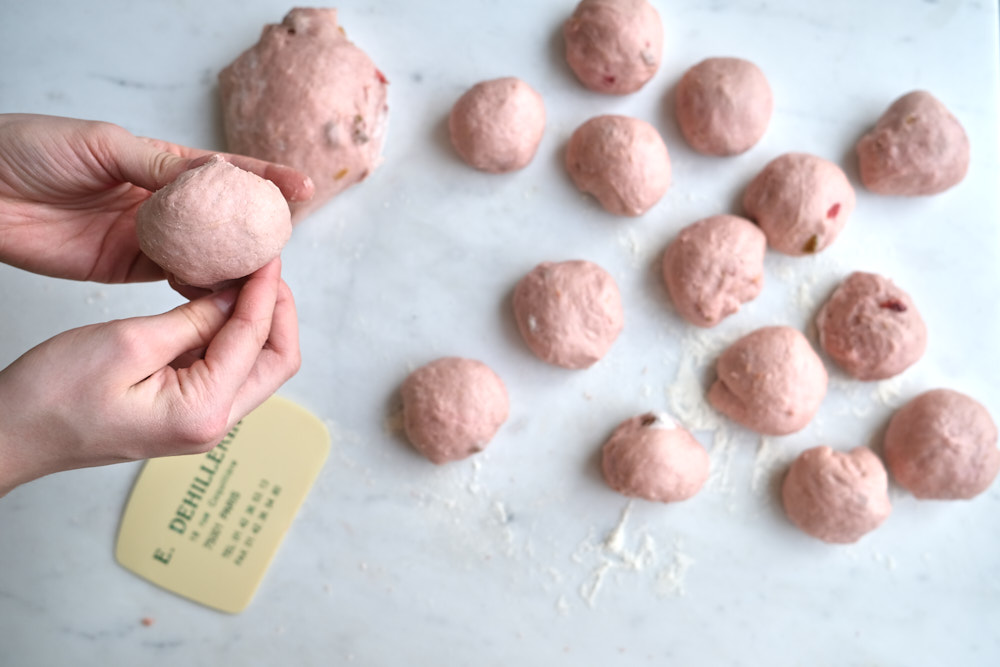

My original recipe uses currants and maraschino cherries instead of candied citron. The pantry was little bare today, and I didn’t want to brave the grocery store, so I just used golden raisins, the last of the maraschino cherries, and a few frozen cherries. It still worked out fine. A little juice from the cherries gives the dough a light pink color.
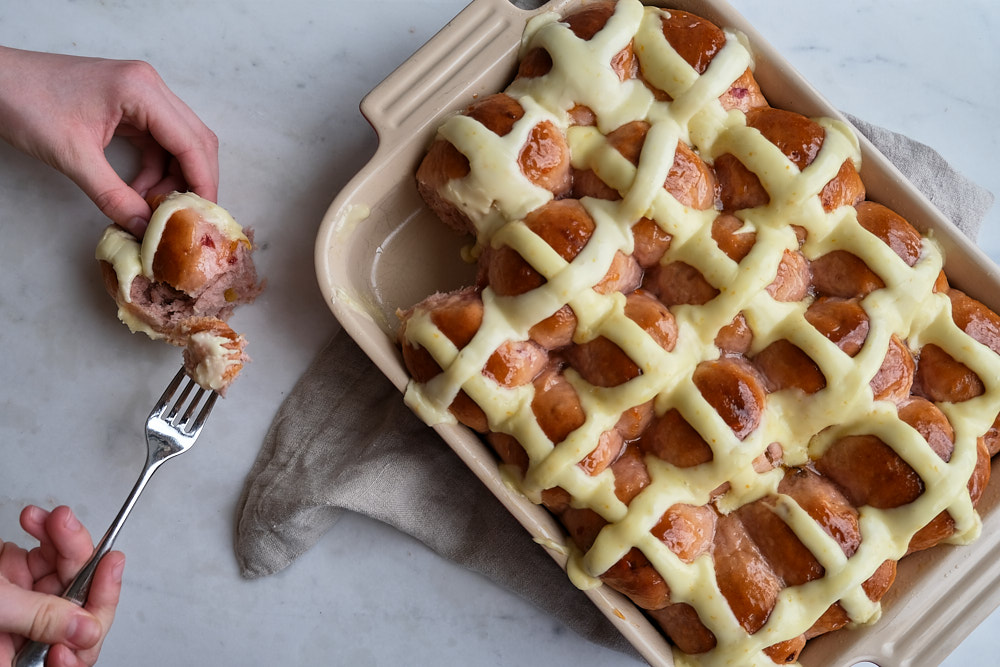
Of course, they were devoured immediately, so if you plan on having these for Easter Morning, you’ll have to hide them from the homebound hungry hordes!
We have other Easter traditions to fill this week, homemade Cadbury Cream Eggs and Carrot Cupcakes, so even if we don’t get to making another batch, it will be ok.
Really, everyone, it will be ok. Happy Easter!
Print
Hot Cross Buns
-
Prep Time: 4 hours
-
Cook Time: 30 minutes
-
Total Time: 4 hours 30 minutes
-
Yield: 20 rolls
Description
These egg-free and dairy-free hot cross buns are traditional for Easter morning. They’re really good, so good luck keeping them safe until then.
Ingredients
Dough
- 4 1/2 cups flour
- 1/2 cup white sugar
- 1/2 cup potato flakes (instant potatoes)
- 1 T. yeast
- 2 t. regular table salt
- 1/2 teaspoon cinnamon
- 1/4 teaspoon cardamom
- 3 T maraschino cherry juice plus enough warm water to equal 1 3/4 cups liquid
- 6 T. dairy-free margarine or shortening at room temp
- 1/4 cup currants
- 1/4 cup chopped maraschino cherries
Glaze
- 1/4 cup jam (peach, apricot or orange marmalade) warmed
Icing
- 1 1/2 cups powdered sugar
- 2 –3 T. fresh squeezed orange juice
- 1/4 t. orange zest
Instructions
- In a stand mixer fitted with the dough hook, add the flour, sugar, potato flakes, yeast, salt, cinnamon, cardamom, margarine, and the cherry water.
- Knead on low until a nice little dough develops, about 3-4 minutes.
- Add in the currants and cherries. Keep kneading for a few more minutes until the dough is soft and well blended.
- Cover bowl with a towel and let dough rise in a warm spot for 2 hours.
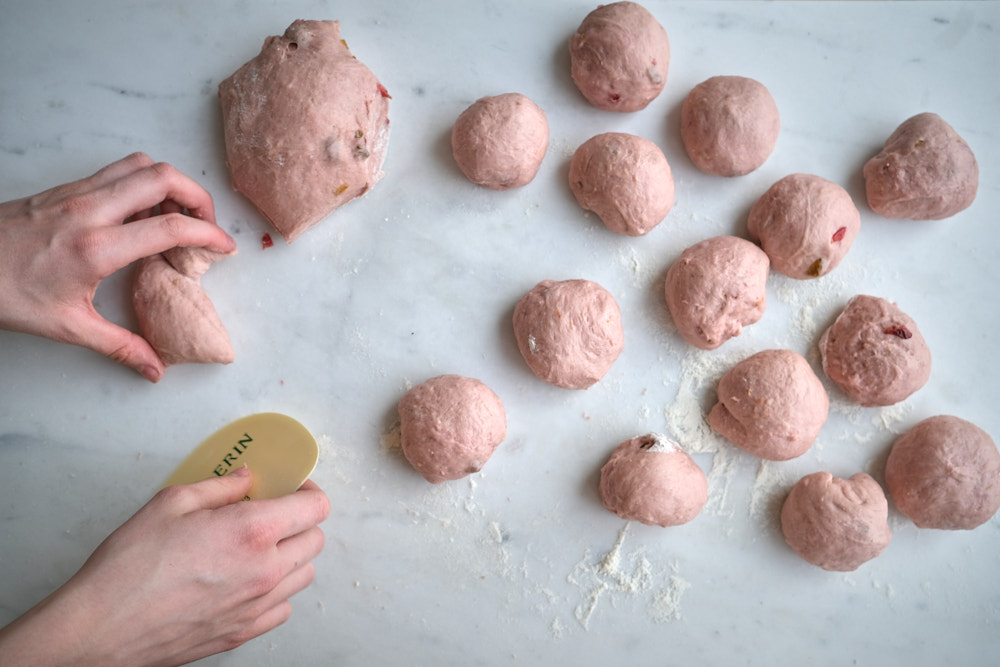
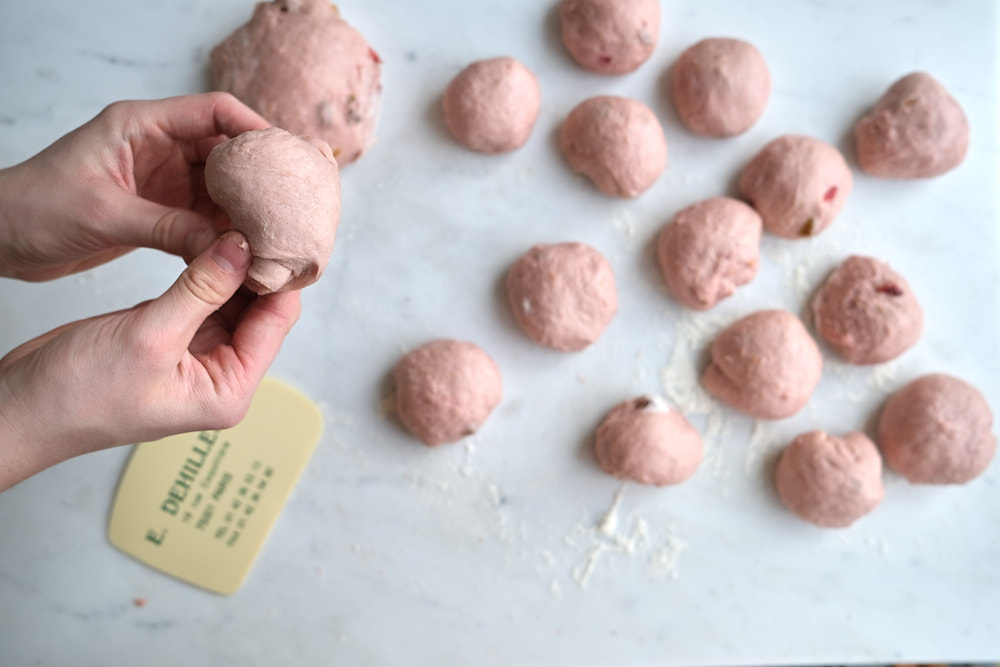
- Gently deflate the dough, pinch off little golf-ball sized balls of dough and shape into rolls.
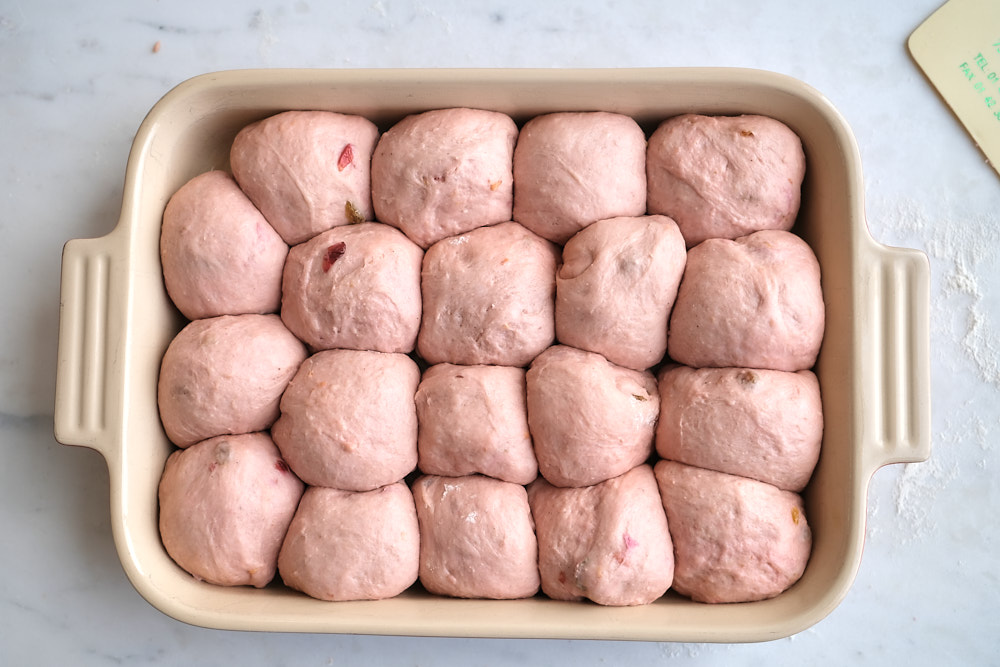
- Place on a parchment lined baking sheet or greased Pyrex 9 x 13, just barely touching. Cover and let rise for 1 1/2 hours.
- Bake at 350 for 25-30 minutes, until they are golden brown.
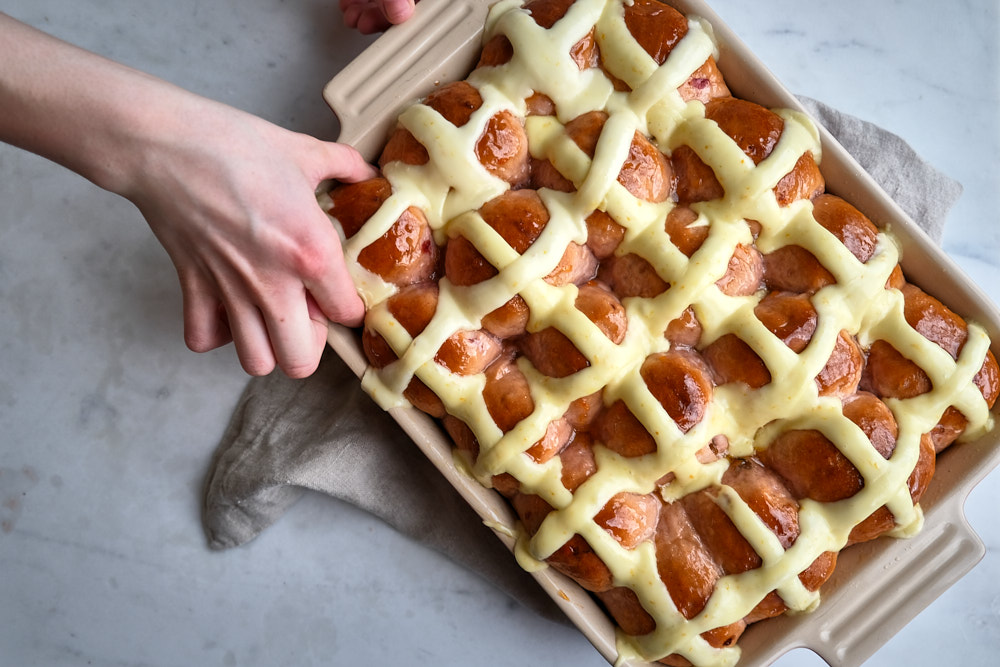
- While the rolls are still piping hot, brush with the warmed jam.
- Set the rolls, parchment and all, on rack to cool.
- While the rolls cool, make the icing. Whisk the powdered sugar, orange zest and orange juice together. Go easy on the juice, you want this to be pretty thick, because it melts on the warm buns. Put icing in a pastry bag, or a ziplock with the corner snipped off.
- When the rolls are pretty much cooled, pipe the crosses on the buns and enjoy!
Notes
See my post on dairy-free butter alternatives if you need sources.
- Category: bread
- Method: baked
- Cuisine: U.K.
Keywords: dairy free rolls, vegan hot cross buns, easter allergy foods
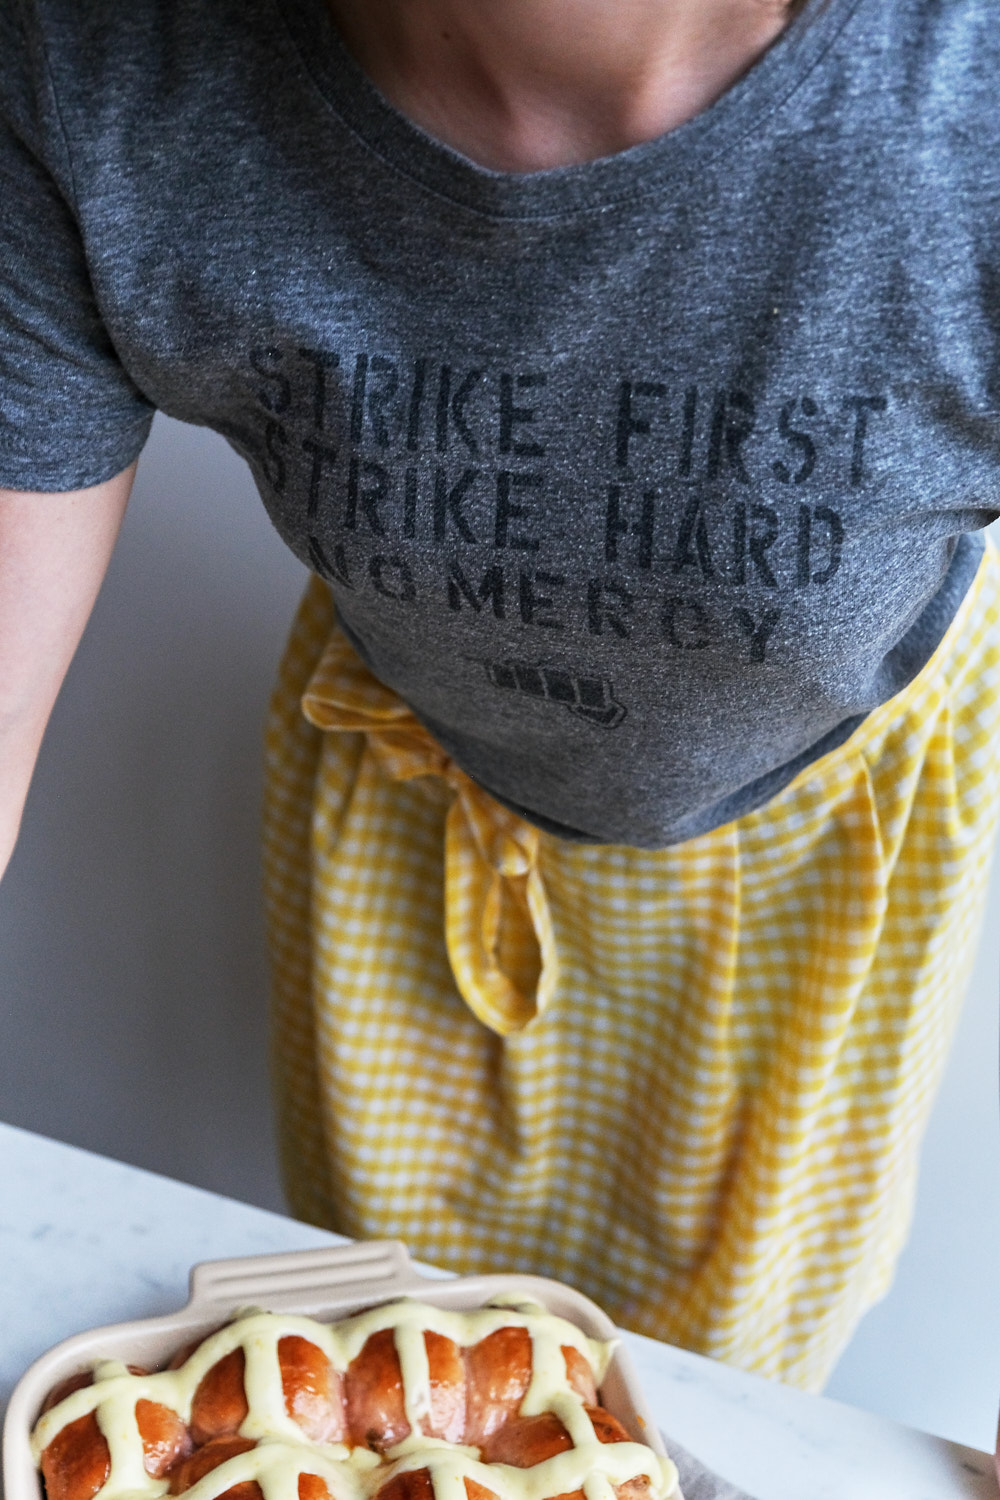
Not exactly a t-shirt to wear on Easter, but it worked for today.
The post Hot Cross Buns appeared first on Speedbump Kitchen.
Irish Soda Bread 10 Mar 2020 5:57 PM (5 years ago)
The first time I had Irish soda bread was as a 4th year medical student at Mott Children’s Hospital on a dreary Saturday morning in March. I was on my sub-internship in pediatrics. I’d been up all night with really sick kids, completely over my head, running scut work to (hopefully) help the busy pediatric residents and fellows while managing my very small panel of relatively simple patients.
I was at the end medical school, months from being a pediatric intern myself. The more I learned, the more I realized I didn’t know. There was so much to know. I was begging the morning to come while subsisting on hospital-issue saltines, peanut butter, and coffee.
The morning came, and so did our attending physician, a wonderful pediatric rheumatologist with a basket full of hot bread, triple citrus marmalade, and orange juice. She was like a personification of Mrs. Beaver from C.S. Lewis and her bread was pretty much heaven.
All my anxieties of the night before melted away. We had done our jobs well, the children were all well cared for. I could see the light at the end of the tunnel. I still had three more years of pediatric residency ahead of me. Three more years of 80 hour weeks to learn about children before I’d be truly alone and caring for patients on my own. Until then, I’d be guided carefully by calm and confident attendings, like Barbara Adams. I wasn’t alone.
Many years later, I was baking through my Martha Stewart Baking Handbook and made Irish soda bread for the first time. I was instantly transported back to that post-call morning and Dr. Adam’s heavenly bread.
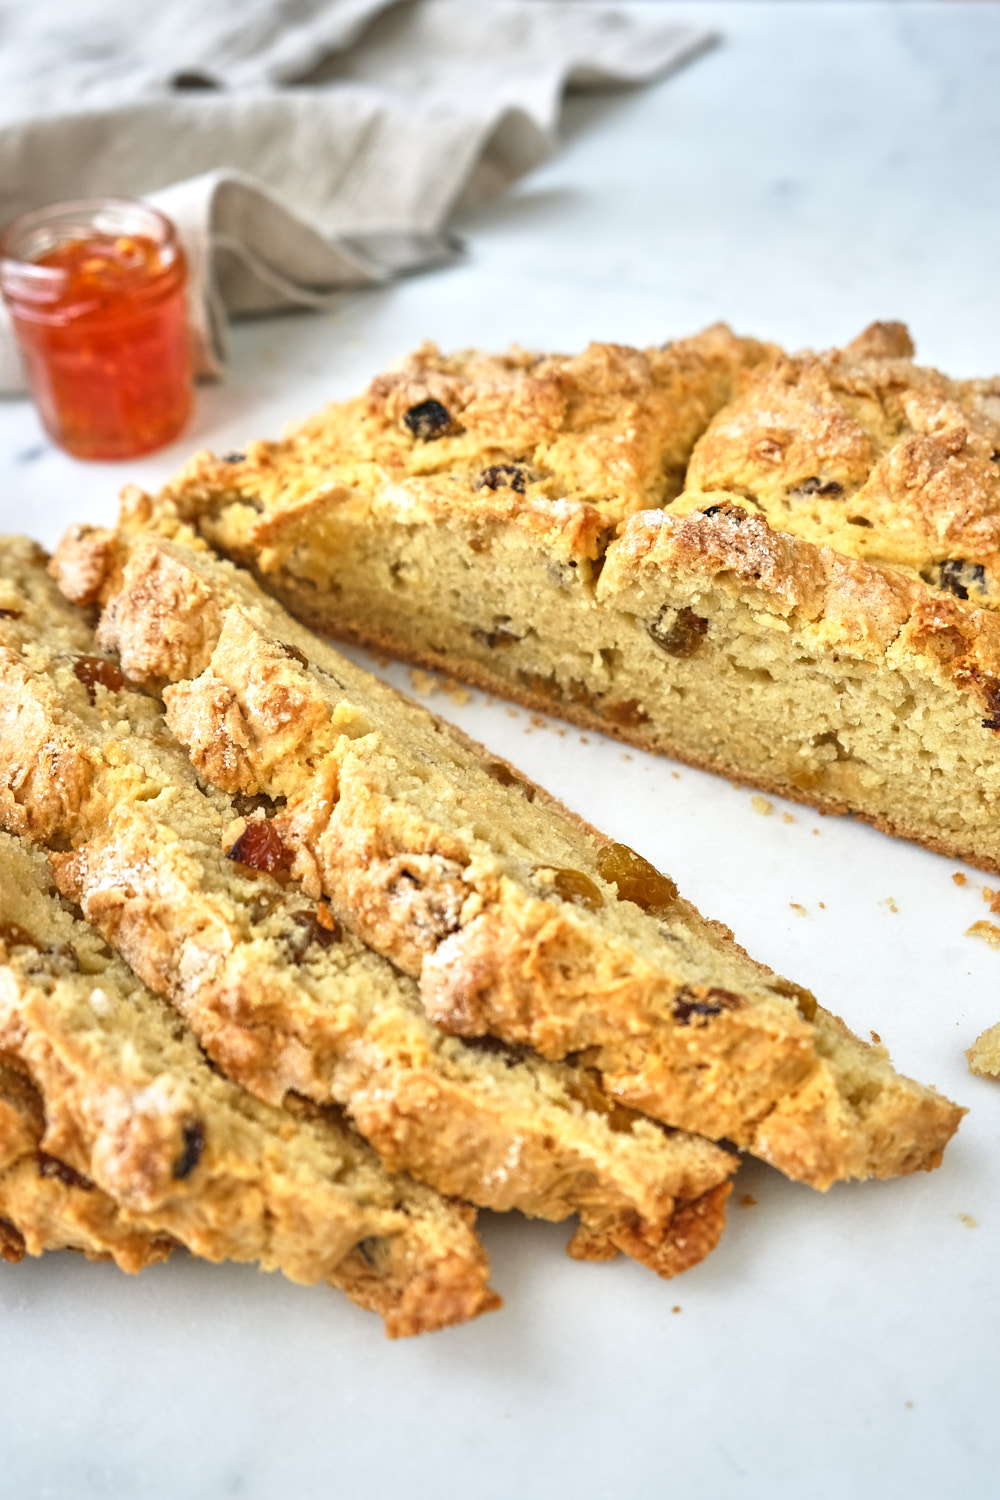
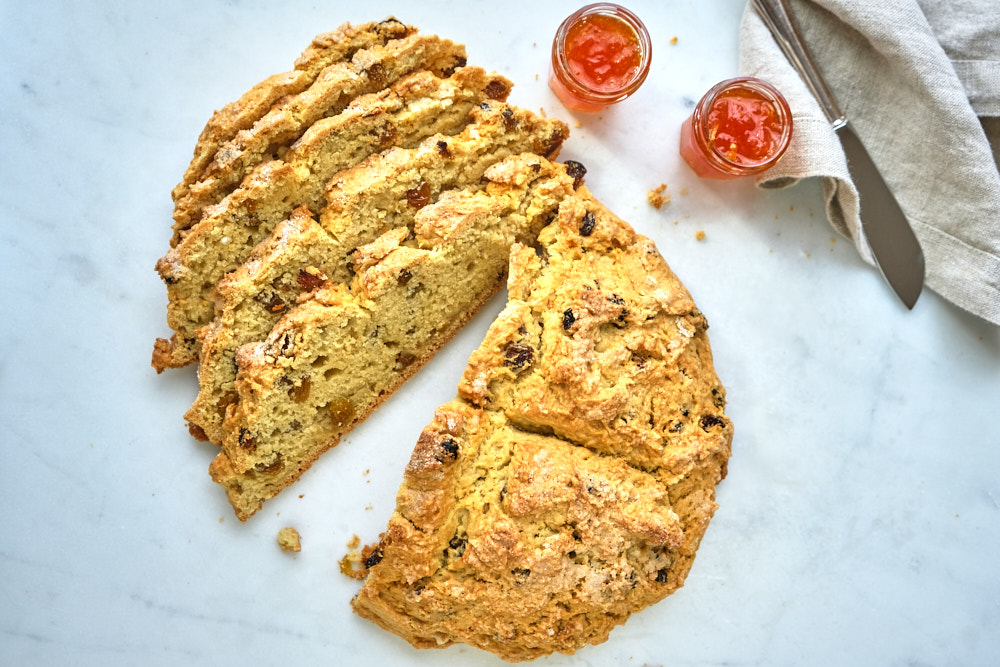
Irish soda bread is a “quick bread”, meaning it uses baking powder and soda to raise, rather than yeast, and doesn’t need extra time to rise. It comes together in a similar fashion to scones.
This version is a touch sweet with the addition of golden raisins. I think this is technically called “Spotted Dog”, but that’s just a bit odd, so we’ll stick with Irish soda bread.
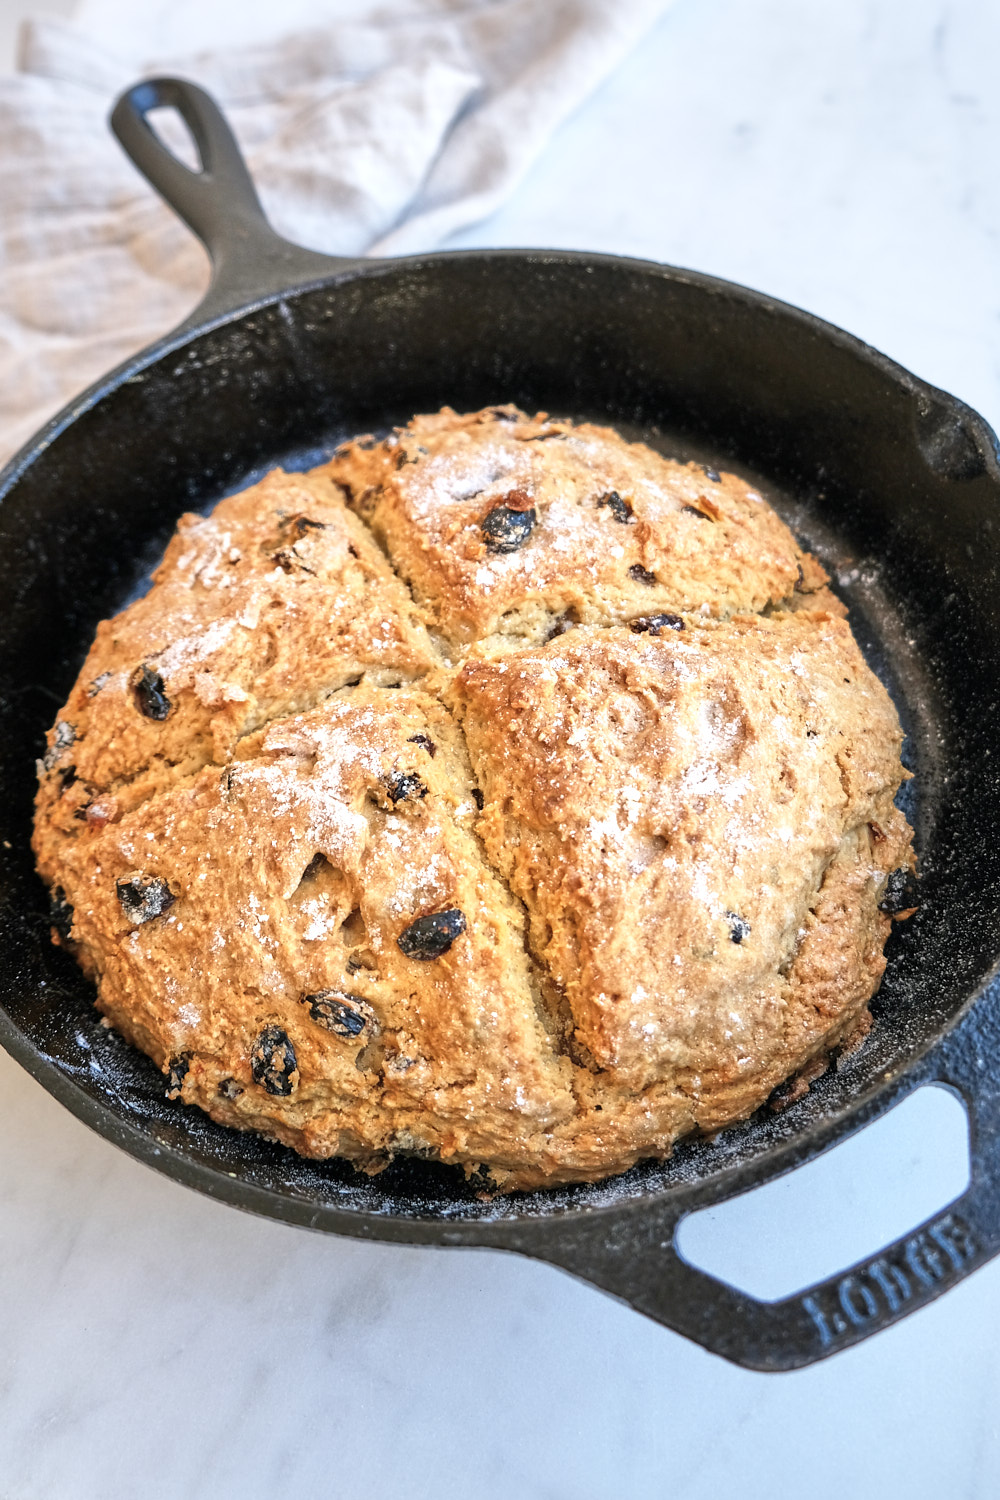
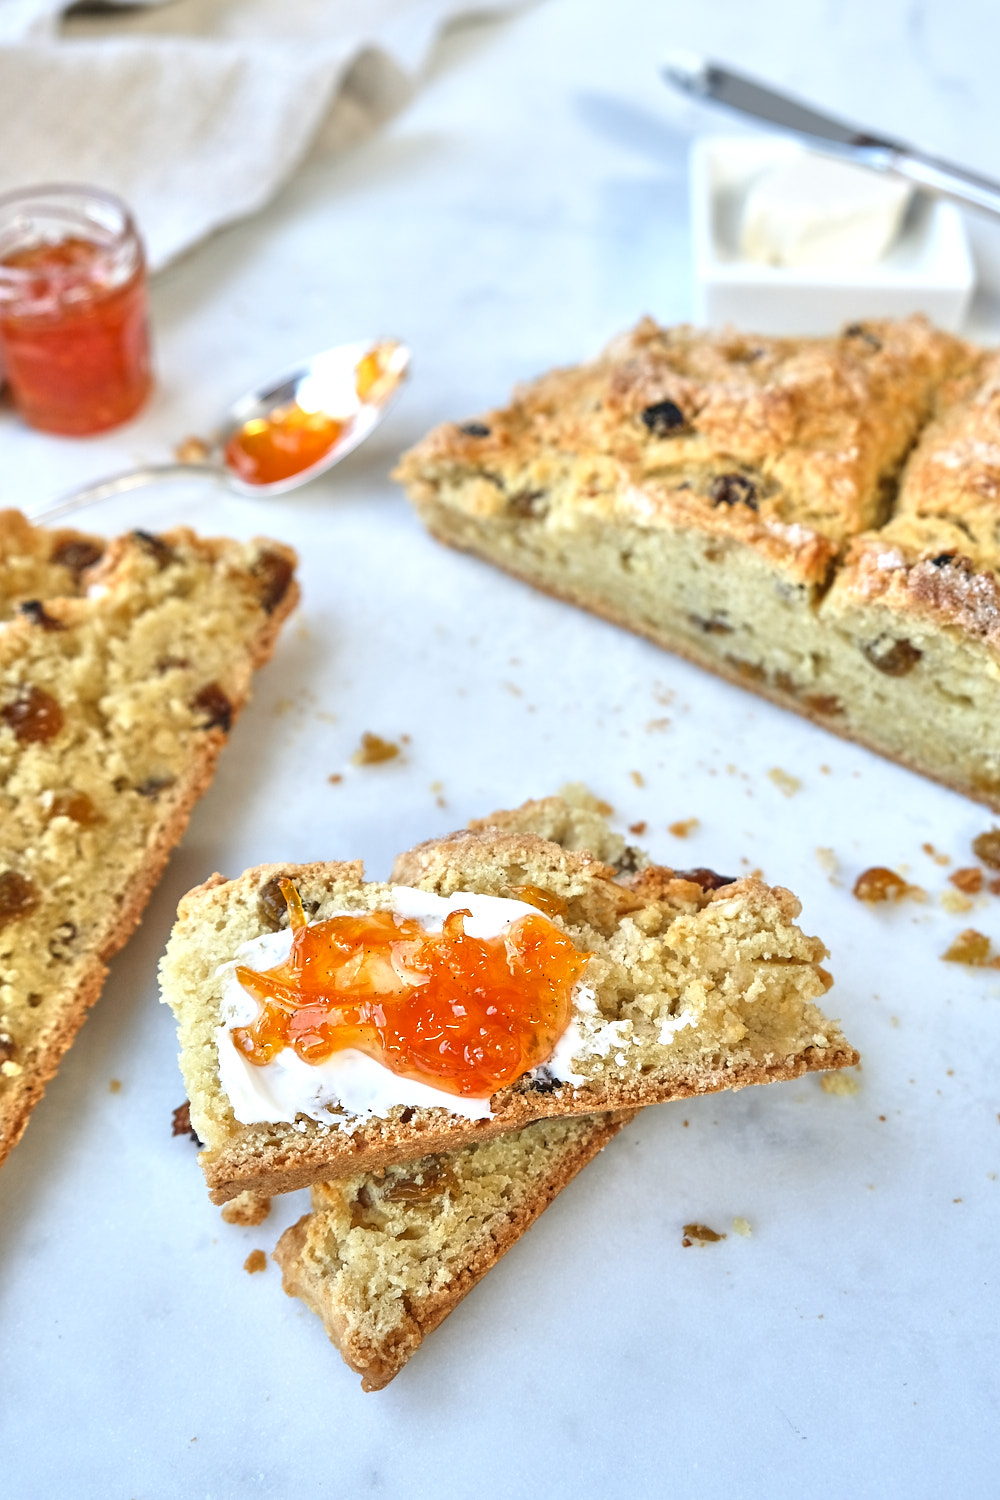
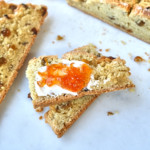
Regardless of technicalities…Irish Soda Bread or Spotted Dog…this warm loaf goes well with marmalade and tea. (Gray Michigan March and post-call pediatric residents are optional.) Enjoy!

Irish Soda Bread
-
Prep Time: 20 minutes
-
Cook Time: 40 minutes
-
Total Time: 1 hour
-
Yield: 1 loaf
Description
This dairy-free and egg-free Irish soda bread is a slightly sweet quick bread that comes together in snap.
Ingredients
- 2 1/2 cups flour
- 1/4 cup sugar
- 1 teaspoon baking powder
- 1/2 teaspoon baking soda
- 1/2 teaspoon salt
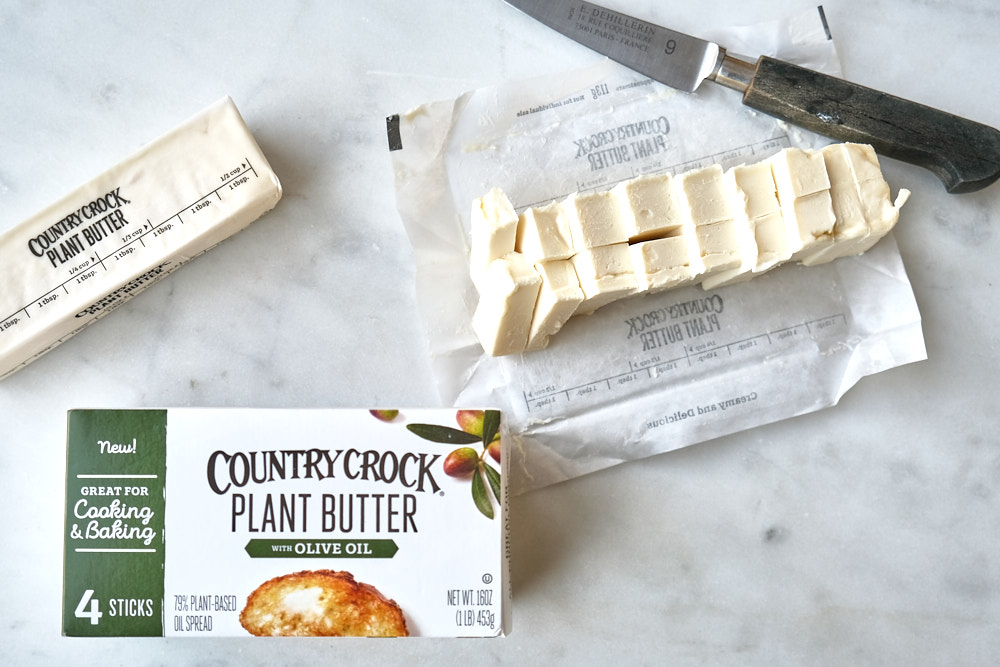
- 1/2 cup cold dairy-free margarine or shortening
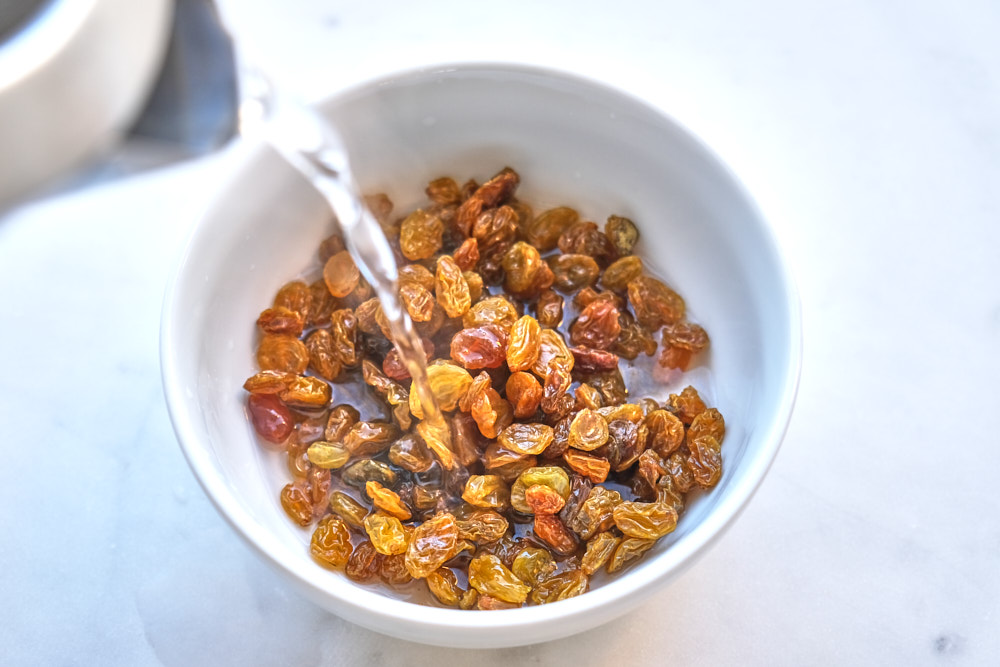
- 3/4 cup golden raisins, covered with boiling water
- 1 cup dairy-free milk + 1 teaspoon cider vinegar, set aside to thicken
Instructions
- Preheat oven to 375 and get some boiling water on the raisins.
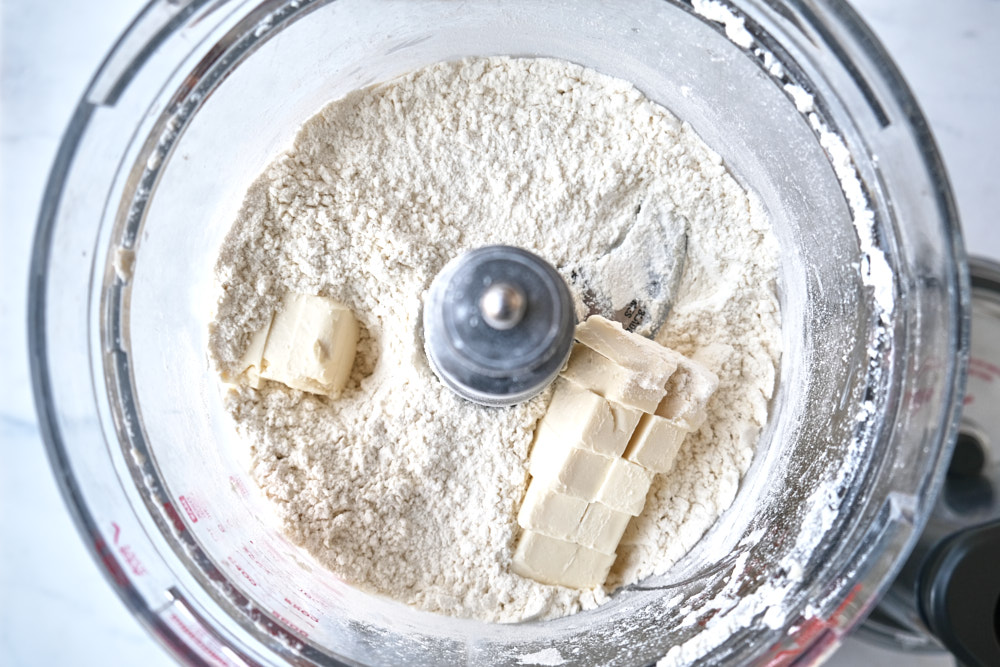
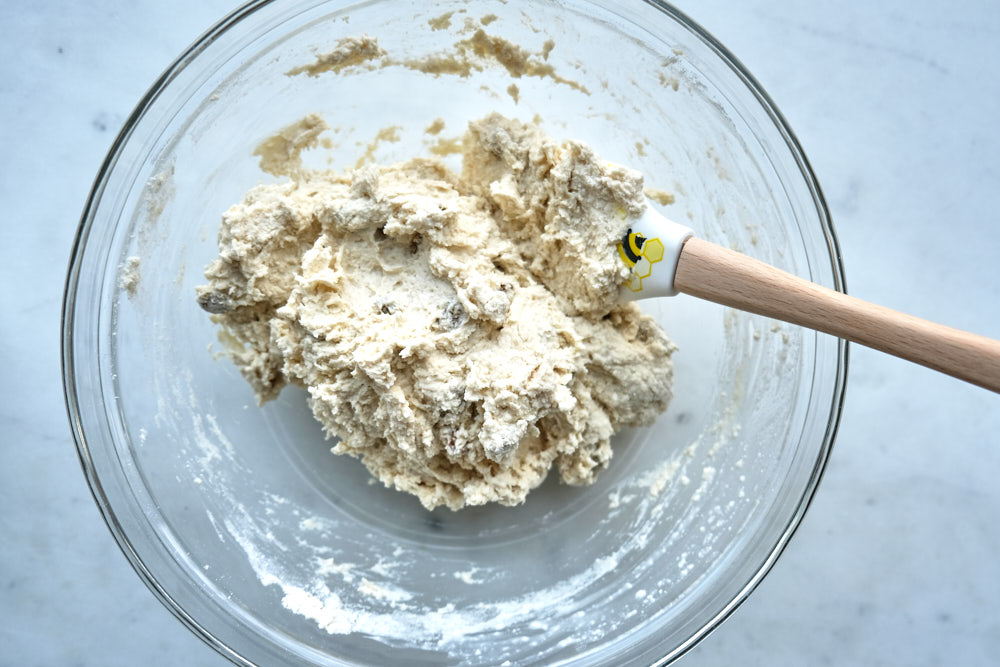
- In a food processor, add the dry ingredients to the bowl and pulse to mix. Then add the margarine and pulse until mixed well. (This can also be done by hand in a large mixing bowl with a pastry cutter).
- Dump the mixture into a large mixing bowl.
- Add the drained raisins, stir into the flour mixture, and then the thickened dairy-free milk. Blend carefully.
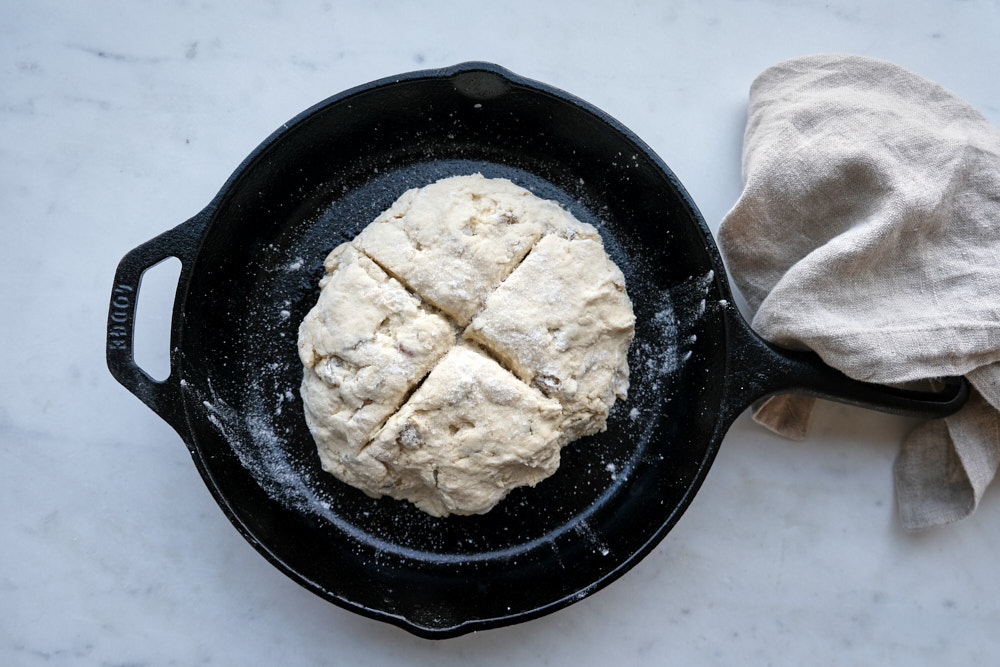
- Dump the dough on to a parchment-line baking sheet, or cast iron skillet. Shape into a mound, slash with an “X” in the top.
- Sprinkle with sugar, unless you’re feeling like a mean mom.
- Bake for 40 minutes, until golden brown on top, and an inserted knife comes out clean.
- Cool and enjoy! This is best on the first day, but still great toasted with marmalade on day 2.
Notes
I’ve fallen in love with Country Crock Plant Butter sticks, the olive oil variety is my favorite.
You can make a savory variety, by cutting out the sugar, and using fresh herbs like thyme, dill, parsley with a sprinkling of salt on top.
- Category: Bread
- Method: Baked
- Cuisine: Irish
Keywords: irish soda bread, spotted dog, vegan irish soda bread
Other Recipes You May Enjoy
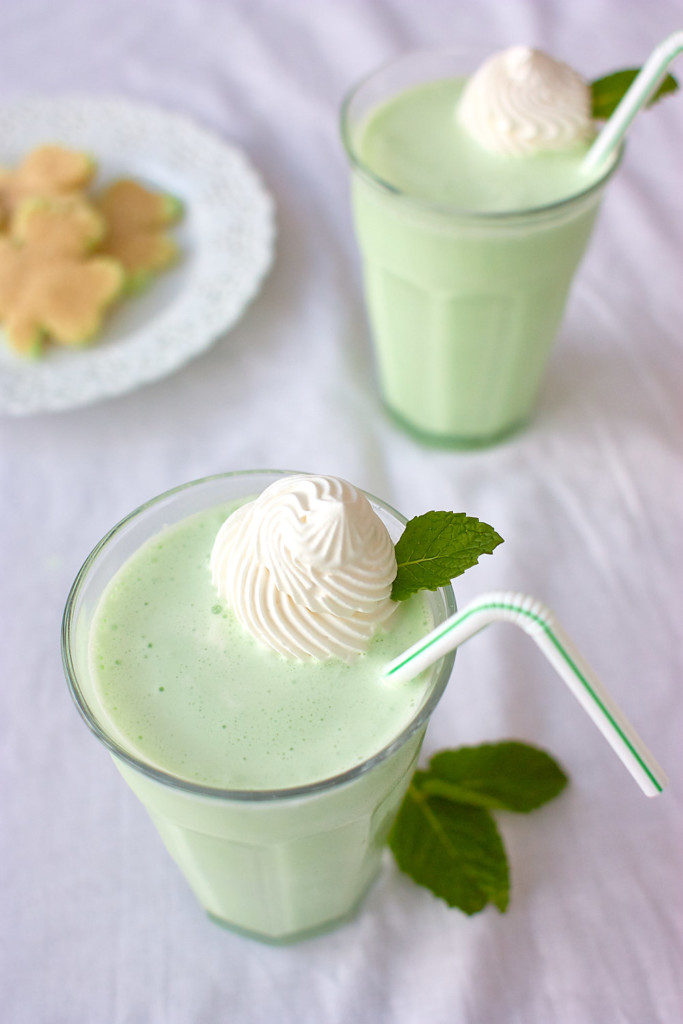
Shamrock Shakes
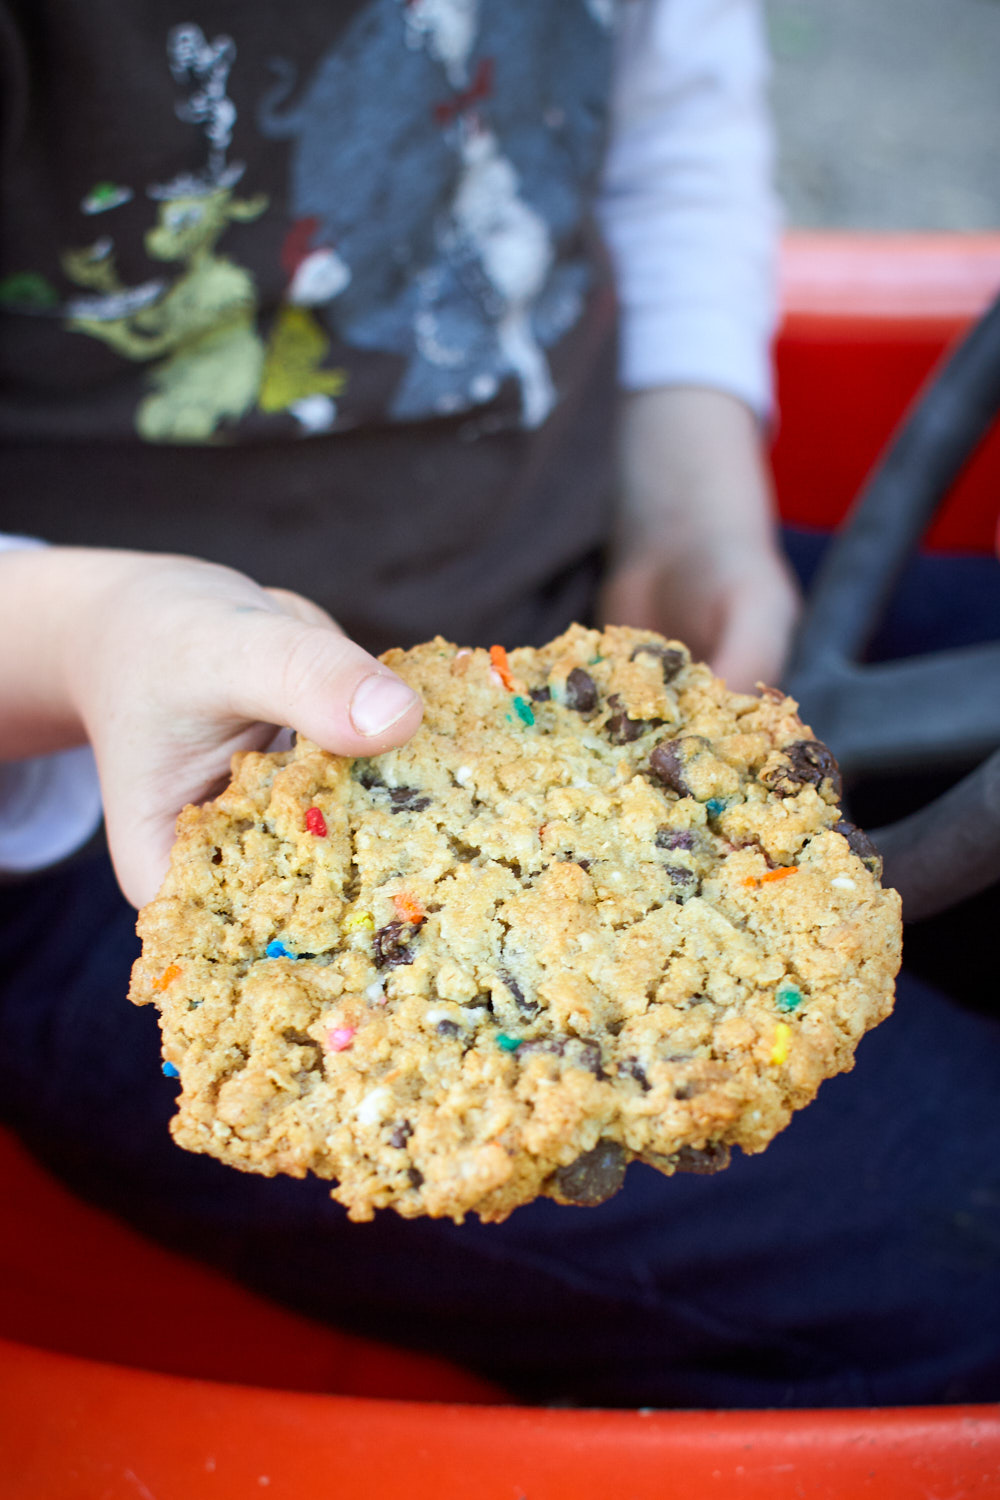
Monster Cookies
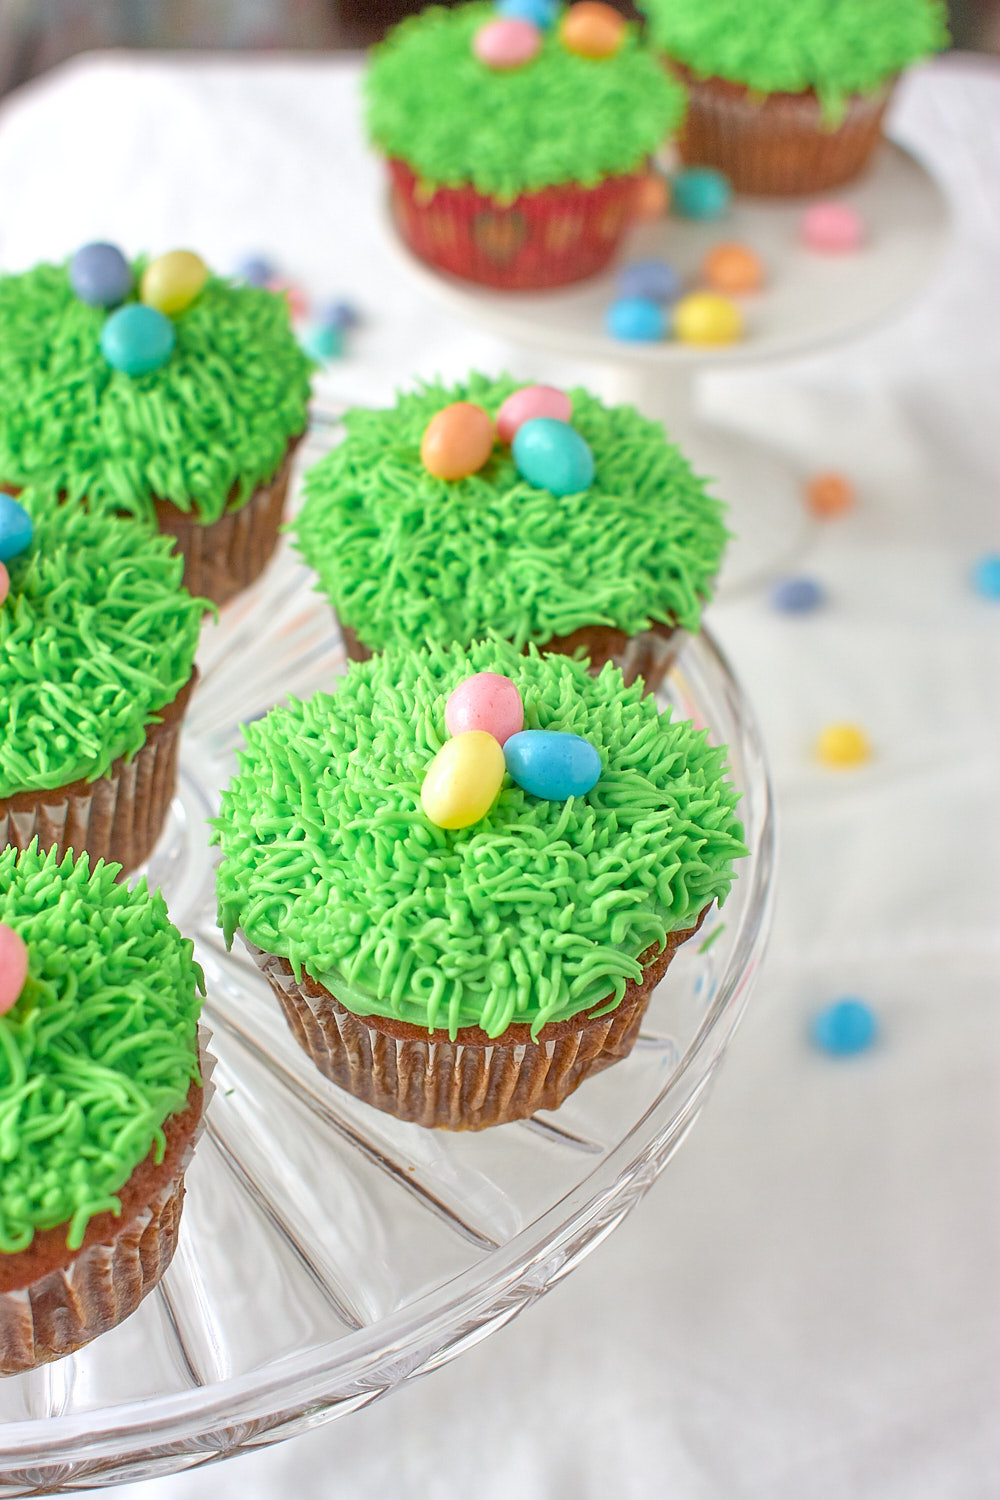
Spring Carrot Cupcakes
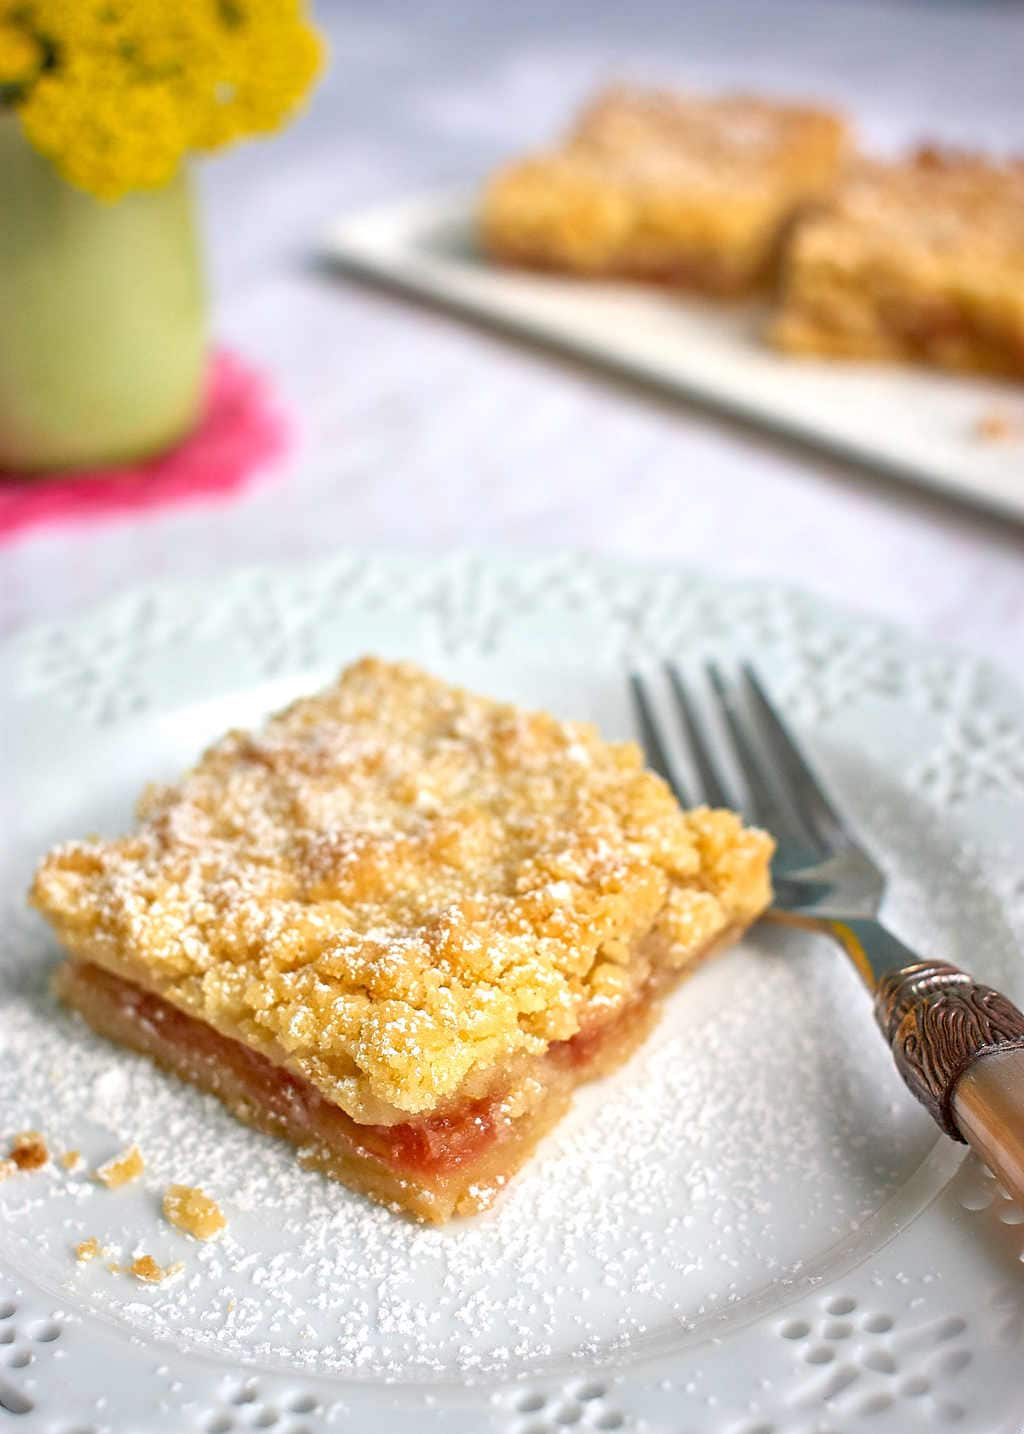
Rhubarb Shortbread
The post Irish Soda Bread appeared first on Speedbump Kitchen.
Chewy Whole Grain Energy Cookies 11 Feb 2020 3:35 PM (5 years ago)
Winter here in Michigan, there’s a volunteer-run indoor track season called the Michigan Indoor Track Series. Unlike high school athletic association regulated sports with all the rules we’ve become so accustomed to, MITS is pure running: any age kid from elementary to high school pays an entry fee, gets to compete in any event they want, wearing whatever they want…so long as it isn’t a school sports uniform. There’s a qualifying standard for the “state meet”. Run, jump, or throw that standard at any meet during the season, and you get to go to state. Simple.
It’s one of the coolest things I’ve watched. Without school uniforms to divide them, kids just mingle and meet each other. They try new events on a whim. Kids figure out what heat they should be in, based on a guess of how fast they run. They assemble relay teams on the fly, without regard to age or school or even knowing how fast their new friend is, just for the fun of passing the baton.
I can’t think of many things in my life that have become less regulated over time. School, parenting, home building, growing a garden, medicine, even food blogging–all choked under rules upon rules. Maybe that’s why I find MITS so beautiful.
Anyway, all that really has little to do with this recipe. We’re four paragraphs in, and I haven’t even mentioned the name of the recipe, and now I’ve torpedoed any hope that the Google Algorithm will rank this post. The only reason this story about MITS relates, is because I invented this recipe after a recent indoor track meet.
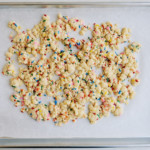
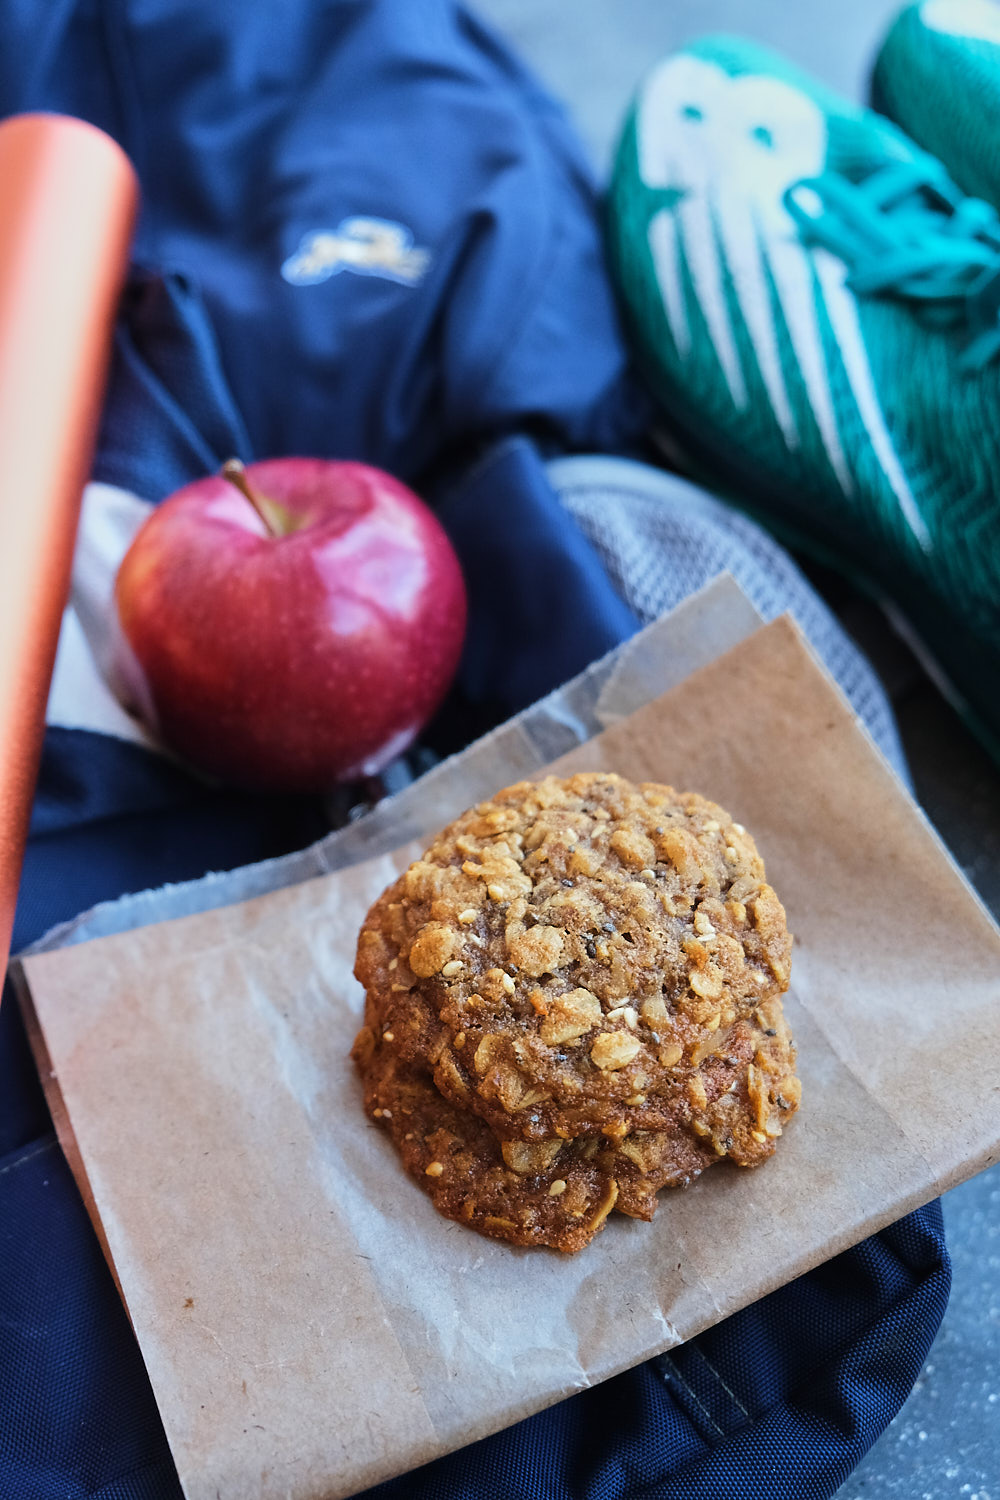
But here’s a teaser photo in case you haven’t “Jumped to Recipe” yet.
Now back to the backstory on the cookies.
It was after an indoor meet, my girls had raced the mile and a 4 x 200 relay (a motley bunch of distance girls trying their luck at a sprint, failing, but having a ball). The girls were doing some 800 repeats on the track to finish out the day while I chatted with the coach. My younger daughter came over to us, looking terrible.
Coach asked…um, when did you last eat? Apparently not since a banana at breakfast.
It was 3pm. She’d raced a mile, a 200, and three 800s on a banana.
Crying out loud, girl. So we fed her, and she perked right up.
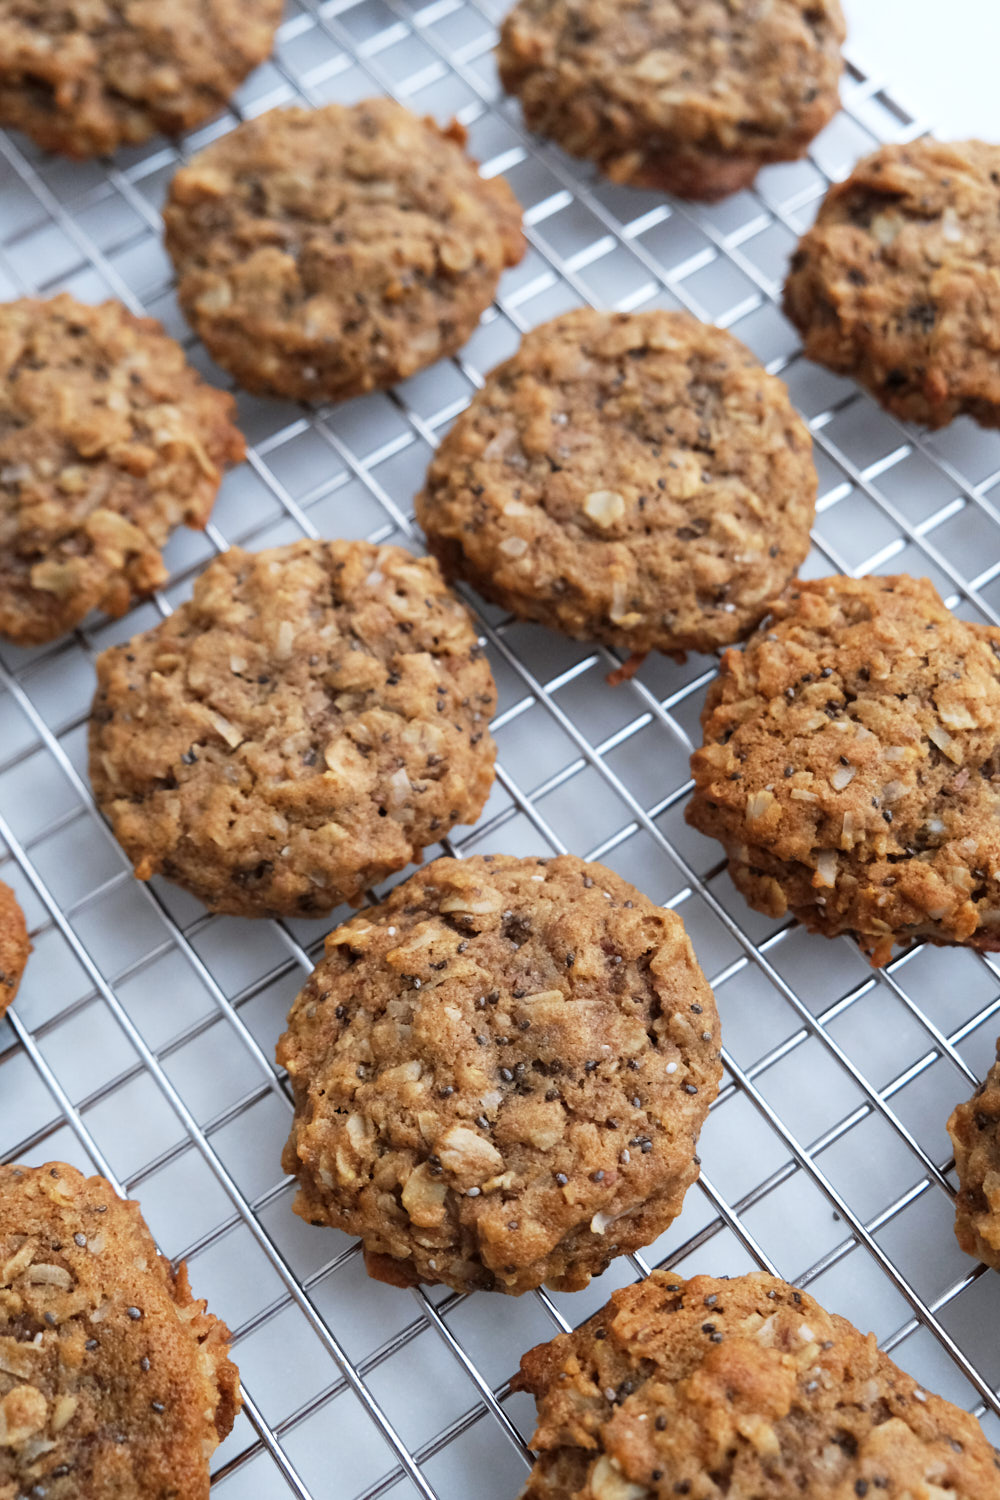
Feeding athletes is a colossal challenge with food allergies. All the “strong” foods we think of are off the table. No high fat yogurt, nuts, eggs, granola bars, protein bars. So out of that event, these Energy Cookies were born. They’re whole grain, dairy-free, egg-free, and nut-free. They freeze perfectly and can adapt easily with any additional dried fruit, seeds, or chocolate you’d like.
I suppose my vegan friends can substitute out the honey, but I had to use honey in this recipe. Because it’s special honey. It’s Bonnie’s honey from her happy bees.
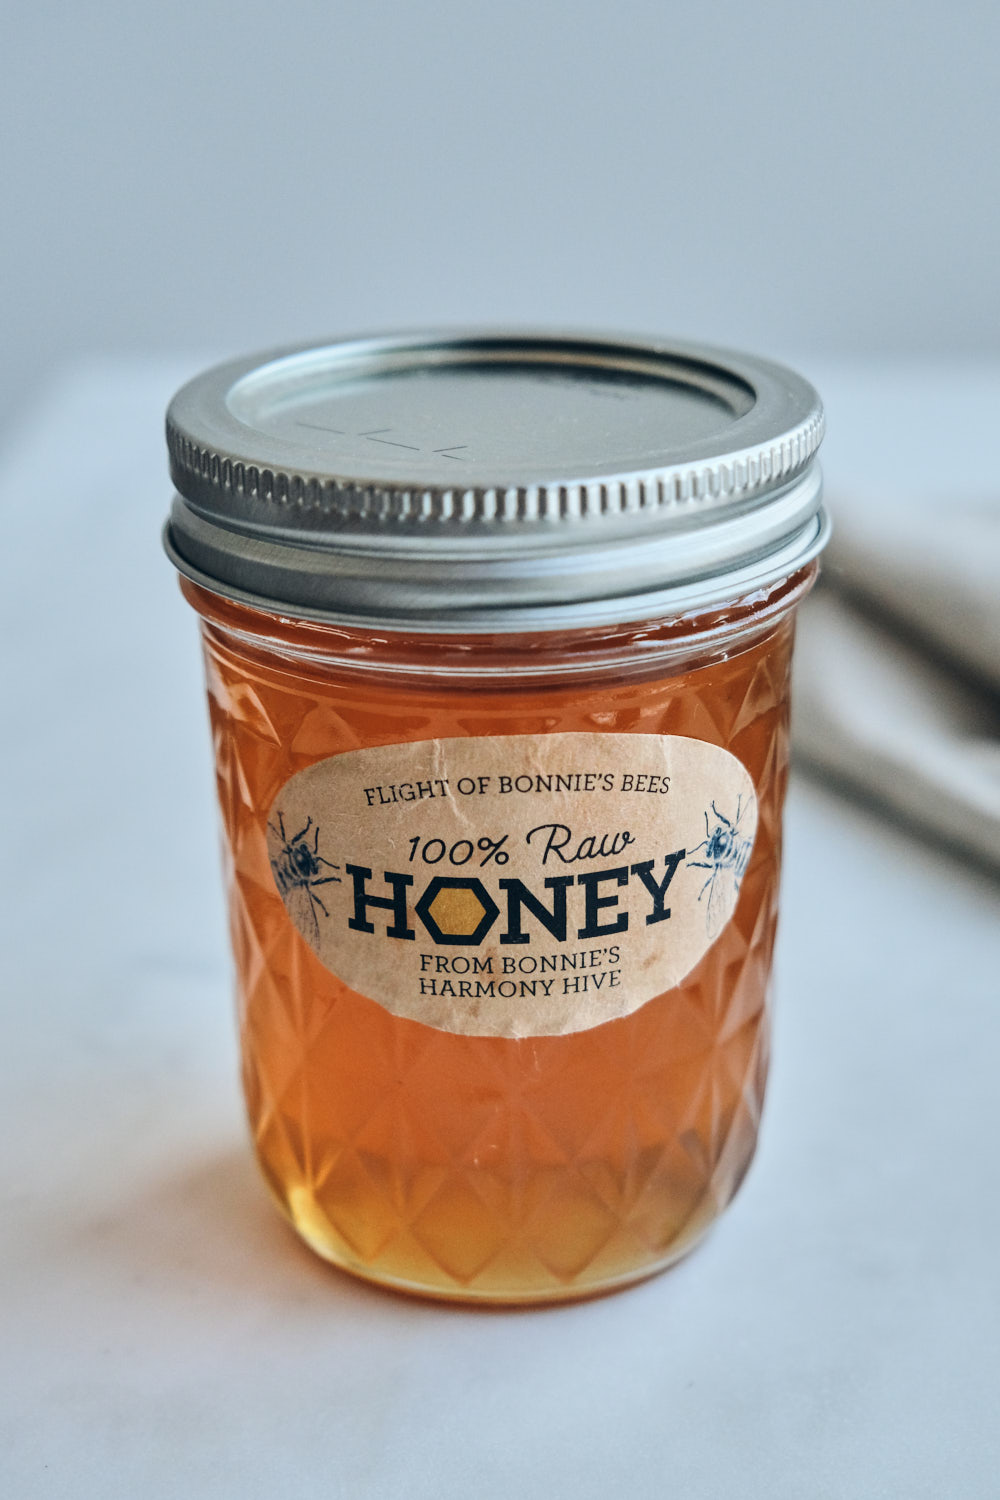
Bonnie is a nurse in our office, and she just doesn’t stop. She always says it like it is. She ran her first marathon at age 50. And then decided to take up beekeeping a few years ago. I challenge any vegan to find a sugar beet, corn kernel, rice grain, or sugar cane stalk more beloved and earth friendly than those bees. Honey from a friend with well-loved bees makes all the difference in this recipe.
So go super-charge your little runners, rowers, lifters, and swimmers. Teach them to fuel their bodies well so they can be strong, and encourage variety in their sport. There’s nothing more fun than watching a distance kid try their hand at a 60 meter dash or a long jump. There’s no better time than youth to sample a range of sport.
Fall and winter running is winding down and spring crew season is upon us. The girls are already itching to get out on the water. Over the next few months, wiry runner legs and arms will turn into thick muscle, as the intensely individual sport of running gives way to rowing, arguably the most team oriented sport on earth.
And this year, we have some pretty great cookies to keep them going.
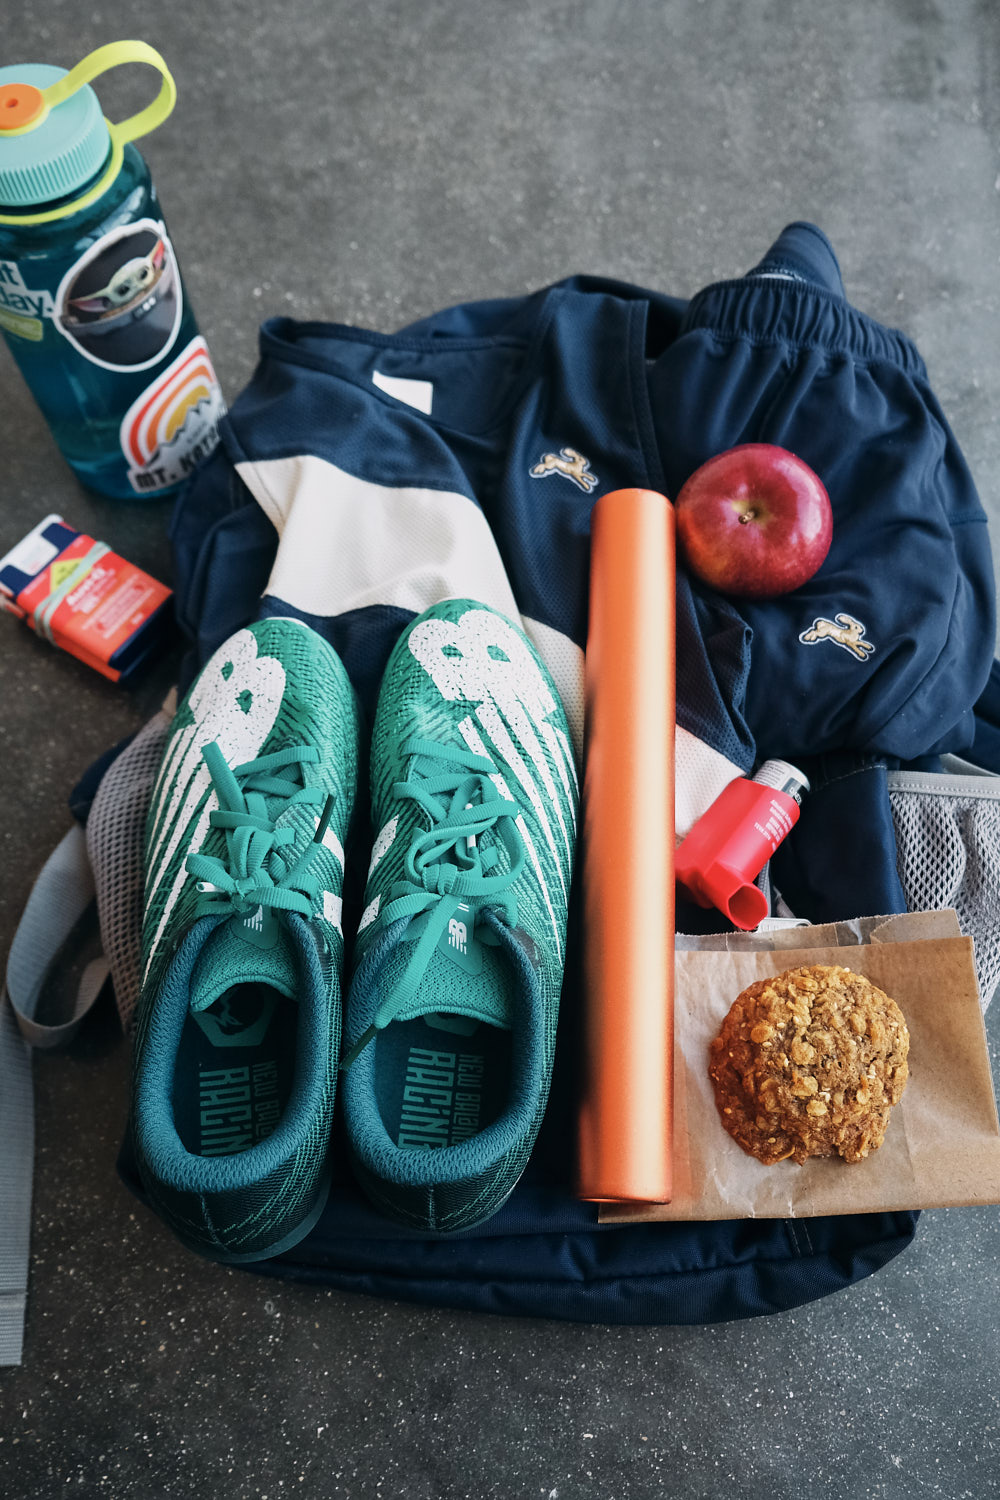
Now this is a properly prepared track backpack!
Print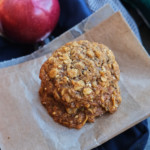
Chewy Whole Grain Energy Cookies
-
Prep Time: 15
-
Cook Time: 10 minutes
-
Total Time: 25 minutes
-
Yield: 24 cookies
Description
These whole grain energy cookies are also dairy-free, egg-free, and nut-free.
Ingredients
Dry Ingredients:
- 1 cup old-fashioned rolled oats
- 1 cup shredded coconut
- 1 1/2 cup whole wheat flour
- 2 T. chia seeds
- 2 T. ground flax seeds
- 1 t. baking soda
Wet Ingredients:
- 1/2 cup packed brown sugar
- 1/2 cup coconut oil (or dairy-free margarine)
- 2 shots of espresso ( I used 2 nespresso pods, about 1/4 cup total)
- 1/4 cup honey
- 1t. vanilla extract
- 1/2 teaspoon salt
Instructions
- Preheat oven to 350.
- Line 2 cookie sheets with parchment paper.
- In a large bowl, mix together the dry ingredients.
- In a medium saucepan, bring the brown sugar, coconut oil, espresso, and honey to a boil.
- Remove from heat and whisk in the vanilla extract.
- Pour the hot sugar syrup mixture over the dry ingredients and blend well.
- Drop in spoonful on the parchment lined cookie sheet.
- Flatten slightly before baking.
- Bake at 350 for 8-10 minutes until golden brown and set on the tops.
Notes
I have a Nespresso espresso maker, but you can use 1/4 cup strong coffee if you’d like. If you don’t want any caffeine, use decaf or just use water.
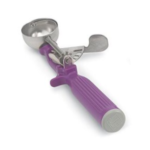
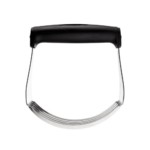
I use a cookie dough scoop for all my cookie recipes, and really recommend getting one. It makes this go so much faster.
I get my chia seeds and flax seeds from Gerbs. I just order from Amazon. A 2 pound bag will last you a while in the freezer!
- Category: Dessert
- Method: Baked
- Cuisine: American
Keywords: energy cookies, whole grain cookies, dairy-free cookies, coffee cookies
Hopefully this crew season will start out better than last year’s first novice race on the Grand River! 😂

Other Recipes You May Enjoy
Shamrock Shakes
Monster Cookies
Spring Carrot Cupcakes
Rhubarb Shortbread
The post Chewy Whole Grain Energy Cookies appeared first on Speedbump Kitchen.
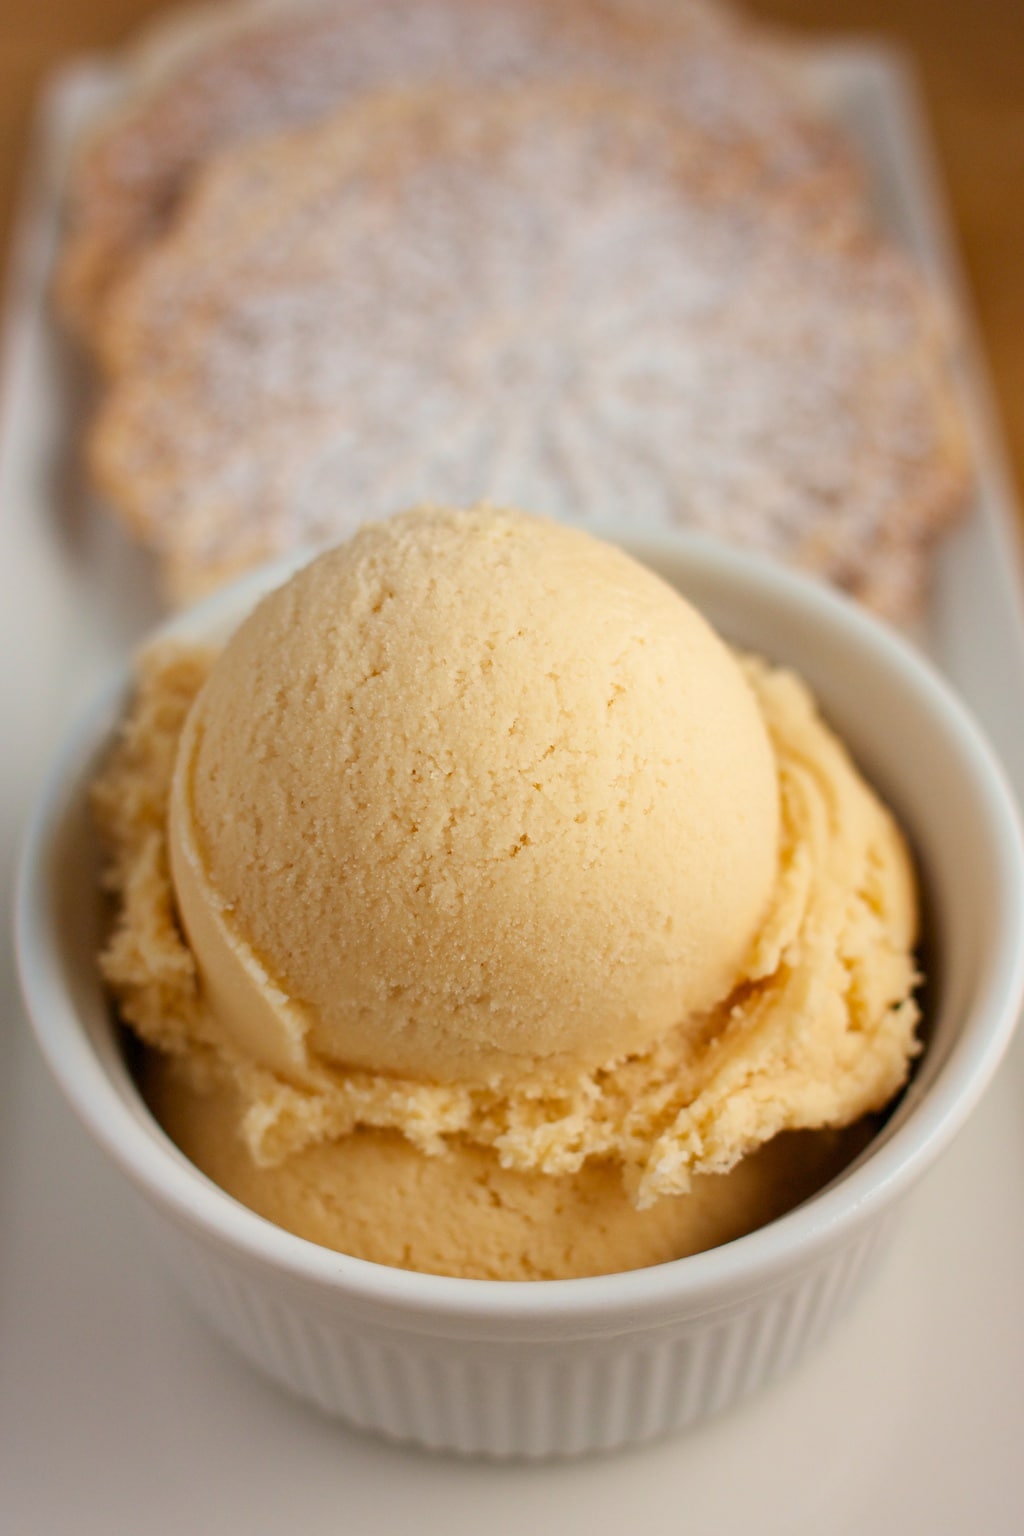
Peppermint Stick Ice Cream 20 Dec 2019 8:27 AM (5 years ago)
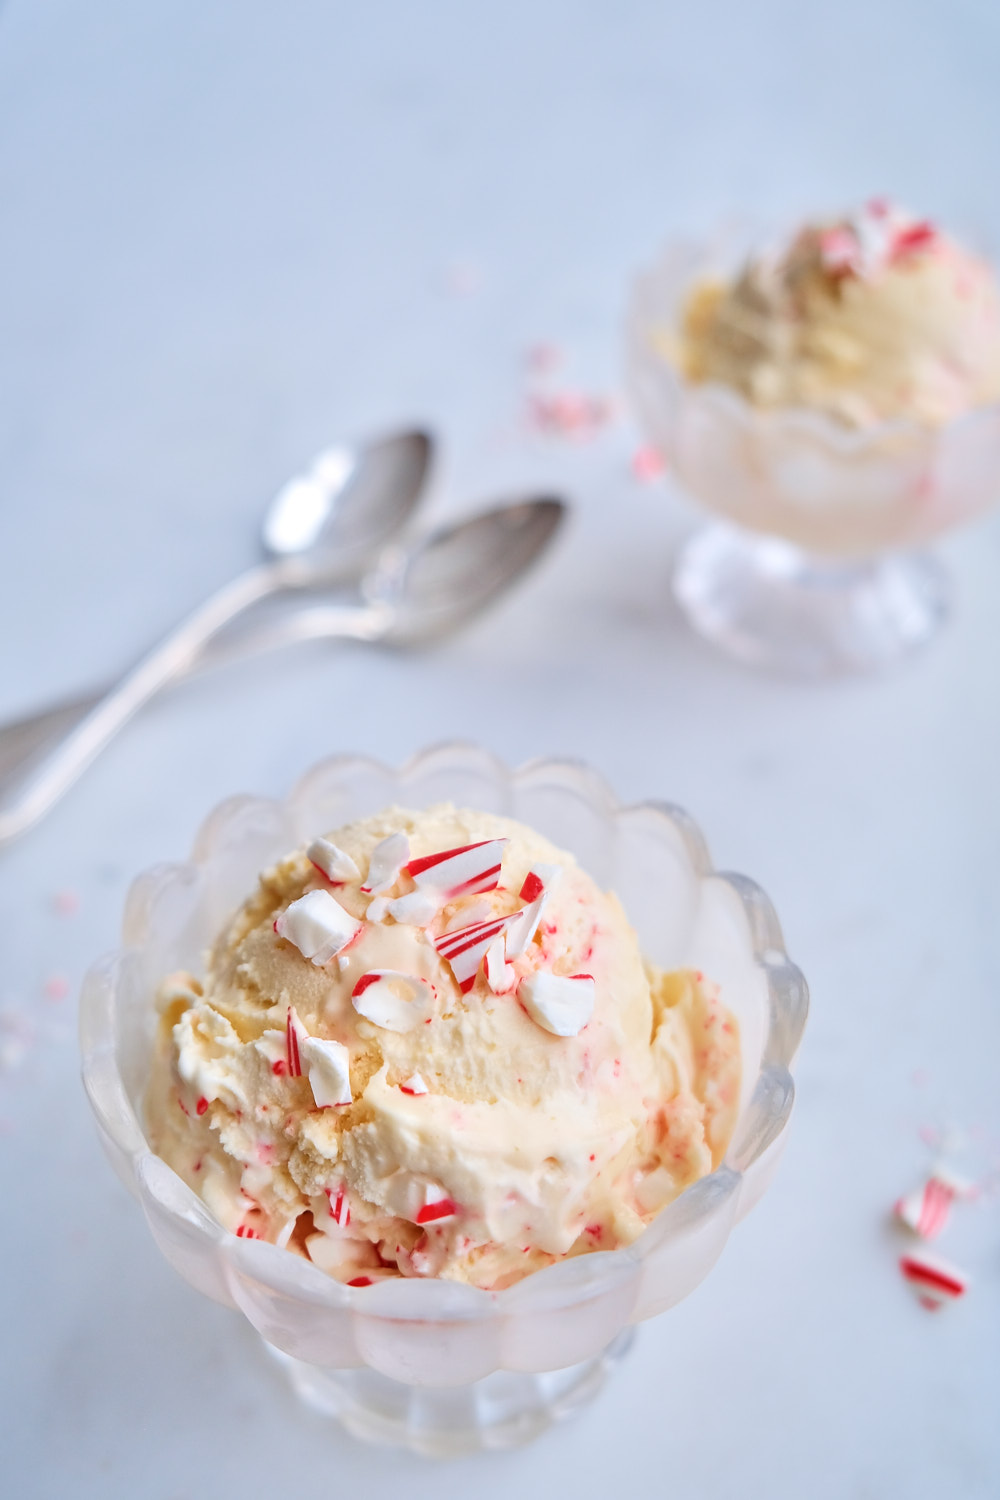
The arrival of peppermint stick ice cream in stores is the signal that Christmas has started. When I was a kid, the Schwan’s man would bring peppermint stick ice cream to our small town. Quantities were limited so one family couldn’t buy the truck out and stash it in the deep freeze.
I thought this was just a small town issue until today, in our big city grocery store, I saw a sign on the Hudsonville Peppermint Stick ice cream limiting people to 2 containers. This is serious business.
For better or worse, when you make this at home, there are no limits! This dairy-free and egg-free peppermint stick ice cream is very easy to make. It’s just my basic vanilla ice cream with some crushed candy canes. I add a little peppermint extract to punch up the peppermint, but you can skip it as well.
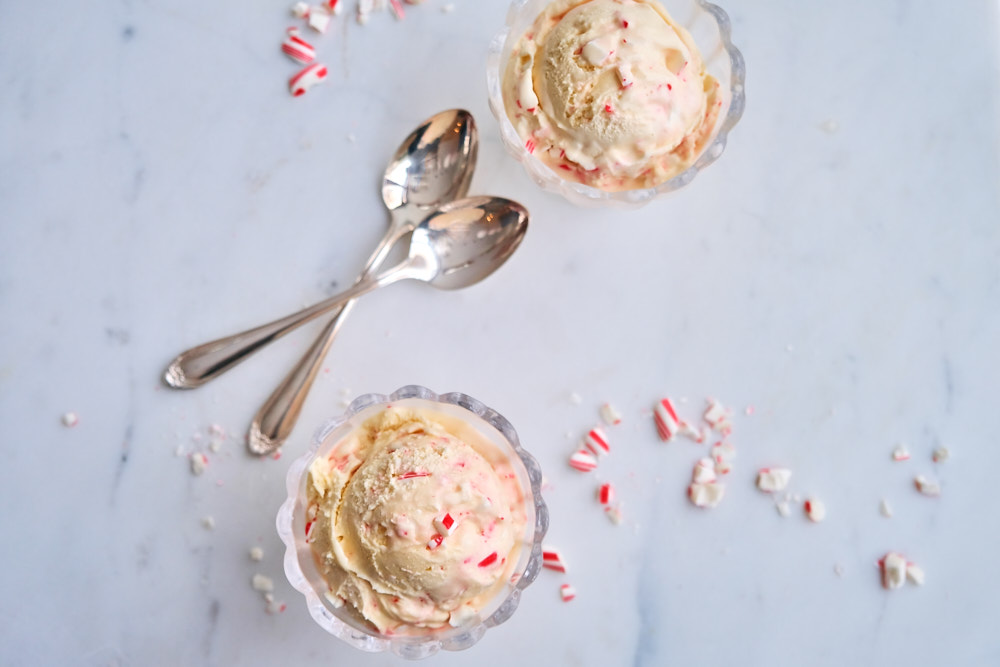
If you want to take this over the top, serve it up with some dairy-free chocolate syrup and hot cocoa. Merry Christmas!
Print
Peppermint Stick Ice Cream
-
Prep Time: 10
-
Cook Time: 10
-
Total Time: 20 minutes
-
Yield: 1 quart
Description
This dairy-free and egg-free peppermint stick ice cream is a traditional holiday treat here, add some hot fudge to the top and it’s heaven.
Ingredients
- 3 cups dairy-free creamer
- 20 regular-sized marshmallows
- 1/4 teaspoon peppermint extract (optional)
- 2-3 candy canes, crushed
Instructions
- Put the marshmallows in a big microwave safe bowl (I have an 8 cup Pyrex that is perfect for this)
- Heat for 1-2 minutes, until soft and puffy.
- Whisk the soft marshmallows with 1/2 cup creamer until smooth. You may have to return the mixture to the microwave for another minute or so to get the marshmallows to fully melt into the creamer.
- Add the remaining 2 1/2 cups of creamer. Whisk until smooth and the marshmallows are all melted.
- Add the peppermint extract.
- Cool the mixture down in the freezer or refrigerator before pouring into an ice cream maker to churn and freeze. I have a Cuisinart that is wonderful.
- At the end of churning, fold the crushed candy canes in to the ice cream, right before transferring to an ice cream freezer container. If you add them too early, they just clog up the ice cream maker’s churning blades.
Notes
You can use plain dairy-free creamer, just add 1/2 cup sugar and 1 t. vanilla to the ice cream mix before churning.
If you can’t find any creamer, just use plain dairy-free milk of your choice but add 1/2 cup sugar, 2 T oil, and 1 t. vanilla to the ice cream mix before churning.
- Category: Dessert
- Method: Freezer
- Cuisine: American
Keywords: dairy-free ice cream recipe, dairy-free peppermint dessert
Other Recipes You May Enjoy
Salted Caramel Ice Cream
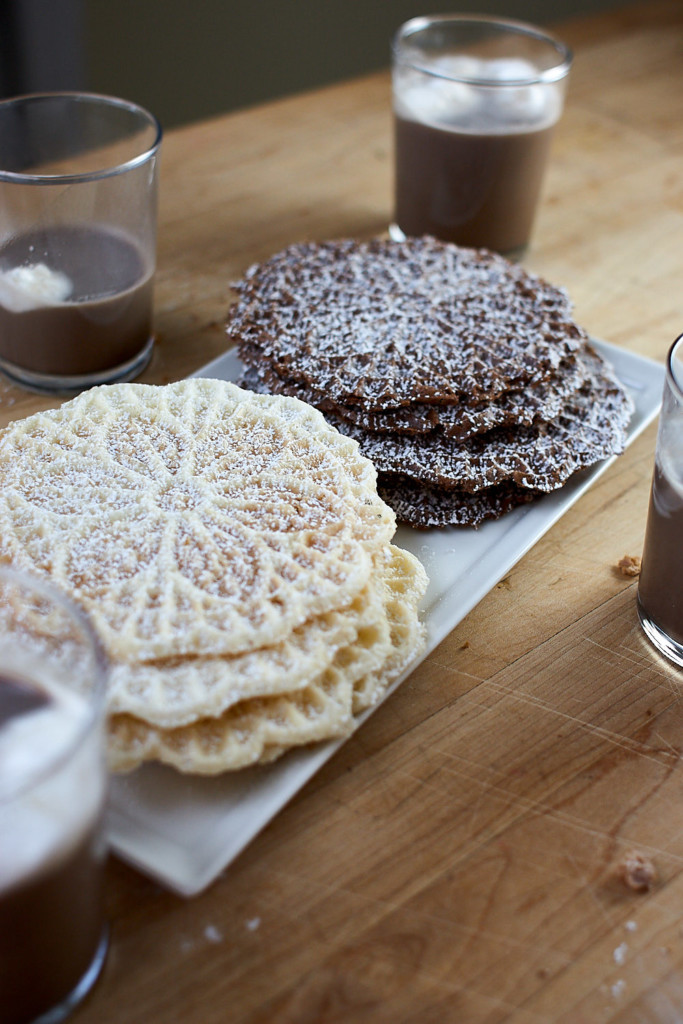
Pizzelle Cookies
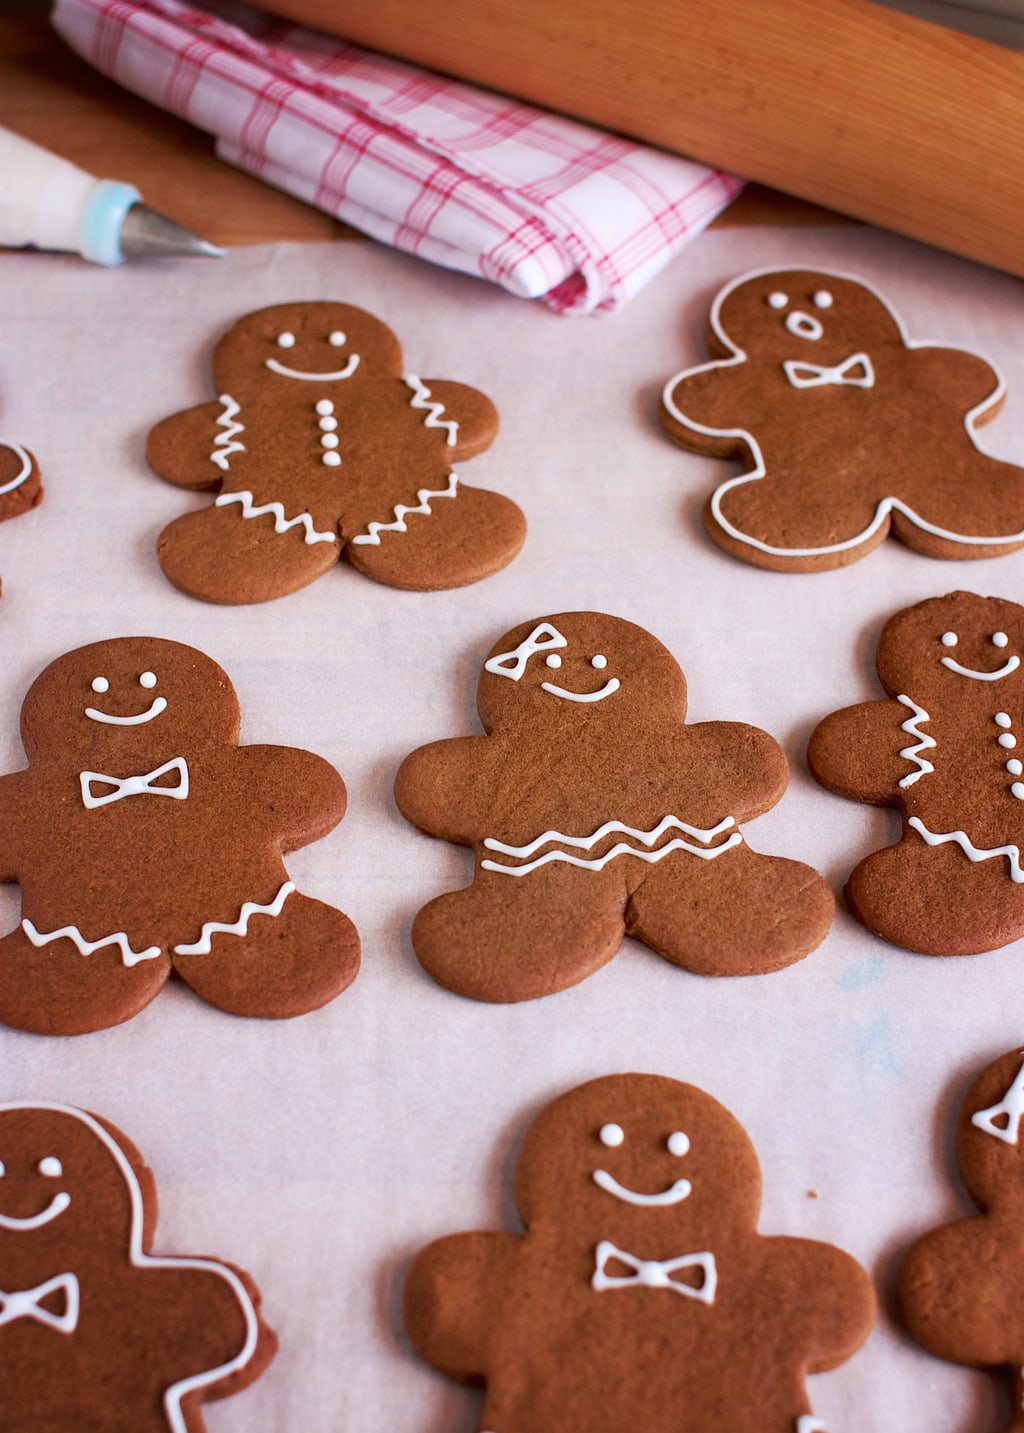
Gingerbread Men
Turkish Delight
The post Peppermint Stick Ice Cream appeared first on Speedbump Kitchen.
No Bake Pumpkin Cream Pie 25 Nov 2019 8:07 AM (5 years ago)

I love pumpkin pie. It’s always been one of my favorites. As a kid, I once asked for pumpkin pie instead of a birthday cake. I love it that much.
I’m going to save everyone the trouble and tell you straight off: it’s impossible to recreate the classic baked custard style pumpkin pie without any eggs or dairy. Impossible. The vegan blogs will try and tell you that concoctions of tofu, agar agar, agave, and pumpkin will bake up to taste “just like the real thing”.
It’s just not true. I’ve tried.
So this is not baked pumpkin pie. It’s not your classic pumpkin pie.
No, this pumpkin pie is the other pumpkin pie that shows up on Midwest Thanksgiving tables…because it turns out, most kids don’t like pumpkin pie. I was the weird one.
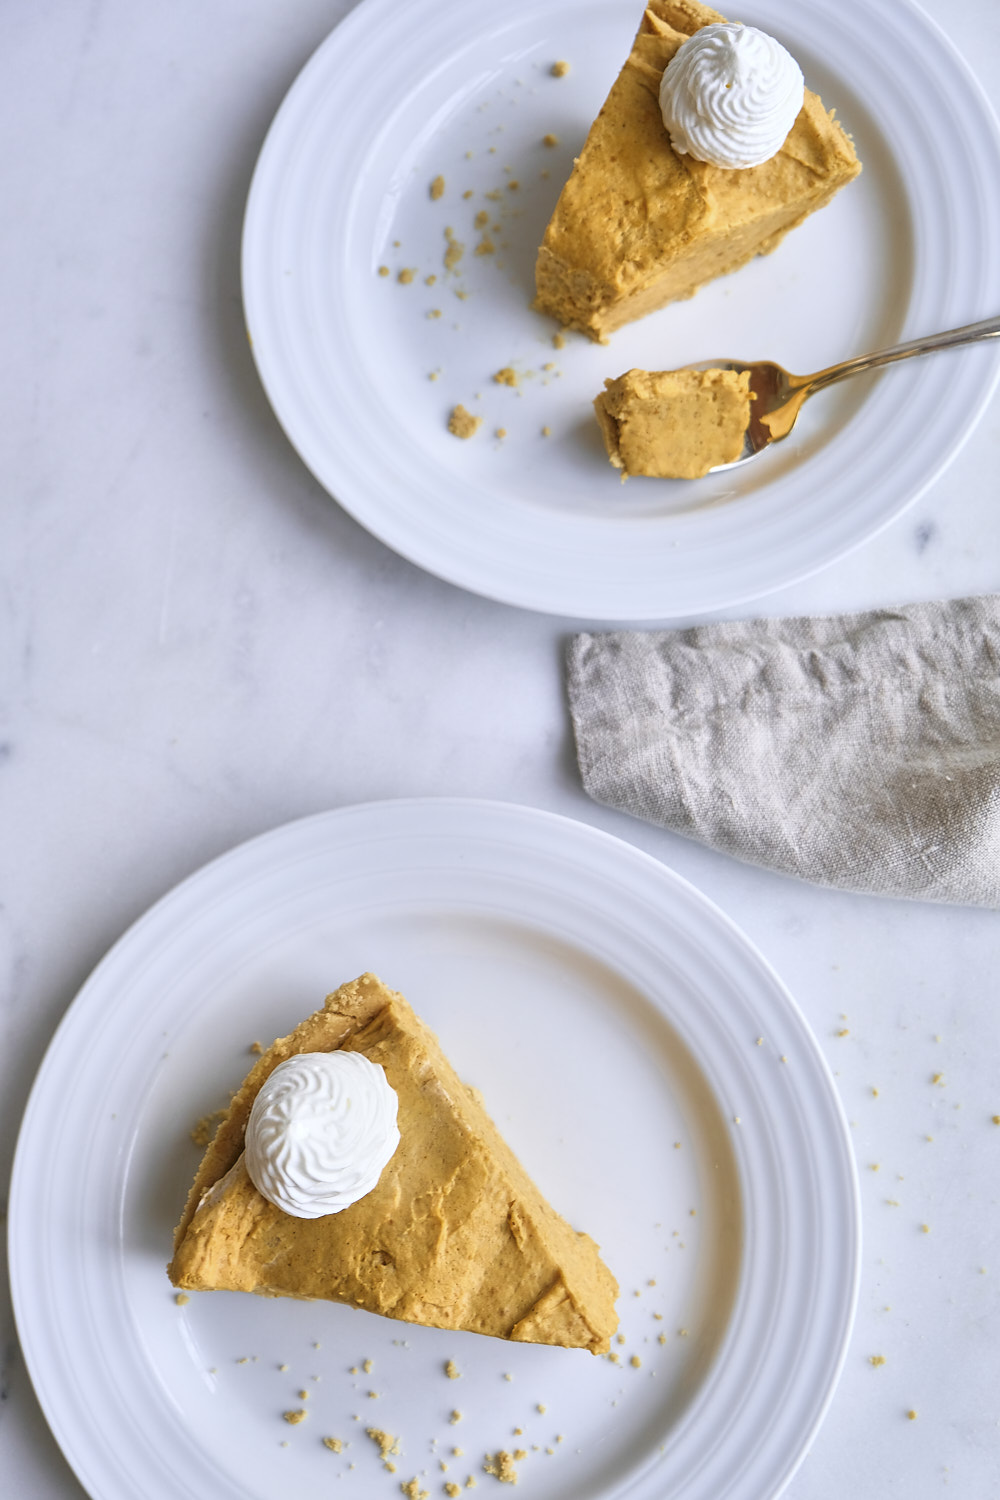
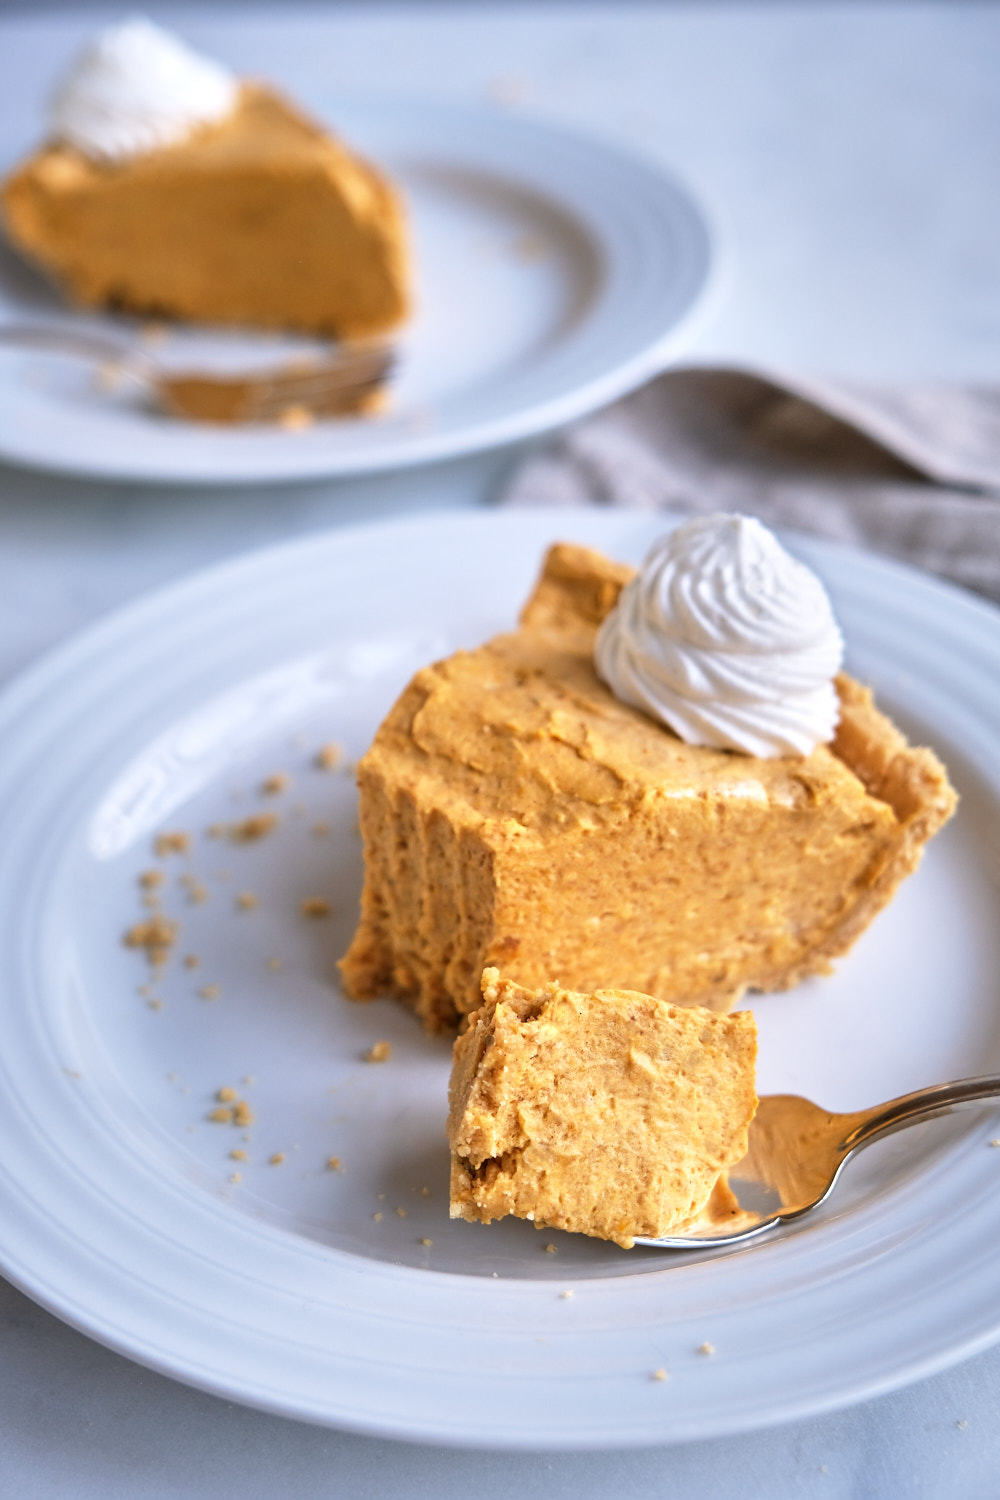
This is the creamy no-bake pumpkin pie, usually brought by an older aunt or lady from church who knows. She knows this pie only takes minutes to make, but will disappear faster than the other pumpkin pies that took hours of prep. She knows the kids will love this one.
And it’s all true. This pie takes minutes to make. It’s easy enough that the kids make it now. It doesn’t take up precious space in the oven on Thanksgiving Day when all heck is breaking loose.
And it’s always the first pie to disappear.
Happy Thanksgiving from the Midwest!
Print
No Bake Pumpkin Cream Pie
-
Prep Time: 15 minutes
-
Total Time: 15 minutes
-
Yield: 1 pie
Description
This dairy-free and egg-free pumpkin cream pie is the easiest pie you’ll ever make. You’ve got enough going on with Thanksgiving Dinner, you can take a break on this one.
Ingredients
- 1 graham cracker pie crust (make your own, or buy one, I used a Keebler Ready Crust)
- 1 cup dairy-free milk
- 1 cup canned pumpkin
- 2 packages (3.4oz) Vanilla Instant Pudding
- 1 t. cinnamon
- 1/2 t. nutmeg
- I cup Rich’s Whip liquid, whipped up thick (or 8 ounces of another dairy-free whipped topping)
Instructions
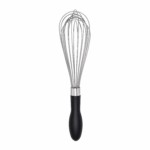
- Beat milk, pudding mixes, pumpkin and spices together with a whisk until well blended.
- Fold in 1 1/2 cups of whipped topping.
- Pour into crust, decorate with remaining whipped topping and refrigerate for an hour.
Notes
I used Silk Coconut Milk in this recipe. Read my full post on dairy-free milk options.
Yes, Jell-O Instant Vanilla Pudding Mix is dairy free, vegan too.
For dairy-free whipped cream, I use Rich’s Whip Liquid, found at Gordon Food Service (a local restaurant food supply store). If you can’t find it, there are other vegan options at your local health food/whole foods-type stores.
If you don’t have a dairy allergy, just use regular milk and Cool-Whip!
The post No Bake Pumpkin Cream Pie appeared first on Speedbump Kitchen.
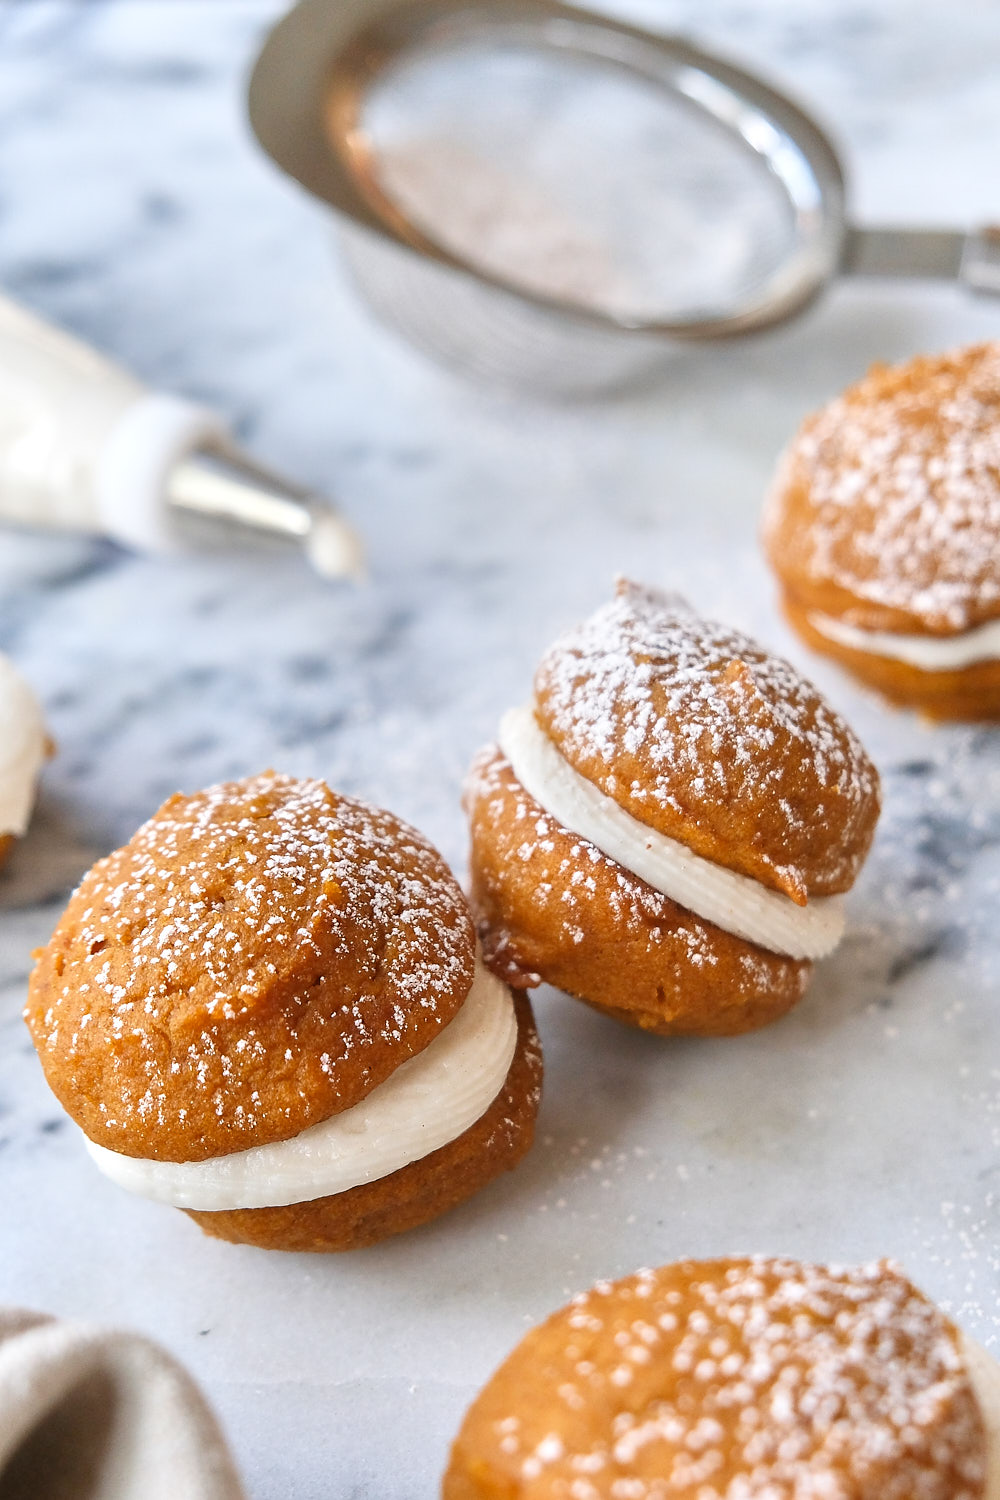
Mini Pumpkin Whoopie Pies with Maple Cream Cheese Filling 27 Oct 2019 12:20 PM (5 years ago)
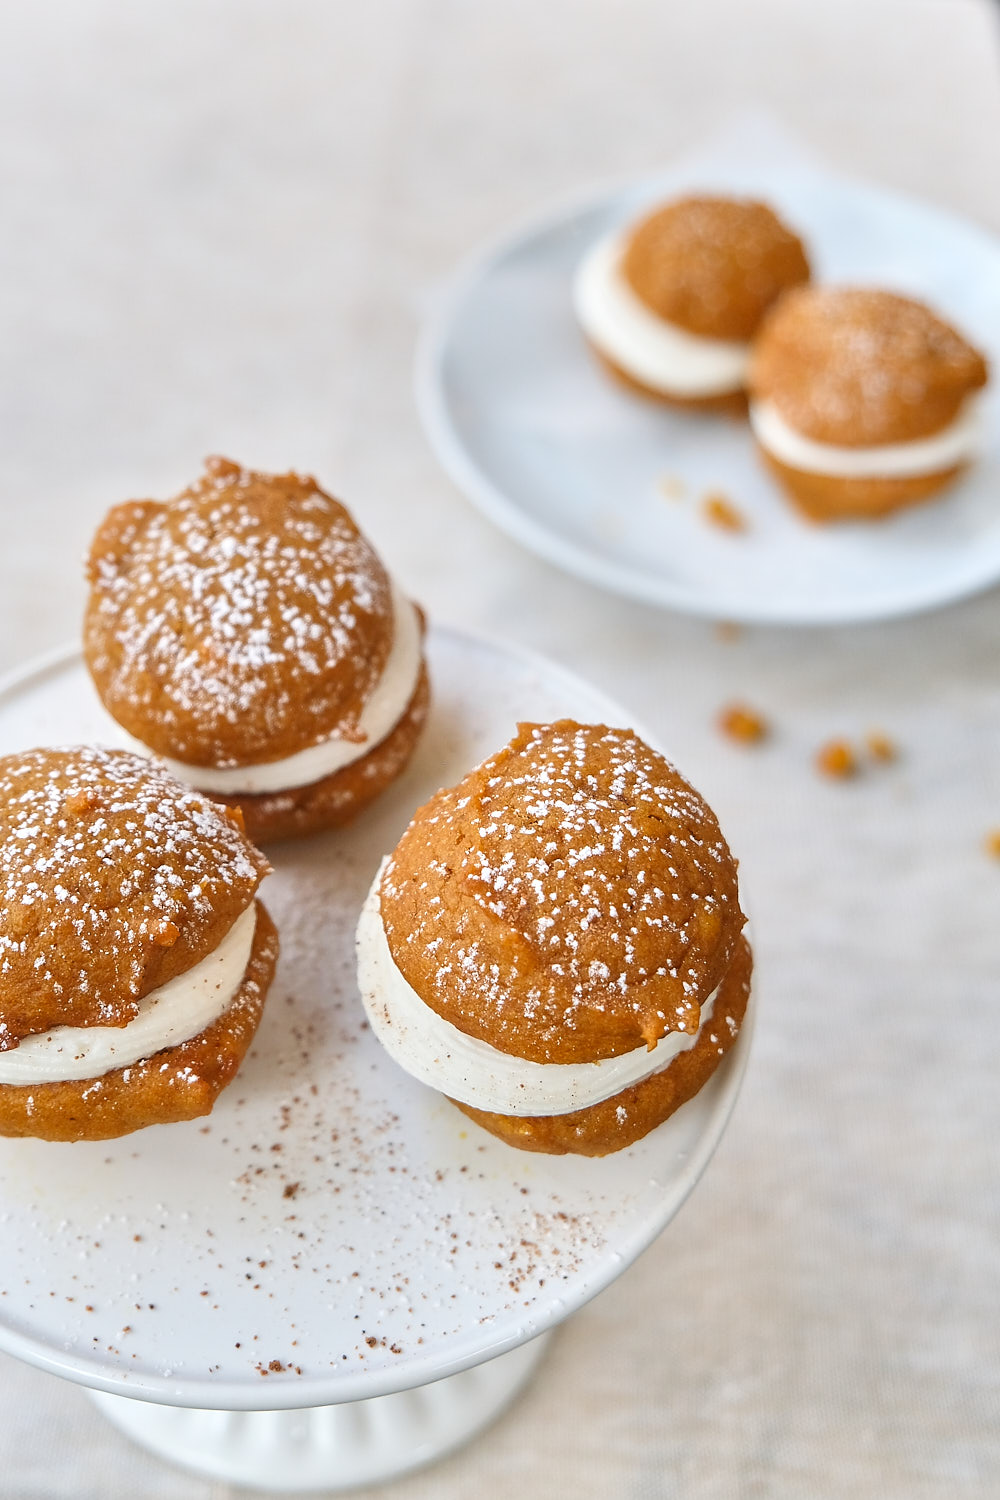
Fall baking is in full swing here. Everything is some variation of pumpkin, apple, and spice. These mini pumpkin whoopie pies are perfect for the season, and are the cutest treats!
Pumpkin whoopie pies look fussy and difficult, but they’re actually no more difficult than pumpkin muffins…and take a look at the recipe…there’s some whole wheat flour in here!
Shh. Don’t let the kids know any of this!
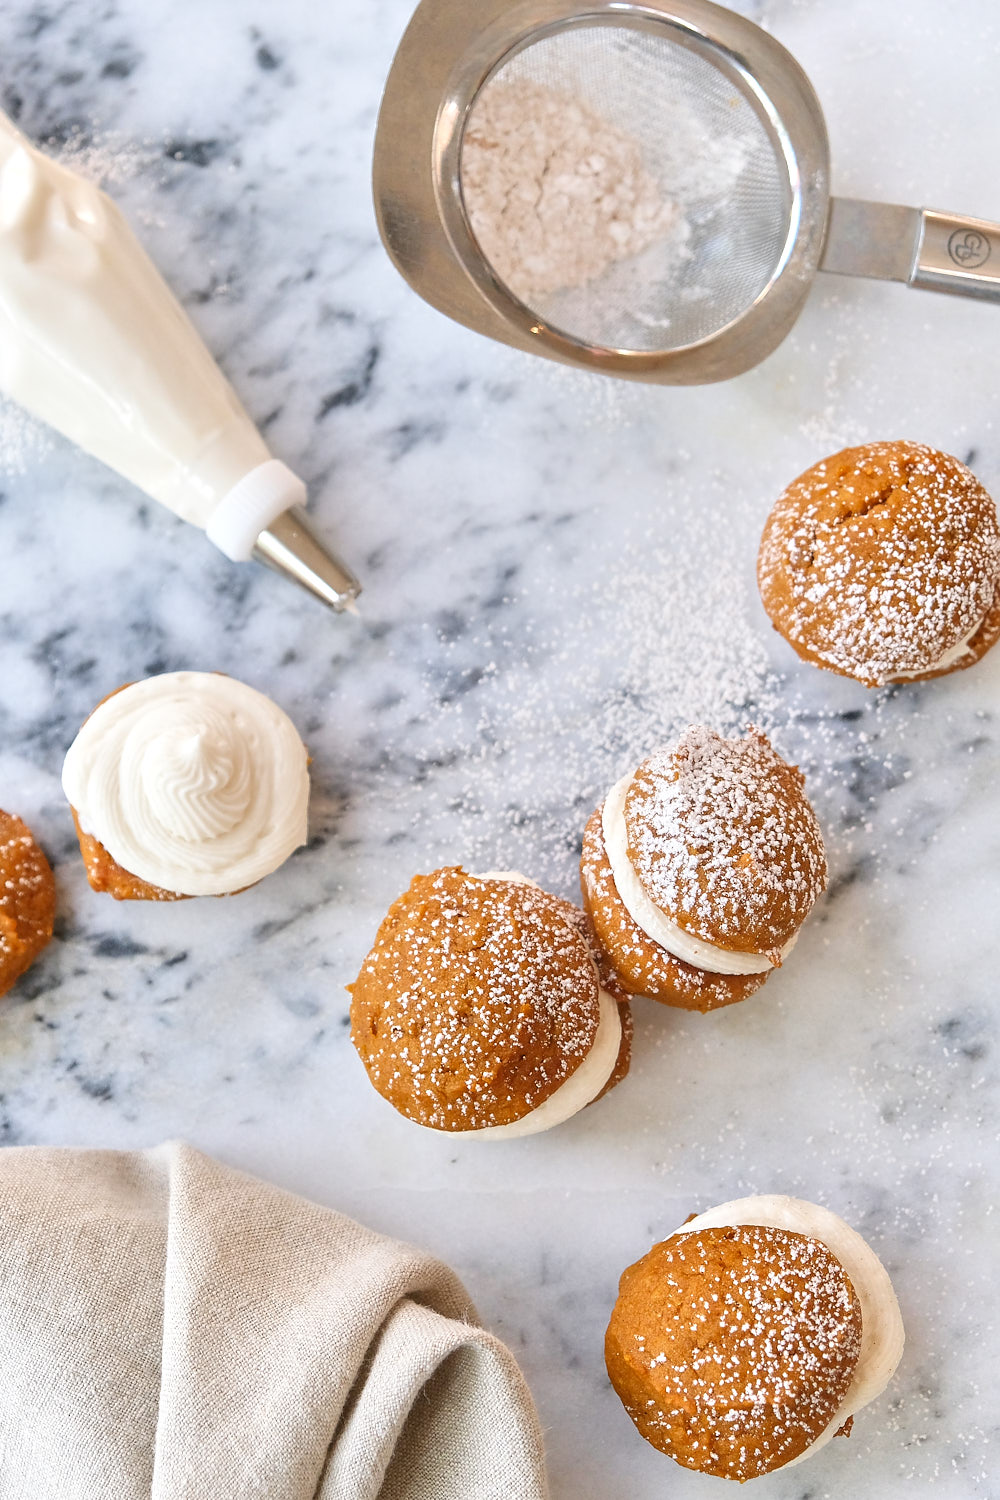
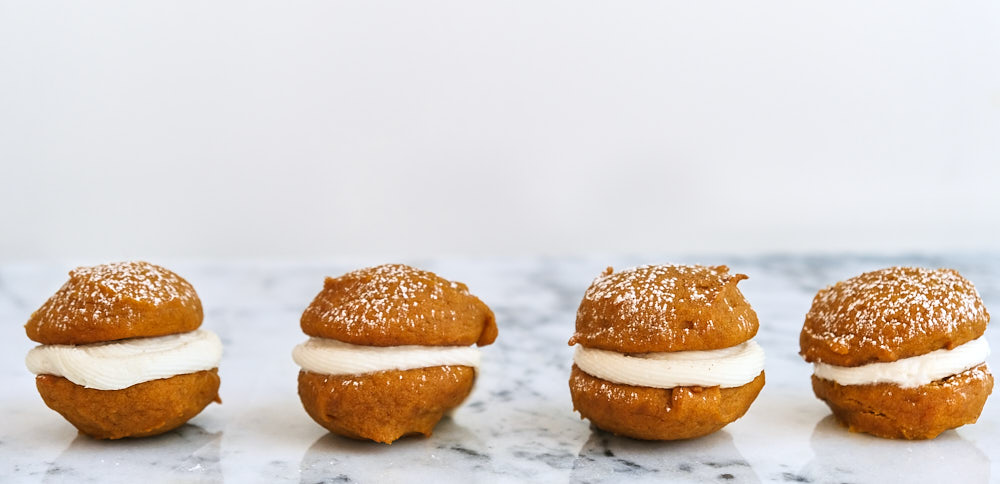
Of course, you can make these into regular sized whoopie pies, but I love the tiny size. They fit perfectly in our little bento boxes for lunches, and it’s just more fun to eat tiny things.
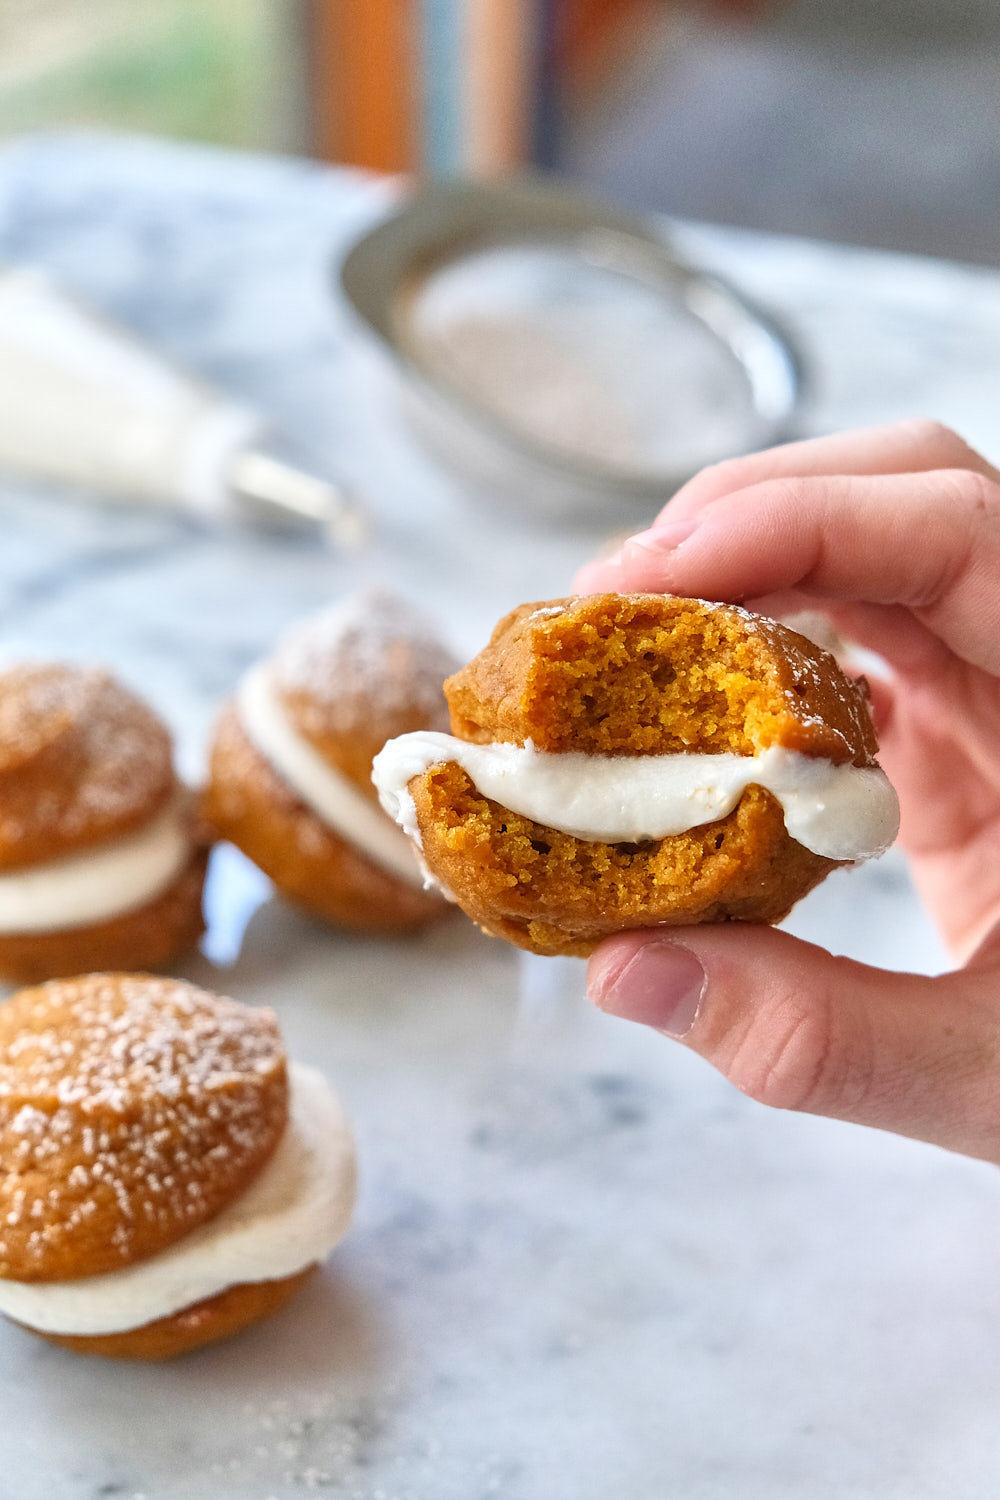
These also freeze perfectly. Pop them from the freezer into a lunch box, and they’ll be thawed by lunch time. And even if they’re still a little frozen…they taste pretty awesome that way too!
Print
Mini Pumpkin Whoopie Pies with Maple Cream Cheese Filling
-
Prep Time: 10 minutes
-
Cook Time: 20 minutes
-
Total Time: 30 minutes
-
Yield: 15 mini pies
Description
These mini pumpkin whoopie pies are dairy-free, egg-free, and vegan. They perfect little treats to put in a lunchbox for the kids or for yourself.
Ingredients
Dry Ingredients:
- 1 1/4 cups white flour
- 1/4 cup whole wheat flour
- 1/2 teaspoon soda
- 1/2 teaspoon baking powder
- 1/2 teaspoon salt
- 1/2 teaspoon cinnamon
- 1/4 teaspoon ginger
- 1/8 teaspoon nutmeg
- pinch of cloves
Wet Ingredients:
- 1/2 cup white sugar
- 1/2 cup brown sugar
- 1/2 cup oil
- 1 1/2 cup canned pumpkin
- 1 teaspoon vanilla
Instructions
- Preheat oven to 350.
- Whisk the white flour, whole wheat flour, baking soda, baking powder, salt & spices in a large mixing bowl.
- Whisk the sugars, oil, pumpkin and vanilla together in a medium mixing bowl.
- Pour the wet ingredients into the dry ingredients and carefully blend together.
- Scoop 2 tablespoon sized blobs of dough onto a parchment lined baking sheet. I have a #40 size food scoop that is indispensable. It’s the perfect size for cookies.
- Bake for 15-18 minutes or until the tops are fully set and edges are slightly browning. This is a case you don’t want to underbake, and should err on the side of overbaking…otherwise the cookies get really sticky and doughy.
- Cool completely before filling.
Notes
Of course you can make regular-sized whoopie pies if you want, just use more batter for the cookies and cook them a touch longer!
- Category: Dessert
- Method: Baked
- Cuisine: American
Keywords: Dairy-free pumpkin dessert, vegan pumpkin dessert, fall whoopie pie recipe
Maple Cream Cheese Frosting
-
Cook Time: 10 minutes
-
Total Time: 10 minutes
-
Yield: 2 cups
Description
This dairy-free cream cheese frosting is also vegan, it’s the perfect creamy counterpoint to the pumpkin cookies.
Ingredients
- 1/2 cup dairy-free cream cheese (I used Tofutti)
- 4 tablespoons dairy-free margarine
- 2 Tablespoons maple syrup
- 2 1/2 cups powdered sugar
- 1 teaspoon vanilla
- Dairy-free milk as needed
Instructions
- Cream the cream cheese and margarine together until fluffy.
- Add the maple syrup and beat again.
- Slowly add the powdered sugar.
- Add the vanilla at the end.
- If the filling seems too thick, add a few splashes of dairy-free milk.
Notes
I used Country Crock Plant Butter Sticks with Olive Oil today. If you need ideas on alternatives, check out my post on dairy-free butter alternatives.
If you don’t have a dairy allergy, just use regular butter, cream cheese, and milk.
- Category: Dessert
- Method: Mixed
- Cuisine: American
Keywords: dairy free frosting, vegan cream cheese frosting, plant based frosting
The post Mini Pumpkin Whoopie Pies with Maple Cream Cheese Filling appeared first on Speedbump Kitchen.
Caramel Apple Dip 16 Oct 2019 9:54 AM (5 years ago)
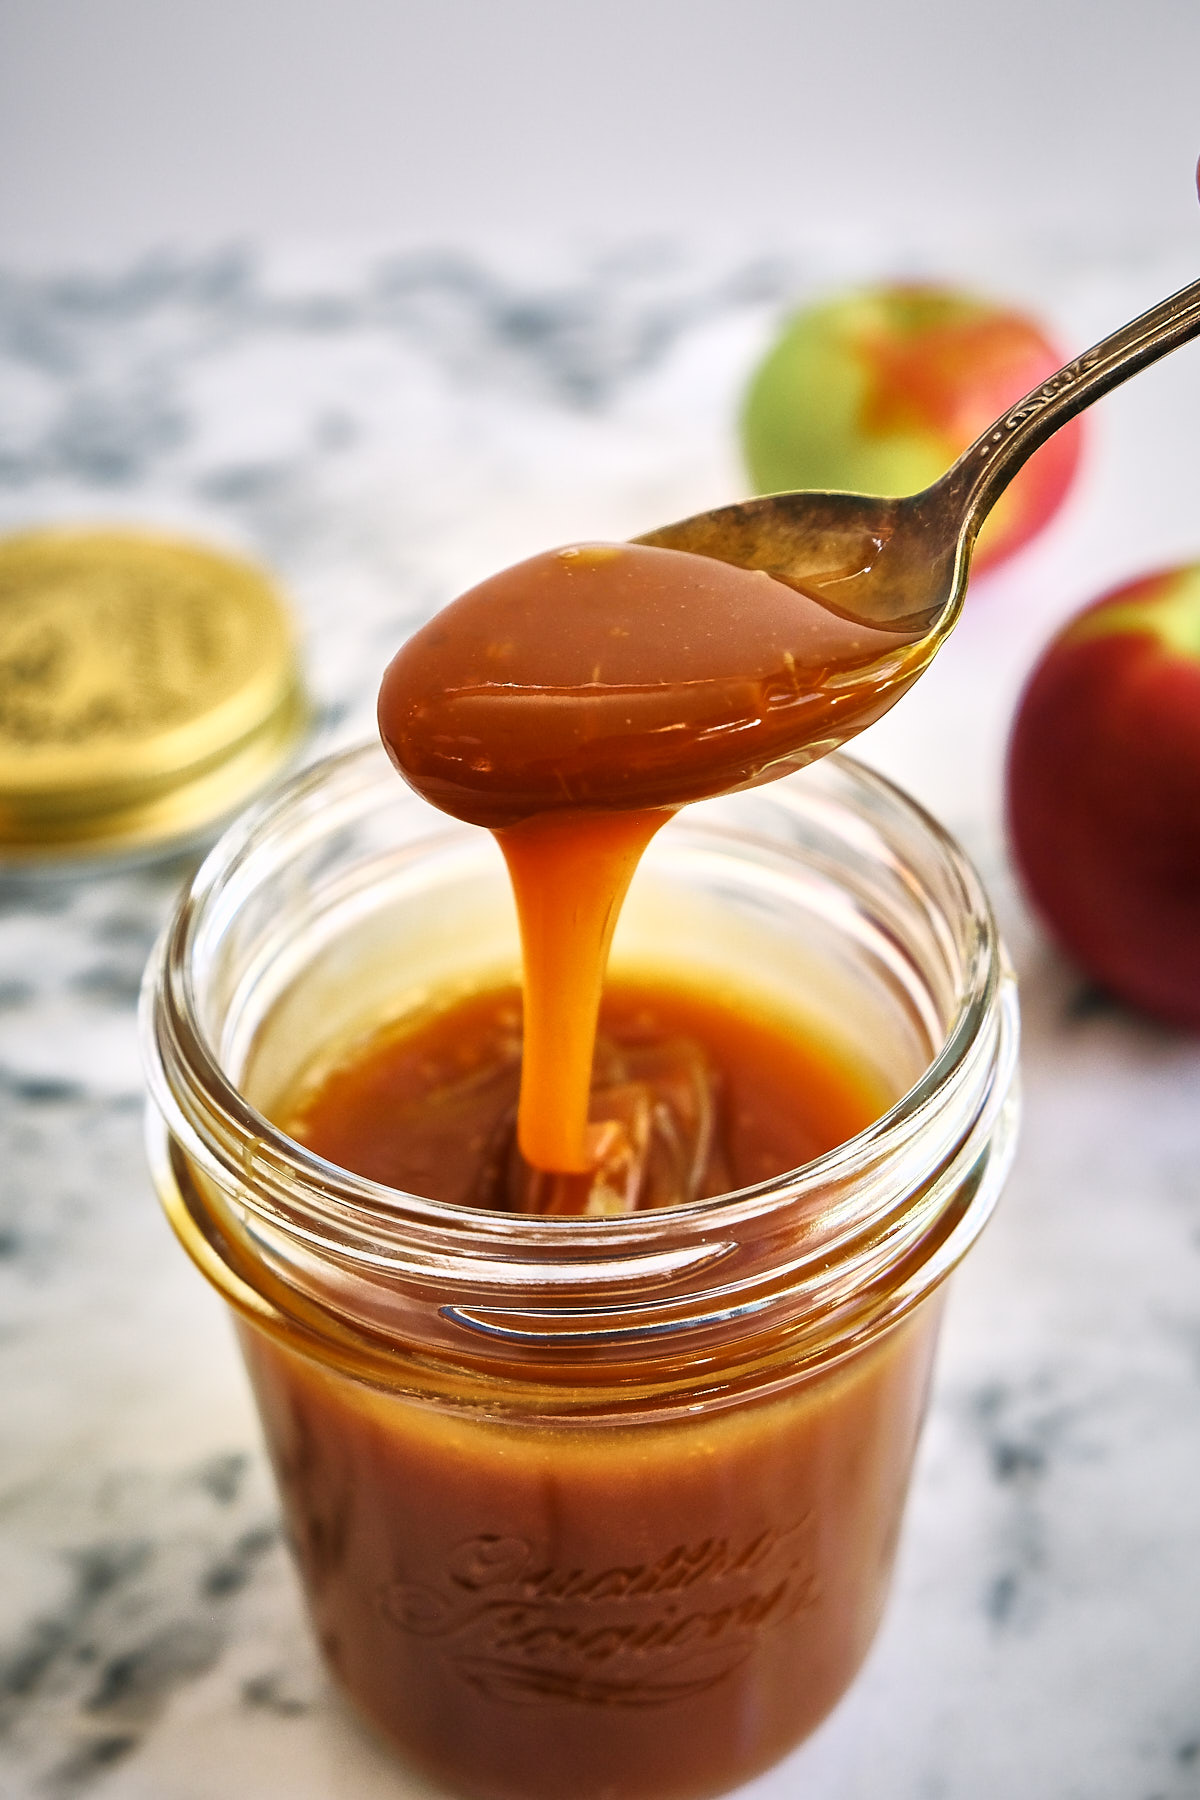
It’s fall here in Michigan, the varieties of apples at the market are astounding…Vestar, Zestar, Molly, Blondee…. to name a few new ones I saw today. I just finished making a batch of this dairy free caramel apple dip, and my parents stopped by with a new apple variety called “Smitten“. Never heard of that variety either, but we sliced it up and it’s fantastic. Especially with caramel!
I have a love-hate relationship with caramel making.
On one hand, I love the magic of turning sugar and water into caramel. My dairy-free salted caramel ice cream recipe still amazes me when I make it. How can such magic come from simple ingredients?
On the other hand, I’ve burned a lot of caramel (and myself) learning to make it properly. Cleaning burned caramel out of a saucepan in no small task.
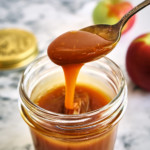
This dairy free caramel apple dip is as foolproof a caramel method I’ve come up with, and I’ve made A LOT of caramel.
The most basic (and difficult) caramel recipes start with heating straight sugar in a saucepan. As the sugar melts, it starts to caramelize quickly. This might be good for some people, not for me. This method usually results in burning half the sugar while the rest is trying to melt. It’s a mess.
This recipe gives you two buffers against disaster: water and corn syrup.
The water dissolves the sugar first, and allows you time to calmly caramelize the sugar as the water slowly evaporates off. The corn syrup is an invert sugar and keeps crystals from forming and generally smooths the whole process out.
You still have to watch the caramel closely, but it’s not going to go from clear to burnt in the blink of an eye.
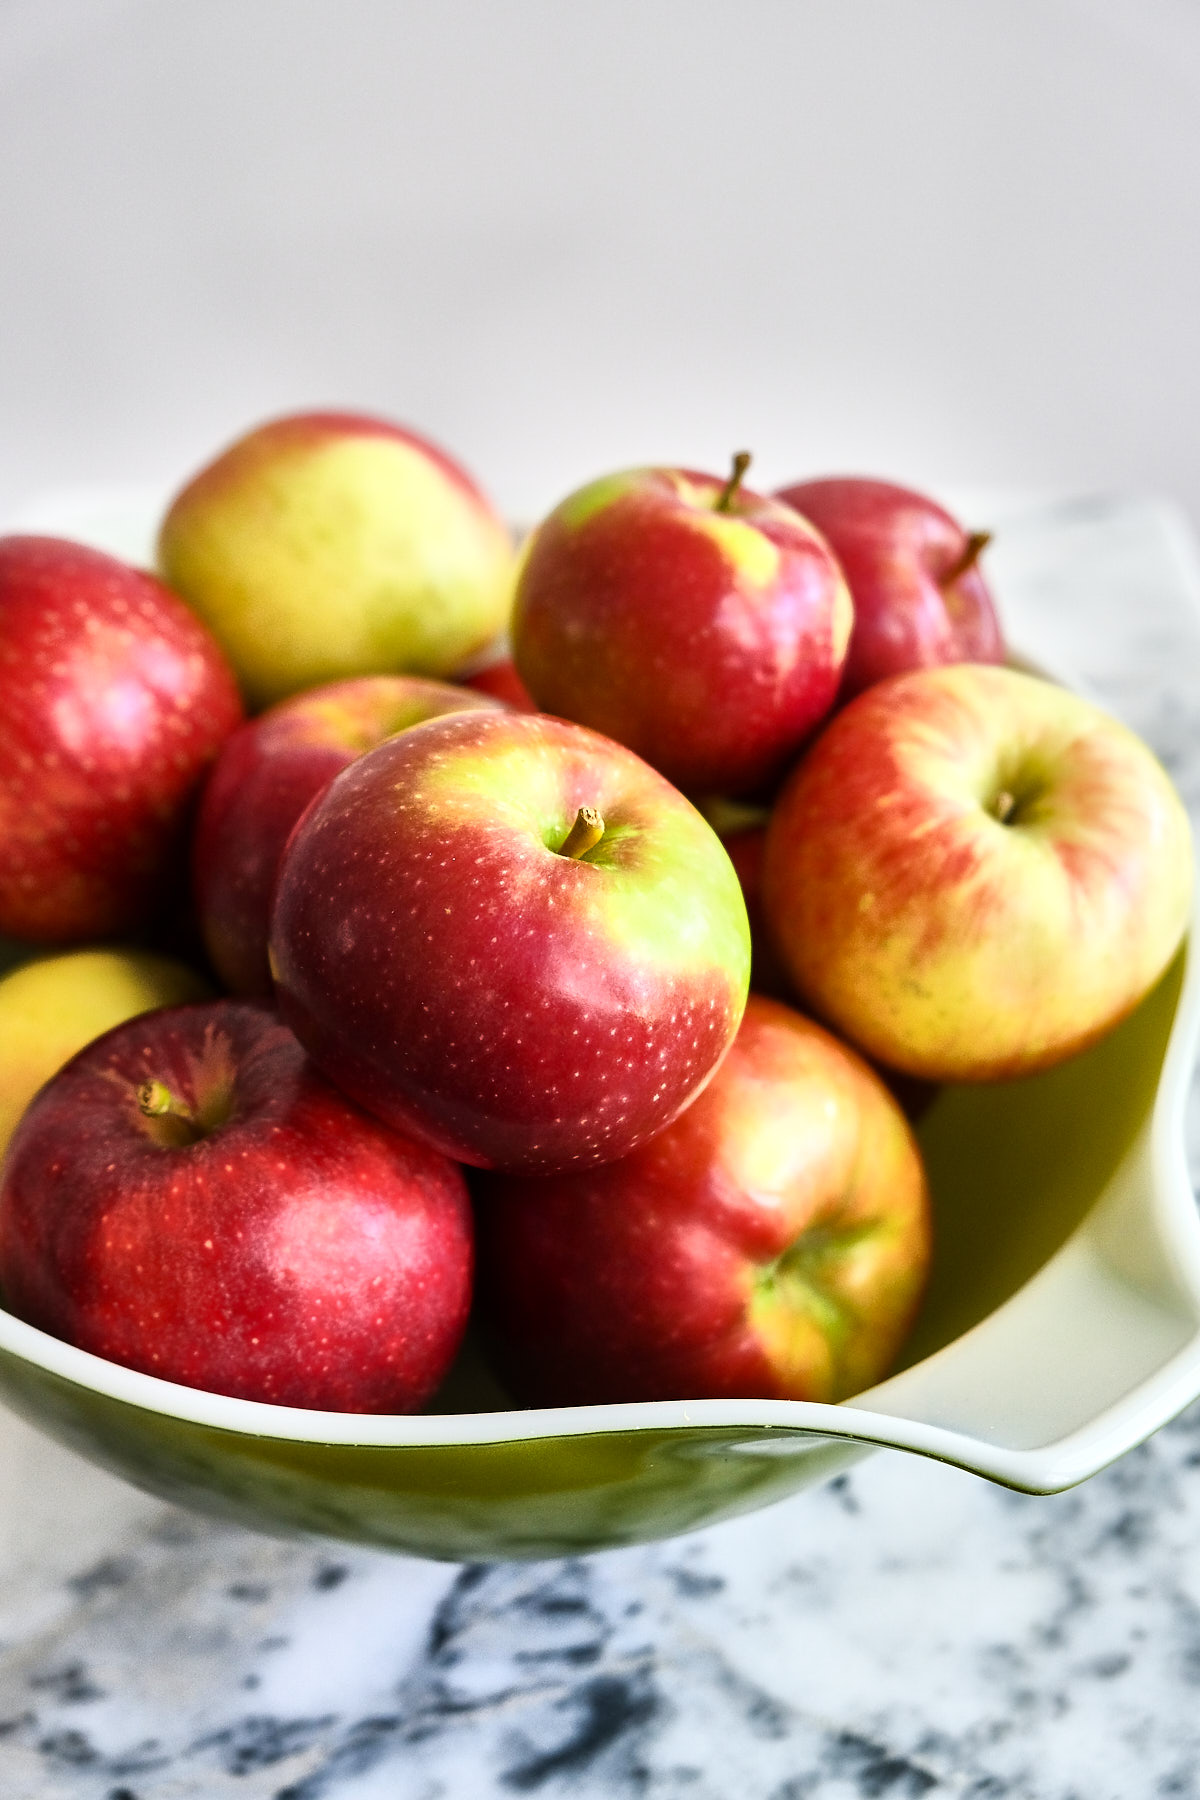
Some Michigan apples from the Fulton Street Farmer’s Market!
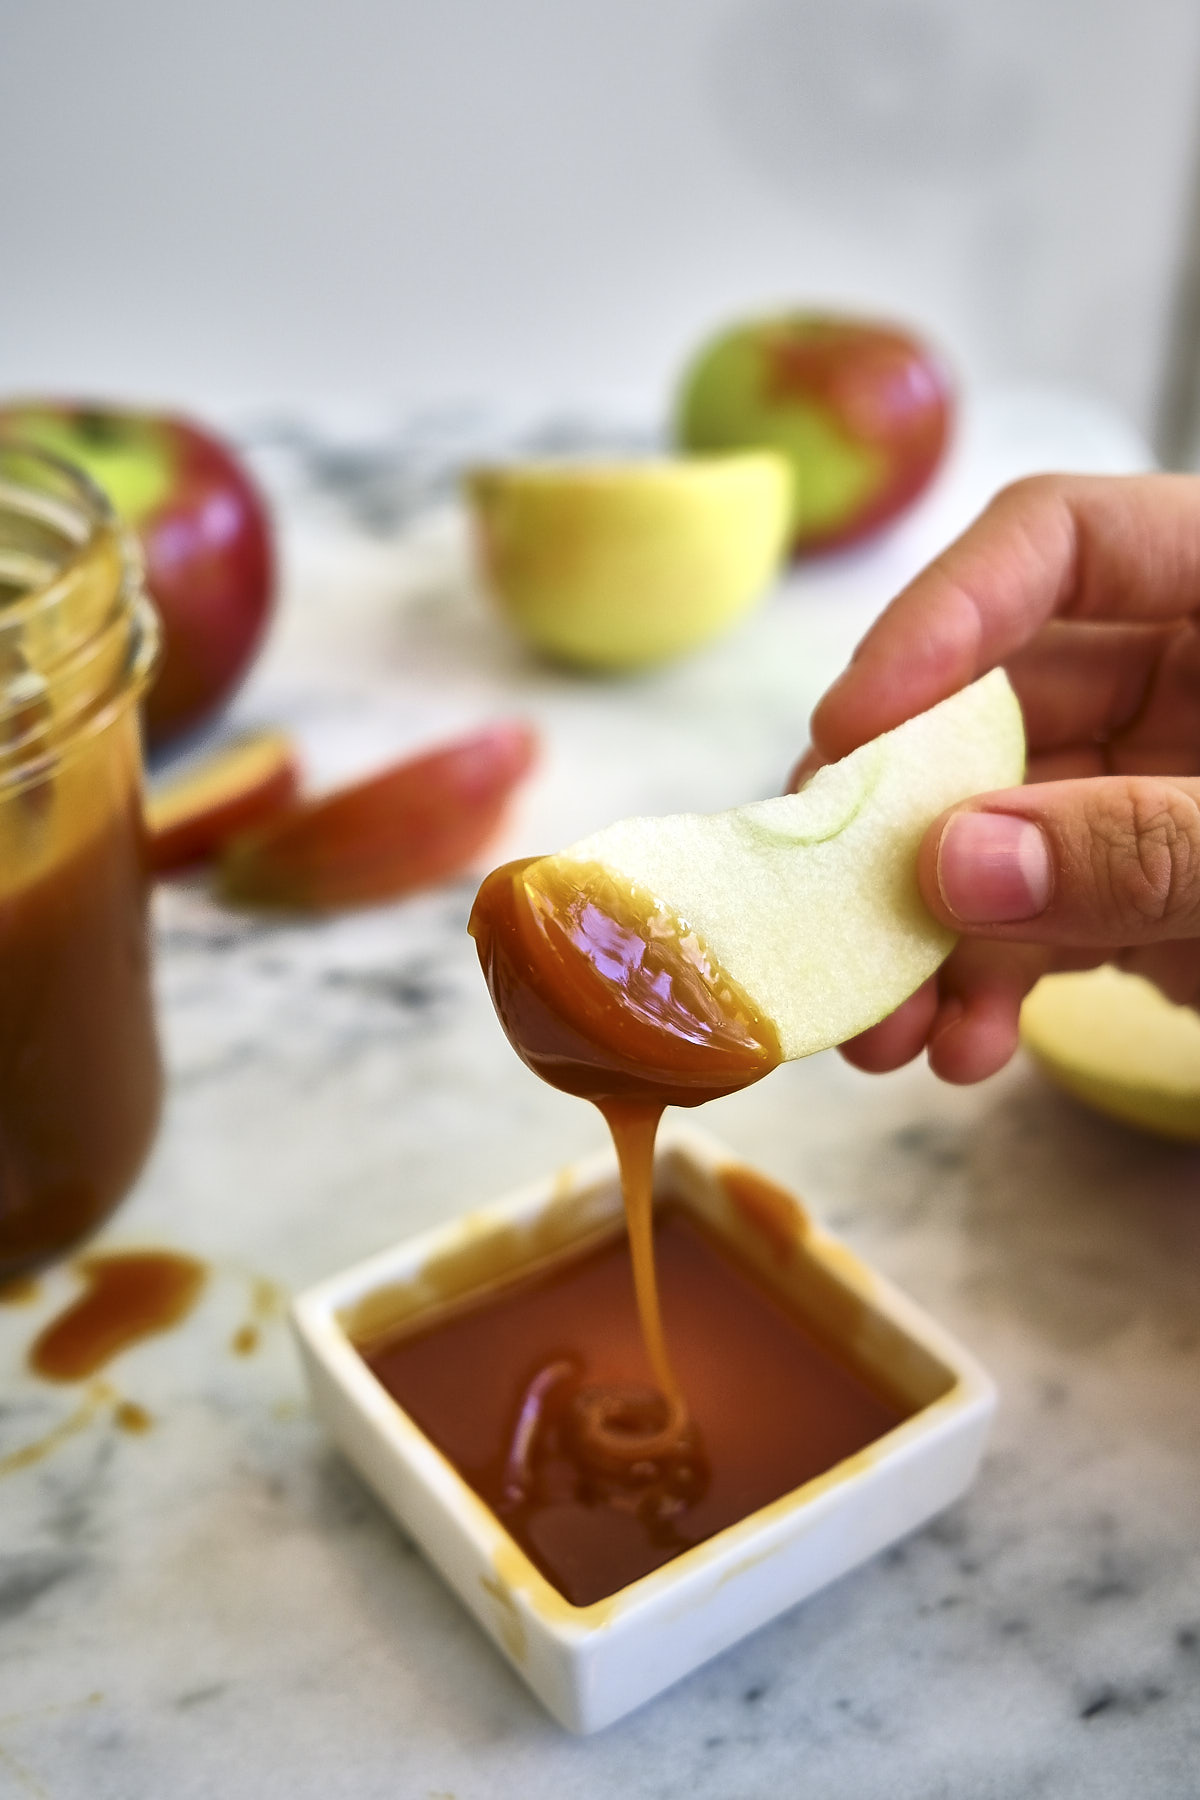
Some Dairy Free Caramel Apple Dip Tips
My kids are starting to cook from Speedbump. Until now, I’ve been writing recipes to other moms with some understanding of baking. Going forward, I need to be writing to the level of a 12 year old boy, in order to avoid disasters in my own kitchen. Hence…the baking tips.
- Wear long sleeves. Caramel can spatter, so protect your arms.
- When in doubt, heat slowly and err on the side of under-caramelizing the sugars. You can always keep heating the sugar to deepen the caramel, you can’t go back once it’s burnt. Sometimes it’s helpful to spoon a little caramel on a white plate to see the true color.
- If you mess up, try again. It’s just a cup of sugar and few squirts of corn syrup. No biggie.
- If you want more salt, add some flaky salt at the end. Vanilla is really expensive right now, so I swap out bourbon at the end.
- Dairy-free caramel apple dip is perfect for lunch-making. I mean, who really wants plain apple slices, when caramel is an option. We use 2oz condiment containers from the restaurant supply store.
Caramel Apple Dip
-
Cook Time: 20 minutes
-
Total Time: 20 minutes
-
Yield: 1 1/2 cups
Description
This dairy free caramel apple dip is perfect for sliced apples or drizzling into coffee!
Ingredients
- 1 1/4 cup sugar
- 1/4 cup water
- 2 T. corn syrup
- 2/3 cup dairy-free creamer
- 4 T. dairy-free margarine
- 1/4 t. salt
- 1 t. vanilla
Instructions
- Measure the dairy-free creamer out into a cup, and keep close to the stove.
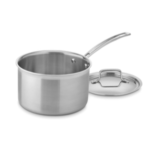
- In a medium sized heavy saucepan, add the sugar, water, and corn syrup.
- Bring to a boil, stirring to dissolve the sugar.
- Lower the heat to a gentle boil. Without stirring, cook until the mixture is a nice caramel color. (You can swirl it around, but don’t stir with a spoon or anything) This usually take 5 minutes. If you’re unsure if the color is dark enough,remove it from the heat and dab a bit on a white plate. If it’s too light, keep cooking a touch more. If it’s burnt, just start over.
- Once you’ve achieved the caramel color, remove from the heat and set on a back burner, far away. It will keep darkening on the heat, so get moving.
- Quickly pour the 2/3 cup dairy-free creamer into the caramel and stand back.
- It will bubble and steam and spurt.
- Once it calms down, bring the saucepan forward onto the burner (still warm, but turned off). Stir to dissolve the caramel. Heat a little, if needed, to dissolve hard caramel clumps.
- Add the dairy-free margarine, salt, and vanilla extract. You can add more flaky salt if you want salted caramel. You can add some bourbon if you want bourbon caramel.
- Store in the fridge for up to 2 weeks.
Notes
I used Country Crock Plant Butter Sticks with Olive Oil today for my dairy-free margarine. I’ve fallen in love with this stuff. I used Silk Soy Creamer for my dairy-free creamer. See my posts on dairy-free butter alternatives and dairy-free milk alternatives if you need some product ideas.
If you don’t have a dairy allergy, just use heavy creamer and butter.
- Category: Dessert
- Method: Stovetop
- Cuisine: American
Keywords: dairy free caramel sauce, vegan caramel sauce, dairy free caramel apple dip
The post Caramel Apple Dip appeared first on Speedbump Kitchen.
Blueberry Boy Bait 28 Aug 2019 4:15 PM (5 years ago)
I kid you not. 6:20am on Sunday morning and I’m enjoying the silence and a cup of coffee, hidden away in a corner of the house while this experimental blueberry crumb cake is baking.
“Pish pish pish pish.”
A little barefoot person is coming down the stairs.
“Pish pish pish“
Shuffling into the kitchen.
“Sniff sniff“
Smelling the baking buckle.
(Long pause)
“MOM!!! WHAT IS THAT AMAZING SMELL!?!”
And that was the end of quiet coffee time.
Of course he didn’t believe me when I said it was called “Blueberry Boy Bait”. And I certainly didn’t take the name seriously when I decided to bake it early in the morning during my quiet hours.
But here it is. Blueberry Boy Bait. For real.

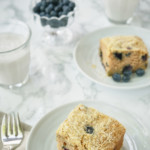
Blueberry Boy Bait
-
Prep Time: 10 minutes
-
Cook Time: 30 minutes
-
Total Time: 40 minutes
-
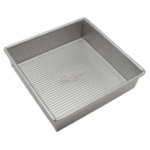
Yield: 9 x 9 pan
Description
Blueberry Boy Bait is the best named treat of all time. It’s basically a blueberry crumb cake, and this version is dairy-free, egg-free, and vegan. Use fresh blueberries in summer and frozen blueberries in the winter.
Ingredients
- 2 1/4 cups flour
- 1 1/2 cups sugar
- 1/4 t. cinnamon
- 1/2 t. salt
- 3/4 t. baking soda
- 1 1/2 sticks (12 T) dairy-free margarine
- 1 1/2 cups blueberries (frozen or fresh)
- 3/4 cup dairy-free milk
- 1 T. cider vinegar
- 1 t. vanilla extract
Instructions
- Preheat oven to 350.
- Mix the milk, vinegar, and vanilla together and set aside to thicken.
- Mix all the dry ingredients in a food processor or a large bowl. Whirl around to mix the ingredients
- Add the margarine into the dry ingredients, pulse until mixed well, or blend well by hand with a pastry cutter.
- Reserve out 1/2 cup of the crumble.
- Pour the soured milk into the rest of the crumble mix. Blend around until everything is moistened.
- Fold in the blueberries.
- Spread batter into a 9 x 9 pan.
- Sprinkle reserved crumble on top.
- Bake at 350 for 30 minutes, or until a toothpick inserted into the center of the cake comes out clean.
Notes
I used Silk Coconut milk and Blue Bonnet Lactose Free as my milk and margarine today. Read my posts on Dairy-Free Butter Alternatives and Dairy-Free Milk Alternatives for ideas.
If you don’t have a 9 x 9 pan (Janelle), you can use a standard 9 x 13 pan. It will just be little thinner.
- Category: Breakfast
- Method: Baked
- Cuisine: American
Keywords: dairy free blueberry cake, blueberry crumb cake, vegan blueberry cake
The post Blueberry Boy Bait appeared first on Speedbump Kitchen.