Export and download themes and extensions from Qlik Cloud 27 Jan 2024 3:00 PM (last year)
Third-party themes and extensions cannot be exported via the user interfaces in Qlik Cloud.
They can, however, be downloaded via public APIs, in the following ways:
- Using Qlik Application Automation - use the extension blocks from the
Qlik Platform Operationsconnector- For general information on how to use this connector, refer to the getting started guide.
- Add a
List Extensionsblock. - Filter the block output to match the name of your extension.
- Add a
Get Extension Archiveblock to retrieve the base64 encoded archive containing the archive. - Use a file storage connector to store the archive to your service of choice, move it to another tenant, version control it, or base64 decode it to convert it back to an archive (online services are available).
- Using the APIs in an active browser session
- Navigate to the extensions view in the management console of your tenant, to ensure you have an active session.
- Navigate to https://tenant.region.qlikcloud.com/api/v1/extensions - this will produce a list of your extensions. Identify the extension you wish to download and copy the
idvalue of that extension. - Navigate to https://tenant.region.qlikcloud.com/api/v1/extensions/{id}/file - replace
{id}with the ID you copied above. Your extension archive will be downloaded. - Review the full API specifications to learn more about extensions and themes.
- Using qlik-cli - there is no native command for extension management, however you can use the raw commands on the APIs listed above to connect and manage extensions.


Creating a while loop in Qlik Application Automation 13 Jan 2023 3:00 PM (2 years ago)
The lack of for n or while loops in Qlik's Application Automation, and a method
to create a for n loop was previously covered in creating a for n loop.
This post covers emulating a more adaptable while type approach using the label blocks.
Again, if you don't need to check state and want to run only a set number of iterations, then using the custom code block from the earlier post is easiest. It also has the advantage that all input linking works correctly, whereas with labels you will break lookups within the automation between sections.
While loop - via label and condition blocks
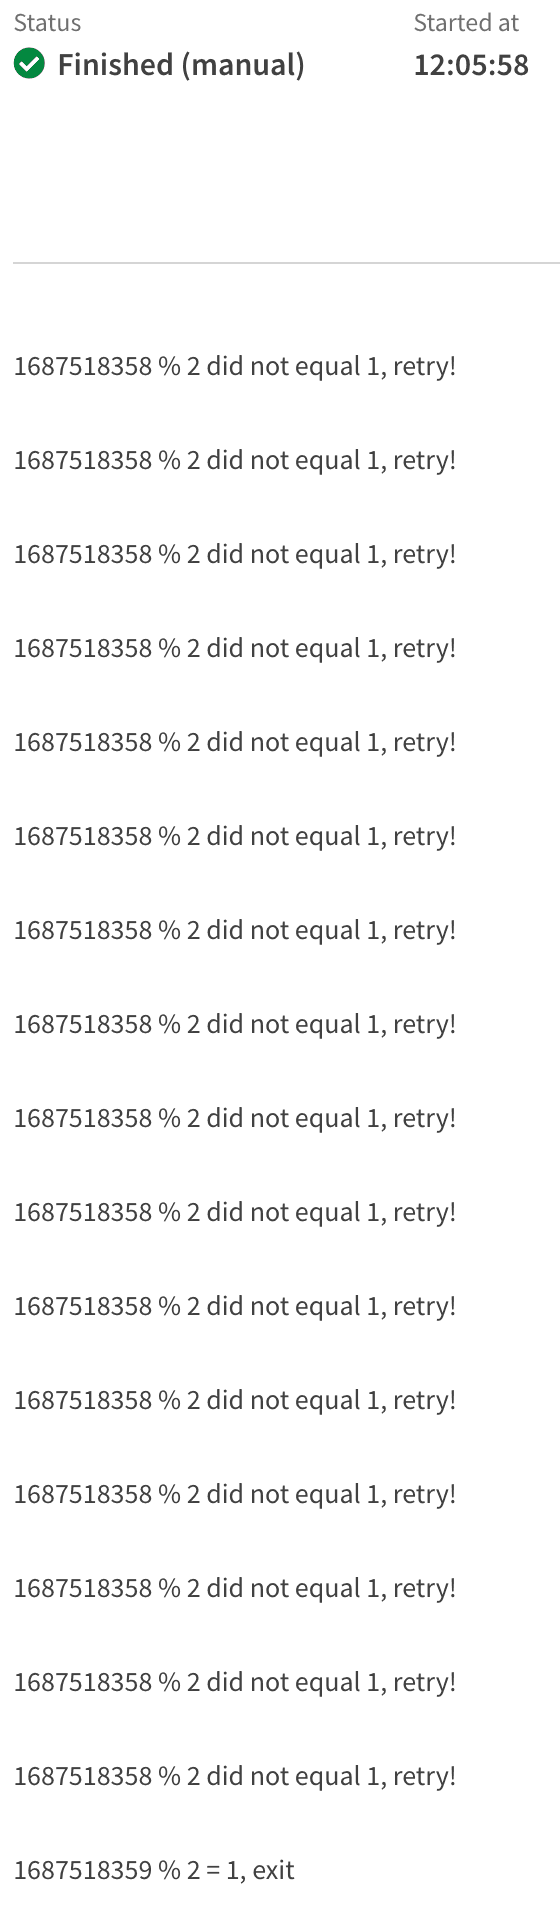
This automation retrieves a value from a public API (current timestamp), and does a simple check on the value.
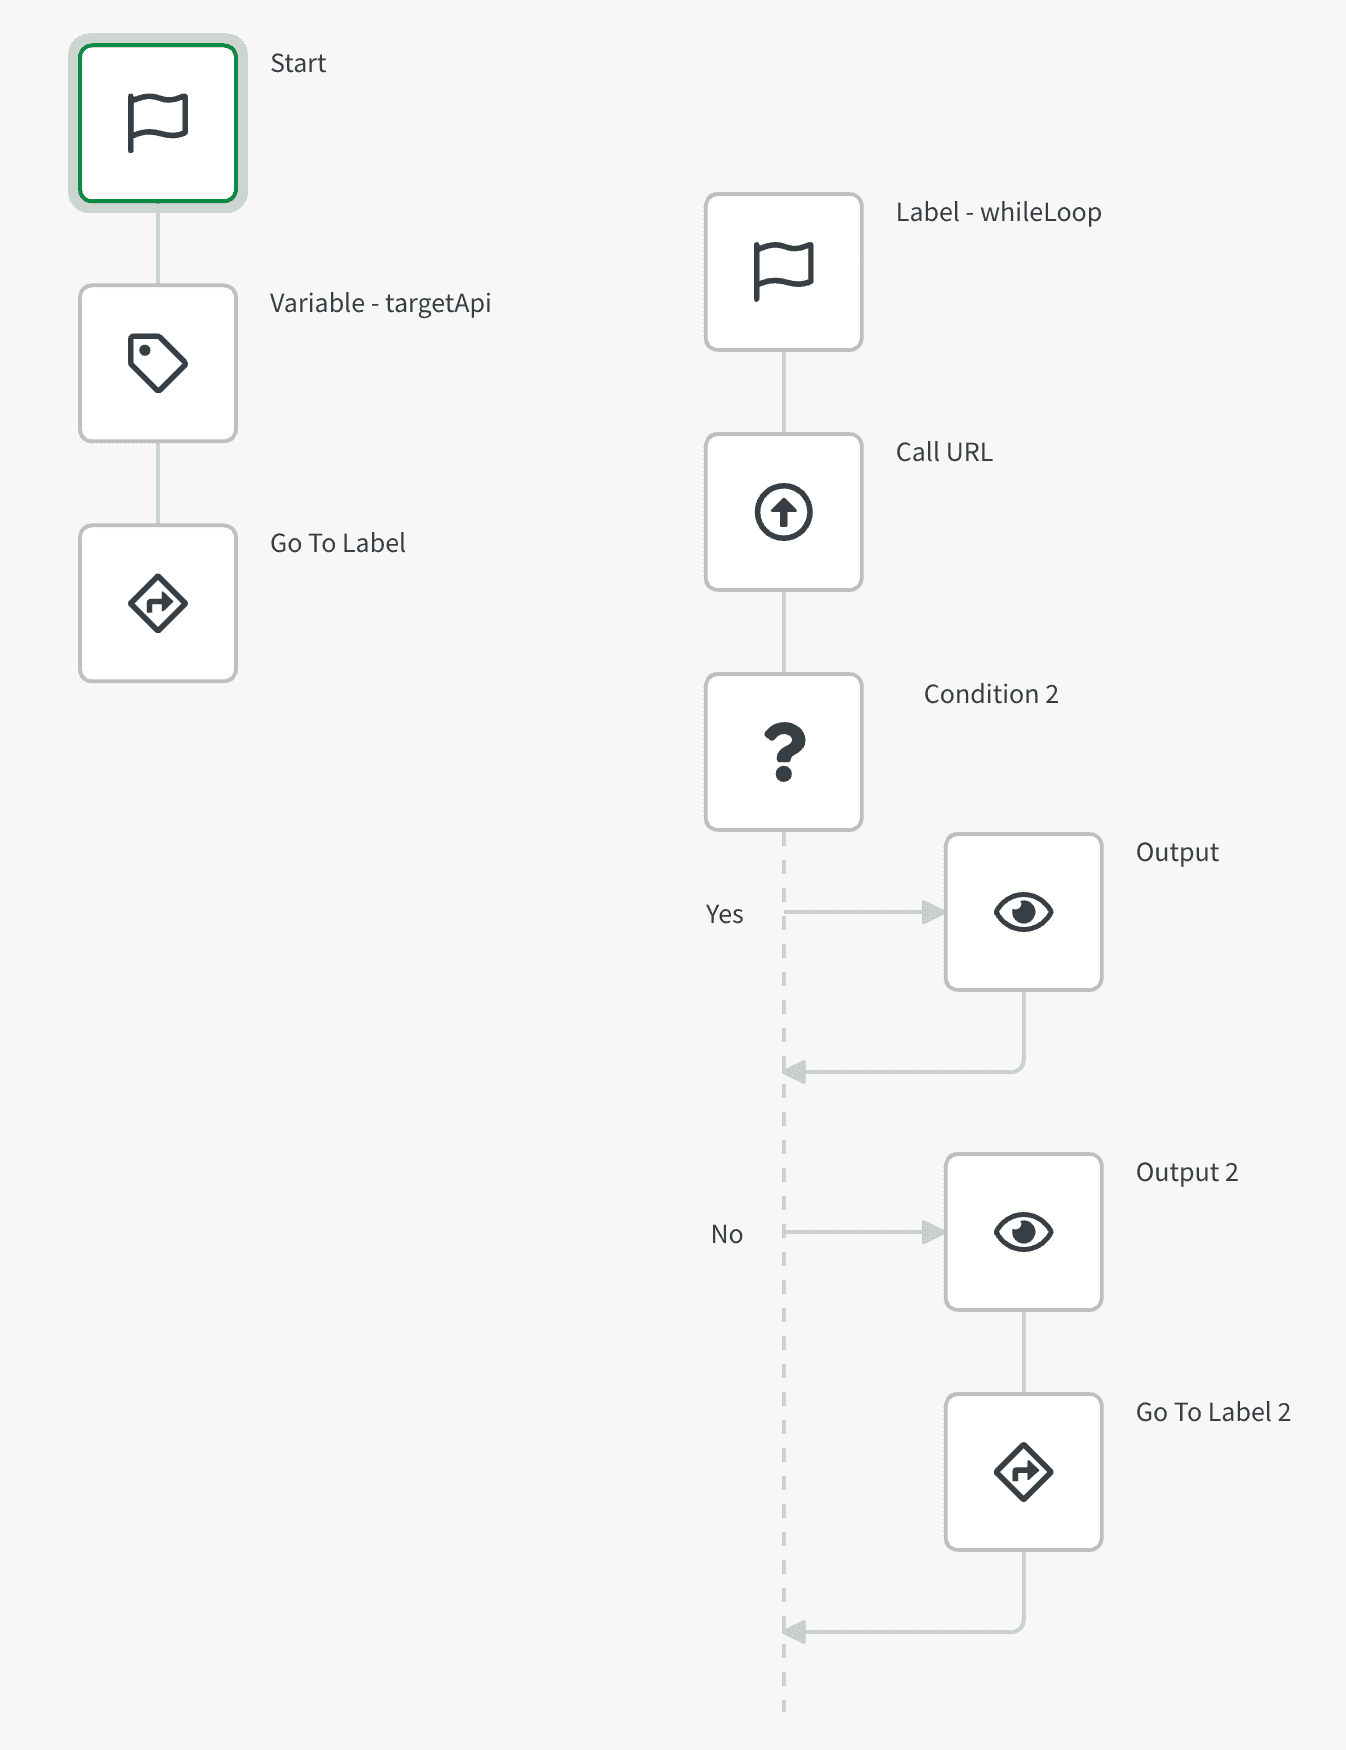
By using a go to label and a condition block, we can evaluate the result, and either end the automation if true, or retry if false.
This approach is useful when used in conjunction with a sleep block to poll APIs.
To import this example, use the automation snippet below by copying the JSON and pasting it straight into a workspace.
Automation snippet:
{"blocks":[{"id":"A7049C5D-39CE-49CE-9153-278C72ED2748","type":"StartBlock","disabled":false,"name":"Start","displayName":"Start","comment":"","childId":"DD391D04-CE90-4FBD-BEB8-DB7C314675D5","inputs":[{"id":"run_mode","value":"manual","type":"select","structure":{}}],"settings":[],"collapsed":[{"name":"loop","isCollapsed":false}],"x":100,"y":100},{"id":"DCC7B8D4-28D9-4449-A8E8-72ACFA0DF3A3","type":"GotoBlock","disabled":false,"name":"goToLabel","displayName":"Go To Label","comment":"","childId":null,"inputs":[{"id":"label","value":"C75AC931-7BA3-4672-8BBF-2E9A0C0BCC2C","type":"select","displayValue":"whileLoop","structure":[]}],"settings":[],"collapsed":[{"name":"loop","isCollapsed":false}],"x":87.88671875,"y":340.31640625},{"id":"C75AC931-7BA3-4672-8BBF-2E9A0C0BCC2C","type":"LabelBlock","disabled":false,"name":"label","displayName":"Label - whileLoop","comment":"","childId":"8A4533EF-0492-46F0-B70D-EDCD031D26C4","inputs":[{"id":"name","value":"whileLoop","type":"string","structure":[]}],"settings":[],"collapsed":[{"name":"loop","isCollapsed":false}],"x":412.88671875,"y":174.31640625},{"id":"DD391D04-CE90-4FBD-BEB8-DB7C314675D5","type":"VariableBlock","disabled":false,"name":"targetApi","displayName":"Variable - targetApi","comment":"","childId":"DCC7B8D4-28D9-4449-A8E8-72ACFA0DF3A3","inputs":[],"settings":[],"collapsed":[{"name":"loop","isCollapsed":false}],"x":84.05859375,"y":193.79296875,"variableGuid":"56FD86DC-C2C4-43F7-8F46-7CCF22B7FE49","operations":[{"id":"set_value","key":"FF1A6796-D2FF-4C0D-985D-40D434976769","name":"Set value of { variable }","value":"https://worldtimeapi.org/api/timezone/Europe/London"}]},{"id":"3C80AC6A-1D75-42F1-AC9D-FE95E29F51A2","type":"GotoBlock","disabled":false,"name":"goToLabel2","displayName":"Go To Label 2","comment":"","childId":null,"inputs":[{"id":"label","value":"C75AC931-7BA3-4672-8BBF-2E9A0C0BCC2C","type":"select","displayValue":"whileLoop","structure":[]}],"settings":[],"collapsed":[{"name":"loop","isCollapsed":false}],"x":643.88671875,"y":598.31640625},{"id":"B792FCE5-46CA-4D96-8B39-D665599B16A4","type":"IfElseBlock","disabled":false,"name":"condition2","displayName":"Condition 2","comment":"","childId":null,"inputs":[{"id":"conditions","value":{"mode":"all","conditions":[{"input1":"{mod: {$.callURL.unixtime}, 2}","input2":"1","operator":"="}]},"type":"custom","structure":[]}],"settings":[],"collapsed":[{"name":"yes","isCollapsed":false},{"name":"no","isCollapsed":false}],"x":636,"y":400,"childTrueId":"D818C1FB-D5AA-453E-AE65-EBEED1D37FA3","childFalseId":"6346A1DB-527E-4BD0-B447-DC289F7F08FA"},{"id":"8A4533EF-0492-46F0-B70D-EDCD031D26C4","type":"CallUrlBlock","disabled":false,"name":"callURL","displayName":"Call URL","comment":"","childId":"B792FCE5-46CA-4D96-8B39-D665599B16A4","inputs":[{"id":"url","value":"{$.targetApi}","type":"string","structure":[]},{"id":"method","value":"GET","type":"select","displayValue":"GET","structure":[]},{"id":"timeout","value":"","type":"string","structure":[]},{"id":"params","value":null,"type":"object","mode":"keyValue","structure":[]},{"id":"headers","value":null,"type":"object","mode":"keyValue","structure":[]},{"id":"encoding","value":"","type":"string","structure":[]}],"settings":[{"id":"blendr_on_error","value":"stop","type":"select","structure":[]},{"id":"full_response","value":false,"type":"checkbox","structure":[]},{"id":"capitalize_headers","value":false,"type":"checkbox","structure":[]},{"id":"automations_censor_data","value":false,"type":"checkbox","structure":[]}],"collapsed":[{"name":"loop","isCollapsed":false}],"x":487,"y":270},{"id":"D818C1FB-D5AA-453E-AE65-EBEED1D37FA3","type":"ShowBlock","disabled":false,"name":"output","displayName":"Output","comment":"","childId":null,"inputs":[{"id":"input","value":"{$.callURL.unixtime} % 2 = 1, exit","type":"string","structure":[]}],"settings":[{"id":"display_mode","value":"add","type":"select","structure":[]}],"collapsed":[{"name":"loop","isCollapsed":false}],"x":585.80859375,"y":510.4296875},{"id":"6346A1DB-527E-4BD0-B447-DC289F7F08FA","type":"ShowBlock","disabled":false,"name":"output2","displayName":"Output 2","comment":"","childId":"3C80AC6A-1D75-42F1-AC9D-FE95E29F51A2","inputs":[{"id":"input","value":"{$.callURL.unixtime} % 2 did not equal 1, retry!","type":"string","structure":[]}],"settings":[{"id":"display_mode","value":"add","type":"select","structure":[]}],"collapsed":[{"name":"loop","isCollapsed":false}],"x":651.65234375,"y":640.31640625}],"variables":[{"guid":"56FD86DC-C2C4-43F7-8F46-7CCF22B7FE49","name":"targetApi","type":"string"}]}
Creating a for n loop in Qlik Application Automation 27 Dec 2022 3:00 PM (2 years ago)
Qlik's Application Automation doesn't support generating a for n loop out with a
block. While there are blocks for looping over existing content (i.e. for each),
you need to use a different approach to run a set number of iterations without a
list or object to iterate over.
There are two common methods:
- Generate a list using a custom code block, and then loop over with a loop block
- Use label and condition blocks to continuously check the state of a variable
If you don't need to check state and want to run only a set number of iterations, then using the custom code block is easiest. It also has the advantage that all input linking works correctly, whereas with labels you will break lookups within the automation between sections.
If you need to check a state/ verify something has completed, then you should use labels and conditions. These are harder to build, but support you being able to modify the state during the run more easily.
For n loop - via custom code block
This automation snippet accepts an input variable for the number of iterations to
generate, and generates an integer between 1 and that number, which is returned as
iterList.
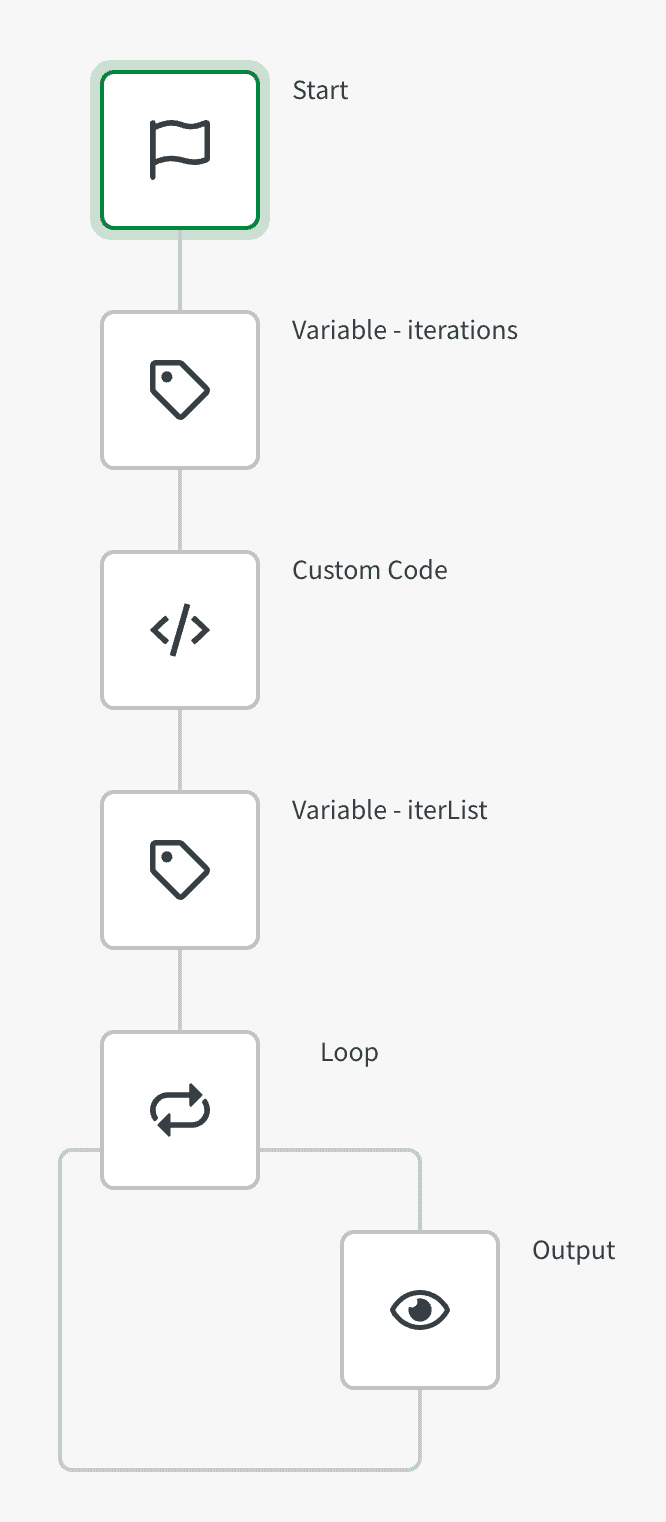
You can then use a standard loop block to run your iteration.
The custom code is javascript, returning the list to the output of the block.
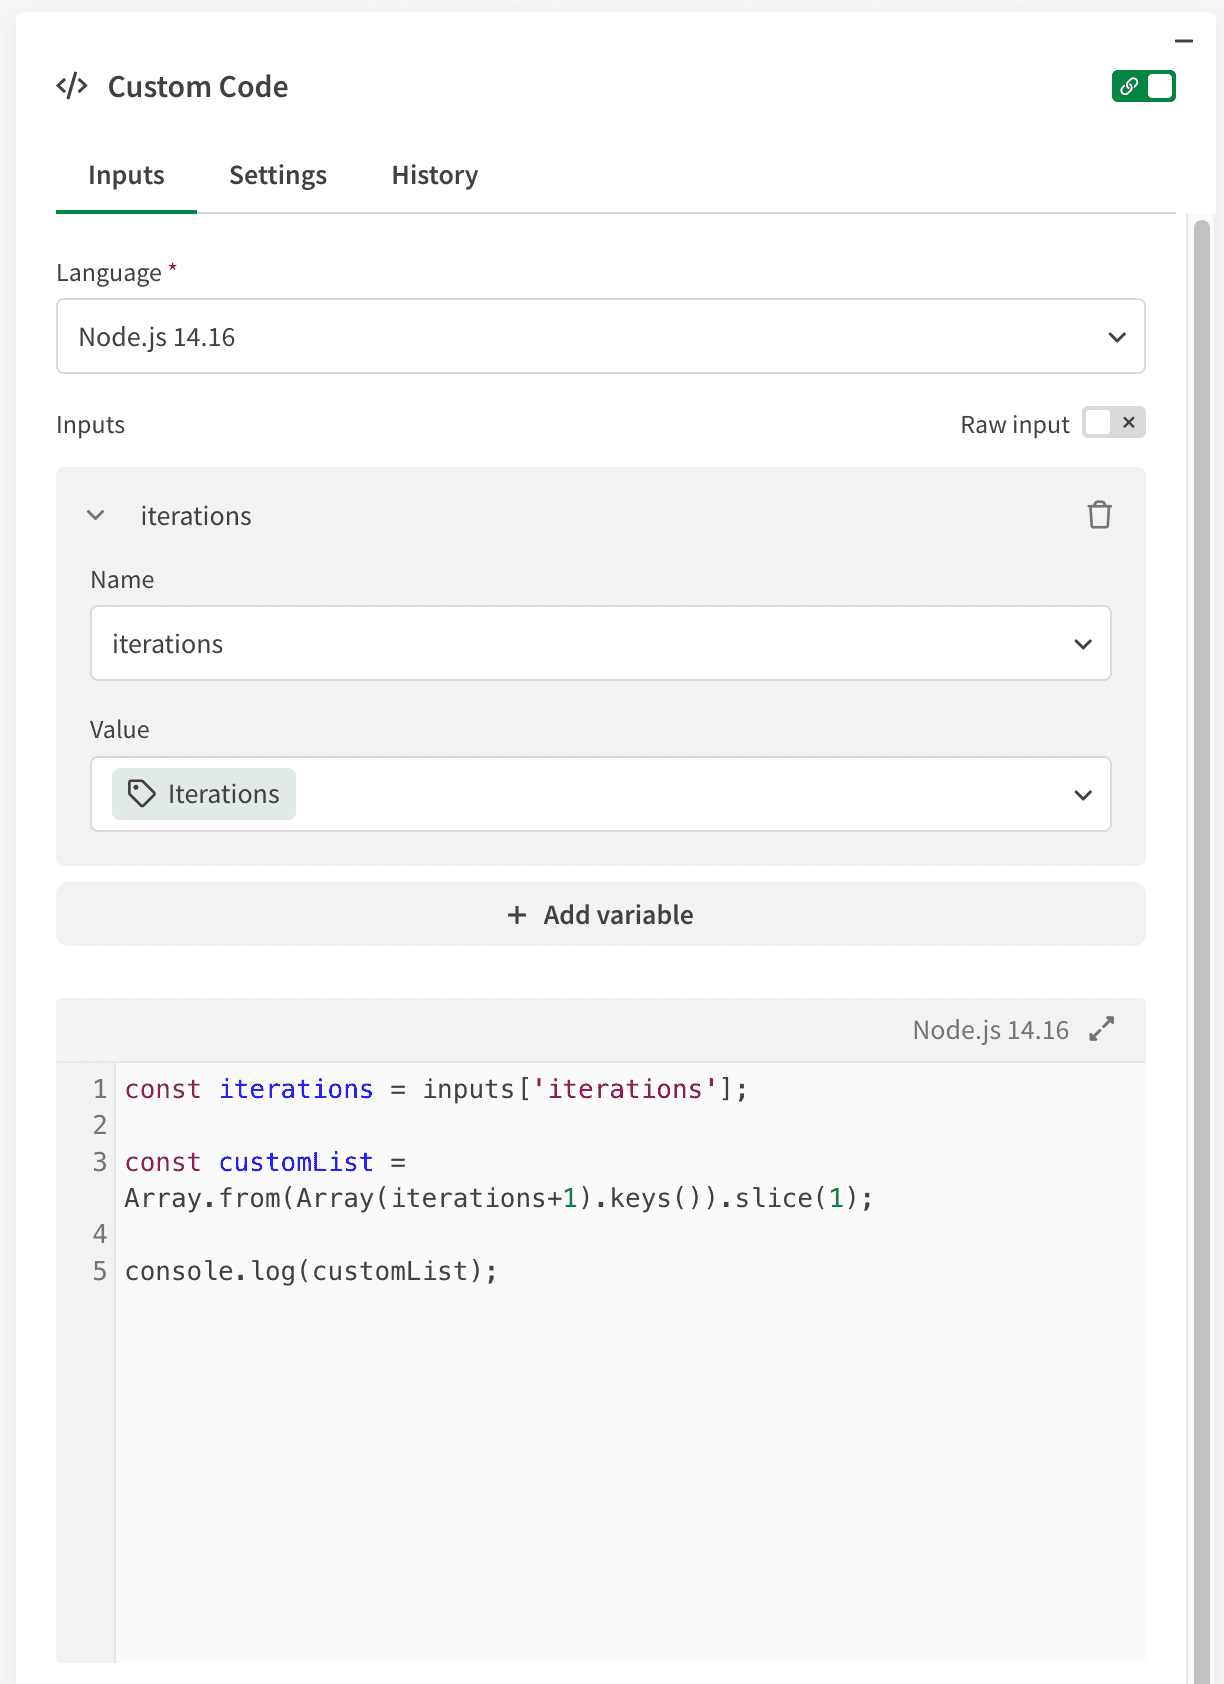
Javascript snippet:
const iterations = inputs['iterations'];

const customList = Array.from(Array(iterations+1).keys()).slice(1);

console.log(customList);
If you prefer to copy this whole example, use the automation snippet below by copying the JSON and pasting it straight into a workspace.
Automation snippet:
{"blocks":[{"id":"B9BACC33-529C-483F-8339-A7029E944BE2","type":"VariableBlock","disabled":false,"name":"iterations","displayName":"Variable - iterations","comment":"","childId":"C3E01264-F076-4BB2-9F59-FC236AF1875F","inputs":[],"settings":[],"collapsed":[{"name":"loop","isCollapsed":false}],"x":250,"y":240,"variableGuid":"EB4BB61B-4EB4-41E9-8F11-7476437AF4B5","operations":[{"key":"1D9C49ED-332A-4C07-967E-F8425B4B16BF","id":"set_value","name":"Set value of { variable }","value":"100"}]},{"id":"C3E01264-F076-4BB2-9F59-FC236AF1875F","type":"CustomCodeBlock3","disabled":false,"name":"customCode","displayName":"Custom Code","comment":"","childId":"4F8812D7-AA6B-4C4D-9F7C-86AF7C48E74B","inputs":[{"id":"language","value":"nodejs","type":"select","displayValue":"Node.js 14.16","structure":{}},{"id":"inputs","value":[{"key":"iterations","value":"{$.iterations}"}],"type":"object","mode":"keyValue","structure":{}},{"id":"code","value":"const iterations = inputs['iterations'];\n\nconst customList = Array.from(Array(iterations+1).keys()).slice(1);\n\nconsole.log(customList);","type":"code","structure":{}}],"settings":[{"id":"blendr_on_error","value":"stop","type":"select","structure":{}},{"id":"automations_censor_data","value":false,"type":"checkbox","structure":{}}],"collapsed":[{"name":"loop","isCollapsed":false}],"x":-293,"y":219},{"id":"4F8812D7-AA6B-4C4D-9F7C-86AF7C48E74B","type":"VariableBlock","disabled":false,"name":"iterList","displayName":"Variable - iterList","comment":"","childId":"5CF740A2-EC7E-4B16-911B-8A730F417D9C","inputs":[],"settings":[],"collapsed":[{"name":"loop","isCollapsed":false}],"x":0,"y":240,"variableGuid":"455BB8DB-169E-47BA-9445-335607D122CC","operations":[{"key":"E737BA8D-EB66-4909-A684-0362DED20DC5","id":"merge","name":"Merge other list into { variable }","value":"{$.customCode}","allow_duplicates":"no"}]},{"id":"5CF740A2-EC7E-4B16-911B-8A730F417D9C","type":"ForEachBlock","disabled":false,"name":"loop","displayName":"Loop","comment":"","childId":null,"inputs":[{"id":"input","value":"{$.iterList}","type":"string","structure":{}}],"settings":[{"id":"automations_censor_data","value":false,"type":"checkbox","structure":{}}],"collapsed":[{"name":"loop","isCollapsed":false}],"x":-417,"y":202,"loopBlockId":"43758FA3-912E-4230-822D-22C12B895487"},{"id":"43758FA3-912E-4230-822D-22C12B895487","type":"ShowBlock","disabled":false,"name":"output","displayName":"Output","comment":"","childId":null,"inputs":[{"id":"input","value":"{$.loop.item}/{count: {$.iterList}}","type":"string","structure":{}}],"settings":[{"id":"display_mode","value":"add","type":"select","structure":{}}],"collapsed":[{"name":"loop","isCollapsed":false}],"x":-391,"y":209}],"variables":[{"guid":"455BB8DB-169E-47BA-9445-335607D122CC","name":"iterList","type":"list"},{"guid":"EB4BB61B-4EB4-41E9-8F11-7476437AF4B5","name":"iterations","type":"number"}]}Creating a while loop via label blocks is discussed in creating a while loop.
Group by performance in Qlik Sense & QlikView with order by sorting 8 Jan 2021 3:00 PM (4 years ago)
When asked how to aggregate data in Qlik products in the quickest way, the answer is "it depends". While the key factor is the uniqueness/ cardinality of the aggregating dimensions, there are other elements at play.
In general, though, the fastest way to aggregate in the data load script (after loading the data into memory) is:
- When aggregating by a low cardinality dimension in a small data set, resident load and run a group by immediately (this is also the fewest lines of script)
- When aggregating by a higher cardinality dimension, or on one that requires a lot of sorting prior to aggregation, resident load and sort the table by the high cardinality dimension as the first step. Then resident load this table and run your group by as a second step.
The short version: use approach 2 as the default, unless your data is very simple.
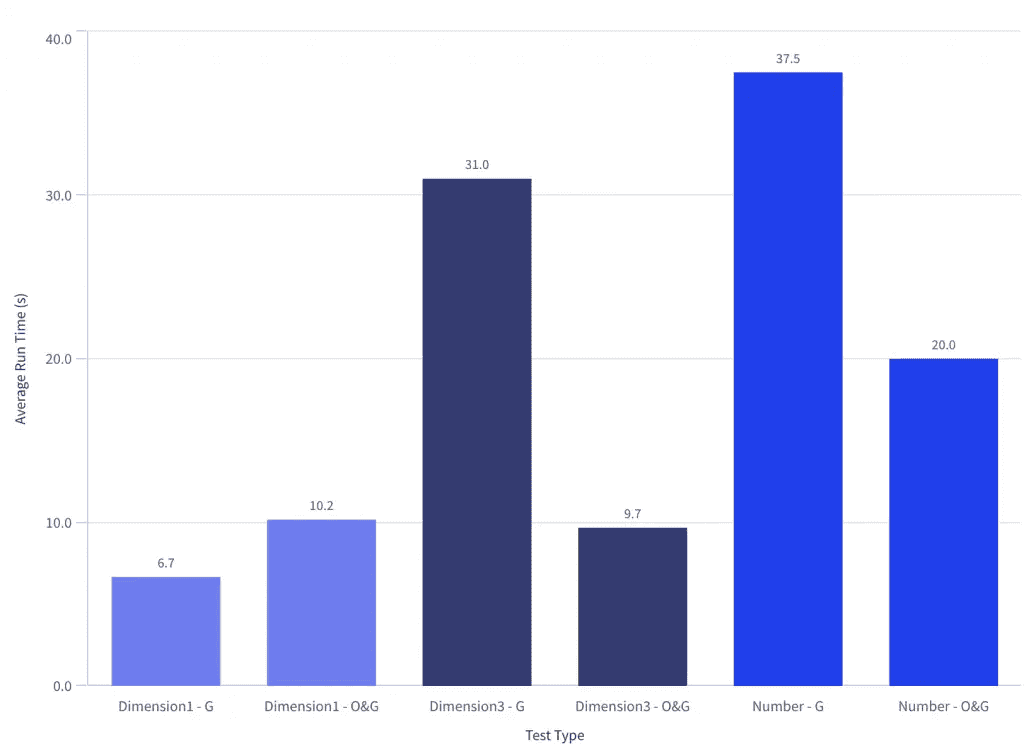
For Dimension1 (low cardinality), a direct group by (G) was fastest. For Dimension3 (high cardinality) and Number (low cardinality) an order by, then group by (O&G) was fastest by a large margin
The Test
Using a 2 core 8GB RAM virtual machine in Azure, we loaded 5 million rows of randomly generated data from a QVD (which was then loaded using an optimised load). The test is run 5 times per test, with the average used for analysis.
This data came from the random data generator script posted earlier this year. The script used to run the test can be found on Github.

The aggregations were tested on Dimension1 (low cardinality), Dimension3 (high cardinality) and Number (low cardinality)
The tests below explores the statement that it can be significantly faster to load data, sort it, then group it (three steps) rather than just loading and grouping it (two steps).
Tests:
- "G" - Group by (load data from QVD, then group in resident load)
- "OG" - Order by, group by (load data from QVD, then sort in first resident load, then group in second resident load)
Test cases:
- Dimension1 - this is a single upper case letter field (26 possible values). The values are in a random order
- Dimension 3 - this is a four letter letter, both upper and lower case. The values are in a random order
- Number - this is an integer between 1 and 26, which increments to 26 before resetting to 1 and repeating the increment across the data set
The Results
Order by, then group by is fastest in more complex data sets
With the exception of the simple alphabetic field (Dimension1), it is significantly faster to first sort the data, then aggregate it when doing so on a single dimension field.
This means more script in your app - but a faster overall load.
Future questions
To explore at a later date:
- Was it the sort order or the data type that resulted in such a large difference between Dimension1 and Number, as both had 26 unique values?
- Where is the crossover in terms of dimension complexity between the O and O&G approaches?
- How does performance change when grouping by a number of dimensions rather than just one?
- How does peak RAM and CPU differ between the tests?
- Does a preceding load offer similar performance benefits (in which case you'd also benefit from less code)
Task Chaining in Qlik Sense Enterprise SaaS 15 Dec 2020 3:00 PM (4 years ago)
Today, QSE SaaS doesn't do task chaining. Instead you have two options:
- Use a scheduled reload task for every app, and try to make sure the start time for task 2 will always be later than task 1
- Use Qlik SaaS REST APIs to trigger the reload
This post covers a simple approach (i.e. Qlik script only) for triggering reloads of downstream apps on completion of an app reload in a way that doesn't require much maintenance or any external systems or integrations.
With the APIs, we can reload as frequently as we wish - to some disastrous results. Be careful.
For those who haven't looked into the QCS APIs in the past, there's a lot of information on the Qlik.dev site; and specifically this video on the topic of task chaining with Qlik-CLI.
The theory
Using the reloads API, we need just one thing to trigger a reload - an app ID. So, all we need to do after a reload is make a call to this API to trigger the next app. This means we only need to put a scheduled reload task on the first app in the chain, with every following app triggered by the proceeding application.
To make this work, we need:
- A REST connection to the /reloads endpoint
- A data file connection to store the logs in
- A parent application (app 1 - this will be triggered by QSE SaaS and a scheduled task)
- A child application (app 2 - this will be triggered by the load script of app 1)
The reason for doing this in the load script of a normal app (and not as a separate "task manager" app) is because scheduling and running a series of task manager apps is tedious, and setting up a large number of these apps may not be supported by Qlik in the QCS environment.
Note: Fair warning, the reloads API is experimental and may change.
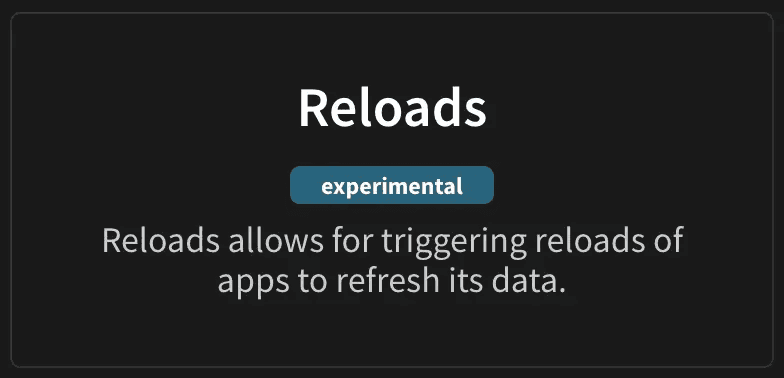
If your reloads suddenly stop working, it could be the API.
The REST connection
We are going to be using the /api/v1/reloads endpoint and hitting it with a POST request. To set this connection up, you'll need the following details:
- URL: https://
. .qlikcloud.com/api/v1/reloads - Type: POST
- Body: {"appId":"
"} - Header: Authorization: Bearer
The subroutine
The inputs and outputs of this sub are listed in the script. You should put this as the last script to execute in your load script.
Sub sTriggerReload(sub_appID,sub_connAPI,sub_connLog)

	/*

    This subroutine triggers the reload of a QCS application (directly, not using scheduled tasks)

    INPUTS:
    * sub_appID = the GUID for the app to be reloaded
    * sub_connAPI = a REST data connection that can access the tenant APIs with appropriate privileges
    * sub_connLog = a folder data connection for storing reload trigger log files (these will be stored as "ReloadLog_<AppID>_<ReloadID>.qvd")

    OUTPUTS:
    * Send a POST message the task API to trigger the relevant app reload
    * Store a log file to record the reload trigger to assist with finding this event in audit logs if needed

    REST CONNECTION CONFIG
    * URL: https://<tenantname>.<region>.qlikcloud.com/api/v1/reloads
    * Type: POST
    * Body: {"appId":"<valid app GUID>"}
    * Header: Authorization: Bearer <API key>

    */

    // Connect to the REST connection
    LIB CONNECT TO '$(sub_connAPI)';

    LET sub_QueryBody = '{""appId"":""$(sub_appID)""}';

    // Collect data from the response for logging
    // Configure app ID for reload
    RestConnectorMasterTable:
    SQL SELECT
        "id",
        "appId",
        "tenantId",
        "userId",
        "type",
        "status",
        "creationTime",
        "__KEY_root"
    FROM JSON (wrap on) "root" PK "__KEY_root"
    WITH CONNECTION (BODY "$(sub_QueryBody)");

    ReloadLog:
    LOAD DISTINCT
    	[id] 			AS [Reload ID],
        [appId] 		AS [Reload App ID],
        [tenantId] 		AS [Reload Tenant ID],
        [userId] 		AS [Reload User ID],
        [type] 			AS [Reload Type],
        [status] 		AS [Reload Status],
        [creationTime] 		AS [Reload Creation Time],
        DocumentName()		AS [Reload Trigger App ID],
        DocumentTitle()		AS [Reload Trigger App Name]
    RESIDENT RestConnectorMasterTable
    WHERE NOT IsNull([__KEY_root]);

    // Set variables to produce log filenames
    LET sub_ReloadTime 	= Timestamp(Peek('Reload Creation Time',0),'YYYYMMDDhhmmss');
    LET sub_ReloadID 	= Peek('Reload ID',0);

    // Check to see if the reload request returned rows, and the variables carry data. If not, fail this reload
    If (NoOfRows('ReloadLog') <> 1) OR ('$(sub_ReloadTime)' = '') OR ('$(sub_ReloadID)' = '') THEN
    	// Fail with an error for the log
        Call Error('An unexpected number of rows was returned by the reloads API, or invalid data was found.');
    END IF;

    TRACE >>> Returned reload $(sub_ReloadID) at $(sub_ReloadTime);

    // Store logs and clear model
    STORE ReloadLog INTO [lib://$(sub_connLog)/ReloadLog_$(sub_appID)_$(sub_ReloadID)_$(sub_ReloadTime).qvd] (qvd);
    DROP TABLE ReloadLog;
    DROP TABLE RestConnectorMasterTable;

End Sub;

// Call - pass in the app ID, the REST connection name, the folder connection name
Call sTriggerReload('ab77b40d-4a30-46d9-9d2b-2943c6b82902','<rest connection name>','DataFiles');
The latest version of this script can be found in this GitHub repo.
What's missing from this?
If you want to take this forward, you'll want a few things:
- Error handling - for when you get a weird response from the API
- An app to blend the log files this produces with the reload event logs to track duration and errors
- To store this script as a text file and load it as an include so it doesn't exist in a million different apps
- To consider whether you want to trigger reloads by app ID or by app and space name
Qlik Sense Object Type Mapping 31 Aug 2020 4:00 PM (4 years ago)
When you're troubleshooting or diving into logs, it's useful to have a mapping of object types. The name of an object is defined by the developer of that object, so there tends to be little convention - other some basic syntax rules and that Qlik Sense only allows one instance of the name per site.

Each object definition references the object type (qType)
Knowing what each type means is useful when inventorying a site for upgrade or migration.
Here's a list put together at the time of writing. The latest version of the list is available on GitHub, and includes descriptions for each object.
| Object Type | Object Name (UI) | Object Origin |
| qlik-date-picker | Date picker | Qlik Dashboard Bundle |
| qlik-share-button | Share button | Qlik Dashboard Bundle |
| qlik-variable-input | Variable input | Qlik Dashboard Bundle |
| idevioanimator | GeoAnalytics Animator | Qlik GeoAnalytics |
| idevioarealayer | GeoAnalytics Area Layer | Qlik GeoAnalytics |
| ideviobubblelayer | GeoAnalytics Bubble Layer | Qlik GeoAnalytics |
| ideviochartlayer | GeoAnalytics Chart Layer | Qlik GeoAnalytics |
| ideviogeodatalayer | GeoAnalytics Geodata Layer | Qlik GeoAnalytics |
| idevioheatmaplayer | GeoAnalytics Heatmap Layer | Qlik GeoAnalytics |
| ideviolinelayer | GeoAnalytics Line Layer | Qlik GeoAnalytics |
| ideviomap | GeoAnalytics Map | Qlik GeoAnalytics |
| auto-chart | Auto Chart | Qlik Native |
| barchart | Bar chart | Qlik Native |
| boxplot | Box Plot | Qlik Native |
| bulletchart | Bullet chart | Qlik Native |
| action-button | Button | Qlik Native |
| combochart | Combo chart | Qlik Native |
| container | Container | Qlik Native |
| distributionplot | Distribution plot | Qlik Native |
| filterpane | Filter pane | Qlik Native |
| gauge | Gauge | Qlik Native |
| histogram | Histogram | Qlik Native |
| kpi | KPI | Qlik Native |
| linechart | Line chart | Qlik Native |
| map | Map | Qlik Native |
| mekkochart | Mekko chart | Qlik Native |
| piechart | Pie chart | Qlik Native |
| pivot-table | Pivot table | Qlik Native |
| scatterplot | Scatter plot | Qlik Native |
| table | Table | Qlik Native |
| text-image | Text & Image | Qlik Native |
| treemap | Treemap | Qlik Native |
| waterfallchart | Waterfall chart | Qlik Native |
| qlik-barplus-chart | Bar & area chart | Qlik Visualization Bundle |
| qlik-bullet-chart | Bullet chart | Qlik Visualization Bundle |
| qlik-funnel-chart-ext | Funnel chart | Qlik Visualization Bundle |
| qlik-heatmap-chart | Heatmap chart | Qlik Visualization Bundle |
| qlik-multi-kpi | Multi KPI | Qlik Visualization Bundle |
| qlik-network-chart | Network chart | Qlik Visualization Bundle |
| sn-org-chart | Org chart | Qlik Visualization Bundle |
| qlik-smart-pivot | P&L pivot | Qlik Visualization Bundle |
| qlik-radar-chart | Radar chart | Qlik Visualization Bundle |
| qlik-sankey-chart-ext | Sankey chart | Qlik Visualization Bundle |
| qlik-trellis-container | Trellis container | Qlik Visualization Bundle |
| qlik-variance-waterfall | Variance Waterfall | Qlik Visualization Bundle |
| qlik-word-cloud | Word cloud chart | Qlik Visualization Bundle |
| backgroundimg | Background Image | Unknown |
| variable | Variable | Unknown |
| qsSimpleKPI | Simple KPI | Unknown |
| qlik-venn | qlik-venn | Unknown |
| cl-finance-report | Vizlib Finance Report | Vizlib |
| VizlibActivityGauge | Vizlib Activity Gauge | Vizlib |
| VizlibAdvancedTextObject | Vizlib Advanced Text Object | Vizlib |
| VizlibBarChart | Vizlib Bar Chart | Vizlib |
| VizlibCalendar | Vizlib Calendar | Vizlib |
| cl-kpi | Vizlib Simple KPI | Vizlib |
| cl-horizontalselectionbar | Vizlib Selection Bar | Vizlib |
| cl-cards | Vizlib Cards | Vizlib |
| VizlibContainer | Vizlib Container | Vizlib |
| VizlibFilter | Vizlib Filter | Vizlib |
| VizlibHeatmap | Vizlib Heatmap | Vizlib |
| VizlibKPI | Vizlib KPI Designer | Vizlib |
| VizlibLineChart | Vizlib Line Chart | Vizlib |
| VizlibPieChart | Vizlib Pie Chart | Vizlib |
| VizlibPivotTable | Vizlib Pivot Table | Vizlib |
| VizlibSankeyChart | Vizlib Sankey Chart | Vizlib |
| vizlibstorytimeline | Vizlib Story Timeline | Vizlib |
| VizlibTable | Vizlib Table | Vizlib |
| VizlibVennDiagram | Vizlib Venn Diagram | Vizlib |
| VizlibGantt | Vizlib Gantt | Vizlib |
Qlik Sense app for disk space monitoring 27 Aug 2020 4:00 PM (4 years ago)
I previously posted a bat file that logs disk capacity and utilisation. I thought I'd share the QVF file that loads those simple logs.

Some simple visualisation of drive consumption by date
The file is available on GitHub here.
Generate random data in Qlik Sense & QlikView 28 Jun 2020 4:00 PM (4 years ago)
This simple snippet provides a randomised data set for testing purposes.

The Data
The field definitions, based on a data set of 5 million rows:
| Field Name | Unique Values | Description |
| TransID | 5m | Incrementing integer |
| TransLineID | 1 | Single integer |
| Number | Up to 26 | Integer between 1 and 26 |
| Dimension1 | Up to 26 | Random upper-case letter |
| Dimension2 | Up to 26 | Random lower-case letter |
| Dimension3 | Up to 5m | Random four letter string |
| Dimension4 | Up to 5m | Random string (hash128) |
| Expression1 | Up to 5m | Random value between 0 and 1000000 (2dp) |
| Expression2 | Up to ~1k | Random value between 0 and 1000 (0dp) |
| Expression3 | Up to ~100k | Random value between 0 and 1 (5dp) |
Sample based on using the script to generate 5 million rows
The Script
// Generate some random data
// This is roughly based off of the Qlik Ctrl+O+O default script, but with a bit more variety
SET vRecordCount = 50000;

Transactions:
Load
	IterNo().                             as TransLineID,
	RecNo()                               as TransID,
	mod(RecNo(),26)+1                     as Number,
	chr(Floor(26*Rand())+65)              as Dimension1,
	chr(Floor(26*Rand())+97)              as Dimension2,
	chr(Floor(26*Rand())+pick(round(rand())+1,65,97))
	   &chr(Floor(26*Rand())+pick(round(rand())+1,65,97))
	   &chr(Floor(26*Rand())+pick(round(rand())+1,65,97))
	   &chr(Floor(26*Rand())+pick(round(rand())+1,65,97)) as Dimension3,
	Hash128(Rand())                       as Dimension4,
	round(1000000*Rand(),0.01)            as Expression1,
	Round(1000*Rand()*Rand())             as Expression2,
	Round(Rand()*Rand()*Rand(),0.00001).  as Expression3
Autogenerate $(vRecordCount);

// Add comments to describe each field
Comment Field Dimension1 With "Random upper-case letter";
Comment Field Dimension2 With "Random lower-case letter";
Comment Field Dimension3 With "Random four letter string";
Comment Field Dimension4 With "Random string (hash128)";
Comment Field Expression1 With "Random value between 0 and 1000000 (2dp)";
Comment Field Expression2 With "Random value between 0 and 1000 (0dp)";
Comment Field Expression3 With "Random value between 0 and 1 (5dp)";
This snippet is also available on GitHub here.
Windows Server Reporting - multi-server total and free space logging via batch script 15 May 2020 4:00 PM (4 years ago)
To help track disk space on a cluster, here's a simple batch script that works on Windows. It accepts a list of hostnames, and outputs the size and free space on each server to a log file.
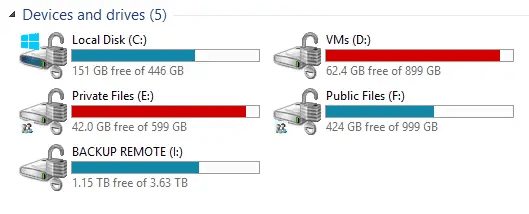
This is a test server, aptly named "server". 5 drives in Windows Explorer.
The script is available on GitHub; the version at time of writing is here:
@echo off
:: Batch file to log out a local drive report to a .log file in the same directory
:: Log files are named based on the date and time

:: Specify which servers to attempt to return disk space for (delimit with spaces)
:: Enter hostname, and ensure the account running this script has local or domain admin rights
set SERVER_LIST=server

:: Set output date time (YYYYMMDD_hhmmss)
set LOG_TIMESTAMP=%date:~-4,4%%date:~-7,2%%date:~0,2%_%time:~0,2%%time:~3,2%%time:~6,2%
set LOG_DATE=%date:~-4,4%%date:~-7,2%%date:~0,2%
set LOG_TIME=%time:~0,2%%time:~3,2%%time:~6,2%

:: Specify output prefix - this uses an absolute path, if you prefer to use relative then ensure the scheduler includes a "start in" path
set LOG_LOCATION=C:\DriveReport\DriveReport_%LOG_TIMESTAMP%.log

:: Create empty output file
>nul copy nul %LOG_LOCATION%

:: Loop over each server to return stats and append to log file
echo ServerName,LogDate,LogTime,Drive,Size,FreeSpace>>%LOG_LOCATION%
for %%i in (%SERVER_LIST%) do (

    for /f "tokens=1,2,3" %%a in ('wmic /node:"%%i" LogicalDisk Where DriveType^="3" Get DeviceID^,Size^,FreeSpace^|find ":"') do @echo %%i,%LOG_DATE%,%LOG_TIME%,%%a,%%c,%%b>>%LOG_LOCATION%

)
This outputs one log file per run, containing a row per drive.

One .log file is produced per run of the batch script
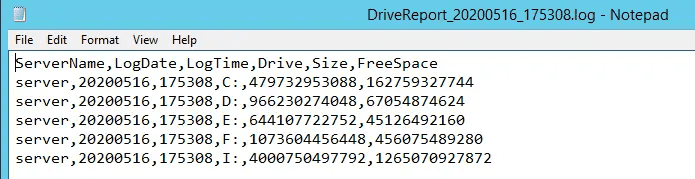
Inside, there's a row per drive
This can be scheduled using Windows Task Scheduler and has been tested on Windows 10, Windows Server 2012R2, Windows Server 2016.
Check a Windows Service, if it's not running, start it via batch script 29 Apr 2020 4:00 PM (4 years ago)
Following a system restart, an overnight shutdown or a system update, some Windows services don't always come up successfully. This script runs via Windows Task Scheduler and accepts one or more service names.

Log files are produced when a service is found to not be running (updated 16/05)
If the service isn't running, it attempts to start it - and produces a log file to capture the incident.
The script is available on GitHub; the version at time of writing is here:
@Echo Off
:: ServiceCheck.bat
:: Accepts a service name, if it's running, exits. If it's not running, attempts to start it and creates a log file.
:: Uplift to check and retry?

Set ServiceName=%~1
::Set ServiceName=QlikSenseProxyService

:: Get date in yyyyMMdd_HHmm format to use with file name.
FOR /f "usebackq" %%i IN (`PowerShell ^(Get-Date^).ToString^('yyyy-MM-dd'^)`) DO SET LogDate=%%i

SC queryex "%ServiceName%"|Find "STATE"|Find /v "RUNNING">Nul&&(
  echo %ServiceName% not running
  echo Start %ServiceName%

  Net start "%ServiceName%">nul||(
    Echo "%ServiceName%" wont start
    exit /b 1
  )

  echo "%ServiceName%" started

  :: Now log out to a file so we have some sort of history
  echo ### Service [%ServiceName%] not running on %LogDate% & echo %Time% Attempting to start service.>>"%~dp0ServiceCheck_%ServiceName%_%LogDate%.log"
  exit /b 0

)||(
  :: All OK, let's just write to console and exit
  echo "%ServiceName%" working
  exit /b 0
)
Configure the task (this example checks two Qlik Sense services) to accept one or more actions.
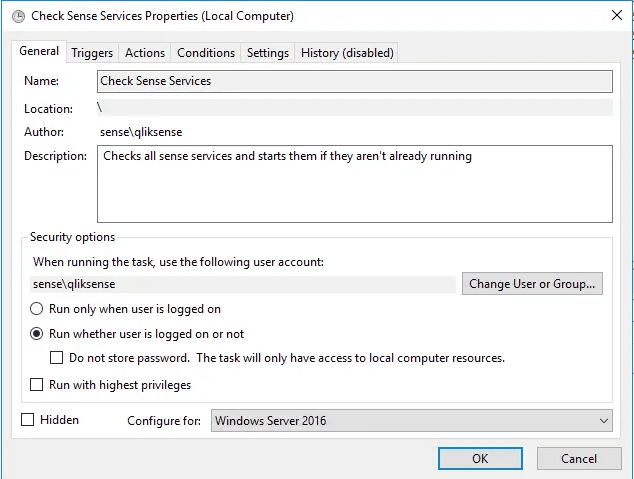
Checked "Run whether user is logged on or not"
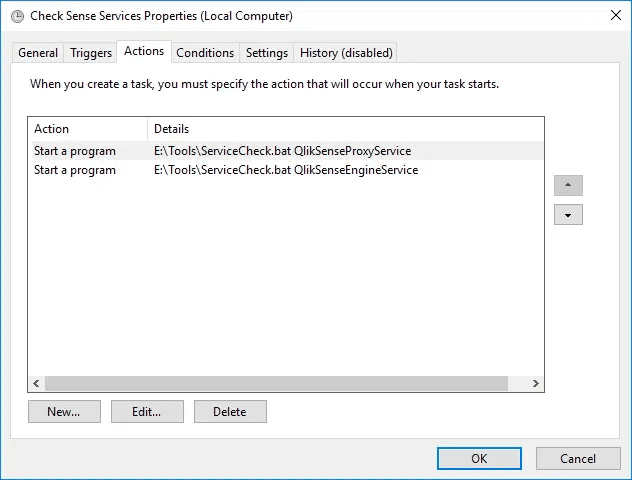
Add one action per service
An updated Version Control tab for Qlik Sense & QlikView 28 Apr 2020 4:00 PM (4 years ago)
This updated snippet (see original post from 2018) is available on GitHub, and included in this post.
The main benefits of this script are that it requires a single row addition per log, with no manual increment of the version number, and the version control information can be surfaced by the engine either to the UI or via the APIs.
This assumes a HidePrefix of %.
/*
********************* INFORMATION *********************

CREATED BY:     withdave
CREATED DATE:   19/03/2020
PURPOSE:        RAW Extractor for Teradata T3 datamarts

********************* CHANGE LOG *********************
*/

// Update this version control table after each edit. Avoid using the ; delimiter in your change log
Island_VersionControl:
LOAD
	*
INLINE [
%Ver_Version; %Ver_Date; %Ver_Author; %Ver_Change
1; 19/03/2020; withdave; Initial version
2; 21/04/2020; withdave; Changed store file names and added mapping for region from contact
3; 28/04/2020; withdave; Added transformed contact file
] (delimiter is ';');


// Do not edit the section below as this loads and sets the version variable in the app using the table above
// Identify the maximum version
Temp_Version:
LOAD
	Max(%Ver_Version) AS Temp_Max_Version
RESIDENT Island_VersionControl;

// Set the version variable
LET vVersion = Peek('Temp_Max_Version',0,'Temp_Version');

// Drop the temporary table
DROP TABLE Temp_Version;
Recursive QVD index script snippet for Qlik Sense & QlikView 15 Feb 2020 3:00 PM (5 years ago)
This simple snippet works with Qlik Sense and QlikView 12+ to recursively collect metadata from QVD files.
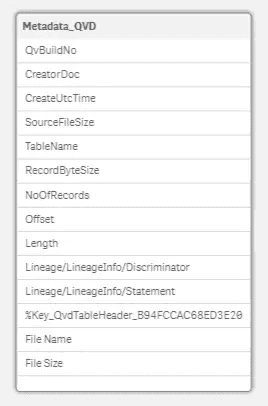
The simple table produced includes only basic QVD metadata
The snippet is available below, or the latest version is on GitHub.
// Sub to recursively load QVD file metadata from a directory
SUB sLoadQVDMetadata(vSub_Path)

	TRACE >> Loading files in path [$(vSub_Path)].;

	// Iterate over each QVD file in the directory and load metadata
	// Use backslash for compatibility with QlikView 12
	FOR EACH vSub_File in FileList('$(vSub_Path)\*.qvd')

        	// For use with QlikView 12, comment out the two lineage rows
        	Metadata_QVD:
        	LOAD
			QvBuildNo,
			CreatorDoc,
			CreateUtcTime,
			SourceFileSize,
			"TableName",
			RecordByteSize,
			NoOfRecords,
			Offset,
			"Length",
			"Lineage/LineageInfo/Discriminator",
			"Lineage/LineageInfo/Statement",
			%Key_QvdTableHeader_B94FCCAC68ED3E20,
			FileName()				AS [File Name],
			FileSize()				AS [File Size]
        	FROM [$(vSub_File)]
        	(XmlSimple, table is [QvdTableHeader]);

        	// Set a count and print to console
        	LET vLoad_Rows = NoOfRows('Metadata_QVD');
        	TRACE >>> Loaded $(vLoad_Rows) rows, last file found: [$(vSub_File)].;

    	NEXT vSub_File;

	// Now recursively call the function for each directory found in this path
    	// Use backslash for compatibility with QlikView 12
    	FOR EACH vSub_Directory in DirList('$(vSub_Path)\*')

		// Resursively call sub
        	CALL sLoadQVDMetadata('$(vSub_Directory)');

    	NEXT vSub_Directory;

END SUB;

// Qlik Sense - i.e. lib, do not include trailing slash
Call sLoadQVDMetadata('lib://Dir_QlikFiles');
// QlikView - i.e. path (do not include trailing slash)
// Call sLoadQVDMetadata('D:\QlikFiles');
Qlik Sense Release Version & Support List 29 Jan 2020 3:00 PM (5 years ago)
As of February 2022, the information shown below is now available on the new Qlik download site at https://community.qlik.com/t5/Downloads/tkb-p/Downloads, and the releases can also be found directly on GitHub at https://github.com/qlik-download/qlik-sense-server/releases
Qlik Sense log files usually contain a reference to a build or engine number, and I've not yet found a complete list where you can see all version numbers at the same time - so I've created one.
This list contains the current (at time of writing) list of Qlik Sense external version names to build number, release dates and end of support dates.
For the latest version of this list (and in CSV format), visit https://github.com/withdave/qlik-releases
Qlik Sense Release List
| Major Version | Minor Version | Build Number | Release date | End of support |
|---|---|---|---|---|
| Qlik Sense February 2022 | Patch 1 | 14.54.4 | 23/02/2022 | As per initial release |
| Qlik Sense February 2022 | Initial release | 14.54.2 | 15/02/2022 | |
| Qlik Sense November 2021 | Patch 4 | 14.44.9 | 27/01/2022 | As per initial release |
| Qlik Sense November 2021 | Patch 3 | 14.44.8 | 05/01/2022 | As per initial release |
| Qlik Sense November 2021 | Patch 2 | 14.44.7 | 17/12/2021 | As per initial release |
| Qlik Sense November 2021 | Patch 1 | 14.44.6 | 06/12/2021 | As per initial release |
| Qlik Sense November 2021 | Initial release | 14.44.5 | 08/11/2021 | 08/11/2023 |
| Qlik Sense August 2021 | Patch 8 | 14.28.15 | 23/02/2022 | As per initial release |
| Qlik Sense August 2021 | Patch 7 | 14.28.14 | 27/01/2022 | As per initial release |
| Qlik Sense August 2021 | Patch 6 | 14.28.13 | 05/01/2022 | As per initial release |
| Qlik Sense August 2021 | Patch 5 | 14.28.12 | As per initial release | |
| Qlik Sense August 2021 | Patch 4 | 14.28.10 | As per initial release | |
| Qlik Sense August 2021 | Patch 3 | 14.28.9 | As per initial release | |
| Qlik Sense August 2021 | Patch 2 | 14.28.7 | As per initial release | |
| Qlik Sense August 2021 | Patch 1 | 14.28.5 | As per initial release | |
| Qlik Sense August 2021 | Initial release | 14.28.3 | 23/08/2021 | 23/08/2023 |
| Qlik Sense May 2021 | Patch 12 | 14.20.20 | 27/01/2022 | As per initial release |
| Qlik Sense May 2021 | Patch 11 | 14.20.19 | 05/01/2022 | As per initial release |
| Qlik Sense May 2021 | Patch 10 | 14.20.18 | As per initial release | |
| Qlik Sense May 2021 | Patch 9 | 14.20.17 | As per initial release | |
| Qlik Sense May 2021 | Patch 8 | 14.20.16 | As per initial release | |
| Qlik Sense May 2021 | Patch 7 | 14.20.15 | As per initial release | |
| Qlik Sense May 2021 | Patch 6 | 14.20.14 | As per initial release | |
| Qlik Sense May 2021 | Patch 5 | 14.20.13 | As per initial release | |
| Qlik Sense May 2021 | Patch 4 | 14.20.10 | As per initial release | |
| Qlik Sense May 2021 | Patch 3 | 14.20.9 | As per initial release | |
| Qlik Sense May 2021 | Patch 2 | 14.20.8 | As per initial release | |
| Qlik Sense May 2021 | Patch 1 | 14.20.6 | As per initial release | |
| Qlik Sense May 2021 | Initial release | 14.20.5 | 10/05/2021 | 10/05/2023 |
| Qlik Sense February 2021 | Patch 16 | 14.5.30 | As per initial release | |
| Qlik Sense February 2021 | Patch 15 | 14.5.29 | As per initial release | |
| Qlik Sense February 2021 | Patch 14 | 14.5.27 | As per initial release | |
| Qlik Sense February 2021 | Patch 13 | 14.5.26 | As per initial release | |
| Qlik Sense February 2021 | Patch 12 | 14.5.25 | As per initial release | |
| Qlik Sense February 2021 | Patch 11 | 14.5.24 | As per initial release | |
| Qlik Sense February 2021 | Patch 10 | 14.5.22 | As per initial release | |
| Qlik Sense February 2021 | Patch 9 | 14.5.21 | As per initial release | |
| Qlik Sense February 2021 | Patch 8 | 14.5.20 | As per initial release | |
| Qlik Sense February 2021 | Patch 7 | 14.5.19 | As per initial release | |
| Qlik Sense February 2021 | Patch 6 | 14.5.18 | As per initial release | |
| Qlik Sense February 2021 | Patch 5 | 14.5.16 | As per initial release | |
| Qlik Sense February 2021 | Patch 4 | 14.5.10 | As per initial release | |
| Qlik Sense February 2021 | Patch 3 | 14.5.9 | As per initial release | |
| Qlik Sense February 2021 | Patch 2 | 14.5.7 | As per initial release | |
| Qlik Sense February 2021 | Patch 1 | 14.5.6 | As per initial release | |
| Qlik Sense February 2021 | Initial release | 14.5.4 | 09/02/2021 | 09/02/2023 |
| Qlik Sense November 2020 | Patch 19 | 13.102.27 | As per initial release | |
| Qlik Sense November 2020 | Patch 18 | 13.102.26 | As per initial release | |
| Qlik Sense November 2020 | Patch 17 | 13.102.25 | As per initial release | |
| Qlik Sense November 2020 | Patch 16 | 13.102.24 | As per initial release | |
| Qlik Sense November 2020 | Patch 15 | 13.102.23 | As per initial release | |
| Qlik Sense November 2020 | Patch 14 | 13.102.22 | As per initial release | |
| Qlik Sense November 2020 | Patch 13 | 13.102.21 | As per initial release | |
| Qlik Sense November 2020 | Patch 12 | 13.102.20 | As per initial release | |
| Qlik Sense November 2020 | Patch 11 | 13.102.19 | As per initial release | |
| Qlik Sense November 2020 | Patch 10 | 13.102.17 | As per initial release | |
| Qlik Sense November 2020 | Patch 9 | 13.102.16 | As per initial release | |
| Qlik Sense November 2020 | Patch 8 | 13.102.15 | As per initial release | |
| Qlik Sense November 2020 | Patch 7 | 13.102.14 | As per initial release | |
| Qlik Sense November 2020 | Patch 6 | 13.102.13 | As per initial release | |
| Qlik Sense November 2020 | Patch 5 | 13.102.12 | As per initial release | |
| Qlik Sense November 2020 | Patch 4 | 13.102.11 | As per initial release | |
| Qlik Sense November 2020 | Patch 3 | 13.102.10 | As per initial release | |
| Qlik Sense November 2020 | Patch 2 | 13.102.8 | As per initial release | |
| Qlik Sense November 2020 | Patch 1 | 13.102.6 | As per initial release | |
| Qlik Sense November 2020 | Initial release | 13.102.5 | 10/11/2020 | 10/11/2022 |
| Qlik Sense September 2020 | Patch 15 | 13.95.23 | As per initial release | |
| Qlik Sense September 2020 | Patch 14 | 13.95.22 | As per initial release | |
| Qlik Sense September 2020 | Patch 13 | 13.95.21 | As per initial release | |
| Qlik Sense September 2020 | Patch 12 | 13.95.19 | As per initial release | |
| Qlik Sense September 2020 | Patch 11 | 13.95.15 | As per initial release | |
| Qlik Sense September 2020 | Patch 10 | 13.95.14 | As per initial release | |
| Qlik Sense September 2020 | Patch 9 | 13.95.13 | As per initial release | |
| Qlik Sense September 2020 | Patch 8 | 13.95.12 | As per initial release | |
| Qlik Sense September 2020 | Patch 7 | 13.95.10 | As per initial release | |
| Qlik Sense September 2020 | Patch 6 | 13.95.9 | As per initial release | |
| Qlik Sense September 2020 | Patch 5 | 13.95.8 | As per initial release | |
| Qlik Sense September 2020 | Patch 4 | 13.95.7 | As per initial release | |
| Qlik Sense September 2020 | Patch 3 | 13.95.6 | As per initial release | |
| Qlik Sense September 2020 | Patch 2 | 13.95.5 | As per initial release | |
| Qlik Sense September 2020 | Patch 1 | 13.95.4 | As per initial release | |
| Qlik Sense September 2020 | Initial release | 13.95.3 | 09/09/2020 | 09/09/2022 |
| Qlik Sense June 2020 | Patch 18 | 13.82.29 | As per initial release | |
| Qlik Sense June 2020 | Patch 17 | 13.82.28 | As per initial release | |
| Qlik Sense June 2020 | Patch 16 | 13.82.26 | As per initial release | |
| Qlik Sense June 2020 | Patch 15 | 13.82.23 | As per initial release | |
| Qlik Sense June 2020 | Patch 14 | 13.82.22 | As per initial release | |
| Qlik Sense June 2020 | Patch 13 | 13.82.21 | As per initial release | |
| Qlik Sense June 2020 | Patch 12 | 13.82.20 | As per initial release | |
| Qlik Sense June 2020 | Patch 11 | 13.82.19 | As per initial release | |
| Qlik Sense June 2020 | Patch 10 | 13.82.18 | As per initial release | |
| Qlik Sense June 2020 | Patch 9 | 13.82.17 | As per initial release | |
| Qlik Sense June 2020 | Patch 8 | 13.82.16 | As per initial release | |
| Qlik Sense June 2020 | Patch 7 | 13.82.15 | As per initial release | |
| Qlik Sense June 2020 | Patch 6 | 13.82.14 | As per initial release | |
| Qlik Sense June 2020 | Patch 5 | 13.82.13 | As per initial release | |
| Qlik Sense June 2020 | Patch 4 | 13.82.12 | As per initial release | |
| Qlik Sense June 2020 | Patch 3 | 13.82.11 | As per initial release | |
| Qlik Sense June 2020 | Patch 2 | 13.82.8 | As per initial release | |
| Qlik Sense June 2020 | Patch 1 | 13.82.6 | As per initial release | |
| Qlik Sense June 2020 | Initial release | 13.82.4 | 10/06/2020 | 10/06/2022 |
| Qlik Sense April 2020 | Patch 17 | 13.72.26 | As per initial release | |
| Qlik Sense April 2020 | Patch 16 | 13.72.25 | As per initial release | |
| Qlik Sense April 2020 | Patch 15 | 13.72.22 | As per initial release | |
| Qlik Sense April 2020 | Patch 14 | 13.72.21 | As per initial release | |
| Qlik Sense April 2020 | Patch 13 | 13.72.20 | As per initial release | |
| Qlik Sense April 2020 | Patch 12 | 13.72.19 | As per initial release | |
| Qlik Sense April 2020 | Patch 11 | 13.72.18 | As per initial release | |
| Qlik Sense April 2020 | Patch 10 | 13.72.17 | As per initial release | |
| Qlik Sense April 2020 | Patch 9 | 13.72.16 | As per initial release | |
| Qlik Sense April 2020 | Patch 8 | 13.72.15 | As per initial release | |
| Qlik Sense April 2020 | Patch 7 | 13.72.14 | As per initial release | |
| Qlik Sense April 2020 | Patch 6 | 13.72.13 | As per initial release | |
| Qlik Sense April 2020 | Patch 5 | 13.72.12 | As per initial release | |
| Qlik Sense April 2020 | Patch 4 | 13.72.9 | As per initial release | |
| Qlik Sense April 2020 | Patch 3 | 13.72.8 | 03/06/2020 | As per initial release |
| Qlik Sense April 2020 | Patch 2 | 13.72.5 | 20/05/2020 | As per initial release |
| Qlik Sense April 2020 | Patch 1 | 13.72.4 | 06/05/2020 | As per initial release |
| Qlik Sense April 2020 | Initial release | 13.72.3 | 14/04/2020 | 14/04/2022 |
| Qlik Sense February 2020 | Patch 13 | 13.62.26 | As per initial release | |
| Qlik Sense February 2020 | Patch 12 | 13.62.25 | As per initial release | |
| Qlik Sense February 2020 | Patch 11 | 13.62.22 | As per initial release | |
| Qlik Sense February 2020 | Patch 10 | 13.62.21 | As per initial release | |
| Qlik Sense February 2020 | Patch 9 | 13.62.20 | As per initial release | |
| Qlik Sense February 2020 | Patch 8 | 13.62.18 | As per initial release | |
| Qlik Sense February 2020 | Patch 7 | 13.62.17 | As per initial release | |
| Qlik Sense February 2020 | Patch 6 | 13.62.16 | As per initial release | |
| Qlik Sense February 2020 | Patch 5 | 13.62.14 | 03/06/2020 | As per initial release |
| Qlik Sense February 2020 | Patch 4 | 13.62.12 | 20/05/2020 | As per initial release |
| Qlik Sense February 2020 | Patch 3 | 13.62.11 | 06/05/2020 | As per initial release |
| Qlik Sense February 2020 | Patch 2 | 13.62.9 | 08/04/2020 | As per initial release |
| Qlik Sense February 2020 | Patch 1 | 13.62.7 | 11/03/2020 | As per initial release |
| Qlik Sense February 2020 | Initial release | 13.62.6 | 25/02/2020 | 25/02/2022 |
| Qlik Sense November 2019 | Patch 18 | 13.51.31 | As per initial release | |
| Qlik Sense November 2019 | Patch 17 | 13.51.30 | As per initial release | |
| Qlik Sense November 2019 | Patch 16 | 13.51.27 | As per initial release | |
| Qlik Sense November 2019 | Patch 15 | 13.51.26 | As per initial release | |
| Qlik Sense November 2019 | Patch 14 | 13.51.25 | As per initial release | |
| Qlik Sense November 2019 | Patch 13 | 13.51.22 | As per initial release | |
| Qlik Sense November 2019 | Patch 12 | 13.51.21 | As per initial release | |
| Qlik Sense November 2019 | Patch 11 | 13.51.19 | 20/05/2020 | As per initial release |
| Qlik Sense November 2019 | Patch 10 | 13.51.18 | 06/05/2020 | As per initial release |
| Qlik Sense November 2019 | Patch 9 | 13.51.15 | 22/04/2020 | As per initial release |
| Qlik Sense November 2019 | Patch 8 | 13.51.14 | 08/04/2020 | As per initial release |
| Qlik Sense November 2019 | Patch 7 | 13.51.13 | 25/03/2020 | As per initial release |
| Qlik Sense November 2019 | Patch 6 | 13.51.12 | 04/03/2020 | As per initial release |
| Qlik Sense November 2019 | Patch 5 | 13.51.10 | 12/02/2020 | As per initial release |
| Qlik Sense November 2019 | Patch 4 | 13.51.8 | 29/01/2020 | As per initial release |
| Qlik Sense November 2019 | Patch 3 | 13.51.7 | 15/01/2020 | As per initial release |
| Qlik Sense November 2019 | Patch 2 | 13.51.6 | 18/12/2019 | As per initial release |
| Qlik Sense November 2019 | Patch 1 | 13.51.5 | 04/12/2019 | As per initial release |
| Qlik Sense November 2019 | Initial release | 13.51.4 | 11/11/2019 | 11/11/2021 |
| Qlik Sense September 2019 | Patch 12 | 13.42.19 | As per initial release | |
| Qlik Sense September 2019 | Patch 11 | 13.42.18 | 03/06/2020 | As per initial release |
| Qlik Sense September 2019 | Patch 10 | 13.42.17 | 06/05/2020 | As per initial release |
| Qlik Sense September 2019 | Patch 9 | 13.42.16 | 08/04/2020 | As per initial release |
| Qlik Sense September 2019 | Patch 8 | 13.42.15 | 25/03/2020 | As per initial release |
| Qlik Sense September 2019 | Patch 7 | 13.42.14 | 04/03/2020 | As per initial release |
| Qlik Sense September 2019 | Patch 6 | 13.42.12 | 12/02/2020 | As per initial release |
| Qlik Sense September 2019 | Patch 5 | 13.42.10 | 29/01/2020 | As per initial release |
| Qlik Sense September 2019 | Patch 4 | 13.42.9 | 15/01/2020 | As per initial release |
| Qlik Sense September 2019 | Patch 3 | 13.42.8 | 18/12/2019 | As per initial release |
| Qlik Sense September 2019 | Patch 2 | 13.42.6 | 04/12/2019 | As per initial release |
| Qlik Sense September 2019 | Patch 1 | 13.42.5 | 08/11/2019 | As per initial release |
| Qlik Sense September 2019 | Initial release | 13.42.1 | 30/09/2019 | 30/09/2021 |
| Qlik Sense June 2019 | Patch 13 | 13.32.19 | 08/04/2020 | As per initial release |
| Qlik Sense June 2019 | Patch 12 | 13.32.18 | 25/03/2020 | As per initial release |
| Qlik Sense June 2019 | Patch 11 | 13.32.16 | 05/03/2020 | As per initial release |
| Qlik Sense June 2019 | Patch 10 | 13.32.15 | 12/02/2020 | As per initial release |
| Qlik Sense June 2019 | Patch 9 | 13.32.12 | 29/01/2020 | As per initial release |
| Qlik Sense June 2019 | Patch 8 | 13.32.11 | 15/01/2020 | As per initial release |
| Qlik Sense June 2019 | Patch 7 | 13.32.10 | 18/12/2019 | As per initial release |
| Qlik Sense June 2019 | Patch 6 | 13.32.9 | 04/12/2019 | As per initial release |
| Qlik Sense June 2019 | Patch 5 | 13.32.8 | 20/11/2019 | As per initial release |
| Qlik Sense June 2019 | Patch 4 | 13.32.7 | 06/11/2019 | As per initial release |
| Qlik Sense June 2019 | Patch 3 | 13.32.6 | 11/10/2019 | As per initial release |
| Qlik Sense June 2019 | Patch 2 | 13.32.4 | 10/09/2019 | As per initial release |
| Qlik Sense June 2019 | Patch 1 | 13.32.3 | 29/08/2019 | As per initial release |
| Qlik Sense June 2019 | Initial release | 13.32.2 | 28/06/2019 | 28/06/2021 |
| Qlik Sense April 2019 | Patch 9 | 13.21.20 | 25/03/2020 | As per initial release |
| Qlik Sense April 2019 | Patch 8 | 13.21.19 | 05/03/2020 | As per initial release |
| Qlik Sense April 2019 | Patch 7 | 13.21.18 | 12/02/2020 | As per initial release |
| Qlik Sense April 2019 | Patch 6 | 13.21.14 | 15/01/2020 | As per initial release |
| Qlik Sense April 2019 | Patch 5 | 13.21.13 | 04/12/2019 | As per initial release |
| Qlik Sense April 2019 | Patch 4 | 13.21.12 | 20/11/2019 | As per initial release |
| Qlik Sense April 2019 | Patch 3 | 13.21.10 | 30/08/2019 | As per initial release |
| Qlik Sense April 2019 | Patch 2 | 13.21.9 | 12/07/2019 | As per initial release |
| Qlik Sense April 2019 | Patch 1 | 13.21.2 | 14/05/2019 | As per initial release |
| Qlik Sense April 2019 | Initial release | 13.21.1 | 25/04/2019 | 25/04/2021 |
| Qlik Sense February 2019 | Patch 9 | 13.9.20 | 25/03/2020 | As per initial release |
| Qlik Sense February 2019 | Patch 8 | 13.9.19 | 04/03/2020 | As per initial release |
| Qlik Sense February 2019 | Patch 7 | 13.9.18 | 12/02/2020 | As per initial release |
| Qlik Sense February 2019 | Patch 6 | 13.9.16 | 18/12/2019 | As per initial release |
| Qlik Sense February 2019 | Patch 5 | 13.9.14 | 20/11/2019 | As per initial release |
| Qlik Sense February 2019 | Patch 4 | 13.9.8 | 09/07/2019 | As per initial release |
| Qlik Sense February 2019 | Patch 3 | 13.9.6 | 23/05/2019 | As per initial release |
| Qlik Sense February 2019 | Patch 2 | 13.9.3 | 16/04/2019 | As per initial release |
| Qlik Sense February 2019 | Patch 1 | 13.9.2 | 26/03/2019 | As per initial release |
| Qlik Sense February 2019 | Initial release | 13.9.1 | 12/02/2019 | 12/02/2021 |
| Qlik Sense November 2018 | Patch 8 | 12.44.17 | 04/12/2019 | As per initial release |
| Qlik Sense November 2018 | Patch 7 | 12.44.16 | 06/11/2019 | As per initial release |
| Qlik Sense November 2018 | Patch 6 | 12.44.11 | 27/06/2019 | As per initial release |
| Qlik Sense November 2018 | Patch 5 | 12.44.9 | 23/05/2019 | As per initial release |
| Qlik Sense November 2018 | Patch 4 | 12.44.7 | 16/04/2019 | As per initial release |
| Qlik Sense November 2018 | Patch 3 | 12.44.5 | 28/02/2019 | As per initial release |
| Qlik Sense November 2018 | Patch 2 | 12.44.3 | 13/12/2018 | As per initial release |
| Qlik Sense November 2018 | Patch 1 | 12.44.2 | 15/11/2018 | As per initial release |
| Qlik Sense November 2018 | Initial release | 12.44.1 | 13/11/2018 | 12/11/2020 |
| Qlik Sense September 2018 | Patch 4 | 12.36.10 | 16/04/2019 | As per initial release |
| Qlik Sense September 2018 | Patch 3 | 12.36.9 | 18/03/2019 | As per initial release |
| Qlik Sense September 2018 | Patch 2 | 12.36.6 | 12/11/2018 | As per initial release |
| Qlik Sense September 2018 | Patch 1 | 12.36.3 | 16/10/2018 | As per initial release |
| Qlik Sense September 2018 | Initial release | 12.36.1 | 11/09/2018 | 11/09/2020 |
| Qlik Sense June 2018 | Patch 3 | 12.26.9 | 16/04/2019 | As per initial release |
| Qlik Sense June 2018 | Patch 2 | 12.26.4 | 12/11/2018 | As per initial release |
| Qlik Sense June 2018 | Patch 1 | 12.26.3 | 30/08/2018 | As per initial release |
| Qlik Sense June 2018 | Initial release | 12.26.1 | 26/06/2018 | 26/06/2020 |
| Qlik Sense April 2018 | Patch 3 | 12.16.7 | 16/04/2019 | As per initial release |
| Qlik Sense April 2018 | Patch 2 | 12.16.4 | 21/11/2018 | As per initial release |
| Qlik Sense April 2018 | Patch 1 | 12.16.3 | 20/06/2018 | As per initial release |
| Qlik Sense April 2018 | Initial release | 12.16.2 | 19/04/2018 | 19/04/2020 |
| Qlik Sense February 2018 | Patch 4 | 12.5.10 | 16/04/2019 | As per initial release |
| Qlik Sense February 2018 | Patch 3 | 12.5.8 | 29/10/2018 | As per initial release |
| Qlik Sense February 2018 | Patch 2 | 12.5.5 | 05/06/2018 | As per initial release |
| Qlik Sense February 2018 | Patch 1 | 12.5.3 | 27/02/2018 | As per initial release |
| Qlik Sense February 2018 | Initial release | 12.5.2 | 13/02/2018 | 13/02/2020 |
| Qlik Sense November 2017 | Patch 4 | 11.24.14 | 29/05/2019 | As per initial release |
| Qlik Sense November 2017 | Patch 3 | 11.24.5 | 13/02/2018 | As per initial release |
| Qlik Sense November 2017 | Patch 2 | 11.24.4 | 18/01/2018 | As per initial release |
| Qlik Sense November 2017 | Patch 1 | 11.24.3 | 01/12/2017 | As per initial release |
| Qlik Sense November 2017 | Initial release | 11.24.1 | 14/11/2017 | 14/11/2019 |
| Qlik Sense September 2017 | Patch 4 | 11.14.8 | 19/09/2017 | As per initial release |
| Qlik Sense September 2017 | Patch 3 | 11.14.7 | 15/02/2018 | As per initial release |
| Qlik Sense September 2017 | Patch 2 | 11.14.5 | 08/12/2017 | As per initial release |
| Qlik Sense September 2017 | Patch 1 | 11.14.4 | 31/10/2017 | As per initial release |
| Qlik Sense September 2017 | Initial release | 11.14.3 | 19/09/2017 | 19/09/2019 |
| Qlik Sense June 2017 | Patch 3 | 11.11.4 | 17/11/2017 | As per initial release |
| Qlik Sense June 2017 | Patch 2 | 11.11.3 | 28/08/2017 | As per initial release |
| Qlik Sense June 2017 | Patch 1 | 11.11.2 | 25/07/2017 | As per initial release |
| Qlik Sense June 2017 | Initial release | 11.11.1 | 29/06/2017 | 29/06/2019 |
QVD read/write performance comparison in Qlik Sense Enterprise with QVD and QVF encryption 30 Dec 2019 3:00 PM (5 years ago)
Following on my previous post, I had a look at the performance impact of enabling QVD and QVF encryption in Qlik Sense.
In this test, I'm using Qlik Sense Enterprise November 2019 release on an Azure B4ms (4 vCPU, 16GB RAM) VM running Windows Server 2019. Qlik Sense encryption settings were left at default.

A sneak peak of the results for the largest data set tested
The questions
I'll prepare a follow up post running through the questions and findings, this post summarises the test structure and high level findings.
The tests & source data
The data I'm loading is one of the freely available data sets on archive.org from StackExchange (in this case, a 618MB serverfault 7z archive).

Stack Exchange makes a huge amount of anonymized data available via Archive.org
Uncompressed, it's 3.13GB, or 2.5GB for just the XML files I'm running tests against.

The three test subjects totalled around 2.5GB uncompressed
Each of the tests below was run a minimum of three times, on XML based data sets of three different sizes (PostHistory, Posts and Badges - in order of decreasing size).
The following tests were run:
- Load from XML (no transformation)
- Store loaded XML data into QVD (no transformation)
- Load from QVD using optimised load
- Store loaded QVD data into a second QVD (no transformation)
- Load from QVD using unoptimised load and perform transformations (using a wide range of functions)
- Store transformed QVD data into a third QVD
- Load from QVD using unoptimised load and perform transformation/where reduction (only two functions)
- Store transformed QVD data into a fourth QVD
- Load from QVD using optimised load, then resident to perform matching transformation to #5
- Store transformed QVD data into a fifth QVD
The QVF file and load scripts to run these tests are available on GitHub.
Test results
The results (when assessing ONLY PostHistory - the largest input file), with the exception of tests 6, 8 and 10 (all store operations on data originally loaded from a QVD), show that enabling encryption for QVDs increases load time, and enabling both QVD and QVF encryption increases this further.
No surprises there.
Average test duration grouped by test and test mode
I'll look into this in more depth in a follow up post.
Observation on QVD file size
There was no noticeable increase in QVD file size following encryption - see screenshots of before and after below.

File sizes without QVD encryption (excluding the 0 value for the first file as this was being written while the screenshot was taken)

File sizes with encryption - at most a few KB out
Considerations for next time
- Instead of using a burstable instance (B4ms), I should have used a general instance such as a DS3 to ensure a baseline level of performance
- The server size was likely too large for the smallest data set I used, meaning that operations completed too quickly for any variation to be meaningful, while Posts and PostHistory were more suitable
- This time, I used Azure files for the primary read/write location. While we should assume performance remains consistent over time, testing with a provisioned disk attached to the VM would be a better test to remove any potential variability
- Services were not restarted between every test, only between test modes (i.e. encrypted, unencrypted) - it would be a better control to begin all tests following a restart of at least the engine service
- The initial test created the QVD files which were then overwritten by all following tests - ideally these would have been deleted between tests (incidentally, no obvious variation appeared between tests 1 and 2)
- There was no system monitoring set up - this would provide insights as to CPU and IO utilisation throughout and would be a useful addition to the time statistics
Qlik Sense QVD / QVF Encryption (Qlik Sense Enterprise on Windows) 29 Nov 2019 3:00 PM (5 years ago)
From Qlik Sense Enterprise on Windows September 2019 (the option became configurable via the QMC in November 2019), users have the option of enabling one or both of QVD and QVF encryption - adding at-rest protection from people who shouldn't have access to your valuable files. This is enabled server-wide and applies to all content on the environment.
The big issue that I see is that any security office is going to require that any and all encryption is enabled - without understanding the issues this could cause.

Here's the new DATA ENCRYPTION section under Service cluster in the QMC
What can I set in the QMC?
Although the Qlik Help site offers plenty of detail, it's surprising that there's no validation on the encryption key you enter in the QMC itself - you can enter anything you want and apply it, without Qlik Sense verifying that a corresponding certificate exists.
Let's say, in my wisdom, I do not read the help pages, and enable QVD encryption with an encryption key of say, 80090016. What happens?

Rather than a certificate thumbprint, I'll enter my own "key"
Well, everything looks OK, until you actually try to store a QVD and you get the message "Failed to open key : 80090016".
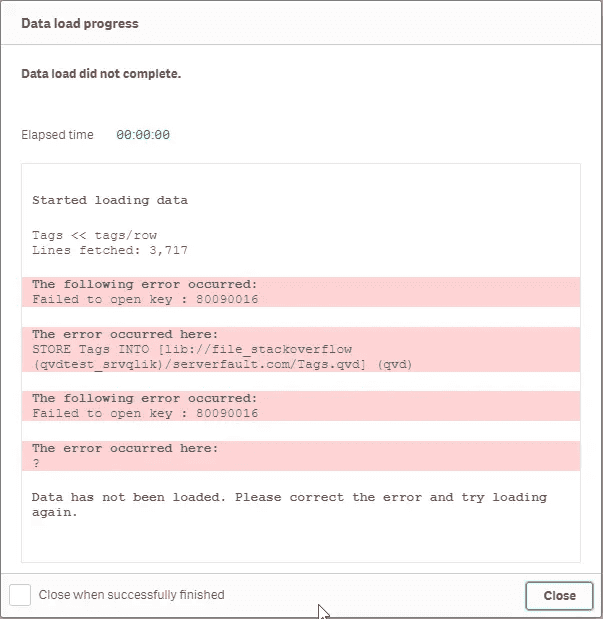
As the person who configured said key, I'd eventually work out that it's because I didn't put in a certificate thumbprint from the system (it would be better if Qlik Sense actually validated this).
The actual process is to create or import a certificate and add the correct thumbprint:
New-SelfSignedCertificate -Subject QlikSenseEncryption -KeyAlgorithm RSA -KeyLength 4096 -Provider "Microsoft Software Key Storage Provider" -KeyExportPolicy ExportableEncrypted -CertStoreLocation "cert:\CurrentUser\My"

The resulting thumbprint can be bussed into the QMC
Do QVDs look any different?
We know that QVDs are formed of an XML header containing metadata related to the QVD and it's content, followed by the data itself in a proprietary Qlik format.
Once encrypted, a QVD retains the same XML header plus one additional node - EncryptionInfo. You can inspect the header in a text editor such as notepad - but if you try to use the Qlik Sense load data or load editor to open the file in XML format you'll get the error listed above.
Example EncryptionInfo from a QVD generated on a test server running Qlik Sense (Qlik Sense Enterprise on Windows, November 2019) with QVD encryption enabled:
<EncryptionInfo>{"ciphertext":"CG9pOkmubU1+3pYtB4ui4/mwAR6y7C5SCm8HV112JKvh432LxjVAgZosXIoL+sMLf34uDgdzv7viSLeRm4ny3gAMGMTJin3HdUnx5pwfQ6Ynp+OjgIW2isVo0h1H4zllzLtqTBT9cIw736dfCDCvASyb3f5/ELfPIegaRYmThAHIrsgFQXV3VW3JRw7009Nu19oSwDqEGmt2puTPh6FJD7DaTMiQQo+nHWD3MjNQKw9Be0cbTi2/agtO0J8dsrHgP+N5C45V8W/gLXWhAQEBm0pNQssM08YK4fnoFX+VqEVpL5NMjiw9QzZDfwqhi45Cb7bECKJXKyPxPU6wC+fCtelASzKzaJTaSrWHs7OCqiE6dKhcQBHh9Y1eBYK+1Q2l44UJmcDhYVpzjDg84lVJvIwSNgayMgJGNWwC9AUo0+JdUHr0dAHYDkEmUgsXEkBAIvVgsuAdHiO+JWeJZrxorbr/mMyhDikKULO7KNlA+XoTxlxcomwEt4oGsNEU2jVMF67f2TEQ7eE3fUAs3f4MpVoYwgxgwHuDzDrOps+ChYInen8hJmzi+mUU3sAt6u+81/XhIXUuO8sQ1Xbp7upS7x97FXxgMeZxS4FSIMPI7ckR0Wri4q8xPmnN0BzgGRUaTcHxOfTTmasUkFHZMbhAZcPKUjW1AjGFNcjRwSuhy4M=","thumbprint":"7FD06E9A238256F70EECA4BEBD0652AB82F4848F","store":"MY"}</EncryptionInfo>This appears to contain the following information:
- cipertext - presumably used for encryption/decryption on another system against the cert
- thumbprint - a hexadecimal key that uniquely identified a certificate
- store - which certificate store the cert is located in
What happens if I try to open an encrypted QVD on a system without the encryption certificate?
You get a rather ungraceful "Cannot open the following file: '{0}'." error.
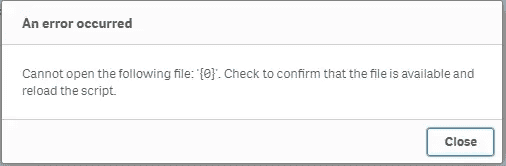
Enter the cryptic "Cannot open the following file: '{0}'. Check to confirm that the file is available and reload the script."
Note that to read encrypted QVDs on a system, you just need to import the correct certificate onto the Qlik Sense server - you do not need to enable QVD encryption on the QMC unless you wish to write encrypted QVDs.
There are a few topics I'll look to follow up on:
- LOAD / STORE performance
- File size impact
- QVD migration pains (to QlikView, to Qlik Sense environments with many certs)
- QVF performance
- QVF import / export
AWS Lightsail snapshots - now automatic for Linux 10 Nov 2019 3:00 PM (5 years ago)
As an update to my previous post on using lambda to automate snaphots, I've finally logged back into the Lightsail console and seen they have added a new feature - automatic snapshots.
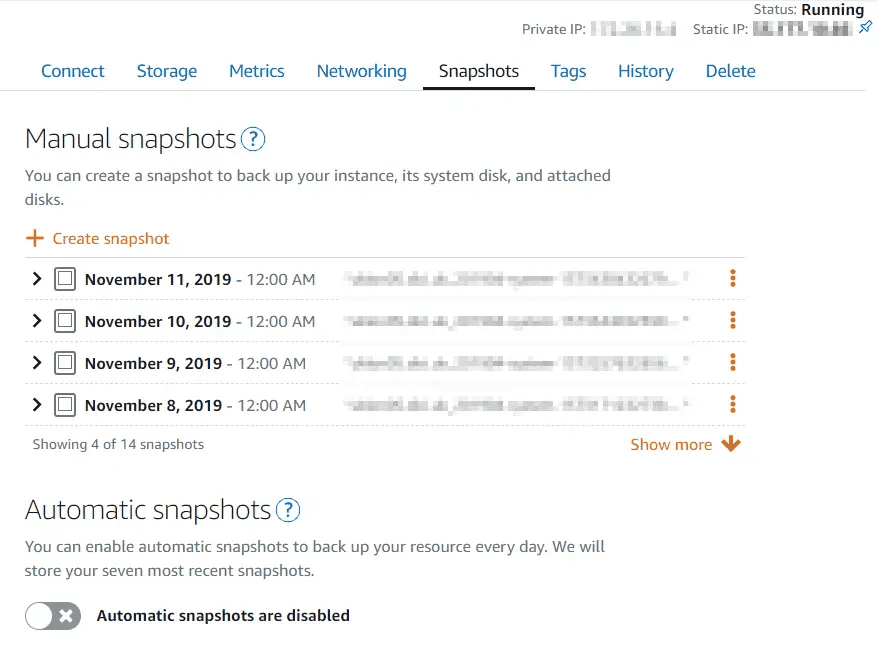
There's now an automatic snapshot section - note that the manual snapshots above are the 14 days dutifully maintained by the lambda script
It looks like the feature was added in October, based on the help site.

You're able to change the time the snapshot is taken, but not the amount of history maintained
I won't be switching from the lambda function as I require 14 days on Lightsail boxes, but if you're happy with the following constraints, then it's a great option:
- Pre-set to 7 days of snapshot retention (no more, no less)
- Must be set to run at a specific time (no triggers)
- Available on Linux boxes only (no Windows as yet)
Remove (destroy) all variables in a Qlik Sense application 5 Nov 2019 3:00 PM (5 years ago)
In QlikView, you had the ability to select multiple variables and delete them en-mass. In Qlik Sense, the UI permits you to undertake this activity one-by-one, and each takes two or three clicks.
This bookmarklet (Chrome only this time, not tried elsewhere) removes ALL variables from a Qlik Sense application by cheating the APIs used by the Qlik Sense client.

Demo showing addition of bookmark and destruction of variables in a Qlik Sense app
The best principle to follow when building apps is to ensure that all variables are recoverable - this means that the definition is set during the reload process in the load script.
How do you use it?
- Navigate to a Qlik Sense sheet and enter edit mode
- Click on the variables menu to bring up the list of user-facing variables
- Click the bookmarklet in your browser, and confirm you wish to proceed
- qsvd will destroy your variables, and print them out to the console just in case you made a mistake
Click here to get the bookmarklet, or go to the qlik-sense-variable-destroy repository for the code.
.gitignore for Qlik Sense and QlikView projects 19 Oct 2019 4:00 PM (5 years ago)
This .gitignore is based on experience of using various Windows, Mac and Linux OS - and a few unexpected commits. It is my go-to for Qlik projects, and was built using the GitHub gitignore repo.
Script below, or latest version on GitHub.
## GitIgnore built from own experience and using samples from https://github.com/github/gitignore
## DC - 20190920

## Qlik exclusions
# Ignore all Qlik data files
*.qvd


## Windows exclusions
# Windows thumbnail cache files
Thumbs.db
Thumbs.db:encryptable
ehthumbs.db
ehthumbs_vista.db

# Dump file
*.stackdump

# Folder config file
[Dd]esktop.ini

# Recycle Bin used on file shares
$RECYCLE.BIN/

# Windows Installer files
*.cab
*.msi
*.msix
*.msm
*.msp

# Windows shortcuts
*.lnk

## Dropbox exclusions
# Dropbox settings and caches
.dropbox
.dropbox.attr
.dropbox.cache

## MacOS exclusions
# General
.DS_Store
.AppleDouble
.LSOverride

# Icon must end with two \r
Icon


# Thumbnails
._*

# Files that might appear in the root of a volume
.DocumentRevisions-V100
.fseventsd
.Spotlight-V100
.TemporaryItems
.Trashes
.VolumeIcon.icns
.com.apple.timemachine.donotpresent

# Directories potentially created on remote AFP share
.AppleDB
.AppleDesktop
Network Trash Folder
Temporary Items
.apdisk

# Finally I want to exclude any packages I might make
*.zip
Generating consistent Qlik Sense app icons 20 Sep 2019 4:00 PM (5 years ago)
Application icons are prominently displayed throughout the Qlik Sense hub, and they are usually either the default blue, or some horrendously stretched icon that has no business being on an enterprise system.
This simple tool (packaged as an extension and accessible as a mashup) helps users generate consistent, appropriate app icons for use in their apps.
![]()
Without peering at the text, the default icons are rather generic
The App Icon Builder prints an application name (and optional application type) onto a background image. The tool allows you to set various templates to allow customisation by business function, app purpose, data source, governance level, etc.
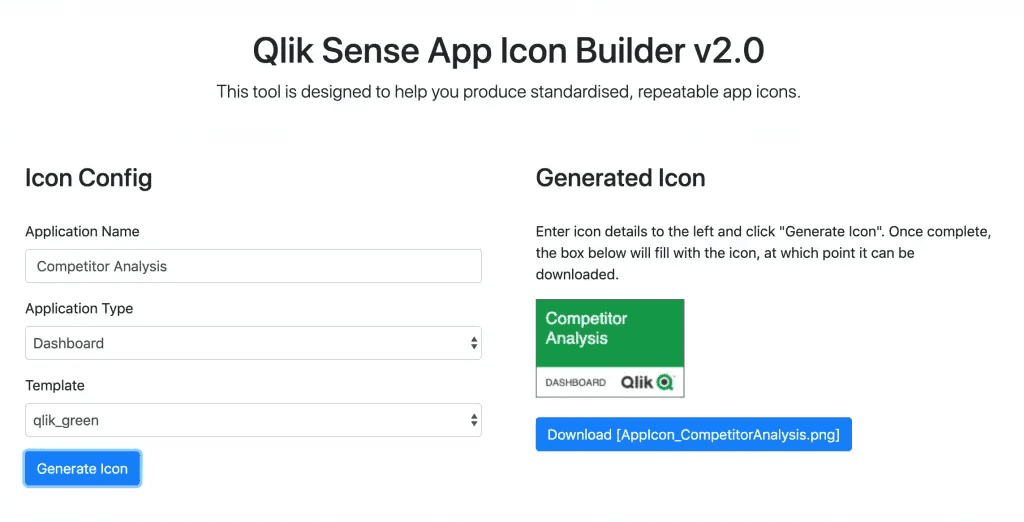
The mashup allows users to generate consistent .png app icons which are styled and sized correctly
Each icon is provided as a png and is sized appropriately for the Qlik Sense Hub. Incidentally, the aspect ratio of the these images is not as per the documentation, nor does it match the aspect ratio of the app icon in the app overview screen (update - see here for more).
Here's the default monitoring apps rebranded with a consistent theme
How do you use it?
- Download the package and customise by editing the .json config file and adding any additional backgrounds
- Re-zip and upload to the QMC
- Navigate to /extensions/qs-icon-generator/index.html to create icons
Click here to go to the qlik-sense-icon-generator repository - you can download a zip ready for import from the releases section.
Qlik Sense Repository Explorer (PostgreSQL extractor) 30 Aug 2019 4:00 PM (5 years ago)
Forewarning - loading data directly from the repository is not recommended. Most requirements can be met through the QRS APIs.

There's a lot of tables, all qualified - plus an index table. Smart search and insights are recommended!
This script loads all QRS data from the repository into an app. The code is below, or the latest is available on GitHub.
// Qlik SenseRepository Explorer Script
// Version date: 27/06/2019
// This script loads each table from the repository to give you the ability to find field values and identify issues without downloading PgAdmin
// Even in big deployments this app shouldn't be too large, as we're avoiding the logs database

// Config steps:
// 1) Create a data connection to the repository and note the name. For a simple single node install:
//	Connection Type: PostgreSQL
//	Host name: localhost
//	Port: 4432
//	Database: QSR
//	User name: postgres
//	Password: defined during Qlik Sense install (superuser password)
// 2) Update the connection name in the script below, then paste it into an app and reload

// -- Script start
// Create a connection to localhost:4432 with postgres user and the superuser password
LIB CONNECT TO 'PostgreSQL_QSR';

// Load the table listing from the default Postgres directory
TableList:
LOAD
	RowNo()			AS %KeyTableList,
    	table_catalog		AS [Table Catalog],
	table_schema		AS [Table Schema],
	table_name		AS [Table Name],
	table_type		AS [Table Type];
SELECT
	"table_catalog",
	"table_schema",
	"table_name",
	"table_type"
FROM "information_schema"."tables"
WHERE "table_catalog" = 'QSR'		// Only load from repository tables
   	AND "table_schema" = 'public'	// Only load public tables
;

// Set a variable with the table count and print this to the console
LET vCount_Tables = NoOfRows('TableList');
TRACE >> Found $(vCount_Tables) tables in QSR.Public.;

// Create an empty table to concatenate table rows to
TableRows:
LOAD
	null()		AS %KeyTableList
AutoGenerate 0;

// Now loop over these tables and load their contents!
FOR i=0 to vCount_Tables - 1

	LET vLoop_TableKey 	= Peek('%KeyTableList',i,'TableList');
	LET vLoop_TableSchema 	= Peek('Table Schema',i,'TableList');
	LET vLoop_TableName 	= Peek('Table Name',i,'TableList');
	TRACE >>> Loading from $(vLoop_TableSchema).$(vLoop_TableName).;

	// Set qualify statement for all Qlik data tables
	QUALIFY *;

	// Get the data from the table
	[$(vLoop_TableName)]:
	LOAD
		*;
	SELECT
		*
	FROM "$(vLoop_TableSchema)"."$(vLoop_TableName)";

	// Set unqualify statement now that we've done the data load
	UNQUALIFY *;

	// Get a row count from the table and join back to the table listing
	Concatenate(TableRows)
	LOAD
		'$(vLoop_TableKey)'		AS %KeyTableList,
		num(tablerows,'#,##0')		AS [Table Row Count];
	SELECT
		COUNT(*) as tablerows
	FROM "$(vLoop_TableSchema)"."$(vLoop_TableName)";

Next i;

// -- Script end
Get Qlik Sense Object IDs quickly 5 Jul 2019 4:00 PM (5 years ago)
If you're doing anything but vanilla Qlik Sense development, it's likely you'll need to get to the object IDs at some point. You can do this by appending /options/developer to the end of the page URL and clicking on each object in turn, or using dev tools - but that's slow.
This bookmarklet makes getting the object IDs fast in Chrome (and, begrudgingly, IE11).

Animated demo showing adding of bookmarklet to chrome and displaying of object IDs
If you're using NPrinting, creating mashups or poking around in the repository you'll need to get to Objects IDs eventually. Each object in an app has a unique ID or GUID, and if you duplicate the app they won't change (unlike the app ID).
How do you use it?
- First click on the bookmarklet pops up the object ID for every object on the sheet
- User can click on an object ID to copy it to the clipboard (in chrome)
- Second click on the bookmarklet will hide the object IDs
This requires nothing installed on the server, no extensions, no mashups, just a client side bookmarket. Click here to get the bookmarket, or click here to see the qlik-sense-object-id-grabber repository and code.
Adding CentOS Web Panel to a fresh CentOS 7 box 14 Jun 2019 4:00 PM (5 years ago)
Revisiting an earlier post on configuring a LAMP server, and on a recent post on installing Webmin, this time I'm dropping CentOS Web Panel (CWP) onto a new CentOS 7 box.
So, on a fresh CentOS 7 1901-01 box on AWS, let’s begin.
# Set the hostname correctly before we start off, otherwise CWP will pick up the wrong name
hostname sub.host.com
# Update existing packages
sudo yum -y update
# Install wget and nano (as I like nano and wget is needed for the CWP install)
sudo yum -y install wget nano
# Reboot the box to sort out any updates requiring reboot
sudo reboot
Reconnect, then continue - this step will take a little longer.
# Change directory, grab a copy of the latest CWP and run the script
cd /usr/local/src
sudo wget http://centos-webpanel.com/cwp-el7-latest
sudo sh cwp-el7-latest
On a 1 core, 1GB RAM box this took 3 minutes until the system prompted for a restart. You can add a flag to the last command to auto-restart.
#############################
#      CWP Installed        #
#############################

Go to CentOS WebPanel Admin GUI at http://SERVER_IP:2030/

http://YOURIP:2030
SSL: https://YOURIP:2031
---------------------
Username: root
Password: ssh server root password
MySQL root Password: YOURPASS

#########################################################
          CentOS Web Panel MailServer Installer
#########################################################
SSL Cert name (hostname): YOURHOSTNAME
SSL Cert file location /etc/pki/tls/ private|certs
#########################################################

Visit for help: www.centos-webpanel.com
Write down login details and press ENTER for server reboot!
Please reboot the server!
Reboot command: shutdown -r now
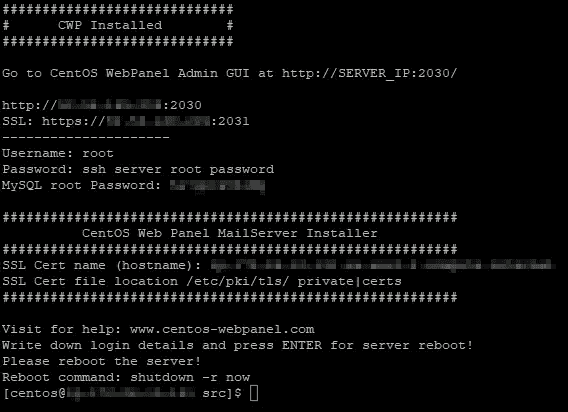
CWP requesting restart
After opening any required ports (2031 for SSL), you're good to go.
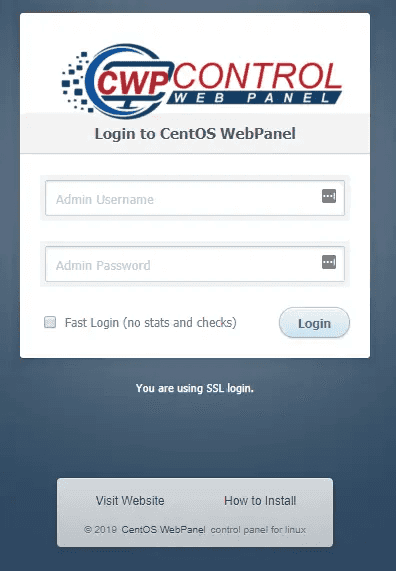
Fresh CWP login screen
If you're using private key auth, you might need to reset the root password before logging in.
# Reset root password
sudo passwd
Once reset, you can start dealing with alerts and issues in the panel.
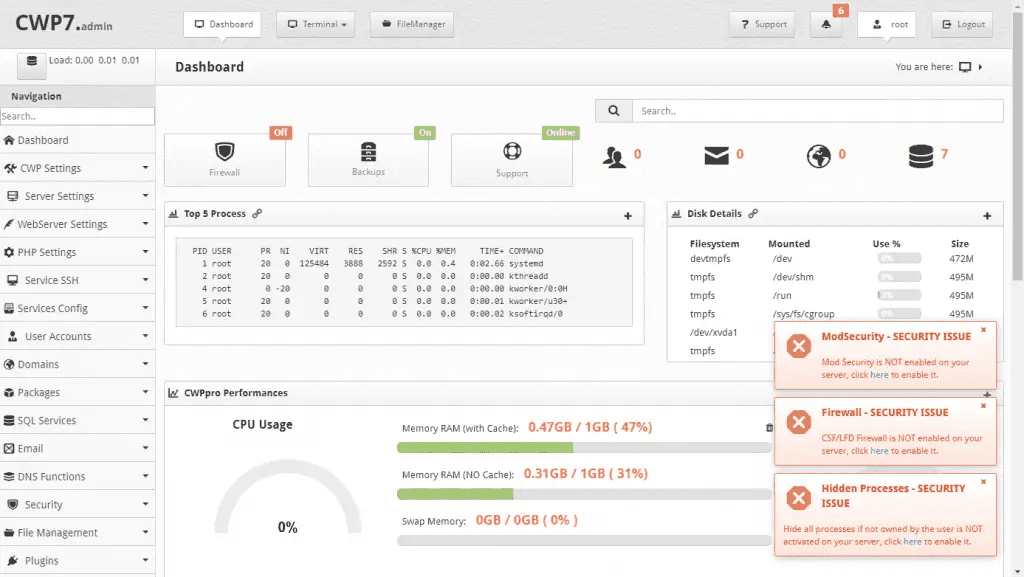
Logged in and ready to configure
As CWP installs many supporting modules (e.g. MySQL, PHP, etc) automatically, the install takes longer and results in a build that uses more RAM and CPU out of the box.
Adding Webmin to a fresh CentOS 7 Box 10 May 2019 4:00 PM (5 years ago)
As a quick refresh from an earlier post, I'm going to use a new CentOS image with Webmin as the control panel of choice.
Happily, the only thing that's changed in the documentation is the way the gpg key is imported - documentation is here: https://doxfer.webmin.com/Webmin/Installation
So, on a fresh CentOS 7 1901-01 box on AWS, let's begin.
# Update all base packages
sudo yum -y update
# Install nano (my preferred text editor)
sudo yum -y install nano
# Edit the /etc/yum.repos.d/webmin.repo file
sudo nano /etc/yum.repos.d/webmin.repo
Copy in the snippet below, then exit and save (Ctrl + X, then Y and Enter).
[Webmin]
name=Webmin Distribution Neutral
baseurl=http://download.webmin.com/download/yum
enabled=1
gpgcheck=1
gpgkey=http://www.webmin.com/jcameron-key.asc
This differs from a post in 2017 on adding Webmin as the gpgkey is captured here rather than imported separately.
The resulting dependencies are included here for reference:
Dependencies Resolved
=============================================================================================================================================================================================================================================
Package Arch Version Repository Size
=============================================================================================================================================================================================================================================
Installing:
webmin noarch 1.940-2 Webmin 22 M
Installing for dependencies:
perl x86_64 4:5.16.3-294.el7_6 base 8.0 M
perl-Carp noarch 1.26-244.el7 base 19 k
perl-Data-Dumper x86_64 2.145-3.el7 base 47 k
perl-Encode x86_64 2.51-7.el7 base 1.5 M
perl-Encode-Detect x86_64 1.01-13.el7 base 82 k
perl-Exporter noarch 5.68-3.el7 base 28 k
perl-File-Path noarch 2.09-2.el7 base 26 k
perl-File-Temp noarch 0.23.01-3.el7 base 56 k
perl-Filter x86_64 1.49-3.el7 base 76 k
perl-Getopt-Long noarch 2.40-3.el7 base 56 k
perl-HTTP-Tiny noarch 0.033-3.el7 base 38 k
perl-Net-SSLeay x86_64 1.55-6.el7 base 285 k
perl-PathTools x86_64 3.40-5.el7 base 82 k
perl-Pod-Escapes noarch 1:1.04-294.el7_6 base 51 k
perl-Pod-Perldoc noarch 3.20-4.el7 base 87 k
perl-Pod-Simple noarch 1:3.28-4.el7 base 216 k
perl-Pod-Usage noarch 1.63-3.el7 base 27 k
perl-Scalar-List-Utils x86_64 1.27-248.el7 base 36 k
perl-Socket x86_64 2.010-4.el7 base 49 k
perl-Storable x86_64 2.45-3.el7 base 77 k
perl-Text-ParseWords noarch 3.29-4.el7 base 14 k
perl-Time-HiRes x86_64 4:1.9725-3.el7 base 45 k
perl-Time-Local noarch 1.2300-2.el7 base 24 k
perl-constant noarch 1.27-2.el7 base 19 k
perl-libs x86_64 4:5.16.3-294.el7_6 base 688 k
perl-macros x86_64 4:5.16.3-294.el7_6 base 44 k
perl-parent noarch 1:0.225-244.el7 base 12 k
perl-podlators noarch 2.5.1-3.el7 base 112 k
perl-threads x86_64 1.87-4.el7 base 49 k
perl-threads-shared x86_64 1.43-6.el7 base 39 k
unzip x86_64 6.0-20.el7 base 170 k
Transaction Summary
=============================================================================================================================================================================================================================================
Install 1 Package (+31 Dependent packages)If you're using a private key to access the box, reset the root password prior to logging in.
sudo /usr/libexec/webmin/changepass.pl /etc/webmin root NEWPASSWORDOnce installed, access at https://yourip:10000 (ensure port 10000 is open) with the default username (root) and your reset password.
An example of embedding Qlik Sense (mashup and APIs) 5 Apr 2019 4:00 PM (6 years ago)
I'm often asked how to create mashups with Qlik Sense, and I strongly believe that it's both easy and intuitive to leverage Qlik Sense APIs to build mashups...when you understand the options available to you.
To help new developers, I've put together a basic mashup using the Material Design Lite template. This example connects to a provided app and demonstrates several different ways of embedding Qlik Sense into a HTML site using just a little Javascript.
The mashup has four pages, one based on the default template and the other three focused on content
App Integration API
The first sheet demonstrates the simple App Integration API (which primarily leverages IFrames), and the demo contains examples of how to:
- Embed the Qlik Sense hub
- Embed a specific application
- Embed a specific object (chart) from a Qlik Sense application
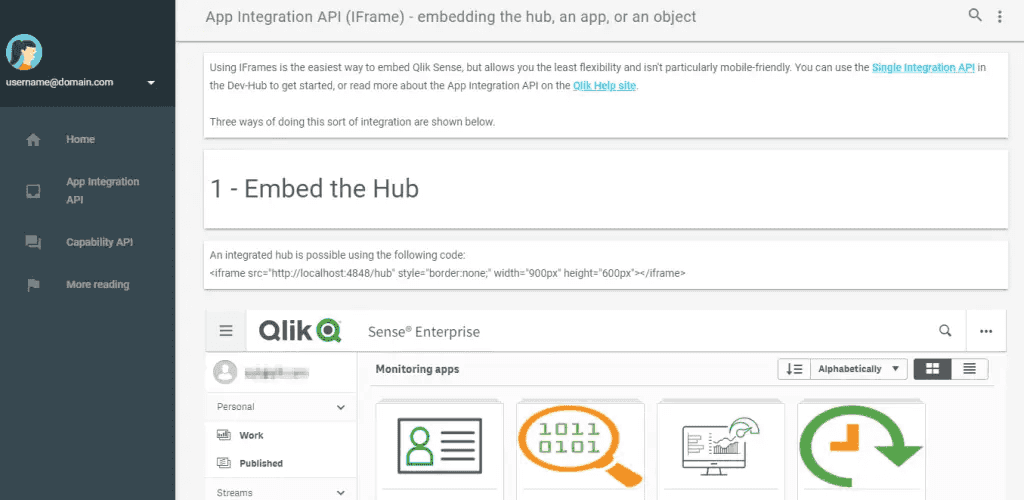
he App Integration API is primarily used with IFrames
Capability API
The Capability APIs are a family of APIs which offer greater flexibility at the cost of greater complexity, and the demo contains examples of how to:
- Embed a specific object (chart) from a Qlik Sense application
- Embed an object (chart) created on the fly by a provided definition, based on the data model from a Qlik Sense application
- Return a specific value from a Qlik Sense application by creating a hypercube and displaying the result
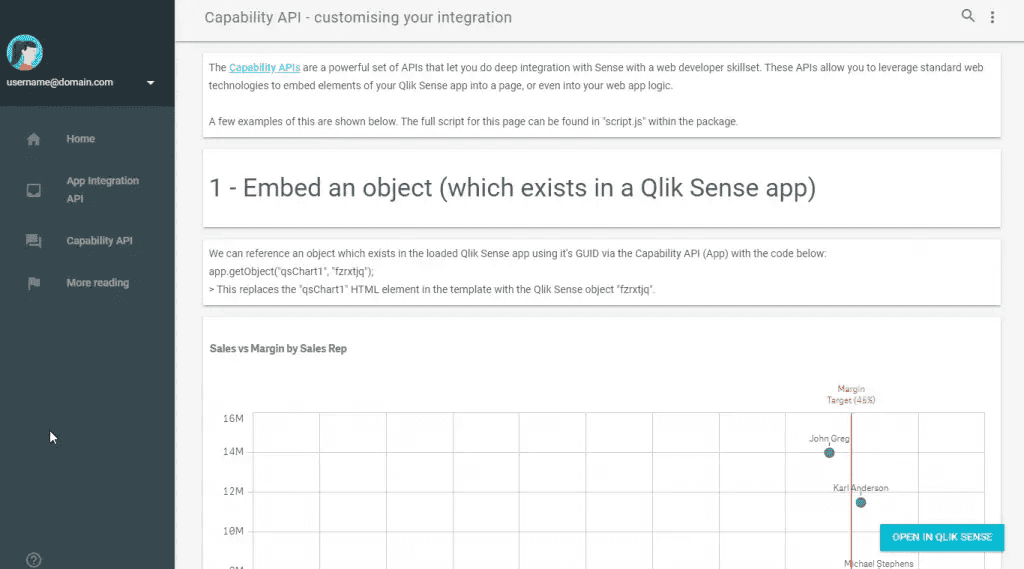
The Capability APIs require custom development, but offer much greater flexibility than the App Integration API
Where's the demo?
The mashup is available on GitHub as a free-to-use demo. See the qlik-sense-embed-material GitHub site for installation instructions.
Plesk on Lightsail Kernelcare Issue - /usr/bin/kcarectl --auto-update spam 3 Mar 2019 3:00 PM (6 years ago)
I was receiving emails titled "Cron root@server /usr/bin/kcarectl --auto-update" with a body "The IP 1.2.3.4 was already used for a trial license on 2018-12-23"
At one point, I was receiving one of these per VM every four hours
As I've not got a licence anyway, this is easily solved with:
sudo apt-get remove kernelcare
AWS S3 Redirects with Cloudflare Page Rules - Fast and Free 1 Mar 2019 3:00 PM (6 years ago)
A few weeks ago I used AWS S3 for 301 redirects, with Cloudflare on top to cache these requests, few as they were. This effectively maintains a handful of links which redirect somewhere useful, while directing all other traffic to this domain.
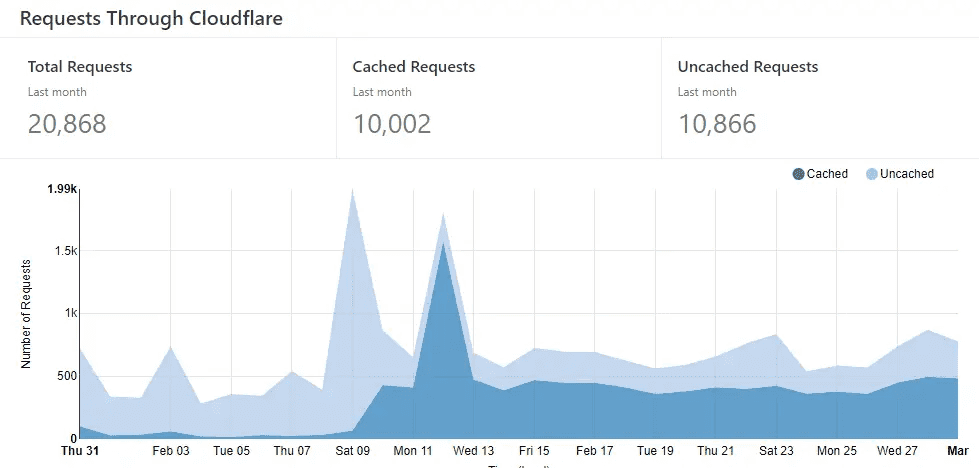
Stats from February for the site show 65% of requests were cached in the last week
The results are great! The switch to S3 was made on the 9th, and a Cloudflare page rule added on the 10th - at which point over 60% of requests became cached.
The page rule I added was:
- URL: domain.com/*
- Cache Level: Cache Everything
- Edge Cache TTL: a month
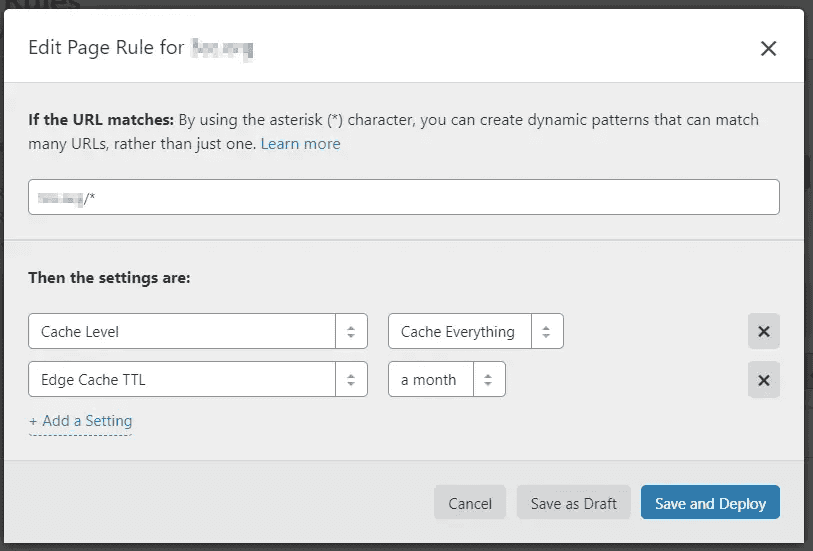
Screenshot of the applied settings
Crucially, I no longer have a server to manage, and the AWS cost for all hits to this S3 bucket is currently at a grand total of $0.00.
SEATT updated to 1.5.1 15 Feb 2019 3:00 PM (6 years ago)
Simple Event Attendance has been updated to 1.5.1.
This is to fix an issue with PHP7.2 where debug logs contain a count function warning:
Warning: count(): Parameter must be an array or an object that implements Countable in /var/www/html/wp-content/plugins/simple-event-attendance/seatt_events_include.php on line 103The few lines where this was a problem were updated to check if the variable was empty. See changelog on the PHP count function spec.
Plugin is live on wordpress.org, and available on GitHub.
Using your own domain with AWS S3 and Cloudflare 10 Feb 2019 3:00 PM (6 years ago)
If you're using a CNAME on your root domain, you're gonna have problems. That's just a DNS thing - and if you want to host a root domain on S3, you won't be provided with an IP address by AWS. You can solve this if you use Route53, but what about if you want to keep your domain in Cloudflare?
You'll also have problems if you want to use Cloudflare Full SSL on an S3 bucket configured for static website hosting - resulting in nothing but Cloudflare error 522 (Connection timed out) pages.
My use case is a set of simple redirects, following on from a post about 301 redirects in S3.
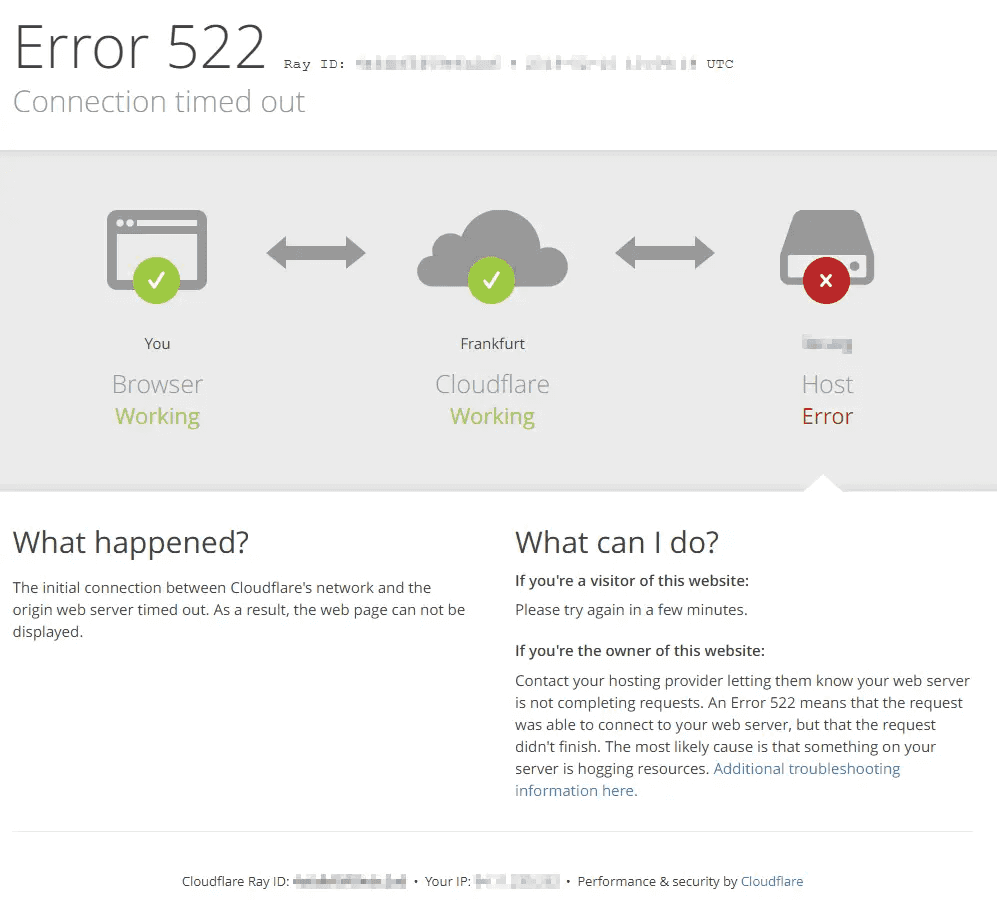
The easy solution to both problems is to use CloudFront to serve https requests for your bucket; but I'm going to assume that you want this solution to be as cheap as possible - and use only S3 from within the AWS ecosystem.
Let's starts with error 522 - all about HTTPS
Cloudflare offers a number of different options under Site>Crypto>SSL. Most sites I work with have a valid SSL certificate on the host server, and so I can use Full (strict) SSL on the Cloudflare end - this means the connection from the host server to Cloudflare, and from Cloudflare to the user.

But with S3, the endpoint they provide is http by default. Historically, by changing your endpoint URL you could use https; at some point this was changed. Therefore you're stuck with the http endpoint if you've got static web hosting configured.
It also means, that if you set SSL on Cloudflare to Full or Full (strict), your users will receive Error 522 - connection timed out. You may also see Error 520 - which is a more generic error. Neither really tell you what's wrong - but it's easy to work out.
Based on an AWS help page, if you've got a bucket configured as a website endpoint, you can't use https to communicate between CloudFront and S3 either (it's not just an external thing).
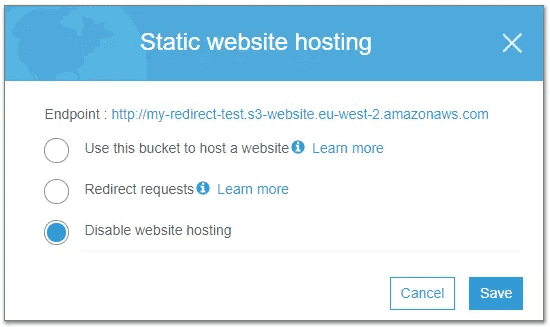
This means we have two options:
- Use CloudFront to serve our content over SSL - this comes with additional cost and complexity
- Use Flexible SSL on CloudFlare - this is free, but will reduce security between the Cloudflare and AWS servers
This is explained in the help text from the Cloudflare console:
Flexible SSL: You cannot configure HTTPS support on your origin, even with a certificate that is not valid for your site. Visitors will be able to access your site over HTTPS, but connections to your origin will be made over HTTP. Note: You may encounter a redirect loop with some origin configurations.
Full SSL: Your origin supports HTTPS, but the certificate installed does not match your domain or is self-signed. Cloudflare will connect to your origin over HTTPS, but will not validate the certificate.
If you're using this bucket to do redirects only (i.e. not sending any pages or data) then the impact is lessened, although it is still a great example of how - as a user - you really can't tell what happens between servers once your request is sent.
Effectively, our request is secure up to the Cloudflare servers, and is then sent in the clear to S3. Obviously for sensitive materials this just won't do - enter CloudFront in that case. For our limited redirect requirements, the risk may be worth the reward.
CNAME on a root domain
Normally, creating a CNAME record for the root domain instead of an A record will violate the DNS specification, and can cause issues with mail delivery, etc.
If we use Route53 then we can create an A Alias record - but with Cloudflare we can create a CNAME and benefit from their CNAME flattening feature. This allows you to use a CNAME while remaining compliant with the DNS spec.
Final thought - Cloudflare page rules for caching
With Cloudflare, you get 3 page rules per free site. This allows you to do some clever things, like crank up the caching level to reduce the number of requests sent to S3.
In this case, I'm using S3 for 301 redirects only - so will those be cached? Cloudflare support says yes, as long as "no cache headers are provided (no Cache-Control or Expires) and the url is cacheable". To be sure, I'm going to add a page rule to catch the rest.
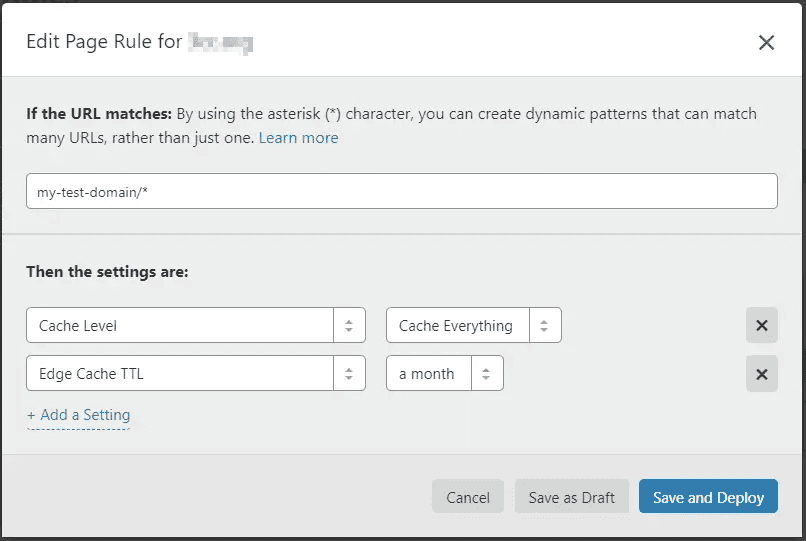
This rule should cache everything (Cache Level = Cache Everything), and keep that cached copy for a month before retrying the source server (Edge Cache TTL = a month). My redirects are going to rarely change, so it seems like a good choice.
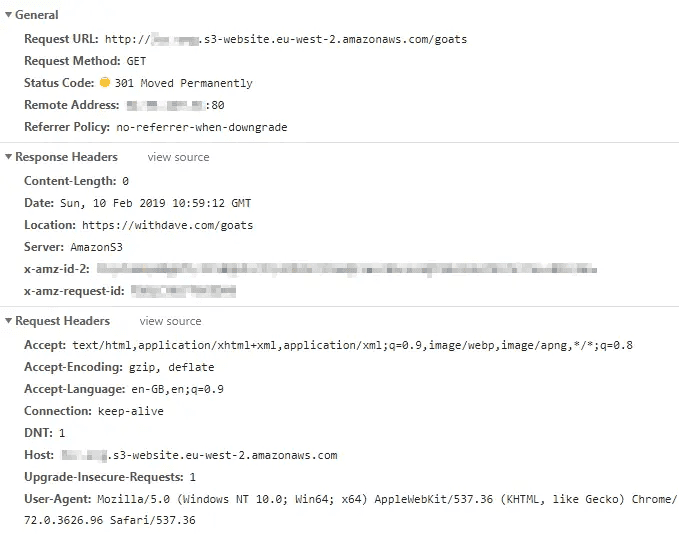
Checking the response headers - no cache headers are present. I will keep an eye on the site and see whether we see an increase in cached responses.
301 Redirects using AWS S3 with Static Hosting and an empty Bucket 9 Feb 2019 3:00 PM (6 years ago)
S3 buckets allow you to host static content with a pay-per-get model. No monthly fees and no servers - so I considered how I could use this to redirect a limited number of URLs from an old website to a new site.
It couldn't be a straight forward as the URLs aren't the same (so using a CNAME, domain forward, or the S3 Redirect requests options were out), but I wanted to preserve the links, and was previously using a .htaccess file to do this. Enter static hosting, on an empty bucket.

We're setting up the example with "my-redirect-test"
To make this work, I have to at least specify an index document - you can't save without this - but we'll be relying on the Redirection rules to apply our logic. I used null as my index document, as this definitely didn't exist on the source site.
The mapping of your domain to this s3 bucket is covered in this AWS help page (which uses Route53 to assign it).
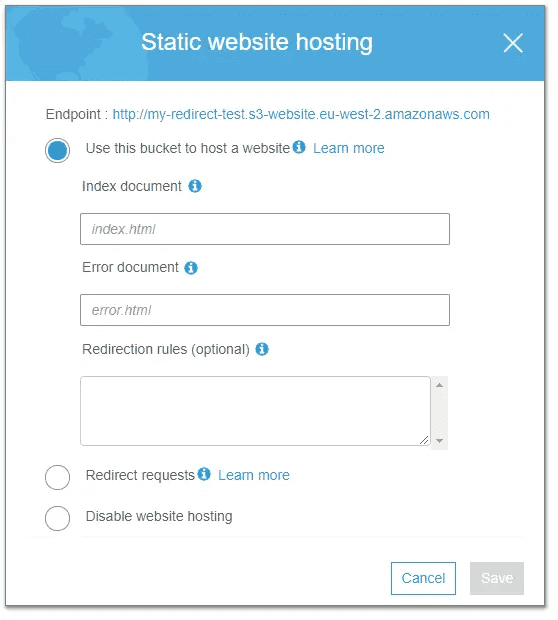
I've got to at least specify the index document, but for the redirects I'll be using the redirection rules
I want the following logic to be applied:
- Send https://my-redirect.test.com/aws.html to https://withdave.com/?s=aws
- Send https://my-redirect.test.com/windows.html to https://withdave.com/?s=windows
- Send every other request to the new domain with the path intact (e.g.
https://my-redirect.test.com/azure.html to https://withdave.com/azure.html)
The rules to do this are quite simple, albeit verbose - there's no logic here other than the stated paths and a catch all. It seems these rules are processed sequentially, so as long as the named redirects are above the catch all (rule with no condition), this works perfectly.
<RoutingRules>
  <RoutingRule>
    <Condition>
      <KeyPrefixEquals>aws.html</KeyPrefixEquals>
    </Condition>
    <Redirect>
      <Protocol>https</Protocol>
      <HostName>withdave.com</HostName>
      <ReplaceKeyPrefixWith>?s=aws</ReplaceKeyPrefixWith>
      <HttpRedirectCode>301</HttpRedirectCode>
    </Redirect>
  </RoutingRule>
  <RoutingRule>
    <Condition>
      <KeyPrefixEquals>windows.html</KeyPrefixEquals>
    </Condition>
    <Redirect>
      <Protocol>https</Protocol>
      <HostName>withdave.com</HostName>
      <ReplaceKeyPrefixWith>?s=windows</ReplaceKeyPrefixWith>
      <HttpRedirectCode>301</HttpRedirectCode>
    </Redirect>
  </RoutingRule>
  <RoutingRule>
    <Redirect>
      <Protocol>https</Protocol>
      <HostName>withdave.com</HostName>
      <HttpRedirectCode>301</HttpRedirectCode>
    </Redirect>
  </RoutingRule>
</RoutingRules>
Note that if you don't include at least one rule with no condition, users will get a 403 error on any request for another page, as the bucket permissions are set to private.
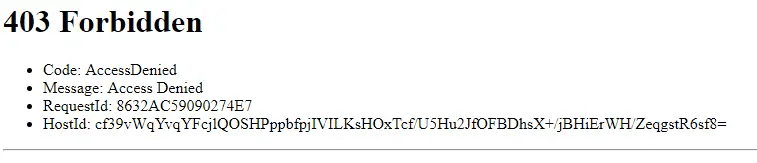
You could hide the error by using a hosted error page in the bucket though, and by setting that file's permissions to public.
How much will it cost?
AWS S3 is a pay-as-you-go service, but we're not storing files here. Instead, users are performing a GET request, which AWS is responding to - so in theory we'll simply be billed for these GET requests only.
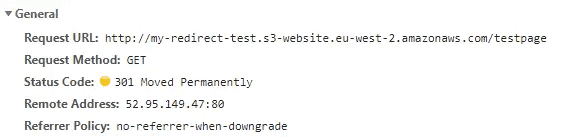
An example request logged in chrome dev tools, with the 301 response and appropriate redirect then applied
If I plug in 1m GET requests into the AWS calculator, the bill comes to a whopping $0.39. Not bad considering there's no server to maintain.
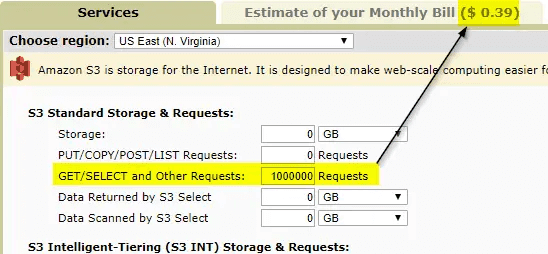
Using the calculator, 1 million GET requests will cost $0.39 in the us-east-1 region
AWS S3 Cross-Region Replication - migrating existing files using AWS CLI 8 Feb 2019 3:00 PM (6 years ago)
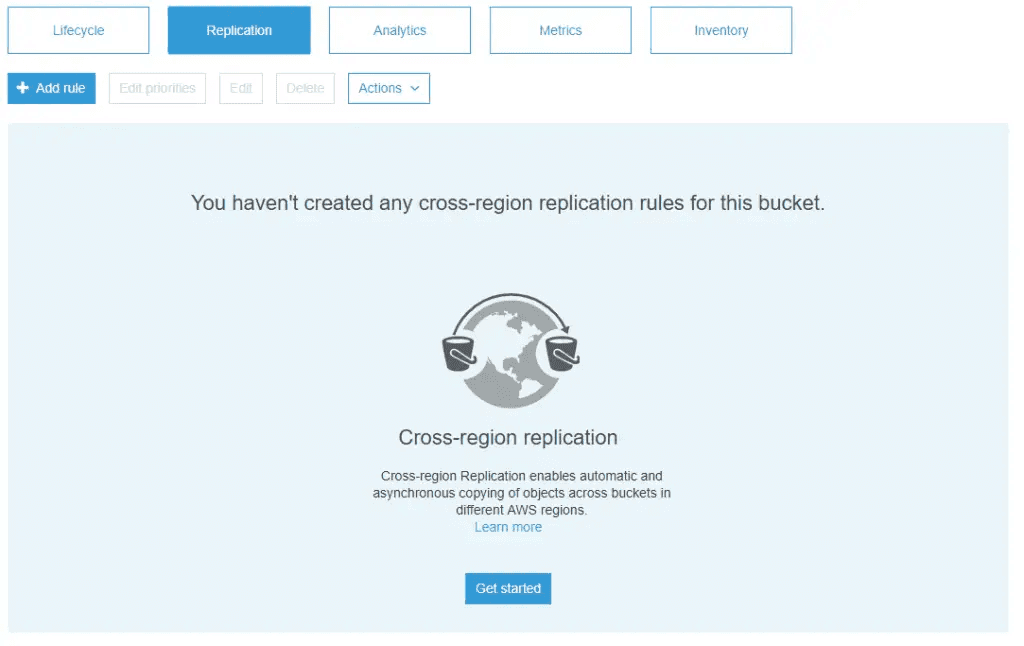
I'm setting up CRR on two buckets, one new, and one existing - which already contains files
When you enable cross-region replication on an existing bucket, it doesn't copy existing files from the source to the target bucket - it only copies those objects created or updated after the replication was enabled. We need to copy the original files manually using the AWS CLI.
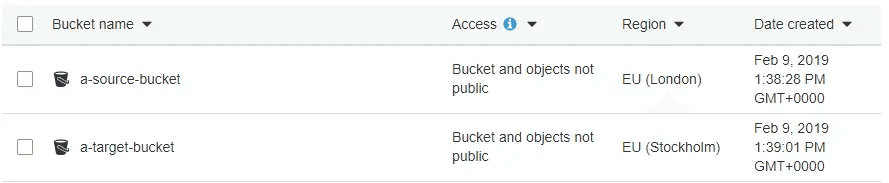
We're using a-source-bucket as the bucket containing the original files, and a-target-bucket as the empty bucket that's going to receive the copy.
What's in the source bucket?
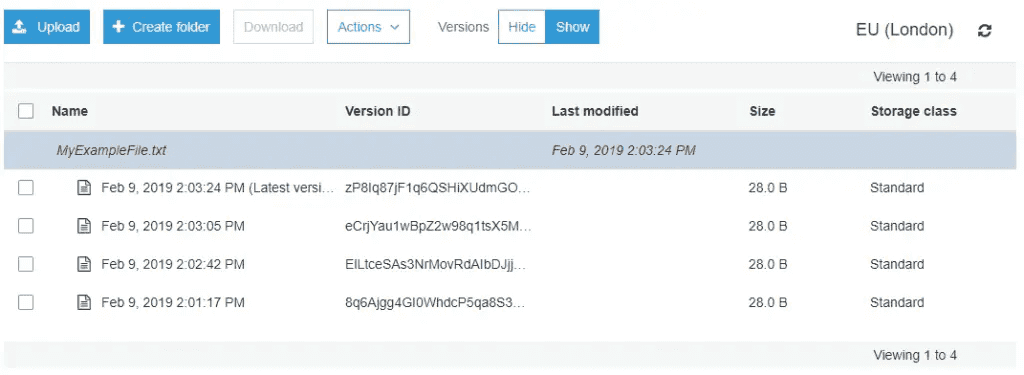
The source contains 1 file, with 4 versions of that file
Copying across the files to our target bucket
After setting up the cross-region replication for a-source-bucket > a-target-bucket, we need to copy the existing file.

The target bucket is empty
In the AWS CLI, we can list our buckets and then run a cp command to copy the content across.
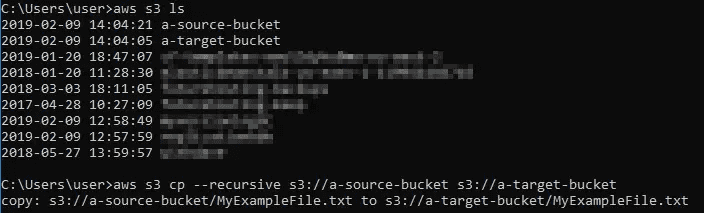
Listing the buckets available to our user, then copying the content
> aws s3 ls
2019-02-09 14:04:21 a-source-bucket
2019-02-09 14:04:05 a-target-bucket
> aws s3 cp --recursive s3://a-source-bucket s3://a-target-bucket
copy: s3://a-source-bucket/MyExampleFile.txt to s3://a-target-bucket/MyExampleFile.txt
The result of the copy is that our target bucket has a copy of the latest version of the file from our source bucket, and as cross-region replication is enabled, all future files will be copied too (and versioned).
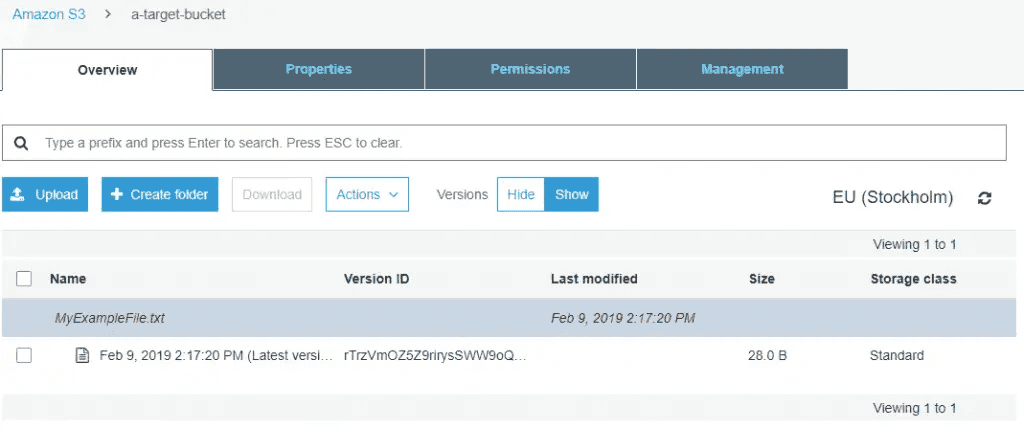
The file has been copied to the target bucket, but note this does not transfer previous versions from the source bucket
What if I've already got files in my target bucket and it's out of sync with the source?
If you don't wish to empty the bucket and start with a fresh copy, then consider using the S3 sync command.
What if I want to copy the version history?
You'll need to script this, as although the versions are accessible they won't be moved by a standard cp command.
What about if my bucket is huge?
Using this approach provides acceptable transfer speeds, but if you're moving thousands of files, or TBs of data it may be faster to use S3DistCp. This spins up an EMR cluster to copy files in parallel, significantly reducing the manual copy time and supporting millions of objects through scaling the cluster size.
Reviewing SPF, DKIM and DMARC settings for Google GSuite Mail on your domains 31 Jan 2019 3:00 PM (6 years ago)
In the past, I've configured these on my domains (and wrote about SPF with GSuite - which was at the time, Google Apps). In the last 9 years, the rest of the DNS config has changed a lot, and as I've never had issues with mail, I never reviewed my settings. Until today.
For another reason, I checked my config on mx toolbox - and I spotted that some tuning was required.
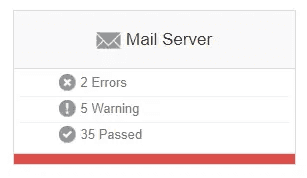
The DNS report shows a few MX errors, and more warnings
As it happens, Google offer a similar tool for their users in their Google Apps toolbox.
It seems, that at some point the recommended record has changed from:
v=spf1 include:aspmx.googlemail.com ~allTo a different domain:
v=spf1 include:_spf.google.com ~all OK; no problem - that one's easy to fix. Setting up DKIM was easy as well, using the guidance here, and again highlighted that those records were incorrect as well. At some point a CPanel server had managed the DNS config and added it's own records!
Reminder to self - review my MX settings at least every couple of years!
Automating AWS Lightsail backups using snapshots and Lambda 20 Jan 2019 3:00 PM (6 years ago)
Update 11/11/19 - limited automatic snapshots now available.
Some of the most glaring omissions from Lightsail are scheduled tasks or triggers - which would provide the ability to automate backups. Competitors in this space like DigitalOcean are all set, as they offer a backup option, whereas for AWS I'm assuming they hope you'll shift over to EC2 as fast as possible to get the extra bells and whistles.
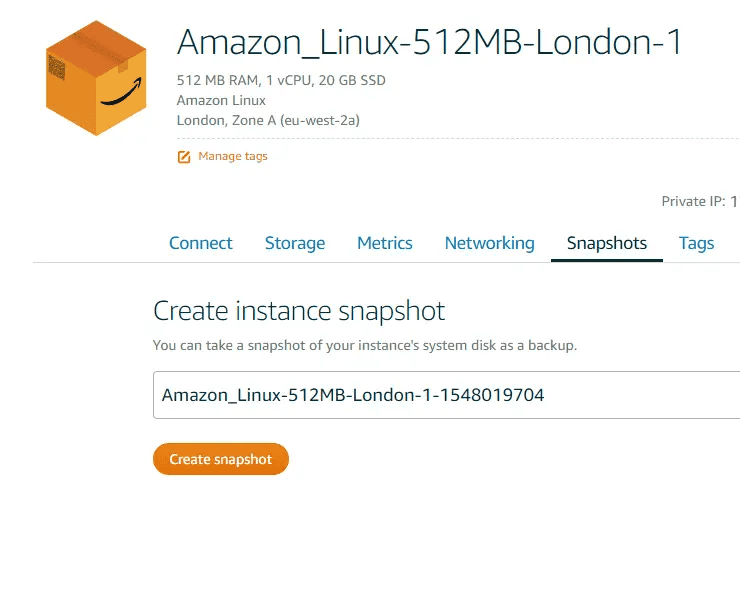
Of course you can manually create snapshots - just log in and hit the button. It's just the scheduling that's missing.
I have one Lightsail server that's been running for 6 months now, and it's all been rosy. Except - I had been using a combination of first AWS-CLI automated backups (which wasn't ideal as it needed a machine to run them), and then some GUI automation via Skeddly. However - while Skeddly works just fine, I'd rather DIY this problem using Lambda and keep everything in cloud native functions.
Introducing...a Lambda function written in Python!
There's a repo under the Amazon Archives called lightsail-auto-snapshots - I used this as the base for my function (I didn't try the deployment template as I wanted to create it end to end). Although it's been archived, it still works and was a good starting point.
1: Create the function, and a suitable role
Head over to the Lambda console to create the function.
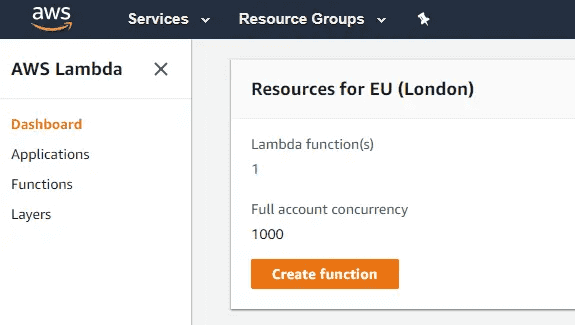
Head to the Lambda console to create your function - created in the same region as my Lightsail instances for my sanity
To create, hit the "Create function" button and fill in the basics. We'll need to create a custom role to determine what the function can access.
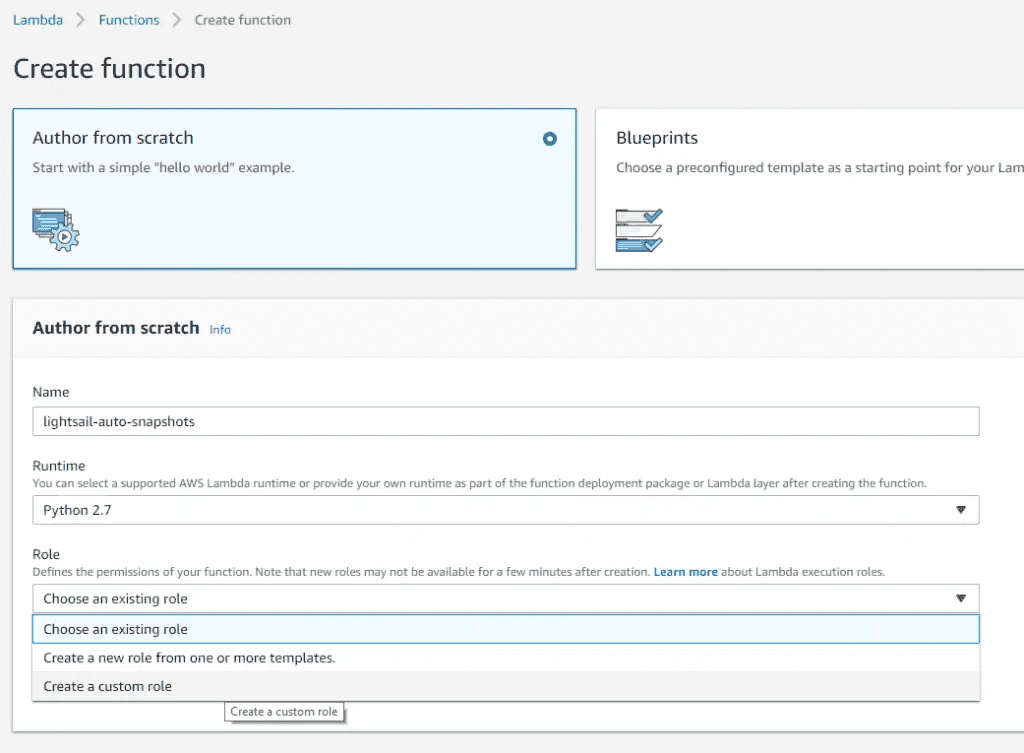
Name: lightsail-auto-snapshots; Runtime: Python 2.7; Role: Create a custom role
The role will need to be able to put logs to CloudWatch, but I'll configure the settings in the next step.
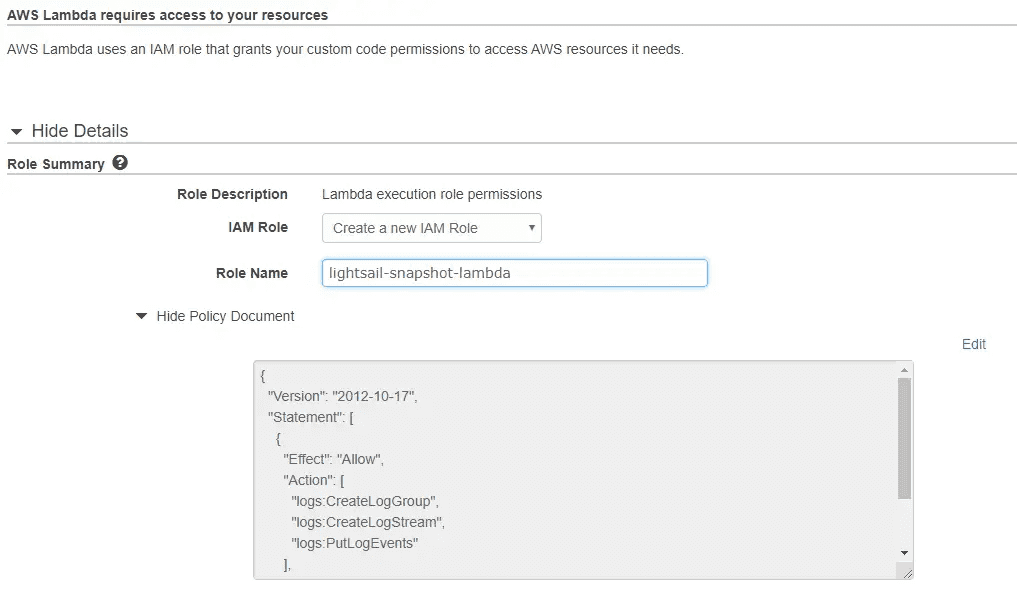
Role Name: lightsail-snapshot-lambda; Policy Document: only log permissions for now
Once the policy was created, I headed over to IAM to attach a new policy to this role. Alternatively, I could have created one policy for the role by combining this with the default policy above.
The second policy definition:
{
    "Version": "2012-10-17",
    "Statement": [
        {
            "Sid": "VisualEditor0",
            "Effect": "Allow",
            "Action": [
                "lightsail:GetInstances",
                "lightsail:DeleteInstanceSnapshot",
                "lightsail:GetInstanceSnapshots",
                "lightsail:CreateInstanceSnapshot"
            ],
            "Resource": "*"
        }
    ]
}
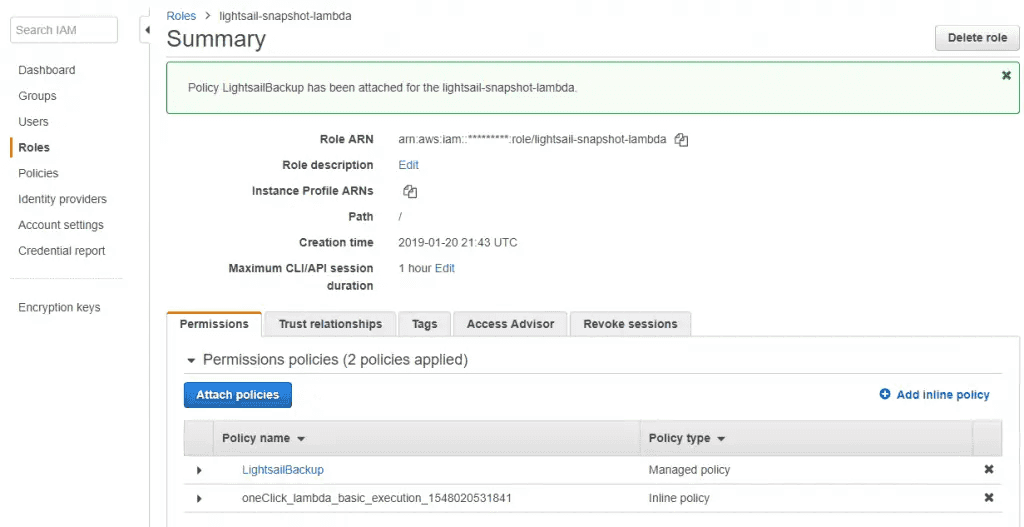
The second policy has been added ("LightsailBackup") to the lightsail-snapshot-lambda role
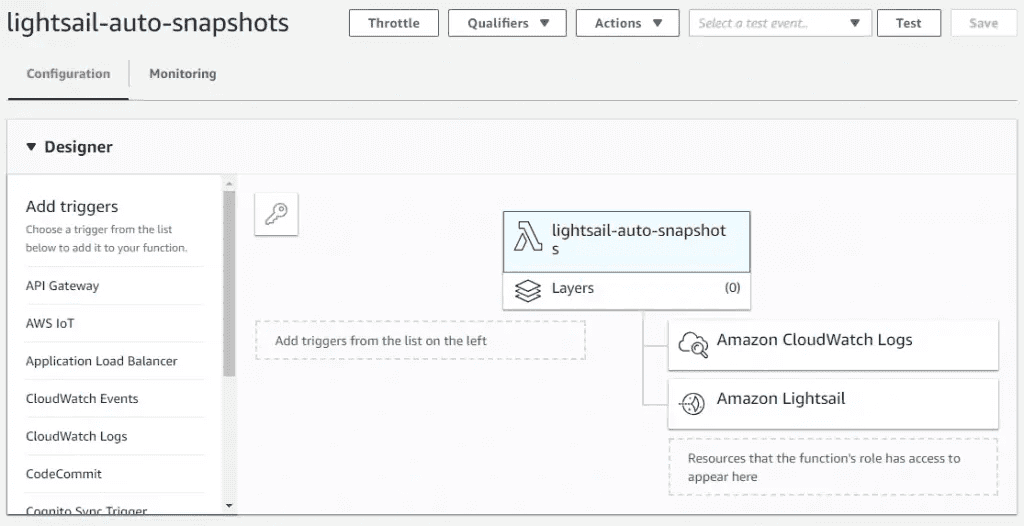
Back in Lambda, we can see that both services appear on the right - meaning the policy has been applied to the relevant role
Now that the function has been created with the right role, we just need to configure the function code and parameters.
2: Add code and parameters
Let's start by adding some script. Create index.py and take the script from the repository (or my slightly modified version below):
from __future__ import print_function
import boto3
from datetime import datetime, timedelta
from os import getenv
from sys import stdout
from time import time

DEFAULT_RETENTION_DAYS = 14
AUTO_SNAPSHOT_SUFFIX = 'auto'


def handler(event, context):
    client = boto3.client('lightsail')
    retention_days = int(getenv('RETENTION_DAYS', DEFAULT_RETENTION_DAYS))
    retention_period = timedelta(days=retention_days)

    print('Maintaining snapshots for ' + str(retention_days) + ' days')
    _snapshot_instances(client)
    _prune_snapshots(client, retention_period)


def _snapshot_instances(client, time=time, out=stdout):
    for page in client.get_paginator('get_instances').paginate():
        for instance in page['instances']:
            snapshot_name = '{}-system-{}-{}'.format(instance['name'],
                                                     int(time() * 1000),
                                                     AUTO_SNAPSHOT_SUFFIX)

            client.create_instance_snapshot(instanceName=instance['name'],
                                            instanceSnapshotName=snapshot_name)
            print('Created Snapshot name="{}"'.format(snapshot_name), file=out)


def _prune_snapshots(client, retention_period, datetime=datetime, out=stdout):
    for page in client.get_paginator('get_instance_snapshots').paginate():
        for snapshot in page['instanceSnapshots']:
            name, created_at = snapshot['name'], snapshot['createdAt']
            now = datetime.now(created_at.tzinfo)
            is_automated_snapshot = name.endswith(AUTO_SNAPSHOT_SUFFIX)
            has_elapsed_retention_period = now - created_at > retention_period

            if (is_automated_snapshot and has_elapsed_retention_period):
                client.delete_instance_snapshot(instanceSnapshotName=name)
                print('Deleted Snapshot name="{}"'.format(name), file=out)
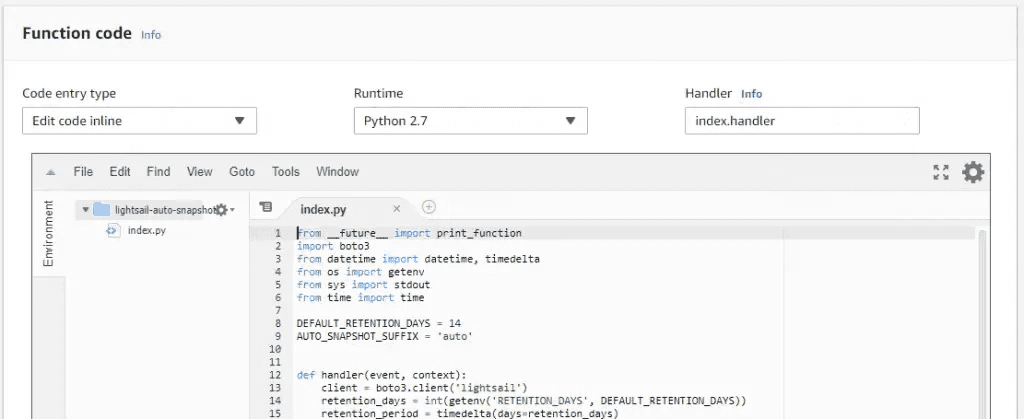
Filename: index.py; Runtime: Python 2.7; Handler: index.handler
Ensure the runtime is still set to Python 2.7 and the handler refers to the index file.
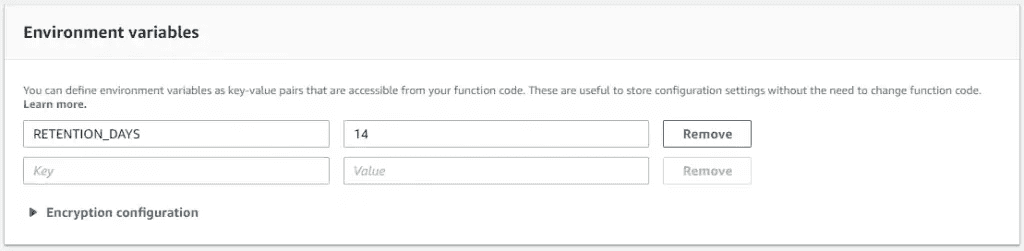
Variable name: RETENTION_DAYS; Value: 14
I only used the retention period via the environmental variables, which is lower to control cost.
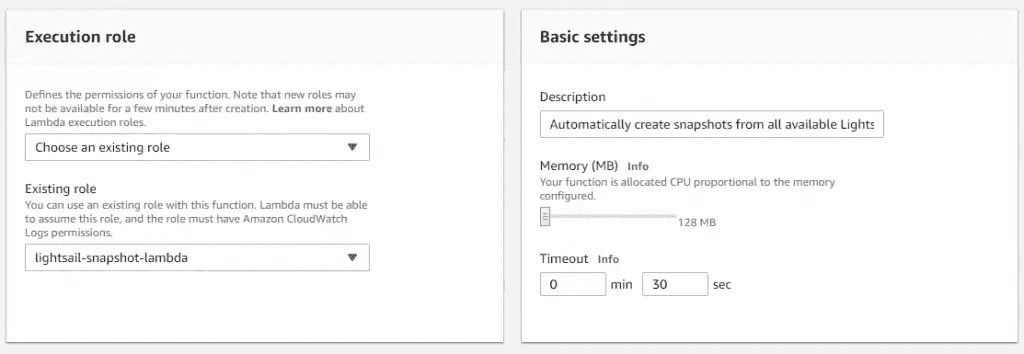
Role: lightsail-snapshot-lambda; Timeout: 30s
The last bit of config here is to ensure the role is correct, and that you've set a description and timeout.
3: Create the CloudWatch Event Rule
The event rule will trigger our function, and is very straightforward to set up. You can create a new rule through the Lambda designer.
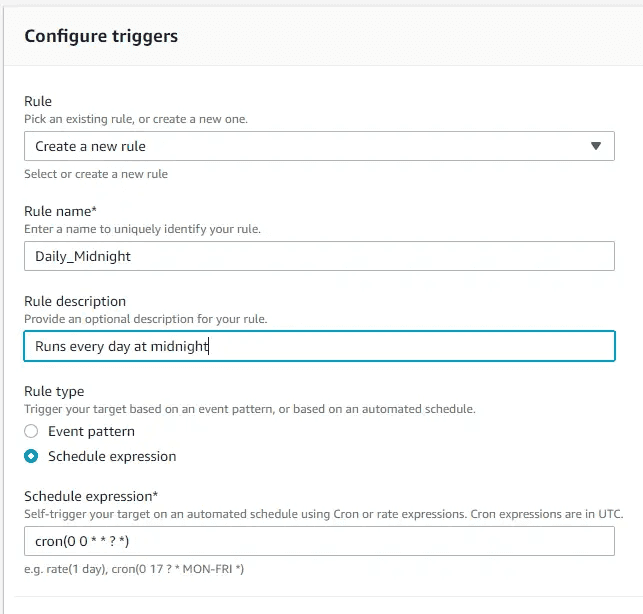
Rule Name: Daily_Midnight; Schedule expression: cron(0 0 * * ? *)
This creates a rule which executes every day at midnight, using a cron expression.

The finished designer view has the trigger from CloudWatch Events on the left, and actions for the two resources on the right
And we're done!
What about the cost?
As AWS operates on a pay-per-use system, it's interesting to note the potential cost for both taking, and storing these snapshots.
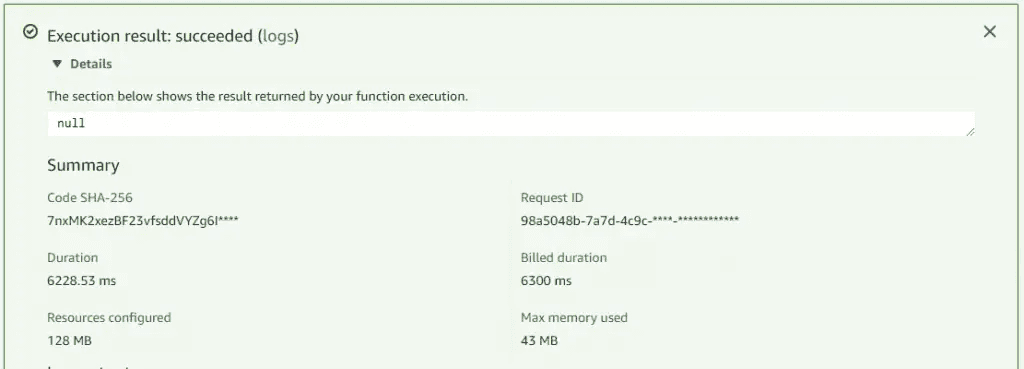
On a test run, it took 6.3s to run the function to snapshot 6 lightsail instances, and remove 6 old snapshots
On the Lambda side, it took ~6 seconds to run for 6 instances in Lightsail (Lightsail will take a few minutes to create these snapshots, but our script doesn't check for completion).
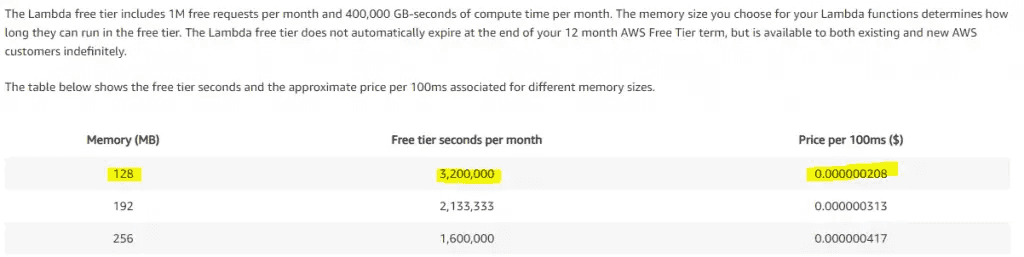
In a 128MB function, there is a considerable free tier, and further requests are not bank breaking
If we assume we'll run this function up to 31 times a month (i.e. every day), then we'll consume perhaps (6*31=186) 186 seconds a month. There's a lot of head room here on the free tier, but even without that it'll still cost less than $0.01.

The actual snapshot is listed for the provisioned size of the instance or disk
The storage of the snapshot is a different matter, and is billed as one of the Lightsail services. This part is much less clear due to the way these are billed, and on the way that they are presented in the Lightsail console.

Simply, you pay for the provisioned size for the first instance, then a top of for the delta on the following snapshots
Bearing the above in mind, it suggests that you will pay a base rate of $2/month for a 40GB snapshot. On top of this, you might have a permanent 14 days of backups, each with a 1GB delta (this would be generous for a web server) - adding another $0.70 to total $2.70/month for a rolling 14 days of snapshots.
Using the Cloudflare API to provide free Dynamic DNS with Windows and Powershell 19 Jan 2019 3:00 PM (6 years ago)
This post details my switch over to using Powershell and Cloudflare to update a DNS record to a server's current IP. This effectively emulates dyndns for this host - except it's free.
There are a load of other options out there, which even include some simple-but-quite-clunky apps for domain registrars like NameCheap; but installing third party software is not the route I want to take.
I previously had my target domain (let's call it targetdomain.com) hosted on a Linux box, and used SSH to update the DNS settings via a Windows server. This worked well for three years without a blip - but was clunky. I was using a scheduled task to start a bat file, which then ran Putty to run the shell script...to update a config on a server which was only hosting the domain to serve this purpose.
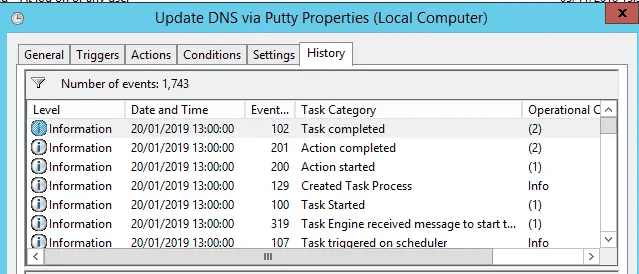
Although the scheduler>bat>shell tasks have been running well for years, it's time to simplify!
I've been using Cloudflare for years, and set aside time to write a script to use their service for this purpose. As it turns out, people have done this for years - so I've taken one off the shelf.
Introducing "CloudFlareDynDns"
To use the script (which is a Powershell module) available on GitHub, I dropped it over to the windows server, and imported it.
To do this, I copied the file into the all users directory (check $Env:PSModulePath if it's unknown).

The default public path for Powershell modules is C:\Program Files\WindowsPowerShell\Modules\[Module Name]\[Module files]
You can then import the module and check it's available
PS cd C:\Program Files\WindowsPowerShell\Modules\CloudFlareDynamicDns
PS Import-Module .\CloudFlareDynamicDns

PS Get-Module

The module is now imported
Setting up our task
I'm using task scheduler for this, as it's straight forward and easy to use. To test this, I simply ran the command on Powershell directly, which works. After, I switched it to calling it from a file and added some logging.
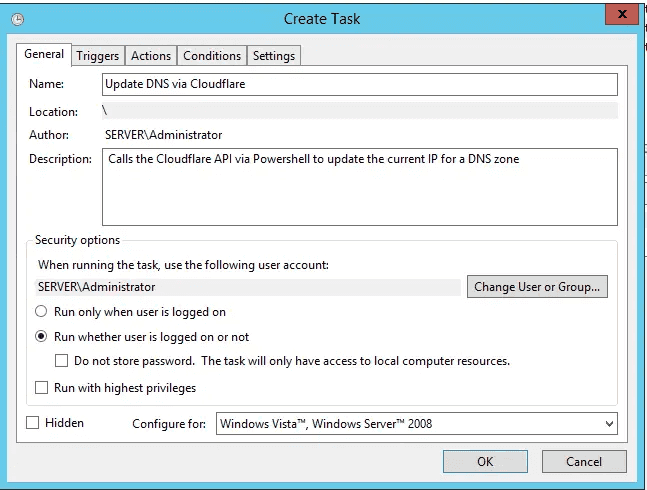
Let's get the script set up with some basics (including run when not logged on)
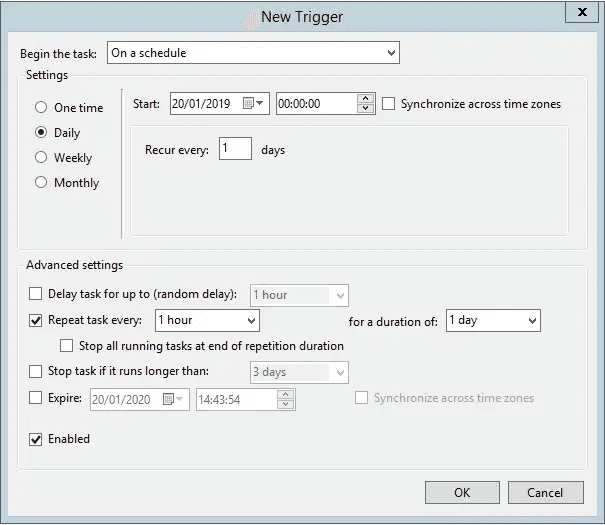
Something like every hour seems appropriate
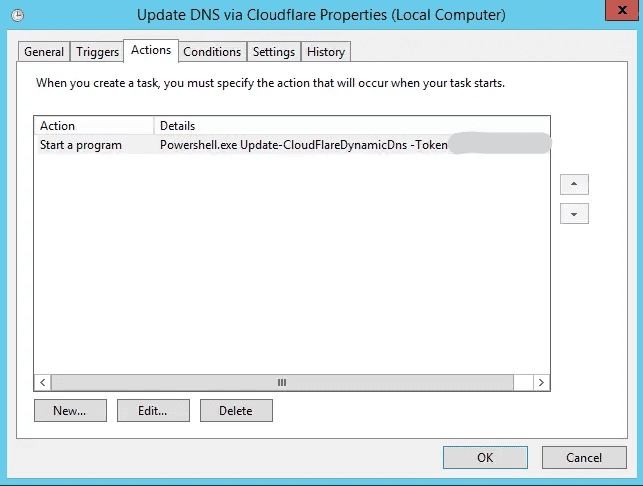
I'm cheating on the action here, but it works fine for testing
All done!
Considerations
At the current time, the two things on my mind are:
- There's no failure notifications (this feature is easily added however)
- The Cloudflare API requires use of your full account key. It's very surprising you can't create per-site keys, but it looks like this is in the works and expected at some point in 2019
Further reading
- Cloudflare API Help: https://api.cloudflare.com/
- The module author's post: https://blog.netnerds.net/2015/12/use-powershell-and-cloudflare-api-v4-to-dynamically-update-cloudflare-dns-to-your-external-ip/
Migrating a private repository from Bitbucket to GitHub with Git 7 Jan 2019 3:00 PM (6 years ago)
As GitHub private repositories have just become free, I'm jumping on the bandwagon and shipping over a few of the repos I have on Bitbucket to reduce the number of providers I store code with.
The end result - a private GitHub repository with all the metadata from the old Bitbucket repository - note we have maintained the last commit from 10 months ago
The option below uses the shell to migrate the repo, but you can also use the GitHub importer if you prefer an automated solution (you'll just have to wait while it does it).
Four simple steps, using "add upstream"
1 Create a target repository on GitHub, either through the website, desktop app or shell
Use the tool of your choice to create a target repository on GitHub. Ensure you don't initialize it with a README or you'll need to resolve this later.
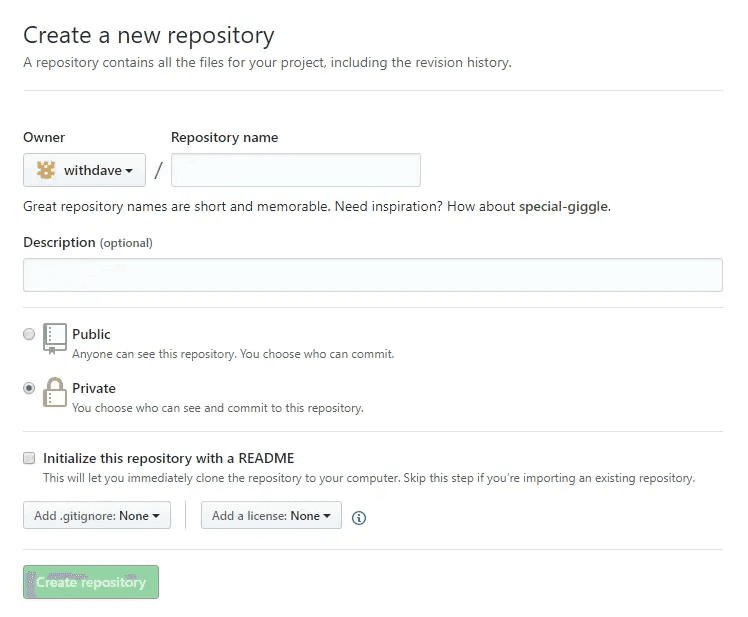
Make sure you don't initialize the repo with a README
2 Clone the Bitbucket repository onto your PC
Clone the repo onto your local system. I'm on Windows today, so that's:
D:\git>git clone https://withdave@bitbucket.org/withdave/wedding-website.git3 Add the target GitHub repository as the upstream remote for the local copy you've just cloned from Bitbucket
D:\git\wedding-website>git remote add upstream https://github.com/withdave/wedding-website.git4 Push the local copy (and if you have them, tags) to the target repository, and remove the Bitbucket copy
D:\git\wedding-website>git push upstream masterOptionally, if you have tags to push:
D:\git\wedding-website>git push --tags upstream Check the status, and if successful remove the Bitbucket repository to tidy up!
Alteratively (1/2): Using the GitHub Importer
GitHub offers an importer for internet accessible repositories, via the plus at the top right (once logged in).
Click the + in the top right, next to the user menu
Simply specify the source URL and target repository name and it'll prompt you for the relevant information.
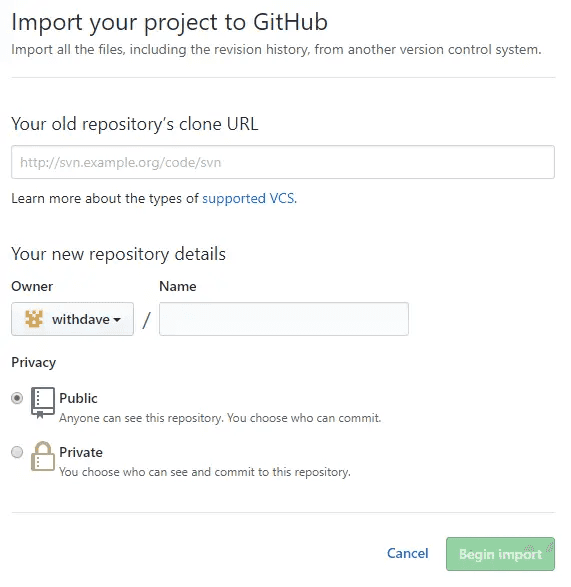
You'll receive a notification once the import is complete
Alternatively (2/2): Use "mirror"
The GitHub help suggests using --mirror with the following commands as detailed on their help site.
$ git clone --bare https://bitbucket.com/withdave/wedding-website.git

$ cd wedding-website.git git push --mirror https://github.com/withdave/wedding-website.git

$ cd ..
$ rm -rf wedding-website.git
This also maintains all branches and tags, but doesn't update the upstream repository - it mirrors the repository, and then removes this from the local machine once complete (so you'd need to clone it again from the target repository to work with it).
References
-
Using --mirror instead of upstream https://help.github.com/articles/importing-a-git-repository-using-the-command-line/
-
Transfer repo from Bitbucket to Github https://gist.github.com/mandiwise/5954bbb2e95c011885ff
-
GitHub Importer Help https://help.github.com/articles/importing-a-repository-with-github-importer
Deleting AWS Glacier Vaults via AWS CLI using a Lightsail Instance 29 Dec 2018 3:00 PM (6 years ago)
Amazon Web Services (AWS) offers some very affordable archive storage via it's S3 Glacier service. I've used this on a backup account in the past to store archives, and have decided it's time to clear down this account (oh, and save $0.32 a month in doing so).
The main challenge with doing this, is that unlike S3, S3 Glacier (objects stored directly there rather than using the Glacier storage tier within S3) objects can only be deleted via the AWS CLI. And to delete a Glacier Vault, you've got to delete all of the objects.
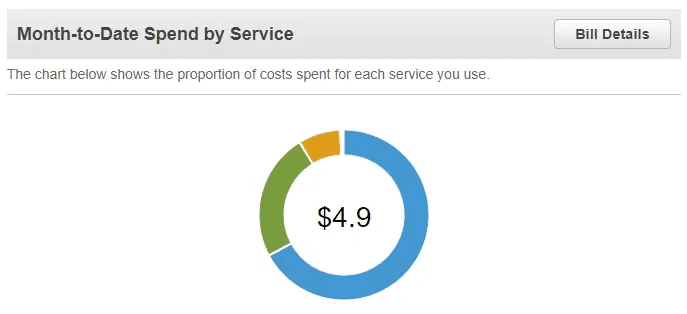
This account has some wild spending. $4.90 a month!
In this post I'll spin up a Lightsail box and wipe out the pesky Glacier objects through the AWS CLI. This doesn't require any changes on your local PC, but will require some patience.

And a whole $0.32 of that is Glacier.
So, for my $0.32 a month, I store ~80GB of archives. Conveniently, these are ancient - so we're outside of the early delete fee period.
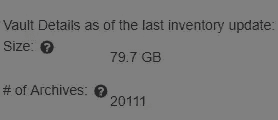
~80GB and >20k archives - let's just delete the archive!
You might assume you can just delete the vault via the AWS GUI and avoid the CLI altogether, but you'd be wrong.
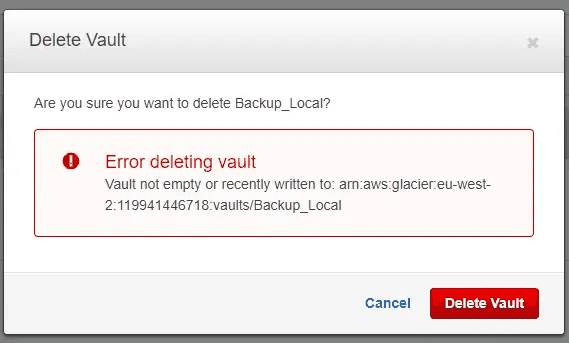
"Vault not empty or recently written to..." - so we need to empty it first
So, my weapon of choice to get the AWS CLI working is going to be a Lightsail machine. Why? Low cost, and low complexity!
1 Spin up a Lightsail Instance
We're going to create a Lightsail instance based on Amazon Linux (you could also use an EC2 box).
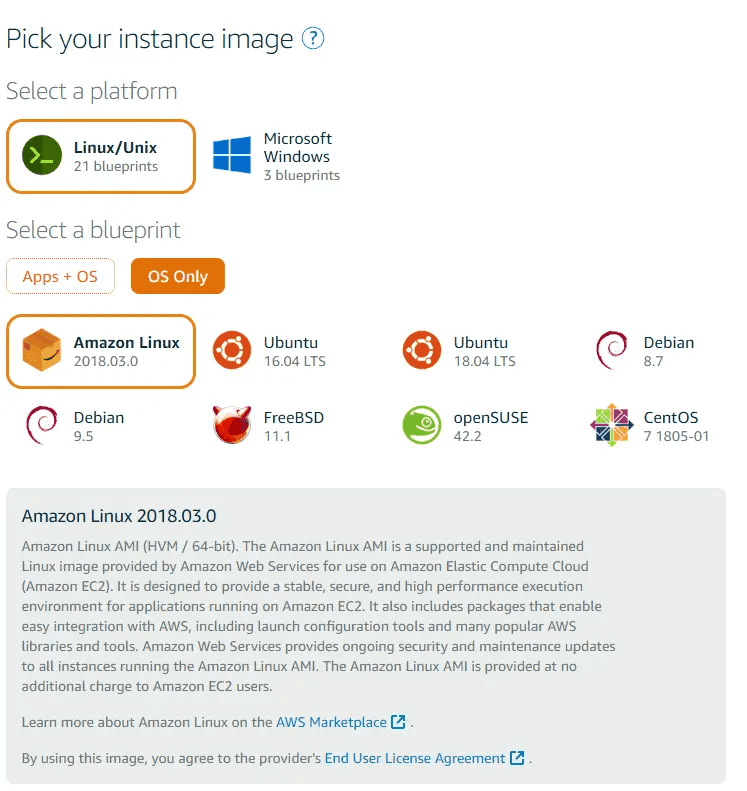
For type, Amazon Linux under Linux/Unix is ideal
As for the size, it doesn't really matter. All we're doing is running a few CLI commands, nothing crazy.
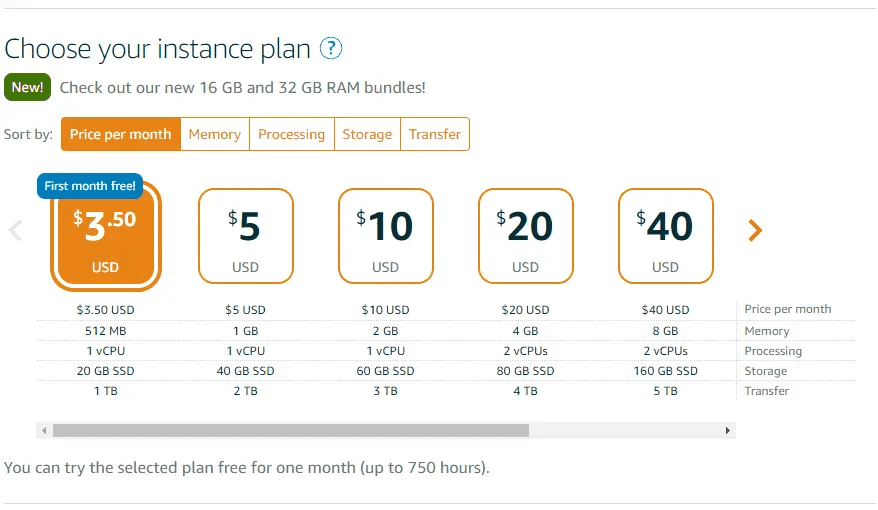
$3.50 looks good - I'll only be running it for a few hours anyway
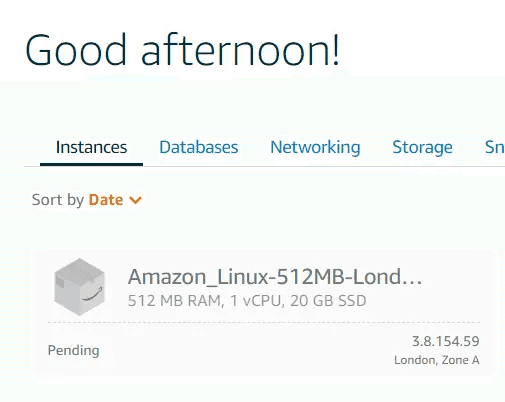
Once the server is created (it may take a few minutes), you can hit the console icon to log into the machine via the browser
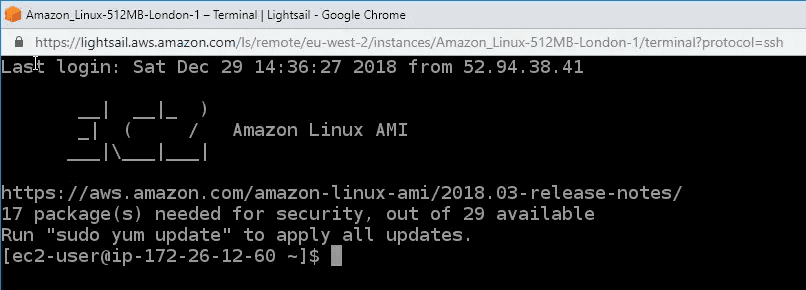
Logging in gives you direct access without requiring anything on your local machine. Great!
2 Check what's installed
We can run a few commands to see what's installed. This is following the Linux install guide. Amazon Linux includes AWS CLI by default, but we may need to update it.
To check what version of the AWS CLI is installed:
$ aws --version
aws-cli/1.14.9 Python/2.7.14 Linux/4.14.62-65.117.amzn1.x86_64 botocore/1.8.13
This shows version 1.14.9, which is a little old. To update:
$ sudo pip install --upgrade awscli
Successfully installed PyYAML-3.13 awscli-1.16.81 botocore-1.12.71 colorama-0.3.9 docutils
-0.14 futures-3.2.0 jmespath-0.9.3 pyasn1-0.4.4 python-dateutil-2.7.5 rsa-3.4.2 s3transfer
-0.1.13 six-1.12.0 urllib3-1.24.1
Let's verify the version installed:
$ aws --version
aws-cli/1.16.81 Python/2.7.14 Linux/4.14.62-65.117.amzn1.x86_64 botocore/1.12.71
Ok, we're good to go.
3 Create an IAM account (if you don't have one)
I created a new IAM account in the IAM Console for use by only this activity. Notably, I gave it full access to Glacier, and nothing else - the "AmazonGlacierFullAccess" policy is a default policy.
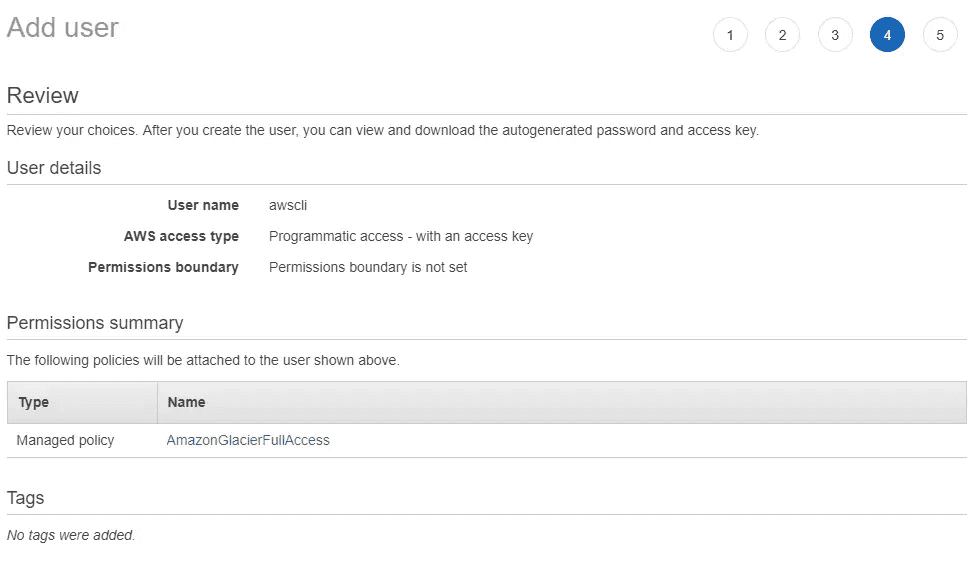
A new user, "awscli" with "Programmatic access - with an access key" and one policy "AmazonGlacierFullAccess"
4 Configure AWS CLI
Now that we have the vehicle (the Lightsail instance) and the driver (the IAM profile), let's configure AWS CLI!
This is as simple as typing "aws configure" and following the guided prompts.
$ aws configure
AWS Access Key ID [None]: [account access id]
AWS Secret Access Key [None]: [account secret access key]
Default region name [None]: eu-west-2
Default output format [None]: json
5 Querying the AWS CLI to get the file list
We can query the CLI to determine whether access is working, and that we're in the right region. Note that the [accountid] is this AWS account ID.
$ aws glacier list-vaults --account-id [accountid]
{
    "VaultList": [
        {
            "SizeInBytes": 85593505088,
            "VaultARN": "arn:aws:glacier:eu-west-2:[accountid]:vaults/Backup_Local",
            "LastInventoryDate": "2017-01-27T11:59:55.235Z",
            "VaultName": "Backup_Local",
            "NumberOfArchives": 20111,
            "CreationDate": "2017-01-17T09:38:35.075Z"
        }
    ]
}
That looks good - we need to generate a list of all archives in the vault with a new job using the vault name:
$ aws glacier initiate-job --account-id [accountid] --vault-name Backup_Local --job-parameters '{"Type": "inventory-retrieval"}'
{
    "location": "/[accountid]/vaults/Backup_Local/jobs/FDBG0Gbry7uNuE20BHiEWXz8uYCwKgDlFP
DqNqxDILY88tA9_iuSVkI7pX80Iw3XzaZ-oPL-GpznrI_k-D6keHOUqmf3",
    "jobId": "FDBG0Gbry7uNuE20BHiEWXz8uYCwKgDlFPDqNqxDILY88tA9_iuSVkI7pX80Iw3XzaZ-oPL-Gpzn
rI_k-D6keHOUqmf3"
}
We can list all the current jobs on that vault using list-jobs, to see whether it's finished:
$ aws glacier list-jobs --account-id [accountid] --vault-name Backup_Local
{
    "JobList": [
        {
            "InventoryRetrievalParameters": {
                "Format": "JSON"
            },
            "VaultARN": "arn:aws:glacier:eu-west-2:[accountid]:vaults/Backup_Local",
            "Completed": false,
            "JobId": "FDBG0Gbry7uNuE20BHiEWXz8uYCwKgDlFPDqNqxDILY88tA9_iuSVkI7pX80Iw3XzaZ-
oPL-GpznrI_k-D6keHOUqmf3",
            "Action": "InventoryRetrieval",
            "CreationDate": "2018-12-29T15:24:04.808Z",
            "StatusCode": "InProgress"
        }
    ]
}
This will take several hours to progress to "StatusCode": "Succeeded".
6 Iterating over files to delete them
Once we have the archive inventory, this is a bit of bash script that will run on our server to remove the archives. This approach is essentially a copy from this gist, but I wanted to run it in the command line directly to delete the 20k archives in the vault.
The only two pre-requisites are a) building an inventory as shown above, and b) installing jq, which is a command line json parser, which will help us read the inventory.
$ sudo yum install jq
Installed:
  jq.x86_64 0:1.5-1.2.amzn1

Dependency Installed:
  jq-libs.x86_64 0:1.5-1.2.amzn1           oniguruma.x86_64 0:5.9.1-3.1.2.amzn1

Complete!
With that done, we can save down the inventory (assuming it's succeeded).
$ aws glacier get-job-output --account-id [accountid] --vault-name Backup_Local --job-id "FDBG0Gbry7uNuE20BHiEWXz8uYCwKgDlFPDqNqxDILY88tA9_iuSVkI7pX80Iw3XzaZ-oPL-GpznrI_k-D6keHOUqmf3" output.jsonWe can now copy paste this script into the AWS Terminal window. The brackets on either side are to ensure it's entered as a single command rather than a set of separate lines.
(
## Set config values, then paste this script into the console, ensure the ( and ) are copied at the start and end of the script.
vAWSAccountId=[accountid]
vAWSVaultName=Backup_Local
vAWSInventoryFile='./output.json'


## Parse inventory file
vArchiveIds=$(jq .ArchiveList[].ArchiveId < ${vAWSInventoryFile})
vFileCount=1

## Echo out to start
echo Starting remove task

for vArchiveId in ${vArchiveIds}; do
    echo "Deleting Archive #${vFileCount}: ${vArchiveId}"
    aws glacier delete-archive --archive-id=${vArchiveId} --vault-name ${vAWSVaultName} --account-id ${vAWSAccountId}
    let "vFileCount++"
done

## Echo out to finish
echo Finished remove task on ${vFileCount} archives
)
This should iterate through all files to leave you with an empty Glacier Vault. This is a not an asynchronous process, so it does one file at a time. You may need to re-inventory or wait a day for it to be able to delete the vault.
On my system, it ran at about 2 archives a second - so it took around 3.5 hours end to end
If you wished to run another inventory retrieval (as per 5 above), then the resulting json file would look like the below - note there's no archives in the ArchiveList array.
$ cat output_after_deleting.json
{"VaultARN":"arn:aws:glacier:eu-west-2:[accountid]:vaults/Backup_Local","InventoryDate":"
2018-12-30T02:07:22Z","ArchiveList":[]}
The AWS GUI also reports a null size and # of archives
Success! We can now delete the vault via the CLI or via the AWS GUI.
Other options and references
There were a bunch of other options dotted around which had code written in different languages. I used a few of these as references while trying to keep it all to something I can paste into the command line:
- Perl script to remove all files from a vault
- Python script to do the same
- PHP script to do the same
- Bash script to do the same (the main source for this post)
A quick performance comparison with Qlik Sense - AWS EC2 vs Azure Virtual Machines 1 Nov 2018 4:00 PM (6 years ago)
Previously, I tested the performance of a load script while using RecNo() and RowNo() functions. This conveniently gave me a script which consumes up to 25GB of RAM, along with considerable CPU power.
So, what about testing it on two cloud boxes? I've chosen a machine from both AWS and Azure, loaded them with Qlik Sense September 2018 and run the load script.

Total Test Duration by Host
The summary: The AWS box was approx 8% faster than the Azure box.
The data
The data set being used is the same as for an earlier post on RecNo() and RowNo(), namely the comments data from StackExchange.
The servers
What I've aimed for here is two servers with similar specifications and cost (at face value). I haven't taken into account other factors such as IOPS or "ECU". The only software installed on these servers is Qlik Sense and Google Chrome. I've also included a laptop for comparison.
AWS VM
VM Size: t2.2xlarge
Type: Standard
CPU: 8 vCPU (Intel E5-2686v4 @ 2.3GHz)
RAM: 32GB
OS: Windows Server 2016 Datacenter
Approx Monthly Cost: ~£270 ($0.4844 per Hour)
Azure VM
VM Size: D8s_v3
Type: Standard
CPU: 8 vCPU (Intel E5-2673v4 @ 2.3GHz)
RAM: 32GB
OS: Windows Server 2016 Datacenter
Approx Monthly Cost: £266.16
Laptop
CPU: 2 core/4 thread (Intel i7-6600U @ 2.6GHz)
RAM: 32GB
OS: Windows 10 Professional
Note that the CPU speed is as reported by Windows Task Manager.
In a production deployment on either AWS or Azure, we might expect a multi-server architecture, and also utilisation of platform specific technologies such as Azure Files for the fileshare.
The results
I had no expectations coming into this, as both of these are general servers (i.e. not specialised for memory or compute) and are in the same price bracket.
Per-host results
Overall, it's AWS>Laptop>Azure. Presumably the higher clock speed on the laptop offsets having 1/2 the cores.
As for AWS vs Azure? It could be the way the infrastructure is configured, the utilisation of other VMs on the same host, also possibly the difference between the 18 core 2686 on AWS and the 20 core 2673 on Azure.
Total Test Duration by Host (total duration in seconds)
Per-test results
The per-test results are interesting, with some notable variances:
- The laptop kills it on RowNo, but not on RecNo (this is what puts it into second place overall)
- Azure suffers across the board compared to AWS

Per-host test results (average duration in seconds)
Iteration results
Comparing the actual per-test results, they are generally consistent on both servers - which you'd expect from a brand new box.
AWS has a few noticeable variations in the shorter tests.

Iteration Results - AWS
Azure has some more obvious variations in the longer tests.

Iteration Results - Azure
Comparing Autonumber, Autonumberhash128, Autonumberhash256, Hash128, Hash160 and Hash256 outputs in Qlik Sense and QlikView 13 Oct 2018 4:00 PM (6 years ago)
There's often a discussion about what each of these autonumber/hash functions does in Qlik. We commonly see these functions used for creating integer key fields, anonymising data (for example, names in demo apps), and maintaining long string fields for later comparison (as the hashes are shorter than the strings they replace).

Sample outputs from the random number generator, with all the functions present
To do this, I'm using the script below. I'm also keen to show outputs from QlikView vs Qlik Sense, and results of running the same script on another machine.
My observations are the following:
- AutoNumber/AutoNumberHash128/256 - different output per load as the value is typically based on the load order of the source data
- Hash128/160/256 - the same output, across every load. Stays the same between Qlik Sense and QlikView, and also between different machines
The Process
I've opted to create random data, with an embedded control value. I'm doing this because I don't want to have the same distinct values in every sample, and I certainly don't want them in the same order (as I'll likely get the same integer outputs for the autonumber fields).
The process was:
- Generate a set of QVD files containing 1,000,000 random numbers, plus 1 control number (this is the value '123456'). These are sorted in ascending order, which means the control number should be at a different position in each QVD.
- Load all of these QVDs into an analysis app and compare the values for each function.
The QVD generator
In the QVD generator, we use a simple load script to build the random numbers and autonumber/hash them.
// Load a control value into a temp table
// This will be the value we check the value of from each source
Data:
LOAD
	1234567						AS Random
AutoGenerate 1;

// Now concatenate 1,000,000 random values to the control value
// It's likely we will get some duplicates due to the limited range of values possible
Concatenate(Data)
LOAD
	Floor(rand()*10000000)		AS Random
AutoGenerate 1000000;

// Now sort this data to ensure the control value isn't the first record
// This is important for the autonumber functions as they tend to use load order
Sorted:
LOAD
	Random		                As Value
RESIDENT Data
ORDER BY Random;

// Now drop the data table
DROP TABLE Data;

// Calculate all of our hash and autonumber values
// The iteration field is used instead of stripping the filename
Hash:
LOAD
    Value,
    Autonumber(Value)			AS AutoNumber,
    Autonumberhash128(Value)		AS AutoNumberHash128,
    Autonumberhash256(Value)		AS AutoNumberHash256,
    Hash128(Value)			AS Hash128,
    Hash160(Value)			AS Hash160,
    Hash256(Value)			AS Hash256,
    6 as Iteration
RESIDENT Sorted;

// Store and drop the hash table
STORE Hash INTO [lib://StackExchange/Rand-6.qvd] (qvd);
DROP TABLE Hash;
Doing this, I produced 7 files - 6 from Qlik Sense (September 2018) and 1 from running the same script in Qlik View (12.10 SR3).

Random Number QVDs
These were then loaded straight into a Qlik Sense app, along with an excel file containing similar results generated through Qlik Cloud.
The analysis
After loading these results into an app, we can see that only the hash remains consistent for our test value. This remains true:
- Between different reloads
- Between different Qlik Sense sessions
- Between different Qlik Sense servers (desktop, enterprise and Qlik Cloud)
- Between QlikView and Qlik Sense

Results for the control value, 1234567
All 8 iterations resulted in the same hash values, while the autonumber values were predictably variable - their order is driven mainly by load order. If the values and load order of the source hadn't changed then it is possible that the autonumber values would have been the same between tests.
Using a "sample load" to do this on real data
The other way I could have done this is using real data, and the Qlik "Sample Load". This loads a random sample from a source table, and I'd only need to inject a control value, then sort it by all values as I did above.
A last thought - collisions
A challenge when using large data sets and hash fields is the chance of collisions and what this might mean for any analysis relying on this field.
As hash outputs have a fixed length (in Qlik this is 22, 27 and 43 characters, for 128, 160 and 256 bit hashes respectively) and the input can be of any length, there is a chance that the same hash is produced by different inputs.

On our small data set, the distinct hash count was as expected (over 7.9m values)
This is, however, very unlikely to present a problem on Qlik-sized data sets (e.g. up to 1 billion unique values, which is the software limit).
Qlik load performance with RecNo() and RowNo() 27 Sep 2018 4:00 PM (6 years ago)
Using RecNo() or RowNo() will impart a performance impact on your load script. I discussed these functions in a previous post where I looked at the output of RecNo vs RowNo.
I recently spotted an unexpected slow-down in a load script, which was caused by using one of these functions. In summary:
- Using RowNo() in a simple load script is considerably slower than RecNo()
- If you must use RecNo(), it may be faster to do this in a direct load
- If you must use RowNo(), it may be faster to do this in a resident load

Example script for one of the tests - load data from disk and add the RowNo
The data
I'm using the comments source file from the stackexchange archive for this post. This file is fairly chunky when saved into a QVD (~14GB) and will act as a larger (~70M rows) source data set.

We're using comments data from StackOverflow
I'll load all fields except for the "Text" field as that's not required for this example.
The tests
I'm interested in the speed of RecNo and RowNo on a direct load from a file, vs on a resident load from a file. There are six tests:
- Load: Load directly from the QVD (optimised load) - to provide a reference point
- RecNo: Load directly from QVD while creating a new field with RecNo
- RowNo: Load directly from QVD while creating a new field with RowNo
- Load_Resident: Load directly from QVD (optimised), then resident this into a new table*
- RecNo_Resident: Load directly from QVD (optimised), then resident this into a new table, creating a new field with RecNo on the resident load*
- RowNo_Resident: Load directly from QVD (optimised), then resident this into a new table, creating a new field with RowNo on the resident load*
*The resident load tests will exclude the time taken to load the original table, and only measure the duration of the RESIDENT operation.
Each test will be repeated five times to ensure a consistent result. The Qlik Sense version tested is September 2018.
The results
The results demonstrated large differences between RecNo and RowNo in both the straight load and in the following resident load tests.

The results show large variation between RecNo and RowNo
On the direct load from QVDs, the following was found:
- Load: Optimised load without transformation - 56.2s
- RecNo: Unoptimised load, adding RecNo field - 84.6s (+28.4s)
- RowNo: Unoptimised load, adding RowNo field - 441.4s (+385.2s)
RowNo takes a huge 6.5 minutes longer than an optimised load - almost 6 minutes longer than the RecNo test.
On the resident load tests (which exclude the initial optimised load time):
- Load_Resident: Straight resident load - 34.0s
- RecNo_Resident: Resident load adding RecNo field - 66.6s (+32.6s)
- RowNo_Resident: Resident load adding RowNo field - 267.4s (+233.4s)
Here, RecNo remains about the 30s mark, and although RowNo is faster than on the direct load, it still takes almost 4 minutes longer than the straight resident.
If we factor in the 56.2s for the initial load and add the 267.4s for the resident load then this brings us to 323.6s - still considerably faster than the direct load option above. RecNo however, would be faster to do in the direct load (84.6s direct vs 56.2s+66.6s=122.8s using resident loads.
Variation and limitations
Once repeated five times (the script runs a single test five times, then moves onto the next test), there was limited variation in duration.
Despite small variations between iterations, the test results highlight clear differences between the two functions
These tests are limited by the omission of any other functions in the load process, and will be influenced by the data set and infrastructure used. The results will therefore vary in a "real world" complex load script, but they do hold true against my observations of deployments seen in the wild.
A copy of the app used for this test is available here on github.
VirtualBox on Windows 10: This 64-bit application couldn’t load because your PC doesn’t have a 64-bit processor 3 Aug 2018 4:00 PM (6 years ago)
Sometimes VirtualBox doesn't behave when it imports Virtual Machines (appliances).
I exported a Windows 10 VM from one machine to another, imported and ran it to receive a recovery message on launch.

My W10 VM isn't happy
The error
A dramatic message:
Your PC/Device needs to be repaired

This 64-bit application couldn't load because your PC doesn't have a 64-bit processor. If you're using Windows To Go, make sure that your USB device has a version of Windows that's compatible with the PC that you're trying to use.

File: \windows\system32\winload.exe
Error code: 0xc000035a

You'll need to use recovery tools. If you don't have any installation media (like a disc or USB device), contact your PC administrator or PC/Device manufacturer.
The solution
This happens frequently, but it's a simple fix. The config has just forgotten it's version:
- Machine > Settings > Basic
- Update the Version drop-down to the correct OS and version

Correct the OS version in the machine config
In my case it had reset it to Windows 7 (32-bit) when it should have been Windows 10 (64-bit).
Compacting Windows 10 VMs and shrinking their VDI/VMDK disk images on VirtualBox host 3 Jul 2018 4:00 PM (6 years ago)
If you've got a couple of VMs, then trimming them occasionally will help with storage management on the host. Disk files (like VDI and VMDK images) will grow over time if the VM was configured to expand the disk as needed - but they will never shrink on their own.
This was tested on a Windows 10 VM managed by VirtualBox, the starting file size was over 40GB, as it had been used for various roles and grown over time.

Our test VM - starting size
1 - Perform a disk clean-up.
There's going to be a ton of Windows updates, temp files and other junk that keeps accumulating over time.
a) Open explorer and open properties on the primary drive
b) Click on "Disk Clean-up" under the general tab
c) Clean all files (don't miss the "Clean up system files" section)

Clean up system files to catch all Windows update files too (this was after running hence zero values estimated)
2 - Disable hibernate.
Use the native save or suspend functionality in the hypervisor rather than the Windows functionality, and save on the chunky hiberfil file.
a) Open a command prompt (run as Administrator)
b) Run the following command: powercfg /h off

Disable hibernation with this command
3 - Reduce pagefile size or disable it.
By default Windows can assign some pretty large pagefiles. Tune these down to save several more GBs.
a) Click start, search for "System" and open it
b) Open "Advanced system settings" from the left hand pane

Getting to Pagefile settings
c) Open performance settings
d) Click on the "Advanced" tab
e) Click "Change" under virtual memory
Change this value to an appropriate amount, save and restart the system.
4 - Compress system files.
Use compact.exe to slim down your system files. This will eek out another few GB in savings, even when some system files are already in the compact state.
a) Open a command prompt (run as Administrator)
b) Optional - verify the current state by running: Compact.exe /CompactOS:query
c) Enable compact mode by running: Compact.exe /CompactOS:always
This may take 10-20 minutes to make the required changes, and it'll update you once it's finished.

Compact status and result - directories were already partially compressed
5 - Overwrite free space with zeros
Although the space is empty, it's still full of 1's and 0's. VirtualBox won't see this as free space until we fill it with 0's. If you're not running a SSD, you may need to optimise/defragment this drive first.
Microsoft has a tool called SDelete - download this to the VM, extract it and do the following.
a) Open a command prompt (run as Administrator)
b) Navigate to where you extracted the zip file: cd c:\users\username\downloads\sdelete
c) Run the following command: sdelete.exe c:\ -z
d) Accept the licence terms if it prompts you
e) Once complete, shut down the VM
[](https://withdave.com/wp-content/uploads/2018/07/sdelete.png)
Navigating to and starting sdelete on C:\
Once that's done, we're in good shape to compact the disk.
6 - Compact the disk image
Back in the host system, we can use VBoxManage.exe to compact the disk image.
a) Open a command prompt (run as Administrator)
b) Navigate to the VirtualBox program directory: cd "C:\Program Files\Oracle\VirtualBox"
c) Run the following to get a list of all disk images registered with VirtualBox:
VBoxManage.exe list hdds

Listing hdds shows all attached disks. We can see the location matches for the first one in the list (hidden in the screenshot)
d) Compact the image using the following if it's a .VDI format:
VBoxManage.exe modifymedium disk "C:\users\username\VirtualBox VMs\vmname\disk.vdi" --compact
If it's a .vmdk format, then you'll receive an error like:
Progress state: VBOX_E_NOT_SUPPORTED
VBoxManage.exe: error: Compact medium operation for this format is not implemented yet!
In this case, we have two options.
Option 1 - Convert the file to VDI and then back to VMDK
Option 2 - Use the VirtualBox UI to clone the VM
I'm going to use option 2 here as it uses less disk space for the process (option 1 requires a full copy, option 2 only uses the compacted space when cloning).

Creating a full clone via the GUI
This results in a new copy of our VM, so we need to delete the original once this is complete.

Final compacted size of clone
The resulting file is approx 50% the size of the original image.
Qlik Counter Functions and their outputs - RecNo() and RowNo() 29 Jun 2018 4:00 PM (6 years ago)
In this post I explore the outputs of RecNo() and RowNo() to demonstrate the difference visually.
These two fields are often used interchangeably, but they provide different output. In summary:
- RecNo() is a record number based on source table(s)
- RowNo() is a record number based on the resulting table
As a result, RowNo will always provide a unique integer per row in an output table, while RecNo is only guaranteed to be unique when a single source is loaded (RecNo is based on each single source table, interpreted individually rather than collectively).

A snapshot of the test output
The data set
A simple table of random numbers was used as the input to this script, as I've been using this for other recent tests.

Random Integer Values
The tests
The following tests were run to demonstrate the difference in properties between the two functions:
- SourceTable: Straight load of the source
- Test1: Resident load of SourceTable
- Test2: Resident load of values in Test1 where the value ends in a digit less than 5 (e.g. 444, 2, 1033 are all included, but 5, 15, 1029 are excluded)
- Test3: Resident load of all values in Test2

Snapshot of load script
The results
The output is as expected:

Test Results, laid out: Value (col1), RecNo values (col2-5), RowNo values (col6-9)
RecNo maintains the record number of the parent table, or source. In Test1 and Test2 this matches as the source data has been unchanged each time (the same rows, in the same order). In Test3 it is different, because it is referring to the reduced Test2 table (which is missing rows 1-4 from the DataSource - therefore record 1 in this table is the value 52).
RowNo starts at 1 and increments on each record in line with the record number of that table. As the order of the data isn't changed, the RowNo ascends with the Value.
These two Qlik blog posts prompted me to write this:
- RecNo or RowNo?
- Counters in the Load
Structured vs Unstructured Data 12 May 2018 4:00 PM (6 years ago)
Structured data is very familiar to most people, as it's what is captured by most user-facing business systems. You've got columns and rows, and data values are stored against a field name and identifying value of some type, with a clear data type.

Some structured data in Excel - field based, and can be loaded with data types into a relational database
Unstructured data is also prevalent, as it is any data which does not conform to a common schema and may not have an identifiable internal structure. It might be written in natural language, might not be formatted in columns and rows, may have dynamic hierarchies or otherwise be difficult to interpret automatically via scripting.

Unstructured data in a PDF file - data is stored in a binary format which isn't human readable or searchable
I've seen comparisons on the web suggest that if structured data is Excel, unstructured is PowerPoint or Word - as in, the contents are not formatted for analysis or easy searching.
So, structured data could be:
- Spreadsheets, with clear column organisation and categorisation of data
- Relational databases
- CSV or other delimited text files
Unstructured data could be:
- Spreadsheets, without clear organisation - for example many cells filled with values which do not form a table
- Pages on a website (including posts on social media)
- Proprietary binary files
- Emails
- PDF files
- Media (e.g. videos, audio, images)
Collecting and categorising this unstructured data requires data mining tools - and although some document types (e.g. Word documents) do have inherent schemas, the contents of that schema cannot be interpreted by normal tools to provide insights. It's almost a similar question as "What is Big Data?", to which the answer could generally be anything that cannot be processed by the software on a commodity computer (e.g. your work laptop).
If we take the example of a word document, this has an XML schema which is structured - but the way the user writes the data in this document is not. We could refer to this as semi-structured. This sort of data is also prevalent in web technologies, with examples such as JSON and NoSQL databases.
Some further detail:
- https://en.wikipedia.org/wiki/Unstructured_data
- https://en.wikipedia.org/wiki/Semi-structured_data
- https://www.datamation.com/big-data/structured-vs-unstructured-data.html
Passing variables to applications via the QlikView QMC with Script Parameters and Publisher 8 Apr 2018 4:00 PM (7 years ago)
Following this post which talks about methods for configuring apps, this post looks at how to achieve this via the QMC in QlikView and set variables in reloaded QVWs.
You'll need to have Publisher enabled to access the features used for this example.
In a QlikView deployment with Publisher you'll have access to the Reload tab for a task. This includes the option to add Script Parameters, which essentially leads to duplicate apps based on the provided field or variable name.
However - provide just one variable value, and you'll pass this into one copy of the app.
We can pass a variable like vConfig = 'qlikapp1acmedev' and consume this in the QVW.

Variable setup in the QMC in the Script Parameters section
The data load script for QlikView is slightly different to the Qlik Sense script above as it uses SubField to break apart the vConfig variable, and creates an absolute path (relative paths can also be used and are generally best practice, but the example uses an absolute path to illustrate the point):
// Config
// Set app-specific variables to determine data connection access

// Set the customer code (e.g. acme, widgetcorp, etc)
LET vConfig_Customer = SubField(vConfig,'~',2);

// Set the product code (e.g. qlikapp1, qlikapp2, etc)
LET vConfig_Product = SubField(vConfig,'~',1);

// Set the environment code (e.g. dev, test, uat, prod, etc)
LET vConfig_Environment = SubField(vConfig,'~',3);

// Build root path for use across app
SET vPath_Dir_Root = '\\qlikserver\QlikData\$(vConfig_Environment)\$(vConfig_Product)\$(vConfig_Customer)\';
This will build a path for \\

Loaded variables for environment, product, customer and path
We can then use this to set titles, load further config (if we add in a value for locale, for example), or set the source and target for loading and saving data files onto disk, by using $(vPath_Dir_Root) in our LOAD...FROM and STORE...INTO statements.
With regards to directory management, a best practice is to construct additional variables from the vPath_Dir_Root to create pointers to the different QDF resource folders. See my earlier post which talks about the value of frameworks.
Doing your Qlik App Configuration in the load script, include files, or QMC (Publisher or the Qlik Repository Service APIs)? 16 Mar 2018 4:00 PM (7 years ago)
For me, the bare minimum when it comes to app configuration in Qlik Sense or QlikView is:
- Setting paths and libs for use in data load script
- Setting "boilerplate" variables - e.g. the number/date/currency/etc formats
- Setting HidePrefix, SearchIndex and other app-specific behaviours
- Setting Product or Customer specific settings for consumption in the UI
This post adds some detail on config methods for Qlik Sense and QlikView, which fills the second tab from an earlier post about versioning.

Script for setting a base library based on config variables
In a multi-product/customer setup (see this previous post about deployment frameworks for context) where we follow common standards for names and folder structures we can streamline this configuration to reduce the maintenance and deployment burden.
Setting config variables in a consistent way helps with questions like:
- How do I update my load statements when I move my QVD folders?
- What happens when I copy my app and want to deploy to another team or customer?
- How do I migrate the app between environments, or set them to use different folder paths on a common share (e.g. _dev, _test, _prod)?
Qlik Sense
In Qlik Sense, we can pass these variables in three ways:
1 - Set them in the data load editor for each application (simple, but needs to be done for every application and each time an app is migrated)
2 - Set them in an external text file, which is loaded via MUST_INCLUDE into the apps on reload (less simple, allows config to be shared amongst apps, requires editing of a text file on disk)
3 - Set custom properties and tags on apps via the Qlik Sense QMC (more complex, but each app can have a custom config, and no in-app or on-disk edits are required)

An example app "My Config App" carrying a tag, and two custom properties. These can be accessed by the app and used to build variables.
I'll cover the implementation detail in a later post, as option 3 provides a really powerful method for setting up apps. This uses the monitoring app REST connections (current versions as per this previous post) to get data from the Qlik Repository Service.
QlikView
In QlikView, the first two methods are the same, with the third being slightly different:
3 - Set a configuration variable via the QlikView QMC (requires Publisher, limited to 1 variable if only 1 output QVW required) in "Script Parameters".
Variable setup in the QMC
I'll cover an example for this one in a following post.
Version sheets and tabs in the load script for Qlik Sense and QlikView 14 Feb 2018 3:00 PM (7 years ago)
In the absence of a source control system like SVN or GIT, a quick and easy way of capturing changes in a app is to update a version control tab before passing the app back to other developers, or onto testers.
This is a very low-tech solution, but the format below works well in shared environments. The first two tabs of your application should be:
- Version (explain the app and list changes you've made)
- Config (set the configuration values like paths, dates, etc used in your application's data load and UI)

Version and Config sheets should become a familiar sight
The version section script that I use typically looks like this (version on GitHub):
/*

*************************** INTRODUCTION ****************************

CREATED BY:     withdave

CREATED DATE:   22/03/2018

PURPOSE:        Extraction of raw data from all SQL server data sources and store to QVD

**************************** CHANGE LOG ****************************

Date        Version     Editor          Notes
2018/03/22  0.1         withdave        Initial development
2018/03/24  0.2         withdave        Replaced all ODBC connectors with new OLEDB connectors

**************************** GUIDELINES ****************************

// All script should be commented

// All changes should be commented and versioned

*/
This gives us an easy view of who changed what, when.
Qlik Deployment Frameworks - using common approaches, naming conventions and paths across developers 13 Jan 2018 3:00 PM (7 years ago)
Any environment with more than on developer will quickly lose consistency of attributes across the environment. Agreeing standards as part of developer onboarding, and validating these before app acceptance is very important.
An example set of naming conventions is discussed below. This assumes a common directory structure similar to a Qlik Deployment Framework (QDF) model.

The QDF helps to organise application components
The example below follows a concept of one common container (for data and files which aren't app specific), and a hierarchy of product (one or more applications developed for a specific purpose) followed by customer (a standalone version of those applications, loaded with different data).
The resulting directory structure is therefore Root > Product > Customer.
This is particularly common in OEM and SaaS deployments where deployment and config of applications is automated and physical separation of resources is desirable.
QlikApplicationData (available via a UNC path)
- common
-- shared
--- 1_application
--- 2_etl
--- 3_qvd
--- 4_...
-- <customer1>
--- ...
-- <customer2>
--- ...
- <product1>
-- ...
- <product2>
-- ...
In this model, we benefit from improved consistency when using a simple set of rules for naming elements both in the QMC and within apps.
Consistent naming in the QMC
Adopting standards in the QMC will help reduce the maintenance burden when adding, updating or removing application components. Administrators and users should be able to see 'at-a-glance' what a resource is intended for.
App and Stream Names
Take a decision whether to include the Product Name (which could refer to a group of apps which might be published into a stream) in the App Name, as well as in the Stream Name.
If you've got a group of Finance apps which are based on GL data, you might want to name a stream "Finance" and set app names like "General Ledger", "Month End Reconciliation", etc, excluding "Finance" from each app name.
Given the limited real estate in the Qlik Sense Hub for app names, shorter can be better if you've already specified the product name or app group in the stream name. The App Description can then be tailored to provide the remaining context to business users.
Concepts:
- Simpler is better - no long app names, no "technical" jargon (like versions, owners, etc)
- Provide a description on every app. At a minimum, tell the user what data the app pulls from, it's intended audience, it's purpose, and any limitations or caveats in the data or the way the data is presented
- Use a common or familiar app thumbnail. This could be tailored by product, and include the name of the app with a small icon to match its purpose (e.g. a book for a General Ledger app)
Content Libraries
Where there is shared content outside of an app, the content library name should align with the product. A convention such as "
Hence a library containing country flags (for use with an extension like Climber Cards) used across multiple customers and apps in a "Customer Analytics" product would be named "CustomerAnalytics_CountryFlags", rather than just "CountryFlags".
Making the name specific to the product (and if needed, to the customer or app) means it's easier to catch dependencies when migrating apps between environments, and to update existing deployed applications without impacting other products or customer deployments.
Data Connections
Data connections should be specific to a container, and provide a common path which can also be used to ensure developers (and full self-service users who can create/edit apps) can only access the connections they need.
The convention here should include:
- the type of data connection
- the product
- the customer
- the location within the container it's pointing to
For ease of sorting, these follow a slightly different convention to other object naming:
So, if we had a product called "Customer Analytics" and a customer called "Acme", we would employ two data connections by default. One specific to the customer, and one specific to the product:
- CustomerAnalytics_Acme_Dir_Root (points to /
- CustomerAnalytics_Shared_Dir_Root (points to /
If we needed to create a REST connection to a Google Analytics API, we might create a connection called:
- CustomerAnalytics_Acme_REST_GoogleAnalytics (this could be specific to that customer as it might use their credentials)
Tasks
These only concern administrators, but they should include some basic terms in the name which explain what that task does at a glance.
Consider a simple tiered ETL process for the "Customer Analytics" product for the "Acme" customer, which has the following three components:
- Extract application (CustomerAnalytics_Acme_Extract)
-- Transform application (CustomerAnalytics_Acme_Transform)
--- Dashboard application (Customer Analytics)
The first app is triggered daily, while the others are triggered upon completion of the last. An example of task naming would be:
Trigger can be D (daily), W (weekly), T (on task trigger), etc. The order will be dependant on where it is in the task chain.
So, for our examples:
- CustomerAnalytics_Acme_D_0_Extract
-- CustomerAnalytics_Acme_T_1_Transform
--- CustomerAnalytics_Acme_T_2_DashboardLoad
Consistent naming in applications
During application development, consider defining standards for most elements within the app.
Sheet names and descriptions
Keep them short but descriptive. Avoid using technical jargon and consider taking out unnecessary words like "Dashboard", "Analysis" or "Report" to keep them succinct.
Variables
Variable naming is important, especially if you're using them for passing expressions into the apps.
If you're using the QDF, employ the appropriate scope prefix (vG, vL, etc), and agree a common structure to follow this.
An example would be:
v
Some examples:
- vG_Color_Header_LightBlue - for a global colour used in all headers
- vL_Expression_Sum_Sales - for a app-specific expression used to provide the sum of a sales field
Other variable types could include:
- Selector (used for flags in the data model, or based on user selections)
- Dimension (used to specify a normal or calculated dimension)
- Conn (used for data connections)
- Set (used for components in set analysis)
- Date (used for date flags and comparisons)
- Agg (used for defining aggregation fields)
More will appear as you continue developing - starting somewhere is better than randomly naming each time!
Note: Renaming Data Connections
Qlik Sense data connections created through the browser (in the data manager or data load editor) automatically append '(
To strip the username, head to /qmc/dataconnections/ and update the name. Any open apps will need to be closed (i.e. all browser tabs closed) before the renamed connection can be used.
On Demand App Generation (ODAG) Best Practices in Qlik Sense (3.0 and 2017 releases) 4 Dec 2017 3:00 PM (7 years ago)
On Demand App Generation (ODAG) was an approach introduced in Qlik Sense 3.0 to use the Qlik Analytic Platform (QAP) APIs to create Qlik Sense applications for very large or frequently changing data sets.
The ODAG method provides an easy way to generate applications containing slices of data from a very large data set, without needing to load all data into memory in Qlik Sense. Users make selections in "selection" or "parent" apps which contain an aggregated view of the entire data set, and can generate their own apps built using specific scopes of data driven by these selections. The resulting "detail" or "child" apps reload while the user waits to provide up to the full granularity of the data set, over a limited row set.
Qlik Sense 3.0 - via Extension
Initially, functionality was provided via extensions only, interacting with the public APIs. As per the ODAG user guide released with the extension, this required a few tweaks of the Qlik Sense security rules, and upload of the extension (http://branch.qlik.com/#!/project/56f1689bc5b2f734933c7e52) to the server.
As Qlik Sense lacks popular QlikView features like loop and reduce and native document chaining, this provided a first step into making larger data sets accessible with Qlik Sense (without using Direct Discovery, which has limitations).
Qlik Sense June 2017 onward - Native
With the June 2017 release, the extension was moved into Qlik Sense as a native feature, and an on-demand service added to control the logging level and the number of apps that could be generated at one time.
From the extension, the only feature lost was the ability to set a name for the child apps from within the selection app (instead, it takes the name of the template and appends the user directory and name). This gap is partially covered by providing an ODAG "drawer" from which users can recall a list of generated apps, complete with the selections they made to create each one.
Over time, extra configuration options were added, although the initial state allowed developers to specify how many child apps users can keep per ODAG link, and for how long these are retained on the server.
For more information on the configuration options and the code required to create bindings, see this Qlik help page.
Considerations for maximising value from ODAG
Here's a few thoughts on how to reduce risk and increase the stability and scalability of your ODAG solution:
-
Ensure your aggregated data carries a proxy for the total row count, which can then be used in the ODAG row limit. Aim to keep these slices to ~100,000 rows (depending on your data source and query complexity)
-
Provide your users with guidance on which fields they need to make selections in and the current row count, and set expectations over generation time and retention of those applications (e.g. if you have an ODAG link set to remove apps after three days, state this in the selection and detail apps)
-
Provide a summary of selections used to generate the detail app in the detail app. Don't rely on users going back to the selection app and checking the ODAG link pane - ensure you minimise the risk of user error
-
Ensure the ODAG selection and detail apps have a similar look and feel, as well as navigation. The user should be able to see that the apps are related, and that the detail app is in fact their own copy of a template loaded with only the data they requested
-
ODAG data sources should be optimised for your queries. For QVDs, this means creating index QVDs which map to the main Fact QVDs via key fields - therefore allowing an optimised load on the slowest step. For technologies like Impala, this is ensuring the table is partitioned by the most common fields a user makes selections in (alternatively, consider using odso to ensure you always limit the data using fields in the partition). In SQL server, Oracle etc, you'll want to be maintaining indexes on important fields and considering the use of integer values or keys
-
The ODAG binding types (ods/odo/odso) should be used appropriately. Fields with a high number of distinct or long values, should avoid the use of odso (as this passes every selected or optional value in the field), rather using this for date fields that might be indexed in the data source
Changes to default QRS API data connections in Qlik Sense from June 2017 11 Nov 2017 3:00 PM (7 years ago)
Default data connections to the Qlik Repository Service API (QRS API) were added in Qlik Sense 3.0.

These data connections are used by the included monitoring applications (Operations and License monitors) and have been renamed and updated in Qlik Sense June 2017.
From June 2017 onwards, the connectors have been renamed to make it clear they are used for the monitoring apps:
-
monitor_apps_REST_app - endpoint qrs/app/full (app information, custom properties, tags, owners and streams)
-
monitor_apps_REST_appobject - endpoint qrs/app/object/full (app object information, tags, owners and apps)
-
monitor_apps_REST_event - endpoint qrs/event/full (task trigger events, time constraints, rules, and reload operational information)
-
monitor_apps_REST_license_access - endpoint qrs/license/accesstypeinfo (total and available tokens, user access type, login access type, analyzer access type)
-
monitor_apps_REST_license_login - endpoint qrs/license/loginaccesstype/full (login access assignments with assigned and remaining tokens)
-
monitor_apps_REST_license_user - endpoint qrs/license/useraccesstype/full (user access assignments and user information)
-
monitor_apps_REST_task - endpoint qrs/task/full (tasks, apps, streams, custom properties tags and task operational and last execution information)
-
monitor_apps_REST_user - endpoint qrs/user/full (users, custom properties, attributes, roles and tags)
Other than the data connection prefixes changing from qrs_* to monitor_apps_REST_*, the licenseSummary connection has been replaced with licence_access.
The connections from version 3.0 until the June 2017 release were:
-
qrs_app (prefix renamed only, endpoint as above)
-
qrs_appobject (prefix renamed only, endpoint as above)
-
qrs_event (prefix renamed only, endpoint as above)
-
qrs_licenseSummary (renamed to monitor_apps_REST_license_access, endpoint as above)
-
qrs_loginAccess (renamed to monitor_apps_REST_license_login, endpoint as above)
-
qrs_task (prefix renamed only, endpoint as above)
-
qrs_user (prefix renamed only, endpoint as above)
-
qrs_userAccess (renamed to monitor_apps_REST_license_user, endpoint as above)
Loading Google Analytics data on Domo 6 Oct 2017 4:00 PM (7 years ago)
Domo is a cloud visualisation tool that offers a wealth of connectors (400+ according to their website) and a simple learning curve.

I thought I'd have a go connecting to the same google analytics account as I did with Qlik Cloud a while ago. This will be using the Domo free tier, which you can use to share up to 50 cards at the time of writing.
Connecting to Google Analytics
1 - Pick the connector you want from the connectors page (there's a lot of choice).

We're using the Google Analytics connector
2 - You're presented with what looks like a four step process, so hit the dropdown and add a new account.

It's a four step process, starting with connecting to your Google Analytics account
3 - We're greeted by the familiar Google account screen, where we approve the request as for any other app.

Say hello to the standard google prompt
4 - Back at Domo, we can switch between the properties we want to view (in this case withDave), and the reports we want to build. As with the Qlik Sense connector, this selects the dimensions and metrics (measures) that we want to pull down.

Domo carries all the standard reports and more
By selecting either a custom or pre-made report, Domo builds the query. Note that the page clearly displays how many dimensions and metrics we are able to load in one query on the left of the page.

Domo clearly displays what selections you've made, and how many more dimensions and metrics you can add
5 - Next up is defining the date range to load (date range, number of days, or days since last successfully run) and providing any segment and filter information. You can also test the configuration to check it's valid.

Domo offers flexible filters and segments
Setting the segments and filter criteria requires you to provide a JSON string containing the fields and values you wish to reduce the data with. This is as per the google documentation on how to build segment and filter requests.
JSON sample to return data where the ga:pageviews metric is greater than 2 (the example provided, although WordPress will ruin the formatting):
{
"metricFilterClauses":[
{
"filters":[
{
"metricName":"ga:pageviews",
"operator":"GREATER_THAN",
"comparisonValue":"2"
}
]
}
]
}
6 - Setting up refreshes of the data is simple, and flexible. You can refresh down to 15 minute intervals, specify when refreshes should happen (active hours) and also specify how many times a failed refresh should be retried (up to 10 times).

There is good flexibility in refresh scheduling, and the mode offers either append or replace
As the connector offers either append or replace, this realistically offers you two options:
-
If you're running a rolling x day report, then this isn't a problem
-
If you're trying to build up a history and don't want to pull all data daily, then set the data refresh range to "since last successful refresh" and the update mode to "append"
7 - After giving the data set a name, the tool return a summary and sample of the data. I've added filters for a browser, minimum session count and device.

Once you've added a name, you get a snapshot of the data
8 - You now have your dataset loaded and ready to go. From here you can build it into an ETL but we'll be using it on it's own in our cards so don't need to touch that for now.

You can look at the refresh history, data lineage, linked cards, permissions, or start configuring more advanced properties
There's some attractive visualisations that bring all your data sources onto one page. At the moment, ours is a little sparse.

It's in our (very empty) data warehouse!
I'll create a card (and on the Qlik Cloud side, an app to compare it to) to build off of this data in an upcoming post.
3arcade PHP game script updated to version 2.1 to work with PHP 5.6 4 Sep 2017 4:00 PM (7 years ago)
I have an installation of the 3arcade script that's still in the wild, and decided it was time to update it to work with PHP 5.6 (at least).
These changes fix:
- a row 0 error in play.php linked to deprecated functions
- deprecation of the ereg_replace function through use of intval
- deprecation of the mysql_connect function (and future deprecation of mysql* functions) through use of PDO
- consistency of database connection and query errors with a variable in the config file
Changes live at https://github.com/withdave/3arcade
How to use subversion to publish Plugin updates to Wordpress.org SVN after development 15 Aug 2017 4:00 PM (7 years ago)
This is a quick post on how to publish updates for Wordpress Plugins (like SEATT) to Wordpress.org. As I rarely use SVN, I forget every time!
Software
For Windows, you can use TortoiseSVN.
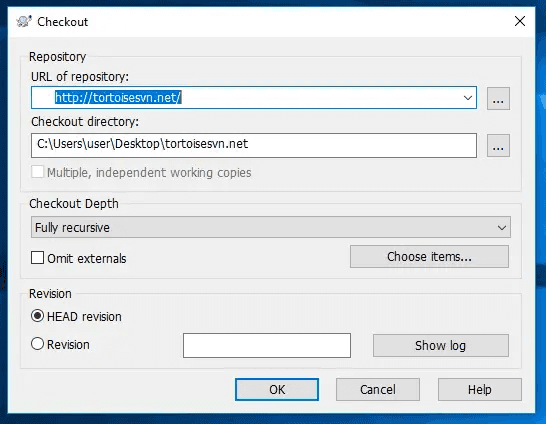
Tortoise is a very easy to use, free tool
Checking out the repository
Using TortoiseSVN, right click in the target directory and select "Checkout". Enter the URL of the repository (for SEATT this is https://plugins.svn.wordpress.org/simple-event-attendance/); if it's on Wordpress.org no auth is needed at this point.
Updating the repository
- Copy the updated files into the /plugin/trunk folder
- Right click on the /plugin folder and select "SVN Commit". Add a comment and submit. You will be prompted to authenticate using your wordpress.org credentials
- Right click on the /plugin/trunk folder and select "TortoiseSVN>Branch/tag...". Change the target directory to "/plugin/tag/
" and submit - Right click on the /plugin folder and select "SVN Update" to fetch the tag you just created
Updating the "tested up to" value
- Run "SVN Update" on your local copy
- Update the "Tested up to" value in "/plugin/trunk/readme.txt" and use this to replace "/plugin/tag/
/readme.txt" - Run "SVN Commit" to push back to the repo
Linux Permissions with chmod on files and directories 16 Jul 2017 4:00 PM (7 years ago)
Linux file permissions can be applied to files and directories, and using ls -l we can quickly get an overview of file properties.
-rw-r--r-- 1 root root 236 Aug 1 2017 install.logThe example shows (from left to right):
1) - Whether the file is a file or directory (- for file, l for link or d for directory, in this case it is a file therefore -)
2) rw-r--r-- Permissions (represented here as a set of three triplets, see below)
3) 1 Number of links or directories inside this directory (1 if a file)
4) root root Owners (user = root, group = root)
5) 236 File size
6) Aug 1 2017 Last modified date
7) install.log File name
Assigning to a user or group
Permissions can be applied to files and directories within the filesystem, and mapped against different categories:
- User (u) - the user that owns the file
- Group (g) - the group that owns the file (the group may contain multiple users)
- Other (o) - users who are not the owner or in the owning group
- All (a) - all users
Users are always members of at least one group, and can be members of many groups. Permissions on a file are mapped, in order, against the first three categories above.
Reading permissions
As permissions are set in the format <owning_user><owning_group><everyone_else>, the following is provided for each category:
Read (r)
- Files: Allows a file to be read
- Directories: Allows file names in the directory to be read
Write (w)
- Files: Allows a file to be modified
- Directories: Allows entries to be modified within the directory
Execute (x)
- Files: Allows the execution of a file
- Directories: Allows access to contents and metadata for entries
So rw-r--r-- means:
- rw- Owner user can read and write
- r-- Owner group can read
- r-- Everyone else can read
Setting permissions
The chmod command is used to set permissions, and can be used in two modes - numeric or symbolic mode. For numeric mode, we use a digit per category, and in symbolic we state the category and then alter the permission.
For example, to set the permission example above to a new file called my.file:
- Numeric: chmod 644 my.file
- Symbolic: chmod u+rw, g+r, o+r my.file
Both have the same result.
Numeric
In a 3 digit binary value, the first value (reading right to left, not left to right) will be 1, followed by 2, then 4 as it doubles each time.
We use binary to set r/w/x on a category:
- rwx = 111 = 421 = 4+2+1 = 7
- rw- = 110 = 420 = 4+2+0 = 6
- r-x = 101 = 401 = 4+0+1 = 5
- r-- = 100 = 400 = 4+0+0 = 4
Therefore, we need 644 for encode for owner user, owner group and other respectively.
Symbolic
This is arguably more straightforward, with the syntax (in order of use):
- ugoa (user category - user, group, other, all)
- +-= (operator - add, subtract or set permissions)
- rwx (permissions)
Here we don't have to se the full file state at once, we can add or subtract single permissions one at a time if we need to, and from specific categories.
Upgrading PHP to 5.6.x or later on CentOS7 via Yum and the IUS repo 4 Jun 2017 4:00 PM (7 years ago)
CentOS7 (and some of the other RHEL flavours) currently don't include PHP 5.6+ in the core repos, and yet the versions of PHP bundled are at EOL or close to it.
A number of guides suggest using the webstatic or remi repos - but this is not recommended as they contain packages with names that conflict with packages in core repos.
One of the better options is to use the IUS repo (Inline with Upstream Stable project), which means you can quickly and easily update.
First, install the IUS rep (you will need the EPEL repo if you haven't got it already)
yum install https://centos7.iuscommunity.org/ius-release.rpmNext, we install, then use yum-plugin-replace to replace the existing PHP package
yum install yum-plugin-replace
yum replace --replace-with php56u php
Finally httpd should be restarted, and you should be good to go
service httpd restartDigitalOcean has a more detailed post on installing PHP7 from the same repo.
After creating a new user in MariaDB / MySQL, flush permissions and MYSQL_SECURE_INSTALLATION 3 Jun 2017 4:00 PM (7 years ago)
After installing LAMP on new servers (similar to as described here for CentOS), I've recently had two errors after the creation of MySQL users.
These user accounts required additional steps after creation - flushing permissions, and re-running the MySQL secure installation.
Creating a new User and assigning permissions
The first user was created in shell, via the MySQL prompt and assigned access to a new database.
Login to MySQL via SSH
mysql -u root -pCreate the new user "newuser" on localhost. We could also use % (any host), or any other specific hosts defined in MySQL.
mysql> CREATE USER 'newuser'@'localhost' IDENTIFIED BY 'password';And assign privileges to a database called "mydatabase" - the format is database.table, so for access to all use "*.*".
mysql> GRANT ALL PRIVILEGES ON mydatabase . * TO 'newuser'@'localhost';And now - crucially, flush permissions. Often it works just fine, but on some setups this is required.
mysql> FLUSH PRIVILEGES;The anonymous user issue
The second issue I've had recently was with a new user being unable to use their account. After some trial and error it turned out that there was an issue with anonymous access, which was easily solved by re-running the MySQL install helper.
MYSQL_SECURE_INSTALLATIONRemove all anonymous access!
SEATT updated to 1.5.0 28 May 2017 4:00 PM (7 years ago)
Simple Event Attendance has been updated to 1.5.0.
Update to fulfill some of the requests posted at https://withdave.com/2017/05/seatt-feature-request-may-2017-update/, as well as some other fixes:
-
Updates to structure of comments in source files to improve readability
-
Addition of list format to make displaying multiple events easier
-
Change to remaining time display in the admin panel (from hours to a formatted time)
-
Removed use of extract function from add_shortcode (seatt-list and seatt-form) as per best practice
-
Added ability to use shortcode to control public visibility of comments
-
Updated screenshots for plugin
Plugin is live on wordpress.org.
SEATT Feature Request - May 2017 Update 27 May 2017 4:00 PM (7 years ago)
Since I've updated SEATT there's been a number of requests for additional functionality. The ones I've captured are below:
-
Repeatable/recurring events - Some sort of functionality to allow repeatable events - whether this be decoupling of event details from dates, or some other mechanism.
-
Event calendar shortcode and layout - Allow you to group events into categories and display all relevant events in a list view on a post. Listing ability added in 1.5.0, categories to be added later
-
Custom page layout to help display events for #2. Added in 1.5.0
-
Allow admin to use tinymce content editor. Completed in 1.4.0
-
Register for events without requiring an account - I'm currently planning to do this via email confirmation and with a captcha, but need to test it.
-
Email notification - More broad email notification, both upon registration (to user and admin), and also allowing admin to email users.
-
Custom list pages and fields - Allow admins to change what information the plugin lists, and where it draws usernames and names from.
-
Allow other users to see comments on short-code form. Added to shortcode in 1.5.0
-
Additional columns in database to capture event details.
-
Internationalisation, and custom locale options - This includes the option to allow the user to call an "Event" a "Ride" or similar.
-
Custom redirect to put user back at entry page after login.
-
Capturing of timestamp when user registers for event (logging).
-
Update list page to give the flexibility to add category filters.
Thanks again to all of you for getting in touch, and to those of you who have provided snippets based on your modifications to the plugin. I'm hoping to get through at least a couple of these in the coming months.
FYI - this post was previously posted on another domain.
More information:
On wordpress.org at https://wordpress.org/plugins/simple-event-attendance/
On GitHub at https://github.com/withdave/SEATT
DateTime with no DateTimeZone set in PHP.ini with ffmpeg and ClipBucket 12 May 2017 4:00 PM (7 years ago)
I've been exploring how to generate videos on the fly through use of packages like ffmpeg (I installed this the other day), and recently tried out ClipBucket (a free video site script).
ClipBucket is a little rough around the edges, but has a load of great features, has a relatively active community, and large parts of the code are on GitHub.
It's easy to setup, but I wasn't getting thumbnails through ffmpeg for any of the uploaded videos. Instead I was getting:
Response : Oops ! Not Found.. See log

Command : /usr/bin/ffmpeg -ss -i /var/www/html/files/...

Invalid duration specification for ss: -i
Searching the web returned no results, so I'm posting this as a record.
The Culprit
The culprit was the casting of time, which is used when a duration is available.
It uses the following line in ffmpeg.class.php:
$d = new DateTime($d_formatted);And on my server, this threw an invisible exception:
DateTime::__construct(): It is not safe to rely on the system's timezone settings. You are *required* to use the date.timezone setting or the date_default_timezone_set() function. In case you used any of those methods and you are still getting this warning, you most likely misspelled the timezone identifier. We selected the timezone 'UTC' for now, but please set date.timezone to select your timezone.The DateTime construct gets rather unhappy when it doesn't have a default timezone, and it turns out I'd neglected to put a default timezone in PHP.ini. Just a quick change in PHP.ini to:
date.timezone = Europe/LondonRestart Apache and we're good to go. Oops.
Another option for this is to set the timezone in the PHP code, but it should still be set at the server level:
$d = new DateTime($d_formatted, new DateTimeZone('Europe/London'));
Installing ffmpeg, flvtool2, mp4box and ImageMagick on CentOS7 11 May 2017 4:00 PM (7 years ago)
This is a quick guide to installing the following in CentOS 7:
-
ffmpeg
-
flvtool2
-
mp4box
-
imagemagick
CentOS 7 requires a tweak to the process I'd used for CentOS 6. The links below are generally suitable for EL7.
Installing ffmpeg
If you don't have the EPEL repo installed already:
sudo yum -y install epel-releaseImport a repo from Nux (this is third party, obviously):
sudo rpm --import http://li.nux.ro/download/nux/RPM-GPG-KEY-nux.ro
sudo rpm -Uvh http://li.nux.ro/download/nux/dextop/el7/x86_64/nux-dextop-release-0-5.el7.nux.noarch.rpm
Install ffmpeg from this repo:
sudo yum -y install ffmpeg ffmpeg-develConfirm it's working:
ffmpeg

ffmpeg reporting back
flvtool2
This is easiest to grab via RubyGems.
Install Ruby and RubyGems
yum install -y ruby rubygemsAnd then it's a simple gem install:
gem install flvtool2And we're done.

flvtool2 - done.
mp4box (GPAC)
This one is quite easy on CentOS 7:
yum install -y gpac mediainfoimagemagick
This package is much more common, so the install is also more straightforward.
Install any prerequisites:
yum install -y gcc php-devel php-pearInstall the package itself:
yum install -y ImageMagick ImageMagick-develInstall it into PHP:
pecl install imagick
echo "extension=imagick.so" > /etc/php.d/imagick.ini
Finishing up.
Last, but not least:
service httpd restart
INACCESSIBLE_BOOT_DEVICE, courtesy of Intel Rapid Storage Technology drivers (14.5.0.1081) 10 May 2017 4:00 PM (7 years ago)
Note to self: do not update Intel Rapid Storage Technology drivers on a HP Proliant ML10v2, unless I really, really need to.
I've become complacent when throwing drivers at devices and this is a reminder how easy it is to break things. I recently added a TPM to one of my servers and one of the fixed drives is classified as removable by Windows, which means I can't use the TPM with it. There's at least two ways to fix this, either install Intel RST drivers and configure it through the console, or change some registry keys to force them to fixed drives.
So - download Intel RST version 14.5.0.1081 (the latest one that I thought was compatible), install, and reboot.
Restarting takes ages with a server BIOS, and you're unlikely to have it hooked up to a display, so I had to jump into the iLO console to work out why it hadn't started. After a reboot, all I had was the Windows logo, the spinning wheel, and shortly after a:
INACCESSIBLE_BOOT_DEVICE (we must restart)
Restarts will yield the same result, even on safe mode, I didn't have access to restore points, and the startup repair was also fruitless.
A fair while later I stumbled across this brilliant blog post which eventually provided success through:
-
Restoring an earlier driver version as per the post
-
Using the "Use last known good configuration (advanced)", which managed to remove the BSOD.
All in all, much of an evening wasted by a single driver.
Mapping UK Highways Agency traffic data in PowerBI Desktop 9 May 2017 4:00 PM (7 years ago)
I downloaded the May 2017 version of PowerBI desktop to load in some of the traffic data that I dropped into Qlik Sense and Tableau in a previous post.

The finished article first
So - back to getting started. This is my first time using the software, and it'a pleasant experience right up until I try to load an .xls file.
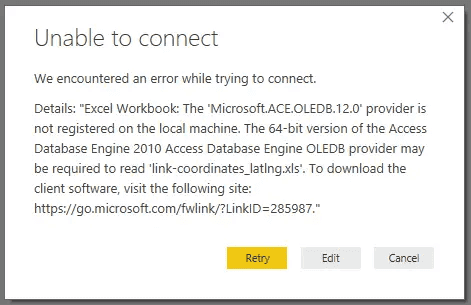
A missing driver? Already?
I have to admit, I'm a little surprised that the driver required to connect to a .xls file isn't included with the download. I would expect .xls to be one of the most common files loaded into the desktop version of PowerBI. It turns out the access database engine is used to connect to earlier versions of excel files, and another download is needed - but enough of that!
Loading the data
A nice interface and good progress updates are a welcome touch, so aside from the driver issue I loaded the 2012-03 dataset (~800MB CSV) quickly. Then, a simple drag and drop joins the lat/lon coordinates to my data.

Loading the data is simple, only the AverageSpeed field was transformed
As per my Qlik and Tableau post, I convert the speed from kilometres to miles. There's a load of other changes I could make to trim long decimals and tidy up the dates but that's for another day.
Visualising in a map (bubbles)
To load into the map and have it look a little similar to my other examples was challenging, as PowerBI doesn't appear to provide as much flexibility out of the box for colour or bubble size. The bubble size is still gigantic even when set to 0%, and you need to set diverging gradients quite carefully to ensure the middle colour doesn't look out of place.
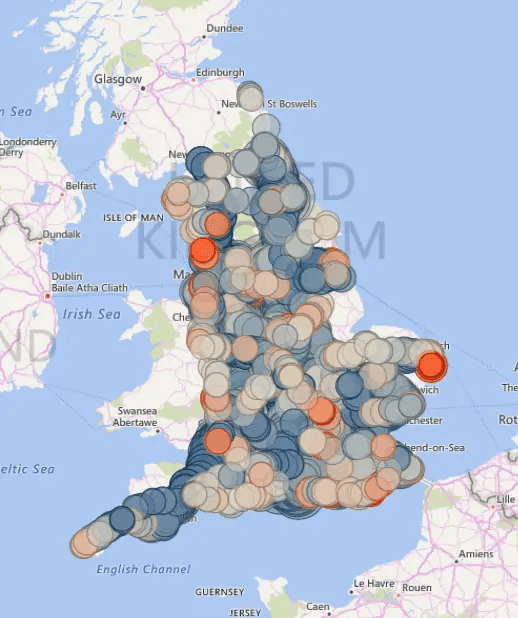
It's a busy map
A couple of nice additions popped out though, including the in-built binning feature. This is available in Qlik GeoAnalytics, but not in the core map product - I had a quick play and although it doesn't make sense to apply it on this dataset, it's a welcome feature. I'll need to check Tableau at a later point.
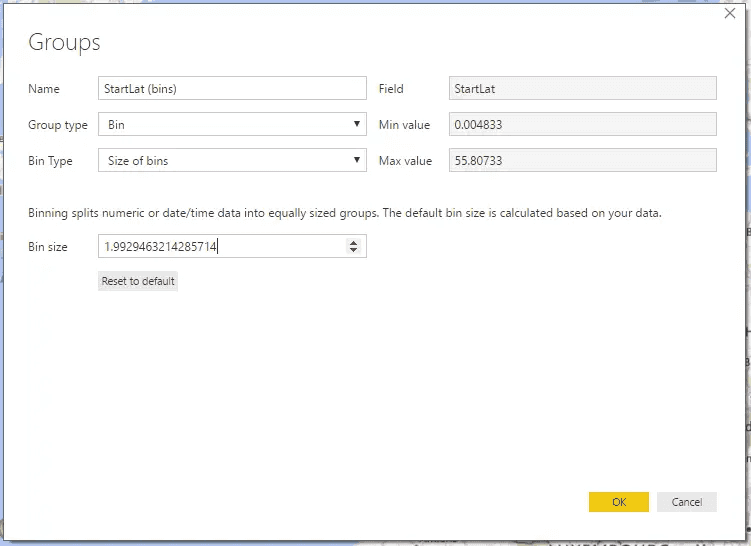
Binning is a welcome feature
The other element of interest is the "Quick Insights" feature. It pulled some insights that I agree with (even if they are common sense on this flat dataset). I'm keen to try it with something a bit more exciting and see what it turns out.

The Quick Insights feature provided some valid feedback
My favourite here is the top right - that average journey time correlates with the distance travelled (well, yeah). But, again, I'm keen to see this on a more interesting dataset.
And...the app
Another embedded app to play with. Like the Tableau embeds I'm pleased that this one also links to the full screen content!
Viewing Department for Transport vehicle statistics by make in Qlik Sense 8 May 2017 4:00 PM (7 years ago)
Generally, getting access to vehicle data is a pay-for-data experience - but snapshots are released each year to the public.
If you head to the Vehicle Statistics page on gov.uk you get statistics about vehicle licencing, excise duty evasion, vehicle roadworthiness testing and more. You'll probably want to check out the index as there's 76 files in the 2016 download alone, at various levels of granularity...
The one I'm going to look at today though, is:
Licensed Cars, Motorcycles, Light Goods Vehicles, Heavy Goods Vehicles, Buses and Other vehicles by make and model, Great Britain, annually from 1994, quarterly from 2008 Quarter 3 ; also United Kingdom from 2014 Quarter 4
AKA table VEH0120. Interestingly, Qlik Sense throws an "Unknown Error" message when trying to load ".ods" files so I converted it to Excel prior to loading.
Loading the data
As seems to be the case with most data from gov.uk, the data isn't in the best format for machine ingestion.
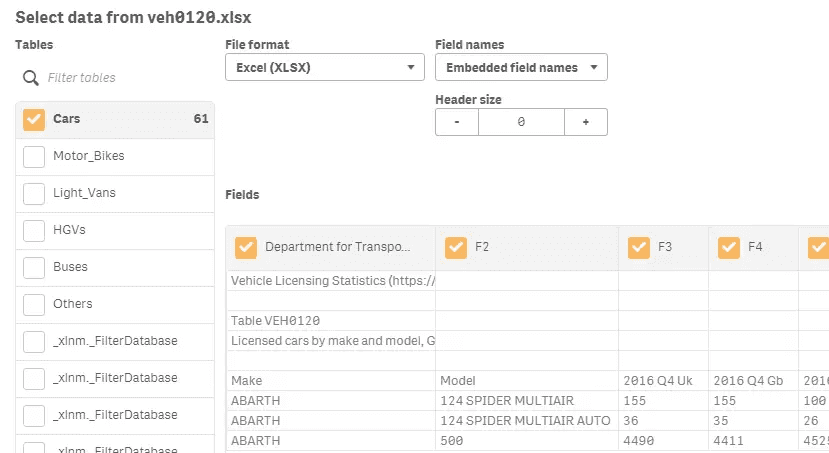
Multiple tabs and header rows require a bit of tweaking in Sense, the data will need formatting in Sense
Not a huge problem however, as I'm interested in cars only (so a single tab), and I can clean the rest up with the data load editor and a header size of 6.
To bring in all the quarters, I'm going to crosstable the data with Crosstable(Period, Vehicles, 2) to provide a format we can work with. The resulting data will be left in a flat table as it's not an issue with these data volumes.
// Load raw table from xlsx
Raw_VehicleStats:
LOAD
 Make,
 Model,
 "2016 Q4 Uk",
 ...,
 "1994q4"
FROM [lib://VehicleLicencing/veh0120.xlsx]
(ooxml, embedded labels, header is 6 lines, table is Cars);


// Transform this into a crosstable
Temp_VehicleStats:
Crosstable(Period,Vehicles,2)
Load
 *
Resident Raw_VehicleStats;

// Drop raw data table
DROP TABLE Raw_VehicleStats;


// Load final version of table
VehicleStats:
NoConcatenate
Load
 *,
 UPPER(Make & ' ' & LEFT(Model,INDEX(Model,' '))) AS [Make and Model],
 LEFT(Period,4) AS Year,
 RIGHT(Period,2) AS Quarter;
Load
 Make,
 Model,
 UPPER(LEFT(REPLACE(Period,' ',''),6)) AS Period,
 Vehicles
Resident Temp_VehicleStats
WHERE WildMatch(Period,'*q4*') // Include only Q4 as years prior to 2009 do not have the other four quarters
AND Not WildMatch(Period,'* Uk'); // Exclude the later duplicated records (GB vs UK)

// Drop temp data table
DROP TABLE Temp_VehicleStats;
I've also removed data to keep only data relating to Gb and Q4 as prior to 2009 this was the only data available in the file. The resulting QVF is around 1.4MB.

DfT Logo in 8:5
I also added a DfT logo in 8:5.
What does the data look like?
There's a few data quality issues, mainly related to data capture. Have a look at the chart below - BMW and Mercedes appear to have hundreds of discrete models on the road, however when you delve into it you find that every engine level of each BMW model is listed (instead of BMW 1 series, it's 114d, 114i, 115i, 116i, etc). Meanwhile, makes like Ford have Fiesta, Focus, Mondeo, etc.
To open this fullscreen, click here.
When looking at the annual tallies for 2016's top 10 makes, unsurprisingly the big names are all there (Ford, Vauxhall, Volkswagen...).

Vehicles on the road for 2016's top 10
Ford, Peugeot, Renault and Citroen have all taken a tumble, or remained static (against a backdrop of increasing cars on the road), while VW, BMW, Audi, Toyota, Nissan and Mercedes have all increased consistently over the period.
But what about the old names - who's not in this picture if we look at this from 1994?

Vehicles on the road for 1994's top 10
Rover, Austin and Volvo are the main losers here, the rest of the list remains the same as 2016 (which replaces the names above and Citroen with Mercedes, Toyota, BMW and Audi).
Unfortunately I couldn't embed these charts as Qlik Cloud currently won't display them for sharing, hence the still images in the post. Hopefully we'll be back to interactivity next time.
Having a look at UK Highways Agency Traffic flow data - in Tableau Public and Qlik Sense (Cloud) 5 May 2017 4:00 PM (7 years ago)
I've had a copy of some of the Highways Agency data downloaded for about a year - so it was time to have a quick look at it.
I'm going to quickly load a single month into Tableau Public and Qlik Sense Cloud (the CSVs are approx 850MB per month) to look at some basic mapped traffic flow information.
The data
The data in this post comes from the Highways Agency journey time and traffic flow data on the data.gov.uk website. Unfortunately this data stops at the start of 2015 (data from then on is incomplete) and is now available via the webtris system APIs, although this post looks at data from March 2012.
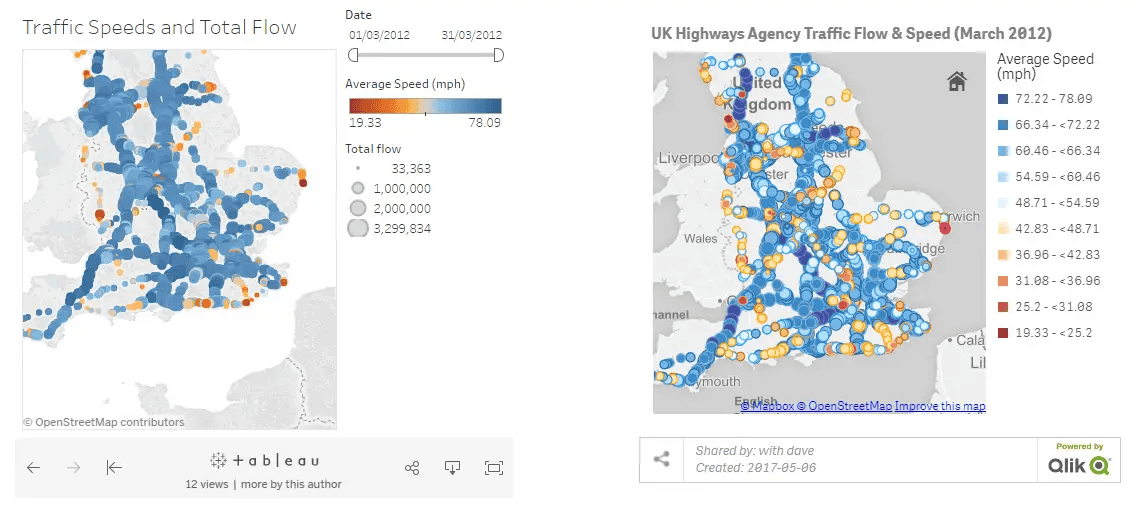
Tableau Public vs Qlik Cloud Maps
Visualising with Tableau Public 10.2.1
A single CSV was loaded in to provide the month's data, and a lookup file with relevant lat/lon was left joined to the data.
>>No longer available.
I'll tidy this up in another post and add some analysis to it, but for now, I'm going to simply compare this to Qlik Sense Cloud.
Visualising with Qlik Sense Cloud
The same process was followed as per the Tableau vis, with the exception that instead of tagging fields as lat/lon, the GeoMakePoint function was used to create a suitable GeoPoint.
What's next
Next up on my list:
-
Reorder the measures
-
Load further data, display time series analysis
-
Add in traffic incident data (does slow traffic correspond to an incident or volume)
-
Identify road capacity at which speed drops (saturation point)
Connecting to Google Analytics in Qlik Cloud (Qlik Sense) through the Qlik Web Connectors package 27 Apr 2017 4:00 PM (7 years ago)
This post looks at using Qlik Cloud (using a paid-for tier) to gather and analyse data from Google Analytics.
Qlik Cloud doesn't allow user-added extensions, connectors or alterations (unlike the Qlik Sense Desktop and Enterprise products), but is free at the basic tier where you can load from uploaded files. As mentioned, I am using a "Plus" account which gives me access to more connectors.
With my account, there are a couple of built-in connectors available on Qlik Cloud if you don't want to manage your data yourself. The one I'm using today is the "Google Analytics (BETA)" connector - obviously if you're using Qlik Sense Desktop, QlikView or Qlik Sense Enterprise you'll have to make a choice (more on that at the end).

We have three connection options, aside from the folder option (which is already setup)
Go to the data load editor (or add data) and use the "Qlik Web Connectors" option - this provides a growing list of connectors, more are promised over time. Note that this covers the two most popular social media platforms...and Google Analytics!
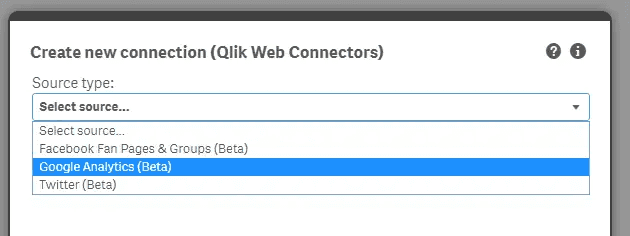
Qlik Web Connectors has three options on my subscription level, at the time of writing
Jumping into the "Google Analytics (Beta)" option, the page updates to give you a single option - which is API access to your signed in Google account. No setting up access or setup of keys from within your Google account required!
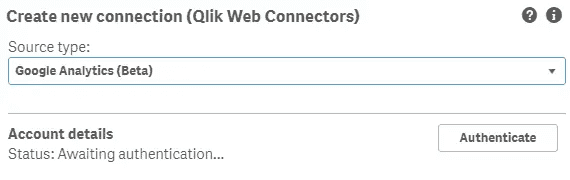
Next step - authenticate with your Google account!
This opens the Google login or access page and details what Qlik needs to connect.
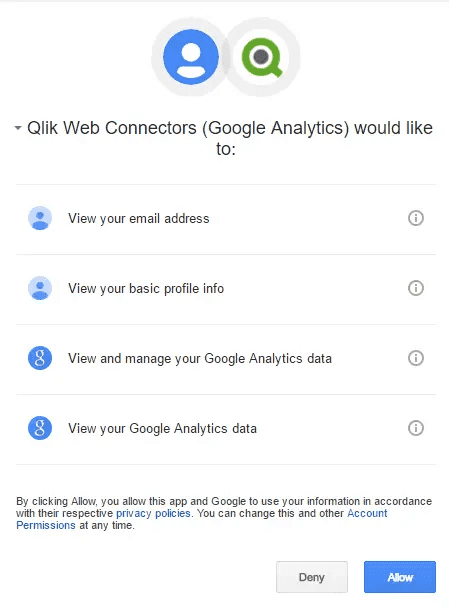
Authentication access
At this point, things are a little less seamless. It takes you back to a Qlik site (the connectors site) and provides you with a Qlik-side authentication code. We'll have to copy this and paste it into the connector for now - perhaps this will be simplified in the future.
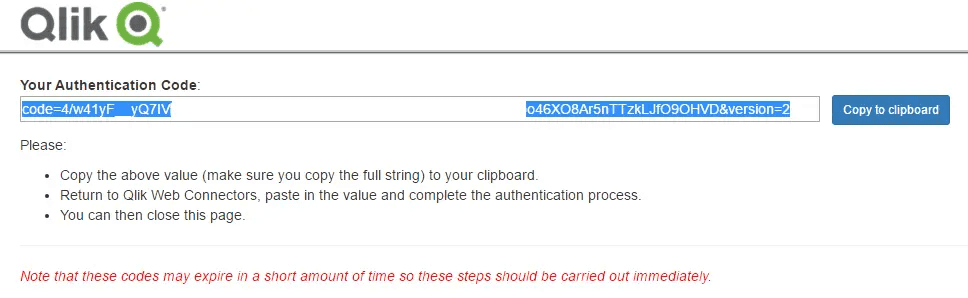
Copy the authentication code from the Qlik site into the connector on Qlik Cloud
Hit authenticate and it should pull your account information (removed from mine below, sorry). Test the connection and you're good to go!
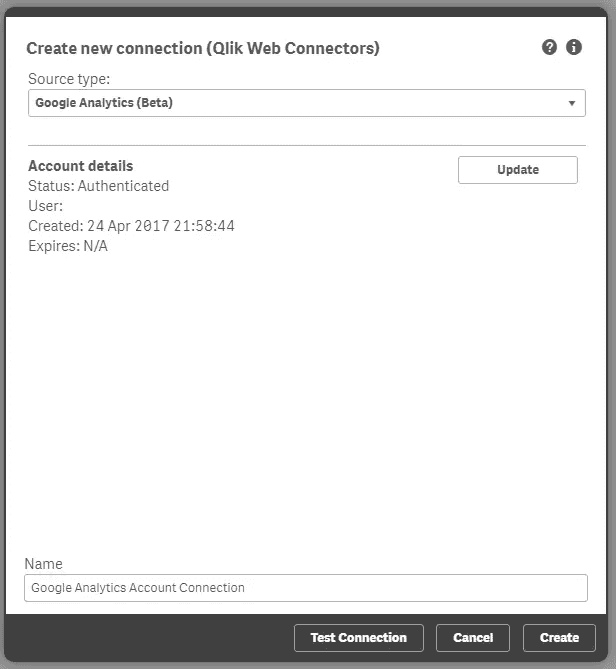
Connected - test to confirm, and you're good to go
The new connection is available from the Data Connections panel. This appears to be per-app at the moment (rather than shared across your account and all your apps).
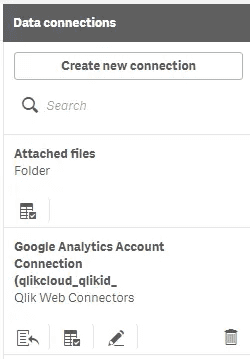
A new connection is available...
And we're connected! Google has a brilliant set of APIs and developer resources, which mean you have a lot of control about how you pull the data. Have a look at the Dimensions and Measures documentation for a glimpse at what you can pull down.
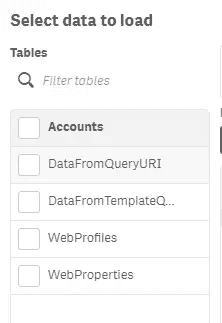
We're connected - you have five "tables" to start
You'll find that in the Qlik data load process you are presented with five "tables" - these are not typical database tables but rather five ways of accessing the data in Google Analytics:
-
Accounts - lists the Google Analytics accounts that your Google account has access to (accounts contain multiple profiles)
-
DataFromQueryURI - allows you to enter a query string directly, once you've built it on the Query Explorer
-
DataFromTemplateQuery - gives you access to some pre-built top queries (such as "Visitors and Pageviews over time", and "Visits by Country")
-
WebProfiles - this returns profiles, which sit under properties
-
WebProperties - this returns information about your individual websites, applications or devices
You can also use the Query Explorer Tool to help you piece together what you need, it's quicker than doing it in Qlik Sense directly if you're new to the Google Analytics platform as it has syntax helpers throughout the tool. You can then copy the parameters back into Qlik Sense to actually load the data.
One other thing to note - Qlik Sense Desktop and Enterprise don't have this connected included by default, although they do have the Qlik REST connector if you want to piece together API calls yourself. The Google Analytics connector is a paid-for product on these platforms via the Qlik Web Connectors package.
I'll pull some data and have a look in a later post.
Connecting to MySQL Community Edition with Qlik Sense (System DSN with MySQL ODBC driver) 22 Apr 2017 4:00 PM (7 years ago)
As of Qlik Sense 3.2.2, the Qlik ODBC Connector package does not connect to MySQL Community Edition servers.
A large number of Linux web servers run on the community edition, so it's handy to be able to connect and extract information from this data source as well.

Error message: ERROR [HY000] [Qlik][ODBC MySQL Wire Protocol driver]Connections to MySQL Community Servers are not supported. Please contact MySQL to obtain a MySQL Enterprise or Commercial version.
As we can't use the connector package, we must instead load the MySQL driver and use a Windows DSN.
1. Install the relevant ODBC connector driver
Download and install the MySQL ODBC Connector Driver (from the MySQL website) on the machine running the Qlik Sense engine.
2. Set up the ODBC connection in Windows
We need to set up the ODBC connection in Windows (as you would for any other regular ODBC driver).
Open the ODBC Data Sources console:
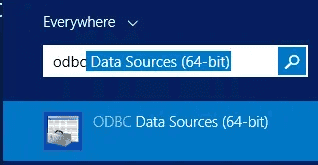
Open ODBC Data Sources (64-bit)
Navigate to System DSN and create a new data source. If you're using the same user for Qlik Sense then you can use a User DSN, but on this server, Qlik Sense runs under a different user (a service account) to normal users.
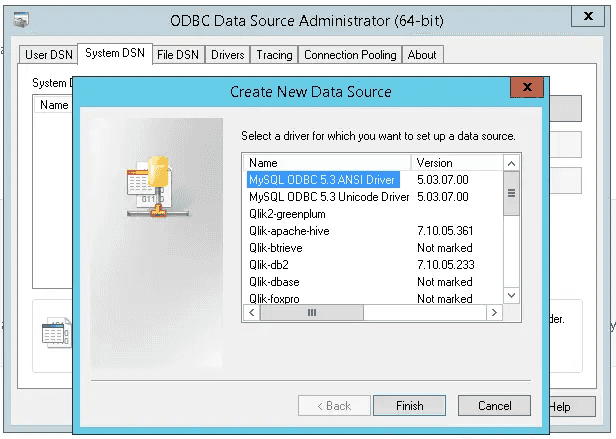
Create a new Data Source under System DSN
Create the connection using the correct driver (pick the one relevant to your character set):

Newly created ODBC connection in Windows
3. Create the connection in Qlik Sense
Once the connection is created in Windows, it is immediately available to Sense. Use the standard ODBC connector to access it, and load data as usual.

Create the connection in Qlik Sense using the ODBC System DSN
Sorting Alternative Dimensions and Measures in Qlik Sense 26 Mar 2017 4:00 PM (8 years ago)
Alternative Dimensions and Measures have been in Qlik Sense since version 2.2 (see a video on Qlik's site describing how to use them) - but there isn't yet an easy way to sort them (as of version 3.2.2).

This bar chart object has multiple alternative dimensions and measures (note the arrows next the the axis titles)
When configuring charts with alternative dims and measures you'll find you can only configure the sort order for the currently active dimensions and measures - nothing else will be visible or configurable.

There are a few alternative dimensions/measures defined for this object
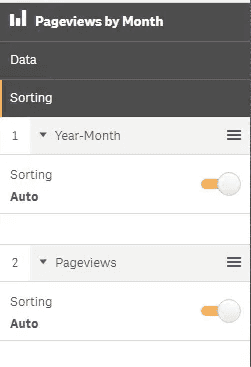
Yet, only active dimensions and measures are configurable in the sort panel - no alternatives are visible
At the moment, you can either let your end users sort it themselves via the "Exploration menu" or switch through them yourself in the edit view.
In this chart, the default sort when switching to [Date.Year] is descending - as such 2017 appears before 2016, etc (newest to oldest). This is contrary to how Year-Month is shown, which is in ascending order (oldest to newest), and needs to be updated to match.

The default [Date.Year] sort order is Descending (newest to oldest) - this needs to be reversed to match [Month-Year]
As mentioned, this means we must go into edit mode, switch round the active and alternative items on the Data pane, and then make the required changes on the Sorting pane.
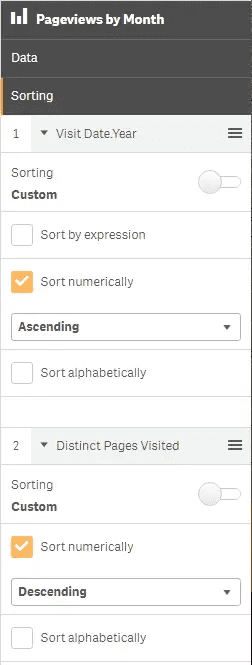
After switching items around in the data panel, we can make the required changes in the sort pane
Once done, change the Data pane back to the it's original order - any changes you have made on a specific dimension or measure (alternative or otherwise) will have been saved in the background, and users accessing the chart will benefit from your new sort order for those alternative items.

When users select the [Date.Year] alternative dimension, they now see it sorted ascending by default (old to new)
Hopefully this functionality will be streamlined in a later release.
Integrating QlikView into SalesForce SFDC with SSO - forcing TLS1.1 or higher 20 Feb 2017 3:00 PM (8 years ago)
Integrating some QlikView screens into Salesforce, and using Salesforce to authenticate your users is actually very simple. Joe Bickley from Qlik wrote about setting up Salesforce SSO back in 2012 - and I thought I'd have a go.
The only road block encountered along the way was Salesforce's decision to disable TLS 1.0. They have a number of very good reasons, including the famous Poodle vulnerability. It meant I experienced the error below:
UNSUPPORTED_CLIENT: TLS 1.0 has been disabled in this organization. Please use TLS 1.1 or higher when connecting to Salesforce using https.on
AppExchangeAPI.GetUserInfoResult userInfoResult = binding.getUserInfo();
This isn't yet a mandatory change for production organisations, but it will be by 22/07/2017. Any development organisation will have it enabled by default, without any method for disabling. Other services do not have a disable date at the time of writing this post.
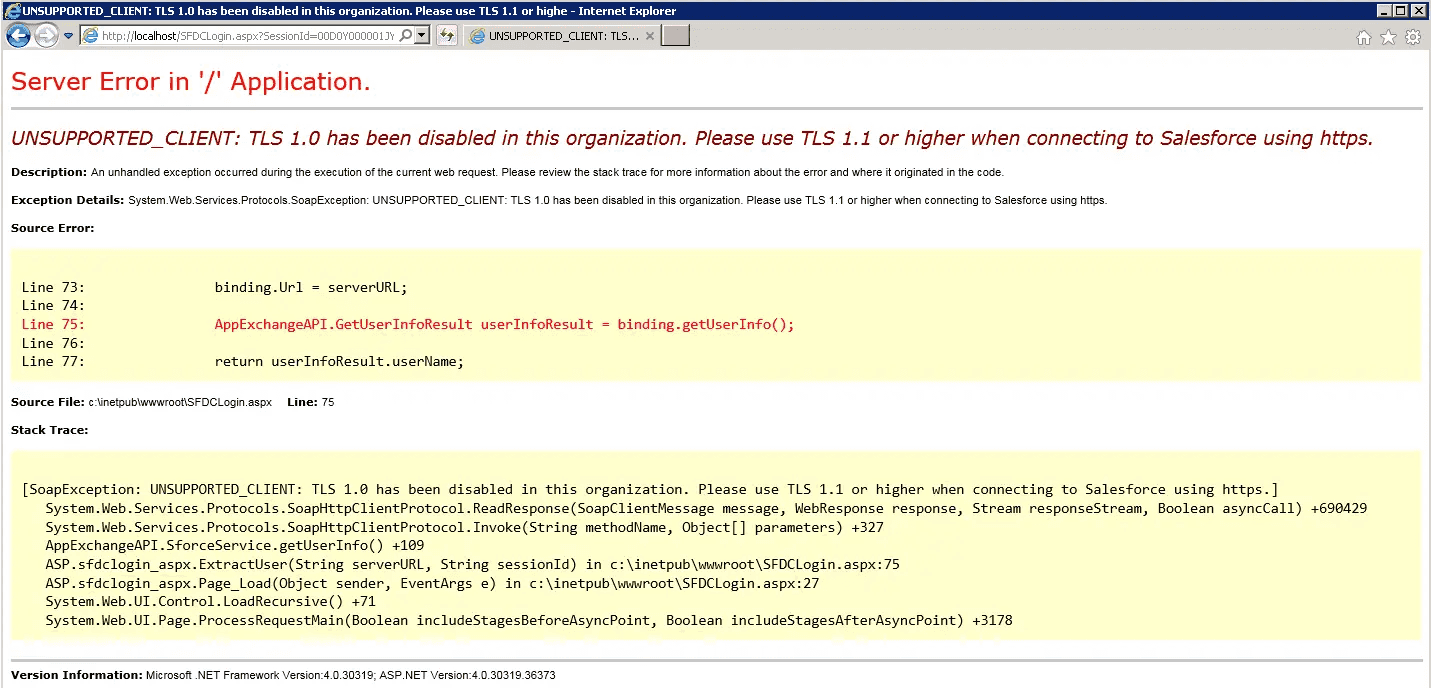
Uh oh, things aren't well with SFDCLogin.aspx
System and configuration requirements
There are some basic requirements that we need to fulfil:
-
We need to have an OS which supports TLS 1.1 or greater. Anything from Windows Server 2008 R2 or Windows 7 up will support TLS 1.1 and TLS 1.2 (see more details at MSDN). Unfortunately it's not a case of the latest and greatest being enabled automatically - see more.
-
Our .NET version ideally needs to at least 4.0. It is possible to enable TLS 1.2 on 3.5 as well by way of a patch, but if you've got no other .NET apps running it'd benefit you to jump straight to 4.6.1 (where the latest standards are enabled by default).
-
IIS needs to be configured to run the correct version of the .NET framework. Although it may only list major releases, as long as you've got a point release installed it'll run just fine.
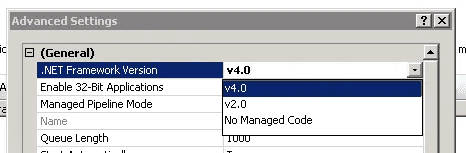
IIS won't list point releases - just use 4.0 and you should be fine
Enabling TLS 1.1 or greater
Assuming we've met the criteria above, we have numerous ways to achieve our goal. Given I'm creating one file which I want to be portable, I've opted to set the protocol in my application, but there are many ways to achieve this globally on a system (there are a number of good stackoverflow discussions about this that are worth skimming through - link 1, link 2, link 3, link 4).

Sforceservice builds on the SoapHttpClientProtocol Class
In our case, the SFDC-SSO solution available from the Qlik article uses the SoapHttpClientProtocol class. We simply need to:
Update the .NET version. I'm running 4.6.1, hence can specify TLS 1.2 outright in the next step.
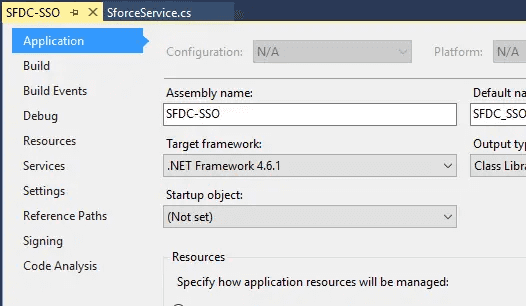
Specifying the 4.6.1 .NET framework
Specify the security protocol we want to use, in the SforceService class (around line 128):
System.Net.ServicePointManager.SecurityProtocol = SecurityProtocolType.Tls12;

Specify System.Net.ServicePointManager.SecurityProtocol
And add the relevant references as required.
Add the System.Net reference
Then rebuild SFDC-SSO and you're good to go.
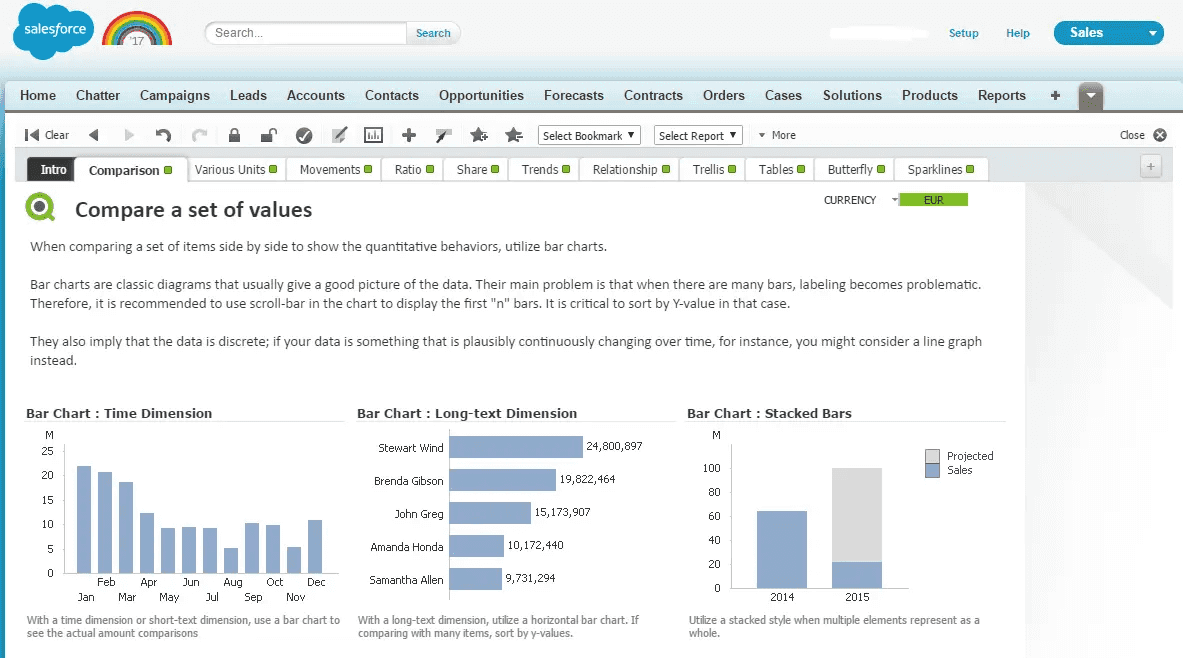
Voila. QV working with SalesForce
My copy of SFDC-SSO.dll
You're welcome to try out my compiled copy, it was built using the changes above and works on a new implementation running .NET 4.6.1, Windows Server 2008 R2, QlikView 12.1 SR3 and a Salesforce developer setup.
All credit, of course, goes to Joe Bickley at Qlik for the original post, I've simply hacked it a bit. Note that there are newer versions of the Salesforce WSDL that can be used, and are accessible via Setup > APIs in your Salesforce control panel.
Setting up a CentOS 7 local development VM with LAMP (Linux, Apache, MariaDB/MySQL, PHP+PHPMyAdmin) 12 Feb 2017 3:00 PM (8 years ago)
I'm going to build a local VM with the following requirements:
- It can host PHP/SQL-based websites
- It has PHPMyAdmin to help administer any SQL databases
- It matches available builds from popular providers (i.e. you can provision it in a similar way on Azure or AWS, but with a public domain name)
- It only has a single account (this is not recommended for public systems)
- I can access the web root using SFTP
As I already have several CentOS builds that have always been pre-setup with CPanel (and because CentOS is free), I've decided to do this build from scratch and without a control panel. I'm not going to be configuring options like multiple user accounts, so things will be fairly simple.
I'll do it in steps (and test each time) to make sure everything's working correctly. You could install everything all at once, but that would make it much harder to troubleshoot if an element didn't work.
Note: All of the commands for this post are available here on GitHub (the Wordpress engine sometimes strips double hypens and other formatting from code).
Step 1 - Pick up a CentOS distro and install it
The current publicly available release of CentOS is version 7 release 1611. The below should stand for any other minor release. I'm using the minimal ISO which lands at about 700MB.
https://wiki.centos.org/DownloadI'm not going to go into depth about installing the OS - take your pick of virtualisation software, my personal preferences are Microsoft's Hyper-V, or Oracle's VirtualBox. At this point it'll be beneficial to give them access to the internet to make installing the required modules much easier.
Step 2 - Update the base packages
We first want to update our system - this will update all installed packages to their latest versions. It's worth noting that the yum command uses pre-defined repositories that can be added to if you need software maintained outside of the standard setup.
yum updateNotice I've not used any flags - when we next run yum we will use -y, which assumes you wish to answer Yes to any prompts. As we haven't used this, we will get two prompts - both of which we need to answer "y" to.
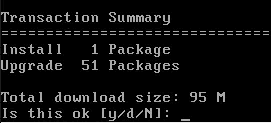
Confirm we'd like to install 1 package and update 51
We also have a key to confirm.
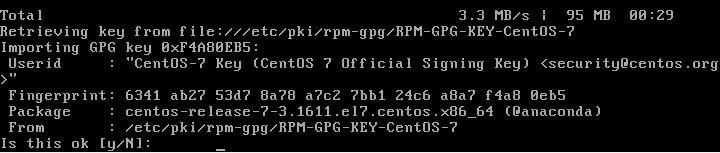
There's also a new key to import
! A note on using root
You may have noticed I'm actually logged in with root. This means I don't have to use "sudo" to execute these commands with admin privileges, but is not recommended for a public system (or any system really). This system will be not be publicly accessible, and I will provide a better user setup in a later post. If you DO use a new user, you will have to use the "sudo" command to execute the commands below with root privileges.
Step 3 - Install some useful utilities and repositories
First up, I'm going to add the nano and wget packages. Nano is my preferred text editor, and wget gives us the ability to easily grab files from the net and pull them to our local machine.
yum -y install nano wget
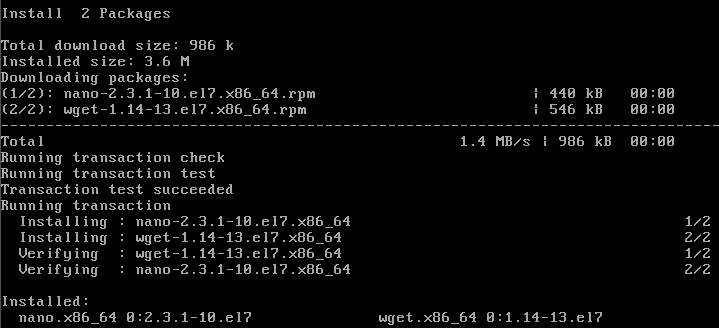
Installing wget and nano using -y yum flag
Step 4 - Install and Configure Apache
Let's install Apache web server:
yum -y install httpd
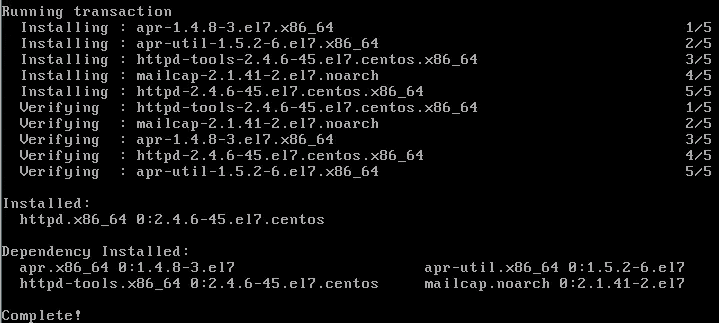
Installing httpd will bring in a few dependencies
FYI - httpd is the Apache HTTP server (notice it's installed v2.4.6). We will need to set it to start it:
systemctl start httpdAnd to start it automatically at boot:
systemctl enable httpdAnd let's check the status:
systemctl status httpd

or

service httpd status
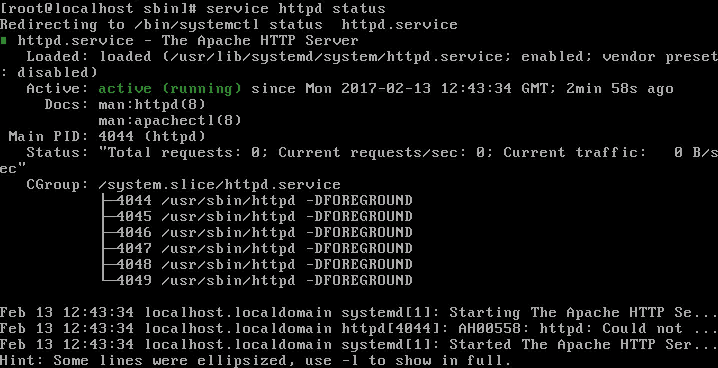
Apache httpd is active (running)
Next up is allowing access through the firewall. CentOS 7 ships with SELinux enabled, and although I've seen a lot of people turn this off (using "setenforce 0") to keep things simple, I'm configuring with it on. With the firewall on too, we'll need to run the following commands to allow port 80 and 443 for HTTP and HTTPS respectively.
Note: The commands below should be as per the image below with 2 x "-", unfortunately WP strips some strings when posting. Use the GitHub repo if you want the unformatted code.
firewall-cmd --permanent --zone=public --add-service=http firewall-cmd --permanent --zone=public --add-service=https firewall-cmd --reload

Firewall rules added and applied successfully
So - we should be able to browse to http://serverip/ and see the test page!

Apache is running, and the required ports are open
Step 5 - Install and configure MariaDB (the drop in replacement for MySQL)
Next up is our SQL engine. Previously you'd have used MySQL, but this has been replaced with MariaDB in CentOS7. MariaDB is a fully open-source replacement for MySQL (which has a number of closed modules), and has an active developer base with broadly reported performance benefits over MySQL.
It's worth noting that even older WHM/Cpanel installs will offer the automatic upgrade from MySQL 5.6 through to MariaDB 10.
yum -y install mariadb-server
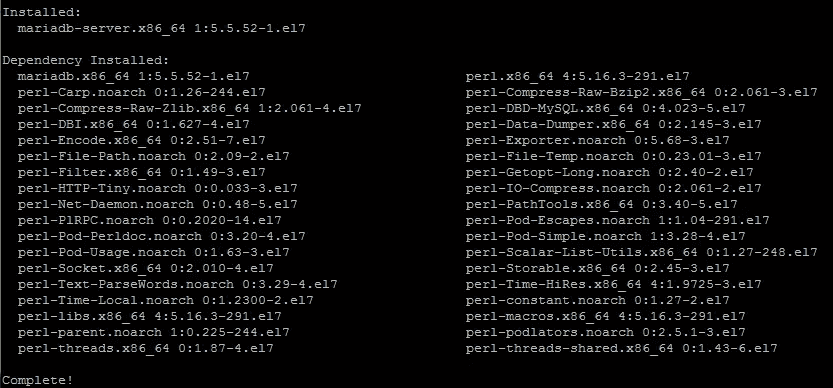
MariaDB brings a couple of dependencies as well
As with apache, we need to start and enable the MariaDB service:
systemctl start mariadb
systemctl enable mariadb
And now time to set up SQL on our system!
mysql_secure_installationThis wizard runs through a series of questions that will help you install MariaDB correctly - my answer are shown below.
-
Login with root password - This is a clean install so this should be blank. Press enter.
-
Set a root password - Yes. Set a secure password, this will be used later with PHPMyAdmin to give us easier access to all of the databases on the box
-
Remove anonymous users - Yes. I'd remove this user so we don't forget to do it later
-
Disallow root login remotely - Yes. This won't affect any locally running scripts, and encourages you to use individual user accounts for your databases, which is good practice
-
Remove test database and access to it - Yes. No need for the test database
-
Reload the privilege tables now - Yes. This completes the installation!
We can test that it's all working by logging into MariaDB via the console:
mysql -u root -pEnter your MariaDB root password and it should bring up the MariaDB prompt. You can exit with Ctrl+C.
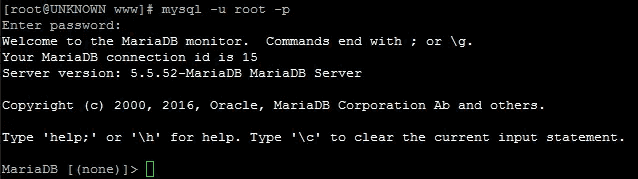
We are able to login to MariaDB
Step 6 - Install PHP
We're going to get PHP running by installing the base package (and dependencies) through yum:
yum -y install php
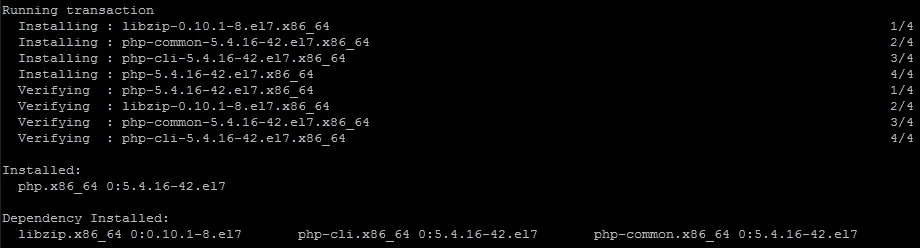
PHP and dependencies installed via yum
No big surprise here, but that will require a restart of Apache:
service httpd restartWe can now create a test file to check that PHP is working. The default directory used by apache for serving files is /var/www/html, so the following commands create a blank file, add code to display php information and then save the file. To create a new file with nano:
nano /var/www/html/phpinfo.phpAnd paste in the following:
<?php

echo phpinfo();

?>
Save the file with Crtl+x, then "y" and Enter. Navigate to http://serverip/phpinfo.php and you should see the result of the function above.

When PHP is correctly installed, phpinfo() will return this
This gives us the base PHP install, but it makes sense to add a number of other packages that are used in a range of popular scripts (like Wordpress, Drupal, etc)
yum -y install php-gd php-ldap php-odbc php-pear php-xml php-xmlrpc php-mbstring php-snmp php-soap curl curl-devel php-mysql
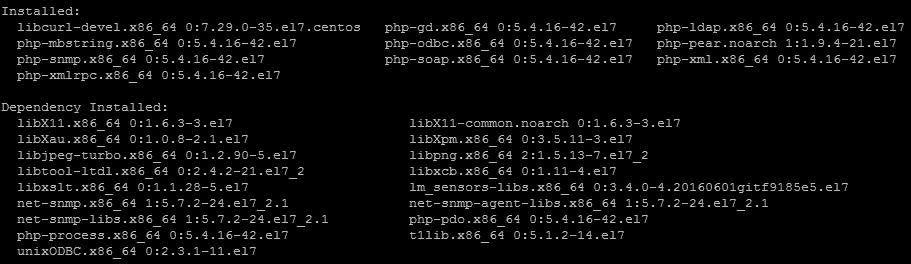
The additional packages bring with them a number of dependencies
We'll just do another apache restart to sort out any unapplied modules and packages:
service httpd restartAnd we're good to go!
Step 7 - Install phpMyAdmin
We need to add the Fedora Extra Packages for Enterprise Linux (EPEL) repository - this is a free, open source repository that provides a huge number of additional packages that install through yum. This includes a large number of modules used by popular third party PHP scripts, openSSL, ProFTP, and most crucially for this section, phpMyAdmin.
yum -y install epel-release
rpm --import /etc/pki/rpm-gpg/RPM-GPG-KEY-EPEL-7
This will add the repository and the relevant key. We can now install phpMyAdmin:
yum -y install phpmyadmin

phpMyAdmin brings even more dependencies
It's a good idea to restart apache again here, as some of the packages we just installed may not have been applied.
service httpd restartNavigate to http://serverip/phpmyadmin and you should be able to see the phpMyAdmin login page.
phpMyAdmin Login Page
Note that if you get a forbidden message, it's likely because phpMyAdmin is setup by default to only accept connections from 127.0.0.1 (localhost). As I'm only testing this on a local network, I'm going to open it up to all - but you could change this address to your workstation IP if you wanted to keep it secure.
nano /etc/httpd/conf.d/phpMyAdmin.confAnd change this:
<IfModule mod_authz_core.c>
# Apache 2.4
<RequireAny>
Require ip 127.0.0.1
Require ip ::1
</RequireAny>
</IfModule>
<IfModule !mod_authz_core.c>
# Apache 2.2
Order Deny,Allow
Deny from All
Allow from 127.0.0.1
Allow from ::1
</IfModule>
to this (add one line)
<IfModule mod_authz_core.c>
# Apache 2.4
<RequireAny>
Require ip 127.0.0.1
Require ip ::1
Require all granted
</RequireAny>
</IfModule>
<IfModule !mod_authz_core.c>
# Apache 2.2
Order Deny,Allow
Deny from All
Allow from 127.0.0.1
Allow from ::1
</IfModule>
Restart apache again:
service httpd restartAnd you should now be able to see the phpMyAdmin login page.
Other options
There are a number of web-based control panels which simplify management of your environment. Out of the available free options I've tried Webmin and CWP (CentOS Web Panel).
You may also want to tidy up permissions now and ensure your apps will be able to write to the default /var/www/html directory. For a dev server, you can keep it really simple and use:
chown -R apache:apache /var/www/htmlInstalling Webmin
To install Webmin via yum we need to add a new repository. To do this we'll create a new config file in the yum repo directory, and then import the required key.
nano /etc/yum.repos.d/webmin.repoIf you have nano installed, this will bring up the editor. If not, you can use another editor like vi.
Paste into the new file:
[Webmin]
name=Webmin Distribution Neutral
#baseurl=http://download.webmin.com/download/yum
mirrorlist=http://download.webmin.com/download/yum/mirrorlist
enabled=1
Save the file by typing Ctrl+X, and "y" followed by Enter to save.
Grab the key from the Webmin site:
wget http://www.webmin.com/jcameron-key.ascImport the key:
rpm --import jcameron-key.ascAnd finally, install Webmin using yum:
yum -y install webminWebmin will list it's access address, which will be https://serverip:10000, and use the existing root account and password for access. If you are using a server where you only have an access certificate (as Azure often does) then you may need to reset the webmin root password using the following command:
/usr/libexec/webmin/changepass.pl /etc/webmin root NEWPASSWORDNote that if you're using Ubuntu/Debian, replace "libexec" with "share".
Updated 04/06/2017 with chown for /var/www/html permissions.
Installing a SSL certificate to Qlik Sense Enterprise on Windows Server 2012 R2 29 Jan 2017 3:00 PM (8 years ago)
Updated on 22/12/2017 to add two other ways of generating a CSR (see below).
In this post I'm going to look at how quick and easy (and cheap) it is to procure and install a SSL certificate on your Qlik Sense deployment. This assumes you are starting with only the self signed certificates, and that you want to use a certificate generated by a signing authority for use on an externally facing site.
A couple of things to note:
-
I'm using Qlik Sense Enterprise 3.1 with a single-node deployment using the default settings
-
You have a choice of verification methods - I chose to use DNS by adding a CNAME (pointer) to my chosen domain, and managed this through a linux DNS host. You can also verify through email or http (placement of a file)
-
I've used a basic certificate from PositiveSSL that offers only domain validation (DV). Certificates offering greater levels of protection and assurance are also available
-
The server is running Windows Server 2012 R2 with IIS 8, which is up-to-date with the latest updates at time of writing (January 2017)
On a clean installation of Qlik Sense Enterprise, you'll note that the domain fails SSL validation in most browsers. Why? Because the certificate is one that has been generated by your server, and not by a "trusted" certificate authority. Have a read of this page about Certificate Authorities if you're after further detail.
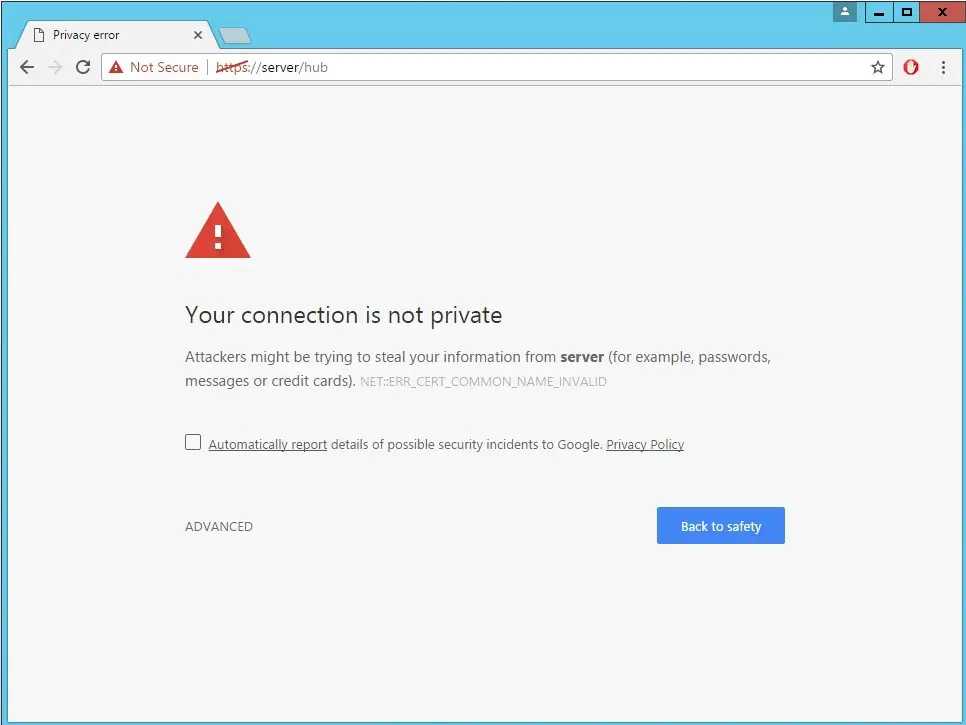
Most browsers will reject the self-signed certificate
So, let's have a look at what's installed on the server! You can get to the right place by diving straight into IIS, or checking the certificate manager (a snap in that’s part of the MMC).
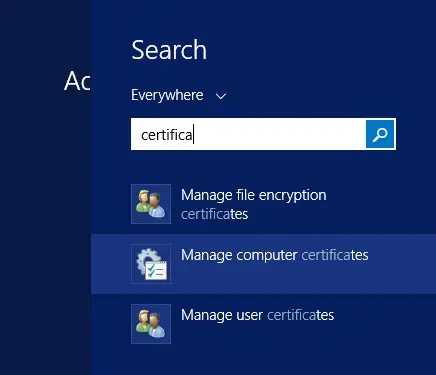
Finding the certificate manager in the start menu is quick and easy
Both of these elements are easily accessible through the start menu, so we’ll open the Certificate manager to see what we’re currently working with. On a new install, this will likely have a single certificate which corresponds to your machine’s host name – in my case it also includes an NVIDIA certificate that has been installed by some drivers on the system (we can ignore this).
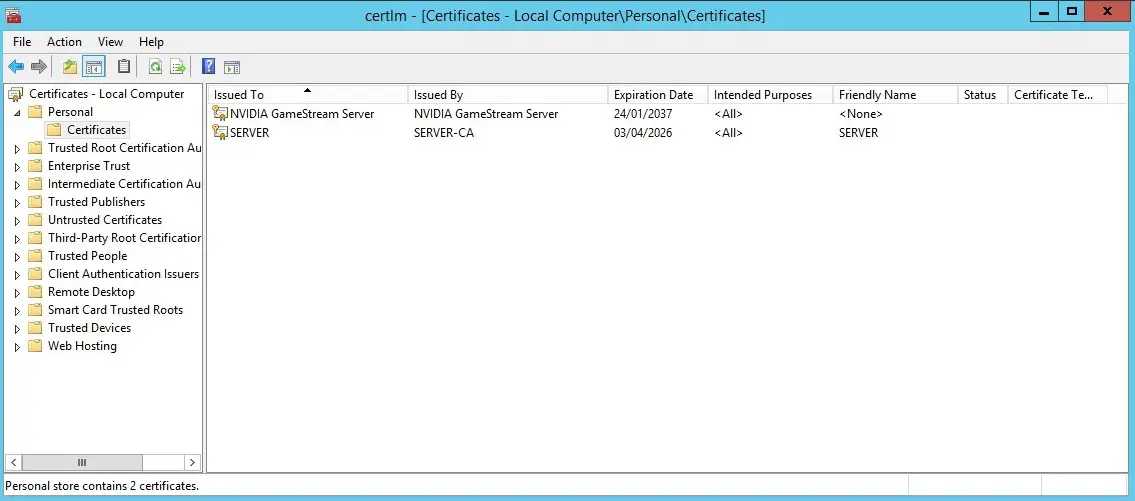
The certificate manager lets you explore which certificates are installed on your system
The SERVER certificate is a self-signed system certificate (from SERVER-CA – aka the server itself) to sign our connections to Sense. As it’s not from a trusted authority, it’s clearly shown as being untrusted when we visit the site in chrome.
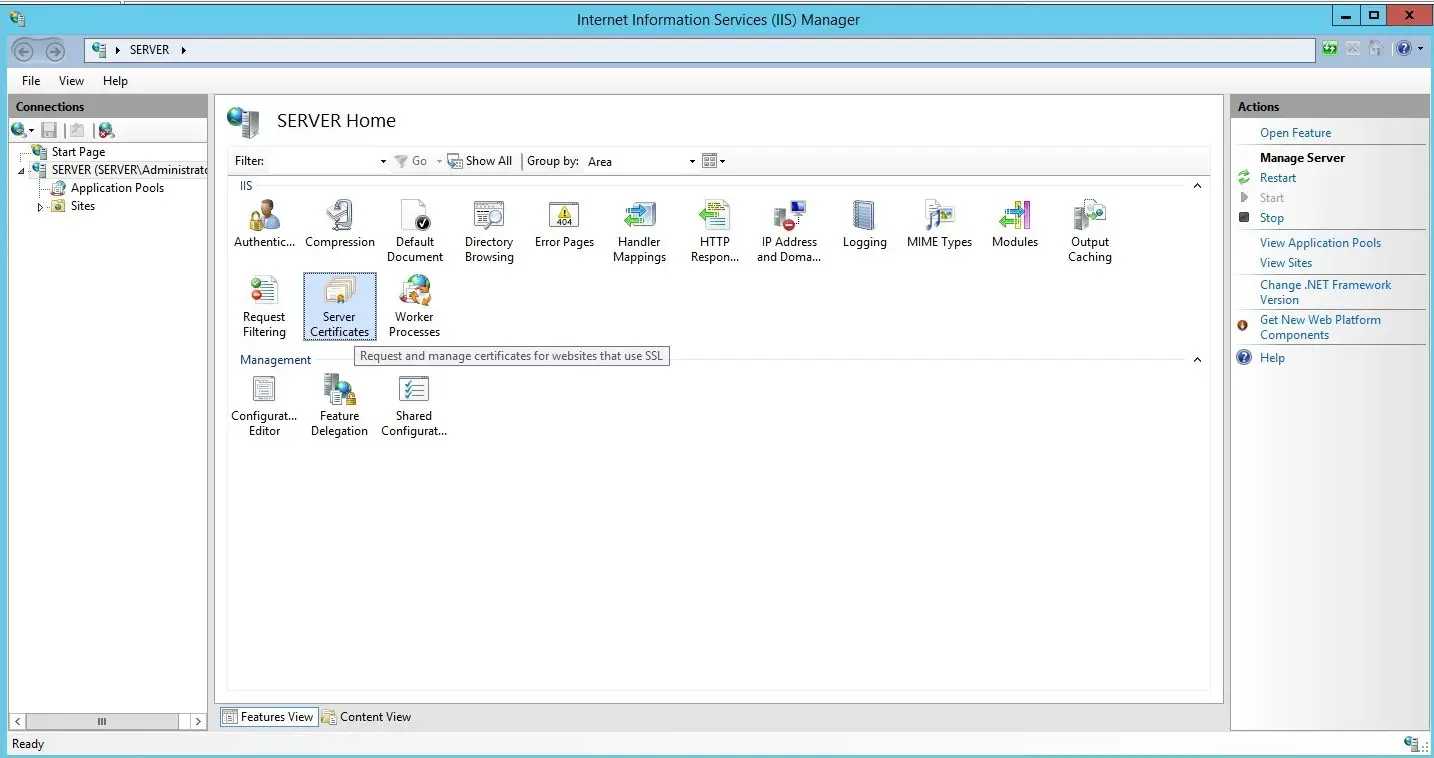
Certificate details are also accessible via IIS Manager
To add a new, trusted certificate to the server we need to follow a few steps:
- Generate CSR (certificate signing request – this comes from IIS and details specifics of the system and requester)
- Purchase a certificate from a trusted authority
- Pass the CSR generated by your server to the authority
- Validate that you control the domain in question (through email or DNS)
- Download the certificate generated by the authority and add it to the certificate store on the machine
- Update Qlik Sense Enterprise to use the newly added certificate
Once you've updated Qlik Sense Enterprise, the proxy will restart and you should be able to use the new certificate immediately. Note that you will likely need to end your current browser session to correctly validate the updated certificate.
1 - Generate CSR using IIS
We'll use IIS to generate a Certificate Signing Request (CSR) which will be used by our chosen certificate authority to generate a certificate.
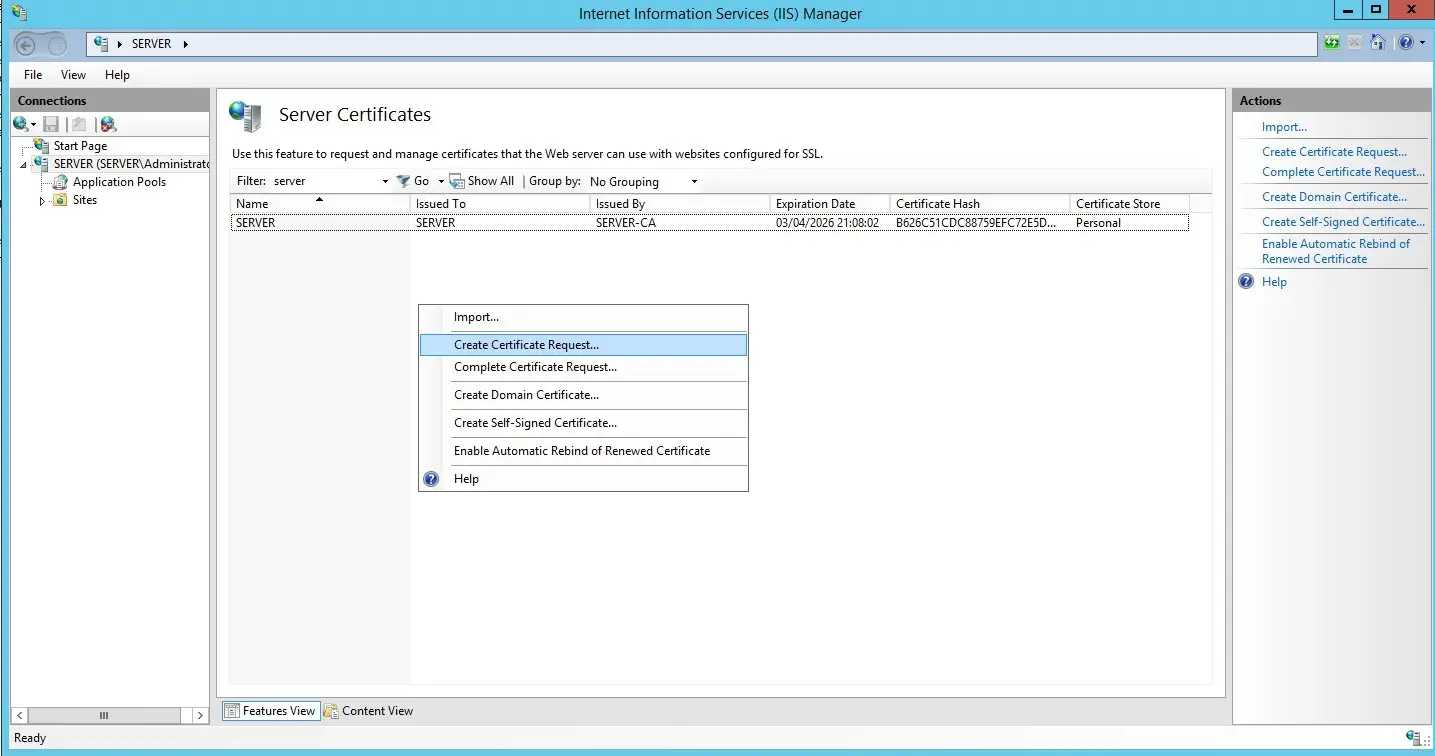
Use IIS Manager > Certificates to generate a CSR
By heading to the IIS Manager and looking at the Server Certificates tab, we can generate a CSR. The common name should match the domain in question - in the below example, our Qlik Sense Hub would be accessible from https://my.domain.com/Hub/. The certificate will be valid for only this domain with this configuration, although it is possible to request multi-domain and wildcard certificates (these will cost more).
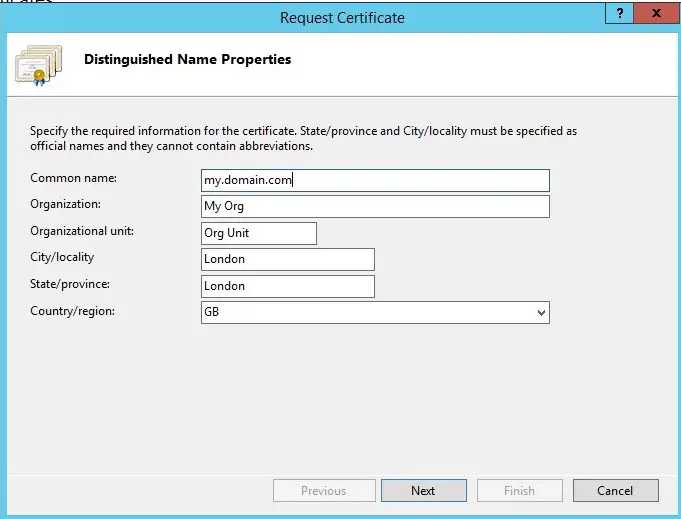
A CSR captures information about the domain and the owner
You will also need to specify a cryptographic service provider and bit length. Generally, longer bit lengths are more secure - but may impact performance. The Certificate Authority may specify which bit length they require.
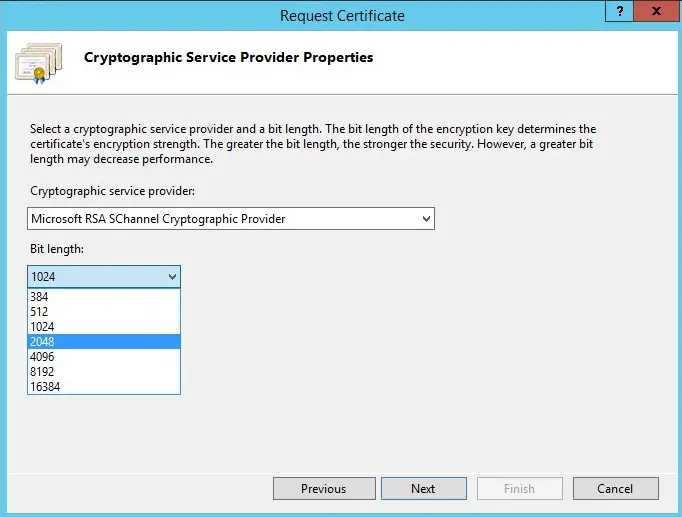
CSR Service Provider and Strength need to be supported by your Certificate Authority
You can then save the CSR file to disk - this will contain a hashed version of the information you've entered and a few other details.
2 - Purchase a Certificate from a Certificate Authority (or reseller)
There are many places that you can purchase a certificate online, and for this example I've gone with a PositiveSSL DV certificate through NameCheap. Resellers will often be cheaper than going direct to the authority, and will allow you to specify whether you want an IIS/Tomcat or Linux/Cpanel/etc certificate - it is important to select IIS/Tomcat as converting a Linux certificate requires a number of additional steps using OpenSSL.
3 - Pass the CSR generated on your server to the Certificate Authority (or reseller)
When purchasing, you should take the opportunity to copy and paste the CSR generated by your machine and validate that it has been loaded correctly by the certificate authority (check the domain and personal details match).
4 - Validate that you control the domain in question
As part of Domain Validation (DV) certificates you will need to prove that you control the domain. Higher certification levels will also validate your identity and that of the organisation the domain is registered to, which involves identity checks and document validation.
For DV however, you generally have three options:
- Have an email sent to an address at the requested domain - e.g. webmaster@my.domain.com. You will need to click a link in this email to confirm receipt
- Change the domain's name server (DNS) settings to include a custom record. This may be a CNAME record (pointing to another domain), or a TXT record (a text-only record)
- Verify through HTTP by placing a file into your web directory. This isn't ideal for a Sense deployment as we aren't using native IIS.
5 - Download the certificate generated by the authority and add it to the certificate store on the machine
Once you've validated domain control with the Certificate Authority, you can download the Certificate (for IIS/Tomcat this should have a .cer file extension - if you have .crt or other extensions then you may have the linux version and will need to convert it for use).
Go back to IIS and select the "Complete Certificate Request" option (as seen in step 1). This will allow you to attach the .cer file, and will ask you which certificate store to add the certificate to. Adding it to the Personal store works fine, and you should now be able to see it on the IIS and Windows certificate pages.
6 - Update Qlik Sense Enterprise to use the newly added certificate
To add this certificate to a proxy for use, we'll need the Thumbprint for the certificate, which is accessible after opening the detail page for the certificate and clicking on the "Details" tab.
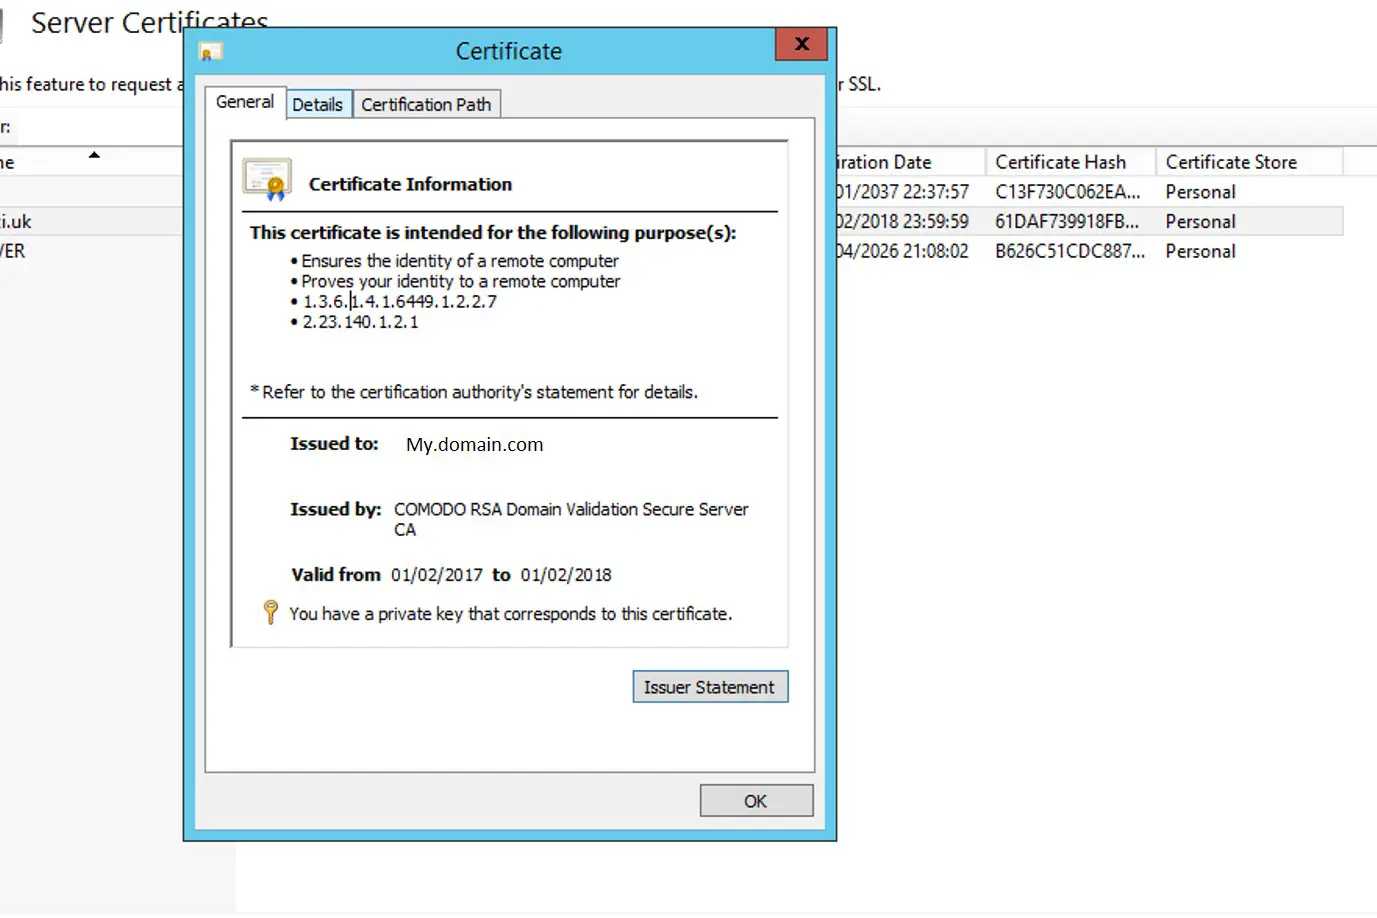
The Certificate detail view lets you get to the Thumbprint on the Detail tab
The thumbprint is a list of two-letter words, as shown below - you will need to copy this...
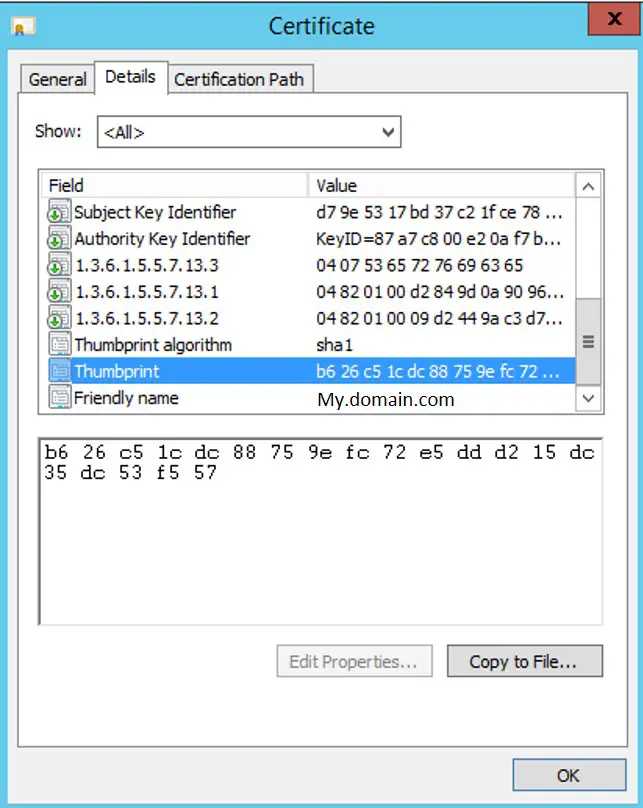
The certificate thumbprint is on the details tab
...and paste it into the QMC in "Proxies > Central > Security > SSL browser certificate thumbprint", then Apply.
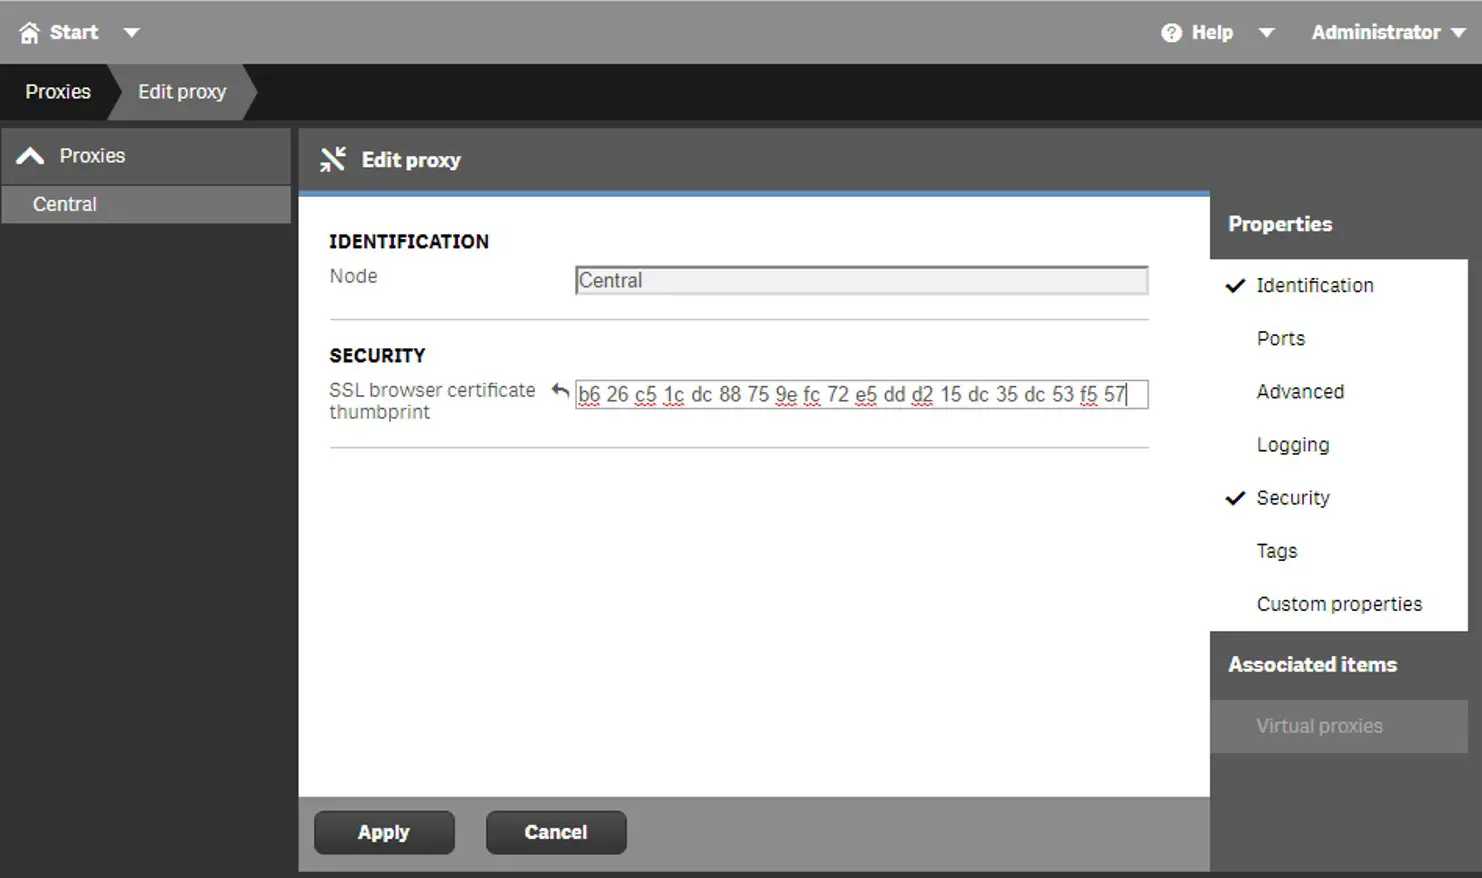
Update the Thumbprint in the QMC
Once you've cleared your current session, you should be good to go - no more SSL errors! I'd recommend not removing any existing certificates unless you have good reason, as it's not a quick fix to correct certificate errors on a QS install.
For the official Qlik-side guide, the following is still relevant: Qlik Sense 1.1 Help - Changing proxy certificate
Other ways to generate a CSR without using IIS
If you're able to install third party software onto the box, then you can generate a CSR through that software and import the resulting certificates via Microsoft Management Console (mmc).
Two such options for generating these CSRs are:
-
OpenSSL - a comprehensive tool that's primarily built for Linux, although some in the community maintain binaries for windows. Requires command line inputs
-
DigiCert Util - a very user friendly GUI that doesn't require any command line inputs
What is Big Data? Thinking about a definition suitable for me 29 Dec 2016 3:00 PM (8 years ago)
I recently worked on an app that was loading from several hundred gigabytes of CSVs, and attempting to perform expensive transformations on these files in Qlik Sense. Normally this isn't a problem, but due to the way the transformation was written, the result was a saturated server...and I found myself reflecting what "Big Data" means to different people (and to myself).
A recruiter's post on LinkedIn also made me chuckle, as it highlights the disparity between definitions well. From my view of big data, I doubt that someone working in that field is likely to be interested in a role where one of the three core job skills is Excel...

Strong in Data Manipulation/Excel/Big Data - so which is it?
My observation is that there are two camps - one side that classifies using the "V's", and another using an altogether simpler definition!
Is it too big to open in Excel?
I like this one.
From a typical end-user perspective, it makes a lot of sense, and is very easily defined by the toolset available to users. We don't have to limit the definition to Excel, but given my recent experience with the large CSV files breaking the tools in my toolbox (the mis-use of Hadoop and how big is big data are interesting reads relevant to this comment) it's easy to see some fairly clear groups form:
-
Reaching the limit of Excel at 1M rows (let's not even mention how poorly this performs if you've got anything more than a simple calculation) - this is the limit for most business users, including more numerically savvy competencies like Accountancy or Management Consulting
-
Reaching the limit of your chosen BI visualisation tool (typically limited by server resources) at up to 1B rows - this appears to be the limit for most Business Analyst and BI developer teams in normal organisations
-
Moving beyond 1B rows takes us into an area commonly tagged as Data Science - and specialist tools like Hadoop and Impala (or as we now hear, into managed cloud solutions)
Perhaps it's better to refer to these limits as a team's "data capacity", but fundamentally, we can define big data as:
-
The volume of data that cannot fit into RAM on a commodity computer (e.g. a typical office PC)
-
And/or the volume at which specialist tools and/or techniques are required to analyse that data
I think this is the practical definition, and it kills the buzz-word a bit. The scientific definition is somewhat more detailed.
Does it conform to the three/four/five V's?
This is what you'll see on most courses, lectures and whitepapers on the subject - and is a more science-based definition. Look to this infographic by IBM big data hub, content on Wikipedia, and many, many more articles and threads discussing this approach.
So, what are the 3-5 V's?
The four V's (three from Gartner, five from IBM - and matched by consultancies like McKinsey, EY, etc)
-
Volume (Gartner, IBM) - the scale of data. Typically this is presented with very large numbers - terabytes to petabytes of data, upwards of trillions of rows...
-
Velocity (Gartner, IBM) - the speed of data, or the pace at which it is now arriving, being captured and analysed
-
Variety (Gartner, IBM) - the diversity of data; from across structured, semi-structured and unstructured formats. Fed from social media, images, JSON files, etc
-
Veracity (IBM) - the certainty (or uncertainty) in data. Many of these new data sources may have poor quality, incompleteness - making analysis with fitted models incredibly challenging. It also raises the question - what should we trust?
-
Value (IBM) - the ability to generate value through the insights gained from big data analysis. This isn't a core element of most definitions, but it's interesting to see it included as it implies there should be business value before investing in a big data solution
Some of the others V's that I've seen:
-
Variability - the velocity and veracity of data varies dramatically over time
-
Viability - likely linked to veracity and value
-
Visualisation - perhaps ease of analysis via comparative or time based analysis rather than hypothesis driven approaches?
Where to go next
It is likely to be quicker and easier to make large data sets accessible in traditional BI tools by providing slices of data from specialist tools like Impala (from Hadoop). The level of aggregation in the data passed to the BI tool is then dependent on capacity of the system, and the business appetite to use techniques like ODAG and live queries in production.
Other areas often associated with Big Data such as IOT and AI (or machine learning) will require different techniques to capture, process and present data back to users. Interestingly, a number of articles this year report the decline of tools like Hadoop, maturity of the big data term in organisations, and the use of streaming data.
2017/05/03 - EDIT: Here's another mid-2017 article which again mentions a decline in tools like Hadoop and a increase in migration to the cloud, which is very relevant to this post!
Also relevant is this week's Google Cloud Next event in London - I've been listening in and it has a huge focus on data engineering, data science, and machine learning in Google Cloud.
CentOS 7 Linux Minimal Install - ifconfig: command not found (let's use ip instead) 12 Nov 2016 3:00 PM (8 years ago)
As someone who doesn't closely follow what's happening with Linux tools, I recently tried a minimal CentOS 7 install, and found out by chance that a command I use a lot on Windows has been deprecated in a number of Linux releases.
Not having run into this before, my first thought was to see if it was in the core repos.
yum provides ifconfig
ifconfig is part of the net-tools package
Interestingly, ifconfig is part of the base repo within the net-tools package. So why wasn't it included, and is there an alternative - surely functionality like this should exist, even in the minimal install?
A scout of sbin provides two promising alternatives - if or ip perhaps?
It turns out that ifconfig (and the majority of the net-tools package) are obsolete and are being slowly removed from installs. Their replacement is iproute2, which provides the "ip" option spotted above - this new package allows support for more modern networking protocols, as it turns out net-tools hasn't really been updated for quite some time (see notes on arch linux, debian list, debian wiki).
So - unless you run other packages or apps that leverage net-tools functionality, use iproute2 - linux.com has a good summary of it's usage.
SEATT updated to 1.4.0 4 Jul 2016 4:00 PM (8 years ago)
I’ve updated Simple Event Attendance (SEATT WordPress plugin) to version 1.4.0. This brings bug fixes, and updates in line with the release of WordPress 4.5.3, as well as the upcoming 4.6.0 release.
The plugin can now also be found on GitHub: https://github.com/withdave/SEATT to help you track changes if you've made any modifications yourself.
This covered some of the feature requests at https://withdave.com/2017/05/seatt-feature-request-may-2017-update/, as well as fixes for get_currentuserinfo in WP 4.5:
* Replaced get_currentuserinfo with wp_get_current_user to fix deprecation issue
* Fixed bug where users couldn't register to an event with limit set to 0 (unlimited)
* Fixed bug where server time was used rather than blog local time on front end form
* Updated admin and template to allow use of TinyMCE for WYSIWYG editor. Can now also add images, colours etc.
A more complete list of QlikView shortcuts 26 May 2016 4:00 PM (8 years ago)
QlikView has a wide range of shortcuts, some of which aren't even options in the menu, or listed in the reference manual.
The below list captures some of the most common, as well as some less common (for example, Alt+Drag, Ctr+Shift+S, etc).
| Shortcut | Description | Type |
| CTRL+N | New file | General |
| CTRL+O | Open file | General |
| CTRL+SHIFT+O | Open file from server | General |
| CTRL+S | Save file | General |
| F12 | Save file as | General |
| CTRL+P | General | |
| CTRL+SHIFT+P | Print as PDF | General |
| CTRL+E | Edit script | Script |
| CTRL+R | Reload script | Script |
| CTRL+SHIFT+R | Partial reload | Script |
| CTRL+T | Table viewer | Script |
| CTRL+Z | Undo | General |
| CTRL+Y | Redo | General |
| CTRL+X | Cut | General |
| CTRL+C | Copy | General |
| CTRL+V | Paste | General |
| DEL | Remove | General |
| CTRL+A | Activate all | General |
| CTRL+F | Search | General |
| SHIFT+CTRL+F | Advanced search | General |
| CTRL+Q | Current selections | Selections |
| CTRL+G | Toggles layout design grid on or off | UI |
| SHIFT+LEFTARROW | Go back a selection | Selections |
| SHIFT+RIGHTARROW | Go forward a selection | Selections |
| CTRL+SHIFT+L | Lock selections | Selections |
| CTRL+SHIFT+U | Unlock selections | Selections |
| CTRL+SHIFT+D | Clear all selections | Selections |
| CTRL+ALT+U | User preferences | Settings |
| CTRL+ALT+D | Document properties | Settings |
| CTRL+ALT+S | Sheet properties | Settings |
| CTRL+ALT+V | Variable overview | Settings |
| CTRL+ALT+E | Expression overview | Settings |
| CTRL+B | Add bookmark | Bookmarks |
| CTRL+SHIFT+B | More bookmarks | Bookmarks |
| CTRL+M | Edit module | Script |
| CTRL+ALT+A | Alerts | Script |
| CTRL+L | Lock selections in active object | Selections |
| CTRL+U | Unlock selections in active object | Selections |
| CTRL+D | Clear selections in active object | Selections |
| ALT+ENTER | Object properties | UI |
| CTRL+QSC | Show available shortcuts when in script pane | Script |
| CTRL+G | Go to line number in the script | Script |
| CTRL+K,C | Comment lines in script | Script |
| CTRL+K,U | Uncomment lines in script | Script |
| CTRL+Q,T,A | Add tab in script | Script |
| CTRL+Q,T,P | Promote active tab | Script |
| CTRL+Q,T,D | Demote active tab | Script |
| CTRL+Q,T,N | Rename active tab | Script |
| CTRL+Q,T,R | Remove active tab | Script |
| CTRL+Q,Q | Creates an autogenerated script | Script |
| CTRL+Q,U,I | Opens Unicode input utility | Script |
| CTRL+Q,J,P,G | Creates a script for reading attributes from jpeg files | Script |
| CTRL+Q,M,P,3 | Creates a script for reading attributes from mp3 files | Script |
| CTRL+Q,W,M,A | Creates a script for reading attributes from wma files | Script |
| F1 | Activates context sensitive help | General |
| F3 | Enters search mode if a searchable object is activated | UI |
| F6 | Activates the sheet tab to the left of the currently active tab | UI |
| F7 | Activates the sheet tab to the right of the currently active tab | UI |
| CTRL+F6 | Activates the leftmost sheet tab | UI |
| CTRL+F7 | Activates the rightmost sheet tab | UI |
| CTRL+SHIFT+S | Show all hidden objects | UI |
| CTRL+Q,B,N,F | From script editor to see the backus-naur form script syntax | Script |
| ALT+DRAG | Move locked object | UI |
| CTRL+TAB | Switch between open QV documents | UI |
(note that this post was moved from the old "dici" website and was originally posted in May 2016)
Qlik Sense and general port troubleshooting on Windows Server 2012 R2 26 Apr 2016 4:00 PM (8 years ago)
One of the beauties of Qlik Sense Enterprise is that it can be installed on nearly any Windows machine, with very few pre-requisites.
One of the drawbacks is that you may then be tempted to load it onto a multi-purpose box, or at the very least, one with a number of core Windows roles installed (especially if you're just testing).

Uh oh, it's a 404
This post is going to offer some quick ways of resolving port clashes, and working out what's binding where without changing the core Qlik Sense Enterprise installation.
You may be able to solve this immediately by turning off a Windows role, or un-installing an application - some of the usual culprits include IIS, and the myriad of roles that rely on a core IIS install (including things like work folders and some remote connection roles).
Access all of the following through Start -> Command Prompt (CMD.EXE). An elevated prompt is recommended.
netsh
Netsh allows you to view or edit your network configuration, which in this case allows us to see bound ports and URLs.
netsh http show urlacl
The above command will list all "discretionary access control lists" for all reserved URLs, a single line of which is shown below.
Reserved URL: https://+:443/remoteDesktopGateway/
This tells us two things - both that something is bound to port 443 (default for HTTPS, which we need to connect to the QMC/hub/etc), and it gives us something to search for. A quick check for "remoteDesktopGateway" will show that this is a Windows role, which we can then either reconfigure or move to another server as needed.
netsh http show servicestate
This is similar to the above but states the registered URLs for that context, a single line of which is shown below.
Registered URLs: HTTP://LOCALHOST:9902/
It's worth bearing in mind that netsh does much more than the HTTP context shown here, giving access to most elements of Windows networking. For more information, have a look at the Microsoft Netsh overview.
netstat and tasklist
These two commands are useful for identifying offending processes, through identifying first the bound addresses, ports and process ID (PID), and second the source of that process.
netstat -ano
Specifically, -a displays all active TCP connections and ports, -n displays active TCP connections, and -o displays associated PIDs.
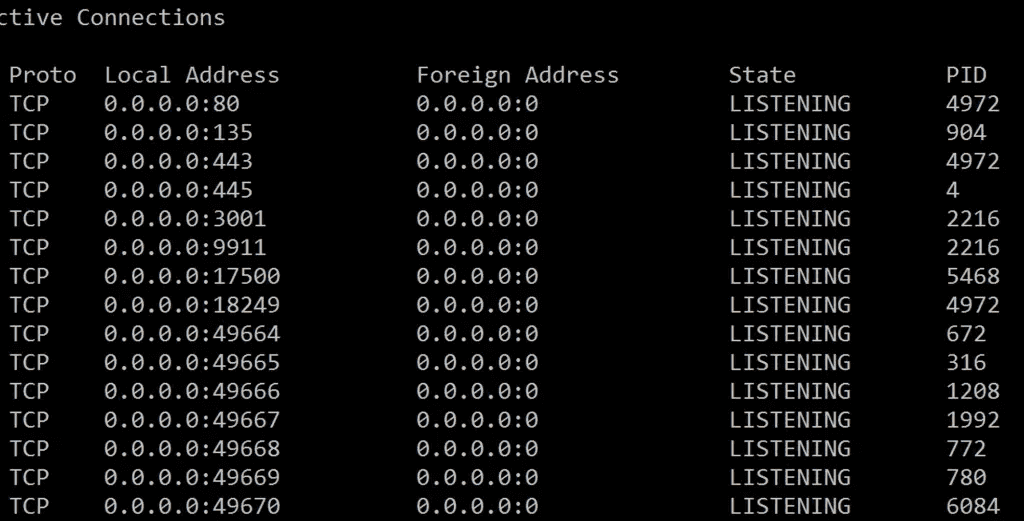
The output of this command tells us the process ID - in the example below it shows port 80 and port 443 on PID 4972.
tasklist /svc
This command will provide you with a list of running processes and their associated PID (you can also get to this through the task manager). Looking up PID 4972 found above, the culprit in this case is Skype, which can be un-installed, or be reconfigured to avoid those ports. By using an elevated prompt, you can get the binary name of the executable as well, through calling netstat -ban.

In addition to the above, netstat can provide additional information through the use of further command line arguaments. Read more on this page about netstat (Windows XP+) at Microsoft.
There are a number of different ways to break this down further, which may be necessary if you've got multiple services running under a single PID (svchost, for example), which I'll cover in a later post. There are also additional tools on Windows Server like PowerShell, as well as non-microsoft Process Explorer apps that will let you delve deeper.
(note that this post was moved from the "dici" site and was originally published in April 2016)
Changing the RDP Port on Windows 10 4 Apr 2016 4:00 PM (9 years ago)
By default, remote desktop connections on windows use port 3389. If you find the need to change this port, the following should help. Make sure you have Allow remote connections to this computer checked under System Properties > Remote before you begin.
In my experience, you should avoid changing the mapped port for core Windows services if possible, as this can cause numerous configuration and management issues.
Other options include:
- Using port mapping (forwarding) on your router (e.g.
externalip:10000->serverip:3389), however not all routers offer this functionality. - Installing a third party remote desktop app, like Chrome Remote Desktop or LogMeIn, however these require specific software and/or subscriptions
- Deploying a server/PC as a RDP "gateway". You then access all further RDP hosts from this first point of contact.
- Using a RD gateway/RD Web access. This requires a server with the appropriate role installed, but can optionally be configured with two-factor authorisation like Duo.
To check what port your RDP is currently listening on, use the netstat command in an elevated command prompt.
netstat -aboThis will show information about current network connections and listening ports, as well as associated executables and processes. You'll see port 3389 bound to svchost.exe on TermService.

RDP running on port 3389 (default), as reported by netstat -abo.
To change the bound port you'll need to open an elevated command prompt and run regedit.
regeditNavigate to the PortNumber setting at HKEY_LOCAL_MACHINE > SYSTEM > CurrentControlSet > Control > Terminal Server > WinStations > RDP-Tcp.
Right click on the REG\_DWORD named PortNumber and hit Modify. Change the base to Decimal and enter the new port (between 1025 and 65535). You can use NetStat to check if a particular port is already bound to a process.
Once you've changed the value, exit RegEdit and either reboot the computer, or simply restart the Remote Desktop Services service using the Services snap-in in Computer Management. You can confirm the port has been changed by running netstat again (in my case, to 10000).

RDP bound to port 10001 (but can be almost any port), reported via netstat -abo.
Finally, open up Windows Firewall and add a new inbound rule for the new port. You won't be able to change the existing rule as that's a core system rule, but copy across the values into a new rule and you'll be good to go.
SEATT updated to 1.3.0 4 Nov 2015 3:00 PM (9 years ago)
I’ve updated Simple Event Attendance (SEATT WordPress plugin) to version 1.3.0. This brings bug fixes, and updates in line with the release of WordPress 4.3.1.
Firstly, an apology for taking so long to release another version - feel welcome to get in touch if you want to discuss changes you've made to your code in the interim. These are largely security changes, so it's recommended that you update when you can. The database structure hasn't changed, so you should experience no loss of data.
Changes:
- Ensured the database elements all use the correct version of wpdb->prepare where needed, and tidied up any inconsistent usage where statements weren't prepared. Thanks to J.D. Grimes for chasing me on this.
- Made some text and layout changes throughout to work better with the Wordpress default templates.
In the pipeline are a few more changes that should further improve functionality of the plugin:
- Some sort of functionality to allow repeatable events - whether this be decoupling of event details from dates, or some other mechanism.
- Selectable categories for lists, allowing you to put one shortcode into a post/page and get a list of all active events.
- Anonymous registration - something that quite a few have asked for. It will be turned off by default but it is coming with captcha user verification.
- Email notification - I haven't explored this yet, but am hoping it can be done using internal wordpress functions.
Live at https://wordpress.org/plugins/simple-event-attendance/
As always, any feedback is very welcome.
Google Maps Distance (DistanceMatrix) API for UK in JSON 10 Nov 2013 3:00 PM (11 years ago)
The postcode code has been updated to use Google's distancematrix api, which provides a very different set of data from the old "as the bird flies" calculation (it calculates road distance, and provides transport options etc).
The following code demonstrates this:
<?php
// Specify Postcodes to Geocode
$postcode1 = 'BH151DA';
$postcode2 = 'BH213AP';

// Set and retrieve the query URL
$request = "http://maps.googleapis.com/maps/api/distancematrix/json?origins=" . $postcode1 . "&destinations=" . $postcode2 . "&mode=driving&language=en-GB&sensor=false&units=imperial";
$distdata = file_get_contents($request);

// Put the data into an array for easy access
$distances = json_decode($distdata, true);

// Do some error checking, first for if the response is ok
$status = $distances["status"];
$row_status = $distances["rows"][0]["elements"][0]["status"];

if ($status == "OK" && $row_status == "OK") {

// Calculate the distance in miles
$distance = $distances["rows"][0]["elements"][0]["distance"]["value"];
$distance_miles = round($distance * 0.621371192/1000, 2);

echo 'The distance between '.$postcode1.' and '.$postcode2.' is '.($distance/1000).'Km ('.$distance_miles.' miles).';

} else {
    echo "Calculating the distance between your locations caused an error.";
}

?>
Having better error checking would also be a good idea if you plan to use the above code. Using &unit=imperial is optional, as Google always returns metres - so the code runs a basic calculation on these to convert to miles.
Raspberry Pi Shutdown Switch - Safely Turning off the Pi 13 Jan 2013 3:00 PM (12 years ago)
I've used a model B rev 2.0 Raspberry Pi as a Samba and DLNA media server in the past, and normally turn it off through a Webmin control panel. This solution is less than ideal however, as it requires a second powered-on device and a couple of clicks to get to the shutdown page in the control panel.
The Raspberry Pi forum has am excellent thread about a simple & safe shutdown button, from which I copied to produce my shutdown switch. It's something you can put together in less than 20 minutes if you have the parts.
All you need is to install the RPi.GPIO Python class on the Pi (use SSH to grab it, wget http://pypi.python.org/packages/source/R/RPi.GPIO/RPi.GPIO-0.4.1a.tar.gz; unzip it; and install it, sudo python setup.py install; then remove the files to tidy it all up), and you can start accessing the pins via Python scripts.
Just connect pin 1 to a momentary open switch, and the switch to a 1K and a 10K resistor. Then connect the 10K resistor to the ground on pin 9 and the 1K to pin 11 (GPIO17). If you're wondering where these are then this page has some nice illustrations; and more info on these pins can be found here. It's worth covering the 5V line with some insulation just to minimise the risk of shorting out your Pi with it (see images below), as everything else on the GPIO header is 3.3V.

Breadboard setup, minus switch which would cross lanes 12 & 13.

In the case, soldered directly onto the pins with a momentary switch screwed into the case above the pi logo (hence minimising risk of contact).
All that's left is to monitor pin 11 (GPIO17) for activity, for which I used the code on the Raspberry Pi forum.
Placed in /home/pi/bin/button/shutdown.py
import RPi.GPIO as GPIO
 import time
 import os
 GPIO.setmode(GPIO.BCM)
 GPIO.setup(17, GPIO.IN)
 while True:
 if(GPIO.input(17)):
 os.system("sudo shutdown -h now")
 break
 time.sleep(1)
Placed in /etc/rc.local on the line before exit 0:
python /home/pi/bin/button/shutdown.pyThen the Pi will shutdown when the button is pressed for about 1 second - only the Power light will remain on (red) when it's shut down. It's worth noting that this won't work if the Pi has crashed.
Updated 22/01/15 - Thanks to "Joost" for clarification on pins, specifically that GPIO17 is pin 11 on the board. "R." suggested using an interruption rather than an active or busy loop.
SEATT updated to 1.2.7 27 Dec 2012 3:00 PM (12 years ago)
I've updated Simple Event Attendance (SEATT Wordpress plugin) to version 1.2.7. This brings bug fixes, and updates in line with the release of Wordpress 3.5.
- Fixed problems with apostrophes being escaped with numerous backspaces in admin panel and in the comment box
- Removed first+last name from page template as this is rarely used, with list users no longer in a table format, but now in an ordered list
- Admins can now sign up registered users simply by supplying a username in the admin panel
- Fixed problems with
wp_prepare()causing errors in wordpress 3.5 - Deleting the plugin now removes all database tables as well as files to provide clean removal. This means uninstalling will now remove all events
Live at http://wordpress.org/extend/plugins/simple-event-attendance/
SEATT updated to 1.2.6 20 Jun 2012 4:00 PM (12 years ago)
Simple Event Attendance has been updated to 1.2.6:
- Addition of extra table columns in admin view.
- Updated screenshots to reflect recent changes.
- Corrected use of
date()function tocurrent_time()to use timezone specified in Wordpress rather than the server one. - Added list of user emails signed up to an event.
- Some other small cosmetic changes, including register & login links on the event signup form.
The plugin is live at http://wordpress.org/extend/plugins/simple-event-attendance/
Facebook Like Buttons, &fb_xd_fragment=, Blank pages and SEO 16 Apr 2011 4:00 PM (14 years ago)
This is a problem that's been around for months now and yet still bugs thousands of users.
Any of your pages with facebook widgets on can result in URL's like www.example.com/page.php?fb\_xd\_fragment=.
This has several implications. Firstly - it can cause blank pages through unwanted interactions with div areas on the page. We can solve this by adding the following fix just before the </body> tag. This came from http://forum.developers.facebook.net/viewtopic.php?id=60571&p=1 (temporary solutions).
<!-- Correct fb_xd_fragment Bug Start -->
<script>
document.getElementsByTagName('html')[0].style.display='block';
</script>
<!-- Correct fb_xd_fragment Bug End -->
The second, more long term issue is that this page will appear in search results alongside the normal page...resulting in duplicate content. Obviously you could just remove the like button but that's not an ideal solution. So you can do a couple of things.
Head to webmastertools (https://www.google.com/webmasters/tools/home) and add the fb_xd_fragment= as something that should be ignored on your site.
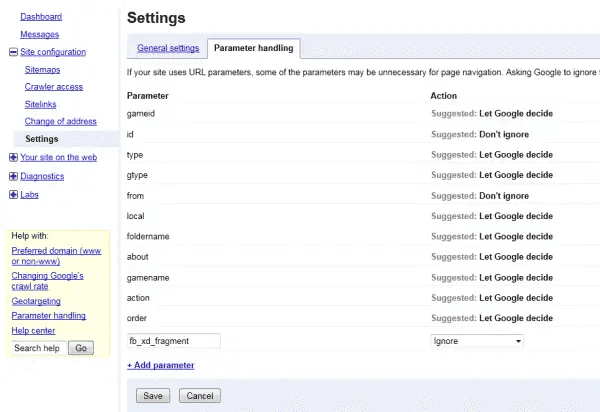
Filtering out fb_xd_fragment in Google Webmaster Tools
Another option is to use .htaccess and 301 redirects to clip out the &fb_xd_fragment=, which is a pain but very easily do-able and removes the requirement to put the display fix on every page. So try this (modified per your site) in your .htaccess:
RewriteCond %{QUERY_STRING} fb_xd_fragment=
RewriteRule ^(.*) http://www.example.com/$1? [R=301]
Note: This is now fixed.
phpBB 3 Script Integration - New Threads and Replies from an External Script 10 Sep 2010 4:00 PM (14 years ago)
This is the third article I've written for pulling functions in phpBB3 for external use. This one allows you to either create new posts in a forum or reply to a thread. This was created for use with a text system, where users could text in comments which would be added to a thread.
Article on phpBB3 Integration
Article on sending PM's
I've put everything needed into one file as I don't want to go through and break it up. The previous two posts (linked above) used a seperate phpbb.php file with part of the code in but this just includes everything.
<?php
// This is not set up for new thread posting, and has been config'd to not increment post count as this is for a bot.
// Further changes will be needed to clean up code as this is using external functions instead of clear documentation. --dc
define('IN_PHPBB', true);
$phpbb_root_path = (defined('PHPBB_ROOT_PATH')) ? PHPBB_ROOT_PATH : './phpBB3/';
$phpEx = substr(strrchr(__FILE__, '.'), 1);
include($phpbb_root_path . 'common.' . $phpEx);

// Start session management
$user->session_begin();
$auth->acl($user->data);
$user->setup();

// post send controller
function sendphpbbpost($pmmessage,$userid,$pmsubject) {

include_once('phpBB3/includes/functions_posting.php');
$my_subject = utf8_normalize_nfc(request_var('$pmsubject', '', true));
$message = utf8_normalize_nfc($pmmessage, '', true);
$uid = $bitfield = $options = '';
$allow_bbcode = $allow_smilies = true;
$allow_urls = true;
generate_text_for_storage($message, $uid, $bitfield, $options, $allow_bbcode, $allow_urls, $allow_smilies);
$data = array(
// General Posting Settings
'forum_id'          => 7,    // The forum ID in which the post will be placed. (int)
'topic_id'          => 5,    // Post a new topic or in an existing one? Set to 0 to create a new one, if not, specify your topic ID here instead.
'icon_id'           => false,    // The Icon ID in which the post will be displayed with on the viewforum, set to false for icon_id. (int)

// Defining Post Options
'enable_bbcode' => false, // Enable BBcode in this post. (bool)
'enable_smilies'    => true, // Enabe smilies in this post. (bool)
'enable_urls'       => false, // Enable self-parsing URL links in this post. (bool)
'enable_sig'        => true, // Enable the signature of the poster to be displayed in the post. (bool)

// Message Body
'message'           => $message,     // Your text you wish to have submitted. It should pass through generate_text_for_storage() before this. (string)
'message_md5'   => md5($message),    // The md5 hash of your message

// Values from generate_text_for_storage()
'bbcode_bitfield'   => $bitfield,    // Value created from the generate_text_for_storage() function.
'bbcode_uid'        => $uid,     // Value created from the generate_text_for_storage() function.

// Other Options
'post_edit_locked'  => 0,
'topic_title'       => $subject, // Subject/Title of the topic. (string). This is needed for new posts but for our purposes isn't.

// Email Notification Settings
'notify_set'        => false,        // (bool)
'notify'            => false,        // (bool)
'post_time'         => 0,        // Set a specific time, use 0 to let submit_post() take care of getting the proper time (int)
'forum_name'        => '',       // For identifying the name of the forum in a notification email. (string)

// Indexing
'enable_indexing'   => true,
'force_approved_state' => true, // Only runs on 6 onwards...check SUCC
);

//Now send that post...
submit_post('reply', '', '', POST_NORMAL, &$poll, &$data, $update_message = true);

}

$user->data['user_id'] = 2;    // User id of poster.
$auth->acl($user->data); // Re-initiate user after recall
$userid = $user->data['user_id'];
$pmmessage = 'This is a new reply, change this to whatever you want.';
sendphpbbpost($pmmessage,$userid,$pmsubject);

?>
Looking through the code above you will see several points that need changing. It's currently set to 'reply' (change this to 'post' for a new post). Change all details to suit really - it's easy to customise.
Benchmarking and testing your PHP script with microtime 9 Sep 2010 4:00 PM (14 years ago)
When you're building a new website you often code it 'on-the-fly'. That's to say, strapping in new features here and there until it does exactly what you want - but leaving a mess that needs to be optimised.
One of the best ways of testing your site for scalability (other than getting huge traffic straight away) is to test how long your PHP scripts take to parse. We can do this by comparing the time at the start and end of a script to give us the processing time.
The PHP manual shows the following example:
$time_start = microtime(true);
// Script you want to test here
$time_end = microtime(true);
$time = $time_end - $time_start;
echo "Did nothing in $time seconds\n";
But I prefer this for readability (I put this in a common include so I can test the whole site by simply calling some functions...see below):
function starttime() {
  $r = explode( ' ', microtime() );
  $r = $r[1] + $r[0];
  return $r;
}

function endtime($starttime) {
  $r = explode( ' ', microtime() );
  $r = $r[1] + $r[0];
  $r = round($r - $starttime,4);
  return '<strong>Execution Time</strong>: '.$r.' seconds<br />';
}
To use this in a script all we'd need to do is place this at the start and end, and do a simple calculation. For example (using sudo code):
$start = starttime();
// Script you want to test here
echo endtime($start);
This will help you discover bottlenecks in your script - there are a load of things you can do to optimise your script; and I find that using functions as above don't add extra complication to your script.
phpBB 3 Script Integration - Sending Private Messages (PM's) From an External Script 9 Sep 2010 4:00 PM (14 years ago)
A while back I posted an article about integrating your site to use the phpBB3 user and login system (here). When I wrote that I also used phpBB as a message system for a site; so when a user did something they were sent a private message automatically.
This bit of code (use it in conjunction with phpbb.php mentioned in the post linked to above) allows you to call a function to send a PM to any user as long as you have their ID.
<?php
// PM send controller
include_once("phpbb.php");

function sendphpbbpm($pmmessage,$userid,$pmsubject) {
include_once('forum/includes/functions_privmsgs.php');

$message = utf8_normalize_nfc($pmmessage);
$uid = $bitfield = $options = ''; // will be modified by generate_text_for_storage
$allow_bbcode = $allow_smilies = true;
$allow_urls = true;
generate_text_for_storage($message, $uid, $bitfield, $options, $allow_bbcode, $allow_urls, $allow_smilies);
$pm_data = array(
'from_user_id'        => 2,
'from_user_ip'        => "127.0.0.1",
'from_username'        => "admin",
'enable_sig'            => false,
'enable_bbcode'        => true,
'enable_smilies'        => true,
'enable_urls'        => false,
'icon_id'            => 0,
'bbcode_bitfield'    => $bitfield,
'bbcode_uid'         => $uid,
'message'            => $message,
'address_list'        => array('u' => array($userid => 'to')),
);

//Now We Have All Data Lets Send The PM!!
submit_pm('post', $pmsubject, $pm_data, false, false);
}

?>
You'll need to modify the code above slightly to fit your needs, for example changing the admin username and user id, and then calling the function but it's all pretty simple stuff one you've got all this.
To call the function (send the PM) to a fictional user 11:
<?php

$pmsubject = 'Please read this PM.';
$pmmessage = 'Thank you for reading this PM!';

$userid = '11';

sendphpbbpm($pmmessage,$userid,$pmsubject);

?>
Posting threads and replying to threads uses a similar system so I'll put up some script for that shortly.
Using Google Maps, Geocoding and PHP to find the distance between UK Postcodes 24 Aug 2010 4:00 PM (14 years ago)
UPDATE: A new version which calculates distance based on roads is available.
If you're looking to make any kind of radius checker, delivery calculator etc, you will need to have some method of calculating this distance. Unfortunately for us in the UK, Royal Mail keep a tight grip on postcode data.
As a result, the best low-budget way of finding postcodes is by using the Google Maps api - which in itself isn't 100% accurate (but good enough).
So we can use the following code:
<?php
// Specify Postcodes to Geocode
$postcode1 = 'BH151DA';
$postcode2 = 'BH213AP';

// Geocode Postcodes & Get Co-ordinates 1st Postcode
$pc1 = 'http://maps.google.com/maps/geo?q='.$postcode1.',+UK&output=csv&sensor=false';
$data1 = @file_get_contents($pc1);
$result1 = explode(",", $data1);
$custlat1 = $result1[2];
$custlong1 = $result1[3];

// Geocode Postcodes & Get Co-ordinates 2nd Postcode
$pc2 = 'http://maps.google.com/maps/geo?q='.$postcode2.',+UK&output=csv&sensor=false';
$data2 = @file_get_contents($pc2);
$result2 = explode(",", $data2);
$custlat2 = $result2[2];
$custlong2 = $result2[3];

// Work out the distance!
$pi80 = M_PI / 180;
$custlat1 *= $pi80;
$custlong1 *= $pi80;
$custlat2 *= $pi80;
$custlong2 *= $pi80;

$r = 6372.797; // mean radius of Earth in km
$dlat = $custlat2 - $custlat1;
$dlng = $custlong2 - $custlong1;
$a = sin($dlat / 2) * sin($dlat / 2) + cos($custlat1) * cos($custlat2) * sin($dlng / 2) * sin($dlng / 2);
$c = 2 * atan2(sqrt($a), sqrt(1 - $a));

// Distance in KM
$km = round($r * $c, 2);

// Distance in Miles
$miles = round($km * 0.621371192, 2);

echo 'The distance between '.$postcode1.' and '.$postcode2.' is '.$km.'Km ('.$miles.' miles).';

?>
You could use $result1[0] and $result2[0] to check codes. If the value is anything other than 200 the postcode is invalid. Also note UK is also searched for to guarantee correct results!
The result is also rounded to make sure we only have 2 decimal places. Make sure your postcodes do not have any spaces in when they go to Google, if you're collecting them from a form maybe use:
function nowhitespace($data) {
  return preg_replace('/\s/', '', $data);
}
$postcode1 = nowhitespace($postcode1);
to remove all spaces before processing, and the following to check it's ok after processing:
if (($result1[0] != 200) || ($result2[0] != 200)) {
  echo "<p>Invalid Postcode(s) Entered. Please try again.</p>";
} else {
Good luck!
SPF Records for Google Apps Hosted Mail - avoiding rejected emails 11 Apr 2010 4:00 PM (15 years ago)
Using Google Apps for your domain's email? Well you definately need to set up some SPF records.
It seems yahoo is extremely strict when it comes to checking for SPF records on a domain, and bounces anything with missing records. Many other email providers like hotmail simply SPAM your message straight away.
Google provide the following resource for this problem: http://www.google.com/support/a/bin/answer.py?hl=en&answer=33786
But, they recommend using: v=spf1 include:aspmx.googlemail.com ~all.
That's all fine and well...but what about the official website? Oddly, they recommend using - instead of ~ (http://www.openspf.org/FAQ/Common_mistakes): v=spf1 include:aspmx.googlemail.com -all
But seeing as it's google hosting my mail, I've been using ~ successfully for some time now, with no more bounces.
Testing whether you're configured correctly
Easy, just send an email to spf-test@openspf.org and you'll get a bounce right back with the SPF status in (http://www.openspf.org/Tools).
How can I configure my server?
If you have access to all your DNS records for your domain you can add it yourself (for example through WHM or root plesk panel) but on most shared hosts just fire off an email to the support team who will add the record for you.
On Plesk & Cpanel you can add either a SPF record or a TXT record through your DNS editor, making it easy to do this yourself.
Validating email addresses in PHP with Preg filters, DNS, MX Servers and other checks 11 Apr 2010 4:00 PM (15 years ago)
UPDATE: It is now easier to send a confirmation email to the provided address to validate it, or to use a framework than a custom script.
There are many tutorials online that show users how to validate an email address, but most do it wrong. This means many websites will reject valid addresses such as customer/department=shipping@example.com or abc!def!xyz%yyy@example.com (yes, they are valid) with the following expression:
"^[_a-z0-9-]+(\.[_a-z0-9-]+)*@[a-z0-9-]+(\.[a-z0-9-]+)*(\.[a-z]{2,3})$"If you're here through search then you've probably already seen a load of these!
The code I'm going to provide:
- Allows international domains, and special characters in the email address
- Checks for domain existance
- Checks for mx records
So...to the code. This was put together from a number of sources, then simply based off an article over at LinuxJournal.
<?php
$email = $_POST['email'];
if ($email) {

function ValidateEmail($email) {

	// Set test to pass
	$valid = true;
	// Find the last @ in the email
	$findats = strrpos($email, "@");
		// Check to see if any @'s were found
		if (is_bool($findats) && !$findats) {
		$valid = false;
		}
		else {
		// Phew, it's still ok, continue...
		// Let's split that domain up.
		$domain = substr($email, $findats+1);
		$local = substr($email, 0, $findats);
		// Find the local and domain lengths
		$locallength = strlen($local);
		$domainlength = strlen($domain);
			// Check local (first part)
			if ($locallength < 1 || $locallength > 64) {
			$valid = false;
			}
			// Better check the domain too
			elseif ($domainlength < 1 || $domainlength > 256) {
			$valid = false;
			}
			// Can't be having dots at the start or end
			elseif ($local[0] == '.' || $local[$locallength-1] == '.') {
			$valid = false;
			}
			// Don't want 2 (or more) dots in the email
			elseif ((preg_match('/\\.\\./', $local)) || (preg_match('/\\.\\./', $domain))) {
			$valid = false;
			}
			// Make sure the domain has valid chars
			elseif (!preg_match('/^[A-Za-z0-9\\-\\.]+$/', $domain)) {
			$valid = false;
			}
			// Make sure the local has valid chars, make sure it's quoted right
			elseif (!preg_match('/^(\\\\.|[A-Za-z0-9!#%&`_=\\/$\'*+?^{}|~.-])+$/', str_replace("\\\\","",$local))) {
				if (!preg_match('/^"(\\\\"|[^"])+"$/', str_replace("\\\\","",$local))) {
				$valid = false;
				}
			}
			// Whoa, made it this far? Check for domain existance!
			elseif (!(checkdnsrr($domain,"MX") || checkdnsrr($domain,"A"))) {
			$valid = false;
			}
		}
	if ($valid) {
	echo $email.' is valid!';
	}
	else {
	echo $email.' is not valid!<br />';
	}
}

ValidateEmail($email);

}
?>
<form id="form1" name="form1" method="post" action="validateemail.php">
  <p>Email:
    <input type="text" name="email" id="email" />
</p>
  <p>
    <input type="submit" name="submit" id="submit" value="Is it valid?" />
  </p>
</form>
You'd call this with:
ValidateEmail("test@domain.com");
Automatic Local, FTP and Email Backups of MySQL Databases with Cron 10 Apr 2010 4:00 PM (15 years ago)
I'll start by saying this is not all my own code, it is based on dagon design's original release in 2007 (Automatic MySql Backup Script) but this version builds on their version 2.1 to add FTP support.
What this script does:
- Backup all of your MySQL databases on a server individually, then package them into a single tar.
- Save that tar locally, on a FTP server or even email it to you
What you need:
- PHP
- MySQL
- An account with relevant mysql access (it needs access to the databases you wish to backup)
What I've added:
To upload to a remote FTP server, I added this to the config file:
######################################################################
## FTP Options
######################################################################

// Use FTP Option?
$useftp = true;

// Use passive mode?
$usepassive = true;

// FTP Server Address
$ftp_server = 'host';

// FTP Username & Password
$ftp_user_name = 'username';
$ftp_user_pass = 'password';
and this to the main file below email sending:
// do we ftp the file?
if ($useftp == true) {
$file = $BACKUP_DEST.'/'.$BACKUP_NAME;
$remote_file = $BACKUP_NAME;

// set up basic connection
$conn_id = ftp_connect($ftp_server);

// login with username and password
$login_result = ftp_login($conn_id, $ftp_user_name, $ftp_user_pass);

// turn passive mode on?
ftp_pasv($conn_id, $usepassive);

// upload a file
if (ftp_put($conn_id, $remote_file, $file, FTP_BINARY)) {
 echo "successfully uploaded to ftp: $remotefile\n";
} else {
 echo "There was a problem while uploading $remotefile\n";
}

// close the connection
ftp_close($conn_id);
}
That's all!
Full code sample
These two files provide the full solution.
dbbackupconfig.php
<?php

######################################################################
## MySQL Backup Script v2.1a - March 7, 2010
######################################################################
## For more documentation, please visit:
## http://www.dagondesign.com/articles/automatic-mysql-backup-script/
## -------------------------------------------------------------------
## Created by Dagon Design (www.dagondesign.com).
## Much credit goes to Oliver Mueller (oliver@teqneers.de)
## for contributing additional features, fixes, and testing.
## -------------------------------------------------------------------
## For updates, please visit:
## http://www.3cc.org/backyard/
## -------------------------------------------------------------------
## FTP functions added by 3cc Internet (3cc.org)
## All other code created by Dagon Design (www.dagondesign.com)
######################################################################

######################################################################
## General Options
######################################################################

// Remember to always use absolute paths without trailing slashes!
// On Windows Systems: Don't forget volume character (e.g. C:).

// Path to the mysql commands (mysqldump, mysqladmin, etc..)
$MYSQL_PATH = '/usr/bin';

// Mysql connection settings (must have root access to get all DBs)
$MYSQL_HOST = 'localhost';
$MYSQL_USER = 'root';
$MYSQL_PASSWD = 'password';

// Backup destination (will be created if not already existing)
$BACKUP_DEST = '/db_backups';

// Temporary location (will be created if not already existing)
$BACKUP_TEMP = '/tmp/backup_temp';

// Show script status on screen while processing
// (Does not effect log file creation)
$VERBOSE = true;

// Name of the created backup file (you can use PHP's date function)
// Omit file suffixes like .tar or .zip (will be set automatically)
$BACKUP_NAME = 'mysql_backup_' . date('Y-m-d');

// Name of the standard log file
$LOG_FILE = $BACKUP_NAME . '.log';

// Name of the error log file
$ERR_FILE = $BACKUP_NAME . '.err';

// Which compression program to use
// Only relevant on unix based systems. Windows system will use zip command.
$COMPRESSOR = 'bzip2';


######################################################################
## Email Options
######################################################################


// Email the backup file when finished?
$EMAIL_BACKUP = false;

// If using email backup, delete from server afterwards?
$DEL_AFTER = false;

// The backup email's 'FROM' field
$EMAIL_FROM = 'Backup Script';

// The backup email's subject line
$EMAIL_SUBJECT = 'SQL Backup for ' . date('Y-m-d') . ' at ' . date('H:i');

// The destination address for the backup email
$EMAIL_ADDR = 'user@domain.com';

######################################################################
## FTP Options
######################################################################

// Use FTP Option?
$useftp = true;

// Use passive mode?
$usepassive = true;

// FTP Server Address
$ftp_server = 'host';

// FTP Username & Password
$ftp_user_name = 'username';
$ftp_user_pass = 'password';

######################################################################
## Error Options
######################################################################

// Email error log to specified email address
// (Will only send if an email address is given)
$ERROR_EMAIL = $EMAIL_ADDR;

// Subject line for error email
$ERROR_SUBJECT = 'ERROR: ' . $EMAIL_SUBJECT;


######################################################################
## Advanced Options
## Be sure you know what you are doing before making changes here!
######################################################################
// A comma separated list of databases, which should be excluded
// from backup
// information_schema is a default exclude, because it is a read-only DB anyway
$EXCLUDE_DB = 'information_schema';

// Defines the maximum number of seconds this script shall run before terminating
// This may need to be adjusted depending on how large your DBs are
// Default: 18000
$MAX_EXECUTION_TIME = 18000;

// Low CPU usage while compressing (recommended) (empty string to disable).
// Only relevant on unix based systems
// Default: 'nice -n 19'
$USE_NICE = 'nice -n 19';

// Flush tables between mysqldumps (recommended, if it runs during non-peak time)
// Default: false
$FLUSH = false;

// Optimize databases between mysqldumps.
// (For detailed information look at
// http://dev.mysql.com/doc/mysql/en/mysqlcheck.html)
// Default: false
$OPTIMIZE = false;

######################################################################
## End of Options
######################################################################

?>
dbbackup.php
<?php

######################################################################
## MySQL Backup Script v2.1a - March 7, 2010
######################################################################
## For more documentation, please visit:
## http://www.dagondesign.com/articles/automatic-mysql-backup-script/
## -------------------------------------------------------------------
## Created by Dagon Design (www.dagondesign.com).
## Much credit goes to Oliver Mueller (oliver@teqneers.de)
## for contributing additional features, fixes, and testing.
## -------------------------------------------------------------------
## For updates, please visit:
## http://www.3cc.org/backyard/
## -------------------------------------------------------------------
## FTP functions added by 3cc Internet (3cc.org)
## All other code created by Dagon Design (www.dagondesign.com)
######################################################################

######################################################################
## Usage Instructions
######################################################################
## This script requires two files to run:
##     dbbackup.php        - Main script file
##     dbbackupconfig.php - Configuration file
## Be sure they are in the same directory.
## -------------------------------------------------------------------
## Do not edit the variables in the main file. Use the configuration
## file to change your settings. The settings are explained there.
## -------------------------------------------------------------------
## A few methods to run this script:
## - php /PATH/dbbackup.php
## - BROWSER: http://domain/PATH/dbbackup.php
## - ApacheBench: ab "http://domain/PATH/dbbackup.php"
## - lynx http://domain/PATH/dbbackup.php
## - wget http://domain/PATH/dbbackup.php
## - crontab: 0 3  * * *     root  php /PATH/dbbackup.php
## -------------------------------------------------------------------
## For more information, visit the website given above.
######################################################################

error_reporting( E_ALL );

// Initialize default settings
$MYSQL_PATH = '/usr/bin';
$MYSQL_HOST = 'localhost';
$MYSQL_USER = 'root';
$MYSQL_PASSWD = 'password';
$BACKUP_DEST = '/db_backups';
$BACKUP_TEMP = '/tmp/backup_temp';
$VERBOSE = true;
$BACKUP_NAME = 'mysql_backup_' . date('Y-m-d');
$LOG_FILE = $BACKUP_NAME . '.log';
$ERR_FILE = $BACKUP_NAME . '.err';
$COMPRESSOR = 'bzip2';
$EMAIL_BACKUP = false;
$DEL_AFTER = false;
$EMAIL_FROM = 'Backup Script';
$EMAIL_SUBJECT = 'SQL Backup for ' . date('Y-m-d') . ' at ' . date('H:i');
$EMAIL_ADDR = 'user@domain.com';
$ERROR_EMAIL = 'user@domain.com';
$ERROR_SUBJECT = 'ERROR: ' . $EMAIL_SUBJECT;
$EXCLUDE_DB = 'information_schema';
$MAX_EXECUTION_TIME = 18000;
$USE_NICE = 'nice -n 19';
$FLUSH = false;
$OPTIMIZE = false;

// Load configuration file
$current_path = dirname(__FILE__);
if( file_exists( $current_path.'/dbbackupconfig.php' ) ) {
	require( $current_path.'/dbbackupconfig.php' );
} else {
	echo 'No configuration file [dbbackupconfig.php] found. Please check your installation.';
	exit;
}

################################
# functions
################################
/**
 * Write normal/error log to a file and output if $VERBOSE is active
 * @param string	$msg
 * @param boolean	$error
 */
function writeLog( $msg, $error = false ) {

	// add current time and linebreak to message
	$fileMsg = date( 'Y-m-d H:i:s: ') . trim($msg) . "\n";

	// switch between normal or error log
	$log = ($error) ? $GLOBALS['f_err'] : $GLOBALS['f_log'];

	if ( !empty( $log ) ) {
		// write message to log
		fwrite($log, $fileMsg);
	}

	if ( $GLOBALS['VERBOSE'] ) {
		// output to screen
		echo $msg . "\n";
		flush();
	}
} // function

/**
 * Checks the $error and writes output to normal and error log.
 * If critical flag is set, execution will be terminated immediately
 * on error.
 * @param boolean	$error
 * @param string	$msg
 * @param boolean	$critical
 */
function error( $error, $msg, $critical = false ) {

	if ( $error ) {
		// write error to both log files
		writeLog( $msg );
		writeLog( $msg, true );

		// terminate script if this error is critical
		if ( $critical ) {
			die( $msg );
		}

		$GLOBALS['error']	= true;
	}
} // function


################################
# main
################################

// set header to text/plain in order to see result correctly in a browser
header( 'Content-Type: text/plain; charset="UTF-8"' );
header( 'Content-disposition: inline' );

// set execution time limit
if( ini_get( 'max_execution_time' ) < $MAX_EXECUTION_TIME ) {
	set_time_limit( $MAX_EXECUTION_TIME );
}

// initialize error control
$error = false;

// guess and set host operating system
if( strtoupper(substr(PHP_OS, 0, 3)) !== 'WIN' ) {
	$os			= 'unix';
	$backup_mime	= 'application/x-tar';
	$BACKUP_NAME	.= '.tar';
} else {
	$os			= 'windows';
	$backup_mime	= 'application/zip';
	$BACKUP_NAME	.= '.zip';
}


// create directories if they do not exist
if( !is_dir( $BACKUP_DEST ) ) {
	$success = mkdir( $BACKUP_DEST );
	error( !$success, 'Backup directory could not be created in ' . $BACKUP_DEST, true );
}
if( !is_dir( $BACKUP_TEMP ) ) {
	$success = mkdir( $BACKUP_TEMP );
	error( !$success, 'Backup temp directory could not be created in ' . $BACKUP_TEMP, true );
}

// prepare standard log file
$log_path = $BACKUP_DEST . '/' . $LOG_FILE;
($f_log = fopen($log_path, 'w')) || error( true, 'Cannot create log file: ' . $log_path, true );

// prepare error log file
$err_path = $BACKUP_DEST . '/' . $ERR_FILE;
($f_err = fopen($err_path, 'w')) || error( true, 'Cannot create error log file: ' . $err_path, true );

// Start logging
writeLog( "Executing MySQL Backup Script v1.4" );
writeLog( "Processing Databases.." );


################################
# DB dumps
################################
$excludes	= array();
if( trim($EXCLUDE_DB) != '' ) {
	$excludes	= array_map( 'trim', explode( ',', $EXCLUDE_DB ) );
}

// Loop through databases
$db_conn	= @mysql_connect( $MYSQL_HOST, $MYSQL_USER, $MYSQL_PASSWD ) or error( true, mysql_error(), true );
$db_result	= mysql_list_dbs($db_conn);
$db_auth	= " --host=\"$MYSQL_HOST\" --user=\"$MYSQL_USER\" --password=\"$MYSQL_PASSWD\"";
while ($db_row = mysql_fetch_object($db_result)) {
	$db = $db_row->Database;

	if( in_array( $db, $excludes ) ) {
		// excluded DB, go to next one
		continue;
	}

	// dump db
	unset( $output );
	exec( "$MYSQL_PATH/mysqldump $db_auth --opt $db 2>&1 >$BACKUP_TEMP/$db.sql", $output, $res);
	if( $res > 0 ) {
		error( true, "DUMP FAILED\n".implode( "\n", $output) );
	} else {
		writeLog( "Dumped DB: " . $db );

		if( $OPTIMIZE ) {
			unset( $output );
			exec( "$MYSQL_PATH/mysqlcheck $db_auth --optimize $db 2>&1", $output, $res);
			if( $res > 0 ) {
				error( true, "OPTIMIZATION FAILED\n".implode( "\n", $output) );
			} else {
				writeLog( "Optimized DB: " . $db );
			}
		} // if
	} // if

	// compress db
	unset( $output );
	if( $os == 'unix' ) {
		exec( "$USE_NICE $COMPRESSOR $BACKUP_TEMP/$db.sql 2>&1" , $output, $res );
	} else {
		exec( "zip -mj $BACKUP_TEMP/$db.sql.zip $BACKUP_TEMP/$db.sql 2>&1" , $output, $res );
	}
	if( $res > 0 ) {
		error( true, "COMPRESSION FAILED\n".implode( "\n", $output) );
	} else {
		writeLog( "Compressed DB: " . $db );
	}

	if( $FLUSH ) {
		unset( $output );
		exec("$MYSQL_PATH/mysqladmin $db_auth flush-tables 2>&1", $output, $res );
		if( $res > 0 ) {
			error( true, "Flushing tables failed\n".implode( "\n", $output) );
		} else {
			writeLog( "Flushed Tables" );
		}
	} // if

} // while

mysql_free_result($db_result);
mysql_close($db_conn);


################################
# Archiving
################################

// TAR the files
writeLog( "Archiving files.. " );
chdir( $BACKUP_TEMP );
unset( $output );
if( $os	== 'unix' ) {
	exec("cd $BACKUP_TEMP ; $USE_NICE tar cf $BACKUP_DEST/$BACKUP_NAME * 2>&1", $output, $res);
} else {
	exec("zip -j -0 $BACKUP_DEST/$BACKUP_NAME * 2>&1", $output, $res);
}
if ( $res > 0 ) {
	error( true, "FAILED\n".implode( "\n", $output) );
} else {
	writeLog( "Backup complete!" );
}

// first error check, so we can add a message to the backup email in case of error
if ( $error ) {
	$msg	= "\n*** ERRORS DETECTED! ***";
	if( $ERROR_EMAIL ) {
		$msg	.= "\nCheck your email account $ERROR_EMAIL for more information!\n\n";
	} else {
		$msg	.= "\nCheck the error log {$err_path} for more information!\n\n";
	}

	writeLog( $msg );
}


################################
# post processing
################################

// do we email the backup file?
if ($EMAIL_BACKUP) {
	writeLog( "Emailing backup to " . $EMAIL_ADDR . " .. " );

	$headers = "From: " . $EMAIL_FROM . " <root@localhost>";
	// Generate a boundary string
	$rnd_str = md5(time());
	$mime_boundary = "==Multipart_Boundary_x{$rnd_str}x";

	// Add headers for file attachment
	$headers .= "\nMIME-Version: 1.0\n" .
		"Content-Type: multipart/mixed;\n" .
		" boundary=\"{$mime_boundary}\"";

	// Add a multipart boundary above the plain message
	$body = "This is a multi-part message in MIME format.\n\n" .
		"--{$mime_boundary}\n" .
		"Content-Type: text/plain; charset=\"iso-8859-1\"\n" .
		"Content-Transfer-Encoding: 7bit\n\n" .
		file_get_contents($log_path) . "\n\n";

	// make Base64 encoding for file data
	$data = chunk_split(base64_encode(file_get_contents($BACKUP_DEST.'/'.$BACKUP_NAME)));

	// Add file attachment to the message
	$body .= "--{$mime_boundary}\n" .
		"Content-Type: {$backup_mime};\n" .
		" name=\"{$BACKUP_NAME}\"\n" .
		"Content-Disposition: attachment;\n" .
		" filename=\"{$BACKUP_NAME}\"\n" .
		"Content-Transfer-Encoding: base64\n\n" .
		$data . "\n\n" .
		"--{$mime_boundary}--\n";

	$res = mail( $EMAIL_ADDR, $EMAIL_SUBJECT, $body, $headers );
	if ( !$res ) {
		error( true, 'FAILED to email mysql dumps.' );
	}
}

// do we ftp the file?
if ($useftp == true) {
	$file = $BACKUP_DEST.'/'.$BACKUP_NAME;
	$remote_file = $BACKUP_NAME;

	// set up basic connection
	$conn_id = ftp_connect($ftp_server);

	// login with username and password
	$login_result = ftp_login($conn_id, $ftp_user_name, $ftp_user_pass);

	// turn passive mode on?
	ftp_pasv($conn_id, $usepassive);

	// upload a file
	if (ftp_put($conn_id, $remote_file, $file, FTP_ASCII)) {
	 echo "successfully uploaded to ftp: $remote_file\n";
	} else {
	 echo "There was a problem while uploading $remote_file\n";
	}

	// close the connection
	ftp_close($conn_id);
}


// do we delete the backup file?
if ( $DEL_AFTER && $EMAIL_BACKUP ) {
	writeLog( "Deleting file.. " );

	if ( file_exists( $BACKUP_DEST.'/'.$BACKUP_NAME ) ) {
		$success = unlink( $BACKUP_DEST.'/'.$BACKUP_NAME );
		error( !$success, "FAILED\nUnable to delete backup file" );
	}
}

// see if there were any errors to email
if ( ($ERROR_EMAIL) && ($error) ) {
	writeLog( "\nThere were errors!" );
	writeLog( "Emailing error log to " . $ERROR_EMAIL . " .. " );

	$headers = "From: " . $EMAIL_FROM . " <root@localhost>";
	$headers .= "MIME-Version: 1.0\n";
	$headers .= "Content-Type: text/plain; charset=\"iso-8859-1\";\n";
	$body = "\n".file_get_contents($err_path)."\n";

	$res = mail( $ERROR_EMAIL, $ERROR_SUBJECT, $body, $headers );
	if( !$res ) {
		error( true, 'FAILED to email error log.' );
	}
}


################################
# cleanup / mr proper
################################

// close log files
fclose($f_log);
fclose($f_err);

// if error log is empty, delete it
if( !$error ) {
	unlink( $err_path );
}

// delete the log files if they have been emailed (and del_after is on)
if ( $DEL_AFTER && $EMAIL_BACKUP ) {
        if ( file_exists( $log_path ) ) {
                $success = unlink( $log_path );
                error( !$success, "FAILED\nUnable to delete log file: ".$log_path );
        }
        if ( file_exists( $err_path ) ) {
                $success = unlink( $err_path );
                error( !$success, "FAILED\nUnable to delete error log file: ".$err_path );
        }
}

// remove files in temp dir
if ($dir = @opendir($BACKUP_TEMP)) {
	while (($file = readdir($dir)) !== false) {
		if (!is_dir($file)) {
			unlink($BACKUP_TEMP.'/'.$file);
		}
	}
}
closedir($dir);

// remove temp dir
rmdir($BACKUP_TEMP);

?>
Stripping everything but letters and numbers from a string in PHP with preg_replace 10 Apr 2010 4:00 PM (15 years ago)
Useful for a number of things including username and anything else you don't want ANY special chars in, leaving only alphanumeric digits.
<?php
$string = 'us$$er\*&^nam@@e';
$string = cleanabc123($string);
function cleanabc123($data)
{
$data = preg\_replace("/\[^a-zA-Z0-9\\s\]/", "", $data);
return $data;
}
// This will be 'username' now
echo $string;
?>
And if you wanted it to also remove whitespace, you could change the function by removing the \s whitespace character.
$data = preg\_replace("/\[^a-zA-Z0-9\]/", "", $data);
Remove whitespace (spaces) from a string with PHP and preg_replace 3 Apr 2010 4:00 PM (15 years ago)
Seeing as ereg_replace and that whole family has been depreciated in the newer PHP releases it's surprising how many sites still show and use it.
This simple function strips out whitespace from a string. Could be useful in taking spaces out of usernames, id's, etc.
<?php
$string = 'us er na  me';
$string = nowhitespace($string);
function nowhitespace($data) {
return preg_replace('/\s/', '', $data);
}
// This will be 'username' now
echo $string;
?>
You could use this to make all whitespace only 1 space wide by changing the '' in the following line.
return preg_replace('/\s/', ' ', $data);Last example modified from the PHP manual.
Using PHP to strip a user IP address into subnets and filter out characters 2 Apr 2010 4:00 PM (15 years ago)
Found it very difficult to find a simple solution to this problem - you want to display the submittor's IP address on a webpage where it will be publicly available, but obfuscate some characters.
You want 255.255.255.255 to become 255.255.255.x or something, right?
Preg_replace() an IP
So, assuming we have the user's IP address, for this we could use the following server variable:
// Displays user IP address
$ip =  $_SERVER['REMOTE_ADDR'];
We can manipulate this with preg_replace.
// Displays user IP address with last subnet replaced by 'x'
$ip = preg_replace('~(\d+)\.(\d+)\.(\d+)\.(\d+)~', "$1.$2.$3.x", $ip);
So the code to get and change this IP would be:
// Sets user IP address
$ip =  $_SERVER['REMOTE_ADDR'];
// Sets user IP address with last subnet replaced by 'x'
$ip = preg_replace('~(\d+)\.(\d+)\.(\d+)\.(\d+)~', "$1.$2.$3.x", $ip);
// Displays user IP address as altered.
echo $ip;
Of course, if you're happy to just cut off the end then you can use the substr function to trim a number of characters off.
I'll revise this to validate and deal with proxies another time.
Integrating your existing site into phpBB3 10 Mar 2010 3:00 PM (15 years ago)
One way of making an existing site dynamic is to integrate it with a phpBB forum. This is actually very easy, and allows you to quickly pull data about your users; control page access by groups and more.
Page type
The page you're integrating phpBB with needs to be a php page! (pretty obvious really seeing as phpBB is a PHP forum).
Connect to phpBB to get variables, etc.
You will need to include a file containing the phpBB connection information (essentially plugs the page into the rest of phpBB). This file should contain the following:
<?php
define('IN_PHPBB', true);
$phpbb_root_path = (defined('PHPBB_ROOT_PATH')) ? PHPBB_ROOT_PATH : 'change_this_to_phpbb_dir';
$phpEx = substr(strrchr(__FILE__, '.'), 1);
include($phpbb_root_path . 'common.' . $phpEx);
// Start session management
$user->session_begin();
$auth->acl($user->data);
$user->setup();
?>
Save this file as phpbb.php, or put this code in some other file you will include in every page you want to integrate. All this code does is define where phpbb can be found, and include the common.php file from within phpbb. It also starts a user session, which we can use on our page.
Get our page to interact with phpBB
So now we go to the page we want to integrate with phpBB. In this case I'm going to use a blank file as an example but obviously you can use any file. This bit of code checks to see if the user is logged in or not and displays an appropriate message:
<?php include_once("phpbb.php"); ?>
<html>
<head>
<meta http-equiv="Content-Type" content="text/html; charset=utf-8" />
<title>phpBB conn test</title>
</head>
<body>
<?php
// PHPBB LOGIN AUTH
if ($user->data['user_id'] == ANONYMOUS) {
?>
Welcome, anomalous!
<?php
} else {
?>
Welcome back, <?php echo $user->data['username_clean']; ?> | You have <?php echo $user->data['user_unread_privmsg']; ?> new messages
<?php } ?>
</body>
</html>
This will display "Welcome, anomalous!" if you're not logged into phpBB or "Welcome back, username | You have 0 new messages" if you are logged in. Note the placement of the include_once ABOVE the
tag - this is required if you don't want any errors.This is a very simple example and doesn't tell our user how to log in or log out...which are pretty critical activities.
How about a login form?
The simple way to login is to push all logins through the phpBB system. This form does just that.
<form method="POST" action="forum/ucp.php?mode=login">
Username: <input type="text" name="username" size="20"><br />
Password: <input type="password" name="password" size="20"><br />
Remember Me?: <input type="checkbox" name="autologin"><br />
<input type="submit" value="Login" name="login">
<input type="hidden" name="redirect" value="">
</form>
This collect the login data and posts it to the phpBB ucp.php. We can make phpBB redirect the user back to any page by changing the value of the redirect input field.
<input type="hidden" name="redirect" value="../somefile.php">Once this form has been posted the user will be logged in. But how about logging out?
Logging out of phpBB
You could just navigate to the forum and click the link there, but hey - might as well do this in as few clicks as possible. So we need a link to log out...
<a href="somefile.php?cp=logout">Log Out</a>and in the same file we could put the following at the top of the document:
<?php
// check for logout request
$cp = $_GET['cp'];
// is it a logout? then kill the session!
if ($cp == "logout") {
$user->session_kill();
$user->session_begin();
echo "Successfully Logged Out.";
}
?>
So when cp is set to logout (when the user visits somefile.php?cp=logout) the session containing the userdata is destroyed and reset. 'Succssfully Logged Out' is also shown for the user's benefit.
Combining conditional, login & logout
As a summary, I've combined what we looked at above.
In phpbb.php:
<?php
define('IN_PHPBB', true);
$phpbb_root_path = (defined('PHPBB_ROOT_PATH')) ? PHPBB_ROOT_PATH :  'change_this_to_phpbb_dir';
$phpEx = substr(strrchr(__FILE__, '.'), 1);
include($phpbb_root_path . 'common.' . $phpEx);
// Start session management
$user->session_begin();
$auth->acl($user->data);
$user->setup();
?>
In somefile.php:
<?php include_once("phpbb.php");
// check for logout request
$cp = $_GET['cp'];
// is it a logout? then kill the session!
if ($cp == "logout") {
$user->session_kill();
$user->session_begin();
echo "Successfully Logged Out.";
}
?>
<html>
<head>
<meta http-equiv="Content-Type" content="text/html; charset=utf-8" />
<title>phpBB conn test</title>
</head>
<body>
<?php
// Page login notice
if ($user->data['user_id'] == ANONYMOUS)
{
?>
<center>Welcome! Please login below or click <a href="forum/ucp.php?mode=register">here</a> to register.<br />
<form method="POST" action="forum/ucp.php?mode=login">
Username: <input type="text" name="username" size="20"><br />
Password: <input type="password" name="password" size="20"><br />
Remember Me?: <input type="checkbox" name="autologin"><br />
<input type="submit" value="Login" name="login">
<input type="hidden" name="redirect" value="../somefile.php">
</form>
<?php
} else { ?>
Welcome back, <?php echo $user->data['username_clean']; ?> | You have <?php echo $user->data['user_unread_privmsg']; ?> new messages | <a href="somefile.php?cp=logout">Log Out</a>
<?php } ?>
</body>
</html>
This will give you basic integration with an existing phpBB forum, we'll look at further integration including private messenging in contact boxes soon.