Score the Advantage: Smart Tips for Buying WoW Gold 15 Apr 3:32 AM (2 days ago)
Introduction
We bring you clear and helpful advice that explains how to make the best use of your extra funds in World of Warcraft. WoW Gold is an important resource used in the game to purchase equipment, upgrades, and various items that improve your play. Many players find that having extra gold gives them the chance to speed up their progress and enjoy the game more. With these smart tips, you will learn to focus on your goals by understanding how extra gold can help you get better items, boost your game progress, and support your overall play style.
This article is written in a direct and accessible way so that everyone, from new players to those with more experience, can follow along easily. We aim to give you practical steps that you can use right away. The focus is on clear ideas that help you create a simple plan for buying extra gold without getting lost in unnecessary details. By following the advice in this guide, you can feel confident in your decision-making and make a smart purchase that benefits your gameplay. Enjoy this read as you prepare to score the advantage in your World of Warcraft adventures by using extra WoW Gold wisely.
Understanding WoW Gold
WoW Gold is the main form of currency in World of Warcraft and plays a key role in every player’s experience. In simple terms, it serves as the money used to buy much-needed upgrades, items, and gear that help you win battles and complete quests. Players often spend many hours collecting gold by taking part in various activities within the game. When you have extra gold, you can quickly purchase powerful equipment or useful items that give your character an edge in important moments. Extra WoW Gold is useful because it helps you invest in necessary upgrades without spending all your time on gathering resources.

This extra currency opens up more options to improve your character and allows you to experiment with different play styles. Many players appreciate that extra gold makes it easier to test out new tactics and try out various equipment setups without worrying about long delays in the game. With extra WoW Gold in hand, your opportunities for customization and upgrades multiply, and you gain access to important resources that enhance your overall experience. In short, understanding how WoW Gold works is an essential step to taking control of your game progress and making decisions that benefit your play. It gives you the power to move faster through the game and helps create exciting moments as you face new challenges.
Key Factors to Consider When Buying WoW Gold
Before you decide to purchase extra WoW Gold, it is helpful to think through some key factors that can guide you in making a smart decision. First, consider the exact amount of gold you need to reach your game goals. Knowing how much you require helps you plan better and avoid spending more than necessary. Next, take a look at your available budget and decide how much money you are comfortable spending on improving your in-game experience. The time you have available is also important; for instance, if you need the gold quickly for an upcoming event or battle, make sure that the delivery time fits your schedule.

To help organize these thoughts, you can create a simple table that lists the key points you need to check. For example, list the amount of gold you want, your budget range, the expected delivery time, and any other details that are important to you. This clear overview can guide you as you move forward with your decision. It is important to be clear about your goals and set a plan that matches them. Considering these factors carefully helps you understand what works best for your play style. As you review your needs, you can feel confident that your next steps will help improve your game. When you take your time to reflect on these points, you can make a purchase that truly supports your journey in World of Warcraft and gives you an advantage in every battle.
Smart Tips for Buying WoW Gold
When you decide to buy extra WoW Gold, there are a few simple tips that can help you make a smart choice. Using extra gold wisely starts with knowing what you need in the game. One tip is to plan ahead and decide the amount of gold that fits your current goals. This way, you avoid getting more than you require and wasting resources on upgrades you do not need at that moment.

Another tip is to keep a close watch on your spending habits so that you can align your investment with upcoming events and battles. Smart buying involves being aware of the benefits that extra gold brings, such as faster upgrades or quicker access to better gear. To give you a clear view, see the table below that lists some smart tips along with their benefits and examples:
| Tip | Benefit | Example |
|---|---|---|
| Plan Your Purchase Amount | Avoid overspending and match needs | Choose 50,000 gold for gear upgrades |
| Align With Game Goals | Ensure gold is used for needed upgrades | Save gold for an important battle event |
| Monitor Spending | Maintain control over your budget | Keep track of your gold usage |
In addition to this table, here is a list of basic actions you can take for a successful purchase process:
- Set clear game goals before buying extra gold.
- Decide on the exact amount you need based on those goals.
- Check your budget and plan when you will make the purchase.
- Write down these details in a simple note or spreadsheet.
Following these straightforward tips gives you an advantage in making smart decisions about buying WoW Gold, ensuring that every coin spent helps your progress in World of Warcraft.
Organizing Your Purchase Plan
Once you know the key factors and smart tips, the next step is to organize your purchase plan in a simple and clear manner. Begin by listing your needs and matching them with your game goals. Creating a plan helps keep your process smooth and ensures you do not miss any important details. A well-organized plan means you know exactly what you need and when to use your extra gold, making the overall process less stressful and more beneficial to your gameplay.

Below is a table that organizes the steps needed to build your purchase plan:
| Step | Description | Action Item |
|---|---|---|
| Define Game Goals | Decide what you need extra gold for | List gear upgrades, consumables, etc. |
| Set a Budget | Determine how much you are willing to spend | Note your spending limit |
| Choose Timing | Decide when the gold is most needed | Match purchase timing with game events |
| Record Details | Keep a simple record of your purchase choices | Save notes or a spreadsheet |
In addition, here is a step-by-step list to follow:
- Write down your main game goals and what items are needed.
- Compare your current resources with your desired upgrades.
- Set your budget by deciding the maximum amount you wish to spend.
- Choose a purchase time that fits with your gaming schedule.
- Finally, record every step so you can review your plan as the game progresses.
This organized approach helps you stay focused on your game progress and provides clear markers that show how extra gold is enhancing your gaming experience.
Conclusion
In wrapping up this guide on smart tips for buying WoW Gold, remember that being organized and clear about your goals is essential for a better in-game experience. Extra gold can provide a significant boost by letting you purchase key items and upgrades that match your personal game plan. By following the simple advice shared in this article and using the table and step-by-step list, you can make informed decisions that help you manage your resources effectively. With a clear plan in place, you can save time and keep your progress on track, ensuring that every purchase of extra gold adds real value to your play sessions in World of Warcraft.
To recap in a few clear points:
- Set clear, achievable game goals.
- Organize your purchase plan using a simple table and list.
- Keep track of your spending and match your spending with your game needs.
By sticking to these steps, you can feel confident in your choices and truly score the advantage in your battles. Enjoy the benefits that come with smartly bought extra WoW Gold and watch your gameplay improve with every upgrade.
The post Score the Advantage: Smart Tips for Buying WoW Gold appeared first on askapadwe.


From Azeroth to Draenor: The Evolution of Mount Collecting in WoW 13 Apr 1:53 PM (3 days ago)
In the ever-shifting realms of World of Warcraft, you’ve witnessed the juxtaposition of the primitive griffins of old Azeroth against the sleek, celestial dragons of modern expansions. As a seasoned adventurer, you’re well aware that your mounts are more than just a means to an end; they’re a reflection of your dedication and a badge of honor in a community that prizes rarity and style.
Mount collecting has undergone significant changes since its inception, evolving from a simple side activity to an engrossing pursuit that mirrors the complexity of WoW itself. But what exactly spurred this transformation, and how have these changes impacted your experience within the game? As you saddle up for this retrospective, you’ll uncover the pivotal moments that have shaped the mount collecting landscape, and perhaps, you’ll even discover the next prized addition to your collection.
Early Days of Mount Hunting
In the early days of mount collecting in WoW, you’d often find yourself grinding for hours on end, hoping for a rare drop from a dungeon boss or world event. This was a time when Blizzard Entertainment had only begun to explore the vast potential of these prestigious in-game companions. The thrill of obtaining a normal mount was significant, as it not only provided a speed advantage but also a status symbol within the capital cities of Azeroth.

Mounts were not just means of transportation; they were badges of honor for those in the Alliance and Horde who had the patience to pursue them. Back then, the Dark Portal was a distant dream, and the notion of flying mounts was as mystical as the lands of Outland itself. You’d circle zones for that one epic drop, or save up gold for what felt like an eternity, just to flaunt your new steed in Stormwind or Orgrimmar.
Rise of Achievement Rewards
As WoW evolved, so did the methods for acquiring mounts, with achievement rewards becoming a coveted source for collectors. You’ve braved the treacherous peaks of Blackrock Mountain and faced the Iron Horde’s might; your efforts haven’t gone unnoticed. Achievement mounts aren’t just a status symbol, they’re a testament to your dedication and skill.

For Draenor collectors, the introduction of achievements tied to mount collecting offered new, engaging ways to expand their stables. Imagine riding through Frostfire Ridge on a mount that’s not just a means of travel, but a trophy earned through overcoming epic challenges in Tanaan Jungle. The dread hatchling, a reward for such feats, isn’t merely a pet; it’s a sign of your mastery over the game’s hurdles.
Here’s a quick glance at some of the achievements that have rewarded diligent collectors with unique mounts:
| Achievement | Mount Reward |
|---|---|
| Glory of the Draenor Raider | Ironhoof Destroyer |
| Challenge Master: Silver | Challenger’s War Yeti |
| Ahead of the Curve | Dread Raven |
These rewards have fueled the passion for mount collecting, ensuring that every adventure and every battle could end with you adding another impressive beast to your collection.
Impact of Expansion Packs
Expansion packs have consistently reinvigorated your mount collection, introducing exotic creatures and legendary steeds with each new realm explored. As you’ve journeyed from the dark corners of Outland to the enigmatic lands of Shadowlands, each expansion has not only expanded the storyline but also the way you acquire and show off your mounts.
With the release of The Burning Crusade, you were first able to soar through the skies on flying mounts, a feature that became a game-changer. Wrath of the Lich King brought about achievements rewarding you with unique mounts, making your efforts in Northrend even more fulfilling. Cataclysm shattered the world and with it came a deluge of new mounts, reflecting the changed landscapes and narratives.

Mists of Pandaria offered you a peek into an oriental-inspired land with its cloud serpents, while Warlords of Draenor introduced you to the majestic creatures of a savage land. Legion empowered you with class-specific mounts, deeply tied to your character’s identity and storyline. And Battle for Azeroth took things a step further, with a myriad of mounts tied to the faction war, world quests, and island expeditions.
Each expansion has not only grown your collection but has also shaped the very culture of mount collecting in WoW.
Community and Trading Developments
While each expansion has broadened your horizons with new mounts to chase, the WoW community has played a pivotal role in shaping the trading and collecting culture. You’ve seen dedicated forums and Discord channels spring up, where you can share tips, arrange trades, or coordinate group efforts for those elusive mount drops. It’s not just about showing off your collection anymore; it’s about the camaraderie and the shared excitement that comes from helping each other achieve those hard-earned goals.
Auction houses across Azeroth have also evolved. You’re now witnessing a much more dynamic market, where the prices of rare mounts fluctuate based on supply and demand. You’ve got to keep your eyes peeled for good deals or risk missing out on a bargain for that sought-after mount.
Guilds and communities have become more structured around mount collecting too. They often host events or lotteries, offering you a chance to win mounts or gold to fund your collecting endeavors. The sense of belonging and collective achievement is something truly special.
Modern Strategies for Collectors
To stay ahead in the game, you’ll need to master a few key strategies that have emerged among top mount collectors in WoW. It’s not just about grinding for hours on end; it’s about being smart and efficient with your time.

Here’s what you should focus on:
- Optimize Your Routes: Streamline your farming circuits to minimize downtime. Use add-ons like “RareScanner” or “SilverDragon” to track rare spawns that drop mounts. Efficient pathing saves countless hours.
- Maximize Your Characters: Leverage multiple characters to farm daily and weekly lockouts. More characters mean more chances at those elusive drops. Don’t forget to gear them up for quicker clear times.
- Join a Community: Connect with other mount collectors. Join dedicated Discord servers, forums, or in-game communities. They often share tips, organize farming groups, and provide support.
Frequently Asked Questions
How Has the In-Game Economy Been Affected by the Demand for Rare Mounts, and Has It Led to Changes in Gold Farming Practices?
The demand for rare mounts has spiked in-game prices, pushing you to adapt your gold farming strategies to afford them—sometimes leading to more time in auction houses or hunting elusive drops.
What Psychological Factors Contribute to the Desire to Collect Mounts, and How Does Blizzard Capitalize on This in Their Design Choices?
You’re drawn to the allure of unique steeds, aren’t you? Blizzard taps into that, crafting irresistible digital companions that feed your collector’s pride and keep your adventures ever so enchanting.
Have There Been Any Notable Controversies or Community Backlash Regarding the Availability or Method of Acquiring Certain Mounts?
You’ve likely heard about the uproar over rare mounts, like when Blizzard introduced store exclusives, causing a rift with players who felt the grind for prestigious mounts was being undermined.
How Do Cross-Realm and Cross-Faction Dynamics Influence Mount Collecting, Especially With Exclusive Mounts Tied to Specific Server Events?
You’re navigating a broader world where cross-realm and cross-faction play blur lines, making exclusive mounts from server events more elusive and your collection a testament to your adaptability and in-game networking skills.
In What Ways Have Third-Party Tools or Websites Facilitated Mount Collecting, and Has Blizzard Taken Any Steps to Regulate or Incorporate Such External Assistance?
You’ve likely used third-party tools to track and snag rare mounts; Blizzard’s aware but generally lets them be, occasionally integrating similar features in-game to help with your collecting endeavors.
Conclusion
Now that you’ve galloped through the annals of mount collecting, remember, each steed you snag is a feather in your cap—a tale of triumph to regale fellow adventurers with. Keep your eyes on the prize, for in the world of Azeroth, the next wondrous beast might just be a quest away. May your stables brim with the rarest of creatures, as you etch your name in the grand tapestry of WoW’s illustrious mount hunters. Saddle up, the horizon awaits!
Home!
The post From Azeroth to Draenor: The Evolution of Mount Collecting in WoW appeared first on askapadwe.
How to Kill Shade of Eranikus in WoW Season of Discovery 9 Mar 5:18 PM (last month)
To conquer the Shade of Eranikus in WoW’s Season of Discovery, you’ll need to master your tank swaps to lessen damage from its deadly abilities. Prior to facing Eranikus, handle nightmare whelplings and scalebanes effectively. Execution is paramount: during Phase 1, concentrate on boss positioning and debuff management. In Phase 2, efficiently deal with the nightmare incursion adds.
Phase 3 requires adaptability to new spawns and mechanics. Equip gear level 50+ and stock up on potions for an advantage. DPS should balance output with mechanics, while healers focus on dispels. Coordination and quick responses to raid-wide fears are essential. Venturing further reveals deeper insights into mastering this encounter.
Key Takeaways
- Manage tank swaps efficiently to mitigate damage from Eranikus’s lethal abilities.
- Focus DPS on nightmare scalebanes during phase 2, using crowd control to manage adds.
- Utilize addons for real-time data to make tactical adjustments during the fight.
- Ensure healers prioritize dispelling the raid-wide fear mechanic and balance healing output.
- Equip gear level 50+ with attribute-enhancing buffs and resistance gear for survivability.
Boss Overview and Abilities
Shade of Eranikus, the dragonkin once Ysera’s consort, guards the Atal’Hakkar ruins with a formidable health pool of 1,452,360 and abilities that’ll test your raid’s mettle. Exploring the sunken temple to reach him, you’ll first encounter nightmare whelplings and scalebanes, honing your skills for what’s to come. Understanding Eranikus’ boss mechanics is pivotal, particularly the significance of tank swaps to mitigate damage from his lethal abilities.

You’ll need to brace yourself for the raid-wide fear, a mechanic that’ll scatter your team if not addressed promptly. Having a plan for dispelling this fear effect is essential, ensuring your team can quickly regroup and continue the assault. Besides fear, the nightmare scalebanes accompanying Eranikus can wreak havoc if left unchecked, necessitating focused damage and control to keep their numbers in check.
Key to your success will be mastering the art of dispelling. The corrosive magic and lethargic poison Eranikus employs will test your healers’ attentiveness and ability to cleanse debuffs efficiently. Keeping the raid healthy and debuff-free is vital, requiring precise coordination and quick reactions from your team. With these strategies in mind, you’re well-equipped to face the challenges that lie within the sunken temple.
Phase Mechanics Explained
Understanding each phase’s mechanics is essential for your team’s success against the Shade of Eranikus. This level raid is not just a test of your combat rotation prowess but also your tactical acumen, especially in maneuvering through the waking nightmare that is Nethergarde Keep.
Here’s a quick guide to help you understand what you’re up against:
| Phase | Key Mechanics |
|---|---|
| Phase 1 | Tanks manage boss positioning and swap to handle debuffs. Addons for SoD can help track these vital swaps. |
| Phase 2 | The nightmare incursion begins, requiring DPS to handle adds efficiently without compromising their combat rotation. |
| Phase 3 | Surviving the waking nightmare involves managing new spawns and mechanics, testing every role’s adaptability. |
Your tanks play a pivotal role throughout the encounter, especially in phase 1, where correct positioning can mitigate much of the incoming damage. Phase 2’s nightmare incursion tests your team’s ability to juggle between adds and the boss, making it essential to refine your combat rotation. Finally, phase 3 demands high adaptability, with new spawns introducing a fresh layer of complexity. This is where addons for SoD can be a game-changer, offering real-time data to tweak your approach on the fly.
Role-Specific Strategies
To effectively address the Shade of Eranikus, it’s crucial to explore the specific strategies tailored for each role within your raid team.
Tanks, you’re up first. Your main task is to oversee the boss’s positioning meticulously. Keep Eranikus facing away from the raid to minimize the impact of his breath attacks. You’ll also need to coordinate swaps efficiently to deal with the debuffs. Timing and communication are key.
Melee DPS, your agility will be tested. Save your cleave abilities for when adds are present, and make sure you’re using gap closers to dodge Eranikus’s more devastating area attacks. It’s all about maximizing your damage while staying alive.

Ranged DPS, you’ve got a crucial role in managing interrupts, especially during phase 2 when adds need to be kept under control. Spread out to minimize the damage from acid rain and be ready to switch targets quickly to prioritize threats.
Healers, your focus on dispelling cannot be overstated. The lethargic poison and corrosive magic can quickly wear down your raid if not removed promptly. Balance your healing output with keeping the raid free from these debilitating effects, and don’t forget to use your interrupts wisely on adds.
Preparation and Gear Recommendations
Having explored role-specific strategies, let’s now focus on how you’ll need to gear up and prepare for the battle against Shade of Eranikus. Your gear and preparation are pivotal in ensuring your success in this encounter. Here are three key points to remember:
- Gear Up: Make sure your gear level is at least 50+. You’re going to face heavy damage from Shade of Eranikus’ abilities, so having high-quality gear will greatly reduce the incoming damage and increase your survivability. Armor with resistance to Shadow damage can be a game-changer.
- Bring Buffs: Stock up on buffs that enhance your attributes. Whether it’s strength for melee or intellect for casters, every little bit helps. Don’t forget potions and food that can give you that extra edge in battle.
- Crowd Control Abilities: Having crowd control abilities ready is essential, especially for handling adds in Phase 2. Assign roles within your team for interrupts and dispels to manage the boss’s dangerous debuffs efficiently.
Execution and Adaptation Tips
Once you’re fully equipped and roles are assigned, it’s vital to execute your strategy while being prepared to adapt on the fly to Shade of Eranikus’ unpredictable mechanics. This dragonkin’s arsenal, from fear-inducing roars to corrosive magic, requires a flexible approach. Begin by ensuring your tanks are skilled at swapping to manage the debuffs efficiently. It’s not just about sticking to the plan; it’s about reacting promptly when things don’t go as anticipated.

For melee and ranged DPS, it’s paramount to balance your output with the mechanics. Don’t focus solely on your damage meters; keep an eye out for adds and prioritize interrupts, especially during the second phase. Positioning can make or break your attempt, so spread out to minimize the impact of acid rain and poison clouds.
Healers, your role extends beyond keeping health bars full. Swift dispels and managing your cooldowns for when the raid-wide fear or poison hits can save your team from a wipe. Remember, each phase introduces new challenges, and staying ahead means being prepared to adapt. Whether it’s switching targets or repositioning, flexibility and communication are key to overcoming the Shade of Eranikus.
Frequently Asked Questions
What Specific Lore Details About Shade of Eranikus Help Explain Its Abilities and Behavior in the Fight?**
You’re curious about Eranikus’ lore, aren’t you? Well, being Ysera’s former consort and tasked with guarding Atal’Hakkar, his dragonkin nature and duties explain his fearsome abilities, like shadow damage and protective spells.
While the Primary Sections Cover the Boss’s Overview, Abilities, and Mechanics, Players Often Seek Deeper Lore Connections to Understand Why Eranikus Employs Certain Abilities or Tactics During the Encounter. This Could Involve Digging Into Eranikus’s History With Ysera and His Corruption in the Emerald Dream to Explain His Shadow and Poison-Based Attacks.
You’re curious about why Eranikus uses those shadow and poison attacks, right? It’s all tied to his past with Ysera and corruption in the Emerald Dream, explaining his abilities beyond just the boss fight mechanics.
Can Shade of Eranikus Be Soloed by Certain Classes or at a Specific Player Level, and if So, How?**
You’re wondering if you can solo the Shade of Eranikus. Yes, with the right gear and strategy, certain classes at higher levels might manage it by exploiting weaknesses, focusing on interrupts, and using defensive cooldowns wisely.
Players Often Look for Challenges or Ways to Test Their Skills by Soloing Old Content. Information on Whether Shade of Eranikus Can Be Soloed, Including Any Specific Class Abilities, Strategies, or Minimum Gear Requirements That Might Make This Feasible, Wouldn’t Typically Be Covered in General Strategy Guides.
You’re looking to solo Shade of Eranikus, eying a personal challenge. You’ll need solid gear, at least level 50+, and a class with strong self-heals or damage mitigation. Study his mechanics, especially the phase changes.
Are There Any Unique Items, Achievements, or Titles Associated With Defeating Shade of Eranikus?**
You might stumble upon exclusive loot while battling Shade of Eranikus. Keep an eye out for unique items, achievements, or titles that mark your victory. It’s these rewards that make your efforts worthwhile.
Conclusion
With your heart racing like a drumbeat in battle, you’re now equipped with the strategies and knowledge to face the Shade of Eranikus. Like a skilled blacksmith forging a masterpiece, your preparation and adaptability are the keys to victory. Remember, every role is pivotal, and your gear, coupled with sharp instincts, will guide you through the darkness. Together, with unwavering focus and precise execution, you and your team are destined to emerge triumphant from the shadows of Atal’Hakkar.
The post How to Kill Shade of Eranikus in WoW Season of Discovery appeared first on askapadwe.
Best Rewards From Quests at End Game. Wow Season of Discovery Guide 6 Jan 4:32 AM (3 months ago)
As you approach the end game of World of Warcraft’s Season of Discovery, the anticipation for rewards is like the calm before a storm—quiet, yet promising immense power. You’ve invested hours honing your skills, forming alliances, and strategizing every move. Now, it’s time to reap the fruits of your labor with gear that’ll not only enhance your prowess but also cement your legacy in the annals of Azeroth. As a seasoned player, you’re well aware that not all rewards are created equal; hence, this guide meticulously highlights the crème de la crème, the gear that truly stands out. Whether it’s the resilience of a battle-hardened tank or the delicate balance of a healer’s touch you seek, we’ve pinpointed the items that are tailored for your class’s needs. Stick with us as we unveil the path to equipping yourself with the mightiest artifacts and ensure that your end game is not just an ending, but a grand new beginning.
Top Gear Rewards Overview
Securing top-tier gear through end game quests in WoW’s Season of Discovery is essential for maximizing your character’s potential. Once you’ve hit max level, you’re ready to dive into endgame content where the real challenges—and rewards—await. You’ll find quests that yield gear with extra functionality crucial for tackling tougher raids or stepping into competitive PvP events.

For example, participating in the Warsong Gulch PvP event could net you some powerful items that’ll give you an edge over the opposition. It’s not just about having the highest stats, but also about equipping yourself with gear that complements your level abilities and play style. Items like the White Drakeskin Cap or the Gelkis Marauder Chain might be just what you need to outmaneuver your foes.
Don’t forget to stock up on consumables such as shadow protection potions, which can be game-changers in both PvP and PvE scenarios. These potions could mean the difference between victory and defeat when facing enemies that deal heavy shadow damage.
Class-Specific Quest Items
Every class in WoW’s Season of Discovery has unique quest items tailored to enhance their specific abilities and combat style. When you’re pushing through the final quests at maximum level, it’s essential to scoop up these class-specific rewards—they’re not just shiny, they’re game-changers.
Let’s say you’re a rogue or a druid; you might find yourself sneaking through the ominous halls of Blackfathom Deeps. Here, you’ll be on the hunt for items that bolster your stealth and agility. Imagine slipping through shadows, dagger at the ready, with gear picked just for your hit-and-run tactics.

For the priests out there, shadow protection potions could be a lifeline in your endgame endeavors. Quests that test your resolve against the darkest magics will reward you with these potent concoctions, vital for those moments when the light seems farthest away.
Warriors, paladins, and other front-liners, you’re not forgotten. Your quests will lead to armor and weapons that let you stand tall amidst the fray. These rewards aren’t just for show—they’ll give you the edge you need to keep swinging when the battle is at its fiercest.
Noteworthy Mail Armor Pieces
As a mail armor enthusiast, you’ll often find that certain pieces stand out for their exceptional stats and unique benefits. The end game quests in World of Warcraft’s Season of Discovery offer some of the most coveted mail pieces that you won’t want to miss. These items not only boost your stats but can also give you that extra edge in both PvE and PvP scenarios.

Here are some of the top mail armor pieces you should be on the lookout for:
- Gelkis Marauder Chain: This chest piece is a must-have for its solid stats and the substantial increase it provides to your stamina, making it perfect for those tough encounters.
- Wrangling Spaulders: Ideal for hunters and shamans alike, these shoulders offer a great balance of agility and intellect, enhancing both your offensive and support capabilities.
- Arcmetal Shoulders: If you’re looking for something to bolster your defensive stats, these shoulders are the way to go, offering a significant boost to armor and stamina.
Unique Accessory and Tool Rewards
In WoW’s Season of Discovery, you’ll find a variety of unique accessories and tools that can significantly enhance your gameplay experience. For example, completing the “Rescue OOX-22/FE!” quest rewards you with an item that’s not just a trophy for your achievement but also a quirky companion on your travels.
If you’re after something that’ll give you an edge in battle, “Set Them Ablaze!” offers an accessory that can ignite your enemies with a single command. Meanwhile, “Hints of a New Plague?” provides an accessory with stats that will bolster your defenses against the darkest sorceries.

Don’t overlook the “White Drakeskin Cap” from the quest “Foul Magics.” It’s a headpiece that combines style with substance, offering impressive stat boosts for your adventures. And for those who prefer the clang of metal, the “Gelkis Marauder Chain” from “Khan Hratha” and “Arcmetal Shoulders” from “Kodo Roundup” are mail quest rewards that provide both protection and prowess.
Lastly, for your class-specific needs, there are tailored accessories that cater to your unique skills and abilities, ensuring you’re outfitted with the best tools to face any challenge Azeroth throws at you.
Memorable End Game Questlines
While equipping yourself with unique accessories and tools from quests enhances your journey, it’s the epic narratives within WoW’s end game questlines that truly forge lasting memories. These quests don’t just give you a sense of completion; they immerse you in stories that resonate long after the final boss has fallen.
As you delve into the Season of Discovery, here are a few questlines you can’t afford to miss:
- The Battle for Azeroth: Stand on the frontlines of a world at war, where your actions will shape the fate of nations and the very fabric of reality.
- The Black Empire Campaign: Unravel the dark mysteries of an ancient evil, facing off against insidious old gods and their twisted minions.
- The Shadowlands Covenant Campaigns: Pledge your allegiance to one of the Shadowlands’ powerful covenants, embarking on a unique journey that will test your resolve and determination.
Each of these epic quests offers not only a riveting adventure but also rewards that are both powerful and visually striking, ensuring that your character stands out in both prowess and style. Don’t just play the game—live the legend.
Frequently Asked Questions
How Can Players Optimize Their Questing Route to Ensure They Obtain the Best Rewards Efficiently at Level 40 During the Season of Discovery?
To optimize your questing route, prioritize quests with valuable gear upgrades or rare items, and plan your path to minimize travel time. Keep an eye on rewards to ensure they align with your goals.
Are There Any Hidden or Less-Known Quests That Offer Exceptional Rewards Which Might Be Overlooked by Players at End Game?
You might miss some hidden gems in your questing. Look for off-path or chain quests, which can surprise you with exceptional rewards not commonly known or sought after by others at endgame.
Can Players Repeat Any of These Quests for Rewards, and if So, Which Ones and How Often?
You might think you can’t redo quests for rewards, but that’s not always true. Some, like “Kodo Roundup,” can be repeated, though typically, most can’t. Check each quest’s details for repeat availability.
What Are the Implications of Choosing One Quest Reward Over Another, in Terms of Future Quest Lines or Faction Reputation?
Choosing one quest reward over another can affect your gameplay by locking out certain future quests or impacting faction reputations, possibly hindering or helping your progress with different in-game groups.
How Does the Scaling of Quest Rewards Work for Players Who Are Above Level 40, and Are There Benefits to Waiting Before Completing Certain Quests?
As you venture beyond level 40, rewards scale up, sweetening the pot. There’s merit in patience; some quests yield juicier fruits if you wait, ensuring your gear remains top-notch for future challenges.
Conclusion
You’ve battled through the sprawling chaos of Azeroth, your exploits now the stuff of legend. Clad in the Gelkis Marauder Chain, your resilience shines, while the White Drakeskin Cap whispers of your stealthy precision. With the Foul Magics in your grasp, you wield raw power, a stark contrast to the subtle might of a rogue. These treasures, your hard-earned badges of honor, set you apart in the Season of Discovery, as you stand, a true paragon among mere mortals.
The post Best Rewards From Quests at End Game. Wow Season of Discovery Guide appeared first on askapadwe.
How to Buy WoW Gold and Maximize Your In-Game Experience 27 Sep 2024 1:14 AM (6 months ago)
World of Warcraft is a vast game with a complex economy, epic dungeons, and a rich variety of content to explore. Whether you’re gearing up for raids, PvP battles, or leveling your professions, having enough gold can make all the difference in your WoW experience. While grinding for gold can be time-consuming, buying gold can be a fast, convenient way to get the resources you need. In this article, we’ll explore how to buy WoW gold safely and smartly, and how to use it to elevate your in-game experience.
1. Buy from Reputable Sources
When purchasing WoW gold, the first rule is to buy from reputable sellers. With so many websites offering gold at competitive prices, it’s important to ensure that you’re buying from a trusted source. Research reviews, check for established platforms, and make sure the site has secure payment methods like PayPal or credit cards. This way, you’ll avoid scams and reduce the risk of account bans.
Look for gold sellers who provide quick, reliable delivery, transparent pricing, and customer support. A reputable gold-selling platform will ensure your gold is delivered quickly, allowing you to get back into the game as soon as possible.
2. Time-Saving: Focus on What You Enjoy
WoW is a game with endless activities, from raiding to PvP, crafting to exploring. However, farming for gold can often take hours away from the content you love. Buying WoW gold saves you the grind and lets you focus on the more exciting aspects of the game.
Need that extra bit of gold to upgrade your gear for an upcoming raid? Or perhaps you’re eyeing a rare mount on the Auction House? Purchasing gold lets you skip the tedious daily tasks and instead jump straight into the heart of the action, enhancing your overall gaming experience.
3. Maximize Your Gold Use for Gear and Upgrades
One of the most common uses for WoW gold is upgrading your character’s gear. Whether you’re preparing for a Mythic raid or competitive PvP, having the best possible gear can drastically improve your performance. With a solid amount of gold in hand, you can:
- Buy BoE (Bind on Equip) gear from the Auction House.
- Purchase consumables, such as potions and flasks, that boost your stats during tough encounters.
- Craft powerful items through professions by purchasing rare materials or crafting recipes.
Buying gold ensures you always have the resources to maintain top-tier gear, which is crucial for staying competitive and progressing through new content.
4. Invest in Professions for Steady Income
Professions in WoW offer some of the best long-term gold-making strategies, and purchasing WoW gold can give you a jumpstart. With extra gold, you can level up profitable professions like Alchemy, Blacksmithing, or Enchanting by buying rare materials or recipes directly from the Auction House. Once your profession is maxed out, you’ll be able to craft high-demand items that can generate steady income.
Using gold to invest in your profession early on allows you to earn it back over time. Crafting rare, high-value items or consumables will make you a reliable supplier in your server’s economy, providing a passive stream of gold to keep you flush with cash.
5. Snag Rare Mounts and Vanity Items
One of the most exciting aspects of WoW is collecting mounts, pets, and cosmetic items that showcase your achievements. Some of the rarest mounts or pets can cost significant amounts of gold, either through vendors or the Auction House.
By buying gold, you can quickly gather the funds to purchase rare mounts like the Reins of the Mighty Caravan Brutosaur (if available) or other vanity items that would otherwise take months to acquire. This allows you to stand out in-game and enjoy the prestige that comes with owning unique, eye-catching items.
6. Optimize for Endgame Content
Gold becomes even more important as you progress into the endgame. When competing in Mythic+ dungeons, raids, or high-stakes PvP, consumables, repairs, and enchants are constant expenses. Having a stash of gold ensures you can afford the necessary resources to remain competitive.
Additionally, joining a top-tier raiding or PvP guild often requires a significant gold investment in order to stay supplied with potions, food, and repairs. With enough gold, you can easily keep up with your guildmates and focus on maximizing your performance without worrying about running out of resources mid-raid.
7. Use Gold to Get Ahead in New Expansions
When a new WoW expansion drops, the race to hit max level and get geared up begins. Having gold ready means you can buy the best items and materials for crafting, level up professions quickly, and purchase gear upgrades as soon as they become available. This advantage lets you stay ahead of the competition, whether you’re aiming to raid sooner or push high PvP rankings.
Being well-stocked with gold early in an expansion helps you keep pace with the game’s progression, allowing you to dive into new content as it’s released without the grind of gold farming holding you back.
8. Blizzard’s WoW Token: A Safe Gold Purchase Option
If you’re concerned about account security, consider Blizzard’s WoW Token system. You can purchase WoW Tokens for real money and sell them in-game for gold, providing a completely safe and Blizzard-approved method to acquire gold. While the WoW Token typically costs more than buying gold from third-party sellers, it guarantees that your account won’t be at risk of suspension or bans.
For players looking for a 100% secure option, the WoW Token provides peace of mind while still giving you access to the in-game gold you need.
9. Balance Gold Purchases with Smart Spending
Buying gold is a convenient way to get ahead, but it’s important to spend it wisely. Prioritize purchases that have long-term value, such as BoE gear, high-quality enchants, or rare mounts that appreciate in value over time. Avoid blowing your entire gold stash on cosmetic items or vanity purchases unless you’ve budgeted for them.
Learning how to manage your in-game wealth, whether you buy wow gold or farm it, ensures you always have enough to cover essential costs like repairs, consumables, and upgrades.
Final Thoughts: Elevate Your WoW Experience with Gold
Buying WoW gold can be a game-changer for players looking to save time, boost their character, and experience more of what the game has to offer. By purchasing gold from reputable sources and using it strategically, you can unlock access to top-tier gear, mounts, and resources, elevating your in-game experience and allowing you to focus on the parts of WoW you enjoy most.
From competitive raiding to high-stakes PvP, having enough gold ensures you’re always prepared for whatever Azeroth throws your way. Just remember to follow best practices for safe purchases, and always use your gold to maximize your adventure in World of Warcraft.
The post How to Buy WoW Gold and Maximize Your In-Game Experience appeared first on askapadwe.
Building Your Garrison: A Warlords of Draenor Retrospective 25 Aug 2024 2:55 AM (7 months ago)
As you fondly remember the days of Warlords of Draenor, you’ll recall that setting up your garrison was less about building a mere base and more about crafting a personal stronghold in the midst of a savage land. You navigated this cornerstone of gameplay with a mix of strategic planning and personal flair, creating a hub that not only reflected your style but also served as a critical foothold in a tumultuous era.
While customizing your fortress and managing your followers, you were thrust into the heart of what it meant to be a commander against the Iron Horde. Now, let’s revisit the intricacies of this system, from the initial decision of where to plant your banner to the continuous evolution of your garrison. Along the way, we’ll explore how these mechanics have rippled through time to influence current gameplay, and you might discover a few strategies you wish you’d known when you first stepped through the Dark Portal.
Garrison Fundamentals Revisited
As you dive back into the world of Warlords of Draenor, it’s essential to grasp the core mechanics of your Garrison that serve as your personal stronghold in this untamed land. Remember, your Garrison isn’t just a hub for your adventures—it’s a reflection of your power and progress as you reach max level.
When you first stake your claim in Frostfire Ridge or Shadowmoon Valley, depending on your faction, you’re laying the foundation for what becomes a vital part of your daily routine. Your Garrison will evolve, unlocking new structures and benefits that cater to both hardcore and casual players alike. It’s a feature that grew in importance since the release of Warlords, transforming from a novel concept into an integral part of gameplay.

You’ll find that managing your Garrison effectively means more than just sending followers on missions. It’s about optimizing your resources, and that includes tapping into the mining nodes scattered throughout your base. These nodes are a goldmine for crafting materials, ensuring that you don’t have to venture far for the essentials. Keep an eye on these resources—they’re crucial for keeping your stronghold, and your adventuring capabilities, at peak efficiency.
Customizing Your Stronghold
Tailoring your Garrison to your playstyle, through the strategic placement of buildings and decorations, enhances both its functionality and aesthetic appeal.
If you’re a player focused on maximizing artifact power, you might prioritize constructing the Mage Tower for its lucrative missions. For those of you in a raid team, the War Mill or Dwarven Bunker becomes essential, providing you with bonus rolls for raid loot each week. It’s all about making your fortress work for you.

Suppose you’re running a tank spec and find yourself constantly queuing for heroic dungeons. In that case, the Barracks is your go-to, granting additional bodyguards to assist in your adventures. Every building you choose is a piece of the larger puzzle that’s your Garrison’s efficiency.
The Follower System Explained
Building on the customization of your Garrison, the Follower system offers a dynamic way to enhance your stronghold’s capabilities and your gameplay experience. Imagine each Follower like a gust of wind, propelling your Garrison’s potential and your strategic prowess to new heights. They’re not just static NPCs; they’re integral cogs in the machinery of your base, each with unique abilities, traits, and a penchant for adventure.
You’ll recruit these Followers throughout your journey in Draenor, and they’ll accompany you in various ways. They’re not just for show; they’re vital for sending on missions that can yield rewards like gear, resources, or even access to the raid finder for tackling high-level content. Think of them as your personal task force, ready to dive into the fray while you manage the broader battle plans.

Managing your Followers is like playing chess. You’ll need to match their skills with the right missions, ensuring success and reaping the rewards. It’s a system that rewards foresight and strategy, turning your Garrison into a hub of activity that mirrors the thrill of the battlefield, even when you’re not on the front lines.
Defending Against the Iron Horde
Fending off the relentless Iron Horde assaults becomes your paramount duty as you fortify your Garrison’s defenses and rally your Followers for battle. The savage onslaught of this formidable enemy is ceaseless, and your leadership is crucial in keeping your stronghold intact. You’ll need to be strategic, employing your Followers with the right skills to repel attackers and shore up vulnerable points.
As you delve deeper into the fray, you’ll unlock Garrison Invasions, a dynamic defense scenario where your command skills are put to the test. You’ve got to react swiftly, deploying your troops to counter the Iron Horde’s tactics. Whether it’s shoring up gates, manning the walls, or leading a sortie, you’re in the thick of it, making split-second decisions that could turn the tide of battle.
Your preparations pay off not just in survival but in rewards. Successfully defending your Garrison nets you resources and the chance to earn unique gear and titles. Every victory bolsters your Followers’ experience and your own reputation as a leader capable of withstanding the Iron Horde’s wrath. Remember, your Garrison is more than a base; it’s a statement of defiance against a relentless enemy, and you’re the architect of its resilience.
Resource Management Strategies
In Warlords of Draenor, managing your resources effectively is key to maintaining your Garrison and equipping your army for the ongoing conflict. You need to be strategic about how you collect and spend Garrison Resources, as they’re the lifeblood of your stronghold’s growth and the prosperity of your forces.
Firstly, prioritize buildings that generate resources. Lumber Mill and Trading Post should be at the top of your list. They’ll provide a steady income of resources essential for construction and recruitment. Don’t forget to send followers on missions that yield Garrison Resources as rewards. These tasks can supplement your income significantly over time.

You’ll also want to keep an eye on Work Orders. They convert raw materials into usable gear and resources, making sure you’re never short on what you need. As you plan out your daily and weekly objectives, factor in time to collect resources from these Work Orders.
Lastly, don’t squander resources on unnecessary upgrades or buildings that don’t align with your strategic goals. Every expenditure should have a clear purpose, whether it’s to strengthen your defenses, expand your army, or enhance your ability to gather more resources. Stay focused and your Garrison will thrive.
Conclusion
You’ve delved into the heart of Draenor, customizing your stronghold and mastering the art of resource management. With your followers by your side, you’ve stood resilient against the Iron Horde.
Interestingly, over 10 million garrisons were built, showcasing the feature’s popularity among players. This statistic underlines the massive engagement in personalizing these war-time sanctuaries.
As you reflect on your journey, remember that your garrison is more than a base—it’s a testament to your strategic prowess in Azeroth.
Buy wow keystone hero carry here!
The post Building Your Garrison: A Warlords of Draenor Retrospective appeared first on askapadwe.
Dungeon-Specific Keystone Hero Tips 27 Jun 2024 4:49 PM (9 months ago)
When tackling Keystone dungeons, adapting to each dungeon’s unique mechanics is essential for your success. For example, in De Other Side, dealing with totems swiftly can make or break your run, while Spires of Ascension demands precise pathing and boss management. Theater of Pain requires solid group coordination and well-timed interrupts, and in Plaguefall, using Plagueborers and controlling Fungalmancers are vital strategies. Each dungeon has its own set of challenges, and mastering them can greatly improve your performance. Are you ready to explore the specific tactics for each of these dungeons to elevate your game?
Key Takeaways
- Swiftly destroy totems in De Other Side to prevent enemy buffs or debuffs.
- Optimize pathing and manage boss fights efficiently in Spires of Ascension.
- Coordinate group efforts and understand boss mechanics in Theater of Pain.
- Use Plagueborers for effective crowd control and manage Fungalmancers in Plaguefall.
- Implement skip strategies and conserve resources in Mists of Tirna Scithe.
De Other Side
Exploring De Other Side can be a breeze with the right strategies and a solid plan. Start by understanding how totems work in this dungeon. Totems spawn throughout the area and can have a substantial impact on your run. They either buff enemies or debuff your group, so prioritize destroying them quickly. Assign specific roles to team members for totem duty to make sure they don’t become overwhelming.
Mana management is another critical aspect. Healers, in particular, need to keep an eye on their mana levels, especially during lengthy trash pulls and boss fights. Use your mana regeneration abilities wisely and take advantage of any downtime to replenish. Consider bringing consumables like mana potions or food to stay topped off.
Throughout De Other Side, you’ll encounter various challenges that test your group’s coordination and resource management. Efficient mana management and quick totem destruction are key. By maintaining focus and practicing these strategies, you’ll navigate this dungeon more smoothly. Remember, communication with your team is essential to adapt to the dynamic environment. Stick to your plan, manage your resources, and De Other Side will be much more manageable.
Spires of Ascension
In Spires of Ascension, you’ll want to optimize your pathing efficiency to save valuable time. Pay close attention to handling boss mechanics, as they can be tricky and wipe your group if not managed properly. Dealing with trash packs efficiently is also vital, so make sure to use crowd control abilities and interrupts effectively.
Optimizing Pathing Efficiency
Nailing down the perfect route in Spires of Ascension can drastically reduce your completion time and make those keystones much more manageable. One key aspect to focus on is mob positioning. Guarantee that you pull enemies into ideal locations where you can maximize your area-of-effect (AoE) damage. This not only speeds up the fight but also reduces the risk of accidental pulls. Plan your pull timing meticulously to avoid overlapping dangerous abilities from different mobs. A well-timed pull can prevent chaos and keep your group on track.
Next, consider using the table below to visualize key points for optimizing your pathing efficiency:
| Key Area | Mob Positioning Tips | Pull Timing Tips |
|---|---|---|
| First Platform | Pull mobs to the side, away from patrols | Time pulls between patrols’ paths |
| Second Platform | Gather mobs under the bird statues for extra DPS | Wait for mobs to group before engaging |
| Third Platform | Position mobs near the stairs for quick movement | Sync pulls with cooldowns for efficiency |
| Final Stretch | Pull groups into open areas for better visibility | Use CC (crowd control) to manage large pulls |
Handling Boss Mechanics
Mastering boss mechanics in Spires of Ascension will greatly enhance your team’s success and efficiency. First, focus on debuff management. Many bosses in this dungeon apply harmful debuffs that need immediate attention. For instance, Ventunax’s Dark Stride debuff requires quick dispels to prevent significant damage. Assign roles within your team to make sure debuffs are promptly managed.
Second, prioritize positioning awareness. Bosses like Oryphrion use abilities that target specific areas of the battlefield. Staying spread out minimizes the risk of multiple players getting hit by the same attack. During the fight with Oryphrion, his Charged Stomp and Purifying Blast require you to move quickly to avoid taking unnecessary damage. Mark positions on the ground to aid with spatial awareness.
Additionally, understanding movement patterns is essential. Kin-Tara’s Charged Spear targets a single player before exploding in a straight line. The targeted player must position themselves to direct the spear away from the group, reducing potential damage.
Lastly, communicate constantly. Clear communication ensures everyone is aware of incoming mechanics and can react accordingly. Overall, maintaining debuff management and positioning awareness is key to handling Spires of Ascension’s challenging boss mechanics effectively.
Dealing With Trash Packs
Dealing with trash packs in Spires of Ascension requires strategic pulls and effective crowd control to prevent overwhelming your team. Start by identifying key mobs that need to be controlled or interrupted. Prioritize interrupting Forsworn Goliath’s Rebellious Fist, which deals significant damage if not stopped. Use crowd control abilities like stuns, silences, and snares on mobs that can’t be interrupted directly.
Coordinate your pulls carefully, ensuring your tank isn’t grabbing too many enemies at once. Focus on one group at a time, using target markers to designate interrupt priority targets. For instance, Forsworn Squad-Leader’s Inspiring Presence should be interrupted to prevent it from buffing nearby enemies. Assigning specific players to handle these interrupts can help maintain order and reduce chaos.
Remember to leverage your group’s unique crowd control abilities. Rogues can use Sap, Mages can Polymorph, and Druids can Hibernate. Utilize these to neutralize dangerous mobs before engaging. Finally, keep an eye on patrol paths to avoid accidental pulls. Patience and communication are key; rushing will likely lead to wipes. By prioritizing crowd control and coordinating interrupts effectively, you’ll navigate trash packs with greater ease.
Theater of Pain
When tackling the Theater of Pain dungeon, you’ll find that understanding the unique mechanics of each boss is essential for success. One key aspect is group synergy. Your team needs to work together seamlessly, especially during high-damage phases. Each player’s role must be clear, and communication should be constant. Make sure your healer is well-positioned to cover the entire group, as some bosses have abilities that target random players. Proper healer positioning can make the difference between a wipe and a successful kill.
For the first boss, An Affront of Challengers, it’s important to manage interrupts and crowd control effectively. The bosses’ abilities are dangerous and can quickly overwhelm the group if not handled correctly. Moving to Xav the Unfallen, coordinating movement to avoid his massive cleaves and ensuring everyone hits the banners during his duel phase is crucial.
During Gorechop, focus on avoiding hooks and managing space within the confined area. Decimator and Mordretha, the final bosses, require tight execution of mechanics like avoiding ground effects and managing adds. By aligning your group’s strengths and maintaining the best positioning, you’ll conquer Theater of Pain with greater ease.
Plaguefall
Traversing Plaguefall demands vigilance, as its toxic environment and tricky mechanics can quickly overwhelm an unprepared group. To start, utilize Plagueborer usage effectively. Plagueborers are your allies when dealing with large packs of enemies. Make sure to kite mobs into the path of these explosive worms. When they die, they release a powerful explosion that deals substantial damage to nearby foes. This tactic can greatly speed up your trash pulls and conserve your group’s resources.
Next, keep an eye out for Fungalmancer buffs. Fungalmancers cast Wonder Grow, which can dramatically increase the power of any mob it buffs. Interrupt or stun these casts whenever possible to prevent your group from facing supercharged enemies. If your group can manage it, you can also control the Fungalmancer and use Wonder Grow to your advantage by buffing your own party members or friendly NPCs, turning the tide in your favor.
Always remember to dodge toxic puddles and avoid standing in green slime to minimize damage taken. Properly managing these key elements will ensure a smoother and more efficient run through Plaguefall.
Mists of Tirna Scithe
After mastering the hazardous challenges of Plaguefall, you’ll find the enchanted domains of Mists of Tirna Scithe present their own unique tests and rewards. This dungeon’s whimsical aesthetic hides a labyrinth that can trip you up if you’re not prepared. The Mists Maze requires keen attention to detail and an understanding of its patterns. Each room in the maze has clues; watch for matching symbols or creatures to guide your path. If you get lost, you’ll waste precious time, so communication with your team is essential.
A Skip Strategy can save you both time and resources. Knowing which packs of enemies to avoid or bypass is important. Certain mobs can be skipped entirely if you’re careful with your movement and crowd control abilities. For instance, using abilities like Invisibility or Rogue’s Shroud of Concealment can help you sneak past tough mobs. Also, the first boss, Ingra Maloch, should be prioritized due to his ability to bolster other enemies if left unchecked.
Halls of Atonement
The Halls of Atonement require a strategic approach, as this dungeon is filled with powerful mobs and mechanics that can easily overwhelm an unprepared group. To navigate it successfully, you’ll need to pay close attention to your positioning and interrupts, especially during packs with Depraved Darkblades and Depraved Obliterators.
Using the Prideful buff effectively can make a big difference, especially before challenging pulls or bosses. Plan your routes to make sure you gain this buff at critical moments. Additionally, if you have a Venthyr in your group, you can take advantage of the unique ability to control Loyal Stoneborns, turning them into powerful allies against mobs or bosses.
Here’s a quick reference table to help you plan:
| Key Points | Tips |
|---|---|
| Prideful Buff | Utilize it before tough mobs or bosses. |
| Venthyr Advantage | Manage Loyal Stoneborns to assist in fights. |
| Depraved Darkblades | Interrupt Wicked Bolt to reduce damage. |
| Depraved Obliterators | Interrupt Curse of Obliteration. |
Necrotic Wake
In Necrotic Wake, you need to manage your cooldowns efficiently to handle the burst damage from trash packs and bosses. Make sure to plot an optimized path to save time and reduce unnecessary pulls. Pay attention to the use of environmental weapons, as they can greatly ease difficult encounters.
Efficient Cooldown Management
Properly timing your cooldowns in Necrotic Wake can be the difference between a smooth run and a wipe. To master cooldown rotation, you need to understand the timing windows of each boss fight. For example, against Blightbone, it’s essential to save defensive cooldowns for when Fetid Gas is cast and offensive cooldowns for when the boss is vulnerable. Consistent use of cooldowns during these windows maximizes your group’s survival and damage output.
For trash pulls, coordinate with your team to guarantee cooldowns aren’t wasted. Use major defensive abilities when large packs or dangerous mobs are engaged. Communicate effectively so that cooldowns are staggered, ensuring constant coverage. This prevents situations where multiple cooldowns overlap unnecessarily, leading to periods where none are available.
When facing Amarth, keep an eye out for when he summons adds. This is the perfect time to use AoE (Area of Effect) cooldowns to quickly clear the field. For Surgeon Stitchflesh, time your interrupts and cooldowns to coincide with his Stitchneedle cast, reducing overall damage taken.
Efficient cooldown management requires practice and communication. By paying attention to each encounter’s specific demands and timing windows, you’ll guarantee smooth, successful runs through Necrotic Wake.
Optimized Pathing Strategies
Mastering optimized pathing strategies in Necrotic Wake guarantees you minimize unnecessary combat and maximize efficiency. Start by focusing on route planning before you even enter the dungeon. Know where each enemy is located and plot a course that limits pull size while still meeting the mob count requirement. Use the in-game map to highlight key areas and mark specific points where you can safely skip enemies.
Vital Map awareness is essential. As you progress through Necrotic Wake, keep an eye on your surroundings to avoid accidental pulls. Familiarize yourself with the layout of the dungeon, including potential shortcuts and alternate routes. This helps you adapt on the fly if a pull goes wrong or if you need to change your strategy.
Effective route planning also involves knowing where and when to use specific abilities or items. For example, utilizing invisibility potions or shroud abilities can help you bypass tough groups of enemies. Additionally, coordinate with your team to ensure that everyone is on the same page regarding your planned path.
Sanguine Depths
Traversing Sanguine Depths requires sharp awareness of enemy mechanics and efficient group coordination. Key elements, such as Lantern Management and Gargoyle Positioning, play a significant role in your success. Lanterns, scattered throughout the dungeon, need to be activated at the right time for best buffs. Make sure your group is ready to engage a pack of enemies before activating a lantern. This will maximize the damage boost and healing received.
Gargoyle Positioning is equally important. These statues become hostile when approached, so plan your pulls to avoid unnecessary aggro. Position your tank to pull enemies away from gargoyles, reducing the risk of accidental activation.
Below is a table summarizing key tips for Sanguine Depths:
| Key Element | Description | Tip |
|---|---|---|
| Lantern Management | Activating lanterns for buffs | Coordinate activation with enemy packs |
| Gargoyle Positioning | Avoiding accidental activation of gargoyle mobs | Pull enemies away from gargoyles to avoid aggro |
| Pathing Strategy | Efficient movement through the dungeon | Plan routes to minimize backtracking and delays |
Tazavesh: So’leah’s Gambit
Moving from the shadowy halls of Sanguine Depths to the bustling markets of Tazavesh: So’leah’s Gambit, you’ll need to adapt your strategy to handle the unique challenges this mega-dungeon presents. This dungeon is teeming with intricate encounters and requires precise execution. One key aspect is mastering the skip mechanics. These mechanics allow you to bypass certain packs of mobs, saving time and reducing the risk of unnecessary fights. Knowing which mobs to skip and how to execute these skips effectively can make or break your run.
Itemization strategies are essential here. Prioritize gear that enhances your survivability and utility, as the dungeon’s mechanics often demand quick reactions and adaptability. Make sure your group is well-balanced with crowd control and interrupts, as many enemies have abilities that can severely hinder your progress.
Communication with your team is vital. Discuss your route beforehand, including any planned skips, and make sure everyone understands their role. This pre-planning will help avoid confusion and time-wasting mistakes. Keep an eye on your cooldowns and manage them strategically to maximize efficiency during boss fights and high-damage phases. By focusing on these strategies, you’ll increase your chances of a successful run through Tazavesh: So’leah’s Gambit.
Frequently Asked Questions
What Add-Ons Are Recommended for Tracking Keystone Dungeon Mechanics?
For tracking keystone dungeon mechanics, you’ll want add-ons that enhance UI customization and provide mechanic timers. Deadly Boss Mods (DBM) and BigWigs are essential as they offer detailed mechanic timers. WeakAuras is highly customizable, allowing you to tailor alerts and visual cues. ElvUI can also help with UI customization, making important information more accessible. These tools guarantee you’re always aware of upcoming mechanics and timers.
How Can I Optimize My Character’s Gear for Keystone Dungeons?
To optimize your character’s gear for keystone dungeons, focus on your stat priorities. Check guides for your class and spec to determine the best stats—like haste, crit, or mastery. Use gear upgrades to boost these stats, ensuring you have the right balance. Don’t forget to enchant your gear and use appropriate gems. Regularly check for new gear drops or crafted items that align with your stat priorities.
What Are the Best Consumables to Use in Mythic+ Dungeons?
For Mythic+ dungeons, focus on potion selection and food buffs. Use potions like Potion of Phantom Fire for single-target damage or Potion of Spectral Intellect for casters. Food buffs can provide essential stat boosts; opt for Tenebrous Crown Roast Aspic for versatility or Spinefin Souffle and Fries for critical strike. Always carry Health Potions or Healthstones for emergencies. These consumables maximize your performance, ensuring you’re well-prepared for any challenge.
How Do I Effectively Communicate With My Team During a Keystone Run?
Effective communication during a keystone run involves using voice commands for real-time coordination. Make sure everyone’s on the same page by discussing strategies before starting. Use emergency signals, like specific phrases or sounds, to indicate urgent actions, such as needing heals or interrupts. Keep your messages clear and concise, focusing on critical information. Regularly check in with your team to adjust tactics and guarantee smooth progress through the dungeon.
What Are the Most Common Mistakes to Avoid in Keystone Dungeons?
In keystone dungeons, you should avoid positioning errors and poor interrupt management. Positioning errors occur when you stand in the wrong place, causing unnecessary damage or missing important mechanics. Poor interrupt management happens when you or your team fail to interrupt vital enemy spells, leading to wipes. Always be aware of your surroundings and coordinate interrupts with your team to guarantee a smooth run.
Conclusion
Mastering Keystone dungeons demands adapting to each dungeon’s unique mechanics and challenges. In De Other Side, swiftly destroy totems to prevent buffs and debuffs. Optimize pathing in Spires of Ascension, and understand boss mechanics in Theater of Pain. Utilize Plagueborers and control Fungalmancers in Plaguefall. Each dungeon requires specific strategies for success. By knowing your roles, managing key elements, and coordinating with your team, you’ll tackle these dungeons efficiently and achieve your goals.
Buy wow keystone hero carry here!
The post Dungeon-Specific Keystone Hero Tips appeared first on askapadwe.
Auction House Tycoon: Advanced Trading Tactics For Savvy Goldmakers 27 Jan 2024 4:19 AM (last year)
Are you ready to become an auction house tycoon? Goldmaking is a lucrative business, and with the right strategies, you can make big profits.
In this article, you’ll learn advanced trading tactics that will help you maximize your gold making potential. From understanding the basics of the auction house to mastering the art of auction sniping, you’ll gain valuable insight into how to become a savvy goldmaker.
You’ll also discover how to optimize your bidding strategies and find the best deals on the market in order to craft profitable trades.
So get ready for success – let’s dive in!
Key Takeaways
- Understanding auction house basics is crucial for success in goldmaking
- Researching market trends, analyzing historical data, and evaluating components are necessary for crafting profitable deals
- Familiarity with bid types and optimizing bidding strategies can give an edge in auctions
- Staying up-to-date with market trends, monitoring prices, and identifying patterns are important for successful goldmaking in auction houses.
Understanding the Basics of the Auction House
Ready to become a master goldmaker? You’ve gotta start by understanding the basics of the Auction House!
There are certain rules you must abide by when participating in auctions. That includes knowing when an auction will begin and end, as well as understanding what types of bids can be made and how much money you can spend. Knowing these details is crucial for success in the Auction House.
It’s also important to understand the timing of auctions. The time it takes for an auction to finish varies depending on what kind of item is being sold and how many people are interested in bidding on it. If there is a lot of competition for a particular item, then it might take longer than usual for the auction to complete. Understanding this timing will help you determine when to place your bid so that you have a better chance at winning an auction.
Furthermore, familiarizing yourself with different types of bids can give you an edge over other bidders. This includes understanding things like proxy bidding, which allows bidders to set maximum amounts they’re willing to pay without having to continuously monitor their bid status during the course of an auction. With this knowledge, you’ll be able to craft profitable deals while still keeping within your budget constraints.
Now that you know the basics, let’s move onto crafting profitable deals!
Crafting Profitable Deals

Making a killing in the auction world takes some serious skill! Crafting profitable deals is one way to maximize your profits and become an auction house tycoon.
When creating deals, it’s important to consider how you can customize gear for increased value. Knowing the optimal pricing evaluation for each item is essential; if you price too high, you won’t get any buyers, and if you price too low, you’ll miss out on potential profits.
Researching market trends will help determine the best prices for different items. It’s also important to understand what types of gear are in demand and how to package them together into more attractive bundles. If you know exactly what types of items people are looking for, then you can use that knowledge to create customized packages that appeal to a variety of customers.
Once you have crafted your deal, it’s time to evaluate its potential success. Analyzing historical data from past auctions and comparing it against current market trends can give valuable insight into whether or not your deal will be successful. Evaluating each component of the deal – such as pricing strategy, promotional tactics, and customer service – will also provide useful information that can help refine your offer before finalizing it.
With careful evaluation and proper execution, crafting profitable deals is just the start of becoming an auction house tycoon! Moving forward with finding the best deals will take this journey even further.
Finding the Best Deals
Discovering the best deals is essential for increasing your profits in the auction world! As a savvy goldmaker, you need to be able to spot bargains, track auctions and identify potential profits.
Here are some of the primary ways you can find profitable deals:
- Regularly scan listings – By regularly scanning listings and staying up-to-date with market trends, you’ll be able to quickly recognize when an item has been listed for less than it’s worth.
- Utilize online tools – Utilizing online tools such as price tracking websites and auction house addons can help you keep tabs on what items are being sold at what prices. This will give you insight into when a bargain may be available.
- Track competitors’ offers – Keeping track of your competitors’ offers will help ensure that you don’t miss out on any great deals. You should also pay attention to other bidders in order to anticipate their strategies and beat them to a good deal.
- Research different markets – Studying different markets and understanding which areas have higher demand or lower supply can help inform your decision about where to purchase items from and how much money could be made off of them.
By following these steps, savvy goldmakers can increase their profits by finding the best deals in the auction house! Staying up-to-date with market trends is necessary for successful trading, so make sure to stay informed on upcoming changes in order to maximize your profits!
Staying Up-to-Date with Market Trends
Staying on top of the ever-shifting tides of the market is like riding a rollercoaster: one wrong move, and you’re out of luck! As a savvy goldmaker, it’s your job to stay abreast of market trends in order to better understand when and where to make trades.
While monitoring prices can give you an idea of what’s happening in the auction house, reading forums can provide insights that may not be obvious by simply looking at numbers. By actively tracking both current prices and forum discussions, you’ll be able to anticipate changes in the marketplace and adjust accordingly.
No matter how much research you do or how carefully you monitor prices, ultimately it comes down to having an understanding of what makes markets move. It’s important to identify patterns in order to determine whether items are likely to rise or fall in popularity over time.
For example, if a new patch introduces something that requires goldmakers’ attention, then prices for those materials could potentially skyrocket overnight due to increased demand from players eager for upgrades. This kind of knowledge can help inform decisions about when best to buy and sell certain items on the auction house.
With these strategies under your belt, you’ll be well-equipped for mastering the art of auction sniping; being able to quickly swoop in and grab deals while other traders are still trying figure out what’s going on. Having a finger on the pulse of the market sets successful goldmakers apart from their counterparts – so use these tactics wisely and watch your profits soar!
Mastering the Art of Auction Sniping
Becoming an auction sniping master requires more than just luck – it takes a keen eye and the ability to spot opportunities before anyone else can. The key is understanding price fluctuation in different markets, and how your auction timing affects your chances of success.
It’s important to be able to identify when prices are going up or down, so you know when to bid on items for the best possible deal. You also need to be aware of how much time you have left until the auction closes; if you wait too long, someone else may swoop in and win the item before you can bid on it.
Having a good strategy is essential for successful sniping. You should always keep an eye on auctions with items that appeal to you, so that when there are great deals available, you can take advantage of them quickly.
Setting specific criteria for what constitutes a great deal will help reduce the amount of research time needed to find those deals. Additionally, having an idea of your maximum spending limit beforehand will help prevent overspending in the heat of bidding wars.
Being flexible and willing to adjust your strategies as necessary is critical if you want to succeed at auction sniping. Price patterns tend to change frequently, so being prepared for anything helps ensure that even if something unexpected happens, you’re still ready and able to act accordingly.
With these tips in mind and proper execution, you’ll be well-equipped for optimizing your bidding strategies!
Optimizing Your Bidding Strategies
Maximizing your auction sniping success requires a winning combination of strategy and timing. Knowing the bidding psychology of buyers is key, as it allows you to anticipate their next move. Similarly, understanding pricing tactics can help you make informed decisions when setting your bid amount. Once you have mastered these two concepts, it’s time to craft an effective bidding strategy that will help you win more auctions and get better deals on items.
| Concept | Overview | Benefits |
|---|---|---|
| Bidding Psychology | Understanding what drives buyers to bid on certain items and how they think about bids in relation to other bidders. | Anticipate buyer moves with greater accuracy Gain insight into competitive strategies used by other bidders Set strategic counter bids for maximum value |
| Pricing Tactics | Learning the tricks of the trade when it comes to setting prices and determining a fair market value for something. | Get better deals on items Earn more gold from sales Make sound investments |
Crafting an effective bidding strategy starts with recognizing common patterns in auction house trading. For instance, if there are multiple players bidding against each other for a particular item or commodity, then try raising your bid incrementally while monitoring the competition’s reactions— this could give you an edge over them in terms of price and speed of acquisition. Additionally, look out for auctions that are likely to attract less competitive bidding and focus on those instead as they may offer higher chances of success at lower costs. Finally, don’t be afraid to walk away from an auction if it becomes too expensive; sometimes this is the best way forward when facing stiff competition or high-value items where even minor price increases can quickly add up. By following these tips—and leveraging your knowledge of both bidder psychology and pricing tactics—you can increase your chances of becoming a successful goldmaker in no time!
Frequently Asked Questions
What is the best way to get started with Auction House Tycoon?
You’re interested in getting started with the auction house? Get your feet wet by analyzing markets and utilizing strategies. Research, learn, and try different tactics to maximize profits. Be detail-oriented and insightful – you’ll be a savvy goldmaker in no time!
What tools are available to help with making successful bids?
You have the tools to make successful bids with tracking trends and auction timing. Analyze data to identify patterns, observe market movements, and time your bid for maximum returns. With these strategies, you can become a savvy bidder.
How do I protect myself from being scammed?
Protect yourself from fraud by researching buyers and avoiding suspicious offers. Metaphorically, it’s like walking through a minefield: be aware of your surroundings and take caution with each step.
What is the most profitable item to buy and sell on the Auction House?
Analyzing market trends and price analysis is key to determining the most profitable item to buy and sell. Do your research and you’ll reap the rewards!
What strategies are there to increase the chances of winning an auction?
Investigate whether timing tactics and bid pricing can increase your chances of winning an auction. Analyze the competition, study prices, and be prepared to bid quickly for the best chance of success.
Conclusion
You’ve come a long way in your journey to becoming an auction house tycoon. You understand the basics of the Auction House, know how to craft profitable deals, and stay up-to-date with market trends. With successful strategies such as auction sniping and optimized bidding, you can make sure that your gold making is lucrative.
Interestingly, 85% of all gold made on the Auction House comes from flipping deals – buying low and selling high. So, make sure to keep an eye out for those golden opportunities!
With hard work and dedication, you can become one of the top goldmakers on the Auction House in no time.
Join us on a journey of discovery through our blog’s fascinating content.
The post Auction House Tycoon: Advanced Trading Tactics For Savvy Goldmakers appeared first on askapadwe.
Conquer The Raid: A Guide To Endgame Challenges In Wow 14 Nov 2023 12:59 PM (last year)
As a World of Warcraft player, I know that endgame content can be an intimidating challenge. Raids are the ultimate test of skill and strategy in WoW. That’s why I’m writing this guide – to help players conquer the raid!
This guide will show you how to prepare for endgame challenges, including understanding mechanics, finding the right gear and strategies, assembling a team, practicing and preparing, executing your plan, and celebrating your victory. Whether you’re a seasoned raider or just starting out on your raiding journey, I’m confident that my advice will help you succeed.
So join me as we delve into the world of endgame WoW content – it’s time to Conquer the Raid!
Key Takeaways
- Conquering endgame challenges in WoW requires focus, coordination, communication, planning, and patience.
- Gathering the right gear and assembling a successful team, choosing the right classes and roles, and establishing an effective chain of command and communication system are crucial.
- Finding and refining the right strategies, practicing and preparing with the team, and executing the plan with everyone aware of their responsibilities are essential.
- Celebrating victory with friends and fellow players, and enjoying rewards such as epic gear and bragging rights, is a common way to bond and feel accomplished after conquering a difficult raid.
Understand the Mechanics
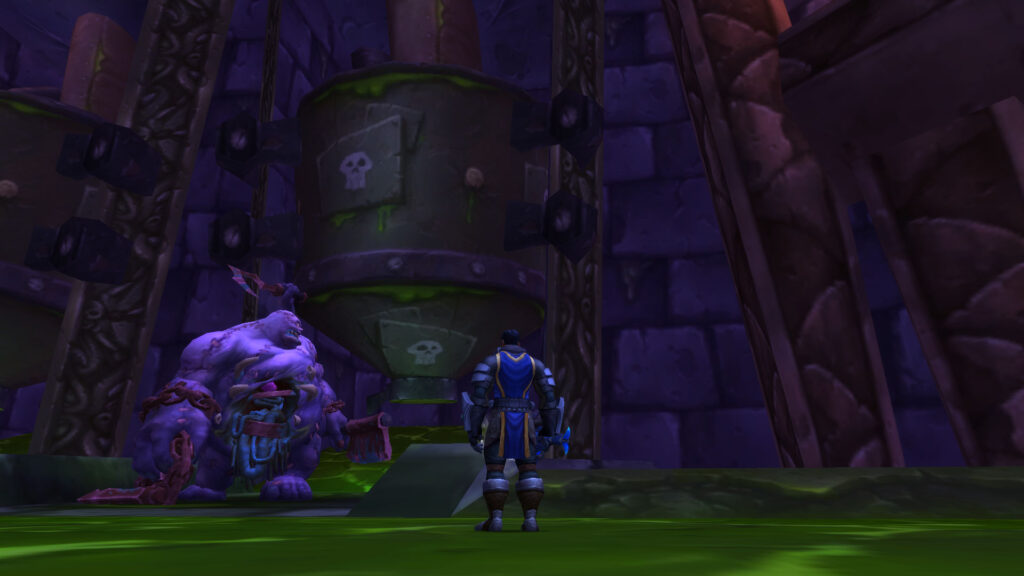
Don’t let the raid’s mechanics overwhelm you – with a little knowledge and practice, conquering it is totally within reach!
To do this, it’s important to understand all of the different mechanics of the raid. This includes tracking cooldowns, understanding how bosses react to certain players’ abilities and actions, and learning to avoid detrimental mechanics.
It can be difficult at first, but taking time to learn these things will pay off in the long run when it comes time to conquer the raid. And once you’ve mastered these basics, you’re ready to move onto gathering the right gear for success!
Gather the Right Gear
Gearing up for a raid can be an intimidating task, but with the right set of armor and weapons, you’ll be ready to tackle any challenge!
First, it’s important to determine your needs. What type of damage are you likely to encounter? Will you need extra protection from magical or physical attacks?
Once you have determined what type of gear is necessary for your success, you can assess which pieces will best serve your purpose. Next, consider the stats on each piece of equipment. Focus on items that will give you the most benefit in terms of damage output or survivability.
If possible, prioritize items with higher item levels so that they provide more powerful bonuses when equipped. Also, remember to check out any enchantments or gems that may increase the potency of an item’s stats even further.
Once you have collected all the necessary gear for your raid run, it’s time to assemble a team and get ready for battle!
Assemble a Team
Assembling a successful team for endgame challenges in World of Warcraft is an essential step to success. Choosing the right classes and roles for your team is critical, as well as having effective communication and coordination between members.
It’s important to take the time to find the right group of players who can work together effectively if you want to conquer a raid.
Choose the Right Classes and Roles
Choosing the right classes and roles for your raid team is essential to conquering endgame challenges in WoW – don’t underestimate its importance!
The key to picking the best classes is striking a balance between damage dealers, healers, and tanks. When selecting your group, make sure to have a mix of strong players from each type.
For example, you’ll need at least one tank who can take on enemy bosses without taking too much damage. You’ll also want several healers with fast reaction times that can revive fallen teammates quickly and efficiently. Finally, you’ll need plenty of damage dealers to help take down challenging enemies as fast as possible.
Your class selection should give you enough firepower while still allowing you to manage any unexpected surprises during the raid.
Communication and coordination are just as important when it comes to choosing the right classes for your team. Make sure everyone understands their individual role within the group so they know how to act in any given situation – this will ensure maximum success during your endgame challenge!
Working together seamlessly will not only guarantee victory but provide an enjoyable experience for all involved. As long as you pay attention to both class balance and communication, there’s no reason why you can’t conquer any raid!
Communicate and Coordinate
Communicating and coordinating with your team is essential for success in any challenge – it’s like a superpower that can make or break you! So, make sure everyone’s on the same page and knows their role within the group for maximum effect. To achieve this goal, here are some important communication strategies:
- Establish an effective chain of command.
- Make sure everyone understands their roles and responsibilities.
- Develop a system for communication during the raid.
- Ensure all players understand group dynamics.
Using these strategies will help your team stay organized and focused during challenging endgame activities in World of Warcraft. It’ll also increase the odds of success and provide a more enjoyable experience for everyone involved. With proper communication, you’ll be able to find the right strategies to conquer your raid goals!
Find the Right Strategies
Finding the right strategies to conquer the raid can make all the difference in your success. Developing strategies and analyzing tactics are essential steps for any group looking to clear an endgame challenge.
Mastering the art of strategy planning requires a thorough understanding of fight mechanics, boss abilities, and party composition. This knowledge can help you identify weaknesses that may exist in your team’s approach and come up with methods that will minimize mistakes. You should also consider how each class or role works together as a unit, so that everyone is fully aware of their duties within specific encounters.
It’s also important to analyze combat data from previous attempts to identify potential problem areas and adjust accordingly. This information can be used to refine your strategies over time until you have developed an effective plan for victory.
Taking this analytical approach will ensure that everyone in your group is on the same page when it comes time to face off against powerful foes. With enough practice and preparation, you’ll be ready to take on any endgame challenge WoW has to offer without fear of failure.
Practice and Prepare

I’m here to talk about practice and preparation for conquering the raid.
The first step is to learn the bosses’ moves – know their abilities, how they use them, and when they will use them.
It’s also important to rehearse the fight with your team, so everyone knows what to expect and can plan accordingly.
Practicing with your fellow raiders will help you develop a strategy that works best for you.
Learn the Bosses’ Moves
Knowing the boss’s moves is essential for conquering the raid – it’s like playing a game of chess, where every move you make could be your last. Mastering cooldowns and analyzing logs are key components in understanding how to deal with each boss.
To do this, players must:
- Learn boss abilities:
- Read up on the fight and watch YouTube videos or streams to get an idea of what each boss can do.
- Pay attention to specific mechanics that require special strategies or reactions from you and your team.
- Monitor cooldowns:
- Track enemy movements as well as your own, noting when they use certain abilities so you can prepare for them accordingly.
- Watch out for any buffs or debuffs that may affect your strategy and plan accordingly.
By learning the bosses’ moves and mastering their cooldowns, players have a much greater chance of success in endgame challenges such as raids. With this knowledge under their belt, they can then start to rehearse the fight until they become experts in taking down even the toughest opponents!
Rehearse the Fight
Once you understand the bosses’ moves and cooldowns, get ready to rehearse the fight – it’s time to show them who’s boss!
To do this successfully, review the tactics you plan to use during battle and analyze each fight as it progresses. This will give you a better understanding of how to handle each situation should something go wrong. Reviewing your own strategy is important too – take notes on what you did well and where improvements can be made.
By doing this, you’ll be able to execute your plan more effectively when it comes time for battle. With that in mind, let’s move on to executing the plan – it’s time to make these bosses bow down before us!
Execute the Plan
Successfully executing the plan is key to conquering a raid in World of Warcraft. Planning ahead and listening carefully are essential aspects of this process, as it’s important to know exactly what needs to be done and who will be doing it.
As you take on the most difficult endgame challenges, make sure everyone in your party is aware of their responsibilities and that they understand how their individual roles fit into the overall strategy. Pay attention to any changes or updates that may arise during battle – these can mean the difference between success and failure!
Executing a successful raid requires focus, coordination, communication, planning, and patience. Taking all this into account will put you well on your way towards victory; with enough practice, you’ll soon have conquered even the toughest raids.
Now it’s time to celebrate your accomplishment – there’s no better reward for all the hard work than celebrating with friends!
Celebrate Your Victory!
Now that the raid is complete, it’s time to celebrate! After all of the hard work and dedication you’ve put in, you deserve a reward for your efforts.
Nothing can quite compare to the feeling of successfully conquering a difficult raid and being rewarded with some well-deserved loot. Whether it’s epic gear or bragging rights among your peers, there are many rewarding achievements that come from defeating a tough endgame challenge in World of Warcraft.
One of the most common ways players like to celebrate their victory is by having celebratory feasts either within their guilds or amongst friends. This includes sharing stories about the fight and passing around loot for everyone to enjoy.
It’s also a great way to socialize with other players who share similar interests as yourself, all while enjoying some good food and drinks in-game.
Celebrating victories together not only allows players to bond but also gives them something positive to look forward to after completing difficult tasks such as raids.
Frequently Asked Questions
What is the best class for completing the raid?
It really depends on the situation. Class synergy and item acquisition are both important factors when deciding which class is best for completing a raid. All classes have their own unique strengths and weaknesses, so it’s important to assess your team composition and gear levels before making a decision.
What is the most efficient way to acquire the necessary gear?
Immerse yourself in the vibrant world of Azeroth to gear up for the raid. Group composition and item farming are key techniques for efficient gearing. With an optimal setup, you can quickly acquire powerful items and be ready to conquer the raid!
Is it possible to complete the raid solo?
Yes, soloing is possible. However, it requires careful planning and a deep understanding of both solo strategies and team dynamics. It’s possible to complete the raid alone but challenging; success will depend on your skill and preparation.
How long does it typically take to complete a raid?
I select my gear carefully, strategizing for the raid ahead. Time varies depending on the complexity of the challenge and my preparedness; typically a successful run takes around two hours.
Are there any rewards for successfully completing a raid?
Yes, completing a raid brings great rewards! Group composition, gear optimization and role selection are key factors for success. The more challenging the raid, the better the rewards – from items to mounts and even achievements. It’s worth it!
Conclusion
Finally, I’ve conquered the raid.
After months of preparation and practice, my team and I executed our plan perfectly.
The sense of accomplishment that comes with such victories is hard to describe; it’s like standing atop a mountain after an arduous climb, looking out at the vast landscape below.
It’s a reminder that anything is possible if you’re willing to put in the effort and dedication needed to reach your goals.
With this success under my belt, I’m sure there’ll be many more challenges ahead – but now I know how to conquer them all!
Join us on a journey of discovery through our blog’s fascinating content.
The post Conquer The Raid: A Guide To Endgame Challenges In Wow appeared first on askapadwe.
Raiding Legends: Conquering The Most Challenging Raids In World Of Warcraft 8 Oct 2023 11:12 AM (last year)
In the vast, treacherous landscapes of Azeroth, there’s a unique thrill that only World of Warcraft raiders know. It’s like standing before a towering behemoth, knowing you’ve got to outsmart and overpower it with your team.
Raiding isn’t just about brute force; it’s chess on a grand scale, requiring tactical acumen, synergy and unyielding perseverance. But fear not! This guide will equip you with all you need to conquer even the most formidable raids in WoW.
From dissecting iconic raids and their strategies to learning valuable tips from seasoned players, we’ll delve into the nitty-gritty of mastering this epic game mode.
Whether you’re prepping for future challenges or seeking to polish your existing skills, our insights will lead you towards becoming a true raiding legend.
So buckle up as we embark on an in-depth exploration of World of Warcraft’s most exhilarating – and demanding – frontier: the artistry of raiding.
Key Takeaways
- World of Warcraft raiding is a complex and strategic game mode that requires teamwork and perseverance.
- Communication and leadership dynamics are crucial in raiding, as each raid requires a tailored strategy.
- Understanding boss mechanics and class abilities, as well as optimizing gear and cooldown management, are important for successful raid performance.
- Loot distribution plays a vital role in motivating team members and rewards players with unique gear and achievements.
Understanding the Basics of WoW Raids
Before you can conquer those legendary WoW raids, you’ll need to get a firm grasp on the basics and we’re here to guide you through that exciting journey.
First off, understand that raiding isn’t just about bashing bosses – it’s a complex dance of strategy and teamwork. Raiding rewards are lucrative, offering unique gear pieces and achievements for your character if successful.
Familiarize yourself with raiding terminology – ‘adds’ refer to additional enemies, ‘aggro’ means attracting enemy attention, while ‘kite’ is leading an enemy away from the group. Master these terms as they are integral in coordinating effective strategies with your team.
Now that we’ve laid down the foundation let’s delve into the art of formulating strategies for successful raiding.
Strategies for Successful Raiding
Venturing into the daunting world of WoW raids, it’s crucial to know that each encounter demands a unique strategy. It’s not just about having high-end gear and weapons; tailoring your tactics to suit each raid is what separates an average raider from a legend in the making.
Yet, remember, no strategy flourishes without effective communication – coordinating attacks, discussing roles and responsibilities or calling out potential threats – every bit of info passed on can make or break your raiding success.
Tailoring Strategies to Each Raid
Navigating each raid is like piecing together a complex puzzle, you’ve got to tailor your strategies specifically to match the unique challenges and bosses you’ll encounter. Understanding boss mechanics and loot distribution are vital.
Consider this chart:
| Raid | Boss Mechanic | Tailored Strategy |
|---|---|---|
| Molten Core | Elemental Damage | Increase Fire Resistance |
| Blackwing Lair | Positioning & Phase changes | Master Class abilities & Timings |
| Naxxramas | DPS checks & Healer stress testing | Optimize Gear and Skill rotations |
Each raid demands its own approach – from Molten Core’s emphasis on elemental resistance, through the intricate positioning in Blackwing Lair, to maximizing damage per second (DPS) and healing in Naxxramas. Unlocking these battles requires meticulous planning, understanding of game dynamics, and most importantly, effective coordination within your team which leads us into our next discussion about the essential role of communication during raids.
Importance of Communication
In the heat of battle, your team’s ability to communicate clearly and efficiently can tip the scales between glorious victory or crushing defeat. Solid communication is paramount in World of Warcraft raids, where coordination is everything.
Having communication tools at your disposal like voice chat apps, in-game pings, and macros can drastically improve efficiency. Don’t underestimate their impact; they allow for real-time updates and instant adjustments during combat.
Leadership dynamics also play a significant role. A clear chain of command eliminates confusion when quick decisions are needed – a raid leader directing movement, a healing lead managing healers’ cooldowns, etc. It’s about using communication to steer everyone towards a common goal: conquering the raid.
With these strategies under your belt, let’s delve into an analysis of some iconic WoW raids and how effective communication played a part in those triumphs.
Detailed Look at Iconic Raids
Now, let’s delve into the heart of some iconic raids that have defined WoW’s legacy.
We’ll start by dissecting The Molten Core, analyzing its intricate mechanics and strategies that challenge even seasoned raiders.
Then, we’ll venture into the depths of The Black Temple, providing insights into its enigmatic bosses and their complex tactics – offering you an edge in mastering these legendary encounters.
Analysis of The Molten Core
You’ll face fiery lava, terrifying elemental minions, and a relentless string of bosses when you step into the infernal depths of The Molten Core. This raid is not for the faint-hearted; it requires strategic gameplay, strong teamwork, and understanding of boss dynamics to conquer.
- Lucifron’s Curse: This debuff can wreak havoc on your team if it’s not handled promptly. Make sure your healers decurse immediately to maintain DPS output.
- Majordomo Executus’ Adds: Killing Executus’ adds in a specific order reduces incoming damage significantly – communication is key here.
- Ragnaros Phase Transitions: Your tank needs to hold aggro while your raid navigates the phase transitions smoothly.
Mastering loot distribution also plays an integral part as it motivates team members by rewarding their efforts appropriately.
Next up, we delve into some keen insights about The Black Temple – another iconic WoW raid that boasts its own unique challenges and rewards.
Insights into The Black Temple
Having conquered the fiery depths of The Molten Core, you’re now ready to tackle a more daunting challenge: The Black Temple. Home to Illidan Stormrage himself, this raid requires not only strength but also strategic planning and understanding of Illidan’s storyline.
The temple architecture is as bewildering as it is magnificent. Here’s a glimpse:
| Room | Key Enemy | Objective |
|---|---|---|
| Sanctuary of Shadows | Supremus | Defeat to reach upper levels |
| Halls of Anguish | Gurtogg Bloodboil | Survive the boiling blood |
| Den of Mortal Delights | Mother Shahraz | Resist seductive illusions |
| The Illidari Council Chamber | 4 council members | Overcome combined powers |
Each room presents unique challenges that test your mettle. Mastering them requires in-depth knowledge and articulate strategies. Now, let’s delve deeper into some insider tips and tricks from seasoned players for conquering The Black Temple.
Tips and Tricks from Experienced Players
Seasoned players often emphasize the importance of understanding your class’s abilities and maximizing their potential during raids.
In World of Warcraft, mastering your class specialization is paramount to conquering challenging raids like The Black Temple. Be sure you’ve optimized gear for your role – be it tank, healer, or damage dealer. Gear optimization doesn’t just mean having high item levels; it also involves selecting the right stats for your class and spec.
Learning how to manage cool-downs effectively can make a difference between victory and defeat in boss fights. Mastering crowd control skills, positioning strategies, and other specific mechanics will significantly enhance your raid performance.
As you continue to grow as a raider, remember that preparing for future raids is not only about gearing up but also about cultivating adaptability and improving tactical acumen.
Preparing for Future Raids
Having absorbed those helpful tips from seasoned players, it’s time to turn our focus on what’s ahead. Preparing for future raids in World of Warcraft requires a strategic approach and foresight.
The first step is gear optimization. Your gear isn’t just about stats; it’s your character’s lifeblood in raids. Understand how each piece works with your class and spec, then optimize accordingly.
Next comes role flexibility. Being able to swap roles as needed dramatically increases your raid team’s effectiveness.
Consider this simple table:
| Gear Optimization | Role Flexibility |
|---|---|
| Understand your gear | Learn multiple roles |
| Optimize based on class/spec | Practice switching roles efficiently |
| Upgrade strategically, not randomly | Be ready to adapt mid-raid |
Careful planning now will lay the groundwork for victorious raids in the future.
Frequently Asked Questions
What are the system requirements to play World of Warcraft and participate in raids?
Like a seasoned knight gearing up for battle, your PC needs the optimal hardware setup to conquer World of Warcraft’s toughest raids. You’ll need a Windows 7 64-bit or newer OS, an Intel Core i5-760 or AMD FX-8100 processor, and an NVIDIA GeForce GTX 560 2GB or AMD Radeon HD 7850 2GB graphics card. Additionally, make sure you have at least 4GB of RAM. Don’t forget the WoW subscription models; they’re your ticket into the world of Azeroth. Arm yourself with this knowledge and charge headfirst into the fray!
How does World of Warcraft’s raiding culture compare to other MMORPGs?
Compared to other MMORPGs, World of Warcraft’s raiding culture is unique. It involves more complex raid mechanics and strategic gameplay that require teamwork and communication. You’ll find it demands a deep understanding of your character’s abilities and the game’s intricacies.
The social dynamics in WoW are also different, fostering a sense of community among players. The game emphasizes cooperation and coordination, turning strangers into teammates as you conquer challenging raids together. Thus, making it unparalleled in terms of depth and engagement.
What has been the evolution of raiding in World of Warcraft over the years?
Raiding in WoW has evolved significantly over the years, with raid mechanics becoming more complex and demanding. Initially, raids were simpler, focusing on tank and spank strategies.
As the game matured, so did its raid difficulty progression. Encounters now require precise coordination, deep understanding of class roles, and expert utilization of abilities.
From Vanilla’s 40-man raids to today’s mythic encounters, WoW’s raiding scene continues to challenge even the most seasoned gamers with innovative mechanics and rigorous difficulty tiers.
Are there any particular classes or roles that are more beneficial for raiding in World of Warcraft?
Imagine you’re standing on the precipice of an epic raid, your heart pounding. The Class Specialization Importance in WoW raids is undeniable.
Tanks are vital as they control enemy attention, healers keep everyone alive while damage dealers eradicate foes. Each class has unique abilities beneficial to a raid’s success.
Gear also plays a pivotal role. Raiding gear recommendations often include items that enhance your chosen class and role’s capabilities – think trinkets with powerful effects or armor with high stats.
Can I participate in raids as a solo player or is it strictly a team-based activity?
Raids in World of Warcraft are team-based activities, requiring collaboration and coordination. However, if you’re keen on solo strategies, some older raids can be tackled alone with enough gear and experience.
Remember though, raid preparation is crucial even for these instances – knowing the mechanics of each boss fight can make a difference between success and defeat. So while it’s not impossible to raid solo, it’s typically more practical and enjoyable as a group endeavor.
Conclusion
So, you’ve tackled the beast that is WoW raids. Remember, 52% of players claim their first raid was the hardest. But look at you now! You’re conquering iconic raids and prepping for future challenges like a pro.
Keep applying those strategies, learning from seasoned players, and diving into the details. Your mastery over these epic battles keeps growing.
Happy raiding!
Join us on a journey of discovery through our blog’s fascinating content.
The post Raiding Legends: Conquering The Most Challenging Raids In World Of Warcraft appeared first on askapadwe.