Choosing the right AI model for autoblogging 30 Mar 1:17 AM (18 days ago)

Not all AI models are created equal, especially when it comes to autoblogging with tools like CyberSEO Pro, RSS Retriever, and AI Autoblogger. Whether you’re generating articles from scratch, rewriting imported content, or scaling a content farm, choosing the right model can make or break your workflow. Here’s a no-nonsense breakdown of the best options out there and when to use them.
| Model | Style | Speed | SEO-Friendly | Best For | Price (approx)/million |
|---|---|---|---|---|---|
| GPT-4o | Neutral, structured, high quality |  |
 |
Reviews, health, how-to, general content | ~$2.5–$2 |
| GPT-4o mini | Balanced, lightweight, efficient | |
|
High-volume blogs, summaries, starter content | ~$0.15–$0.6 |
| Claude 3.7 | Human-like, emotional, warm | |
|
Lifestyle, psychology, personal development | $3–$15 |
| Gemini 1.5 Flash | Dry, factual, concise | |
|
Tech, IT, FAQs, short posts | Free (Google), ~$0.35 (OpenRouter) |
| Mistral Large | Concise, competent, generalist | |
|
Scalable content, SEO-friendly autoblogging, uncensored topics | ~$0.50–$1.00 (OpenRouter) |
| Perplexity: LLaMA 3.1 Sonar Online | Balanced, web-aware, current | |
|
News content, trending topics, real-time relevance | ~$1 (OpenRouter) |
| Yi-34B / DeepSeek | Edgy, uncensored, raw | |
 |
NSFW, alt-niches, political or taboo topics | Free (OpenRouter) |
| Command R+ | Formal, businesslike | |
|
Finance, legal, B2B, analytics | ~$2.3–$9.5 (OpenRouter) |
| Grok (xAI) | Bold, witty, unpredictable | |
|
Entertainment, viral, humorous or edgy blogs | ~$1.00–$3.00 |
Each model brings its own flavor to the table. Some prioritize speed and cost-effectiveness, while others strive for natural-sounding, human-like output. Your choice should depend not only on your budget, but also on the tone, niche, and purpose of your autoblogging project.
GPT-4o (OpenAI)
This one is the jack of all trades. It writes smooth, human-like articles with solid structure and a good mix of narrative and clarity. GPT-4o is ideal for universal content: product reviews, health articles, how-tos, tech guides, you name it. It’s not the cheapest option, but it delivers where it counts. It works great for both creating from scratch and rewriting imported text. If you’re serious about quality, this is your main weapon.
GPT-4o mini
A trimmed-down version of the GPT-4o, this model is perfect when you need a balance of quality, speed, and affordability. It’s fast and produces reasonably clean output suitable for most autoblogging needs. The GPT-4o mini is ideal for scaling projects where content volume is more important than perfect prose. It doesn’t have the full finesse of GPT-4o, but it’s a very practical option for high-throughput workflows.
Claude 3.7 Sonnet (Anthropic)
Claude 3.7 is a refinement of the 3.5 version, with better coherence, slightly more concise outputs, and improved factual grounding. It still favors a dialog-heavy, emotionally rich style, making it perfect for lifestyle, self-help, and psychology blogs. While not the fastest or cheapest model, Claude 3.7 brings a distinctly “human” voice to autoblogged content, and it’s a solid upgrade if you were already considering Claude.
Gemini 1.5 Flash (Google)
His is fast. Very fast. It’s best for short content, technical tutorials, summaries, and posts where speed is more important than style. Gemini is dry and to the point, which is perfect for IT blogs, documentation, and FAQ-type posts. Plus, it’s either free or dirt cheap via OpenRouter, making it perfect for high-volume operations.
Gemini sometimes generates Markdown formatted texts even when explicitly asked for HTML. The AI Autoblogger plugin automatically detects and converts Markdown to HTML behind the scenes, so the result will still appear correctly on your site. For CyberSEO Pro and RSS Retriever users, it’s recommended to enable the Convert Markdown to HTML option in the “Advanced” tab of the feed settings to ensure proper formatting.
Mistral Large
A significant upgrade from Mixtral. Mistral Large produces clean, logically structured, SEO-ready content that retains context well. It’s good for general autoblogging in a variety of niches. Affordable, competent and reliable – especially when GPT-4o feels too expensive. It’s also a solid option for generating uncensored or less-filtered content, making it a viable alternative for users working in gray or borderline niches where stricter models may refuse to comply.
Perplexity: LLaMA 3.1 Sonar Online
This model builds on LLaMA 3.1 70B with Perplexity’s proprietary fine-tuning and real-time web access. It can fetch fresh information during generation, making it especially effective for blogs that cover current events, trending topics, or rely on up-to-date facts. While it’s slightly more expensive and can be slower than offline models, the ability to stay relevant is a major advantage for autoblogging that targets Google News and time-sensitive keywords.
Yi-34B / DeepSeek
These open models work surprisingly well for uncensored or niche topics that the mainstream models shy away from. Political takes, erotic fiction, fringe hobbies – these are their playground. Don’t expect perfect structure, but if you need edgy or unrestricted content, they’ll go places GPT won’t.
Command R+ (Cohere)
This one is all business. It’s formal, accurate, and good at long-form reasoning. Think B2B blogs, finance, legal, and analytics content. If your blog sounds like a whitepaper or a consultant’s report, this is the right model.
Grok (xAI)
Grok writes like a Twitter troll with a PhD. It’s witty, bold, sometimes sarcastic, and not always safe for work. If you’re doing viral, controversial, or entertainment blogging, Grok can add flavor. But it’s unpredictable, so use it when you want personality more than polish.
What About So-Called “Thinking” Models?
Some models are marketed as better at deep reasoning, long context understanding, or analysis-heavy tasks. While that sounds impressive, autoblogging typically doesn’t benefit from that extra cognitive horsepower. These models tend to be expensive and slower, and for 99% of autoblogging cases, their output isn’t noticeably better than what GPT-4o, Mistral Large, or Claude already offer. Unless you’re publishing scientific breakdowns or legal digests, “thinking” models are usually overkill.
So which AI model to choose for autoblogging?
There’s no single best model for autoblogging – the right choice depends on your niche, goals, and budget. Perplexity: LLaMA 3.1 Sonar. Building an opinionated lifestyle blog? Claude. Need thousands of posts a day? GPT-4o mini or Yi. Running a tech tutorial site? Gemini again.
Mix, test and match. That’s the beauty of using plugins like AI Autoblogger or CyberSEO Pro – you’re not locked into one model. Use what works for your niche, and don’t be afraid to switch gears as your project evolves.


How to automate WordPress custom fields 9 Nov 2024 4:10 AM (5 months ago)

Custom fields in WordPress are a powerful tool that allows you to add custom metadata to each post, organize data, and use it in templates, making life much easier for developers. For example, you can add additional fields like “product_price” or “release_date” to make your posts more informative and tailored to the specific needs of your project.
These fields can store information that doesn’t fit into the standard WordPress fields, such as title, content, or categories. Custom fields can be shown or hidden in the post editor, such as those with names that begin with an underscore (“_”), which are for internal use only.
Many third-party WordPress plugins and themes also use custom fields to store parameters necessary for their operation, such as information needed to properly display posts and their elements on the website. For instance, plugins like Advanced Custom Fields (ACF) and WooCommerce actively use custom fields to store product information, metadata, and various user parameters. In these cases, the ability to configure custom field values is critically important.
To work with custom fields in the WordPress editor, enable their display in the Screen Options, located in the upper right corner of the post editing page.
One of the key advantages of CyberSEO Pro is the automatic conversion of all imported sources into a unified XML format, which simplifies data integration because all sources are represented in the same format, regardless of their original structure. For example, if data comes from different sources such as RSS and JSON, unifying it into XML avoids the need to write separate handling rules for each format, saving users time and effort. This means that for creating custom fields, all data is presented in a consistent format, allowing you to focus on your end goals instead of parsing different formats.
The “Custom fields” text box in the Advanced tab of the feed settings allows you to configure rules for creating these fields, providing flexibility and automation. For example, you can import product characteristics and automatically add them to posts, creating more detailed descriptions that help users better understand the features and benefits of each product.

Assigning fixed values
To set a fixed value for a custom field, use the following syntax:
"String value"->custom_field_name
For example, to set the value “Guided Tour” for a custom field named “tour_type,” type the following in the “Custom fields” text box:
"Guided Tour"->tour_type
This is useful if you need to add the same information to all imported posts that does not vary depending on the data source.
Fixed strings can also be recorded using Spintax, which allows you to randomize results for each new import. This is especially useful when creating diverse content for SEO purposes, as unique text variations help improve search engine rankings by boosting content originality. Spintax is a format that allows you to create multiple variations of a text using curly braces and vertical bars. For example, the string “{Guided Tour|Self-Guided Adventure|City Walk}” means that one of the specified values will be chosen at random during each import.
Example rule:
"{Guided Tour|Self-Guided Adventure|City Walk}"->tour_type
In this case, the custom field “tour_type” will contain one of the randomly chosen values for each new post.
Importing XML tag values
When importing any content source, you can view its XML structure in the Preview mode -> XML structure box, located at the top of the imported feed settings.
Here, you can see all tag names and attributes for each record of the imported source. This allows you to accurately determine what data is available for use and which tags can be applied. To save the value of an XML tag from the imported feed in a custom field, use the following syntax:
xml_tag_name->custom_field_name
For example, if the imported feed contains travel information in the following format:
<price currency="EUR">
1499.99
</price>
<destination>
Maldives
</destination>
To store the price value in a hidden custom field named “price” and the destination in a custom field named “destination,” type the following in the “Custom fields” text box:
price->price
destination->destination
Importing XML tag attribute values
XML tags can also contain attributes, similar to HTML. To get the attribute value, specify its name after the tag name, separated by a colon:
tag_name:attribute_name->custom_field_name
For example, to store the currency attribute value from the above example in the cost_currency custom field, use this rule:
price:currency->price_currency
Extracting content from articles
The plugin also allows you to save specific parts of the post content in custom fields. This can be done in two ways: using an external HTML tag or with regular expressions.
Using external HTML tags
Use the name of the external HTML tag with attributes in JSON format:
tag {"attribute_name_1": "value_1", "attribute_name_2": "value_2", ...}
For example, if the post contains the following HTML code with product data:
<span class="product-name">Smartphone X</span><span class="product-price">$599.99</span>
To store the product name in the custom field “product_name” and its price in “product_price”, type:
span {"class": "product-name"}->product_name
span {"class": "product-price"}->product_price
Using regular expressions
To extract content using regular expressions, use the prefix “regex:”
Suppose you have the following HTML code:
<video class="highlight" src="https://example.com/videos/awesome.mp4" alt="Awesome Video"></video>
To store the video link in a custom field named “video_link”, use this rule:
regex:<video class="highlight" src="(.*?)"->video_link
As a result, the value “https://example.com/videos/awesome.mp4” will be saved in the custom field “video_link.” This allows you to dynamically save links to media files or other elements found in the post’s HTML code.
When using regular expressions, note that slashes in closing HTML tags must be escaped to avoid HTML parsing errors and to ensure proper tag matching. For example, to extract text from an HTML tag with a closing slash, use the following regex:
regex:<div class="content">(.*?)<\/div>->content_field
Here, the slash before div in the closing tag is escaped to ensure the regex works correctly.
Assigning values to standard post fields
You can assign XML tag values not only to custom fields but also to standard WordPress post fields, such as the title or post content. To do this, use the post template placeholder names. For example, to assign a tag value to the post title field, use:
title->%post_title%
text->%post_content%
Available placeholders:
%link%– link to the source of the imported article;%post_title%– post title;%post_content%– post content;%post_excerpt%– post excerpt;%post_tags%– post tags, comma-separated;%categories%– post categories, comma-separated.
Custom field manipulation for programmers
If you are familiar with the basics of PHP programming, you can use all the tools of this language in the “Custom PHP code” field in the Expert tab of the feed settings. All custom fields of the generated WordPress post are represented as elements of the $post['custom_fields'] array. Thus, by manipulating the elements of this array, you can create, delete, and modify custom fields of the post. For example:
$post['custom_fields']['thumb'] = 'https://www.example.com/images/my_image.png';
$post['custom_fields']['author'] = $xml_tags['name']['val'];
$post['custom_fields']['rating'] = $xml_tags['review']['attr']['rating'];
Using custom fields in CyberSEO post templates
All custom fields created by the CyberSEO Pro plugin are also available to you in HTML templates for posts, post titles and post excerpts. To insert the template content into the post body, use the %custom_fields[name]% placeholder. For example:
<strong>Price:</strong> %custom_fields[price]% %custom_fields[price_currency]%
Import RSS, XML, JSON, CSV and HTML as WooCommerce products with CyberSEO Pro
Making money with autoblogging and CyberSEO Pro 9 Oct 2024 4:38 AM (6 months ago)

It’s been over a year since we published the article “How to make money with an autoblog”. Since then, autoblogging has evolved significantly. AI technologies have advanced rapidly, and CyberSEO Pro has added new features like enhanced AI integration, automatic multilingual support, and improved product feed imports, making autoblogging easier and more profitable.
Whether you’re new to autoblogging or an experienced blogger, this guide will help you get started. We’ll explore practical strategies for making money with a WordPress autoblog, covering affiliate marketing techniques and ad revenue strategies to ensure your autoblog thrives.
Affiliate Marketing with Product Feeds
Implementation Strategy
- Importing marketplace feeds: With CyberSEO Pro, you can import product feeds from marketplaces like Amazon, AliExpress, ShareASale, ePN, and others. These marketplaces are only examples, as the plugin can import data from any marketplace or affiliate program that provides catalogs of products in an importable format (XML, CSV, JSON). This allows you to pull fresh product data from virtually any available source.
- Automatic post generation: Configure CyberSEO Pro to generate posts based on the imported feeds. Use the built-in AI to create unique descriptions, reviews, or other types of content from the product data. Unique descriptions are beneficial for improving SEO and avoiding duplicate content penalties, which helps your site rank higher in search engine results. For example, when importing products from Amazon, you can use an AI preset that generates entirely new, unique descriptions based on the product characteristics obtained from Amazon, resulting in more engaging and sales-driven text. Utilize customizable HTML templates to display products with their descriptions, images, and links. Experiment with Amazon preset and AliExpress preset settings to generate optimal descriptions for your strategy.
Site Structure Optimization
To achieve the best SEO results, it’s important to properly structure your website by organizing content logically, including relevant keywords, and ensuring easy navigation. Rather than simply posting product reviews, combine different types of content to retain visitors and improve your search rankings. For example:
- Informational articles: Create articles related to your niche that answer users’ questions and help them solve specific problems. These articles can be generated by AI using data from various sources, including YouTube video transcripts, expert blogs, and forums. This approach helps attract more organic traffic and build user trust.
- Guides and tutorials: Publish guides on how to use the products you promote. These articles add value and build trust with users. Guides can be generated by AI using information from external sources, or from the descriptions of products imported from marketplaces. Such guides can also include affiliate links to the corresponding products.
- Comparative reviews: Create posts comparing several products within the same category. This helps users make informed decisions and increases your affiliate income. Use AI models with internet access, such as Perplexity Llama 3.1 Sonar 405B Online (available via the OpenRouter API), which can independently search for product competitors online and incorporate them into reviews, making comparisons more relevant and useful for users.
- Customer reviews: The plugin can automatically generate comments on posts or products (e.g., for WooCommerce) by analyzing the content of the post. This is a fully automated process that significantly increases user engagement. You can also import and modify real reviews from external sources like Reddit discussions to make comments more diverse and useful. Frequent user comments and regular content updates keep users engaged and build trust. This activity also signals quality to search engines, ultimately improving search engine rankings.
- Adding affiliate links: Include your affiliate link in each post to earn commissions on sales. The plugin automatically inserts such links.
- Automatic updates: Set a schedule to update the feeds so that the products on your site always remain up-to-date. The plugin can also assign a lifespan to generated product posts, after which they will be automatically deleted—useful if you don’t want outdated offers lingering on your site.
Niche Sites for Advertising Revenue (AdSense)
Implementation Strategy
- Selecting a niche: Find a narrow niche with a high demand (e.g., pets, diets, DIY projects).
- Importing content from RSS and YouTube: Use CyberSEO Pro to import text from popular RSS feeds and YouTube transcripts. The plugin can automatically convert YouTube video transcripts into completely new, unique articles using AI, providing fresh and engaging content for your website.
- Rewriting and optimizing content: Use the built-in AI models to rewrite the imported content and optimize it for SEO. This will help create unique articles that are well-indexed by search engines.
- Adding ad blocks: Integrate Google AdSense or another ad service to insert banners and text ads into posts.
- Optimizing AI-generated content with proper prompts: To successfully pass AdSense moderation without manual editing, it’s important to use the right prompts when generating content. Provide the AI with specific questions and instructions to generate text that meets Google’s quality requirements. For example, you might ask the AI to “describe the benefits of this product in detail”, “compare these two items with pros and cons”, or “summarize user experiences from online reviews”. Instruct the model to create content with in-depth analysis, including key elements such as facts, examples, and useful tips. In addition, consider using an author style, e.g.: “Write in the style of {David Pogue|Bonnie Burton|Alex Cranz|Andrew Liszewski|Joanna Stern|Nicole Lee|Chris Velazco}” (the plugin supports Spintax). This helps avoid detection by services like ZeroGPT as AI-generated content and makes it more human-like.
Monetization
Maximize your PPC revenue by optimizing ad placement, such as placing ads above the fold or near engaging content, targeting specific high-traffic pages, and ensuring ads are relevant to your audience. Consider using the WP Ad Inserter plugin, which dynamically displays HTML, JS and PHP ads on your web pages based on the visitor’s geographic location and browser language, to optimize ad placement for better PPC performance. In addition to Google AdSense, you can use ad networks such as Media.net, PropellerAds, Ezoic, and AdThrive.
Creating Sites with Unique Images and AI Content
Implementation Strategy
- Generating unique content: With CyberSEO Pro, you can create unique articles generated from short ideas or keywords. Use over 100 AI models to create engaging content.
- Generating Images: The plugin integrates with DALL-E, Stable Diffusion, and Midjourney to automatically generate and insert unique images relevant to each content block. It works in a fully automated mode, analyzing article texts and generating images based on content analysis. This works for both content generated from scratch and imported content, such as illustrating an article or even a book on full autopilot.
- Creating visual blogs: Build a site focused on visual content (e.g., recipes with images of finished dishes, galleries of nature or art). Unique images help you stand out from competitors and attract more attention.
Monetization
Sell ad space, use affiliate links to products related to the content.
Multilingual Sites for Global Reach
Implementation Strategy
- Importing and translating content: Use CyberSEO Pro to import articles from various sources and automatically translate them into multiple languages using integrations with Google, Yandex, DeepL or various AI language models including the free ones like Google Gemini.
- Creating a multilingual blog: CyberSEO Pro integrates with Polylang or WPML plugins for WordPress to manage multilingual content. This allows you to attract audiences from different countries and increase site traffic. Since each article generates separate pages in different languages, they are also indexed by search engines, which is a significant SEO advantage.
Monetization
Affiliate marketing, advertising, premium content access for different audiences.
Autoblogging for Paid Access
Implementation Strategy
- Generating unique content: Use CyberSEO Pro to generate educational or analytical content based on verified sources. Beyond the vast amount of content the plugin can import from external sources, modern AI models already have an extensive knowledge base of what has been published online. Typically, even the content you import from external sources is already known to the AI model. As a result, modern language models can generate highly valuable educational content from scratch-all you need is the right prompt.
- Adding premium access: Install a membership plugin (such as MemberPress) and restrict access to certain content. Publish compelling previews to all users, while making full versions available only to subscribers. Use AI to create compelling previews that entice users to subscribe to premium content.
- Regular updates: Use the scheduler in CyberSEO Pro to create an automatic publishing schedule, so users see that the content is updated regularly. Regular updates keep subscribers engaged and create a sense of ongoing growth.
Monetization
Paid subscriptions for premium content, user donations.
⬝⬝⬝
CyberSEO Pro offers a wide range of ways to create and monetize content. Whether it’s classic affiliate marketing or building premium sites with paid access – all these schemes can be implemented with minimal manual content creation.
If you’re managing just one site, it may make sense to do everything manually. However, CyberSEO Pro is designed for large-scale autoblogging automation, where the plugin and its supported AI services take care of everything. This makes it an ideal tool for autonomously managing large networks of autoblogs, significantly increasing the earning potential. That’s why CyberSEO Pro has very liberal conditions for bulk purchase of licenses – one license in a package of 100 copies is only $3. This is especially advantageous for those who plan to build and manage an extensive network of autoblogs without significant manual effort.
Use the plugin’s powerful tools to automate processes, create unique and valuable sites, and turn traffic into real revenue.
It’s important to test different approaches and analyze the results using analytical tools like Google Analytics. The world of autoblogging is changing rapidly, and those who can adapt and take advantage of modern technology will always be one step ahead.
How to automate a multilingual site in WordPress with AI, WPML and Polylang 26 Sep 2024 1:55 AM (6 months ago)
Reaching a global audience is essential to expanding your website’s reach and influence. One of the most effective ways to do this is to create a multilingual WordPress site. By using CyberSEO Pro and RSS Retriever in combination with multilingual WordPress plugins like Polylang and WPML, you can automate the translation of your content into multiple languages. This approach not only improves the user experience, but also provides significant SEO benefits.
Why multilingual content boosts SEO
While modern browsers offer auto-translation capabilities, they can’t compare to a website that natively publishes content in multiple languages. Search engines like Google prioritize and index these language-specific pages, increasing your site’s visibility in localized search results. By adopting a multilingual approach, your content can rank higher in different regions, attracting more diverse traffic and improving your site’s global reach.
Using WPML and Polylang along with AI-powered autoblogging plugins like CyberSEO Pro and RSS Retriever streamlines the process of creating multilingual content. Every article you publish is automatically translated and optimized for SEO in multiple languages. This ensures that your site is indexed in multiple languages, allowing you to effectively and effortlessly reach new markets.
In this guide, we’ll walk you through the step-by-step process of configuring CyberSEO Pro and RSS Retriever to work seamlessly with WPML and Polylang. Whether you want to build an autoblog that generates content in multiple languages, or simply expand the reach of your site, this setup will allow you to deliver well-crafted multilingual content without the need for manual translation. Let’s dive into the details and see how you can increase the performance and visibility of your WordPress site worldwide.
Configuring CyberSEO Pro and RSS Retriever with WPML and Polylang
To configure your autoblog – powered by CyberSEO Pro or RSS Retriever – for compatibility with WPML and Polylang, please follow the steps below:
Install and Activate the Multilingual Plugin
Start by installing and activating either WPML or Polylang on your WordPress site. This is very important because the option to select the desired language in the content feed settings of CyberSEO Pro or RSS Retriever will only appear after activating one of these multilingual plugins.
Add Feeds for Each Language
If you want to generate posts in multiple languages from a single feed, you’ll need to add that feed to the plugin multiple times – once for each language. For example, you can use an RSS, XML, JSON, or CSV feed to generate posts in English, add the same feed again to generate posts in German, and then add it a third time to generate posts in Korean. When adding each version of the same feed, it’s recommended to manually append the feed title with a language code (e.g. “EN”, “DE”, “KO”) to help you easily manage your list of content feeds in CyberSEO Pro Syndicator.
Select the Appropriate Language in Feed Settings
After setting up each language version of the feed, go to the feed settings and select the appropriate WPML or Polylang language from the drop-down menu in the “Basic” tab.

Choose Your Translation Service
In the “Advanced” tab, you’ll find another drop-down menu labeled “Translation”. Here you can choose your preferred translation service, such as Google Translate, Yandex Translate, DeepL or AI Translate. Selecting “AI Translate” allows you to choose from a number of AI models and providers supported by the plugin.
That’s all it takes to configure CyberSEO Pro or RSS Retriever to work seamlessly with WPML and Polylang. If you’d like to see this process in action, check out the video tutorial.
Important Note
All translated posts generated from the same article are linked and share the same external content source (the link to the original article). Therefore, if you choose to delete posts generated from one of the language versions of a feed using the “Delete posts syndicated from selected feeds” button, this will not only delete the posts from that specific feed, but also all of their translated versions from the WordPress database. If you prefer to delete posts selectively, it’s best to use the standard WordPress menu at “Posts -> All Posts”.
Translating articles efficiently with AI Models
Translating articles can be efficiently handled by AI language models. While larger models offer advanced capabilities, smaller models are often sufficient for translation tasks and are more cost-effective.
For instance, GPT-4o mini is a great fit for this purpose. It’s affordable and provides accurate translations quickly. However, if you’re looking for a free solution, Google’s Gemini model is a strong contender.
Using Google Gemini Flash for free translations
The Gemini API 1.5 Flash can be accessed at no cost (for free), offering robust translation capabilities without incurring any fees. Here’s what you need to know about its free usage tier:
- 15 RPM (Requests Per Minute)
- 1 Million TPM (Tokens Per Minute)
- 1,500 RPD (Requests Per Day)
These generous limits make Gemini an excellent choice for the majority of your translation needs. In most scenarios, Google Gemini 1.5 Flash performs exceptionally well, providing high-quality translations that are correctly formatted for most uses.
However, for very complex HTML documents that require precise formatting, you may occasionally encounter challenges with Gemini. In such cases, it may be beneficial to use a more advanced model such as OpenAI’s GPT-4o mini. But for the vast majority of translation needs-especially those that do not require intricate formatting-Google Gemini 1.5 Flash is a powerful and cost-effective solution.
OpenRouter – One API Key to Rule Them All 13 Sep 2024 4:05 AM (7 months ago)

Sometimes it feels like the world of APIs and AI models is designed to confuse us. Each model has its own account, its own limitations, and, of course, its own price tag. Want to use OpenAI GPT? Pay here. Want to try Google Gemini? Forget it if your server is in the EU.
You’re juggling multiple models at once, instead of focusing on creating content, you’re stuck monitoring API limits, which completely disrupts your workflow. Instead of focusing on quality content, you end up dealing with API limitations and the availability of each model.
But there’s a solution – OpenRouter. It’s not just about bringing different models together in one place. It’s a tool that actually simplifies your workflow by putting everything under one API key. It’s not about checking a box for convenience – it’s a practical advantage that helps you focus on what matters.
In CyberSEO Pro and RSS Retriever, OpenRouter can be selected both from the model dropdown menu in the feed settings and through special shortcodes like [or_text] and [gpt_article], which you can use directly in your WordPress post template. In AI Autoblogger, OpenRouter is available in the “AI model” drop-down menu, making it easy to switch to this service directly from the article campaign settings.
One API key for all models
Let’s face it: managing multiple APIs is not work – it’s a juggling act. One key for OpenAI, another for Google Gemini, and a few more for other services. Instead of working, you’re spending time managing and organizing all those accounts. It’s not only tedious, it’s a distraction from your core tasks.
With OpenRouter, it’s easy. One API key and all your models are at your fingertips. You work through a unified interface where you can view detailed statistics on each model’s usage, which application or plugin was used, the number of tokens consumed, and the associated costs. And it’s not just about convenience – it’s about having real control over your workflow and budget, something you won’t find with standard platforms.
No regional restrictions
Regional blocking is a constant headache. OpenAI is not available on servers in Russia, and Google Gemini doesn’t work in most of the EU countries. How can you plan content when the technology itself restricts you based on your location?
OpenRouter solves this problem from the ground up. By routing everything through its proxy servers, it removes all IP restrictions and lets you use the models regardless of your server’s location. Boundaries disappear – your site just works, creating content the way it should.
No rate limits
We’ve all been there. You’ve got everything set up for your site, expecting articles to roll in, and suddenly you hit the dreaded “rate limit exceeded”. Instead of smoothly generating content, the process stalls and your plugins stop generating posts as expected.
OpenRouter removes these limitations and keeps your content flowing. You’re no longer limited by the number of requests you can make. Need to generate content? Do it as often as you want (well, almost). This is true workflow freedom.
Access to high-tier models
Everyone knows that basic models are good, but for serious work, you want more power. But access to advanced models usually costs more and requires you to move up the price tiers. OpenRouter gives you access to models typically only available on premium tiers of official platforms, without the hassle of upgrade plans. Get the most out of your content creation without the extra expense.
For example, with OpenRouter you already have access to the latest OpenAI o1 (openai/o1-preview) and OpenAI o1 mini (openai/o1-mini) models, also known as Strawberry.
No censorship
If you’ve ever tried to use OpenAI to generate or modify text on complex or sensitive topics like politics, you’ve probably run into severe limitations. OpenAI is notorious for its heavy censorship – many requests are blocked, even if they’re perfectly innocuous. This can severely limit what you can do with your content.
OpenRouter solves this problem. It gives you access to a huge number of open source AI models, none of which are censored. Want to generate text on any topic? No problem. Even proprietary models like Anthropic’s Claude are available through OpenRouter in uncensored form. You have full control over what you create, with no platform restrictions.
Free models
We all love it when something useful comes free. With OpenRouter, you get access to dozens of third-party models that are free to use. Each model has its own quirks, but when you need to generate content quickly and without spending a dime, these options are there for you. Sure, even free models have some limitations, but when you need a quick, hassle-free solution, they’re perfect for getting started.
Finally, let’s be clear. This isn’t an advertisement. We’re just sharing a solution that really works and can save you a lot of time and frustration. Especially considering how many times our support forum has seen questions about API limits, regional blocks, and other restrictions from official services like OpenAI and Google. Almost every time the answer is the same: switch to OpenRouter and the problem is solved. We recommend this service simply because it makes your work easier and more efficient, without the headaches.
Comprehensive guide to understanding key GPT model parameters
Increase PHP maximum execution time 19 Aug 2024 9:11 AM (8 months ago)

- Common symptoms
- The importance of PHP maximum execution time
- How to check your current PHP settings
- Methods to increase PHP maximum execution time
- LiteSpeed Web Server
- Troubleshooting
The CyberSEO Pro, RSS Retriever and AI Autoblogger plugins are designed to generate complex content using advanced AI models for text and image generation. These models take a significant amount of time to produce the final output. When used in a shared hosting environment, these plugins often run into a problem where the maximum PHP execution time is too short to complete the generation process.
On most shared hosting platforms, the default maximum PHP execution time is set to 30 seconds, although some allow up to 90 seconds. While this may be sufficient for simple tasks, it is insufficient for the more resource-intensive operations required by AI models. As a result, the plugin process may be abruptly terminated by the server before it has a chance to finish, resulting in incomplete content generation.
It’s important to understand that this problem is not caused by the plugins themselves. The plugins do exactly what they are supposed to do – call external AI services and process the data returned. However, they are limited by the execution time constraints of the server. While all three plugins allow you to configure the maximum execution time within their general settings pages, this programmatic method may be overridden or ignored by the server configuration. In such cases, manual server adjustments are required. These are explained in the following guide.
Changing the plugin code will not solve this problem, as it’s basically a matter of server settings that determine how long a PHP script is allowed to run.
Common symptoms
When the PHP process for a plugin is terminated prematurely due to insufficient maximum execution time, users typically observe certain symptoms. These symptoms might not immediately indicate an issue with execution time, but they are telltale signs that the script has been interrupted:
- The logs that track its actions during the post-generation process. When the server cuts off the PHP process, these logs do not record any error message. Instead, they simply stop logging at the point where the script was terminated. For example, a log might show, “Generate Midjourney image with GoAPI for…” and then nothing further, indicating that the process was stopped before it could finish.
- Depending on the hosting environment, users might encounter timeout errors.
These symptoms can be frustrating because they give the impression that the plugin is malfunctioning, when in fact the server settings are the cause.
The importance of PHP maximum execution time
The PHP maximum execution time is a critical setting that dictates how long a PHP script is allowed to run before the server forcibly terminates it. For AI-powered plugins that need to make numerous external API calls, process complex data, or generate media content, a short execution time can be very restrictive.
In shared hosting environments, hosting providers often enforce strict limits on PHP execution times to prevent a single user from consuming too many resources that could impact the performance of other websites on the same server. While this is understandable from a hosting management perspective, it poses significant challenges for users running resource-intensive plugins.
If the maximum execution time is insufficient, the script will not be able to complete its tasks, resulting in the problems described above. Increasing the maximum PHP execution time is essential to ensure that a plugin has enough time to complete its processes and deliver the desired content.
How to check your current PHP settings
Before you can address the issue of insufficient execution time, you need to know what your current PHP settings are. Here’s how you can check your PHP maximum execution time using common hosting management panels:
cPanel
- Log in to your cPanel account.
- Navigate to the Software section and click on Select PHP Version or PHP Selector.
- On the PHP settings page, click on the Options tab.
- Look for the setting labeled
max_execution_time. This value indicates the maximum time a PHP script is allowed to run.
Plesk
- Log in to your Plesk account.
- Go to Websites & Domains and click on the domain name where your plugin is installed.
- Click on PHP Settings.
- Scroll down to the Common settings section and locate
max_execution_time.
These steps will help you identify the current execution time limit on your server, which will guide you in determining how much it needs to be increased.
Methods to increase PHP maximum execution time
Once you’ve identified that the PHP maximum execution time is insufficient, the next step is to increase it. Depending on your hosting environment, you can use one of several methods to achieve this:
Modifying .htaccess File
If your hosting provider allows it, you can increase the PHP execution time by adding a directive to your .htaccess file, which is located in the root directory of your website. Add the following line to your .htaccess file:
php_value max_execution_time 600This sets the maximum execution time to 600 seconds (10 minutes). Adjust the value as necessary based on your needs and what your hosting provider allows.
Editing php.ini
Another method is to modify the php.ini file, which is the main configuration file for PHP. This file controls many of PHP’s settings, including execution time:
- Locate your
php.inifile on the server. The exact location may vary depending on your hosting environment. - Open the file in a text editor.
- Find the line that contains
max_execution_timeand change the value to your desired limit. For example:
max_execution_time = 600- Save the file and restart your web server to apply the changes.
Adjusting settings via hosting control panels
Some hosting control panels, like cPanel or Plesk, allow you to adjust the PHP maximum execution time directly through their interface without editing configuration files.
- In cPanel, you can do this by navigating to Select PHP Version > Options and setting the
max_execution_timevalue. - In Plesk, go to PHP Settings under Websites & Domains and find the
max_execution_timesetting.
Contacting hosting support
If the above methods are not available or do not work due to restrictions imposed by your hosting provider, you may need to contact your hosting support team. Explain that you need a higher PHP maximum execution time for specific plugins that require more processing time. Many hosting providers are willing to accommodate such requests if they are reasonable and won’t negatively impact server performance.
LiteSpeed Web Server
In some cases, increasing the PHP maximum execution time might not be enough to prevent scripts from being terminated prematurely, especially if you’re using LiteSpeed Web Server. LiteSpeed offers additional options to manage long-running PHP scripts efficiently, ensuring that important processes like backups or cron jobs complete without interruption.
Prevent Script Termination with noabort
For LiteSpeed users, one of the simplest ways to keep long-running PHP scripts from being aborted is by adding the following code to your .htaccess file:
<IfModule Litespeed>
    RewriteEngine On
    RewriteRule SCRIPT_URL - [E=noabort:1, E=noconntimeout:1]
</IfModule>
Replace SCRIPT_URL with the URL of the script that requires more execution time. This ensures that LiteSpeed will not abort the script, even if the connection is broken or times out.
Important: Do not apply noabort globally to all requests (.*), as it can cause issues with server performance, especially in environments with limited resources, like CloudLinux. Only apply this rule to the scripts that truly need it, like backup or cron scripts.
Handling Broken Connections
By default, LiteSpeed aborts PHP scripts when a user disconnects, such as closing a browser window. This behavior helps save server resources but can cause problems if the script needs to run in the background, like WordPress cron jobs. To avoid this, you can use the noabort environment variable.
For example, to ensure that scripts like wp-cron.php, backupbuddy.php, or importbuddy.php are allowed to run without being interrupted, you can use the following SetEnvIf directive in your .htaccess file:
SetEnvIf Request_URI "(wp-cron|backupbuddy|importbuddy)\.php" noabort
Or, use a rewrite rule:
RewriteEngine On
RewriteRule (wp-cron|backupbuddy|importbuddy)\.php - [E=noabort:1]
This allows these specific scripts to run uninterrupted, even if the user has closed the connection.
Expanding the Scope with Conditions
In certain cases, you might want to expand the scope of noabort beyond specific scripts but avoid applying it globally. For instance, you could use conditional rules to apply noabort to WordPress cron jobs or when a user is logged in and accessing the admin area. Here’s an example:
<IfModule LiteSpeed>
    <IfModule mod_rewrite.c>
        RewriteEngine On
        # Noabort for WP Cron scripts
        RewriteRule ^wp-cron.php$ - [E=noabort:1]
        # Noabort if user is logged in and accessing admin
        RewriteCond %{REQUEST_URI} ^(.*)?wp-admin
        RewriteCond %{HTTP_COOKIE} ^.*wordpress_logged_in_.*$
        RewriteRule .* - [E=noabort:1]
    </IfModule>
</IfModule>
Troubleshooting
While attempting to increase PHP maximum execution time, you might encounter some common issues.
Changes not taking effect
If modifications to .htaccess or php.ini do not seem to work, it could be due to server-level restrictions. In such cases, verify that your hosting provider allows these settings to be overridden or contact their support for assistance.
Error messages
After adjusting the settings, you may encounter error messages like “500 Internal Server Error.” This usually happens if there is a syntax error in your .htaccess or php.ini file. Double-check the syntax to ensure there are no mistakes.
Limited by hosting plan
If your hosting plan imposes strict execution time limits that cannot be adjusted, you may need to consider upgrading to a more flexible plan or switching to a different hosting provider that better suits your needs.
Import YouTube transcripts into AI-generated WordPress articles 18 Aug 2024 1:01 PM (8 months ago)
With the latest update, the CyberSEO Pro and RSS Retriever plugins have introduced a powerful new tool that allows you to import YouTube transcripts directly into WordPress-generated posts. This is achieved using the %youtube_transcript[…]% placeholder, which is designed for use within post templates. Let’s dive into its features.
The %youtube_transcript[…]% placeholder
The placeholder has a parameter that expects a link to a YouTube video, an embed URL, or just the video ID. For example:
%youtube_transcript[https://www.youtube.com/watch?v=3vCCfNQMEi4]%
or
%youtube_transcript[3vCCfNQMEi4]%
When importing YouTube videos from Atom feeds or CSV files, you’ll often need a link to the current video being imported. By default, this is available through the %link% placeholder. Therefore, your transcript import placeholder for the current video will typically look like this:
%youtube_transcript[%link%]%
If you’re importing a YouTube feed, such as a playlist like https://www.youtube.com/feeds/videos.xml?channel_id=UC_UqGjJSDND2t7jhKIj3PPA, and you place the above shortcode in the “Post content” field of the import template settings, the post generated by the plugin will include the full transcript of the video.
However, you’re unlikely to want to use this raw format, as YouTube’s automatic transcripts are often poorly formatted, broken into lines without punctuation. This is where AI models come into play, implemented by the CyberSEO Pro and RSS Retriever plugins through shortcodes such as [openai_gpt], [claude], [gemini], [or_text], and [gpt_article], which can process the %youtube_transcript[…]% placeholder as part of any string parameter.
YouTube transcripts to formatted text
For example, to import YouTube transcripts into WordPress posts and convert them into properly formatted, readable text with punctuation and beautiful HTML formatting, you might use a template like this:
%link%

[openai_gpt model="gpt-4o-mini" prompt="Transform the following unformatted transcript into a well-structured HTML-formatted block suitable for insertion into the body of a WordPress post. Ensure that the text is properly punctuated, divided into coherent paragraphs, and logically structured. Use appropriate HTML tags like <p>, <h2>, <strong>, <em>, and <ul> where necessary. Divide the text into larger, more substantial sections, ensuring that each section flows naturally and covers a significant portion of the content. Avoid using too many subheadings, and only use them when absolutely necessary to indicate a major shift in topic or focus. Do not add a 'conclusion' or any similar headings that signal the end of the article. The resulting HTML should be clear, logically organized, and suitable for publishing.

Text to transform:
%youtube_transcript[%link%]%"]
This template includes the %link% placeholder and the [openai_gpt] shortcode. During the import process, the plugin will replace %link% with the YouTube video link, which WordPress will automatically turn into an embed code. Thus, the corresponding video will appear above the text of each generated post. You can also place it below the text or choose not to include it at all, focusing solely on the transcript text generated by the [openai_gpt] shortcode.
The [openai_gpt] shortcode can, of course, be replaced with any other AI model shortcode available within the plugin. Similarly, feel free to modify the prompt text to tailor it to your needs.
 Here is a tip to make your YouTube video responsive in any WordPress theme. Inside your prompt, place the
 %link% placeholder in a <div> block with the name “video-container”:
<div class="video-container">
%link%
</div>
Now go to Customize -> Additional CSS settings of your theme, add the following style and save the settings:
.video-container {
    position: relative;
    padding-bottom: 56.25%;
    height: 0;
    overflow: hidden;
}

.video-container iframe {
    position: absolute;
    top: 0;
    left: 0;
    width: 100%;
    height: 100%;
}
There’s no need to explain why copying YouTube transcripts verbatim won’t benefit your site, neither from an SEO perspective nor in terms of potential legal issues. Therefore, let’s explore a more practical way to use imported transcripts.
Unique posts based on YouTube transcripts
Modern AI models, with their vast knowledge bases, can use YouTube video transcripts as the foundation for creating new, unique articles that offer additional informational value.
To encourage the AI model to use its creative abilities and share its knowledge and ideas, you’ll need a more complex prompt. A template for such a shortcode might look like this:
[openai_gpt model="gpt-4o-mini" prompt="Transform the information from the following unformatted transcript into a well-structured, detailed, and engaging informational article. The article should be a new, original piece that expands on the ideas presented in the transcript, providing additional context, analysis, and entertainment value. The text should be comprehensive and thorough, significantly expanding on the content of the transcript by including relevant information, useful tips, ideas, examples, quotes, real-life cases, and insights from your broader knowledge base. Imagine that you are a journalist or writer tasked with creating an in-depth piece that not only informs, but also engages the reader.

Make sure the article is substantive and longer than the original transcript, allowing for a deeper exploration of the topics discussed. Divide the text into larger, more substantial sections, with each section large enough to cover at least a full page of text (approximately 800-1000 words). Use subheadings only when absolutely necessary to indicate a major change in topic or focus. Avoid using too many subheadings, and make sure the text flows naturally between sections.

Avoid adding any 'conclusion' or similar headings that signal the end of the article, as they are not appropriate for this context. Use appropriate HTML tags like <p>, <h2>, <strong>, <em>, <blockquote> and <ul> where necessary. Avoid generating unnecessary or irrelevant headings. The resulting HTML-formatted block should be clear, logically organized, and suitable for insertion into the body of a WordPress post.

Text to transform:
%youtube_transcript[%link%]%"]
Consider this prompt as a proof of concept when creating your own. Also, note that in both shortcodes above, the most affordable OpenAI GPT-4o mini model (gpt-4o-mini) is used.
If the quality of the generated text is more important to you than API cost, it is recommended to use the more powerful OpenAI GPT-4o (chatgpt-4o-latest) model or the [claude] shortcode with its default model, which currently is Anthropic Claude 3.5 Sonnet. Also, remember that all these models and over a hundred others are available through the OpenRouter service via the [or_text] shortcode.
The [gpt_article] shortcode for long YouTube transcripts
If you want to import a transcript of a large video, the output window size of the GPT-4o mini, GPT-4o and Anthropic Claude Sonnet 3.5 models may not be sufficient, as it is limited to 16k tokens. In this case, it is recommended to use the Mistral Large 2 model (mistralai/mistral-large) or Meta Llama 3.1 405B Instruct (meta-llama/llama-3.1-405b-instruct), which have an output window size of 128k.
Alternatively, you can use shortcode [gpt_article], which allows you to generate very large texts using models with a relatively “small” output window like GPT-4o. E.g.:
[gpt_article topic="%post_title%" engine="openai-gpt-4o" sections="10" structure="Before you create the section names, analyze the YouTube script below and use it as a reference for your new article section structure to make sure you include all the important information.

The transcript for your inspiration:
%youtube_transcript[%link%]%" directives="Write a new, exciting article/story in a blog post format. Ensure that the article is rich in content and longer than the original transcript, offering deeper exploration of the topics discussed. The article should be a new, original piece that expands on the ideas presented in the transcript, providing additional context, analysis, and entertainment value. The text should be comprehensive and thorough, significantly expanding upon the content of the transcript by incorporating relevant information, examples, and insights from your broader knowledge base. Imagine yourself as a journalist or writer tasked with creating an in-depth piece that not only informs but also captivates the reader.

Use appropriate HTML tags like <p>, <strong>, <em> and <ul> where necessary. Avoid generating unnecessary or irrelevant headings. The resulting HTML-formatted block should be clear, logically organized, and suitable for insertion into the body of a WordPress post.

The transcript for your inspiration:
%youtube_transcript[%link%]%" language="English" heading="h2"]
Note that in the example shortcode above, the transcript is given to the AI model for inspiration twice – once to compile a list of article sections (structure), and a second time to generate the text of those sections (directives). The modern AI models are very good at translation, which means that they are not only able to generate unique articles based on information from YouTube transcripts, but also able to automatically translate them into another language. Just add the instruction to your GPT prompt.
Unique illustrations
It is not recommended to use YouTube video thumbnails as they may be copyright-protected content. Instead, use the tools on the “Media enrichment” tab or the post template shortcodes for generating unique images using DALL-E ([dalle]), Stable Diffusion ([stable_diffusion]) and Midjourney ([midjourney]).
For generating images, it is recommended to use the %gpt_image_prompt% placeholder, which will be replaced with a relevant text prompt for the chosen graphical AI model, generated by the CyberSEO Pro and RSS Retriever plugins based on the content of each of your articles. This is a simple yet powerful tool that should not be overlooked.
Post excerpts
Finally, a few words about the “Post excerpt” template, which by default contains the %post_excerpt% placeholder, including the textual description of the imported video. You will likely want to delete it and leave the post excerpt empty or insert a shortened version of the text description (%post_excerpt_notags[50]%) or generate a brief post description based on the article’s text using the same shortcodes [openai_gpt], [claude], [gemini], [or_text], and [gpt_article].
In summary, the %youtube_transcript[…]% shortcode can be yet another valuable tool in your extensive autoblogging arsenal provided by the CyberSEO Pro and RSS Retriever plugins.
Don’t try to scrape all of YouTube at once because they won’t let you and will block your server’s IP address for frequent requests. Create a few posts a day with a break in between, like one post every 8-12 hours, and you’ll be fine. Adding dozens of posts to your blog at once is a strategy that can backfire, especially when it comes to how Google perceives your site. This type of behavior raises red flags because it signals that the content is likely not being produced by a human blogger, but rather by an automated system. No real human blogger can consistently produce large volumes of posts in such a short period of time. This lack of organic content creation can make your site look unnatural, and from an SEO perspective, it’s a bad practice. Google’s algorithms are designed to reward content that is created over time, reflecting consistent effort and engagement.
Using a proxy can help mitigate these risks by distributing requests across multiple IP addresses, making your activity appear more natural. If you send all your requests from a single IP, platforms like YouTube are more likely to flag your activity as suspicious, especially if the requests are frequent or automated. By using a proxy, you can rotate IPs, reducing the load on a single address and minimizing the chances of being blocked. This approach not only protects your server’s IP from being banned, but also keeps your content creation process running smoothly. Proxies are an essential tool for maintaining anonymity and staying within the acceptable limits of automated requests, while keeping your site’s activity under the radar.
Best YouTube Proxy Providers in 2024 – Programming Insider
Comprehensive guide to understanding key GPT model parameters 9 Aug 2024 11:59 AM (8 months ago)

When working with CyberSEO Pro and RSS Retriever plugins and using the [openai_gpt] shortcode, it’s important to understand the key parameters for text generation. These parameters allow you to fine-tune how the AI generates content and help you achieve the best possible results.
This guide focuses on the parameters used with OpenAI GPT models to give you a solid foundation for getting the most out of your content generation. While the details here are specific to the [openai_gpt] shortcode, this information can be applied to other models as well. If you’re using the [claude], [gemini], or [or_text] shortcodes, keep in mind that the supported parameters may differ slightly, as each model has its own. However, the principles we’ll cover here provide a strong foundation that you can apply in one form or another to these models as well.
- Max tokens
- Temperature
- Top-p (nucleus sampling)
- Repetition penalty
- Presence penalty
- Frequency penalty
- Stop
- Model
Max tokens
Let’s start with one of the most basic parameters: max_tokens. In simple terms, this parameter determines the maximum length of text that the model will generate. The term “tokens” may sound a bit technical, but it’s just a way of referring to chunks of text. A token can be as short as a character or as long as a word, depending on the context.
For example, the word “fantastic” could be one token, while the phrase “AI is amazing!” could be multiple tokens. The max_tokens parameter sets the upper limit on how many of these tokens can be generated in a single response.
Impact on Output
The number of tokens you allow the model to generate directly affects the length and completeness of the output. If you set max_tokens too low, the model may stop mid-sentence or fail to fully express an idea, leaving your text incomplete or abruptly cut off. On the other hand, if you set it too high, the model may go on longer than necessary, resulting in unnecessary verbosity or even rambling.
This is especially important when you’re working on tasks that require concise and focused responses, such as answering a specific question or creating a summary. On the other hand, if you’re looking for a more detailed explanation or a longer piece of creative writing, you may want to set max_tokens higher.
Best Practices
Choosing the right max_tokens setting depends on what you’re trying to achieve:
- For Short, Direct Responses: If you need a brief answer or a quick snippet of text, a lower max_tokens value (around 50-100) might be ideal. This ensures the model stays focused and doesn’t stray off-topic.
- For Medium-Length Content: If you’re aiming for a paragraph or two, a max_tokens value of 200-400 works well. This gives the model enough space to fully develop an idea without becoming overly long-winded.
- For Long-Form Content: When generating articles, stories, or in-depth analyses, you might want to set max_tokens to 500 or more. This allows the model to explore ideas more fully and produce more comprehensive content.
Remember, it’s all about balance. You want to give the model enough room to express herself, but not so much that she loses focus. As you experiment, you’ll get a feel for what works best for your specific needs.
Temperature
Next up is the temperature parameter, which plays a crucial role in determining how “creative” or “random” the generated text will be. In simple terms, temperature controls the level of randomness in the model’s predictions. A lower temperature makes the output more focused and deterministic, while a higher temperature introduces more diversity and creativity into the text.
Think of temperature like adjusting the spice level in your food. A low temperature is like a mild dish – predictable and consistent. A high temperature, on the other hand, adds some heat, making the output more unpredictable and potentially more interesting.
Impact on Creativity
Adjusting the temperature has a significant impact on the style and nature of the generated text:
- Low Temperature (0.1 to 0.3): When you set the temperature low, the model becomes more conservative in its word choices. It’s likely to choose the most probable next word based on the context, which results in coherent, clear, and often more predictable text. This is great for factual writing or when you need precise, well-structured content. However, it might make the text feel a bit rigid or unimaginative.
- Medium Temperature (0.4 to 0.7): With a moderate temperature, the model balances predictability with a touch of creativity. The text generated at this level is still coherent, but with more variation and less repetitiveness. This is often the sweet spot for many types of content where you want to maintain a balance between creativity and clarity.
- High Temperature (0.8 and above): A high temperature setting pushes the model to take more risks in its predictions, leading to more diverse and sometimes unexpected outputs. This can result in more creative and playful text, which is great for brainstorming, poetry, or generating unusual ideas. However, it can also lead to less coherent or more chaotic outputs, which might not always be what you’re looking for.
Use Cases
Knowing when to adjust the temperature can help you tailor the output to fit your needs:
- Low Temperature: Use a low temperature for tasks that require precision, such as generating technical content, factual summaries, or when you need the model to stick closely to a specific topic or style.
- Medium Temperature: Ideal for most content creation tasks, a medium temperature gives you a good mix of coherence and creativity. It’s useful for writing blog posts, articles, or any text where you want the model to stay on track but still bring in some unique phrasing or ideas.
- High Temperature: Great for creative writing, brainstorming sessions, or when you want the model to explore a wider range of possibilities. If you’re looking for novel ideas, creative dialogue, or poetic language, a high temperature setting can provide the unexpected twists and turns you need.
In summary, temperature is a powerful tool that allows you to fine-tune the creative output of your GPT model. Whether you need straightforward, fact-based content or something with a bit more flair, adjusting the temperature can help you get there.
Top-p (nucleus sampling)
Now let’s dive into the top-p parameter, also known as core sampling. This parameter is slightly different from temperature, but equally important in shaping the variety and creativity of the generated text. While temperature controls the randomness of the model’s predictions, top-p focuses on narrowing down the selection pool of possible next words.
Here’s how it works: when the model is about to generate the next word, it looks at all possible words and ranks them by their probability of being the next word. The top-p parameter then tells the model to consider only the smallest set of these top-ranked words that together have a cumulative probability of p. For example, if you set top-p to 0.9, the model will consider only the top words that together make up 90% of the probability distribution.
Impact on Diversity
The top-p setting directly influences how diverse or conservative the generated text will be:
- Low Top-p (e.g., 0.1 to 0.3): With a lower top-p setting, the model is restricted to choosing from a smaller group of highly probable words. This often leads to more predictable and safe text, as the model sticks to the most likely words and phrases. It’s like the model is playing it safe, avoiding any wild or unexpected word choices. This setting is useful when you need reliable and straightforward output.
- Moderate Top-p (e.g., 0.4 to 0.7): At a moderate top-p level, the model considers a broader set of potential next words, leading to a more varied output. It’s still focused enough to stay on topic, but with enough flexibility to introduce some interesting and less obvious word choices. This is a good middle-ground for generating content that needs to be both engaging and coherent.
- High Top-p (e.g., 0.8 to 1.0): Setting top-p closer to 1.0 allows the model to consider almost all possible next words, including those with lower probabilities. This leads to more diverse and sometimes unexpected text. The model becomes more creative and exploratory, which can be great for generating unique content, but it might also result in less coherence or logical consistency, similar to using a high temperature setting.
Practical Applications
Understanding when and how to use top-p can enhance your ability to control the model’s output:
- Low Top-p: Ideal for situations where you need the text to be highly predictable and precise, such as in technical writing, summaries, or instructions where clarity and correctness are key.
- Moderate Top-p: This setting is versatile and works well for most writing tasks. It’s suitable for blog posts, articles, and general content creation where you want a good balance between consistency and variety.
- High Top-p: Use a high top-p setting when you’re looking for creativity and novelty, such as in brainstorming sessions, poetry, or when you want to explore a wider range of ideas. However, be prepared for the text to sometimes wander off the beaten path.
By tweaking the top-p parameter, you can fine-tune the model’s ability to generate text that is either more focused or more adventurous, depending on your needs.
Repetition penalty
The repetition_penalty parameter is a handy tool for managing the model’s tendency to repeat itself. Without some control, GPT models can sometimes get stuck in loops, repeating the same phrases or words more often than desired. The repetition_penalty helps address this by preventing the model from using the same token multiple times in a given context.
In simple terms, this parameter makes it less likely that the model will recycle the same words or phrases, and pushes it to introduce more variety into the text. It’s like nudging the model to think a little harder before repeating itself.
Managing Redundancy
By applying a repetition_penalty, you can prevent the output from becoming monotonous or redundant. Here’s how different settings affect the text:
- Low or No Penalty (e.g., 1.0 or below): With no penalty, the model feels free to reuse words and phrases as often as it likes. While this might be okay for certain types of content, like technical writing or when specific terms need to be repeated, it can also lead to unnecessary repetition, making the text feel dull or repetitive.
- Moderate Penalty (e.g., 1.1 to 1.5): A moderate repetition_penalty encourages the model to avoid repeating itself too often, promoting a more varied and engaging text. This is particularly useful for general content creation, where you want to keep the reader’s interest with fresh language and diverse phrasing.
- High Penalty (e.g., 1.6 and above): A higher penalty setting makes the model strongly avoid using the same words or phrases repeatedly. This can be useful in creative writing or in scenarios where you want the text to be as varied as possible. However, if the penalty is too high, it might force the model to use less appropriate synonyms or awkward phrasing just to avoid repetition, which can sometimes lead to less coherent text.
Optimization Tips
Here are some tips on how to set the repetition_penalty based on your content needs:
- Technical or Instructional Writing: If you’re writing content that requires the use of specific terminology repeatedly (e.g., technical documents, tutorials), a low or no penalty might be appropriate to maintain clarity and focus.
- Creative Writing and Storytelling: For creative tasks like storytelling, poetry, or dialogue generation, a moderate to high repetition_penalty can help maintain the reader’s interest by ensuring the text doesn’t become too repetitive.
- General Content: For blog posts, articles, and general content, a moderate penalty is usually a good choice. It helps keep the text lively and varied without sacrificing coherence.
By adjusting the repetition_penalty, you can strike the right balance between coherence and variety, ensuring that your text remains engaging and free from unwanted redundancy.
Presence penalty
The presence_penalty is another useful parameter that encourages the model to introduce new words and phrases into the generated text. While it may sound similar to repetition_penalty, presence_penalty is slightly different in that it specifically discourages the model from sticking to concepts and ideas that have already been mentioned in the text.
Simply put, presence_penalty nudges the model to explore new territory instead of revisiting the same topics over and over again. It’s like saying to the model, “Okay, you’ve mentioned this idea-now let’s see what else you can come up with.
Impact on Lexical Diversity
The presence_penalty has a direct impact on the diversity of ideas and vocabulary in the generated text:
- Low or No Penalty (e.g., 0.0 to 0.5): With a low or no presence_penalty, the model is more likely to stick to the ideas and words it’s already used. This can be useful when you want the text to remain tightly focused on a specific topic or when consistency is more important than variety.
- Moderate Penalty (e.g., 0.6 to 1.0): A moderate presence_penalty encourages the model to introduce new concepts and vocabulary while still staying somewhat on track. This can help make the text more engaging by introducing fresh ideas without straying too far from the main topic.
- High Penalty (e.g., 1.1 and above): A high presence_penalty strongly pushes the model to bring in new ideas and avoid repeating itself. This is particularly useful for creative tasks where you want to explore a wide range of concepts or for generating text that needs to cover multiple aspects of a topic. However, if the penalty is too high, the text might become disjointed as the model continually shifts to new ideas without fully developing any of them.
Best Practices
Here’s how you might use the presence_penalty depending on your content goals:
- Focused Content: If your goal is to produce content that needs to stay focused on a specific subject (like a technical article or a detailed analysis), a low presence_penalty ensures that the model doesn’t drift too far from the main topic.
- Explorative or Creative Writing: For tasks like brainstorming, creative writing, or when you want to generate content that covers a broad range of ideas, a higher presence_penalty can help keep the text varied and interesting by introducing new concepts and vocabulary throughout the piece.
- Balancing Relevance and Variety: If you need a good mix of relevance and diversity (such as in a blog post or essay), setting the presence_penalty at a moderate level allows the model to explore new ideas while still maintaining a coherent narrative.
By fine-tuning the presence_penalty, you can control how much the model sticks to its original ideas versus how much it explores new ones, helping you create text that is either tightly focused or richly varied, depending on your needs.
Frequency penalty
The frequency_penalty parameter is used to control the repetition of individual words within the generated text. While repetition_penalty and presence_penalty manage broader concepts and phrases, frequency_penalty specifically targets the likelihood of the same word appearing multiple times. In essence, it tells the model, “Don’t overuse this word – find another one if you can.”
This parameter is particularly useful for ensuring that the generated text doesn’t feel monotonous or overly reliant on a limited vocabulary.
Impact on Word Frequency
Adjusting the frequency_penalty can significantly alter the variety of word choice in the output:
- Low or No Penalty (e.g., 0.0 to 0.5): With a low or no frequency_penalty, the model doesn’t hesitate to reuse words. This can be beneficial in situations where consistency is key, such as in technical writing or when you need to emphasize specific terms. However, it might lead to text that feels repetitive or lacks lexical diversity.
- Moderate Penalty (e.g., 0.6 to 1.0): A moderate frequency_penalty encourages the model to vary its word choice, resulting in text that is more dynamic and engaging. This setting strikes a good balance between maintaining coherence and introducing a bit of variety in the language used.
- High Penalty (e.g., 1.1 and above): A high frequency_penalty makes the model work harder to avoid repeating the same words, leading to a richer vocabulary and more varied expression. This is ideal for creative writing, poetry, or any content where a wide range of word choices enhances the quality of the text. However, it can sometimes lead to less precise or awkward wording as the model stretches to avoid repetition.
Practical Usage
Here’s how you can leverage the frequency_penalty for different types of content:
- Technical or Instructional Content: When writing content that requires the consistent use of specific terms (e.g., in manuals, guides, or detailed technical documents), a lower frequency_penalty can help maintain clarity and focus.
- Creative and Literary Writing: For tasks like storytelling, creative writing, or poetry, a higher frequency_penalty will push the model to explore more diverse vocabulary, making the text more interesting and varied.
- General Content Creation: For most blog posts, essays, and general writing tasks, a moderate frequency_penalty is typically the best choice. It ensures the text remains engaging without overusing specific words while still being clear and coherent.
By adjusting the frequency_penalty, you can enhance the readability and appeal of your generated text, ensuring it doesn’t feel repetitive or dull.
Stop
The stop parameter is a powerful tool that allows you to define specific points at which the model should stop generating text. Think of it as a way to set boundaries for text generation, ensuring that the output stops exactly where you want it to. This can be particularly useful if you need to control the length of the output, or if you want the text to stop at a natural or meaningful point.
A stop is simply a string of characters or words that, when encountered during text generation, signals the model to stop.
Controlling Output Length
Using stop can help you manage the length and structure of the generated content. Here’s how it works in various scenarios:
- Fixed Endings: If you want the model to generate a response that ends with a specific phrase or doesn’t go beyond a certain point, you can set that phrase as a stop sequence. For example, if you’re generating a summary or an answer to a question, you might set a stop sequence like “In conclusion,” or “And that’s the key point.” This ensures the text ends where it makes the most sense, rather than trailing off into unnecessary detail.
- Preventing Overextension: When generating content for blog posts or articles, it’s important to ensure that the output doesn’t go beyond the intended scope. By using a stop sequence, you can control the text generation process and prevent the model from adding unnecessary content. For example, if you’re generating a blog post and want to stop the text before inserting tags or a call-to-action, you can set a specific phrase or marker as a stop sequence. This ensures that the content stays concise and doesn’t spill over into unintended sections, keeping the article focused and relevant.
- Breaking Up Text: If you’re generating a list or multiple sections of text, you can use stop sequences to control where each section ends. This can be particularly useful in generating structured content like FAQ sections, step-by-step guides, or multi-part articles.
Examples
Here are some practical examples of how to use stop sequences:
- Emails and Letters: Use a stop sequence such as “Best regards” or “Sincerely” to ensure that the model stops after the body of the email is complete, without generating unintended content in the signature area.
- Code Snippets: When generating code, you can specify a stop sequence such as “}” or “// End of function” to ensure that the model stops at the end of a function or code block, preventing additional, unnecessary code from being generated.
- Summaries: For summaries or short answers, a stop sequence such as “In summary” or “To conclude” can signal the model to stop the text at the appropriate point, keeping the output focused and relevant.
Best Practices
When using stop, consider the following tips:
- Contextual Relevance: Choose stop sequences that naturally fit the context of your content. The sequence should make sense in the flow of the text and not feel abrupt or out of place.
- Multiple Sequences: You can define multiple stop sequences if there are several points where you’d be okay with the text stopping. This gives the model more flexibility while still maintaining control over the output.
- Testing and Adjusting: Sometimes, you might need to experiment with different stop sequences to see which works best for your specific needs. Don’t hesitate to tweak and test until you get the desired result.
By effectively using stop, you can control the structure and flow of the generated text, ensuring it ends precisely where and how you want it to.
Model
The model parameter refers to the specific version of the GPT model you are using, such as GPT-4o mini, GPT-4o, or any other variant. Each version of the model has its own strengths and capabilities, so choosing the right one for your task can significantly affect the performance, complexity, quality of generated text, speed, and most importantly – the price of using the API.
Different models are trained with different amounts of data and different computational power, resulting in differences in how they handle language, generate responses, and understand context. Choosing the right model is like choosing the right tool for the job – some tasks require precision and subtlety, while others may benefit from a broader or more creative approach.
Impact on Performance
The choice of model can affect several aspects of the generated output:
- Complexity and Nuance: More advanced models like GPT-4o are typically better at understanding complex prompts, handling nuanced language, and generating more sophisticated responses. They can provide deeper insights, more contextually appropriate language, and better handle tasks that require a high degree of understanding.
- Creativity vs. Accuracy: While simpler models may be faster and require less computational power, they might not be as creative or accurate in generating text. For example, GPT-4o mini might be suitable for straightforward tasks or where computational efficiency is a priority, but for more demanding tasks that require a nuanced understanding of context, GPT-4o might be a better choice.
- Task-Specific Performance: Some models might excel in certain areas, such as creative writing, technical documentation, or conversational AI. Understanding the strengths of each model can help you pick the one that aligns best with your specific needs.
Choosing the Right Model
Here’s how to approach model selection based on your needs:
- Simpler Tasks: For tasks that don’t require deep contextual understanding or highly creative outputs – such as generating simple text snippets, summaries, or routine responses – using a less advanced model like GPT-4o mini can be efficient and effective. It’s faster and less resource-intensive, making it ideal for high-volume tasks where speed is more important than depth.
- Complex and Nuanced Tasks: When the task involves complex instructions, requires nuanced understanding, or benefits from sophisticated language use – such as detailed content creation, creative writing, or in-depth analysis – opt for a more advanced model like GPT-4o. These models are better equipped to handle such challenges and can produce higher-quality results.
- Resource Considerations: Advanced models like GPT-4o typically require more computational power and might be slower to generate responses. If you’re working with limited resources or need quick turnaround times, a simpler model might be more appropriate.
- Experimentation: If you’re unsure which model will work best for your task, don’t hesitate to experiment. Try generating text using different models and compare the outputs to see which one meets your expectations. Over time, you’ll develop a sense of which model works best for different types of content.
Currently available models
| Model | Description | Max request |
|---|---|---|
| GPT-4o (gpt-4o) | 2x faster, 50% cheaper and has 5x higher rate limits compared to GPT-4 Turbo. | 4,096 tokens |
| ChatGPT 4o latest (chatgpt-4o-latest) | Dynamic model continuously updated to the current version of GPT-4o in ChatGPT. | 16,384 tokens |
| GPT-4o mini (gpt-4o-mini) | Cheap, fast, powerful. | 16384 tokens |
| GPT-4 (gpt-4) | More capable than any GPT-3.5 model, able to do more complex tasks, and optimized for chat. Will be updated with the latest model iteration. | 8,192 tokens |
| GPT-4 32K (gpt-4-32k) | Same capabilities as the base gpt-4 mode but with 4x the context length. Will be updated with the latest model iteration. | 32,768 tokens |
| GPT-4 Turbo (gpt-4-turbo) | The latest GPT-4 model. Returns a maximum of 4,096 output tokens. This preview model is not yet suited for production traffic. The current model used is gpt-4-1106-preview. | 128,000 tokens 4,096 tokens for output |
| GPT 3.5 Turbo (gpt-3.5-turbo) | Most capable GPT-3.5 model and optimized for chat. Will be updated with the latest model iteration. | 4,096 tokens |
| GPT 3.5 Turbo 16K (gpt-3.5-turbo-16k) | Same capabilities as the base gpt-3.5-turbo mode but with 4x the context length. Will be updated with the latest model iteration. | 16384 tokens |
Choosing the right model is critical to getting the best results from your GPT-based content creation. By understanding the strengths and limitations of each model, you can make informed decisions that meet your specific needs, whether it’s for creativity, accuracy, or efficiency.
Additional resources
For more detailed information on these parameters and how to use them, check out the following resources:
These resources offer deeper insights and hands-on tools to help you refine your approach to using GPT models effectively.
How to import Google News into WordPress 30 Jul 2024 12:45 AM (8 months ago)

In recent years, Google has been actively complicating the process of parsing its news feeds (RSS). This trend goes against the very concept of RSS, which was created to simplify access to content. RSS (Really Simple Syndication) was originally designed for easy and automatic retrieval of updates from various websites, including news portals. But instead of making this task easier, Google has made it more and more difficult.
One of the ways Google has made parsing its news more difficult is by encrypting its links. Instead of direct URLs to articles, Google News RSS feeds now often contain encrypted links. These links do not lead directly to the content, but instead redirect users to intermediate pages that use JavaScript to further redirect to the final articles.
This not only violates the principle of simplicity inherent in RSS, but also makes the parsing process on the server side nearly impossible. Most traditional RSS parsing tools simply cannot handle such tasks. This creates numerous problems for developers and users who want to automatically collect and process news content.
Even third-party services that specialize in news feed parsing have problems working with Google News. For example, after recent link protection updates, Google News parsing services either stop working or start returning links not to the articles themselves, but to intermediate pages with JavaScript redirects (e.g. RSSHub).
The CyberSEO Pro plugin for WordPress fundamentally solves the problems with Google News parsing. Unlike most other tools, the plugin guarantees reliable and resilient parsing of Google News feeds, regardless of Google’s protective measures.
- CyberSEO Pro uses unique algorithms that effectively bypass any complications related to encrypted links and JavaScript redirects.
- No matter what new protection methods Google might implement in the future, CyberSEO Pro will continue to successfully parse Google News as long as the feed exists.
CyberSEO Pro is a reliable tool for automatically collecting and processing news content. The plugin not only solves existing problems but also guarantees their resolution in the future, regardless of what changes might be introduced.
To import an article from Google News with CyberSEO Pro, simply enter the URL of the desired Google News feed in the “New feed URL” field of the content syndicator. For example, you can use a feed like
https://news.google.com/rss/search?q=Sports
https://news.google.com/rss/topics/CAAqJggKIiBDQkFTRWdvSUwyMHZNRFp1ZEdvU0FtVnVHZ0pWVXlnQVAB
or
https://news.google.com/search?q=Business
https://news.google.com/topics/CAAqJggKIiBDQkFTRWdvSUwyMHZNRGx6TVdZU0FtVnVHZ0pWVXlnQVAB
Both RSS and web link formats are supported by the plugin. In addition, the link can contain language and regional parameters, e.g:
https://news.google.com/rss/search?q=top+news&hl=en-US&gl=US
Each Google News feed imported by CyberSEO Pro will always contain a real link to the latest published news.
In addition to Google News, there are several other news feeds that you can import with the plugin. For example, you can easily import news from Yahoo News using their RSS feed:
https://news.yahoo.com/rss/
Another good source is Bing News. E.g.:
https://www.bing.com/news/search?q=NASA&format=rss
You can also use the NewsAPI service to import news. You will need a NewsAPI key, which you can get for free by registering here. Here is an example NewsAPI link:
https://newsapi.org/v2/top-headlines?country=us&category=business&apiKey=<your NewsAPI key>
When you add a NewsAPI link (like the one above), make sure you select the “NewsAPI” preset in the CyberSEO Pro’s Syndicator. This preset comes with the necessary settings for the NewsAPI JSON feeds.
New features inspired by GPT-4o mini 26 Jul 2024 4:15 AM (8 months ago)

In the wake of AI advances and the constant emergence of new, increasingly powerful language models, the CyberSEO Pro plugin continues to evolve – introducing new features and improving existing ones. For example, after the release of OpenAI’s GPT-4o mini-model, significant changes were made. Since you might not be able to discover all the new features without delving into the relevant settings sections, we’ll explore the most important changes below.
AI Translate

A powerful translation tool, AI Translate, has been added to both CyberSEO Pro and RSS Retriever plugins. Now, alongside traditional options like DeepL, Yandex and Google, users can opt for an AI model for translation. Currently, OpenAI’s GPT-4o mini is available, accessible via the official API or OpenRouter’s unified API. GPT-4o mini has several advantages:
- Extensive contextual coverage (128k input, 32k output)
- High-quality translation
- Support for numerous languages
- Cost-effectiveness compared to competitors
AI Spinner

The AI Spinner has received a substantial upgrade in CyberSEO Pro and made its debut in RSS Retriever. Powered by GPT-4o mini, this feature now supports multiple languages, including German, Spanish, French, Chinese, and Turkish. The spinner preserves the original HTML structure of the text, ensuring unparalleled quality in content transformation.
Auto-comments and AI Article Generation
CyberSEO Pro’s Auto-comments and AI article generation functions now support a wide array of language models, including:
- OpenAI GPT-4o mini (official API, OpenRouter)
- GPT-4o (official API, OpenRouter)
- OpenAI GPT-4 32k (official API, OpenRouter)
- GPT-3.5 Turbo 16k (official API, OpenRouter)
- Anthropic Claude 3.5 Sonnet (official API, OpenRouter)
- Google Gemini Pro 1.5 (official API, OpenRouter)
- Meta Llama 3.1 405B (OpenRouter)
- Mistral Large (OpenRouter)
Of particular note is Meta Llama 3.1 405B-the first open-source frontier-level model, released on July 23, 2024. It supports eight languages and has an extended context of up to 128K. Meta Llama 3.1 405B support is already implemented in the CyberSEO Pro, RSS Retriever and AI Autoblogger plugins.
%gpt_image_prompt% placeholder
The new %gpt_image_prompt% placeholder parses the article text and generates a prompt to create an appropriate image. It’s compatible with graphics models such as Midjourney, DALL-E 3, and Stable Diffusion. This placeholder uses the default AI model selected on the General Settings tab.
Optimal use of %gpt_image_prompt% is within [midjourney], [dalle], and [stable_diffusion] shortcodes. For example:
[midjourney prompt="%gpt_image_prompt%" aspect_ratio="16:9"]
%gpt_image_prompt% can also be used in prompt fields on the Media enrichment tab. In this case the placeholder generates a unique prompt for each section of text before which an image is inserted. This is a very powerful tool to graphically illustrate text imported from third party sources or generated from scratch using AI.
Thanks to the use of models with large contextual windows and accessible APIs, such as OpenAI GPT-4o mini, Google Gemini Flash 1.5, and Anthropic Claude 3 Haiku, the cost of using this feature remains minimal.
Autoblogging with OpenAI’s GPT-4o mini 19 Jul 2024 8:49 AM (9 months ago)

OpenAI has introduced GPT-4o mini, a new AI model designed to provide cost-effective solutions for content creators and website owners. This model aims to enhance autoblogging capabilities by offering high-quality content generation comparable to its more expensive counterpart, GPT-4o, at a significantly reduced cost.
We are pleased to inform our users that GPT-4o mini is now fully compatible with our autoblogging plugins for WordPress, including CyberSEO Pro, RSS Retriever and AI Autoblogger. This means you can immediately start using the power of the GPT-4o mini to create high-quality, engaging content for your websites without any additional setup or configuration
The most striking feature of the GPT-4o mini is its price: at just 15 cents per million input tokens and 60 cents per million output tokens, it’s more than 60% cheaper than the GPT-3.5 Turbo and significantly more affordable than previous frontier models. But here’s the kicker: The quality of content generated by GPT-4o mini is on par with OpenAI’s flagship model, GPT-4o.
Let that sink in. You’re getting world-class AI-generated content at a fraction of the cost. For autobloggers and content creators, this is a game changer. Why pay more when you can get the same quality results with the GPT-4o mini?
The GPT-4o mini isn’t just about affordability; it’s a powerhouse in its own right. With a context window of 128K tokens and support for up to 16K (4x more than GPT-4o) output tokens per query, it can handle complex, long-form content with ease. Some key highlights include
- 82% score on MMLU (benchmark for textual intelligence and reasoning)
- 87% score on MGSM (Mathematical Reasoning Benchmark)
- 87.2% score on HumanEval (coding performance)
- 59.4% score on the MMMU (Multimodal Reasoning)
These impressive results translate into versatile content creation capabilities, whether you’re creating blog posts, product descriptions, or even code snippets.
As you know, content quality is king. With the GPT-4o mini, you no longer have to choose between quality and affordability. This model delivers the same high-quality content as the GPT-4o, but at a price point that makes AI-powered content creation accessible to autoblog networks of all sizes.
By integrating GPT-4o mini with our autoblogging plugins for WordPress, you’re not just saving money – you’re investing in a content creation strategy that’s both efficient and effective. So why pay more when you can get premium AI-generated content at a fraction of the cost?
Why you don’t need meta keywords 18 Jul 2024 2:10 AM (9 months ago)

If you’re using WordPress plugins like CyberSEO Pro, RSS Retriever or AI Autoblogger, you might be wondering about the importance of meta keywords. Let’s cut to the chase: you don’t need them. Here’s why, and what you should be focusing on instead.
The rise and fall of meta keywords
To understand why meta keywords are obsolete, we need to take a trip down memory lane. Meta keywords have a rich history that dates back to the internet’s infancy. Born in 1995, when the web was still in its adolescence, meta keywords were part of the original SEO toolkit. During this era, search engines like AltaVista and Infoseek were the gatekeepers of online information, and the internet was a far more innocent place.
The meta keywords tag was designed as a way for webmasters to explicitly tell search engines what their pages were about. It was implemented as a simple HTML meta tag that looked like this:
<meta name="keywords" content="seo, search engine optimisation, search engine optimization, search engine ranking">
This tag, like all meta elements, was invisible to website visitors but clearly visible to search engines. The keywords listed in the “content” attribute were used as a direct ranking factor by search engines of that era.
How meta keywords work (in theory)
The concept was simple and seemed logical at the time. Webmasters would enter a list of relevant keywords that accurately described the content of their page. Search engines would then use this information to understand the page’s topic and rank it accordingly in search results.
In theory, this would help pages rank for those terms and related searches. It was a direct line of communication between webmasters and search engines, a dream come true for early SEO practitioners.
The fall from grace
However, as is often the case with systems that are easy to manipulate, people soon found ways to abuse meta keywords. As the web became more commercialized and competition for top search rankings increased, less scrupulous webmasters began to exploit this tag.
Instead of using relevant keywords, they would stuff the meta keywords tag with popular search terms, regardless of whether they were related to the actual content of the page. This keyword stuffing was aimed at ranking for high-traffic terms, even if the page had nothing to do with those topics. It didn’t take long for the search engines to catch on to this practice.
By the early 2000s, major search engines began to reduce the importance of meta keywords in their ranking algorithms. Google, which quickly became the dominant search engine, was particularly quick to discount the tag.
The final nail in the coffin came in September 2009, when Google officially announced that it would no longer use the meta keywords tag in web ranking. Matt Cutts, then head of Google’s webspam team, clarified in a video that Google had actually been ignoring the tag for years before the official announcement.
Other search engines followed suit. Yahoo announced in October 2009 that they no longer used meta keywords (although they still indexed them). Bing stated in 2014 that the meta keywords tag was “dead in terms of SEO value” and even implied that using it improperly could be considered a spam signal.
What really matters in SEO
So if meta keywords are out, what should you focus on? That’s where plugins like CyberSEO Pro, RSS Retriever and AI Autoblogger come in. These tools use advanced AI to generate meta titles and descriptions for your WordPress posts. Unlike meta keywords, these elements still play an important role in SEO and user experience.
Meta titles
These are the headlines that appear in search results. A well-written meta title can improve click-through rates and give search engines a clear idea of the topic of your content.
Meta descriptions
While not a direct ranking factor, meta descriptions are your pitch to potential visitors. A compelling description can entice users to click on your result instead of a competitor’s.
The beauty of using these plugins is that they automatically save these important meta elements as custom fields, compatible with popular SEO plugins like Yoast SEO, Rank Math SEO, SEOPress, and The SEO Framework. This integration ensures that your AI-generated meta data will work seamlessly with your chosen SEO solution.
Content is king
While meta titles and descriptions are important, they’re just the tip of the iceberg in modern SEO. Search engines have become incredibly sophisticated in their understanding of content, and this is where your focus should be. Instead of relying on outdated techniques like meta keywords, the key to success is creating high-quality, relevant content that answers your audience’s questions and solves their problems, so it’s important to remember that the goal is to create content for people, not just search engines.
Always use your understanding of your audience to fine-tune your content to address their specific needs and interests. Humanize the generated content with a fictional character created for your prompts with a detailed personality. Since the CyberSEO Pro, RSS Retriever and AI Autoblogger plugins give you complete control over your prompts, take full advantage of this opportunity to get the most out of the AI models you use.
Still vital, just different
While meta keywords are dead, keyword research is very much alive. The difference is how we use that research. Instead of stuffing keywords into a meta tag, we now use them to inform our content strategy. What questions are people asking? What topics are trending within your niche? Use this information to guide your content creation.
Don’t forget the technical aspects of SEO. Make sure your site is fast, mobile-friendly, and easy for search engines to crawl. The WordPress plugins you use can help with content creation, but also keep an eye on the overall health of your site.
Social signals and backlinks
Search engines also consider factors such as social engagement and quality backlinks. Share your content on social media platforms and work to build relationships with other sites in your niche. Natural, high-quality backlinks remain a strong indicator of a site’s value.
The AI capabilities in plugins like CyberSEO Pro, RSS Retriever and AI Autoblogger represent the future of SEO. By automatically generating relevant meta titles and descriptions, these tools help ensure that your content is well positioned for both search engines and users. However, it’s important to remember that AI is a tool to enhance your SEO efforts, not replace the need for strategy and quality control.
How to humanize AI content 17 Jun 2024 2:39 AM (10 months ago)

The AI Autoblogger, CyberSEO Pro and RSS Retriever plugins for WordPress give users complete control over the text prompts used by the language AI models to generate content for WordPress posts. This feature sets these tools apart from other similar solutions. One of the most obvious applications of this feature is humanizing AI-generated content.
Because bypassing AI detectors is not a critical task in the context of autoblogging, search engines do not penalize or de-index sites with AI-generated content. They prioritize the quality of the content, regardless of whether it was created by a human or an artificial intelligence. This is where the need to humanize AI content comes in
When evaluating the quality of online content, search engines like Google rely heavily on user experience factors. The lower the bounce rate, the higher the active reading time, the frequency of user return visits, and the addition of pages to bookmarks, the more trust search engines will place in your content. The main goal is to keep real readers engaged with the published articles. After all, who wants to read long articles written in dry, formal language?
Various online AI content generation services offer settings to humanize the generated content. Typically, they allow users to choose from a fixed list of options such as “5th grade, easily understood by 11-year-olds” or “7th grade, fairly easy to read”. These options simply add a specific text directive to the GPT prompt used to generate articles, instructing the AI model to write in a particular style.
The CyberSEO autoblogging plugins work differently, giving users full control over text prompts. Therefore, the settings for their article generation campaigns do not include any selectors or drop-down menus for choosing the method of humanization. While this may seem like a drawback to some novice users, it is actually a significant advantage as it gives users direct control over GPT prompts. This means users are not limited to a fixed set of presets for content humanization and can provide the AI model with any instructions without restrictions.
All you need to do to humanize AI-generated articles is to add the appropriate textual directive in the “Prompt” field of your campaign settings. Here are examples of such directives that may be needed for humanizing AI content:
8th grade level:
Write the text at an 8th grade level to make it easy to read and understand. Avoid complex terms and long sentences.
5th grade level:
Write the text at a 5th grade level so that it is very easy to read and understand. Use simple words and short sentences.
7th Grade Level:
Write the text at a 7th grade level so that it is fairly easy to read and understand. Use simple words and avoid complex sentences.
Casual and conversational:
Write in a casual and conversational tone, as if you were talking to a friend. Use everyday language and keep it light.
Professional but simple:
Write in a professional tone, but keep it simple and easy to understand. Avoid jargon and overly complex sentences.
Be engaging and friendly:
Write the text in an engaging and friendly manner. Use a warm tone and make it accessible to a general audience.
Direct and to the point:
Write in a direct and straightforward manner. Be concise and clear, and make sure the main points are easily understood.
Narrative style:
Write the text in a narrative style, telling a story that is easy to follow and engaging for the reader.
In the style of Ernest Hemingway:
Write the text in the style of Ernest Hemingway. Use short, straightforward sentences and a minimalist approach. Focus on clear, direct language and vivid descriptions.
Empathetic and understanding:
Write with empathy and understanding. Acknowledge the reader’s feelings and concerns, and offer supportive and encouraging language.
Inquisitive and curious:
Write in an inquisitive and curious tone. Ask questions to engage the reader and encourage them to think and reflect.
Inspirational and motivational:
Write in an inspirational and motivational tone. Use positive language and uplifting messages to inspire and encourage the reader.
Humorous and light-hearted:
Write with a sense of humor and a light-hearted tone. Use playful language and fun examples to make the text enjoyable and entertaining.
Patient and explanatory:
Write in a patient and explanatory manner. Take the time to break down complex ideas into simple, easy-to-understand steps.
Warm and inviting:
Write with a warm and inviting tone. Make the reader feel welcome and valued, and create a sense of connection and community.
Visual and descriptive:
Write with vivid, descriptive language that paints a clear picture for the reader. Use metaphors and similes to make the text more engaging and relatable.
Encouraging feedback:
Write with a focus on providing positive, encouraging feedback. Highlight the reader’s strengths and offer constructive suggestions for improvement.
Adaptable and flexible:
Write in a way that is adaptable and flexible, able to change tone or style based on the reader’s needs and preferences.
Collaborative and inclusive:
Write in a collaborative and inclusive tone. Encourage participation and make the reader feel like a valued part of the conversation or project.
You can use these examples as a starting point and adapt them to meet your specific needs. These guidelines have a significant impact on the tone, style, and clarity of the text. By specifying the desired level of sophistication, you ensure that the content is accessible to your target audience. For example, writing at an 8th grade level makes the text easy to read for most people, while writing at a 5th grade level ensures simplicity and clarity.
Guidelines such as “casual and conversational” or “professional but simple” tailor the language to the context, making the content more engaging or more formal as needed. Using an “empathetic and understanding” tone can help in sensitive contexts by creating a supportive atmosphere, while a “humorous and lighthearted” approach can make the content more entertaining.
Instructing the AI to write in a “narrative style” can make the content more engaging by telling a story, while a “direct and to the point” directive ensures that the main points are clear and concise. Styles such as “Ernest Hemingway style” offer a minimalist and vivid approach, making the text more impactful through simplicity and clear descriptions.
Overall, these directives guide the AI to produce content that better matches your specific goals, audience, and context, increasing the effectiveness and readability of the generated text.
To go one step further, you can create your own fictional character or use an existing one to humanize your content even more. OpenAI GPT has read the entire Internet and is familiar with many famous personalities such as writers, scientists, actors, and more. You can specify this character (whether a fictional one with specific traits or a real person) in your prompt, and all generated text will be written in their unique style.
Here are a few sample prompts that demonstrate the use of a fictional character with specific personality traits and a real character whose style is known to modern AI models:
Fictional character:
Write an article about the benefits of healthy eating in the voice of Dr. Eliza Harper, a fictional nutritionist known for her warm and encouraging tone. Dr. Harper always uses simple language and personal anecdotes to connect with her readers. She often shares stories from her own life and those of her patients, making the information relatable and easy to understand. Her style is compassionate and motivational, with the goal of inspiring readers to make positive changes in their lives.
In this example, Dr. Eliza Harper’s warm and encouraging tone, use of simple language, and inclusion of personal anecdotes would make the generated text more engaging and relatable. Readers might feel a personal connection to Dr. Harper, making them more likely to trust and follow her advice.
Real character:
Write an article about the importance of climate change awareness in the style of David Attenborough. Use his distinct narrative voice, focusing on detailed descriptions and a passionate plea for conservation. Attenborough’s style is characterized by a deep reverence for nature, vivid imagery, and an authoritative yet gentle tone that captivates and educates his audience.
By using such personalized prompts, you can ensure that your AI-generated content is not only humanized, but also uniquely engaging, reflecting the personality and style of the chosen character. This approach can significantly enhance the reader experience, making content more memorable and impactful.
You probably don’t want all the articles in your campaign to be written in the same style and follow a repetitive template that could easily be recognized by Google as a machine-generated pattern, right? So always use nested Spintax in your prompts to randomly generate different article titles on your chosen topics.
Use Spintax to create prompts with intricate structures that make each iteration unique, thereby increasing engagement or reducing repetition. Avoid appearing formulaic to search engines. Each article can have a different structure, tone, and author style, with even formatting elements varying from one iteration to the next. E.g.:
Write this article in {a formal tone|an informal tone|a conversational tone|a neutral tone|an engaging tone|a thought-provoking tone}, and use {a storytelling approach|an analytical approach|a reflective approach|a humorous approach|a narrative-driven approach}, in the style of {George Orwell|Virginia Woolf|Mark Twain|Jane Austen|Ernest Hemingway|Hunter S. Thompson|Gabriel Garcia Marquez}. Ensure that the article is {well-structured|captivating|informative|compelling|entertaining} with {a strong introduction and conclusion|logical and seamless transitions between sections|vivid imagery|thought-provoking questions}.
{Include relevant examples|Cite appropriate references|Use quotes from well-known authors|Incorporate recent studies or statistics} to {support key points|add depth to the argument|engage readers more effectively}. {Format the content with subheadings|Format the content with bullet points|Format the content with lists|Format the content with pull quotes to improve readability|Insert call-to-action buttons|Insert bolded key points|Insert hyperlinks for additional reading}.
Do not underestimate the power of the “Write in the style of…” directive added to your prompt, which dramatically changes output. For example, ask the AI model to generate, say, Marcel Proust-style text, use Spintax as suggested above, and check the output with an online detector, and this is what you’ll see.

For real-life examples demonstrating this approach, check out the stories from this site using ZeroGPT. All the stories on it are automatically generated with the CyberSEO Pro plugin using the low-tier GPT-4o mini-model. None of the stories on it has been manually edited.
This is why the CyberSEO Pro, AI Autoblogger, and RSS Retriever plugins do not have any drop-down menus for selecting content humanization styles. Instead, they give users full control over their prompts, allowing them to implement any ideas, mimic the writing styles of famous personalities, and even create their own unique characters. This flexibility and control is what sets these plugins apart from simpler, more casual solutions.
Creating unique articles from imported RSS feeds using AI 27 May 2024 8:27 AM (10 months ago)

Did you know that the [gpt_article] shortcode is perfect for creating unique articles with CyberSEO Pro and RSS Retriever plugins based on imported content? The AI model can be inspired by a variety of sources, such as news articles or scientific publications. This isn’t just a simple rewrite; you’ll get new, comprehensive articles that provide additional information on the topic you specify. So let’s explore some strategies that might be useful.
First, let’s consider a simple example where we want to use AI to create a new article based on information from an external source, such as an RSS feed. Import the desired content source using CyberSEO Pro and RSS Retriever, then navigate to the “Post templates” settings tab.
Let’s say you import a news channel and want to generate articles based on current world news in light of global warming, waste management, or any other topic your site is dedicated to. Just add the appropriate prompt to the text of the structure and directives. For example, if your site focuses on artificial intelligence and you import an IT news feed, your shortcode [gpt_article] for the “Post content” template might look like this:
[gpt_article topic="%post_title%" engine="anthropic/claude-3-sonnet" sections="3" structure="Before generating the section names, analyze the article/story below and use it as a reference for the new article section structure to ensure all the essential information is included. Explain the benefits of AI technology by 2024.

THE ARTICLE FOR YOUR INSPIRATION:
%post_content_notags%" directives="Write a new, exciting article/story in a blog post format. Format the text for embedding in a WordPress post using only the <p>, <ul>, <li>, <strong>, <table>, <td>, <tr>, and <em> tags. Exclude any other HTML tags. Explain the benefits of AI technology by 2024. Use the reference article below for inspiration.

THE ARTICLE FOR YOUR INSPIRATION:
%post_content_notags%" language="English" heading="h3"]
In the example above, we generate a three-section article that highlights the content of the original article in light of the benefits of AI technology by 2024. The generated articles may have more or fewer text sections, and the size in tokens may also vary. Note that we use the %post_content_notags% placeholder, which is replaced by the imported article content, stripped of HTML tags to save on token usage. If you select a language other than the source language, the article will be translated into the selected language.
Additionally, the example uses the Anthropic Claude 3.5 Sonnet model provided by OpenRouter.ai. You can use any other model, such as Claude 3 Opus, GPT-4 Turbo, GPT-4o, or Google Gemini Pro 1.5.
Note that the topic of our post (“Explain the benefits of AI technology by 2024”) and the content of the original article are included twice: once to create headings for the text sections of our post, and again to generate the post content. Of course, you can use the section1, section2, etc. parameters to fine-tune the content of each generated post section and specify the HTML elements you want to include.
The shortcode provided above will generate complete articles on the benefits of AI technology by 2024 in the context of the imported articles. Each generated text will include the specified HTML elements, such as bold fonts, lists, tables, etc. However, it will not include the original illustrations from the imported articles, as we did not ask the AI model to include them, and we provide it with the original text without any HTML elements, including images (note %post_content_notags%).
Accordingly, you can instruct the plugin to generate unique images for your articles using DALL·E 3, Stable Diffusion, or Midjourney in the “Media enrichment” tab of your feed settings (this method is detailed in this article).
However, if you want the generated WordPress post to include images from the original article, you should explicitly ask the AI model to do so with additional prompts. You can do this both in the main prompt contained in the directives parameter and in the specific prompts for each section of the generated article where you want to retain the original images. Here is an example of a modified shortcode for this:
[gpt_article topic="%post_title%" engine="anthropic/claude-3-sonnet" sections="3" structure="Before generating the section names, analyze the article/story below and use it as a reference for the new article section structure to ensure all the essential information is included.

THE ARTICLE FOR YOUR INSPIRATION:
%post_content_notags%" directives="Write a new, exciting article/story in a blog post format. Format the text for embedding in a WordPress post using only the <p>, <ul>, <li>, <strong>, <table>, <td>, <tr>, and <em> tags. Ensure that the article is rich in content and longer than the given article, offering deeper exploration of the topics discussed. The article should be a new, original piece that expands on the ideas presented in the given article, providing additional context, analysis, and entertainment value. The text should be comprehensive and thorough, significantly expanding upon the content of the given article by incorporating relevant information, examples, and insights from your broader knowledge base. Imagine yourself as a writer tasked with creating an in-depth piece that not only informs but also captivates the reader.

THE ARTICLE FOR YOUR INSPIRATION:
%post_content%" language="English" heading="h3" section1="If there is an image in the source article, insert it at the top of the generated text."]
Note two important points:
- In the directives parameter, we now use the placeholder
%post_content%, which includes all the HTML code of the imported article, thus containing links to the images it includes. - In the section1 parameter, we explicitly ask the AI model to insert the found image from the imported article (if any) at the very beginning of each generated post, i.e., above the text of the first section.
Now let’s focus on the titles of the generated posts, since we’ve only discussed the nuances of creating post content. If our goal was to simply rewrite the content, the shortcode for the “Post title” template might look like this:
[or_text model="anthropic/claude-3-sonnet" prompt="Reword this: %post_title%"]
However, since we are generating new posts not only based on the content of the imported articles, but also based on a specified topic, a more appropriate approach is to generate a new title based on the generated content. So your shortcode might look like this:
[or_text model="anthropic/claude-3-sonnet" prompt="Analyze the following article and create a title for it. Provide only the generated title without any comments. Don't use colons or double quotes. Keep it short.

The article:
%post_content_notags%"]
If you don’t want to mess around with shortcodes, you can simply select the “Feed to unique articles” preset before you import your feed into CyberSEO Pro.

Since we are generating the post title based on the already created post content, we need to set the correct order of generating each post element. This will ensure that the main WordPress post content is generated first, followed by its excerpt and title. The Template Processing Order settings should look like this:

Now let’s consider generating meta for SEO titles and descriptions of your posts. The feed settings include templates for “Meta title” and “Meta description”. Here are examples of what they might look like:
Meta title
[or_text model="anthropic/claude-3-sonnet" prompt="Generate a search engine optimized meta title for an article based on the following information. No more than 70 characters! Include 1-2 keywords.

Keywords: %categories%
Original title: %post_title%

The article:
%post_content_notags%" max_tokens="20"]
Meta description
[or_text model="anthropic/claude-3-sonnet" prompt="Generate a search engine optimized meta description for an article based on the following information. No more than 160 characters! Include 1-3 keywords.

Keywords: %categories%
Original title: %post_title%

The article:
%post_content_notags%" max_tokens="40"]
In these examples, the shortcodes use the list of categories from the imported article as keywords. You can specify your list of keywords separated by commas. Note that all shortcodes support Spintax, so you can use randomly changing keyword lists. Spintax can be used in any shortcode parameter, such as directives, structure, sectionN, the number of generating sections, or even as the name of the AI model, which can also be randomly selected when generating each new post.
Of course, this is just an example demonstrating the capabilities of the [gpt_article] shortcode for generating new unique content based on the information obtained by the AI model when analyzing articles from your imported content feeds. While RSS Retriever can only work with RSS and Atom feeds, CyberSEO Pro can handle almost any public content sources on the web, including RSS, Atom, XML, JSON, and CSV of any structure. Moreover, this method works well, for instance, when importing product descriptions from Amazon and other marketplaces.
In this article, we used the [or_text] shortcode, which allows you to select from more than a hundred language AI models provided by OpenRouter.ai from a single account. You can use your chosen AI models directly through their official APIs. Use the [openai_gpt], [claude], and [gemini] shortcodes, respectively.
Remember that all the shortcodes provided above are simplified examples of using the [gpt_article] shortcode in CyberSEO Pro and RSS Retriever plugins. Instead of copying them directly into your feed settings, analyze how they work and create your own optimized shortcodes tailored to your specific autoblogging strategy.
OpenAI GPT-4o for autoblogging 14 May 2024 1:12 AM (11 months ago)

The powerful capabilities of OpenAI’s latest language model, GPT-4o, are now fully integrated into the CyberSEO Pro, RSS Retriever and AI Autoblogger plugins for WordPress. Key differences in the GPT-4o language model API that will be of interest to the plugin users include twice the performance, five times the rate limit, and a cost that is half that of the previous GPT-4 Turbo model. These improvements provide users with faster, more efficient processing and more cost-effective access to advanced AI capabilities.
In the CyberSEO Pro plugin, the new GPT-4o model is now available on the “Auto-Comments” settings page, as well as in the “Content Spinner” and “AI Article Generation” sections of the feed settings window. This integration allows users to leverage GPT-4o for more accurate and engaging content creation. Additionally, GPT-4o has become the default language model for the [gpt_article] shortcode implemented in the CyberSEO Pro and RSS Retriever plugins, ensuring consistent and high quality content generation across platforms. In the AI Autoblogger plugin, it is available under the “AI Model” menu, giving users streamlined access to the new AI model.
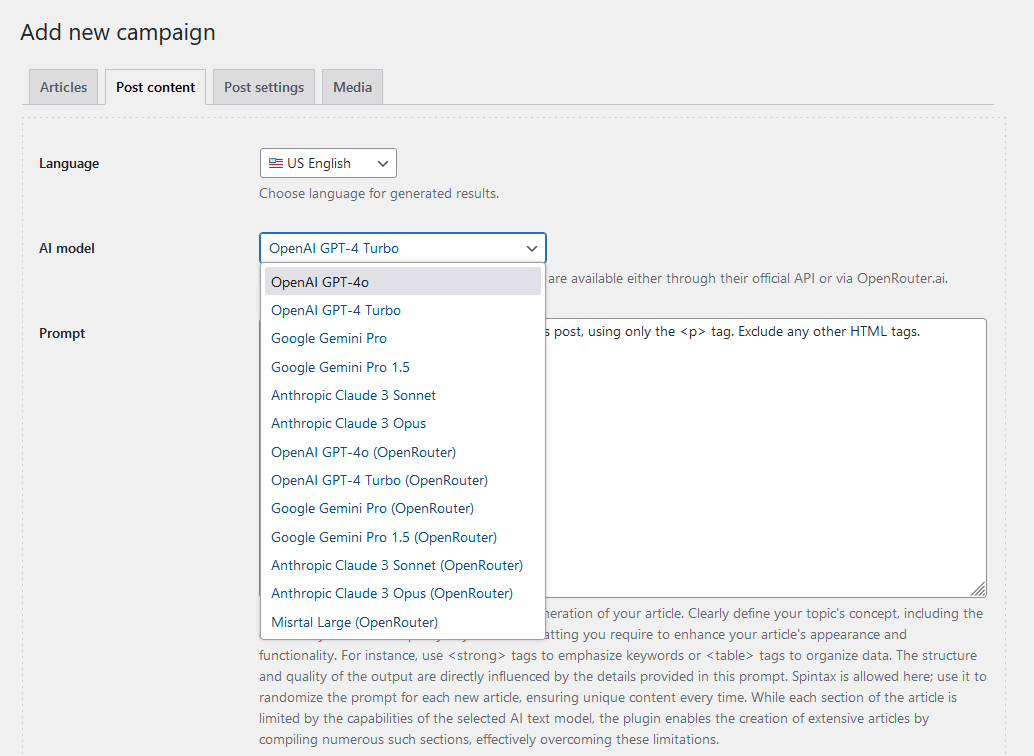
Controlling the content of text sections in the [gpt_article] shortcode 2 May 2024 4:06 AM (11 months ago)
![CyberSEO Pro: Controlling the content of text sections in the [gpt_article] shortcode](https://www.cyberseo.net/wp-content/uploads/2024/05/controlling-the-content-of-text-sections.png)
The [gpt_article] shortcode used in the CyberSEO Pro and RSS Retriever plugins has introduced a new parameter that allows users to provide additional directives for the prompts used to generate each individual article section, similar to the functionality offered by the AI Autoblogger plugin.
Unlike AI Autoblogger, where the prompts are entered as a plain text document, CyberSEO Pro and RSS Retriever work with shortcodes. This requires a different way of formatting the directives used to generate each section of text, but achieves the same result. Let’s take a closer look at this new parameter, which has the following syntax: sectionN="your section-specific directives".
Where N is the numeric section number of the article section for which you want to specify your own rules, in addition to the main prompt set by the directives parameter. This approach allows for a high degree of customization and lets you tailor content generation to specific sections of the article, improving relevance and consistency based on the unique needs of each section.
In your shortcode configuration, you can either choose not to include any sectionN parameters, or to include one or more of them. In the first case, the same prompt specified by your main directives parameter will be used to generate all text sections of the article. In the second case, the values of directives and sectionN are combined into a single unified prompt for each specific section. For example:
[gpt_article engine="anthropic/claude-3-opus" sections="4" topic="%post_title%" directives="The text should tell about known facts reviving the secrets." section2="Format the text for embedding in a WordPress post, using only <p>, <em>, <blockquote>, <ul>, <li> tags. Add one quote from your knowledge base. Exclude any other HTML tags." section4="Format the text for embedding in a WordPress post, using only <p>, <em>, <table>, <tr>, <td> tags. Include one table with a useful information. Exclude any other HTML tags. Tell about a mystery or secret related to the topic and invite the reader to find the answer for themselves. Encourage them to think."]
In this setup, the prompts for generating the different sections of the article are intended to provide specific instructions that improve the relevance and formatting of each section, ensuring a cohesive and engaging content flow.
For the 1st and 3rd sections of the generated article, the prompt will be:
The text should tell about known facts reviving the secrets.
For the 2nd section, the prompt will be enhanced with additional directives:
The text should tell about known facts reviving the secrets.
Format the text for embedding in a WordPress post, using only <p>, <em>, <blockquote>, <ul>, <li> tags. Add one quote from your knowledge base. Exclude any other HTML tags.
For the 4th section, the prompt also contains its own specific instructions:
The text should tell about known facts reviving the secrets.
Format the text for embedding in a WordPress post, using only <p>, <em>, <table>, <tr>, <td> tags. Include one table with a useful information. Exclude any other HTML tags. Tell about a mystery or secret related to the topic and invite the reader to find the answer for themselves. Encourage them to think.
Note that the text sections of the generated article are numbered in regular order, starting from 1. This numbering helps in targeting and customizing each section with appropriate content through the use of sectionN parameters, ensuring that the content generation is organized and each section is precisely aligned with the given directives.
Avoid giving direct instructions to create an article in your prompts. The language model should understand that it is writing text that is part of an article. Otherwise, it may begin to generate sections of text that include an introduction and a conclusion, which are not desirable for this particular application. It’s important to ensure that the prompts are crafted in a way that directs the AI to produce content that fits seamlessly into the broader context of the article, without redundant structural elements. This approach helps maintain the coherence and focus of each section, optimizing the overall quality and relevance of the content.
The sectionN parameter gives you maximum control over the specific content of each text section in addition to the overall content of the article. Remember that you can use Spintax to further randomize the results, adding an element of uniqueness to each section generated. This attention to detail in the setup allows for a highly customizable output, tailored precisely to specific content goals and presentation styles.
Introducing AI Autoblogger 29 Apr 2024 1:55 AM (11 months ago)
While the CyberSEO Pro plugin acts as a Swiss army knife, combining content syndication features and AI-powered article generation, it has a relatively complex, multi-functional interface and requires knowledge of shortcodes. This complexity can make it a challenging tool for those who are not professional webmasters.
Introducing AI Autoblogger – a specialized plugin designed for users who need an easy-to-use, reliable, yet powerful tool to automatically create WordPress posts using AI. This plugin features an intuitive and user-friendly interface that focuses solely on creating large book-sized articles using the top AI language models. It also supports the generation of high-quality images for these articles and facilitates their automatic posting to WordPress, thus streamlining the content creation process.
Like CyberSEO Pro, the AI Autoblogger plugin is designed to work in a fully autonomous mode according to a scheduler, but it also allows for manual content generation, which is typically necessary for initial testing of settings for each new article creation campaign. But that’s where the similarities with CyberSEO Pro end.
AI Autoblogger has its own interface and unique concept, specifically designed to implement specific AI autoblogging strategies for WordPress. Using the plugin requires no fumbling with shortcodes or learning extensive documentation, as it was originally designed to do one thing – automatically create SEO-optimized, long-form articles and publish them to WordPress. This focus on simplicity and efficiency makes AI Autoblogger a powerful tool for content creators looking for a simple and effective solution.
Despite its seemingly simple interface, the AI Autoblogger plugin provides all the necessary functionality for AI autoblogging, as it is fully integrated with AI services and language models such as OpenAI GPT-4 Turbo, Google Gemini Pro 1.5, Anthropic Claude 3 (Sonnet and Opus), Mistral Large, Stable Diffusion XL, DALL∙E 3, and Midjourney.
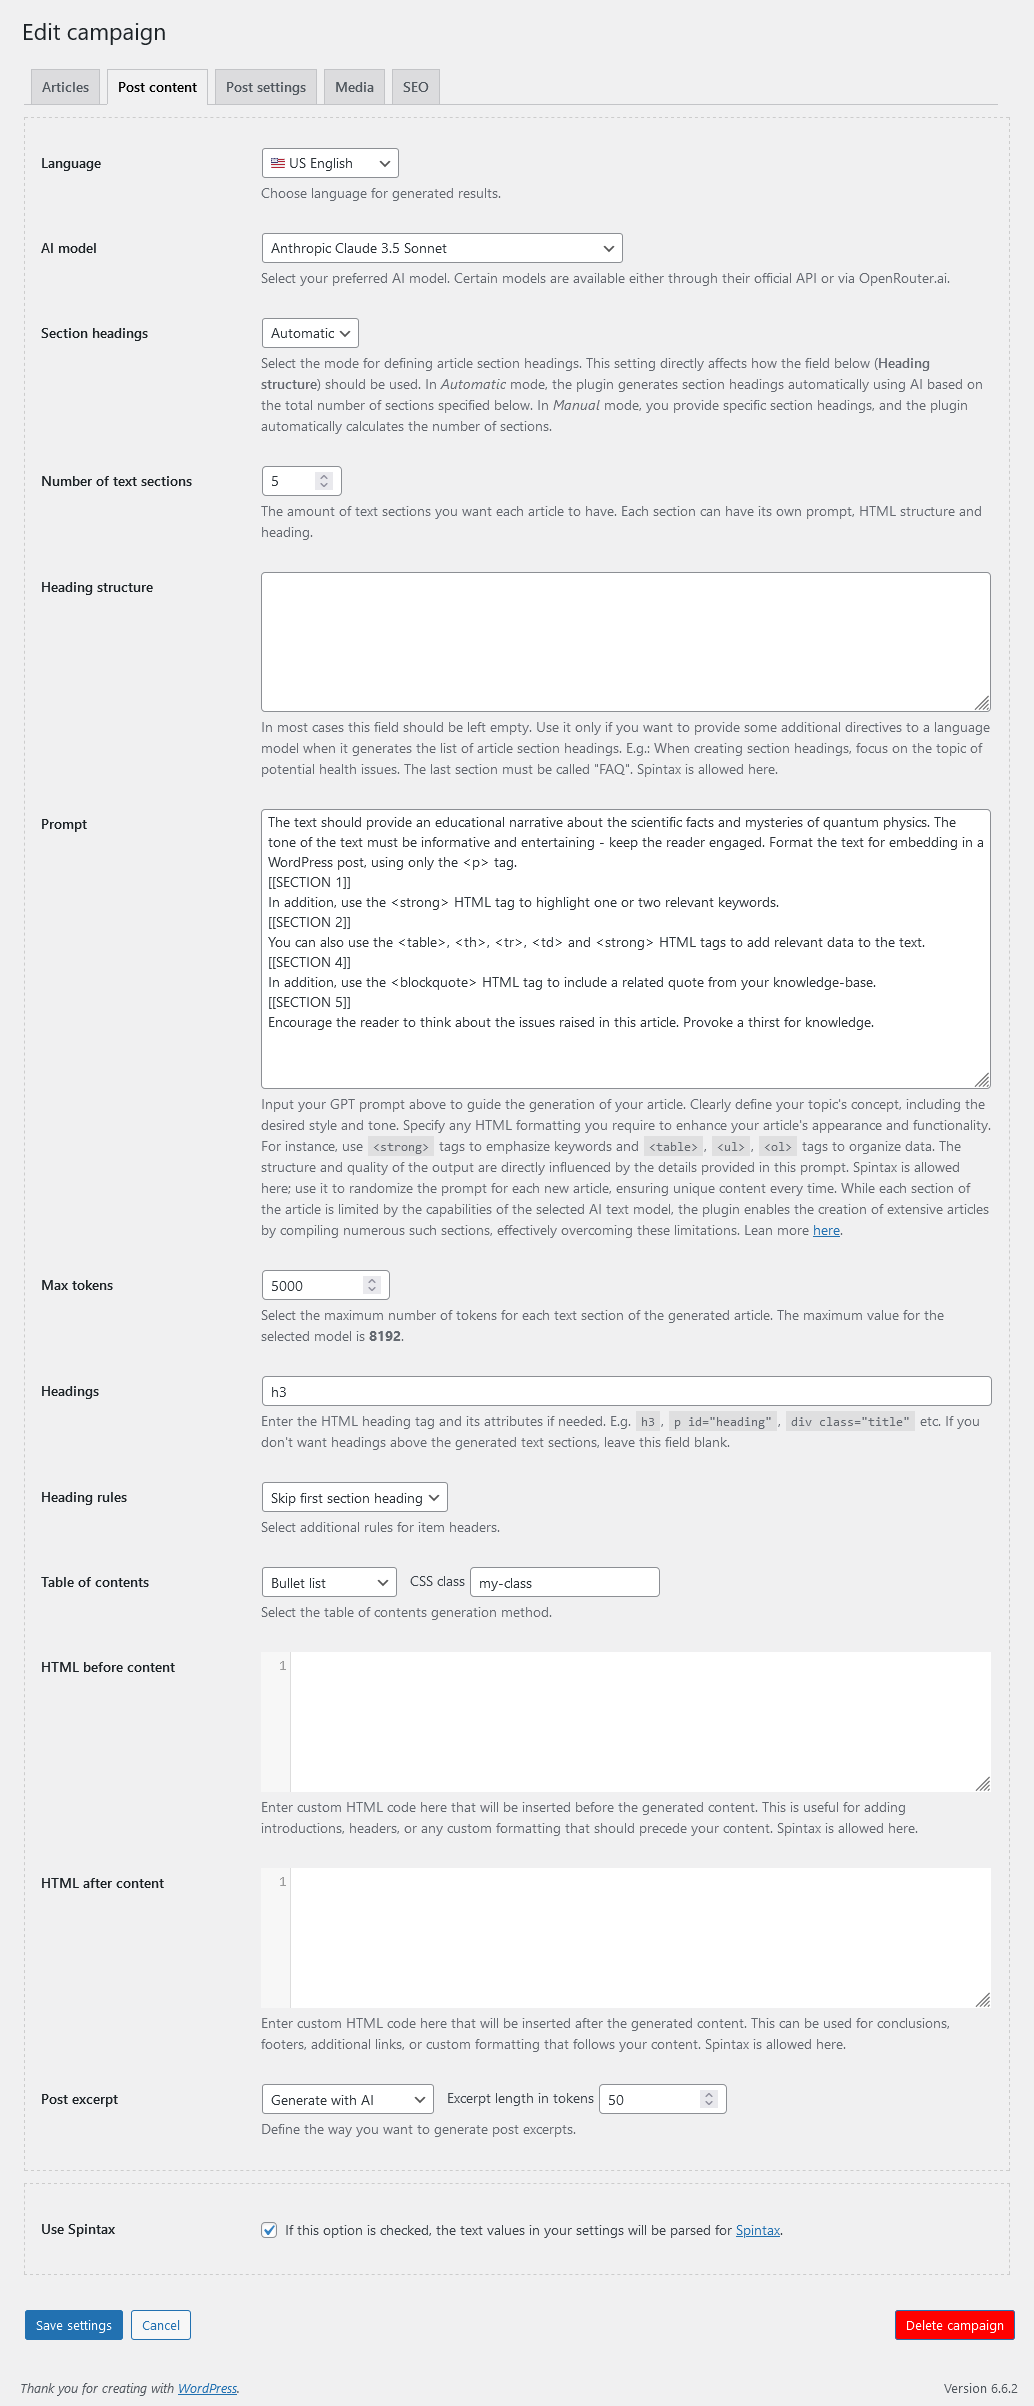
A key feature of AI Autoblogger is the complete control it offers users over their GPT prompts for AI models. The plugin’s interface lacks drop-down menus, radio buttons, and toggles for selecting the style of writing, text structure, and HTML elements (such as lists, tables, quotes, div blocks for styling code segments) of the articles. All these nuances are directly specified in the prompt, using plain human language as if you are instructing a live copywriter. Thus, the plugin does not restrict you with any sets of buttons or switches, offering complete freedom to work directly with prompts.
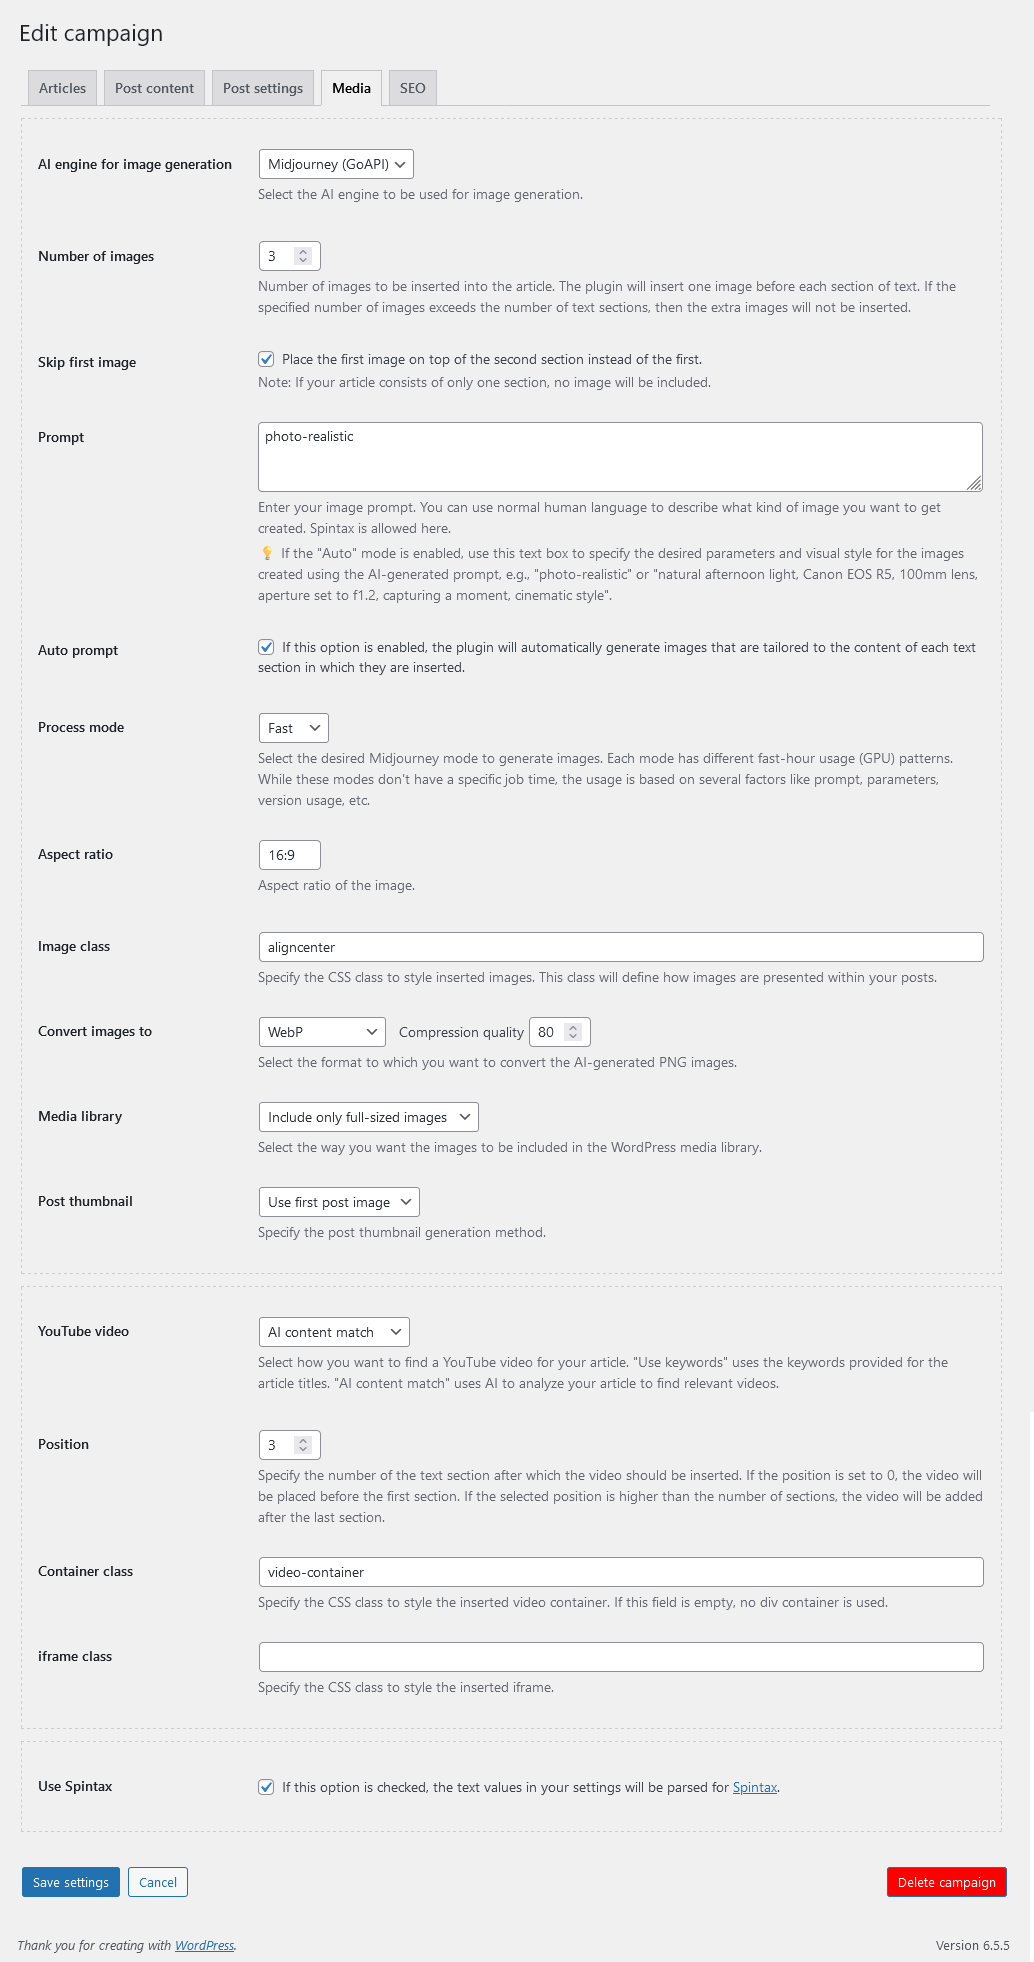
In AI Autoblogger’s settings, you have the option to specify a general prompt for the entire article you are generating that supports Spintax, as well as individual specific prompts that will be used to generate each section of text you define. This flexibility allows for detailed customization of content, ensuring that each section of the article meets specific thematic or stylistic requirements. By using different prompts for different sections, you can tailor content to different needs and increase the relevance and engagement of each part of the article.
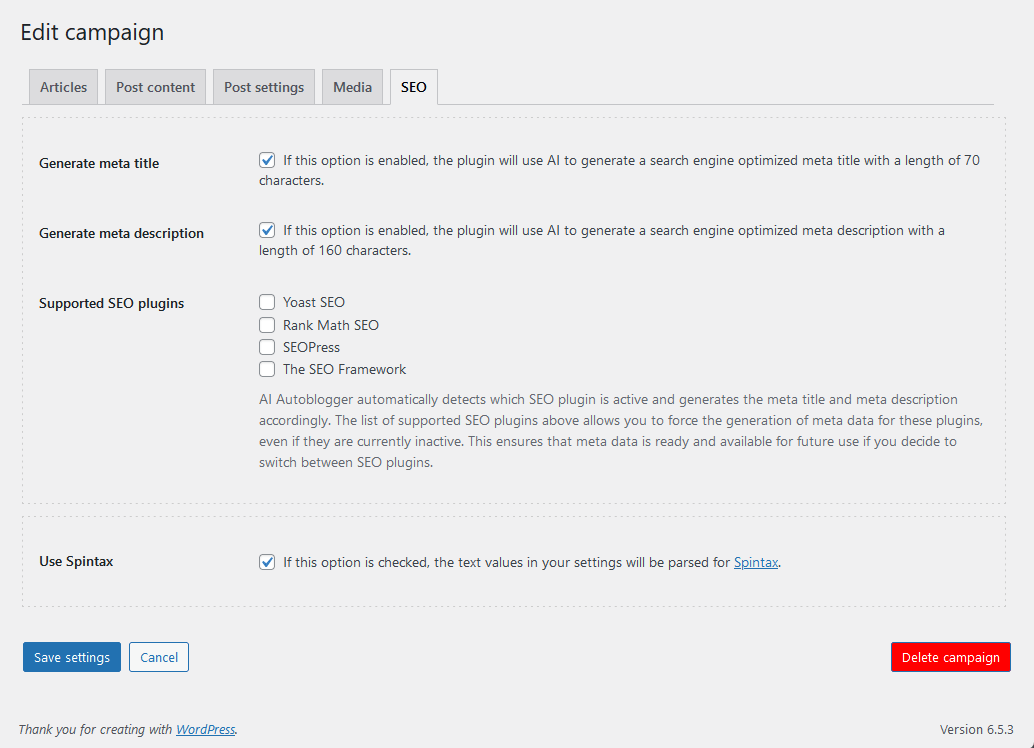
The same approach applies to the process of generating images for your articles. The AI Autoblogger plugin can automatically generate the specified number of images and insert them evenly into the text of each article it creates. You can use your own text prompts to generate images, or you can leave the image generation process entirely to the plugin. In this case, AI Autoblogger will analyze each article section before which an image is to be inserted, use an AI language model to create a prompt for an image generation engine (e.g. Midjourney), generate an appropriate image, and insert it into the article being created. This integration ensures that each image is contextually appropriate and enhances the overall coherence and visual appeal of the article.
Unlike the CyberSEO Pro and RSS Retriever plugins, which are designed for instant import of large numbers of posts from external feeds, AI Autoblogger offers a more flexible license. This license allows you to transfer the plugin to another site in case the plugin was uninstalled, domain was lost etc. In addition, the AI Autoblogger license includes a subscription to all future versions. This means that users can continuously benefit from the latest updates and improvements without the need for additional purchases, ensuring that they always have access to the most advanced features for content creation.
Batch insert and replace images in WordPress posts 21 Mar 2024 8:43 AM (last year)

In addition to the ability to embed images and YouTube videos into WordPress posts via shortcodes, the CyberSEO Pro and RSS Retriever plugins introduce a batch method for adding graphic and video content via the Media enrichment panel.
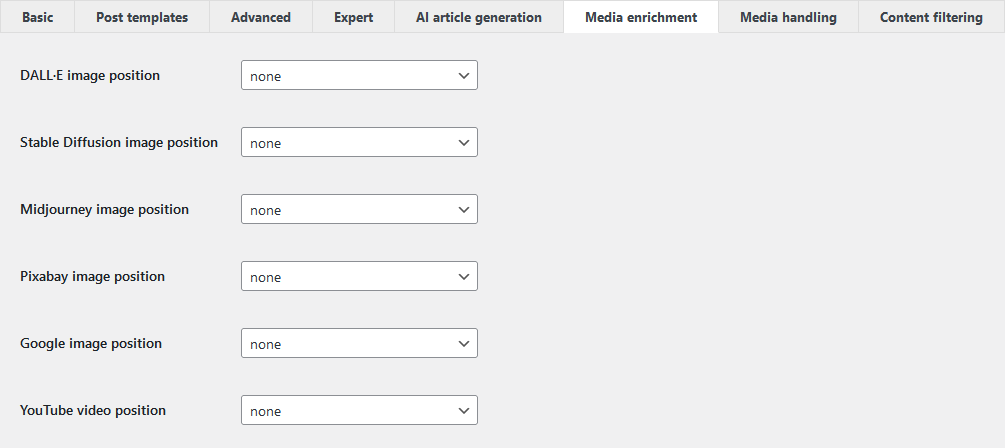
While this interface allows you to insert media content above and below the post text, and to store image links in the custom “thumb” field, its primary purpose is to facilitate the replacement of images in imported posts. It also allows you to diversify your articles with images generated by AI models (such as Midjourney, DALL-E, Stable Diffusion), whether imported from external content sources (RSS, XML, JSON, CSV, HTML) or created from scratch using text AI models (GPT-4, Gemini Pro, Claude, Mistral Large, etc.).
The “Media enrichment” panel supports various strategies for automatically replacing and adding images to WordPress posts generated in this way. Let’s delve into the most obvious tasks related to images generated by neural networks. The options for replacing and adding images can be configured in the “Image Position” drop-down menu, based on the selected AI model.
After selecting the desired model, the first step is to customize the image generation parameters, such as size, style, and CSS class name for embedding in the HTML code of your article. However, the most important and necessary parameter is your prompt, which describes the images to be generated by the selected neural network and inserted into your posts by the plugin.
Text prompts for graphical neural networks are written in plain human language and consist of simple descriptions of the desired images. For example, you might specify:
A Japanese-style illustration of a man holding a sword, featuring anime-inspired character designs, with elements of opacity, translucency, and the artistic influence of the Gutai group, all rendered in a charmingly realistic manner, predominantly in shades of gray and amber.
Or,
A determined and courageous female Jedi navigating a market on Tatooine, clad in a hooded robe.
It’s important to note that your prompts can include placeholders like %post_title% and %post_tags%, which the plugin will automatically replace with the actual elements of the generated post title and tags, respectively:
A sheet of paper emblazoned with ‘%post_title%’ at a bus stop in Tokyo, under spectacular neon reflections.
In addition, your prompts can be formatted in Spintax, allowing you to generate a variety of images with random themes from a single prompt. For example:
{{Majestic|Snowy|Dreamlike} mountains|{Lush|Asian|Winter} forests|Glittering lakes|Desert dunes|Golden sunsets}, featuring {precise details|moonlit landscapes|Pixar style|natural light|stylized illustrations}.
Let’s explore some potential strategies for using the “Media enrichment” panel.
Inserting images into AI-generated articles
Let’s say you create your articles using a text AI model, such as the [gpt_article] shortcode. Since this shortcode generates text-only content in post templates, albeit with rich HTML formatting, the task of enriching it with images falls to you. This is where the “Media enrichment” functionality comes in.
In the “image position” drop-down menu of your selected neural network, select “above content,” “below content,” or “batch insert” to insert an image above the article text, below the article text, or to insert multiple images at different locations within the text.
While the first two options in the “image position” menu are fairly self-explanatory, let’s focus on the “batch insert” option, which you’ll likely use most often in this strategy. When you select this option, you’ll see two additional fields:

The “Number of images” field allows you to specify the desired number of images to be automatically added to each article. The “Insert images before tag” field specifies the HTML tag that will divide the text into sections, between which the neural network generated images will be inserted.
For example, if each section in the plugin-generated articles has a <h2> heading, you’ll probably want to place your images above those sections. Therefore, you should select “h2” as the value for “Insert images before tag”. If your text contains no headings at all and consists only of paragraphs (<p>), it would be logical to insert images between them, so you should choose “p“.
In batch insert mode, the plugin will try to distribute the generated images evenly among the sections you’ve defined. The first image will always be placed above the whole article. The plugin will prevent more than one image from being inserted between two adjacent sections. Therefore, if the number of images you specify exceeds the number of sections found in the text that match your selected tag, only the number of images corresponding to the real structure of the article will be added, i.e. no more than the number of identified text sections.
Replacing images in imported posts
You’ve probably read our articles on rewriting and enriching imported articles, and creating new articles based on the analysis of external content using text AI models. Of course, you may want to automatically replace their illustrations with unique images generated by neural networks such as Midjourney.
The “Media enrichment” panel in the CyberSEO Pro plugin allows you to replace either just the first illustration or all graphic images contained in imported posts. To do this, simply select “replace first image” or “replace all images” from the “image position” drop-down menu of your chosen neural network. The use of Spintax is also highly recommended.
Inserting images into imported posts
You may want to go beyond simply replacing existing graphics in an imported article to removing all existing images, possibly even creating a new article with a different structure than the original, and then inserting the desired number of images into it. In this case, you’ll need the “batch insert” method recommended earlier for use in articles generated from scratch using Text AI models.
At first glance, using the batch insert option seems logical, and it is, but there’s a nuance. The article you are importing may already contain some images. So if you insert new ones, they will simply mix with the existing ones.
To avoid this, you must first remove all existing images from the article using the “HTML tags to strip” option in the “Advanced” feed settings tab. All you have to do is enter the name of the tag you want to remove, which is “img“.

However, you should never remove existing images from imported posts in this way if you plan to use the “replace all images” method described in the previous section. This is critical because attempting to replace non-existent images in the article (those you’ve removed using the “HTML tags to strip” option) will result in an article with no images, since there will be nothing to replace.
Therefore, using “HTML tags to strip” to remove existing images is only necessary if you intend to completely strip the article of graphic content with the goal of later using the “batch insert” method.
WordPress automatic blogging with Midjourney 15 Mar 2024 2:08 AM (last year)

Users of CyberSEO Pro and RSS Retriever plugins have justifiably expressed dissatisfaction with the image quality generated by AI services like DALL-E and Stable Diffusion, pointing out that Midjourney currently leads the field in this area. This consensus makes it exciting to introduce a new feature that now allows users to generate images for autoblogs using the Midjourney service!
It’s important to note that Midjourney does not offer a public API for integrating its AI image generator with third-party applications. Therefore, the only method available for its use is through external services. After exploring various options, we have chosen to partner with GoAPI, which offers access to Midjourney through a functional API at very attractive rates.
GoAPI offers two usage plans:
- Bring-Your-Own-Account (BYOA): If you already have an active Discord account with access to Midjourney, you can use it for automatic image generation via GoAPI’s API for a fixed monthly subscription fee.
- Pay-Per-Use (PPU): If you don’t have a Midjourney account on Discord, you can use GoAPI’s API in the same way as any other AI service, paying for each generated image.
GoAPI pricing plan: https://www.goapi.ai/docs/pricing-plan
It’s important to understand that the process of generating each image involves two distinct stages:
- Imagine: This step generates a preview consisting of four images.
- Upscale: The next step creates a full-size image based on one of the four previews, randomly selected. This is because the plugins operate in a non-interactive, automatic mode.
As a result, the final cost of generating each image will exceed the imagine task price listed on the GoAPI website.
We have evaluated other services which offer significantly higher rates. Consequently, they have not been supported at this stage. However, this does not mean they will not be integrated into CyberSEO Pro and RSS Retriever in the future as alternative Midjourney API providers. This openness to incorporating other services promises more flexibility and options for users in their content generation efforts.
Image generation via the Midjourney service is seamlessly supported by plugins through both standard methods: the “Media Enrichment” settings panel and a specialized shortcode for post templates, which is formatted as follows:
[midjourney prompt="your Midjourney prompt" provider="API service provider" process_mode="image generation mode" aspect_ratio="aspect ratio" name="alt image name in the post" class="desired CSS class"]
he only mandatory parameter is prompt, with all other parameters being optional and can be omitted. Here is a detailed description of each:
prompt: A text description of the image to be generated.provider: The name of the API service provider. Currently, as Midjourney is only accessible via GoAPI, this parameter can only take the value “goapi” or be omitted.process_mode: This parameter can be set to “lazy”, “fast” (the default), or “turbo”.aspect_ratio: Sets the aspect ratio for the generated image, with the default being “16:9”.name: The text to be used as the alt attribute for the generated image in your post. The default value is “%post_title%”.class: The CSS class name for the image in your post, with the default being “center”.
Examples of using the [midjourney] shortcode in a post template:
[midjourney prompt="gangster outside the corner store, Grand Theft Auto GTA5 style art"]
[midjourney prompt="an image for a blog post on the topic '%post_title%'" aspect_ratio="1:1"]
These functionalities offer a flexible way to enrich your posts with high-quality, AI-generated images, allowing for a wide range of creative expressions tailored to your content’s specific needs.
There’s probably no need to include examples of images created with Midjourney in this article. Midjourney has become the top-recommended service for generating images for your newly created or modified articles. It’s worth noting that in the latest versions of the CyberSEO Pro and RSS Retriever plugins, within the Media Enrichment settings menu, there’s an option to “replace the first image.” This feature allows the replacement of the first image in an imported article with one created by AI. This functionality is particularly beneficial for those importing articles from external content sources.
After providing a brief overview of this new feature, it seems appropriate to offer a practical guide on obtaining a Discord token for use in the BYOA (Bring-Your-Own-Account) plan settings to access the GoAPI API.
How to get your Discord token
A Discord token serves as a cryptographic identifier for your Discord account, created at the time of account setup. It’s a unique alphanumeric string that functions as an authorization code, facilitating access to Discord’s servers and validating the actions you perform on the platform. This token is vital for various integrations, including with GoAPI.ai, providing a secure method to authenticate and communicate with Discord’s API.
- Navigate to Discord in a web browser. Use the direct link provided to open Discord and select “Open Discord in your browser” to proceed.
- Enter your Discord credentials to log in. Ensure the login process is completed through a web browser.
- Once logged in, activate the Developer Tools by pressing “Ctrl” + “Shift” + “I” on your keyboard. Mac users should use Option+Cmd+I. Refresh the page (F5) after the developer tools appear.
- Within the Developer Tools, find and click on the “Network” tab. Refresh Discord by pressing “F5”.
- In the Network tab’s filter box, type “/api” to filter for Discord APIs. Select “Library” from the filtered results.
- In the header section of the selected “Library“, find the “Authorization” line which contains your Discord token. Copy this token for your use.
Chrome
Firefox
Keep in mind that by providing your Discord token (as well as tokens for other social networks like Instagram, Facebook, etc.) to third-party services like GoAPI.ai, you are granting them access to your account. In doing so, you assume full responsibility for any consequences. Therefore, it is advisable not to use your primary account for these purposes and instead create a special dedicated account for this. If you do not trust a given third-party service, the best option for you would be to use the Pay-Per-Use (PPU) plan, which does not expose your personal Discord account to any potential risks.
New Mistral Large AI model for autoblogging 27 Feb 2024 1:05 PM (last year)
 On February 26, 2024, Mistral Large was released to the public. This advanced language model is a big step forward for text generation. CyberSEO Pro and RSS Retriever plugin users can now use Mistral Large through OpenRouter.ai, offering new opportunities for autoblogging.
What really sets Mistral Large apart, beyond its advanced features, is its approach to content creation without censorship. This feature is a breath of fresh air for autobloggers who have struggled to create or rewrite articles on sensitive topics. Unlike models from OpenAI (GPT), Anthropic (Claude), and Google (Gemini), which are known for their restrictive content filters, Mistral Large offers a level of freedom in content generation that is hard to find elsewhere. This makes it an ideal choice for those who want to modify or create articles on a wider range of topics without fear of being silenced by the model’s limitations.
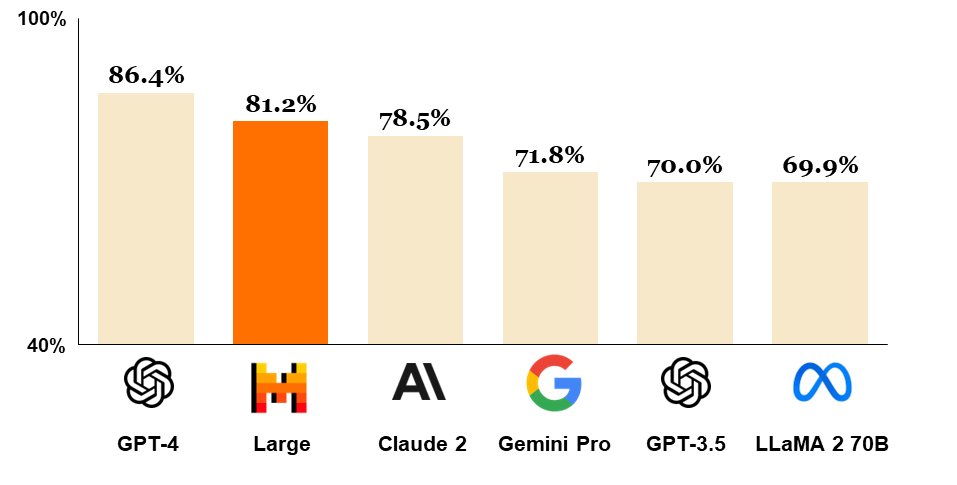
Comparison of GPT-4, Mistral Large (pre-trained), Claude 2, Gemini Pro 1.0, GPT 3.5 and LLaMA 2 70B on MMLU. Image source: mistral.ai
Mistral Large represents the pinnacle of language model development. It has been designed to excel at a wide range of tasks, from text understanding and transformation to new content creation. What sets it apart is its exceptional reasoning power, which has made it the world’s second most API-available model, just behind GPT-4. This achievement is a testament to its robust performance on various benchmarks.
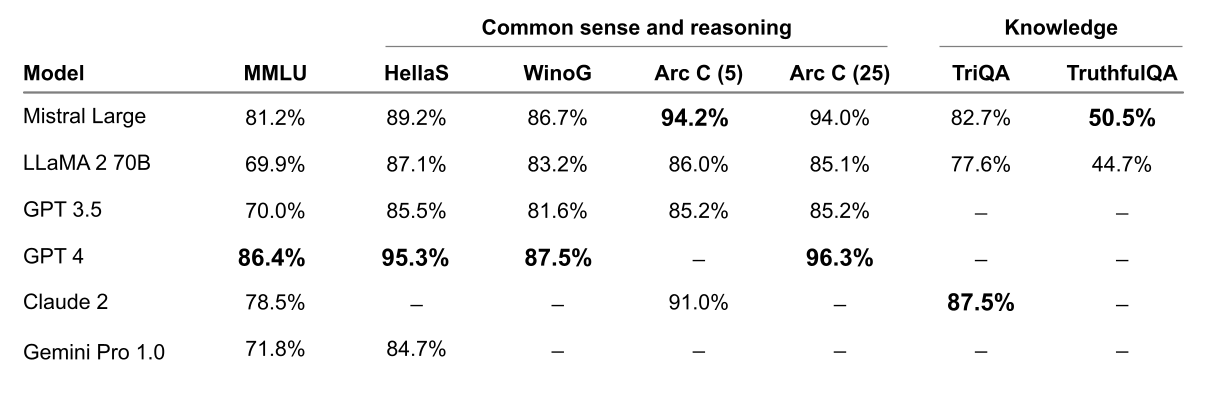
Performance on widespread common sense, reasoning and knowledge benchmarks of the top-leading LLM models on the market: MMLU (Measuring massive multitask language in understanding), HellaSwag (10-shot), Wino Grande (5-shot), Arc Challenge (5-shot), Arc Challenge (25-shot), TriviaQA (5-shot) and TruthfulQA. Image source: mistral.ai
For autobloggers, the integration of Mistral Large with CyberSEO Pro and RSS Retriever means you can now create more nuanced, contextually accurate content in English, French, Spanish, German and Italian. Thanks to its advanced understanding of grammar and cultural nuances, content generated with Mistral Large feels authentic and engaging.
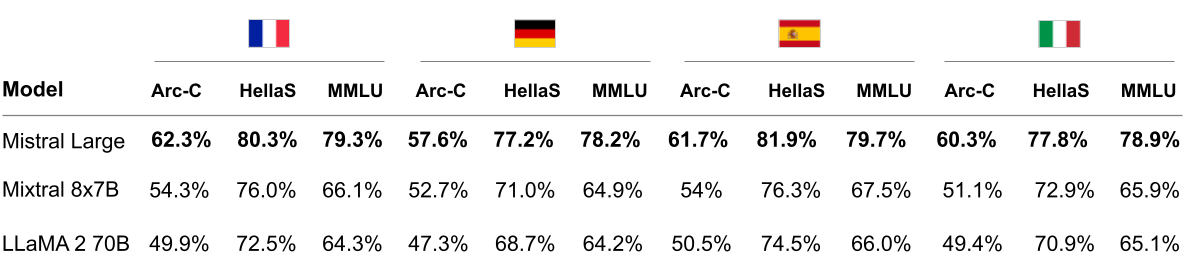
Comparison of Mistral Large, Mixtral 8x7B and LLaMA 2 70B on HellaSwag, Arc Challenge and MMLU in French, German, Spanish and Italian. Image source: mistral.ai
One of the most exciting features for content creators is the model’s 32K tokens context window. This capability allows for precise information recall from extensive documents, making your blog posts richer and more informative. Moreover, its adherence to specific instructions empowers developers to craft tailored moderation policies, ensuring that the generated content aligns with your site’s guidelines and values.
Using Mistral Large in your autoblogging process is straightforward. HTML templates for posts can now include shortcodes like [or_text model="mistralai/mistral-large" prompt="..."] and [gpt_article engine="mistralai/mistral-large" topic="..."], making it easy to incorporate this technology into your content creation workflow. This integration is not just about improving the efficiency of content generation; it’s about enhancing the quality.
The release of Mistral Large is a milestone for autobloggers using CyberSEO Pro and RSS Retriever. Its multilingual capabilities, coupled with superior reasoning and a deep understanding of cultural contexts, make it an invaluable resource for creating high-quality, diverse content. The added benefit of censorship-free content creation opens up new ways to discuss and share ideas on a wide range of topics, making Mistral Large an unparalleled tool in the field of autoblogging.
WordPress Autoblogging: OpenAI GPT-4 vs Google Gemini Pro vs Anthropic Claude