CakePHP 5.4 is around the corner 28 Jun 4:25 PM (14 days ago)
CakePHP 5.4.0-RC2 just dropped. The final 5.4.0 will follow shortly, so now is the time to pull the release candidate into your apps and surface any regressions while they are still cheap to fix.
This post highlights the changes that are most likely to show up in day-to-day code, with small, runnable examples. The full diff between 5.3 and 5.next is roughly 100 commits — what follows is the cream, not the full list.
Installing the RC
composer require cakephp/cakephp:5.4.0-RC2 --update-with-dependencies
If you maintain plugins, also try your plugin’s test suite against the RC — that is where most surprises tend to live.
ORM: new default eager loading strategy
The default loading strategy for HasMany and BelongsToMany associations changed from select to subquery. For most apps this is a net win on larger result sets — it avoids the N+1 multi-IN(...) query that grew unbounded with page size.
If a specific association regresses for you (e.g. very small parent sets, or strange index plans on your DB), opt back in explicitly:
$this->hasMany('Comments')
    ->setStrategy('select');
The behavior is identical, only the default flipped. Worth re-running your slowest endpoints and comparing query plans.
ORM: transaction commit callbacks finally fire correctly
Second behavior change worth retesting: Model.afterSaveCommit and Model.afterDeleteCommit are now correctly dispatched when save() or delete() runs inside an outer transaction. Previously these events were either suppressed or fired at the wrong moment in nested-transaction scenarios — a long-standing footgun for anyone using event listeners for audit logs, search-index updates, notifications, or other post-commit side effects.
If you have code like this:
$this->Articles->getEventManager()->on(
    'Model.afterSaveCommit',
    fn($event, $article) => $this->Search->index($article),
);

$connection->transactional(function () {
    $article = $this->Articles->save($newArticle);
    $this->Comments->save($firstComment);
    // afterSaveCommit for $article was previously NOT fired here in 5.3
});
…the search index now updates exactly once, after the outer transaction commits. Rolled-back transactions correctly discard the pending callbacks, and they don’t leak between transactions.
The underlying machinery is also exposed publicly as Connection::afterCommit() if you want to defer arbitrary post-commit work yourself:
$connection->afterCommit(function () {
    $this->mailer->sendWelcome($user);
});
// fires after the outermost transaction commits;
// runs immediately if no transaction is active.
This is the kind of fix that quietly removes a class of bugs — but it also means any listener you previously expected never to fire in those nested-save paths will now actually run. Re-check your event listeners.
ORM: stricter entity class checks
Table::delete($entity), save(), patchEntity(), and loadInto() previously accepted any EntityInterface. A copy-paste bug like $this->Invoices->delete($orderEntity) would happily delete from the wrong table — silent data loss, no exception.
5.4 (#19428) adds a runtime assertion at the persistence and marshalling chokepoints. If the entity’s concrete class doesn’t match the table’s configured entity class, you get an InvalidArgumentException instead:
$order = $this->Orders->get(1);
$this->Invoices->delete($order);
// InvalidArgumentException: Entity of class App\Model\Entity\Order
// does not match table entity class App\Model\Entity\Invoice
The escape hatch is the generic Cake\ORM\Entity itself, so ad-hoc usage like $table->delete(new Entity(['id' => 1])) still works. Only Entity subclasses that belong to a different table get rejected, which is the actual bug we want to catch.
The check is wired into:
-
save(),saveOrFail(),saveMany(),saveManyOrFail() -
delete(),deleteOrFail(),deleteMany(),deleteManyOrFail() -
patchEntity(),patchEntities() -
loadInto()
This is a behavior change in a minor: code that previously silently mis-fired will now throw. Worth grepping your codebase for cross-table delete() / save() calls before deploying the RC.
Catch it at static-analysis time too
cakephp-ide-helper 2.18.0 ships a matching 'strict' tier for the concreteEntitiesInParam option, mirroring the runtime guard at the PHPStan level. After upgrading and re-running bin/cake annotate all, table classes get explicit @method doc-blocks typed with their concrete entity:
/**
 * @method \App\Model\Entity\Invoice|false delete(\App\Model\Entity\Invoice $entity, array $options = [])
 * @method \App\Model\Entity\Invoice deleteOrFail(\App\Model\Entity\Invoice $entity, array $options = [])
 * @method iterable<\App\Model\Entity\Invoice> deleteMany(iterable<\App\Model\Entity\Invoice> $entities, array $options = [])
 * @method \App\Model\Entity\Invoice loadInto(\App\Model\Entity\Invoice $entity, array $contain)
 */
class InvoicesTable extends Table
PHPStan now rejects $this->Invoices->delete($order) before the code ever runs. Same bug, two layers of defense. The static one fails the build, not the request.
Opt in via config/app.php (or wherever you load your IdeHelper config):
'IdeHelper' => [
    'concreteEntitiesInParam' => 'strict',
],
The 'strict' tier also narrows iterable params on patchEntities / saveMany / deleteMany to iterable<TEntity> even if you leave genericsInParam at the default false.
ORM: type-safe unhydrated reads
SelectQuery->disableHydration() always returned arrays at runtime, but the static type still resolved to entity|array — so every array access needed a cast or a PHPStan ignore. Worse, disableHydration() becomes a hard error in 6.0.
5.4 adds Table::unhydratedFind() returning a dedicated UnhydratedSelectQuery. It behaves exactly like a normal select query (eager loading, finders, the lot), but because it extends SelectQuery<array<string, mixed>>, first() / all() / toArray() / iteration resolve to arrays at the type level:
$rows = $this->Articles->unhydratedFind()
    ->where(['published' => true])
    ->all();

foreach ($rows as $row) {
    echo $row['title']; // typed as array, no cast, no PHPStan ignore
}
Use it anywhere you read raw rows for performance or export and never needed entities. It is the forward-compatible replacement for disableHydration().
DateTimeType accepts date-only strings
A small marshalling fix that removes a common validation papercut: a datetime column fed a date-only Y-m-d string (e.g. from a <input type="date">) used to marshal as invalid. 5.4 accepts it and sets the time to midnight:
// posting 'starts_at' => '2026-06-28' to a datetime field
$event = $this->Events->newEntity($data);
$event->starts_at; // 2026-06-28 00:00:00 — no longer an error
If you previously worked around this with a separate date column or manual 00:00:00 concatenation, you can drop that glue.
New query expression methods
A small but very welcome batch of expression helpers landed on the query builder. They replace patterns that used to need raw SQL or awkward orWhere() gymnastics.
notBetween() — the missing partner to between():
$query->where(function (QueryExpression $exp) {
    return $exp->notBetween('Articles.published', $start, $end);
});
inOrNull() / notInOrNull() — match a list or include rows where the column is NULL. This is the single most common reason people reach for raw SQL today:
$exp->inOrNull('Articles.category_id', [1, 2, 3]);
// generates: (Articles.category_id IN (1,2,3) OR Articles.category_id IS NULL)
isDistinctFrom() / isNotDistinctFrom() — null-safe equality, finally as a first-class expression:
$exp->isNotDistinctFrom('Articles.author_id', $authorId);
// matches when both are NULL too, unlike plain '='
EXCEPT / EXCEPT ALL set operations on SelectQuery:
$active = $this->Users->find()->where(['active' => true]);
$banned = $this->Users->find()->where(['banned' => true]);

$activeNotBanned = $active->except($banned);
And stringAgg() on FunctionsBuilder — a portable wrapper over GROUP_CONCAT / STRING_AGG so you no longer have to branch on driver:
$query->select([
    'Articles.author_id',
    'tags' => $query->func()->stringAgg('Tags.name', ', '),
])->groupBy(['Articles.author_id']);
Collection convenience methods
The collection trait got five additions that round out gaps people have hit for years:
$collection = collection(['a' => 1, 'b' => 2, 'c' => 3]);

$collection->keys();                   // ['a', 'b', 'c']
$collection->values();                 // [1, 2, 3]
$collection->implode(', ');            // "1, 2, 3"

// Conditional pipelines — no more breaking out of the chain:
$results = collection($rows)
    ->when($onlyActive, fn($c) => $c->filter(fn($r) => $r->active))
    ->unless($includeArchived, fn($c) => $c->reject(fn($r) => $r->archived))
    ->toList();
when() / unless() are the big quality-of-life ones — long collection chains that previously had to be torn apart for a single conditional filter() now stay fluent.
Text::mask() and Text::maskValue()
Two new sibling helpers for safe logging and partial display:
use Cake\Utility\Text;

// Mask by position
Text::mask('4111111111111111', 4, 8);
// => "4111********1111"

// Mask specific values inside a string
Text::maskValue(
    'API call with token=sk-abcd1234 from user mark@example.com',
    ['sk-abcd1234', 'mark@example.com']
);
// => "API call with token=*********** from user ****************"
Useful in logs, audit trails, and anywhere PII or secrets accidentally end up in user-visible strings.
TestCase::mockModel() with Mockery
Mocking table classes used to be one of the rougher corners of testing. The new helper sets up a partial Mockery mock that is already wired into the table locator:
$Articles = $this->mockModel('Articles');
$Articles->shouldReceive('publishLatest')
    ->once()
    ->andReturn(true);

// Controller code that does fetchTable('Articles') now gets the mock
$this->post('/articles/publish-latest');
$this->assertResponseOk();
PHPUnit itself stopped supporting the old style of mocking with notices on newer versions — this is the supported path going forward.
Enum labels
A small but lovely addition for anyone using PHP enums as form options or table columns: EnumLabelTrait plus the #[Label] attribute give you human-readable labels without a switch statement:
use Cake\Database\Type\EnumLabelTrait;
use Cake\Database\Type\Attribute\Label;

enum ArticleStatus: string
{
    use EnumLabelTrait;

    #[Label('Draft')]
    case Draft = 'draft';

    #[Label('Pending review')]
    case Pending = 'pending';

    case Published = 'published'; // falls back to "Published"
}

ArticleStatus::Pending->label(); // "Pending review"
The label string also flows through __d() translation if you set up a domain, so it plays nicely with i18n. Combined with FormHelper::enumOptions() (now public), enum-backed select boxes become a one-liner.
A fluent filesystem utility
Cake\Utility\Fs\Finder is a new fluent file-discovery API — pattern matching, depth limits, hidden-file handling, exclusions, cross-platform paths. It replaces hand-rolled RecursiveIteratorIterator gymnastics:
use Cake\Utility\Fs\Finder;

$finder = (new Finder())
    ->in(ROOT . DS . 'src')
    ->name('*.php')
    ->notPath('*/Test/*')
    ->depth(3);

foreach ($finder->files() as $file) {
    // SplFileInfo for each match
}
Internally CakePHP already uses it for I18nExtractCommand and command scanning. The path helpers (Cake\Utility\Fs\Path::join() etc.) are also drop-in replacements for the older pathCombine() calls.
JsonStreamResponse
Streaming large JSON payloads without buffering them in memory is now first-class:
use Cake\Http\Response\JsonStreamResponse;

return new JsonStreamResponse(function () {
    foreach ($this->Reports->find()->all() as $row) {
        yield $row->toArray();
    }
});
The generator emits items into a JSON array as they are produced — handy for exports and reports that would otherwise OOM your worker.
Forward-compat: Commands now auto-hydrate $io and $args
In 6.0 the execute() signature drops the $io and $args arguments. 5.4 lays the groundwork by hydrating them as properties before execute() runs:
class MyCommand extends Command
{
    public function execute(Arguments $args, ConsoleIo $io): int
    {
        // Already works today AND forward-compatible:
        $this->io->out('Hello');
        $this->args->getArgument('name');

        return static::CODE_SUCCESS;
    }
}
Migrate to $this->io / $this->args now and your commands will need no changes when 6.0 lands.
RequestToDto attribute
A new attribute system maps request data into typed DTO action arguments — like Symfony’s MapRequestPayload but native:
use Cake\Controller\Attribute\RequestToDto;
use Cake\Controller\Attribute\Enum\RequestToDtoSource;

public function create(
    #[RequestToDto(source: RequestToDtoSource::Body)]
    CreateArticleDto $dto,
): Response {
    $article = $this->Articles->newEntity($dto->toArray());
    // ...
}
Sources are Body, Query, Request (merge of both), and Auto (the default — picks Query for GET/HEAD, otherwise Body).
The only contract the attribute enforces on your DTO class is a single static method:
public static function createFromArray(array $data): static;
Pairing with cakephp-dto
Because of that contract, the RequestToDto attribute and the cakephp-dto plugin compose with zero glue code. Every DTO generated by the plugin already ships a public
public static function createFromArray(array $data, bool $ignoreMissing = false, ?string $type = null): static
— which is exactly what core looks for. You get the strict, code-generated, IDE-friendly DTOs from the plugin plus core’s native request mapping for free.
A typical workflow:
1. Declare the DTO in your config/dto.xml:
<dto name="CreateArticle">
    <field name="title" type="string" required="true"/>
    <field name="body" type="string" required="true"/>
    <field name="authorId" type="int" required="true"/>
    <field name="tags" type="string[]"/>
    <field name="publishedAt" type="\Cake\I18n\DateTime"/>
</dto>
2. Generate the immutable class:
bin/cake dto generate
This produces App\Dto\CreateArticleDto with typed getters/with*() methods, createFromArray(), and toArray().
3. Use it directly in your controller action:
use App\Dto\CreateArticleDto;
use Cake\Controller\Attribute\RequestToDto;
use Cake\Http\Response;

public function add(
    #[RequestToDto] CreateArticleDto $dto,
): Response {
    // $dto is fully typed and immutable — no manual hydration, no array soup.
    $article = $this->Articles->newEntity($dto->toArray());
    if ($this->Articles->save($article)) {
        return $this->redirect(['action' => 'view', $article->id]);
    }
    // ...
}
No source: argument needed — Auto picks Body for the POST, Query for a GET form. The DTO’s required="true" fields throw a meaningful exception on missing input, so validation surfaces early and typed. Marshall via $dto->toArray() into an entity, or pass $dto straight into a service layer.
This is the foundation for cleaner, type-safe controller actions — expect it to grow in subsequent releases.
Also landed
A handful of smaller-but-noteworthy changes that didn’t get their own section:
-
In-tree DI container forked from
thephpleague/container(#18090). CakePHP has usedleague/containerfor years; 5.4 ports it into core asCake\Container\Containerso the framework controls its own evolution. League remains the default for BC; opt into the in-tree version withConfigure::write('App.container', 'cake'). Tagged services land viaDefinition::getTags(). Plugin authors: skim it so you know it’s coming. -
CSP-compatible hidden form inputs (#19414).
FormHelpernow uses the HTML5hiddenattribute instead of inlinestyle="display:none", so strict Content-Security-Policy setups (style-srcwithout'unsafe-inline') stop silently breaking forms.
New: Lock component
The biggest feature to land between RC1 and RC2: Cake\Lock, a new component for distributed locking (#19370). It closes a long-standing parity gap with Symfony Lock and Laravel Cache::lock().
Cache-style configuration, with engines for Redis, Memcached, File (flock), and Null (no-op for tests). Non-blocking acquire() and blocking acquireBlocking() with timeout, lock refresh for long-running jobs, owner verification on release, plus a fluent synchronized() wrapper:
Lock::synchronized('rebuild-search-index', function () {
    // Critical section runs at most once across all workers.
});
If you currently work around the gap with database advisory locks or a third-party lock library, this is the one to swap in and stress-test during the RC window.
What we need from you
The RC window is short. Before 5.4.0 lands, please:
- Pull the RC into a non-production branch of your app and run your full test suite.
- Re-run a few heavy endpoints — the eager-loading default flip is the most likely place to see surprises (good or bad).
- Try your plugins against the RC. Plugin maintainers, this is the moment to publish a 5.4-compatible tag.
- File issues on cakephp/cakephp with a minimal reproduction.
Every issue caught now is one that does not bite someone after the stable tag. Thanks for testing.


CakePHP Reactions: 👍, ❤️, or 🚀 15 Jun 2:49 PM (27 days ago)
Most applications eventually need a lightweight way for users to respond to content. A single like button works for some flows, ratings work for others, but there is a useful space in between: reactions.
The dereuromark/cakephp-reactions plugin adds that layer to CakePHP
applications. It lets users react to any model record with emoji literals such
as 👍, ❤, or 🚀, or with named keys such as thumbsup, heart, or
rocket. It is built for CakePHP 5.1+ and follows CakePHP conventions:
behaviors for model integration, helpers for view rendering, a plugin
controller for normal form posts, an optional component for action-local
handling, migrations for schema setup, and configuration through Configure.
The core rule is simple:
model + foreign_key + user_id + reaction
That means a user can add multiple different reactions to the same record, but
cannot add the same reaction twice to that record. One post can have both 👍
and 🎉 from the same user, and many users can all add their own 👍.
Where this plugin fits
The plugin is meant for the multiple-reaction case. If you only need a single
binary opinion, such as star, favorite, or like, dereuromark/cakephp-favorites
is the smaller fit. If you need weighted scores, averages, or star ratings,
dereuromark/cakephp-ratings is the better tool.
Use cakephp-reactions when the UI should offer several response types for the
same record:
-
articles with
👍,❤,🎉, and👀, -
comments with
👍and👎, -
roadmap items with
🚀, -
support replies with
❤or😄, -
private business-domain keys such as
approved,blocked, orneeds-review.
The stored reaction value is just a string. Emoji are first-class values, but the plugin does not require them.
Installation
Install the package with Composer:
composer require dereuromark/cakephp-reactions
Load the plugin and run its migration:
bin/cake plugin load Reactions
bin/cake migrations migrate -p Reactions
The current branch targets CakePHP 5.1+ and PHP 8.2+.
The database model
The migration creates one table, reactions_reactions. Each row stores the
host model name, the host record id, the reacting user id, the reaction key, and
the creation timestamp.
The important columns are:
-
model: the stored model string, for examplePostsorBlog.Articles, -
foreign_key: the primary key value of the host record, -
user_id: the user who reacted, -
reaction: the emoji literal or named key.
The table has a unique index across model, foreign_key, user_id, and
reaction. That is what makes writes idempotent and prevents duplicate rows for
the same user/reaction pair.
The foreign_key column is polymorphic. It is not a real database foreign key,
because one reaction table can point at many different host tables. Before
running the migration, you can choose the foreign-key column type through the
global Polymorphic.type configuration:
'Polymorphic' => [
    'type' => 'integer', // integer, biginteger, uuid, or binaryuuid
],
For integer and biginteger primary keys, signedness follows
Migrations.unsigned_primary_keys.
On MySQL, the migration gives the reaction column an utf8mb4_bin collation.
That matters for emoji. Binary comparison keeps grouping and uniqueness
byte-for-byte, so different emoji do not collapse into the same comparison
weight under a broad case-insensitive collation.
Attach the behavior
Every model that can receive reactions gets the Reactable behavior:
// in src/Model/Table/PostsTable.php
public function initialize(array $config): void {
    parent::initialize($config);

    $this->addBehavior('Reactions.Reactable', [
        'allowed' => ['👍', '👎', '❤', '🎉', '🚀'],
    ]);
}
The allowed option is optional. Set it to an array when you want a fixed
reaction set. Set it to null when arbitrary non-empty keys are acceptable:
$this->addBehavior('Reactions.Reactable', [
    'allowed' => null,
]);
The behavior gives the host table methods for common operations:
$this->Posts->addReaction([
    'modelId' => $postId,
    'userId' => $userId,
    'reaction' => '👍',
]);

$this->Posts->removeReaction([
    'modelId' => $postId,
    'userId' => $userId,
    'reaction' => '👍',
]);

$result = $this->Posts->toggleReaction([
    'modelId' => $postId,
    'userId' => $userId,
    'reaction' => '🚀',
]);

$counts = $this->Posts->reactionCounts($postId);
$mine = $this->Posts->userReactions($postId, $userId);
addReaction() is idempotent. It returns the new reaction id when a row is
created, and null when the same row already exists. removeReaction() returns
the number of deleted rows. toggleReaction() returns the action that happened
and fresh counts:
[
    'action' => 'added', // or 'removed'
    'counts' => [
        '👍' => 3,
        '🚀' => 1,
    ],
]
Counts are returned as an array keyed by reaction and sorted by reaction key for deterministic output.
Typed reactions with enums
The plugin includes a Reactions\Reaction enum for the default GitHub-style set:
use Reactions\Reaction;

$behavior = $this->Posts->getBehavior('Reactable');

$behavior->react($postId, by: $userId, with: Reaction::ThumbsUp);
$behavior->unreact($postId, by: $userId, with: Reaction::ThumbsUp);
$behavior->toggle($postId, by: $userId, with: Reaction::Rocket);
The bundled enum cases are:
-
ThumbsUp:👍, -
ThumbsDown:👎, -
Laugh:😄, -
Confused:😕, -
Heart:❤, -
Party:🎉, -
Rocket:🚀, -
Eyes:👀.
Applications can also define their own string-backed enum:
enum ArticleReaction: string {
    case Helpful = 'helpful';
    case NeedsWork = 'needs-work';
    case Approved = 'approved';
}
Then use those enum cases in the behavior config and calls:
$this->addBehavior('Reactions.Reactable', [
    'allowed' => [
        ArticleReaction::Helpful,
        ArticleReaction::NeedsWork,
        ArticleReaction::Approved,
    ],
]);

$this->Articles
    ->getBehavior('Reactable')
    ->react($articleId, by: $userId, with: ArticleReaction::Helpful);
The short methods react(), unreact(), and toggle() live on the behavior
instance. They are intentionally not exposed as table magic methods, because
those method names are generic and can collide with other behaviors. The
array-form table methods are still available and also accept BackedEnum
values in the reaction field.
Configure public aliases
When reaction requests go through the plugin controller or helper, the plugin uses public aliases. The alias is part of the URL and form payload, so it should be short, stable, and explicitly configured:
'Reactions' => [
    'models' => [
        'Posts' => 'Posts',
        'Articles' => 'Blog.Articles',
    ],
    'allowed' => ['👍', '👎', '❤', '🎉', '🚀'],
],
This gives you URLs such as:
/reactions/reactions/toggle/Posts/123
Unknown aliases are rejected. That is an important boundary: the browser should not be allowed to submit arbitrary table class names.
Render a reaction widget
Load the helper in AppView:
// in src/View/AppView.php
public function initialize(): void {
    parent::initialize();

    $this->loadHelper('Reactions.Reactions');
}
Render the widget and counts in a view:
// in templates/Posts/view.php
echo $this->Reactions->widget('Posts', $post->id);
echo $this->Reactions->counts('Posts', $post->id);
The widget renders the current user’s selected reactions and a <details>
picker for the available reactions. Internally it uses FormHelper::postLink()
with block => true, which keeps generated forms out of nested form markup.
Your layout must output the postLink block once:
<?= $this->fetch('postLink') ?>
The helper’s default icon set is derived from Reactions\Reaction, but you can
replace it:
$this->loadHelper('Reactions.Reactions', [
    'icons' => [
        'thumbsup' => '👍',
        'heart' => '❤',
        'rocket' => '🚀',
    ],
    'html' => '<span class="reaction%s" aria-hidden="true">%s</span>',
]);
The array key is the stored reaction value. The array value is what gets rendered.
If you need custom markup, ask the helper for the toggle URL and build the UI yourself:
$url = $this->Reactions->urlToggle('Posts', $post->id);
Choose a request strategy
The plugin supports two UI submission strategies.
The default strategy posts to the plugin controller. This is the simplest setup:
echo $this->Reactions->widget('Posts', $post->id);
The controller reads the current user id from the configured session key,
validates the alias, validates the reaction key, writes the row through
ReactionsTable, refreshes counters when needed, and redirects back for normal
HTML requests.
For JSON or AJAX toggle requests, the controller returns a small payload:
{
    "action": "added",
    "counts": {
        "👍": 3,
        "🚀": 1
    }
}
The second strategy posts back to the current host controller action and lets
ReactableComponent process the reaction payload:
// in src/Controller/PostsController.php
public function initialize(): void {
    parent::initialize();

    $this->loadComponent('Reactions.Reactable');
}
Load the helper with the action strategy:
$this->loadHelper('Reactions.Reactions', [
    'strategy' => 'action',
]);
With this setup, the helper includes alias, id, reaction, and action in
the POST body. The component checks whether the current controller action is
enabled, loads the behavior when needed, validates the payload, reads the user
id, and delegates to addReaction(), removeReaction(), or toggleReaction().
Use the controller strategy when a plugin route is acceptable. Use the action strategy when reactions should be handled inside an existing page flow.
Counter caches for list views
Counting reactions on detail pages is usually cheap. On list pages, repeatedly counting reactions for many records can get expensive. For that case, enable the optional counter cache.
Add a column to the host table:
$this->table('posts')
    ->addColumn('reactions_count', 'integer', [
        'default' => 0,
        'null' => false,
    ])
    ->update();
Enable it on the behavior:
$this->addBehavior('Reactions.Reactable', [
    'counterCache' => true,
    'fieldCounter' => 'reactions_count',
]);
The plugin recomputes the total count after add, remove, and toggle operations. Recomputing costs a little more than incrementing, but it self-heals after manual data changes. If the configured counter column does not exist, the write is skipped, which makes staged deployments easier.
Direct calls to ReactionsTable::add() or ReactionsTable::remove() bypass the
behavior. Use the behavior for normal application writes when you want counters
to stay in sync automatically.
Querying reacted content
The behavior adds two finders.
Use reactions to load one host record with its reactions and reacting users:
$post = $this->Posts
    ->find('reactions', id: $postId)
    ->firstOrFail();
Use reactedBy to find host records a user has reacted to:
$posts = $this->Posts
    ->find('reactedBy', userId: $userId)
    ->all();
These finders are useful for detail pages, profile activity, notification features, and dashboards.
Custom user models
By default, reactions belong to Users through user_id. If your application
uses another user table class, configure it:
$this->addBehavior('Reactions.Reactable', [
    'userModelClass' => 'Accounts',
]);
For a fully custom association:
$this->addBehavior('Reactions.Reactable', [
    'userModel' => 'Authors',
    'userModelConfig' => [
        'className' => 'Accounts.Users',
        'foreignKey' => 'user_id',
    ],
]);
The reaction table uses that association for its existsIn rule, so invalid
user ids are rejected at the table layer.
Admin backend
The plugin ships an admin listing for reaction rows:
/admin/reactions
Access is deny-by-default. You must configure Reactions.adminAccess with a
closure that returns literal true for allowed requests:
use Cake\Http\ServerRequest;

'Reactions' => [
    'adminAccess' => function (ServerRequest $request): bool {
        $identity = $request->getAttribute('identity');

        return $identity !== null && in_array('admin', (array)$identity->roles, true);
    },
],
The admin backend can list reaction rows and filter by configured models.
Security model
The plugin keeps the browser-facing surface intentionally narrow.
Do not trust submitted user ids. The controller and component read the current user id from the server-side session configuration. When you call the behavior directly, pass the authenticated user id from your own server-side identity logic.
Always configure Reactions.models for models exposed through the controller
strategy. The submitted alias is public input. The plugin rejects aliases that
are not mapped.
Use allowed when arbitrary reaction keys are not part of your product design.
The behavior and controller both enforce the configured allow-list.
Reaction entity foreign keys are not intended for direct mass assignment. Write through the behavior or table methods so validation, uniqueness, and counters stay consistent.
Keep the admin backend closed until your application explicitly allows the
request through adminAccess.
Troubleshooting
If reaction buttons render but do nothing, check your layout first:
<?= $this->fetch('postLink') ?>
This should be placed just before the closing </body> tag.
The helper stores generated forms in the postLink block. Without fetching
that block, the visible links will not have the backing POST forms.
If you see an invalid alias error, verify your Reactions.models config:
'Reactions' => [
    'models' => [
        'Posts' => 'Posts',
    ],
],
If a reaction key is rejected, check the behavior-level allowed config first.
The controller uses the host table’s loaded behavior config when available and
falls back to Configure::read('Reactions.allowed').
If counters do not update, confirm that the host table has the behavior loaded,
that counterCache is enabled, and that the configured counter column exists.
A complete minimal setup
For a simple posts application, the setup can be as small as this.
Configuration:
'Reactions' => [
    'models' => [
        'Posts' => 'Posts',
    ],
    'allowed' => ['👍', '👎', '❤', '🎉', '🚀'],
    'sessionKey' => 'Auth.User',
    'userIdField' => 'id',
],
Posts table:
public function initialize(array $config): void {
    parent::initialize($config);

    $this->addBehavior('Reactions.Reactable', [
        'allowed' => ['👍', '👎', '❤', '🎉', '🚀'],
    ]);
}
View helper:
public function initialize(): void {
    parent::initialize();

    $this->loadHelper('Reactions.Reactions');
}
Template:
echo $this->Reactions->widget('Posts', $post->id);
echo $this->Reactions->counts('Posts', $post->id);
Layout:
<?= $this->fetch('postLink') ?>
That gives you a working, POST-based reaction widget with server-side validation, duplicate protection, and count rendering.
Demo
Check out the sandbox examples for a live demo.
Closing thoughts
cakephp-reactions deliberately keeps the data model small and the integration
points idiomatic. The plugin does not force one presentation style or one set of
emoji. It gives your CakePHP application a dependable reaction table, a
Reactable behavior, a helper for the common UI, controller and component flows,
typed enum support, optional counters, and secure defaults around public aliases
and admin access.
That makes it useful for the common social-style reaction UI, but also for business workflows where the reaction keys are not emoji at all. In both cases, the same core rule holds: a user can express several distinct reactions to a record, and each distinct reaction is stored once.
CakePHP is now fully generics-able 5 Jun 5:48 PM (last month)
For years, running PHPStan at level 8 on a CakePHP app meant making peace with a wall of missingType.generics and missingType.iterableValue warnings, or quietly silencing them in ignoreErrors. The ORM knew the entity type. The query knew its result type. PHPStan just could not see any of it.
That era is over. As of CakePHP 5.3.6+ and cakephp-ide-helper 2.19.3+, a CakePHP app is officially generics-able: you can run level 8 with generics and land on a clean 0 errors – no blanket ignores.
- CakePHP >= 5.3.6 (the template declarations across ORM, view and event layers) – initially 5.3.4 already, but some more fine-tuning was necessary
- dereuromark/cakephp-ide-helper >= 2.19.3 (emits the matching generic doc-blocks)
What actually changed
Two things had to line up: the framework had to declare the generics, and the tooling had to emit the matching doc-blocks.
1. The core became generic
CakePHP 5.3 is where it clicked into place. The relevant template declarations:
-
Cake\ORM\Tablecarries@template TEntity(since 5.3.4), on top of the long-standing behavior template. -
The
find()/findOrCreate()/loadInto()family flowsTEntitythrough (a slightly later change). -
Cake\View\Helperis generic over its view:@template TView of \Cake\View\View. -
Cake\Event\EventInterface,Cake\ORM\Query\SelectQuery,Cake\Datasource\ResultSetInterfaceand friends are all parameterized.
So the information was finally there. The base classes could say “a UsersTable only ever deals with User entities” in a way PHPStan understands.
2. The tooling caught up
Declaring templates upstream is only half the story. Your own src/ classes still need the matching annotations, and those are generated by dereuromark/cakephp-ide-helper.
It generates fully parametrized annotations straight into your source – @method Cake\ORM\Query\SelectQuery<\App\Model\Entity\User> find(...), @property \Cake\ORM\Association\HasMany<\App\Model\Table\CommentsTable> $Comments, typed entity setters – and then you are done. PHPStan, your IDE, and every other tool just read plain committed doc-blocks. Nothing has to boot or stay resident to understand your models.
With the generated approach, the generics are in the file, version-controlled, reviewable, and tool-agnostic.
The annotator already had a tri-state switch for this – it just was not turned on, and a few generated shapes still leaked a bare array:
IdeHelper.genericsInParam is the switch. Set it to true for basic generics, or 'detailed' for fully detailed shapes (array<string, mixed>, ResultSetInterface<int, TEntity>, …).
// config/app.php (or app_local.php)
'IdeHelper' => [
    'genericsInParam' => true,
    'concreteEntitiesInParam' => 'strict',
],
Then re-run the annotator and your table doc-blocks turn from this:
/**
 * @method \App\Model\Entity\User saveOrFail(\App\Model\Entity\User $entity, array $options = [])
 */
into this:
/**
 * @method \App\Model\Entity\User saveOrFail(\App\Model\Entity\User $entity, array<string, mixed> $options = [])
 */
On top of that the new propertyTypeMap config also can help you with a larger code base:
IdeHelper:2.21.0
Make sure to check out this release update.
The last gap
Flipping the switch got us most of the way. One small leak remained, fixed upstream:
-
Helper base class. The annotator never emitted an
extendstag, so every helper trippedmissingType.genericsonTView. It now prepends@extends \Cake\View\Helper<\Cake\View\View>– gated by a runtime reflection check on the parent, so it self-disables on older cores instead of emitting an invalid generic.
One LSP gotcha worth remembering
When you override a framework method, you cannot narrow a parameter type below the parent’s. A bare array in the parent is effectively array<array-key, mixed>, so an override typed array<string, mixed> raises method.childParameterType:
Parameter #1 … should be contravariant with parameter … of method …::beforeFilter()
The fix is to use the equal type, not a narrower one:
/**
 * @param \Cake\Event\EventInterface<\Cake\Controller\Controller> $event
 */
public function beforeFilter(EventInterface $event) { /* ... */ }

// and for plain array overrides, prefer the wide form:
// @param array<mixed> $config   (not array<string, mixed>)
array<mixed> still satisfies missingType.iterableValue while staying contravariant with the parent. Best of both.
The result
My sandbox app went from 383 errors to 0 at PHPStan level 8 with phpstan-strict-rules and type-perfect enabled – and crucially, with the two blanket ignores removed:
     ignoreErrors:
-        - identifier: missingType.generics
-        - identifier: missingType.iterableValue
         - identifier: new.internalClass
CakePHP now joins Symfony/Doctrine in clean level-8-with-generics territory, and goes further by auto-generating the annotations via IdeHelper.
And we are light-years ahead of other major PHP frameworks that are still on PHPStan level 1-5.
CakePHP ships with a clean architecture, no hidden magic or anti-patterns and enables developers the right way.
PHPStan level 8+ on core and app level ensures the highest possible code quality and developer experience and literally prevents bugs and security issues before they happen.
Flip the switch, re-annotate, delete the ignores and enjoy one of the leading rapid application development frameworks in the ecosystem.
A powerful composable menu builder for CakePHP 27 May 9:03 AM (last month)
Every CakePHP project I’ve ever opened has the same file. It’s called something like MenuHelper.php or Navigation.php, it lives somewhere in src/View/Helper/, and it grows a new if ($this->request->getParam('controller') === ...) branch every quarter. By the time anyone notices, the helper is doing three jobs at once — declaring the tree, deciding which entry is active, and emitting the markup — and changing any one of them risks breaking the other two.
Over time I also often used the Tools.Tree helper to build tree structures from plain PHP arrays or from database query results.
cakephp-menu is the plugin we all might need. It builds nested menus from plain PHP (or from arrays, or from a database), resolves active state and visibility from the request, and renders to a string template, Bootstrap 5, a full navbar, a collapsible sidebar, breadcrumbs, or JSON — and it keeps those three concerns separate so each one is testable on its own.
This post is a tour of how the plugin is structured, the design choices behind that structure, and a recent round of “make the tree honest” hardening that landed before the latest release.
Want to poke at every renderer and option without cloning anything? The plugin has a hosted playground at https://sandbox.dereuromark.de/menu-sandbox — tweak menu definitions, flip resolvers, swap renderers, and watch the markup update.
The pipeline: build, resolve, render
The mental model is three steps, in order:
flowchart LR
    A["1 · Build<br/>tree"] --> B["2 · Resolve<br/>per-request"] --> C["3 · Render<br/>markup"]
Build declares what is in the menu — labels, links, icons, badges, nested submenus. It knows nothing about the current request or the logged-in user. Resolve takes the built tree and applies per-request state on top: which item is active, which branch is an ancestor of the active item, which items are visible to this user. Render turns the resolved tree into output.
The split matters because it’s what makes the same menu definition reusable. A menu you define once at boot time is resolved fresh for every request and rendered into whatever shape that page needs — a sidebar here, a breadcrumb there, JSON for the SPA tab on the same page.
Building: PHP, arrays, or a database row
The common case is fluent PHP:
use Menu\Menu;

$menu = Menu::create(['class' => 'nav nav-pills']);
$menu->addItem('Home', '/');
$menu->addItem('Docs', 'https://book.cakephp.org', [
    'attributes' => ['target' => '_blank', 'rel' => 'noopener'],
]);

$account = $menu->addItem('Account', '#');
$account->getSubMenu()->addItem('Profile', ['controller' => 'Users', 'action' => 'profile']);
$account->getSubMenu()->addItem('Logout',  ['controller' => 'Users', 'action' => 'logout']);
A link can be a string URL or a CakePHP array URL. The array form is almost always the better choice: the Router resolves base paths, plugins, and prefixes for you, which means active matching keeps working in subdirectory installs and across plugin remounts. The string form is there for external links and the odd hard-coded edge case.
A few things you get out of the box, with no extra helpers:
-
Section headers (
addHeader) render as a non-link<li>— perfect for grouping a sidebar. -
Dividers (
addDivider) render the<hr>/ separator semantic without you handling escape rules. -
Icons and badges are first-class options, not strings you smuggle through the
label. - displayChildren = false renders the item as a leaf even when it has a submenu — useful when an admin section has child items that shouldn’t appear in the chrome but should still resolve as active.
For larger setups you can skip the PHP entirely:
$menu = Menu::fromArray([
    'attributes' => ['class' => 'nav'],
    'items' => [
        ['label' => 'Articles', 'link' => '/articles', 'submenu' => [
            'items' => [['label' => 'View', 'link' => '/articles/view']],
        ]],
    ],
]);
// rows: [['id' => 1, 'parent_id' => null, 'label' => 'Articles', 'link' => '/articles'], ...]
$menu = Menu::fromFlat($rows);
fromFlat() is the one I get the most mileage out of in CMS-style apps — a single menu_items table with parent_id self-references, edited in an admin UI, materialised back into a real tree on each render. The inverse — Menu::toArray() — round-trips back to the same shape that fromArray() accepts, so a built menu can be cached, serialised, or shipped over the wire.
Tree manipulation: reorder, move, merge, split
Building a menu is rarely a one-shot operation. The most common reason you reach for this plugin in the first place is “plugin X wants to add an item to menu Y, after the third entry, but only if the user is staff”. So the API for re-arranging items after they exist is first-class:
// Insert relative to a sibling (id or key):
$menu->insertBefore($menu->newItem('What\'s New', '/changelog'), 'articles');
$menu->insertAfter($menu->newItem('Beta', '/beta'), 'home');

// Move an existing item to a specific slot:
$menu->moveToFirstPosition('account');
$menu->moveToLastPosition('logout');
$menu->moveToPosition('articles', 2);

// Reorder by id/key (unlisted items keep their order, appended after):
$menu->reorder(['home', 'articles', 'account']);

// Sort, filter, and find across direct children:
$menu->sortBy('weight');
$menu->filter(fn ($item) => $item->isVisible());
$items = $menu->find(fn ($item) => str_starts_with($item->getLabel() ?? '', 'Admin'));

// Active state lookups:
$current = $menu->getActiveItem();
$menu->clearActive();
Two operations that show up in surprising places:
-
merge($other)deep-copies another menu’s items into this one. The source stays intact, so you can keep a master menu and merge slices into per-page composites without aliasing bugs. -
slice($offset, $length)andsplit($at)give you derived menus by copy. “Render this menu as a two-column dropdown” becomes:
['primary' => $left, 'secondary' => $right] = $menu->split(4);
Pair these with the tree-integrity guarantees and you can rearrange aggressively without the “why is this item rendering twice” class of bug ever showing up.
Named menus and the helper
The helper lets you register menus by name once and render them many times:
$this->Menu->register('main', static function ($menu): void {
    $menu->addItem('Home', '/');
    $menu->addItem('Articles', ['controller' => 'Articles', 'action' => 'index']);
});

echo $this->Menu->render('main');
register() is idempotent by default — calling it twice returns the same menu — so you can scatter the call across templates and elements without worrying about double-registration. Pass ['rebuild' => true] if you actually want to wipe and rebuild.
The rest of the helper
Beyond register / create / render, the helper carries the breadcrumb integration and the named-menu lifecycle:
// Named-menu lifecycle:
$main = $this->Menu->getOrCreate('main');
$this->Menu->has('main');
$this->Menu->remove('main');
$this->Menu->reset(); // wipe every named menu

// Active item + path (after resolution):
$current = $this->Menu->getCurrentItem('main');
$path = $current ? $this->Menu->extractPath($current) : [];

// Breadcrumbs — three flavours depending on where you want to render:
$crumbs = $this->Menu->getBreadcrumbs('main'); // plain array
$this->Menu->populateBreadcrumbs('main'); // push into CakePHP's BreadcrumbsHelper
echo $this->Menu->renderBreadcrumbs('main'); // render directly via BreadcrumbRenderer
The three breadcrumb flavours are deliberate. getBreadcrumbs() is for code that wants to do something with the path itself (a JSON-LD BreadcrumbList, an SEO meta tag, a custom layout). populateBreadcrumbs() plays nicely with CakePHP’s stock BreadcrumbsHelper so existing layout code keeps working. renderBreadcrumbs() is the “just give me the markup” shortcut.
Resolvers: active state and visibility, without if-trees in your menu code
The resolver layer is where I think the plugin earns its keep. Instead of every menu helper sprouting a giant match over controllers and actions, you compose a small ResolverCollection. The bundled resolvers cover most apps out of the box:
| Resolver | What it sets | Reads from |
|---|---|---|
UrlArrayResolver |
active | item link array vs request route |
Psr7UrlResolver |
active | item link string vs request URI |
SectionResolver |
active | item data.section vs request params |
RegexResolver |
active | item data.regex vs request URL |
LoggedInResolver |
visible | identity present/absent |
PermissionResolver |
visible | item data.permission callback |
AuthorizationResolver |
visible | closure per item (TinyAuth-shaped) |
CallbackResolver |
active / visible | arbitrary closure per item |
Compose them in any order:
use Menu\Resolver\Psr7UrlResolver;
use Menu\Resolver\UrlArrayResolver;
use Menu\Resolver\SectionResolver;
use Menu\Resolver\LoggedInResolver;
use Menu\Resolver\AuthorizationResolver;

$resolvers = (new \Menu\Resolver\ResolverCollection())
    ->add(new UrlArrayResolver($request)) // active state
    ->add(new SectionResolver($request)) // also active state (section badges)
    ->add(new LoggedInResolver($identity)) // visibility
    ->add(new AuthorizationResolver(fn ($item) =>
        is_array($item->getLink()?->getRawUrl())
            ? $this->AuthUser->hasAccess($item->getLink()->getRawUrl())
            : null,
    ));
Each resolver inspects every item, mutates runtime state (active, visible, expanded), and hands the tree to the next one. Order matters — later resolvers see what earlier ones decided — but the structure of the tree never changes. Re-render the same menu for a different request and the previous active state is overwritten cleanly.
A couple of well-loved options that ride on top:
-
singleActive => true— when several items match the current URL (a parent and a child both pointing at the same route, for example), keep only the deepest visible match active. Breaks ties by document order so the active trail is unambiguous. -
hideEmptyBranches => true— if an authorization resolver hides every leaf under a parent, skip the now-empty dropdown instead of rendering a hollow chevron. -
additionalResolvers— the helper applies the URL resolvers automatically; this option lets you tack extras on without losing the defaults.
The TinyAuth recipe is the one that gets people most excited:
use Menu\Item\ItemInterface;
use Menu\Resolver\AuthorizationResolver;

echo $this->Menu->render('admin', [
    'hideEmptyBranches' => true,
    'additionalResolvers' => [
        new AuthorizationResolver(function (ItemInterface $item): ?bool {
            $url = $item->getLink()?->getRawUrl();

            return is_array($url) ? $this->AuthUser->hasAccess($url) : null;
        }),
    ],
]);
A single menu definition, no role-aware branches in the template, and every user sees exactly the items they can actually reach.
Active matching, all the way down
The default UrlArrayResolver is more forgiving than it looks. A few item options let you fine-tune what counts as active without writing a custom resolver:
// Named CakePHP routes — works against Router::url(['_name' => ...]):
$menu->addItem('View', ['_name' => 'articles:view']);

// Fuzzy / prefix matching — /articles/view/42 still marks /articles/view active:
$menu->addItem('Articles', ['controller' => 'Articles', 'action' => 'view'], [
    'fuzzy' => true,
]);

// Alternate routes — mark this item active for any of these too:
$menu->addItem('Inbox', ['controller' => 'Messages', 'action' => 'index'], [
    'matchRoutes' => [
        ['controller' => 'Messages', 'action' => 'unread'],
        ['controller' => 'Messages', 'action' => 'starred'],
    ],
]);

// Per-item override of query-string handling:
$menu->addItem('Search', '/search', ['ignoreQueryString' => true]);
And two helper-level knobs control how far matching runs:
-
resolveDepth— caps how deep into the tree the default URL resolvers scan. Useful when you have a giant CMS-backed menu and you only care about the first two levels for active state. -
depth(renderer option) — caps how deep the renderer goes, independently.hideEmptyBranchesalways looks at visibility, not the depth cutoff, so a top-level item with hidden children is kept when its submenu is truncated bydepthbut dropped when authorization hid everything under it.
The combination is the “a hundred-item plugin menu, two visible levels, active state still correct” setup that almost every admin app eventually needs.
Renderers: pick the shape, keep the tree
A renderer never decides active state or visibility. It only reflects what resolution already decided. That means swapping renderers is a per-call choice, not a refactor:
echo $this->Menu->render($menu); // string template
echo $this->Menu->render($menu, ['renderer' => Bootstrap5Renderer::class]);
echo $this->Menu->render($menu, ['renderer' => NavbarRenderer::class]);
echo $this->Menu->render('sidebar', ['renderer' => Bootstrap5SidebarRenderer::class]);
echo $this->Menu->render($menu, ['renderer' => JsonRenderer::class, 'pretty' => true]);
echo $this->Menu->renderBreadcrumbs('main');
The bundled renderers all emit accessible markup out of the box — aria-current="page" on the active label, aria-expanded on collapsible branches, the right role attributes on nav / menubar / menuitem. The sidebar wires each branch to its collapse element through a unique id so it works with the stock Bootstrap bundle and zero custom JavaScript.
The distinction between Bootstrap5Renderer and NavbarRenderer is worth calling out: Bootstrap5Renderer emits the inner <ul class="nav"> and expects you to wrap it. NavbarRenderer emits the whole <nav> chrome — brand, responsive navbar-toggler, the collapsible navbar-nav, and dropdowns for nested items. Drop it straight into a layout and you have a working top bar; no extra markup, no Bootstrap JS glue.
If none of them fit, the renderer interface is small enough that a custom one is an afternoon’s work — and per-call template overrides let you tweak just the bits you care about without subclassing.
A small detour: keeping the tree honest
The pipeline is only as trustworthy as the data structure under it. A menu is a tree of items, and trees are easy to corrupt by accident — the same item attached to two parents, a removed item that still thinks it has a parent, a child added back to its own grandchild’s submenu. The plugin used to let you do all of these. It didn’t lie, exactly, but the failure modes were quiet: the wrong branch rendered, the wrong item resolved as active, a stale reference held the old parent’s classes.
A recent round of PRs tightened this up.
Direct menu ownership. Items now know which Menu they were last attached to. Move an item across menus and the source forgets it; the destination claims it. That single invariant rules out the “item belongs to A but lives in B’s tree” class of bug.
Detach on move. add() / insertBefore() / insertAfter() now detach the item from its previous parent before reattaching. Before this, moving an item into a different submenu left it attached to the old one as a phantom — most renderers happily rendered it twice.
Explicit detach(). If you hold a reference to an attached item and want to move or reuse it elsewhere, you say so:
$item->detach();
$otherMenu->add($item);
The fluent setter is part of ItemInterface, so editor tooling surfaces it the moment you start typing.
Cycle checks. Adding an item into its own descendant subtree now throws instead of producing a RuntimeException deep in the renderer (where the stack trace is nine frames away from your actual mistake).
Fail loudly on misses. remove() and removeByKey() now throw when the id or key doesn’t exist, instead of silently returning. The old swallow-and-continue behaviour was a footgun every time you renamed an item: the removal silently did nothing and the menu kept showing the old entry.
Most of these are behaviour changes, not API changes — code that was already correct still works. Code that relied on silent no-ops will surface real exceptions. That’s the point.
Things you only notice once you’ve used it for a week
-
Menu::collect()returns anItemCollectionover the whole tree depth-first, so you canfindById,findByKey, orfindByParentwithout recursing by hand. -
Menu::merge(),Menu::slice(),Menu::split()give you derived menus by copy — the source stays intact, which means “render this menu as two columns” is two method calls. -
freeze()locks the structure of a menu but leaves runtime resolver state mutable. Useful when you want to publish a built menu from a service and have application code resolve it without accidentally adding items. -
bin/cake menu generate Mainwrites aconfig/menu_main.phpspec under theMenu.menusConfigure key. The helper auto-registers anything it finds there oninitialize(), so$this->Menu->render('main')works without any wiring inAppView. -
The default
Bootstrap5Rendererhonours per-itemdisplayChildren = falseon the anchor itself, not just the submenu, so admin chrome stays clean when you only want the parent clickable.
Why it’s small on purpose
The plugin has no runtime dependencies beyond CakePHP itself, ships on PHPStan level 8, and the entire test suite runs in under a second. That’s deliberate — a menu plugin should never be the thing that pushes you onto a higher Cake or PHP minimum, and it should never be the thing that slows your test suite down. The trade is that everything beyond the bundled renderers and resolvers is yours to write, but the interfaces are small enough that you’ll be writing fifty-line classes, not three-hundred-line subclasses.
Get it
composer require dereuromark/cakephp-menu
bin/cake plugin load Menu
Full docs, including the recipes catalogue, live at https://dereuromark.github.io/cakephp-menu/. The live sandbox is the fastest way to see the renderers side-by-side before you wire it into your app.
If you maintain a CakePHP app and you’ve got a hand-rolled MenuHelper lying around, this is the plugin you can replace it with — and once the build / resolve / render split clicks, you’ll wonder why you kept reinventing it.
RFC 9116: security.txt for your PHP apps 23 May 6:02 AM (last month)
… and how we automated it in CakePHP
Most security incidents do not start with a genius attacker. They start with an honest person who found something and could not figure out how to tell you. If reporting a bug is harder than tweeting about it, you have quietly chosen public disclosure for them.
At the same time AI makes it possible to even automate security testing on a scale we have not seen before. Every single day now there is a vulnerability found (and reported) somewhere out there.
security.txt fixes the boring part of that problem: it tells finders exactly
where to send a report. This post covers what the standard is, why lowering the
reporting barrier matters, and how we turned it into a one-liner for CakePHP apps
with an always-fresh middleware.
The problem: a locked door with no doorbell
Put yourself in a researcher’s shoes. You notice an exposed endpoint on a site. You want to do the right thing and report it privately. So you start hunting:
-
Is there a
/securitypage? Usually not. -
A
security@mailbox? Maybe, maybe monitored. - A contact form? It caps your message at 500 characters and eats attachments.
- The company on social media? Now you are discussing a vulnerability in public.
Every dead end raises the odds of one of two bad outcomes: the reporter gives up, or the details end up somewhere public. Neither is what you want.
What security.txt is (RFC 9116)
security.txt is a small, plain-text file described by
RFC 9116, “A File Format to Aid in
Security Vulnerability Disclosure” (Informational, 2022, by Edwin Foudil and
Yakov Shafranovich). You serve it over HTTPS as text/plain at a well-known
location:
https://example.com/.well-known/security.txt
Inside, it is just Field: value lines. Two fields are required, the rest are
optional:
| Field | Required | Purpose |
|---|---|---|
Contact |
Yes | How to reach you: an https: URL, mailto:, or tel:. May repeat, in order of preference. |
Expires |
Yes | When the file’s data should no longer be trusted (ISO 8601). |
Encryption |
No | Where to find your public key, so reports can be encrypted. |
Policy |
No | Link to your disclosure policy. |
Acknowledgments |
No | Your hall of fame for past reporters. |
Preferred-Languages |
No | Languages you can read, e.g. en, de. |
Canonical |
No | The canonical URL of this file. |
Hiring |
No | Security-related job openings. |
A couple of details matter in practice:
-
Order does not matter between different fields. The one exception: multiple
Contactlines are read top-down as order of preference. -
Expiresis the trap. It must be a date in the future. Asecurity.txtyou wrote two years ago and forgot is, by the spec, stale — and a stale file signals an inattentive team.
Why a standard at all? Because researchers should not have to reverse-engineer your org chart. One predictable path, machine-readable, that scanners and humans both know to check.
Why it matters: lower the barrier, route to the right channel
security.txt is cheap to add and pays off in two ways.
It reduces friction. The faster a finder can reach the right inbox, the more likely they report at all — and the less likely the issue leaks while they search. You are removing excuses for public disclosure.
It routes people to the proper channel. This is the part teams underrate. “Proper channel” means private, monitored, and expected:
- A private intake (a dedicated mailbox, or GitHub’s private vulnerability reporting) instead of a public issue tracker.
-
A stated
Policyso the reporter knows what to expect: do you offer safe harbor? A disclosure timeline? Credit? - A real human on the other end who has agreed to receive these.
Make that path obvious and you turn a potential zero-day-on-Twitter into a quiet, coordinated fix. That is the whole game: make auditing and reporting easy, and make the easy path the safe one.
Our take: a CakePHP middleware that never goes stale
We wanted security.txt on our CakePHP apps, but a static file has that
Expires problem — somebody has to remember to bump the date forever. So we built
it as a small PSR-15 middleware in the
cakephp-setup plugin
(3.21.0+).
See it in action: sandbox.dereuromark.de/.well-known/security.txt
A few design choices made it pleasant to use:
- It is a middleware, not a route. The file is public and fixed-shape, so it short-circuits the request before routing and authentication ever run. No controller, no route entry, no auth exceptions.
-
Expiresis computed on every request. By default it is “one year from now”, so it is always valid. The maintenance problem simply disappears. -
Config is a typed value object. You describe the document with a
SecurityTxtobject — named arguments, IDE autocomplete, and type checks — instead of a loose array of magic strings. - Contact is enforced. Since RFC 9116 requires it, the object throws if you forget it. Misconfiguration fails at boot, not silently at runtime.
Wiring it up is one call in your application’s middleware stack:
use Setup\Middleware\SecurityTxt;
use Setup\Middleware\SecurityTxtMiddleware;

public function middleware(MiddlewareQueue $middlewareQueue): MiddlewareQueue
{
    $middlewareQueue->add(new SecurityTxtMiddleware(new SecurityTxt(
        contact: 'https://github.com/owner/repo/security/advisories/new',
        canonical: 'https://example.com/.well-known/security.txt',
        policy: 'https://github.com/owner/repo/security/policy',
        preferredLanguages: 'en, de',
    )));

    // ... the rest of your stack

    return $middlewareQueue;
}
That serves the following at both /.well-known/security.txt and the legacy
/security.txt, with a fresh Expires on every hit:
Contact: https://github.com/owner/repo/security/advisories/new
Policy: https://github.com/owner/repo/security/policy
Canonical: https://example.com/.well-known/security.txt
Preferred-Languages: en, de
Expires: 2027-05-23T00:00:00.000Z
Other niceties: HEAD requests return headers without a body, path matching is
base-path aware (so it works for apps mounted in a subdirectory), and there is a
raw-array escape hatch for fields the value object does not cover yet.
Pair it with a SECURITY.md
If you have an open (Git) repository for your project, this can be an additional help.
security.txt says where to report; a SECURITY.md says how and what to
expect. On GitHub, a SECURITY.md (in the repo root, .github/, or docs/) is
rendered at /security/policy and surfaced in the repo’s Security tab — which is
exactly what the Policy field above points to.
The two reinforce each other:
-
Contactpoints at GitHub’s private vulnerability reporting, not a public issue. -
Policypoints atSECURITY.md, which spells out the process and timeline.
Now both a scanner and a human land in the same private, expected place.
Try it today
Adding security.txt is one of the highest-leverage, lowest-effort things you can
do for the security posture of a public app. It is a handful of lines, and it
tells the world you want to hear about problems.
- Read the standard: RFC 9116
- Generate or validate a file: securitytxt.org
- CakePHP users: the security.txt middleware docs
Make the door easy to find, put a doorbell on it, and answer when it rings.
Agnostic middleware code
The PSR-15 middleware can easily be ported to any PSR-15-compatible framework. Adjust it by copy and paste into your ecosystem if needed (middleware + DTO). The Response class would need to be replaced by whatever you might be using. Also the InstanceConfigTrait usage.
Here a possibly agnostic version:
<?php

declare(strict_types=1);

/**
 * Serves an RFC 9116 security.txt. Pure PSR-15 + PSR-17: it depends only on the
 * injected factories, so it runs in any compliant stack.
 *
 * The required `Expires` field is computed on every request, so it never goes
 * stale. `Contact` is required; constructing without one throws.
 */
class SecurityTxtMiddleware implements MiddlewareInterface
{
    /** @var array<string, string|array<string>> */
    private array $fields;

    private string $expiresInterval;

    public function __construct(
        SecurityTxt $document,
        private readonly ResponseFactoryInterface $responseFactory,
        private readonly StreamFactoryInterface $streamFactory,
        private readonly string $path = '/.well-known/security.txt',
        private readonly bool $serveRootFallback = true,
        private readonly int $cacheMaxAge = 86400, // 1 day; was CakePHP's DAY constant
    ) {
        $this->fields = $document->toFields();
        $this->expiresInterval = $document->expiresInterval;

        if (SecurityTxt::normalize($this->fields['Contact'] ?? null) === []) {
            throw new InvalidArgumentException(
                'SecurityTxtMiddleware requires at least one non-empty Contact field (RFC 9116).',
            );
        }
    }

    public function process(ServerRequestInterface $request, RequestHandlerInterface $handler): ResponseInterface
    {
        $method = $request->getMethod();
        if ($method !== 'GET' && $method !== 'HEAD') {
            return $handler->handle($request);
        }

        if (!$this->matches($this->relativePath($request))) {
            return $handler->handle($request);
        }

        $rendered = $this->render();

        $response = $this->responseFactory->createResponse()
            ->withHeader('Content-Type', 'text/plain; charset=utf-8')
            ->withHeader('Content-Length', (string)strlen($rendered)); // correct even for HEAD

        if ($this->cacheMaxAge > 0) {
            $response = $response->withHeader('Cache-Control', 'max-age=' . $this->cacheMaxAge);
        }

        // HEAD: same headers as GET, but no body.
        $body = $method === 'HEAD' ? '' : $rendered;

        return $response->withBody($this->streamFactory->createStream($body));
    }

    private function matches(string $path): bool
    {
        return $path === $this->path
            || ($this->serveRootFallback && $path === '/security.txt');
    }

    /**
     * Resolve the request path relative to the application base path. The `base`
     * attribute is set by some frameworks (e.g. CakePHP) for subdirectory installs;
     * elsewhere getAttribute() returns '' and this is a pure-PSR-7 no-op.
     */
    private function relativePath(ServerRequestInterface $request): string
    {
        $path = $request->getUri()->getPath();
        $base = (string)$request->getAttribute('base', '');
        if ($base !== '' && str_starts_with($path, $base)) {
            $path = substr($path, strlen($base));
        }

        return $path !== '' ? $path : '/';
    }

    private function render(): string
    {
        $lines = [];
        foreach (SecurityTxt::normalize($this->fields['Contact'] ?? null) as $contact) {
            $lines[] = 'Contact: ' . $contact;
        }
        foreach ($this->fields as $name => $value) {
            if ($name === 'Contact' || $name === 'Expires') {
                continue;
            }
            foreach (SecurityTxt::normalize($value) as $item) {
                $lines[] = $name . ': ' . $item;
            }
        }
        $lines[] = 'Expires: ' . $this->expires();

        return implode("\n", $lines) . "\n";
    }

    private function expires(): string
    {
        $timestamp = strtotime($this->expiresInterval) ?: strtotime('+1 year');

        return gmdate('Y-m-d\TH:i:s.000\Z', (int)$timestamp);
    }
}
CakePHP Fixture Factories 2.0 13 May 5:16 PM (2 months ago)
A clean v2 API is coming
dereuromark/cakephp-fixture-factories just shipped 2.0.0 RC. After a year of incremental cleanup — typed persistEntity() / persistEntities(), the TEntity template on BaseFactory, redirected deprecations — the next major was the right moment to redesign the surface coherently rather than keep layering.
This post walks through the why, the what, and the how to upgrade.
TL;DR
-
One small, internally consistent API:
new(),from(),count(),build(),buildMany(),save(),saveMany(),state(),sequence(),sequenceField(),for(),has(),with(),recycle(),query(),table(). - Every fluent call returns a fresh factory. No more “oops, that test polluted the next one because the factory was reused”.
-
Sharp static analysis: subclass
@extends BaseFactory<\App\Model\Entity\Article>once;build(),buildMany(),save(),saveMany()all resolve to the concrete entity type from there. - A bundled Rector config covers the mechanical call-site renames so the upgrade is mostly one command.
-
Generator backend is pluggable and auto-detected: install
fakerphp/fakerorjohnykvsky/dummygenerator, the factory picks whichever is available with no config required, and you can plug your own adapter. -
recycle($entity)reuses an already-built parent across multiple belongsTo branches of an association tree, instead of silently building duplicate parents N times. -
TableAssertionsTraitadds direct database-state assertions (assertTableHas,assertTableCount,assertEntityExists, …) with failure messages tuned for factory-driven tests.
Why we wanted to modernize
The original design from vierge-noire/cakephp-fixture-factories is what made fast, factory-driven testing the default in CakePHP land in the first place — credit where it’s due. But the codebase was shaped by a PHP 7 / early-PHP-8 sensibility, and a few things had drifted out of step with where the surrounding ecosystem landed:
-
PHP 8.2+ features change what’s idiomatic. Readonly-style immutability, native enum support, first-class callable syntax, sharper generic templates — all of these unlock cleaner shapes than were possible when the API was first drawn. Immutable fluent factories and
BackedEnumcases as first-class values both belong in this bucket. -
The static-analysis bar moved. PHPStan level 8 with strict generics is now table stakes for serious projects. The single
@extends BaseFactory<\App\Model\Entity\Article>line carrying through to every terminal —build(),buildMany(),save(),saveMany(),from()— is a meaningful upgrade over the per-method docblock dance that 1.x had to do. -
The factory-DSL space matured. Laravel’s factories, Foundry in Symfony land, and our own v2 design iterations surfaced patterns worth borrowing — the
count()modifier separated from the entry call, directionalfor()/has(), named state methods over inlinestate(...)shapes, sequence/cycle helpers. Some of that fits Cake idiomatically, some had to be adapted (we usesaveover Laravel’screatebecauseTable::save()is the native verb), but the shape benefits from the cross-pollination. -
The 1.x surface grew organically.
make()/makeMany()/getEntity()/getEntities()/persist()/persistEntity()/persistEntities()plus static finders on the factory class — each addition made sense in its moment, but together they were seven-plus terminals you had to keep straight, plus a result-set return path that looked like a query result but wasn’t quite, plus mutable factories that could leak state across reuse. v1.4 cleaned up the typing without changing the shape; v2 is the right moment to redraw the shape itself.
The brief I gave myself going in: a small, internally consistent surface that one paragraph teaches end to end, no footguns the docs have to warn around, and crisp generics so the IDE just knows. Everything below follows from that.
What v2 looks like
Entry and terminals
// Singular, in-memory
$user = UserFactory::new()->build();

// Singular, persisted
$user = UserFactory::new()->save();

// Plural via count() — note the explicit *Many() terminal
$users = UserFactory::new()->count(5)->saveMany();

// Plural with overrides applied to all
$users = UserFactory::new(['admin' => true])->count(3)->saveMany();
build / save was chosen over Laravel’s make / create because save resonates with Table::save() in the CakePHP idiom and create collides with several Cake-side meanings. saveMany() mirrors Table::saveMany() exactly.
State, layered three ways
// Inline — the ad-hoc override
$user = UserFactory::new()->state(['name' => 'Foo'])->save();

// Per-row variation across count()
$users = UserFactory::new()
    ->count(3)
    ->sequence(
        ['role' => 'admin'],
        ['role' => 'editor'],
        ['role' => 'user'],
    )
    ->saveMany();

// Single-column variation that stacks across calls
$articles = ArticleFactory::new()
    ->count(6)
    ->sequenceField('status', 'draft', 'published')   // 2-cycle
    ->sequenceField('priority', 1, 5, 10)             // 3-cycle
    ->buildMany();
sequenceField() is the new addition. It cycles a single column independently of sequence(), and stacks across different fields with their own cardinalities — the example above produces an LCM-of-6 pattern across status × priority without you having to spell out all six combinations. It also accepts BackedEnum cases natively:
->sequenceField('status', ...Status::cases())
Lifecycle hooks
$user = UserFactory::new()
    ->afterBuild(fn (User $user) => $user->name = 'Built name')
    ->afterSave(fn (User $user) => $user->synced = true)
    ->save();
Both fire for nested factories too — when a child factory is persisted as part of its parent’s cascading save, its own afterSave() callbacks run on the saved children. (That was a quiet 1.x gap.)
Associations: for(), has(), with()
The split that took the most discussion in #40:
-
for()— belongsTo. Auto-resolves the association from the target factory’s table; takes an optional 2nd-arg alias to disambiguate multi-association schemas. -
has()— hasOne / hasMany / belongsToMany. Same auto-resolve, with an optional 2nd-arg alias and an optionalpivot:named arg for habtm join-row data. -
with('Alias', $factory)— explicit-alias escape hatch (still works, just verbose).
// belongsTo
$article = ArticleFactory::new()
    ->for(AuthorFactory::new(['name' => 'Mark']))
    ->save();

// has-many
$author = AuthorFactory::new()
    ->has(ArticleFactory::new()->count(3))
    ->save();
When the parent table has more than one association pointing at the target — say, Messages with both Sender and Recipient belonging to Users — for() and has() throw, not silently pick. The exception itself is paste-ready:
MessageFactory::for(UserFactory::new()) cannot resolve a unique belongsTo —
`Messages` declares 2 associations targeting `Users`:
  - Sender    (foreign key: sender_id)
  - Recipient (foreign key: recipient_id)

Use the explicit form to disambiguate:
  MessageFactory::new()->with('Sender',    UserFactory::new())
  MessageFactory::new()->with('Recipient', UserFactory::new())
for() and has() also accept the alias inline as a second argument if you’d rather not switch helpers:
$message = MessageFactory::new()
    ->for(UserFactory::new(['name' => 'Mark']), 'Sender')
    ->for(UserFactory::new(['name' => 'Lou']),  'Recipient')
    ->save();

// has() with an alias on a habtm association
$post = PostFactory::new()
    ->has(TagFactory::new()->count(3), 'PrimaryTags', pivot: ['featured' => true])
    ->save();
For repeated use, bin/cake bake fixture_factory --methods generates forSender() / forRecipient() wrapper methods on the factory itself, co-locating the alias with the schema knowledge in one place.
Sharing a parent across branches with recycle()
When the same parent shows up on multiple belongsTo branches of a build graph — say, a Country referenced both by User directly and by each Address the user has — 1.x silently built a fresh Country per branch and you’d find out only when a code uniqueness assertion blew up downstream. recycle() hands the factory a pre-built entity to reuse anywhere the graph encounters its source table:
$country = CountryFactory::new(['code' => 'DE'])->save();

$users = UserFactory::new()
    ->count(5)
    ->recycle($country)
    ->has(AddressFactory::new()->count(2))   // Address also belongsTo Country
    ->saveMany();
You end up with 5 users + 10 addresses + 1 country, not 5 users + 10 addresses + 15 countries. Pass several entities (or factories) to recycle() to cover multiple shared parents at once.
Reads: the static factory surface stays small
// Direct table access (replaces 1.x Factory::get($id))
$article = ArticleFactory::table()->get($id);

// Dedicated query starting point (replaces static Factory::find / count)
$published = ArticleFactory::query()->find('published')->all();
Three statics total: ::new(), ::from(), ::query(). Plus ::table() for the Table instance. That’s the whole static surface.
Wrap an existing entity with from()
$article = $articlesTable->newEntity(['title' => 'Existing']);
$factory = ArticleFactory::from($article);
from(EntityInterface) keeps the entity’s identity intact — _accessible, _virtual, source alias all survive the trip. Unlike state(EntityInterface) which extracts via toArray(). v2 explicitly rejects combining from($entity) with count(>1) (it never produced N distinct entities anyway) and points you at the proper alternative in the error: new($entity->toArray())->count(N).
Sharper static analysis
Declare the entity type once on the factory:
/**
 * @extends \CakephpFixtureFactories\Factory\BaseFactory<\App\Model\Entity\Article>
 */
class ArticleFactory extends BaseFactory
{
    // ...
}
…and PHPStan / Psalm resolve build(), buildMany(), save(), saveMany(), from() and friends to Article and array<Article> everywhere they’re called. No per-method overrides, no @phpstan-return magic.
If you have existing factories, the bundled FactoryAnnotatorTask keeps the docblocks in sync. With dereuromark/cakephp-ide-helper installed, bin/cake annotate classes (or annotate all) walks tests/Factory/ automatically.
Database-state assertions
TableAssertionsTrait adds a small set of assertion methods that read off Factory::query() with failure messages tuned for fixture-driven tests:
use CakephpFixtureFactories\TestSuite\TableAssertionsTrait;

class ArticleSyncServiceTest extends TestCase
{
    use TableAssertionsTrait;

    public function testSyncImportsExpectedRows(): void
    {
        ArticleFactory::new(['title' => 'Old', 'status' => 'draft'])->save();

        $this->articleSyncService->run();

        $this->assertTableCount(ArticleFactory::class, 3);
        $this->assertTableHas(ArticleFactory::class, ['title' => 'New', 'status' => 'published']);
        $this->assertTableMissing(ArticleFactory::class, ['status' => 'broken']);
    }
}
Available helpers: assertTableHas, assertTableMissing, assertTableCount, assertTableEmpty, assertEntityExists, assertEntityMissing. Compared to hand-rolling $this->fetchTable('Articles')->find()->where(...)->count() in tests, the failure messages tell you which factory, which conditions, and what the actual rows look like instead of just “Failed asserting 2 matches 3”.
Named entity pools with Story
The new Story scenario abstract is for fixtures with a bit of structure — when you want a named pool of users (”Admins”, “Editors”), draw random members from it for related rows, and have the whole thing build in one call:
class BlogStory extends Story
{
    public function build(): void
    {
        $this->addToPool('Admins',  UserFactory::new(['role' => 'admin'])->count(2)->saveMany());
        $this->addToPool('Authors', UserFactory::new(['role' => 'author'])->count(5)->saveMany());

        foreach ($this->getPool('Authors') as $author) {
            ArticleFactory::new()
                ->count(3)
                ->for($author)
                ->saveMany();
        }
    }
}
addToPool, getPool, getRandom, getRandomSet are the surface; existing FixtureScenarioInterface implementations keep working unchanged.
Test isolation without $fixtures arrays
CakePHP’s classic fixture flow asks you to enumerate every table a test class might touch in a $fixtures property. That works, but it drifts: someone adds a Behavior that hits Logs, the test class doesn’t know, the fixture array doesn’t update, and you find out hours later when CI complains about leaked rows.
FactoryTransactionStrategy flips the model. Configure it once in config/app.php:
'TestSuite' => [
    'fixtureStrategy' => \CakephpFixtureFactories\TestSuite\FactoryTransactionStrategy::class,
],
Every test then runs inside a transaction on the primary connection, opened at setupTest() and rolled back at teardownTest(). Anything written during the test — factories, direct $table->save($entity) calls, raw $connection->execute('INSERT ...') — is automatically reverted. No per-class $fixtures array, no manual cleanup.
Two extras worth knowing:
-
Multi-database setups still skip transactions on connections they never write to. The strategy opens eagerly on the primary connection (default
test, override via theprotected string $primaryConnectionproperty in a subclass). Secondary connections are tracked lazily throughBaseFactory::save()/saveMany()— so a test that only uses one connection only opens one transaction. -
Generator unique-state resets between tests. The strategy clears the cached generator instances at teardown, so the second test in a class doesn’t inherit the first test’s
unique()history and can’t tripOverflowExceptionon a small value space.
For the rare cases that need real commits — code that depends on Model.afterSaveCommit, commit-triggered behaviors, or rows being durably visible across a separate connection — opt into the lazy variant per-class with LazyTransactionTrait, or fall back to Cake’s Eager strategy as a temporary pressure valve. The upgrade guide covers the trade-off.
Pluggable generator backend
The generator behind definition() is no longer hard-wired to Faker. v2 introduces a GeneratorInterface with two adapters in the box:
-
faker—fakerphp/faker, the well-known one, full locale catalogue, large provider list. -
dummy—johnykvsky/dummygenerator, smaller and designed for deterministic, seeded output.
You don’t have to pick one in config. The resolver runs in this order:
-
Explicit
$typeargument toCakeGeneratorFactory::create()— wins if you pass one. -
Configure::read('FixtureFactories.generatorType')— wins next, for projects that want to pin a choice. -
Auto-detection — if
Faker\Generatoris loaded, usefaker; otherwise fall back toDummyGenerator\DummyGeneratorif that’s installed; throw a clearFixtureFactoryExceptionwith installation guidance when neither is available.
Faker stays the tiebreaker when both libraries are installed (preserving the prior default), but a project that only depends on johnykvsky/dummygenerator no longer needs to declare anything in config/app.php to make it work — the factory just picks it up.
Override globally or per call when the auto-detected default isn’t what you want:
// config/app.php — pin Dummy regardless of what's installed
'FixtureFactories' => [
    'generatorType' => 'dummy',
],

// Or per call, scoped to one factory instance
$article = ArticleFactory::new()->setGenerator('dummy')->build();
Why pick one over the other?
-
Faker gives you realistic-looking data and the broadest provider surface — names, addresses, jobTitles, IBANs. The price is that it seeds via PHP’s process-global
mt_srand, which interacts with PHPUnit’s randomized test ordering and with anything else in the process touchingmt_rand. Two CI runs of the same seeded test can drift because of factors outside the seed. -
DummyGenerator uses a per-instance
XoshiroRandomizerseeded explicitly through the adapter, so the sequence depends only on the seed and the call order on that specific generator instance. CI failures on row 47 of a 100-row factory output replay locally with the same seed. It’s also smaller and faster — no locale catalogue to load — at the cost of a narrower provider surface.
For reproducible test data either way, set the seed once:
'FixtureFactories' => [
    'seed' => 1234,
    'defaultLocale' => 'en_US',  // explicit beats I18n fallback
],
If a test is flaky on the lowest-deps matrix and you can’t pin down why, switching that one test class to Dummy is often enough to confirm whether the flake was a Faker mt_srand interaction.
How to upgrade
The package ships a Rector config that covers the safe, mechanical call-site changes:
vendor/bin/rector process tests --config vendor/dereuromark/cakephp-fixture-factories/rector.php
The bundled rules cover:
-
Factory::make(...)→Factory::new(...) -
Factory::make($data, $n)→Factory::new($data)->count($n) -
setDefaultTemplate()wrappers →definition(GeneratorInterface $generator) -
getEntity()→build(),getEntities()→buildMany() -
persistEntity()→save(),persistEntities()→saveMany() -
patchData(...)→state(...)(in factory helper methods such asasAdmin()) -
static query helpers like
Factory::find()→Factory::query() -
Factory::get($id, $opts)→Factory::table()->get($id, $opts)
A few things rector intentionally doesn’t do — like rewriting deprecated persist() calls, because that return type is shape-dependent and needs a human choice between save() and saveMany(). The Factory::find() rule also splits by arity: zero-arg Factory::find() rewrites to Factory::query() directly (CakePHP 5’s SelectQuery::find() requires a finder name, so the chained form would error at runtime), while calls with an explicit finder name keep the chained Factory::query()->find('name') shape.
There’s also a small set of behavior changes since 1.4 that aren’t mechanical — setGenerator() is instance-scoped by default now, setDefaultTemplate() is no longer wired up (the rector handles the rewrite, but if you skip rector your factories produce empty data silently), FactoryTransactionStrategy is eager again on the primary connection. The full list is in the upgrade guide.
What’s next
v2 is out and tested against a real sandbox app, currently available as 2.0.0-rc.1 for adopters who want to upgrade before the final tag drops. If you’re on the 1.4.x line, follow the upgrade guide — the migration tooling does most of the work, and the rest is documented as you hit it.
Issues, PRs, and “this confused me when I tried it” posts on the issue tracker all welcome.
Thanks
A big thank-you to pabloelcolombiano and the vierge-noire team for building cakephp-fixture-factories in the first place. It shaped how a generation of CakePHP projects write tests (fast, factory-driven, no $fixtures-array gymnastics), and this continued version stands entirely on that foundation.
With the project not being maintained anymore in 2025, we decided to take over. The redesign is a continuation of their work.
Links
CakePHP AuditStash 2.0: Beyond CRUD 4 May 4:36 AM (2 months ago)
The cakephp-audit-stash plugin has grown a lot of new surface between 1.x and the current 2.0. What started out as a behavior that records entity-level CRUD into an audit_logs table is now a full mini-app for observability: custom action events beyond CRUD, a dashboard, a coverage report, native chat alerting, and a streaming exporter.
This post walks through the highlights of the new major release, grouped by what they unlock for you as a maintainer of an audited Cake application.

Log anything, not just CRUD
2.0’s headline feature is custom action events. The audit trail is no longer limited to Created / Updated / Deleted rows tied to an entity — anything you want to leave a forensic record of can flow through the same persister, the same hash chain, and the same admin viewer.
use AuditStash\Audit;

Audit::log(
    type: 'user.login',
    source: 'Users',
    primaryKey: $user->id,
    data: ['ip' => $request->clientIp()],
    meta: ['user_id' => $user->id, 'user_display' => $user->name],
);
Behind the scenes:
-
A new
AuditStash\Auditstatic facade dispatches the event. -
EventFactoryfalls back to a newAuditCustomEventfor unknown types. -
audit_logs.typewidened fromVARCHAR(7)toVARCHAR(64)so dotted scope strings fit. - The admin templates (timeline, view, index filter dropdown, email alert) all learned to render custom events with a neutral grey marker and a generic Event payload card instead of mis-rendering them as deletions.
BC note: $auditLog->type is now a plain string instead of the AuditLogType enum. If you need the enum form, call AuditLogType::tryFrom($log->type).
A real admin dashboard
The plugin now ships an at-a-glance dashboard at the admin root (configurable via AuditStash.routePath) so you stop landing on a paginated list as the first thing you see.
What’s on it:
- KPI cards: events today, active users, active sources (7d), coverage percentage.
- Daily activity chart over the last 30 days — pure CSS stacked bars, no chart library dependency.
- Top sources and top users over 7 days, click-through to the filtered viewer.
-
Recent activity table reusing the existing
AuditHelper::eventTypeBadgeandformatRecordhelpers.
Alongside it, a new Coverage report at /admin/audit-stash/coverage answers the question “which of my tables are actually being audited?”:
-
Discovers
Tableclasses from the app and every loaded plugin viaPlugin::getCollection(). - Three statuses: Tracked (class exists + behavior attached), Missing (class exists but behavior NOT attached — a coverage gap), and Empirical (events recorded for a source we can’t map to a class — custom event sources, renamed tables, uninstalled plugins).
-
Configurable deny-list via
AuditStash.coverage.hidePlugins/AuditStash.coverage.hideTables. - A self-recursion guard so the plugin doesn’t try to audit its own audit tables.
Native Slack and Discord alert channels
AuditMonitor already supported alert delivery, but until now you had to hand-write a Channel subclass to get a readable Slack or Discord message. The new release ships two platform-native channels you can drop in directly:
'channels' => [
    'class' => SlackChannel::class,
    'url' => env('SLACK_WEBHOOK_URL'),
],
-
SlackChanneluses Block Kit (header / section / fields blocks) with a severity-colored attachment. Optionalusername/icon_emoji/channeloverrides. Fields are mrkdwn-escaped, so a source containing<or@everyonecan’t smuggle markup or pings. -
DiscordChanneluses the embed format with a decimal-RGB sidebar color and inline fields. Setsallowed_mentions: { parse: [] }defensively, omits thetimestampkey when the audit row has nocreated, and normalises empty / null field values ton/aso Discord doesn’t reject the payload. - Both channels link back to the admin view of the row that triggered the alert, so chat recipients can jump straight into the entry instead of pasting source / PK into the URL bar.
The shared HTTP, retry and error-logging plumbing was extracted into a new AbstractWebhookChannel — the documented extension point for whatever platform-native schema your tenant prefers.
Teams users: there’s no bundled TeamsChannel because Microsoft is sunsetting MessageCard incoming webhooks in favor of Adaptive Cards via Power Automate Workflows, which has a fundamentally different setup and trigger model. The Building your own channel docs section points at AbstractWebhookChannel as the extension seam for whatever schema your tenant currently accepts.
Lifecycle hooks for the monitor
Channels are the happy-path delivery mechanism — but they’re a closed set. Anything beyond the bundled platforms (per-context suppression, alert mutation, forwarding to Sentry, custom incident stores) used to require subclassing.
Two new events on the global EventManager fire around the existing rule-check / alert-send flow:
| Event | When | What you can do |
|---|---|---|
AuditStash.Monitor.beforeAlert |
After rule.matches() and createAlert(), before any channel runs |
stopPropagation() to suppress; setData('alert', $new) to replace |
AuditStash.Monitor.afterAlert |
After every channel finished | Inspect the [channelName => bool] results map for partial failures |
Rule-failure routing went a different way: instead of a third event, the rule-failure logger call now passes the full Throwable ('exception' => $e) so PSR-3 handlers like Monolog’s IntrospectionProcessor or the sentry/sentry Cake bridge pick up the stack natively. No new API surface, full forwarding to your existing error pipeline.
A real export workflow
Export is now its own page, not an inline button. Three pieces:
-
AuditStash\Service\ExportService— streams the query in configurable batches (AuditStash.export.batchSize, default 1000), pre-flights with acount()againstAuditStash.export.hardCap(default 100000), and refuses oversized exports withBadRequestExceptionrather than silently truncating. -
A dedicated
/admin/audit-logs/exportform page showing the active-filter summary, row-count estimate, format picker (CSV / JSON / NDJSON), and a disabled submit button when the cap would be exceeded. -
A controller action that streams via
php://temp+Laminas\Diactoros\Stream— bounded PHP-process memory, spills to disk past 2 MB.
NDJSON joins CSV and JSON for streaming-friendly machine consumers. Filters carry from the index page through to the form via query string and on through to the streaming download URL — so the row count you confirm is the row count you get. The default 30-day created-at floor is skipped when other narrowing filters (source, primarykey, transactionkey, etc.) are already set, so a deliberately-narrowed view never silently exports zero rows.
Security: deny-by-default admin access
This is the change most likely to bite on upgrade, and it’s deliberate.
Audit logs commonly contain who-did-what records — PII, IP addresses, before/after field values for every change. An accidentally forgotten host-side route guard would expose more than a typical admin page. So the plugin now refuses to serve any admin action unless AuditStash.adminAccess is explicitly set to a Closure. A missing config key, a non-Closure value, a Closure that returns anything other than literal true, or a Closure that throws — all yield a 403.
The config key was also renamed from accessCheck to adminAccess to align with the cakephp-queue posture and to read more naturally (describes what is gated rather than the function shape).
Escape hatch for users who want to delegate fully to their host AppController auth:
'AuditStash' => [
    'adminAccess' => fn() => true,
],
That’s now an explicit “I trust the upstream guard” choice rather than an accidental forgotten gate.
Forensic capture and a sensitive-field rule
Two opt-in observability additions:
EnvironmentMetadata learned a new capture constructor argument so applications can opt in to request-derived meta fields:
new EnvironmentMetadata(
    request: $request,
    capture: ['user_agent', 'referer', 'session_id'],
);
Off by default because these can carry PII / GDPR implications. Empty headers and inactive sessions are skipped so the audit row never gains an empty-string column. Unknown field names are filtered against an allow-list, so a typo can’t smuggle arbitrary values into meta.
SensitiveFieldRule is a new monitor rule that fires when a configured field on a configured table appears in an audit row’s changed (create / update) or original (delete) payload. Mirrors MassDeleteRule’s shape, slots into the existing channel pipeline with no infrastructure changes, defaults to high severity. Ideal for “alert me when anyone touches users.password_hash” style rules.
Tamper-evident audit logs
This one actually shipped back in 1.1.0 but never got a proper writeup, so it’s worth covering alongside 2.0: an opt-in SHA-256 hash chain over persisted audit rows, giving AuditStash the integrity guarantees that regulated environments — GoBD (DE), SOX (US), HIPAA, and friends — expect from the audit trail itself.
Each persisted row carries two new columns — prev_hash (the previous row’s hash) and hash (SHA-256 over the canonicalized current row plus that previous link). Editing any historical row breaks the chain at that row and every row after it; a verifier walking the table catches the break and points at the offending row.
Disabled by default. To turn it on:
'persisterConfig' => [
    'hashChain' => true,
],
…plus the new migration that adds prev_hash / hash / idx_hash. Rows written before the migration stay NULL in both columns — the chain simply anchors at the first row written after you flip the flag, so there’s no destructive backfill step.
A few mechanics worth flagging:
-
Verification is a shipped CLI:
bin/cake audit_stash verify_chain [--table=... --chunk=...]— streams the table in bounded memory and exits 1 on the first broken link with a human-readable reason. Drop it in cron or CI. -
The whole
logEvents()batch runs in a single transaction; on MySQL / Postgres the chain tail is read withSELECT ... FOR UPDATEso concurrent writers serialize on it instead of orphaning links. SQLite’s database-level locking gives the equivalent guarantee. -
Hashing is schema-aware — only fields that exist on the target audit table are included in the digest, so custom audit tables (without e.g.
display_value) verify cleanly without payload divergence across installs. -
Fail-loud: a
save()failure mid-batch throwsRuntimeExceptionrather than silently dropping a row and breaking the chain at the tail.
Only TablePersister implements this — the Elastic Search persister can’t offer the same ordering guarantee, and the flag is ignored there. If you need tamper-evidence on Elastic, route audit events through SQL first and replicate downstream.
Full rationale, concurrency semantics, and the truncation-at-tail limitation (plus anchoring / heartbeat mitigations) are written up in docs/tamper-evidence.md.
Tracking file uploads (hashes, not content)
Audit rows are not the place to stash uploaded file blobs. The clean approach is a virtual field on the entity that exposes a stable fingerprint — a hash over the stored bytes, a CDN ETag, byte length, whatever is cheap and deterministic for your storage:
// src/Model/Entity/Document.php
protected function _getFingerprint(): ?string
{
    return $this->file_path
        ? hash_file('sha256', WWW_ROOT . $this->file_path)
        : null;
}
Virtual fields participate in entity diffs like any other column, so the audit row records “fingerprint changed from abc… to def…” without your audit table ever seeing the file body. No audit-side machinery required.
For legacy schemas where you can’t add a virtual field — uploads tracked in a sibling join table the audited entity doesn’t know about, for example — there’s a AuditStash.beforeLog event hook that fires before the audit row is persisted. One caveat called out explicitly in the docs: BaseEvent has no public setter for changed / original, so the event-hook path needs a small persister decorator to actually merge your additions in. The pattern is in docs/usage.md.
For the related case of recording that a sensitive field changed without storing the value itself, the existing 'sensitive' behavior config is still the right tool — no new machinery there either.
Testing helper trait
If you maintain a downstream application that uses audit-stash, you’ve probably written a one-off helper to assert “this controller action produced an audit row”. There’s now a shipped one:
use AuditStash\TestSuite\AuditAssertionsTrait;

class OrdersControllerTest extends TestCase
{
    use AuditAssertionsTrait;

    public function testCreateLogsAuditEntry(): void
    {
        $this->post(['controller' => 'Orders', 'action' => 'add'], [...]);

        $this->assertAuditLogged('Orders');
        $this->assertAuditFieldChanged('Orders', 'status', null, 'pending');
    }
}
Mixes into any TestCase that loads plugin.AuditStash.AuditLogs. Exposes assertAuditLogged, assertAuditNotLogged, assertAuditCount, assertAuditFieldChanged, plus a buildAuditQuery seam for custom assertions. Queries the audit_logs table directly so tests verify what was persisted, not just what an in-memory event queue produced.
The new docs/testing.md covers the full reference and the buildAuditQuery extension seam.
Where to next
If you’re upgrading from 1.x to 2.0, the two things to look at on the way in are:
-
Set
AuditStash.adminAccessto an explicitClosure— evenfn() => trueis fine if you trust your upstream guard. A missing config key now yields a 403. -
Run the migration that widens
audit_logs.typetoVARCHAR(64). It also drops the EnumType mapping on the column, which means$auditLog->typenow returns a string instead of anAuditLogTypeenum.
Everything else is additive.
Feedback, bug reports, and feature requests (ideally as PRs) welcome over at the GitHub repo.
ACL Is Back in CakePHP 27 Apr 3:24 AM (2 months ago)
And This Time It Grew Up
Remember CakePHP 2’s ACL? The ACO/ARO trees, the aros_acos join table, the tutorial that taught a whole generation of us what “hierarchical permissions” even meant? That was a big idea for its time — permissions as data, managed at runtime, not baked into code. A lot of us learned authorization concepts from that component, and the DNA of today’s tools goes right back to it.
Some people remember: It was painful and slow to work with it, though.
Then the ecosystem evolved. CakePHP 3, 4, and 5 shipped cakephp/authorization and cakephp/authentication — clean, policy-based, composable. TinyAuth kept the lightweight INI-file style alive for teams who wanted configuration over code. Both approaches are great at what they do.
Maybe you also read my last blog post about authz topic.
The one thing that stayed a little wistful was the admin-UI story. Policies live in code; INI files live on disk; and every so often a project would ask, “Can ops toggle this without a deploy?” The honest answer used to be “not really”. That’s the gap TinyAuth Backend 3.x closes — and it’s the reason ACL, as a concept, is quietly having a comeback.
A complete rewrite, on purpose
TinyAuth Backend 3.x is a full rewrite. The breaking changes are real — the old tiny_auth_allow_rules and tiny_auth_acl_rules tables are dropped by the migration, PHP 8.2 and CakePHP 5.1 are the new minimums, and existing permissions need to be re-imported or recreated. The payoff is a plugin that feels native to modern CakePHP instead of bolted on around it.
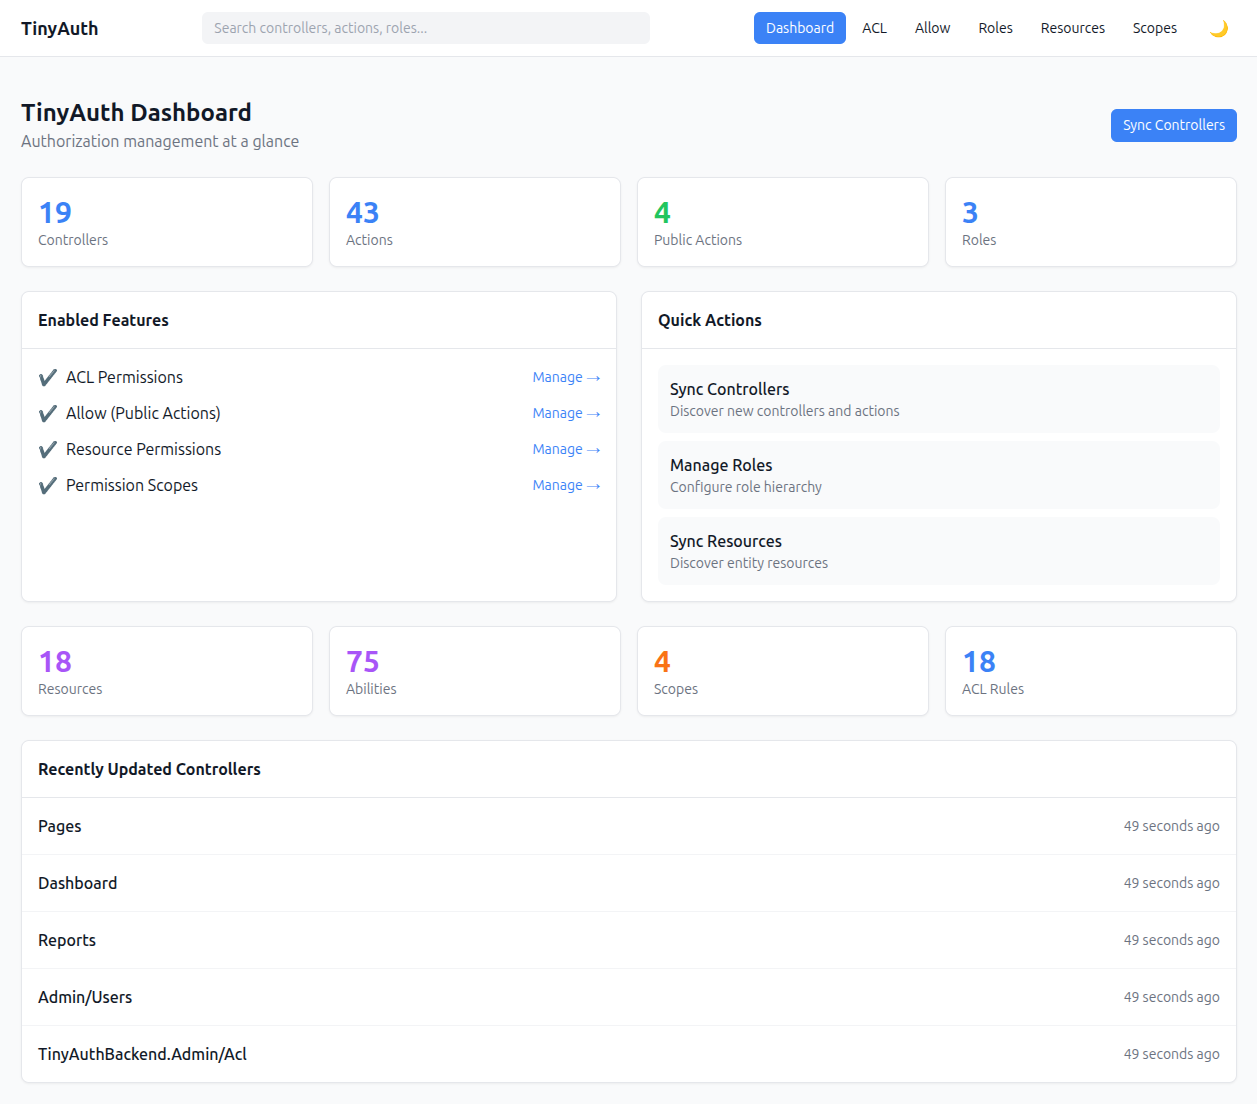
The easiest way to understand the shape of the rewrite is to look at the schema, the UI, and the integration points side by side.
A normalized schema, eight tables deep
The old 2-table layout has been replaced with eight properly normalized tables:
| Table | Purpose |
|---|---|
tinyauth_roles |
Roles, with parent/child hierarchy |
tinyauth_controllers |
Discovered controllers (plugin / prefix / name) |
tinyauth_actions |
Controller actions, with a public flag |
tinyauth_acl_permissions |
Role-to-action grants, with optional rule descriptions |
tinyauth_resources |
Entity resources for resource-based auth |
tinyauth_resource_abilities |
Abilities per resource (view, edit, delete, publish, …) |
tinyauth_scopes |
Reusable conditions (e.g. “own records”, “same team”) |
tinyauth_resource_acl |
Resource-to-role grants, with scope support |
Two things stand out here. First, every row is addressable on its own — you can join, query, export, audit, and diff permissions with plain SQL. Second, abilities and scopes are reusable data, not hand-written policy classes. Define own once, apply it to Articles, Projects, Comments, and anything else that has a user_id. That’s the kind of reuse that gets expensive when permissions live in code.
The normalized layout is also what makes features like rule descriptions, inherited-permission rendering, and one-click sync possible at all — they all read from the same tables the runtime enforcement uses.
A real admin UI, not a stale admin skin
The admin panel at /admin/auth/ is written with HTMX + Alpine.js + Tailwind CSS. Toggling a permission is a partial update — no full page reload, no lost scroll position, no “did it save?” anxiety. The layout is standalone: the plugin ships its own chrome, so you don’t have to wrestle your host app’s layout into rendering an admin screen, and it comes with light and dark themes out of the box.
A few details that add up:
- Tree + matrix navigation on the ACL page: controllers on the left, a role-by-action permission grid on the right.
- Inherited permissions render as visibly inherited — a different state than direct grants — so you can tell at a glance which cells come from a role and which come from a parent role.
- Drag-and-drop role ordering for building and adjusting the hierarchy, with parent/child relationships kept consistent as you reorder.
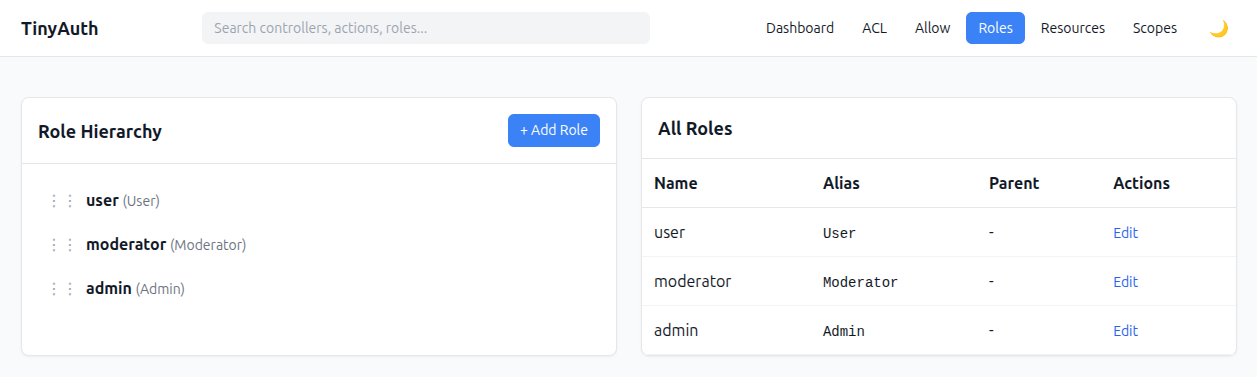
- Inline rule descriptions: every ACL rule can carry a short description, editable straight from the toggle endpoint and surfaced as a cell tooltip. This is the feature that solves “why does this rule exist?” six months after the fact. You can leave notes like “legacy carve-out for the migration script” or “reporting team needs read-only access during Q2” right next to the rule.
- Search across controllers, actions, and roles from a single box in the header.
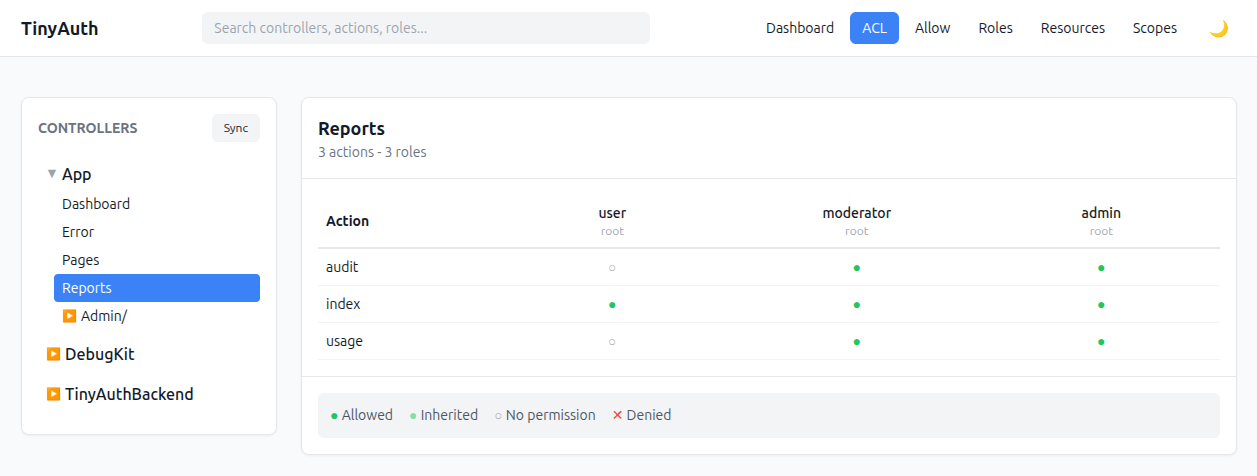
None of these are visual polish for its own sake — they exist because once you’re managing permissions in a UI, the UI has to make intent visible. A green dot is information; a green dot with a tooltip explaining why is a conversation your team doesn’t have to have in Slack.
Sync: permissions that keep up with your code
A runtime permission system is only useful if it knows what actions and resources exist. TinyAuth Backend 3.x ships auto-discovery for both:
-
Controller sync (
ControllerSyncService) walks your application (and plugins, and prefixes) and writes discovered controllers and actions intotinyauth_controllers/tinyauth_actions. Added a new action this morning? Click Sync in the admin panel at/admin/auth/syncand it appears in the matrix. -
Resource sync (
ResourceSyncService) discovers entity resources and their abilities, so resource-level authorization stays in step with your models.
The sync is idempotent — re-running it won’t clobber your existing grants. Actions that appear in code get added; existing rows are left alone. (Orphans from deleted controllers aren’t auto-pruned yet — you’ll want to clean those up by hand or with a quick SQL query.) Permissions management stops being a manual catch-up chore.
Import / export: a real upgrade path
If you already have a TinyAuth app with auth_allow.ini and auth_acl.ini files, you don’t have to rebuild your permissions from scratch:
bin/cake tiny_auth_backend import allow
bin/cake tiny_auth_backend import acl
That’s the upgrade path from plain TinyAuth to the backend — run the import, and your INI rules show up in the admin UI as editable rows. Going the other way, ImportExportService can export the whole permission set to JSON or CSV, which is genuinely useful for diffing environments, seeding staging, or attaching a snapshot to a pull request.
And if you’re not ready to commit fully? The composite adapters (CompositeAllowAdapter / CompositeAclAdapter) let you keep your existing INI files active and layer DB-backed rules on top, served by a single adapter slot. That’s the gradual-adoption path: switch on the backend, import what you want to migrate, leave the rest in INI, and move rules over at your own pace.
Keeping the admin panel admin-only
The admin panel is at /admin/auth/, which is exactly the kind of URL you want gated. Rather than force you to wire this into your host application’s middleware, TinyAuth Backend 3.x adds a plugin-level hook:
// config/app.php
use Psr\Http\Message\ServerRequestInterface;

'TinyAuthBackend' => [
    'editorCheck' => function (mixed $identity, ServerRequestInterface $request): bool {
        return $identity !== null && in_array('admin', (array)$identity->roles, true);
    },
],
The callable receives the current identity and the request, and runs before every /admin/auth/* action. Return true and you’re in; return anything else and the plugin rejects the request with a 403. Your host application’s middleware stack stays clean, and the gating rule lives next to the plugin config.
Only the features you want
Not every project needs every feature. The backend exposes five main capabilities as independently togglable features — allow, acl, roles, resources, and scopes — and by default each one auto-enables if its backing table exists. That means you can run migrations selectively (say, just tinyauth_actions for public-action management) and the rest simply stays out of the way.
When you want explicit control, the TinyAuthBackend.features config overrides auto-detection:
// config/app.php
'TinyAuthBackend' => [
    'features' => [
        'allow'     => true,   // force enabled
        'acl'       => true,
        'roles'     => true,
        'resources' => false,  // force disabled
        'scopes'    => false,
    ],
],
Disabled features disappear from the admin navigation entirely — no dead links, no half-rendered pages pointing at tables that don’t exist. This is how you adopt the plugin one capability at a time: start with just allow as a UI for your public-action list, add acl when you want role-level gating, and turn on resources + scopes the day you need entity-level authorization. Each step is a config flag and a migration, not a commitment to the whole stack.
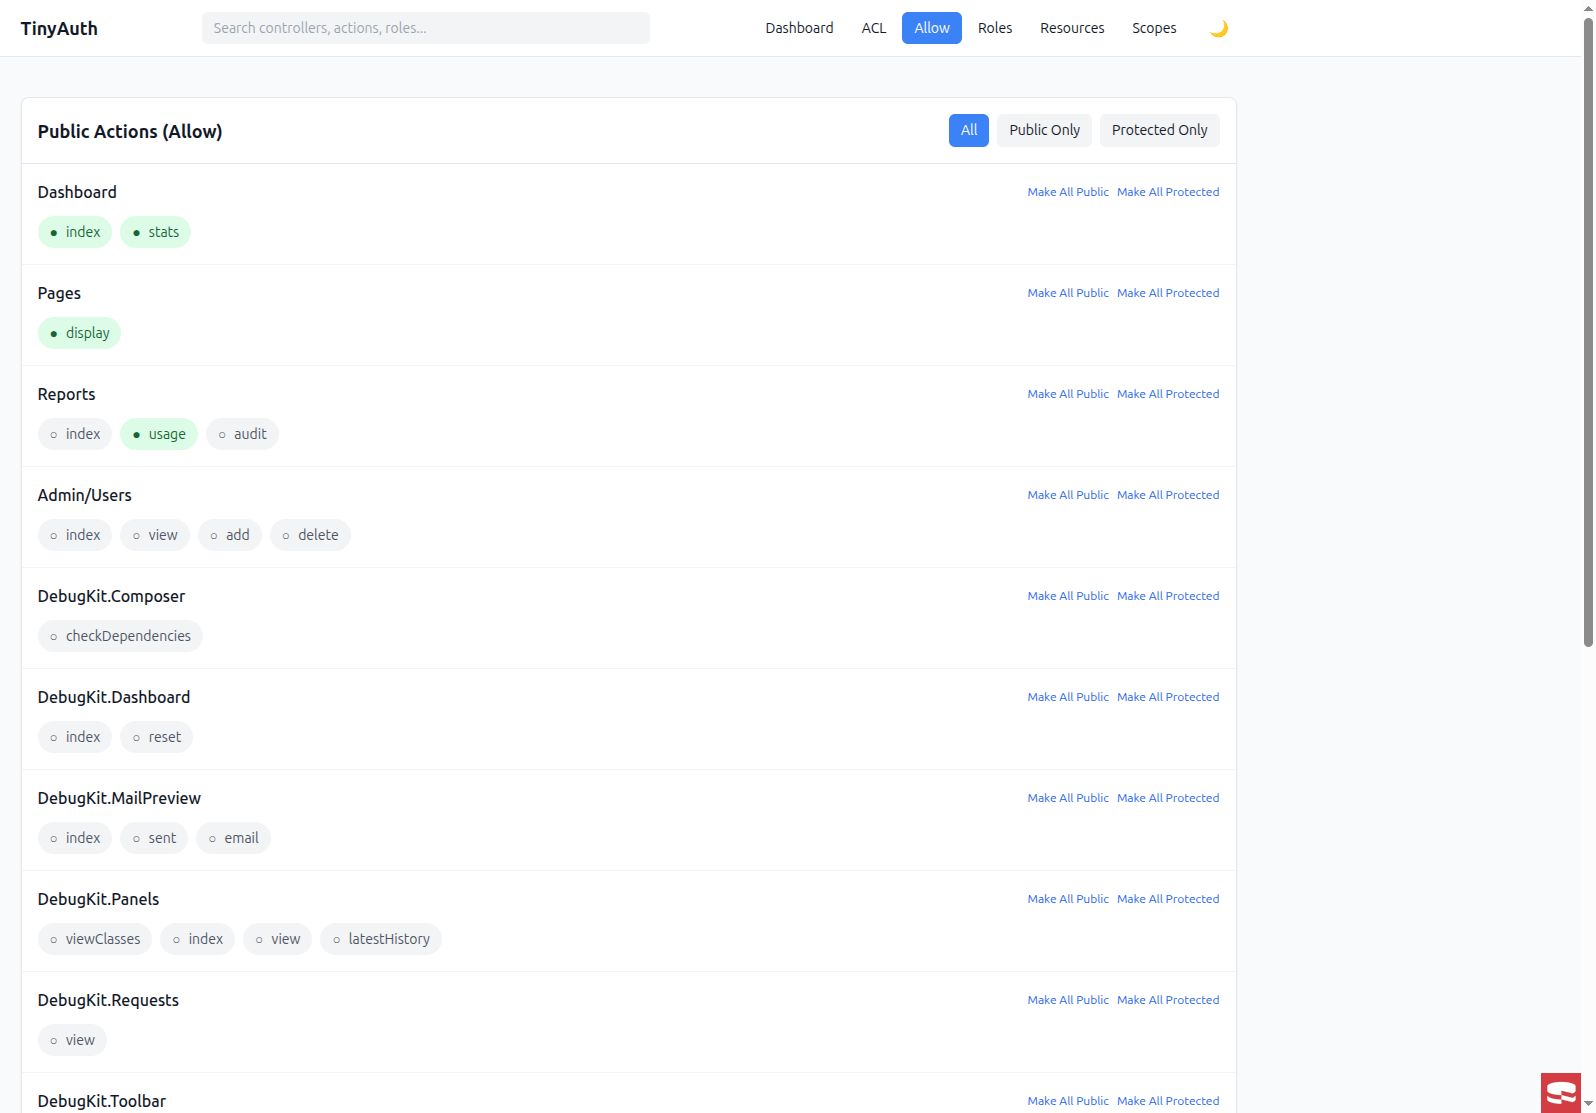
Flexible role sources
Roles don’t have to live in users.role_id. RoleSourceService supports four role source styles out of the box:
- A database table (the default, for most apps)
-
A
Configurepath (for roles defined in config at deploy time) - A plain array (for tests, fixtures, small apps)
- A callable, which is the big one — roles can come from a session, a JWT claim, an LDAP group lookup, an SSO gateway response, or any combination of the above
Whichever source you pick, everything downstream — scopes, hierarchy, matrix UI, policy integration — keeps working unchanged. This is the mechanism that makes the ExternalRoles rung below possible, and it’s a genuinely nice separation of concerns.
First-class cakephp/authorization integration
The policy side is built around four small pieces, all shipped by the plugin:
-
TinyAuthPolicyplugs intocakephp/authorizationas a regular policy class. It ships with both entity-levelcan*()methods andscopeIndex()/scopeView()built in, so$this->Authorization->applyScope($query)narrows list results through the same DB rules that govern entity access. One source of truth for “can see” and “can edit”, no subclassing required. -
TinyAuthResolveris aResolverInterfaceimplementation that maps every known entity, table, orSelectQuerytoTinyAuthPolicy— transparently unwrapping queries to their repository so the same resolver works for bothauthorize($entity)andapplyScope($query). Cake’s built-inMapResolverfails at the query path, andOrmResolverforces convention-basedApp\Policy\*classes;TinyAuthResolveravoids both. Pass it an allowlist of classes, or leave it empty to govern everything. -
EntityIdentityis a minimalIdentityInterfacewrapper around a Cake entity, for apps that resolve users from a session, a JWT claim, or an SSO gateway and don’t loadcakephp/authentication. The authorization service argument is optional — without it,can()returnsfalseandapplyScope()is a pass-through, which is the correct behavior for role-only strategies. -
TinyAuthServiceis the programmatic entry point —canAccess($roles, $resource, $ability, $entity, $user)for checks (the first argument is a role alias or an array of aliases),getScopeCondition(...)for query filtering.
Pick your rung: the four-strategy ladder
All of the above can be adopted incrementally. The demo app ships four usage strategies, arranged as a ladder. Start on the rung that fits where your project is today, and climb as needs grow. Every rung is a legitimate destination — you don’t have to reach the top to “win”.
Rung 1 — AdapterOnly: a GUI for your config
You have a CakePHP app. You have an auth_allow.ini. You’d like non-developers to be able to adjust who-can-do-what without a pull request.
AdapterOnly is made for that. No cakephp/authorization component, no policy classes — just role-level request gating, with the admin panel as a friendly front door to the same data. The migration is small, and the mental model barely changes.
// AdapterOnly: role-level request gating, nothing more.
// TinyAuthBackend reads from the DB, the admin UI writes to it,
// your controllers keep doing exactly what they were doing.
A short path to a real win: ops gets a UI, you get your afternoon back.
Rung 2 — FullBackend: the real deal
This is the rung where it becomes the thing you probably pictured when you first read the phrase resource permissions.
Load cakephp/authorization and wire the plugin-provided TinyAuthResolver into your authorization service. One constructor call, one allowlist:
// Application::getAuthorizationService()
use TinyAuthBackend\Policy\TinyAuthResolver;

$resolver = new TinyAuthResolver([
    \App\Model\Entity\Article::class,
    \App\Model\Entity\Project::class,
]);

return new AuthorizationService($resolver);
That’s the whole wiring. TinyAuthResolver maps both entities and queries to the plugin’s TinyAuthPolicy, transparently unwrapping SelectQuery instances to their repository so the same resolver works for both $this->Authorization->authorize() and ->applyScope(). With that in place, the following works out of the box:
public function edit(string $id)
{
    $article = $this->Articles->get($id);
    $this->Authorization->authorize($article, 'edit');
    // ...
}

public function index()
{
    $query = $this->Authorization->applyScope($this->Articles->find(), 'index');
    // Query now filtered by the user's scope — "own", "team", whatever.
}
Under the hood, authorize() runs through TinyAuthPolicy::can() → TinyAuthService → DB rules → role hierarchy → scopes. Four layers, one call. The demo wires this up for articles (scoped by user_id) and projects (scoped by team_id), and the scope definitions — own, team, department, company — are reusable rows in tinyauth_scopes rather than hand-written policy classes.
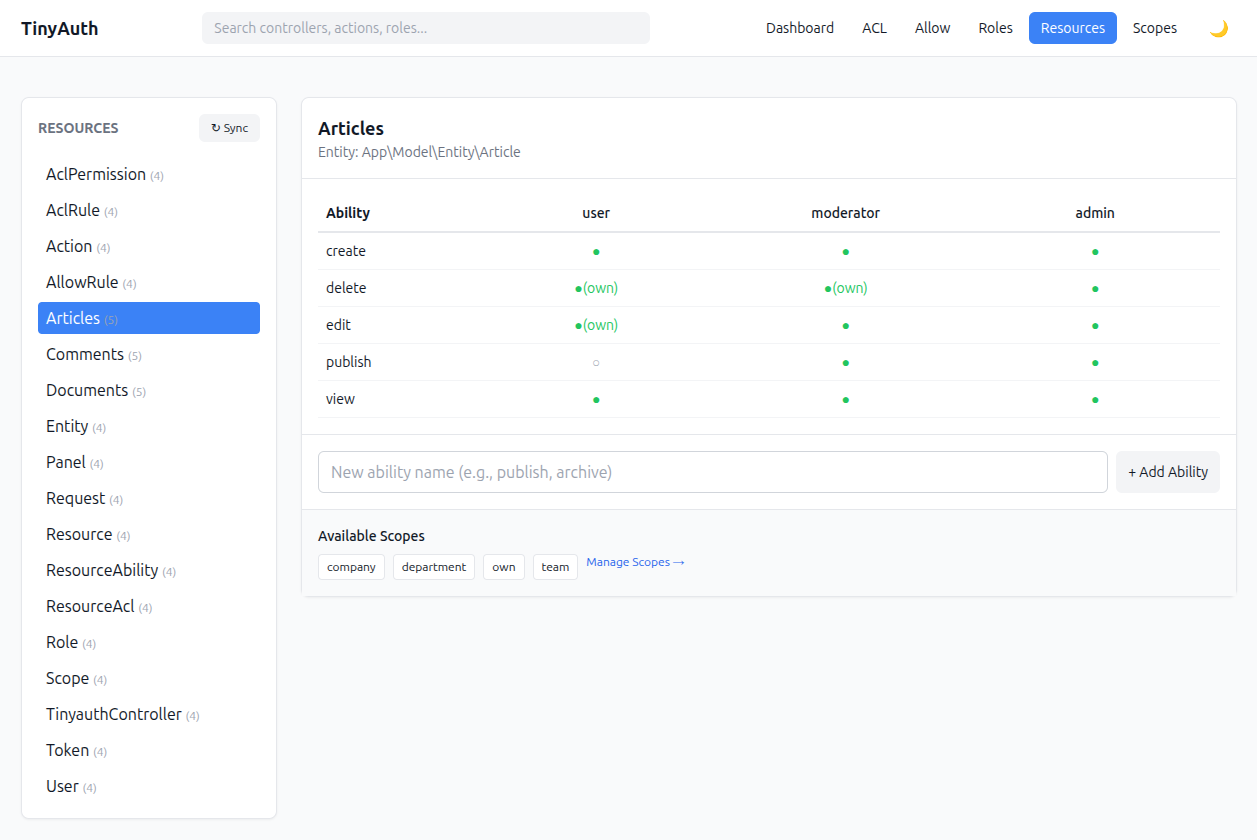
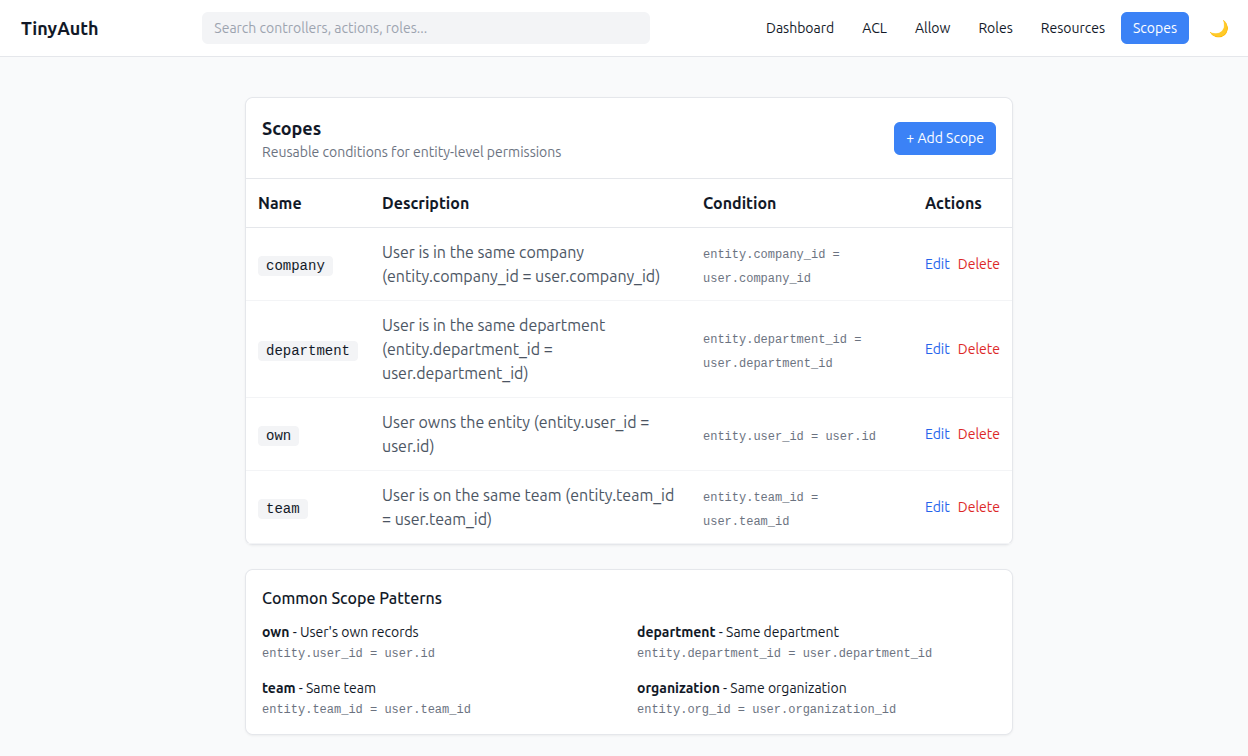
The best part: the matrix UI and the runtime enforcement read the same data. If a cell lights up green in the admin panel, it lights up green in the controller. That alignment is genuinely rare, and it pays for itself the first time you debug a permission question.
Rung 3 — NativeAuth: same enforcement, your middleware
A sibling of FullBackend with a different wiring diagram. Teams already running cakephp/authentication can keep owning the identity side of the stack; TinyAuth contributes the policy layer and stays out of the middleware conversation.
The enforcement code is identical — the demo’s NativeAuth controllers literally extend the FullBackend ones. That’s the point: moving between rungs is a wiring change, not a rewrite.
Rung 4 — ExternalRoles: roles from anywhere
Sooner or later, the role stops living in users.role_id. It lives in a JWT claim, an LDAP group, a session from an upstream SSO gateway. ExternalRoles supports exactly that: swap TinyAuthBackend.roleSource for a callable (the demo uses a session-backed one via StrategyMiddleware), and everything else — scopes, hierarchy, the matrix UI, the policy layer — keeps working unchanged.
Changing where roles come from without changing how permissions work is the whole reason this rung exists, and it’s a genuinely nice separation.
Under the hood: a service per concern
The rewrite leans hard on small, focused services. If you want to build tooling around the plugin — custom import formats, a different UI, a scheduled sync — these are the handles:
-
TinyAuthService— central permission checking -
HierarchyService— role hierarchy traversal and inheritance resolution -
ControllerSyncService— controller/action discovery from your application -
ResourceSyncService— entity resource/ability discovery -
ImportExportService— JSON/CSV export and legacy INI import -
FeatureService— enable/disable optional features at runtime -
RoleSourceService— flexible role data source resolution
Each one has a single job and a small surface area. Together they’re what makes the admin UI, the CLI commands, and the authorization integration feel like parts of the same system rather than three things stapled together.
Today’s take on a classic idea
A few things worth celebrating about where TinyAuth Backend 3.x landed:
- Flat, queryable schema. Eight tables, plain joins, plain SQL, no trees of nodes pretending to be both subjects and objects.
-
A good neighbour to
cakephp/authorization. It plugs into the framework’s policy layer rather than replacing it. - Permissions as self-documenting data. Rule descriptions, export to JSON/CSV, auditable in a query.
- A real UI stack. HTMX + Alpine + Tailwind, dark mode included, no full-page reloads, scrolls and search that actually work.
- A gradual adoption story. Composite adapters, INI import, CLI sync, and four usage strategies you can climb through at your own pace.
- Identity-agnostic. Roles can come from wherever your auth story actually lives.
- No lock-in. You can stop at any rung, or step back a rung, without tearing things up.
So, is ACL back?
In spirit, yes. The concept that made ACL interesting in the first place — configure permissions as data, manage them in a UI, enforce them at runtime — is back, and it’s wearing modern CakePHP underneath. Normalized schema, reactive UI, first-class policy integration, flexible role sources, and a gradual adoption path that meets your project where it actually is.
Pick a rung, give it a spin, and see how far up the ladder your project wants to climb. The linked demo app below also has strict CSP and showcases that it works with strictest SecurityHeadersMiddleware implementations for maximum safety.
Links
- Demo app: github.com/dereuromark/cakephp-tinyauth-demo
- TinyAuth Backend: github.com/dereuromark/cakephp-tinyauth-backend
- TinyAuth: github.com/dereuromark/cakephp-tinyauth
Working with IPs in CakePHP 10 Apr 1:49 PM (3 months ago)
The problem: env(’REMOTE_ADDR’)
Do not use env('REMOTE_ADDR') or low level env() wrapper directly. Those are always the direct TCP connection source, not necessarily the real IP.
Make sure to always use ServerRequest::clientIp() when interacting with the user’s IP address.
When you move a CakePHP application behind a reverse proxy – for example, switching from PHP-FPM to FrankenPHP in Docker behind nginx, this issue becomes visible. Now env('REMOTE_ADDR') holds the internal IP of the proxy (e.g. 172.22.0.1 for Docker’s bridge network).
This breaks anything that relies on the raw environment variable:
- IP-based blacklists stop matching
- GeoIP lookups resolve to the wrong location
- Rate limiting becomes ineffective (all users share one IP)
- Logging records the proxy IP instead of the actual visitor
You’ll typically notice it first in the logs – every request line shows the same address:
[2026-04-09 14:22:01] login.INFO: User logged in {"user_id":42,"ip":"172.22.0.1"}
[2026-04-09 14:22:07] login.INFO: User logged in {"user_id":17,"ip":"172.22.0.1"}
[2026-04-09 14:22:11] login.WARN: Failed login attempt {"ip":"172.22.0.1"}
That’s the Docker bridge gateway, not your visitors.
The fix: ServerRequest::clientIp() + Middleware
CakePHP’s ServerRequest::clientIp() is proxy-aware. When trusted proxies are configured, it reads the real client IP from the X-Forwarded-For or X-Real-IP headers that the reverse proxy sets. When no proxy is involved, it falls back to REMOTE_ADDR – so it works correctly in both environments.
Step 1: Add a TrustedProxyMiddleware
class TrustedProxyMiddleware implements MiddlewareInterface {

    public function process(
        ServerRequestInterface $request,
        RequestHandlerInterface $handler,
    ): ResponseInterface {
        if ($request instanceof ServerRequest) {
            $trustedProxies = Configure::read('App.trustedProxies');
            if ($trustedProxies) {
                $request->setTrustedProxies((array)$trustedProxies);
            }
        }
        return $handler->handle($request);
    }
}
Register it early in your middleware queue – before the error handler.
Step 2: Configure trusted proxy IPs
In app_local.php (or app.php):
'App' => [
    'trustedProxies' => [
        '127.0.0.1',
        '172.16.0.0/12',
        '10.0.0.0/8',
        '192.168.0.0/16',
    ],
],
This tells CakePHP to trust X-Forwarded-For headers from these addresses (your local network and Docker subnets).
[!CAUTION] Never add
0.0.0.0/0or any public IP range totrustedProxies. If you do, any client on the internet can spoof their IP simply by sending anX-Forwarded-Forheader. Only list addresses you actually control – your proxy, your load balancer, your Docker subnets.
Multiple proxies in the chain
If your traffic goes through more than one proxy – e.g. Cloudflare → nginx → app – the X-Forwarded-For header becomes a comma-separated list like 203.0.113.5, 198.51.100.7, 172.22.0.1. CakePHP walks that list from right to left, skipping addresses that match trustedProxies, and returns the first untrusted one as the real client.
For this to work, you must trust every intermediate proxy IP. With Cloudflare in front, that means adding Cloudflare’s published IP ranges to your trusted list – otherwise CakePHP will stop at the Cloudflare edge IP and treat that as the client.
Alternative: nginx real_ip module
You can also fix this at the web server layer using nginx’s ngx_http_realip_module, which rewrites REMOTE_ADDR before the request reaches PHP. It works, but the application-level approach is usually preferable:
- Works regardless of the web server (nginx, Caddy, FrankenPHP, Apache, …).
- Configuration lives with the app, not in ops files.
- Easier to test and reason about.
- No surprises if you swap web servers later.
Step 3: Replace env(’REMOTE_ADDR’) everywhere
Search your codebase for direct REMOTE_ADDR usage:
env('REMOTE_ADDR')
$_SERVER['REMOTE_ADDR']
Replace each occurrence with $request->clientIp() or $this->request->clientIp() depending on context.
If you don’t have a request object in scope, fetch the current one statically via Router::getRequest():
use Cake\Routing\Router;

$ip = Router::getRequest()?->clientIp();
This returns the same ServerRequest that already passed through your TrustedProxyMiddleware, so clientIp() stays proxy-aware.
Caveats:
-
Returns
nullin CLI/shell context or before the request has been dispatched – always null-check. - Avoid relying on it in code that might run before middleware (e.g. bootstrap).
- For testability, prefer passing the request in explicitly where you can; the static accessor is a service-locator fallback.
clientIp() is correct in both scenarios. There is no reason to use env('REMOTE_ADDR') directly in application code.
This is especially important if you are a plugin maintainer. As this code is then not directly “adjustable” from the developer’s perspective. So that will cause a bug ticket at some point otherwise.
Step 4: Verify it works
The easiest way to confirm everything is wired up correctly is to use the cakephp-setup plugin, which ships with a built-in IP debug page at /admin/setup/backend/ip. It shows you exactly what clientIp() returns, what headers came in, and which proxies were trusted – so you can spot misconfigurations at a glance.
If you’d rather not pull in the plugin, a tiny debug route does the same job:
$routes->get('/debug-ip', function ($request) {
    return new Response(['body' => $request->clientIp()]);
});
Curl it from inside and outside the proxy and confirm you see your real public IP, not the proxy’s internal address.
Console/CLI context
clientIp() only makes sense during an HTTP request. If you have a queue worker or shell command that needs the visitor’s IP – say, to send a “new login from $ip” email asynchronously – you can’t recover it after the fact. Capture the IP at request time and persist it into the job payload, then read it from there in the worker.
Further reading
Bottom line
If you run CakePHP behind any reverse proxy – Docker, nginx, a load balancer, Cloudflare – always use ServerRequest::clientIp() with trusted proxies configured. It’s a one-time setup that prevents a whole class of subtle bugs.
TOML Support in PHP 30 Mar 12:25 AM (3 months ago)
A Complete Guide to php-collective/toml
TOML has gained traction as a configuration format. Rust’s Cargo, Python’s pyproject.toml, and various CLI tools use it. For PHP projects that need to read or write TOML files, php-collective/toml provides a modern parser and encoder with AST access.
Why Consider TOML?
Configuration formats involve trade-offs. YAML offers flexibility but brings complexity. JSON lacks comments and trailing commas. PHP arrays work but aren’t portable. TOML aims for a middle ground: human-readable, unambiguous, and easy to parse.
TOML Syntax Primer
For those unfamiliar with TOML, here’s a quick overview of the format.
Basic key-value pairs:
title = "My Application"
version = 1.2
enabled = true
Tables (sections):
[database]
host = "localhost"
port = 5432

[database.credentials]
username = "admin"
password = "secret"
Arrays:
ports = [8080, 8081, 8082]
hosts = ["alpha", "beta", "gamma"]
Array of tables:
[[servers]]
name = "alpha"
ip = "10.0.0.1"

[[servers]]
name = "beta"
ip = "10.0.0.2"
Inline tables:
point = { x = 1, y = 2 }
database = { host = "localhost", port = 5432 }
Multiline strings:
description = """
This is a longer description
that spans multiple lines.
Whitespace is preserved."""

regex = '''\\d+\\.\\d+'''
Dates and times:
created = 2024-01-15T10:30:00Z
date_only = 2024-01-15
time_only = 10:30:00
Format Comparison: TOML vs YAML vs NEON
Each format has its quirks. Here’s how they compare in practice.
The “Norway problem” – unquoted strings becoming booleans:
# YAML 1.1 and some legacy parsers: This becomes boolean false
country: NO

# YAML 1.1 and some legacy parsers: These also become booleans
answer: yes
enabled: on
# TOML: Always a string, no ambiguity
country = "NO"
Whitespace sensitivity:
# YAML: Indentation matters - this is valid
database:
  host: localhost
  port: 5432

# YAML: This breaks everything
database:
  host: localhost
 port: 5432  # Wrong indentation = parse error or wrong structure
# TOML: Indentation is purely cosmetic
[database]
host = "localhost"
    port = 5432  # Works fine, though unconventional
Type ambiguity:
# YAML: Is this a string or a number?
version: 1.0      # Parsed as float 1.0
version: "1.0"    # Parsed as string "1.0"
version: 1.0.0    # Parsed as string "1.0.0" (silently)

# YAML: Octal numbers surprise
permissions: 0755  # Parsed as decimal 493 in YAML 1.1
# TOML: Explicit typing required
version = 1.0.0    # Parse error - invalid syntax
version = "1.0.0"  # String (must quote it)
count = 42         # Integer
ratio = 3.14       # Float
NEON specifics:
# NEON: Entity syntax (used in Nette DI)
service: App\MyService(@dependency, %parameter%)

# NEON: Concise syntax works well for Nette-style configuration
# but entity syntax does not map directly to TOML
| Aspect | TOML | YAML | NEON |
|---|---|---|---|
| Whitespace-sensitive | No | Yes | Partial |
| Comments | # |
# |
# |
| Multiline strings | Yes | Yes | Yes |
| Native datetime | Yes | Yes | No |
| Type ambiguity | Minimal | Significant | Moderate |
| Nested depth | Verbose | Concise | Concise |
| Spec complexity | Simple | Complex | Moderate |
Here’s the same configuration expressed in all three formats:
# Application configuration
title = "My App"
version = "2.1.0"
debug = false

[database]
host = "localhost"
port = 5432
name = "myapp"
pool_size = 10

[database.credentials]
username = "admin"
password = "secret"

[cache]
driver = "redis"
ttl = 3600

[[servers]]
name = "alpha"
ip = "10.0.0.1"
roles = ["web", "api"]

[[servers]]
name = "beta"
ip = "10.0.0.2"
roles = ["worker"]

[logging]
level = "info"
format = "json"
created = 2024-01-15T10:30:00Z
# Application configuration
title: My App
version: "2.1.0"
debug: false

database:
  host: localhost
  port: 5432
  name: myapp
  pool_size: 10
  credentials:
    username: admin
    password: secret

cache:
  driver: redis
  ttl: 3600

servers:
  - name: alpha
    ip: 10.0.0.1
    roles:
      - web
      - api
  - name: beta
    ip: 10.0.0.2
    roles:
      - worker

logging:
  level: info
  format: json
  created: 2024-01-15T10:30:00Z
# Application configuration
title: My App
version: "2.1.0"
debug: false

database:
    host: localhost
    port: 5432
    name: myapp
    pool_size: 10
    credentials:
        username: admin
        password: secret

cache:
    driver: redis
    ttl: 3600

servers:
    - name: alpha
      ip: 10.0.0.1
      roles: [web, api]
    - name: beta
      ip: 10.0.0.2
      roles: [worker]

logging:
    level: info
    format: json
    created: 2024-01-15T10:30:00Z
Library Features
Full TOML 1.0/1.1 support with strict validation for keys, tables, strings, numbers, and datetimes. The project also publishes a support matrix for current coverage and known gaps.
Error recovery – Rather than stopping at the first problem, it can collect multiple errors. Useful for tooling and editor integrations:
$result = Toml::tryParse($tomlString);
foreach ($result->getErrors() as $error) {
    echo $error->format($tomlString);
}
Simple API for common operations:
$config = Toml::decodeFile('config.toml');
Toml::encodeFile('output.toml', $data);
Separate Lexer/Parser/AST – The architecture allows direct AST access for analysis without full evaluation.
No required extensions – Works out of the box on PHP 8.2+. The php-ds extension is optional for performance.
Error Recovery
When parsing invalid TOML, the library can continue past the first error and collect multiple problems. This is particularly valuable for editor integrations and linters where you want to surface all detected issues at once:
$result = Toml::tryParse($tomlString);

if ($result->hasErrors()) {
    foreach ($result->getErrors() as $error) {
        echo $error->format($tomlString);
    }
}
Each error includes line and column information, making it straightforward to report precise locations in CLI output or IDE diagnostics.
Working with the AST
For tools that need to analyze configuration structure without evaluating it, such as linters, formatters, or editor plugins, direct AST access is available:
use PhpCollective\Toml\Toml;
use PhpCollective\Toml\Ast\Table;
use PhpCollective\Toml\Ast\KeyValue;

$document = Toml::parse($tomlString);

foreach ($document->items as $node) {
    if ($node instanceof Table) {
        echo "Found table: " . implode('.', $node->key->parts) . "\n";
    } elseif ($node instanceof KeyValue) {
        echo "Found key: " . implode('.', $node->key->parts) . "\n";
    }
}
This separation means you can traverse the document structure, check for specific patterns, or even implement custom validation rules beyond what TOML itself requires.
Real-World Use Cases
Application configuration:
// config/app.toml
$config = Toml::decodeFile(__DIR__ . '/config/app.toml');

$dbHost = $config['database']['host'];
$cacheDriver = $config['cache']['driver'] ?? 'file';
Environment-specific settings:
$env = getenv('APP_ENV') ?: 'development';
$config = Toml::decodeFile(__DIR__ . "/config/{$env}.toml");
Reading Python project configuration:
// Parse a pyproject.toml to extract dependencies or metadata
$pyproject = Toml::decodeFile('/path/to/pyproject.toml');

$projectName = $pyproject['project']['name'];
$dependencies = $pyproject['project']['dependencies'] ?? [];
$pythonVersion = $pyproject['project']['requires-python'];
Plugin or package metadata:
# plugin.toml
[plugin]
name = "My Plugin"
version = "2.1.0"
author = "Jane Doe"

[plugin.requirements]
php = ">=8.2"
extensions = ["json", "mbstring"]

[[plugin.hooks]]
event = "beforeSave"
handler = "App\\Hooks\\ValidateData"

[[plugin.hooks]]
event = "afterSave"
handler = "App\\Hooks\\ClearCache"
Using TOML Inside Framework Apps
These examples are not all equivalent.
- CakePHP offers a real extension point for custom configuration engines.
- Symfony can consume TOML during container building, but TOML is not a first-class Symfony config format.
-
Laravel can read TOML during bootstrapping, but its native config format remains PHP arrays in
config/*.php.
CakePHP – Config engine integration:
// src/Configure/Engine/TomlConfigEngine.php
namespace App\Configure\Engine;

use Cake\Core\Configure\ConfigEngineInterface;
use Cake\Core\Exception\CakeException;
use PhpCollective\Toml\Toml;

class TomlConfigEngine implements ConfigEngineInterface
{
    protected string $path;

    public function __construct(string $path = CONFIG)
    {
        $this->path = $path;
    }

    public function read(string $key): array
    {
        $file = $this->path . $key . '.toml';

        if (!is_file($file)) {
            throw new CakeException("Could not load configuration file: {$file}");
        }

        return Toml::decodeFile($file);
    }

    public function dump(string $key, array $data): bool
    {
        $file = $this->path . $key . '.toml';

        return file_put_contents($file, Toml::encode($data)) !== false;
    }
}

// Register in bootstrap.php
Configure::config('toml', new TomlConfigEngine());
Configure::load('app_local', 'toml');
This is a proper CakePHP integration point because Configure is designed to work with custom engines.
Symfony – Custom parameter import pattern:
// src/DependencyInjection/TomlExtension.php
namespace App\DependencyInjection;

use PhpCollective\Toml\Toml;
use Symfony\Component\DependencyInjection\ContainerBuilder;
use Symfony\Component\DependencyInjection\Extension\Extension;

class TomlExtension extends Extension
{
    public function load(array $configs, ContainerBuilder $container): void
    {
        $configFile = $container->getParameter('kernel.project_dir') . '/config/app.toml';

        if (file_exists($configFile)) {
            $tomlConfig = Toml::decodeFile($configFile);
            $container->setParameter('app.toml', $tomlConfig);
        }
    }
}
This can work in a bundle or application-specific extension, but it is still a custom pattern. Symfony’s standard configuration formats are YAML, XML, and PHP, so this is better framed as importing TOML-derived parameters than as native Symfony config loading.
Laravel – Boot-time import pattern:
// app/Providers/TomlConfigServiceProvider.php
namespace App\Providers;

use Illuminate\Support\ServiceProvider;
use PhpCollective\Toml\Toml;

class TomlConfigServiceProvider extends ServiceProvider
{
    public function boot(): void
    {
        $tomlConfig = config_path('app.toml');

        if (file_exists($tomlConfig)) {
            config()->set('toml', Toml::decodeFile($tomlConfig));
        }
    }
}
This is useful when you want TOML-backed application settings inside a Laravel app, but it is not native Laravel config-file support. Keeping the imported data under a dedicated toml key avoids accidentally overwriting existing framework or package config keys.
Migrating from YAML or NEON
Converting existing configuration files is straightforward. Here’s a helper approach:
use PhpCollective\Toml\Toml;
use Symfony\Component\Yaml\Yaml;

// Load existing YAML
$yamlData = Yaml::parseFile('config.yaml');

// Write as TOML
Toml::encodeFile('config.toml', $yamlData);
For NEON (Nette):
use PhpCollective\Toml\Toml;
use Nette\Neon\Neon;

$neonContent = file_get_contents('config.neon');
$neonData = Neon::decode($neonContent);

// Filter out NEON-specific constructs like entities
// that don't translate directly to TOML
$cleanData = array_filter($neonData, fn($v) => !is_object($v));

Toml::encodeFile('config.toml', $cleanData);
Some things to watch for during migration:
-
NEON entities (
@service,%parameter%) have no TOML equivalent - YAML anchors and aliases need to be expanded
- Deeply nested structures may become verbose in TOML
- Datetime literals need to match TOML’s RFC 3339-based syntax
Installation
composer require php-collective/toml
Requires PHP 8.2+. Optional: install php-ds extension for improved performance with large files.
Summary
TOML won’t replace YAML or NEON everywhere, but it has its place — especially when interoperating with tools that already use it. For PHP projects that need TOML support, this library provides a complete implementation.
Personally, I still reach for NEON or classic PHP arrays in most projects — for deeply nested configs, they’re simply more concise. TOML shines in flatter structures and cross-language tooling. What are you using?
Further Resources