5 Dietitian-Approved Store-Bought Sauces for Quick, Healthy Meals 1 May 10:40 AM (20 hours ago)
As a registered dietitian who is also a certified plant-based cook, I delight in whipping up delectable sauces from scratch. But leisurely preparing a meal with multiple steps and ingredients just isn’t realistic every night. Ready-to-use sauces are my time-saving solution, but I’m picky about store-bought products. I look for options with simple, recognizable whole-food ingredients. My preference is no oil, although I make an exception for extra-virgin olive oil when it really enhances the flavor of a sauce. I also look for sauces with no more than 360 mg of sodium per serving (a reasonable limit, especially since these sauces are flavorful enough that you won’t need to add extra salt) and no more than 4 grams of added sugar. Oh, and they have to be downright delicious! Here are five of my favorite sauces, why each makes my list, and simple, healthful ways to use them when meal prep requires a shortcut.
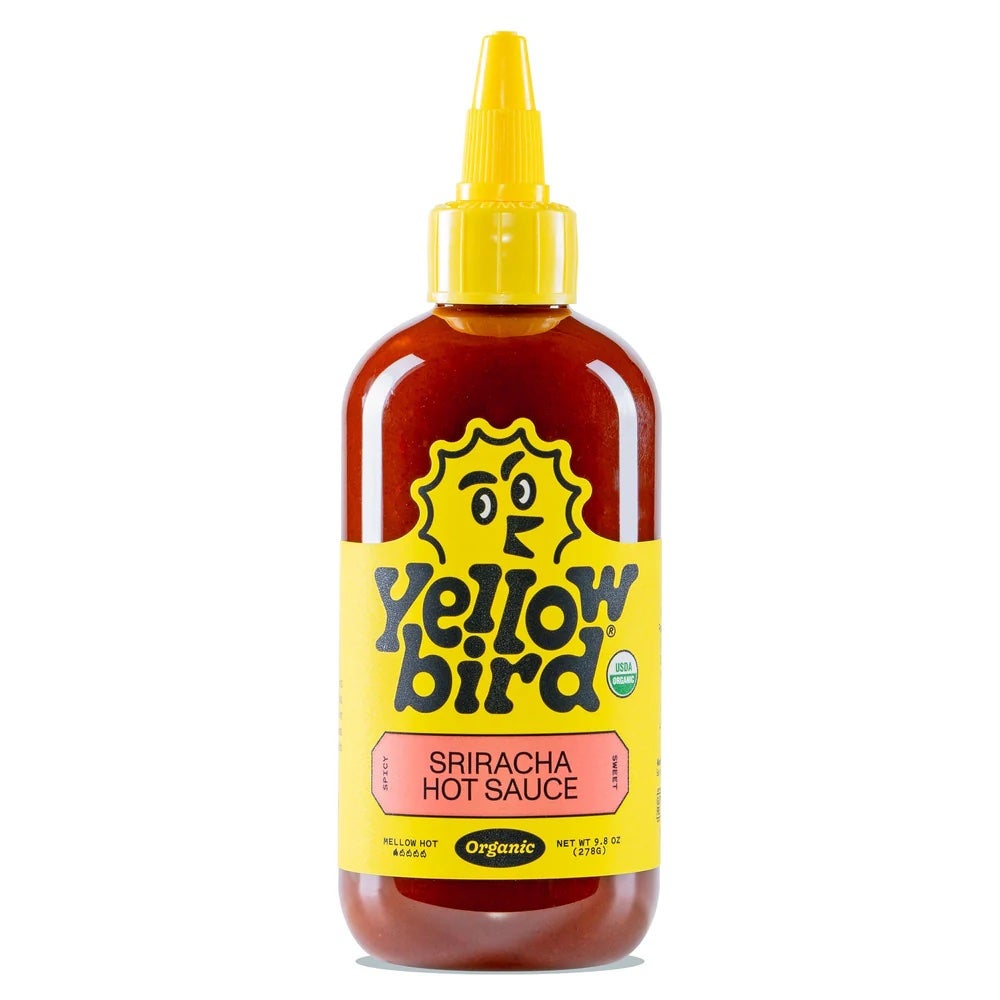
Yellowbird Sriracha (oil-free)
Organic red jalapeños give this sauce its kick, balanced with organic distilled vinegar and garlic, a touch of salt, and sweetness from organic dates, raisins, and citrus juice concentrates. A 1 -teaspoon serving (a little goes a long way) provides zero calories and just 70 mg of sodium (3% of the Daily Value). Use it to jazz up air-fried tofu served over a bed of massaged kale or collards, brown rice, and avocado. It’s also amazing drizzled on grilled corn on the cob or swirled into hummus.
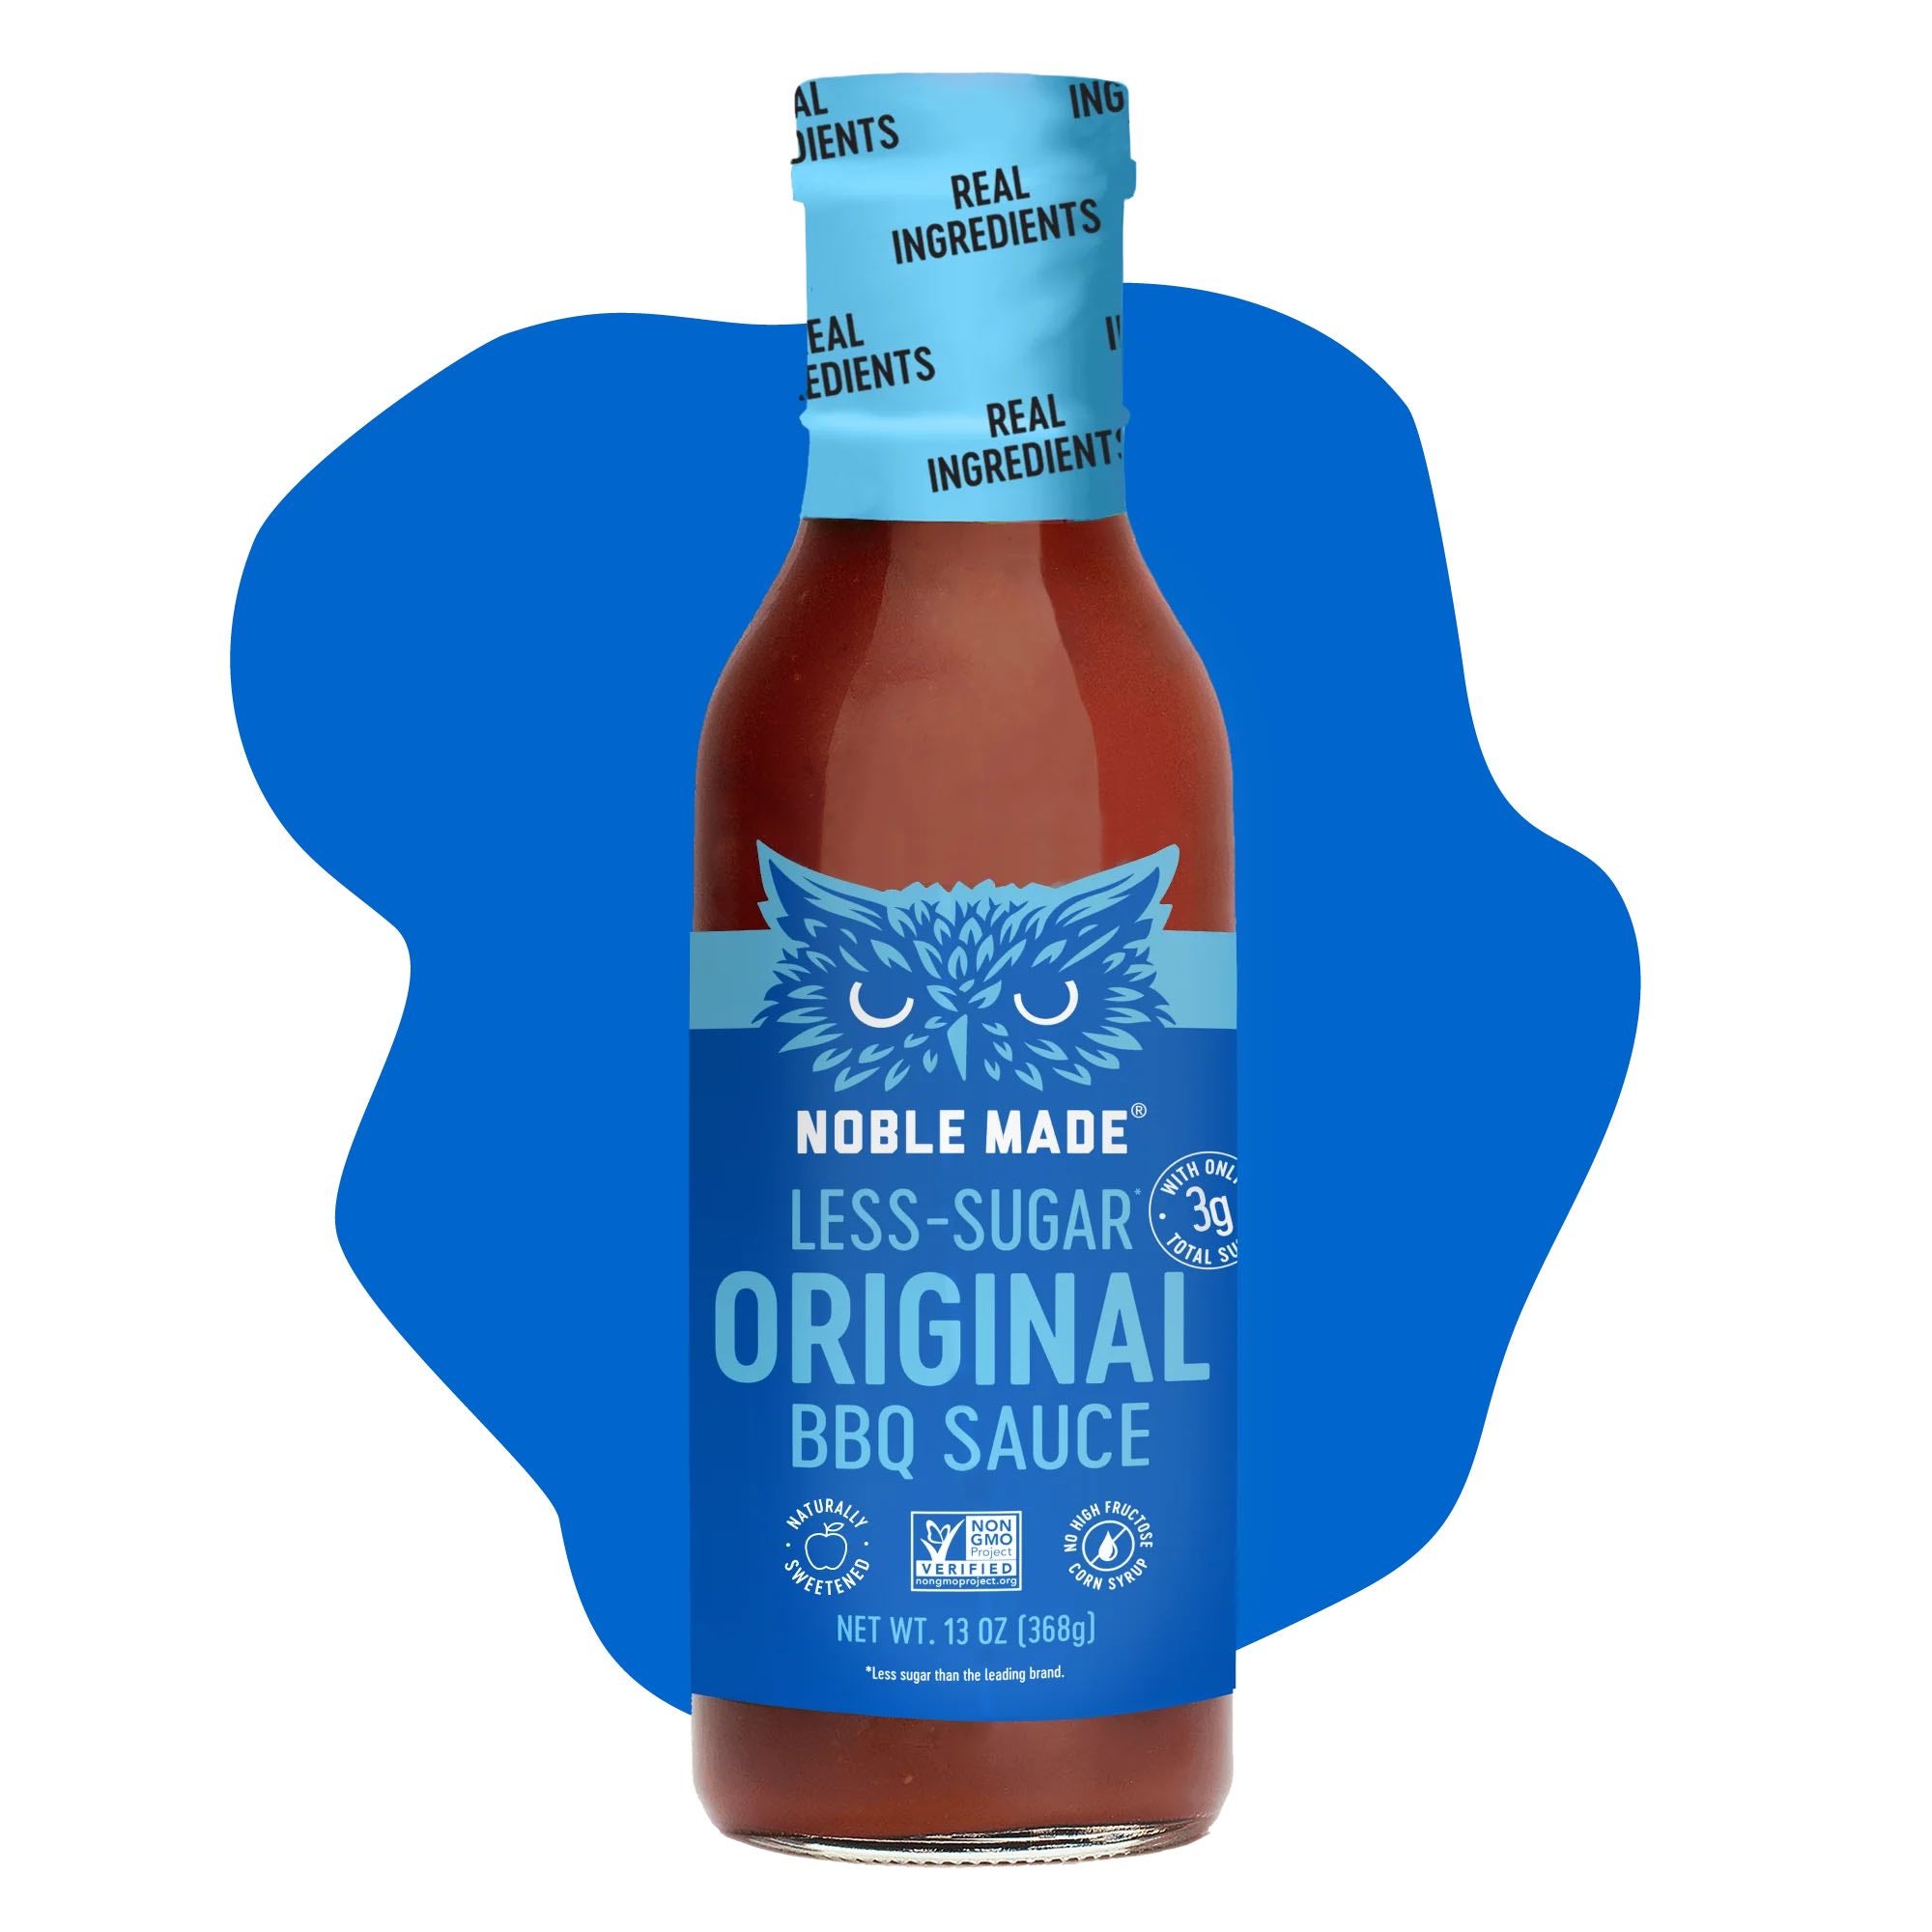
Noble Made Less-Sugar Original BBQ Sauce (oil-free)
The natural hickory smoke flavor is what makes this BBQ sauce my current go-to. It’s made from a tomato puree base combined with apple cider vinegar, apple juice concentrate, and an array of spices, including garlic, ginger, and cayenne. With just 2 grams of added sugar per 2 tablespoons, it deserves the less-sugar callout in its name. (In contrast, one popular BBQ sauce brand packs a whopping 16 grams of added sugar for the same-sized portion.) Use it to flavor plain beans or tempeh paired with a citrusy slaw and roasted sweet potatoes. It’s also a one-step tactic to transform veggies such as roasted cauliflower and grilled Portobello mushrooms.
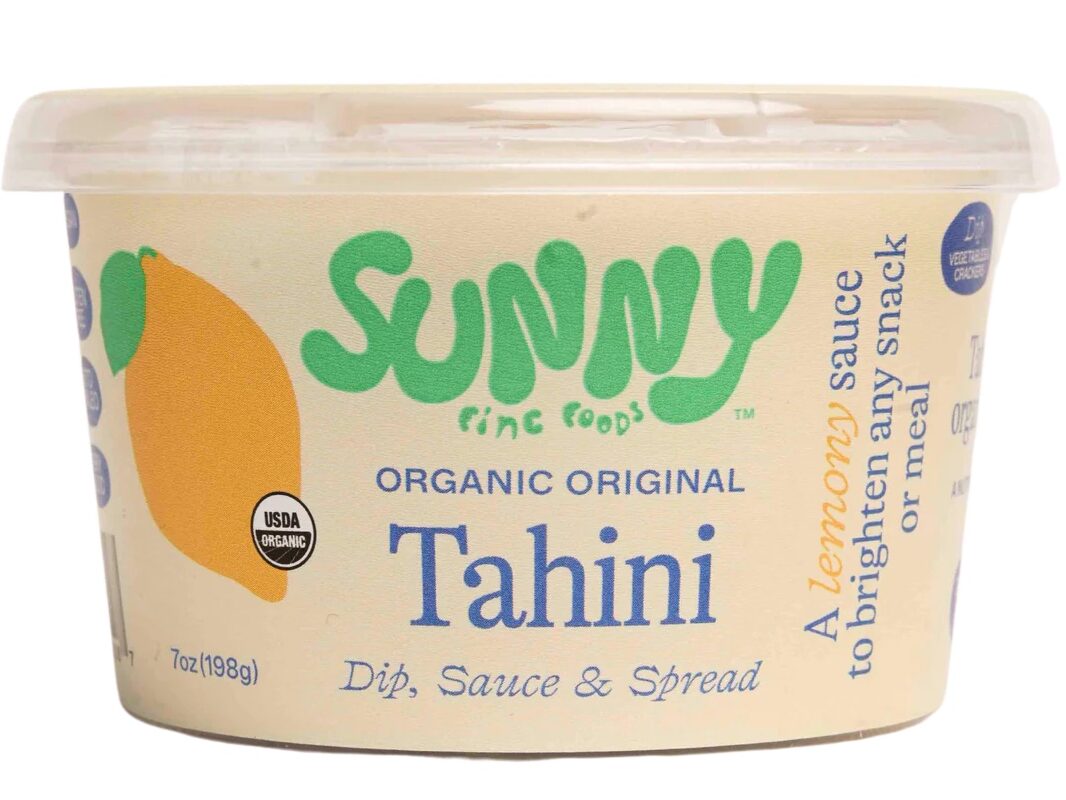
Sunny Original Tahini Dip, Sauce & Spread (oil-free)
This top-quality sauce made simply from ground sesame seeds, filtered water, lemon juice, garlic, sea salt, and spices, is incredibly versatile and quite nutritious. A 2-tablespoon potion contains just 1 gram of saturated fat and 112 mg of sodium (5% of the Daily Value), 3 grams of protein, and 6% of the daily target for iron. In addition, sesame products, including tahini, are a source of antioxidants and anti-inflammatory compounds. Enjoy it as a creamy salad dressing, dipping sauce for raw or leftover roasted veggies, or as a baked potato topping. For a quick balanced meal, toss tahini sauce with sautéed cremini mushrooms, a generous handful of greens, and a scoop of cooked chickpea pasta.
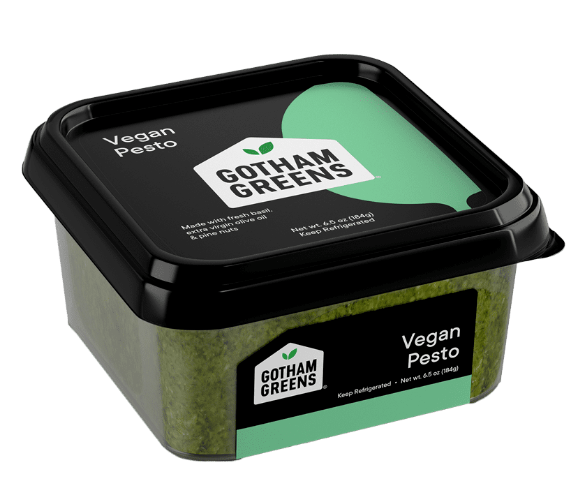
Gotham Greens Vegan Pesto (contains oil)
Gotham Greens nixed the cheese in this classic sauce made from a combo of extra-virgin olive oil, basil, pine nuts, lemon juice, garlic, and sea salt. In addition to pasta and pizza, pesto can be used to dress up whole grains, veggies, tofu, and pulses. For a make-ahead chilled grab-and-go lunch, add steamed lentils, cooked quinoa, greens, sliced cherry tomatoes, and a dollop of pesto to a glass food storage container. Close the lid, shake, and refrigerate overnight. (Editor’s note: For a no-oil option, Forks Over Knives recommends this homemade pesto recipe.)
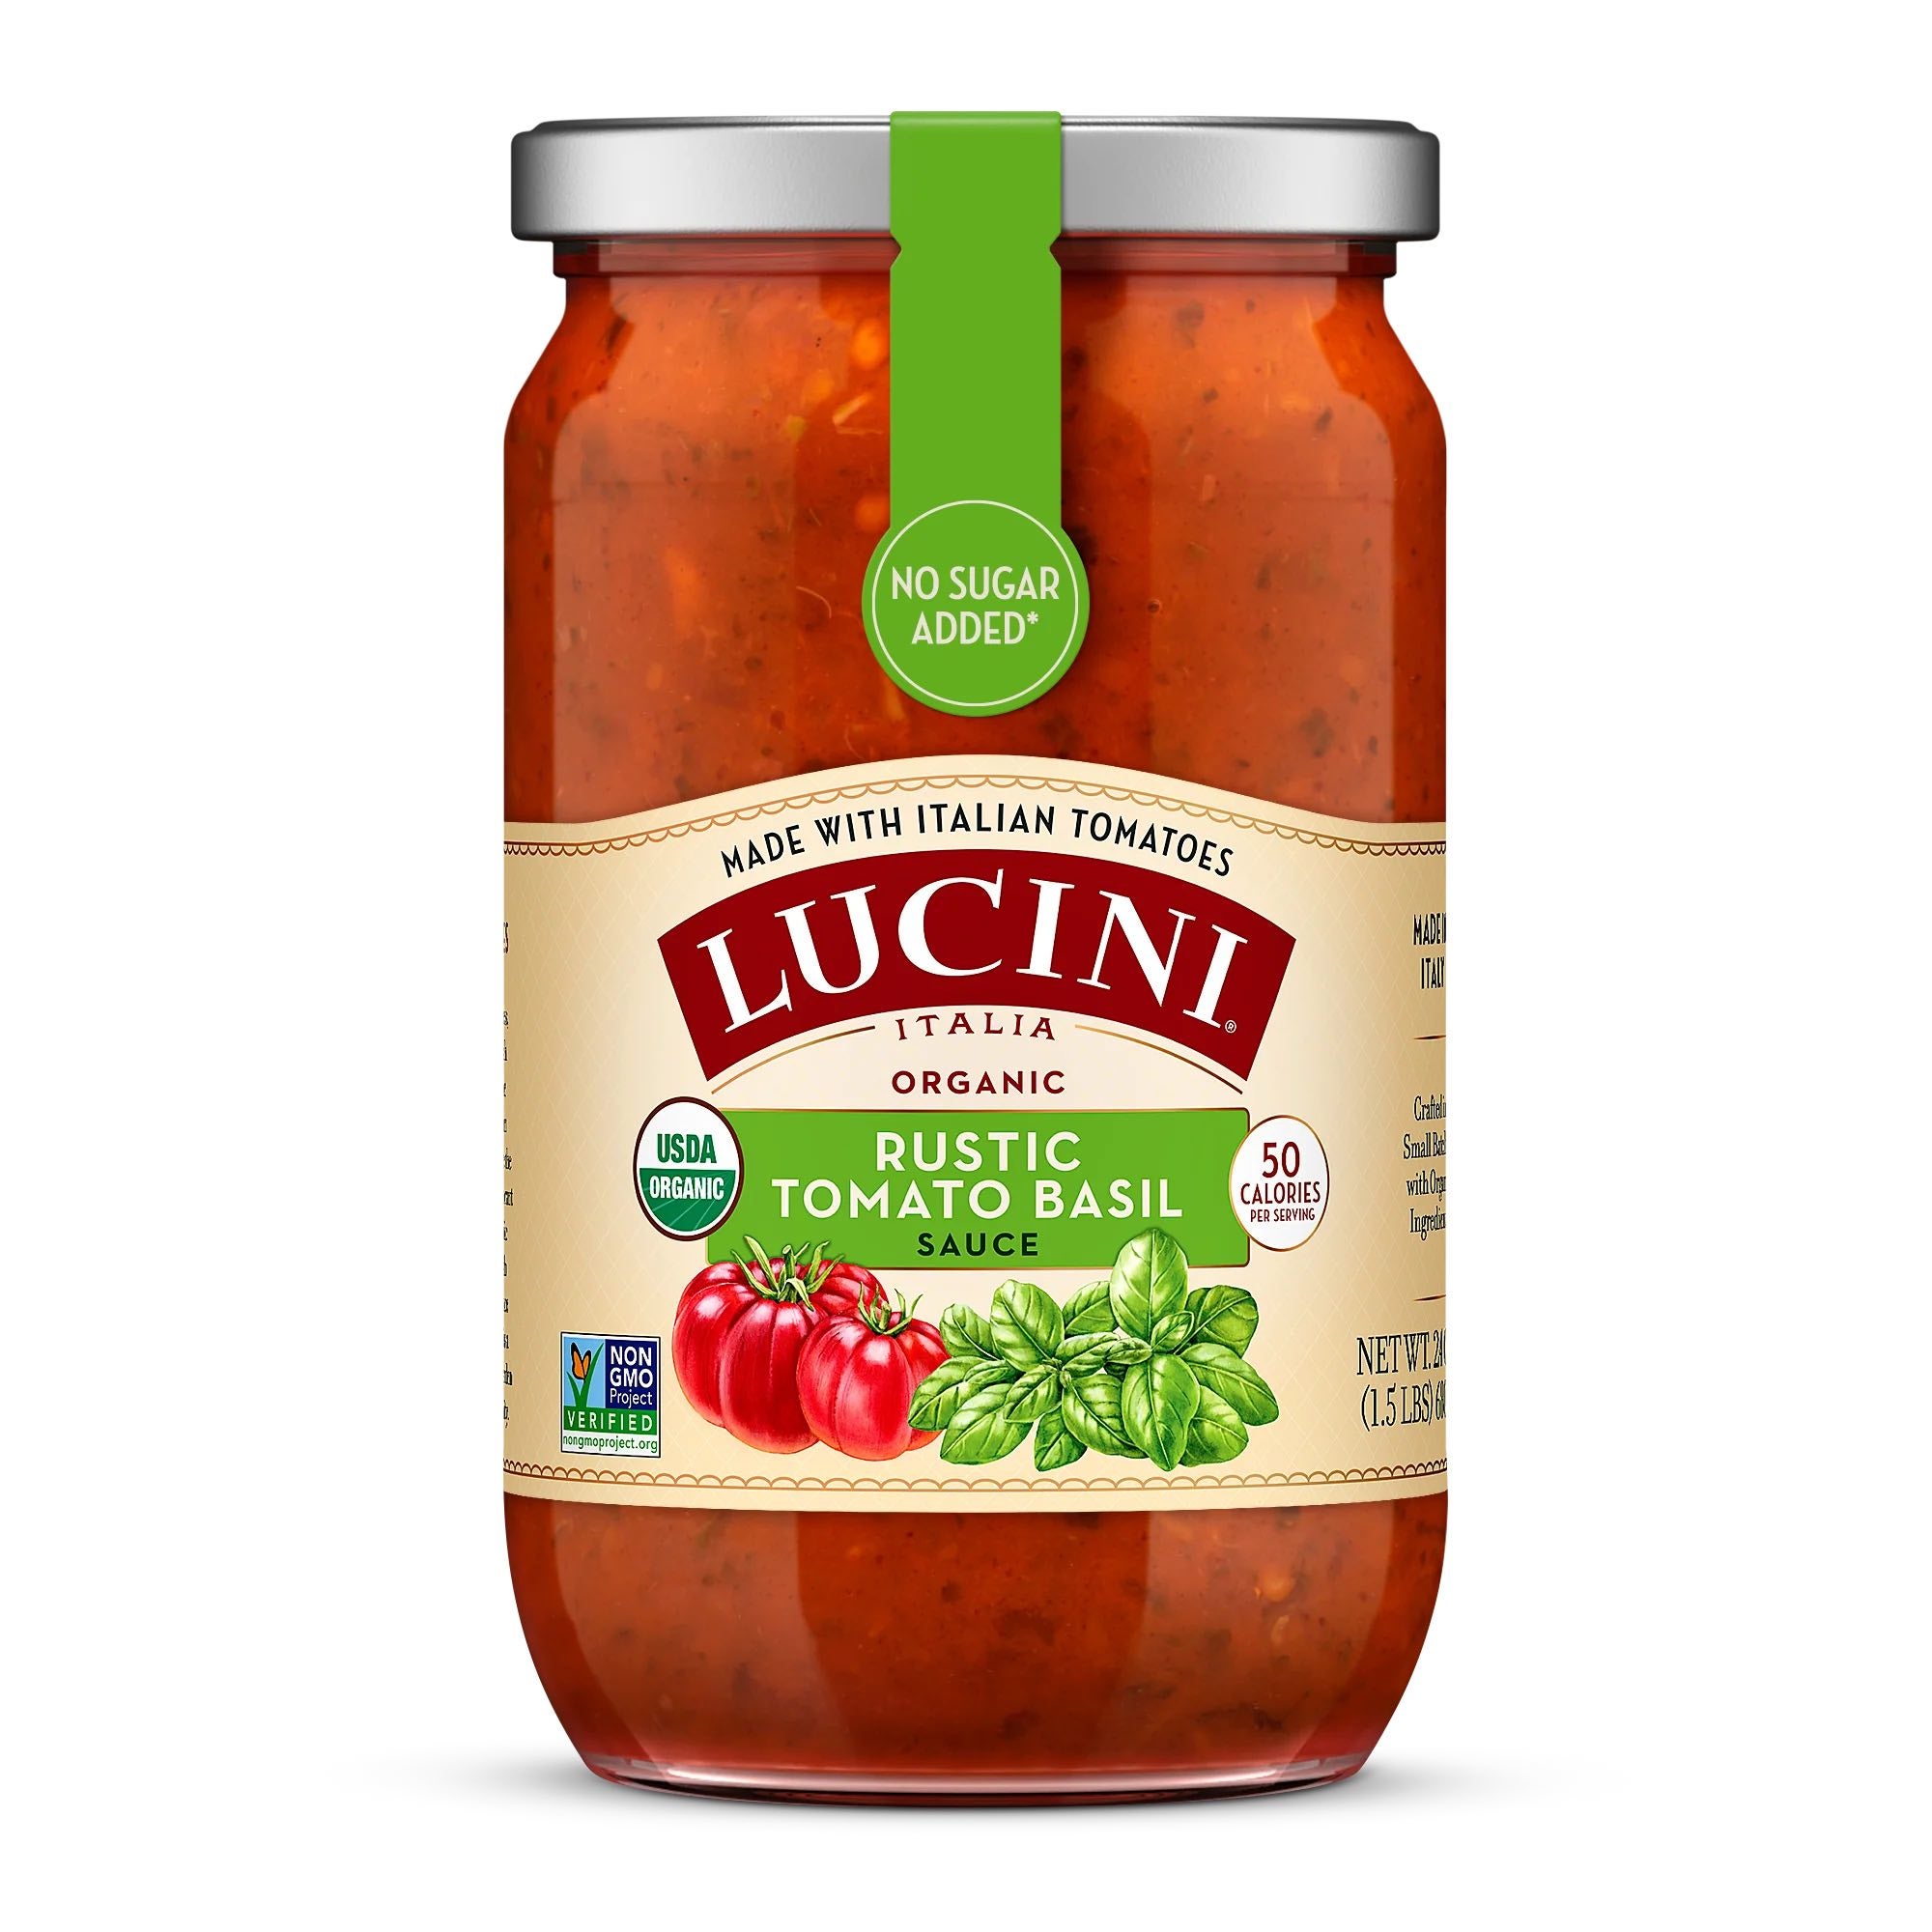
Lucini Organic Rustic Tomato Basil Sauce (contains oil)
I’ve long been a fan of this brand for its high quality, lack of added sugar, and short list of ingredients, which reads like a recipe: fresh tomatoes, organic onions, organic extra virgin olive oil, organic basil, organic carrots, sea salt, and organic black pepper, all sourced from Tuscany. Use it for lentil-stuffed peppers and chickpea shakshuka, or layer it with roasted veggies, quinoa, and crumbled, herbed tofu for a nourishing noodle-less lasagna. (Editor’s Note: For an oil-free option, FOK recommends 365 by Whole Foods Market Organic Fat Free Marinara.)
The post 5 Dietitian-Approved Store-Bought Sauces for Quick, Healthy Meals appeared first on Forks Over Knives.


Kale Apple Smoothie 30 Apr 9:18 AM (yesterday, 9:18 am)
This fruity green kale apple smoothie is supremely refreshing and perfect as an energizing snack or breakfast pick-me-up. Apple, banana, and orange keep the flavors lively, while fresh baby kale (you can also use spinach) adds green goodness without overpowering the fruit flavors. If your blender allows, include a few ice cubes to make it an extra chill affair. The recipe makes one large or two small smoothies.
For more inspiration, check out these tasty ideas:
- Pineapple Ginger Smoothie
- Berry-Banana Smoothie Bowls
- Chocolate Peanut Butter Smoothie Bowls
- Cherry and Acai Smoothie Bowls
- 1 orange
- 1 green apple, unpeeled, cored, and coarsely chopped
- 1 banana, sliced
- 1 cup packed fresh baby kale or spinach
- 4 to 8 ice cubes (optional)
Instructions
- Slice off the top and bottom of orange. Place it with a cut side down on a cutting board. Slice off the skin and white pith from top to bottom. Holding the orange over a bowl to catch juices, slide a knife between a section and membrane. At the core, turn the knife and cut between the other side of the section and the membrane. The section will drop into the bowl. Repeat to remove all sections. Squeeze membranes to release any juice. (Alternately, peel the orange and cut it into quarters.)
- In a blender combine orange sections and any juice and the remaining ingredients. Cover and start blending on low, gradually increasing speed to high until completely smooth. Pour into glasses. Serve immediately.
The post Kale Apple Smoothie appeared first on Forks Over Knives.
Molasses Spice Cookies 29 Apr 9:21 AM (2 days ago)
Editor’s note: Dr. Michael Greger’s How Not to Age was one of our favorite books of 2023, and now Dr. Greger is back with The How Not to Age Cookbook, featuring recipes by Robin Robertson. This wholesome yet delicious cookie recipe is an excerpt from the new cookbook.
The amazing aroma of molasses and spice will fill your home as these cookies bake in the oven. Almond flour and almond butter add richness while oat flour ensures they’re not too heavy. But it’s the combination of ginger, cinnamon, and allspice paired with caramel-like date syrup and molasses that is a match made in heaven. Slightly chewy and perfectly delicious, they’re especially good served with a cup of hot tea or coffee!
Tips
Gluten-free: This recipe is gluten-free if you use gluten-free oat flour.
Consistency: Because the consistencies of molasses, almond butter, and date syrup can vary, you will need to monitor the amount of additional water, using it only if the dough is too dry.
Variations
- Add grated lemon or orange peel to the cookie dough.
- Add a pinch of ground cardamom to the spices.
- Top the dough discs with some chopped nuts.
Reprinted with permission from Flatiron Books. Recipe by Robin Robertson. © 2025 by Michael Greger
- ⅓ cup blackstrap (dark) molasses (80 ml)
- ⅓ cup date syrup (80 ml) (see Consistency tip, recipe intro)
- 2 tablespoons almond butter
- ½ teaspoon pure vanilla extract
- 1 cup almond flour (110 g)
- 1 cup oat flour (120 g)
- 1 teaspoon aluminum- and sodium-free baking powder
- 1 teaspoon ground ginger
- 1 teaspoon ground cinnamon
- ¼ teaspoon ground allspice
Instructions
- In a large bowl, combine the molasses, date syrup, almond butter, vanilla, and 2 tablespoons of water. Stir until smooth and well blended. Set aside.
- In a medium bowl, combine the almond flour, oat flour, baking powder, ginger, cinnamon, and allspice. Mix well. Slowly add the dry ingredients to the wet ingredients, stirring to mix well. If the mixture is too dry to form into smooth balls, add more water, (see tip, recipe intro) 1 tablespoon at a time. If the dough becomes too wet, add a bit more flour. Chill the dough for 30 minutes.
- Preheat the oven to 350°F (175°C). Line one or two baking sheets with parchment paper.
- Scoop out 1 tablespoon of the dough and roll it between your hands to shape it into a ball. Place the dough ball on the prepared baking sheet. Repeat until all the cookie dough has been used, making about twelve balls, spaced about 2 inches (5cm) apart on the sheet. Wet your fingers and gently press each cookie to flatten the dough into a disk about ¼ inch (0.5cm) thick.
- Bake until the bottom edges are slightly browned, 10 to 12 minutes. Remove from the oven and set aside to cool for about 10 minutes. The cookies will continue to firm up as they cool. When completely cooled, use a metal spatula to transfer the cookies to a plate to serve, or store them in a covered container until ready to enjoy.
The post Molasses Spice Cookies appeared first on Forks Over Knives.
From Bacon-Lover to Vegan: My Unlikely Journey to Better Health 29 Apr 9:18 AM (2 days ago)
For much of my life, I was the stereotypical “never going vegan” guy: double cheeseburgers, meat-lovers pizzas, Mmmm…bacon jokes. My parents are retired dairy and cattle farmers, and I farmed pigs and chickens myself. I was also an avid fisherman. Veganism was not remotely appealing to me. In fact, I ridiculed it.
In 2019, my then-fiancée (now wife), Deb, and I moved to a rural area in Summerland, British Columbia, right next to a dairy farm. At that point, Deb had already been vegetarian for over a decade, as long as I’d known her. One day, the farmer next door separated the cows from their calves. The calves were moved just far enough away that they couldn’t see their mothers—but they could still hear them. For 48 hours, the grieving mothers and their babies cried out to each other nonstop, calling in vain to be reunited. Deb, a town girl, had never experienced anything like it. When I explained what was happening—that it was the mothers and babies calling to each other—she made the connection and went vegan on the spot. No more dairy; no more eggs.
The Moment Everything Changed
Since I did most of the cooking and grocery shopping, I suddenly had to figure out how to feed a vegan. At that point, I barely knew what veganism even meant. So I started watching health documentaries to educate myself. I began with Forks Over Knives, then moved on to What the Health, Eating You Alive, Cowspiracy, and Earthlings.
Eventually, I found my way to Dominion, an Australian documentary with hidden-camera footage from slaughterhouses.
Ironically, I was eating leftover chicken taquitos when I pressed play. Twenty minutes into the film, I was vegan—and sobbing. I was incredibly moved by what I saw: a side of animal agriculture I thought I understood but had never really confronted. I resolved to never eat animal products again.
At the time, I was obese (305 pounds), with prediabetes, high cholesterol, inflammation, frequent chest pain, gout, acid reflux, arthritis, erectile dysfunction, and constant headaches. I was headed straight toward heart disease, stroke, cancer, and dementia—basically, all the “old man” diseases.
The Pleasant Side Effects of Going Plant-Based
Within two years, I’d adopted a largely whole-food, plant-based diet, quit drinking alcohol, and lost 110 pounds.
I’ve since gained back about 20 pounds (I went a little underweight for a while), but I’ve kept off the bulk of the weight for over four years now. Today, in my mid-50s, I take zero medications. I hardly ever get sick. And you know those claims from The Game Changers about improved sexual performance on a vegan diet? Absolutely accurate—a very pleasant surprise for a middle-aged man.
One of the best parts of this transition has been doing it alongside my wife. Before, we had very different diets; the only overlap was eggs and cheese. Now, we cook together, and I’ve become a much better cook. Removing butter, cheese, and eggs opened up a world of flavor I never appreciated before. Our meals are now colorful, diverse, and delicious. It’s been eye-opening to learn how whole plant foods are high in nutrients and low in calories. Being a big guy with a big appetite, I love that I can pile my plate high without worrying about excess calories, fat, or cholesterol.
This shift didn’t just change my health—it changed our lives. What started as an effort to support my wife’s ethical choices ended up saving my life. The WFPB diet has also drastically reduced our food bill and cut our household waste by about fivefold. No eggs, cheese, or meat has been a boon for the pocketbook.
Today, we run a small vegan animal sanctuary, offering forever homes to goats, sheep, chickens, roosters, ducks, geriatric dogs, and even a python. We garden, steward our permaculture-inspired property, and have become more deeply connected to nature and wildlife than ever before.
All of this stemmed from one simple choice. I encourage anyone to give it a try. You can support your health, the environment, and the animals all by making a change with your very next meal.
Ready to get started? Check out Forks Meal Planner, FOK’s easy weekly meal-planning tool to keep you on a healthy plant-based path. To learn more about a whole-food, plant-based diet, visit our Plant-Based Primer.
The post From Bacon-Lover to Vegan: My Unlikely Journey to Better Health appeared first on Forks Over Knives.
Tinola 28 Apr 9:44 AM (3 days ago)
Tinola is a bright, gingery soup that has been a comfort food staple in the Philippines for centuries and is served over rice as a main meal. The soup is typically made with chicken, but in this vegan twist, Cleodia Martinez switches things up and uses tofu and umami-rich mushrooms, to delicious effect. Crunchy green papaya and tender bok choy balance out the flavors with crunchy green goodness. This recipe calls for cooked brown rice, so be sure to have that to hand or get it going first up!
Tips
Green papaya: Green papaya is the unripe version of the golden-fleshed papaya you may be more familiar with. It has a crisp texture and flavor similar to jicama or cucumber.
For more inspiration, check out these tasty ideas:
- ½ cup chopped yellow onion
- 4 cups low-sodium vegetable broth
- 6 cloves garlic, minced
- 1 2-inch piece fresh ginger, peeled and thinly sliced
- 1 small green papaya, peeled, seeded, and diced (1½ cups)
- 1 tablespoon white miso paste
- 1 cup sliced fresh cremini mushrooms
- ½ of a 14-oz. pkg. extra-firm tofu, diced
- 6 baby bok choy, halved lengthwise
- 6 cups cooked brown rice
- Crushed red pepper (optional)
Instructions
- In a 4- to 6-quart pot cook onion in 2 tablespoons of the broth over low 10 minutes or until onion is translucent, stirring frequently and adding water, 1 to 2 tablespoons at a time, as needed to prevent sticking.
- Add garlic and ginger. Increase heat to medium. Cook 2 minutes more. Add papaya, the remaining broth, the miso, and 4 cups water. Bring to boiling; reduce heat. Partially cover and simmer 10 minutes or until papaya is tender.
- Add mushrooms and tofu. Simmer 5 minutes. Add bok choy. Return to boiling; remove from heat. Serve immediately with rice, topped with crushed red pepper (if using).
The post Tinola appeared first on Forks Over Knives.
Chickpea, Fennel, and Radish Salad 24 Apr 9:21 AM (7 days ago)
This summery chickpea, fennel, and radish salad pops with flavor. The sweetness of shredded carrots and the anise-like flavor of the fennel complement the peppery radishes while aromatic fresh herbs up the ante all around. Top with walnuts and a drizzle of lemony Dijon dressing. This company-worthy salad is perfect for a potluck or serving at your next grill-out.
Tips
Radish ribbon variation: To make this salad with radish ribbons, look for long varieties, such as scarlet or fire and ice radishes. Using a vegetable peeler, shave long, thin ribbons from radishes, turning radishes to make even cuts. When you can’t shave off any more, thinly slice remaining radishes.
For more inspiration, check out these tasty ideas:
- Roasted Radish Salad with Sweet Potato and Apple
- Watermelon Radish Spring Rolls with Dipping Sauce
- Easter Egg Radish Panzanella
- Strawberry-Radish Salad with Creamy Lemon Dressing
- 10 to 12 oz. of radishes (see tip, recipe intro)
- 2 15-oz. cans no-salt-added chickpeas
- 1 medium fennel bulb, trimmed and very thinly sliced
- 1 cup coarsely shredded carrots
- 2 tablespoons coarsely chopped fresh dill
- 2 tablespoons thinly sliced fresh chives
- ¼ cup lemon juice
- 1 teaspoon Dijon mustard
- ½ teaspoon sea salt
- ¼ to ½ teaspoon freshly ground black pepper
- 4 cups torn red leaf lettuce
- ⅓ cup chopped toasted walnuts
- 4 6-inch whole grain pita bread rounds, warmed
Instructions
- Trim tops off radishes; if you like, chop ¼ cup of the tops to add at the end. Thinly slice radish into coins. Place radishes in a large bowl.
- Drain chickpeas, reserving ¼ cup of the liquid from the can (aquafaba). Rinse and drain chickpeas. Add to bowl with radishes. Add fennel, carrots, dill, and chives.
- In a small bowl whisk together reserved aquafaba, the lemon juice, mustard, salt, and pepper. Drizzle over radish mixture; toss to coat.
- Arrange lettuce and radish mixture on a platter. Top with walnuts and radish tops (if using). Serve with warm pita bread.
The post Chickpea, Fennel, and Radish Salad appeared first on Forks Over Knives.
How to Pack a Cooler So It Stays Cold 23 Apr 10:05 AM (8 days ago)
Whether you’re packing for a picnic in the park, a cross-country road trip, or a multiday camping adventure, knowing how to properly pack a cooler can make all the difference. The following tips ensure optimal chill for day trips, long car rides, and even weekends in the wild.
With a bit of prep and the right layering method, you can keep your perishables in top shape, no matter how far you’re traveling. Whether you’re working with a soft-sided cooler bag or a heavy-duty ice chest, the packing tips below will help you get the most out of your cooler.
Prep and Pre-Chill
Place all foods in zip-top bags or square airtight containers that fit snugly in your cooler. This includes store-bought items with odd shapes and cardboard packaging that would otherwise monopolize cooler space and get crushed or soggy in transit. Refrigerate everything overnight.
Build a Base Layer of Ice
Line the bottom of the cooler with ice—cubes, blocks, packs, or frozen water bottles (which can do double duty as beverages). The larger the better; big frozen items melt more slowly than cubes or small packs.
Remember the 2:1 Ratio
Cooler manufacturers recommend packing coolers with a 2 parts ice to 1 part food ratio for optimal chill.
Keep It Tight
Time to play cooler Tetris! Starting with items you’ll need last, pack them tightly in the cooler so there are as few air pockets as possible. Fill any gaps with ice or small ice packs. (One exception is whole fruits and veggies, which shouldn’t be packed directly next to ice packs—see tips below.) Finish with foods you’ll want to access first, e.g., a snack or picnic lunch.
Seal in the Cold
Cover everything with a final layer of ice or ice packs, filling the cooler to the top. Reusable flat ice sheets work especially well here: They’re light and easy to shift and replace each time you open the cooler. Keep the cooler closed as much as possible so the interior stays cold. If you don’t have a shady spot for the cooler, cover it with a blanket for extra insulation.
Handle Produce with Care
Headed to a resort or a campsite where grocery options are limited? Then you’re probably bringing along a bag’s worth of whole fruits and veggies. Here’s how to pack them in a separate cooler so they stay intact and optimally fresh.
- Protect items from extreme cold by topping the cooler’s base layer of ice with cardboard or a paper bag.
- Don’t fill gaps between unpackaged produce with ice. Intense cold and moisture can cause fruits and veggies to soften and wilt.
- Delicate items go in last! Add lettuce, berries, grapes, and other crushable items right before you close the lid.
The post How to Pack a Cooler So It Stays Cold appeared first on Forks Over Knives.
Beet Bliss! Red and Golden Beet Recipes Packed with Nutrients 23 Apr 8:59 AM (8 days ago)
Not just for Grandma, the humble beet is a seriously versatile and exciting ingredient in any healthy cook’s kitchen. Vibrant and sweet, beets offer a satisfying crunch when raw and become sweet when cooked. Steamed, boiled, or baked are common ways to cook them. Tossed into a salad, roasted in a hearty breakfast hash, or blended into dips, these bright beauties add visual appeal to any dish. Below are a few of our favorite red and golden beet recipes to get you started.
Are beets and beetroot the same thing? Yes. In the U.S., “beet” refers to the bulb; in other countries, such as the U.K., the bulb is called beetroot.
What to do with beet greens: If your beets come with healthy-looking green tops, add them to salads and smoothies or cook them like Swiss chard.
For more on beets, check out What Are Beets, and How Do You Cook Them?
The post Beet Bliss! Red and Golden Beet Recipes Packed with Nutrients appeared first on Forks Over Knives.
7 Vegan-Friendly Mother’s Day Experiences She’ll Truly Love 22 Apr 9:26 AM (9 days ago)
This Mother’s Day, skip the crowded restaurants and generic gift baskets, and show your appreciation with something more meaningful: a day designed around connection, nourishment, and compassion.
Whether your mom is a seasoned plant-based pro or just dipping her toes into the world of whole-food, plant-based living, we’ve rounded up some heartfelt, health-conscious ideas to make her feel truly cherished. From cozy homemade brunches and animal sanctuary visits to spa days and movie nights, these vegan-friendly experiences are sure to tug at Mom’s heartstrings. Read on and get inspired to find the perfect gift for your one-of-a-kind mama.
Make her a special brunch.
Whether your mom is a longtime vegan or this is a delicious introduction, show her how much you care about her health, vitality, and taste buds with a nourishing spread of whole plant-based dishes. Start with a bowl of fresh, seasonal fruit as a colorful centerpiece for the table, and choose a few recipes from our roundup of vegan Mother’s Day options. She will feel the TLC when you invite her to sit back, relax, and taste the love.

Do lunch at an animal sanctuary.
Want to melt Mom’s heart? Take her to visit rescued pigs, cows, sheep, and other farmed animals at an animal sanctuary. Pack a tasty plant-based picnic or look for an onsite restaurant, such as The Kitchen at the Farm Sanctuary in Watkins Glen, New York. The restaurant serves vegan meals made with fresh ingredients from local farmers and the sanctuary’s own garden. You can even turn the trip into an overnight stay in one of their cozy tiny houses overlooking the pasture.

Gift her a trip to a vegan resort.
For a next-level Mother’s Day gift, treat Mom to a vegan getaway so that she can live and breathe the plant-based lifestyle at a fabulous destination. When you build her a travel itinerary at an eco-friendly property focused on sustainability and wellness, she will not only eat like a WFPB queen; she can nourish herself inside and out with activities like yoga, meditation or hiking. Vegan travel comes in all price ranges to fit any budget—even under $100 a night. Just don’t forget to offer up the perfect travel companion: You!

Host a movie night and fix her some yummy snacks.
Bypass the local movie theater concession stand’s buttery popcorn and sugary candy. Instead invite your mom to a private screening from the comfort of home where you can kick back with pillows and blankets and your favorite homemade vegan snacks. Need ideas? We’ve gathered plant-based pros’ top picks for movie-night munchies. Trade jumbo fountain sodas for infused water, iced teas, or tropical smoothies. Go ahead and do the kitchen prep work ahead of time so that you can turn down the lights and enjoy the show with your VIP guest.

Book an appointment at a cruelty-free spa or salon.
Pamper your mama with an indulgent self-care day that you both can feel good about. Whether you want to do hair, makeup, nails, a massage or facial, search HappyCow or Aveda to find a local establishment that uses vegan and certified cruelty-free products. You can also look for the Leaping Bunny–certified or PETA-approved designations, or check out hashtags on social media such as #VeganSalon or #CrueltyFreeBeauty. For a stay-at-home spa day, bring Mom a basket filled with vegan beauty products.

Hit the farmers market together in style.
Could there be a lovelier way to spend a weekend morning with your mom than strolling the springtime farmers market stocking up on fresh produce and other vegan treasures? To start, hook her up with some clutch farmers market gear for a stylish, zero-waste shopping experience——think reusable totes, mesh produce bags, and a wide-brimmed hat for sun protection. (We also love this hands-free water bottle, which will help Mom stay hydrated without getting in the way of shopping.) Now you’re ready to let the Mother’s Day festivities begin!
Gift her a plant-based cooking course.
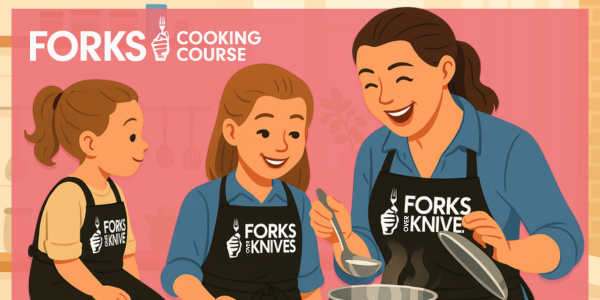
Is Mom getting into the plant-based lifestyle? Give her the tools to nourish herself long after Mother’s Day with the Forks Over Knives Ultimate Cooking Course. Designed for all skill levels, this self-paced online program empowers her to create delicious, wholesome meals with confidence. It’s a thoughtful way to support her health and spark inspiration in the kitchen—no crowded restaurants required. Normally $349, the course is currently on sale for $149.
Featured image courtesy of Best Friends Animal Sanctuary.
The post 7 Vegan-Friendly Mother’s Day Experiences She’ll Truly Love appeared first on Forks Over Knives.
Cherry Berry Whoopie Pies 21 Apr 9:14 AM (10 days ago)
These delicious whoopie pies are a healthy twist on Maine’s classic dessert and are ideal for a special occasion. Cherry-almond cookies sandwich a bright and fluffy berry cream filling. Aquafaba (liquid from a can of chickpeas) whips up into a frothy cream, while freeze-dried mixed berries add tang. Note: You’ll want to serve these within two hours of assembling them, but you can make the cookies and filling ahead of time (see tip, below).
Tips
To make ahead: Simply refrigerate the cookies and the filling in separate airtight containers for up to 24 hours. Assemble and let the cookies come to room temperature before serving.
For more inspiration, check out these tasty ideas:
- Chocolate-Strawberry Vegan Whoopie Pies
- Vegan Strawberry Cupcakes
- Double Chocolate Cupcakes
- Chocolate Mint Kiss Cookies
- ⅔ cup unsweetened black cherry juice
- 3 tablespoons flaxseed meal
- 2 cups white whole wheat flour
- 1½ teaspoons regular or sodium-free baking powder
- ½ teaspoon sea salt
- ¼ cup pure maple syrup
- ½ cup unsweetened applesauce
- 2 tablespoons almond butter
- 1 tablespoon pure vanilla extract
- 1 teaspoon pure almond extract
- 1 cup pitted and snipped fresh or frozen cherries (about 18 cherries)
- ¾ cup freeze-dried mixed berries (⅝ oz.)
- ¼ cup aquafaba (liquid from canned no-salt-added-chickpeas)
- 1 tablespoon pure cane sugar
Instructions
- Preheat oven to 375°F. Line two large baking sheets with parchment paper. In a small bowl stir together cherry juice and flaxseed meal; let stand 5 minutes. In a large bowl stir together flour, baking powder, and salt.
- In a medium bowl stir together flaxseed mixture and the next five ingredients (through almond extract) until well combined. Add to flour mixture; stir until combined. Stir in fresh or frozen cherries. Spoon 1½-tablespoon portions of batter onto prepared baking sheets, spacing 2 inches apart. Using wet hands, flatten each portion.
- Bake 10 to 12 minutes or until set. Cool cookies on baking sheets 10 minutes. Transfer to a wire rack. Cool completely.
- For filling, in a small food processor process freeze-dried berries to a fine powder. (You will have about 3 tablespoon powder.)
- In a medium bowl combine aquafaba, sugar, and berry powder. Stir until sugar is dissolved. Beat with a mixer on medium to high until foamy. Continue beating on high 5 minutes or until stiff peaks form (tips stand straight).
- To assemble whoopie pies, spread filling over the flat sides of half of the cookies. Gently press the flat sides of the remaining cookies against filling. Serve within 2 hours.
The post Cherry Berry Whoopie Pies appeared first on Forks Over Knives.