
Drascombe & Devon Lugger vs the Dabber
Designed for safe family boating under sail, or or power, but taken long distance by intrepid sailors, Clive Marsh looks…
Prolific small boat owner Clive Marsh shares his experience of sailing Drascombe and Devon Luggers

While renting a cottage at Flushing, west Cornwall, I got to sail Luggers for the first time.
The hired boat was kept on a swinging mooring in view of the lounge window and could be accessed at any state of the tide using the tender that came with the accommodation.
We were taking one of those short autumn breaks which are cold and rainy every day. But this didn’t put us off enjoying the Lugger.
At the time, I owned a fin-keeled Westerly yacht, and I was looking forward to the traditional simplicity that Luggers are famous for, like pulling up at the beach at St Mawes and going to the pub.

Negotiating the moored yachts at Falmouth under jib and mizzen. Credit: Clive Marsh
I also liked the idea of being able to row the boat when there was little wind and the engine was playing up.
As I clambered aboard from the tippy tender, it was noticeable how stable the Lugger was even before I lowered her heavy galvanised steel centreplate.
There was plenty of room in the cockpit for my family of four, much more space than there was in the cockpit of our Westerly yacht, in fact.
But what was particularly nice was being able to walk forward and let go from the mooring buoy in more safety than it would be on the deck of a small yacht.
It was all very convenient and simple and perfect for messing about in Falmouth Harbour.
It was blowing a good Force 4-5, so I sailed off the mooring under just jib and mizzen.
This is a very handy and easily managed arrangement. I had the motor on tickover in neutral just in case while I manoeuvred through the moored yachts.
I didn’t put the main up that day and was happy just to potter around Falmouth Harbour in the rain and enjoy the few moments when the sun shone through.
During the course of our break, we tried every option the Lugger gave: rowing, motoring, motor-sailing, full rig, main only, jib and mizzen etc.
I decided there and then that I must have one of these versatile boats and within a few weeks became the owner of Lugworm, a Mk1 Lugger with a rope horse, named after the famous Drascombe Lugger sailed by Ken Duxbury on his many open sea passages.
I gave Lugworm a new name, Spray, as I like short names for my boats.

Drascombe Lugger at Salcombe; Luggers are ideal family boats. Credit: James Bell (PS)/Alamy
She was an early glass-reinforced plastic (GRP) boat on an old T-type trailer. The first thing I did was invest in a new swing-back trailer supplied by Drascombe.
This meant the total cost of the oldish boat and the new trailer came to £6,500, which was more than my old Westerly was worth.
Good dinghies and day boats may cost more than old small cruisers, but they save a lot in marina and haul-out charges.
Early Luggers have a simple steel tube as a horse for the mainsheet.
My old Lugger unusually had a rope horse which worked perfectly well. Later models have a mainsheet track.
The jib had roller furling and the mizzen was sheeted out to a long bumpkin which was great at sea but vulnerable in the rivers at close quarters when coming alongside etc.
Some owners have fitted a boom to their mizzen and done away with the bumkin, but I like bumkins which are simple and go with the style of a Lugger.
The mainsail had no boom, and I tried different sheeting positions. The only modification I made was to remove the roller furling jib for a simple hank-on jib because it is easy to just walk forward and handle the jib in an open boat.
The less string, the better for me. That’s a personal preference of mine, but most people like their roller furling jibs.
I initially kept Spray on her nice new trailer and towed her to a variety of places on the South Coast.
Country bed and breakfasts a few miles from the coast are more likely to have space for you to keep the trailer.
Towing this new trailer that fitted the boat perfectly was a doddle. I did not need to immerse the ‘sealed for life’ type bearings, but the inevitable dunking did happen a few times on crowded slipways, and I discovered that I could not change the bearings on site like I could with my old tapered variety.
These sealed-for-life bearings needed a bench press in a garage. I had them checked at a garage, and, yes, one set had corroded.
Later, for another boat, I specified tapered bearings for a newly-built trailer. Again, this is a personal preference; some people prefer the sealed-for-life variety, but I like to be able to inspect and change my bearings at home on the drive.
After a while, I decided to antifoul Spray and keep her on a mooring at Rye. This worked very well; the Lugger has a well-fitting cockpit cover, which enables the rain to run onto the side benches and out through their scupper holes.
The cockpit was always dry. Sailing on the open sea under just jib and mizzen was a very pleasant experience, and Spray held her course without much help from me.
Under full sail, she romped along and was easy to sail single-handed.

Clive’s old Mk1 Lugger at Rye. Credit: Clive Marsh
The rudder arrangement takes a bit of getting used to. The heavy steel plate drops through a slot on deck. The weight of this plate adds to stability, but it is awkward to raise.
This made beaching the boat difficult, but I see that modern Luggers have alternative arrangements.
The oak tiller was attached to the rudder stock with a bolt, and this was a weak point. Mine broke off just as I entered the narrow River Rother from the sea, which made things a bit awkward.
My local blacksmith made me a steel tiller, which solved that little problem. Latter models have better arrangements.
The outboard motor fits into a very convenient well, and I always found a 4hp more than adequate, although the recommended power is 5-6hp.
There is a big difference in weight between a 4hp and a 5hp, which is why I prefer the lighter 4hp.
Rowing was surprisingly easy once the boat was moving. I once launched from a slip on the Percuil River, which is just up from St Mawes.
I noticed a bungalow for rent, which came with a later model Drascombe Lugger, and for several summer breaks, I rented it. This saved me 450 miles of towing, and it was nice trying out a newer Lugger with her many little improvements.
The original Drascombe Luggers were built by Honnor Marine, but when this company ceased trading in the late 1990s, the moulds and the Drascombe name went their separate ways – the licence to use the Drascombe name to McNulty Boats in late 1997 and the original moulds to a new Honnor Marine company.
McNulty created new moulds taken from a set of original boats. When McNulty closed down in August 2002, it was taken over by Churchouse Boats (now called Drascombe Boats), which continues building to this day.
Honnor Marine is also still building Devon Luggers using the original Drascombe moulds.
So the two boats are much the same, and both current builders give useful advice and can help sailors to buy and sell their Lugger and provide spare parts.
To avoid confusion, I refer to the boats simply as Luggers – though to be pedantic, neither of these boats has a lug sail.
These Luggers must be one of the best and most versatile boats designed, which is why more than 2,000 have been built.
The Drascombe Association (www.drascombe-association.org.uk) produces a useful journal, has a forum, and provides advice, UK-based events and meetings arranged throughout the year.
Designed for safe family boating under sail, or or power, but taken long distance by intrepid sailors, Clive Marsh looks…

Visit any UK harbour in the summer and the chances are you’ll see a Drascombe Lugger or a Devon Lugger…

For such a venerable name in the world of boating as Drascombe, the launch of a new model is quite…

Ben Lowings shares his tips for dingy cruising around the UK and further afield
Want to read more boat articles?

A subscription to Practical Boat Owner magazine costs around 40% less than the cover price.
Print and digital editions are available through Magazines Direct – where you can also find the latest deals.
PBO is packed with information to help you get the most from boat ownership – whether sail or power.
Follow us on Facebook, Instagram, TikTok and Twitter


%20100vw,%20300px%22%20data-image-id%3D%2295292%22%20/%3E%3Cfigcaption%3EDrascombe%20and%20Devon%20luggers%20are%20similar%20boat%20designs%20due%20to%20a%20shared%20history.%20Credit:%20Will%20Perrett/Alamy%3C/figcaption%3E%3C/figure%3E%3Cp%3E%3Cstrong%3EProlific%20small%20boat%20owner%20Clive%20Marsh%20shares%20his%20experience%20of%20sailing%20Drascombe%20and%20Devon%20Luggers%3C/strong%3E%3C/p%3EProlific%20small%20boat%20owner%20Clive%20Marsh%20shares%20his%20experience%20of%20sailing%20Drascombe%20and%20Devon%20Luggers)


From bareboat to skippered or flotilla holidays, Laura Hodgetts looks at options for sunnier climes a few hours’ flight away

Just a short-haul flight away from the UK, warm sunshine and a sailor’s playground awaits.
The Mediterranean coast stretches approximately 2,500 miles and encompasses 23 countries, boasting varied landscapes, cultural gems and countless islands, islets and bays.
Cruising hotspots range from traditional Greek fishing harbours to Italian escapes that rival Caribbean settings, Croatian National Parks to sleepy Turkish bays.
While it’s hard to choose a favourite cruising area, the team at Nautilus Yachting, which has been organising sailing holidays in the Mediterranean for over 30 years, said: “Few sailing areas offer more possibilities than Croatia’s Dalmatian Coast. Split and Dubrovnik are among the most popular tourist hotspots, although charterers can find pure escapism by anchoring free of charge by uninhabited islands in the Kornati or experience vibrant nightlife at Hvar.”

Yacht charter in Europe: Pula is recommended as a ‘slightly quieter spot’ along the popular coast of Croatia. Credit: Leonid Tit/ www.helm.yt
A one-way charter between Split and Dubrovnik is a popular option for sailors wishing to ‘pack in as much as possible’.
Sunsail, which has bases in Agana and Dubrovnik, has expanded its Croatian offering with an adventurous ‘Libertas flotilla’, with a focus on rugged coastlines exploring coves, picturesque harbours, swimming, scuba diving and snorkelling. Prices for seven nights start from £3,360 for four passengers on a 34ft yacht.
Adi Tognarelli, a founder at PlainSailing.com, agrees that Croatia is a hotspot for 2025 bookings, although this was not the case last year.
Adi said: “We’re seeing a trend back towards Croatian waters – last year there was a drop off as prices have gone up and up in the last five years, and for the first time in many years there was last-minute boat availability in Dubrovnik even in high season (usually every single boat is sold out many weeks in advance).

Check with the charter company to see if lifejackets are provided for your yacht charter in Europe. Credit: Steppenwolf/Alamy
“The marinas have also gone up quite a bit since Croatia joined the Eurozone, which made it much more expensive than its old rival Greece, where staying moored up overnight can typically be around 75% cheaper. We’ve also seen a growing number of new enquiries asking to take the boat from Montenegro down to Albania, which is a new and growing sail tourism area. Not all that many companies have the insurance needed to cover the territories, but some do, and Albania has the same stunning coastline and beautiful old towns to explore, often at great prices.
“With Albania being the last piece in the puzzle, it hopefully means that in a few years time you’ll finally be able to charter a boat from Croatia and sail it one way down to Greece, linking the cruising grounds for the first time.
“Italy, Mallorca and the South of France remain as popular as ever.”
The team at HELM has noticed that while Croatia and Greece “remain hugely popular”, they are seeing a resurgence of charters in Turkey and “slightly quieter spots, like Pula in North Croatia”.
James Foot at HELM recommends their new base in Kaş, Turkey, “in a beautiful natural bay away from the hustle and bustle of Fethiye and giving direct access to remote areas like the bay of Kekova Roads.”

Drone footage of the peninsula and Setur Marina in Kaş district of Antalya. Credit: www.helm.yt
He added: “We always suggest avoiding August if at all possible. The best times to sail in the Mediterranean are usually June and September, outside of the peak busy periods but benefitting from lovely warm weather, without oppressive heat.”
Chartering from smaller marinas where there is only one charter fleet in operation can help to ‘keep things peaceful.’
Foot said: “Starting in Sivota, Greece, rather than Lefkada, for example, keeps you away from the Saturday chaos and gains you the advantage of being a day ahead of the south Ionian flotillas – all for the price of an extra 40 minutes down the coast road. The further east you go, the longer the season lasts – I took my family to the Dodecanese in early October 2024, and we had 24°C all week. If you have a particular yacht or specific requirements in mind, we recommend booking early to lock in your chosen boat and take advantage of early booking discounts.”
New for 2025, Seafarer cruising and sailing holidays is offering one-way ‘explorer flotilla’ routes this summer, with the start alternately in Kiato and Korfos.
One week will see the flotilla start in Korfos and, after crossing the Corinth Canal, explore the Gulf of Corinth, “an area off the radar for most sailors”.
The second week begins in Kiato in the Gulf of Corinth, cruising through the iconic canal before exploring the Saronic Gulf.
Running from April to November with 35-45ft monohull options, sailors can expect an average daily distance of 18 miles. Prices are £1,823 for a Bavaria 37. A skipper can be provided for £1,295 per week.
Chris Lorenzo, Seafarer managing director, said: “Reliable sunshine on the Corinth and Saronic Gulf flotilla is all but guaranteed during the season between May and October, with temperatures ranging from the low 20s in early and late season up to the mid to high 30s in late June through August. Sailing conditions are generally moderate with winds typically Force 3-5.”

Surprisingly predictable and gentle winds in the summer months are a draw of the Greek Ionian. Credit: www.sunsail.com/uk
Sunsail has noticed a 7% year-on-year increase in European charter bookings from the UK market, with Lefkas in Greece the top spot, plus a ‘slight increase’ in flotilla bookings.
Katrina Lawson, head of brand and acquisition at Sunsail, said: “Lefkas is one of our most accessible sailing destinations, with affordable mooring options, making it a more budget-friendly holiday which may be why it’s so popular. The Ionian Sea around Lefkas is renowned for its predictable and gentle winds, particularly in summer. The mix of calm morning breezes and moderate afternoon winds makes it an excellent choice for sailors of all skill levels.”
Sunsail’s Lefkas base offers flotilla, bareboat, skippered and sailing schools.
In peak season, some flotillas include a children’s co-ordinator, as well as a host, skipper and technician.
Other trends include an 8% increase in Sunsail’s Croatian bookings year on year, driven by Dubrovnik, which is up 35%. Agana is up 9% on bareboat bookings; 38ft and 41ft vessels are the most popular.
One of Nautilus Yachting’s top 10 destinations is Sardinia, the second-largest island in the Mediterranean Sea, after Sicily, where its Emerald Coast beaches ‘rival the Caribbean’.
The Maddalena National Park is a haven of over 60 islands, home to bottlenose dolphins and turtles. Highlights include Budelli’s pink beach, Caprera, Razzoli, Santa Maria, Santo Stefano and Spargi.

Island of Budelli, Sardinia famed for pink sand. Credit: Paolo Reda – REDA &CO/Alamy
Nautilus Yachting’s business development manager, Leanne Kiffor,d recommends experiencing two countries in one trip by sailing from Sardinia to Bonifacio on the French island of Corsica, which is “within easy reach and has the dramatic entrance through the narrow opening in the cliff; the Bocche di Bonifacio is not to be missed.”
En route, visit the Lavezzi Islands nature reserve, dubbed the ‘Seychelles of the Mediterranean’ due to its large rocks.
Confident sailors with the right licences – RYA Day Skipper or International Certificate of Competence (ICC) – can save a fortune by opting for a bareboat charter – skippering the boat either in company (with a flotilla) or by following the charter company’s recommended routes.
James Foot at HELM has noticed an increase in people selecting skippered charters as a choice rather than a necessity: “It may be older sailors who have lost a little confidence at sea, or sailors who want to relax and not worry about the damage deposit.”

Whether you join a flotilla with friends or family, or not, the frequent get-togethers and
shared experiences will create a familiar group by the end of your yacht charter in Europe. Credit: Nautilus Yachting
Eloise Barker, an experienced sailor and travel writer at Responsible Travel, recommends: “When it comes to sailing in more popular destinations like the Greek Islands, a little local knowledge goes a long way to making your trip better.”
She added: “You’re much more likely to get a chance to check out small off-the-beaten-track ports, drop anchor in hidden-away coves or discover the restaurants local people love. These kinds of charters help you minimise your impact on over-touristy destinations too. You can spend less time in busy areas, and you’ll be helping to make sure your money reaches local people’s hands. You can also choose a boat that provisions from local suppliers, not just big supermarket chains.”
Bigger groups can split the cost of a skipper. For example, in mid-July, a Sunsail 404 Classic four-cabin catamaran on its Croatian Libertas flotilla costs £9,798 for six people with a skipper, which works out at £3,266 per couple. Remember that a skipper will require a berth.
The €200 a day may seem a luxury, but if their local knowledge removes the need to spend €240 a night on mooring fees or their restaurant suggestion reduces evening meal prices by €10 per person, they soon add value – and have the language skills.
“Modern catamaran designs have opened charters up as an option for a much wider group of holidaymakers, rather than just being the preserve of sailors,” says James Foot at HELM.
Another trend noticed for several years “is an increasing demand for newer and larger, more comfortable yachts.”

A knowledgeable skipper can be worth their wage, which ranges from €190 to €200 a day, taking the stress of your yacht charter in Europe. Credit: www.helm.yt
Foot adds: “This could be driven by the new customer entrants, as well as the growth in clients from the United States. Because most Mediterranean marinas use stern-to mooring with lazy lines, the length of yacht isn’t really relevant from a space perspective, although it does obviously influence cost. I tend to prefer anchoring overnight, and with the price of marinas in Croatia at around €120 per night for a 13m yacht, we often advise clients to choose boats with a generator so they can enjoy peaceful evenings away from the hectic, sweltering marinas.”
Sunsail’s Katrina Lawson has noticed: “Some customers choose catamarans to help ease hesitant friends or family members onto the water, thanks to the extra space and stability the vessel offers, making longer trips more comfortable.”
When it comes to choosing monohull size, Katrina says vessel choice is usually determined by the sailing conditions, particularly in narrower channel passages.
Among the many online offerings for inland waterways, Mediamare Yacht Charter operates a fleet on the Baltic Sea, ‘located in the middle of the most beautiful sailing areas, protected by the offshore islands of Rügen and Usedom’.
Undiscovered Sailing offers bareboat and skippered sailing yacht holidays on Poland’s Masurian lake district, and Nicols organises river and canal motorboat fleets in the Hungarian inland waterways via local company Mahart, plus bases in France, Germany, Portugal, the Netherlands, and Ireland, which do not require the skipper to have boating qualifications.
Meanwhile, Locaboat offers self-drive canal boat hire that sleeps two to 12 people in Ireland, Italy, Germany, the Netherlands and France.
A Nicols spokesperson said their charter holiday bookings were up 8% for 2025 holidays from last year.
He added: “In terms of destinations, the south of France is seeing the biggest growth as customers are seeking the sun. The three Nicols bases in this region benefit from fine weather all year round. The top three destinations in terms of growth on 2024 are: Canal du Midi, Camargue and Brittany. The top three destinations in terms of weeks booked per boat are: Camargue, Lot and the Netherlands.”
Keen charterers may be tempted to buy a yacht and hire it out when not in use, through a scheme such as Sunsail’s yacht ownership programme.
Benefits include being able to use equivalent sister ships or upgrade to larger models operated by Sunsail or The Moorings, up to 12 weeks of sailing a year and ‘zero operating costs’.
Corfu and the South Ionian have been knocked off the Greek charter top spots by the Cyclades and Dodecanese, says Nautilus Yachting business development manager Leanne Kifford, who believes sailors are seeking “lesser-known cruising areas which provide more challenging sailing conditions.
Both the Cyclades and the Dodecanese are known for stronger winds and longer sails between islands.” The areas retain authentic Greek island charm.
For the Cyclades, fly to Athens for a 40-minute transfer to Lavrion; for the Dodecanese, fly to Kos or Rhodes.

Exploring the Kisköre region of River Tisza with three children on a 13.5m motor cruiser – the largest boat on…

A skippered flotilla charter on the Dalmatian Coast is a dream come true for Laura Hodgetts, but can she really…

“How do you get from one lake to another?” My brother Jack, a ferry captain, wanted to know when I…

Planning on sailing in Europe? The Cruising Association shares its advice on what you need to know for a stress-free…
Want to read more articles like Yacht charter in Europe: where to sail?
A subscription to Practical Boat Owner magazine costs around 40% less than the cover price.
Print and digital editions are available through Magazines Direct – where you can also find the latest deals.
PBO is packed with information to help you get the most from boat ownership – whether sail or power.
Follow us on Facebook, Instagram, TikTok and Twitter
%20100vw,%20300px%22%20data-image-id%3D%2295311%22%20/%3E%3Cfigcaption%3EA%20flotilla%20charter%20in%20the%20Ionian,%20Greece%20offers%20the%20support%20of%20a%20cruise%20in%20company.%20Credit:%20Nautilus%20Yachting%3C/figcaption%3E%3C/figure%3E%3Cp%3E%3Cstrong%3EFrom%20bareboat%20to%20skippered%20or%20flotilla%20holidays,%20Laura%20Hodgetts%20looks%20at%20options%20for%20sunnier%20climes%20a%20few%20hours%E2%80%99%20flight%20away%3C/strong%3E%3C/p%3EFrom%20bareboat%20to%20skippered%20or%20flotilla%20holidays,%20Laura%20Hodgetts%20looks%20at%20options%20for%20sunnier%20climes%20a%20few%20hours%E2%80%99%20flight%20away)
Bob Shillito converts his classic 19ft (5.8m) clinker boat for near-silent river cruising

Just like many estuaries, here on the River Fowey in South Cornwall, it’s a peaceful haven for nature, but motoring along in a petrol or diesel-powered boat shatters the tranquillity and harms the environment, writes Bob Shillito.
Believing there is plenty of scope for converting existing boats to use quiet electric motors, even where there is little or no access to shore power, I set out to demonstrate that a professional-standard inboard motor conversion could be achieved at an affordable price for typical boat owners.
So I acquired the classic 19ft (5.8m) clinker-built river boat Swift for the conversion.
Built in 1962, she was originally fitted with a 2-stroke Stuart Turner petrol engine, which may have been state-of-the-art 60 or more years ago but is certainly not in the 2020s!

The original noisy Stuart Turner petrol engine. Engineering masterpiece or an industrial relic?
The engine still worked but was very noisy, smelly and emitted a lot of oil.
I had no qualms about removing the engine as the boat is hardly a museum piece, and Swift would probably have been destined for the bonfire without this new lease of life.
While marinas generally offer mains power and charging facilities, a river mooring is more challenging for an electric-powered boat.
While doing research, I kept being told that creating an electric-powered boat with no regular access to shore power was a non-starter, which was not what I wanted to hear!
Thus, the challenge was set.
Having launched Swift in late 2021 (and ensured that she’d float, which was not initially obvious), I set about establishing some real-world facts and fitted an ePropulsion Spirit 1.0 Plus to an outboard bracket.
This is a 1kW motor (roughly equivalent to a 3hp petrol outboard) with a 1.25kWh battery.
I wasn’t expecting it to be enough, but it turned out to be remarkably effective. I could cruise the Fowey River for an afternoon at half power at about 3.5 knots.

Launch day after a major refit is always tense. First trials for the new electric-powered boat. Credit: Bob Shillito
Top speed was about 4.2 knots, which was similar to the old Stuart Turner.
And, of course, the outboard was dragging the original prop through the water, too.
From this, I concluded that an inboard motor of about 4kW would be right, with at least 5kWh of batteries, giving a bit over an hour at full power but many hours at, say, 30%. The target range was set at 9 miles.
Clearly, the boat needs to beat the powerful spring tide currents on the river but it’s never going to exceed its hull speed of 5.9 knots.
With the existing 11/7 bronze propeller (ie 11in diameter, 7in pitch) and estimated prop slip of 35%, I reckoned the top speed (at 1,500rpm) would be 5.6 knots.
Following the trials, the design criteria were set at:
To meet the criteria, a balance needed to be struck when specifying the motor, batteries, solar array and mains charging.
Motor manufacturers or their distributors generally offer a complete package, and while that eliminates much of the technical risk and saves the owner from having to grapple with some of the technical factors, it can be an expensive route to take.
For example, one motor that seemed reasonably priced at first glance worked out at £18,000 when fully specified by the distributor.
Of course, there is always the hard-core route: get an old golf-cart or forklift motor and a retired Nissan Leaf or Tesla battery pack.
These can be broken down and rebuilt using custom electronics for a very reasonable cost but we’re talking about some seriously technical work, both mechanical and electrical.
I did consider this approach, but the objective is to go boating, not spend years in the workshop grappling with tech issues to achieve the ideal electric-powered boat.
Furthermore, I wanted to achieve a repeatable, quality result that did not look or feel home-spun.
Dozens of inboard electric motors are listed on the excellent plugboats.com website, but most are not available here in the UK.
Three that are readily available were considered in detail. The Lynch Yellowtail/Marlin, the Bell Marine Drivemaster and the Waterworld range.

Lining up the Waterworld motor to figure out engine mountings. Credit: Bob Shillito
I selected the Waterworld 4 from Energy Solutions for several reasons: it is a compact design with good control systems and a significantly lower price than the alternatives.
Waterworld also provides a very good manual, which helps ensure a trouble-free installation.
Indeed, the installation work was straightforward and completed in a couple of days, details are covered further down the article.

The engine connected to the original propshaft via a flexible coupler. Credit: Bob Shillito
The motor runs at a top speed of 1,500rpm, which matches the nominal speed of the engine it replaced, meaning that the original propeller and shaft could be retained.
You can power a boat with traditional lead-acid batteries or with lithium.
Lithium batteries are much lighter, can use their full charge, last longer (more charge-discharge cycles), but are much more expensive.
Either way, the 48V motor system would need several batteries in some combination.
A usable 5kWh of lead-acid batteries was going to work out at about 400Kg, which would overload the boat, so the decision was made.
But which lithium batteries? LiFePo4 is the preferred battery chemistry for this type of application, and there are a lot available.
Furthermore, all lithium batteries require a battery management system (BMS) to ensure they charge and discharge evenly and safely, which may be within the battery or external.

The Victron mains charger, which has actually had little use due to the success of the solar installation. Credit: Bob Shillito
You can’t get away from BMS: lithium batteries won’t charge properly without one, and the early lithium batteries that lacked them suffered from reliability issues.
Typically, the more expensive batteries have a data connection (called CanBus) which allows communication between them, the BMS and the motor’s controller to keep everything in balance.
We all know how electronics on boats can pack up at the slightest opportunity.
Some of the batteries have fans in the side, which didn’t seem like a great idea in a marine environment, either.
With all this in mind, I selected a reasonably priced battery with an internal BMS, the Polinovel Novel 12100 from Quality Source.
Four of these, connected in series, add up to 48V and a total store of 5.12kWh of energy.

A screen from the app used to monitor the status of each battery, and showing here the voltage, current draw and temperature when motoring. Credit: Bob Shillito
However, with no communication between the batteries, you need to keep an eye on their individual state-of-charge to ensure that they don’t drift out of sync, with one battery at a higher or lower charge than the others.
Fortunately, each battery has a Bluetooth link so you can use a phone app to monitor the state-of-charge, voltage and temperature.
The combined weight of the motor and batteries is a little less than that of the original 90kg petrol engine, with better weight distribution in the boat.
The batteries fit neatly under the V-berths in the cabin, two on each side.
Swift’s large cabin provided an ideal area for solar panels, although the curvature of the cabin top meant that flexible panels were needed.
Several types of panel were considered, with the objective of fitting the largest area possible.
One supplier, the Italian company Solbian, custom builds panels to your dimensions, which is attractive but costs around three times the price of standard panels.
Three 110W SunPower panels were chosen for their fit, price and flexibility.
My prior experience of solar charging was limited to bilge pump configurations, so I carried out charging trials to ensure the system worked correctly before gluing the panels to the boat.

Testing the solar array with the charge controller and batteries to ensure they all behaved as expected before they were installed. Credit: Bob Shillito
The solar array supplies up to 1.5kWh each day to the batteries through a Victron MPPT charge controller.
Victron is the market leader in this area, and this controller is a superb piece of kit: at under £200, it is fully configurable and has an excellent app that shows you where in the charge cycle it is operating, the maximum charge rate and the total for each day.
The solar charge system always remains on, meaning that the batteries can be charged while the boat is in use, thereby extending the range.
A Victron Titan mains charger was also selected and installed, which can fully recharge the battery array in under four hours when shore power is available.
Being an older design, the Titan’s controls are far less sophisticated than the solar unit but it does the job – which is just as well because there is very little choice when it comes to 48V chargers.
The boat has been in use for two months, and trials have shown not only that the design criteria were exceeded but that the revitalised Swift is a beauty to use.
The target cruising speed of 4 knots is achieved at a surprisingly low 1.2kW power consumption.
Because the original propeller is smaller than the recommended size, at maximum revs of 1,500rpm, only 2.8kW is used – rather less than the rated power of the motor.
This is good news, as it reduces current draw from the batteries and helps to extend the range while still achieving the maximum speed when needed, such as to beat the strong currents associated with spring tides in Cornwall.

Three screens from the app used to monitor the Victron solar charge controller showing (from left) the current charge status; settings; and a summary of the previous days’ charging performance
At around 18 nautical miles (33km), the range is at least double that of the original design criteria.
We have been able to make trips from the mooring, out to sea to a favourite beach and back – 8 miles – and been surprised to find that over 70% of the battery charge remains.
After a day or two, the batteries are fully recharged, and, outside of testing, pontoon charging has not been needed.
The lack of noise is an extraordinary experience: at the helm, it’s perfectly possible to carry on a normal conversation with someone sitting on the bow.

Bob is now experiencing near-silent cruising on his electric-powered boat. Credit: Bib Shillito
When cruising the backwaters, wildlife no longer flees, and other water users are intrigued: people are amazed at how silent the boat is, particularly when manoeuvring at a jetty or pontoon.
Gone forever is the lingering oily smell in the cabin that some find an acceptable part of boating and others – my wife included – definitely do not.
An electric conversion can be expensive. Sophisticated systems and lithium batteries increase the price.
However, careful selection of components brought the total cost in at a similar price to a professionally-installed diesel engine, under £8,000 all in.
Swift is now set for a new lease of life, and hopefully, others can learn from the conversion.
The installation of the electric system was remarkably straightforward in contrast to the renovation of the boat, which took months.
Since this is an article about electric boating and not clinker boat restoration, I’ll gloss over the eight weeks spent cutting in new pieces of plank and rib, and scraping greasy, flaking paint out of the bilges.
The Waterworld motor has mounting brackets designed to adapt to most situations: they can be used either way up via various sets of bolt holes.
In most cases, where there are conventional longitudinal engine bearers in the boat, it would be simple to fit anti-vibration mountings (sold separately) and then bolt the engine to them.
However, Swift has two hefty cross beams to which the old Stuart Turner was attached, which made mounting difficult since they were in the way
of the bolts.

The rear of the graphic display and the solar charge controller; data cables and wiring are above, power cables and isolator are below. Credit: Bob Shillito
Once these issues were overcome and the engine was in, the motor was aligned to a new flexible coupling attached to the original ¾in bronze prop shaft.
The four 12V, 100Ah lithium batteries are not much bigger than regular car batteries and can be installed anywhere fairly close to the motor, to minimise cable runs and lost power.
As the boat was a little stern-heavy with the old motor, I wanted to set the batteries forward.
As luck would have it, they fit perfectly under the V-berths in the cabin, two on each side, where they are secured with rack-straps.
A benefit of lithium batteries is that they do not need to be fitted upright, so I could lay them against the hull on pieces of Correx floor protection sheet.
As the cables had to pass through the bilge from one V-berth to the other, I ran them through lengths of plastic piping for additional protection.
The solar panels were stuck to the painted cabin roof with CT1 adhesive, while the cables pass through the roof and are sealed in place.

Parts of the installation showing the throttle, graphic display, ignition key, main relay and the motor. Plus a fire extinguisher. Credit: Bob Shillito
Through-deck cable glands would be a more robust solution, but at a higher price.
The motor comes with a wiring loom for all controls and a master relay. This is very simple to wire up – just a matter of ensuring the cable runs are not too long before cutting holes for the throttle control, display and ignition key.
Power cables need to be made up to connect the motor to the batteries via a master fuse, isolator switch and bus bar. All these marine-grade items can be bought from a supplier such as 12 Volt Planet, along with terminals, insulator caps, and tools.
The 35mm2 power cables are substantial and need perfect termination to avoid problems, so a proper crimping tool is essential.
It is worth practising some crimps on short lengths of cable first.

Swift’s solar array, glued to the cabin roof. Credit: Bob Shillito
The chargers were simply mounted in convenient locations where they are most protected from damp and any rainwater leaks.
The mains charger is fed by a standard marine/outdoor 16A cable inlet, to which a cable can be fitted when using shore power.
Being a wooden boat, a reliable bilge pump is vital, so I decided to keep it separate from the motor installation.
I retained the existing configuration, installed a year earlier, of an automatic pump, small 12V car battery, 10W solar panel and charge controller.
You can watch Bob’s video about the conversion by clicking here.
Cost of conversion to an electric-powered boat

Norman Rubenis gets ‘Thunderstruck’ when he ditches the diesel and converts his Contessa 32 to run on a 10kW electric

Rupert Holmes takes an in-depth look at the practicalities and pitfalls of choosing electric propulsion, or even an all-electric boat

Felix Marks attempts to embrace a green future for his Tofinou 7, but his experiment with an electric motor proves…

Dena Hankins is on a global voyage aboard her 1984 9m Baba 30 converted to run with an electric propulsion…
Want to read more practical articles, like Electric-powered boat for under £8,000?
A subscription to Practical Boat Owner magazine costs around 40% less than the cover price.
Print and digital editions are available through Magazines Direct – where you can also find the latest deals.
PBO is packed with information to help you get the most from boat ownership – whether sail or power.
Follow us on Facebook, Instagram, TikTok and Twitter
%20100vw,%20300px%22%20data-image-id%3D%2295230%22%20/%3E%3Cfigcaption%3EThe%2019ft%20river%20boat,%20Swift,%20now%20runs%20on%20a%20Waterworld%204.%20Credit:%20Bob%20Shillito%3C/figcaption%3E%3C/figure%3E%3Cp%3E%3Cstrong%3EBob%20Shillito%20converts%20his%20classic%2019ft%20(5.8m)%20clinker%20boat%20for%20near-silent%20river%20cruising%3C/strong%3E%3C/p%3EBob%20Shillito%20converts%20his%20classic%2019ft%20(5.8m)%20clinker%20boat%20for%20near-silent%20river%20cruising)
With a few practical woodworking skills anyone should be able to replace a plank on a carvel-built wooden hull, as Richard Johnstone-Bryden discovers

One of the beauties of a traditionally planked wooden boat is that each individual hull plank can be replaced if they lose integrity through rot, old age or accident, writes Richard Johnstone-Bryden.
The procedure should not be beyond the skills of most practical boat owners.
Here, Harry Morgan removes an old hull plank before cutting and fitting a replacement.

1. With filler picked away from the nail head and the copper rove ground off inside the hull, Harry uses a centre punch to drive the nail back through the hull plank so it can be extracted with a claw hammer.

A metal dolly held against the outside of the hull counteracts the vibration.

2. With the damaged wood cut away, the adjoining end of the sound plank also needs to be pulled away from the timbers.

3. The length of this adjoining plank is then marked up to ensure that the scarf joint will be over a timber to provide additional strength.

4. A wedge keeps the still-attached plank steady and away from the hull while Harry cuts it to length. He’s using a Japanese kataba saw, but a tenon saw will work too.

5. A smoothing plane removes the bulk of the wood required to form the inboard half of the aft scarf joint.

6. Harry now saws a straight edge at the aft end of the scarf. The idea is to create a bull-nosed edge to the outer part of the joint rather than a difficult-to-fasten feather edge. He cuts the rest of the joining surface away with a bull-nosed plane

7. A similar scarf needs to be cut on the inboard end of the forward plank. Again the plank is wedged out for stability, though Harry is using a smaller block plane because of the restricted working space between the inner face of the plank and the hull.

8. To determine the exact shape of the new plank, Harry nailed on a temporary spiling plank. He uses a dummy stick placed against the existing upper and lower planks to draw lines on the spiling plank – these will be transferred back to the new plank to determine its exact width and length.

9. The positions of the timbers are also marked on to the spiling plank and each timber is numbered so the plank can be pre-drilled for fastening later.

10. An alternative to a dummy stick is to use a set of dividers to measure the required width at each numbered frame. These measurements are then plotted out onto the replacement plank.

11. Using the spiling plank, Harry now plots the positions of the frames onto an overwidth 3⁄4in-thick larch plank.

12. Harry places the inboard edge of the dummy stick along the line on the spiling plank and runs a pencil along the outer edge to plot one edge of the replacement plank. He does the same for the other edge.

13. The plank can now be cut – slightly oversized – with a handheld circular saw, which gives a good, clean line.

14. A plane finishes off the edges to make the plank the exact width. After that it is run through a thicknessing machine so it exactly matches the thickness of the boat’s existing planks.

15. Scarf joints are cut on the ends of the new plank, and the edges are accurately trimmed to mate with those on the boat.

16. The moment of truth! The time spent marking up and accurately cutting the joint has paid off, as the two halves of the forward scarf fit together perfectly. This joint will then be glued and allowed to cure.

17. Having secured the forward scarf joint, wooden battens are used to clamp the plank in position along the hull so it can be permanently fixed with copper nails and roves.

18. Where the plank forms part of a sharp curve in the hull, a bridging batten is used: wedges are hammered beneath the bridge to force the plank into position.

The plank and timbers are then joined using copper nails and proves to complete the repair – (above) being demonstrated on a different job.

Boatbuilder and finisher Lyndon March explains which types of wood work best for different repairs and modifications on board

Kit boat builder Polly Robinson shares her tips for painting and varnishing a plywood-epoxy boat

Face up to the task of applying veneer with the help of boatbuilder Tony Davies

Zoran Glozinic saves some cash by making a new cockpit grate for his yacht using redundant old wooden kitchen shelves
Want to read more practical articles?
A subscription to Practical Boat Owner magazine costs around 40% less than the cover price.
Print and digital editions are available through Magazines Direct – where you can also find the latest deals.
PBO is packed with information to help you get the most from boat ownership – whether sail or power.
Follow us on Facebook, Instagram, TikTok and Twitter
%20100vw,%20300px%22%20data-image-id%3D%2295068%22%20/%3E%3C/figure%3E%3Cp%3E%3Cstrong%3EWith%20a%20few%20practical%20woodworking%20skills%20anyone%20should%20be%20able%20to%20replace%20a%20plank%20on%20a%20carvel-built%20wooden%20hull,%20as%20Richard%20Johnstone-Bryden%20discovers%3C/strong%3E%3C/p%3EWith%20a%20few%20practical%20woodworking%20skills%20anyone%20should%20be%20able%20to%20replace%20a%20plank%20on%20a%20carvel-built%20wooden%20hull,%20as%20Richard%20Johnstone-Bryden%20discovers)
A range of boats, from the Saxdor 340 to the Bavaria SR35 HT, will be making their UK debut at the 2025 British Motor Yacht Show

The 2025 British Motor Yacht Show will feature UK debuts when it opens next month.
The four-day show at Swanwick Marina in Hampshire is an appointment-only event, allowing boat buyers to meet brokers and find out more about new boats for sale.
Argo Yachting will present the UK debut of the Saxdor 340 GTWA – a wheelhouse walkaround model with large side terraces and glass sliding doors and roof, allowing plenty of natural light in the cabin.

Sunseeker’s Predator 55 will be unveiled for the first time in the UK at the show
Other UK debuts include Sunseeker’s all-new Manhattan 68 (2025) and Sunseeker Predator 55, the Axopar 29 CCX, Bavaria SR35 HT and SR38 HT, Fjord 39XP, Virtue V10 Cabin
These join the previously announced Bellini Astor 36 and Pearl 63.
Other models on display include:
Sunseeker:
Fairline:
Princess:
Salorenzo Yachts UK:
Exhibitor Approved Boats will also debut Absolute Yachts.
Shoreside, marine decking specialists Aquadeck and Permateek will be exhibiting alongside Nautafix Global and Meridien Modena Ferrari.

The Bellini Astor 36
Graham Bristowe, general manager of Premier Marinas Swanwick, commented: “The British Motor Yacht Show continues to set the standard as the UK’s premier event for serious buyers of luxury motor yachts. With a record number of UK debuts, exclusive showcases from industry giants and a relevant selection of premium brands ashore, the 2025 show promises to be our most spectacular yet.
“We look forward to welcoming guests to Premier’s Swanwick Marina for an unparalleled showcase of design, craftsmanship and innovation,” he added.
The 2025 British Motor Yacht Show will take place from 15-18 May 2025.
To book an appointment visit: BritishMotorYachtShow.com

Just like today’s sailing cruisers, the new generation of motorboats give you a lot of space for their length. David…

Gilbert Park undertakes some training for riding out heavy seas and wind in his Mitchell 28 – but first has…

Many moons ago I had a premonition that Hunter Boats ought to build a classy little motorboat for customers who…

Retired doctor and practical motorboat owner Gilbert Park has undertaken numerous DIY challenges on board his various motorboats, publishing several…
Want to read more articles?

A subscription to Practical Boat Owner magazine costs around 40% less than the cover price.
Print and digital editions are available through Magazines Direct – where you can also find the latest deals.
PBO is packed with information to help you get the most from boat ownership – whether sail or power.
Follow us on Facebook, Instagram, TikTok and Twitter
%20100vw,%20300px%22%20data-image-id%3D%2294973%22%20/%3E%3Cfigcaption%3EThe%202025%20British%20Motor%20Yacht%20Show%20will%20run%20from%2015-18%20May%20and%20is%20by%20appointment%20only%3C/figcaption%3E%3C/figure%3E%3Cp%3E%3Cstrong%3EA%20range%20of%20boats,%20from%20the%20Saxdor%20340%20to%20the%20Bavaria%20SR35%20HT,%20will%20be%20making%20their%20UK%20debut%20at%20the%202025%20British%20Motor%20Yacht%20Show%3C/strong%3E%3C/p%3EA%20range%20of%20boats,%20from%20the%20Saxdor%20340%20to%20the%20Bavaria%20SR35%20HT,%20will%20be%20making%20their%20UK%20debut%20at%20the%202025%20British%20Motor%20Yacht%20Show)
Stu Davies explains how he fitted a new cam belt to the diesel engine in his 1999 Beneteau 381

Venerable is a word to describe the Volvo Penta MD22 engine fitted to my 1999 Beneteau 381.
The 50hp MD22 is a marinised version of the Perkins Prima 50, which was also used by British Leyland as the diesel engine for their Montego and Maestro 2.0 saloons.
It was developed jointly by British Leyland and Perkins back in the 1980s. Volvo Penta also offered a turbocharged version of this engine, the TMD22, producing 78hp.
This engine is basically the same as the MD22 with the addition of a turbocharger and extra heat exchangers and coolers.
Some of the earlier ones have a different fresh water intercooler system, but essentially, the basic engine is the same.

It’s important to check your cam belt every year to ensure the tension is correct. Credit: Stu Davies
The engine is a single overhead cam engine with the cam being driven by a cam belt, a simple method of valve operation BUT having the possibility of dire consequences if the cam belt breaks!
I’m sure most motorists are aware of the costs that can be incurred if the belt breaks and the pistons contact the valves.
The purpose of this article? I wrote the job up quite a few years ago for PBO when I first had the boat and have since changed the cam belt several times.
Some of the information I sourced all those years ago has now changed, so I wanted to update readers and reveal how the engine and belt have fared over the years.
After conducting some more research, I found that the MD22 and its variants have a relatively low compression ratio but are not ‘free wheeling’ engines (ie there is not enough room for the pistons to miss the valves if the belt breaks).
Normally, when the belt breaks on these engines, the valve hits a vertically opened valve, which is driven directly by the cam shaft and snaps the cam.
Cams for this engine are now nearly impossible to source so checking and changing the cam belt, if necessary, is important.
As I was a maintenance engineer, I’ve always done my own engine work so changing the cam belt is just a routine job for me!
On the subject of the cam belt, Volvo recommends that owners ‘check for cracks and oil contamination’ and ‘change if necessary’.
Personally, I find this is not very helpful if you don’t have the expertise to make a considered judgment on what is good or bad or necessary.
If, like me, you were brought up to ‘change cam belts religiously’, this information seems a bit haphazard, although after further research I discovered that because the belt is 30mm wide it would last longer than a normal, thinner one found on modern vehicles.
More data has since become available, and Volvo Penta now recommends changing the belt every three years.
I did some checking in my logbook and found out that I last changed the belt in 2014, and have only put 400 hours on the engine.
Anecdotal evidence shows the average boater puts around 100 hours a year on the boat’s engine.
I will say in my defence that I religiously check the belt’s condition every year.
The engine on Sacha, my Beneteau 381, is now 25 years old but is still going strong; I change oil and filters regularly, and I changed the injector nozzles a few years ago, which made a massive difference to the sound and smoothness of the engine.
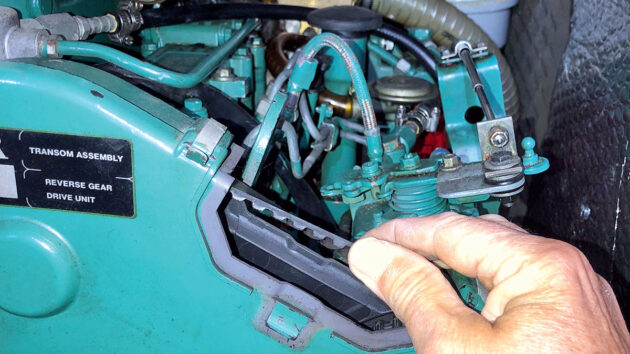
Accessing the engine is a relatively simple task on a Beneteau: lift the companionway steps, and the front of the engine is easily accessible.
The top of the cam belt cover has an inspection piece which is easily removed to expose part of the cam belt for checks.

Locate the hole in the cam cover for the locking pin. Credit: Stu Davies
Volvo Penta recommends making a chalk mark on the belt and then manually turning the engine over, inspecting the belt for cracks and oil contamination until the chalk mark appears again.
A word of warning here: I tie off the manual stop lever on the injector pump to make sure the engine doesn’t start while barring it over!
Before starting the job I collect the tools and parts needed.
Basic hand tools, spanners and sockets, an 8mm Allen key plus the ‘pins’ to hold the crankshaft, camshaft and injector pump in their relative positions whilst changing the belt.
I used 6mm threaded bolts and some 6mm bar to make these pins up.

Finding a new cam belt is becoming more difficult. The one for Stu’s engine also fits the old Maestro and Montego cars
New cam belts are getting harder to find nowadays – unlike a few years ago when I could source a new belt for a 2-litre diesel Montego from my local car parts supplier.
Today, one of the best sources is www.parts4engines.com – and this is where I bought my cam belt, which arrived marked for a Montego engine by the manufacturer, Gates.
Changing a cam belt involves placing the engine in a position and locking it there so the timing of the injector pump and cam shaft isn’t lost.
I started the job by locating the locking flywheel pinhole on the starboard side of the engine under the inlet manifold.
This is a 6mm hole in the flywheel housing that corresponds with a similar hole in the flywheel.

Make sure you insert the flywheel locking pin to lock the engine into position. Credit: Stu Davies
I then located the cam shaft locking pin hole; this 6mm hole is accessed by removing a 6mm screw at the top front of the cam cover.
I turned the engine over with a 24mm spanner until my wife, Laura, was able to push a 6mm bolt through the flywheel hole, and I could drop a 6mm pin into the cam locking hole and, similarly, with the cam shaft.
The engine was now locked in position so the cam belt could be removed and replaced.
The next job is to remove the fresh water pump pulley so the cam belt cover can be removed.
Four 8mm-headed bolts hold it on. The bolts were first slackened (it is best to do this first so the pulley is held by the alternator belt to stop it from turning), and then the alternator holding bolts were slackened so the cam belt could come off.

The fresh water pump pulley needs to be removed to access the cam belt cover. Credit: Stu Davies
The water pump pulley is then removed. The clips around the edge of the cam belt housing are easy to flip off, and the cover can then be removed.
A little bit of wriggling is required, but this will expose the cam belt drive train. The injector pump drive gear can be seen.

Remove the cam belt drive train cover by undoing the clips. Credit: Stu Davies
You need to fit two 6mm bolts through the non-threaded holes in the pump drive wheel – this locks the injector pump in position.
Now that the engine is locked into position, the belt can be safely removed.
The four 10mm bolts which hold the cam wheel are then slackened slightly; the holes are elongated to allow a little bit of wriggle room when fitting and tensioning the new belt.

Use two 6mm bolts to lock the injector pump into position. Credit: Stu Davies
The next job is to slacken the belt tensioner using an 8mm Allen key before the jockey wheel can be removed using a 13mm socket on the holding bolt.
This will give enough room to manoeuvre the belt around the bottom pulley.
Then the tensioner pulley can be removed to give some more room.
Now, the old belt can be removed and compared with the new one.
It’s important to note the direction of the rotation arrows (the engine rotates clockwise looking from the front).
After examining my 10-year-old cam belt, I found it was in perfect condition with no sign of cracking or excessive wear.
Thoroughly check the cam belt for signs of cracking or wear. Credit: Stu Davies
The jockey wheel and belt tensioner pulley wheel bearings were also checked for wear.
They were in perfect condition with no noise, and the seals were in excellent condition. Some people would change these too as a matter of course.
The case covers can be cleaned up, getting rid of alternator and cam belt dust, and the new belt offered up to the bottom pulley, cam wheel and injector pump pulley.
There are arrows on the new belt indicating which way to fit it.
Move the jockey wheel into position and make sure the bolt is loosely fitted. It is worth noting that the stiffness of the new belt makes it slightly difficult to hold the pulley in position while fitting the bolt.

Removing the jockey wheel will give you more room to manoeuvre the belt around the bottom pulley. Credit: Stu Davies
The belt tensioner pulley is then fitted loosely.
The slacking of the cam shaft pulley securing bolts is handy here, allowing a bit of wiggle room to get the belt teeth properly lined up.
There is an Allen keyhole in the pulley base which can be used to tighten the belt with an 8mm Allen key.
The elongated holes in the cam wheel fixing will ensure that as the belt is tightened, the cam wheel moves slightly, but the cam remains still.

The belt tensioner pulley. Credit: Stu Davies
Many manuals suggest using a special tool to check the belt tension.
As a veteran of many cam belt changes, I’m confident of my ability to check the tension of the belt by feel.
This is the third time I’ve changed the belt and, touch wood, all has been well.

Use an 8mm Allen key to tighten the cam belt tensioner pulley. Credit: Stu Davies
I aim for a 1cm deflection and no ‘twanging’ when the belt is flicked.
The belt is driven via the teeth, unlike a V belt, which relies on tightness to make it grip.
The rest of the job is a straightforward replacement of the case, water pump pulley and alternator belt.

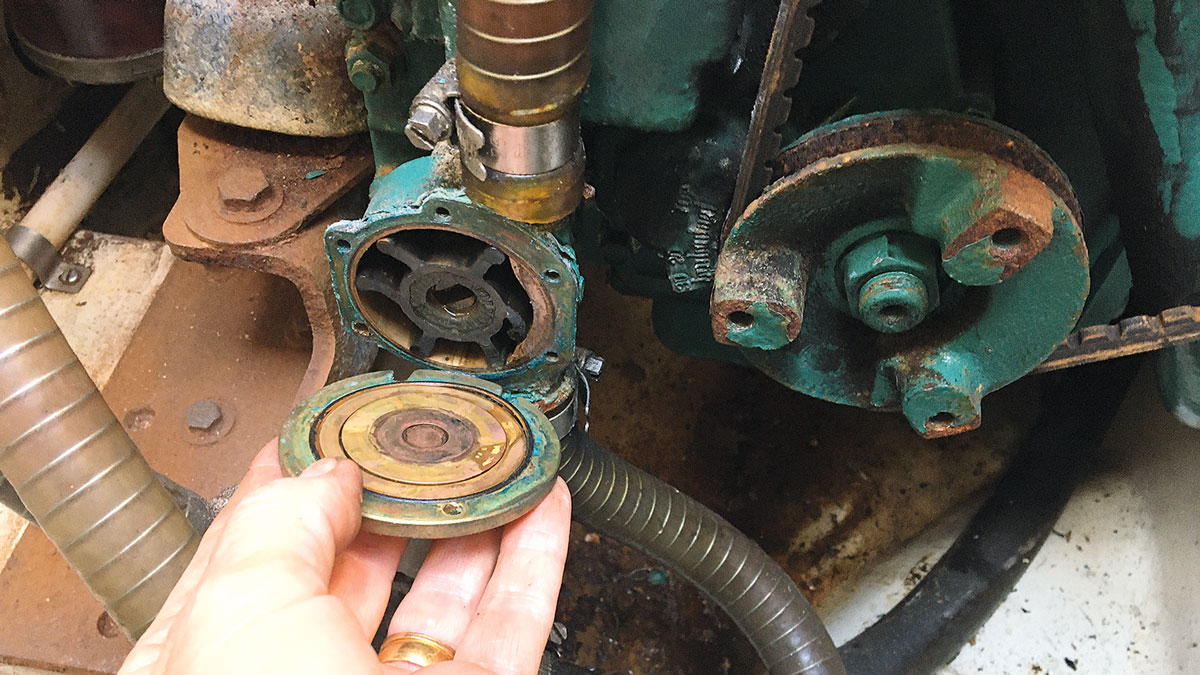
Stu Davies shows you how to check and replace an engine’s raw water pump impeller, and explains why it’s an…
Engineer Stu Davies explains the steps you should take to make sure your boat’s engine is protected over the winter…

Stu Davies shares useful maintenance tips on how to keep your 2-stroke and 4-stroke outboard motors running sweetly

Every boat owner should know some basic engine maintenance. Stu Davies shares how to tension the alternator drive belt
Want to read more practical articles?
A subscription to Practical Boat Owner magazine costs around 40% less than the cover price.
Print and digital editions are available through Magazines Direct – where you can also find the latest deals.
PBO is packed with information to help you get the most from boat ownership – whether sail or power.
Follow us on Facebook, Instagram, TikTok and Twitter
%20100vw,%20300px%22%20data-image-id%3D%2295200%22%20/%3E%3Cfigcaption%3EArrows%20on%20the%20cam%20belt%20showing%20the%20right%20way%20to%20fit%20it.%20Arrows%20should%20point%20towards%20the%20front%20of%20the%20engine.%20Credit:%20Stu%20Davies%3C/figcaption%3E%3C/figure%3E%3Cp%3E%3Cstrong%3EStu%20Davies%20explains%20how%20he%20fitted%20a%20new%20cam%20belt%20to%20the%20diesel%20engine%20in%20his%201999%20Beneteau%20381%3C/strong%3E%3C/p%3EStu%20Davies%20explains%20how%20he%20fitted%20a%20new%20cam%20belt%20to%20the%20diesel%20engine%20in%20his%201999%20Beneteau%20381)
The crinkle of crisp boilersuits shuffling around the boatyard heralds a new season

Every year, just as the Essex marshes begin to sprout with the first buds of succulent samphire, a final, final demand to pay the TV licence wafts through my letter box and lands on top of the others.
These are as sure signs of spring as the knock on the door a few seconds later.
“Oi,” says the gruff, familiar voice through the letter box, “pay your TV licence then get your backside down the boatyard and get your boat cover off.”
The truth is that Adi knows too well that his berth holders, and me in particular, are an indolent bunch of slackers who need rousing from the cosy months of hearth-side hibernation when we’d happily forgotten we owned boats.
Down in the yard, those with delusions of adequacy are shuffling around in a confused daze like meerkats in brown and blue boilersuits, and there’s even one wearing crisply ironed white overalls with epaulettes, which denote senior rank and an altogether higher degree of competence.
Most of us, though, are realists, assured above all that if we do anything, as Adi often intones wearily, that we’ll either damage our boats and land him with a load of work or damage ourselves and land him with a load of work.
He’s got a point, and to that end the yard has withdrawn its supply of yard ladders after someone in white overalls fell off one and sued the yard and the neighbouring boat owner who’d left an open can of red antifouling at the bottom of the ladder.
When his overalls were put through the wash and they came out pink he sued his wife and she left him.
Like all health and safety initiatives, the ladder edict led to unintended consequences, as more resourceful boat owners made their own and the most resourceful ‘borrowed’ them.
In another case, the fall from Grace, which was the name of the boat, was cushioned by landing in a paint tray of antifouling, which after washing turned the brown overalls mauve.
The one intended consequence of the seasonal mayhem is that the chandlery at the top of the yard has stopped its 20% off sale of ladders, antifouling and overalls and is doing a roaring trade.
The other consequence is that berth holders have stopped trying to self-harm with angle-grinders and orbital sanders and wot not and, like young buck kangaroos, are trying to harm each other and punch each others’ lights out.
At least, they would have done, but for the fact that there’s not enough space in the yard to swing a cat or even a sharp, right upper cut.
All the plastic boats, many of which have summer berths downriver, are on the hard waiting for their lift in, and all the wooden boats are in their mud berths waiting for their annual lift out.
It’s like a game of chess with as many pieces as there are squares on the board.
Being naturally of a defeatist nature I turned to walk the few yards home but somehow discovered inner backbone and renewed motivation thanks to Adi, who blocked my path and kindly growled: “Oh no you don’t, Dave, get your covers off and get varnishing.”
I walked along the pontoon and started to peel back the winter cover which, to my surprise, was far better secured than I remembered with proper knots of the type you find in books.
I was even more surprised when a voice on board said: “Oi, get off of my boat.”
This puzzled me for a bit as I hadn’t remembered selling it, but then was helpfully informed they’d shuffled the berths around in the winter.
I found Snipe, my 1953 wooden Blackwater sloop, and with trepidation approaching terror peeled back the cover like a mourning shroud, to see what state of shameful dereliction she was in.
And it was worse than I thought.
In a panic, I lifted the floorboards and looked in the bilges.
I then examined the lockers, shelves, forepeak and galley where all I found was a half-eaten pack of mouldy ginger nut biscuits.
With remorse, regret, shock and shame, I trundled to the chandlery, cursing myself.
I’d made the stupidest of beginner’s errors, and it was going to cost me dearly.
There were no tea bags on board!
Want to read more articles?
A subscription to Practical Boat Owner magazine costs around 40% less than the cover price.
Print and digital editions are available through Magazines Direct – where you can also find the latest deals.
PBO is packed with information to help you get the most from boat ownership – whether sail or power.
Follow us on Facebook, Instagram, TikTok and Twitter
%20100vw,%20300px%22%20data-image-id%3D%2295252%22%20/%3E%3Cfigcaption%3EQuick%20rub%20down,%20coat%20of%20antifoul%20and%20home%20by%20lunchtime?%20Cartoon%20credit:%20Claudia%20Myatt%3C/figcaption%3E%3C/figure%3E%3Cp%3E%3Cstrong%3EThe%20crinkle%20of%20crisp%20boilersuits%20shuffling%20around%20the%20boatyard%20heralds%20a%20new%20season%3C/strong%3E%3C/p%3EThe%20crinkle%20of%20crisp%20boilersuits%20shuffling%20around%20the%20boatyard%20heralds%20a%20new%20season)
After struggling with a heavy lifting keel, Brian Johnson builds a simple tackle to make light of the problem

I was asked by a friend to make some fittings for his new boat, a Parker Super Seal, to make it easier to lift the lifting keel.
The existing arrangement was a single sheave, mounted in the top of a box which fitted over the keel slot.
A rope tied to the top of the keel passed over this sheave and was led aft to the halyard winch.
Another Super Seal-owning club member had improved on the standard system by fitting a box sheave in the keel.
An anchor plate fitted on the port side of the keel slot raised the lifting tope about 100mm above the deck.
A similarly raised block on the starboard side allowed the rope to be led from the anchor point through the keel block and the starboard block to a deck organiser, then aft to a winch, thus giving a 2:1 advantage and halving the effort needed to lift the keel.
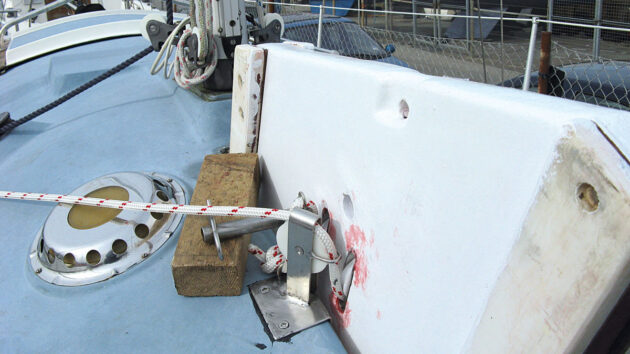
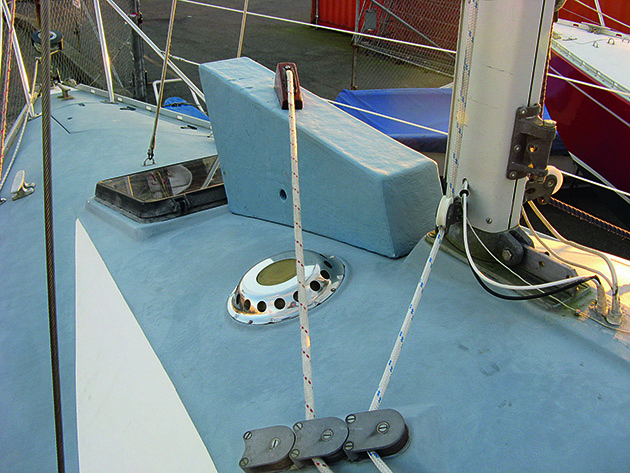
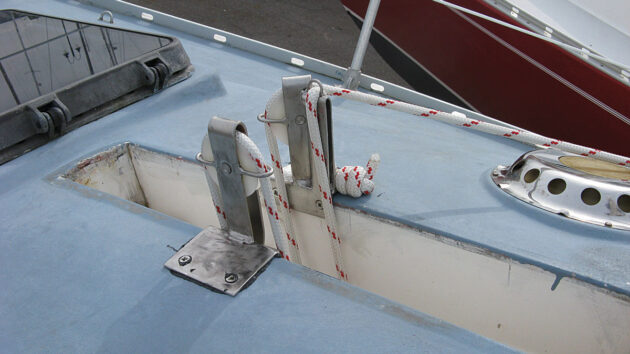
The fully raised lifting keel showing the lifting sheaves and locking pin
It was necessary to raise the anchor point and starboard block because the keel projects from the keel slot when fully raised.
It also helped to lift the rope clear of a deck vent.
We decided instead to fit two sheaves in the keel and blocks on both sides of the keel slot, one of which would incorporate a strong point to fasten the end of the lifting line.
This would give a 4:1 advantage, or a quarter of the effort needed to lift the keel.
We first removed the lifting keel from the boat, measured its thickness at the point where the sheaves were to be fitted, and machined them from nylon such that the diameter at the bottom of the groove was 5mm greater than the keel thickness,
This ensures that the lifting line will not chafe on the edges of the slots in the keel or on the sheave boxes.
The sheaves will accept 10mm diameter rope, and the centres are drilled to take a 10mm pin.
We also made two slightly smaller sheaves for the deck fittings.
I used thin card to make a template of the keel sheave boxes, the sides of which were designed to be slightly narrower than the lifting keel.
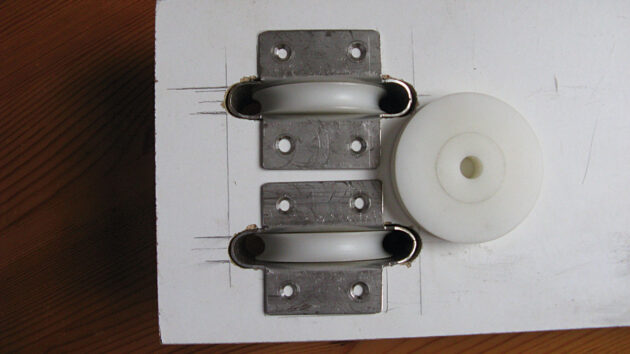
Keel sheaves in jig with a loose sheave to give the slot spacing
Once I was happy with the shape and size of the mock-up, I cut two pieces – one for each sheave -from 1.5mm stainless steel using an angle grinder.
I filed the edges smooth, then bent the pieces to shape around a suitable diameter bar, the join meeting in the centre of one end.
I bent the flanges over with the pieces held in a vice, using a hardwood spacer to prevent the box from being squashed.
When satisfied with the bending and sure that the sheave would fit, I marked and drilled the boxes for the sheave axle pins and for the screws to secure them into the keel – the latter holes being countersunk for the screws.
I cut the axle pins from 10mm diameter stainless steel rod, approximately 4mm longer than the overall thickness of the sheacces.
I faced and drilled the ends with an 8mm drill to a depth of about 2mm – this left a rim of only 1mm, which was easier to rivet over when the sheave and box were put together.
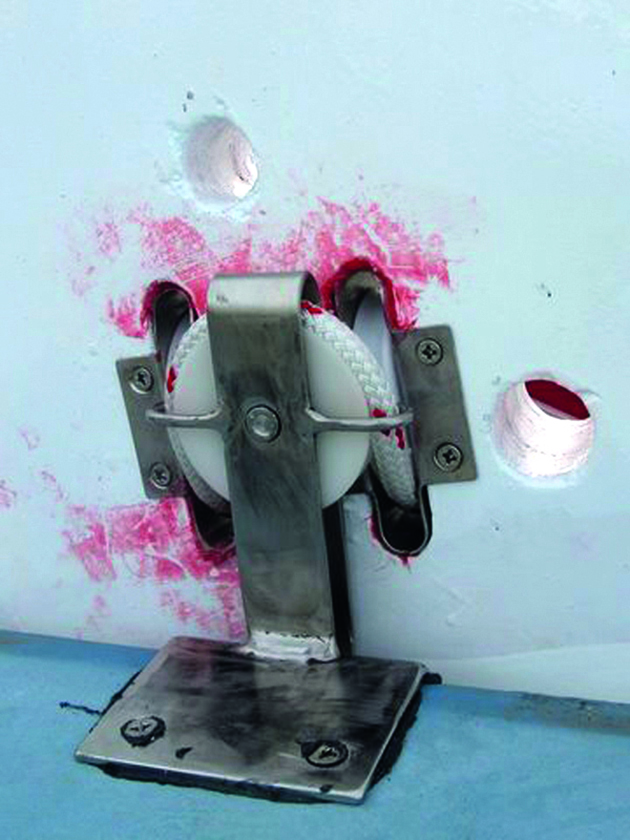
The port side in-line raise sheave
Drilling the end of the pins in this way also helps to avoid riveting too tightly, which could jam the sheave.
When it came to the two fixed blocks that sit over the edges of the keel slot, the port side block was fairly straightforward, with the support bracket set in line with the keel slot and the sheave offset slightly to overhang the slot.
The keel itself is quite a bit thinner than the slot – nylon guide blocks keep it centred – which means there is plenty of clearance for the sheave and lifting line.
The starboard fitting was more complex, however, the sheave needing to both overhang the slot and be angled to lead the lifting line to the turning block.
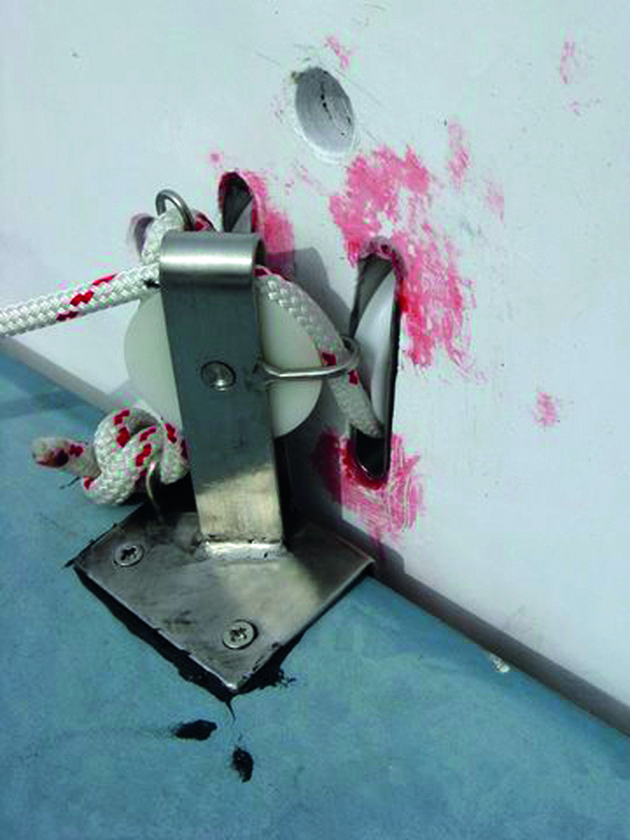
The raised starboard sheave with knot around the anchor point
It also needed a strong point to anchor the rope, positioned so that both ends of the lifting line would run parallel to and from the sheaves in the keel.
The spacing between the sheaves in the keel was set by the size of the sheave in the port block.
I made more templates to get the correct angle for the base plates and to work out the lead angle from the starboard block to the organiser, forward of the winch.
I also used cardboard to refine the shape of the various parts before fabricating them from stainless steel.
For ease of access, most holes were drilled and, where necessary, countersunk before I welded all the pieces together.
Once all of the main parts were made and welded, I added a U-shaped anchor point and guides.
The guides are there to ensure the rope stays on the sheaves and also offers some protection against knocks.
The next task was to make a drilling jib to enable accurate positioning of the slots in the keel for the two sheave boxes, square to the sides of the keel and parallel to each other.
I marked the positions central to the width of the keel and around 30cm from the top to ensure the keel could be fully lifted and to allow the insertion of a locking pin.
I was apprehensive about drilling as I had been told that the keel had a steel or iron core, but fortunately, the area where the slots were to go proved to be a laminate consisting of an 8mm outer skin of GRP, the layers of plywood and filler.
A 17mm HSS drill bit coped easily, so I drilled the hole at each end of the slot and then removed the rest with a long-bladed jigsaw and a coarse file.
The next step was to liberally coat inside the slot with two-part epoxy paint to stop water from getting in to the keel laminates, and once it was dry the keel blocks were inserted, secured with stainless steel screws and any gaps filled with marine filler.
We returned the keel to the boat and hoisted it aboard using a jib halyard and lots of helpers.
I’d decided that, even though I had worked out where the fitting were to be located at the top of the slot, it was best to have the keel in place first to be sure everything would line up as expected.
It was fortunate I did because, in my reckonings, I had not taken sufficient account of the angle of the keel.
Because the keel tilts aft and does not therefore rise vertically, both of the blocks needed to be about 8mm further forward than I had calculated.
Once I was happy with the positions of the fittings, I marked the deck and drilled it to take 14-gauge self-tapping screws,
With the fittings bedded on marine sealant and screwed down, I threaded the lifting rope through the sheaves to test the system.
From its anchor point on the starboard fitting, the rope is led down through the aft sheave in the keel, up and over the raised block on the port side of the keel slot, back down to the forward sheave in the keel and finally up and over the starboard block and aft through the organiser to the winch.
With this system, the keel can be lifted quite easily even without the use of the winch, the weight being comfortably held by a halyard clutch and then a locking pin when in its mooring.
Three stages in the evolution of a Super Seal lifting keel mechanism
1. The original keel cover box with one sheave and no mechanical advantage
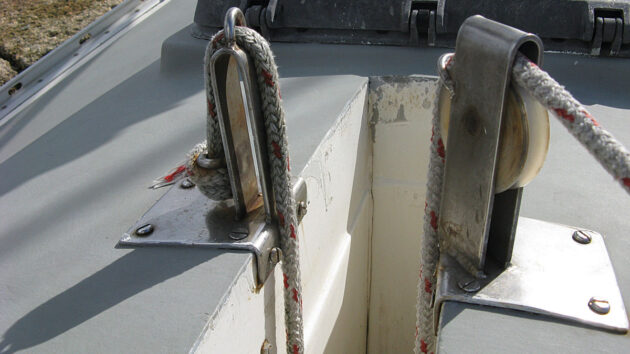
The system designed by Super Seal club member Mike Haise gives a 2:1 advantage
My modification looks similar, but actually gives a 4:1 advantage

Ben Lowings talks to Bjorn Haraldsson about his simple air-regulated keel

Galvanic corrosion is often something mainly associated with metal fittings on larger craft: however, David Parker has a cautionary tale…

Peter Poland looks at the history of keel design and how the different types affect performance

In our Maxi 84 boat survey, Ben Sutcliffe-Davies concluded that the antifouling needed to come off and whilst the keel…
Want to read more practical articles?
A subscription to Practical Boat Owner magazine costs around 40% less than the cover price.
Print and digital editions are available through Magazines Direct – where you can also find the latest deals.
PBO is packed with information to help you get the most from boat ownership – whether sail or power.
Follow us on Facebook, Instagram, TikTok and Twitter
%20100vw,%20300px%22%20data-image-id%3D%2295014%22%20/%3E%3Cfigcaption%3ELifting%20the%20keel%20up%20through%20its%20slow%20using%20the%20new%20mechanism%3C/figcaption%3E%3C/figure%3E%3Cp%3E%3Cstrong%3EAfter%20struggling%20with%20a%20heavy%20lifting%20keel,%20Brian%20Johnson%20builds%20a%20simple%20tackle%20to%20make%20light%20of%20the%20problem%3C/strong%3E%3C/p%3EAfter%20struggling%20with%20a%20heavy%20lifting%20keel,%20Brian%20Johnson%20builds%20a%20simple%20tackle%20to%20make%20light%20of%20the%20problem)
Bob Goode improves his Jeanneau Sun Odyssey 32’s sail handling by replacing the original fixed wire split backstay

My 2002 Jeanneau Sun Odyssey 32 was quite a simply-rigged boat when new: to keep the price reasonable, the builders had hardly pushed the boat out when it came to deck gear, writes Bob Goode.
The downside to this was that she could be a bit of a handful in winds above 20 knots, particularly if conditions were gusty. The solution was simple: improve the sail handling controls and fit better sails.
The original ‘Technique Voile’ sails were adequate but lacked the material quality to last long and quickly lost their shape.
One item that needed attending to immediately was the backstay.
The original, a 4mm fixed wire split backstay, did not allow adjustment to flatten the main and tighten the forestay in stronger winds.
I started by fitting a simple strop between the split stays: this allowed me to apply some tension, albeit not easily, to see if the results would be worth the expense and effort.

Bob checked the rig tensions with a good-quality tension gauge before starting work on fitting the adjustable backstay. Credit: Bob Goode
A positive outcome saw me dashing off to buy a good rig tension gauge and setting about recording the tensions in the rig.
Some research on breaking strains and comparison with the recorded tensions allowed me to design a simple cascade that would replace the existing split wires.
I used the strength of the existing wire backstay as a guide to the required strength in the replacement components to avoid introducing any weakness in the rig.
I would keep the same main section of backstay from the masthead but replace the 4mm 1×19 split wires with a single, 5mm 7×19 wire, passing it over a wire block fitted to the main part of the retained backstay.

The ladder was secured on a very calm day in a marina at low water – so no wash from passers-by to allow for fixing the check-line on the backstay. Credit: Bob Goode
The single wire would be shorter to allow for the adjusting pulley system.
Fitting would pose a problem as the mast would have to remain in place while the work was carried out.
Fortunately, the Sun Odyssey 32 has sharply swept back spreaders, so even with the backstay released, the mast should remain fairly secure.
I fitted a stepladder across the cockpit and roped it tightly in place.
Luckily, my berth at Chichester Marina is very calm, and at low water springs, the access channel is so shallow that there are virtually no moving vessels to create an unsettling wash.

Backstay secured and the Barton wire block in place with 7×19 wire threaded. The green line is a temporary check line to hold the backstay in place. Credit: Bob Goode
The stepladder allowed me to reach the connection where the original split wire was fixed to the single backstay running up to the
masthead.
To be on the safe side, I attached a temporary securing line and tensioned it to ensure the fitting at the masthead stayed in place.
With the new flexible wire already threaded through the wire block, I secured the new block to the existing backstay fitting and then connected the fittings back at deck level before threading the Dyneema rope.

Stopper knot and bobble which prevents the tension from being inadvertently released from the adjustable backstay. Credit: Bob Goode
I then used the original rig tension measurements to adjust the new backstay so that the rig was correctly tensioned again.
Next, I checked that the tension in the cap shrouds did not drop too far when tension was hauled on the backstay: this is important as the cap shrouds act partly as backstays and partly to keep the mast from inverting.
All that remained was to whip the knots in place and add a stopper to the adjustment line so that the backstay could not be inadvertently completely released.
Improved performance during the first sail in a fresh breeze quickly convinced me my work to fit an adjustable backstay was worth the effort.
And on top of that, I now have an extra line to play with on longer sails!

At each stage of the cascade, the safe working load (SWL) can reduce as the total load is shared between the parts of the subsequent cascade.
One end of the flexible 7×19 wire split backstay is secured to the existing deck fitting on the starboard side of the yacht.
From there it goes over a Barton wire block on the end of the existing backstay. The port side end of the 7×19 wire is fitted with a single 60mm block.
An 8mm Dyneema line leads from the port deck fitting over this block to a 50mm triple block.
With another triple block and jammer secured to the deck fitting, a 6mm Dyneema line completes the cascade.
Stainless steel wire
Assuming you don’t have exotic rigging, your mast is probably held up with 1×19 stainless steel wire – ie the wire consists of 19 single strands.
This construction is strong, with little stretch; however, it is also inflexible. If the wire is to go around a pulley, then the wire of choice is 7×19, meaning the wire is made up of seven strands, each consisting of 19 smaller strands.
This is not quite as strong as 1×19, but it is very flexible.
Typically, the breaking strain of 4mm 1×19 stainless steel is around 1,400kg, which is about that of 5mm 7×19 stainless steel.
A safe working load would be no more than half this figure.
Dyneema rope
Dyneema was chosen for its great strength, low stretch and minimal creep under load.
A typical 8mm line has a breaking strain of around 3,000kg, so it is over strength for this application.
The 6mm Dyneema has a breaking strain of around 1,600kg so is also over strength, but is much nicer to handle than a thinner
line would be.
Wire blocks
The breaking load of the Barton wire block is 1,300kg: 60mm Lewmar Synchro blocks are specified to have a safe working load of 800kg, and the 50mm ones around 450kg.

Correct rig tension will maximise the efficiency of your boat’s sails as well as reduce stresses on the mast. David…

The ability to sail faster and more efficiently can also be safer and more satisfying. Peter K Poland explains...

Sailing efficiently when the wind comes astern doesn’t mean you have to fly a spinnaker or cruising chute. David Harding…

Some boats need persuasion to make to windward, so tweaking the sails to best advantage can make all the difference.…
Want to read more practical articles like How to fit an adjustable backstay?
A subscription to Practical Boat Owner magazine costs around 40% less than the cover price.
Print and digital editions are available through Magazines Direct – where you can also find the latest deals.
PBO is packed with information to help you get the most from boat ownership – whether sail or power.
Follow us on Facebook, Instagram, TikTok and Twitter
%20100vw,%20300px%22%20data-image-id%3D%2294994%22%20/%3E%3Cfigcaption%3EBob%20added%20an%20extension%20to%20the%20lower%20triple%20block%20of%20the%20backstay%20to%20improve%20handling%20of%20the%20line.%20Credit:%20Bob%20Goode%3C/figcaption%3E%3C/figure%3E%3Cp%3E%3Cstrong%3EBob%20Goode%20improves%20his%20Jeanneau%20Sun%20Odyssey%2032%E2%80%99s%20sail%20handling%20by%20replacing%20the%20original%20fixed%20wire%20split%20backstay%3C/strong%3E%3C/p%3EBob%20Goode%20improves%20his%20Jeanneau%20Sun%20Odyssey%2032%E2%80%99s%20sail%20handling%20by%20replacing%20the%20original%20fixed%20wire%20split%20backstay)
Roger Cottle was presumed dead after falling overboard a 27ft yacht and lost at sea for five-and-a-half hours in a holed lifejacket, at night

Falling overboard, I discovered that what they don’t tell you on the sailing courses is that a safety harness is great until you fall in, and then you become a waterskier.
I was dragged across the waves and then under the bottom of the boat for about half a minute, where I hit my head on the propeller.
Then the stanchion eye, which I had clipped onto, was ripped from the boat.
It was quite a lightweight 27ft yacht, and the weight of me in all my sailing gear being dragged through the water, pulled
it clean out.
I ended up swimming in the Atlantic with the metal weight between my legs. I released it and kicked it off, along with my boots, and watched the boat sail away.

A chart showing where Roger fell overboard and where he was rescued
My crewmate, Paul, was chucked out of his bunk and realised we were in trouble because the boat was full of water.
He came up on deck, saw I wasn’t there and the stanchion eye was missing and set off an emergency position indicating radio beacon (EPIRB) alert.
The newspapers all reported at the time that I had been wearing an EPIRB, but 18 years ago, personal locator beacons didn’t exist; I just had a lifejacket with a hole in it.
The little light had been ripped off, I had to keep blowing air into the hole to keep the lifejacket inflated.
Paul also let off a distress flare and turned the yacht back. He came close to picking me up but couldn’t quite manage it.
I shouted for him to throw me a lifeline, anything to pull me in, but by the time he got a line out of the locker, I was too far away.

After falling overboard, Roger Cottle didn’t swim for nine years, and even today, waves make him nervous. Credit: Roger Cottle
I’ve done lots of courses with different organisations, and I remember that if you want to stay alive in these situations, the thing is to will yourself to stay alive. I said, “I’m not going to die like this.”
All the yacht electrics were down, but Paul knew I always carried an emergency radio and handheld GPS as a standby, and I didn’t rely on electrics.
I’m an astronavigator and still look at the stars now. So Paul was able to call for help, and that’s what saved me really.
I think I was in the water for five and a half hours.
When you’re doing survival courses in a pool, it’s hard to imagine being in a choppy sea.
Keeping my mouth and nose out of the water was a huge problem; I had to keep swimming on my back.
The waves were getting higher. I’m told that 44 ships were looking for me. One thing that went through my mind is I’d always wanted to go in a helicopter and this was my big chance.
When I worked on the big ships, I volunteered for helicopter rescue training three or four times, but each time something occurred or the weather was unsuitable, it didn’t happen.
But I’d trained to be prepared. I could see the lights of Vigo and thought perhaps I could swim ashore.
At 15 or 16 miles out, with a current, that was completely unrealistic, but it shows my determination not to die in this situation.
I could see the three stars on the belt of Orion as a guide, and I still look at Orion now, and it brings back memories.

Rash, a Kelt 8.5 – a twisted rudder was the reason Roger Cottle’s crewmate, Paul, was unable to turn the yacht for another rescue attempt after Roger’s falling overboard incident. The 27ft yacht was later left in Spain for repair. Credit: Roger Cottle
I usually try to put this to the back of my mind. I was 48 years old at the time, and now I’m 67. I haven’t spoken about this rescue for 12 years. It happened in late October 2006.
I used to deliver yachts to people, and as my experience grew I got more choosy about who I worked for and where I went.
This delivery was for a guy I’d worked for before. He was a Yachtmaster instructor and wanted to get a Kelt 8.5 brought from Portugal to Cardiff or Swansea, where he intended to teach racing techniques.
It was getting late in the year, and I agreed to do it, providing we had bolt-hole options. He trusted me to be the skipper, with his friend, Paul, as my crew.
While I’m the traditionalist sailor, Paul prefers to plug the computer in and do everything electronically.
Paul and I sat in a Porto marina, in good shelter, waiting for a storm to blow over.
I used to be a meteorologist when I was on the big ships, and I reckoned that if we followed this storm up the coast of Portugal into the Bay of Biscay, when the wind started to go south-west, we’d have three days of good sailing.
The plan was to keep sailing north, and if things started to get rough, turn right and hide in La Rochelle where we could also fly home, or Brest, which is a place I’d stopped at so often one of the local bar owners knew my name.
And if all went well, we could cross the English Channel, get to the Bristol Channel, and then to Cardiff or Swansea.
I was keen to get the job over quickly since it was my last sailing job of the year, and I had other work lined up.
Getting out of the marina was awkward because the wind was blowing in, and Paul and I looked at each other quite often, thinking, ‘Should we do this or not?’
Out at sea, the water flattened down, and we had a beautiful run up the coast. The winds were at Force 6 or 7, and we were doing really well.
After a sleep, I woke about 2100 ahead of my watch and took over the helm at 2200.
We were doing a Danish watch system of six hours on and off during the night.
I’m a bit of a toughie. I like sailing at night; staying up for six hours in rough weather is nothing to me.
We were patting ourselves on the back; it looked like we might get across to the English Channel in two-and-a-half days.
Shortly after I took the helm and Paul retired to his bunk, it became evident that the steering gear we were using wasn’t coping with the waves.
The boat weighed less than three and a half tons. I decided to hand steer and it was as I was taking out the self-steering gear that we got ‘pooped’ – a wave broke into the cockpit, filled the boat full of water and spun it round.
The next wave hit me in the back – like someone coming up behind you and pushing you into a swimming pool.
The boat went over and filled up with water. All the electronic gear in the boat failed except for the bilge pump. And I went over the side.
The first thought that hit me was, “This water’s nice and warm” – we were off the coast of Portugal, after all.
After Paul’s near-miss attempt to recover me, I was lost from sight, so that was it.
The waves got higher. At one point, a helicopter flew over me, and I was sure it had seen me, but it flew on.
I also saw a row of lights. These were the ships, and they were coming towards me, and maybe got half a mile away.
I was getting cold, and I knew I had to stop swallowing the water. I was wasting energy trying to swim, but just lying there waiting to die didn’t seem like a good option either.
Then a boat did come close, and I got very, very excited, shouting and screaming. I saw a man run along the deck and up to the bridge, and they turned the spotlight on me.
That was the boat that picked me up. And the most frightening thing about the whole episode was being rescued.
It was one of those big tunny boats for catching tuna, with a Spanish crew. The sides were about 15 to 20ft tall.
They threw a rescue ring. I caught that, and they dragged me to the side of the boat. But before they could lower the ladder, I got swept underneath the boat. I’ve still got the oilskins with a blue paint stain as a reminder.

After falling overboard, Roger Cottle’s story attracted a lot of interest from the Spanish media. This extract is from a report by the Faro de Vigo newspaper. Credit: Faro de Vigo newspaper report, 27 October 2006
I managed to get out from under the tunny, but the biggest problem was getting up the chain link pilot ladder.
I used to work on the trading boats, square riggers, mostly. I knew that if I was clever, I could wait for a wave, then as the ship dived, if I caught the ladder I’d already have climbed 10ft.
But I didn’t have the strength to go any further. So in the end, I had to wait for these people to pull me up, and I just hung on.
It took them a long time.
Now I was out of the water, and I was really starting to feel the cold. My fingers had gone to sleep, my toes didn’t seem to have any blood in them.
The crew didn’t know how to treat me. They left me in wet clothes and gave me scalding cups of coffee laced with rum.
They left me to get my clothes off and into the shower; there was no one there to check I didn’t collapse or fall over, then
I was left in a bunk.

The timeline of Roger’s falling overboard incident as reported by the Faro de Vigo newspaper. Credit: Faro de Vigo newspaper report, 27 October 2006
They didn’t supervise me aside from providing lots of rum-filled hot drinks.
I’m very much indebted to these people, but this is where the story gets comical.
The captain, who fortunately spoke pigeon English as I didn’t speak Spanish, asked who I was.
I replied, “I’m the one who fell in”, and his response was, “You’re dead.”
It was like the Monty Python dead parrot sketch. I was very confused, and for a moment, I did wonder if heaven was a fishing boat.
When the first mate was later dragged out of his bed, he explained that the Spanish Navy co-ordinating the rescue had declared that no one can survive in the water for more than two hours at this time of the year on the Atlantic coast.
He told me, “The Spanish coast guard declared you dead about four hours ago.” I said, “Well, I don’t think I am”. He said, “No, you’re not”.
So he got hold of the radio and told the operation authority, “We’ve got him, and he’s alive”. They said, “No, he’s dead.”
So he had much the same conversation that I’d had with the captain. I had my passport in my coat pocket, which proved to the Spanish I was still alive.
The ship’s chef, a lovely guy who didn’t speak any English, dried my passport, page by page, by putting it in the toaster. I was then transferred to another boat, by now wearing a new lifejacket, and then onto a big Spanish coast guard boat.
It had a flight deck on the back, and I thought, “Oh, I’m going to get to ride a helicopter”. But no, the ship transferred me into its 20ft rigid inflatable boat, and I was taken into a little harbour called Cangas.
I was dropped off on the quayside where a television crew filmed me as I had an awkward wait while the ambulance made its way from the other side of the harbour to pick me up.
I was in some borrowed clothes, 10 sizes bigger than me, and I had a little bag with my clothes in it.
They took me to a hospital, checked me over, and after making sure I had money – I still had my wallet on me, with a credit card and euros – they put me in a hotel where I saw a news programme about my rescue.
I woke up feeling like I had two important things to do.
First, I had to find out where I was, as I didn’t know if I was in Spain or Portugal. Secondly, I knew the boat had been towed into the harbour, so I needed to find out how Paul was.
I went down to the reception desk and asked if they spoke English.
They said no but disappeared and came back with a smart-looking Spanish girl. She said, “My name is Marina, and I’m
a journalist.”
Before I could say “My name is Roger, and I might have a story for you,” I looked up to find three television cameras pointing at me.
The local TV crews had been waiting in the hotel cafeteria for me to get up.
They accompanied me to the harbour to meet Paul. The Spanish media were a little upset when we shook hands as they wanted more emotion.
But Paul said, “Well, we’re English, we don’t do the hugging.”
It became a really big story in Spain as there are a lot of Catholics, and I’d mentioned that while I was in the water, I asked God to get me out of there; I promised myself that if God did, I’d take religion more seriously, look after my girlfriend and stop delivering yachts.
I regret saying that.
For days afterwards, I had to sign all the newspapers, even coming back on the ferry.
Back in England, a local newspaper caught wind of the tale, and I became known in Bristol, where I lived then, as the man who didn’t die.
I didn’t swim after that for eight or nine years, and I don’t like waves.
Sailing my wooden boat is still my joy, but I don’t go out in anything more than a Force 5 or 6, or for more than 12 hours or overnight anymore.
So it did affect me. I also always have a PLB on my lifejacket.

Matt Pavitt, coastal operations area commander for HM Coastguard
Matt Pavitt, coastal operations area commander for HM Coastguard, responds: “Both EPIRBs and PLBs are essential pieces of lifesaving equipment that broadcast a distress signal on the same 406Mhz frequency. While EPIRBs are larger beacons designed for use aboard a vessel, PLBs are designed for individual use. Once activated, the alert is picked up by search and rescue COSPAS-SARSAT satellites and relayed to search and rescue centres.
“While many sensible seafarers and watersports enthusiasts will aim to plan for every possible scenario, there’s always a risk that things could go wrong, like falling overboard. In these situations, the items that you have with you will have a considerable impact on your chance of survival.
“Since Roger’s falling overboard incident, there have been technological advances in the field of emergency location beacons, which can be widely found online. It takes around 15 minutes to register your beacon with the Maritime and Coastguard Agency, which can then use the supplied information for a rescue response.
“Roger’s lifejacket almost certainly helped to save his life. Wearing his lifejacket, Roger was able to remain alert and call out for help, which greatly aided his rescuers in locating him. Falling overboard is rarely controlled and well-managed – casualties are either leaving the vessel through necessity or have been ejected from it. In either case, a casualty could be entering cold water or a choppy sea-state, with debris potentially falling from a vessel or presenting a hazard in the water.
“If a casualty becomes unconscious, a life-saving appliance (LSA) code-compliant adult lifejacket should have sufficient buoyancy and stability in calm waters to lift the mouth of a person at least 12cm clear of the water. To ensure these are up to standard, we recommend that LSAs are serviced regularly and kept in good condition.”
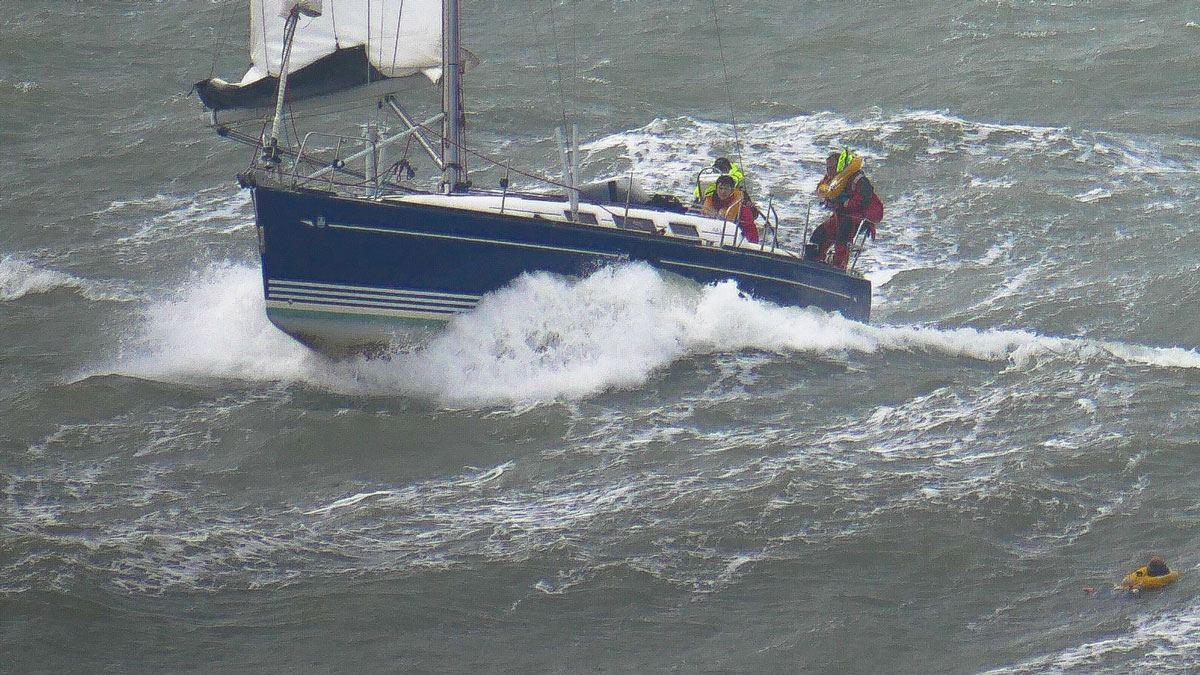
As if this year’s Round the Island Race wasn’t tough enough for competitors with winds gusting 45mph and a rough…

Can rigging your jackstays in a different way really save lives? PBO reader Willem Bijl reckons it can, so David…

Rupert Holmes shares top tips on how to avoid the dangers of falling in while in a marina and how…

Big changes to marine radio device rules are planned to be brought into the UK. The only MOB AIS devices…
Want to read more seamanship articles like Left for dead after falling overboard: how one sailor survived 5 hours lost at sea before rescue?
A subscription to Practical Boat Owner magazine costs around 40% less than the cover price.
Print and digital editions are available through Magazines Direct – where you can also find the latest deals.
PBO is packed with information to help you get the most from boat ownership – whether sail or power.
Follow us on Facebook, Instagram, TikTok and Twitter
%20100vw,%20300px%22%20data-image-id%3D%2295150%22%20/%3E%3Cfigcaption%3ERoger%20Cottle%20spent%20nearly%20six%20hours%20in%20the%20waters%20of%20Biscay%20after%20falling%20overboard%20before%20before%20rescued.%20Credit:%20Claudia%20Myatt%3C/figcaption%3E%3C/figure%3E%3Cp%3E%3Cstrong%3ERoger%20Cottle%20was%20presumed%20dead%20after%20falling%20overboard%20a%2027ft%20yacht%20and%20lost%20at%20sea%20for%20five-and-a-half%20hours%20in%20a%20holed%20lifejacket,%20at%20night%20%3C/strong%3E%3C/p%3ERoger%20Cottle%20was%20presumed%20dead%20after%20falling%20overboard%20a%2027ft%20yacht%20and%20lost%20at%20sea%20for%20five-and-a-half%20hours%20in%20a%20holed%20lifejacket,%20at%20night)
Imray’s nautical paper charts and books are no longer at risk of ceasing publication this year.
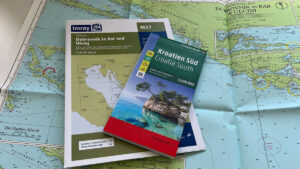
Leading publisher of nautical information for leisure sailors Imray Laurie Norie & Wilson Ltd (Imray) and Austrian cartographic specialist freytag & berndt (FB) have pledged to “ensure the continued availability and development” of Imray paper charts.
Imray Laurie Norie & Wilson Ltd and freytag & berndt have announced a joint venture, FB Imray Laurie Norie & Wilson GmbH (FB Imray), to be headquartered in Vienna, and signed a letter of intent to “ensure the continued availability and development” of Imray’s nautical paper charts and books.
In addition, Bookharbour (Stanfords) Ltd will continue as the main UK-based distributor of Imray paper charts and books.
It is hoped that the collaboration with freytag & berndt’s cartographic knowledge, will strengthen and expand the Imray offerings, while Imray’s nautical portfolio with be ‘literally filling a large blank spot’ in the land-based maps of Austria’s market leader in cartography.
The evolved organisation is set to launch in the summer, with further details to be announced in due course.
The focus will be on producing high-quality nautical charts and publications under the Imray brand, while also developing new products tailored to the needs of sailors and advancing digital navigation solutions.
Imray managing director Lucy Wilson said: “By combining our deep-rooted maritime knowledge with freytag & berndt’s cartographic abilities, we are securing the future of Imray’s nautical charts and publications while opening the door to new opportunities for development and growth.
“Our commitment to providing sailors with trusted, high-quality navigation resources remains at the heart of everything we do.”
Carl Rauch, Managing Director of freytag & berndt, added: “With this joint venture, we are taking a big step towards becoming a global cartographic publisher.
“Until now, we have only been involved in predominantly land-based cartography so with this partnership we are literally filling a large blank spot in our maps.
“By continuing and further developing the Imray portfolio and tapping into digital opportunities, we are creating innovative solutions for navigators.”
There will be no interruption in service— charts and books will continue to be available as usual.
Last November, Imray announced the end of an era, and that it would be ceasing its paper chart publishing operations in 2025.
The company, which has been providing sailors and maritime enthusiasts with expertly designed charts, books and guides for more than 200 years, since the mid-18th century, said in a statement: “While this decision has not been taken lightly, it is a recognition of growing trends in nautical digital navigation.”
At the time, Imray was offering “a final opportunity for potential buyers interested in preserving its legacy, providing a unique chance to acquire the chart business and/or rights to the Imray name.”
Chairman of the Small Craft Group at the Royal Institute of Navigation (RIN), Paul Bryans told PBO: “The news of an outline deal between Imray and freytag & berndt is excellent, due to the potential to secure the continued production of the Imray paper charts.
“Paper charts will continue to be the best backup navigation resource for leisure sailors for some time and their large size means they are excellent for planning purposes.
“As we know that the UKHO wants to exit paper chart production at some point, it is essential that access to approved paper charts remains for the sub-24m market (leisure and commercial), especially in UK waters.
“It is also good to read that advancing digital navigation solutions is also part of the plan. Imray raster charts are an excellent resource having all the information on the paper versions and none of the current drawbacks of vector charts which some users dislike.
“Stopping production of the Imray paper charts would have been a great loss to leisure sailors in many parts of the world so we hope this new venture comes to fruition quickly and proves a success.”
Back in February 2023, the UK Hydrographic Office (UKHO) announced a delay to the withdrawal of paper Admiralty Standard Nautical Charts and Thematic Charts in response to user feedback.
Admiralty paper charts are expected to remain in production until at least 2030.

Imray, the leading publisher of nautical information for leisure sailors, will cease its paper chart publishing operations in 2025.

Gilbert Park helps a fellow motorboater achieve his first voyage to the Channel Islands and gets a lesson in the…

The withdrawal of Admiralty paper charts is to be delayed until at least 2030 to allow for the development of…
Want to read more articles that impact recreational sailors?
A subscription to Practical Boat Owner magazine costs around 40% less than the cover price.
Print and digital editions are available through Magazines Direct – where you can also find the latest deals.
PBO is packed with information to help you get the most from boat ownership – whether sail or power.
Follow us on Facebook, Instagram, TikTok and Twitter
%20nautical%20paper%20charts%20and%20books%22%20decoding%3D%22async%22%20loading%3D%22lazy%22%20srcset%3D%22https://keyassets.timeincuk.net/inspirewp/live/wp-content/uploads/sites/19/2025/04/web_Imray_freytagberndt_2-300x169.jpg%20300w,%20https://keyassets.timeincuk.net/inspirewp/live/wp-content/uploads/sites/19/2025/04/web_Imray_freytagberndt_2-630x354.jpg%20630w,%20https://keyassets.timeincuk.net/inspirewp/live/wp-content/uploads/sites/19/2025/04/web_Imray_freytagberndt_2-768x432.jpg%20768w,%20https://keyassets.timeincuk.net/inspirewp/live/wp-content/uploads/sites/19/2025/04/web_Imray_freytagberndt_2.jpg%201200w%22%20sizes%3D%22(max-width:%20300px)%20100vw,%20300px%22%20data-image-id%3D%2295138%22%20/%3E%3C/figure%3E%3Cp%3E%3Cstrong%3EImray%E2%80%99s%20nautical%20paper%20charts%20and%20books%20are%20no%20longer%20at%20risk%20of%20ceasing%20publication%20this%20year.%3C/strong%3E%3C/p%3EGood%20news%20for%20Imray's%20paper%20charts:%20the%20nautical%20publisher%20and%20freytag%20%26%2338;%20berndt%20aim%20to%20%E2%80%9Censure%20the%20continued%20availability%E2%80%9D%20of%20Imray's%20paper%20charts%20and%20books)
There are many paths to bluewater cruising. Here boat owners share their stories with Ali Wood ahead of their transatlantic crossings
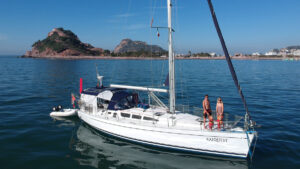
For many of us, bluewater sailing is a lifelong dream which, often, never seems quite attainable due to the pressures of work, life, family or just circumstance.
We spoke to four families to find out how they did it
Sarah Curry helps run a wind vane self-steering business with husband, Will while living afloat on their catamaran with five-year-old twins
The Hydrovane was invented by a British engineer in the late 1960s.
My husband Will’s family purchased Hydrovane 23 years ago and Will joined his parents in the now-Canadian business shortly thereafter.

Will and Sarah Curry run their Hydrovane business from on board Kaia while bluewater sailing. Credit: Sarah Curry
When Will and I met and began saving for our own boat, I was working my way up the corporate ladder in HR.
I gave notice to take time out for a sailing adventure, and a short-term stint working at Hydrovane made sense.
I didn’t know how to sail when we bought the first boat, a Beneteau First 405, in Mexico.
The initial plan was to cruise for one year, no longer, but it’s been 12!
We crossed the Pacific and sold the boat in Sydney, Australia. During that time, I quickly realised I had little desire to return to the corporate world; working with Will at Hydrovane was an ideal fit.
After six months of boatlessness, we bought a Jeanneau 43 near Vancouver and sailed locally in British Columbia for a year before heading south to California and then Mexico.

A catamaran provides plenty of safe, useable space for bluewater sailing with children. Credit: Sarah Curry
By then kids had been added into the picture.
When the boys were a year and a half and we were cruising in Pacific Mexico, during Covid, we quickly found ourselves red-lining with two toddlers loose on a boat, full-time jobs, and never-ending boat maintenance. No surprise.
For safety and our mental health, we decided to bring a third person along.
It was tight quarters, but still an amazing experience. We’ve since been fortunate to have fantastic girls join us for various lengths of time to make the sailing life more manageable and enriching.
When the twins were two and a half we wanted to move to a catamaran for more living space.

The Currys bought their Leopard 46 sight unseen from a previous owner in Greece for their bluewater sailing adventure. Credit: Sarah Curry
We sold our Jeanneau and became hyper-focused on finding a Leopard 46. This model was our top choice pricewise, layout-wise, and for its reputation in safe offshore passage making.
The catamaran rush was near its height in 2022. We wanted to buy in the Caribbean but kept finding ourselves a step too late.
I decided to join Facebook and, specifically, the Leopard 46 Owners group.
The following day, a post was made about a boat in Greece, and we jumped on it to arrange a Zoom call.
We bought the boat privately and unseen but with full confidence in the diligence of the previous owner.
Greece is my favourite cruising ground so far. However, the 10-hour time difference to our Vancouver office was a struggle.
Will was working most nights until midnight and during the day as well, so this was one of the motivations for sailing to the Caribbean.

Kaia flies a Parasailor for light winds performance and up to 24 knots windspeed. Credit: Sarah Curry
We’re so fortunate to work in the marine industry. Our business is international, and our customers are sailors all over the world.
The fact that we are often responding from our boat, from varied time zones, is understood.
We still have a home in Vancouver, which we rent out so we can cruise seasonally, leaving the boat in various places over winter or hurricane season.
Our longevity in cruising is thanks to our adaptable jobs and going back and forth between sailing and land life.
We’ve hardly spent any time in marinas because Kaia is so well-equipped.
The boat was set up with 2,600W of solar, a 1200Ah lithium battery bank and a 5,000W inverter; she can power a small city!
We have a generator as well, but hardly touch it.
For our crossing, we’ve added a Watt & Sea hydrogenerator to compensate for the reduced solar output on the ocean.
We also have an induction stove top, an electric oven, a washing machine, and there are three air conditioning units. All such luxuries!

Starlink makes working from on board a much more viable proposition for cruisers while bluewater sailing. Credit: Sarah Curry
There’s really nothing that’s so different to being in a house. We have a 12V freezer, but a lot of 220V appliances too, including an air fryer and a breadmaker, which someone just gave us.
We chased wifi for 10 years of our cruising life so Starlink has been a complete game changer.
Will plans to keep up with emails during our transatlantic, but I’d like to focus on enjoying the voyage and the more important job of entertaining the twins.
We have a work colleague coming along too, a good friend.
Ironically, we don’t sail a lot faster, being a catamaran.
The Leopard 46 is a cruising cat; no daggerboards, and we tend to sail conservatively.
When we crossed the Pacific on our Beneteau First 405, we averaged 6.5 knots.
On this boat, we’ll also be happy to get 6 or 7 knots across the Atlantic.
We have a Hydrovane to steer, of course, so we are conscious of keeping her balanced and never overpowered. It’s all about being comfortable at sea.
Simon Ridley bought Gertha 5, a 40-year-old Swan and worked alongside engineers to get her shipshape
For a lot of people a tradewind Atlantic passage is on the bucket list. For me, it’s turned into a bit of an addiction!
I’m doing it again so I can continue to the Pacific.
You spend a lot of money preparing the boat, and then more again on breakages. But when you’re offshore, at least, it doesn’t cost you anything.
I’ve been sailing since I was very young. I’ve done two Atlantic circuits and the Baltic, but this time, I’m carrying on to Australia.
Gertha 5 is my fifth boat. I bought her very cheap – around £95,000. It cost me about the same for my 37ft Hanse, which
I bought new in 2006, but for a 46ft Swan, this is a really good price.
A new Swan would cost in excess of a million pounds, three times the price of a production boat.
To be fair, on a Beneteau, you do get the cockpit space and room to sit out, and Gertha 5 only has two cabins, while a modern boat tends to have three.
Everyone has a different take on the perfect boat. For me, it comes down to performance.

Simon Ridley’s Swan Gertha 5 in Grenada – he plans to sail her round the world. Credit: Travis Ranger/WCC
What few people realise is that friction really slows a boat. Gertha 5 has such a sweet hull; half the wetted area of a modern boat which has to drag its flat back through the water.
I can do 4 knots in 8 knots of wind, while a lot of boats struggle to get going until the wind reaches 12.
My Hanse was quick, too, but because of her profile, there was enough banging around in the waves to knock your fillings out!
She was a cruiser-racer, one of the early ones with big rigs. The modern ones are a lot more cruising-oriented.
I wanted something a bit bigger and heavier, which is why I bought Gertha 5.
She’d had three German owners, and in 1993, the second one spent a fortune on her: new teak decks, new sails and upholstery – the invoice file was huge!
Sadly, the third owner, who bought the boat for a transatlantic, died of cancer, and I think because he was sick, the maintenance was left to local trades in Gran Canaria.
While the work carried out was OK for cruising, it wasn’t good enough for an Atlantic crossing.
It didn’t matter to me that Gertha 5 needed work, as I was in a position to do it myself. I’m an engineer, builder and plumber, so I saved a lot on labour, which would have cost £50 to £70 an hour.

Simon Ridley at the helm of Gertha 5 in Gran Canaria at the start of the ARC 2024. Credit: James Mitchell/WCC
The rig needed an overhaul, and insurance companies like to know the service history. As this is rod rigging, the only way you can be sure it’s in the correct condition is to do a five-yearly dye test on the heads.
We didn’t know the age or quality of the rigging when I bought the boat, but it was certainly over 10 years old.
I stripped down the boom and mast, which was corroded – it took about five days’ work – then the riggers did the rest, including repainting the mast, a bill which came to around £4,000.
I wasn’t sure of the integrity of the keelson. Being a Swan, the boat could be taken apart easily, but what I thought would be a quick clean and spray with paint turned into a shot-blast and regalvanisation.
I considered replacing the keelson, but it was made of good quality British steel, and the recommendation was to keep it.
Gertha 5 is a cutter rig, and I wanted twin headsails for downwind sailing, so I had to buy a new furler and modify the jib.
This required stainless steel bracketry on the chainplates.
Overall, the rigging was over £20,000, including the £10,000 modification.

David Ridley (right) refurbished his Swan to sail the ARC. Credit: Travis Ranger/ WCC
I’d say the complete cost – to take a neglected 1983 Swan and turn her into a boat I could sail around the world in – was £30,000 to £50,000.
Finally ready, I did the ARC circuit in 2018 (Gran Canaria to St Lucia and back) but didn’t have enough money to do a circumnavigation.
However, the 10,000 miles flagged a few things I wanted to improve on.
I’ve just bought a new engine and installed it with the help of a local mechanic. I’d never fitted one before, but it was straightforward. I also helped to make the engine mounts alongside an engineer.
Boatyards tend to be very busy and struggle to find skilled labour. If you can do a lot yourself and just ask for a few hours so they can finish it off or check the work, they’re more likely to fit you in.
Historically, I used to run an Iridium sat phone for emails, then switched to the Iridium GO!, which was slightly better, but now I’ve got Starlink broadband.
The hardware cost me £500, and at £250 a month, it’s expensive to run, but you can just get on and get things done.
To save on shore power, I’ve got a DuoGen wind and water generator. Historically, hydro was my best source of electricity – if we were making 6-7 knots for 12 hours a day, that would equal consumption.
Unfortunately, there’s a lot of weed now in the Atlantic, which slows it down.
I’ve also got 12 solar panels. A lot of people fit a gantry for them, but a problem with a Swan is ‘duck’s disease’ – they’re down at the back, so you’re trying to get the weight forward.
I fixed my 12 solar panels to the deck and moved the battery bank to the front of the mast, and we sail so much sweeter in light airs now!
For backup, I have a petrol generator.
Last time I did the ARC+ I only took half a tank of fuel – around 200lt. That was enough for two days, which left another four to Cape Verde, and you’d be very unlucky to have to motor on a tradewind passage.
I’d rather sit and wait for the wind. There’s no point in getting too much diesel because it goes bad if you leave it.
This time I’ve got full tanks because I’m going to the Pacific.
Helen Harbour, together with husband, David, worked hard and saved hard for 30 years before taking on her parents’ boat to sail the world
Frances Louise V was my parents’ boat. She’s an Amel Santorin, a baby of the Amel fleet.
My dad was a scout, and he used to go cycling and read a lot. While at university, he read a book about sailing and convinced some friends, including my mum, to join him on the Broads.
He built a Heron in the early 1960s, and when I came along, he taught me to sail an Optimist and built me a Mirror Dinghy.

David and Helen Harbour sail an Amel Santorin. Credit: Ali Wood
I met David when I was 17. He’d never sailed before, but when my parents took him out on our 28ft wooden boat, he fell in love with it.
That was 1978, and for the next 20 years, we cruised with my parents, did flotillas together, and went dinghy racing.
We sailed with my parents most summers, and during the 1990s, we decided cruising would be the lifestyle for us.
I was a chartered surveyor and David worked in IT. We worked hard and put money aside, and in 2008, we took delivery of a Southerly 110 Silver Dream, which we kept in Hayling Island.
That way, we could sail most weekends and for two or three weeks during the holidays.
Being at MDL Marinas meant we could set off from where we left her, as far west as Plymouth and get to the Scilly Isles, Normandy and Brittany.
We downsized from a big house to a Dutch barge on the Thames near Tower Bridge, and then we sold that and bought a bungalow on the Isle of Wight.

David Harbour first fell in love with sailing on the Norfolk Broads. Credit: Ali Wood
We got rid of our mortgage and just saved and saved. We have a very good financial advisor, so that’s how we managed to retire in 2015 and get the lifestyle we wanted.
We haven’t got any children and we didn’t go on expensive holidays or drive flash cars. We saved hard for this.
Shortly before retiring we joined the Cruising Association and learnt a lot about different cruising areas and bluewater sailing.
Since then we’ve been doing six months on, six months off. We never wanted to sail around the world but, rather, ‘potter’ around the world.
We went up north through the Dutch canals and Frisian Islands to the Baltic and left Silver Dream on Fehmarn off the north coast of Germany after exploring Denmark.
In 2017, and now in their mid-80s, my parents decided to give up sailing so we took delivery of Frances Louise V in Corsica.
That year, we sailed both Silver Dream and Frances Louise V back to the Isle of Wight. The Amel was re-rigged in La Rochelle on the way.
By now, Frances Louise V was 20 years old but was very well looked after. She was only in need of cosmetic changes like upgrading the heads and installing bigger holding tanks to make her ready for bluewater sailing.
We bought new sails and electronics, reupholstered her and revamped the galley.
Being a ketch, the new rig was costly with a wardrobe of five sails – we have more canvas than other people with bigger, expensive yachts, and we don’t go any quicker for it!
But she’s a boat designed for two people to sail around the world, and is well set-up for the tradewinds.
In the seven years we’ve owned her, we’ve done almost 20,000 miles.

David and Helen Harbour saved hard to achieve the bluewater sailing lifestyle they craved. Credit: Ali Wood
After the big refit during 2017/18, we added odd bits each year until 2024, when we bought the new engine, which cost £20,000, including the installation, plus a second autopilot and second fridge.
It’s surprising, though, how the small things add up.
Since we’ve been in Gran Canaria preparing for the ARC+, we’ve been going backwards and forwards to the chandlery spending hundreds of euros each go.
Five new batteries cost €1,900, but then we probably won’t spend anything other than the annual lift-out costs for the next five years or so.
We sailed all over the Baltic, including the Baltic states and to the top of the Gulf of Bothnia – all the way to the Arctic – then over to Shetland and down the west coast of Scotland.
In 2023, we did some of Norway, and then last year, we went around Ireland. We have diesel heating and a 3kW fan heater.
In Norway, we’d stop at these little docks and have one power cable for the boat and one for the heater. We didn’t mind the cold at first, but in the end, we did – when you do it for four or five months and the temperature doesn’t get above 10°C, that’s enough.
We naively thought that if we went to Shetland at the end of June, it would warm up, but it didn’t!
We decided it was time to do the Caribbean and experience more bluewater sailing before we got too old.
We’ve done quite a lot of the Med, but we can always do that on the way back.
Carol Wu is a Hong Kong executive who swapped a career in engineering and construction project management for sailing in the Baltic
The Charles River in Boston is where I learned to sail dinghies as an adult. I was working there one summer, and it didn’t get dark until 9pm.
We’d sail between Longfellow Bridge and Harvard Bridge, which really tested my skills.
I’m from Hong Kong, and stopped working full-time in construction around 2015. I’d been working on infrastructure projects such as tunnels and metro systems, including a stint in post-war reconstruction in Iraq.

Carol Wu is one of a very select group in the ARC – women who own and sail their own yacht. Credit: James Mitchell/ WCC
Now I do non-profit work, helping others to manage projects. I no longer need a nine-to-five job to finance my sailing, which is amazing.
When I left the corporate world, I thought, what am I going to do with myself? I decided I’d do the Atlantic Rally for Cruisers, and realised if I was going to get serious about doing a transatlantic, I should get some experience.
I booked various berths on passages in Norway, Svalbard, Iceland, and on Rubicon 3 from Gosport to Waterford. I did courses and sailed on a lot of other people’s boats, but it became obvious that until I bought my own boat I’d never become a good skipper.
In 2017, I went to Hallberg-Rassy’s annual open house in Ellös, Sweden, to take a look at their new 340 model.
I sailed the only one that was on the water; the others were still being built. It was quite cutting edge for the yard, having twin rudders and no chart table.
I said I’d only have hull number eight as I’m suspicious, and in Chinese, eight is a lucky number!
They told me I had to sign up the following week, and that’s how I came to own Aria Legra.

Carol hopes to have more bluewater sailing adventures. Credit: James Mitchell/ WCC
I’m quite an academic person, having studied both engineering and architecture at university.
Throughout this time I’d been living in Hong Kong and doing courses at Hamble School of Yachting, which is where I met my crew, Peter Hopps.
The training there was very rigorous, and often, I felt very clumsy. I’m sure the instructors were pulling their hair out at this crazy woman who wanted to do the ARC.
Up until two summers ago, I kept Aria in Sweden. It’s one of the most beautiful places to sail, so since the boat was built there, I decided to keep her there.
The second season, I went to Norway, but then Covid struck in 2020, and as Sweden wasn’t locked down I returned there so I could carry on sailing.
When Europe opened up again, I went to Denmark and all along the Swedish coast.

Carol Wu often sails her Hallberg-Rassy with crew Peter Hopps. Credit: James Mitchell/ WCC
In 2022, I was going to do ARC Baltic, but Russia invaded Ukraine, so that was cancelled. Instead, I sailed by myself and sometimes with a crew to Estonia, Finland and the east coast of Sweden.
I could have done the next 10 years without leaving the Baltic – I’m still just scratching the surface – but I said to myself, I better get going on my plan, so here I am, about to cross the Atlantic.
Becoming a boat owner was a steep learning curve. I wanted to do all the courses and learn it all before I owned the boat, but actually, there’s a lot of stuff you can’t learn until you own it.
On sailing courses, you do a little bit of pretend skippering, but there’s always someone watching over your shoulder. Plus, you’re always on a boat with four or five other people, and all the jobs get distributed.
The most daunting thing for me was that from the very beginning, I was short-handed and it dawned on me that nothing I learned at school applies.
How do you get all the lines to slip when you only have one pair of hands? How do you keep the boat to wind to hoist the main?
Peter has his own boat and does a lot by himself, so when he came on board, I was watching everything he did. I was so shocked he was rarely at the helm!
The biggest mindset change from school sailing is to use the autopilot as an extra crew member.
Somewhere along the way I realised I did know what I was doing and got a lot more confident. It took a couple of seasons, though.

Ben Good, 60, swaps Drascombe pottering in the Suffolk estuaries for a “proper 60ft offshore yacht” to cross the North

From Starlink to tradewind sails, first aid and cooking, Ali Wood reports on new and traditional gear for transatlantic sailors

What is the best boat for crossing the Atlantic? Ali Wood asks the owners of two catamarans and two monohulls…

Sailmaker Daryl Morgan gives some expert advice on ocean sails, while Neil Smith explains how his family coped with delaminating…
Want to read more practical articles like How we live the dream: sailors share their routes into bluewater sailing?
A subscription to Practical Boat Owner magazine costs around 40% less than the cover price.
Print and digital editions are available through Magazines Direct – where you can also find the latest deals.
PBO is packed with information to help you get the most from boat ownership – whether sail or power.
Follow us on Facebook, Instagram, TikTok and Twitter
%20100vw,%20300px%22%20data-image-id%3D%2294906%22%20/%3E%3Cfigcaption%3EThe%20Curry%20family%20live%20and%20work%20aboard%20-%20all%20while%20bluewater%20sailing.%20Credit:%20Sarah%20Curry%3C/figcaption%3E%3C/figure%3E%3Cp%3E%3Cstrong%3EThere%20are%20many%20paths%20to%20bluewater%20cruising.%20Here%20boat%20owners%20share%20their%20stories%20with%20Ali%20Wood%20ahead%20of%20their%20transatlantic%20crossings%3C/strong%3E%3C/p%3EThere%20are%20many%20paths%20to%20bluewater%20cruising.%20Here%20boat%20owners%20share%20their%20stories%20with%20Ali%20Wood%20ahead%20of%20their%20transatlantic%20crossings)
Ben Russell adds basic cooking facilities to his motorboat

Having recently finished building Athena, my 18ft motorboat, I’ve been using the boat for day trips around the Firth of Clyde, writes Ben Russell.
As we ventured further, I wanted to have the ability to make a hot drink, heat soup etc on board.
The simplest and cheapest way to achieve this would be with a portable gas camping stove, but several reports in recent years of fires on boats using these appliances means this wasn’t an option for me, plus the fact my insurers will not provide cover for any incidents arising from the use of a portable gas stove on board.
The alternative of a fixed gas installation with a cylinder in a locker which drains overboard isn’t a feasible option in a small boat like mine.
So, using a spirit stove looked to be the safest option and would still provide reasonable performance.
I found a supplier in Europe who stocked a single-burner spirit stove that would be adequate for my needs.
I really wanted a place to mount the stove, with dedicated storage for a 1lt bottle of fuel and a couple of compartments for supplies, plates, cups and basic utensils.
Galley boxes vary in size/shape/design to suit the boat and the crew’s needs and wants.
They can be made in a very basic style, or you can go to town and display your joinery skills.

Try to finish as much as you can before the final assembly. Ben Russell
I had some 9mm plywood and lengths of timber left over from my boat build, so mine would be a simple plywood box glued and screwed to timber cleats.
You could use epoxy/glass tape to hold it together if you prefer and some galley boxes have been built with small angle brackets.
Once I’d made the outer box, I rounded the edges on a router table.
I made the inner partitions and the shelf for the stove as one piece, but didn’t fit it to the carcass yet – it’s much easier to do as much finishing as you can on the bench, before you permanently fit them into place on the boat.
I debated whether to hinge the front opening horizontally or vertically.
The advantage of hinging horizontally is that you have another fold-out surface, but on my boat the galley box will be used while it is sat on the cockpit side benches.
If I’d hinged it this way, I think it’d be more likely to get knocked. It would also have made accessing the small storage space underneath more awkward.
For the lift-off lid, I used some 20x45mm meranti to trim the edges of the ply.
After the usual, tedious rounds of filling and sanding, I painted the galley box and varnished some trim pieces.
To protect the galley box from heat, I used an adhesive-backed, aluminium-faced, glassfibre cloth which was recommended by a specialist textile supplier to be suitable for the job.
One square metre was enough to line the stove area, the inside of the door and the space under the stove.
I’ve lined the underside of the lid too, so it can be used as a tray for hot pans, cups etc.
The adhesive is very sticky, and I found it best to peel off an edge of the backing paper from the fabric, line up the exposed sticky edge with the surface to be covered, and press down the fabric.
I continued to work like this, rather than expose the whole sticky surface all at once.

The finished galley box, painted
and varnished. Credit: Ben Russell
You do get a chance to peel it back and re-apply, but if you get it right the first time, so much the better.
I fitted angle brackets to the stove shelf to keep the stove in place.
For re-fuelling, the stove easily lifts out. I fitted a rubber foot on each corner of the base of the galley box and a silicone pad on the corners on both sides of the lid to prevent slipping.
I’ve fitted a deck eye and a short piece of rope on each side to the back of the box, about 200mm from the bottom, so it can be tied to the boat to hold it in place if necessary.
The aluminium pan clamps needed a single hole drilled through the stove top at a corner, and there is plenty of room underneath for a nut and washer to hold it tight.
The pans sit supported by the pan clamps and don’t roll around when underway.
Wooden carry handles on the sides of the galley box work fine and look good.
I’m very pleased with the finished article.
It’s light enough for me to move around the boat and can be placed on the cockpit seat and tied to the grab rails to keep it still.
The size of the galley box works well for my boat, and the spirit stove works well for my needs.

Gas cookers used to be the standard choice on almost every boat, but there are good reasons why they are…

Ben Russell gets busy constructing his own custom boat shed

Garry Flashman swaps gas for meths to make cooking and a cuppa much safer, easier and cheaper on his replica…

Having already built a dinghy and a dayboat, Ben Russell decided to design and construct an 18ft Selway Fisher Clyde…
Want to read more practical articles?
A subscription to Practical Boat Owner magazine costs around 40% less than the cover price.
Print and digital editions are available through Magazines Direct – where you can also find the latest deals.
PBO is packed with information to help you get the most from boat ownership – whether sail or power.
Follow us on Facebook, Instagram, TikTok and Twitter
%20100vw,%20300px%22%20data-image-id%3D%2294758%22%20/%3E%3Cfigcaption%3EGalley%20box%20contains%20a%20spirit%20burner%20and%20provides%20stowage%20for%20plates%20and%20utensils.%20Credit:%20Ben%20Russell%3C/figcaption%3E%3C/figure%3E%3Cp%3E%3Cstrong%3EBen%20Russell%20adds%20basic%20cooking%20facilities%20to%20his%20motorboat%3C/strong%3E%3C/p%3EBen%20Russell%20adds%20basic%20cooking%20facilities%20to%20his%20motorboat)
AkzoNobel’s International® brand shares expert tips for getting your boat ready for the water this season

Look after the boat, and it’ll look after you. After a winter ashore, there are some spring tasks to schedule before your boat ‘swims’ once more.
It’s a matter of following the three ‘P’s: Preparation, Priming and Protection.
Spring maintenance will always go more smoothly when your vessel is already clean and tidy.
A lack of commitment to seasonal upkeep can even lead in some circumstances to invalidations of insurance policies.
Understanding the crucial importance of spring boat maintenance is vital for achieving peak performance both above and below the waterline.
Spring is the optimum time to rejuvenate your boat.
An initial spring clean is recommended, with a thorough cleansing with International® Super Cleaner. This will sweep off all those salt smears as well as dirt and general grime.
The next stage is to look below the waterline on the hull.
Blisters that may weep a fluid resembling vinegar are osmosis: they require treatment.
Examine the keel and rudder for impact damage, cracks, or where the coating may have become loose.
Should remedial action be needed, select the most appropriate tool for the task of grinding out.
Address the affected areas thoroughly. A proper job here will save time later.
Fully dried out areas after treatment will help you get a great finish.
Visual inspection of the interior is a good idea. For this, ensure proper ventilation in lockers and bilges by opening them up.
A deep clean will almost certainly involve lifting the sole boards (in most cases taking them off the boat completely). Everything has to be left to dry properly.
Time taken over this will allow, for example, paint to have a better grip, and therefore increase the life expectancy of your resulting paint job.
As regards the deck, it’s a case of going over any woodwork with care to determine which surfaces should remain untreated, such as teak decking, and which ones require a refresh, whether that be by varnishing or sealing.
Non-slip deck areas ought to get a good scrub-down.

Should you have identified any cracks or crazing in the gelcoat or paint, then preparatory work is required.
If the gelcoat appears dull or chalky, consider buffing, polishing, or repainting to bring back the shine.
Should any coatings in the bilges and lockers be found to be worn or damaged, take the time to clean and repaint these areas to restore their condition.
Non-slip deck areas will have their durability increased significantly with an application of two coats of Interdeck®.
If you are in doubt about how best to proceed, it is better to seek advice first.
Our advisers are on hand to help you select the most appropriate solutions for hull protection and fouling control.
Factors in this calculation include the quality and condition of the boat.
Evaluate the existing fouling control system; if you notice any peeling paint or excessive buildup, it may be time to remove it.
Select the appropriate fouling control paint that aligns with the specific conditions of your location and the type of boat you have.
When changing brands of fouling control products, consult compatibility charts to confirm that the new paint will adhere correctly.
Primocon® serves as a vinyl-based primer that can be applied over most pre-existing coatings.
Before applying a new fouling control paint, make sure to sand and prepare the surface.
As you will be working underneath the vessel do ensure that you and other maintenance crew are not exposed to any danger.
Protecting your auxiliary propulsion makes common sense: make sure to apply fouling control to your propeller.
Propeller Primer is a fast-drying, single-component primer that boasts outstanding adhesion. This is owing to its Dual-Activated Bonding Technology.
The key attribute is a unified, cohesive coating system.
When used alongside our suggested fouling control, it is designed to withstand dynamic and cavitation forces.
This will safeguard propellers and underwater metals (such as those in transducers and rudder fittings) from the accumulation of fouling. This primer dries quickly and bonds well.
By integrating Propeller Primer with our recommended fouling control solution, you enhance the durability and performance of your propeller, keeping unwanted growth away.
Investing in this combination will help maintain the efficiency of your propeller and prolong the life of your underwater metals.
With the right preparation and products, you can prevent fouling buildup and ensure optimal performance in the water.
Marine life will often be said to select the easiest path to make itself at home on your hull.
But conversely the simplest combination of elements in a defensive system is often the easiest and most effective way to repel that unwanted organic matter.

Your boat’s topsides deserve protection as well! The One UP and Toplac® Plus two-step system from International® offers several advantages.
Firstly, it allows for quicker application, requiring fewer coats to achieve a professional look.
Secondly, it offers superior UV protection, which helps preserve both colour and gloss over time.
The sun’s harmful rays degrade the boat’s skin, in a manner of speaking, so that the shade of paint that originally graced the hull’s topsides may have faded or even become blotchy in places with the passage of time.
The most enamelled-looking solid colours or finishes can, owing to the power of the sun’s light, dim or wash out to the more ‘matt emulsion’ effect.
Lastly, it delivers a smoother and glossier finish, eliminating the need for brush tipping.
To lengthen your boat’s lifespan, boost performance, and enjoy a hassle-free season on the water, check out our full 2025 Boat Painting Guide
Have questions about boat maintenance, coatings, or product recommendations? Our team of experts is ready to assist you in choosing the best solutions for your boat.
%20100vw,%20300px%22%20data-image-id%3D%2295054%22%20/%3E%3C/figure%3E%3Cp%3E%3Cstrong%3EAkzoNobel%E2%80%99s%20International%C2%AE%20brand%20shares%20expert%20tips%20for%20getting%20your%20boat%20ready%20for%20the%20water%20this%20season%3C/strong%3E%3C/p%3ESpring%20Maintenance%20Look%20after%20the%20boat,%20and%20it%E2%80%99ll%20look%20after%20you.%20After%20a%20winter%20ashore,%20there%20are%20some%20spring%20tasks%20%3Ca%20href%3D%22https://www.pbo.co.uk/sponsored/get-ready-for-the-season-with-akzonobels-international-95050%22%3E%26%238230;Continue%20reading%20%26%23187;%3C/a%3E)
Gilbert Park runs aground in a tidal river and tells the story of what happened to him and the boat at the time and later

Heading up the River Rance in Brittany, France, we went slowly in our twin-engined motorboat.
The Rance is a locked river used for hydroelectric generation, and its tides are controlled by the need for electricity and are published in advance.
So because it can get shallow we were cautious, following the port hand markers on a rising tide for our trip to Dinand.
All of a sudden, there was a bump, and the boat stopped; I slid forward on my seat, and the port engine stalled.
We’d hit the side of the channel!

Although Gilbert followed the markers, the channel goes way off to port, towards the beach and his boat ran aground. He wasn’t alone – the yacht pictured is anchored after also running aground. Credit: Gilbert Park
Although we’d followed the channel markers between the red buoy we’d just passed and the next red, the channel actually took a big loop between them.
I restarted the port engine and tried all the techniques for getting off – reverse, my wife Máire moving to the bow, the stern, heeling the boat to the side… nothing worked.
As we were on a rising tide, we decided to have lunch and wait. High tide arrived, and if anything, the water seemed lower, and there was a clear bump where the boat had stopped.
I tried to get the boat off again with no luck.
Then, to add to my woes, the exhaust temperature alarm on the port side exhaust alarm went off, so I stopped the engines.
Time to think about what to do next.
There was no option – strip down to my boxers (not a pretty sight) into the water.
Anchor out and pull resulted in no movement. So time to push.

Exhaust temperature alarm that warned of a blocked water inlet to the engine after running aground. Credit: Gilbert Park
Slight movement was detected, then a bit more pushing and the boat moved a little more and a little more; finally, it seemed we might be able to get off. I climbed back on board and started both engines.
No alarms were heard, and the exhaust temperature was normal so off we went, very slowly.
I thought the previous alarm might be because the engine intake was buried in the mud, so water couldn’t get in.
My wife wiped some of the mud off me and gave me a towel to stand on, so the blood from my cut foot (from either a stone or an oyster shell) wouldn’t get on the carpet.
I put on some clothes as we went through the lock, before arriving at Dinard.
Once moored, a long, hot shower helped with my resuscitation and cleaning the mud off, and a plaster on my foot stopped the torrential (man) haemorrhage.
Clean clothes and it was time to look at the boat.
The port water filter was jammed full of horrible, sticky grey mud that needed to be scooped out into a bucket before the filter basket could be removed and cleaned.

On checking the raw water filters, Gilbert found the one for the port engine completely full of mud. The starboard one had a little mud in it, but still functioned normally. Credit: Gilbert Park
Then, the short pipe to the stopcock was washed out using a hose to ensure it was clear.
The engine was restarted, and water came out of the exhaust.
On the return trip down the Rance, the engine had a brief spell at wide open throttle, and the exhaust temperature was normal, so everything was working normally.
On the way down the Rance, we passed where we’d run aground, and there was another boat at exactly the same spot, obviously aground and anchored.
Presumably, the owner had left it aground, intending to return later, so we were not alone in misinterpreting the route and running aground.
That could have been the end of the story, but unfortunately, it wasn’t.

Gearbox oil was black and took two changes in oil before it was a more normal colour. Credit: Gilbert Park
On the way home, we stopped off in Alderney, and in preparation for crossing the Channel, I checked everything, including the oil level in both gearboxes.
Another bit of bad luck. On the port side, the dipstick sheared off when I tried to screw it in.
I secured it with gaffer tape, leaving a space for the vent in the dipstick to work to be able to get home.
Later, having bought a replacement dipstick, I had to get the threaded part out.
More bad luck. I used a screw extractor but it cut a thread all the way through the dipstick, being as it was made of plastic. A larger extractor had the same result.
Eventually, I removed the remaining part with the tang of a file wedged in it.
However, there was a lot of swarf, and I was unsure if any of it had gone into the gearbox.
Before using the boat again, I decided to change the oil and remove any swarf.
On sucking the oil out I found it was black, presumably clutch material, and I assume that it was caused by running aground.
The starboard gearbox oil was its usual clear straw colour. After changing the oil twice, it was clear.
Finally, some good luck: checking the impeller showed it had not been damaged.
Since then, both the engine and the gearbox have performed faultlessly.
Lessons learned

Gilbert Park installs a temperature monitor and alarm to prevent costly exhaust hose damage in the event of impeller failure

Sailing in shallows means it’s likely that sooner or later you’ll go aground – but if you’ve planned for the…

Perhaps it is inevitable in my long and eventful sailing life that I’ve faced a number of emergency situations. In…

Faith Merrett gets stuck in the mud while cruising from Teddington to St Katharine Docks Marina in Central London aboard…
Want to read more articles like Running aground in a motorboat: a cautionary tale?
A subscription to Practical Boat Owner magazine costs around 40% less than the cover price.
Print and digital editions are available through Magazines Direct – where you can also find the latest deals.
PBO is packed with information to help you get the most from boat ownership – whether sail or power.
Follow us on Facebook, Instagram, TikTok and Twitter
%20100vw,%20300px%22%20data-image-id%3D%2294878%22%20/%3E%3Cfigcaption%3ENever%20underestimate%20the%20consequences%20of%20the%20smallest%20accidental%20groundings.%20Credit:%20Andrew%20Smith/Alamy%3C/figcaption%3E%3C/figure%3E%3Cp%3E%3Cstrong%3EGilbert%20Park%20runs%20aground%20in%20a%20tidal%20river%20and%20tells%20the%20story%20of%20what%20happened%20to%20him%20and%20the%20boat%20at%20the%20time%20and%20later%3C/strong%3E%3C/p%3EGilbert%20Park%20runs%20aground%20in%20a%20tidal%20river%20and%20tells%20the%20story%20of%20what%20happened%20to%20him%20and%20the%20boat%20at%20the%20time%20and%20later)
Ben Lowings shares his tips for dingy cruising around the UK and further afield

Dinghy cruising? I’ve done a fair bit, from family cruising in the 80s with a Mirror dinghy to mucking about in a Bosun near Shepperton.
There are few activities that I could recommend with greater gusto. Ratty’s quote from The Wind In The Willows about the value of boating activity is so well-known it need not be reprinted here.
There are numerous ways to enjoy cruising in a small dinghy; whittled down to 30, even…
1. Read up and plan
You can go dinghy cruising without moving. Perhaps the best way to begin is with a good story, tucked up abed, floating off like Iggle Piggle in the end credits of In The Night Garden, his single lightbulb hoisted on his bare mast (in compliance with Colregs), and snuggling down with a little red blanket.
A recommended entry point to the universe of dinghy cruising literature would be The Lugworm Chronicles. In his book, Ken Duxbury describes taking his Drascombe Lugger from England to the Mediterranean and back.
As the president of the Dinghy Cruising Association, Roger Barnes, says in his introduction to the Lodestar Books edition: ‘It is an exciting story, but not an adventure hopelessly unattainable by the rest of us. No extremes of fortitude nor absurdly large amounts of money were required.’
2. Sort your stowage space

Make sure you can still comfortably sail the boat after stowing all your kit. Credit: Sailpics/Alamy
Thinking about space for your adventure is key. Your craft will need to accommodate your person, primarily (it’s easy when planning to skip over this most important of considerations).
The crew will need seating space, preferably with that ‘wiggle room’ that comes to mean so much on a longer trip.
Buoyancy aids (flotation devices for inland waterways and close inshore work) are bulky in front and behind.
So bear in mind the space between the boom and the deck or gunwales, as you’ll have to bend forward to dip your head under the boom. Chunky foam over your midriff can restrain this.
Hefty buoyancy aids rising from your back have been known to catch on a travelling boom even when it has missed your head.
Differently-abled sailors will require adequate, preferably stable accommodation space.
Ensure any access adjustments don’t compromise safety: for instance, a small craft can have a transom or landing-craft bow that descends like a drawbridge for a scooter or wheelchair to drive abroad.
This door must be absolutely watertight and maintained in line with the latest Maritime and Coastguard Agency recommendations.
3. Organise your funds
Dinghy cruising is less expensive than yachting, if only because there are shorter lengths overall, you are often trailering, and you have a simpler vessel with fewer moving parts.
That said, I’ve been naive very often, and a trip to the Lake District from southern England, for example, cost a lot more than I thought it would.
Factor into your budget the land transfer to the target area. Allow for contingencies in your financial plans.
Budget for meals and accommodation ashore if you don’t fancy camping afloat, and any mooring fees.
A beach might be free if you stay within the tidal range, but if you need to walk inland, you wouldn’t want to be fined.
4. Find a good fit

Consider what type of sailing you would like to do, and whether you will have crew. Credit: Chris Yaxley/Alamy
Different boats suit different missions. When acquiring a boat (perhaps on Boatshed or Woodenships’ small craft, via your local sailing club, Gumtree, Preloved, or even new from the RYA Dinghy Show), think about how easy it’ll be to haul up a slipway or a beach, single-handed.
What kind of effort will you be putting in for your sailing experiences? The economy of effort is a key equation to consider.
What energy you have to expend on a day trip exploring some marshland might be seriously diminished by the effort of hauling your craft into the water in the first place.
Horses for courses is the obvious advice. You don’t need a fully battened composite mainsail for creek-crawling. Short trips don’t need Arctic gale-thickness canvas. Sails should be light.
To find a good fit, think literally as well: Where will the helm sit? Can they reach the sheets and the tiller without leaning over and obstructing something else? Will you have to step over the tiller or dodge around it when you turn? Can you grab the sheets properly when you do this?
Consider your crew. It might be fun for a younger crewmember to pole out a headsail. But trimming even the smallest spinnaker might be unmanageable for them.
5. Get trained

Some training is advisable. Credit: Ali Wood
The RYA dinghy sailing scheme is clearly stratified in its expectations of the candidates for each level of qualification.
You can expect to take a course at an accredited RYA training centre and come away with confidence in your achievement, or a serious assessment of your skill level and professional advice on how to improve.
However, be aware that no qualification is required to sail a vessel of any size and this article has as its focus sailing as the chief joy of dinghy cruising.
If you want dinghy cruising to be free of any programme or assessment, if you want to be free from any racing calendar or dare I say, club duties, then you can.
But wise words here would be never go out alone, and have an RYA-accredited instructor at least give their informal verdict on your sailing skills as soon as you can.
Dinghy cruising is like mountain hiking: usually free (at least if you live next to the hill or have free parking). No power can stop you from running to the top of Ben Nevis barefoot, but you’d be ill-advised to do so, especially in poor weather and bereft of training or experience.
6. Cart it

During the season, you may be able to park your boat at your local dinghy lot, making it even easier to go cruising. Credit: Clive Marsh
A sturdy trailer will be required if you’re transporting your vessel by road.
Consequently, a vehicle with enough horsepower, a towing hook and a light board electrical connection will be needed to shift it.
Trailer tyres should be well-inflated, and the wheels turn true and at right angles to the axle.
A jockey wheel at the trailer apex is worth its weight in gold for that turn to the towing hook, and to aid that lift up to fit the cup onto the hook.
If your road trailer is also your launch trolley, the jockey wheel is wonderful for helping you cart the boat about a dinghy park.
Alternatively, you may be able to ‘park’ your boat in the ‘dinghy lot’ or, if it is fairly large, it can be kept on a mooring during the season.
Alternatives for shifting boats around on land are little carts (like a piano dolly but ‘marinised’), and also don’t forget the merits of rolling a hull towards the water atop a series of fenders.
Eyebrows might be raised at this technique owing to its resemblance to the log train which brought the monoliths to Stonehenge.
Let the observers smirk, for at least on mud you will be spreading the hull’s weight far more effectively than narrow trailer wheels.
7. Trailer to your local slip
Keeping your boat in an off-street parking space or your front garden keeps costs down. Recce your local slip. Scour appropriate information sources for slipway fees.
Consider where there are dedicated spaces for leaving trailers. Do you have to park your tow vehicle in the same zone or a separate one?
How long you spend preparing the boat on shore deserves serious thought. You don’t want to block the ramp for others, but you also want to take care on a slimy concrete slope.
Dinghies are often seen on the slip with mains rigged but jibs left down.
Raising the main when afloat has its disadvantages for stability, although a mainsheet would only be whipping about on a transom horse for a shorter time than if the sail were hoisted on land.
Flailing jib sheets are never good on the slip, not least because they’re at head height for little ones.
8. Go off the beach
Calm days are best for launching from beaches. Beware rip tides, covering rocks, reefs and breaking waves.
Make the tide your ally, and time your trip correspondingly.
Check access to the seafront and find somewhere to leave your trailer (unless you have a friendly tractor or are trying the fender-roller technique).
If you are arriving at a different beach – say one across the same estuary – the same considerations apply.
Ken Duxbury came ashore on one Cornish beach to be told by ‘a lonely traffic warden’ there had been ‘no ‘Arbourmaster since Lord knows when, back-along they was rummagin’ for tin!’
9. Gravel pit
Dinghy cruising is not just about the sea!
A filled-in quarry can accommodate sailors as much as water skiers, divers, canoeists and swimmers…
10. Toilet matters

Green Blue GB320 Portable Toilet
Not to be forgotten in any list of dinghy cruising considerations is the toilet. A larger vessel might take a chemical loo, but a bucket may be more likely.
Ashore, you can set up a tent screen. In wild-camping style, though, you can disappear into the bush with loo roll in a plastic bag and a trowel…
11. Outboard it
A flat, calm day on a canalised river almost begs for a quiet motor. The River Nene in Cambridgeshire, near Market Deeping, is well-sheltered from the Fen surrounding, owing to the high banks of its channel.
The views are extensive, still, and even if you are motoring, it is indubitably serene.
12. Go punting
Not sailing doesn’t necessarily mean motoring.
You don’t need a punting pole, full oars or even a boat hook, the handle end of a telescopic paddle can shunt you from the side of a river or even the bottom if it’s shallow enough.
Dipping under a bridge, the vessel can be directed just fine with handholds on the underside of the structure.
13. Aided paddling
A kayak or canoe can travel well with a wind scoop, an umbrella or a dinghy spinnaker from an upturned oar.
You might even get an assist from a dog, keeping lookout on your foredeck.
Your canine won’t be much use though, when you need to drag the hull across a bunch of reeds to portage from one waterway to another.
14. Grapnel out
Swing your grapnel anchor out to stop for a picnic. Go mudlarking. Sling out your kedge.
A stone wrapped in a Killick Hitch will answer too.
15. Anchor fore and aft
Two anchors, fore and aft, will stop you swinging in a tight space.
This is good for rivers with heavy flow volumes or strong tidal streams.
16. Ghost along
Experience the peace of life afloat by keeping your sails up even when there is absolutely no wind.
The bonus is that the sounds of wildlife and rustling vegetation become more perceptible.
Land smells become more ripe; we cruise to savour such things.
Waggling the tiller or leaning out to roll the boat may be the only option for turning through and away from the wind.
It’s not exactly being caught in irons, but just waddling in almost no wind, going nowhere.
A boom set high on the mast is good for this situation. You can paddle and ‘sail’ at the same time- in which case can you do it without getting your noggin clonked by a boom that’s too low?
17. Picnic
A dinghy can cruise to a sandbank and go aground between tides with less worry than a yacht.
With a boom crutch up and a screen to shield the wind, a methylated spirits stove will be easier to light, and bring you your tea more quickly.
Bear in mind freshwater storage aboard if you plan picnics a lot.
18. Swim

One of the advantages of dinghy cruising is anchoring in shallow water, ideal for swimming. Credit: Charles Erb
Head to a swimming hole, to a beach, to a river mouth… There is magic in this activity… less so when trying to climb aboard again without capsizing the boat.
On an extended cruise, when swimming from the boat, beware that dinghies don’t carry much in the way of first aid items to treat coral cuts or ear infections.
19. Camp under a boom tent

A boom tent can provide shelter for overnight cruises. Credit: Charles Erb
Larger vessels are best for this. A Hawk went up to the top of the Baltic with this as a key accommodation option.
Keeping dry is key as getting the bedding arrangements in order often involves stuffing clothing into corners, wrapping and burying bags.
Squeezing into a ‘coffin berth’ on a smaller yacht has nothing on shuffling your body under a thwart to obtain the maximum flat surface area.
Unlike a tent, a sailing dinghy has a fair number of solid things (blocks, lines, clips etc) that project uncomfortably into your living space.
Unlike a tent, there is little height for mattresses or foam.
20. Camp ashore
With your boat secure (say drawn up on a beach or shingle) you can spend a night under canvas.
Sailors won’t need to wake in the night to check their boats or reset guy lines. Being ashore is more comfortable than afloat (speaking of dinghies) and permits more extended cruising.
21. Cruise in company
The Dinghy Cruising Association is your first port of call for joining one of their excellent rallies.
Apart from the laughter and fireside tales, a cruise in company provides ready assistance for launching and retrieving, tent-pitching, cooking, and even navigation.
22. Solo it
DCA president Roger Barnes says one joyful aspect of solo cruising is ‘monastic simplicity’, and he hits the nail on the head.
Think about boundaries, in terms of wind speeds and cruising grounds.
Remember the comfort factor of having to tend jib sheets while staying on course. Do you need a piece of elastic (bungee good, surgical tubing better) to stabilise the tiller while doing so?
23. Post-race workout
Forget the division between cruising and racing. Race, then keep going after the race finishes!
Hiking out and trapezing is one for the sportier cruisers, maybe…
24. Fish
I’ve never caught anything, but those in the know will take their time and sort out the finest bait suited to the most likely catch.
They will be cruising without any unnecessary sound. The anchor will be dropped, or the boat hove-to, in exactly the right spot, say where the weed streams one way or another for the tide that brings in the shoals this way and that.
They will exercise a great deal of patience. Fishing takes dedication, is all I can say as an observer.
Watching someone else fish is perhaps among the finest of dinghy cruising add-on activities. It is easy to get mesmerised by gazing, at least in the clearer waters of this world, by the colour and tranquillity of the deep.
25. Go gourmet
Too lumpy for a picnic? Out of fuel for your stove? Sandwiches get soggy?
Well, you can pretend that eating alfresco was never the plan. Similar to tip number 20, above, but without the canvas element.
Yes, go ashore at your destination to dine at a restaurant or cafe. You may have to be appropriately attired for the more exclusive establishments – and you may not be able to say you left your credit card in the car – but the arrival of the gourmet dinghy cruiser might be the last word in style.
26. Film reenactment
Peel Island on Coniston Water is the place to go if you want to re-enact Swallows and Amazons, specifically the film of 1976.
The rock harbour of the island (owned by the National Trust, which has forbidden overnight stays) fits two 16ft wooden vessels as if it had been carved out especially for them.
If your crew aren’t keen, then you can always nominate a crewmember as Fletcher Christian and re-enact Mutiny on the Bounty.
27. Head to the Continent
Do it! In the 1950s, a Ford Corsair took Ken Duxbury’s dinghy on a towing trailer to the European mainland.
There were no phone apps to sort him out. Duxbury and his wife had to get their bank manager to “make arrangements to secure cash withdrawals at six selected towns in Greece and Italy”…
“The manager nearly came with us,” Duxbury admits.
28. Go coastal

Creek crawling can be tranquil – here cruising the Pennington Marshes in the Solent. Credit: LecartPhotos/Alamy
A jaunt to the lighthouse in fine weather need not turn into the horror show of the catboat Tina’s Joy in the ridiculous Jaws 2.
But bear in mind how quickly waves can build at sea, and whether you can cope with capsize and righting, perhaps alone if your crew is incapacitated.
Roger Barnes is best placed to speak of the joys of cruising his own dinghy around Brittany.
For him, “meandering between the delightful havens and offshore islands of the Baie de Quiberon” were “days of utter uncomplicated contentment. Only those who have experienced it know the true delight of cruising in a small dinghy.”
In North America, such routes are coming to be called ‘water trails’ and are designed for Canadian canoes that take a small mast and outrigger.
Close inshore cruisers in the UK need to be aware that firing ranges are often located right off the beach.
Patrol boats will ward you off and call you up on VHF radio if you stray…
29. Open water
Wayfarers cruising to Lundy Island come to mind here. It’s something for a long summer day, but some would see it as extreme.
Do you really want to go out of sight of land? Factors for large vessels come into play here.
Crew fatigue is something to bear in mind. Stamina for a long day out needs extending if the day gets longer than intended.
Think about your boat’s ability to steer through waves. Be aware of weather helm, and whether reefing will even be possible in a squall.
Where is your escape route to shore? What are your tactics for staying ahead of the problems? Do you need wetsuits? Handwarmers? Heated cushions?
30. Epic voyage

Sandy Mackinnon with Jack de Crow (the 2nd) – the Mirror dinghy he spent 171 days sailing. Credit: Sandy Mackinnon
Not for the beginner or even the expert, but a trip of hundreds of miles does count as dinghy cruising.
Whether it’s mostly coastal hopping like Sandy Mackinnon in Jack De Crow, or cruising open ocean like Frank and Margaret Dye, high adventure is guaranteed.
Epic missions these days are also certain to raise serious money for charity (eg the Wayfarer Hafren round Britain).
Going to Iceland, going to Norway, going to Greece is extreme, but makes for fantastic tales.
One of my favourites is Ken Duxbury, returning to Weymouth after crossing the Channel, flying his yellow flag for the attention of Customs.

Duncan Kent reviews a selection of new and used trailer sailer boats that are large enough to accommodate crew for…

Sandy Mackinnon sailed the 10.8ft Jack de Crow across the Black Sea and the Mediterranean Sea to fullfil his dream…

Roger Barnes reflects on the legacy of small-boat sailors Margaret and Frank Dye

Trailer-sailers can be stored at home, may not need a motor and can provide cosy accommodation with clever use of…
Want to read more articles?
A subscription to Practical Boat Owner magazine costs around 40% less than the cover price.
Print and digital editions are available through Magazines Direct – where you can also find the latest deals.
PBO is packed with information to help you get the most from boat ownership – whether sail or power.
Follow us on Facebook, Instagram, TikTok and Twitter
%20100vw,%20300px%22%20data-image-id%3D%2294844%22%20/%3E%3Cfigcaption%3EDinghy%20cruising%20has%20many%20benefits.%20The%20boat%E2%80%99s%20size,%20light%20weight%20and%20shallow%20draught%20means%20you%20can%20explore%20areas%20others%20can%E2%80%99t%20reach.%20Credit:%20Stephen%20Dorey/Alamy%3C/figcaption%3E%3C/figure%3E%3Cp%3E%3Cstrong%3EBen%20Lowings%20shares%20his%20tips%20for%20dingy%20cruising%20around%20the%20UK%20and%20further%20afield%3C/strong%3E%3C/p%3EBen%20Lowings%20shares%20his%20tips%20for%20dingy%20cruising%20around%20the%20UK%20and%20further%20afield)
Genevieve Leaper and Aleko Stephan remove the old teak deck on their Nicholson 32 and renovate the original GRP with a new coating

Attractive to look at and a nice feel underfoot, a teak deck is a lovely thing. But even a well-made and well-cared-for deck won’t last forever.
Repairs and re-caulking may extend its life but eventually, the only choices are to remove the teak or replace it.
Aleko had already decided that Beduin’s teak deck must go.
Beduin is a Nicholson 32 built in 1964 which he’s been sailing for nearly 40 years. Aleko fitted the teak deck himself about 20 years ago, and it has weathered many years of Mediterranean sun plus a voyage to South America.
Unfortunately, the polyurethane caulking has been breaking up, letting water in under the teak which causes it to swell and buckle up.
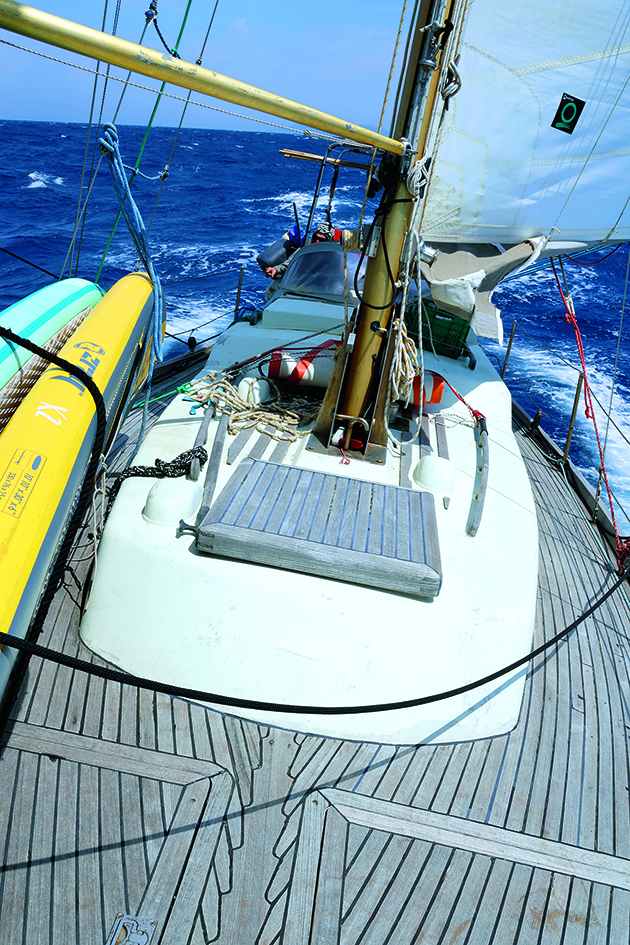
The teak decks on the Nicholson 32, Beduin lasted 20 years before leaks began
The water then finds its way through old screw holes (from an earlier deck) where the polyester filler has come out.
In other words, the deck was leaking; naturally in the most inconvenient places – through the foredeck, shorting out the windlass electrics and from the side deck into the galley lockers.
A short-term fix was no longer working, and the leaks were inaccessible under the planking.
Coincidentally, Aleko’s friend, Sokratis, needed to replace a teak deck on his Najad 320, Peran.
The Najad is a newer boat and, unlike the Nicholson 32, was built with a teak deck. Sokratis’s problem was not leaks but that the teak had worn away.
Water ingress through caulking led to the teak swelling and buckling
Having agreed to supply and cut the teak for Peran, Aleko briefly considered replacing Beduin’s teak deck while they could work on the two boats together.
But it would still be quicker and easier to return to a GRP deck painted with SoftSand coating, just retaining the teak planking in the cockpit.
Two boats, different problems and different solutions, but both benefited by working together -– sharing expertise and tools (and the odd beer at the end of the day!), buying epoxy in bulk and an extra pair of hands for some jobs.
I didn’t expect to be much involved, beyond watching the experts at work, but it turned out there were plenty of jobs for the unskilled labour; sanding, masking, painting and, of course, cleaning up.
Both skippers have plenty of practical experience.
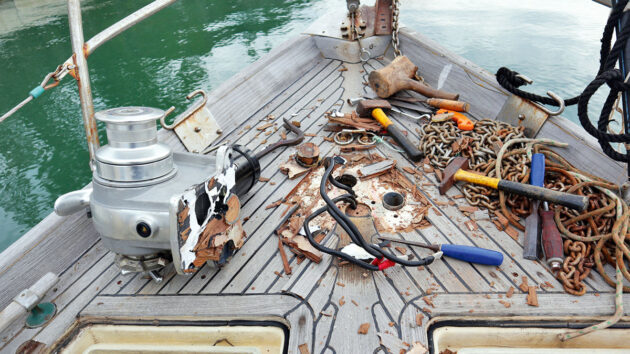
All of the deck gear needed to be removed, including the windlass
Aleko has fitted teak decks on several boats as well as his own. The work was carried out with the boats afloat in Milina harbour in the Aegean, saving the cost of lifting them out at the boatyard.
In the UK, such a project would be unrealistic with the boat uncovered and, even in Greece, spring was the only time to do it, winter being too wet and summer too hot.
Aleko started work on Beduin in the middle of March so we wouldn’t lose too many weeks of cruising time. Peran arrived from Athens about three weeks later.
First, everything attached to the deck had to come off, including the windlass, sheet tracks, mooring cleats and spinnaker sheet pulleys.
In Beduin’s case, even the shrouds had to be detached, one at a time.
Accessing the bolts for the sheet tracks involved dismantling part of the galley and the instrument panel.
Working alone, Aleko undid the track bolts by wedging the mole-grips holding the nut with a screwdriver while turning the bolt on deck.
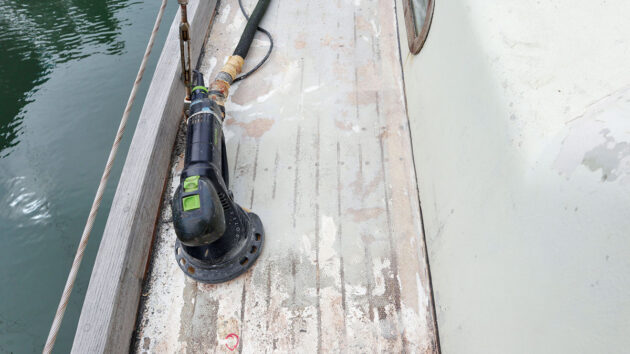
After removing the teak planks, the deck needed sanding
When it came to removing the deck, he started carefully, trying not to damage the planks, but while some came off easily, others planks were stuck down well and had to be broken.
It was hard work with a chisel and, of course, the first of many hours on his knees. Knee pads are pretty essential!
In places with heavy use, such as the foredeck, the teak planks had worn down from 12mm to 6mm, but around 60m was reclaimed, enough for the cockpit seats and some short planks on the other boat.
The boat was built with aluminium reinforcing plates beneath sheet tracks and cleats. As aluminium swells, it corrodes and can break glassfibre.
Although the largest plates were removed 20 years ago, Aleko now found some small plates from the original mainsheet attachment and old foredeck cleats.
After removing these with the angle-grinder, there were about two days of work sanding the deck with P40-grade paper on a powerful eccentric sander.
Dust extraction on the sander is beneficial for environmental as well as health reasons.
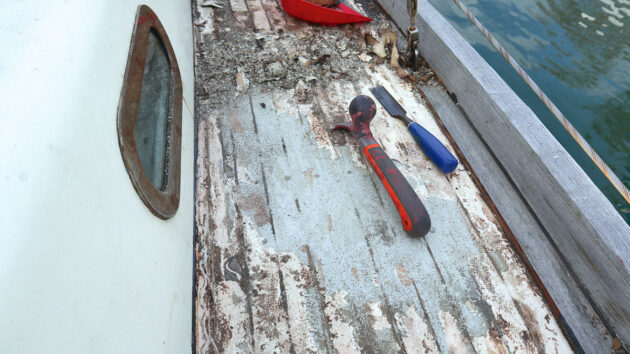
Scraping and sanding the deck was also hard on the knees
There was an awful lot of mess at all stages, and the most used power tool was probably the vacuum cleaner.
Next came the filling and fairing, using epoxy mixed with silica (cheaper than microballoons and strong, but harder to sand – so a mixture would be preferable).
The various holes in the deck for the water tank filler, track bolts etc. would be glassed over, so they needed to be marked for drilling again later.
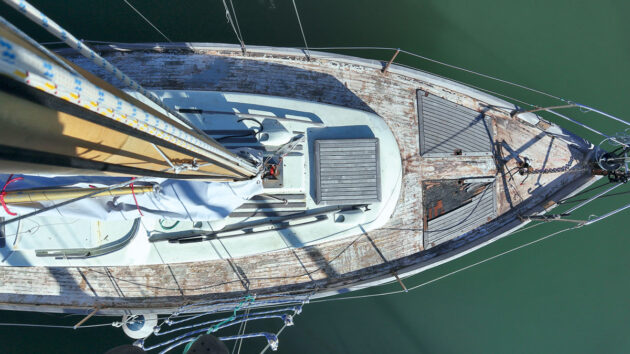
The deck after the removal of teak planks
A red marker pen shows clearly through the glassfibre.
For glassing the deck, Aleko was glad to have a friend to help, especially as Stepke has a pair of electric scissors for cutting the glass mat.
They set up a makeshift table on the quayside for cutting, working in approximately one-metre sections, slightly oversized for trimming later.
The routine was to roll on a layer of epoxy, lay the pre-cut 600gsm glass mat, wet it out and roll again.
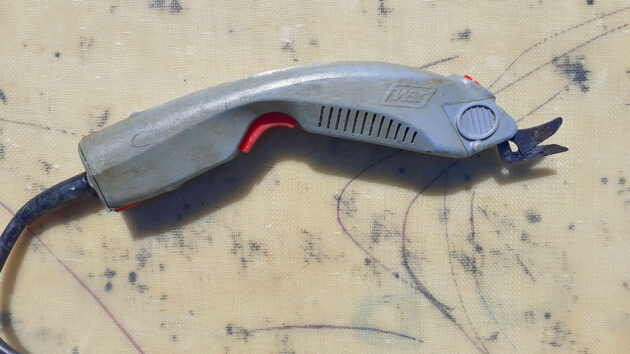
Electric scissors made short work of cutting glass mat
The next morning, Aleko went to check if the epoxy was dry enough to sand. Disaster! The foredeck had not cured at all.
Distracted by a friend coming by to chat while he was mixing that batch, he’d forgotten to add the hardener.
So the whole foredeck section had to be removed and cleaned off; a very messy job.
In any project, there always seems to be one part that takes a disproportionate amount of time.
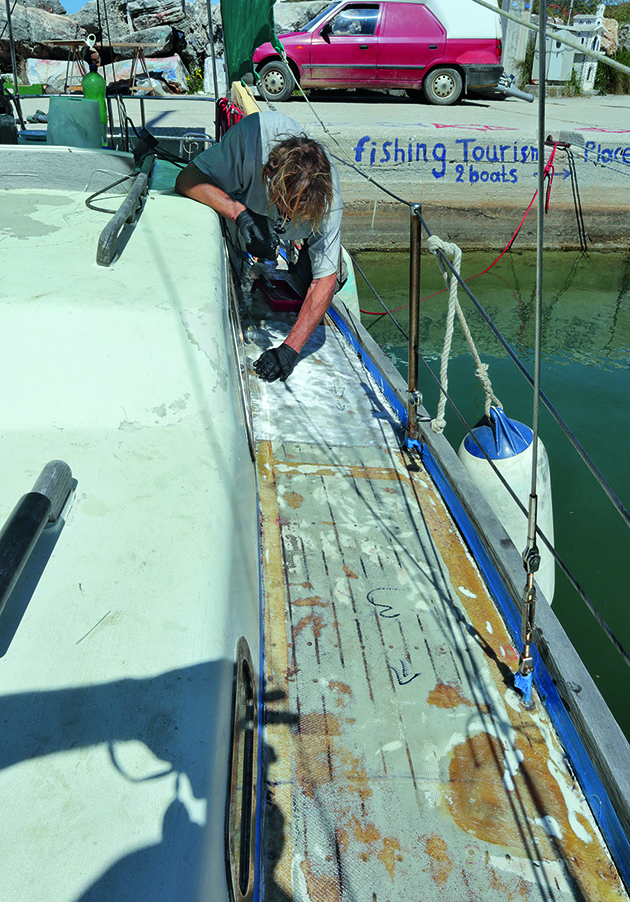
It’s important to ensure you mix the epoxy thoroughly ahead of laying the glass mat
On Beduin, it was the foredeck locker hatches, which had been fitted at the same time as the teak deck.
With the teak covering removed, the edges of the hatches had to be built up for a flush fit with the deck, as well as some filling on the upper surface and refitting of hinges and catches.
I arrived in Greece in early April, just in time for the next round of sanding.
While we took out the worst lumps and roughness with the big sander it was not, the skipper informed me, a professional job.
It would have taken a lot more work to prepare for a new teak deck – which the boat was not designed for – as this requires a very smooth, flat surface with no undulations.
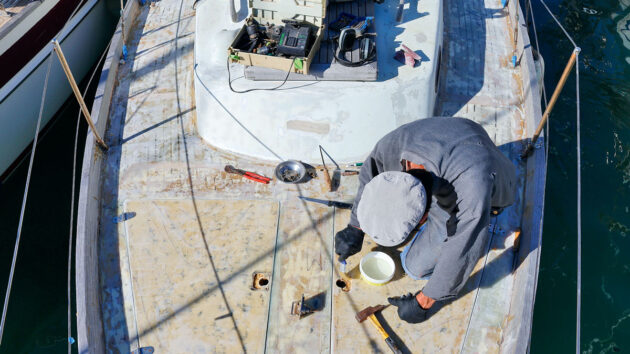
Refitting the foredeck locker catches before applying the SoftSand coating
The last step was drilling the bolt holes for tracks and cleats while the marks were still visible.
While we were painting the decks, it made sense to do the coachroof.
The sides were just fiddly, using a smaller sander around the windows, while the old non-slip on the cabin top was harder work and wore out a lot of sandpaper.
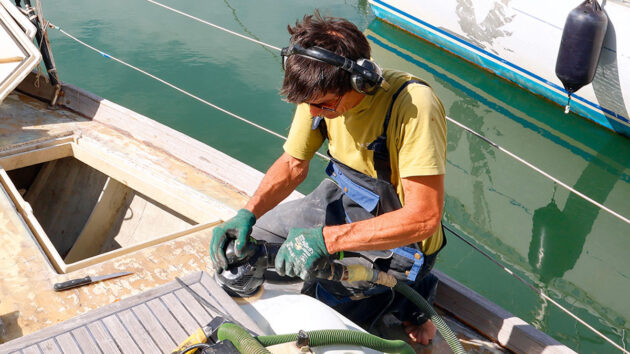
As well as replacing the deck, Aleko also sanded the coachroof – a long job
The cockpit was even worse – it had previously been painted with single-pack paint, so absolutely all the paint had to come off.
After sanding, all surfaces were thoroughly hoovered and cleaned with acetone, before masking off.
SoftSand is a non-slip additive of rubber particles which can be used with paint or epoxy.
We used epoxy as it is cheaper than paint, and we wanted to use medium-grain granules. It can be mixed in, but sprinkling over the wet surface is recommended as the best way to achieve a uniform texture.
The idea is to use plenty and then hoover up the excess once the paint or epoxy has dried.
This can be re-used so a domestic vacuum cleaner was cleaned out for the purpose.
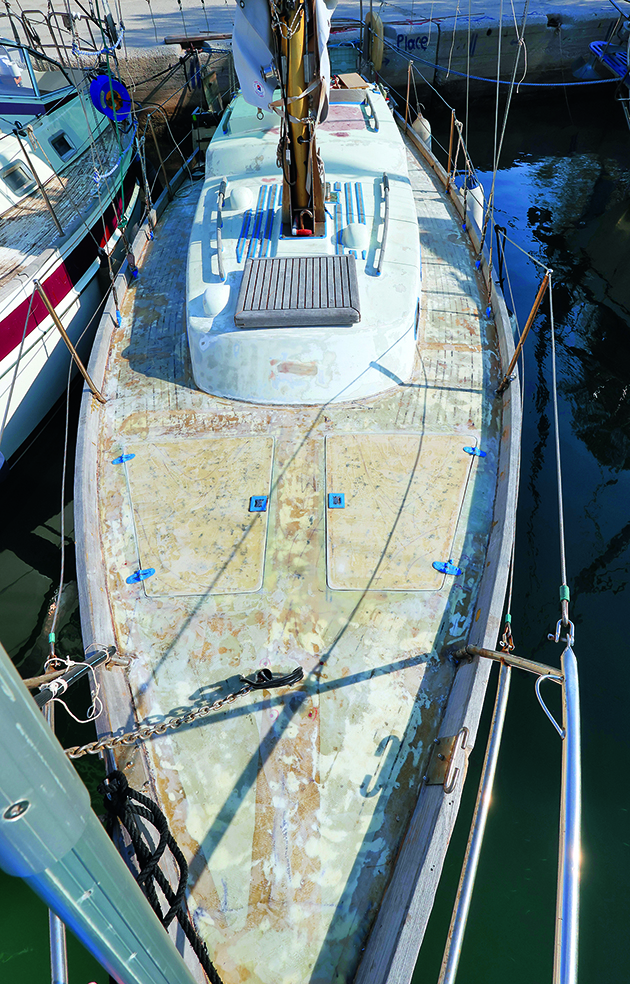
The deck ready for SoftSand coating
It was a hot day, and the epoxy was going off quite quickly, so we mixed only small batches.
The 4lt of SoftSand should have been more than enough (theoretical coverage of 16m2), but it was all gone by the time we stopped for lunch, and the main deck was still not finished.
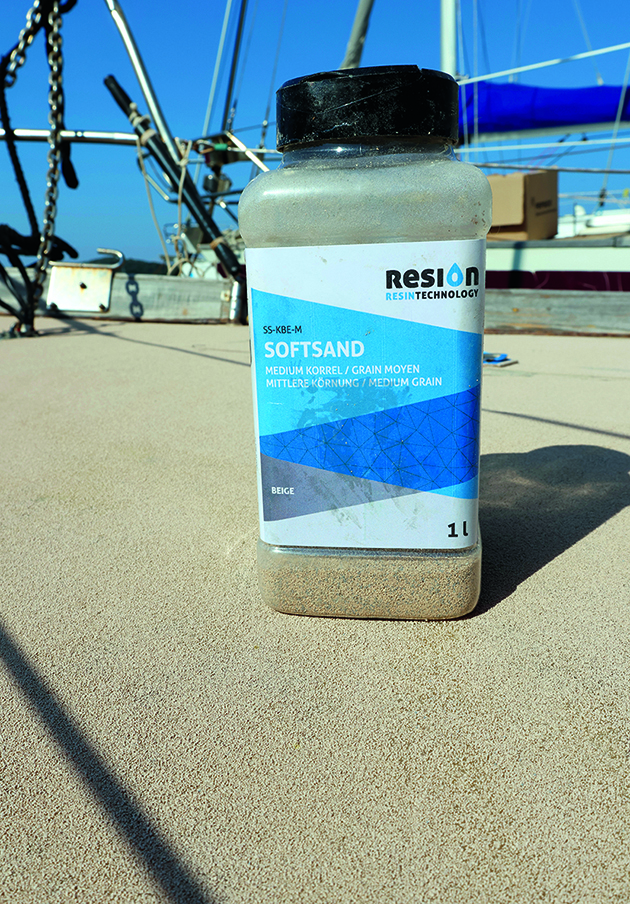
The SoftSand coating was easy to apply and worked well with epoxy, giving a decent finish
We did recover about 30% as expected but had to broadcast it very thinly over the cabin top, leaving out any non-essential areas.
We suspect that epoxy holds more of the particles than paint, resulting in a good thick coat, but perhaps one should allow for a larger quantity.
The other problem was only apparent on hoovering up the loose particles of SoftSand coating when a few bald patches were revealed.
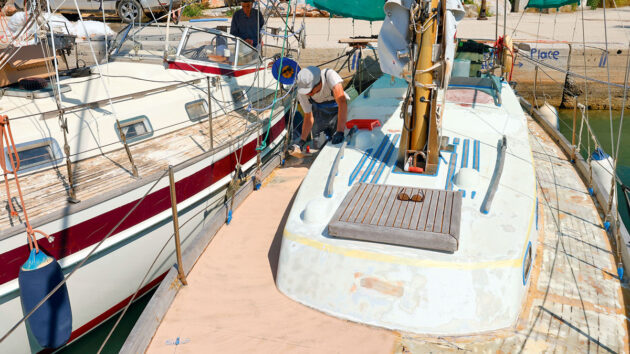
Epoxy soaked up more SoftSand coating than anticipated
Although we thought we’d been thorough with the epoxy, a few slight depressions must have been missed by the roller; this would have been easier to see with paint or a little colour in the epoxy.
It wasn’t difficult to patch up the bits of SoftSand coating we’d missed, but it does show.
There was the usual preparation; cleaning again and masking, before applying two coats of two-pack paint by roller.
Again, despite careful calculations and allowing extra time, we found ourselves running out of paint with not quite enough for two coats all over.
The SoftSand non-skid definitely takes a lot to cover. Also, even after all the hoovering, some grains come off on the roller.
We discovered the hard way not to use the same roller for the cabin sides.
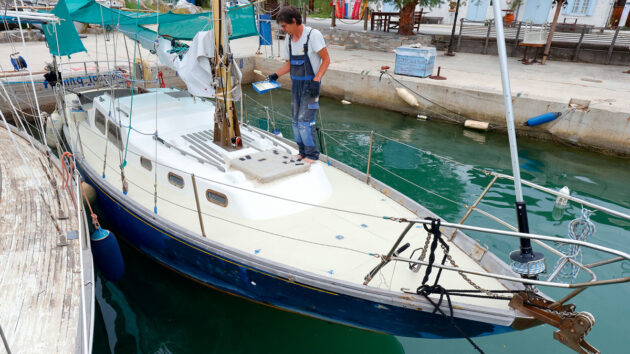
Painting the SoftSand anti-skid. Beduin’s teak-free deck is now closer to original specification
In a hot climate, a light colour is desirable for the decks and it made practical and economic sense to use the same off-white paint all over.
But when we finished, I found the decks too white and we decided a different colour from the coachroof would look better.
Luckily, the wonderful village hardware shop lived up to its sign proclaiming ‘All Kind Store’ with a stock of marine paints.
A 1.5kg pot of cheaper paint in ‘sandstone’ solved our aesthetic problem with another coat on the deck.
Of course, all the fittings taken off the deck had to be replaced. The new deck had a lovely spacious look, it seemed almost a shame to clutter it up with toe-stubbing tracks and cleats!
Unfortunately, it wasn’t just a question of putting things back as they were.
With the thickness of the teak removed, the bolts for the sheet tracks were now too long to access with a socket spanner, so some had to be cut down.
The anchor windlass needed a new teak support plate.
One little mistake caused us a lot of trouble. We had temporarily taped over the bolt holes for the genoa sheet tracks, but the tape didn’t stick well on the SoftSand anti-skid.
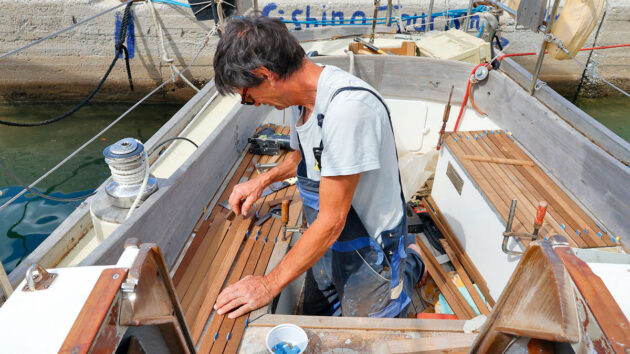
Using offcuts from the old deck, Aleko made new teak cockpit seats
Although heavy rain was forecast overnight, the skipper was confident no water would get in.
Unfortunately, although only one bolt hole leaked it was in the worst possible place.
The next morning, the chart table was awash, with all the boat papers, pilot books, charts and instruction manuals in a soggy lump.
I spent two grumpy days peeling papers apart and drying books page by page, trying not to make comments of the ‘I told you so’ variety, while the skipper continued with more technical operations.
We made sure to get the tracks back on – a two-person job – before the next rain, using plenty of sealant around the bolts.
Quite apart from that little mishap, it took several days of work to get everything back in place.
The one place we really wanted to keep the teak was the cockpit.
Only short lengths were required which could easily be salvaged from the old deck planks.
While Aleko was cutting teak for Sokratis, he ran the old planks through the workshop machines (planer, circular saw, band-saw), before cutting the lengths and fitting them back on the boat.
The corners by the cabin were not flat, so a mix of epoxy with microballoons filler was applied to level the surface.
To glue the planks, both surfaces were coated with a thick paste of epoxy plus microfibres, using a tiling spatula.
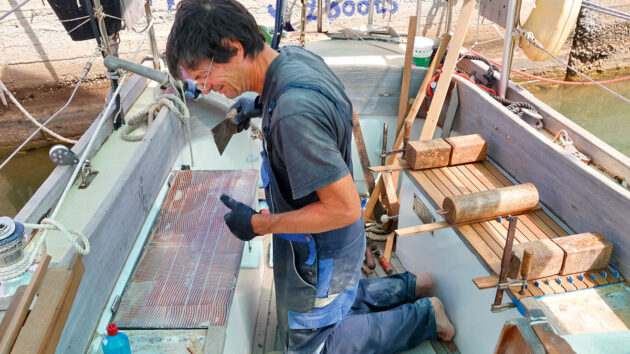
The planks were glued down using epoxy and microfibres before being weighted down
The planks were laid with spacers in between and weighed down until set.
You can’t have too many weights – as well as several 5kg iron weights, lead diving weights and bricks also came in handy.
After masking all the seams in the cockpit I have to confess I was glad we didn’t have a whole deck to do.
After one day of laying the planks, the caulking took another half day, and then, when that was cured (two days in Greece, more likely three in the UK) it could all be sanded.
From the appearance, you wouldn’t know the teak had already been on the deck for 20 years.
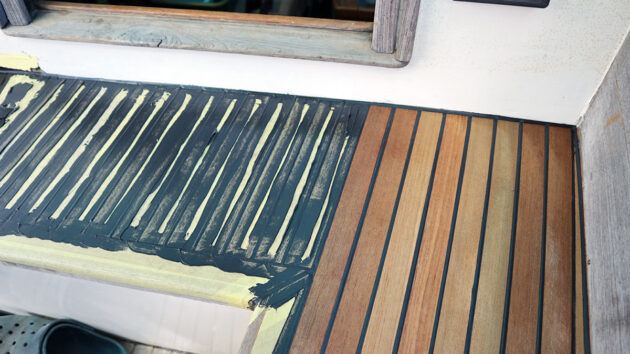
Caulking applied to the cockpit seats; it took two days to fully cure
There was to be no more polyurethane-based caulking, which had been the start of our deck problems.
Although supposed to be UV resistant, it does deteriorate in the Mediterranean climate, sometimes going sticky like tar in the sun, or brittle and crumbling.
Sokratis had chosen a silane polymer after some research, and Aleko was happy to use the same.
The teak forehatch was still in good condition, it just needed recaulking.
We’d already scraped out the old caulking so it could be done at the same time as the cockpit, along with sealing around the cockpit coaming.
With her low freeboard, Beduin takes a lot of water on deck, which tends to ooze under the coaming onto the cockpit seats.
A minor detail compared to leaking decks, but who wants a wet backside when otherwise comfortably dry under the sprayhood?
After six weeks, the SoftSand deck was finished, and it was time for the skipper to tidy his tools away before a major clean-up.
Absolutely everything inside the cabin, as well as in the deck lockers, was covered with an unhealthy mix of epoxy and teak dust on top of the usual winter grime.
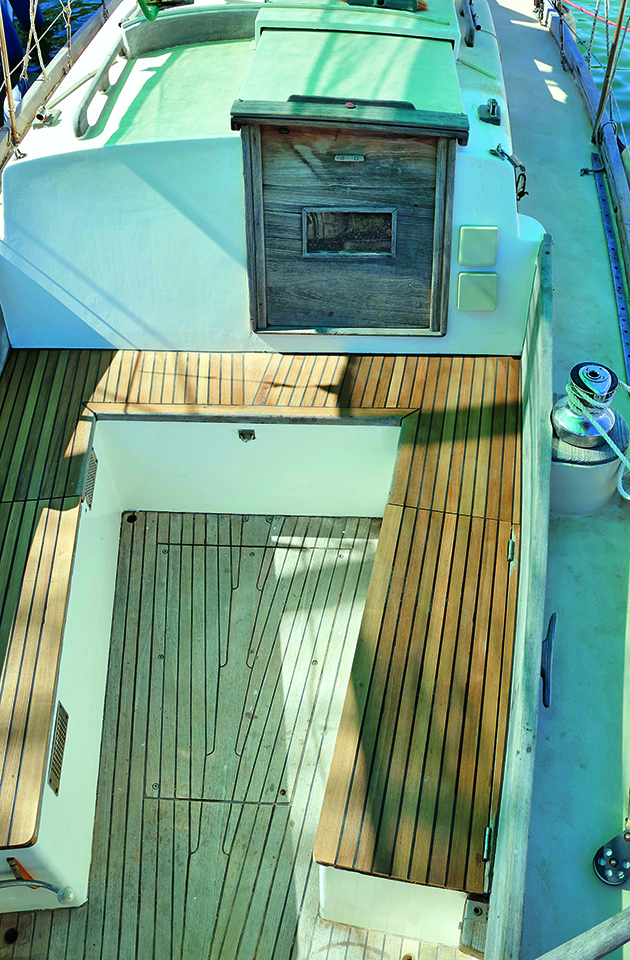
The finished cockpit seating
On deck, the recent rain coming from the south had also left a coating of orange Sahara dust on our new paintwork.
Finally, we were ready to go cruising and put the new deck to the test, leaving Sokratis to enjoy his planking.
While I loved the teak, we have very quickly got used to Beduin’s new look.
The SoftSand coating is effective non-slip and kind to bare feet.
It’s not quite so nice for kneeling or sitting on so I’m glad we kept the teak in the cockpit.
Best of all, we have a dry boat with no leaks. There is still the cockpit floor to be done, and she’ll have to come out of the water at some point for work on the hull – but now is for sailing.

PBO reader Les Broughton is struggling to glue his teak planking to the fibreglass in his cockpit. Boat builder Lyndon…

First, they removed the old caulking between the planks using a Bosch Palm Router and pinned a guide into the…

With the eye-watering cost of teak, Andy Pag decides to lay bargain EVA foam decking in the cockpit of his…

Anti-slip decks are vital for safe sailing, with a wide range of attractive, long-lived, and sustainable coverings available. Jake Kavanagh…
Want to read more practical articles like How to coat a GRP deck with SoftSand non-skid?
A subscription to Practical Boat Owner magazine costs around 40% less than the cover price.
Print and digital editions are available through Magazines Direct – where you can also find the latest deals.
PBO is packed with information to help you get the most from boat ownership – whether sail or power.
Follow us on Facebook, Instagram, TikTok and Twitter
%20100vw,%20300px%22%20data-image-id%3D%2294790%22%20/%3E%3Cfigcaption%3EThe%20new%20SoftSand%20non-skid%20coating%20on%20Bedouin.%20Credit:%20Photos:%20Genevieve%20Leaper%20and%20Aleko%20Stephan%20%3C/figcaption%3E%3C/figure%3E%3Cp%3E%3Cstrong%3EGenevieve%20Leaper%20and%20Aleko%20Stephan%20remove%20the%20old%20teak%20deck%20on%20their%20Nicholson%2032%20and%20renovate%20the%20original%20GRP%20with%20a%20new%20coating%3C/strong%3E%3C/p%3EGenevieve%20Leaper%20and%20Aleko%20Stephan%20remove%20the%20old%20teak%20deck%20on%20their%20Nicholson%2032%20and%20renovate%20the%20original%20GRP%20with%20a%20new%20coating)
Charles Beddingfield finds a way to stay level on a drying mud mooring

Bilge keels on Tudor Rose are not full depth so that on her half tide Beaumaris mooring the boat cants over 15° when the tide goes out, writes Charles Beddingfield.
This is not a disaster but irritating if staying aboard at moorings. I didn’t want to fit legs so we had to find something else.
The solution came to me one day when I saw Roger Wilkinson’s Cornish Shrimper beached at Gallows Point – mud feet – and I quickly knocked up a pair of boat feet out of scraps.
The boat feet had to be hooked onto the bilge keels by pushing them underwater with a boat hook, feeling for position.
With a much bigger footprint than legs, they worked well, but like legs, they had to be removed and refitted before and after every cruise which became tiresome.

The Tudor Rose. Credit: Charles Beddingfield
They also cluttered the deck while under way and were prone to being dragged adrift in my absence no matter how tightly I swigged up the guy ropes.
I concluded that although fine for occasional use on a boat normally kept in deep water, this type of foot was less suited for frequent use.
I contemplated making new, deeper bilge keels, but that would be no mean task, so I opted for a ‘temporary’ compromise that could be made quickly from materials I had mostly to hand.

The original mud feet for Tudor Rose, made from wood scraps. Credit: Charles Beddingfield
The more streamlined Mk2 foot is bolted semi-permanently in place, saving the bother of fitting and removing for every cruise and eliminating the dislodging issue; they are still easily removable.
They are not perhaps the prettiest objects, and I expect they knock a quarter of a knot off Tudor Rose’s top speed, but by golly, they do the job.
Besides, I hardly ever go at top speed anyway. My object in boating is to enjoy being out there playing boats.
I go by land if I want to get somewhere in a hurry.
The sketch (below) and photos show the gist of things.

Charles Beddingfield’s sketch of his mud feet
The oval-shaped boat feet flare out at the bottom so they have enough footprint to be effective yet readily shed mud picked up from the bottom.
They are likely to take some knocks, so there is no point in using expensive top-grade wood – anything hard will do.
The sole should be rounded or veed so that on hard ground, the foot is not strained by bearing on one edge.
The foot and extension parts are fastened together with two 8mm stainless steel studs.
The elliptical plywood cheeks have a bevelled edge to improve water flow.

The parts for the streamlined Mk2 boat feet. Credit: Charles Beddingfield
They are screwed to the extensions with seven hefty stainless steel woodscrews, and the whole assembly is bolted to the bilge keel by four 12mm stainless steel through bolts placed so as not to interfere with existing keel bolts.
No modification was required to the existing bilge keels.
In case of some dreadful clash with rocks, I think this construction might allow the mud feet to be safely ripped off without threatening the actual bilge keels.
The Tudor Rose is antifouled in Coppercoat, so I have also applied it to the mud feet.
Large stainless steel washers with plastic isolators under bolt heads and nuts prevent contact between the two metals.

The Coppercoated boat feet ready for installation on Tudor Rose. Credit: Charles Beddingfield
With hindsight, the foot parts might be better faired for water flow, but in profile the extensions as a whole are shaped with sloping ends so that they will not snag a rope in the water even if it passes right under the boat – an important factor given all the reports of fouled propellers due to entanglement with lobster pots.
The boat feet are made only slightly shallower than the central keel so that on mud, Tudor Rose generally sits bolt upright; on a hard surface such as a beach she lies at a very slight angle with one foot a couple of inches clear of the sand so that the feet only bear the balancing weight.
Should I move to a deep water port the feet can be easily removed and the bolt holes plugged.
My ‘temporary’ mud feet have so far survived several seasons.
They have the disadvantage that, like twin keels, they prevent deliberately biasing the boat to lean uphill on a slope, or inward against a quay, but all things considered, they are far more convenient than legs.
Despite their crude appearance, I’m well satisfied with the result.
Material sources
Faith Merrett gets stuck in the mud while cruising from Teddington to St Katharine Docks Marina in Central London aboard…

Gilbert Park shares his tips for allowing motorboats to dry out safely
Having already built a dinghy and a dayboat, Ben Russell decided to design and construct an 18ft Selway Fisher Clyde…
Gilbert Park undertakes some training for riding out heavy seas and wind in his Mitchell 28 – but first has…
Want to read more practical articles?
A subscription to Practical Boat Owner magazine costs around 40% less than the cover price.
Print and digital editions are available through Magazines Direct – where you can also find the latest deals.
PBO is packed with information to help you get the most from boat ownership – whether sail or power.
Follow us on Facebook, Instagram, TikTok and Twitter
%20100vw,%20300px%22%20data-image-id%3D%2294742%22%20/%3E%3Cfigcaption%3EThe%20Mk2%20mud%20feet%20do%20produce%20drag%20when%20Tudor%20Rose%20is%20under%20way%20but%20make%20life%20on%20board%20more%20palatable.%20Credit:%20Charles%20Beddingfield%3C/figcaption%3E%3C/figure%3E%3Cp%3E%3Cstrong%3ECharles%20Beddingfield%20finds%20a%20way%20to%20stay%20level%20on%20a%20drying%20mud%20mooring%3C/strong%3E%3C/p%3ECharles%20Beddingfield%20finds%20a%20way%20to%20stay%20level%20on%20a%20drying%20mud%20mooring)
Addressing the Limitations of Pyrotechnic Flares

For decades, handheld pyrotechnic flares have been an essential component of maritime distress signalling, alongside radios, EPIRBs, PLBs, and rocket flares. However, they present significant drawbacks:
Electronic Visual Distress Signals (EVDS) have been introduced as a safer, more sustainable alternative to flares. However, current EVDS models do not meet the International Maritime Organization (IMO) light intensity requirements for distress signalling. The Maritime and Coastguard Agency (MCA) has stated that no EVDS currently meets the required brightness level of 15,000 candela to replace handheld red flares.
The primary issue with traditional EVDS is light intensity. Many models attempt to distribute LED-generated light in all directions (360° or across a hemisphere), reducing their effective brightness to approximately 100 Candela—suitable only for short-range visibility at night. Achieving sufficient brightness for daytime operation using this approach is impractical due to excessive energy demands.

Ultraflare Daylight was designed to overcome these challenges using a directional beam architecture, optimising visibility while conserving power. Key innovations include:


The Royal Yachting Association (RYA) has recognised EVDS as a valuable tool for final-mile locating but notes that current regulations still favour pyrotechnic flares. The MCA states:
“It is not aware of any EVDS product which meets the light intensity required by the IMO for distress flares. This means that if your commercial vessel is required to carry flares, they cannot be an EVDS product. . . Where carriage of flares is not mandatory, the MCA nevertheless advises that EVDS should not currently be carried as a substitute for conventional pyrotechnic flares . . . However, for pleasure vessels, seagoing commercial vessels, and most non-seagoing commercial vessels, EVDS may be carried in addition to the required distress signalling equipment and used to identify location or transmit the S-O-S distress signal.”
Given that Ultraflare Daylight meets the necessary light intensity requirements, it stands to reason that it could be accepted as part of evolving regulations.
For pleasure vessels under 13.7m, Ultraflare Daylight is a practical day and night alternative to red hand flares and orange smoke signals, aligning with RYA guidance on distress signalling. It is also highly suitable for kayakers, paddleboarders, and PWC users who require a compact, powerful, and long-lasting distress signal.
For larger vessels (13.7m+) and commercial operators, traditional flares remain mandatory. However, as the industry moves towards safer and more sustainable alternatives, non-pyrotechnic solutions like Ultraflare Daylight are likely to gain regulatory recognition in the near future.

Make sure your vessel is prepared for the future of marine distress signalling. Learn more at www.ultraflare-daylight.com.
%20100vw,%20300px%22%20data-image-id%3D%2294501%22%20/%3E%3C/figure%3E%3Cp%3E%3Cstrong%3EAddressing%20the%20Limitations%20of%20Pyrotechnic%20Flares%3C/strong%3E%3C/p%3EFor%20decades,%20handheld%20pyrotechnic%20flares%20have%20been%20an%20essential%20component%20of%20maritime%20distress%20signalling,%20alongside%20radios,%20EPIRBs,%20PLBs,%20and%20rocket%20%3Ca%20href%3D%22https://www.pbo.co.uk/sponsored/ultraflare-daylight-a-breakthrough-in-marine-distress-signalling-94498%22%3E%26%238230;Continue%20reading%20%26%23187;%3C/a%3E)
John Tylor brings some cast-off tarnished brass light fittings back to shiny life

A couple from our sailing club had just taken delivery of a new (to them) catamaran and could not wait to show it off to the members.
The boat was beautiful, but improvements were needed, including replacing the dull brass electric lamps distributed throughout the cabins.
Destined for the junk pile, they were basically in excellent condition, but the years in the sea air had tarnished them to an unattractive dull brown/grey.
Over time, the clear lacquer had broken down, allowing the salt air to do its worst. So they were just right for a winter project.
Easy, I thought, remove the clear coating, polish it up, spray on another coat of lacquer, and the brass will glow like new gold!

The mini-tool was slow but proved to be the best finishing combination to clean tarnished brass. Credit: John Tylor
Well, the job required a little more effort than I first thought.
I’d been doing a lot of brass restoration on a project at the Australian National Maritime Museum, where I work as a volunteer.
There, we use a chemical paint stripper to soften the old lacquer then scrape the residue off with a razor blade.
Unfortunately, that process didn’t work on these lamps.
The coating was very difficult to remove; paint stripper didn’t work and neither did acetone, which usually softens most coatings.
Carefully scraping with a razor blade only removed small amounts and risked marking the brass – this old lacquer was hard.
Very fine wet-and-dry paper was only partially successful, and I couldn’t resort to heat as it would have damaged the wiring and plastic parts.
I don’t have a bench grinder with a buffing wheel, so I bought a small battery-powered mini-grinder.
This came with a selection of grinding wheels and sanding discs, but the most successful combination was using a polishing wheel with a tub of multipurpose paste cleaner from the kitchen to just wear the stuff off.
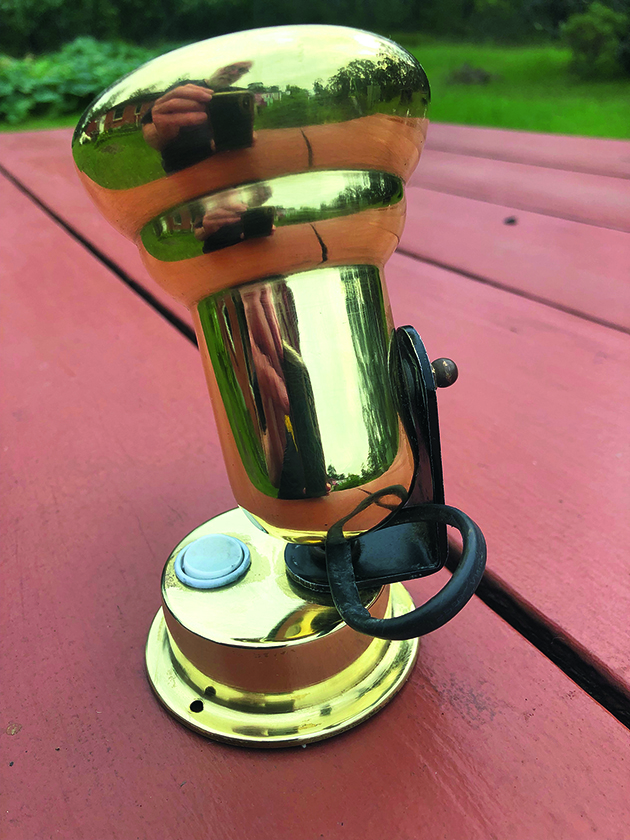
John’s method to clean tarnished brass worked a treat! Credit: John Tylor
By adjusting the speed of the tool, this was just gritty enough to remove most of the stubborn residue.
Once the old lacquer had finally been removed – carefully to avoid damaging the plastic switch – I found that a well-worn green scouring pad worked well in removing the last of the residue without leaving deep scratches.
Finally, a polishing cloth and Brasso finished the job off, leaving a beautiful mirror shine.
The final job was to spray on a few coats of new lacquer.
Was it worth it? Yes, for the sense of achievement in restoring an otherwise serviceable light and seeing the beautiful shine.
It was a lot of effort but what else to do when the TV offered nothing and the weather was too bad to get to the boat?

Applying corrosive acid to magically clean or loosen a boat part sounds tempting - but caution is required, as Andy…

Andy Pag takes the plunge to clean his boat’s dirty bottom while afloat

Richard Barnard braves the mess and overcomes key challenges for the satisfaction of a clean fuel tank, free from sediment…

With a half-empty liquid-filled steering compass and no obvious sign of a leak, Norman Eastwood decided it was time to…
Want to read more practical articles like How to clean tarnished brass?
A subscription to Practical Boat Owner magazine costs around 40% less than the cover price.
Print and digital editions are available through Magazines Direct – where you can also find the latest deals.
PBO is packed with information to help you get the most from boat ownership – whether sail or power.
Follow us on Facebook, Instagram, TikTok and Twitter
%20100vw,%20300px%22%20data-image-id%3D%2294726%22%20/%3E%3Cfigcaption%3EThe%20brass%20lamp%20was%20tarnished%20so%20John%20set%20about%20to%20find%20the%20best%20way%20to%20renew%20the%20shine.%20Credit:%20John%20Tylor%3C/figcaption%3E%3C/figure%3E%3Cp%3E%3Cstrong%3EJohn%20Tylor%20brings%20some%20cast-off%20tarnished%20brass%20light%20fittings%20back%20to%20shiny%20life%3C/strong%3E%3C/p%3EJohn%20Tylor%20brings%20some%20cast-off%20tarnished%20brass%20light%20fittings%20back%20to%20shiny%20life)
13 of the Mini Globe Race entrants are now racing towards Fiji in their 19ft plywood boats, a further two skippers are expected to be underway by next week

It is 7,200 miles from Panama to Fiji, and the solo skippers in the Mini Globe Race fleet will need to dig deep if they are to finish the longest of the five legs in the 26,000-mile race.
But, they will not need to do it all in one sitting; the toughest will be the 4,700-mile passage from Panama to the Marquesas Islands, with strong currents and light winds to negotiate before the entrants reach the south east trade winds.
After an eight-day stopover, this will be followed by a 500-mile passage to Papeete, Tahiti and another seven-day pitstop before the 1,500-mile crossing to Pangai, Tonga.
After eight days, the fleet will then make the final 500-mile push to Vuda Marina, Fiji, where the first skippers are expected to arrive in late May/June.
Leg 2 began on 25 March, and already, Swiss skipper Renaud Stitelmann is leading the pack aboard his Globe 5.80, Capucientte – as he did for Leg 1.

All smiles from Spanish entrant Pilar Pasanau, who now has a new Hydrovane to help her race to Fiji. Credit: Mini Globe Race
Stitelmann, who won the 2024 Globe 5.80 Transat, chose to sail closer to shore to make use of the down draught from the hills, which helped him ease into the lead, although Australian Dan Turner is currently just 1nm behind him.
Turner had hoped to have reinstalled his headsail furling gear during the stopover in Panama after the turnbuckle on the forestay came undone. Instead, he will now have to race to Fiji with a hanked jib.
Behind the lead pack is a group led by Spanish sailor Pilar Pasanau, with Christian Sauer, Dan Turk, Jakub Ziemkiewicz, and Adam Waugh.
Pasanau has installed a new Hydrovane windvane self-steering system on her boat and can now make use of a new asymmetric spinnaker after struggling in Leg 1.
Canadian Dan Turk, sailing Little Bea, had a far-from-easy start. On the first night, he had to radio for assistance after the battery on his electric outboard engine suddenly drained from 70% power to zero.
Caught in light winds and strong currents, Little Bea was being pushed towards the rocks, and Turk had to seek assistance from his nearest rival, Christian Sauer, who sailed back 1.5 miles to tow him to safety.
But the biggest frustration in the fleet is being faced by British sailor Keri Harris, who, along with Jasmine Harrison, missed the official start of Leg 2 due to logistical issues. The Mini Globe Race fleet had to be transported over land from the Atlantic side of Panama to the Pacific side for the start of Leg 2, as the boats are too slow to transit the Panama Canal, and the €55,000 maritime tow fee was too costly.

The Mini Globe Race fleet had to be shipped by road from the Atlantic to the Pacific side of Panama for the start of Leg 2. Credit: Mini Globe Race
Harris’s Origami was one of the last boats to leave the marina at Colon, along with Jasmine Harrison’s Numbatou, and so was forced to start Leg 2 12 hours behind everyone else.
He has also had to do some serious maintenance on his Globe 5.80 in Panama after the boat was knocked down “to a capsize position” off Colombia during Leg 1, destroying two solar panels and damaging the electronics.
Harris, who was wearing a helmet at the time of the knockdown, spent time pumping out 600 litres of water from the boat and then drying it out as he raced towards the Leg 1 finish line, finishing in second.
Writing on his official Facebook page, he said: “..I am pushing hard to catch the pack. I think I might have solved the Wind Pilot problem – but my Simrad tiller pilot is now dead. I hope it is not going to be 40 degrees C every day because I am feeling pretty frazzled tonight. I just had to douse the A3 spinnaker in a squall, but will push hard again once it passes. At least the Starlink Mini works.”

The Mini Globe Race skippers – many have helped each other get ready for Leg 2. Credit: Mini Globe Race
Two sailors are still in Panama and should leave in the next day or so.
Mike Blenkinsop is no longer racing, but will cruise the Pacific to Fiji, then on to Australia.
His son John Blenkinsop has a “Green card” and is racing, but plans to sail in support with his father for now.
The Mini Globe Race fleet is expected to take 45-55 days to reach the Marquesas Islands
Mini Globe Race 2025: Leg 2: Panama to Vuda Marina, Fiji on 28 March 2025 at 1700 UTC
Renaud Stitelmann, Capucientte
Dan Turner, Immortal Game
Pilar Pasanau, Peter Punk
Christian Sauer, Argo
Dan Turk, Little Bea, 9d, 2h, 47m, 23s
Jakub Ziemkiewicz, Bibi
Adam Waugh, Little Wren,
Ertan Beskardes, Trekka
Jasmine Harrison, Numbatou
Eric Marsh, Sunbear
Josh Kali, Skookum
Keri Harris, Origami
Gary Swindaill
Yet to start racing
John Blenkinsop, Delja100, 10d, 0h, 18m, 33s
Retired
Mike Blenkinsop, Delja99

Swiss sailor Renaud Stitelmann, who won the Globe 5.80 Transat, has taken Leg One of the Mini Globe Race 2025

14 skippers have crossed the start line of the Mini Globe Race 2025, with the first leg taking entrants from…

15 skippers are expected to leave Antigua to sail around the world in the Mini Globe Race 2025, aboard 5.8m…

British skipper Keri Harris is determined to take victory in the Mini Globe Race 2025. He shares how he is…
%20100vw,%20300px%22%20data-image-id%3D%2294936%22%20/%3E%3Cfigcaption%3ELight%20winds%20were%20the%20feature%20of%20the%20start%20of%20Leg%202.%20Credit:%20Mini%20Globe%20Race%3C/figcaption%3E%3C/figure%3E%3Cp%3E%3Cstrong%3E13%20of%20the%20Mini%20Globe%20Race%20entrants%20are%20now%20racing%20towards%20Fiji%20in%20their%2019ft%20plywood%20boats,%20a%20further%20two%20skippers%20are%20expected%20to%20be%20underway%20by%20next%20week%3C/strong%3E%3C/p%3E13%20of%20the%20Mini%20Globe%20Race%20entrants%20are%20now%20racing%20towards%20Fiji%20in%20their%2019ft%20plywood%20boats,%20a%20further%20two%20skippers%20are%20expected%20to%20be%20underway%20by%20next%20week)
Sail training providers across the UK are warning the cost of proposed changes to the Maritime and Coastguard Agency’s (MCA) Sport and Pleasure Code of Practice’ could have a ‘devastating’ impact on the services they deliver.

The new MCA Sport and Pleasure Code of Practice aims to meet the rapidly changing needs of the small commercial vessel sector used for sport or pleasure, and sets out the legal and safety requirements.
The MCA is now reviewing responses following a 12-week consultation period. The Ellen MacArthur Cancer Trust was among the sail training providers to urge supporters to have their say and ‘help protect the future of our sailing adventures.’
The Ellen MacArthur Cancer Trust said in a statement: “While we support safety improvements, some changes could bring significant costs – limiting how many young people we can help.”

The Ellen MacArthur Cancer Trust inspires young people aged 8-24 to believe in a brighter future living through and beyond cancer. Credit: Martin Allen Photography
Key concerns surrounding the Sport and Pleasure Code of Practice (among other points) the Ellen MacArthur Cancer Trust is asking the MCA reconsider are:
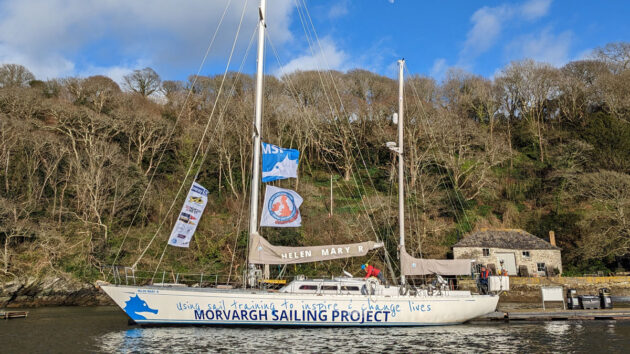
Helen Mary R sails best with teamwork, communication and resilience, on deck and below
The Morvargh Sailing Project, which provides youth development opportunities for young people aged 11-plus aboard its Bowman 57 yacht, Helen Mary R, from Fowey, Cornwall, has also raised concerns.
A spokesman said: “The proposed changes fail to reflect the realities of running a small sailing vessel. Instead, they appear to be directly adapted from the Workboat 3 regulations designed for tugs and workboats, poorly suited to small commercial vessels.”
“The reality is that the cumulative effect of multiple new requirements places a significant strain on small organisations.
The compliance costs add up quickly, and the risk is very real for an organisation like Morvargh Sailing Project, which operates on tight budgets and limited reserves.
Some of these changes could make it financially impossible for us to continue operating.”

The Morvargh Sailing Project, which operates on tight budgets and limited reserves, helps young people become more confident, more resilient, more motivated and better able to communicate though volunteer-led, life-changing sail training voyages
In reference to the new Sport and Pleasure Code of Practice, a Royal Yachting Association (RYA) spokesman said: “We support the need to update the existing codes of practice to reflect evolving standards, address key Marine Accident Investigation Branch (MAIB) recommendations, and accommodate alternative propulsion types.
“However, we urge the MCA to allocate sufficient time to thoroughly review and respond to the feedback from this public consultation.”
A MCA spokesperson said: “There is now a greater range of vessels undertaking a wider scope of activities than previous iterations of the small commercial vessel codes can reasonably and safely regulate, and the MCA will always work to ensure there is proper regulation that is up to date and fit for purpose.
“Our aim is to support the industry to thrive and innovate.”

Four year's after undergoing surgery and treatment for a brain tumour, sailing has boosted Ben Baldry's confidence
Big changes to marine radio device rules are planned to be brought into the UK. The only MOB AIS devices…

From tall ships to small dinghies, you don't need to own a boat to go sailing. Ali Wood looks at…
Want to read more news articles?
A subscription to Practical Boat Owner magazine costs around 40% less than the cover price.
Print and digital editions are available through Magazines Direct – where you can also find the latest deals.
PBO is packed with information to help you get the most from boat ownership – whether sail or power.
Follow us on Facebook, Instagram, TikTok and Twitter
%20100vw,%20300px%22%20data-image-id%3D%2294764%22%20/%3E%3Cfigcaption%3EThe%20Ellen%20MacArthur%20Cancer%20Trust%20has%20a%20four-strong%20fleet:%20Solent%20Hero,%20Caledonian%20Hero,%20Moonspray%20and%20the%20new%20Kalooki,%20however%20the%20proposed%20changes%20would%20make%20the%2020-year-old%20Moonspray%20financially%20unviable.%20Credit:%20Martin%20Allen%20Photography%3C/figcaption%3E%3C/figure%3E%3Cp%3E%3Cstrong%3ESail%20training%20providers%20across%20the%20UK%20are%20warning%20the%20cost%20of%20proposed%20changes%20to%20the%20Maritime%20and%20Coastguard%20Agency%E2%80%99s%20(MCA)%20Sport%20and%20Pleasure%20Code%20of%20Practice%E2%80%99%20could%20have%20a%20%E2%80%98devastating%E2%80%99%20impact%20on%20the%20services%20they%20deliver.%3C/strong%3E%3C/p%3ESail%20training%20providers%20across%20the%20UK%20are%20warning%20the%20cost%20of%20proposed%20changes%20to%20the%20Maritime%20and%20Coastguard%20Agency%E2%80%99s%20(MCA)%20%E2%80%98Sport%20and%20Pleasure%20Code%20of%20Practice%E2%80%99%20could%20have%20a%20%E2%80%98devastating%E2%80%99%20impact%20on%20the%20services%20they%20deliver.)
Due to popular demand, Tim Owen shares his stitch-and-glue design ideas for a rigid 8ft plywood rowing dinghy. He built his 50 years ago in 24 hours – it’s still going strong and turning heads to this day

Nearly 50 years ago I designed and built a little ply stitch-and-glue dinghy, writes Tim Owen.
I’ve used it on and off ever since but recently getting to and from an East Coast mooring, I twice got stopped by other boaters who asked if they could buy it from me as they couldn’t find anything comparable on the market.
This led me to wonder if PBO readers would like to have a go at making an 8ft rigid boat on similar lines.
I don’t have my original plans from half a century ago, but I have drawn up the approximate dimensions by making a cardboard model, which I then checked via a computer-aided design (CAD) program.
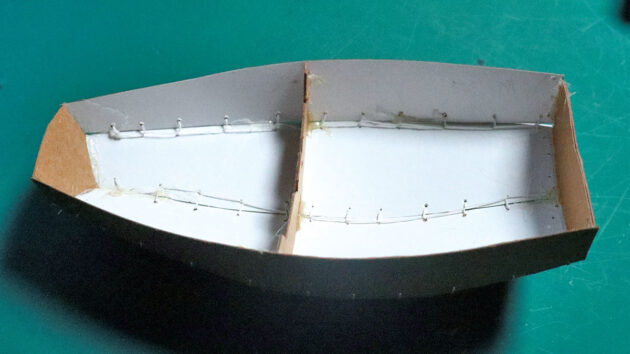
Tim’s cardboard model. Credit: All images Tim Owen
My original creation – built around the time of the Mirror dinghy – involved the stitch-and-glue method.
After sketching drawings, I made cardboard cutouts of the hull panels and bulkheads at 1/10th scale and stitched them together with needle and cotton until I got a pleasing design (sticking the bulkheads in with paper glue).
Then I undid the model, scaled the measurements and cut them out of ply.
This worked well and I was able to put the dinghy together with just 24 hours work from the design stage.
I needed a tender because, in the early 1970s, I purchased a bare glass reinforced plastic (GRP) hull taken from a beautiful Broads class of 19ft strip mahogany racing sailboat – a Reedling.
An optimistic boatbuilder had thought to make a cheaper GRP version, but the class association decided otherwise and his efforts ended up in the Wroxham boat auction and passed into my possession.
I used the bare hull moulding as the basis for Gwaihir, a sweet little 19ft sailing cruiser, a very popular size at that time.
I trailer-sailed her on the East Coast and on the West Coast of Scotland for several years, then moved her to a mooring at Pin Mill, which I needed a dinghy to access.
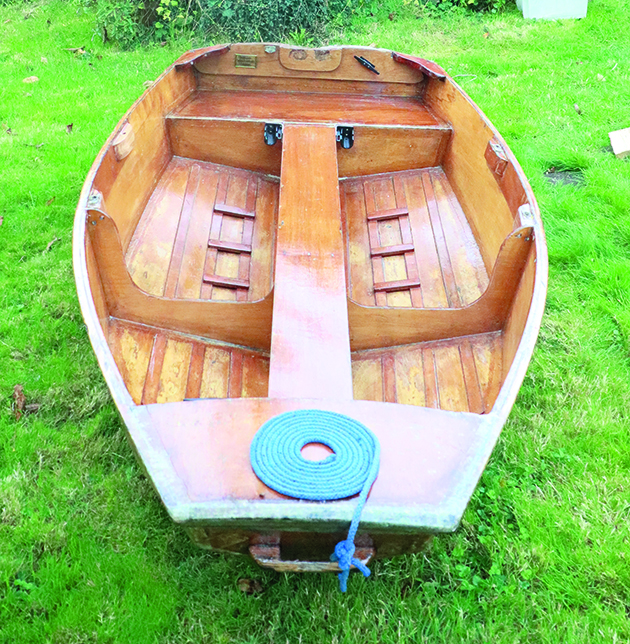
Bow view of Tim Owen’s home-built stitch-and-glue dinghy
The tender needed to be light enough for me to lift onto a car roof rack; easily wheeled down a slipway laden with kit; to trim properly when rowed with one to three people on board; be operable with an outboard; and cheap and quick to build.
As luck would have it I came across a bankrupt timber merchant just before the bailiffs arrived, who was offering his stock at any price in cash.
This gave me a supply of basic waterproof ⅛in (3mm), ¼in and ⅜in (9mm) ply in 8x4ft sheets along with some strip mahogany.
You might think that ⅛in ply is too thin to make a dinghy from, but I figured that it would get pretty rigid if given sufficient curvature and some judicious reinforcement.
Plus, a light weight effectively reduces hull stresses in handling and use and my extreme weight limit ruled out anything thicker.
This was the beginning of the ‘stitch-and-glue’ construction era so that was the obvious and quickest construction technique.
To get the versatility in crew numbers and the required overall stiffness I’d need to put the ‘thwart’ along the boat instead of across – so that, plus the length limit of my 8ft sheets, became my target specification.
The design has stood the test of time. Recently I used Ent – named after the tree-like creatures in Lord of the Rings – at North Fambridge, and twice people asked if I wanted to sell her as they’d been unable to find such a handy rigid dinghy.
When making the model shapes for the panels and bulkheads at 1/10th scale, don’t use corrugated cardboard – it doesn’t work as well as ‘solid’ card.
You will soon get a feel for the relationship between the panel shape and the final hull shape, and a couple of iterations should get you a workable design.
Take the card apart and carefully measure it. You could make a 1/5th scale model from your measurements but I didn’t bother.
Once you have your basic dimensions you can mark them onto the plywood and fair them with a batten to get a smooth curve – eye the curve from several different directions until you’re sure it is fair.
A couple of old pallets make a good working platform and enable you to put wire nails through to help with the batten positioning and later building.
Ensure that both sides are identical or the boat will be asymmetrical.
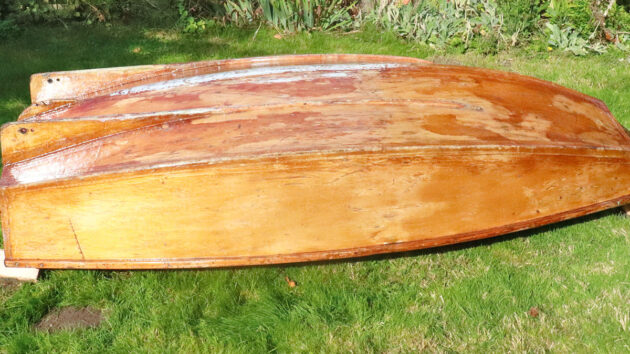
The final construction job is to turn the boat over and fix the keelsons
Measure the panel widths at the transoms and bulkhead to check it will all fit together.
Adjust the transom and bulkheads to suit the panels, not the other way round.
The stitch-and-glue joints are fairly forgiving – in fact, for the panel joints you don’t want a very close-fitting joint as it needs to get a good fillet.
Once the panels are cut out the fun starts – putting the bottom panels together, if necessary smooth the edges with a low angle plane, and drill holes 6mm from the keel edge and the chine edge and sew the keel edges together with copper wire.
Now you’ll need to devise a way of supporting the bottom panels at the right angles while you drill and stitch the sides in place – the pallets will help here – if possible, get someone to assist.
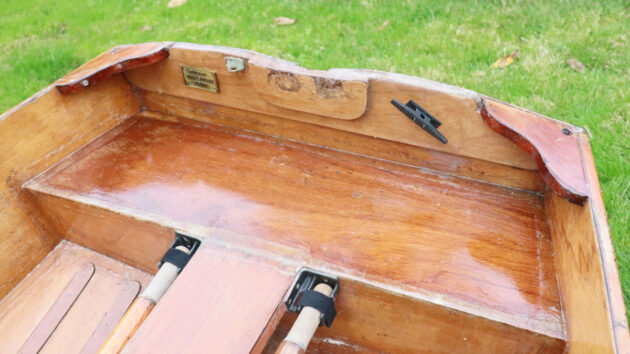
The stern seat of the stitch-and-glue dinghy
By now it is beginning to look like a boat!
Check the transom for fit, trim its edges, glue and tack it in place with brass tacks. Ditto the bulkhead and the bow transom, which will probably need a bit more chamfering and fiddling to get a good fit.
At this stage it’s a good time to go over all the joints, cutting off excess copper wire and pressing the twisted tails down into the joints, then put a generous fillet of thickened resin over and into the joints on the inside of the boat, particularly in areas that might later be covered within buoyancy compartments.
Once the resin has hardened go over the joints with unthickened resin and 50mm wide glass tape.
Before you do any glueing or resin bonding ensure your floor is protected from drips and the hull is perfectly level and has no twist – you won’t be able to correct it afterwards.
Now it is time to glue on the outside gunwale strip of 25x20mm hardwood, holding it in position with brass screws from the inside, or clamps if you have enough – you may need to clamp temporary strips of wood inside to keep the ply in contact with the outer gunwale.
Make the stern buoyancy compartment/aft seat and the longitudinal thwart, securing them in place using 20x20mm timber to support joints and 20x40mm battens under the edges of the longitudinal thwart for strength.
The thwart is structural so it needs to be firmly attached to both the bow transom and the aft seat to take compression loads.
Then fit the 20x25mm internal gunwale forward of the bulkhead, recessing it to let the foredeck fit flush inside the ply at the front.
Fit a strip of 9mm ply about 100mm wide inside at the gunwale aft of the bulkhead to take the two sets of blocks for rowlocks to give two rowing positions.
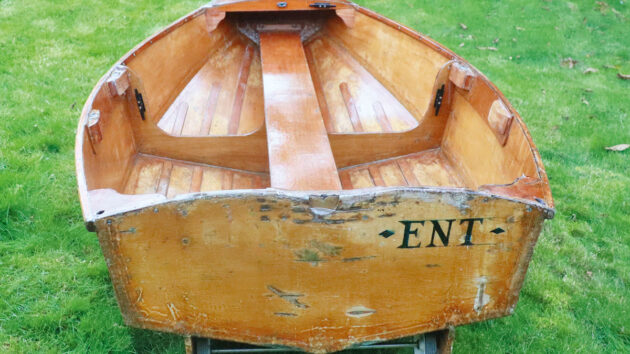
Well used, but the stitch-and-glue dinghy is still in great nick after 50 years
Glue them and add screws through from the outside as there is a lot of strain on rowlocks – two blocks on my dinghy fell off – its only major structural fault in all these years.
Now fit the foredeck with a bearer at the aft end.
The inside of the hull needs fore and aft strips of thin ply 30mm wide glued to the bottom panel 120mm apart to provide additional strength and grip, with blocks glued across on top for foot rests while rowing.
Finish off the interior with a couple of brackets reinforcing the gunwales-to-transom joint, with holes for attaching ropes – you can’t have too many points to attach ropes while coming alongside a boarding ladder.
Fix and through-bolt a stout handhold horizontally near the bottom of the bow transom to wheel and tow the dinghy.
The final construction job is to turn the boat over and fix the keelsons that add directional stability to the aft end, and provide support for an axle for wheels – two layers of 9mm ply should be fine for the deeper aft part, then a cap of shaped 18 x 18mm running forward to the bulkhead position at least – brass tacks from inside.
File off any drips that came through the seams, fill the outside joints with thickened resin and then tape them.
Then, put several layers of tape on the keelsons and along the middle of the keel where it will wear.
Plastic 5in wheels are fine – they need 10mm stainless rod for axles and a piece of tube to keep the wheels apart.
Drill the ends of the axles and put washers and split pins through to hold it in place.
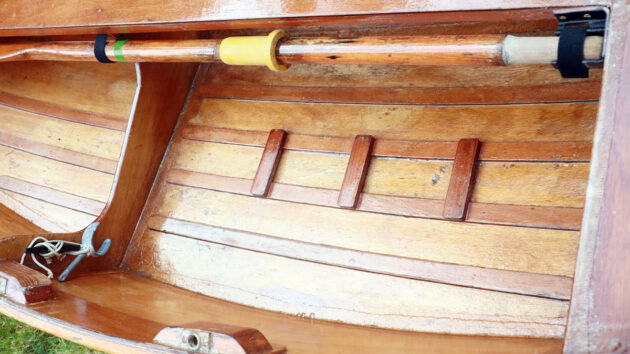
Floor footholds to aid rowing the 8ft stitch-and-glue dinghy
Position the axles slightly forward of the stern so when the bow is lifted above waist height, the wheels lift off the ground and you can tip the boat up without it running away from you – I initially had them too far back and standing the boat on end to put it in a dinghy rack was a pain – so I moved them forward a little.
At this point, go over any joints that require more tape and resin, sanding or filing off any messy high spots to give a smooth finish.
Very lightly hand sand the boat – the ply is quite thin and you don’t want to thin it further.
Finish the whole boat with something that will increase the surface strength and be scratch-resistant; epoxy resin is fine, although remember it’s not UV resistant and will need overpainting.
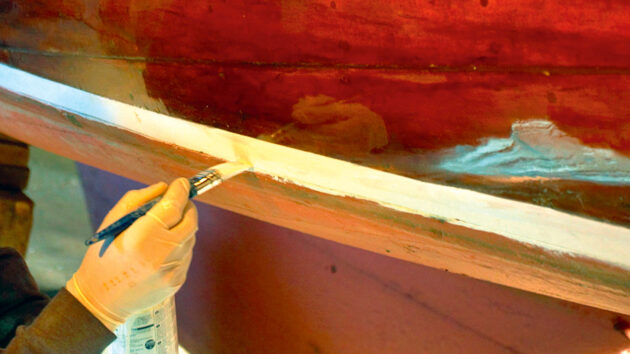
Finish with two-part varnish
Two-part polyurethane varnish is pretty good – with ply this thin it’s advisable to use a clear finish so you can see the condition of the wood underneath to catch incipient problems.
Ent has proved to be a very handy dinghy and apart from the occasional rub down and re-coat to cover knocks, and the rowlock problem, she remains seaworthy with one or two adults and gear on board – three adults can get wet in choppy water.
And yes, I could once easily lift her onto the Land Rover.
I’m not sure I still could – but my excuse is that’s because extra coats of resin and varnish over the years have increased the weight!
The following dimensions will give you a design taken from the lines of my dinghy.
I have made a model to these dimensions and smoothed them carefully in a computer-aided design (CAD) program so they should be broadly right, but I recommend that you follow the model-building approach, and engage with the design process rather than just slavishly following my dimensions.
Perhaps this design could be turned into a sailing dinghy with a carbon-fibre mast through the thwart forward of the bulkhead, and either lee boards or a daggerboard case, again through the thwart, and a rudder – something for an enthusiastic PBO reader to think about!
Bottom and side panels: Two of each 3.6mm ply or as available. Dimensions in mm. All curves to be faired with batten, dash means use faired curve. Draw right angles along long edge of ply at the station positions and mark offsets, then fair with a batten and mark and cut to fair line. Plane with low angle plane if needed. Requires two sheets of 1,220x 2,440mm ply. Cut one sheet in half for two bottoms.
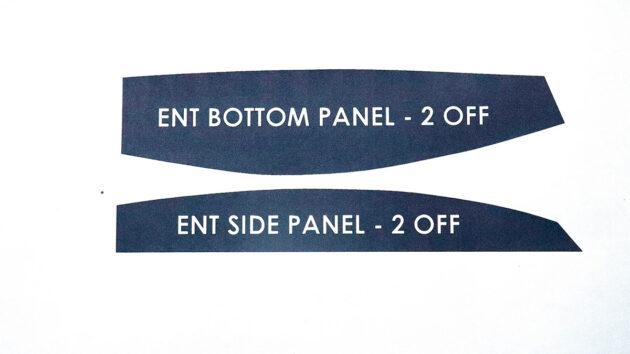
Hull bottom and side panel shapes
Transom: dimensions from lowest centre point: 9mm ply, double for the top section above stern thwart. Fit reinforcing corners in 25mm timber and an additional centre 9mm pad for the outboard clamp. Check panel sizes before cutting or cut oversize and adjust to fit.
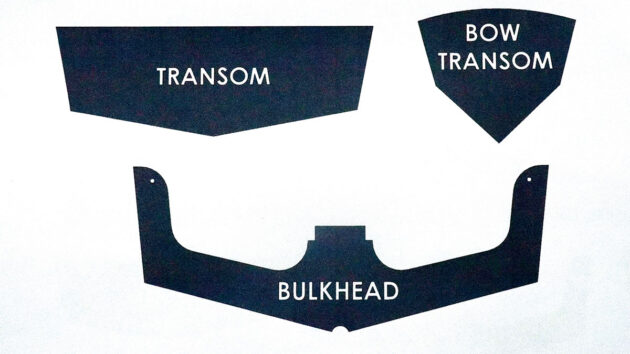
Transom and bulkhead shapes
Bulkhead: dimensions from the lowest centre point: 9mm ply, bottom section cut 120mm wide, side section 100mm wide, radii 120mm on the bottom, 100mm on a side, 25mm diameter limber hole on the keel. Thwart support notched to fit stringers. Check panel sizes before cutting and if necessary adjust to fit.
Bow transom: trim to size as needed: 9mm ply, cut about 6mm oversize all round and trim/chamfer to fit as required.
Licensed under creative commons CC-BY-NC 2023 (non-commercial and must be attributed to Tim Owen 2023
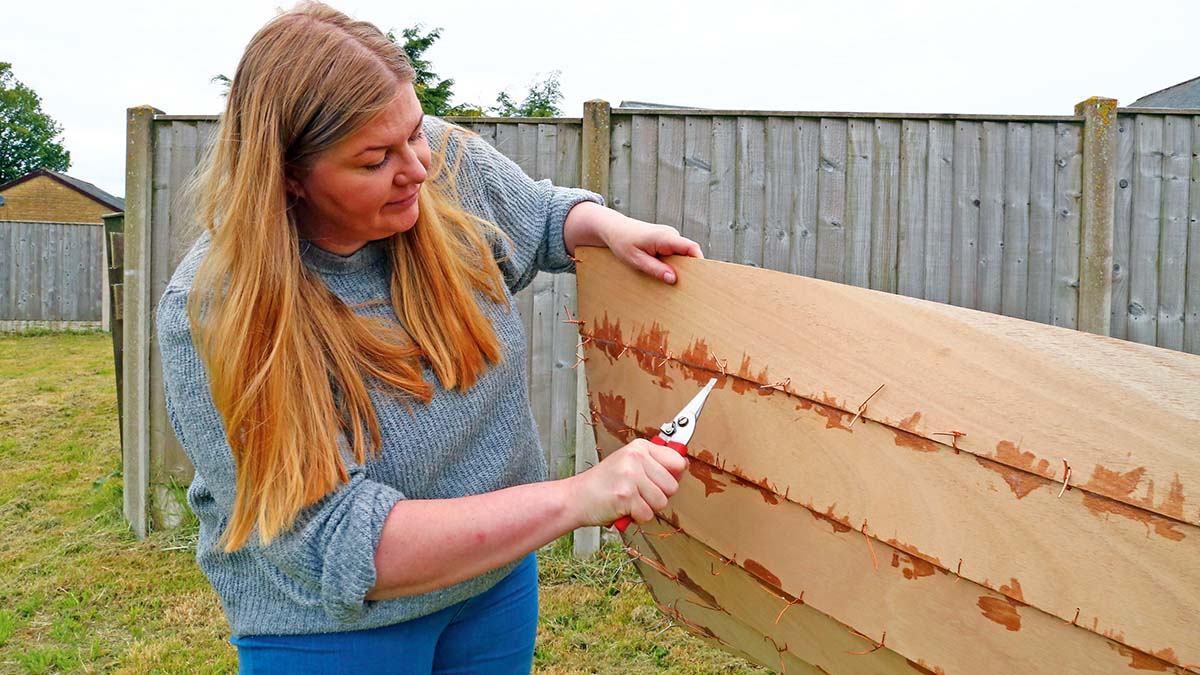
You don’t have to be a boatbuilder to learn how to build a boat, argue Roger Nadin and Polly Robinson.…

There’s a great way to own a new boat on a budget – build it yourself. We followed five builders…

It’s nearly two years since the first Western Skiff Mk2 was launched on the River Dart. The boat was based…

Inspired by a stunning homebuilt yacht, Ali Wood visits the Boat Building Academy to learn how any of us can…
Want to read more practical articles?
A subscription to Practical Boat Owner magazine costs around 40% less than the cover price.
Print and digital editions are available through Magazines Direct – where you can also find the latest deals.
PBO is packed with information to help you get the most from boat ownership – whether sail or power.
Follow us on Facebook, Instagram, TikTok and Twitter
%20100vw,%20300px%22%20data-image-id%3D%2294654%22%20/%3E%3Cfigcaption%3ETim%20still%20uses%20his%2050-year-old%20Ent%20%E2%80%93%20and%20now%20you%20can%20build%20your%20own!%20Credit:%20Tim%20Owen%3C/figcaption%3E%3C/figure%3E%3Cp%3E%3Cstrong%3EDue%20to%20popular%20demand,%20Tim%20Owen%20shares%20his%20stitch-and-glue%20design%20ideas%20for%20a%20rigid%208ft%20plywood%20rowing%20dinghy.%20He%20built%20his%2050%20years%20ago%20in%2024%20hours%20%E2%80%93%20it%E2%80%99s%20still%20going%20strong%20and%20turning%20heads%20to%20this%20day%3C/strong%3E%3C/p%3EDue%20to%20popular%20demand,%20Tim%20Owen%20shares%20his%20stitch-and-glue%20design%20ideas%20for%20a%20rigid%208ft%20plywood%20rowing%20dinghy.%20He%20built%20his%2050%20years%20ago%20in%2024%20hours%20%E2%80%93%20it%E2%80%99s%20still%20going%20strong%20and%20turning%20heads%20to%20this%20day)
Next month, Portland Marina will be hosting two boat buying open weekends

Prospective boat buyers are being invited to a series of free open days at boatfolk’s Portland Marina.
The free Spring Boat Sales Open Weekends will be taking place on 5 to 6 April and 12 to 13 April 2025.
Broker boatpoint will be displaying a range of sailing and power brands, including Jeanneau, Elan and Ryds.
The group boat sales manager for boatpoint, Philip Jones, said: “These weekends are about so much more than just buying and selling – they’re about helping people take the next step in their boating journey. Whether that’s upgrading to a dream boat, dipping a toe into ownership for the first time, or deciding it’s time to sell, we’re here to guide people every step of the way.

Visitors will be able to look around the Quarken 27
Boat owners looking to sell their boats at the event can take advantage of a special pre-event Scrub and Lift offer, available from £24 per metre.
“We’ll have a fantastic selection of boats on display, knowledgeable brokers on hand to answer questions, and exclusive event-only packages for sellers,” said Jones.
“There’s a real energy around the marina during these events, and we’re looking forward to welcoming people to be part of it.”
To register your boat or find more details about the weekend visit: www.boatpoint.co.uk
%20100vw,%20300px%22%20data-image-id%3D%2294862%22%20/%3E%3Cfigcaption%3EPortland%20Marina%20will%20host%20four%20open%20days%20in%20April%202025%3C/figcaption%3E%3C/figure%3E%3Cp%3E%3Cstrong%3ENext%20month,%20Portland%20Marina%20will%20be%20hosting%20two%20boat%20buying%20open%20weekends%3C/strong%3E%3C/p%3ENext%20month,%20Portland%20Marina%20will%20be%20hosting%20two%20boat%20buying%20open%20weekends)
Trevor Martin shows how he replaced the pumps and modified the installation of his vacuum heads for easier servicing in the future

Aboard my boat I have two heads, identical Blakes Lavac Zenith vacuum-type toilets. Yet, like many twins, they have entirely different characteristics.
Initially, the main difference was that the forward heads didn’t work and the aft cabin one did.
I eventually trained my crew not to pump the aft toilet if a second crew desperately needed it as you cannot open the lid for five minutes after creating the necessary vacuum!
Finally, I bit the bullet and investigated the forward heads.
These loos are reliable as they are simple and have a good reputation, with the marketing promise that: ‘the efficient membrane pump is easy to maintain without tools through the large screw-off inspection port.’
The forward heads job involved the easy removal of the wet-locker false floor behind the pan and spinning off the pump inspection hatch; the whole pump was then removed to refit a full-service kit.

The original installation. Marking out the new opening. Credit: All photos Trevor Martin
That is when I saw the pump body casing was cracked. I bought a new heads pump.
Faced with re-drilling holes and replacing pipe lengths, I instead brazed two 90° central heating brass fittings which now connect the pan output end to the pump input port, and the pump output port to the discharge soil pipe.
This meant that I could now fit the housing back using the pre-existing fixings holes.
It was now time to fit a full-service kit to the aft heads.

The pump could then be attached to the bars and screwed in place
Access was not as easy for this one as the back of the pump was behind a lovely flush wall fascia.
There are two versions of this same pump: one for through-bulkhead operation where the handle enters the underside of the housing; the other being the bulkhead-mounted version where the handle enters the side of the housing.
The obvious choice for a master mariner is the bulkhead-mounted pump complete with hoses on show.
But, it doesn’t look so good and in a tight heads compartment, it does encroach on the user.
So the popular choice for bespoke outfitting on my luxury yacht was the more discrete through-bulkhead pump, with just the operating handle on show.
When my heads pump was originally installed the fitter had sawn the fascia in half to gain access before covering up the holes with an ugly trim.
I removed the panel, unavoidably damaging it in the process and discovered the pump was just inches from the hull and facing away from me.
This meant I could not open, inspect, clear or replace the expendables. So, I cut off the hose ends due to the usual age-hardening grip and removed the pump.

To access the pump,undo the four pump mounting screws and the bar screws from one side…
After a very aromatic cleaning session and just as I was fitting the new valves, I noticed a hairline crack on the housing near a screw fixing.
I consigned it to the bin and bought a new heads pump; I also took the opportunity to make future access to the pump easier, negating the need to remove any of the yacht’s bodywork and ensuring the pump faces outward when I need to work on it.
A check online and with fellow boat owners showed that many had come across similar access problems.
I replaced the two fascia panel halves, cutting out a square hole the size of the pump.
I then realised it needed to be bigger to accommodate the jubilee clips above and below the housing, fixings and finger space.
I added two steel bars across the space and secured them to the fascia with machine screws and –essential for removal next time – wing nuts!

… with the bars swung down and hose clips loosened, the pump body can be turned through 180°
I then drilled the bars to match the location holes in the pump housing.
The housing was then bolted to the bars (reasoning will follow).
The pipes were attached with a liberal wipe of waterproof grease and new jubilee clips.
At this point, it felt like performing open-heart surgery.
The process for accessing the heads pump in future is now:
While initially testing the pump access, I gleefully spun off the inspection cover and got soaked with the water from the pump housing. Thankfully, it was just ‘unadulterated’ seawater.
Remembering the unsavoury content earlier and not wishing to contaminate the bilges under the cabin bunk, I took it all apart again and fitted a catch-tray, made from an old plastic Tupperware box.

A threaded through-gland was fitted so a catch-tray could be adjusted to the correct height
A threaded through-gland was sourced from Toolstation and a hose clip was used to ensure the catch-tray’s correct height could be set after installation.
After installation, I added a liberal smear of my favourite sealant, Geocell’s The Works and reassembled everything again.
The temporary plywood cover panel was later remodelled with blue acrylic sheet and a matching trim over the fascia joint.

A temporary plywood cover panel was later replaced with a smarter acrylic sheet
It was a shame there had to be a join, but I inherited that.
Finally, I had a hidden, space-saving pump, with easy access for servicing and unblocking – should the need arise.
When sourcing the new pumps, Lavac wanted to supply the branded Lavac pump. To me, however, this looked similar to the old Henderson Mk5 general-purpose pump.
I discovered that early Lavac loos were fitted with the Henderson model before Lavac began supplying their own.
So, was I to fit the recommended pump or the Henderson?
I did research but, in the end, decided to go with the Henderson pump, as it is a ‘Proven bilge pump with robust housing of white plastic especially suited for the installation in the sanitary areas’.
There are also plenty of cheap copies available on eBay, but I would recommend doing your own research before making a decision on which to buy.

With seacocks previously installed in the Maxi 84, it was time to connect the hoses. The first thing to decide…

We’ve all been there; middle of the night, you need a pee. The marina toilet or camping block is just…

Choosing a marine toilet isn’t as straightforward as you think – and after looking at the options it may be…

Most modern mass produced yachts are fitted with Jabsco hand pumped boat toilets. They are cheap, simple and robust and…
Want to read more practical articles?
A subscription to Practical Boat Owner magazine costs around 40% less than the cover price.
Print and digital editions are available through Magazines Direct – where you can also find the latest deals.
PBO is packed with information to help you get the most from boat ownership – whether sail or power.
Follow us on Facebook, Instagram, TikTok and Twitter
%20100vw,%20300px%22%20data-image-id%3D%2294625%22%20/%3E%3Cfigcaption%3ETrevor%20Martin%20replaced%20the%20toilet%20pump%20in%20the%20aft%20heads%20of%20his%20boat%20and%20made%20improvements%20for%20easier%20access%20to%20it%20in%20the%20future.%20Credit:%20Trevor%20Martin%3C/figcaption%3E%3C/figure%3E%3Cp%3E%3Cstrong%3ETrevor%20Martin%20shows%20how%20he%20replaced%20the%20pumps%20and%20modified%20the%20installation%20of%20his%20vacuum%20heads%20for%20easier%20servicing%20in%20the%20future%3C/strong%3E%3C/p%3ETrevor%20Martin%20shows%20how%20he%20replaced%20the%20pumps%20and%20modified%20the%20installation%20of%20his%20vacuum%20heads%20for%20easier%20servicing%20in%20the%20future)
Faced with his 30-year-old Konsort's knackered vinyl dforecabin, Richard Hare renovated it with 12mm insulation and maple strips

Restoring the inside of a tired forecabin, resplendent with the ubiquitous ‘vinyl droop’ commonly associated with Westerlies and other yachts of that genre, presented us with problems.
Predominant was the complex curvatures of the hull itself.
One thing I knew was that any attempt to restore most of the existing vinyl would be a waste of time.
So, I adopted a solution that I’d used previously when fitting out my former boat, a Golden Hind 31.
The criteria then, as here, were that the end result would have to be aesthetically pleasing, technically sound (insulation and strength) and, importantly, within my amateur capabilities.
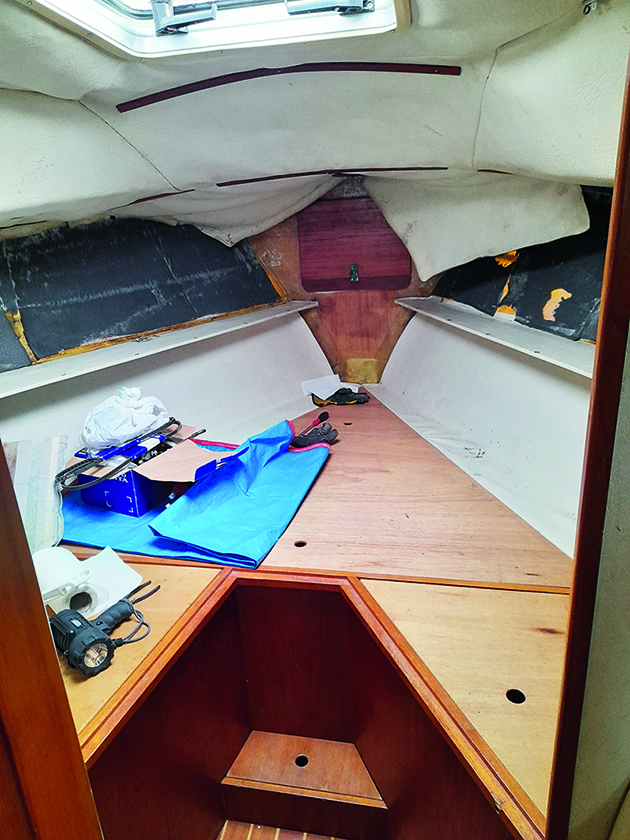
Vinyl is shown removed from the forward bulkhead and about to be removed below the foredeck. The foam above the shelves had to be junked to make way for ribs. Credit: All images Richard Hare
Not all vinyl had to be junked. Aboard Cockle, the forecabin vinyl above the side shelves and the thin foam behind it had to go.
The same applied to the bedraggled vinyl on the main cabin bulkhead and also the foredeck underside.
What could remain was the vinyl under the side shelves and the deckhead (forecabin ceiling).
The vinyl below the shelves was OK as it had been protected by the berth cushions. It was also intact. All of this could be re-tightened and thoroughly cleaned.
A considerable advantage to me was that Westerlies of this type benefit from a useful wood core to cabin deckheads and side decks.
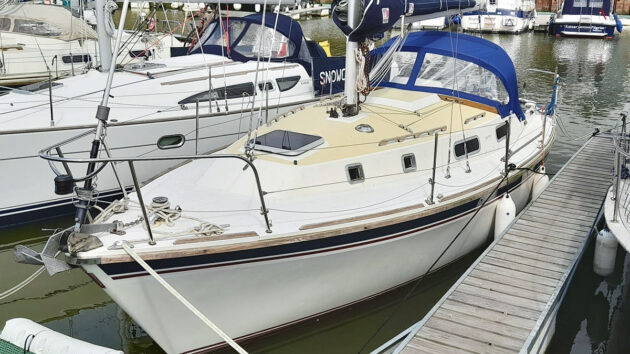
The Westerly Konsort Cockle before the side decks were painted. The forecabin extends aft to include the first square windows on each side
The reusable vinyl cleaned up well enough after I first used white spirit, followed by a gentle scrub using warm water with washing-up soap and a dash of white spirit.
I considered that the best solution for the problematic lining above the shelf was to repeat a technique I’d used on my previous yacht; thick closed cell foam, obscured by 9mm thick x 45mm wide maple slats, 9mm being sufficiently meaty to attach other items later on, such as cabin lights and small storage bins.
I sourced the wood from Robbins Timber, a timber company specialising in wood and wood-based products for marine use.
Since this forecabin was to be our main sleeping area, it made sense to fit it out with an attractive material, and maple scored well on aesthetics.
It goes well with teak, Cockle’s predominant interior wood species.
Given the curvature of the hull, the problem was this: how do we attach near-horizontal maple strips to a curved GRP hull?
Attaching the strips directly to the GRP hull surface is a non-starter.
My solution was to laminate ribs to the hull using 12mm plywood offcuts, subsequently ripped into 75mm (3in) wide strips.
The plywood was bonded to the hull using a polyurethane mastic which is similar to Sikaflex.
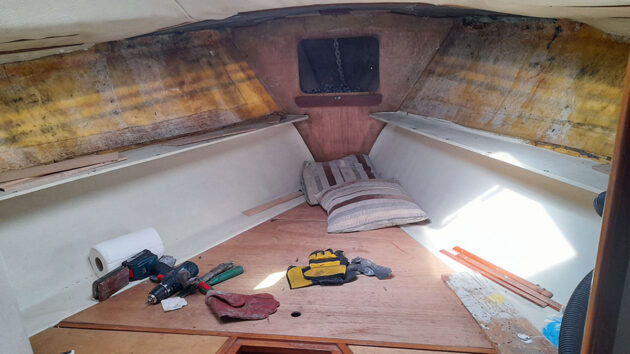
With shelf upstands removed, the upper hull was cleaned and scrupulously degreased
The difficulty with this is obvious; you can’t bond a flat length of plywood to a curved GRP surface. Further, it’s doubtful that 12mm plywood is thick enough to take the screws from the maple strips.
The answer was to bond shorter pads, about 75 x 100mm (3 x 4in) top and bottom, and then attach the full-length pieces to them. This forms a sort of bridge that has the benefit of bridging the curvature as well.
It’s worth noting that, in this case, I did not attempt to introduce a vertical curvature to the full-length pieces. The comparative short rib length didn’t warrant it.
But before any plywood/GRP bonding took place, the glassfibre had to be thoroughly cleaned of all old glue and grime.
It’s a tedious task – no point in pretending otherwise – but I found I could wipe away most of the old impact adhesive with white spirit, scraping and sanding manually.
Leaving overnight helps as the surface becomes crispy and consequently, more amenable to sanding the next day. I then repeated the process, this time with cellulose spirit, sometimes known as ‘paint thinners’ in car parts shops.
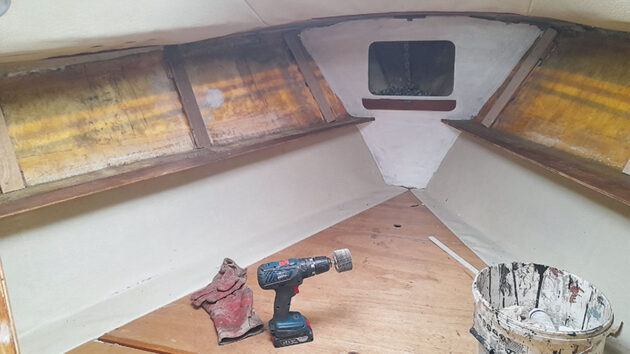
A first coast of white Superdec is applied to the fore bulkheads. The rib pads are shown as well as the bridging plywood strips. Old vinyl was stripped from the shelves and they’d be finished later with Superdec. Note flap wheel abrasive in battery drill
This was also scraped and hand-sanded. I then finished off with a flap-wheel abrasive in my hand drill.
The final touch was to wipe it over with a mix of soapy warm water and white spirit.
With the GRP thoroughly cleansed, I could bond the top and bottom plywood rib pads.
I did this using a PU mastic adhesive like Sikaflex or CT1. This way, I could construct four ribs down each side of the hull.
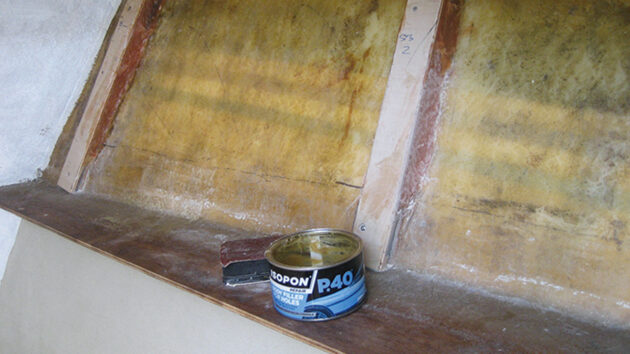
Ribs solidified and stiffened by filling with Isopon P40 car body filler
By the following day, the short plywood pads were cured and securely bonded to the inside of the hull, sufficiently for the second full-length strips of 12mm plywood to be attached.
Screws and waterproof PVA adhesive were used to draw this into contact with the pads, thereby forming the ‘bridge’.
What followed next was a visit to the local car parts shop.
Here I bought a tin of pre-mixed P40 glassfibre car body filler which makes a very cheap and effective stuffing for the bridge/voids that now existed between the plywood and the glassfibre hull.
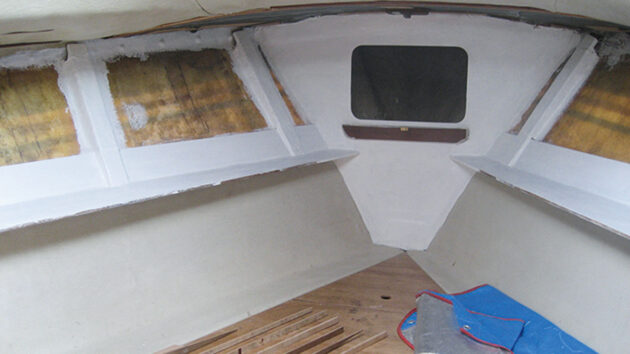
The ribs were then bandaged in using resin-soaked glassfibre mat and finished with two coats of white Superdec paint. Ply shelf backs are bonded to the hull and painted along with the shelves
Not only does this completely stiffen the batten but it provides additional reassuring strength to a hull at a point where it can be particularly useful…
The final touch was a bandage of polyester resin-soaked random strand glassfibre mat wrapped over each composite rib.
This is not only good practice but also relieves the PU mastic from being the sole bond between the hull and the composite ribs.
I bought a 1lt can of Isopon Fastglas polyester resin for the purpose, also from the car parts shop. I already had glassfibre mat in stock.
Next came the insulation. Not only is this highly desirable if condensation is to be avoided, but it makes a forecabin so much more comfortable in hot and cold temperatures.
If we ever return to free movement across Europe and can once again base our boats on the Continent for periods longer than 18 months, we’ll very likely return to the South of France.
Irrespective of the political obstacles, this is the best time to add insulation as it would entail significantly more upheaval later.
Unlike wood, GRP has horrendous thermal insulation properties, especially if you have a blue-coloured gel coat.
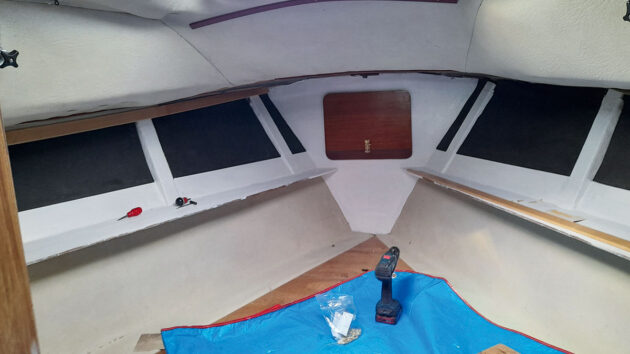
The 12mm insulation bonded into position
Here, thick closed-cell insulation is a huge benefit. Don’t use open-cell insulation – it absorbs condensation and can end up loaded with water.
I bought the 12mm thick closed-cell flexible foam from a local supplier although thicker insulation semi-rigid bats are readily available from builders’ merchants.
Either way, this insulation was bonded to the hull using PU mastic/adhesive.
But before the insulation was bonded into place, the ribs and their surrounds were given two coats of white (satin) Sadolin Superdec, a water-based acrylic paint that sticks to absolutely everything that I‘ve used it on.
It doesn’t like epoxy though, as the epoxy makes it yellow.
Once it was fitted, I also gave the foam two coats of white Superdec.
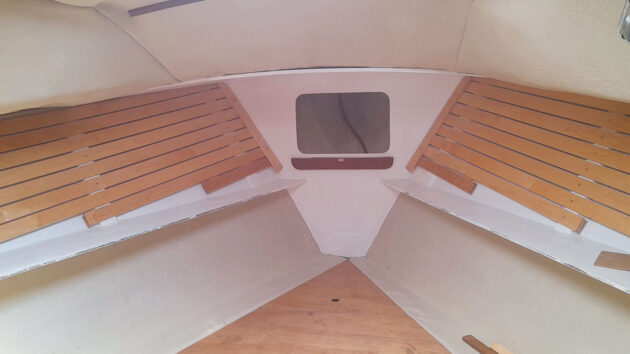
Maple strips attached to ribs and painted plywood attached below foredeck
Satisfied with the solidity and strength of the ribs, I turned my attention to the horizontal maple strips.
These were attached using brass screws. Using a piece of 4mm plywood as a spacer, a gap was left between each batten.
The gap is important as it can be very difficult to get each strip to lay perfectly against its neighbour.
Even if they fit perfectly when initially fabricated, the impact of seasonal relative humidity fluctuations will cause stresses later on.
Further, I think that the appearance of the white paint behind the slats makes a cabin less claustrophobic.
Each batten was given a liberal coat of Ronseal Yacht Varnish (satin) to its reverse side to ensure that each was encapsulated when fully finished.
Now to the ‘pointy’ end. Using the discarded vinyl beneath the foredeck as a template, I made a cardboard version and then cut a 6mm plywood replacement.
A plywood deckhead like this is warmer than vinyl and consequently, less prone to condensation.
But, how to attach it to the foredeck underside? I first bonded on and screwed 9mm and 12mm plywood attachment points/pads to the underside to provide something for the plywood sheet to be screwed onto.
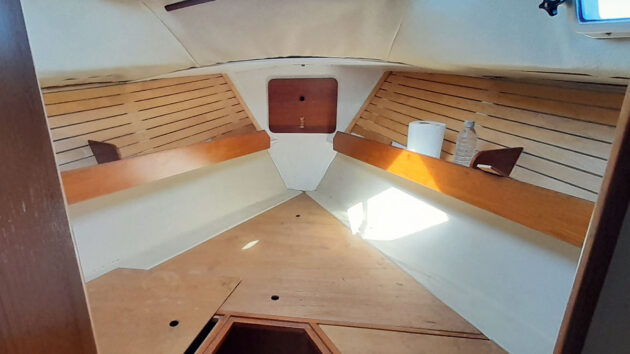
The re-varnished shelf upstands are re-fitted
The foam insulation here had been redone recently, so I was able to retain it, albeit with bits cut out to make space for the plywood pads.
The plywood sheet was given two coats of Superdec. A feature I like about Superdec is that being water-based as opposed to oil-based, it doesn’t yellow over time. Nor does it flake.
The anchor box/forward bulkhead was stripped of all its vinyl, old foam backing and adhesive, and refinished with two coats of Superdec.
The teak-faced anchor hatch varnish was cut back and two coats of Ronseal Yacht Varnish were applied.
Removing the largely wrecked old vinyl and wasted foam backing from the existing plywood structural bulkhead was a piece of cake, but the removal of the adhesive was anything but.
Inspired by the quality of the tropical hardwood plywood that was unveiled, however, I set to the task of removing it all including the old contact adhesive.
If I’d not done this, the varnish would not have stuck, and it would have looked a mess.
Several days were taken up using rags and white spirit followed by judicial use of a broad paint scraper.
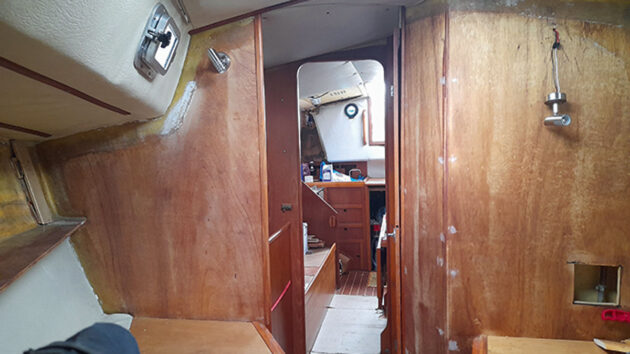
The main bulkhead stripped of vinyl and adhesive to reveal a pleasing wood figure
I found it helped to leave this to dry overnight and harden. This made it sand better.
It was galling to know that no trace of glue could remain. Not only would the varnish not take properly to it but my indiscretions would be there to haunt me until the day that Cockle and I finally part company.
On more than one occasion, I toyed with the idea of throwing in the towel, resorting to Plan B; to paint the entire bulkhead white. Life’s too short! But I persevered.
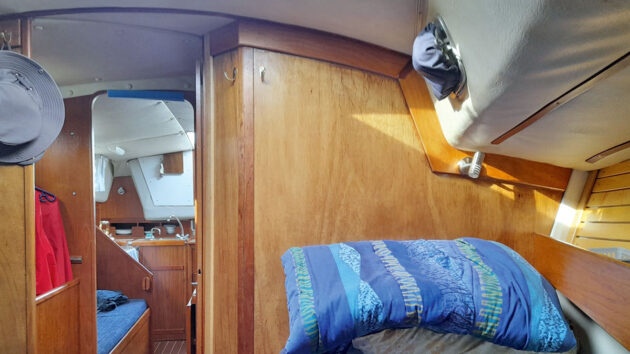
The finished main bulkhead complete with all edges, profiles, and trims cut and fitted
Another time-consuming task was making the 4in (or so) wide trim profiles that disguise the unsightly edge where the ply bulkhead is joined to the hull and deckhead.
The lack of vinyl originals meant I had to make cardboard templates before graduating upwards to off-cuts of chipboard, MDF, hardboard, or whatever I could find before using plywood for the finished article.
Not having the original was a pain as the plywood cores might have cleaned up well enough for re-use.
9mm maple strips (12 x 3.6m*): £293 (ex delivery)
Ronseal varnish: £22
Closed cell foam: £50
Fibreglass resin: £20
Sundries (adhesives and screws etc): £50
Total: £435
* Strips available in 3.6m lengths only at the time (sometimes available in 3m lengths). Offcuts were sufficient for the 2nd and 3rd from bottom slats, these being shorter. The bottom slat was left over from a job from over 20 years ago. There were quite a lot of useful other offcuts, all of which have since proved useful on board. All plywood for the ribs was from existing offcut stock. For this use Class 2 plywood to EN 314-2 1993: ‘Plywood. Bonding Quality Requirements’. It’ll be fine in this situation. No need for Class 3 (Marine).

Originally a triple chine plywood hull, modern GRP Golden Hind 31s have vertical curvature to overcome, the tricky angle at the sheerstrake and the rest of the hull
Of course, there are also situations where boat owners will want to line the entire height of the cabin side, from berth height up to side decks.
If so, you’ll probably want to introduce a vertical curvature, one that mimics, to a degree, the curvature of the hull.
This was the situation with my former boat, the Golden Hind 31, Keppel. In this case, the hull was new so the process involved less GRP cleansing.
A good wipe with cellulose spirit to remove wax emulsion and an abrasion did the trick.
On Keppel, the ribs were deeper and I attached 25mm semi-rigid closed-cell insulation bats.
Once semi-rigid, I used a Stanley knife to score the back in places to enable the bats to take up the curvature of the hull, particularly the corner where the sheerstrake meets the rest of the hull.

Roger Hughes replaces old vinyl boat headlining with easy-to-clean white PVC planking

Yacht designer Ian Nicolson explains how to make changes to living space on board
Kit boat builder Polly Robinson shares her tips for painting and varnishing a plywood-epoxy boat
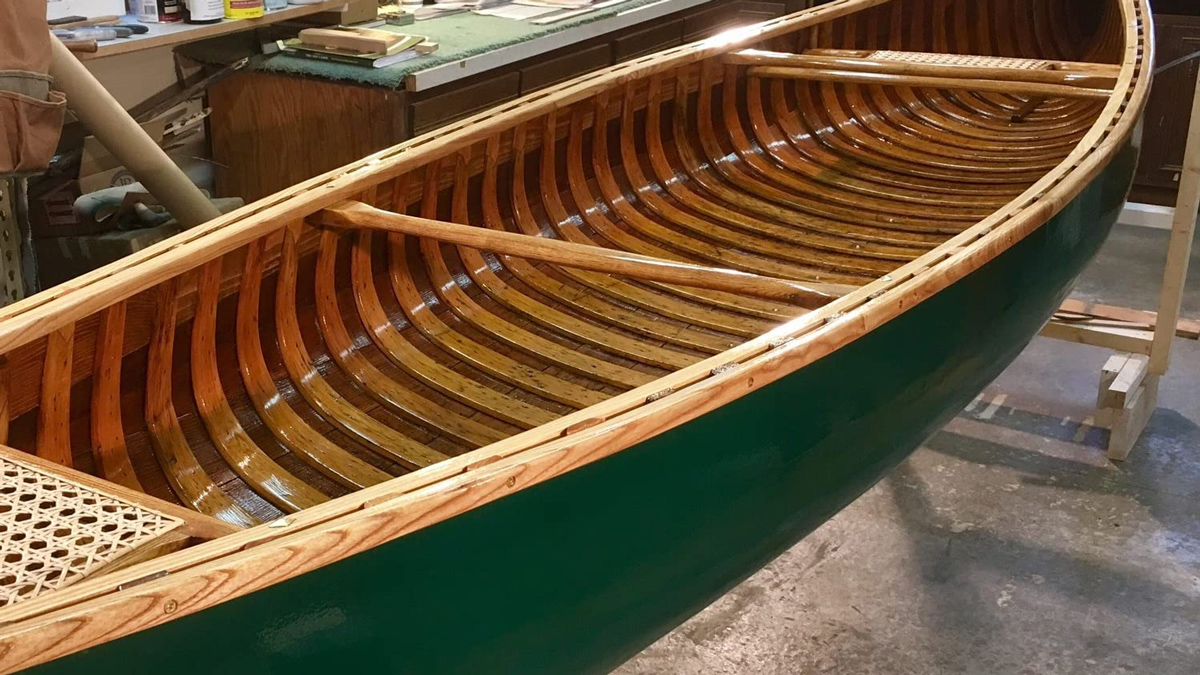
Few things are as quintessential to the archetypal sailboat as gleaming, iridescent woodwork that is indicative of a recent coat…

One of the roomiest cruisers of her size, the Konsort is also known for her solidity, interior finish and easy…
Want to read more practical articles?
A subscription to Practical Boat Owner magazine costs around 40% less than the cover price.
Print and digital editions are available through Magazines Direct – where you can also find the latest deals.
PBO is packed with information to help you get the most from boat ownership – whether sail or power.
Follow us on Facebook, Instagram, TikTok and Twitter
%20100vw,%20300px%22%20data-image-id%3D%2294595%22%20/%3E%3Cfigcaption%3EThe%20finished%20work%20in%20the%20forecabin.%20Credit:%20Richard%20Hare%3C/figcaption%3E%3C/figure%3E%3Cp%3E%3Cstrong%3EFaced%20with%20his%2030-year-old%20Konsort's%20knackered%20vinyl%20dforecabin,%20Richard%20Hare%20renovated%20it%20with%2012mm%20insulation%20and%20maple%20strips%3C/strong%3E%3C/p%3EFaced%20with%20his%2030-year-old%20Konsort's%20knackered%20vinyl%20dforecabin,%20Richard%20Hare%20renovated%20it%20with%2012mm%20insulation%20and%20maple%20strips)
Stu Davies shares his tips for making sure your boat's saildrive runs smoothly

Maintaining a saildrive is just as important as engine care, given its role in ensuring smooth motoring.
I am most familiar with Volvo Penta saildrives so this article will focus on that make, but other manufacturers make them – all are basically of a similar design and layout.
Saildrives are the method of getting power to a propeller easily and relatively cheaply; cut a hole in the hull moulding, drop an engine and propulsion package in, seal with a big rubber gasket and that’s it.
There are no shaft-to-propeller-to-engine alignment problems, no tricky through-hull tubes to align and no leaky propeller shaft seals.
However, like all things in life, they have issues. A saildrive does not need a deep water seal but it does have lip seals on the propeller stub shaft.

Note the reaction between the copper-based antifoul paint and the saildrive leg. Credit: Stu Davies
If you’re unlucky enough to get a fishing line wrapped around the saildrive the seal will soon be destroyed, allowing seawater to enter the drive.
This mixes with the oil in there to form an emulsion.
Saildrives are made of aluminium, a good, strong light metal but one which is easily corroded by seawater and other metals if steps are not taken to protect it.
They’re bolted onto the back of the engine and have two right angle gears converting the drive from horizontal to vertical to horizontal again.
Saildrives have a forward and reverse gear, as well as four pinions to convert the drive to get the power down and out.
These are highly stressed ‘contact’ pinions and require specialised oil which is usually used in the back axles of cars.

The inside boss of the propeller. Note the rubber bush which can be just seen connecting the spline drive to the prop. Sometimes these become loose and the prop slips causing drive issues. Credit: Stu Davies
You can identify this oil as the word ‘hypoid’ is usually in the description; it also has a peculiar smell that is easily recognised by seasoned engine mechanics.
Volvo Penta is very particular about keeping its engines, gearboxes and saildrives electrically isolated to prevent galvanic corrosion.
Large zinc anodes are fitted to the saildrive, usually behind the propeller which is normally made of aluminium.
Copper or any components containing copper are usually kept well away from them. Copper can react with aluminium very badly.
When I worked in the oil industry the skipper in the aluminium crew change boat would be paranoid about maintenance staff dropping bits of copper wire in the bilges when doing repairs.
The plus side is that although the components are precision built, they do stand up quite well to seawater-contaminated oil. Saildrives also feature a rubber diaphragm hull seal.
Two friends in Portugal have saildrives on their Dufour yachts and I’ll share their experiences to illustrate what can go wrong and how to fix it.
One of them had serious corrosion on the saildrive leg and the anode on the propeller had been eaten away.
He stripped the leg, cleaned out all of the emulsion and replaced the lip seals behind the prop.
To do this, remove the propeller and anodes. Undo the housing holding the bearings and seals, take out the shaft and inspect and replace the seals.
There are two of them positioned back to back, to hold the seawater out and the oil in.

A saildrive leg cleaned of all paint and ready for etch priming, undercoating and the correct antifouling. Credit: Stu Davies
My friend noticed wear marks on the shaft, but not enough to warrant more work. If the lip seals have worn the shaft, repairs can be done using SKF Speedi Sleeve.
This thin-walled sleeve can be fitted on a worn shaft with simple hand tools to make it like new again.
My other friend had seawater in his saildrive, just enough to start discolouring the oil.
He asked me how he could confirm that the water in the drive was seawater and not condensation.
I told him to taste it. It was salty so the question was answered.
The saildrive was painted with ordinary copper-based antifouling paint by the local boatyard; the result can be seen in the picture (opposite left) of a badly corroded saildrive leg and propeller.
He had to buy a new prop. Copper on aluminium saildrives is a big no-no.
He cleaned off all of the offending paint, used acid etch primer and then two-part International epoxy undercoat before using the correct antifouling paint.
The rubber seal where the saildrive goes through the hull is a maintenance item; the thought of it failing is the stuff of nightmares as it is a big hole!
Volvo Penta recommends changing the seal every seven years with annual inspections.
Anecdotal evidence says these seals last much longer but there is always the exception to the rule.
Changing them involves moving the engine away from the leg and forward out of the way.
The seal and leg also have an outside fairing ‘seal’, which has nothing to do with stopping water from entering the boat.
This can be changed fairly easily when the boat is on the hard.

Check the oil levels and viscosity regularly
Check your saildrive oil levels regularly; the dipstick is usually found on the top of the leg inside the boat.
Seals can only be checked when the boat is out of the water, so checking for signs of emulsification via the dipstick is the only way to ensure the saildrive seal is not leaking.
Milky oil is a sign of water mixing with oil. The oil should be changed as per the manufacturer’s instructions.
The oil can be changed when the boat is in the water by using a vacuum pump via the dipstick and fill hole.
The engine water intake usually comes through a grill on the leg up to a shut-off valve at the top of the leg.
Beasties have been known to grow in there and block it. Some people do block off this section and install a through-hull fitting in the hull to prevent it from happening.
However, I suspect the water coming through the grill is also used to cool the engine’s gearbox, so take advice before deciding to make changes.

While changing his engine oil, Chris Mardon noticed milky oil in his saildrive. Will it have caused damage to the…
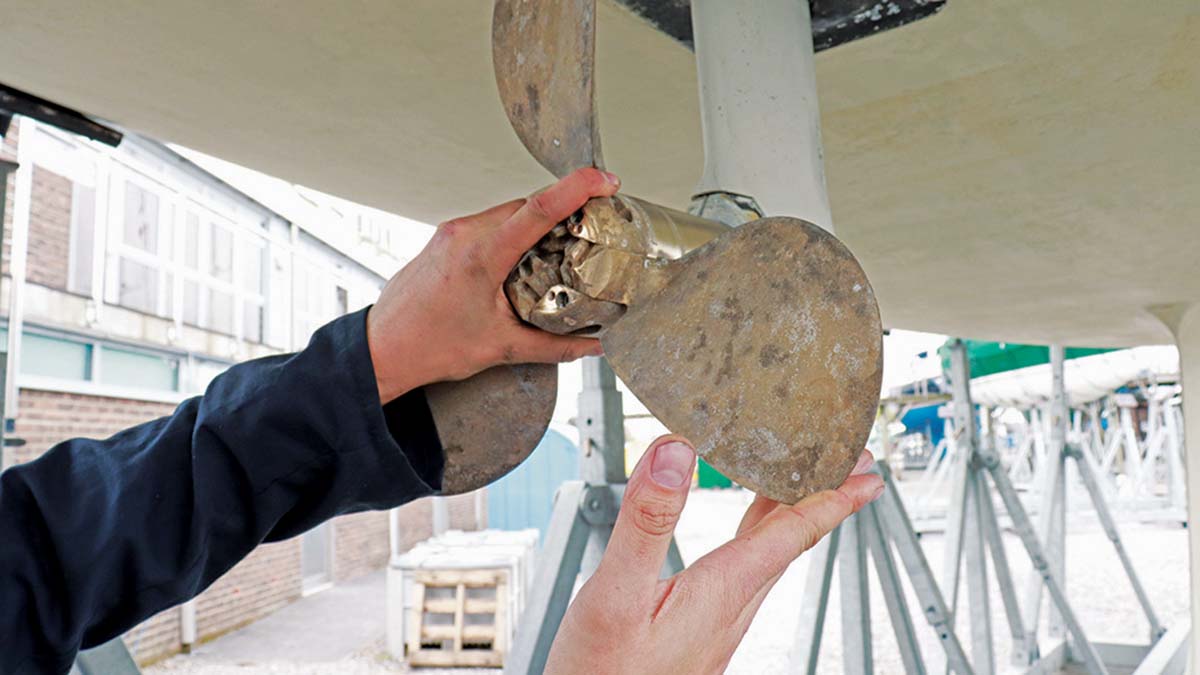
Peter Dunlop writes: “I have a Volvo Penta MD20-30 with saildrive and three-bladed folding propeller on my 1998 Dawn 39…

After seven years of regular use, a saildrive gaiter should be changed before it deteriorates to let water through the…

Simon Johnson asks: “I’m planning to sail my boat Zeno back to Britain from Corfu next spring and as the…
Want to read more practical articles?
A subscription to Practical Boat Owner magazine costs around 40% less than the cover price.
Print and digital editions are available through Magazines Direct – where you can also find the latest deals.
PBO is packed with information to help you get the most from boat ownership – whether sail or power.
Follow us on Facebook, Instagram, TikTok and Twitter
%20100vw,%20300px%22%20data-image-id%3D%2294570%22%20/%3E%3Cfigcaption%3EWhen%20was%20the%20last%20time%20you%20checked%20your%20saildrive?%20It%20needs%20an%20annual%20inspection%20to%20ensure%20your%20boat%20performs%20well%3C/figcaption%3E%3C/figure%3E%3Cp%3E%3Cstrong%3EStu%20Davies%20shares%20his%20tips%20for%20making%20sure%20your%20boat's%20saildrive%20runs%20smoothly%3C/strong%3E%3C/p%3EStu%20Davies%20shares%20his%20tips%20for%20making%20sure%20your%20boat's%20saildrive%20runs%20smoothly)
What should you do when you catch a line or fishing net and your prop becomes fouled? Ali Wood looks at the options

A fouled propeller is every sailor’s nightmare. Whether snagged suddenly in the middle of a channel, or a drifting target for shipping, it’s a stressful situation and one that requires a calm head.
Lobster pots are better marked these days thanks to tireless campaigning by bodies such as the Cruising Association. However, the chances are you’ll still run into one sooner or later – either that or a free-floating fishing net or polypropylene line.
Mostly, it’s down to bad luck, but keeping a good watch is imperative.
Pot markers are easier to spot from the side of the boat, so if you have a spare crew, place them there and keep a particularly good lookout around headlands and in strong tidal race areas where markers may be dragged below the surface.
In many instances, however, rope caught around the propeller is your own!
Never start the engine without looking for loose ends over the side. In particular, check when leaving a berth or towing a dinghy.
It’s a worrying moment when an engine slows or judders to a halt.

This netting was picked up on a trip from Cherbourg to Honfleur. Credit: Jim Gibson/MBY
There can be other clues too – for example, a tendency for the vessel to stray to one side or for the engine to sound not quite right and perhaps overheat.
If conditions allow, a yacht has the advantage of being sailed into port, and can usually do so dragging a modest length of light line.
Even so, it’s a good idea to radio the marina or harbour authority who may prefer to send out a tow.
Motorboats, of course, don’t have the luxury of alternative propulsion.
If you have twin engines, and there’s a port nearby, try motoring slowly because if you stop to free the disabled prop, the tangle may loosen enough to ensure the other one gets knotted.
With a single engine, the likelihood is you’ve come to a complete stop, and your first thought is safety. Which way are you drifting? Are there any obstacles you need to fend off? Anchor if you can, and have a boat hook or lines ready if there’s any chance of catching a mooring buoy.

This Sealine S42 caught a rope off Guernsey. Credit: Richard Havill/MBY
A motorist wouldn’t think twice about using hazard warning lights, but not many boats carry the correct NUC (Not Under Command) signals these days.
These are two black balls by day, two red lights at night, both in a vertical line.
In poor visibility, one prolonged blast followed by two short blasts is the correct sound signal. The next step is to advise the coastguard of your situation.
If you’re in danger, or a danger to shipping, the coastguard may alert the RNLI.
Alternatively, if you’re not in any danger, a commercial breakdown service, such as SeaStart, which covers the English Channel, may be able to clear the fouled propeller or offer a tow to the nearest port.
Polly Philipson of Grenada Bluewater Sailing points out that the way you’re entangled will dictate the method for freeing the fouled propeller or rudder. If you’re drifting, try gently reversing on low revs.
If you’re sailing, raise the sails to control your movement – you may even be able to reach a safe anchorage. If you’re in imminent danger, call for help.

If you have to try and cut the entanglement from your propeller, it is a good idea to cable tie a knife to your boathook. Credit: Lester McCarthy
If the boat’s anchored by a line you need to take pressure off the part that’s tangled – either the prop or the rudder.
Drop your sails immediately and, using a boat hook, locate the line and bring it up to the boat.
Next, tie the line off on a cleat. This may take some effort if there is wind and tide so be careful not to drop the boat hook (she recommends carrying two).
Do not cut the line at this point as then you will have a drifting boat, which is more dangerous! Now it’s time to assess the tangle and cut it free (see below).
Before you go anywhere near the fouled propeller, be sure to remove the keys from the engine so your crew doesn’t accidentally start it.
Even then, have a first aid kit handy because even stationary props are sharp. If you have sailing gloves, wear them.
Solutions vary for untangling props, and if you can stay in the boat that’s by far the best option.
An outboard engine or sterndrive (where the outdrive or drive leg lies outside behind the transom) can be lifted to the beach position so you can access it from the boat.
If you’ve sucked one of your own ropes into the prop; a jib sheet or halyard, for example, you may be able to unwind it by hand-turning the fouled propeller slowly in the opposite direction.
However, even then it can be difficult to untangle.
In severe cases, the rope can actually melt into a hard ball and may need a hacksaw or other knife to clear.
Even if you do clear the prop, bear in that there may still be damage that needs attention when you get to port.
With an inboard engine, where you can’t reach the prop, try the ‘dry’ method first.
Restart the engine in neutral, then go astern, just for a second before slipping back to neutral.
If this doesn’t free it, try going ahead. Note – only do this if you’re drifting; if you’re anchored by the line it’ll make the situation worse.
Hopefully, whatever has wound its way around will start to work free, or if you have a rope-cutter device fitted to the prop shaft that will do the job for you.

Gaffer tape will stop the knife from twisting, if it is cable tied to the boathook. Credit: Lester McCarthy
If you feel things are improving, run for a few more seconds each time.
You may be able to move slowly on, but if it keeps stalling you have a serious problem and will need to call for help.
If the rope is from your own boat, Tom Cunliffe, writing in PBO’s sister magazine Yachting Monthly, suggests having someone heave it, but warns. “You need to be sensitive here, because trying to crank the engine with the electrics when it doesn’t want to turn can burn out the starter motor as well as flatten the batteries. Think about the kit and be gentle with it.
“It’s a long shot, but before trying the starter motor method, it’s kinder to put the gearbox into neutral, grab the shaft inside the boat if you can reach it, and see if you can turn it while someone on deck tugs the rope. You could even try mole grips on the shaft to get it started.”
You may be able to clear a fouled propeller by leaning over the boat with a knife attached to a boat hook or long-handled hull scrub brush.
Gaffer tape and cable ties will keep it secure. Mark the handle so you know which way the blade edge is pointing.
Ensure you’re tethered on and wearing a lifejacket. Have a crew keep a lookout while you lean over the bathing platform.

Remove debris from the water so it doesn’t foul another prop. Credit: Lester McCarthy
Locate the rudder/s with the boat hook as the propeller/s will be just ahead of them.
Slide the pole in as horizontally as possible so that you can push the blade down onto the rope (cutting downward is usually easier than cutting up).
Using a sawing action, try and cut off as much as possible and keep removing any debris from the water so it can’t entangle anyone else.
When you’ve cut as much as you can, retry the engine to see if drive is restored.
For better access, you can try tying your tender alongside, though this can be a struggle in anything other than calm water.

With a lifejacket and safety line, lean over the bathing platform and saw through the rope. Credit: Lester McCarthy
In reality, this is very hit-and-miss; here’s what Tom Cunliffe reported back whilst trialling this method for Yachting Monthly.
“First, I lashed a short bread knife to our extending boat hook and despite a quarter-hour of hacking about, the arrangement didn’t budge a millimetre.
“The only chance of getting near the prop shaft was to lie in the dinghy with my arm right in the water. The question was, after I’d groped around and found the shaft, do I try to cut up or down? I’d assumed that ‘up’ would be best, but in practice, ‘down’ proved the superior option. I had enough purchase to do some cutting and there was plenty of space above the shaft, but it was literally a hit-and-miss affair. In real life, I’d have been in with a chance, but I could well have been at it all morning.”
Diving under the boat to free a fouled propeller should be the very last resort.
Many sharp, hard parts on the underside of a boat can injure you, not to mention the risk of entanglement, hypothermia and cutting yourself with the knife.
Keep fins, a snorkel and mask on board, as well as a wetsuit. Not only will a wetsuit guard against cuts and bruises, but will keep you warm (in UK waters, opt for the thickest you can find, ie 6mm neoprene).
A small air bottle can allow you to dive under the boat for a few minutes, but bear in mind this means there’s more to get tangled.
Keep a line on your cutting tool, lest you drop it. A wrist lanyard is an option, but make sure it’s loose enough that if the blade gets stuck you can wriggle free.

Breathing apparatus makes diving on a fouled propeller easier
Most sailors will have a multitool, sailing or Swiss Army knife on board.
However, Tom Cunliffe favours a robust bread knife or hacksaw. “Both are less likely to inflict horrible wounds and both will hack their way through nets, rope that’s welded itself together into a lump, or that villainous feature of modern life, the plastic fertiliser bag.”

If the fouled propeller can not be cleared at sea, then it could require a costly lift-out. Credit: Stu Davies
The RYA’s Richard Falk is a free diver, former SCUBA diving instructor and a sailor with several hundred thousand miles under his belt.
He tells PBO, “I have some first-hand experience of this – and it is a pretty touchy subject! First and foremost, entering the water should not be attempted by anyone who is not experienced in snorkelling or diving, and is physically fit and healthy.
“Even then, circumstances such as sea state, water temperature, traffic, pollution, risk of entanglement and potentially dangerous sea life may be good reasons not to consider getting in the water.
“Even the slightest of seas will create a slamming effect as the bow and stern of the vessel hobby horse, risking the stern of the vessel slamming into the person in the water working to clear the prop or rudder.
In the event that an individual does decide to get in the water to clear a fouled propeller or rudder, they would want to consider the following:
“There have been several fatalities involving people entering the water to clear a fouled prop, only to be struck by their vessel stern slamming into them, and I emphasise this is not an action that should be undertaken lightly.”
If you’ve managed to free a fouled propeller it’s still really important to check the hull.
Water ingress or loss of the prop shaft can be catastrophic. A fouled propeller can strip gears in the gearbox or even rip the engine from its mounts.
You’d have to be really unlucky for your prop shaft to fall out at sea – but it does happen.
Make sure you have a hardwood bung on board that fits the prop shaft’s exit hole – ideally secured with a lanyard next to the stern gland.
As the old adage goes, prevention is better than cure, and prop rope cutters can certainly limit the damage or prevent a wrap altogether.
These have been around commercially since the early 1980s and there are three types: disc, scissor and shaver.
The disc cutter, also known as a rotary cutter, is mounted on the prop shaft and as the propeller spins, so does the disc, its sharp edges slicing through any tangled rope or debris.

Shaver-type rope cutter attached to a P-bracket. Credit: Darglow Engineering
Scissor rope cutters have two or more blades that operate in a scissor-like action.
When they meet resistance such as a rope or fishing net, the rotation of the prop shaft forces them to close and cut the debris.
Shaver rope cutters – used by the RNLI – are small fixed blades mounted on the block attached to the P-bracket.
A cylinder slides over the shaft and attaches to the front boss of the prop.

A disc rope cutter can prevent a fouled propeller from becoming much worse. Credit: Stu Davies
Debris is forced between the blades and the prop and as the blade spins the rope is gradually shaved through.
Rope cutters are made from stainless steel or titanium and can be retrofitted by anyone with good DIY skills, though the boat needs to be out of the water.
Many designs can be fitted without removing the prop but you’ll need to drill into the shaft to attach the cutter.
For specialist information, try companies such as Darglow Engineering and R&D Marine.
While it’s unusual to encounter nets on an ocean crossing, two yachts got tangled in fishing gear last November whilst en-route to Cape Verde in the first leg of the ARC+ rally.
Kristian Hægeland, skipper of Najad 520 Christina, noticed what looked like ‘a veil’ in the ocean.
Further investigation with a GoPro camera and flashlight attached to a boat hook revealed the net had disabled both the rudder and the propeller.
After hours of hard work, they managed to free the net from the rudder and bring it to the bow, but it was still tangled around the propeller.
As it was night-time and the seas were rough, they were unable to deal with it immediately.

The long net that fouled the keel, prop and rudder on ARC+ yacht Christina. Credit: Bjørn Ander
However, the nearby yacht Frenesi, a Nauticat 43, stayed on standby.
With her rudder back in action, Christina continued to sail towards Cape Verde and, when conditions allowed, the boats hove-to and put out their sea anchors.
Using a paddleboard and a long line with a fender attached to the boat, Frenesi’s skipper Martin Hakansson dived overboard with a crewmember and cut free the net with a Leatherman knife.
In an unfortunate coincidence, the following day Frenesi also got tangled in line and Martin had to dive overboard again, this time to free his own propeller.

A paddleboard provided a steady platform for the divers to rest mid-Atlantic. Credit: Bjørn Ander
Despite the ordeal, the two crews arrived in Marina Mindelo, Cape Verde, happy and well rested.
It’s not the first time PBO has interviewed a skipper who dived overboard in the Atlantic.
In 2020 we met ARC participant Jarmo Lohikari, who swam underneath his Hans Groop EA to free the jammed rudder.
When Jarmo surfaced he was covered not only in bruises, but antifouling – leading his daughter to comment he looked like a Smurf!
The Finnish skipper had been given a diving lesson the Christmas before by his wife Teija.
“Little did I know how valuable her gift would turn out to be,” he said. “My first dive was in the swimming pool in Helsinki. My second dive, it turned out, would be in the middle of the Atlantic…”

World Cruising Club communications manager Rachel Hibberd
Rachel Hibberd, a comms manager for World Cruising Club, was crossing the North Sea from the Netherlands to the East Coast when she and her then-husband Steven caught a rope around the propeller of their Hallberg-Rassy 42.
“It was where the traffic separation schemes come together; where all the ships are!” She recalls.
”The first thing we noticed was the dropping revs from the engine. There was no wind at all, and visibility was poor – classic North Sea conditions.”
The boat was wide at the stern so it was hard to see what was happening. Steven decided to go overboard with a snorkel and mask to investigate.
“He was quite adventurous and the stronger of the two of us, so it made sense,” says Rachel. “He discovered the prop was fouled by a 6ft rope, around 2in diameter, with bits of nets on it.”
Steven attached himself to the boat with a rope around the waist, but encountered far more swell than he’d envisaged. He had to be incredibly careful not to bang his head under the transom.
He went down with cutting tool after cutting tool, but nothing worked.
“Perceived wisdom is to lash a knife onto a pole but you need a lot of force and we couldn’t get it to work,” says Rachel. “We tried all our sailing knives and blunted everything; hacksaw blades and various other things. The rope was plastic and very fibrous.”
Finally, after an hour’s battling, an exhausted Steven managed to free the rope with a bread knife.
Looking back, Rachel acknowledges it could have been an extremely stressful situation, but says she felt confident because it was daylight.
“There were lots of ships around but we put out regular warning calls and had white flares and orange float flares to hand. I think it was the adrenaline that kept us going. In a way, it was also kind of fun and exciting. We were young and solving a problem. I can’t say I’d feel the same excitement now, 20 years later!”
These days Rachel recommends using a GoPro on a stick like the crew of Christina did in the recent ARC+ rally.
“That way you could formulate a plan before deciding whether to do the most risky thing and enter the water,” she advises.
“You might discover the rope’s not as tightly attached as you first thought and you can free it with a boat hook or fishing gaff.”
Through her role at World Cruising Club, Rachel speaks to hundreds of sailors taking part in ARC rallies, and has found sargassum weed is a growing problem because of increasing water temperature.
“There are quite large rafts of it so you need to keep a lookout,” she says. “It’s easy to deal with – you can push it off with a boathook or reverse under sail or motor.”
It happens to the best of us: even PBO’s engine expert Stu Davies has come a cropper twice from fouled props!
The first time was when Stu and wife, Laura, were on the river in Waterford, Ireland.
“We felt something wind around the prop and managed to limp to the marina in the town centre,” says Laura.
“I was happy to dive under the boat but I didn’t tie myself on in case I got tangled. Instead, I attached a rope from the winch to the propeller so I had something to hang on to. It turned out to be one of those orange barrier fences with the holes in. It had wrapped itself around the propeller shaft and I managed to free it with a diving knife.”
That was 15 years ago, and since then the couple have moved their Beneteau 381 out to Portugal to enjoy some winter sun.

The damaged bearing on Stu’s Beneteau 381. Screws were required to get it out of the bearing tube. Credit: Stu Davies
They were leaving an anchorage in Ferragudo when they went over the dinghy painter. The engine immediately started banging.
Due to his health, Stu was unable to dive overboard, but Laura had done it before and was happy to do it again.
“I didn’t wear diving gear,” adds Laura. “The tank just gets in the way and it’s not that far down, but it did get blinking cold! The rope had wrapped itself around the prop shaft, pushing the cutless bearing up the shaft. Laura tried a diving knife but it didn’t work.
“There was an inch of shaft exposed and the rope had wrapped itself in very tightly,” she says.
“It took a fair bit of work, wedging my back against the boat and holding my breath long enough to make the cuts. You quickly run out of energy.” After three exhausting hours, Laura succeeded with a pairing knife – one they use to peel potatoes.
“I managed to get it between the rope and the shaft. It was sharp as a razor and did the job!”

Stu and Laura’s propshaft required a new bearing. Credit: Stu Davies
It was enough for them to hand-turn the shaft to get the engine started and leave the anchorage.
Fortunately, they had enough wind to sail 12 miles to Albufeirer, where they paid a hefty €460 for a lift-out.
Stu then removed the prop and replaced the cutless bearing.
“It’s really important to check your prop after it’s been fouled,” Stu advises. “Even if everything looks fine, a tangle may have bent the shaft and shifted the engine bearers.”
Fortunately, the boat had rope cutters, which limited the damage considerably. “Fitting rope cutters is a DIY job. If you’re capable of taking off a propeller you can easily put the rope-cutters on.”

The correct prop can have a dramatic effect on your boat's performance. Ali Wood learns how you can save fuel,…

Jake Kavanagh talks to Sea Start marine engineer Nick Eales about how to avoid the five major causes of an…

While Rod Stuart was scrubbing his boat, he saw the anode had fallen off and his propeller was turning a…

Nicko Williams asks: “I wonder what your views are on folding versus feathering boat propellers. “My Jeanneau 379 carries a…
Want to read more practical articles?
A subscription to Practical Boat Owner magazine costs around 40% less than the cover price.
Print and digital editions are available through Magazines Direct – where you can also find the latest deals.
PBO is packed with information to help you get the most from boat ownership – whether sail or power.
Follow us on Facebook, Instagram, TikTok and Twitter
%20100vw,%20300px%22%20data-image-id%3D%2294556%22%20/%3E%3Cfigcaption%3EIf%20you%20can,%20try%20and%20deal%20with%20a%20fouled%20propeller%20on%20the%20boat,%20but%20there%20are%20times%20when%20you%20might%20have%20no%20option%20but%20to%20enter%20the%20water.%20Credit:%20Lester%20McCarthy%3C/figcaption%3E%3C/figure%3E%3Cp%3E%3Cstrong%3EWhat%20should%20you%20do%20when%20you%20catch%20a%20line%20or%20fishing%20net%20and%20your%20prop%20becomes%20fouled?%20Ali%20Wood%20looks%20at%20the%20options%3C/strong%3E%3C/p%3EWhat%20should%20you%20do%20when%20you%20catch%20a%20line%20or%20fishing%20net%20and%20your%20prop%20becomes%20fouled?%20Ali%20Wood%20looks%20at%20the%20options)
Boat owners and other stakeholders are invited to share their boat licensing experiences and suggestions for improvement via the Canal & River Trust's survey – are changes needed for the UK network’s future?

An independently led commission is reviewing the legal framework around the Canal & River Trust’s boat licensing.
As part of this review, a public consultation is under way with a survey asking individuals and organisations to share their experiences of boat licensing on the UK’s canal network, and any changes they would like to see to the Trust’s approach to boat licensing.
The survey began on 3 March and will close at 9am on Tuesday 22 April.
The survey can be completed anonymously or to provide contact details for those individuals or organisations who may wish for further engagement as the commission develops its recommendations.
It has been 30 years since the British Waterways Act 1995 was passed and, in that time, there have been many changes to the canal network and how it is managed, the number of boats licensed on our waterways, and the way people are choosing to use their boats.
Trust representatives say “it’s a sensible time to take a fresh look at how we licence boats on our waters and help us consider whether it would be sensible to consider possible changes that better reflect the use of the network, today and in the future.”
The Trust has already set out our plans for licence price changes up to 2028, and these won’t change. All decisions on proposals for change coming out from the work of the Commission will remain with the Board of Trustees of the Canal & River Trust.
The Commission is being chaired by Andrew Cowan, a former senior partner at Devonshires, a law firm. It also includes Penelope Barber, one of the elected boating representatives on the Trust’s Council, and trustee Sir Chris Kelly, a previous senior civil servant and former boat owner.
Mr Cowan said: “Over the past 30 years there have been significant changes in the use of the 2,000-mile canal network managed by the Canal & River Trust. We have been asked to review the framework around boat licensing and to explore whether it is appropriate for the network’s future.
“As part of the process we are keen to hear from boaters and other stakeholders with a view on boat licensing. The responses will help us understand the views of different stakeholder groups and will be key to forming our thinking about the current licensing system and whether it can be improved.”
It is anticipated that the Commission will make recommendations to the Trust’s Board of Trustees in September 2025.
Find out more and complete the survey at canalrivertrust.org.uk/boating

Rupert Holmes and Jonathan Mosse look at boats, seamanship skills, planning and destinations in their guide to inland boating in…

For years my wife, Ann, and I have been Greek Mediterranean cruisers – we keep our Moody Eclipse Aderyn Glas…

When we first moved to Deganwy I saw a programme on Welsh television with a couple of guys from Aberaeron…
Just like today’s sailing cruisers, the new generation of motorboats give you a lot of space for their length. David…
Want to read more news stories in PBO?
A subscription to Practical Boat Owner magazine costs around 40% less than the cover price.
Print and digital editions are available through Magazines Direct – where you can also find the latest deals.
PBO is packed with information to help you get the most from boat ownership – whether sail or power.
Follow us on Facebook, Instagram, TikTok and Twitter
%20100vw,%20300px%22%20data-image-id%3D%2294413%22%20/%3E%3Cfigcaption%3EGarstang,%20on%20the%20Lancaster%20Canal,%20is%20part%20of%20the%202,000-mile%20canal%20network%20in%20the%20UK%20which%20is%20managed%20by%20the%20Canal%20%26amp;%20River%20Trust.%20Credit:%20Barrie%20Harwood%20Alamy%20%3C/figcaption%3E%3C/figure%3E%3Cp%3E%3Cstrong%3EBoat%20owners%20and%20other%20stakeholders%20are%20invited%20to%20share%20their%20boat%20licensing%20experiences%20and%20suggestions%20for%20improvement%20via%20the%20Canal%20%26amp;%20River%20Trust's%20survey%20%E2%80%93%20are%20changes%20needed%20for%20the%20UK%20network%E2%80%99s%20future?%3C/strong%3E%3C/p%3EShare%20your%20experiences%20and%20suggestions%20for%20improvement%20via%20the%20Canal%20and%20River%20Trust's%20boat%20licensing%20survey%20%E2%80%93%C2%A0are%20changes%20needed%20for%20the%20network%E2%80%99s%20future?)
Got old sails and unwanted rope that you don't want to put into landfill? The ReSail platform, one of the not-for-profit Clean Sailors projects, allows sailors to search for and find free drop-off points to give new life to end-of-life sails and other marine kit

Sadly 97% of old and end-of-life sails end up in landfill in the UK and in most other geographies it indexes much higher, touching almost 100%, with no formal facilities to recycle old sails anywhere in the world.
Find out how to make sails last longer
After the success of a pilot project by Clean Sailors in 2021, whereby SKB Sails in Falmouth, Cornwall, agreed to become the first drop-off point for old sails, now there are 38 more such drop-offs in 11 countries across the UK and Europe – including France, Poland, the Netherlands, Germany, Italy, Spain, Portugal and Greece.
“We joined ReSail by Clean Sailors as we had so many customers who don’t know what to do with old sails. To give them another use, a second lease of life – why not?” says Nick Head, sailmaker and director of SKB Sails.
“It has totally snowballed and it’s really good to see that there are other companies onboard who share the same view as us.”

Nick Head, sailmaker and director of SKB Sails, with Holly Manvell, founder of Clean Sailors
Sailors can use the Resail global platform to locate their nearest participating business or organisation that can recycle old sails.
Sails can be dropped off, they will then be ‘upcycled’ and given a second life, made into a host of lifestyle products such as bags, washbags, deck chairs and doorstops and taken up by other individuals, including sailors, looking for second-hand kit.
Whilst most materials used for sailing are built to withstand some of the toughest conditions on our planet including UV light, saltwater and wind, they don’t last forever, and they all have a time limit on their initial use.
The ReSail global sail recycling platform is giving old sails a new life.
Visit resailbycleansailors.com and search for your nearest sail recycling drop-off point.
Here you will see what type of kit is accepted, some locations only take sails, while others will also accept old rope, canvas and spinnakers.
Across the UK there are currently eight companies taking part, primarily in the south west, amongst 27 participating drop-off points worldwide.
OneSails GBR (East) signed up for the global ReSail ‘drop off’ platform in March 2023 to collect old and end-of-life sail materials.
John Parker from OneSails GBR (East) said: “To be honest, we didn’t know whether it would strike a chord with people, but the response has been fantastic.
“Over 250 sails in less than a year shows sailors are conscious of their environmental impact and want to reduce their waste. We have now started collecting old rope as well as sails, and we’ve found interesting and creative ways to find new uses for both.”

Unwanted sails were collected at SKB Sails in Falmouth, Cornwall. Credit: Clean Sailors
SOUTH & SOUTH WEST
Rocketcrunch
29 Creswicke Avenue,
Bristol, Bristol, BS15 3HE
Collects: Sails / Canvas / Lines / Sheets / Ropes
Sails and Canvas
Shed 9, Topsham Quay
Topsham, Devon, EX3 0JB
Collects: Sails / Canvas
OARSUM
The Olde Cottage, Bent Street
Nether Wallop, Stockbridge, SO208EJ
Collects: Dacron Sails / Canvas
SKB Sails
The Sail Loft, Commercial Road
Penryn, Cornwall, TR10 8AG
Collects: Sails / Canvas
WALES
Mouse Sails
Porthdafarch,
Holyhead, Wales, LL65 2LL
Collects: Sails / Line / Sheets / Ropes
NORTH
Retribe Clothing Ltd
109-111 Randall Street,
Sheffield, South Yorkshire, S2 4SJ
Collects: Sails, Canvas
EAST & SOUTH EAST
OneSails GBR
Suffolk Yacht Harbour, Levington
Ipswich, East Suffolk, IP10 0LN
Collects: Sails
Ocean Republic
32 Downside,
Shoreham-by-Sea, West Sussex, BN43 6HG
Collects: Sails /Heavy Duty Sails / Lines / Sheets / Ropes
FRANCE
La Virgule
Les ateliers du Détroit, Rue Gustave Courbet
Calais, 62100, France
Collects: Sails
La Virgule
Garage, 34 Boulevard Carnot
Lille, 59000, France
Collects: Sails
La Virgule
Presqu’île Guérandaise, 28 A Rue de Kerdandec
Mesquer, 44420, France
Collects: Sails
THE NETHERLANDS
Setting Sails
Westerstraat 5-9,
Rotterdam, 3016 DG, Netherlands
Collects: Sails
GERMANY
Sailmate
An der Alster 58,
Hamburg, 20099, Germany
Collects: Sails / Lines / Sheets / Ropes
Sailmate
Oststrasse 7,
Sangerhausen, 6526, Germany
Collects: Sails / Lines / Sheets / Ropes
POLAND
CODE ZERO
Boh. Monte Cassino 10,
Sopot, 81-805, Poland
Collects: Sails
CODE ZERO
Lanowa 70,
Gdansk, 80-777, Poland
Collects: Sails
ITALY
Bolina Sail
Viale Italia 48, Lignano Sabbiadoro,
33054, Italy
Collects: Sails
Purye Clothing
Viale Italia 48,
Lignano Sabbiadoro, 20810, Italy
Collects: Sails
JUNKLE
Piazza Aragona 13,
Palermo, 90133, Italy
Collects: Sails
SPAIN
Resail BCN
Port Esportiu del Masnou, S/N
Barcelona, 8328, Spain
Collects: Sails / Line / Sheets / Rope
PORTUGAL
La Virgule
Casa do Impacto, Tv. de São Pedro 8,
Lisbon 1200-432, Portugal
Collects: Sails
La Virgule
Mercedes Sailing Academy, Doca de Santo Amaro
armazém 17, Lisbon 1350-353, Portugal
Collects: Sails
La Virgule
Sail Fix, Avenida Brasilia Doca de Belém
núcleo de apoio à náutica 12, Lisbon 1300-598, Portugal
Collects: Sails
GREECE
Salty Bag
Erotokritou Moraiti 14,
Corfu, Corfu 49100, Greece
Collects: Sails
Visit resailbycleansailors.com for the latest list of participating organisations and businesses.
Clean Sailors is a not-for-profit founded in 2020 by sailor, environmentalist and ocean appreciator, Holly Manvell. Through its projects, Clean Sailors raises awareness of ocean conservation issues and opportunities within the global sailing and marine communities.
In 2022, Clean Sailors partnered with Italian boatbuilder, nl comp and OneSails to launch the world’s first fully recyclable Optimist, and the project has a podcast featuring conversations with industry innovators and figureheads engaged in building a more sustainable marine industry.
Want to read more news stories about sailing and boating?
A subscription to Practical Boat Owner magazine costs around 40% less than the cover price.
Print and digital editions are available through Magazines Direct – where you can also find the latest deals.
PBO is packed with information to help you get the most from boat ownership – whether sail or power.
Follow us on Facebook, Instagram, TikTok and Twitter
%20100vw,%20300px%22%20data-image-id%3D%2294377%22%20/%3E%3Cfigcaption%3EUnwanted%20sails%20collected%20at%20SKB%20Sails%20in%20Falmouth,%20Cornwall.%20Credit:%20Clean%20Sailors%3C/figcaption%3E%3C/figure%3E%3Cp%3E%3Cstrong%3EGot%20old%20sails%20and%20unwanted%20rope%20that%20you%20don't%20want%20to%20put%20into%20landfill?%20The%20ReSail%20platform,%20one%20of%20the%20not-for-profit%20Clean%20Sailors%20projects,%20allows%20sailors%20to%20search%20for%20and%20find%20free%20drop-off%20points%20to%20give%20new%20life%20to%20end-of-life%20sails%20and%20other%20marine%20kit%3C/strong%3E%3C/p%3EGot%20old%20sails%20and%20old%20rope%20that%20you%20don't%20want%20to%20put%20into%20landfill?%20The%20ReSail%20platform%20allows%20sailors%20to%20find%20free%20drop-off%20points%20to%20give%20new%20life%20to%20end-of-life%20sails%20and%20other%20marine%20kit)