Homemade Shrimp Tacos 28 Apr 8:48 AM (yesterday, 8:48 am)
After 17 years of developing delicious recipes (many of which are tacos), I’ve learned one undeniable truth: when cheese gets golden and lacy and fuses to a tortilla… magic happens. These shrimp tacos are a spicy little love letter to that moment.

These tacos are also unique. Why?
If you take a look at the ingredient list you may notice that something is missing.
This recipe doesn't have any spices -- zero taco seasoning or anything similar.
Sometimes I think tacos are over-reliant on a heavy seasoning. Yes, cumin and chili powder make some pretty bomb tacos, but this recipe highlights the natural taste of the shrimp, peppers, onions, and sweet corn toasted up in some garlic butter.
A hit of Worcestershire and some tomato paste give it a bump of umami but trust me: you don't need any taco seasoning.
The Best Shrimp Taco Recipe
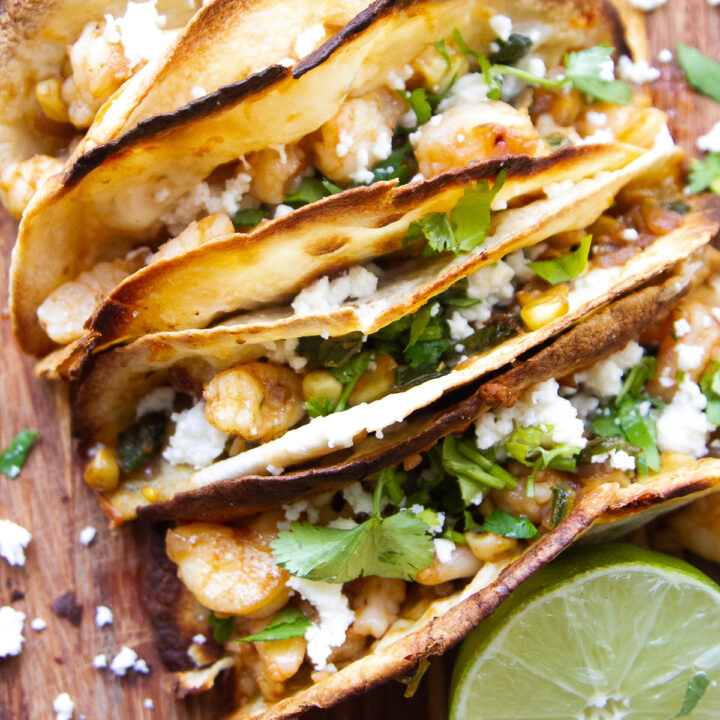
They’ve got it all—perfectly seasoned, juicy shrimp; tortillas with that crispy, melty cheese situation; bits of shrimp and veggies sautéed in garlic butter; and a squirt of lime that pulls the whole thing together.
And the fact that the shrimp is chopped makes the filling more homogenous and easier to eat. (You're welcome.)
Why you'll love this Recipe For Shrimp Tacos
If you're leery of handling shrimp (or any raw seafood, for that matter) I'll show you how insanely easy shrimp is to prep and cook. And I'll show you exactly what to look for when you're at the store!
The simplicity of these tacos is what makes them special. It's a "whole is greater than the sum of its parts" situation.
I’ve made a lot of tacos in my day, and these? They’re easily top-tier. Fast enough for a weeknight, bold enough to impress your most food-savvy friend.
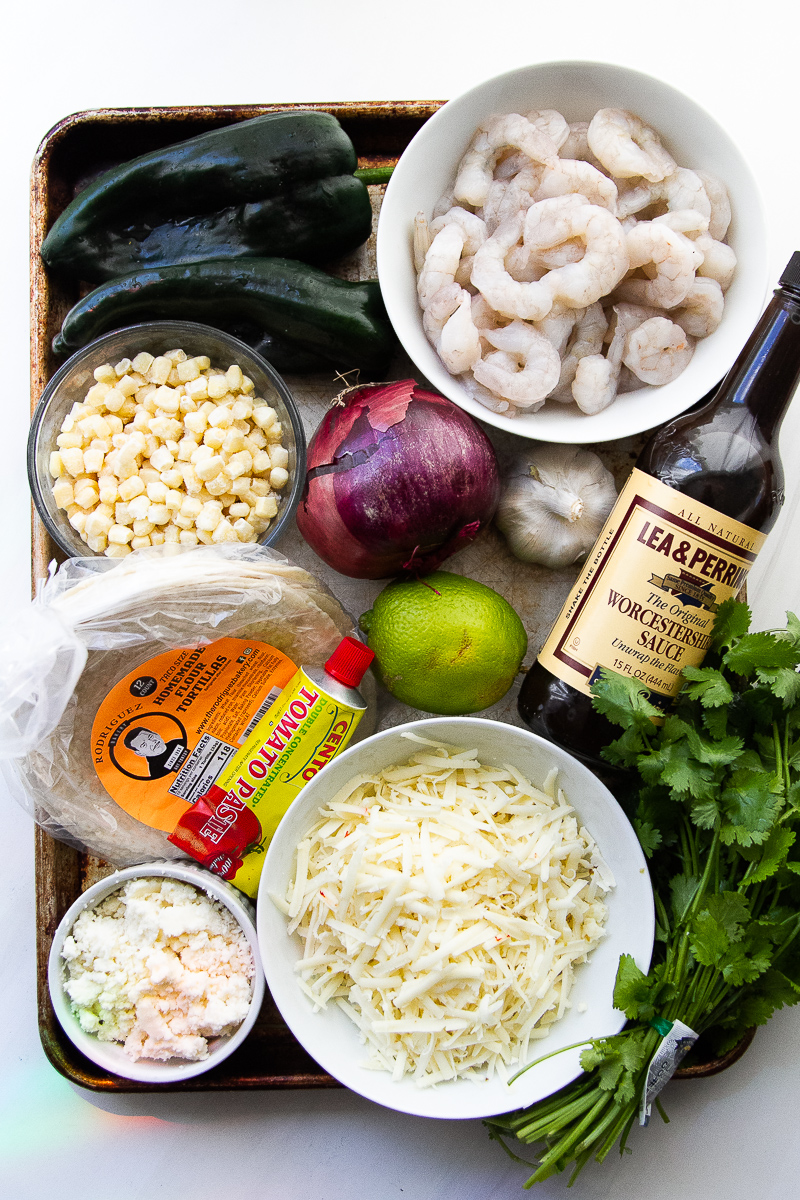
Shrimp Taco Ingredients
- Uncooked shrimp - Look for large or medium uncooked shrimp, tails and shells removed. (Unless you prefer handling that yourself.) I usually buy a frozen bag and keep it in the freezer for emergencies.
- Onion -- Use any kind you prefer. I use basic yellow or sweet onions for most things I sauté.
- Poblano Peppers -- If you've never purchased poblano peppers, they look like a bell pepper and a jalapeño had a baby. Large, deep green, and elongated, these peppers have a little kick, but not as spicy as a jalapeño. I included some substations below if you can't find these.
- Frozen Corn -- White or yellow both work well here. You could even use fresh.
- Fresh Garlic -- Pre-minced is also OK.
- Sea Salt -- Or whatever salt you prefer using.
- Butter -- The star, really. It's such a diva.
- Worcestershire -- I know, it sounds weird, but trust me on this. It adds a nice little boost of umami.
- Tomato Paste -- Another boost of umami and creates a little "saucy" texture. Rawr.
- Lime juice -- Fresh, please!
- Small Tortillas -- I like the street taco or "small" taco size. Use flour or corn -- whichever you prefer.
- Grated Cheese -- I like "quesadilla cheese" found in the Latin dairy section, pepper jack, or Monterey Jack for these tacos.
- Queso Fresco -- Yes, more cheese. To sprinkle on top. Love these slightly salty fresh cheese also found in the Latin dairy section.
- Fresh Cilantro -- Sprinkle away at the end. Or not, if you've got that soap thing going on.
How to make Cheesy Shrimp Tacos
- Chop the shrimp, sprinkle it with sea salt. Set aside.
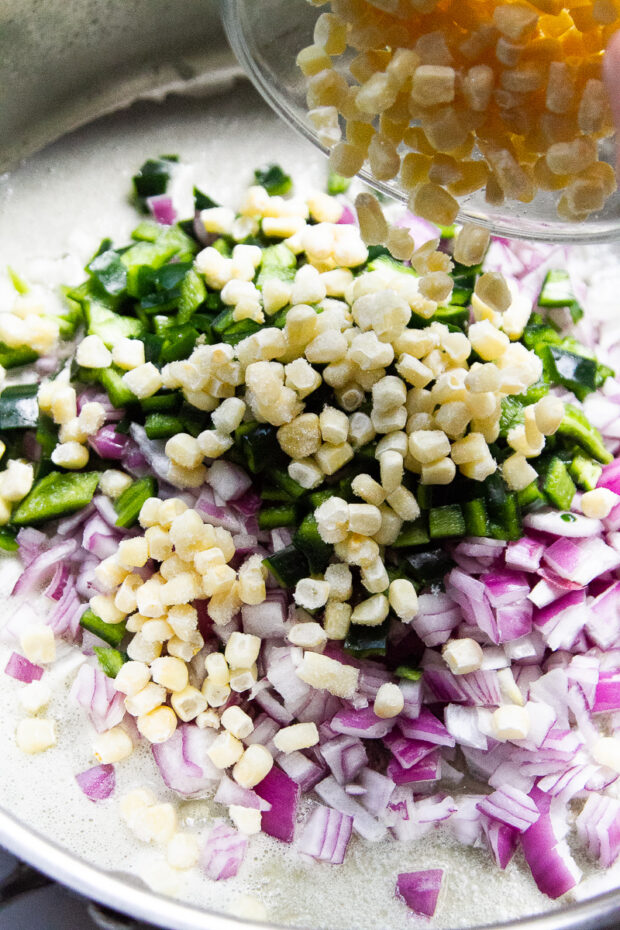
- Melt some of the butter in a very large skillet and sauté the corn, poblanos, and onion until the onions have some deep caramelization -- about 20 minutes.
- Preheat your oven broiler to high and place an oven rack in the upper third of your oven.
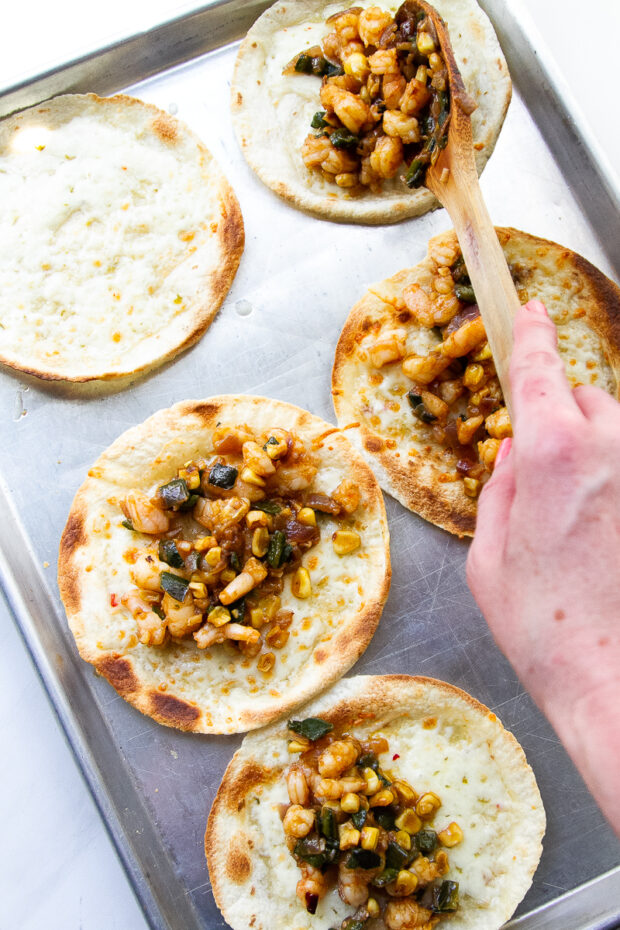
- Lay tortillas on a large sheet pan and sprinkle each with some grated cheese. Set aside.
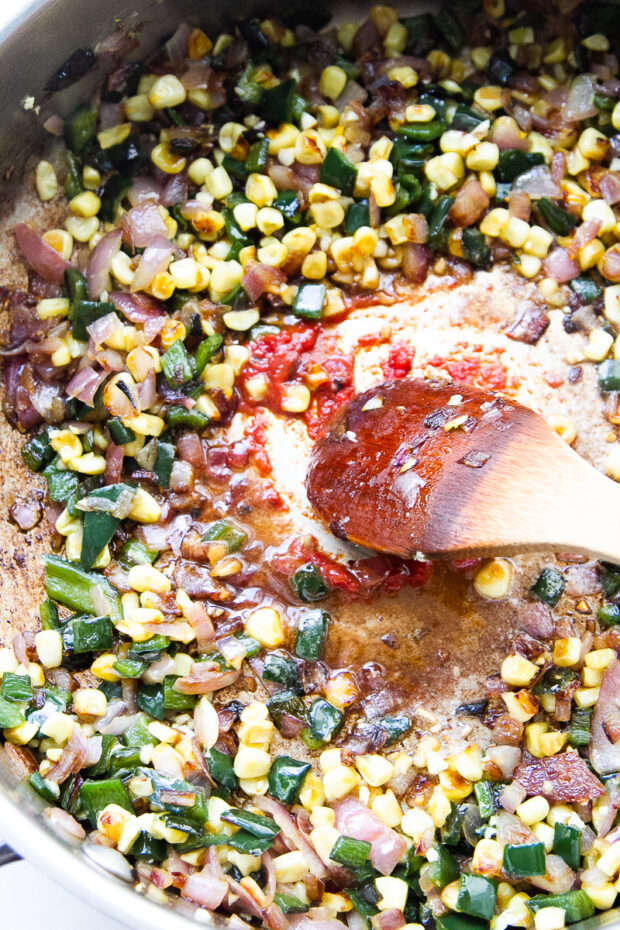
- Clear out a space in the middle of your skillet and add more butter. Add the garlic, Worcestershire sauce, water, and tomato paste to the melted butter and stir it into the vegetables.
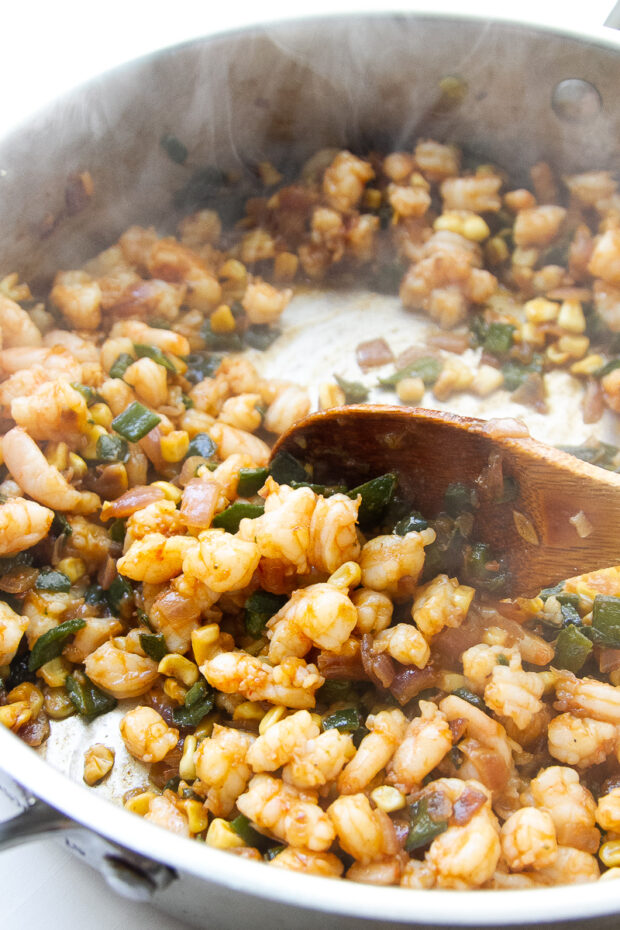
- Add the chopped shrimp and cook for 4-5 more minutes. Squeeze juice from a lime over the whole thing and remove from heat.
- Put the pan with the tortillas in the oven for 3-4 minutes until the cheese is melted and has some browned spots.
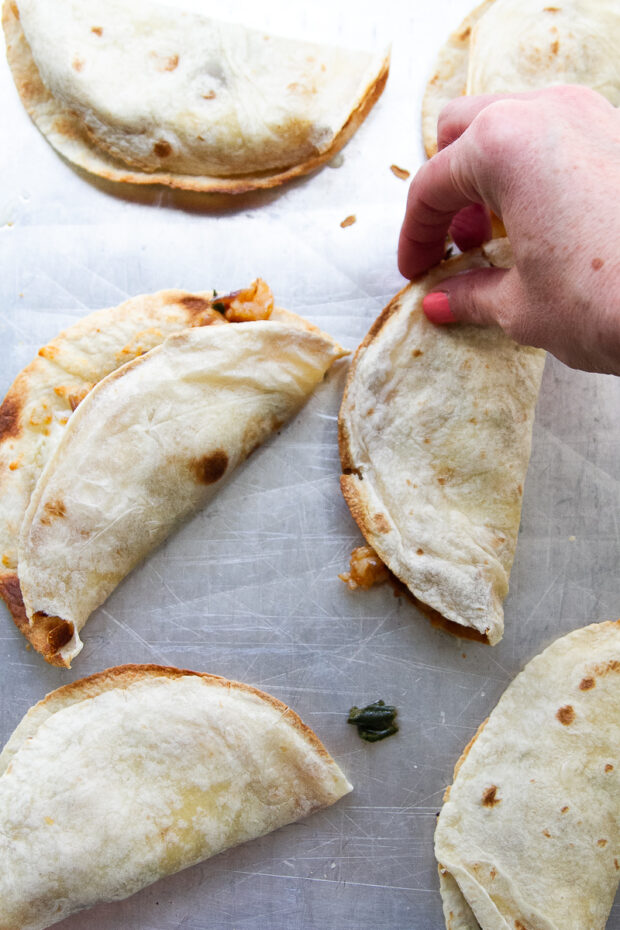
- Pull it out, put some shrimp filling into the center of each tortilla and fold them in half. Return to the broiler for 90 seconds, flip, and cook another 90 seconds or until they're as crispy as you like.
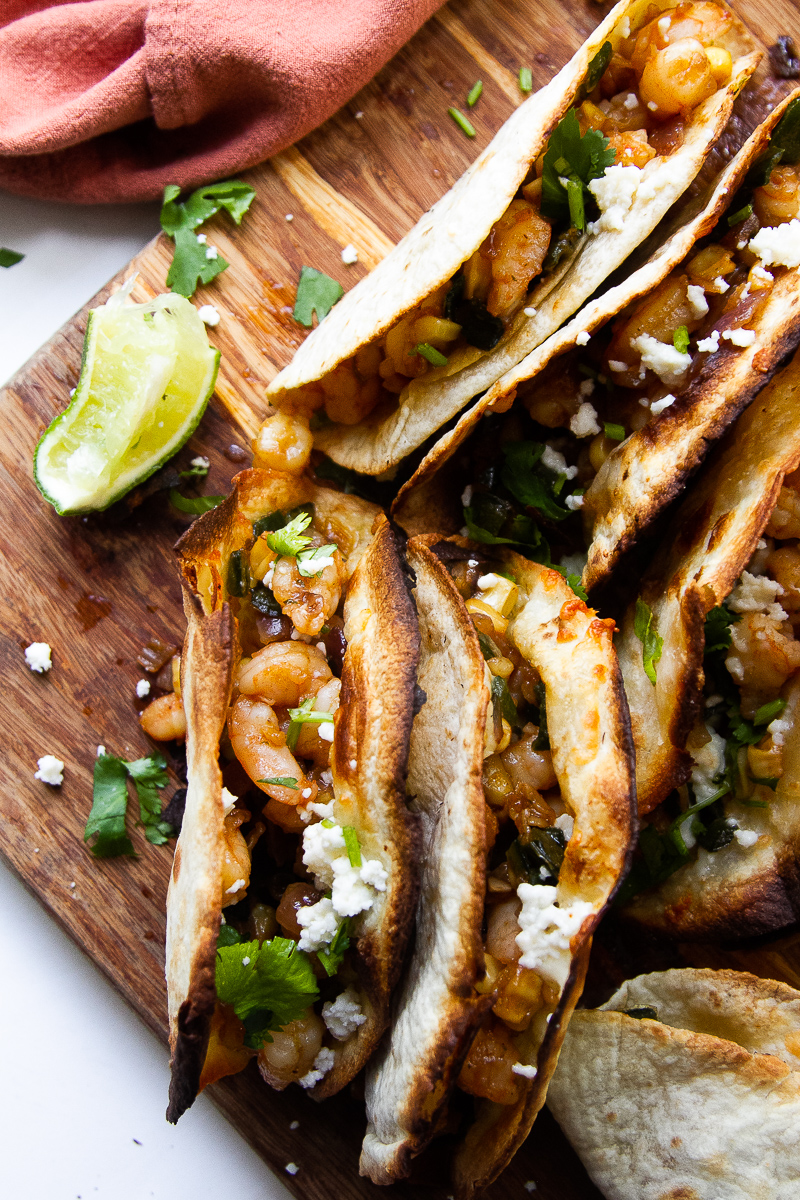
- Serve with a sprinkle of queso fresco and fresh cilantro.
How to prepare the shrimp
If your shrimp is frozen, pull out the required amount (Weight it if you need to, if you've got a kitchen scale. I use mine all the time!)
To quickly thaw the shrimp, put it in a bowl with some cool water. Let it sit for 15-20 minutes and use your hands to get more of the ice off the shrimp. When they're thawed, drain and transfer them to a cutting board to chop.
You can pile them all up and run your knife through them or you can cut them individually. Aim for each shrimp to be cut into 3-4 pieces.
Homemade Shrimp Tacos Variations and Substitutions
Here are a few substations you can make for ingredients in the recipe:
- Poblanos: Use bell peppers (any color) or a few jalapeños if you want things spicier. You could even use a 4-ounce can of diced green chiles.
- Corn: If you don't eat corn, you can simply add more peppers and onions. Chopped zucchini would be another good swap.
- Garlic: Yes, you can use granulated garlic. If you must.
- Worcestershire: Use equal amount of coconut aminos or half the amount of Tamari/soy sauce.
- Make it a salad: If you're avoiding grains and dairy, use the shrimp filling over a bed of salad greens and top with some Pico de Gallo and a drizzle of extra-virgin olive oil! My Southwest Slaw would be my first choice for a salad base!
Best Shrimp Taco Recipe Tips
- Get some good color on the onions. It takes some time, yes, but the more caramelization you have on those onions, the more natural sweetness will come out in the filling. You'll want that.
- Use the biggest skillet you have. The bigger, the more cooking space and the faster your vegetables will caramelize.
- Don't overcook the shrimp. As soon as you don't see any gray spots, it's done. Overcooking shrimp is a one-way ticket to chewy-town.
- Use a timer when you're using your broiler. If you're like me and chronically char stuff under your broiler, set a damn timer.
- Toast up your tacos in a skillet if you don't want to do it in the broiler. I was trying to avoid more dirty skillets and have quicker toasting tacos by using the broiler, but it's a risky move.
What to serve with Cheesy Shrimp Tacos
Here are a few side dish ideas to round out this taco meal!
Pressure Cooker Black Beans are one of my go-to sides for Mexican-inspired meals. They're smoky, citrusy, with a little heat. (Psst.. they freeze beautifully and I love having a container or two in the freezer for emergencies!)
My Instant Pot Cilantro Lime Rice is a family favorite and mimics that to-die-for rice you find in fresh Mex eateries.
To keep it simple you could always grab your favorite tortilla chips, guacamole, and salsa! My Easy Simple Guacamole Recipe and Pico de Gallo Recipe are both the bomb if you're wanting to make your meal a little extra.
Our favorite Shrimp Taco Toppings
I kept it simple in this recipe with some queso fresco and cilantro, but here are a few other toppings you could add:
- Sliced avocado or guacamole
- Sour cream or Mexican crema
- Salsa or hot sauce
- A little sliced cabbage dressed with lime.
- Pickled onions. Have you made your own Homemade Pickled Onions? *gasp* they're so easy and so good on allll kinds of tacos and salads.
Storing Homemade Shrimp Tacos
Store any leftover filling in an airtight container in the fridge for up to 3 days for best flavor. Assembled tacos don't store well because the tortillas get soggy. They're best made to order!
More Easy Taco Recipes on Perry's Plate
One of my favorite games is "will it taco?" and here are a few of our favorites...
If you make one of my recipes, be sure to post it on social media and tag me at @perrysplate or #perrysplate so I can send you some love!
Cheesy Shrimp Tacos
After 17 years of developing delicious recipes (many of which are tacos), I’ve learned one undeniable truth: when cheese gets golden and lacy and fuses to a tortilla… magic happens. These shrimp tacos are a spicy little love letter to that moment.
Ingredients
- 1 pound uncooked medium or large shrimp, peeled, and tails removed
- Sea salt
- 6 Tablespoons butter, divided
- 1 large yellow onion, peeled and diced
- 2 poblano pepper (see note), seeded and diced
- 1 cup fresh or frozen corn
- 3 garlic cloves, crushed or Microplaned
- 2 teaspoons Worcestershire sauce or coconut aminos
- 2 teaspoons tomato paste
- 1 lime
- 12 small tortillas
- 6 ounces shredded cheese (see note)
- Queso Fresca and fresh cilantro, for garnish
- Queso Fresca and fresh cilantro, for garnish
Instructions
- Chop the shrimp roughly into thirds, sprinkle generously with sea salt. Set aside.
- Melt 4 Tablespoons of the butter in a very large skillet and sauté the corn, poblanos, and onion on medium or medium-high heat until the onions have some deep caramelization, stirring often -- about 20 minutes. Reduce heat of they start to scorch.
- While you're waiting, preheat your oven broiler to high and place an oven rack in the upper third of your oven.
- Lay half of the tortillas on a large sheet pan and sprinkle each with some grated cheese. It's OK if they overlap some. Set aside.
- When the vegetables are done, clear out a space in the middle of your skillet and add 2 Tablespoons more butter. Add the garlic, Worcestershire sauce, and tomato paste to the melted butter and stir it into the vegetables.
- Add the chopped shrimp and ⅓ cup of water and cook for 4-5 more minutes until the shrimp is pink and just barely cooked through. Squeeze juice from the lime over the whole thing and remove from heat.
- Put the pan with the tortillas in the oven for 3-4 minutes until the cheese is melted and has some browned spots.
- Pull it out, put some shrimp filling into the center of each tortilla and fold them in half. Return to the broiler for 90 seconds, flip, and cook another 90 seconds or until they're as crispy as you like.
- Repeat, assemling and toasting up the tacos with remaining tortillas, cheese, and shrimp filling.
- Serve each taco with a sprinkle of queso fresco and fresh cilantro.
Notes
- You could also use a couple small bell peppers or a few jalapeno peppers in place of the poblanos. Poblanos have a mild amount of heat but not the amount that is in a jalapeno.
- I like using "quesadilla cheese" that's found in the Latin dairy section, but Monterey jack or pepper jack also work well. Queso fresco is also found in the Latin food aisle. If you can't find it, just use more of whatever cheese you melted onto the tortillas.
- Use whatever tortillas you want. I recomend "street taco" or small taco sized. I especially love Siete's almond flour tortillas if you're avoiding grains. We find them at our Costco.
- If you're a hot sauce person, I highly recommend adding a little to these. I thought they were perfect with just a hint of heat.
Recommended Products
As an Amazon Associate and member of other affiliate programs, I earn from qualifying purchases.

Nutrition Information
Yield 6 Serving Size 2 tacosAmount Per Serving Calories 647Total Fat 33gSaturated Fat 17gTrans Fat 1gUnsaturated Fat 13gCholesterol 75mgSodium 1041mgCarbohydrates 68gFiber 5gSugar 4gProtein 21g
The information shown is an estimate provided by an online nutrition calculator. It should not be considered a substitute for a professional nutritionist’s advice.
This post may contain affiliate links. Any purchases made by using these links won't cost you any extra and helps keep my content free. These links may be Amazon links as I am part of the Amazon Associate Program.
The post Homemade Shrimp Tacos appeared first on Perry's Plate.


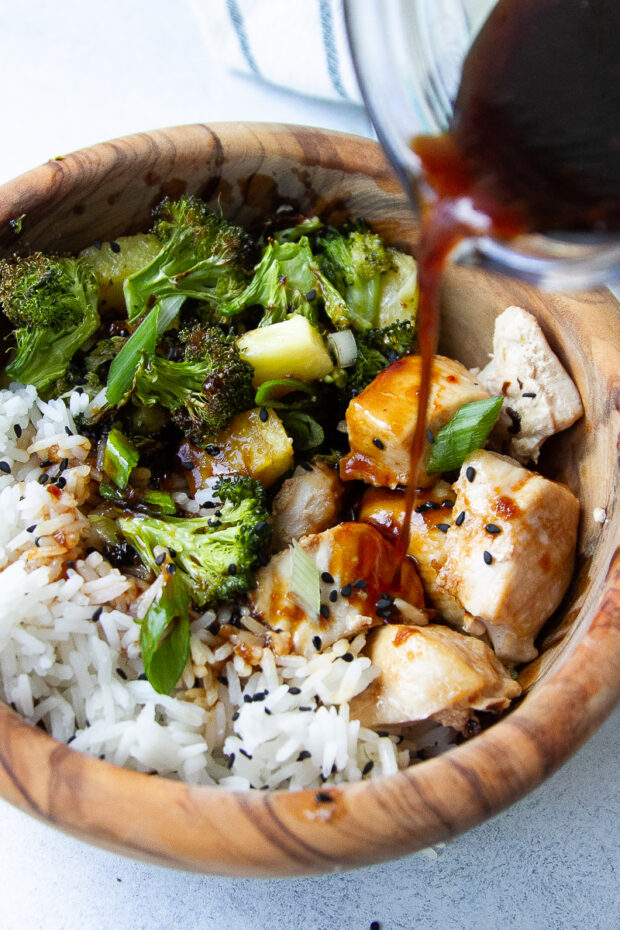
Chicken Teriyaki and Rice 4 Apr 2:16 AM (25 days ago)
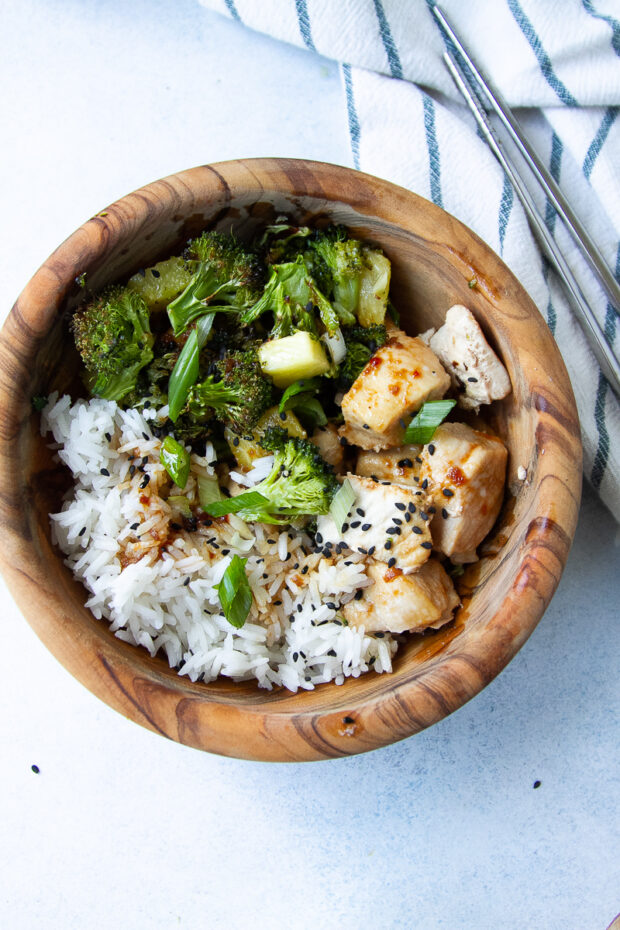
After feeding picky kids for 17 years, here's my best advice: make assembly type meals. Since this teriyaki chicken and rice isn't cooked in one big skillet all mixed together I can accommodate the kid who doesn't like pineapple, the kid who doesn't like broccoli, and the kid who doesn't like teriyaki sauce. And everyone is happy!
Teriyaki Chicken and Rice
It's a sheet pan meal, too! I LOVE sheet pan meals! This Teriyaki Chicken meal is being added to my big arsenal of quick, weeknight meals that my kids love. I promise you'll want to add this gem to your regular rotation!
Speaking of teriyaki sauce, you're more than welcome to use any kind you like here.
I don't love all the sugar and/or corn syrup in most teriyaki sauces. So... I made my own. It's quick to throw together and since it's honey-sweetened you can control the amount of sweetness!
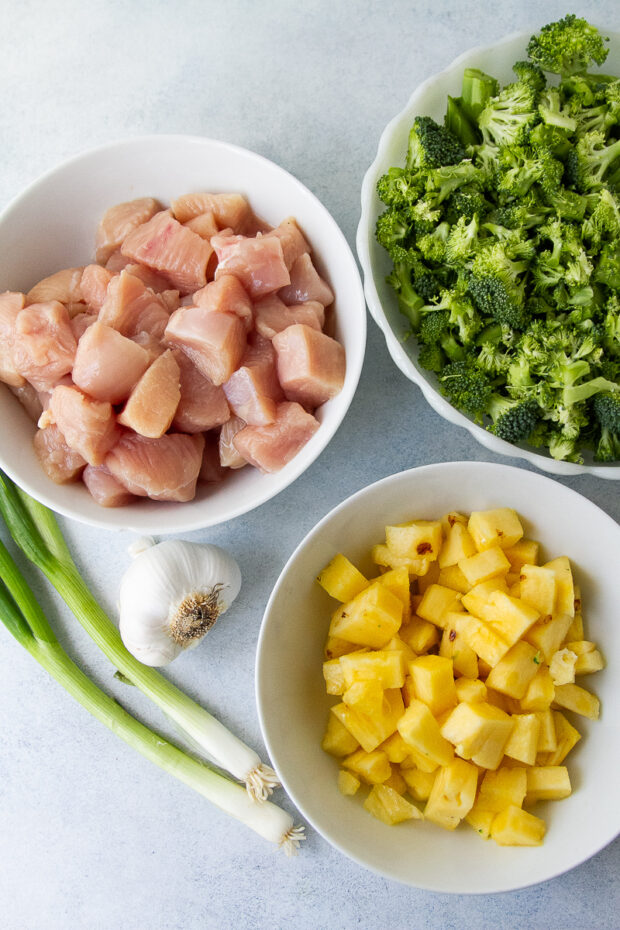

Teriyaki Chicken Rice Bowl Ingredients
- Chicken breasts or thighs - boneless, skinless works best here. And yes it's juicy!
- Pineapple - I chopped some fresh pineapple, but you can use canned if you want.
- Broccoli - About 2 crowns and chop it smaller than you would for a veg tray so it cooks quickly.
- Avocado oil - For roasting
- Sea Salt
- Soy Sauce - I use gluten free tamari, but you can also use coconut aminos if you're avoiding soy altogether.
- Rice vinegar - unseasoned
- Sesame Oil
- Honey
- Garlic - fresh or granulated
- Ginger - fresh or ground
- Asian-style hot sauce - sriracha and sambal oelek are my favorites
- Steamed Rice - You can also use my Instant Pot Coconut Rice or Roasted Cauliflower Rice if you're wanting this to be lower carb/grain free.
- Green onions and sesame seeds - for garnish. Totes optional.

How to make Teriyaki Chicken and Rice
- Cook the rice first!
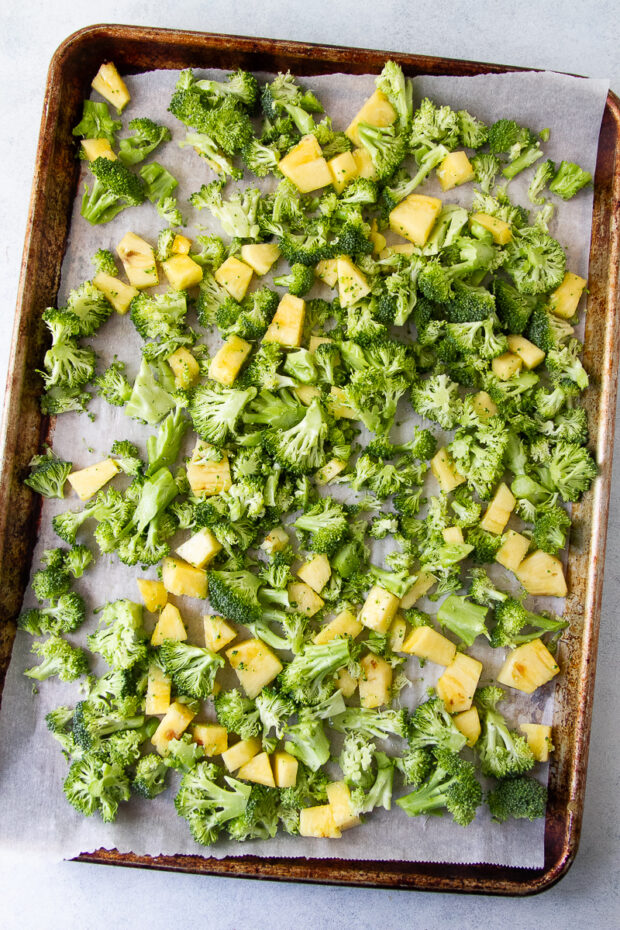
- Roast the chicken on one pan and the broccoli + pineapple on another under your oven broiler, rotating pans halfway through.
- Cook all the sauce ingredients for about 10 minutes in a saucepan over medium high heat until reduced to about ¾-1 cup.
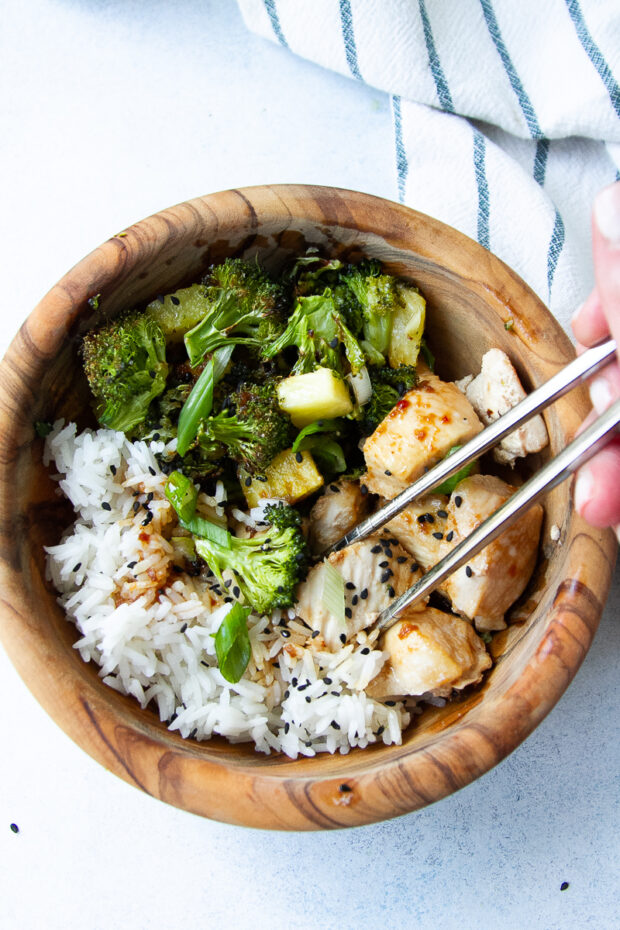
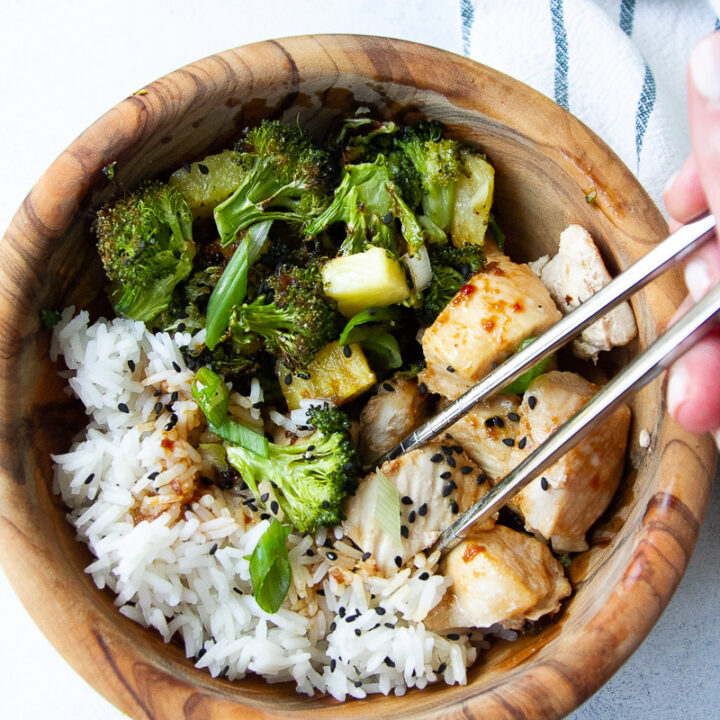
- Assemble the bowls with rice, chicken, broccoli, and pineapple. With a drizzle of sauce and a sprinkle of green onions and sesame seeds.

Chicken Teriyaki Rice Bowl Variations
- Swap out the meat for chunks of pork loin or slices of steak.
- Use a different quick cooking vegetable in place of the broccoli, like chopped asparagus, shredded Brussels sprouts, snow peas, bell peppers, thinly sliced onions. Or a combination!
- Don't want the pineapple? Replace it with more veg!
- Make it spicy! Add more hot sauce to the teriyaki sauce and add sliced jalapeños to the pan with the broccoli.
What to serve with Teriyaki Chicken and Rice
This meal is meant to stand on its own, but if you're wanting to flesh it out, try adding one of these sides...
How to store leftover Chicken Teriyaki with Rice
Store any leftover in lidded containers, chilled, for up to 5 days. Store the teriyaki sauce separately.
Teriyaki Chicken Rice Bowl FAQs
In this particular recipe, it's drizzle on afterward. I like doing this so I can control how much goes on. I don't like teriyaki chicken that gets too... goopy. Feel free to mix it all together if you like!
It can be either thick or thin. Mine is rather thin, but you want it thicker you can add a little cornstarch when it's not bubbling, but still hot.
More Easy Sheet Pan Recipes on Perry's Plate
If you make one of my recipes, be sure to post it on social media and tag me at @perrysplate or #perrysplate so I can send you some love!
Chicken Teriyaki with Rice
Teriyaki chicken sheet pan style! I love quick sheet pans for busy weeknights! You'll dig how easy this is to throw together. Use any kind of teriyaki/stir fry sauce you like or whip up my easy honey-sweetened version below.
Ingredients
For the bowls:
- 1 ½ pounds boneless skinless chicken breasts or thighs
- 2 broccoli crowns, cut into 1-inch pieces (5-6 cups total)
- 1 ½ cups fresh or canned pineapple, cut into ½-inch pieces
- 2 green onions, thinly sliced (optional)
- 5 cups freshly steamed rice (see note)
- 3 Tablespoons avocado oil, divided
- 1 Tablespoon soy sauce or tamari
For the sauce:
- ½ cup soy sauce or tamari
- ¼ cup honey
- 2 Tablespoons rice vinegar
- 1 Tablespoon sesame oil
- 1 Tablespoon fresh ginger, minced or grated (or ½ teaspoon ground ginger)
- 1 Tablespoon fresh garlic, minced or grated (or ½ teaspoon garlic powder)
- ½ teaspoon sriracha or another Asian style hot sauce
Instructions
- Get your rice going first.
- Preheat your oven broiler to high and place one rack as high as you can and the other on the very bottom. Line a couple of large rimmed sheet pans with parchment or treat with nonstick spray.
- Put the ingredients for the sauce in a small saucepan. Bring to a boil and let it go for about 10 minutes until it's reduced to roughly ¾-1 cup of sauce. Set aside.
- Meanwhile, put the chicken on one sheet pan. Drizzle with 1 Tablespoon avocado oil, 1 Tablespoon soy sauce, and a generous pinch of sea salt. Toss everything to coat the chicken well, and spread it out evenly.
- Put the broccoli and pineapple on the other pan. Drizzle with the remaining 2 Tablespoons of oil and a generous pinch of sea salt.
- Put the chicken on the top rack close to the heating element and the broccoli on the bottom. Cook for 5 minutes, then rotate the racks. Cook for another 5 minutes and check the chicken for doneness by cutting one of the larger chunks in half with a knife. If there's no pink inside, then remove the pan from the oven.
- Cook the broccoli and pineapple for another 2-3 minutes or until they're as toasty as you prefer.
- Assemble the bowls with a spoonful of rice, some chicken, broccoli, pineapple, a sprinkle of sliced green onions (sesame seeds and extra hot sauce if you prefer) and a drizzle of the warm teriyaki sauce!
Notes
- If you're avoiding soy, you can swap out the soy sauce for coconut aminos, but use ⅔ cup instead since it's not as strong as soy sauce.
- You could also use my Instant Pot Coconut Rice here (it's my favorite) or Roasted Cauliflower Rice as a grain-free option. Since the oven is occupied you could toss the cauliflower rice in a large skillet with some oil.
Recommended Products
As an Amazon Associate and member of other affiliate programs, I earn from qualifying purchases.

This post may contain affiliate links. Any purchases made by using these links won't cost you any extra and helps keep my content free. These links may be Amazon links as I am part of the Amazon Associate Program.
The post Chicken Teriyaki and Rice appeared first on Perry's Plate.
How to make Beef Stew in Instant Pot 21 Mar 9:55 AM (last month)
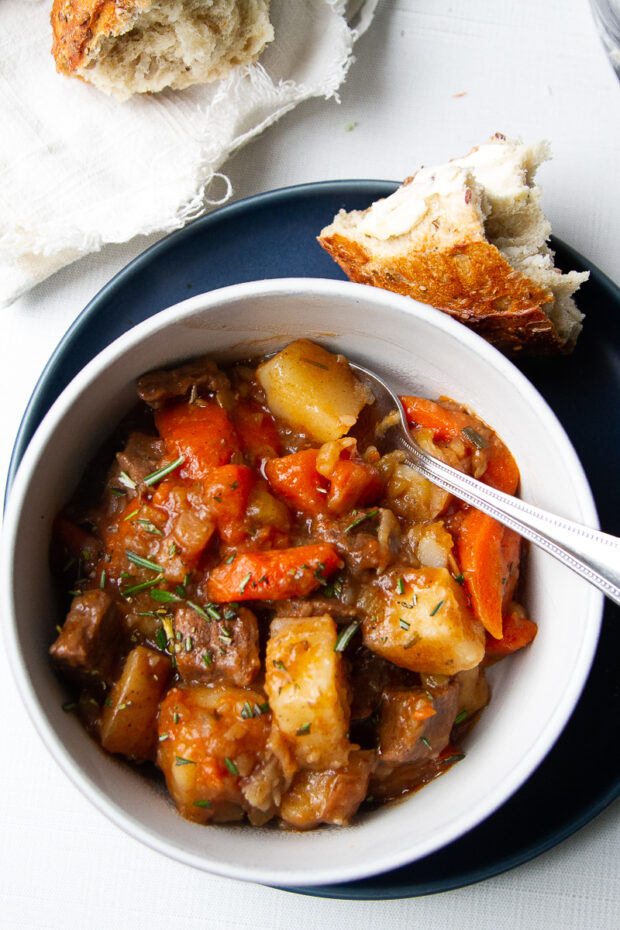
I've created hundreds of creative Instant Pot recipes (literally) and sometimes going back to the basics is the best choice. This Instant Pot Beef Stew is the definition of cozy. Using easy to find, basic ingredients with a couple little tricks you'll have the best beef stew of your life in under an hour!
Pressure Cooker Beef Stew is the best!
Pot roast is generally considered to be the epitome of comfort food, yes?
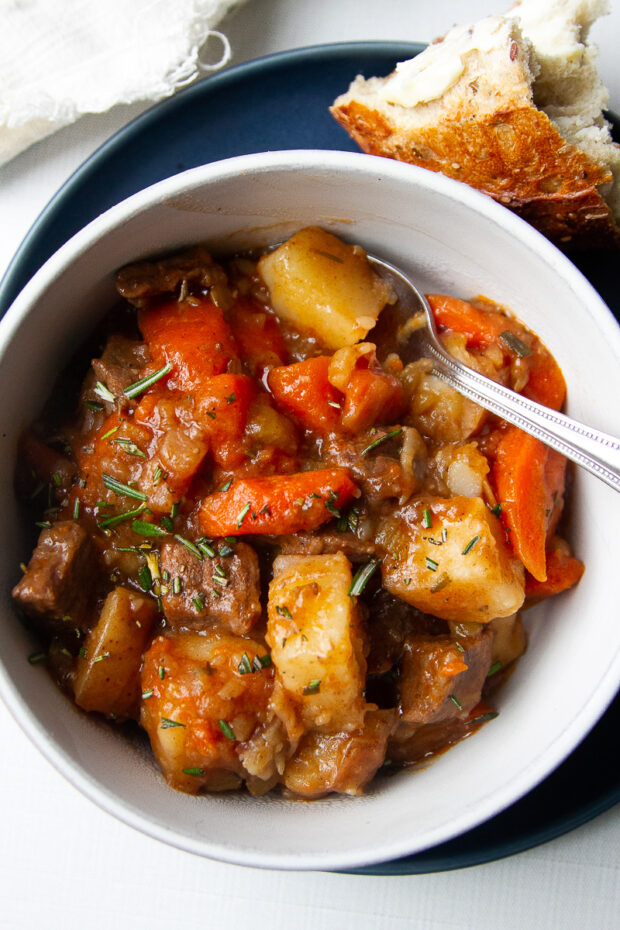
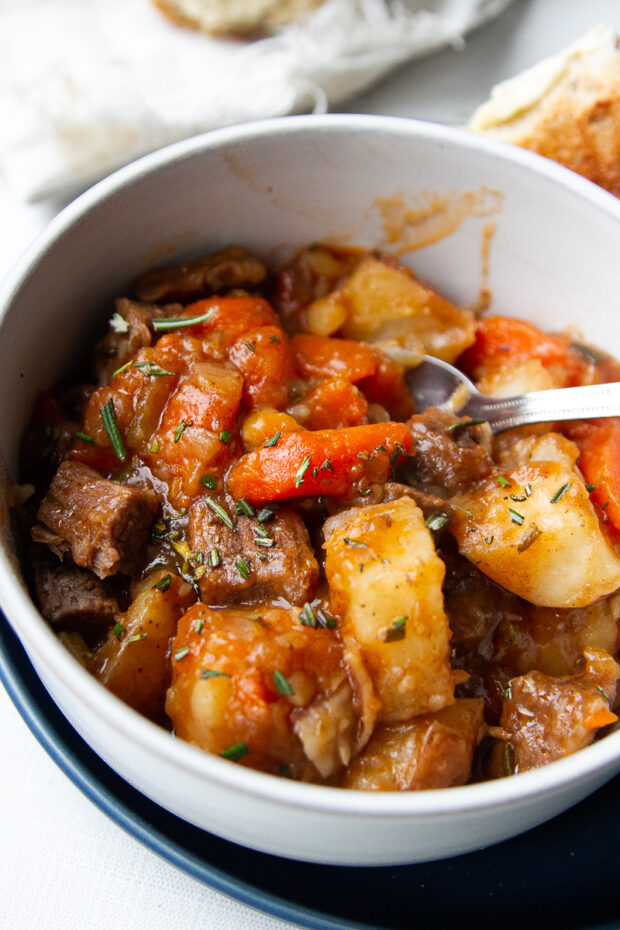
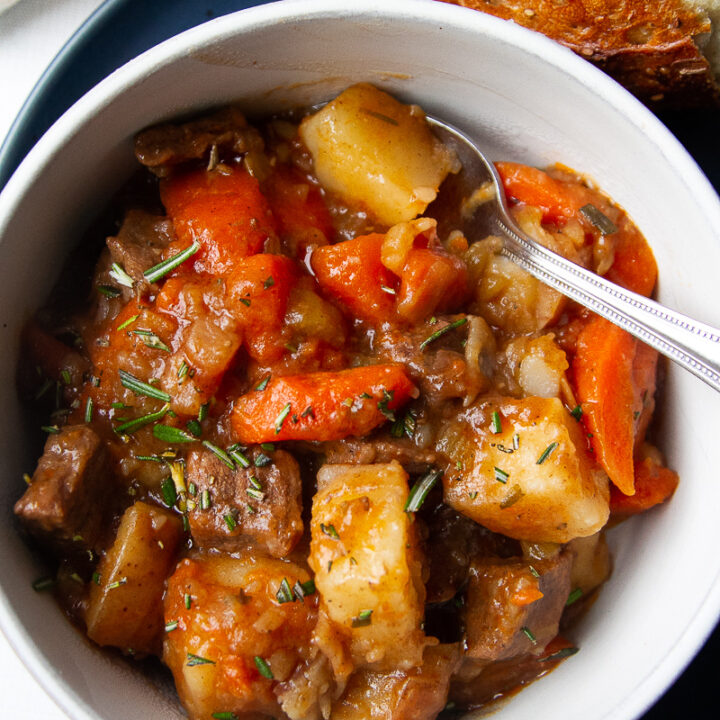
To me, beef stew is like a shortcut for a pot roast meal. You've got tender, melt-in-your-mouth beef and buttery soft carrots and potatoes hanging out in a rich, thick gravy.
Your Instant Pot makes this super quick so you don't have to wait all day to eat!
But if slow cooking is more your speed (I get it. It's great, too!) I added that variation in the recipe card below.
What you'll need for this Instant Pot Beef Stew Recipe
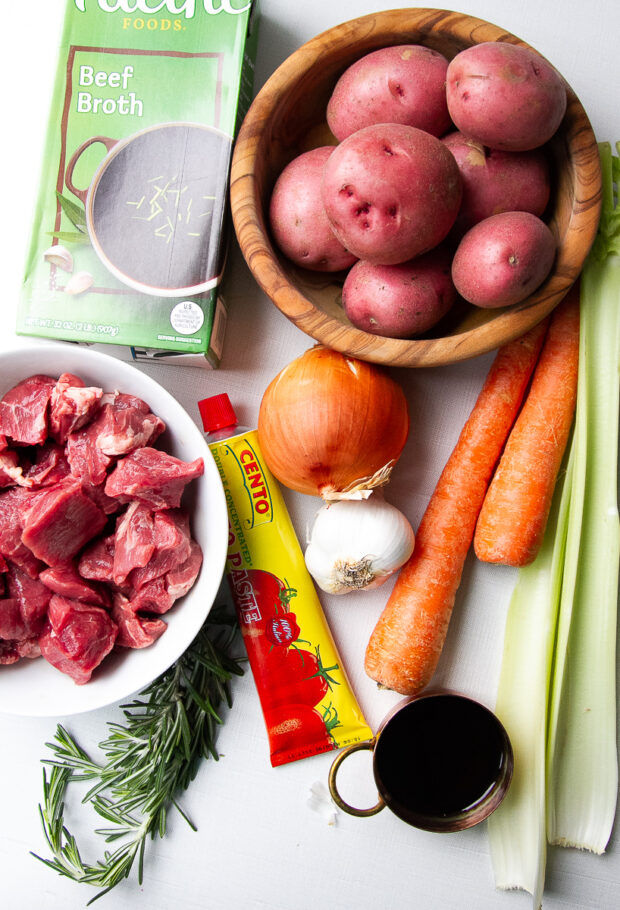
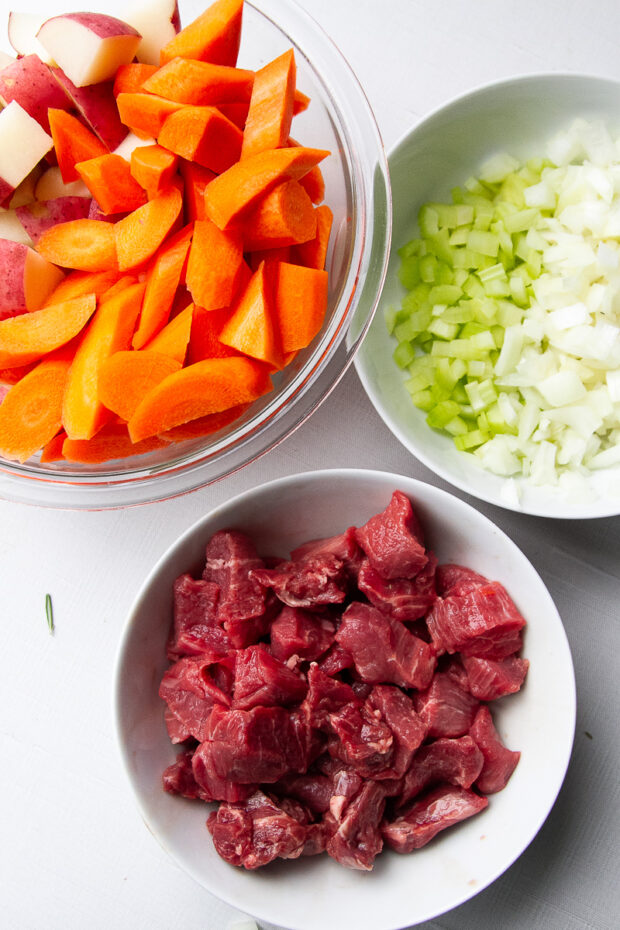
- Beef Stew Meat - I don't recommend using steak for this because it will dry out quickly. Chopped chuck roast also works well here.
- Potatoes - I recommend using red potatoes or Yukon golds. These waxier types of potatoes hold up better under intense cooking than Russets which might get incredibly mushy.
- Carrots - Cut them big like the potatoes.
- Celery - You'll want these cut small.
- Onion - These, too.
- Beef Broth - If I'm on my game I've got Homemade Bone Broth in the freezer to pull out (you can use that bone broth recipe for beef as well as chicken!) but boxed broth is JUST fine here.
- Balsamic vinegar - Gives this recipe an extra little somethin' somethin'.
- Tomato paste - This hit of umami deepens the flavors of the gravy and adds great flavor!
- Fresh rosemary - If you have it. You don't have to be precious about this -- you can use dried if you want.
- Fresh garlic - Or granulated garlic. But fresh is amaaaazing.
- Cornstarch - To thicken the gravy afterward. By the way, did I mention this recipe is gluten free?
- Salt & Pepper - Because, always.
How to Make Beef Stew in Instant Pot
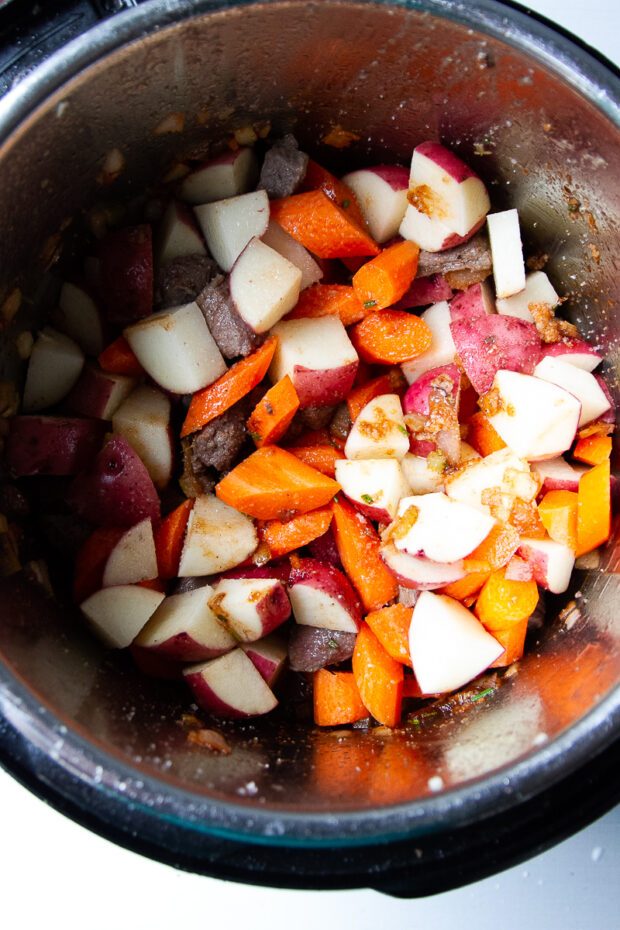
- Brown the meat in the Instant Pot using the sauce setting. Set it aside.
- Saute the onions and celery. Add the tomato paste, garlic, and rosemary. Cook for a couple minutes and add the balsamic vinegar.
- Add the seared meat back to the pot along with the carrots, potatoes, salt, and some of the broth.
- Cook on high pressure for 15 minutes. Let it sit for 10, then release the rest of the steam manually.
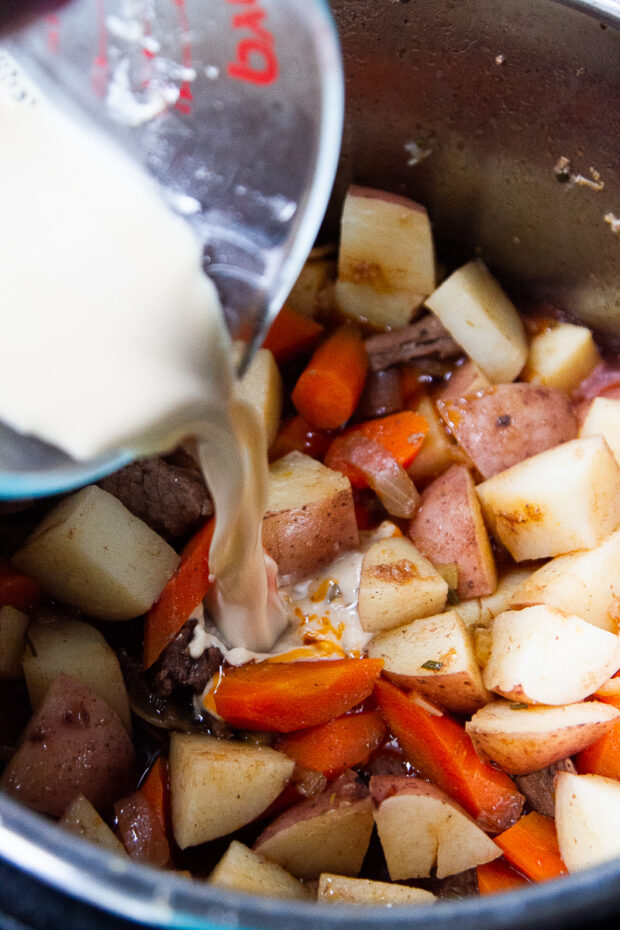
- Whisk the cornstarch into the rest of the broth and stir it into the hot stew.
- Serve! We love it with crusty bread.
How long to cook Beef Stew in Instant Pot
A 15-minute pressurizing cycle with a 10-minute cooks the beef and vegetables really well. You'll want to make sure you leave it alone for 10 minutes an resist the urge to release the pressure early.
Those minutes after the cycle is over is important for the juices to redistribute in the meat. It makes it more tender, I promise!
Tips for making this Beef Stew Pressure Cooker recipe
- The size of your meat and vegetables is important! You'll want the beef, potatoes, and carrots roughly the same size (chunky) so they're cooked evenly. The onions and celery can be small so they incorporate more into the gravy.
- Searing the meat is optional. It's easy to do in the Instant Pot with its build-in sauce function, but if you want the prep to go a little faster, skip this step!
- Let the Instant Pot naturally release for 10 minutes. After the pressurized cycle, leave your cooker alone for 10 minutes. See above for the explanation on this.
- Use red or Yukon gold potatoes. Russets are starchier and might get reallllly mushy. The other types hold their shape better during cooking.
Easy Instant Pot Beef Stew variations
- Swap out the potatoes for turnips or another sturdy root vegetable.
- Change the seasoning profile! Instead of rosemary, add some taco seasoning or Greek seasoning.
- Replace the beef stew meat with chunks of pork shoulder for a different twist.
What to serve with Pressure Cooker Beef Stew
This beef stew is great on its own, but here are a few ideas of things to serve it with if you're looking to flesh out the meal a little more.
- Crusty bread, cornbread muffins, or biscuits.
- Cooked rice or noodles
- A green salad. Like Spring Mix Salad or Syrian Salad.
How to store this Beef Stew Recipe (Instant Pot)
Store any leftovers in a lidded container in the fridge for up to a week. Just a heads up... it's going to be a little mushy when you reheat it. But that just means it's extra cozy, right?
FAQs for making this Beef Stew Pressure Cooker recipe
That entirely depends on the type of beef and how big the pieces are. For this recipe, with 1-inch pieces it should be tender with a 15 min pressurizing time + 10 min natural release.
Yes. Cook it too long and your beef will be dry and your vegetables will be overly mushy.
You probably didn't cook it long enough. Or didn't allow it to rest for 10 min after the pressurizing cycle.
Don't overcook it and make sure there's enough moisture in the cooker.
More Recipes Using Beef Stew Meat on Perry's Plate
If you like this recipe, try another one of my recipes using beef stew meat! These are all family favorites, too.
Steak Chili Recipe - If you've never had chili with chunks of tender beef (as opposed to ground beef), it's something you need to experience. This recipe calls for a tougher cut of steak, but you can for sure use beef stew meat, too.
Borscht - Steve's favorite soup in the whole world. All of our kids love it too. A little time consuming, but I always make a double batch and it's gone within a week!
Hungarian Goulash - No, not elbow Mac and ground beef. It's close to a traditional Hungarian version with tender chunks of beef in a paprika sauce. It's deeeelish.
If you make one of my recipes, be sure to post it on social media and tag me at @perrysplate or #perrysplate so I can send you some love!
Beef Stew Pressure Cooker Recipe
To me, beef stew is like a shortcut for a pot roast meal. You've got tender, melt-in-your-mouth beef and buttery soft carrots and potatoes hanging out in a rich, thick gravy. Your Instant Pot makes this super quick so you don't have to wait all day to eat!
Ingredients
- 1 - 1 ½ pound beef stew meat
- 2 Tablespoons avocado oil
- 2 teaspoons sea salt, divided
- ½ teaspoon black pepper
- 1 medium onion, peeled and diced small
- 2 stalks celery, diced small
- 1 Tablespoon tomato paste
- 1 Tablespoon minced or Microplaned garlic
- 1 Tablespoon minced fresh rosemary (or 1 teaspoon dried)
- ¼ cup balsamic vinegar
- 3 large carrots, peeled and cut into 1-inch chunks
- 1 ½ lbs potatoes (reds or Yukons), cut into 1-inch chunks
- 2 cups beef broth, divided
- 2 Tablespoons cornstarch
Instructions
- Trim the stew meat to your liking and cut the pieces into roughly one-inch chunks if they aren't that size already. Sprinkle 1 teaspoon of salt and the black pepper on the meat and toss to coat it evenly.
- Turn your Instant Pot or electric pressure cooker to the saute setting and add the oil to the insert pot.
- When it's hot, add half of the meat to the pot and let it cook for 2-3 minutes undisturbed. Flip them around and cook for another minute or two. Remove them from the pot and cook the other half of the meat. Remove that meat from the pot. (Browning the meat is optional, but adds flavor!)
- Add the onion and celery to the hot oil and cook for a few minutes until the onion softens. Stir in the tomato paste, garlic, and rosemary and cook for another minute or two.
- Pour in the balsamic vinegar to the pot. Add the potatoes, carrots, browned beef, 1 teaspoon salt, and 1 ½ cups of the broth. Give it a good stir.
- Put the lid on the pot, sealing it. Set it to high pressure for 15 minutes and make sure the steam valve is set to "sealing".
- When the pressurized cycle completes, leave it alone for another 10 minutes and then release the rest of the pressure manually.
- Whisk the cornstarch into the remaining ½ cup broth. While the stew is still steaming but not bubbly, pour in the cornstarch mixture and stir it gently. The liquid in the pot should thicken, creating a smooth gravy.
- Serve immediately with crusty bread or by itself.
Notes
SLOW COOKER VARIATION: If you'd to sear the meat on the stove in a skillet you can for sure do that. Otherwise, put all of the ingredients into a 6 or 7 quart slow cooker. Whisking the tomato paste into the broth would avoid any lumps. Cook on low for 5-6 hours.
- You can use Russet potatoes in this recipe, too, but I recommend using a less starchy and more waxy potato like reds or Yukon golds because they hold up better during cooking.
Recommended Products
As an Amazon Associate and member of other affiliate programs, I earn from qualifying purchases.

Nutrition Information
Yield 5 Serving Size 1 ½ cupsAmount Per Serving Calories 492Total Fat 15gSaturated Fat 5gTrans Fat 1gUnsaturated Fat 10gCholesterol 135mgSodium 1343mgCarbohydrates 40gFiber 5gSugar 6gProtein 50g
The information shown is an estimate provided by an online nutrition calculator. It should not be considered a substitute for a professional nutritionist’s advice.
This post may contain affiliate links. Any purchases made by using these links won't cost you any extra and helps keep my content free. These links may be Amazon links as I am part of the Amazon Associate Program.
The post How to make Beef Stew in Instant Pot appeared first on Perry's Plate.
Caramel Chocolate Tart 11 Feb 10:05 AM (2 months ago)
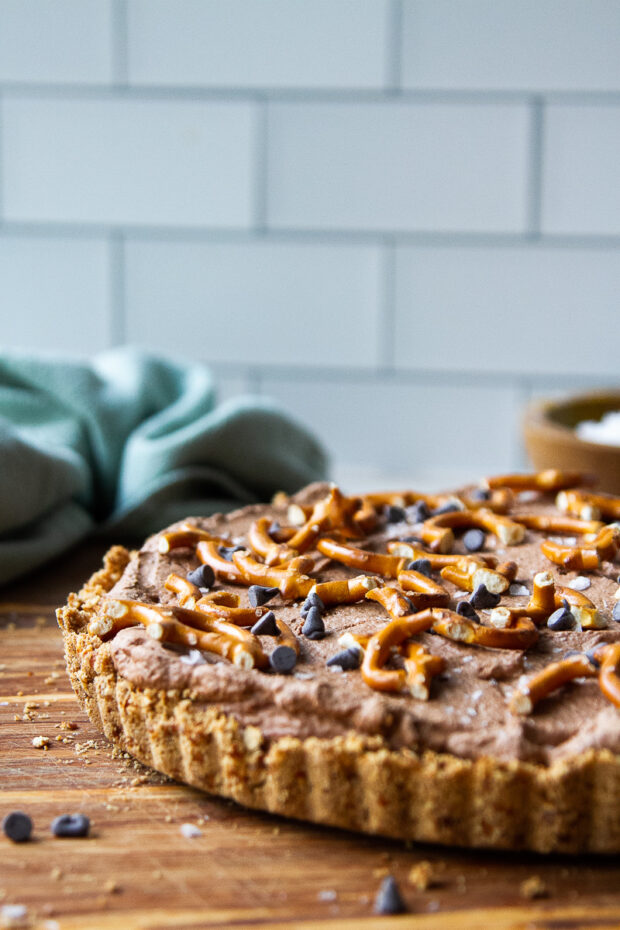
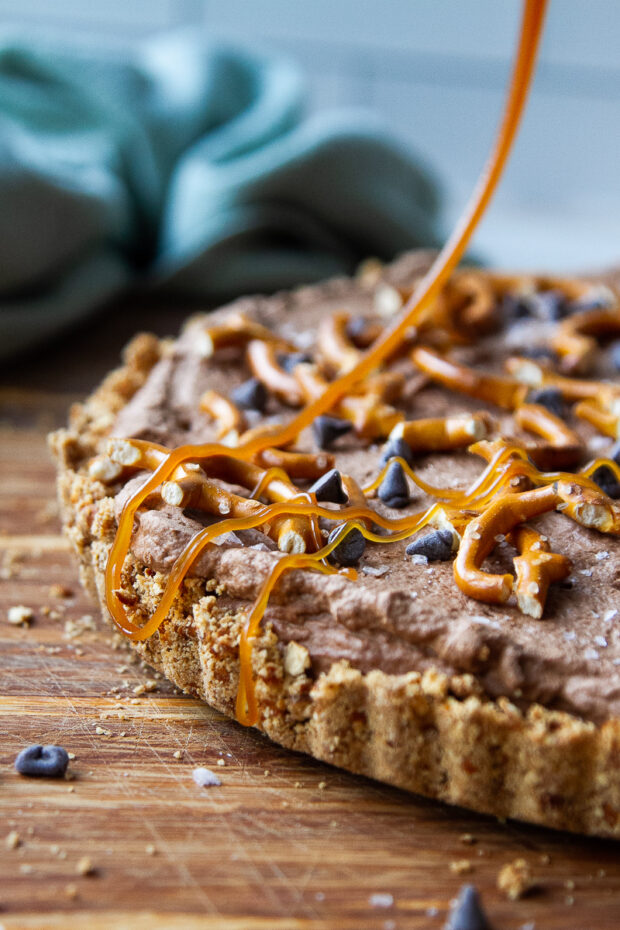
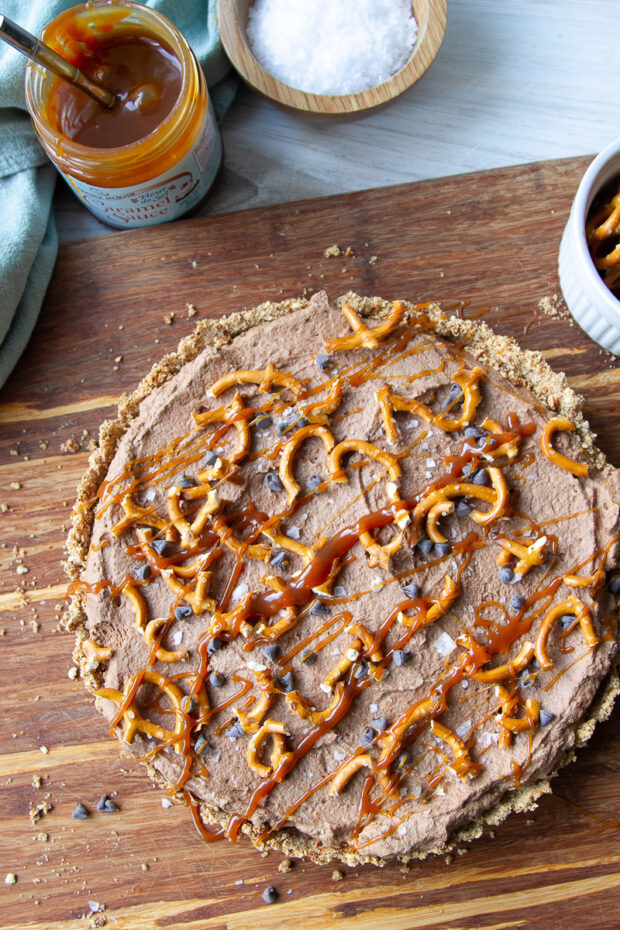
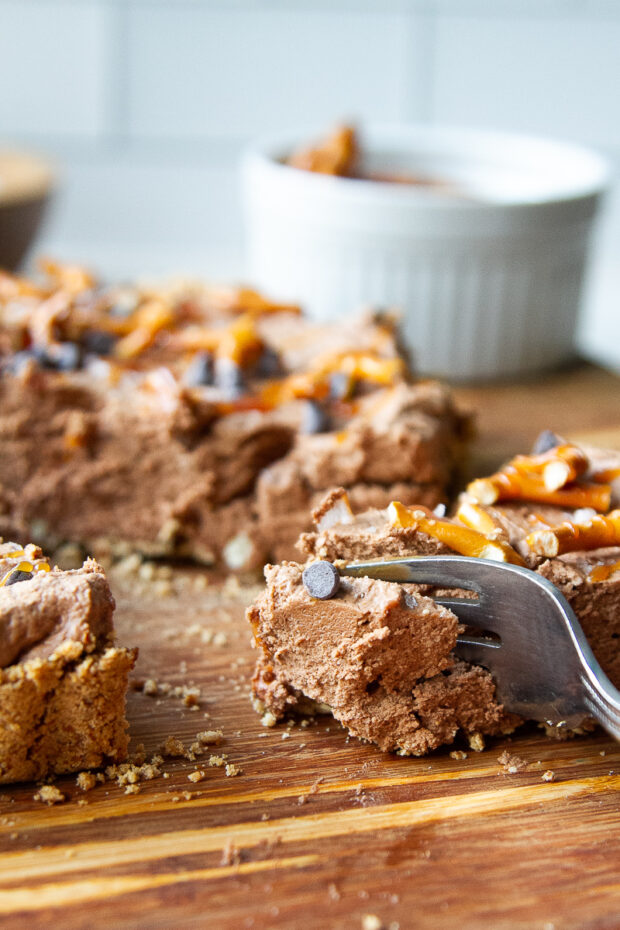
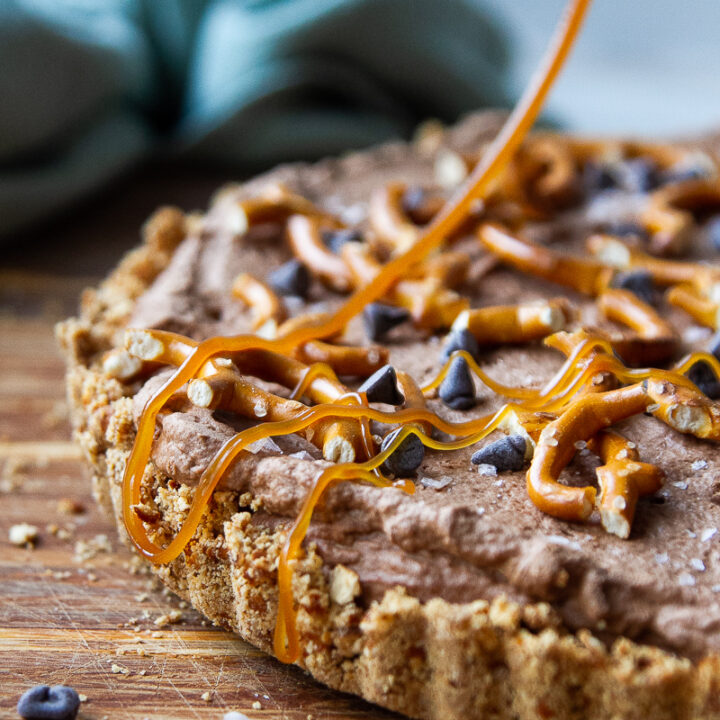
I've created a lot of gluten free desserts recipes over the years, but this chocolate tart might be my favorite. The silky chocolate mousse nestled in a salty pretzel crust and drizzled with salted caramel sauce combines for the best salty-sweet dessert you've ever had!

Remember when I convinced you to buy a tart pan to make a Cranberry Curd Tart last year? Pull it out again because I've got another tart that will make your head spin. In the very best way.
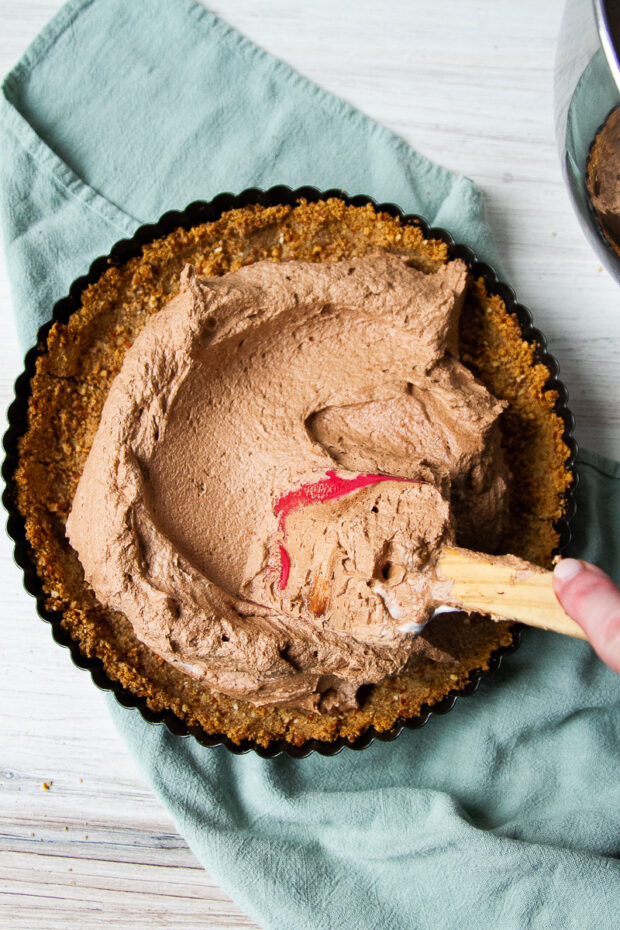
The filling in this tart is so silky smooth and fluffy. It takes a few minutes whipping in a stand mixer, but the extra whipping will be well worth your time. You can have this tart prepped for the fridge in under an hour and you can make it a a few days ahead of time!
This Chocolate Mousse Tart makes any day a special one!
Are you a sucker for salty-sweet desserts like me? Give me all the chocolate covered pretzels and sea salt caramel ice cream.This chocolate tart combines everything I love about those flavors into one dessert.
One of the best things about this dessert is that it can EASILY be made gluten free. Just swap out those pretzels for gluten free and use a little 1:1 GF flour in the crust and BOOM. You're on your way.
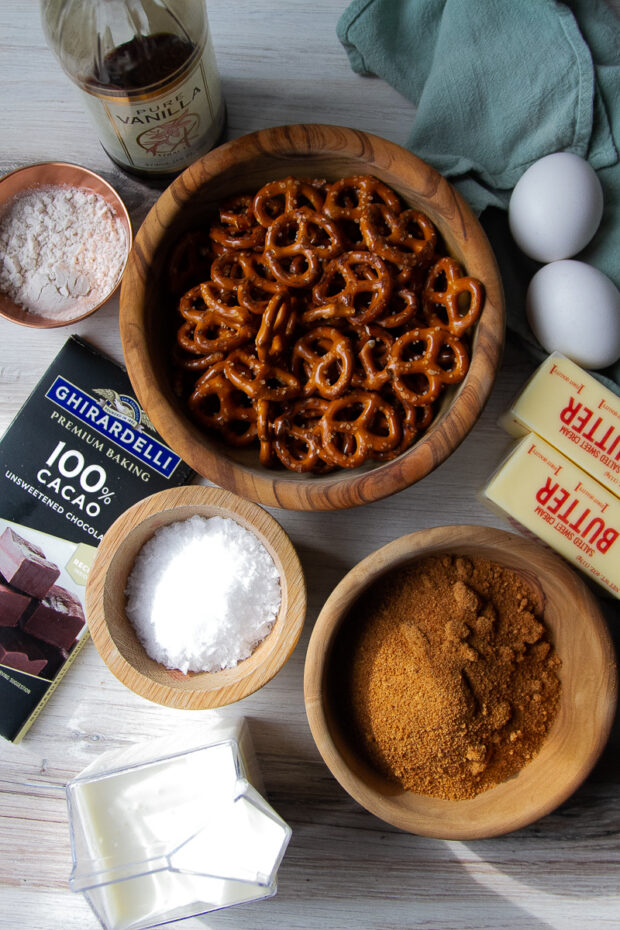
What you'll need for this Caramel Chocolate Tart
- Salty Pretzel Crust (see below)
- Chocolate Mousse Filling (see below)
- Extra pretzels and mini chocolate chips (optional, for garnish)
- Sea Salt Caramel Sauce
- Sea Salt Flakes - I highly recommend using Maldon Sea Salt Flakes. I also use these in my Everything Bagel Seasoning so I always have some on hand. They're delicate and delicious and are a subtle boost of salty flavor.
Chocolate Tart Crust
- Pretzels - Any plain pretzels will do of any shape. Just don't get flavored ones (obviously). Gluten free pretzels work just as well as regular ones, too.
- Butter
- Flour - All-purpose or a 1:1 GF blend will do here. I used King Arthur gluten free flour.
Chocolate Tart Filling
- Unsweetened baking chocolate - I like Ghirardelli 100% cacao bars or Bakers unsweetened baking chocolate.
- Butter - There's quite a bit in this recipe - both in the crust and in the filling. We're not on the low-fat train with this.
- Coconut Sugar - You can also use brown sugar here, but I like the caramely flavor of coconut sugar in this recipe.
- Vanilla extract
- Eggs - You might notice that I use raw eggs in this recipe. If that freaks you out, use pasteurized eggs. There's a quick tutorial in this recipe post if you want to pasteurize your own eggs!
- Heavy cream
Salted Caramel topping
Trader Joe's Fleur de Sel Caramel Sauce is my favorite but feel free to use whatever you can find. Or make your own naturally sweetened caramel sauce with this recipe: Paleo Caramel Sauce.
How to make a Chocolate Caramel Tart
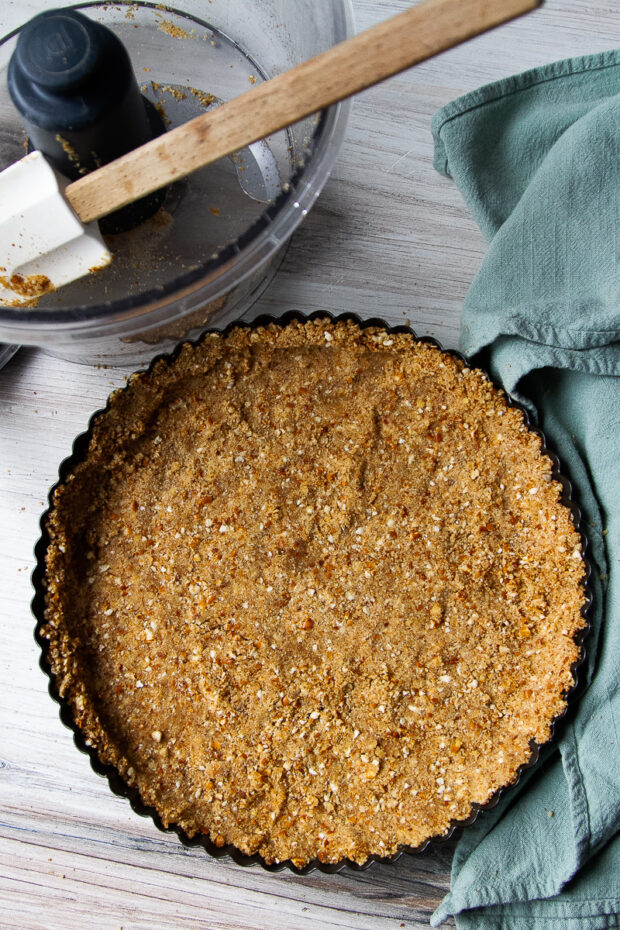
- Crush the pretzels, mix with melted butter, flour, and a little water and press it into a tart pan. Bake for 8 min.
- Meanwhile make the filling by whipping the sugar and butter. Add the melted and cooled unsweetened chocolate and vanilla. Keep whipping.
- Add the eggs, whipping for a few minutes between each addition.
- Whip the cream and fold it into the chocolate mixture.
- Transfer the chocolate filling to the baked and cooled pretzel crust. Cover and chill for 2 hours.
- Top with extra pretzels, sea salt flakes, sea salt caramel sauce, and some mini chocolate chips. (optional, but cute)
Tips for making this Chocolate Tart Recipe
- Make sure the pretzels are crushed really, really finely. It'll make it easier for it to stick together when you cut into the tart.
- Temperature is important during different times in this recipe. Make sure the chocolate is cooled to room temp or else your butter will melt and it will affect the texture of the mousse. Also, make sure the crust is cooled before you add the filling or it will melt.
- There's a lot of whipping in this recipe. Make sure to whip everything as stated in the recipe for the fluffiest mousse!
- Chilling the tart will help it cut more easily when you serve it.
Salted Caramel Chocolate Tart variations
Use a different pan: If you don't have a tart pan, you can use a 9-inch shallow pie plate or a 8/9-in springform pan. The crust won't reach the top of those pans, but that's OK because the tart itself is supposed to be rather short.
Make individual tarts: Use 6 or 8 ounce ramekins to make individual desserts. I haven't tried that with this recipe, but I estimate you could get 5-6 mini tarts out of the crust and filling.
Top with fruit: If chocolate + fruit is more your thing, skip the toppings listed in the recipe and pile a bunch of fresh berries on this tart! Raspberries would be especially delicious.
Make a S'More Tart! You can also use a pre-made graham cracker pie crust and top it with some toasted marshmallow fluff to make a s'more situation.
Storing leftover Caramel Chocolate Tart
This tart is kinda rich so I imagine you'll have some leftover unless you're feeding a bunch of people.
Store any leftovers, covered, in the fridge for up to 7 days for best flavor.
Chocolate Mousse Tart FAQs
If it's made in a shallow tart pan, then it's a tart. Tarts usually have some kind of crust and can be both savory or sweet.
A torte has a cake component whereas a tart has some kind of pudding or fluffy mousse-like filling. Savory tarts tend to be either egg or cream based.
First, the pan used. Tart pans have a removable bottom and they're more shallow than a pie dish. Dessert tarts aren't usually baked whereas a pie can be both hot or cold, depending on the type.
See the tips I wrote out earlier in this post. My guess would be that your chocolate was too warm and melted your butter at the beginning. Or the crust was still warm and melted your filling at the end of the recipe. Make sure the components are the proper temperature when you're putting this tart together. The tart filling should be a thicker, creamy texture even before you put it in the fridge.
More Easy Tarts and Pies on Perry's Plate
If you like this chocolate tart recipe, try one of these other recipes!
Cranberry Curd Tart - A showstopping, fuchsia-hued tart that combines cranberry curd and sweet orange for a perfect holiday dessert.
Pineapple Pie - Think lemon meringue, but pineapple. My favorite cold pie, hands down.
Gluten-Free Pumpkin Pie - Mine is infused with maple and chai spices!
If you make one of my recipes, be sure to post it on social media and tag me at @perrysplate or #perrysplate so I can send you some love!
Chocolate Mousse Tart
The silky chocolate mousse nestled in a salty pretzel crust and drizzled with salted caramel sauce combines for the best salty-sweet dessert you've ever had!
Ingredients
For the Crust:
- 4 cups pretzels (twisted are easier to measure than sticks)
- 6 Tablespoons melted butter
- 3 Tablespoons flour (all-purpose or GF 1:1)
For the Filling:
- 2 ounces unsweetened baking chocolate
- 8 Tablespoons softened butter
- ¾ cup coconut sugar or brown sugar
- 1 teaspoon vanilla extract
- 2 eggs (pasteurized if you prefer)
- ½ cup heavy cream
For the Topping:
- Extra broken pretzels
- 3 Tablespoons sea salt caramel sauce
- Pinch of sea salt flakes
- Sprinkle of mini chocolate chips (optional, but cute)
Instructions
- Preheat oven to 400F. Place an 9-inch tart pan on a large cookie sheet.
- Put the pretzels in the work bowl of a food processor and process until they're as finely chopped as you can get them. (Alternately you can put them in a zip top bag and use a rolling pin to crush them.)
- Add the 6 Tablespoons melted butter, flour, and 2 Tablespoons of water to the bowl and pulse until well blended. Mixture should be crumbly, but If you pinch, it should stick together. Add another Tablespoon of water if it seems dry.
- Transfer the pretzel mixture to the tart pan and press it to cover the entire bottom and up all of the sides as evenly as you can.
- Bake for 8 minutes. Set aside to cool. (Can be done a day ahead.)
- Start the filling by breaking the chocolate into smaller pieces and microwaving it in a small bowl for 15-second increments, stirring after each one, until the chocolate is completely melted. Set aside to cool. It should be room temperature when you use it.
- Put the softened 8 Tablespoons of butter into the work bowl of a stand mixer (fitted with the whisk attachment) along with the coconut sugar. Whip the butter and sugar for 3-4 minutes until it has lightened several shades. (Don't worry if it's grainy -- it'll all work out in the end.)
- Pour the melted and cooled chocolate and the vanilla extract into the bowl and continue to whip.
- Add the eggs, one at a time, whipping for 5 minutes in between each addition. When you're done the mixture won't be grainy and it will resemble fluffy chocolate pudding.
- Whip the heavy cream until soft peaks form. Fold it into the chocolate filling.
- Transfer the filling to the cooled pretzel crust and smooth it out.
- Cover with plastic wrap and chill for at least 2 hours in the fridge to firm it up. It'll be easier to cut this way.
- When you're ready to serve it, sprinkle on some extra pretzels, a bit of sea salt flakes, some mini chocoalte chips (if you want), and a generous drizzle of sea salt caramel. Store refrigerated for up to 7 days for best flavor.
Notes
- I have made this with both gluten free and regular pretzels and flour and it works beautifully both ways.
- If you're using the last of a bag of pretzels, make sure you don't pour the excess salt at the bottom of the bag into the crust or you'll be bummed later.
- If you don't have access to a tart pan you can use an 8-in springform pan or an 8-in shallow pie dish. It will turn out thinner than a traditional pie, but still delicious.
- Also, sorry for all the of the dishes dirtied in this recipe.
Recommended Products
As an Amazon Associate and member of other affiliate programs, I earn from qualifying purchases.


Nutrition Information
Yield 8 Serving Size ⅛Amount Per Serving Calories 600Total Fat 38gSaturated Fat 23gTrans Fat 1gUnsaturated Fat 12gCholesterol 117mgSodium 2953mgCarbohydrates 63gFiber 4gSugar 34gProtein 7g
The information shown is an estimate provided by an online nutrition calculator. It should not be considered a substitute for a professional nutritionist’s advice.
This post may contain affiliate links. Any purchases made by using these links won't cost you any extra and helps keep my content free. These links may be Amazon links as I am part of the Amazon Associate Program.
The post Caramel Chocolate Tart appeared first on Perry's Plate.
Kale Salad with Quinoa 25 Jan 8:51 AM (3 months ago)
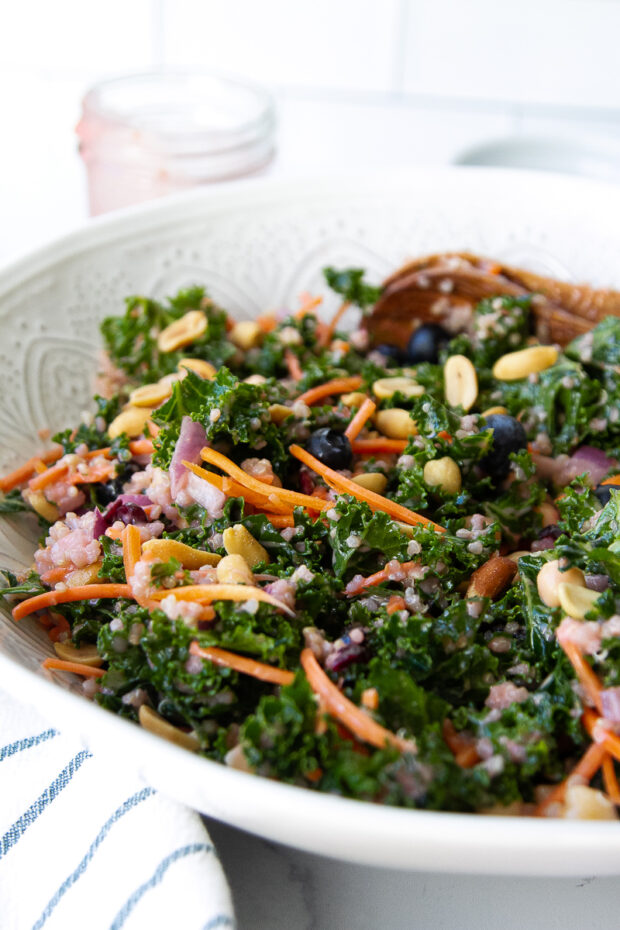
I'm in love with big salads with a lot going on. This Kale Quinoa Salad hits all of the best notes -- hearty, nutritious, protein-packed, crunchy, sweet, salty, and tangy. Make it for a meatless meal or a meal prep option for lunches during the week!
You need to try this Kale and Quinoa Salad!
If you're not a fan of raw kale salads, hear me out...
Have you ever had a massaged kale salad? When you rub oil into the greens it softens them and tones down their bitterness making them more palatable.
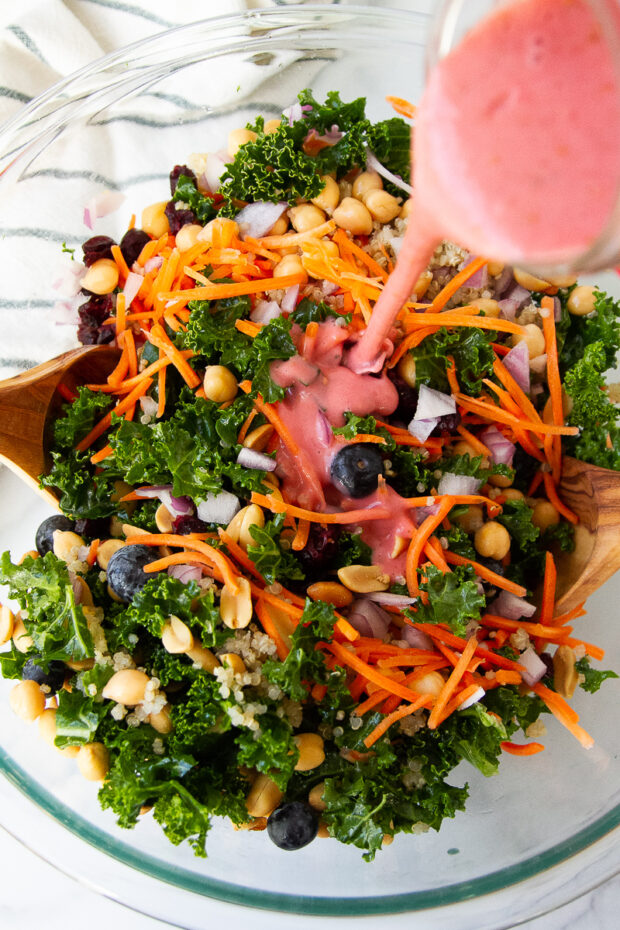
And this specific combination of mix-ins makes this salad the best kind of circus for your tastebuds. I especially love the raspberry lime dressing!
Fun fact: This salad is actually a copycat version of a pre-made "Ironman" salad I got at Harmon's grocery store in Utah. I LOVED it.
Quinoa Kale Salad Ingredients
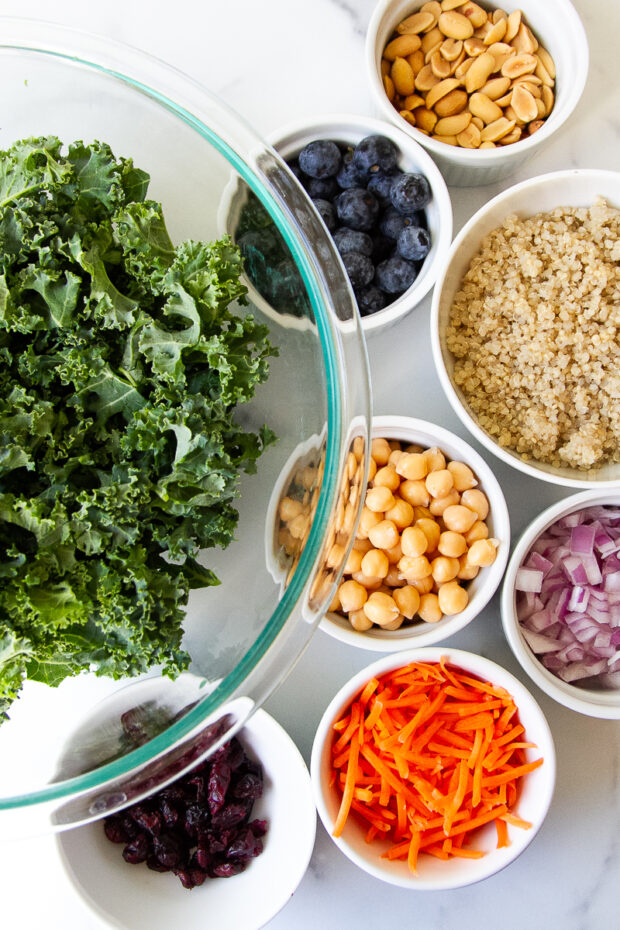
Here's what you'll need for the salad:
- Kale -- curly or laciano
- Avocado oil
- Cooked quinoa - feel free to use another grain. Wild rice, brown rice, or farro would all work well here.
- Garbanzo beans (chickpeas) - The original salad used edamame which I'm not a big fan of, but also works well here.
- Shredded carrots
- Red onion
- Blueberries
- Peanuts or another type of nut/seed
- Dried cranberries
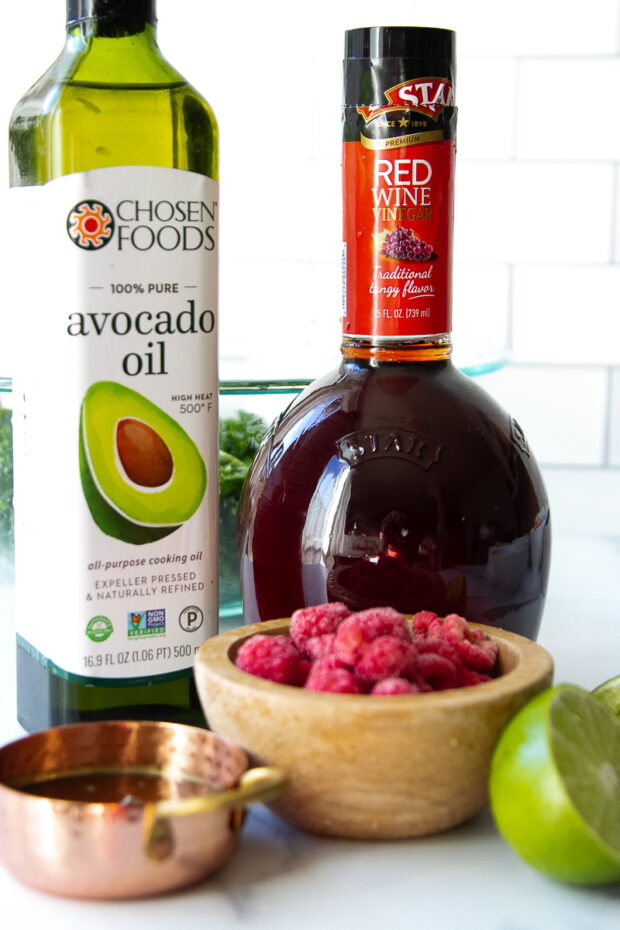
Here's what you'll need for the dressing:
- Raspberries, fresh or thawed from frozen
- Lime - You'll need the juice and some zest.
- Honey
- Red wine vinegar
- Avocado oil
How to make Kale Quinoa Salad
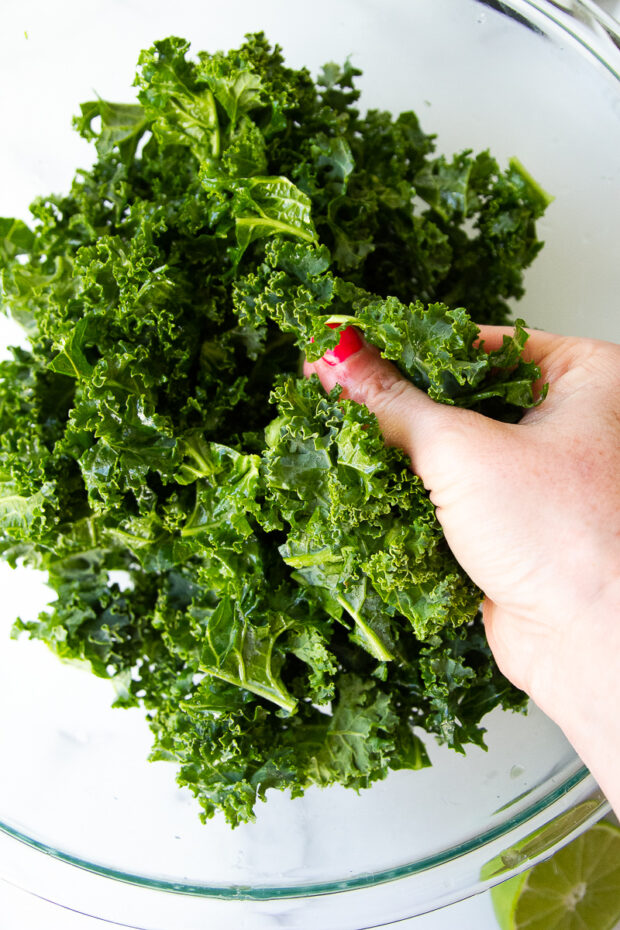
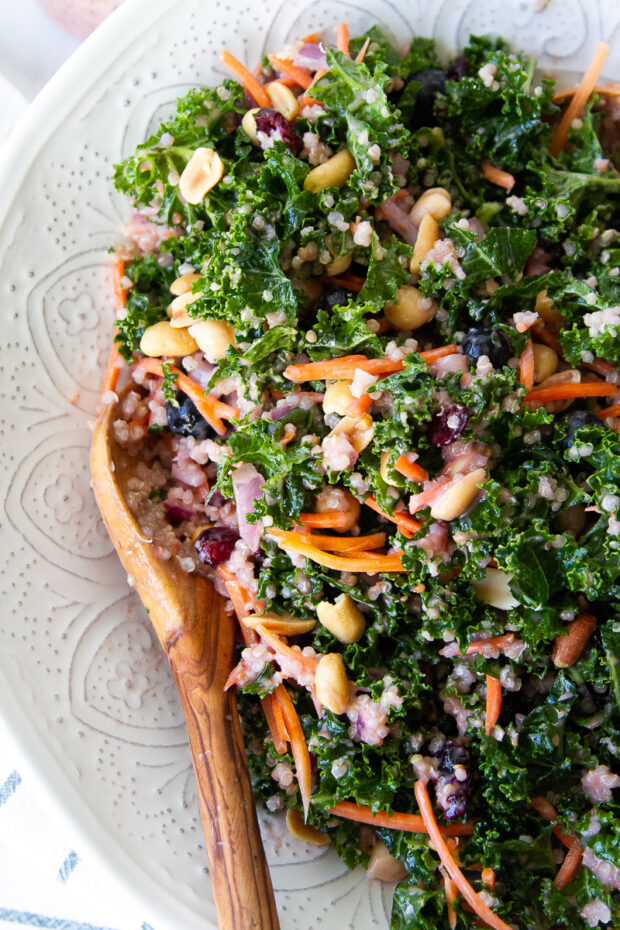
- Remove the kale leaves from the stem. Chop the leaves into bite sized pieces and transfer to a large bowl.
- Drizzle avocado oil over the greens. Use your hands to massage the oil into the kale. Do this for a full minute until the greens have darkened and softened.
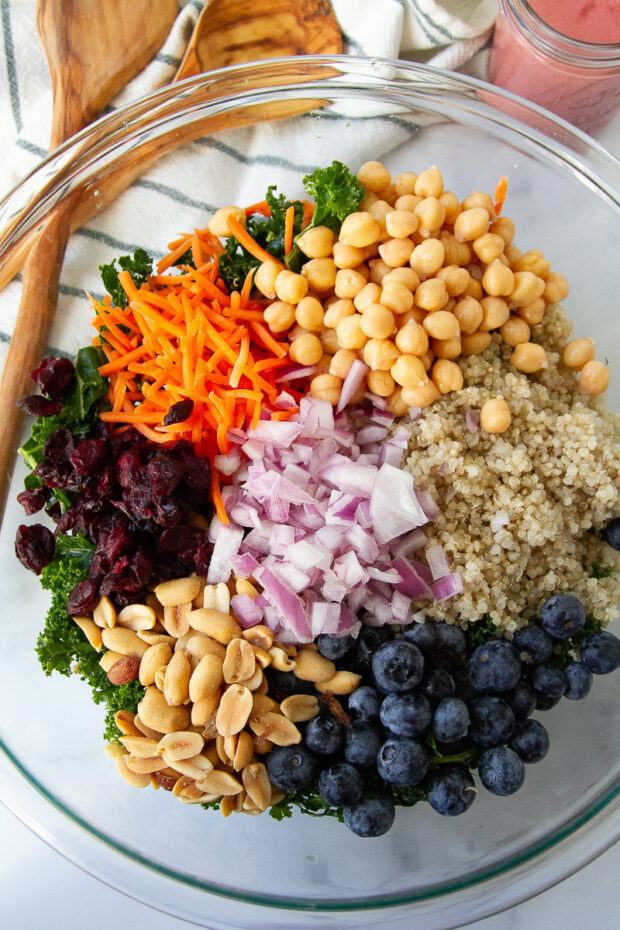
- Add the quinoa, garbanzo beans, carrots, onion, blueberries, peanuts, and cranberries to the bowl.
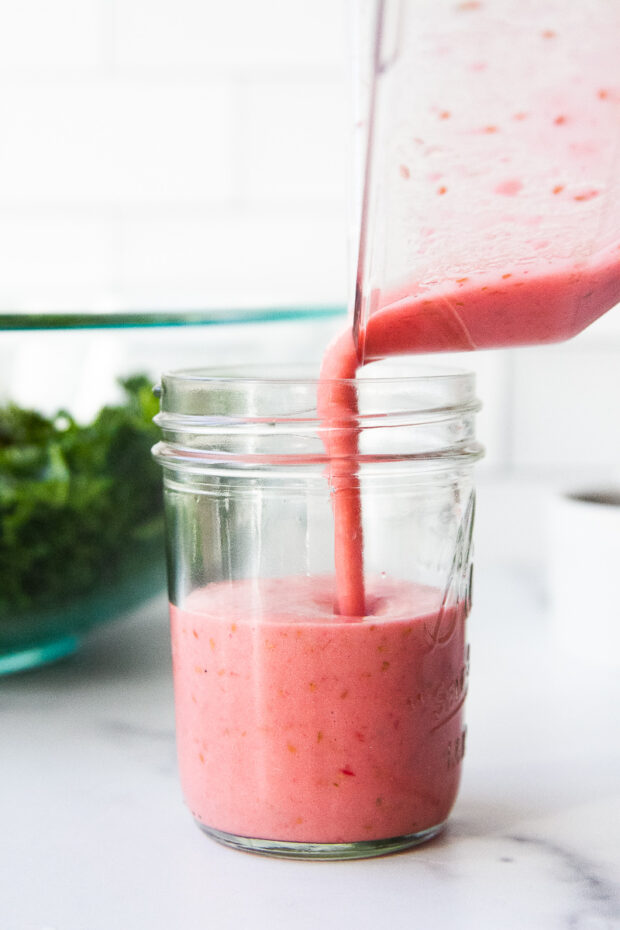
- In a blender, combine the raspberries, lime zest, juice from the lime, honey, red wine vinegar, avocado oil, and salt. Blend until smooth.
- Pour over the salad and mix well with a pair of salad tongs.
- Serve immediately or cover and chill for up to 5 days.
Quinoa and Kale Salad variations
You can use this recipe as a jumping point for endless variations! Just be sure you keep the same amount of ingredients in the salad so the salad to salad dressing ratio stays the same.
Use different beans: Any kind of bean would work here! The original salad had edamame which is nice and neutral, but adds protein.
Use different fruit: Swap out the blueberries for chopped strawberries, raspberries, or apples.
Use different grains: Not a fan of quinoa? Use leftover wild rice, brown rice, or farro. Or any other grain you prefer. Or leave it out completely if you're avoiding grains.
Use different nuts: Swap out the peanuts for any other salted nut. Since there are so many sweet components to this salad, I recommend using salted nuts instead of raw or candied to keep the flavors balanced.
How to serve Kale Quinoa Salad
This is intended to be a stand alone meal, so serve up a generous bowl and eat up!
If you'd like to add another type of protein, try adding some hard cooked eggs or some simply seasoned grilled chicken or steak. Here are a few things that would go well with this salad:
How to store Kale Salad with Quinoa
Store this salad in a lidded container in the fridge for up to 5 days for best flavor.
If you liked this recipe, try my Grilled Chicken Salad Recipe next!
Kale Quinoa Salad FAQs
Yes! I recommend massaging some oil into the greens (see below) and using a few sweeter ingredients to offset the bitterness from the greens.
Since raw kale can be abrasive and fibrous, I highly recommend massing some oil into the greens before finishing the salad. This helps it to soften and tones down the bitterness. Adding a few sweet components helps this, too.
More Easy Kale Recipes on Perry's Plate
If you like this recipe, try another one of my favorite recipes featuring kale!
Kale Salad with Roasted Butternut Squash
Sweet Kale Salad (Copycat of the famous Costco salad kit!)
If you like this recipe, you'd love my Grilled Caesar Salad!
If you make one of my recipes, be sure to post it on social media and tag me at @perrysplate or #perrysplate so I can send you some love!

Kale Quinoa Salad Recipe
I'm in love with big salads with a lot going on. This Kale Quinoa Salad hits all of the best notes -- hearty, nutritious, protein-packed, crunchy, sweet, salty, and tangy. Make it for a meatless meal or a meal prep option for lunches during the week!
Ingredients
For the Salad:
- 1 bunch of kale -- curly or laciano
- 1 Tablespoon avocado oil
- 1 cup cooked quinoa
- 1 cup garbanzo beans (chickpeas), drained
- ½ cup shredded carrots
- ½ cup chopped red onion
- ½ cup fresh blueberries
- ½ cup peanuts or another type of nut/seed
- ⅓ cup dried cranberries
For the dressing:
- ⅓ cup raspberries, fresh or thawed from frozen
- 1 lime
- 3 Tablespoons honey
- 2 Tablespoons red wine vinegar
- ¼ cup avocado oil
- Pinch of salt
Instructions
- Remove the kale leaves from the stem. It's quick and easy if you hold the bottom end of the stem with one hand while you pinch and move your fingers up the stalk with the other hand. Chop the leaves into bite sized pieces and transfer to a large bowl.
- Drizzle 1 Tablespoon avocado oil over the greens. Use your hands to massage the oil into the kale. Do this for a full minute until the greens have darkened and softened.
- Add the quinoa, garbanzo beans, carrots, onion, blueberries, peanuts, and cranberries to the bowl.
- In a blender, combine the raspberries, ½ teaspoon lime zest, juice from the lime, honey, red wine vinegar, ¼ cup avocado oil, and salt. Blend until smooth.
- Pour over the salad and mix well with a pair of salad tongs. Serve immediately or cover and chill for up to 5 days.
Notes
- If you're making the quinoa fresh the day of, combine ⅓ uncooked quinoa with ⅔ cup water in a small saucepan. Bring to a boil, reduce to a simmer and cook, covered for 12-15 min or until there isn't any water left at the bottom. Remove from the heat and let it sit, covered, for another 10 minutes for the quinoa to fully steam. Let it cool for a bit before using.
- Feel free to use another type of bean or lentil in place of the garbanzo beans if you like. Edamame works well, too, if you like that.
- If using that much raw onion freaks you out, reduce it by a little or chopped green onions for a milder flavor. I don't recommend omiiting it completely. This salad is rather sweet, and the onion adds a nice, pungent opposing flavor. Pickled red onions would also be good here.
Recommended Products
As an Amazon Associate and member of other affiliate programs, I earn from qualifying purchases.
The post Kale Salad with Quinoa appeared first on Perry's Plate.
Smoked BBQ Meatballs 21 Dec 2024 2:24 AM (4 months ago)
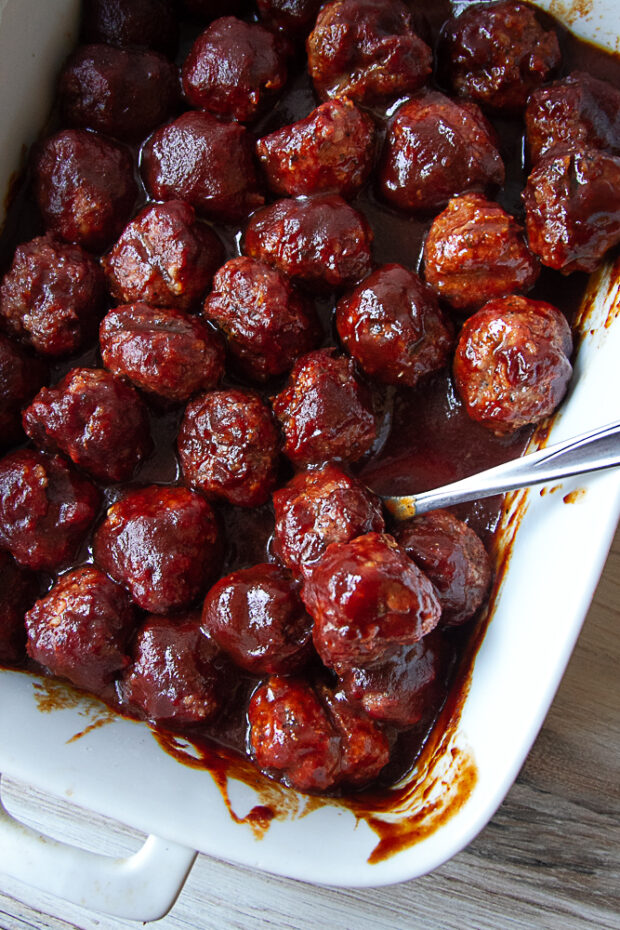
If you're looking for easy, delicious smoked meatballs you're in the right place. I'm all about exerting minimum effort for maximum results. Let them have a little spa time in your smoker, and you'll have the most flavorful meatballs of your life for any kind of party or as part of a tasty dinner.
You Need to Make These Smoked Meatballs
I feel like briskets and pork shoulders get all the attention in pellet smoker recipes. Pellet smokers magically turn any kind of meat (and things that aren't meat!) into an eyes-rolling-back-into-the-head experience. And ground beef is no exception.
Meatballs are universally loved -- if done well. This particular recipe uses two kinds of meat (if you prefer) and just a handful of ingredients letting the smoky, beefy flavor shine.
These are easy to make gluten free, too! Just use gluten free breadcrumbs or make some from that stale loaf of GF bread. (See recipe notes for instructions for this!)
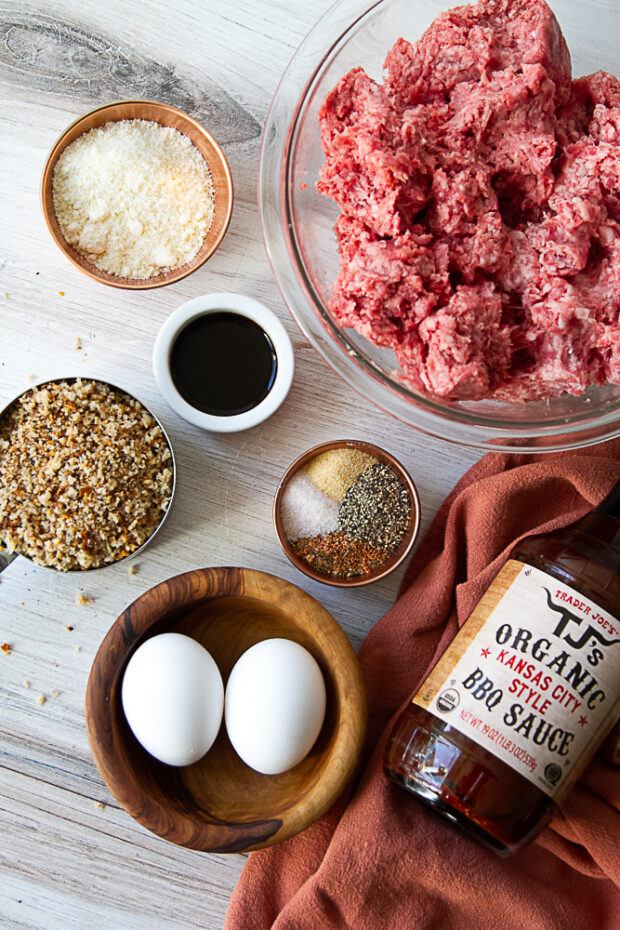
Smoked Meatball Recipe Ingredients
- Ground beef - I use grass-fed 80/20 or 85/15 fat content for this.
- Ground pork - I like using two kinds of meat to add extra flavor. And if my beef is particularly lean, using some ground pork adds a little fat & flavor. This is optional, though. Feel free to use all beef for this recipe.
- Salt & Pepper
- Granulated Garlic
- Steak seasoning - I use my Homemade Steak Seasoning, but you can use any steak seasoning you like or your preferred all-purpose BBQ seasoning.
- Egg
- Breadcrumbs - Use either seasoned or unseasoned. And use gluten free if you like!
- Worcestershire sauce, soy sauce, or coconut aminos
- Finely grated Parmesan cheese - also optional, but adds a yummy flavor!
- BBQ Sauce - Use any kind! Trader Joe's Kansas City BBQ Sauce is my favorite store-bought because it doesn't contain HFCS. You could also use a homemade BBQ sauce! I linked to a few below.
How to Make Smoked BBQ Meatballs
- Preheat your pellet smoker to 225F with a high smoke setting.
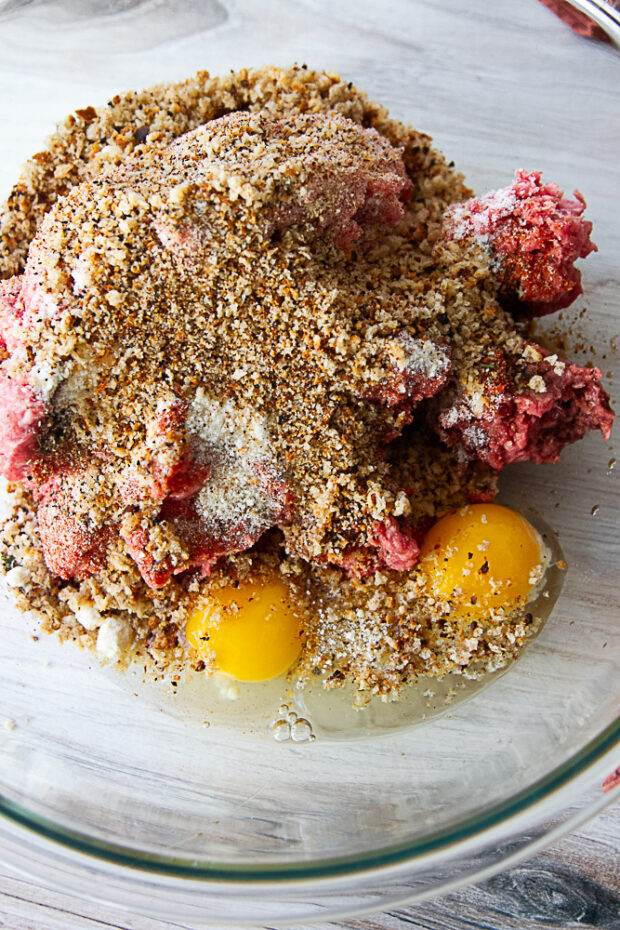
- In a large bowl, combine all of the meatball ingredients (except the BBQ sauce). Use your hands to gently blend everything together.
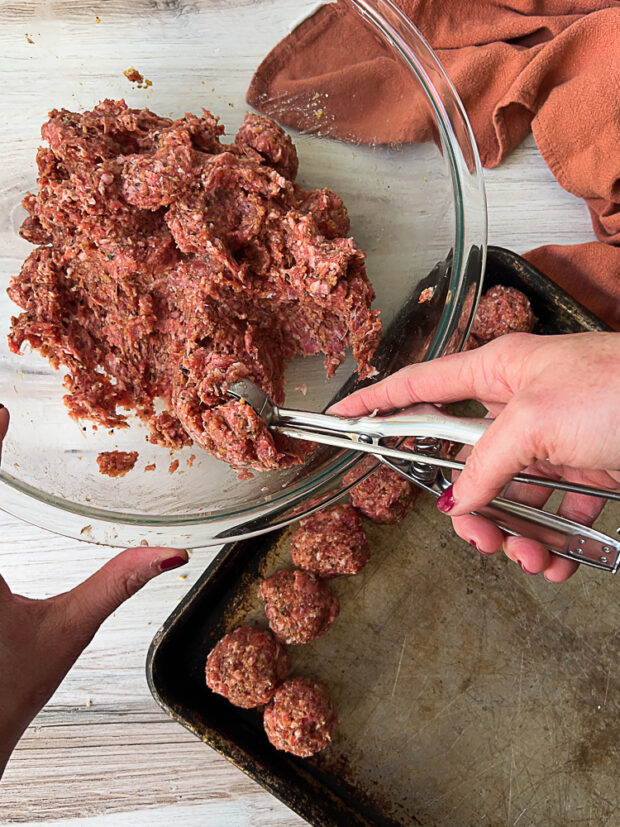
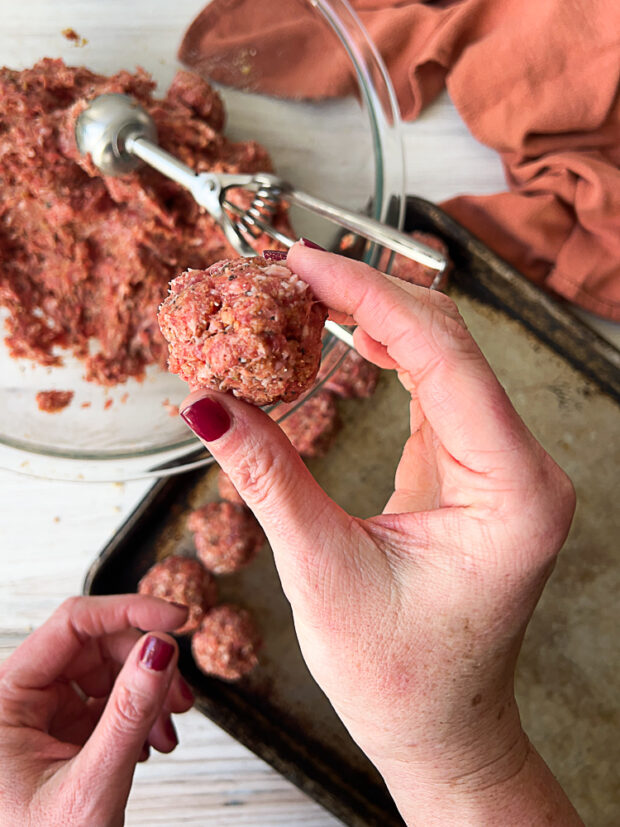
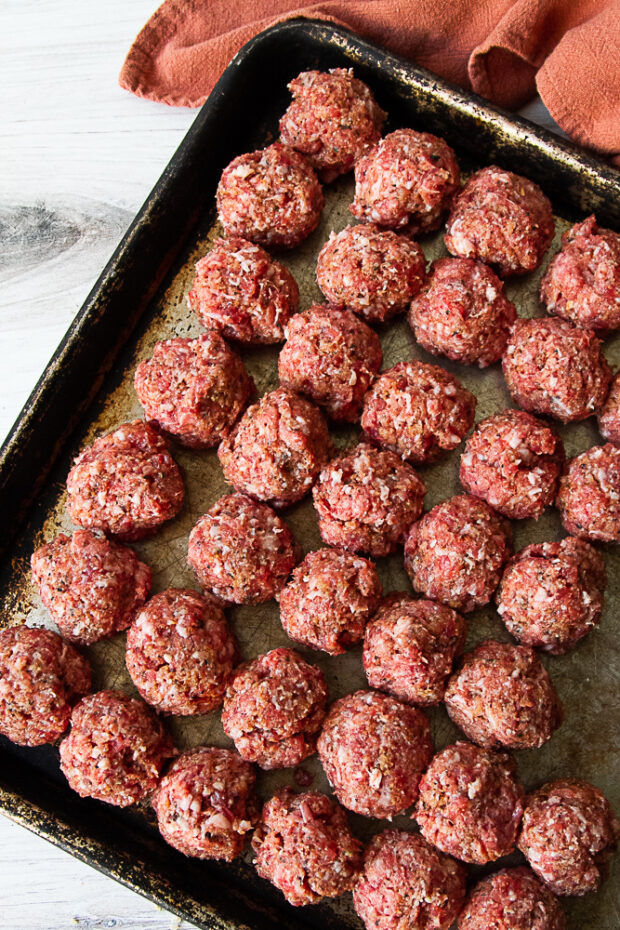
- Form them into 1 ½ in balls using a spoon or a medium cookie scoop. Roll them tightly and put them on a sheet pan.

How to Smoke Meatballs
- Transfer the meatballs to the pellet grill, putting them directly on the grill grates.
- Smoke for 30-40 minutes or until they reach 145F inside.
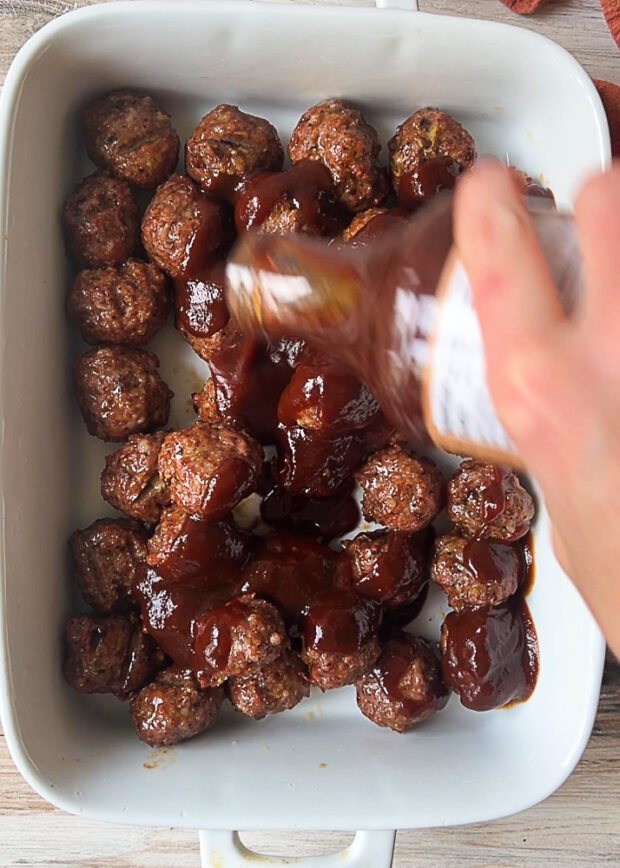
- Transfer the meatballs to a baking dish or a foil pan. Pour BBQ sauce over them.
- Put the pan back into the smoker for another 20 minutes.
Smoked Meatballs Recipe Variations
There are a lot of ways you can change up this recipe! It's intended to be a jumping off point. Here are a few ideas to get you started:
- Change up the meat: Feel free to use ground turkey or chicken, but be aware of them being too dry if the fat content of the meat is super low. You could add in some ground sausage or grated zucchini to counteract this.
- Make them spicy: throw in some crushed red pepper flakes or a diced jalapeño to add some heat.
- Change the cheese: Use grated sharp cheddar or another strong flavored cheese in place of the Parmesan. Or use nutritional yeast in place of cheese if you're avoiding dairy but still want that "cheesy" flavor.
- Make your own BBQ sauce! If you're wanting to control the sugar content better or use naturally sweetened BBQ sauce, I have a few recipes on my site. Any of these would work well here: Balsamic BBQ Sauce, Raspberry Chipotle BBQ Sauce, or Honey Lime Ginger BBQ Sauce.
Smoked Meatball Recipe Tips
Don't squeeze your meat. When you're mixing the raw meat and seasonings don't squeeze it hard in your fists. You may end up with mealy, mushy meatballs this way. Use your fingers and gently mix it instead.
Use a meat thermometer. Most pellet grills come with meat thermometers, but you can use an instant read thermometer stuck into a meatball to check the temp. You don't want dry, overcooked meatballs.
What to Serve with Smoked Meatballs
These smoked meatballs can be served alone as hearty appetizer or as part of a full meal! Here are some tasty sides that would be delicious with these:
Roasted vegetables: Crispy Roasted Broccoli, Roasted Delicata Squash, Roasted Cabbage Steaks
Cozy Carbs: Instant Pot Mashed Potatoes (No Drain), Herbed Rice
One day I wrapped a stray meatball in a slice of sourdough sandwich bread and decided they'd be a fabulous meatball sub with some smoky cheese. *drool*
Storing Smoked BBQ Meatballs
Store any leftover meatballs and sauce in a lidded container in the refrigerator for up to a week.
More Delicious Pellet Smoker Recipes on Perry's Plate
If you love these meatballs, try another one of my smoker recipes!
If you make one of my recipes, be sure to post it on social media and tag me at @perrysplate or #perrysplate so I can send you some love!

Smoked Beef Meatballs
You'll love how easy these smoked meatballs are to put together! Let them have a little spa time in your smoker, and you'll have the most flavorful meatballs of your life for any kind of party or as part of a tasty dinner.
Ingredients
- 1 pound lean ground beef (80/20 or 85/15)
- 1 pound ground pork
- 1 cup dried breadcrumbs
- 2 egg
- 4 Tablespoons Parmesan cheese
- 2 Tablespoons Worcestershire sauce
- 1 Tablespoon steak seasoning
- 2 teaspoon sea salt
- 1 teaspoon granulated garlic
- 1 teaspoon black pepper
- 16 oz BBQ sauce (any kind)
Instructions
- Preheat your pellet smoker to 225F with a high smoke setting.
- In a large bowl, combine all of the meatball ingredients (except the BBQ sauce). Use your hands to gently blend everything together.
- Form them into 1 ½ in balls using a spoon or a medium cookie scoop. Roll them tightly and put them on a sheet pan.
- Transfer the meatballs to the pellet grill, putting them directly on the grill grates.
- Smoke for 30-40 minutes or until they reach 145F inside.
- Transfer the meatballs to a baking dish or a foil pan. Pour BBQ sauce over them.
- Put the pan back into the smoker for another 20 minutes.
- Remove the pan from the smoker, stir them around, and serve immediately.
Notes
- If you'd prefer to use all ground beef, go ahead. Using two kinds of meat addes extra flavor and if the ground beef is especially lean, the pork would add some extra flavor and richness.
- You can also use tamari (soy) sauce or coconut aminos in place of the Worcestershire sauce.
- I make my own steak seasoning, but you can use whatever you prefer.
- This recipe can easily be doubled or tripled if you need a LOT of meatballs.
- You can make the meatball larger if you like. Just plan for extra smoke time to get them to the appropriate internal temperature.
Recommended Products
As an Amazon Associate and member of other affiliate programs, I earn from qualifying purchases.

Nutrition Information
Yield 5 Serving Size 4 meatballsAmount Per Serving Calories 506Total Fat 18gSaturated Fat 7gTrans Fat 0gUnsaturated Fat 9gCholesterol 123mgSodium 1824mgCarbohydrates 55gFiber 2gSugar 39gProtein 29g
The information shown is an estimate provided by an online nutrition calculator. It should not be considered a substitute for a professional nutritionist’s advice.
This post may contain affiliate links. Any purchases made by using these links won't cost you any extra and helps keep my content free. These links may be Amazon links as I am part of the Amazon Associate Program.
The post Smoked BBQ Meatballs appeared first on Perry's Plate.