Buttercream Sugar Cookies 12 Feb 9:46 PM (3 months ago)
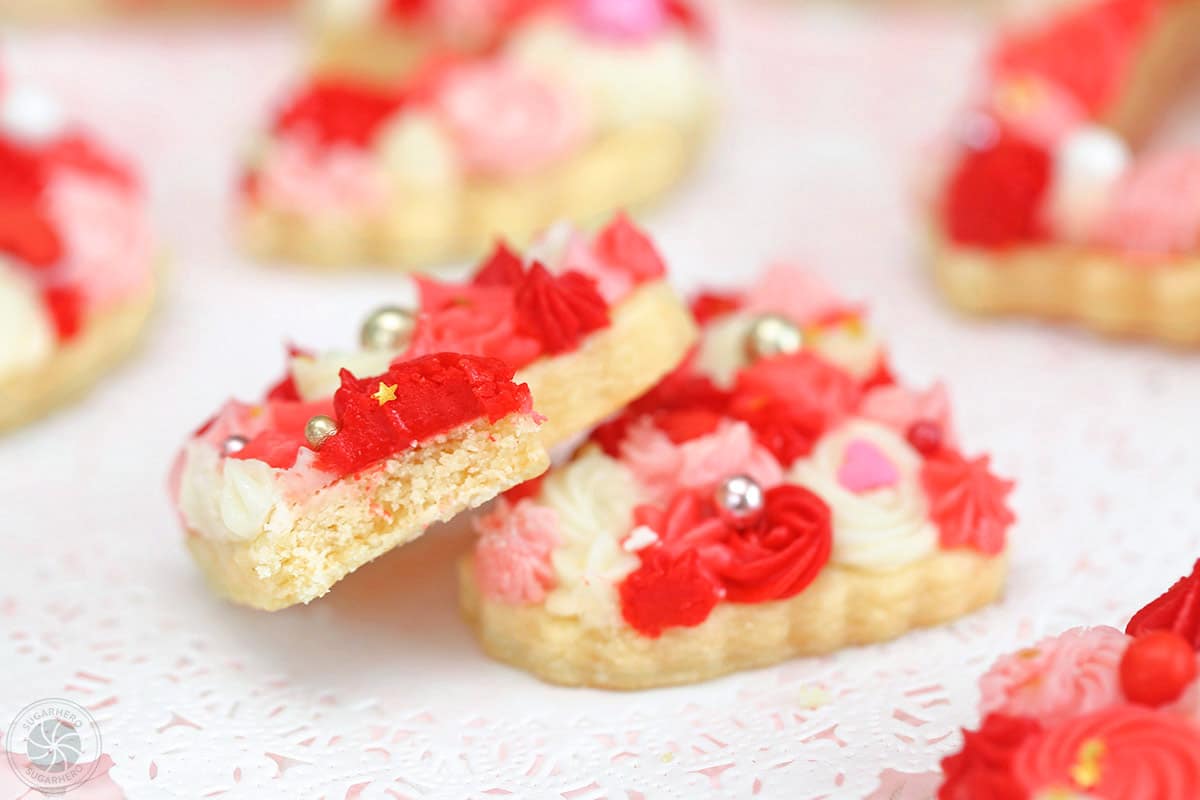
No need to visit a bakery when you can make perfect sugar cookies at home! Our recipe for foolproof cut-out sugar cookies produces cookies that are crisp around the edges and tender in the center. Top them with a smooth, easy-to-pipe buttercream frosting that holds its shape beautifully and is ideal for decorating.
Easy Buttercream Decorated Cookies
For some beginning bakers, piping frosting can be the most intimidating part of a recipe. If you’ve ever looked at a piping bag and heard the Jaws theme song playing in your head, this might just be the recipe that gets you over your fear for good.
Don’t believe me? All you need are a few different frosting tips and colors of buttercream to make your cookies look like they came from the best bakery in town.
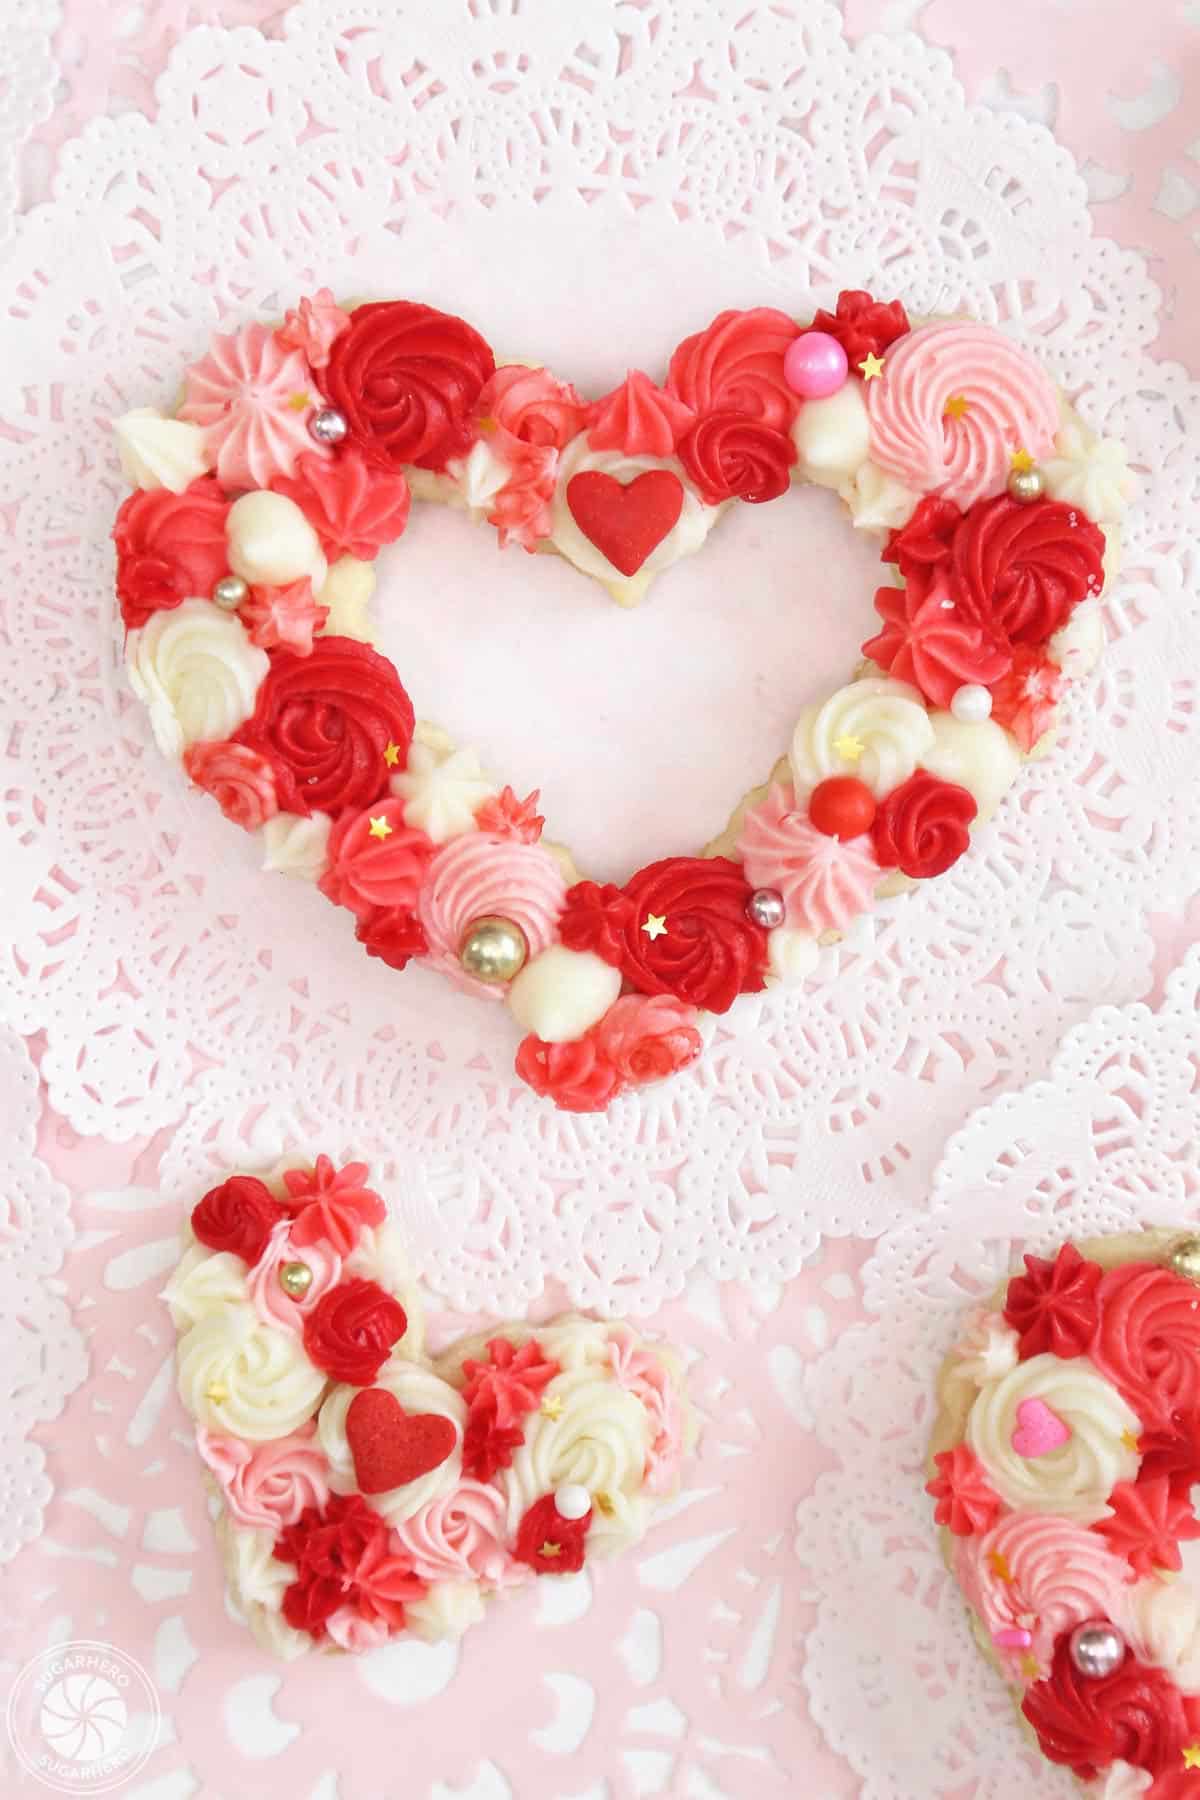
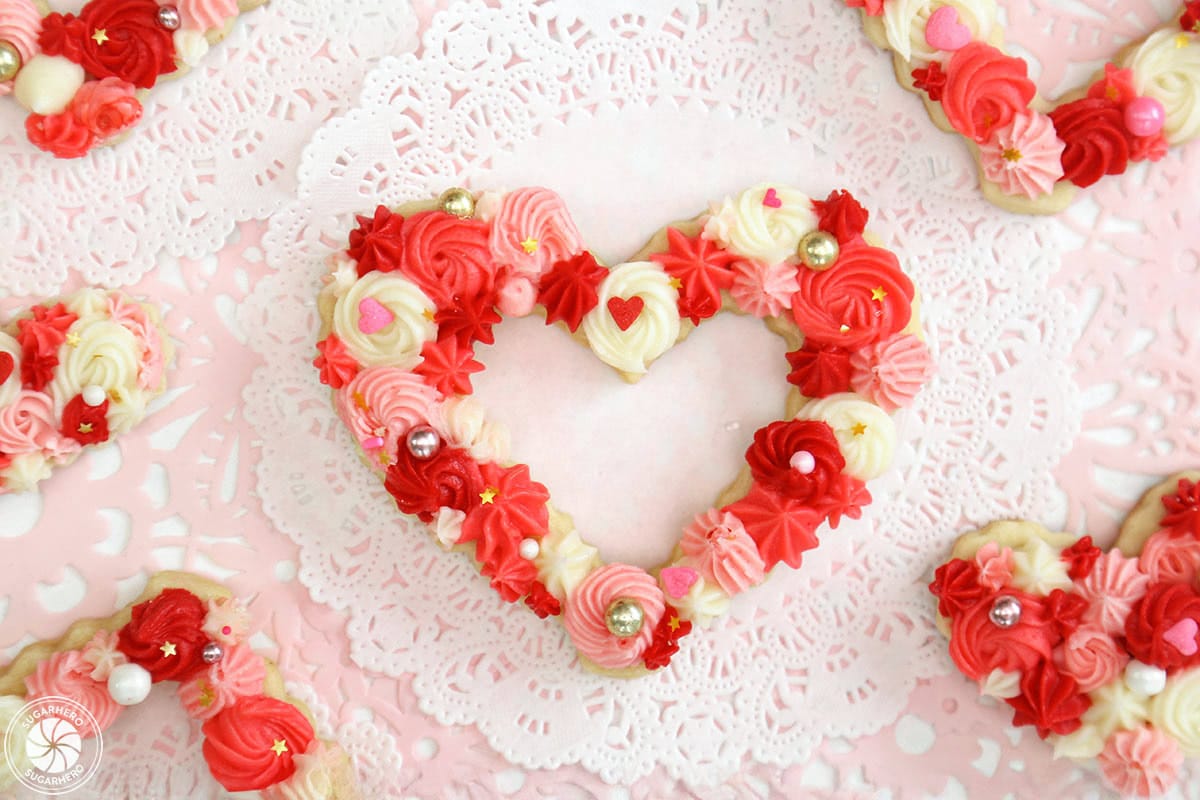
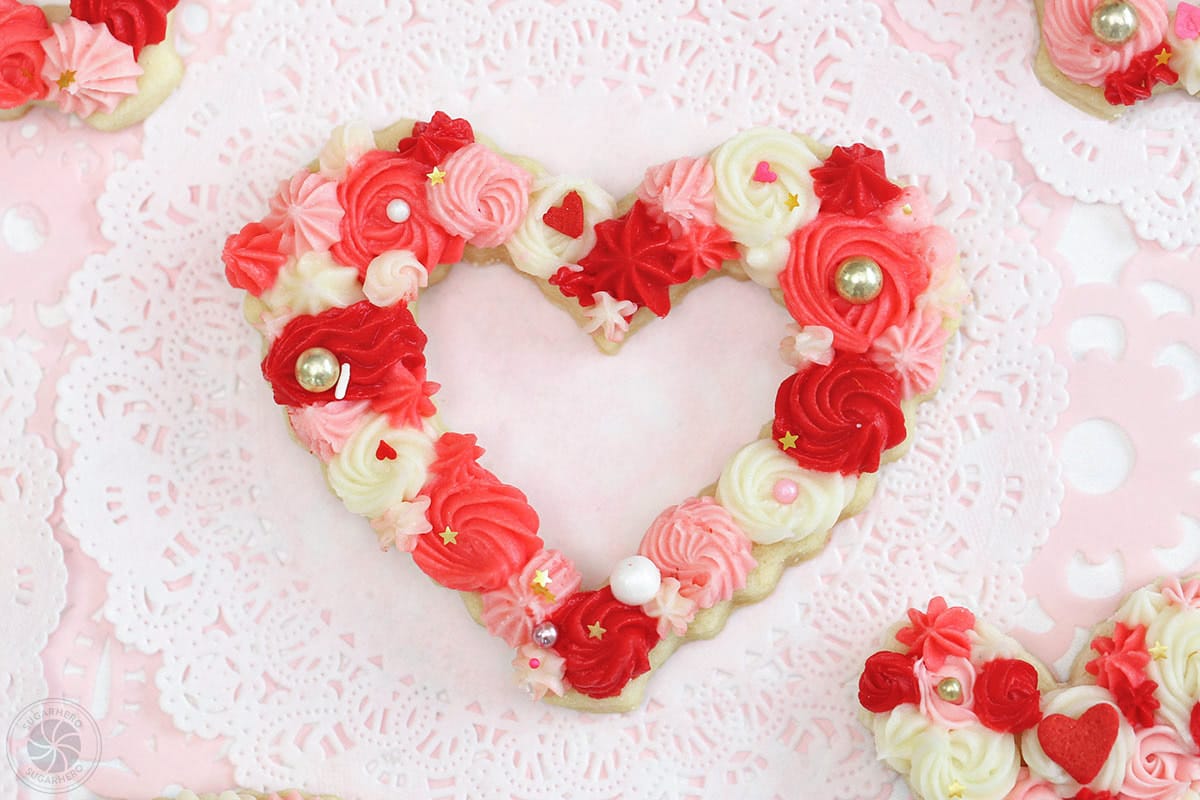
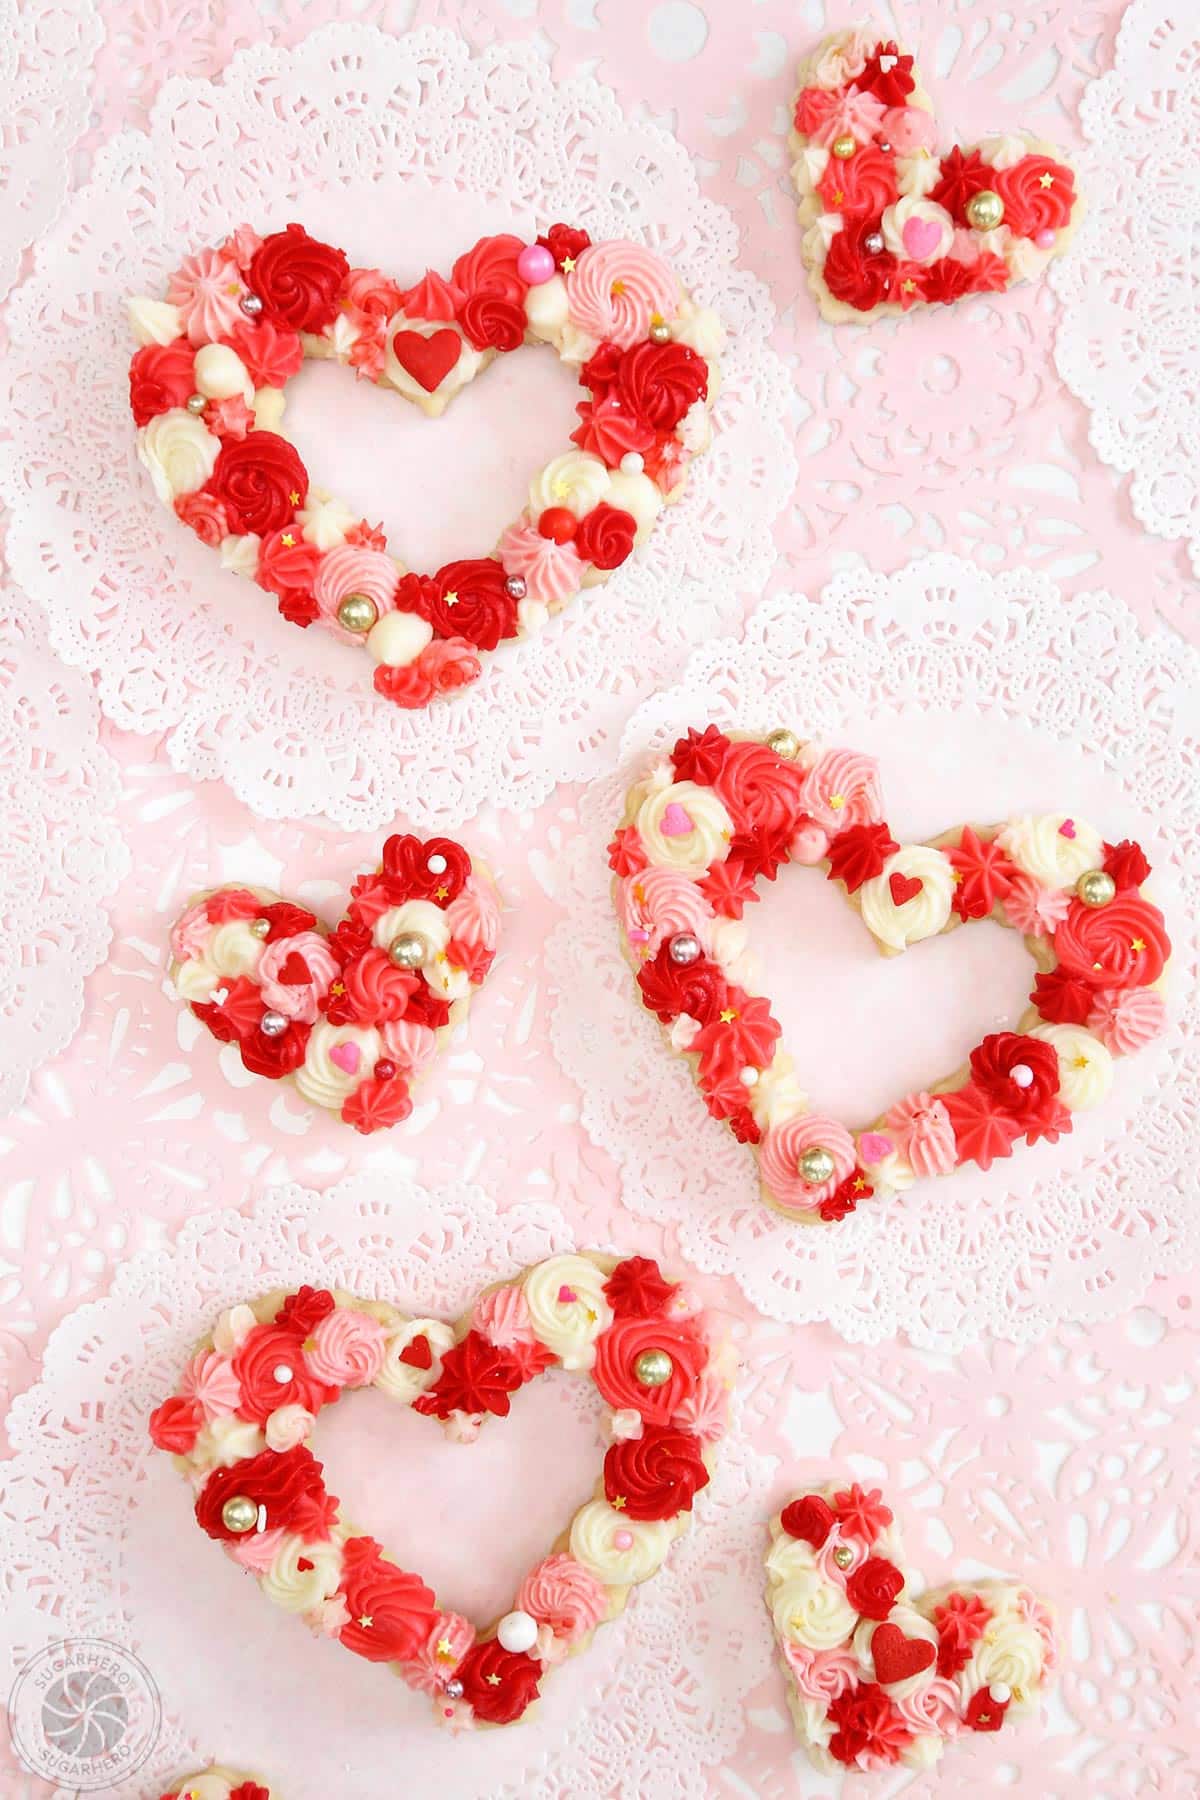
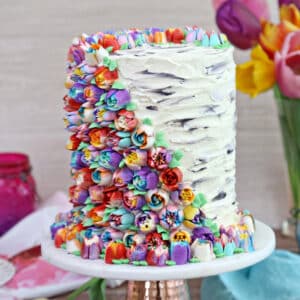
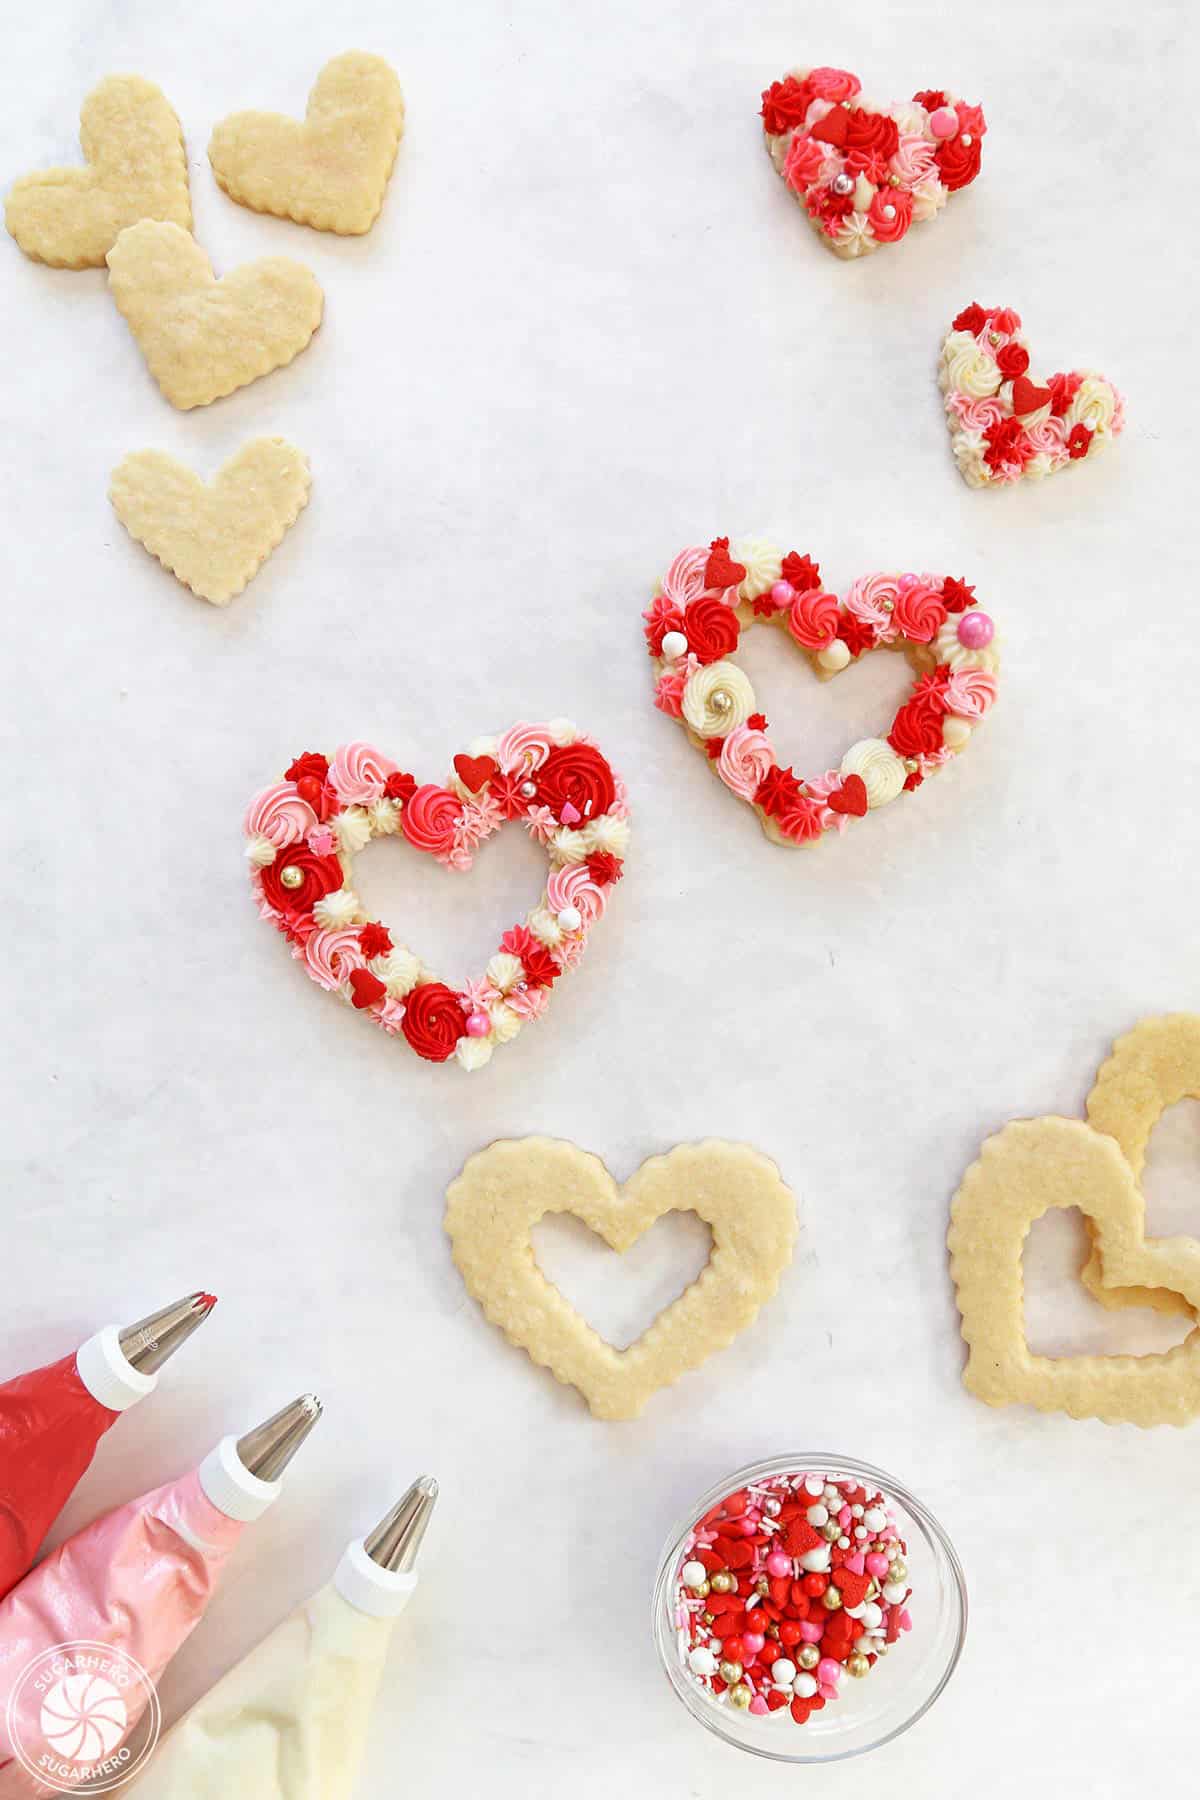
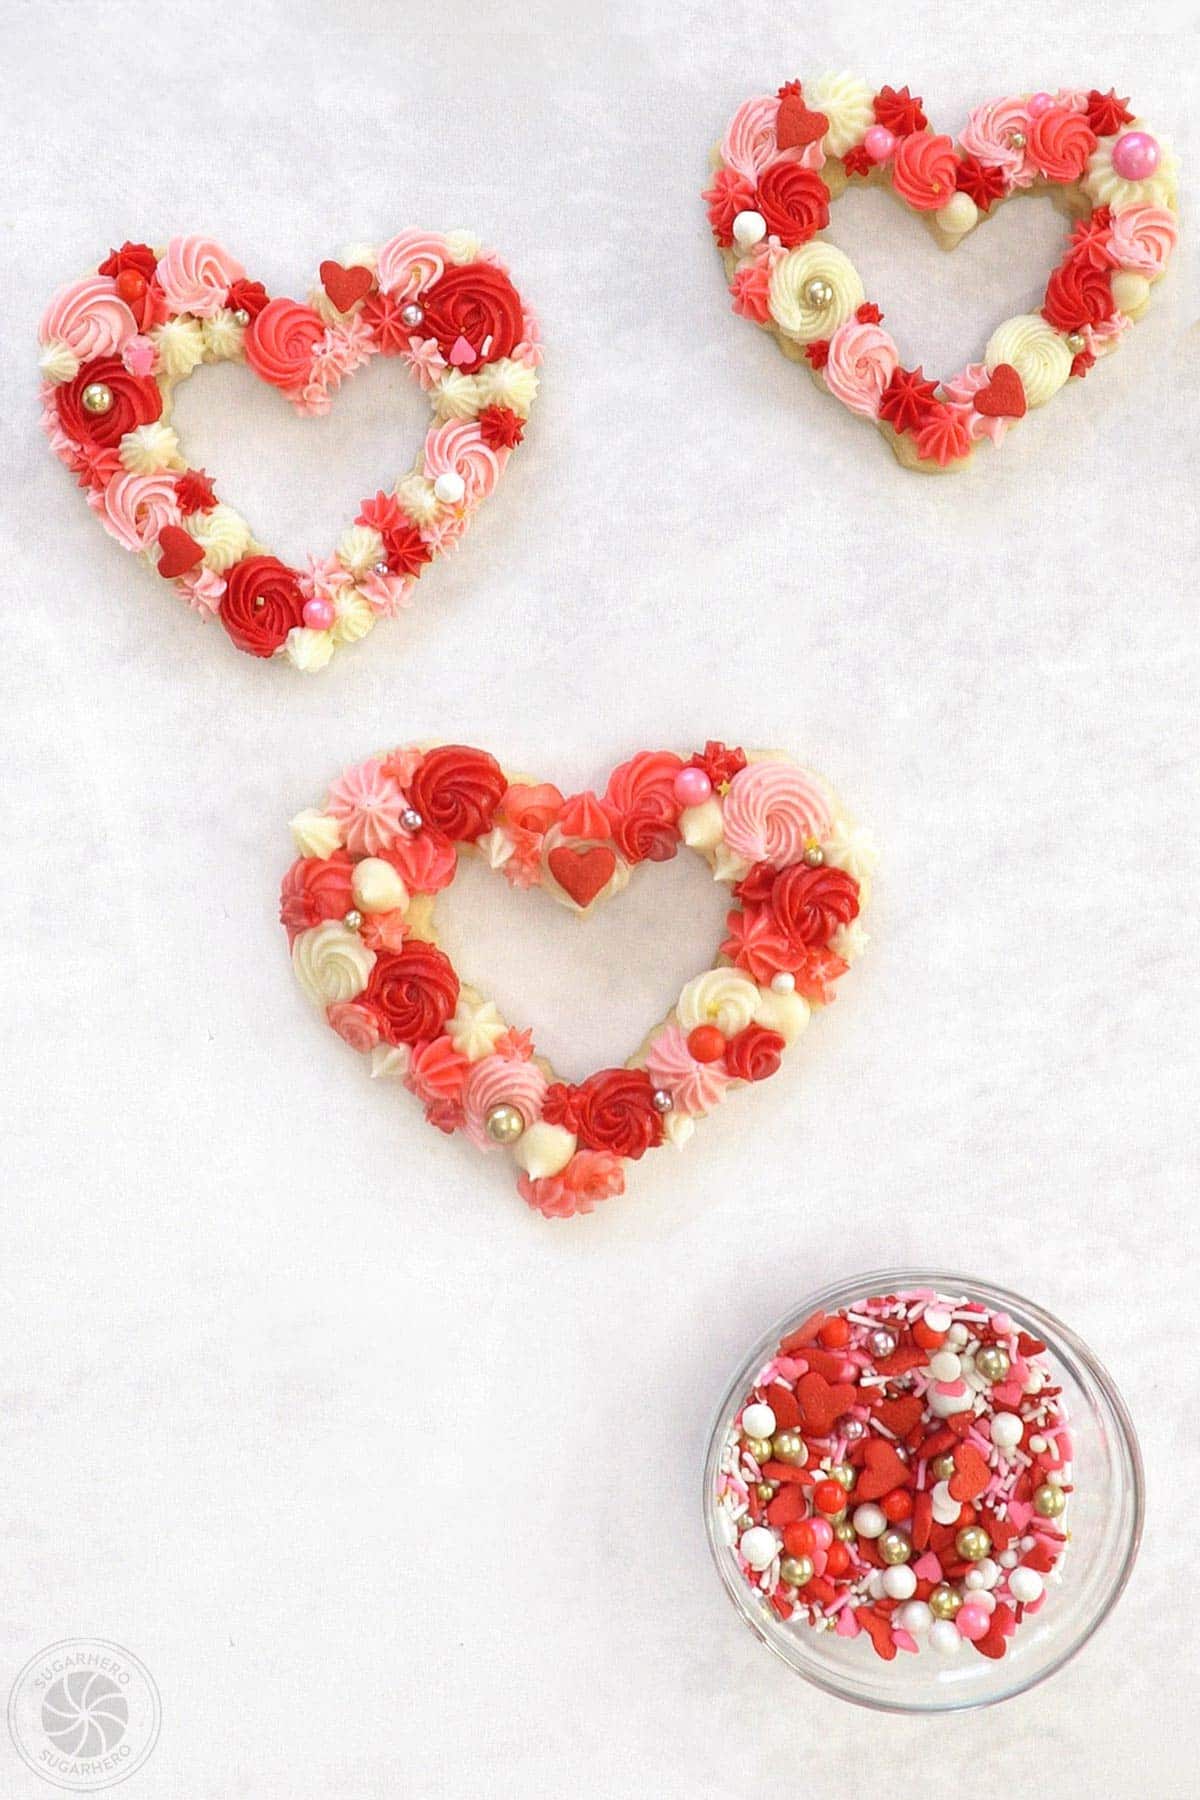
These deceptively simple cookies start with my favorite cut-out sugar cookie dough recipe. I’m using scalloped cutters and creating a “wreath” shape to make them a little fancier, but any shape will work for this technique.
The frosting is an easy American-style buttercream, meaning it has just a handful of ingredients and takes about 5 minutes to whip up.
What Makes These Great for Beginners?
The not-at-all-secret “secret sauce” of this decorating technique is to use a variety of colors and piping tips. So for these cookies, I used white, dark red, dark pink, and then mixed the dark pink and some white to make a lighter pink.
Each color gets its own piping bag and its own small star piping tip – don’t worry about matching exact piping tip numbers, if it’s small and has ridges along the opening, you’re good to go!
The beauty of this technique, and what makes it so beginner-friendly, is that there’s no wrong way to do it. You don’t have to be precious or precise. Go crazy piping swirls, dots, and squiggly lines of different colors next to each other, covering the entire cookie. Add a few sprinkles on top for a finishing touch, and your beautifully chaotic masterpieces are complete.
Don’t believe me? Check out the photo tutorial down below that shows just how simple these cookies are!
💖More Sugar Cookie Recipes
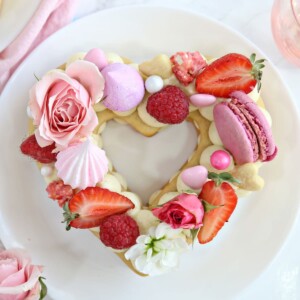
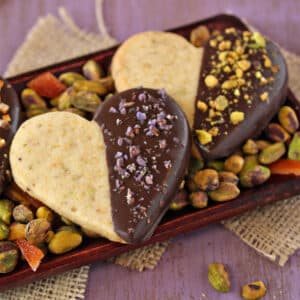
Want to know the secret to my heart? Give me ALL the Valentine’s Day cookies! Especially heart-shaped cookies like these Pistachio Shortbread Cookies, Cream Tarts with White Chocolate Frosting, Watercolor Rose Sugar Cookies and Brown Butter Heart Cookies!
(If you prefer a soft baked sugar cookie, try my Big Soft Sugar Cookies. They are topped with buttercream and easily decorated with sprinkles. 😉)
Table of Contents
🧾 What You’ll Need
Ingredients
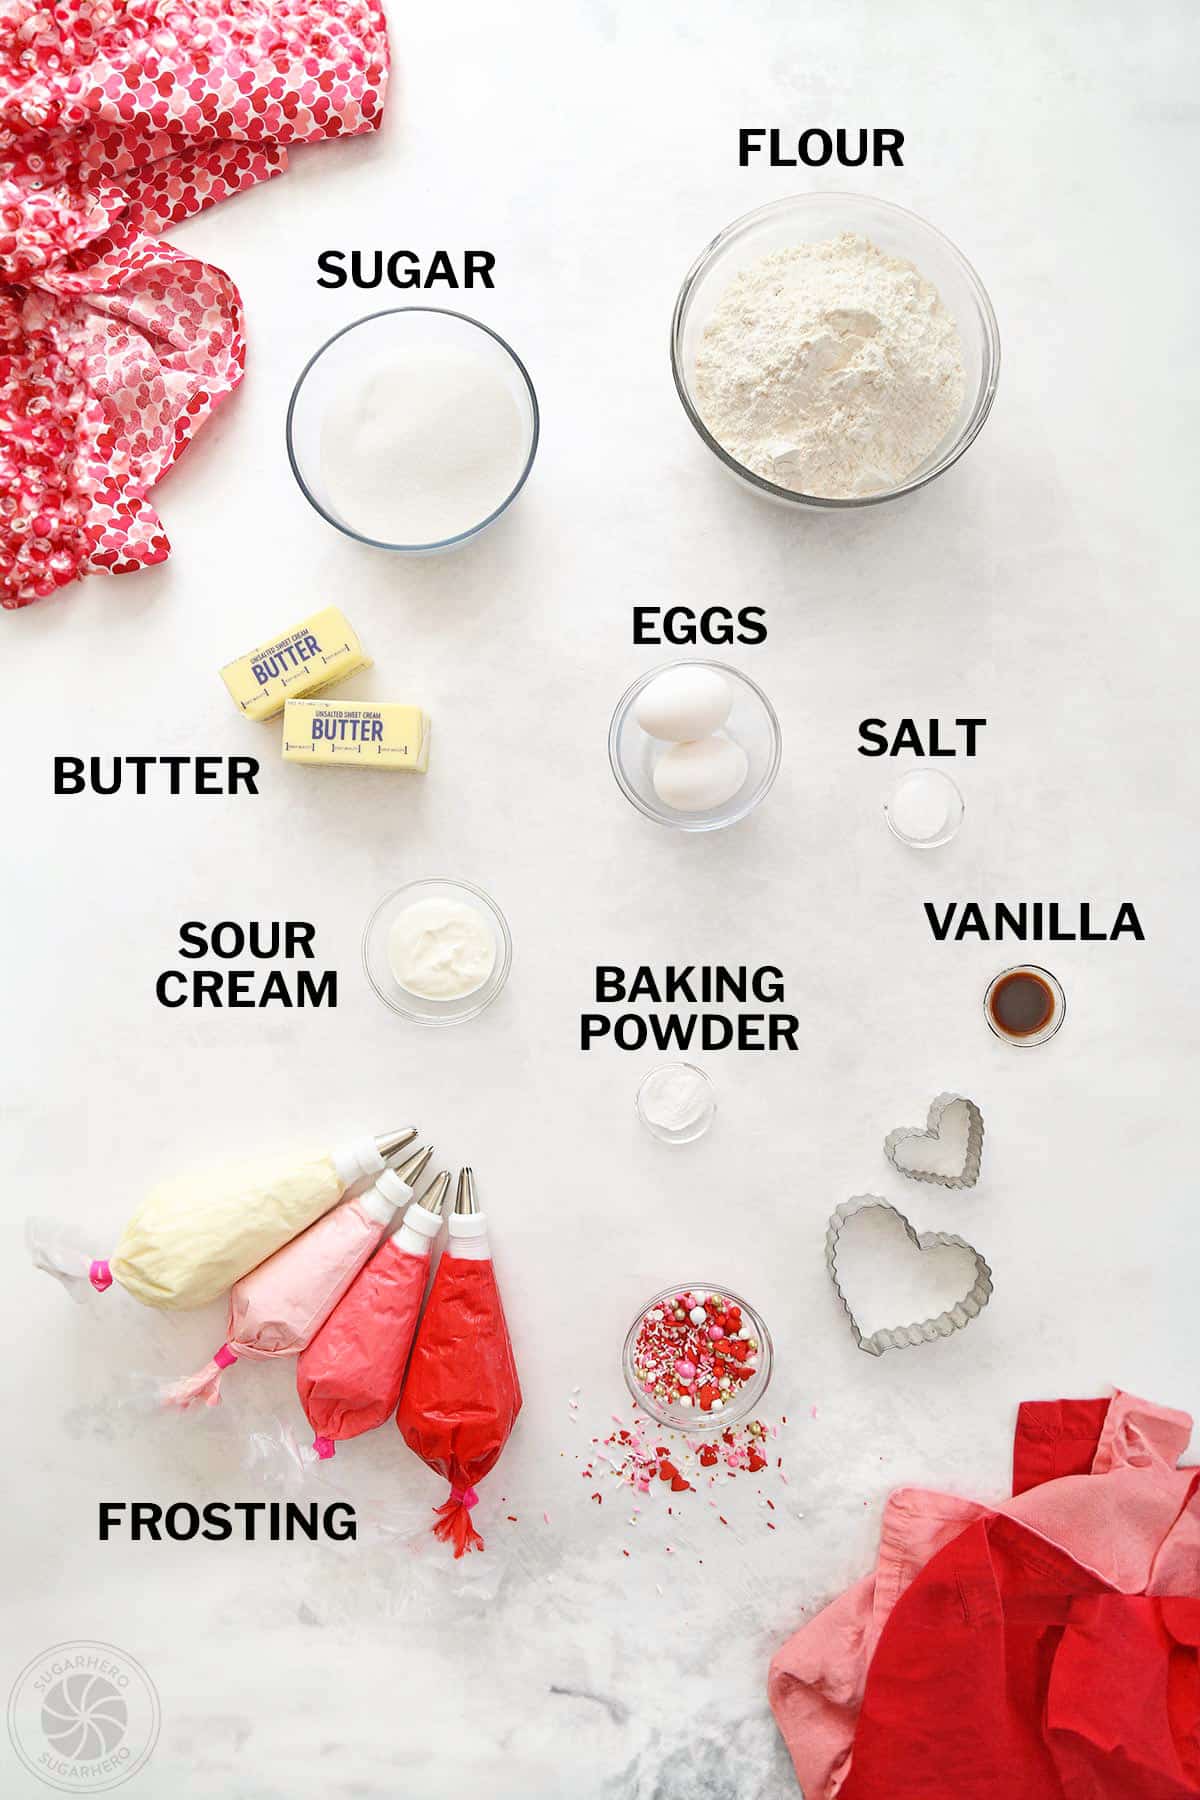
Take a look at these ingredient tips as you gather everything you’ll need to get started. Full ingredient amounts can be found in the recipe card below. (Links are affiliate links and I earn a small commission from qualifying purchases.)For the Sugar Cookies
- Flour:It’s best to use a scale to measure ingredients, but if you don’t have one, make sure you’re measuring your all-purpose flour using the spoon-and-scrape method. Spoon flour into your measuring cup, then use the back of a knife to level off the top of the cup. This method is better and more precise than just dipping your measuring cup in the flour bin to fill it.
- Baking powder
- Granulated Sugar
- Unsalted butter and salt: I like to use unsalted butter and precisely control the amount of added salt. If you only have salted butter, feel free to use it — just omit the extra salt. Make sure your butter is at room temperature so it mixes easily.
- Eggs: Use large, room temperature eggs (not medium or extra large). To make sure they’re at room temperature, either let them sit out for 20-30 minutes, or submerge them in a bowl of warm water for a few minutes to warm up quickly.
- Vanilla extract: Vanilla is the classic sugar cookie flavor, but you can experiment and add other extracts in addition to or instead of vanilla. Try almond or lemon extract, or use vanilla bean paste for a really intense vanilla vibe.
- Sour cream: The secret to my extra-soft, super tender cookies! Make sure to bring it to room temperature so everything blends together nicely.
- Powdered Sugar: The buttercream uses powdered sugar for sweetness and structure. It may seem strange, but I am very picky about my powdered sugar, and this is my powdered sugar of choice. Some sugar can make frosting gritty or starchy, but this one produces lovely results.
- Food coloring: I used Americolor Super Red and Soft Pink gel coloring for these cookies.
- Sprinkles: Using a mix of different sizes and shapes makes these cookies extra-fun.
Equipment
All the tools you need to make cookie-making and decorating a breeze!
- Scalloped heart-shaped cookie cutters: I used scalloped heart-shaped cookie cutters, but you can use any style of cookie cutter you like. You could go with regular hearts or any other shape, letters, or numbers.
- Piping tips: Depending on the designs you’d like to make, you’ll need a few piping tips. I recommend small star tips – I used tip #21, tip #15, and tip #18.
- Piping bags and couplers: I like these disposable piping bags (I wash them and re-use them to reduce waste!). Piping couplers aren’t a necessity, but are helpful if you want to swap tips between colors.
- Stand mixer: I highly recommend using a stand mixer to make the cookie dough and buttercream for the best results.
- Rolling pin: You’ll be rolling out the cookies so you’ll need a good rolling pin. To prevent your dough from sticking to your work surface, I recommend rolling the dough between sheets of parchment paper. It will also make clean up so much easier.
Ready to Make These?
- Get the recipe below 👇👇
- Scroll below the recipe for step-by-step photos
- Read important FAQs and more
❤️ Desserts You’ll Fall For

Leave a Review!
If you make this recipe, let us know! Leave a ⭐️⭐️⭐️⭐️⭐️ rating on the recipe below, and leave a comment, take a photo and tag me on Instagram @elabau, or use #sugarhero on IG!

Buttercream Sugar Cookies
Equipment
- Scalloped heart cookie cutters (3" and 2")
Ingredients
For the cookies:
- 19 oz all-purpose flour (4 ¼ cups)
- 1 tsp salt
- 1 tsp baking powder
- 12.25 oz granulated sugar (1 ¾ cups)
- 8 oz unsalted butter (1 cup), at room temperature
- 2 large eggs at room temperature
- 1 tsp vanilla extract can substitute lemon or almond extract
- 1 oz sour cream (2 TBSP), at room temperature
For the frosting:
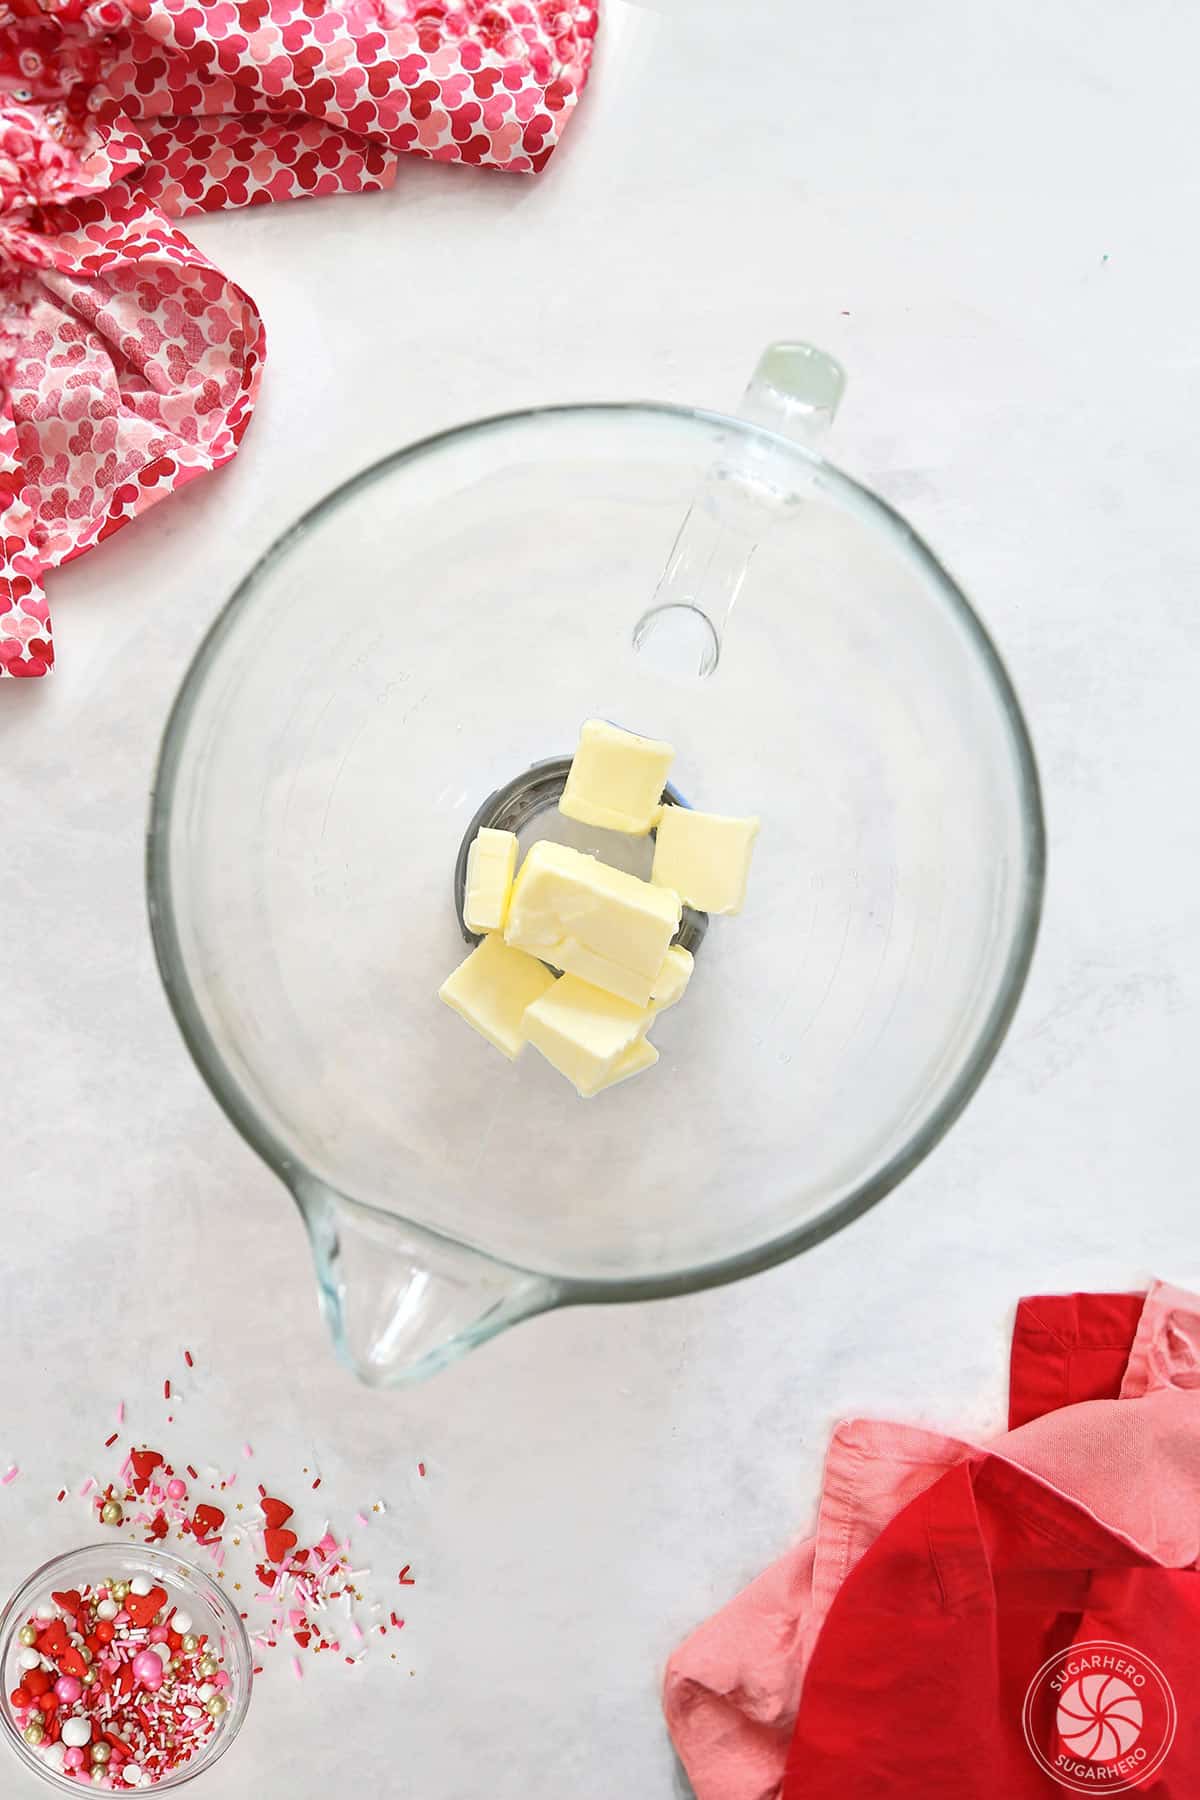
- 8 oz unsalted butter (1 cup), at room temperature
- 1 TBSP vanilla extract use clear extract to avoid yellow frosting
- 1 tsp salt
- 24 oz powdered sugar (6 cups), sift after measuring
- ¼ cup milk slightly warmed
To decorate:
- Gel food coloring I used Americolor Soft Pink and Super Red
- Assorted sprinkles like heart shapes, jimmies, nonpareils, etc
Instructions
To make the cookies:
- Combine the dry ingredients: In a bowl, whisk together the flour, salt, and baking powder, and set aside for now.
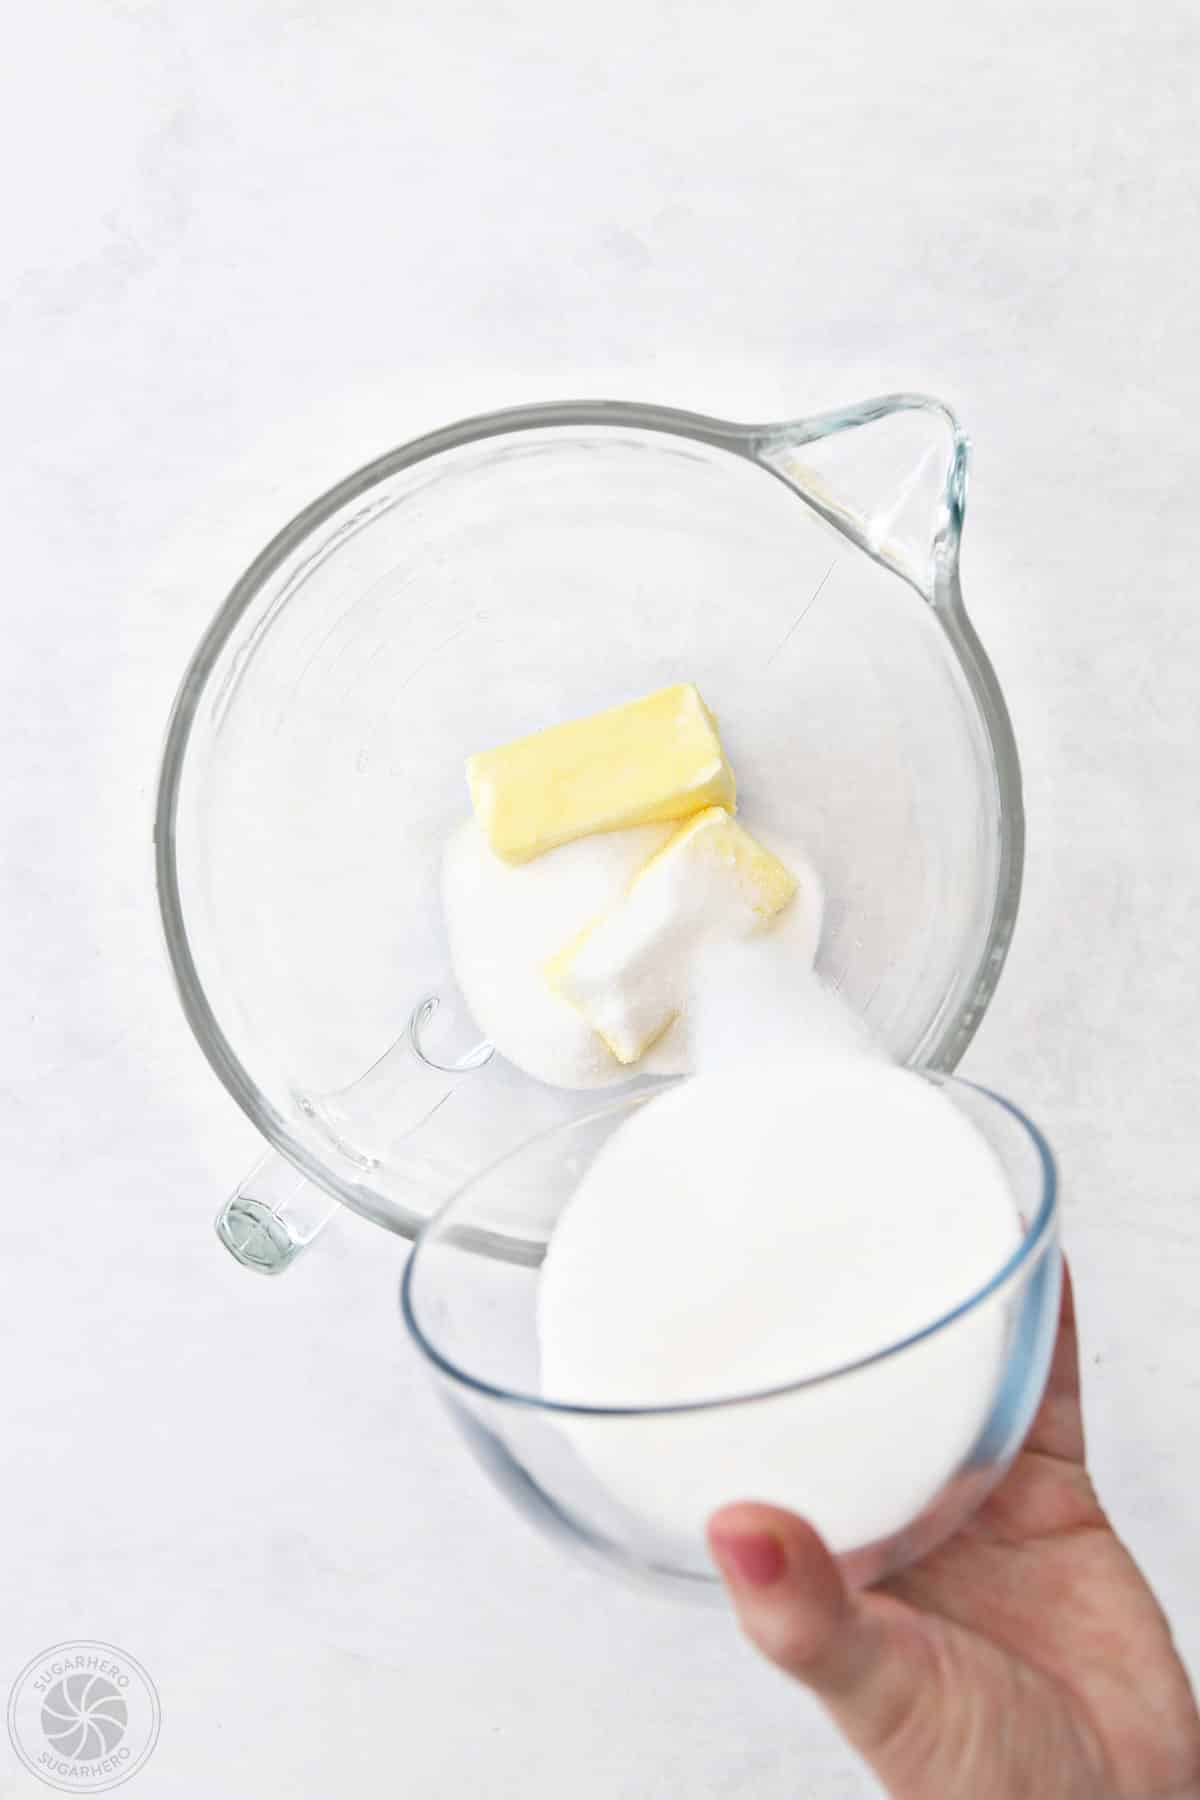
- Cream the butter and sugar: In the bowl of a large stand mixer fitted with a paddle attachment, combine the butter and sugar, and mix everything together on medium speed until fluffy and well-mixed, about 1-2 minutes.
- Add the liquid ingredients: Add the eggs one at a time, beating well after each addition, then add the vanilla extract and sour cream.
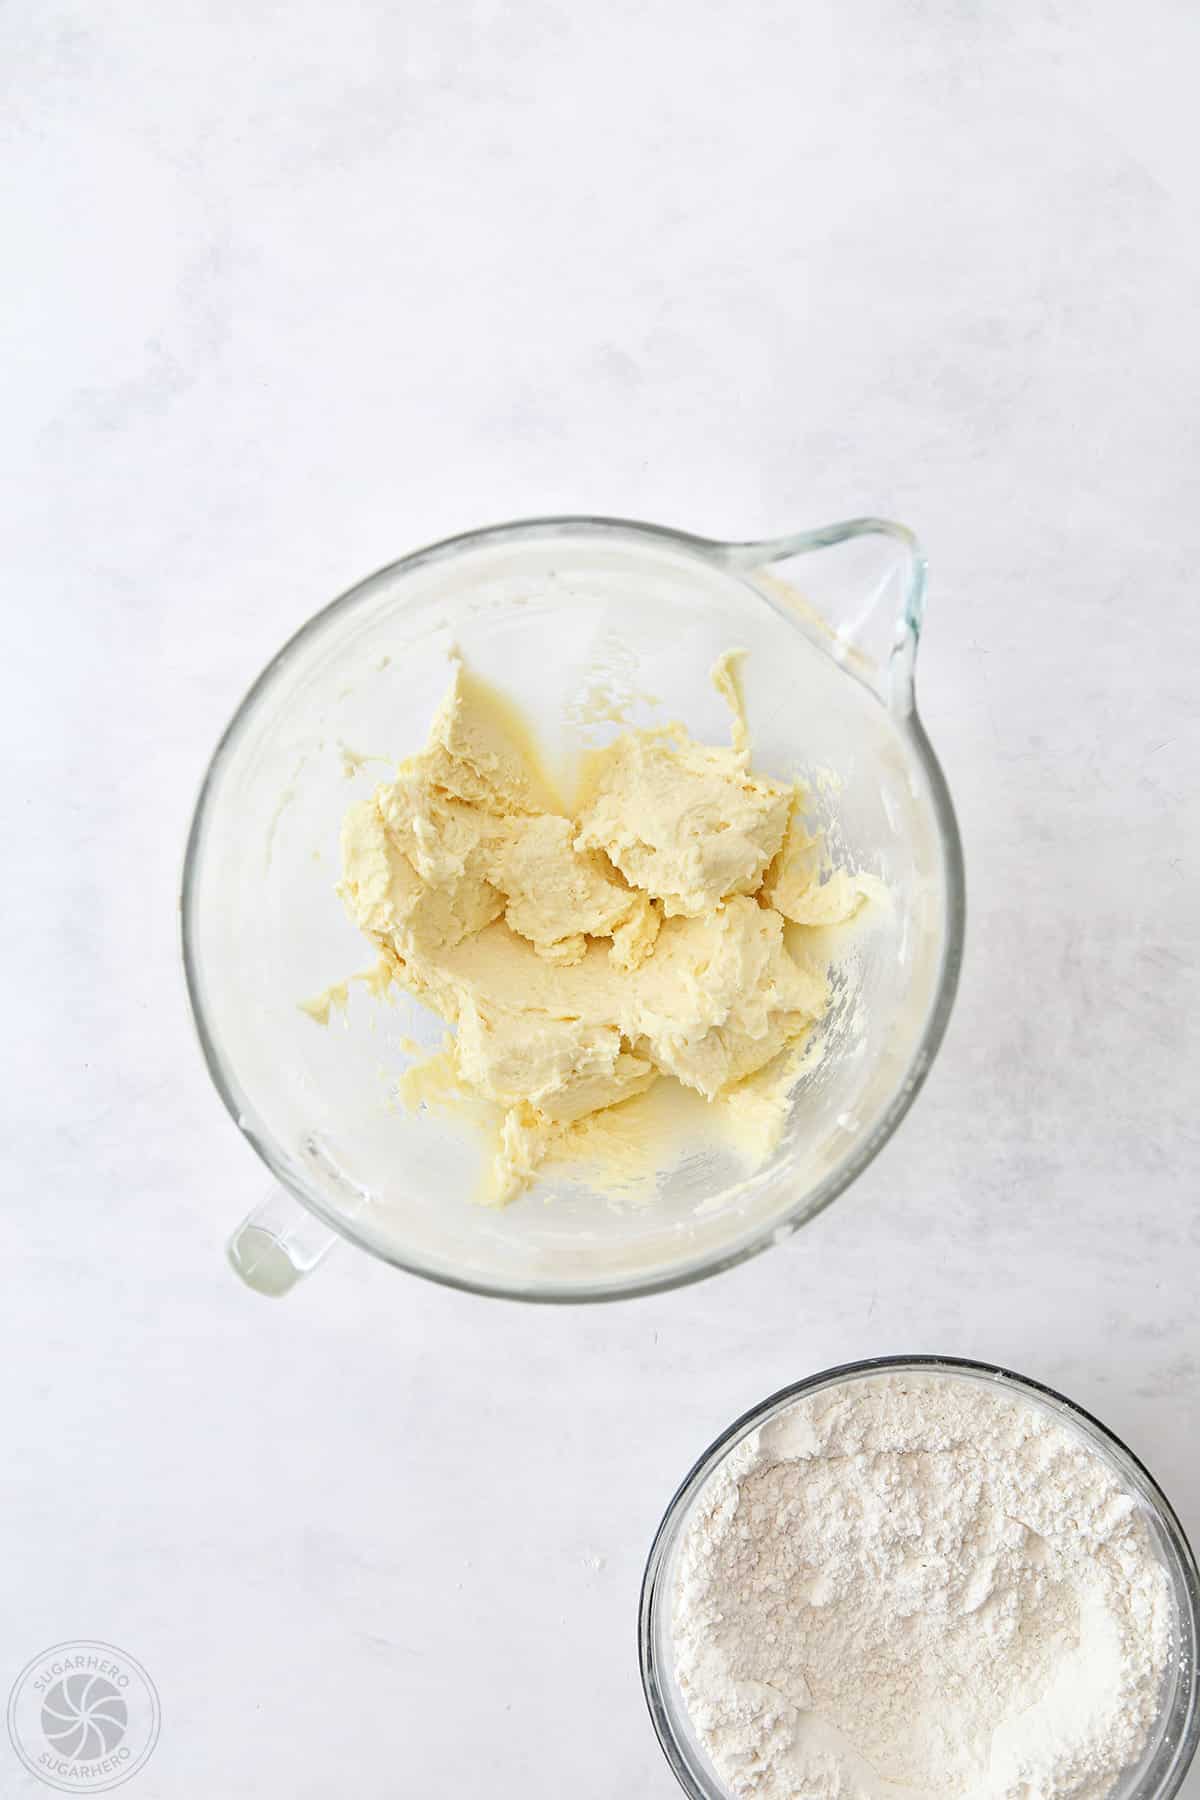
- Slowly add the drys: With the mixer running on low, add the dry ingredients gradually, and mix until they’re just about incorporated. Stop the mixer when only a few streaks of flour remain. Scrape the bottom and sides of the bowl with a spatula, and finish mixing all the dough by hand.
- Portion the dough: Divide the dough in half. If you want to use a kitchen scale, your dough portions should be about 22 oz each.
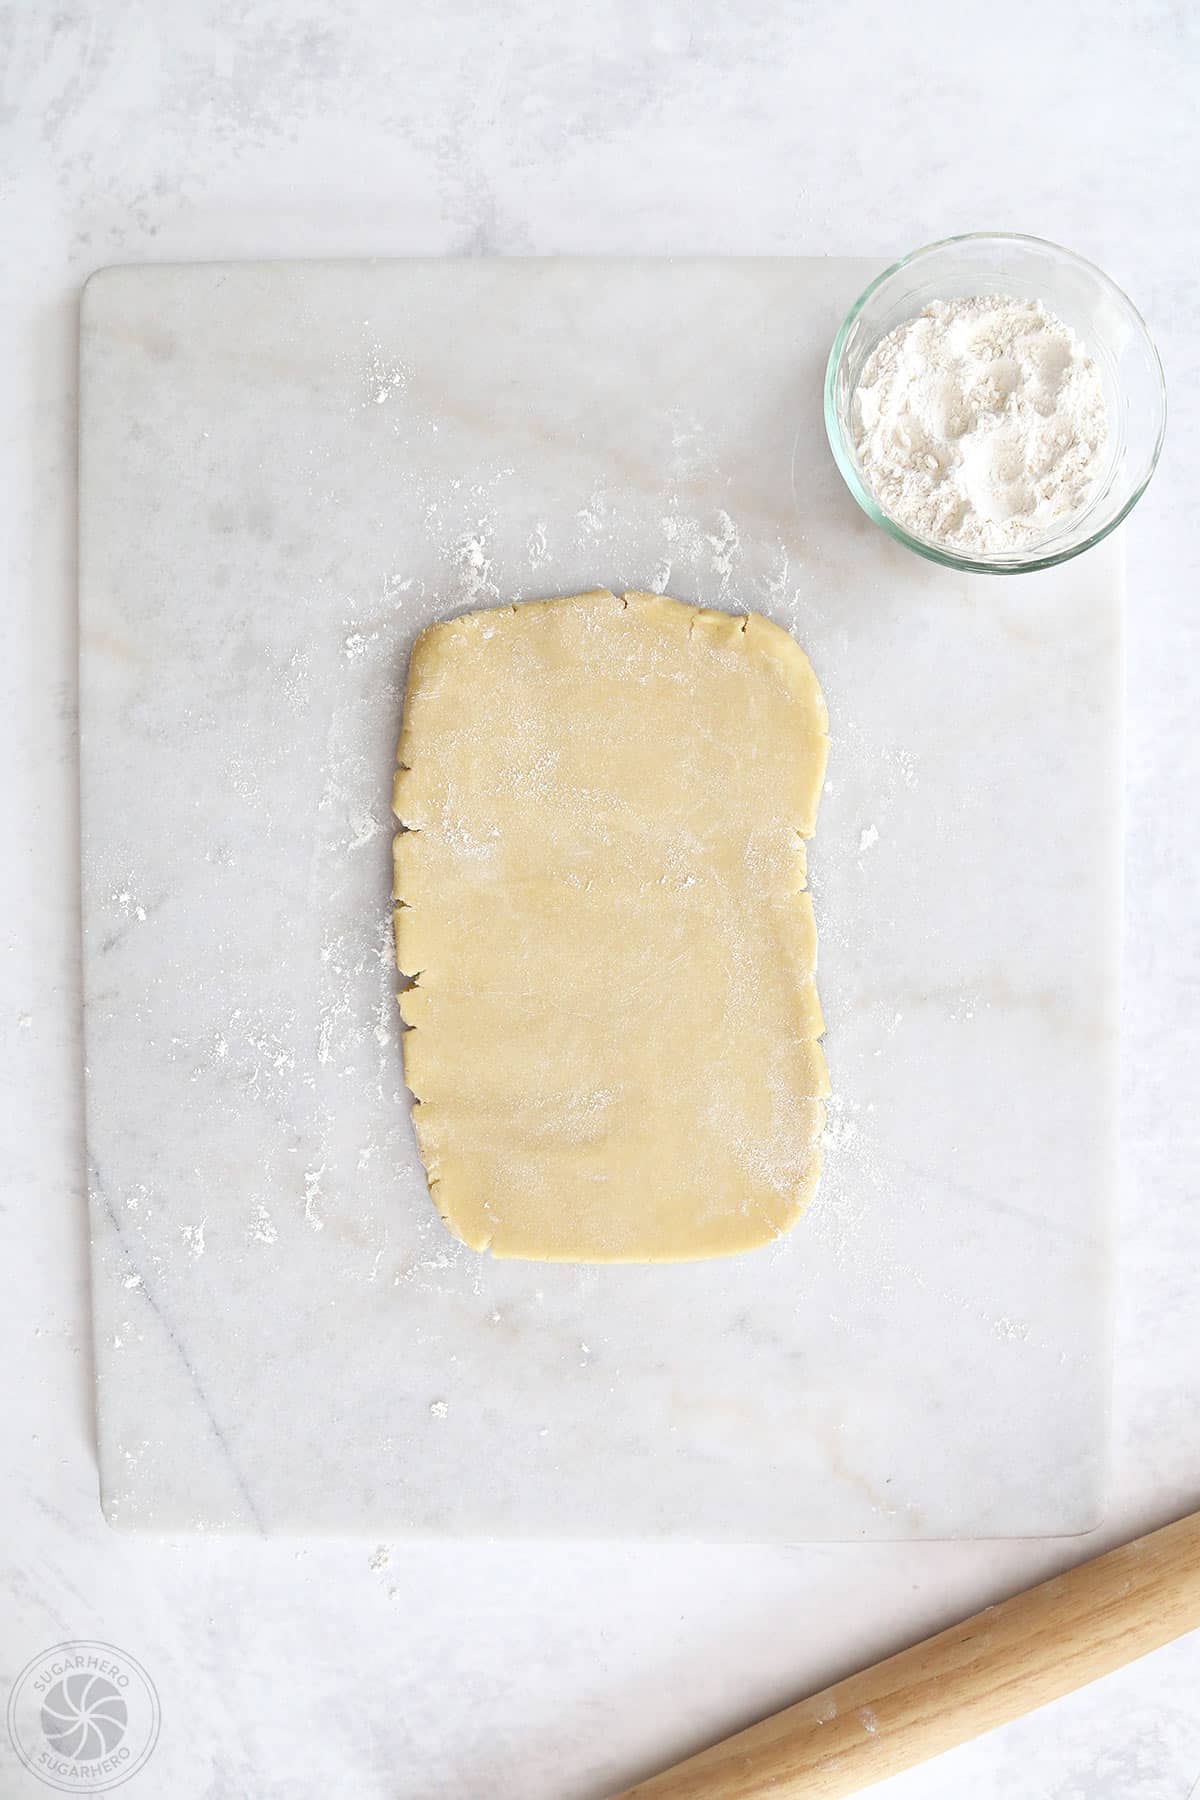
- Roll out the dough: This is my trick for making rolled-out cookies easier! Roll the dough BEFORE it’s chilled, so you don’t struggle with rolling out rock-hard dough. Place the dough between two sheets of parchment paper, and roll out the dough until it is about 1/4-inch thick. Place the rolled-out dough, still between the parchment sheets, on a baking sheet. Repeat with the second portion of dough, stacking it right on top of the first.
- Chill the dough: Chill the baking sheet with the rolled-out dough for 45 minutes, until the dough is firm. It can be left in the refrigerator for several days – if you are not going to be using it within a day, wrap the baking sheet in plastic wrap to keep the dough from drying out.
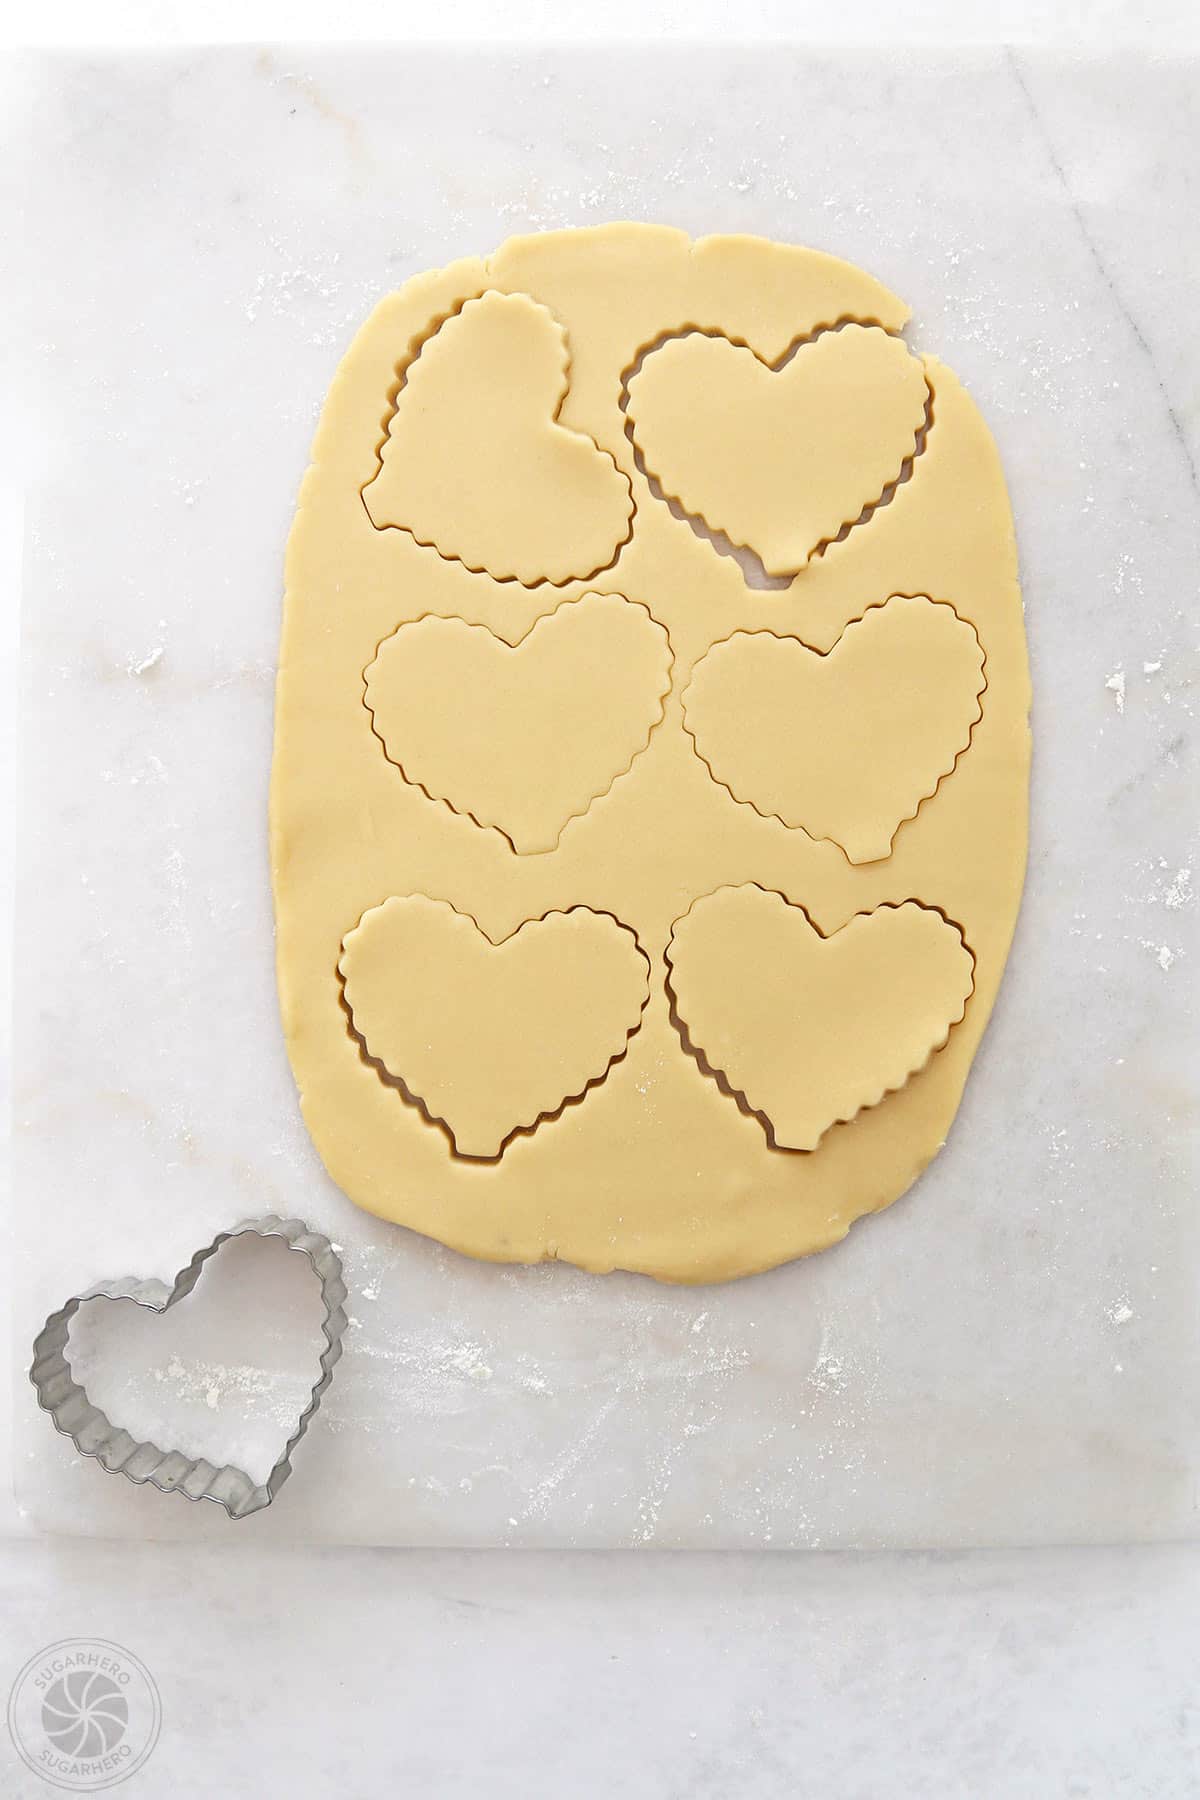
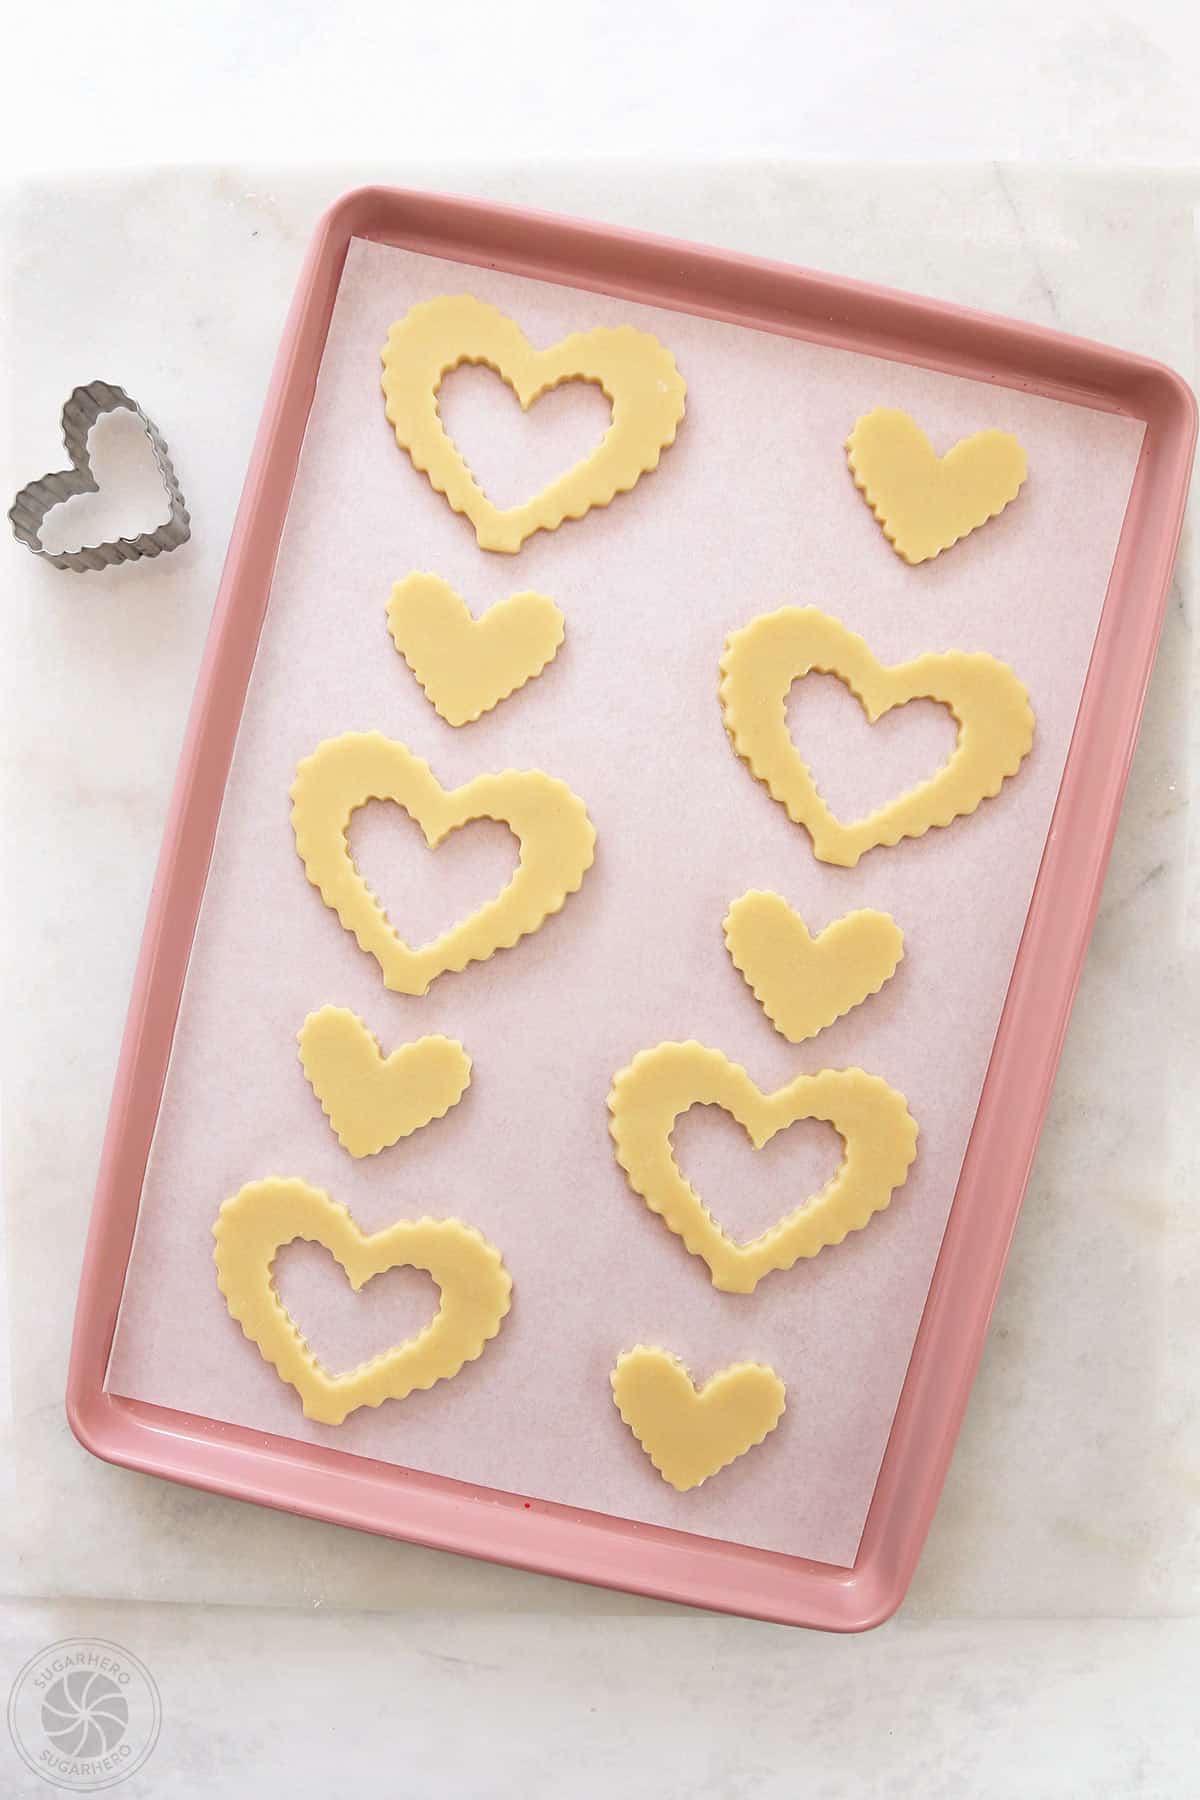
- Cut out the cookies: Preheat the oven to 350 degrees F. Use a 3-inch scalloped cookie cutter to cut hearts out of the chilled dough. Transfer the hearts to a parchment-covered baking sheet, then use a smaller scalloped cutter to cut hearts out of the center. Place the small hearts on a different baking sheet. It helps to keep the different shapes on separate sheets, since they might bake at different rates.
- Re-roll as needed: Combine the scraps and re-roll the dough to cut more cookies. You should get about 16-18 large heart cookies and a similar number of smaller ones. If at any time the dough becomes too soft and sticky to easily work with, refrigerate it briefly until it firms up again.
- Freeze the cookies: Put the sheets of cut-out cookies in the freezer for 10 minutes before baking to help the cookies hold their shape. This is optional, but helpful if your cookies are a more intricate shape.
- Bake the cookies: Bake the trays of cookies for 8-10 minutes, until the edges are just starting to take on color and they have lost the raw shine in the middle. Let them cool on the baking sheet for 5 minutes, then remove them to wire racks to cool completely before decorating them.
To make the frosting:
- Beat the butter: Beat the butter with an electric mixer fitted with a paddle attachment on medium speed for about 2 minutes, until creamy and light in color. Don’t skip this step, it gives your frosting a smooth and creamy texture, and prevents it from being overly yellow.
- Add vanilla and salt: Turn the mixer to medium-low, add the vanilla and salt, and mix until incorporated.
- Add partial sugar and milk: With the mixer running on low, gradually add half of the powdered sugar. Once it’s mostly incorporated, add the milk and mix it in.
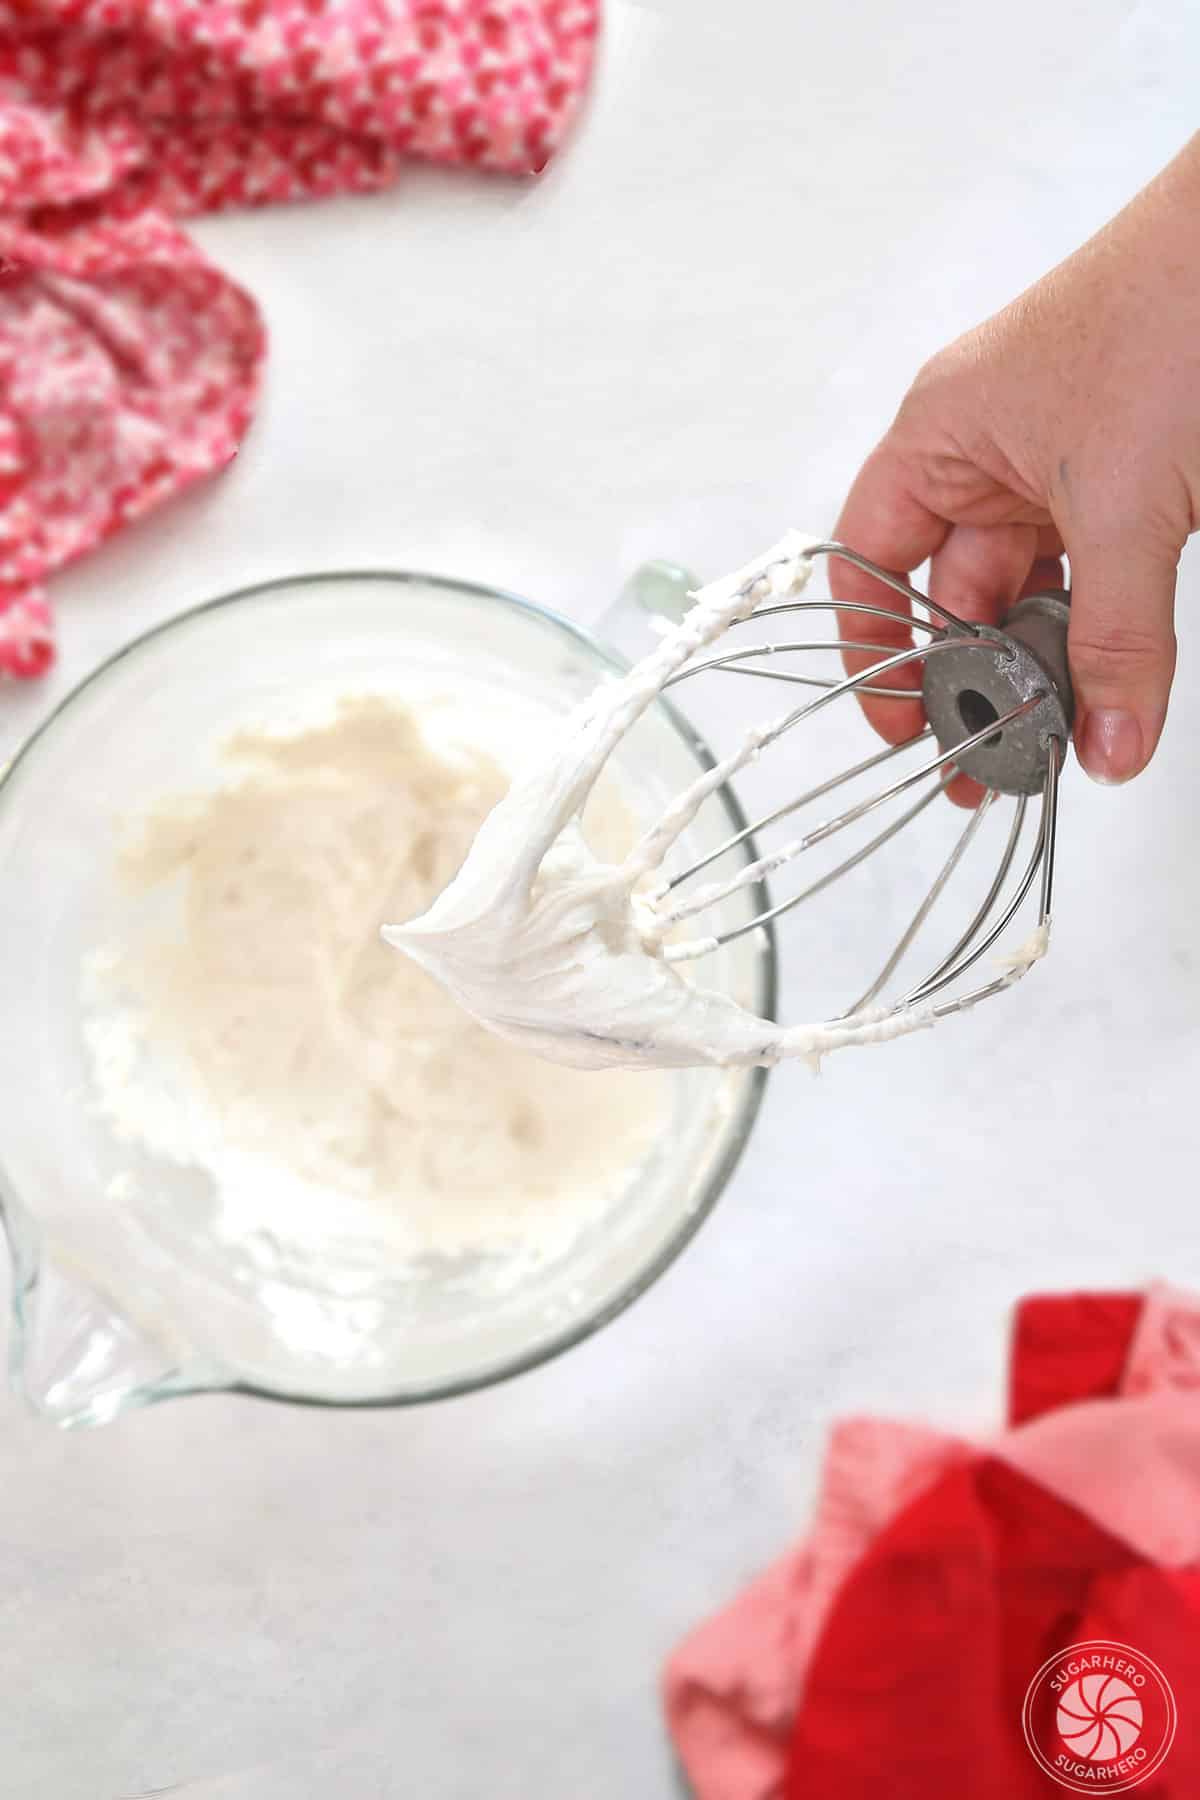
- Add remaining sugar: Add the second half of the sugar, and once it’s mostly mixed, stop the mixer and scrape down the bottom and sides of the bowl. Mix once more on medium speed until light and creamy.
- Adjust the texture: If the frosting is too stiff for your liking, you can add a little more milk a bit at a time, until you get a texture you like. If it is too soft, add a few spoonfuls of powdered sugar to adjust the texture. A stiffer texture is for these better, so the piped decorations hold their shape well.
- Color the frosting: Decide how many colors you want to have, and divide the frosting into that many separate bowls. Keep a piece of cling wrap pressed on top of any frosting you’re not working with, so it won’t crust over. Add gel food coloring to each bowl and mix well. See the Notes section below for tips on how to get vibrant colors.
- Storage: If you are not not using this frosting right away, store in an airtight container and press a layer of plastic wrap directly on top of the frosting to avoid the frosting crusting. Store at room temperature for 1-2 days, in the refrigerator for up to a week, or in the freezer for up to 3 months.To use after storage, allow the frosting to come to room temperature, then mix it again before using to restore its creamy texture.
To decorate:
- Fill piping bags: Fit piping bags with small star tips (I used #15, 18, and 21, but any small star tip will work). Fill each bag with buttercream and snip off the tip so they’re ready to go.
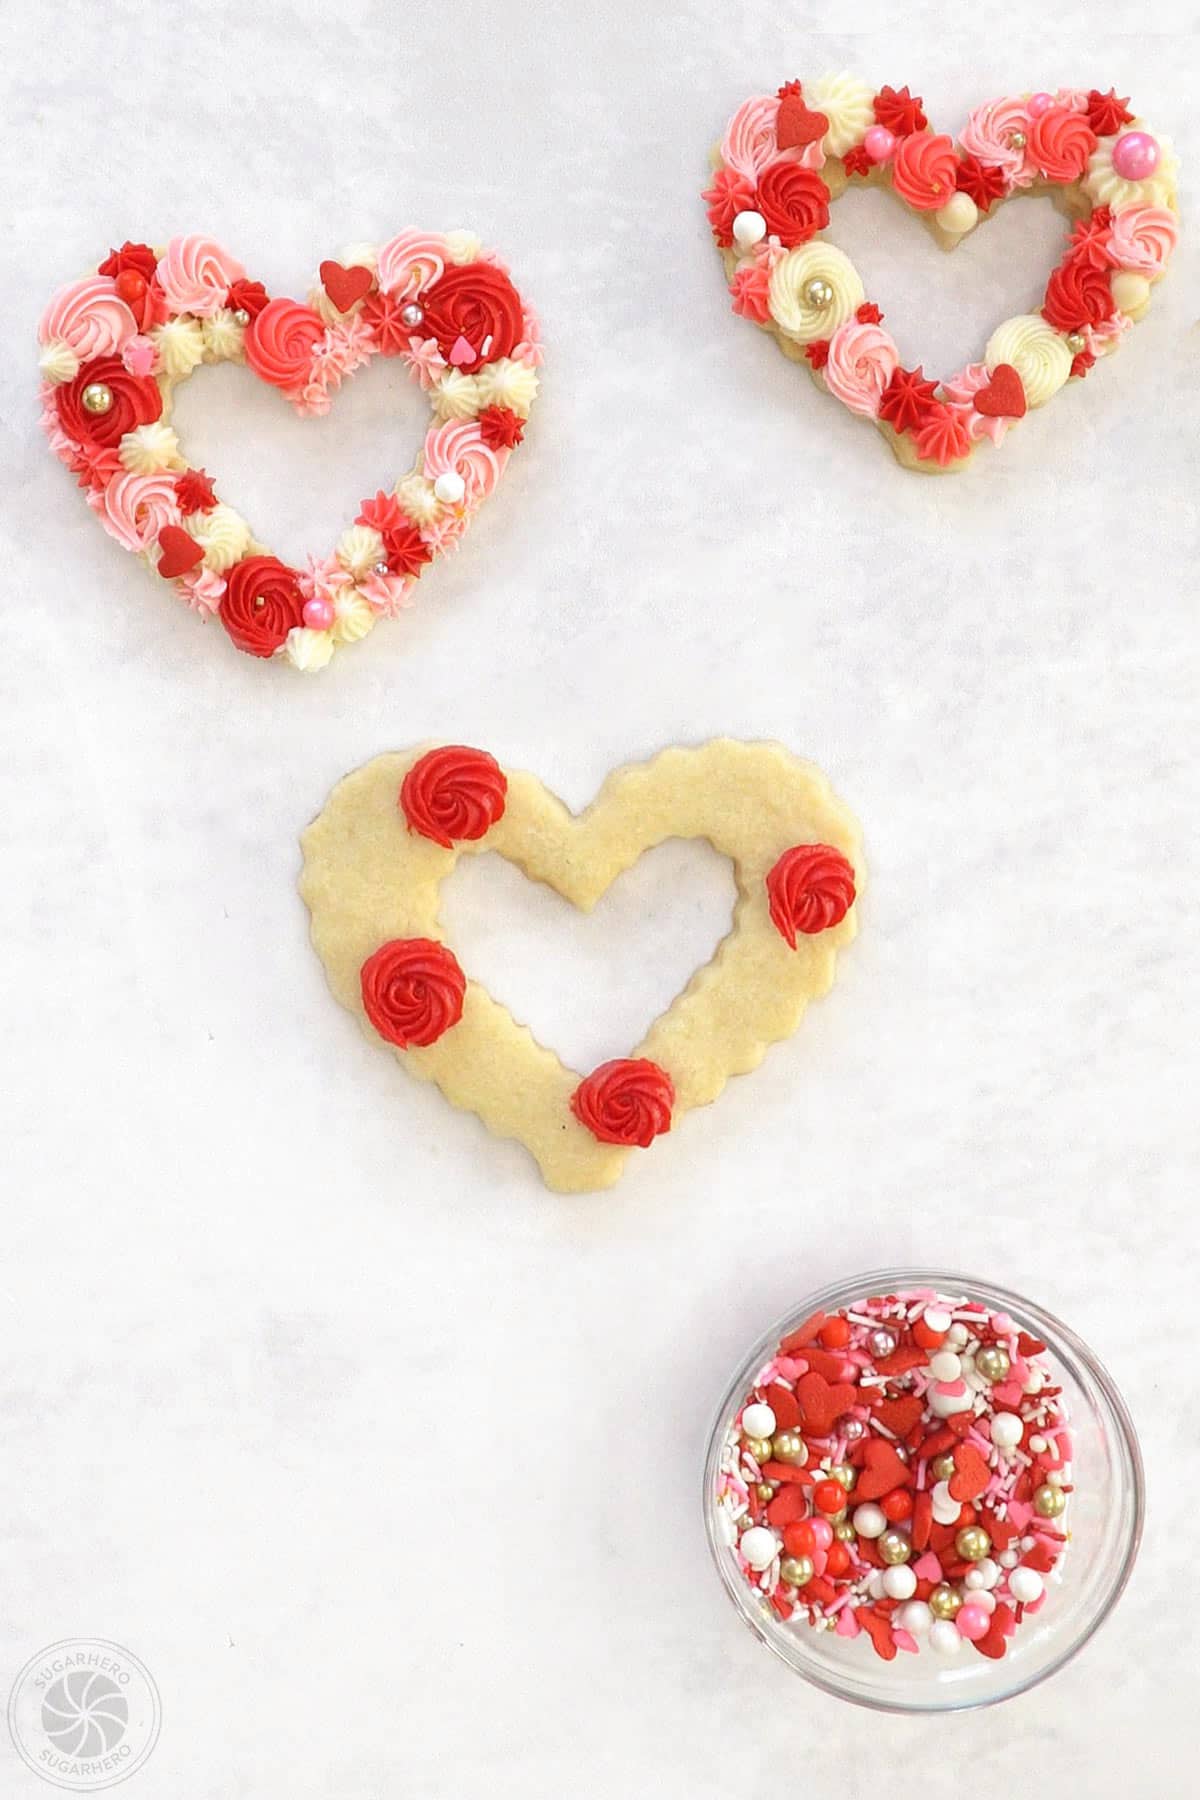
- Pipe stars: Start with one color, and pipe 4 or 5 small stars or rosettes around a cookie, leaving space in between for other colors. Repeat with 2 more cookies. (This frosting crusts quickly, so if you’re adding sprinkles on top, you’ll only want to decorate about 3 cookies at a time, or else the sprinkles won’t stick.
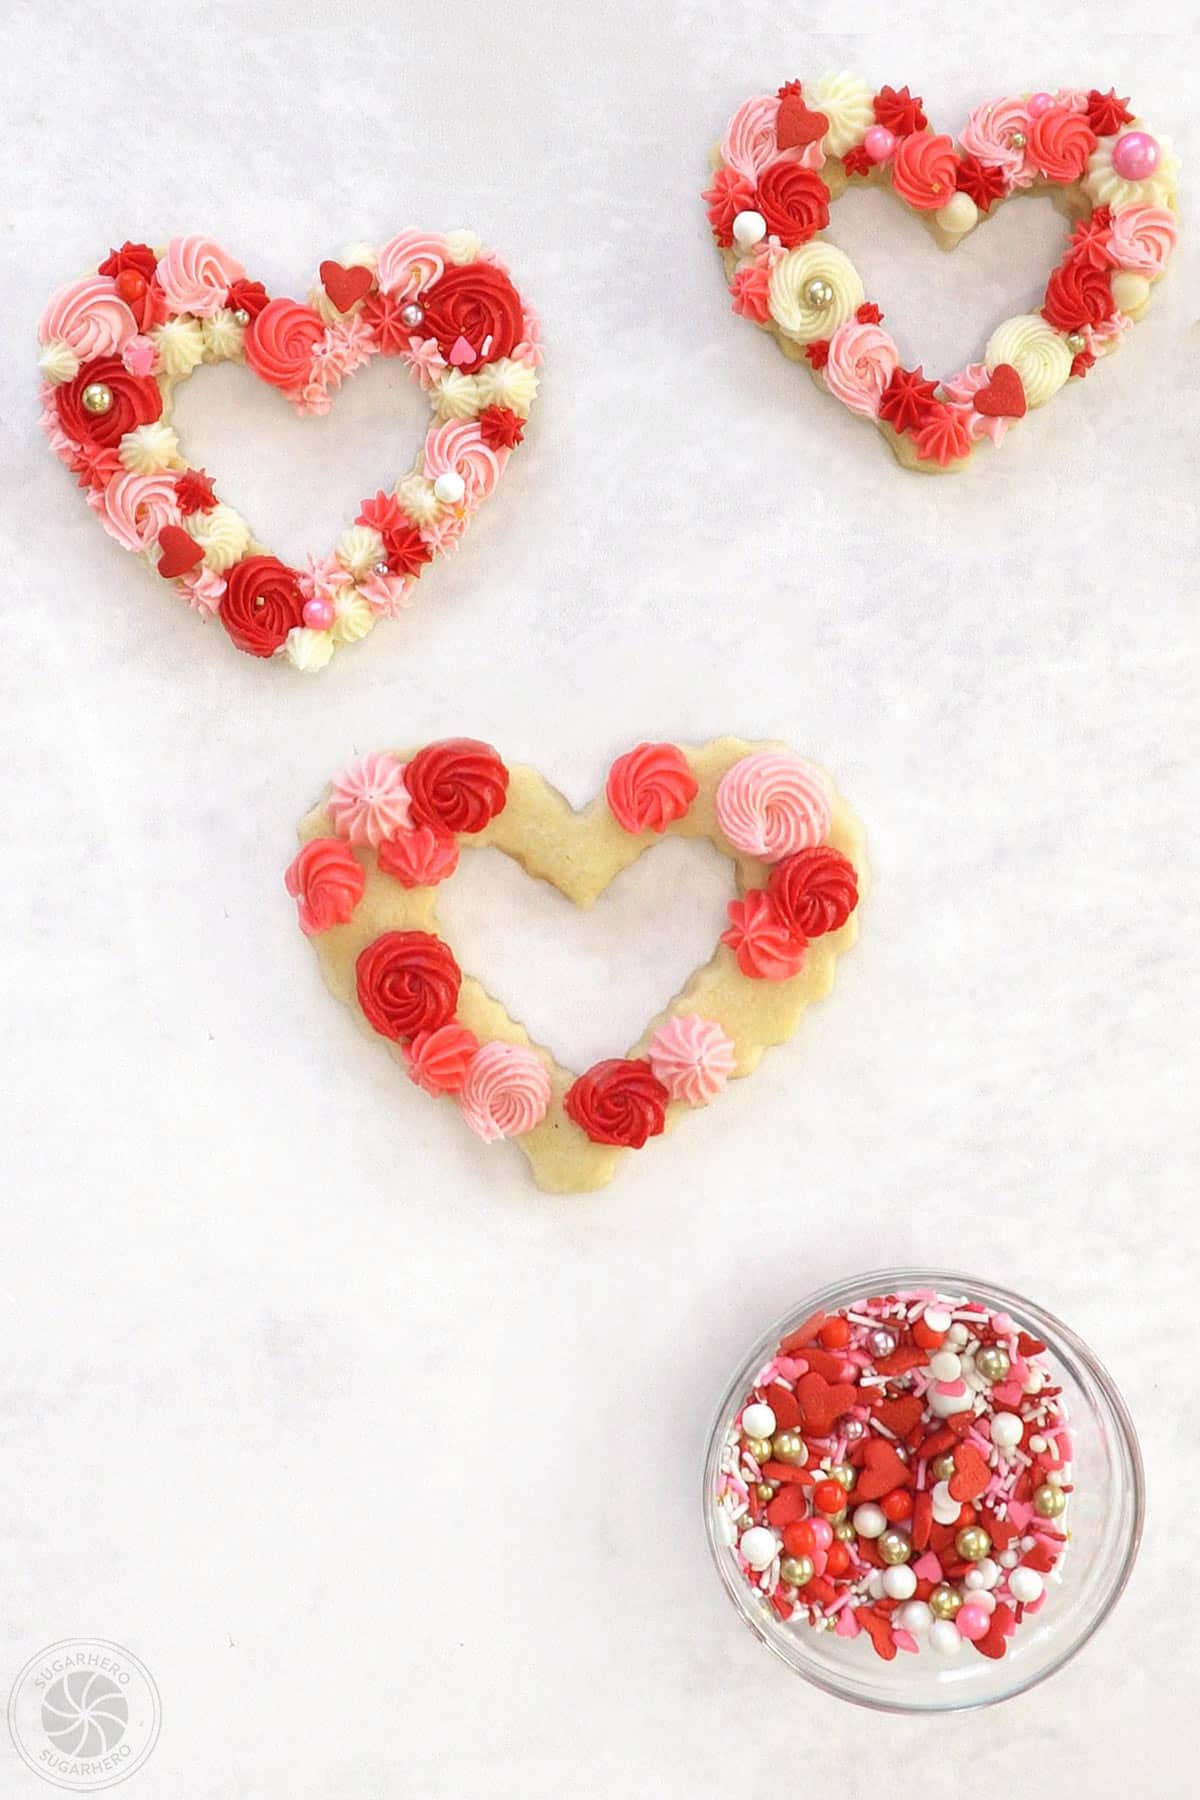
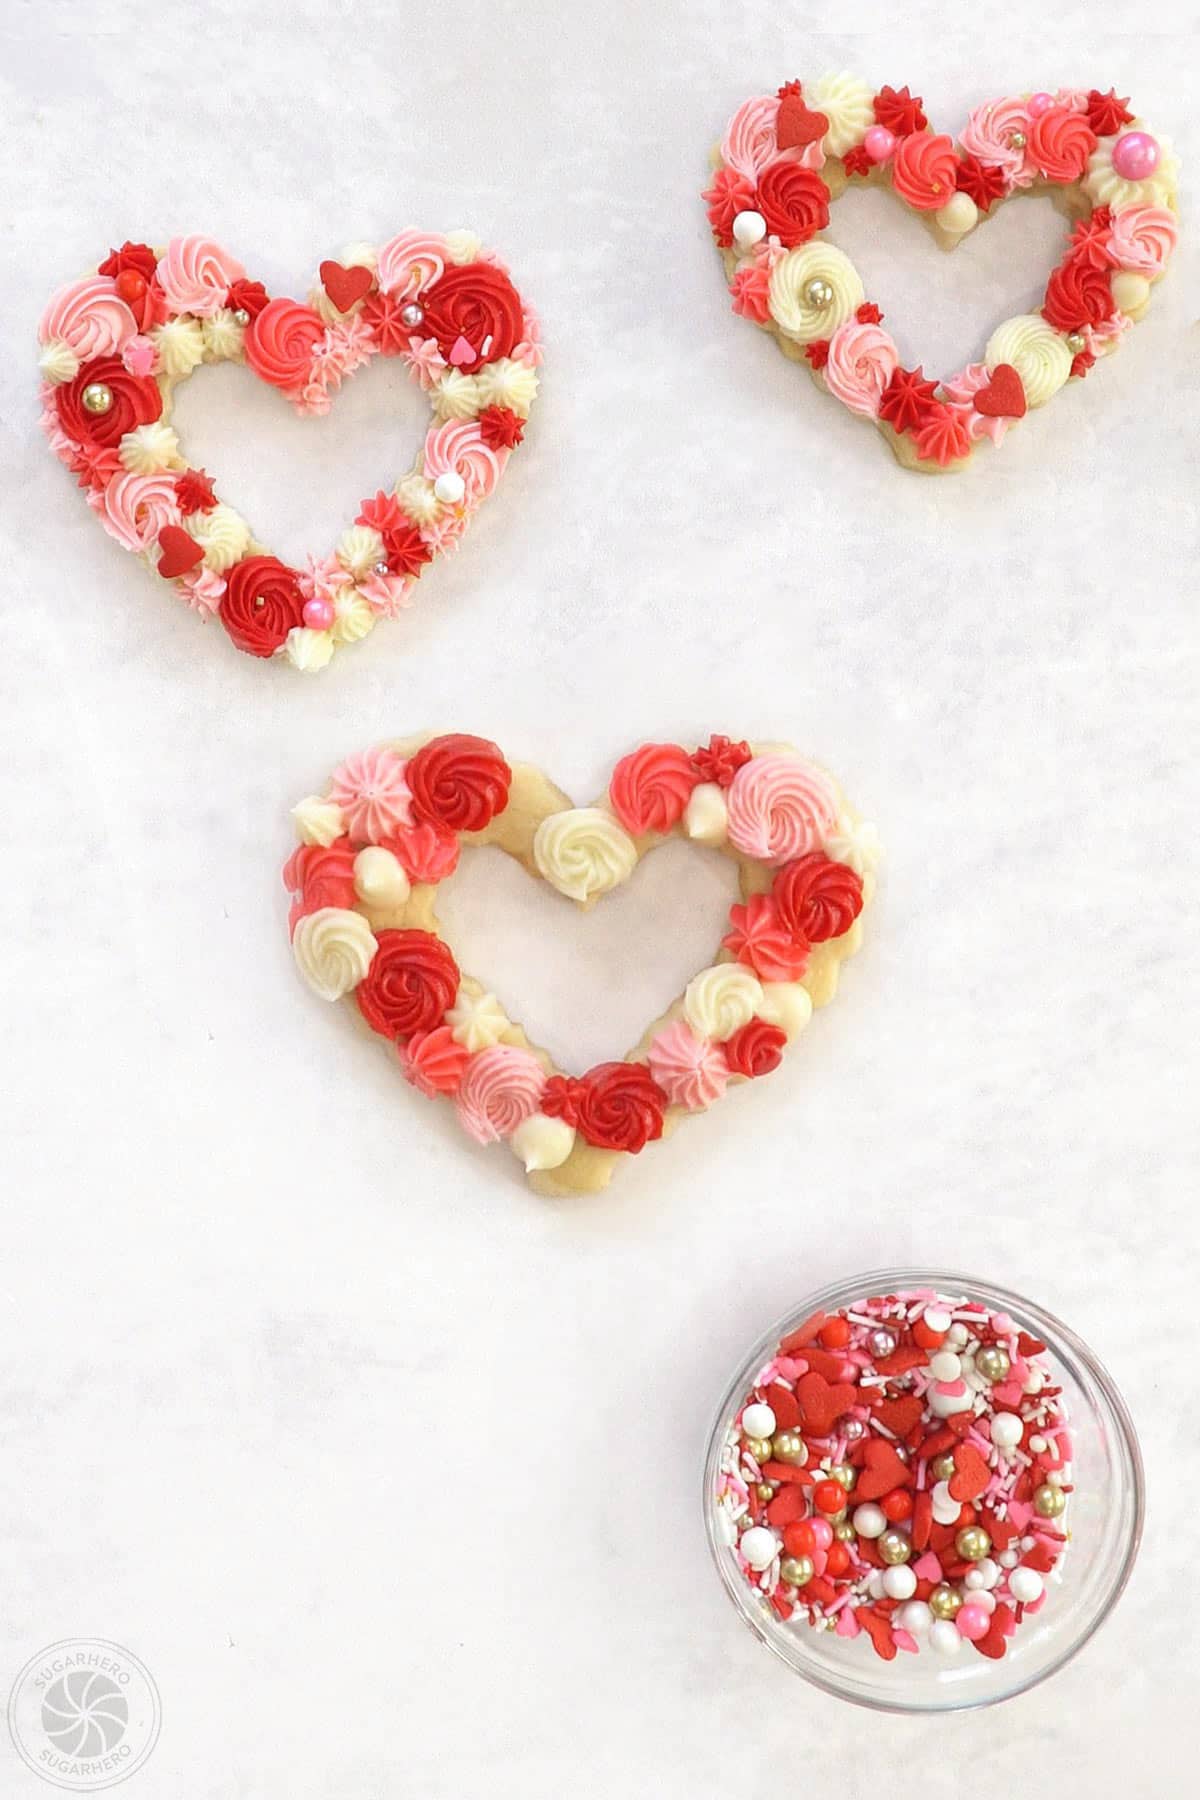
- Add other colors: Use a different color and pipe a different size/shape around the cookie, spacing them out like you did before. Repeat with the rest of the frosting colors, until the cookie is covered with small stars and flowers. These cookies look best when you use a variety of tips, shapes, and sizes.
- Add sprinkles: As soon as the frosting is done, add your sprinkles on top. For large sprinkles, press them in gently to adhere them to the buttercream.
- Repeat: Repeat the process until all of your cookies are decorated.
Notes
- Make the frosting a day ahead of time – the color will darken and deepen over time.
- Use an immersion blender to mix the coloring into the frosting – this does a much better job than mixing by hand.
- If the immersion blender trick doesn’t do it, try a small amount of heat. Place a few tablespoons of red frosting in a small bowl, and microwave it until just barely melted. It should be slightly warm but definitely not hot. Mix this melted frosting into the rest of the red color, and you’ll see the color darken right before your eyes.
Measuring Tips
Our recipes are developed using weight measurements, and we highly recommend using a kitchen scale for baking whenever possible. However, if you prefer to use cups, volume measurements are provided as well. PLEASE NOTE: the adage “8 oz = 1 cup” is NOT true when speaking about weight, so don’t be concerned if the measurements don’t fit this formula.
Nutrition
📸 Tutorial: How to Make & Decorate Buttercream Sugar Cookies
Don’t let a new recipe intimidate you! Follow along with this photo tutorial to stay on track and avoid common mistakes. Full instructions are included in the recipe card above.
To Make the Sugar Cookies
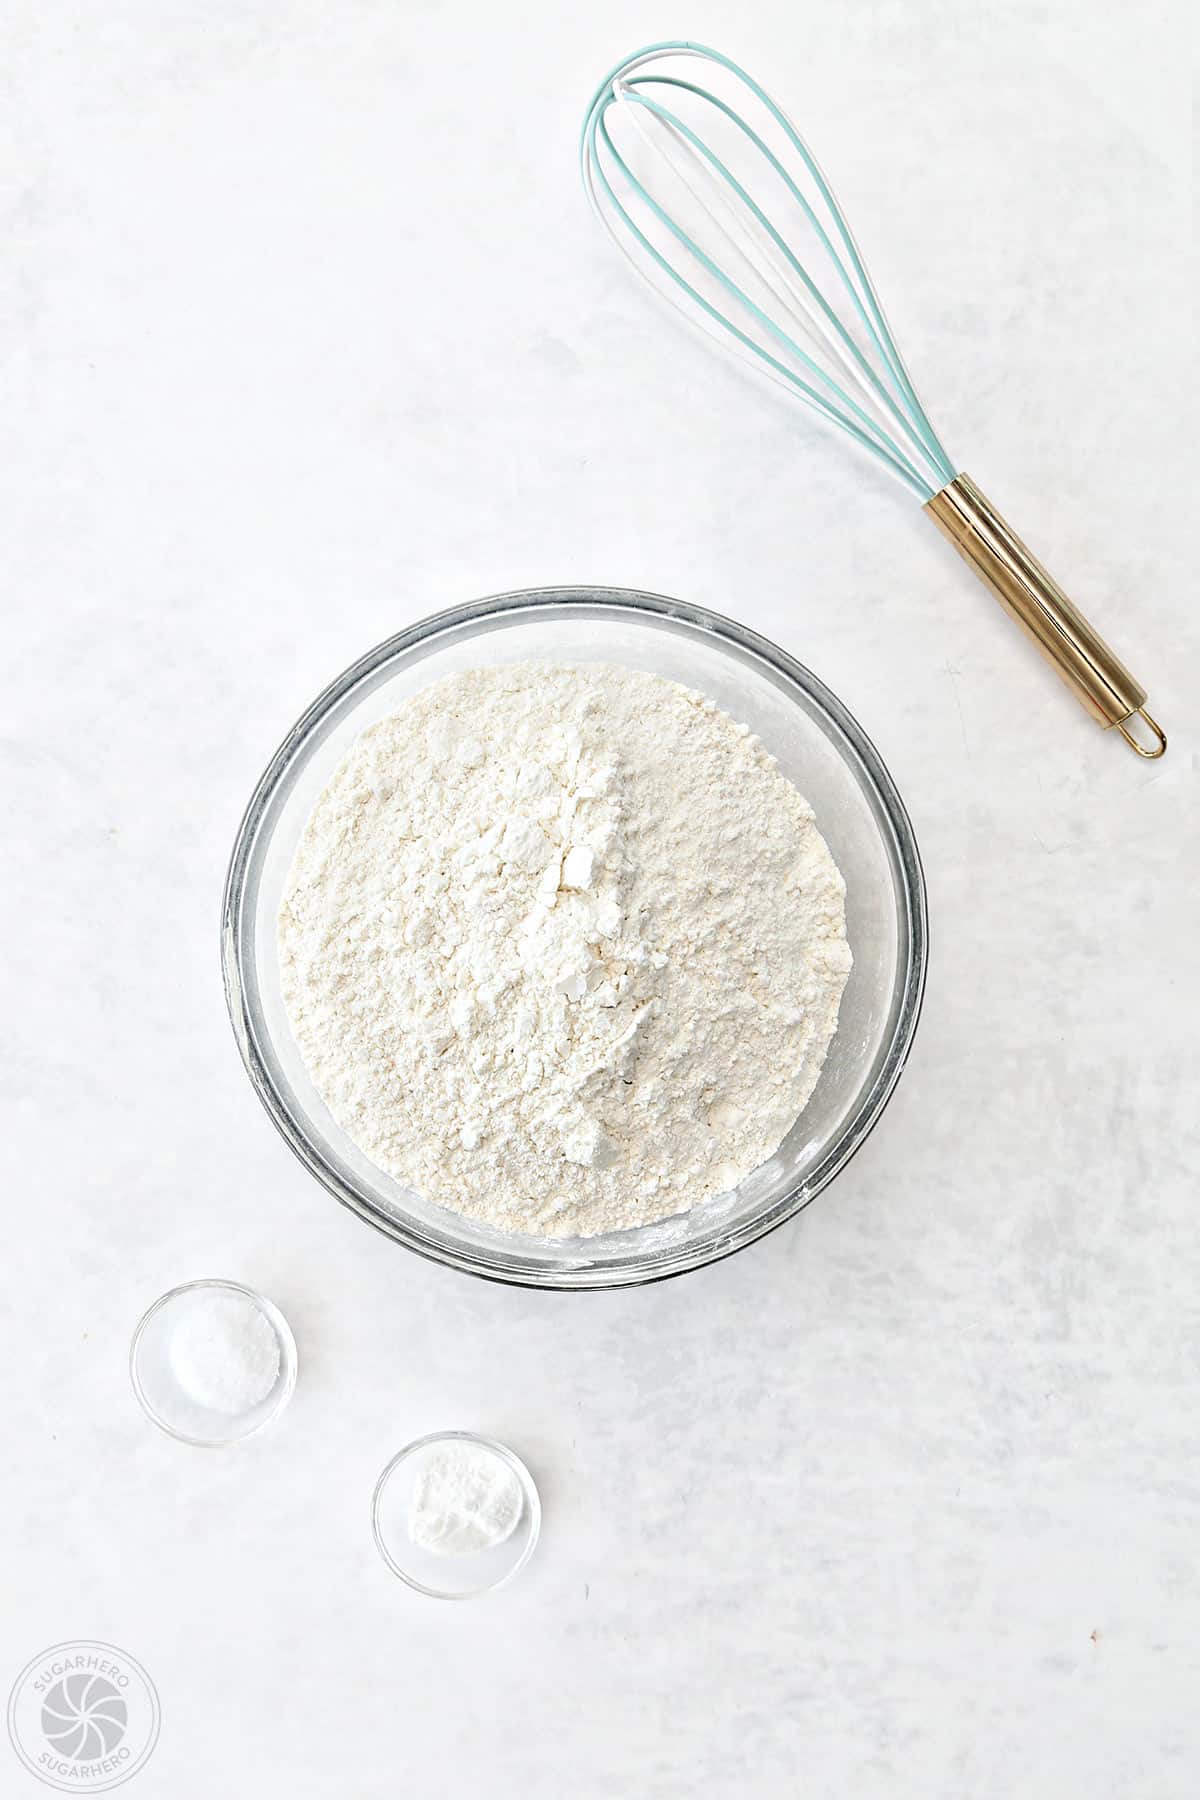
- Combine dry ingredients: In a bowl, whisk together the 19 oz (4 1/4 cups) flour, 1 tsp salt, and 1 tsp baking powder, and set aside for now.
- Cream the butter and sugar: Combine 8 oz (1 cup) softened butter and 12.25 oz (1 3/4 cups) sugar in the bowl of a stand mixer. Mix together on medium speed until fluffy, 1-2 minutes.
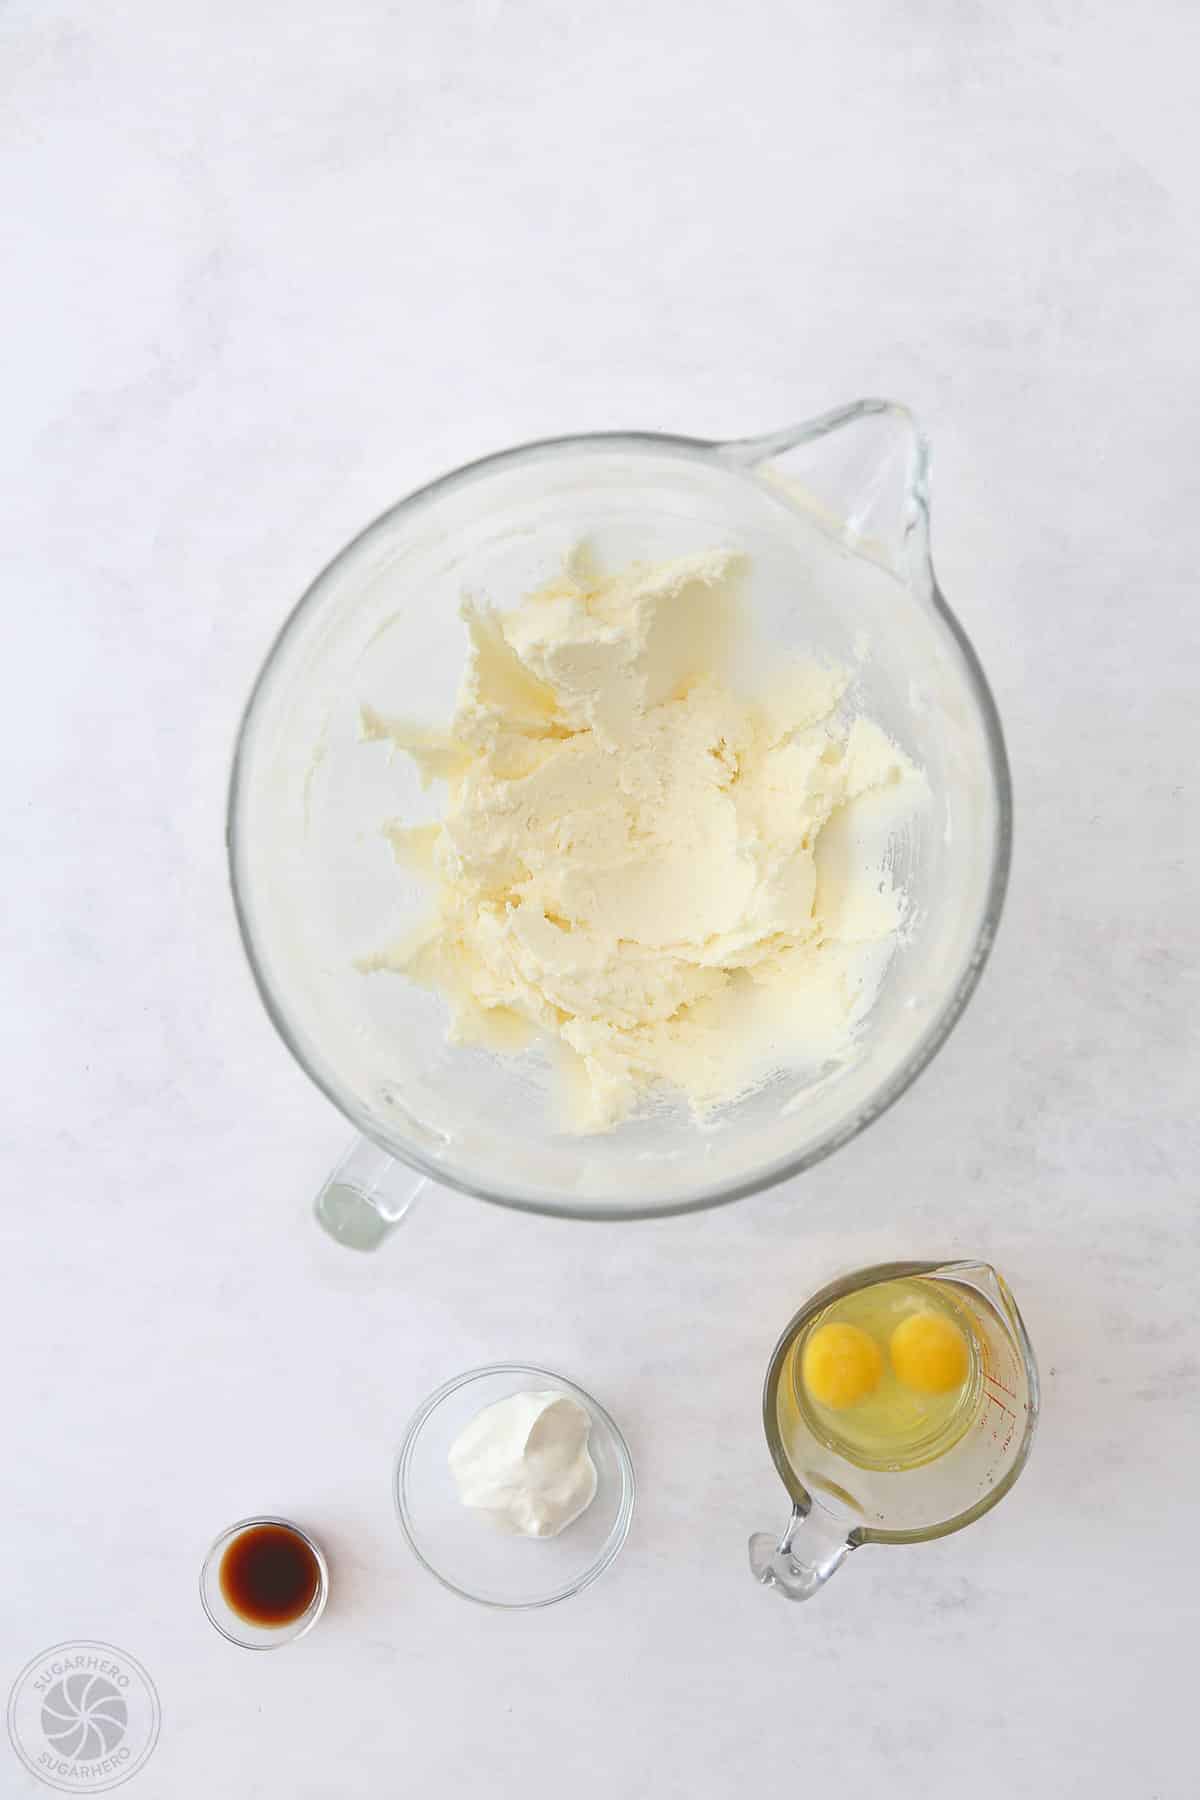
- Add eggs: Add 2 large eggs (one at a time), beating well after each.
- Add vanilla and sour cream: Then add 1 tsp vanilla extract and 1oz (2 TBSP) sour cream.
- Mix in dry ingredients: Turn the mixer to low, and slowly start adding the dry ingredients. Mix until just combined and only a few streaks or flour remain.
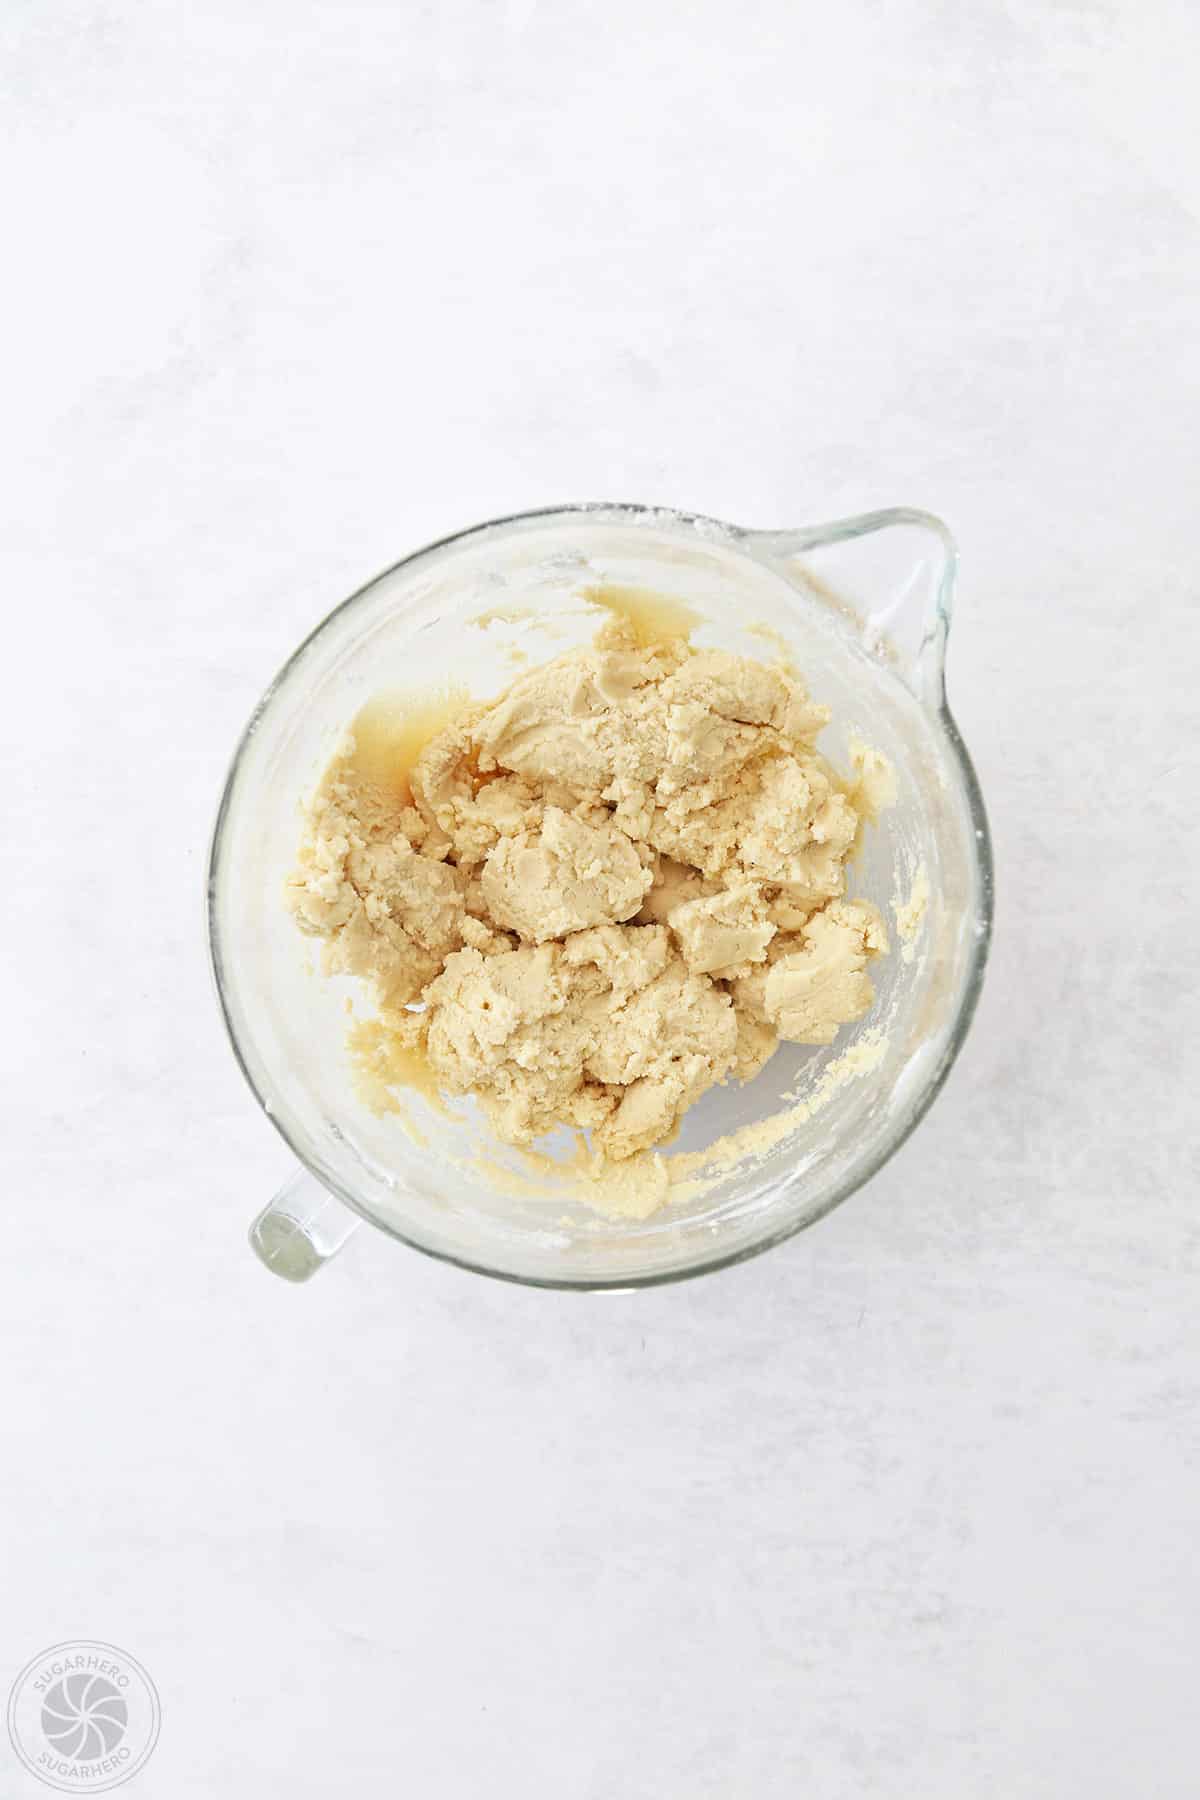

- Finish mixing by hand: Stop the mixer, scrape the bowl with a spatula, and finish mixing the dough by hand.
- Divide dough and refrigerate: Portion the dough into 2 thin discs and wrap them well with plastic. Refrigerate until firm but not hard, about 30 minutes.
- Prepare to bake: Preheat oven to 350 degrees F and line baking sheets with parchment.
- Roll out dough: Place a disc of dough between two sheets of parchment, and roll it out to 1/4-inch thick.
- Cut large cookies: Use a 3-inch heart cookie cutter to cut out your cookies and place them on a parchment-lined baking sheet. Combine the scraps and re-roll the dough until you have 16-18 large heart cookies.
- Cut out centers: Use a smaller 2-inch scalloped cutter to cut hearts out of the center of each large cookie. (Tip: Put the smaller hearts on their own baking sheet. Different sizes of cookies bake at different rates.)
- Freeze for 10 minutes: Put the cookie sheets in the freezer for 10 minutes before baking to help the cookies hold their shape.
- Bake: Bake the cookies for 8-10 minutes, until the edges are just starting to brown and the raw shine is gone from the middle.
- Cool: Let cookies cool on the baking sheet for 5 minutes, then cool completely on wire racks before decorating them.
To Make the Cookie Frosting
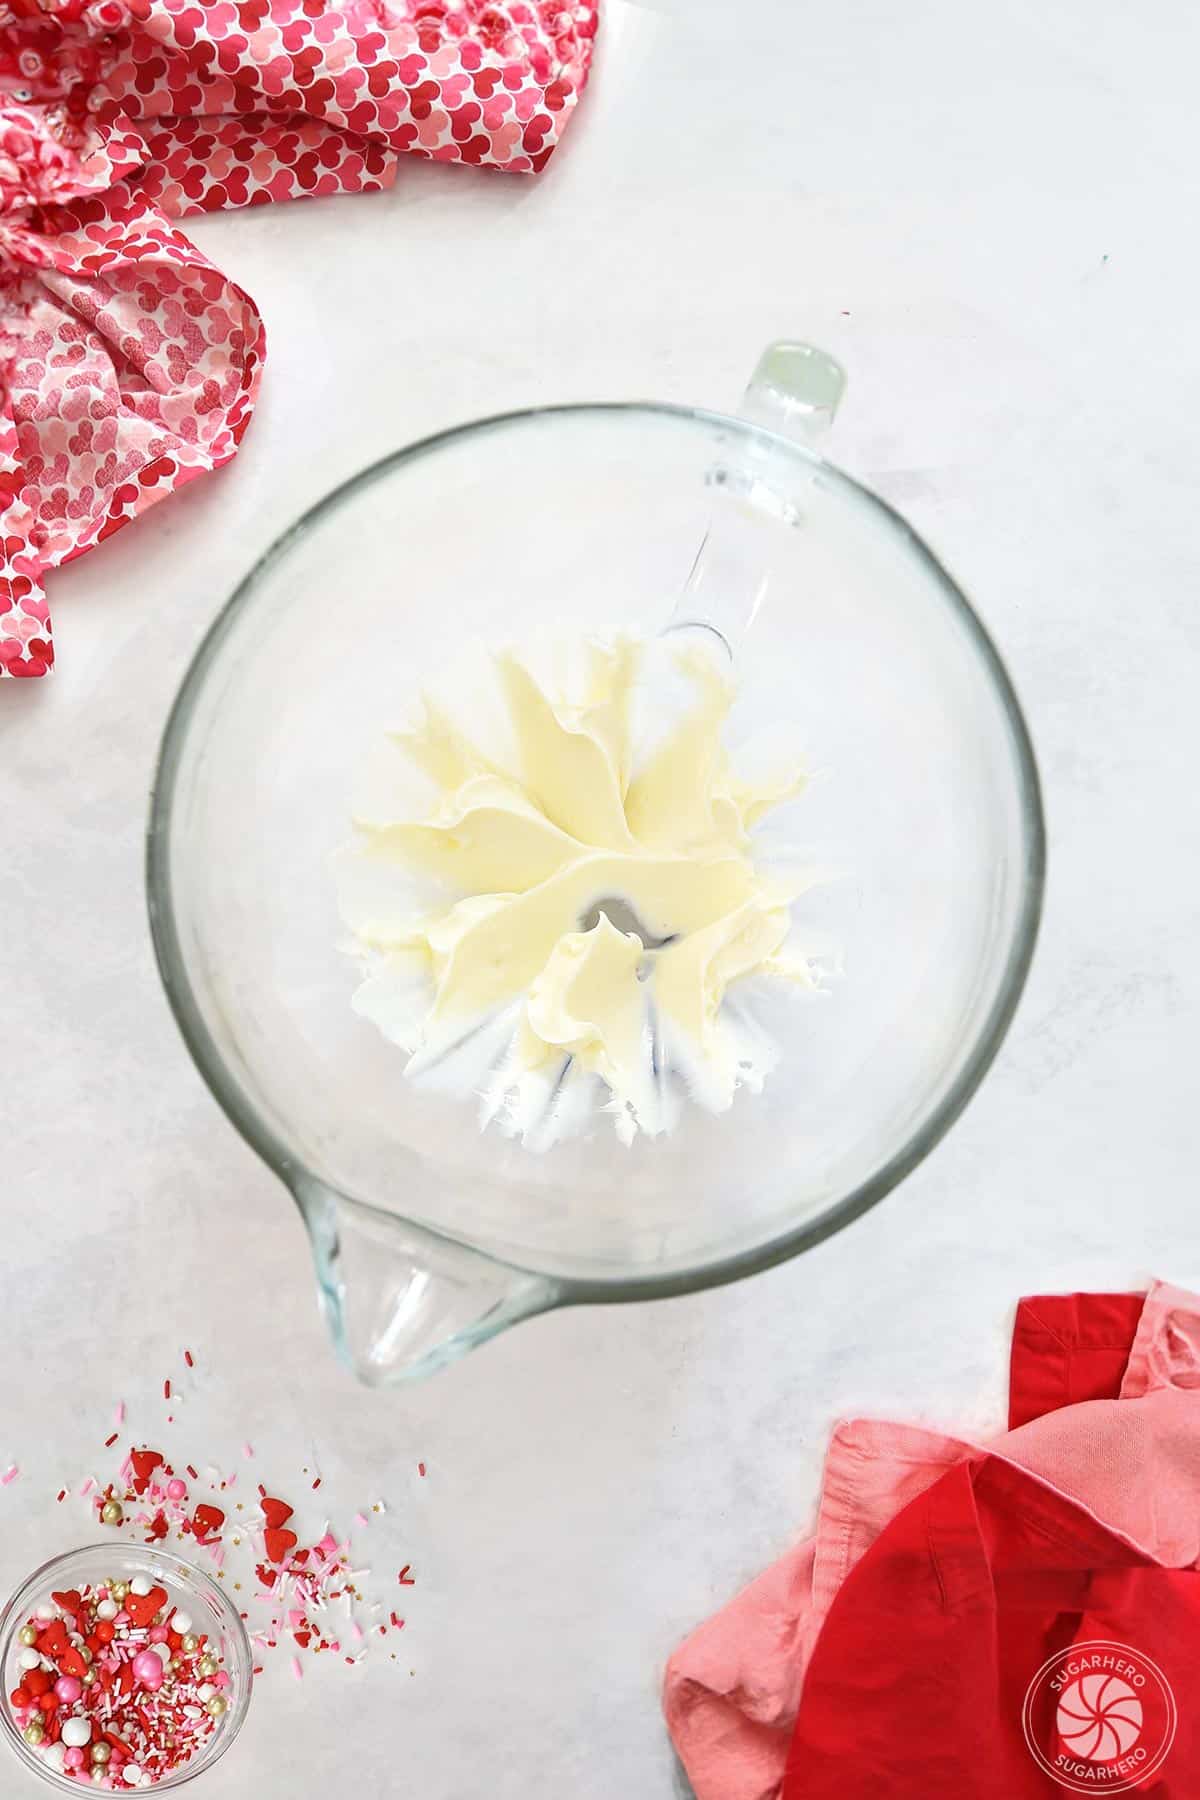
- Beat the butter: Beat the butter on medium speed for about 2 minutes, until light and creamy.
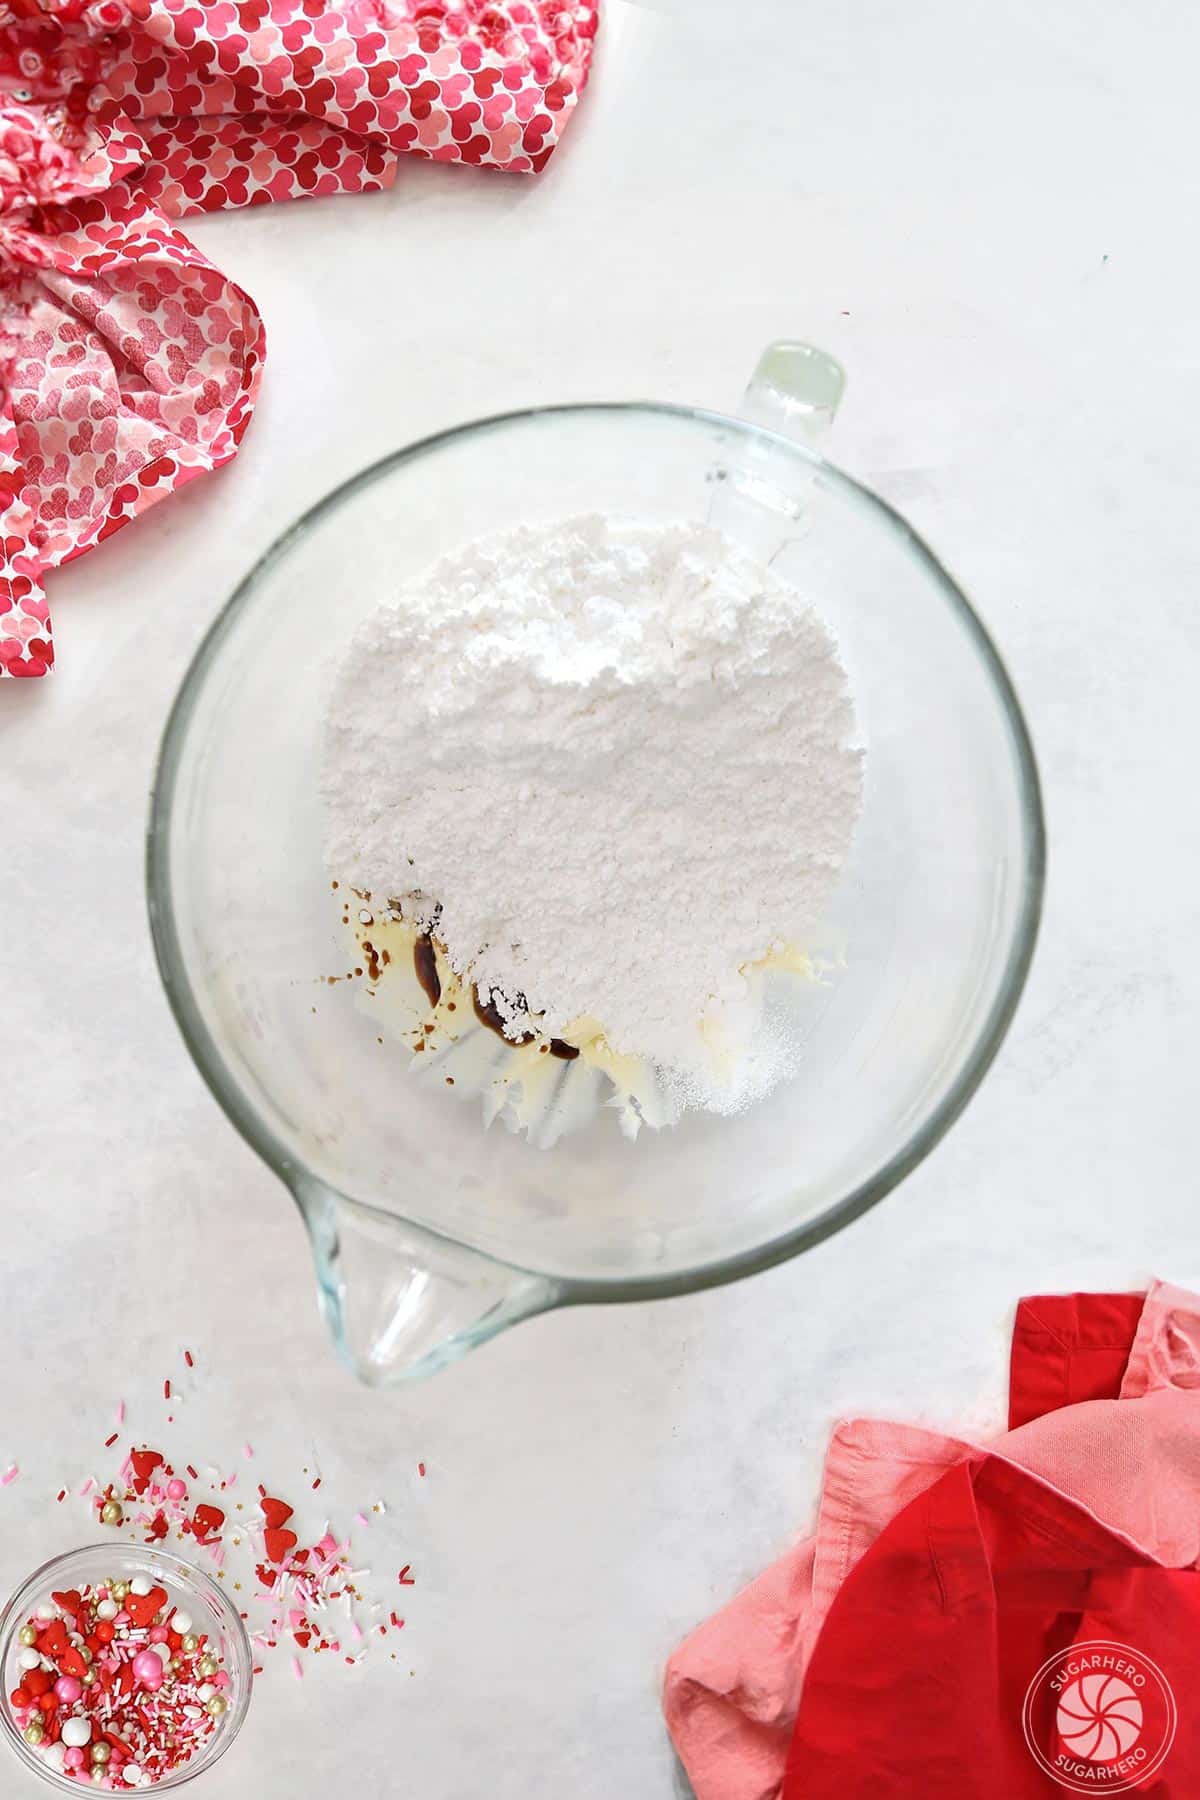
- Add vanilla and salt: Turn the mixer to medium-low and mix in the vanilla and salt until combined.
- Add sugar and milk: Put mixer on low and slowly add half of the powdered sugar, mixing until mostly incorporated. Mix in the milk and then finish with the second half of the sugar, scraping down the sides as needed until fluffy.
- Add remaining sugar: Add the second half of the sugar, and once it’s mostly mixed, stop the mixer and scrape down the bottom and sides of the bowl. Mix once more on medium speed until light and creamy.
- Adjust the texture: A stiffer frosting is needed for the piped decorations to hold their shape. If the frosting is too soft, mix in a little powdered sugar; if it is too firm, mix in a little more milk.
To Decorate the Sugar Cookies
- Divide frosting: Decide how many colors of frosting you want to have, and put the frosting into that many individual bowls. Press cling wrap on top to prevent crusting.
- Color frosting: Add gel food coloring to one bowl at a time and mix well. See Tips below for how to get vibrant colors.
- Fill piping bags: Fit piping bags with small star tips (I used #15, 18, and 21) and fill each bag with buttercream.
- Pipe stars: Since the frosting crusts quickly, decorate in batches of 3 cookies at a time. Start with one color, and pipe 4 or 5 small stars or rosettes, leaving space other colors.
- Add other colors: Use a different color to pipe more stars and rosettes in a spaced out pattern.
- Fill in the cookie: Repeat with the rest of the frosting colors, until the cookie is covered with small stars and flowers. Use a variety of tips, shapes, and sizes.
- Add sprinkles: Immediately after finishing the frosting, add your sprinkles on top, pressing larger sprinkles in gently to help them stick.
- Finish decorating: Continue working in batches until all the cookies are decorated.
Tips for Cookie Success
- Don’t over-mix the butter and sugar – mixing too much will beat too much air into the dough, and cause your cookies to spread.
- Roll your dough between two sheets of parchment or waxed paper, and roll out until it is 1/4-inch thick. The thickness of the dough really makes a big difference in how crispy or soft the cookies turn out after being baked. I like rolling between parchment paper because it reduces the need for added flour during the rolling process, which can make cookies dry and tough.
- Freeze cut-out cookies for 10 minutes before baking (longer is okay too) to help them hold their shape.
- Use light-colored, heavy baking sheets that are not insulated. Dark or thin cookie sheets can cause the cookies to burn on the bottom before they’re cooked all the way through, and insulated cookie sheets can cause your cookies to spread too much.
- It’s always a good idea to do a test bake with 1 or 2 cookies on a baking sheet before baking a full batch. Ovens and baking sheets can produce drastically different results, and your baking time might vary from what the recipe says. Doing a test bake to figure out your personal timing will ensure all of your cookies turn out well!


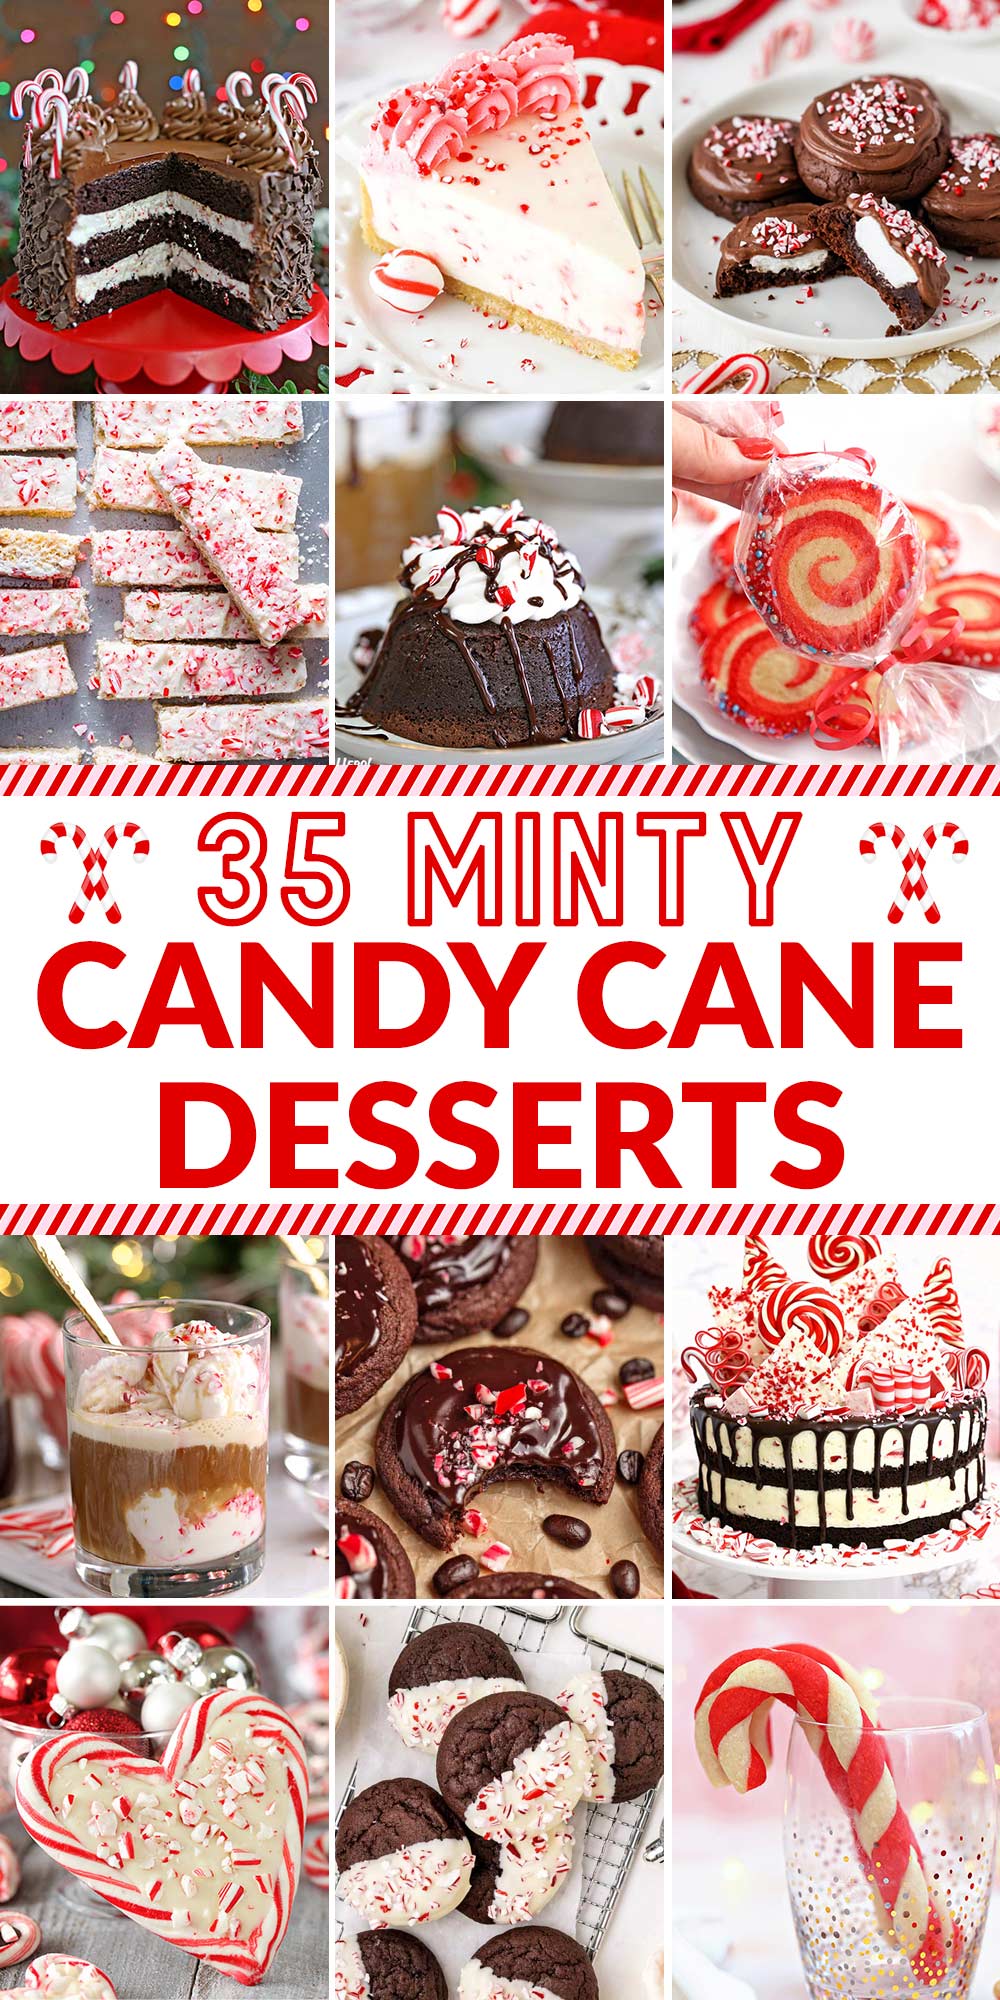
35 Peppermint Desserts 19 Dec 2025 8:29 AM (5 months ago)
Holiday Desserts with Peppermint Perfection in Every Bite!
It’s time to add some excitement to your holiday baking with seasonal peppermint recipes and gorgeous desserts with candy canes.
This minty collection has something for everyone! Whether you love Christmas cookies with peppermint, candy cane cheesecake, or peppermint cake recipes, we’ve got you covered.
We’ve also gathered a few fun and flavorful holiday drink recipes that are sure to bring some holiday cheer! And of course, no peppermint dessert collection would be complete without plenty of cool and creamy peppermint fudge, peppermint bark, and other candy recipes.
These recipes sleigh all day and are guaranteed to bring the holiday magic to your dessert table.
Visit our entire collection of Christmas Recipes!
Table of Contents
Cookies
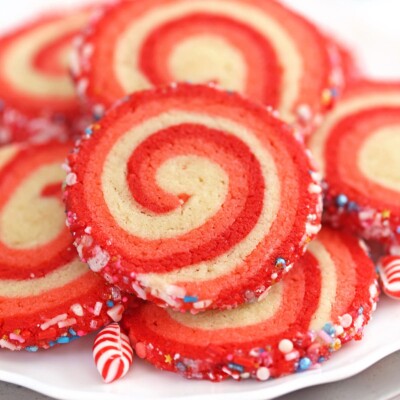
Peppermint Pinwheel Cookies
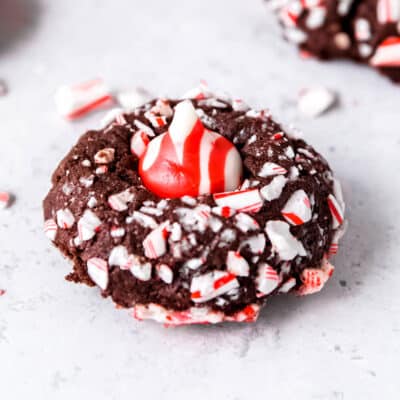
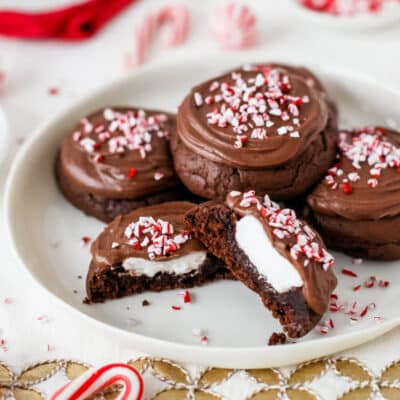
Chocolate Peppermint Kiss Cookies
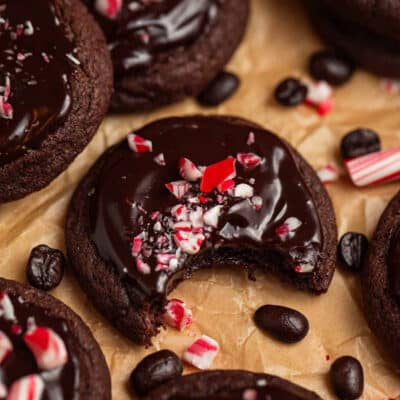
Chocolate Truffle Peppermint Crunch Cookies

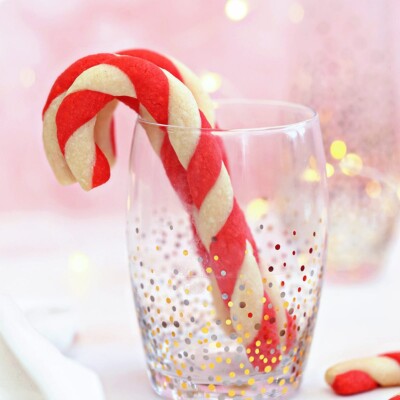
Candy Cane Cookies
Peppermint Mocha Cookies
Chocolate Peppermint Cheesecake Cookies
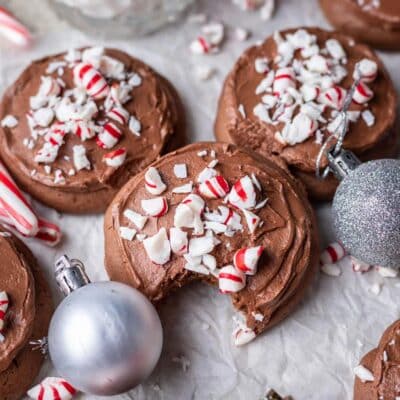
Chocolate Peppermint Lofthouse Cookies
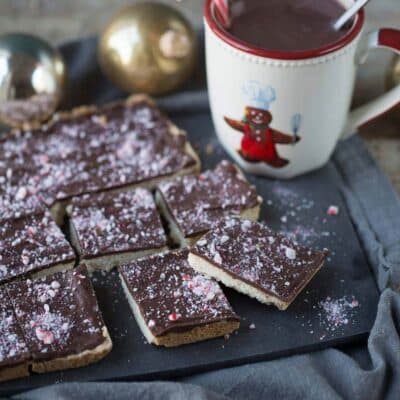
Chocolate Peppermint Shortbread
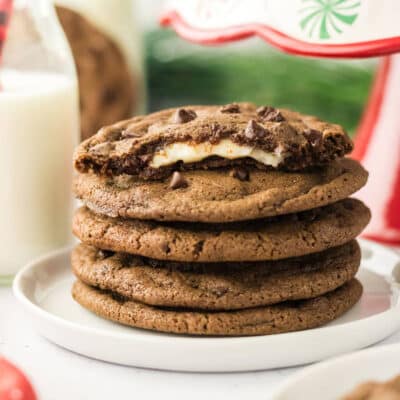
Peppermint Hot Chocolate Cookies
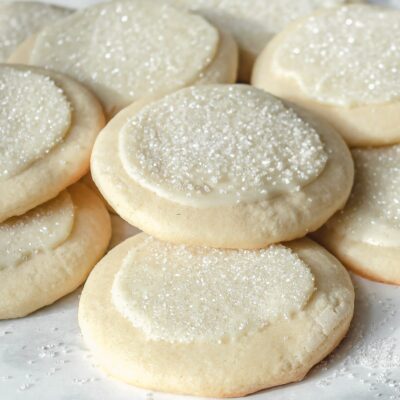
Peppermint White Chocolate Sugar Cookies
Cakes
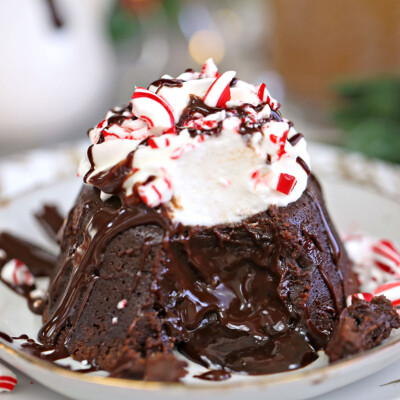
Peppermint Lava Cakes
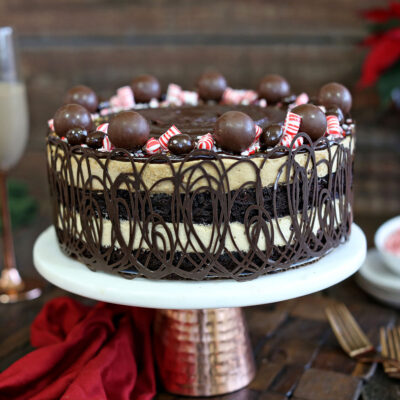
Peppermint Mocha Mousse Cake
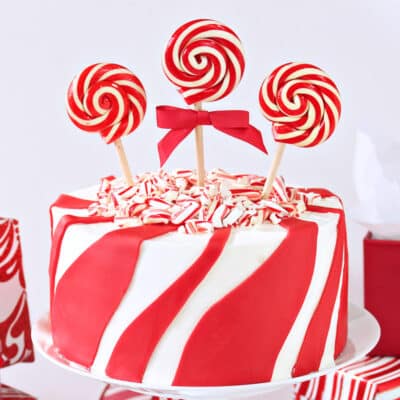
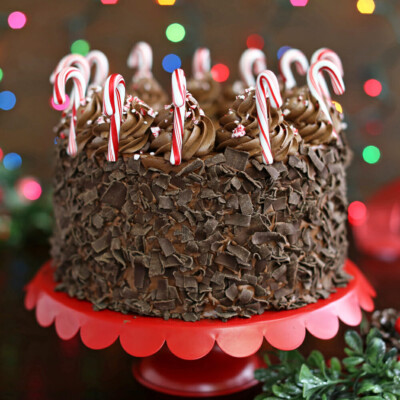
Candy Cane Chocolate Cake
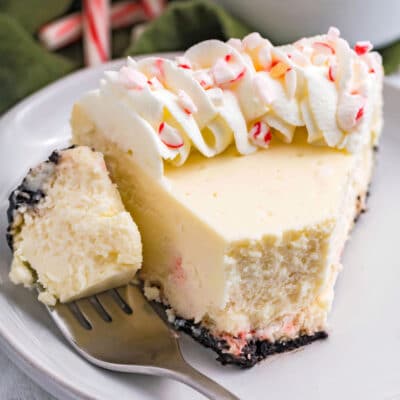
Candy Cane Cheesecake
Candy Cane Mousse Cake
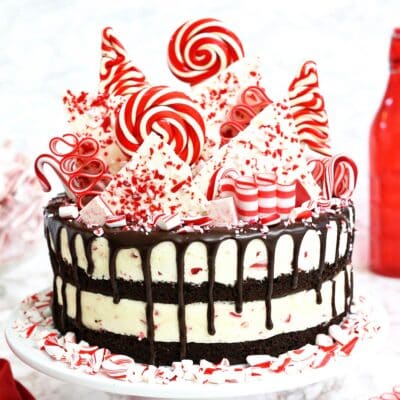
Chocolate Candy Cane Cake
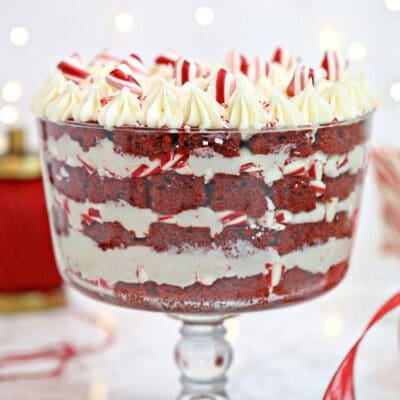
Red Velvet Trifle
No Bake Peppermint Cheesecake

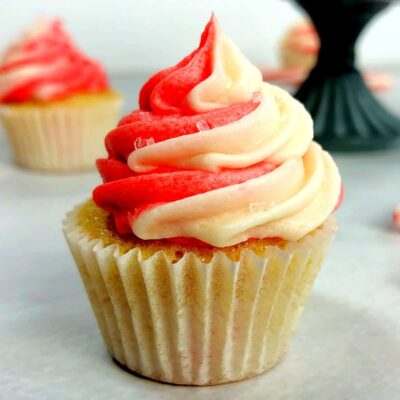
Candy Cane Cupcakes
Drinks
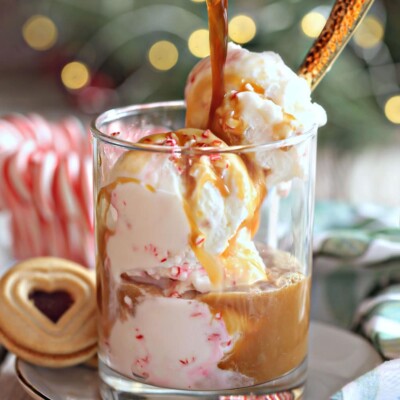
Peppermint Affogato
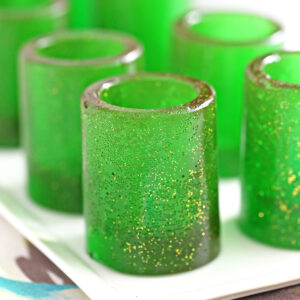
Candy Cane Cups

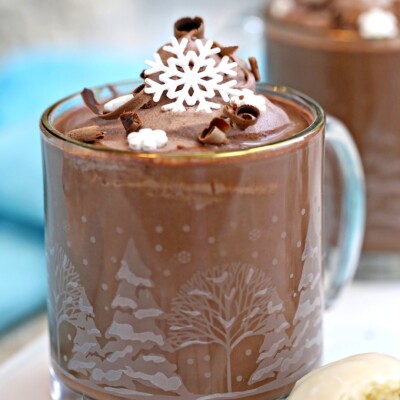
Peppermint Hot Chocolate
Copycat Chick Fil A Peppermint Milkshake
Copycat Starbucks Peppermint Syrup

Sweets and Treats
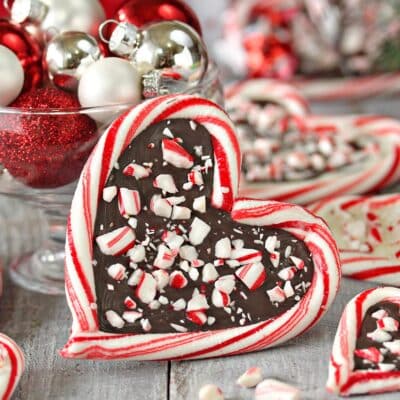
Candy Cane Hearts
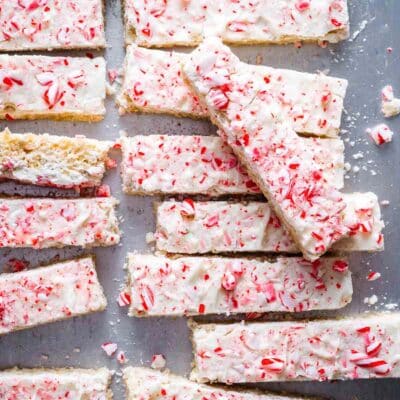
Peppermint Crunch Brownies

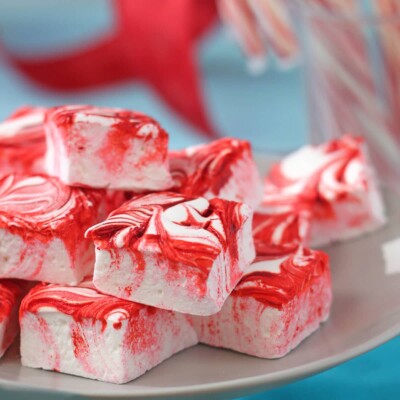
Peppermint Swirl Marshmallows
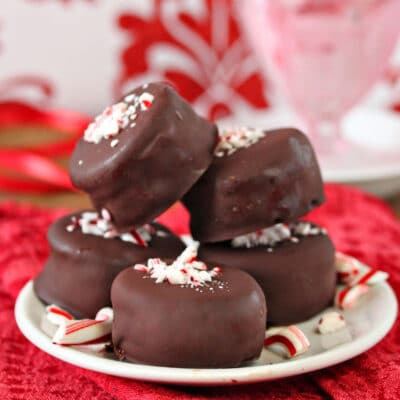
Oreo Peppermint Ice Cream Bonbons
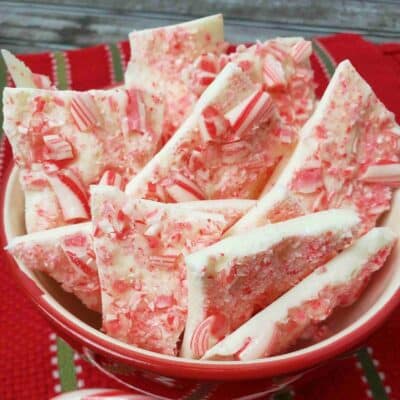
Peppermint Candy Cane Bark
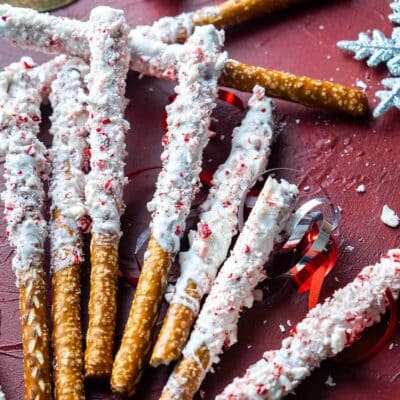
Peppermint White Chocolate Pretzels
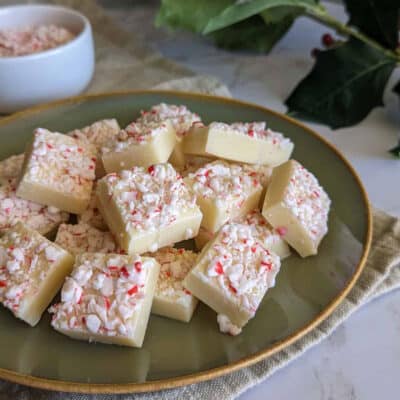
Easy Peppermint White Chocolate Fudge
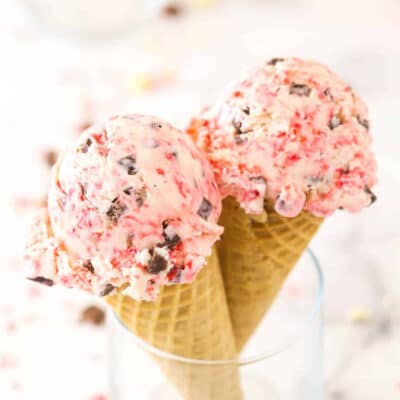
No-Churn Peppermint Bark Ice Cream
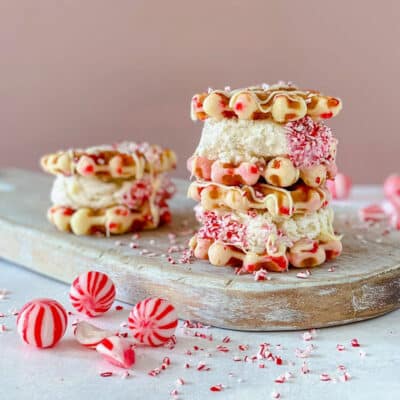
Easy Peppermint Waffle Ice Cream Sandwiches
Peppermint Rice Krispie Treats
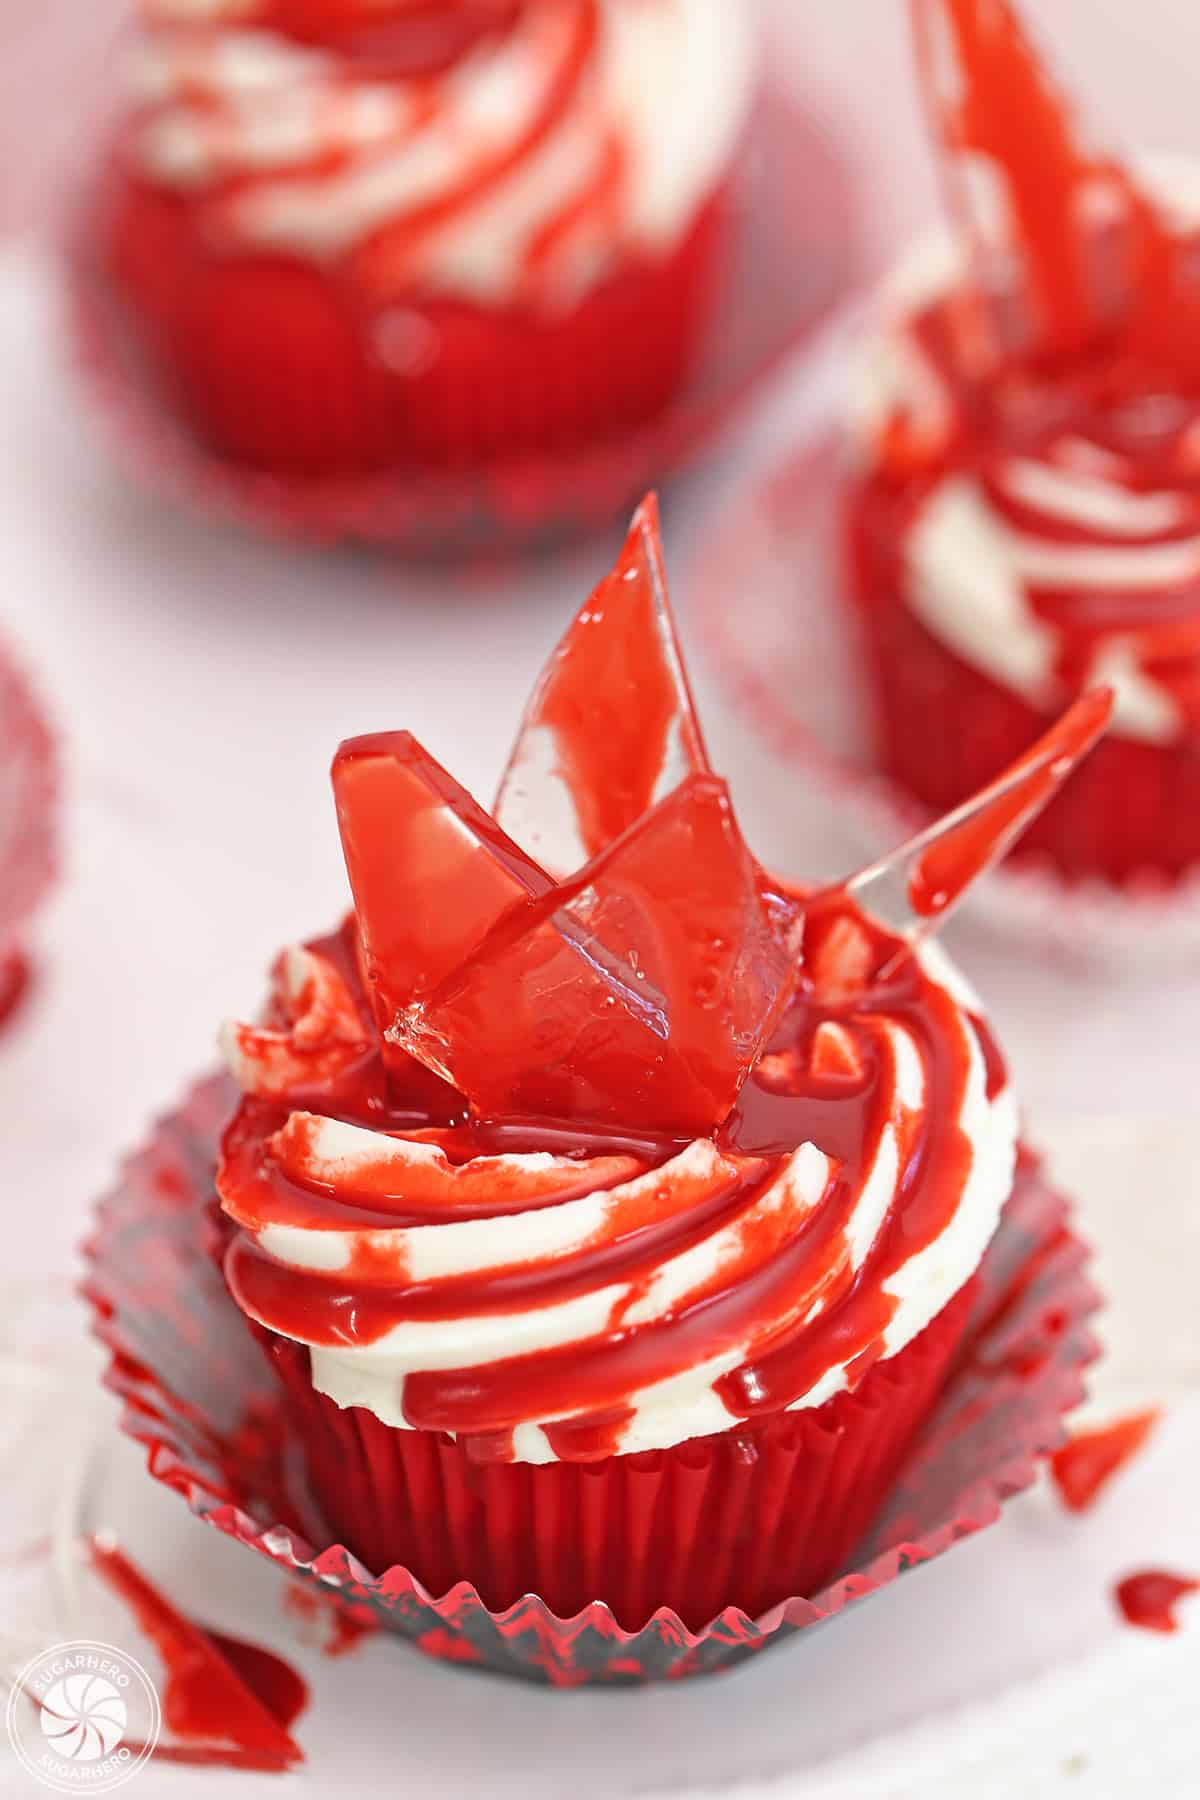
Bloody Glass Cupcakes 30 Oct 2025 9:20 PM (7 months ago)
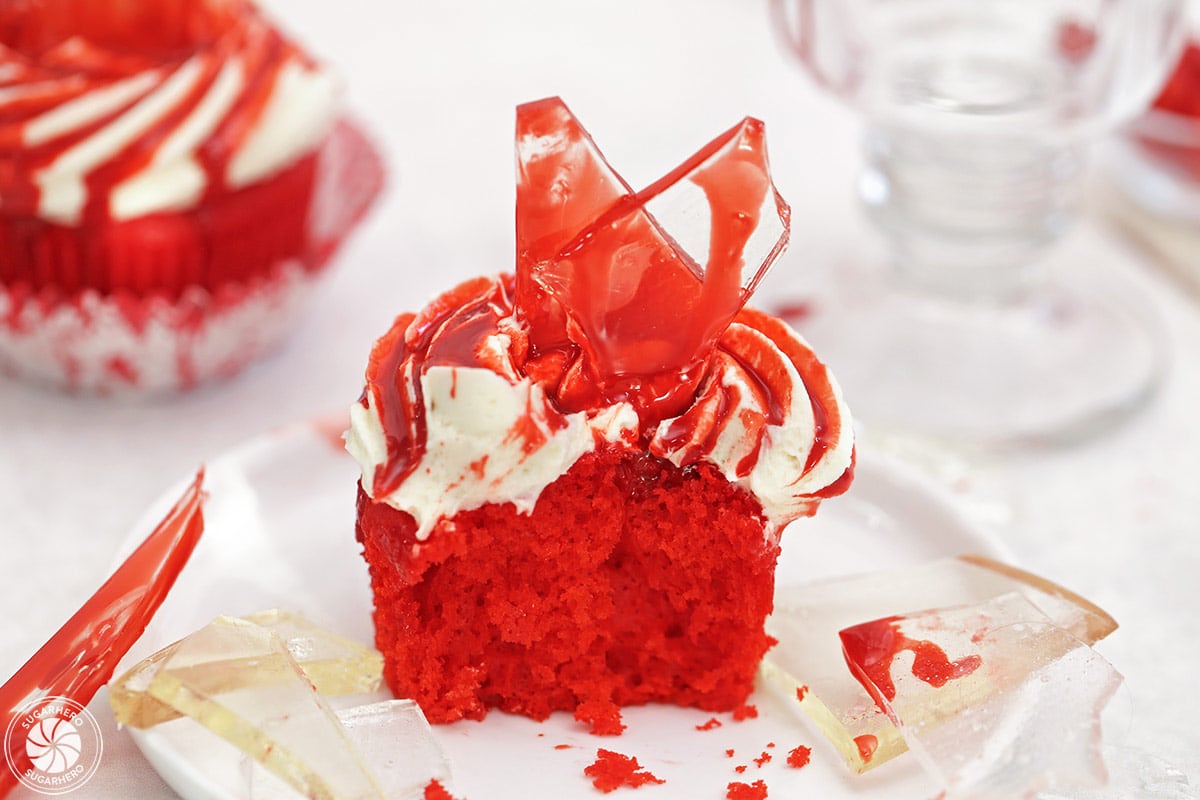
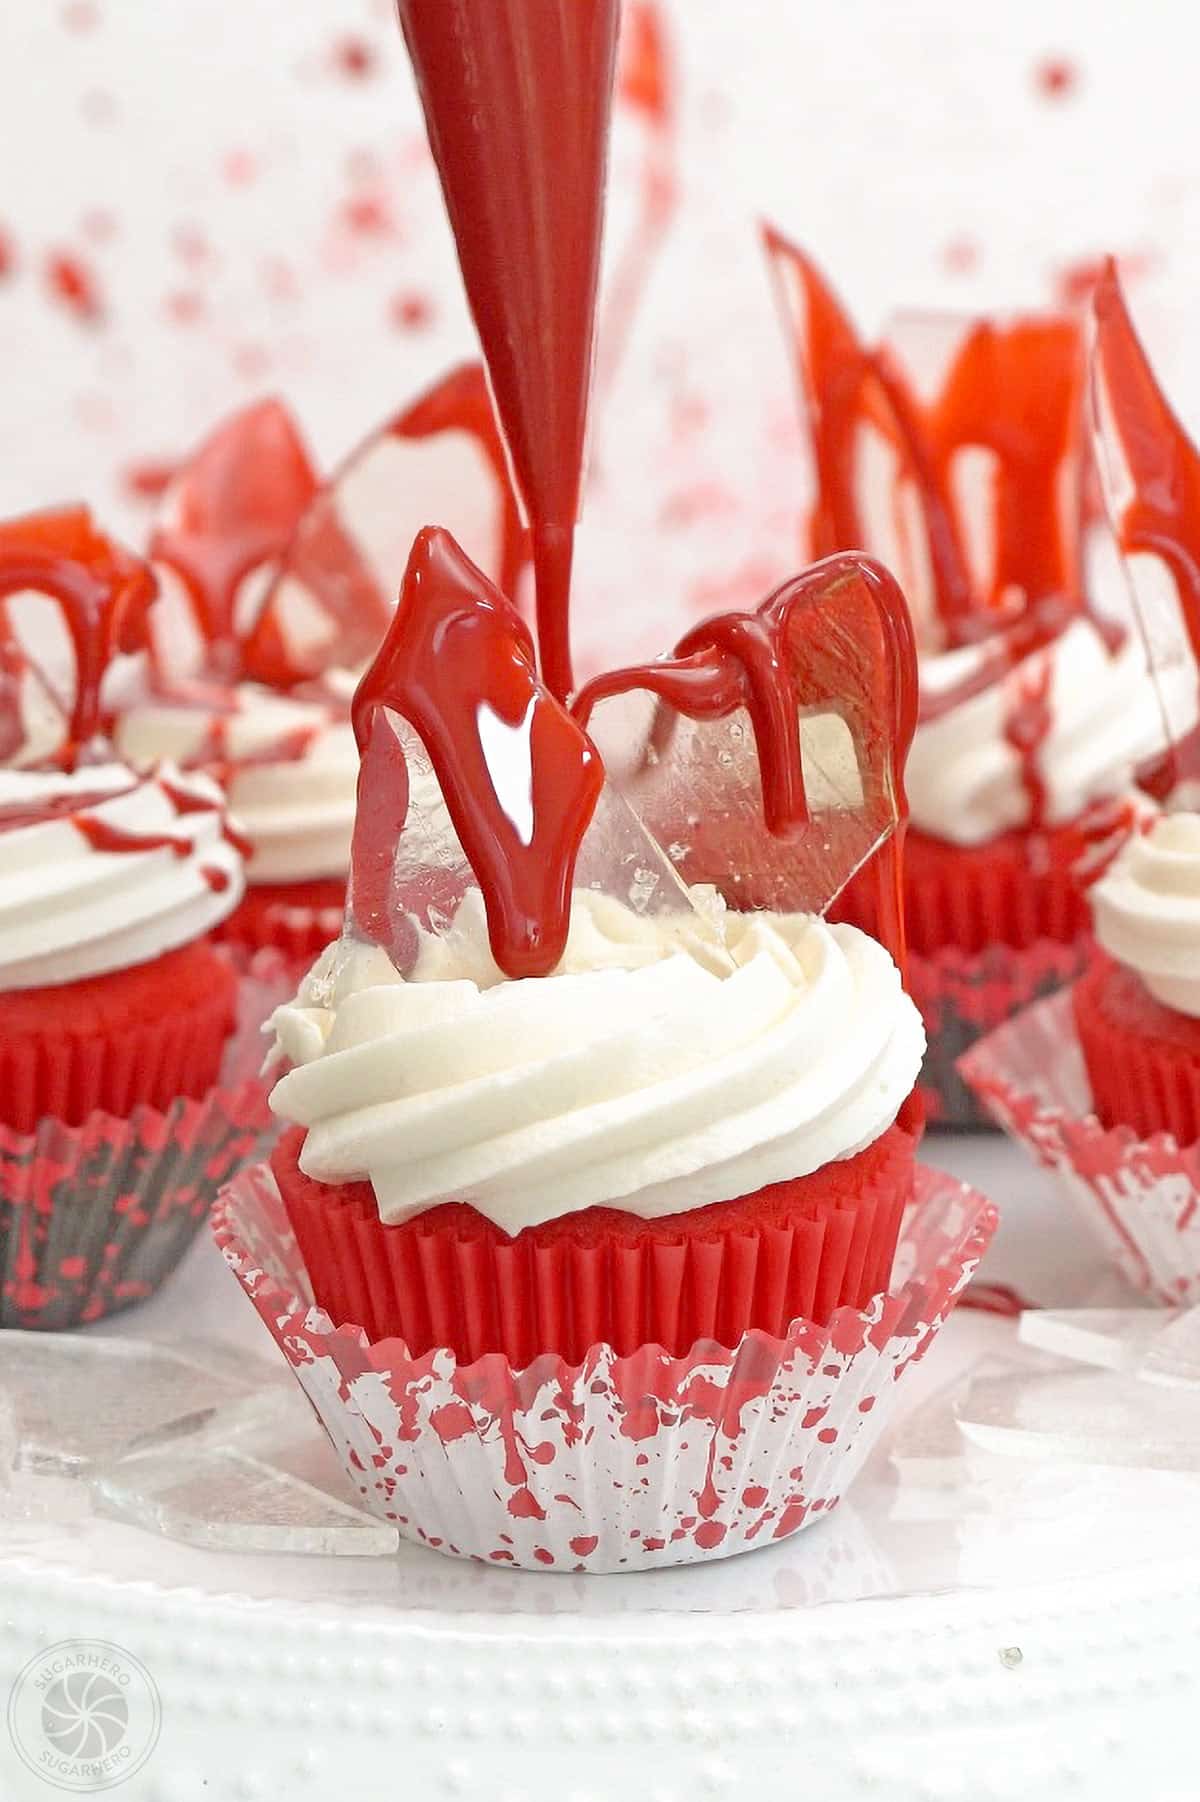
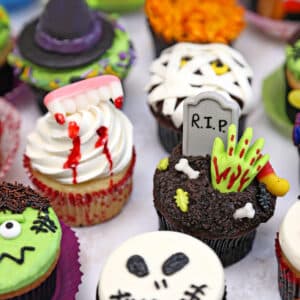
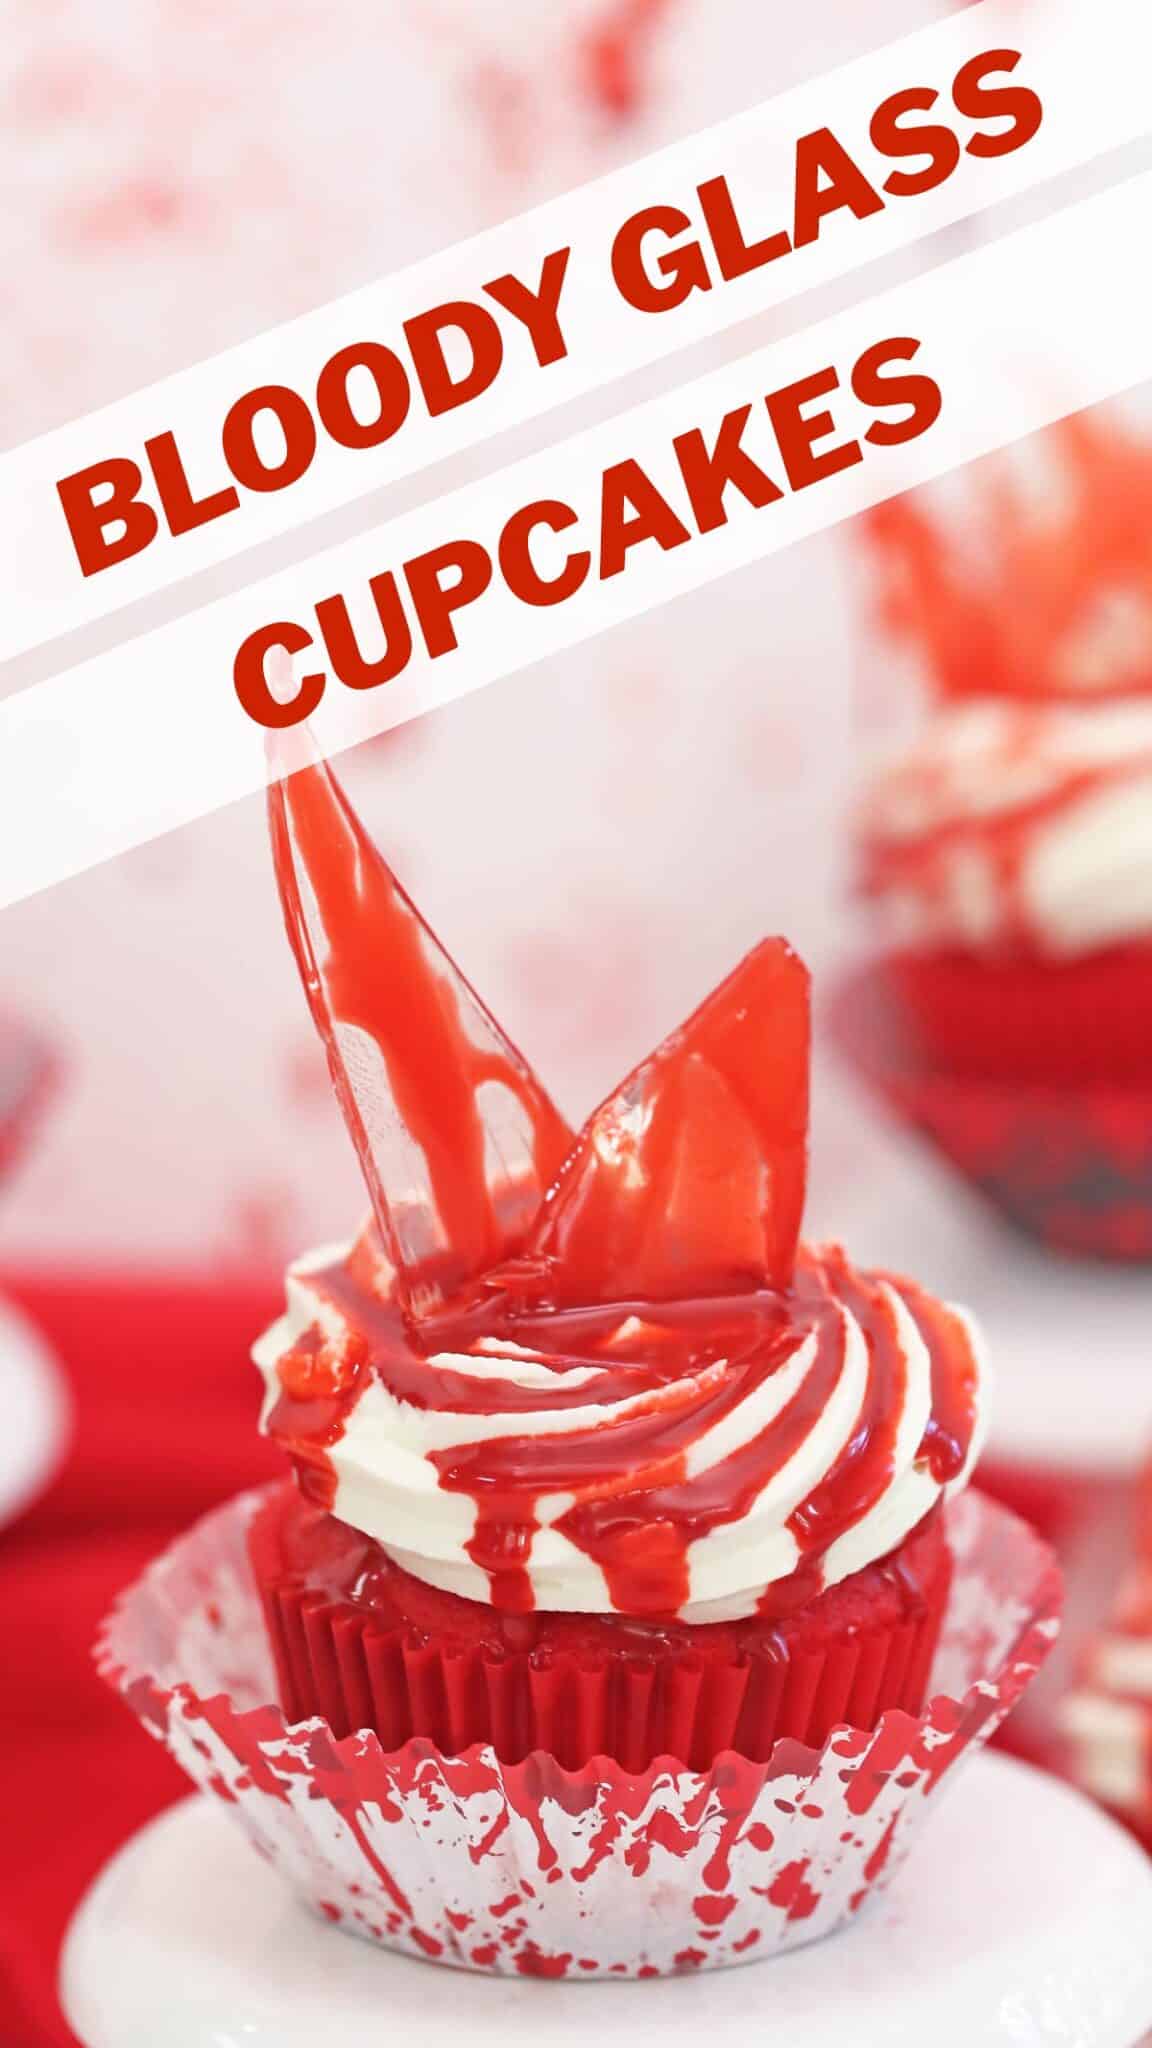
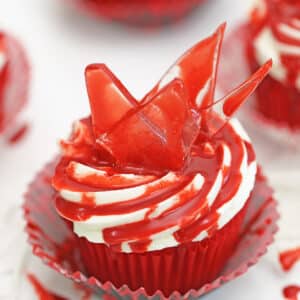
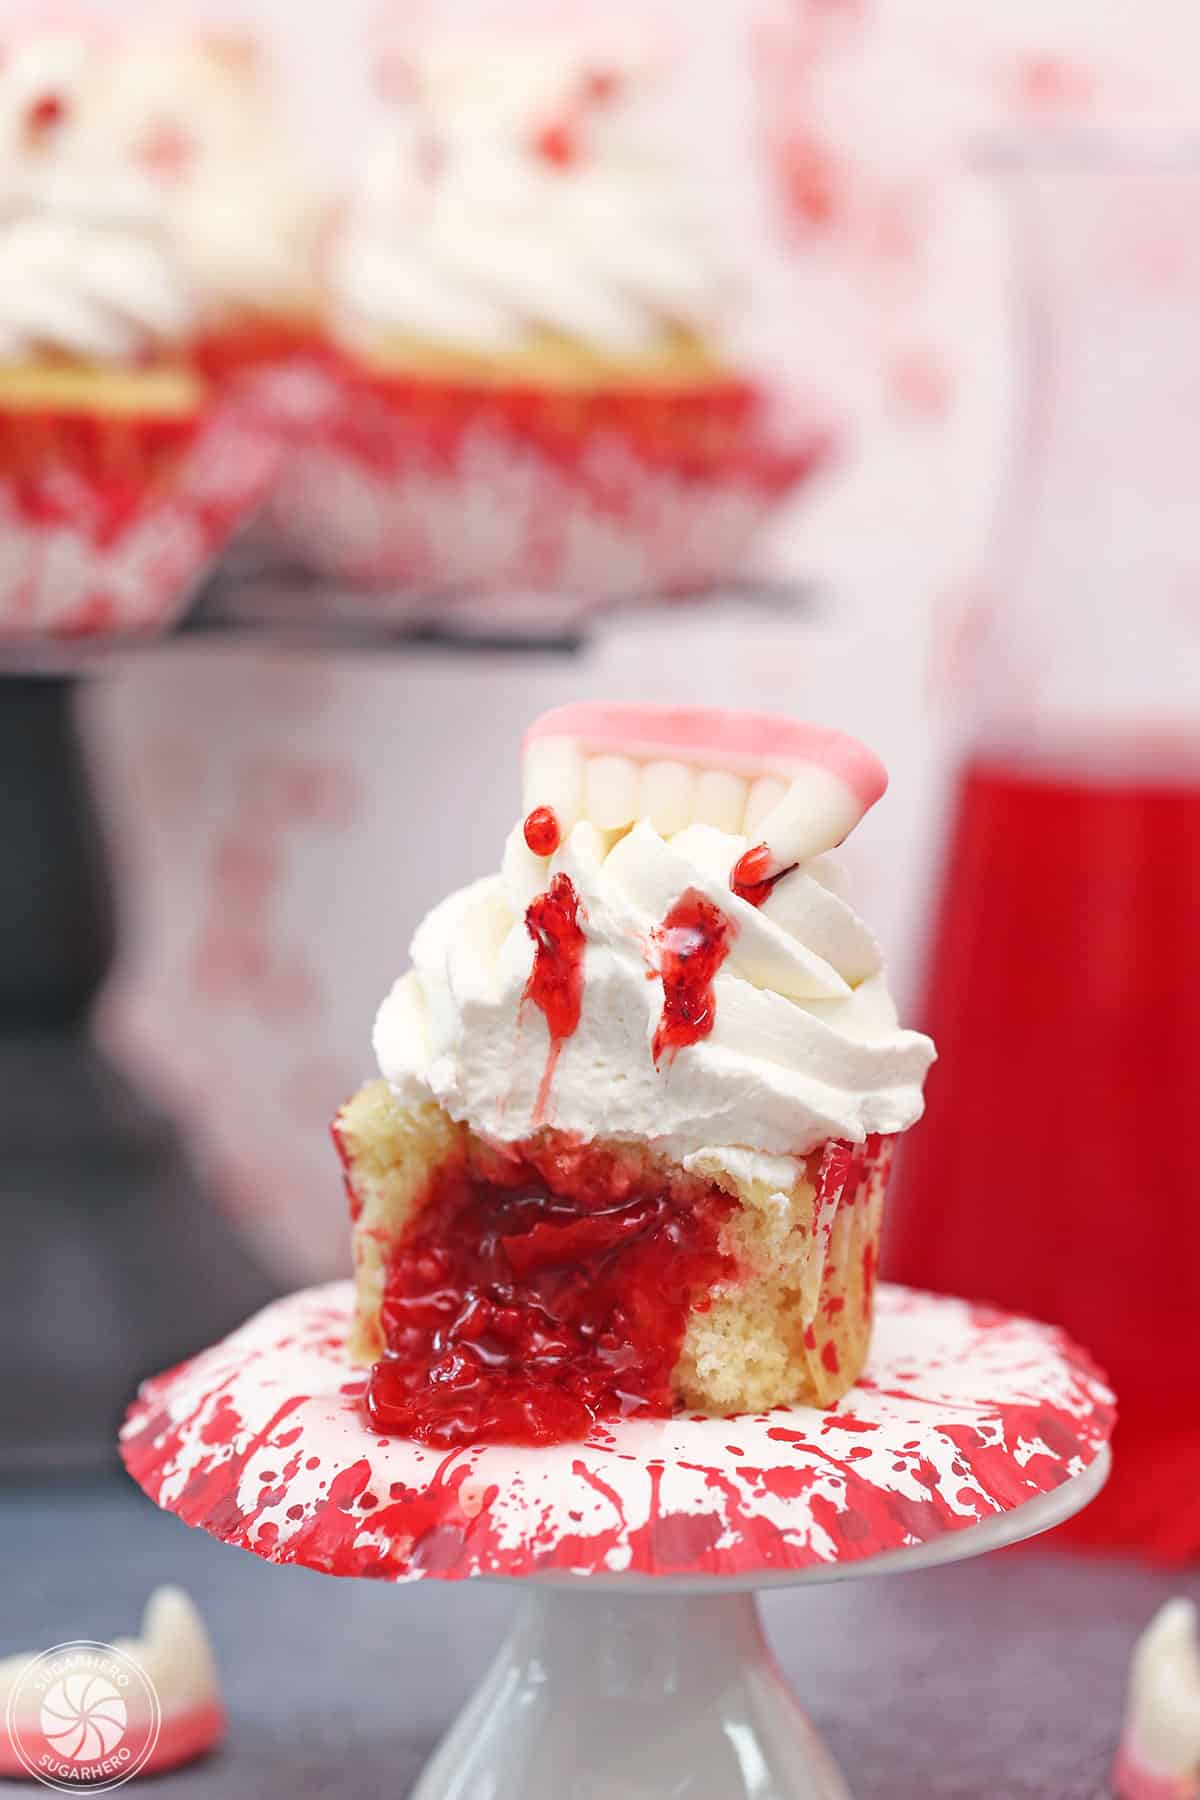
These Bloody Glass Cupcakes may look creepy, but the taste of moist red velvet cupcakes and smooth vanilla buttercream is heavenly! Add a touch of Halloween drama and top these gory goodies with homemade candy glass shards.
🩸 Broken Glass Cupcakes
If you like your Halloween sweets to be more chilling than cutesy, these Bloody Glass Cupcakes are the recipe for you!
They start out innocently enough, with a red velvet cupcake base and a swirl of creamy vanilla frosting on top. But then things get macabre: add spiky shards of edible candy glass, and finish with a drizzle of bright red edible “blood” to make the most gruesome Halloween cupcakes ever.
They’re probably not appropriate for kid’s parties, but for any horror-themed adult get-togethers? They’re to die for.
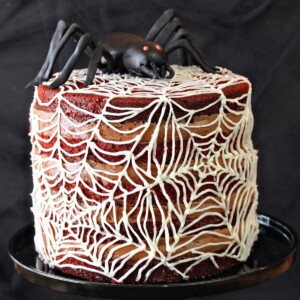
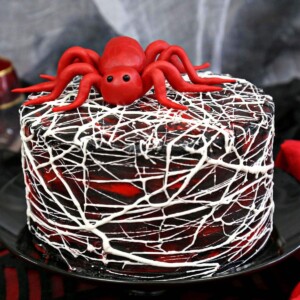
P.S. Can we agree that red velvet is the master mood-setter for spooky get-togethers? Serve up a slice of Red Velvet Marshmallow Spiderweb Cake, or a steaming cup of bloody Red Velvet Hot Chocolate, and your party is guaranteed to be horrifyingly good.
More Sinister Sweets
‘Tis the season for frightfully-fun Halloween treats!
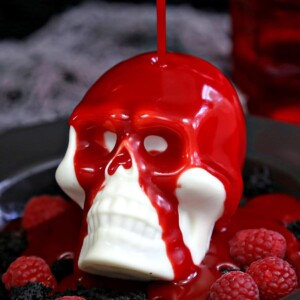
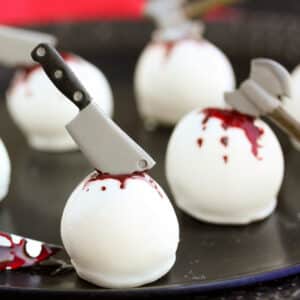
Check out some of our most popular recipes for the holiday: Donut Hole Eyeballs, Bloody Halloween Cake Balls, Melting Chocolate Skulls, and Vampire Bite Cupcakes.
Table of Contents
🧾What You’ll Need
Ingredients
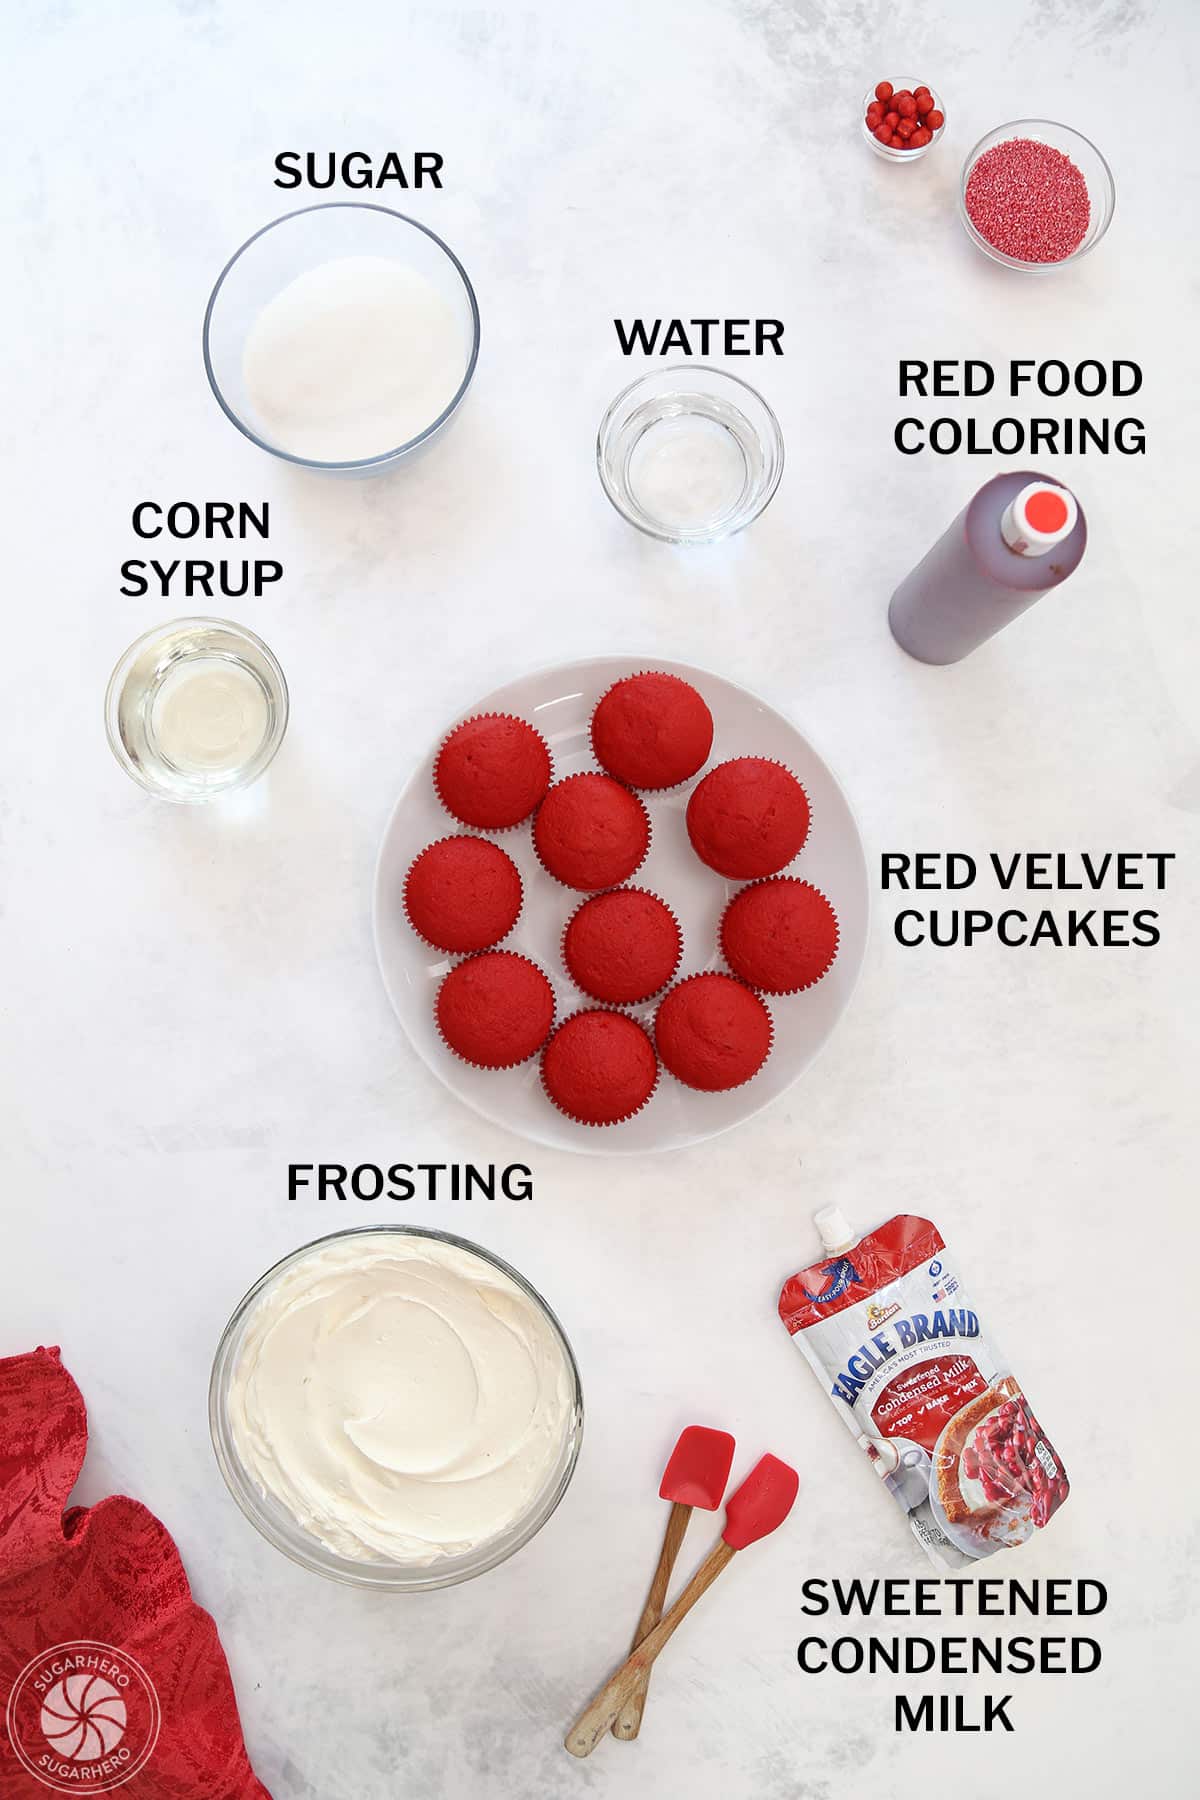
You’re going to love how these simple ingredients come together to make such creepy cupcakes. Read through these helpful ingredient tips, and check the recipe card for full ingredient amounts. (Links are affiliate links and I earn a small commission from qualifying purchases.)
For the cupcakes and Glass Candy
- 24 baked and cooled cupcakes: You can use a store bought mix, or try my recipe for red homemade red velvet cupcakes. If you don’t like red velvet, make any other cupcake flavor you like.
- Water
- Light corn syrup: Prevent crystallization in your glass candy by adding light corn syrup to the mixture. You can also use golden syrup or glucose syrup if you can’t find it.
- Granulated sugar: In my experience, granulated sugar made from cane sugar has more reliable, consistent results than granulated sugar made from beets. I strongly prefer using 100% cane sugar. If your sugar package does not specify, it’s likely made from beet sugar or a mix of both.
- Clear vanilla extract: Flavoring is optional, but if you think people might try nibbling on the edible glass, I suggest using a clear extract, like clear vanilla extract, to flavor it without adding any color.
For the Frosting
- Unsalted butter and salt: The key to smooth, lump-free frosting is to use cool room temperature butter. If you prefer salted butter, omit the extra salt.
- Milk: You can use any milk percentage, or even water, to adjust the consistency of the frosting. I typically use 2%.
- Vanilla extract: I used my favorite Madagascar Bourbon vanilla extract.
- Powdered sugar: This frosting recipe is an American Buttercream, which is powdered sugar-based. You’ll want to measure the sugar with a scale if possible and then sift it into the mixture.
For the Blood Topping
- Sweetened condensed milk: To make the blood topping, I used sweetened condensed milk. The thick texture and light color of the milk gave the topping a more realistic look. You could replace the milk with corn syrup or strawberry syrup if desired.
- Red gel food coloring: You’ll need a few drops of red gel food coloring to make the blood-colored topping.
Equipment
To be successful making the glass candy, you’ll need a few special tools. I’ve also included some equipment that will make this project easier and more fun. (Links are affiliate links and I earn a small commission from qualifying purchases.)
- Baking sheet: Pour the candy syrup on a flat surface like a standard baking sheet to set.
- Non-stick foil: Line your baking sheet with non-stick foil or spray it well with non-stick spray so that the candy can be removed easily.
- Medium saucepan: The sugar syrup will get extremely hot and bubble up a little. Use a medium saucepan (about 3-4 quarts) so that the syrup doesn’t boil over.
- Pastry brush: To prevent crystallization, use a pastry brush to wipe away sugar stuck to the inside walls of the pan.
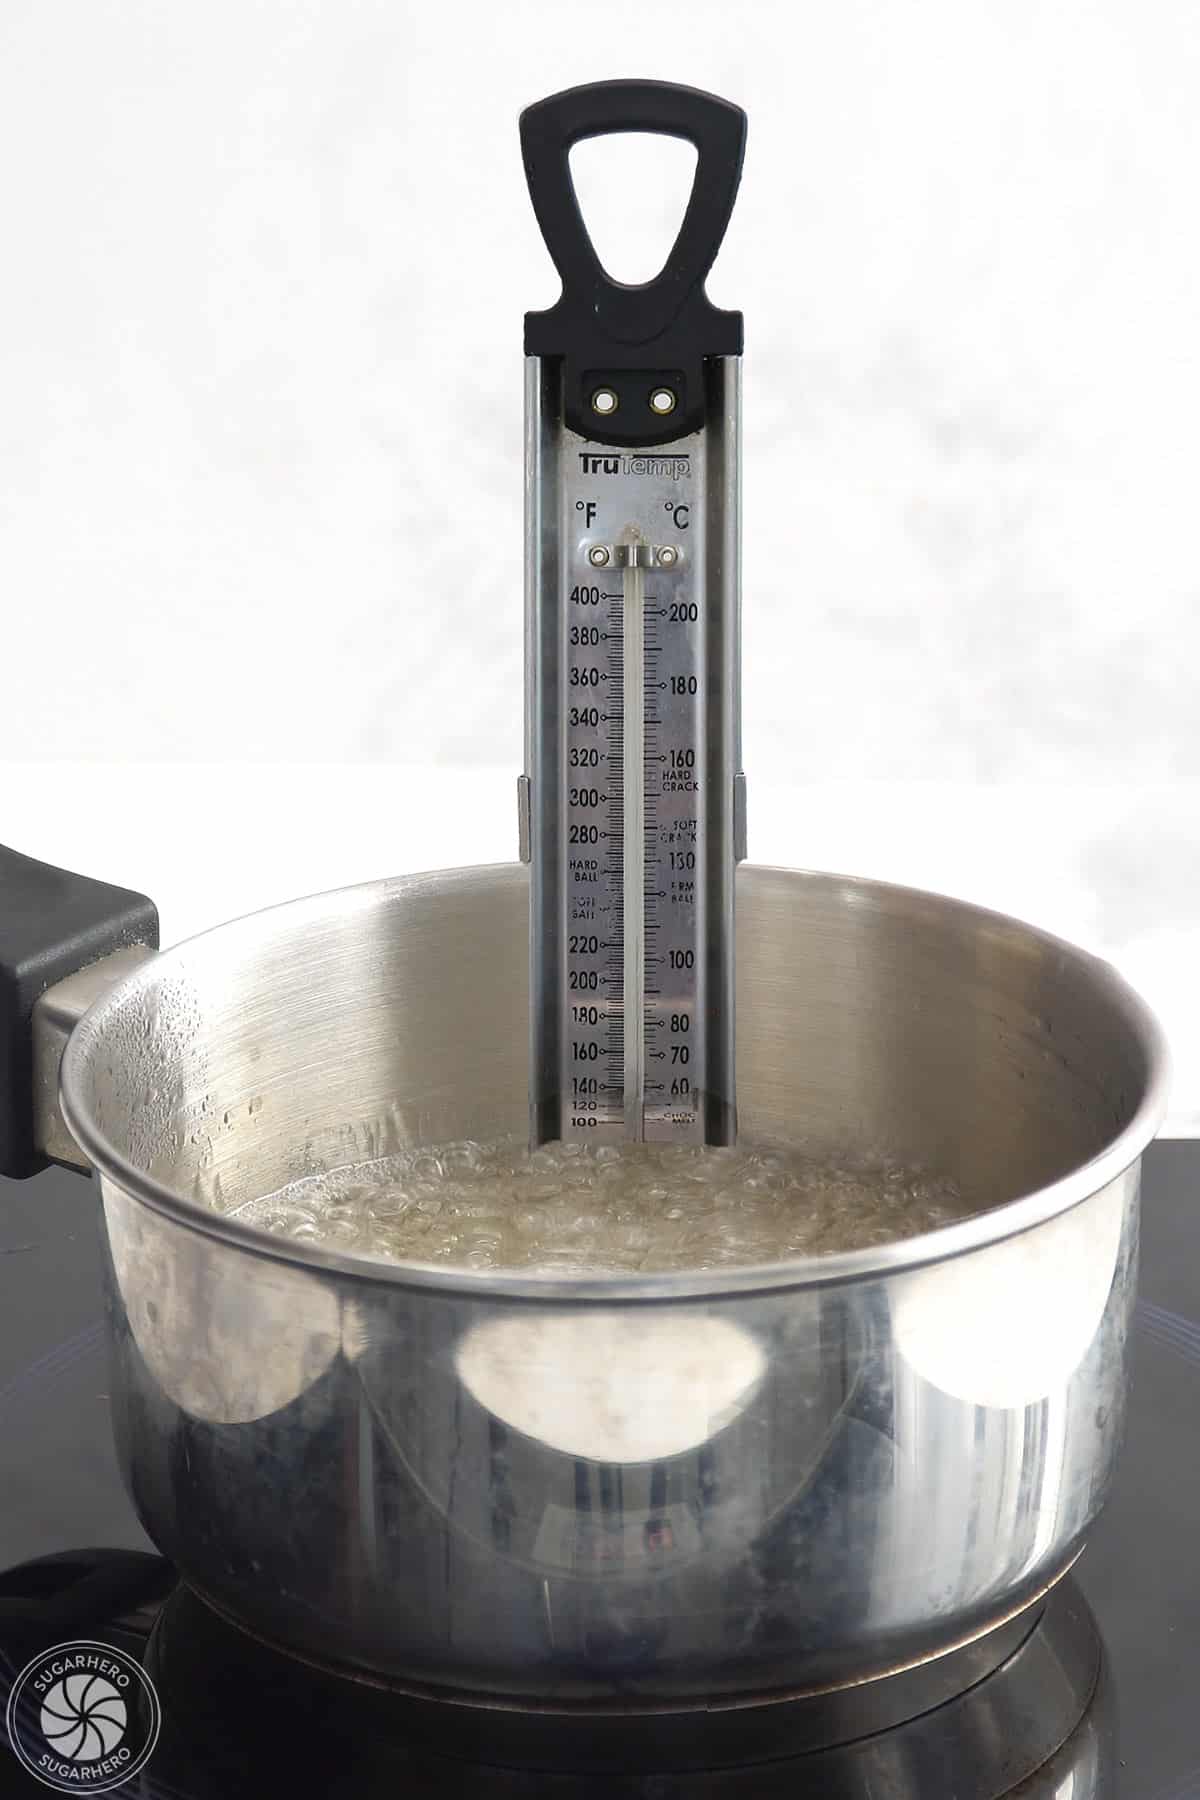
- Candy thermometer: Using a candy thermometer is the most important tool for making glass candy. The difference of a few degress can make or break your candy.
- Kitchen mallet: I used a kitchen mallet (meat tenderizer) to break the candy glass into shards. If you don’t have one, you can use another heavy kitchen tool (like a rolling pin) to break it.
- Mixer: You can use a stand mixer or hand mixer to whip up the frosting.
- Piping bags and coupler: If you plan to pipe the frosting and bloody topping onto the cupcakes, you’ll need piping bags and couplers. Check the Tips below if you don’t have piping tools.
- Piping tip: I recommend using a large closed star piping tip, like Ateco #849, to make the buttercream swirls.
- Cupcake liners: If you want to give your cupcakes some extra Halloween pizzazz, try baking them in blood-splattered cupcake liners.
Ready to Make These?
- Get the recipe below 👇👇
- Scroll below the recipe for step-by-step photos
- Read important FAQs and more
👻 More Halloween Desserts
Leave a Review!
If you make this recipe, let us know! Leave a ⭐️⭐️⭐️⭐️⭐️ rating on the recipe below, and leave a comment, take a photo and tag me on Instagram @elabau, or use #sugarhero on IG!

Bloody Glass Cupcakes
Ingredients
- 24 baked and cooled cupcakes from scratch or your favorite mix, I used red velvet cupcakes
For the Edible Sugar Glass Shards
- 4 fl oz water (½ cup)
- 8.25 oz light corn syrup or glucose syrup or golden syrup, (¾ cup)
- 14 oz granulated sugar (2 cups)
- 2 tsp clear vanilla extract or other clear extract, if desired
For the Frosting
- 1 lb unsalted butter at cool room temperature
- 2 TBSP milk can substitute water
- ½ tsp salt
- 1 TBSP vanilla extract
- 28 oz powdered sugar (7 cups), sifted after measuring
For the Blood Topping
- ½ cup sweetened condensed milk or corn syrup or strawberry syrup
- Red gel food coloring
Instructions
Make Glass Candy Shards
- Prepare baking sheet: Line a baking sheet with foil and spray it with nonstick cooking spray, or use non-stick foil.
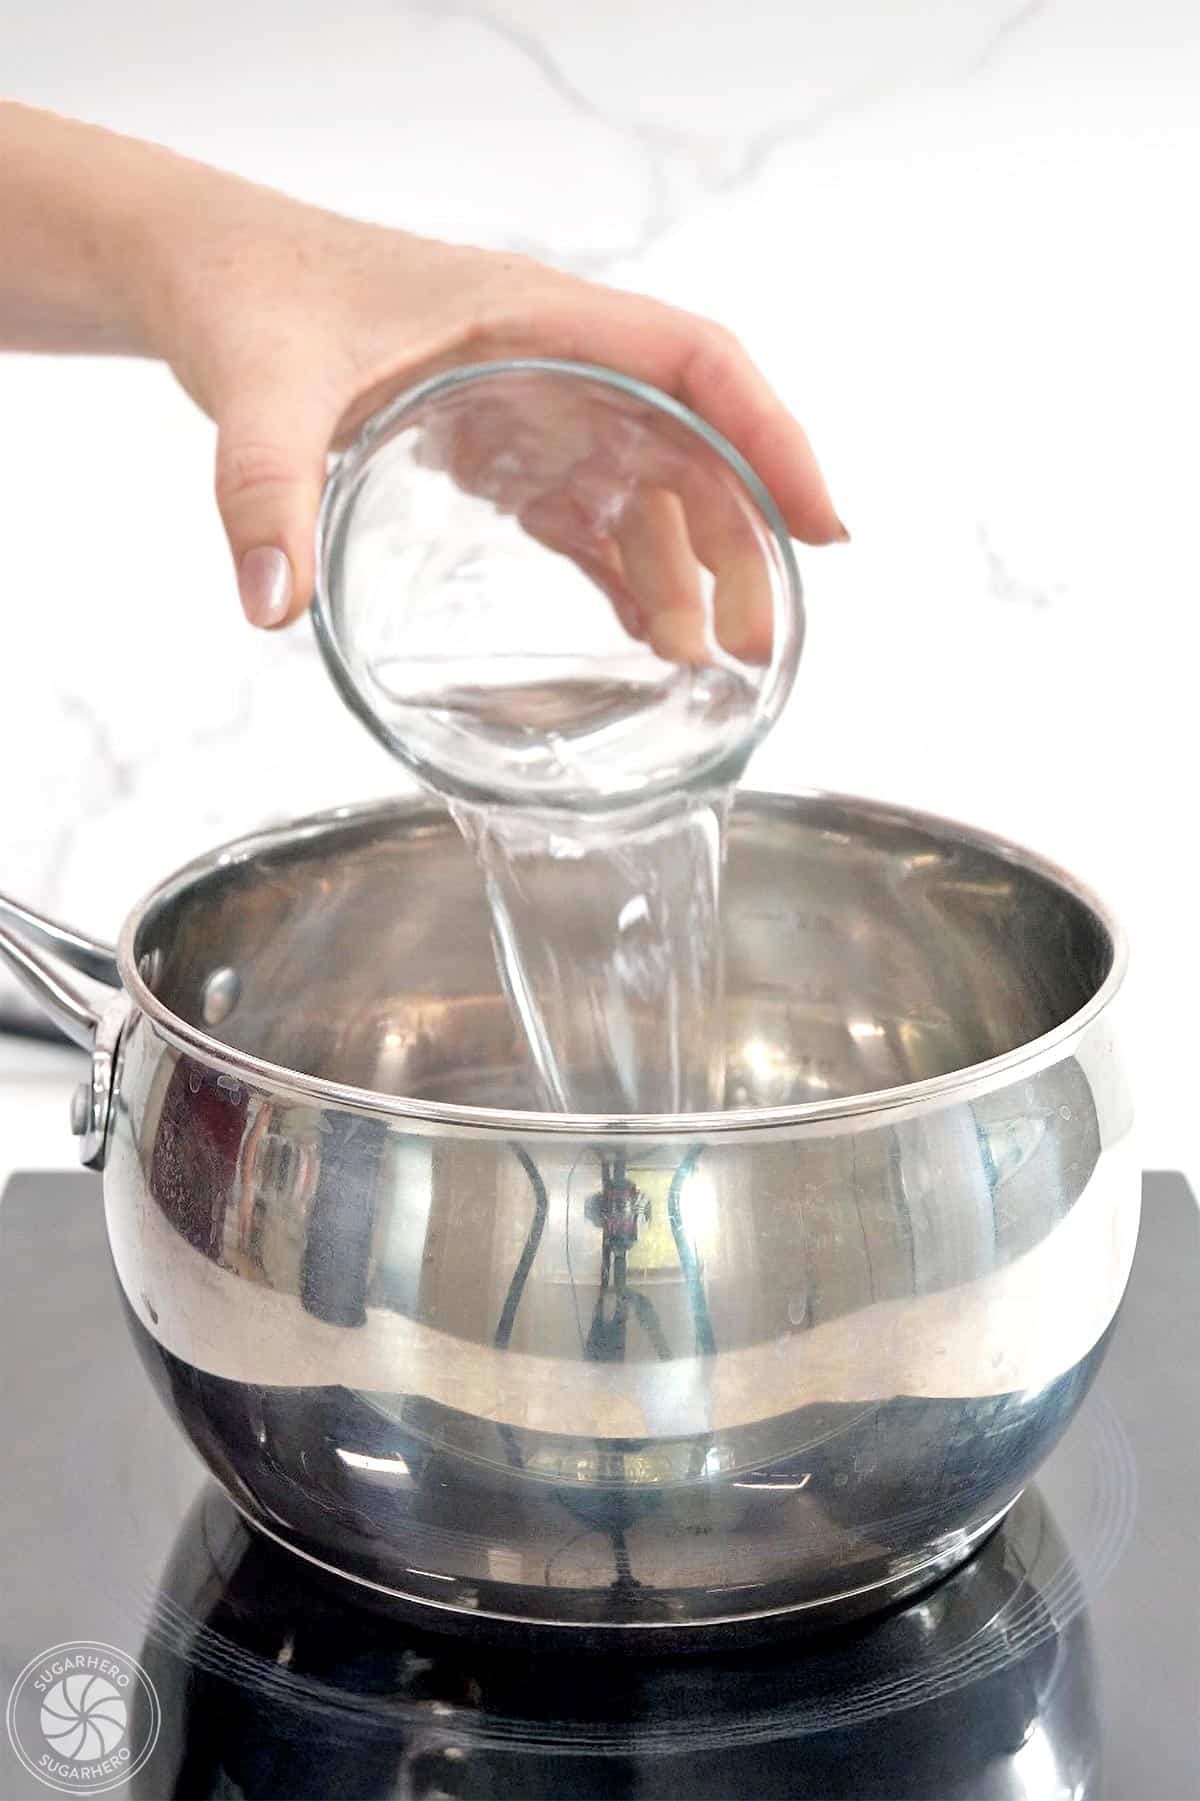
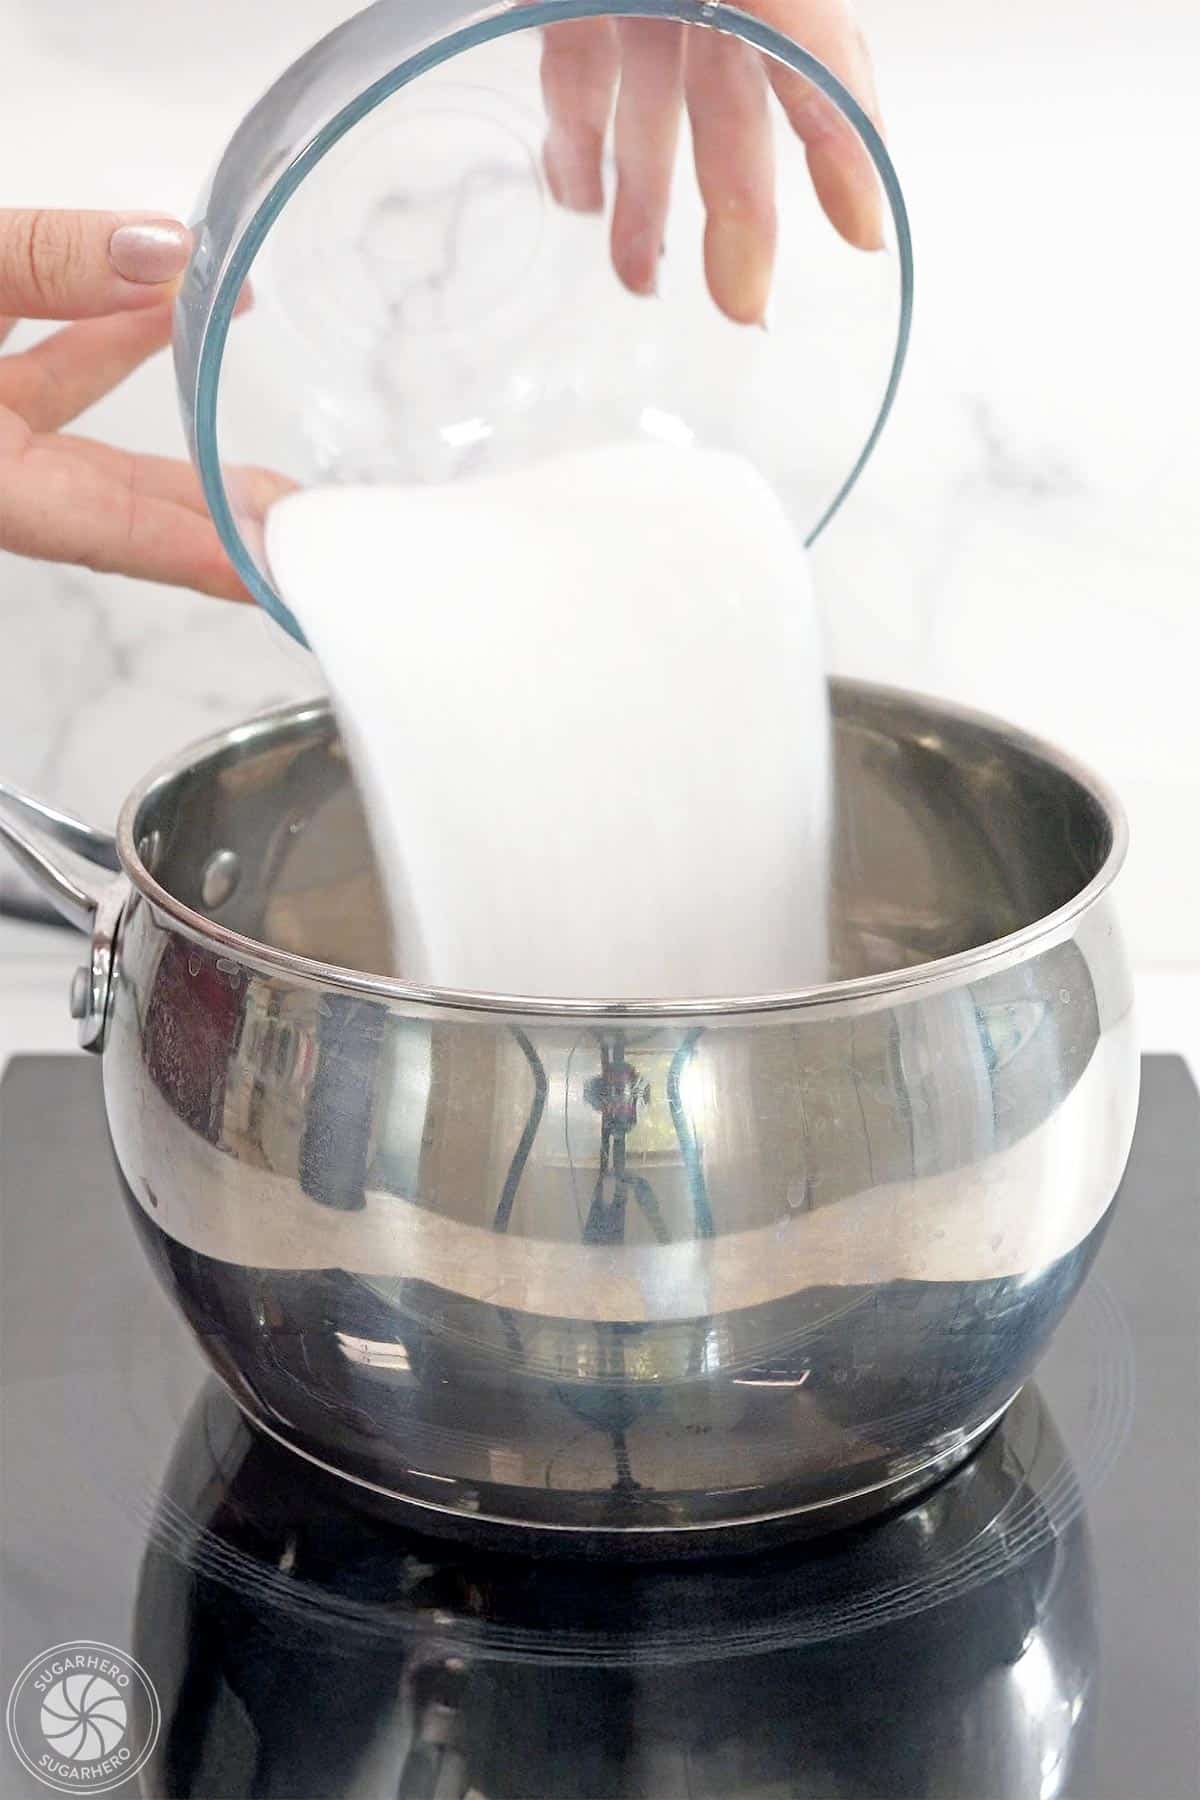
- Heat water, corn syrup, and sugar: In a medium saucepan, combine 4 fl oz (1/2 cup) water, 8.25 oz (3/4 cup) corn syrup, and 14 oz (2 cups) granulated sugar. Place the pan over medium-high heat, and stir until the sugar dissolves.
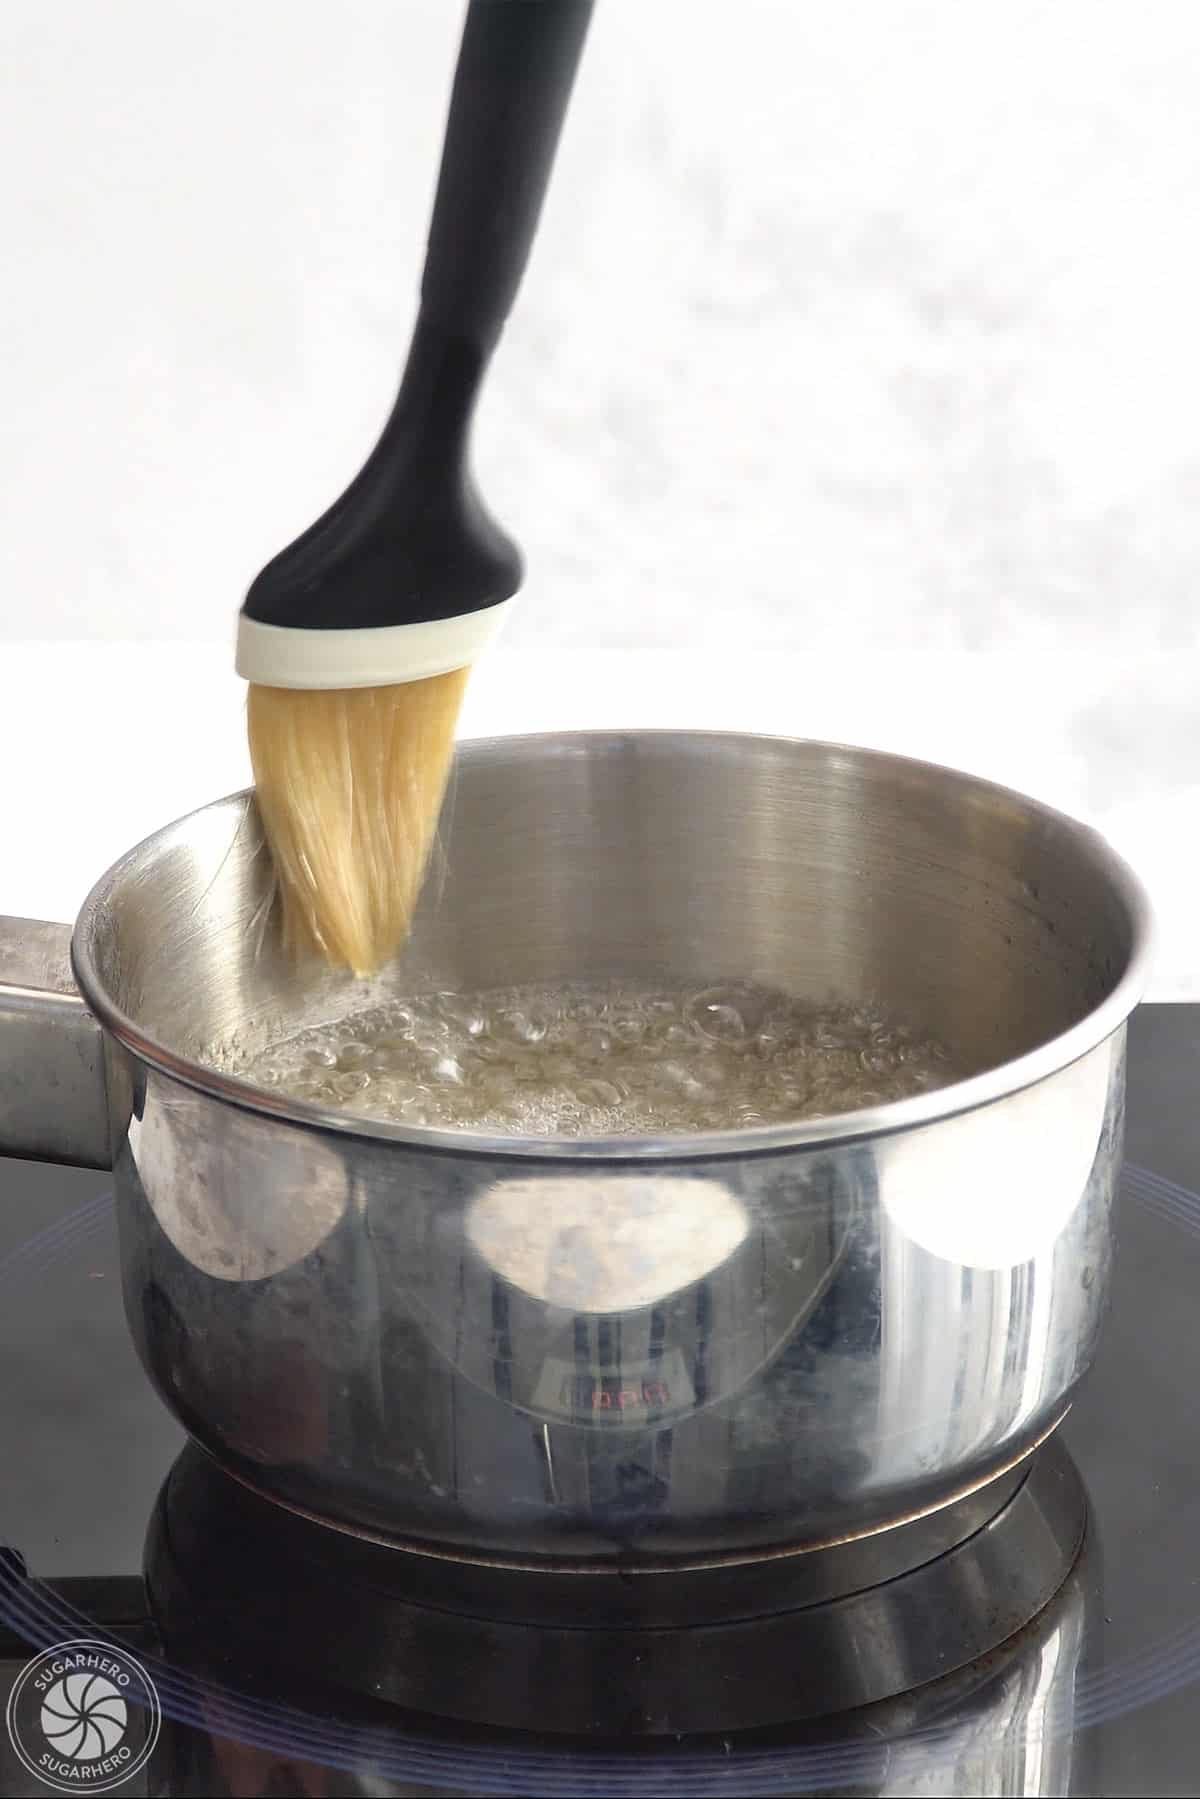
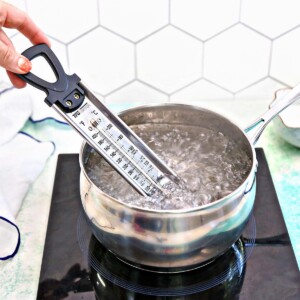
- Wipe pan with pastry brush: Once the mixture comes to a simmer, brush down the inside walls of the pan with a wet pastry brush to prevent sugar crystals from forming. Insert a candy thermometer.
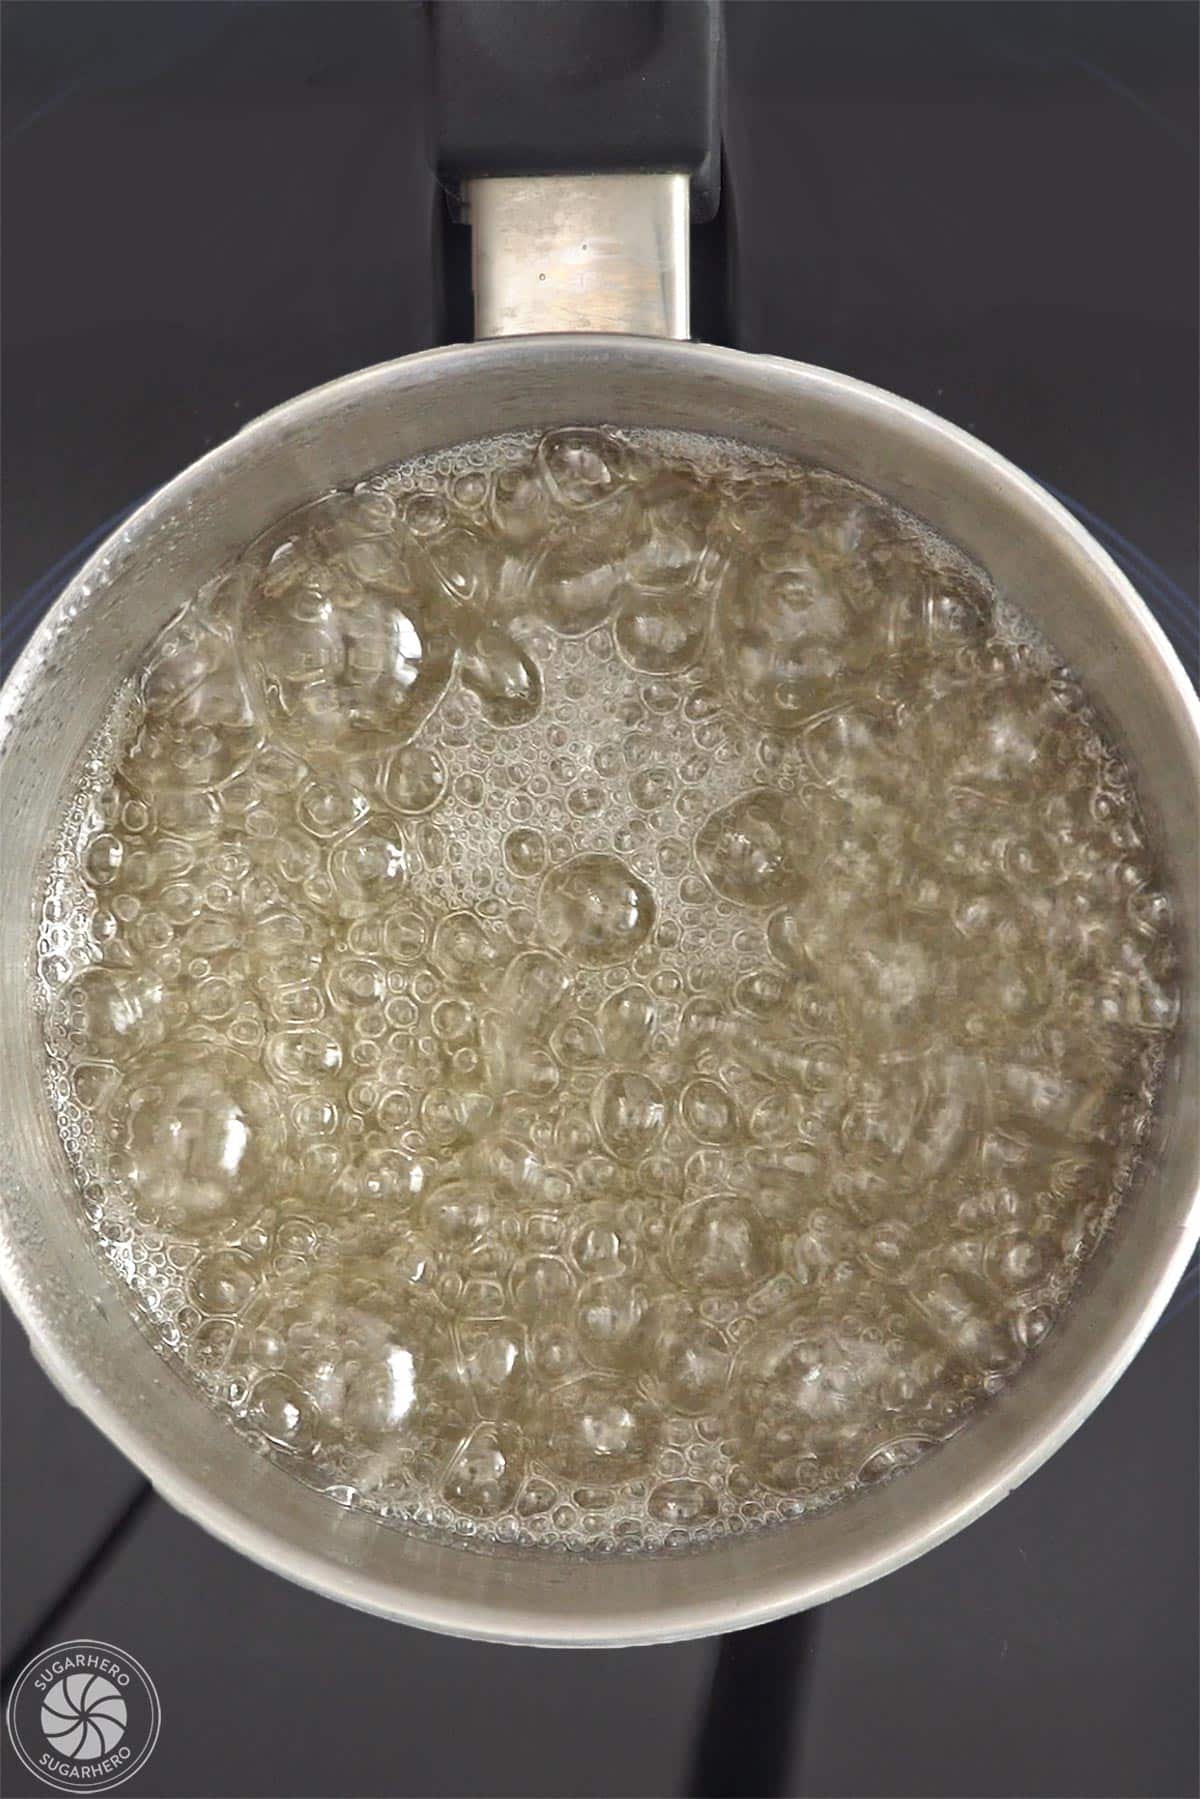
- Cook without stirring: Continue to cook the candy without stirring until it reads 290° F (143° C) on the thermometer. Watch the temperature carefully–a lower temperature might produce sticky candy, while a higher temperature runs the risk of producing green candy!
- Remove from heat, add flavoring: Once at 290° F (143° C), take the pan off the heat and let it sit for a few moments, until rapid bubbles stop breaking on the surface. Stir in the flavoring.
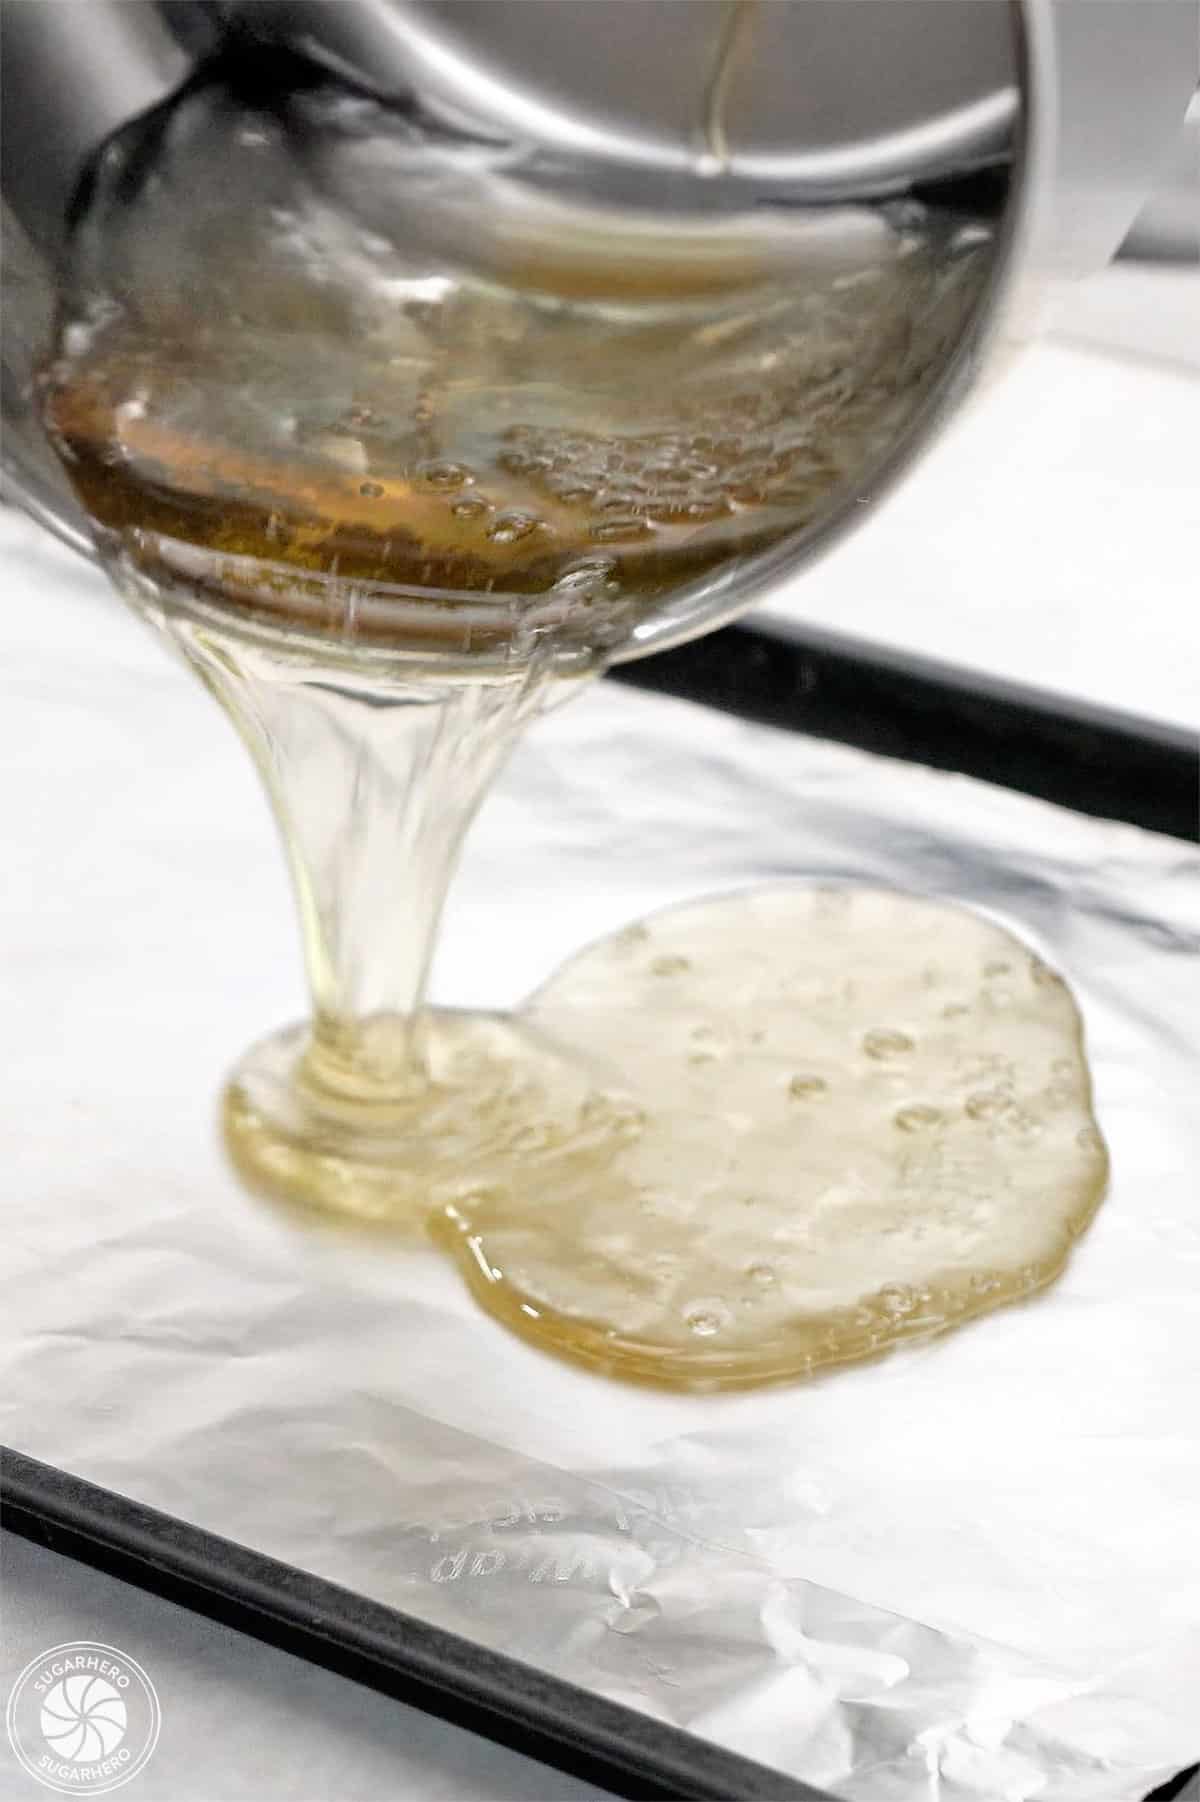
- Pour candy to set: Pour the candy onto the prepared baking sheet and spread it into a thin layer. Let it set completely at room temperature.
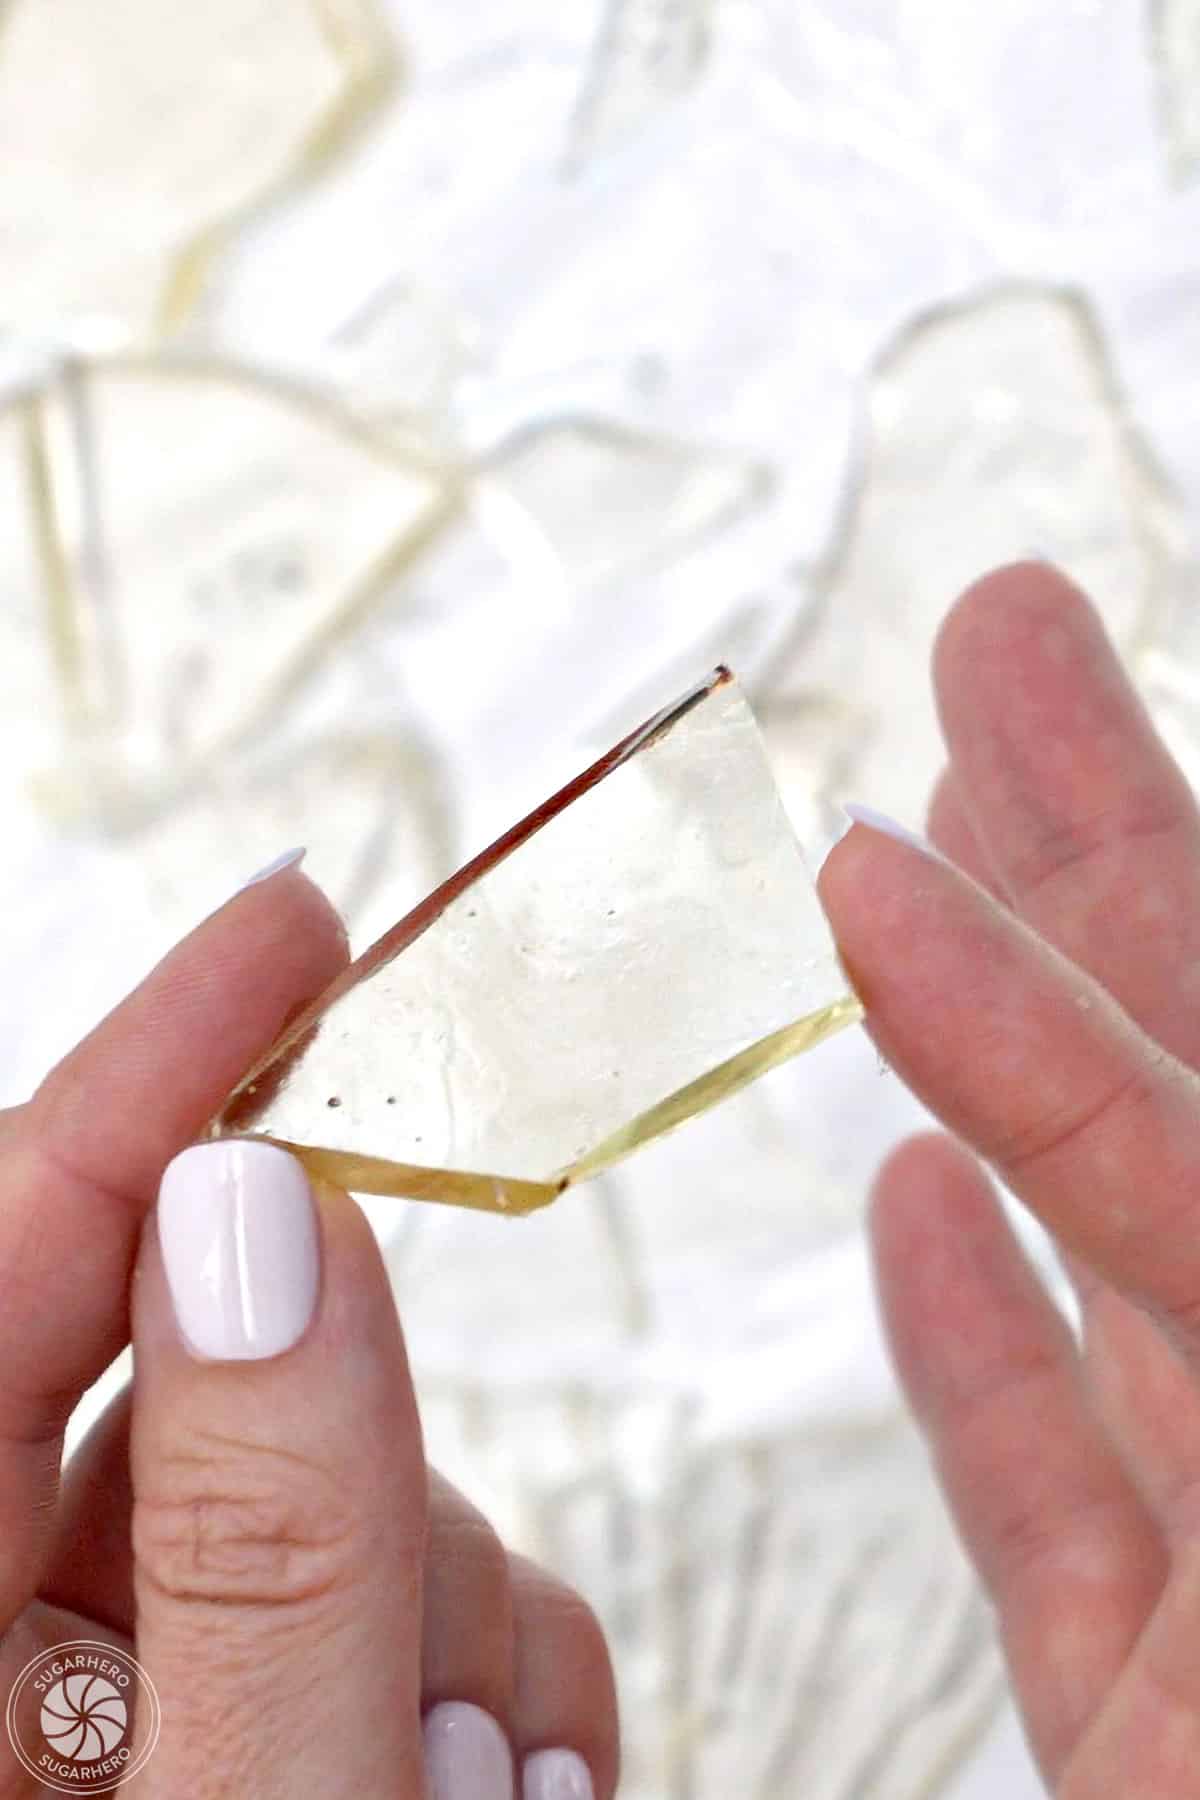
- Break: Once set, use a mallet to break it into jagged pieces resembling shards of glass. Use the shards to decorate right away or store them for up to a week, see Note below.
Make the Frosting
- Beat the butter: Place the 1 lb (2 cups) butter in the bowl of a large stand mixer. Beat on medium speed with a paddle attachment until very white and pale, about 3-4 minutes.
- Add milk, salt, and vanilla: Turn the speed lower, and add 1 TBSP milk, 1/2 tsp salt, and 1 TBSP vanilla extract. Mix until everything is well incorporated with the butter.
- Slowly add powdered sugar: With the mixer running on low, slowly add 28 oz (7 cups) powdered sugar. Once all of it is added, stop and scrape down the bottom and sides of the mixing bowl, then mix the buttercream on medium speed for 30 seconds.
- Adjust consistency: If the buttercream is too stiff for your needs, add the remaining 1 TBSP milk, a little at a time, and mix it in well. You can adjust the final texture by adding more powdered sugar or milk until you like the consistency.
- Use or store: You can use the frosting right away, or store it for up to a week. See Note below.
Make the Blood Topping
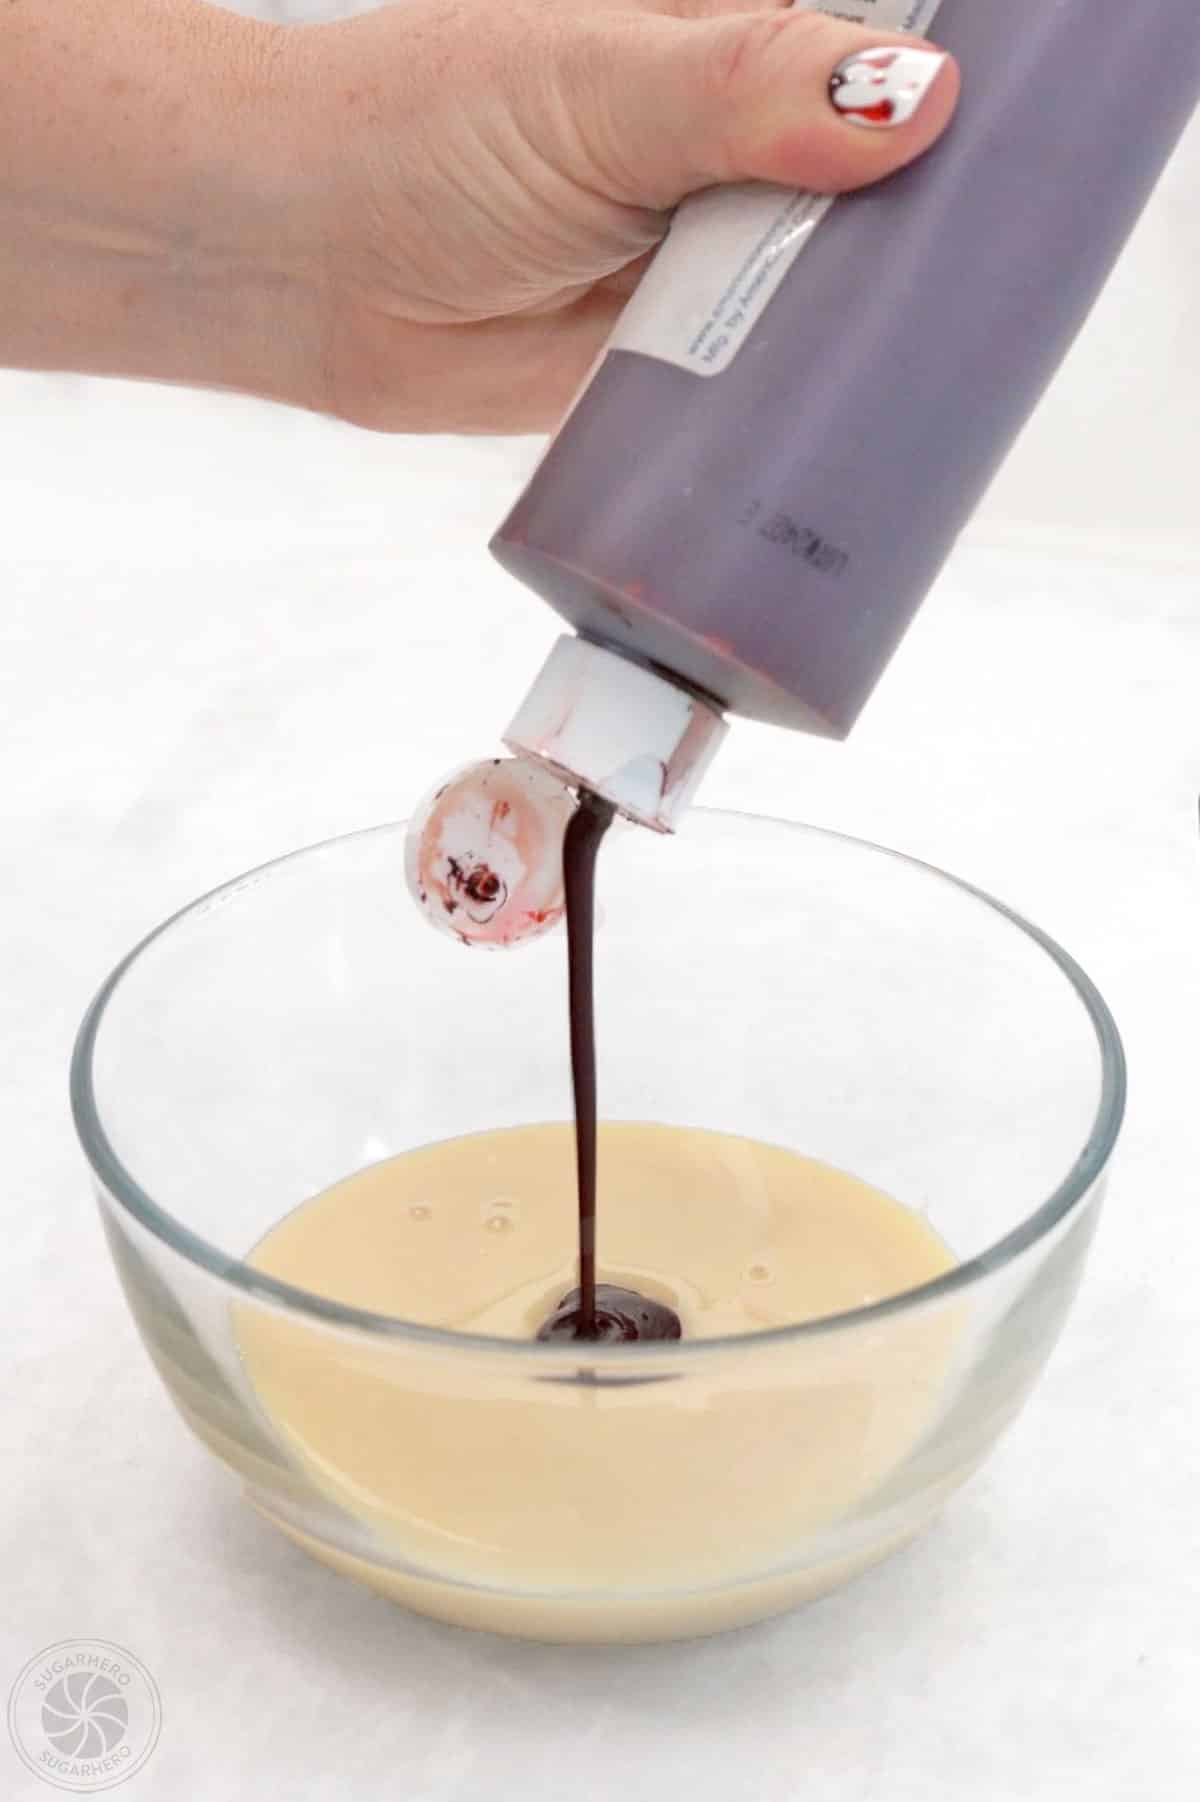
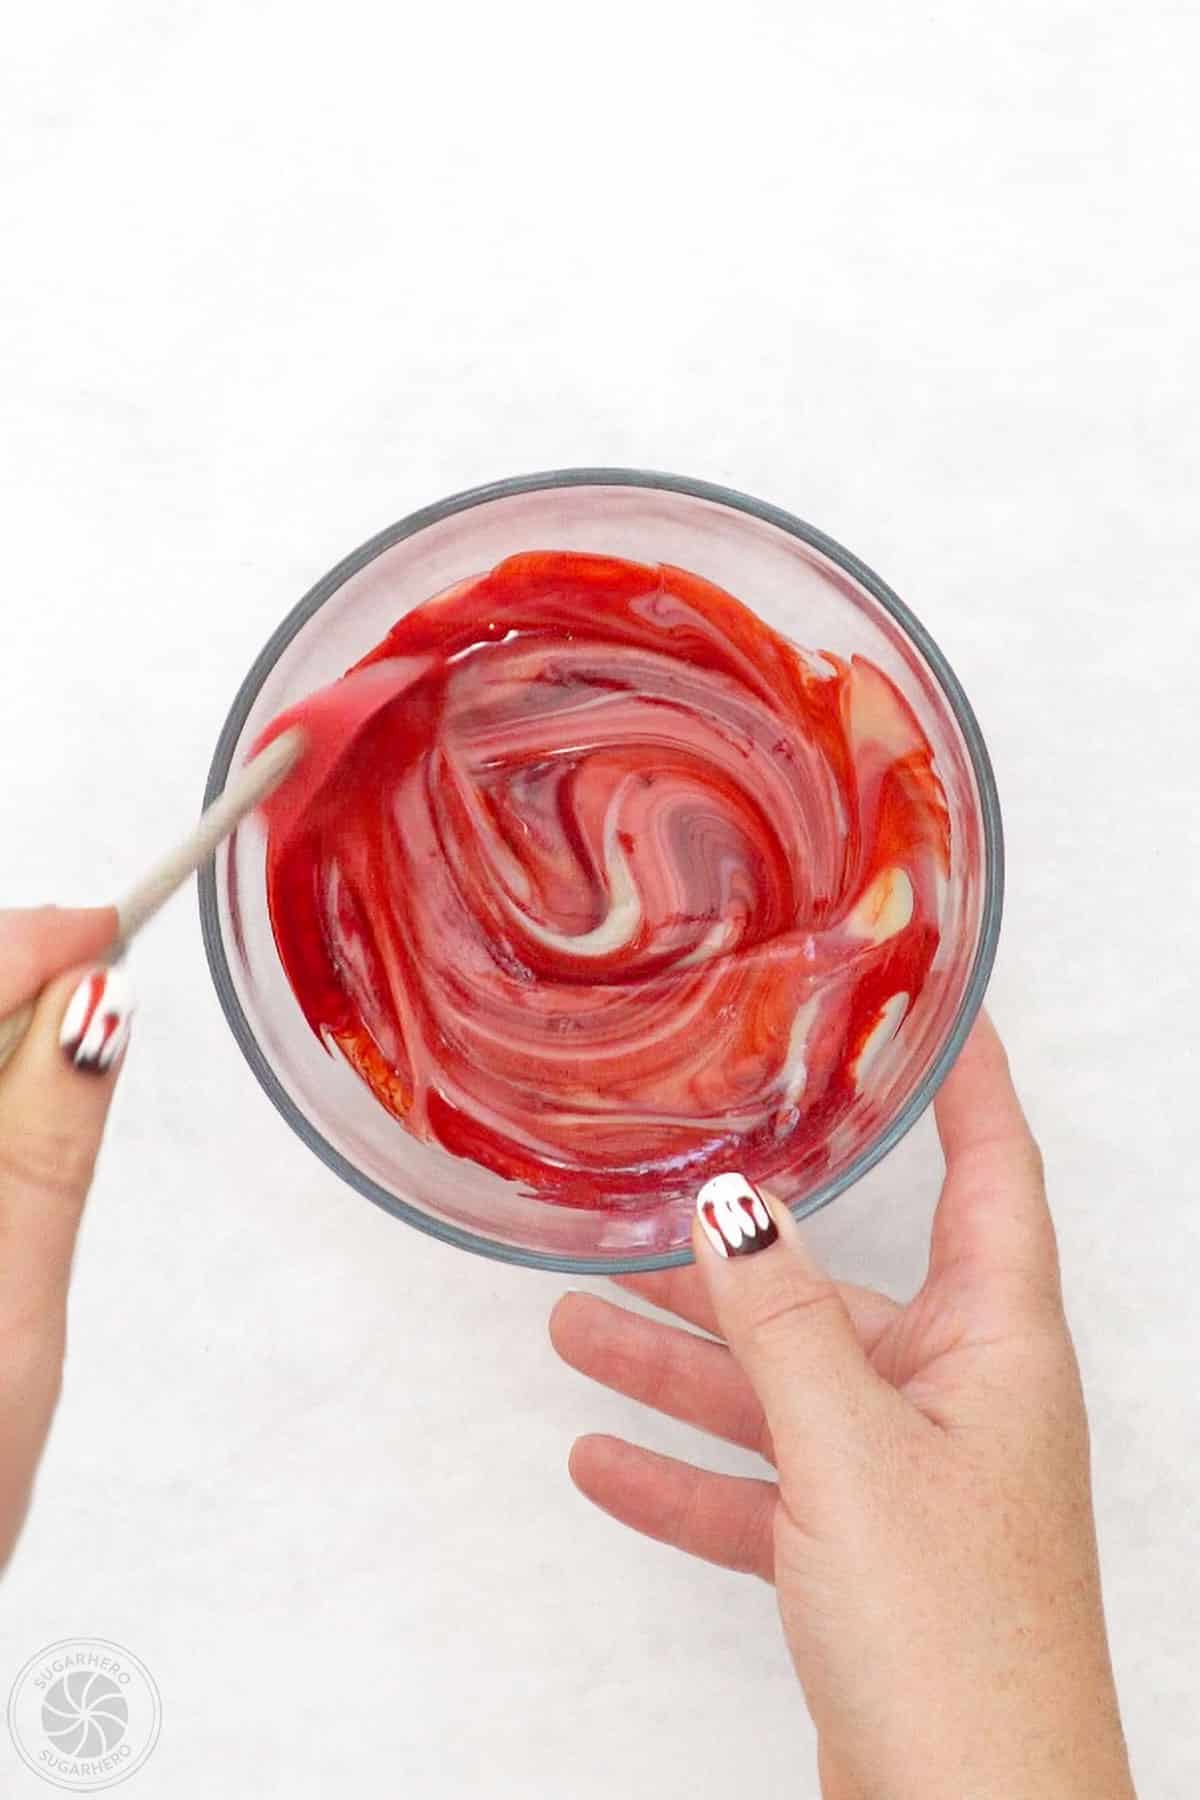
- Mix milk and food coloring: Pour 1/2 cup sweetened condensed milk into a small bowl. Add a few drops of red gel food coloring and stir until a blood-red color is achieved.
Frost and Decorate the Cupcakes
- Prep piping bags: Put the white buttercream in a piping bag with a large closed star piping tip (I used Ateco #849). Put the blood topping in a piping bag fitted with a small round tip (I used Ateco #3).
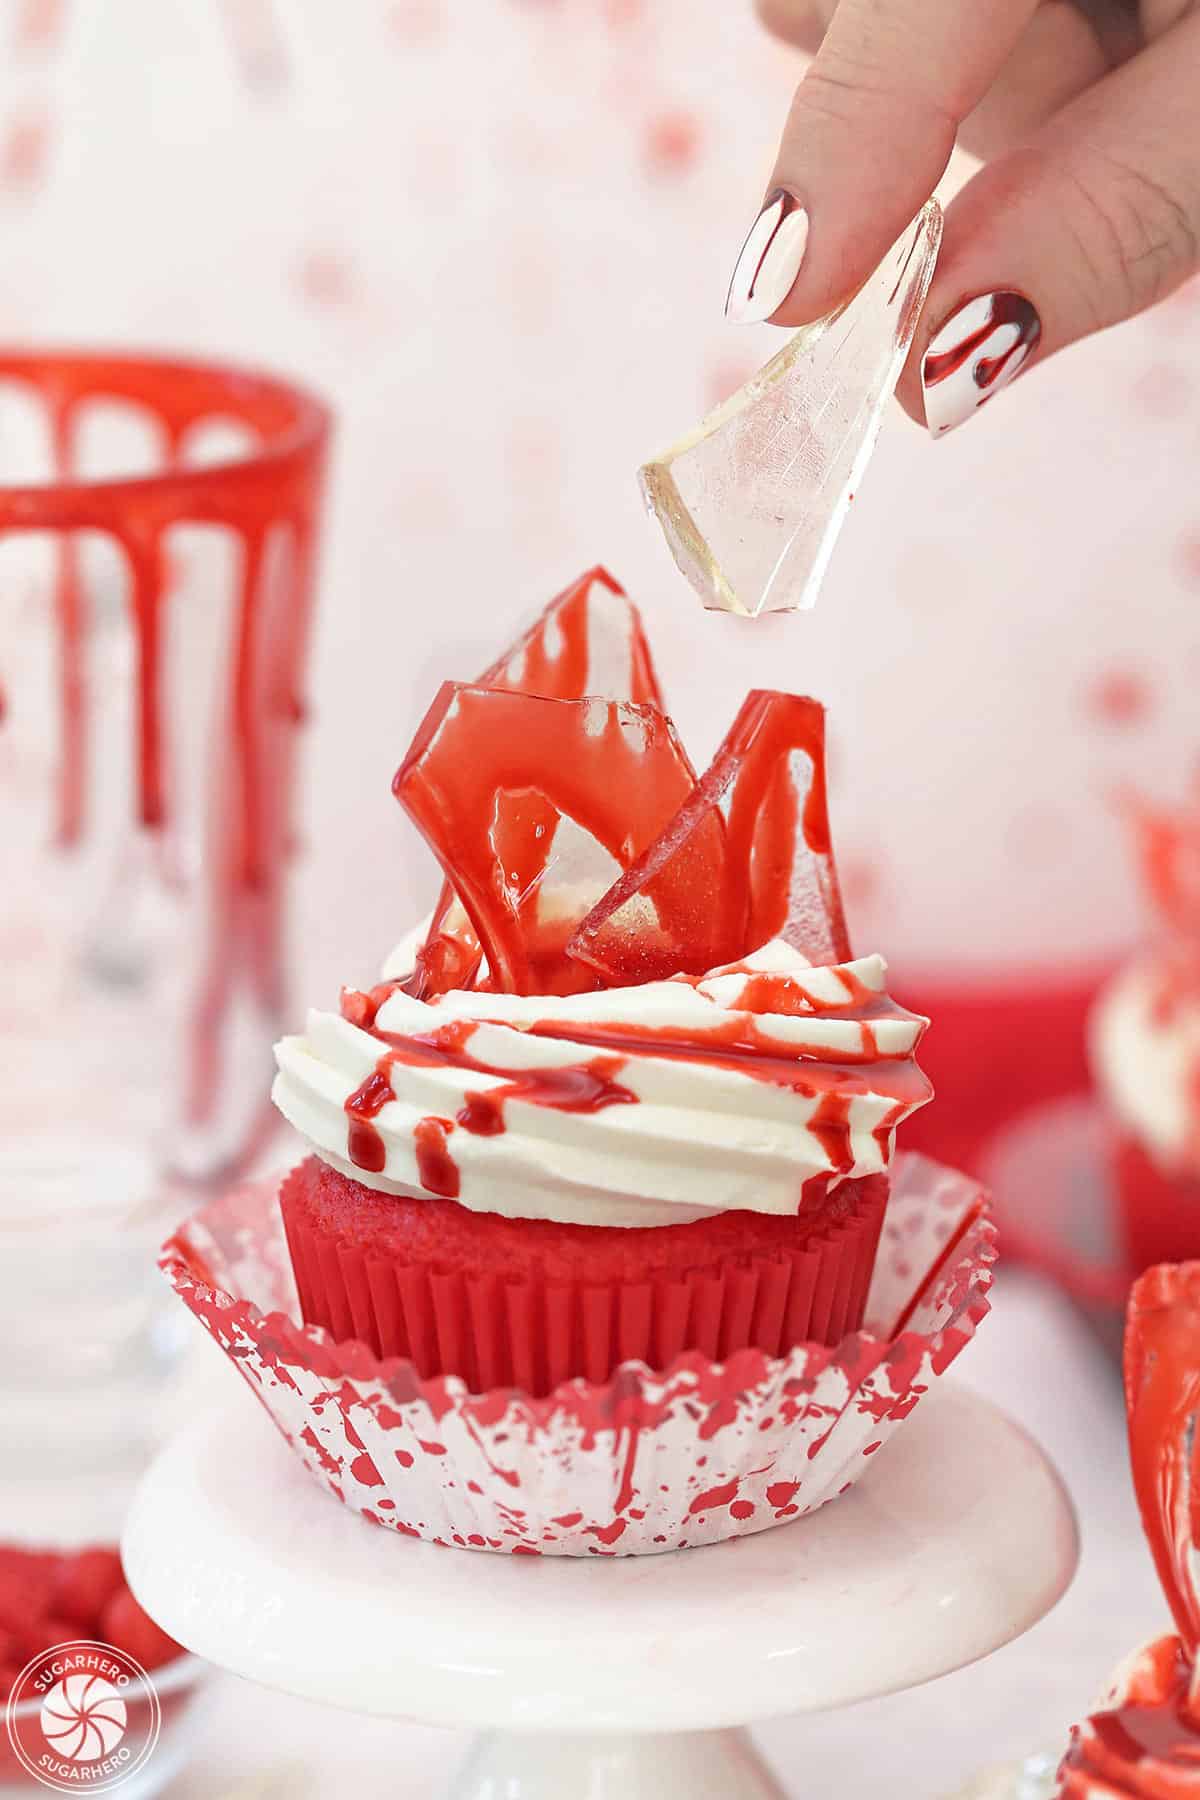
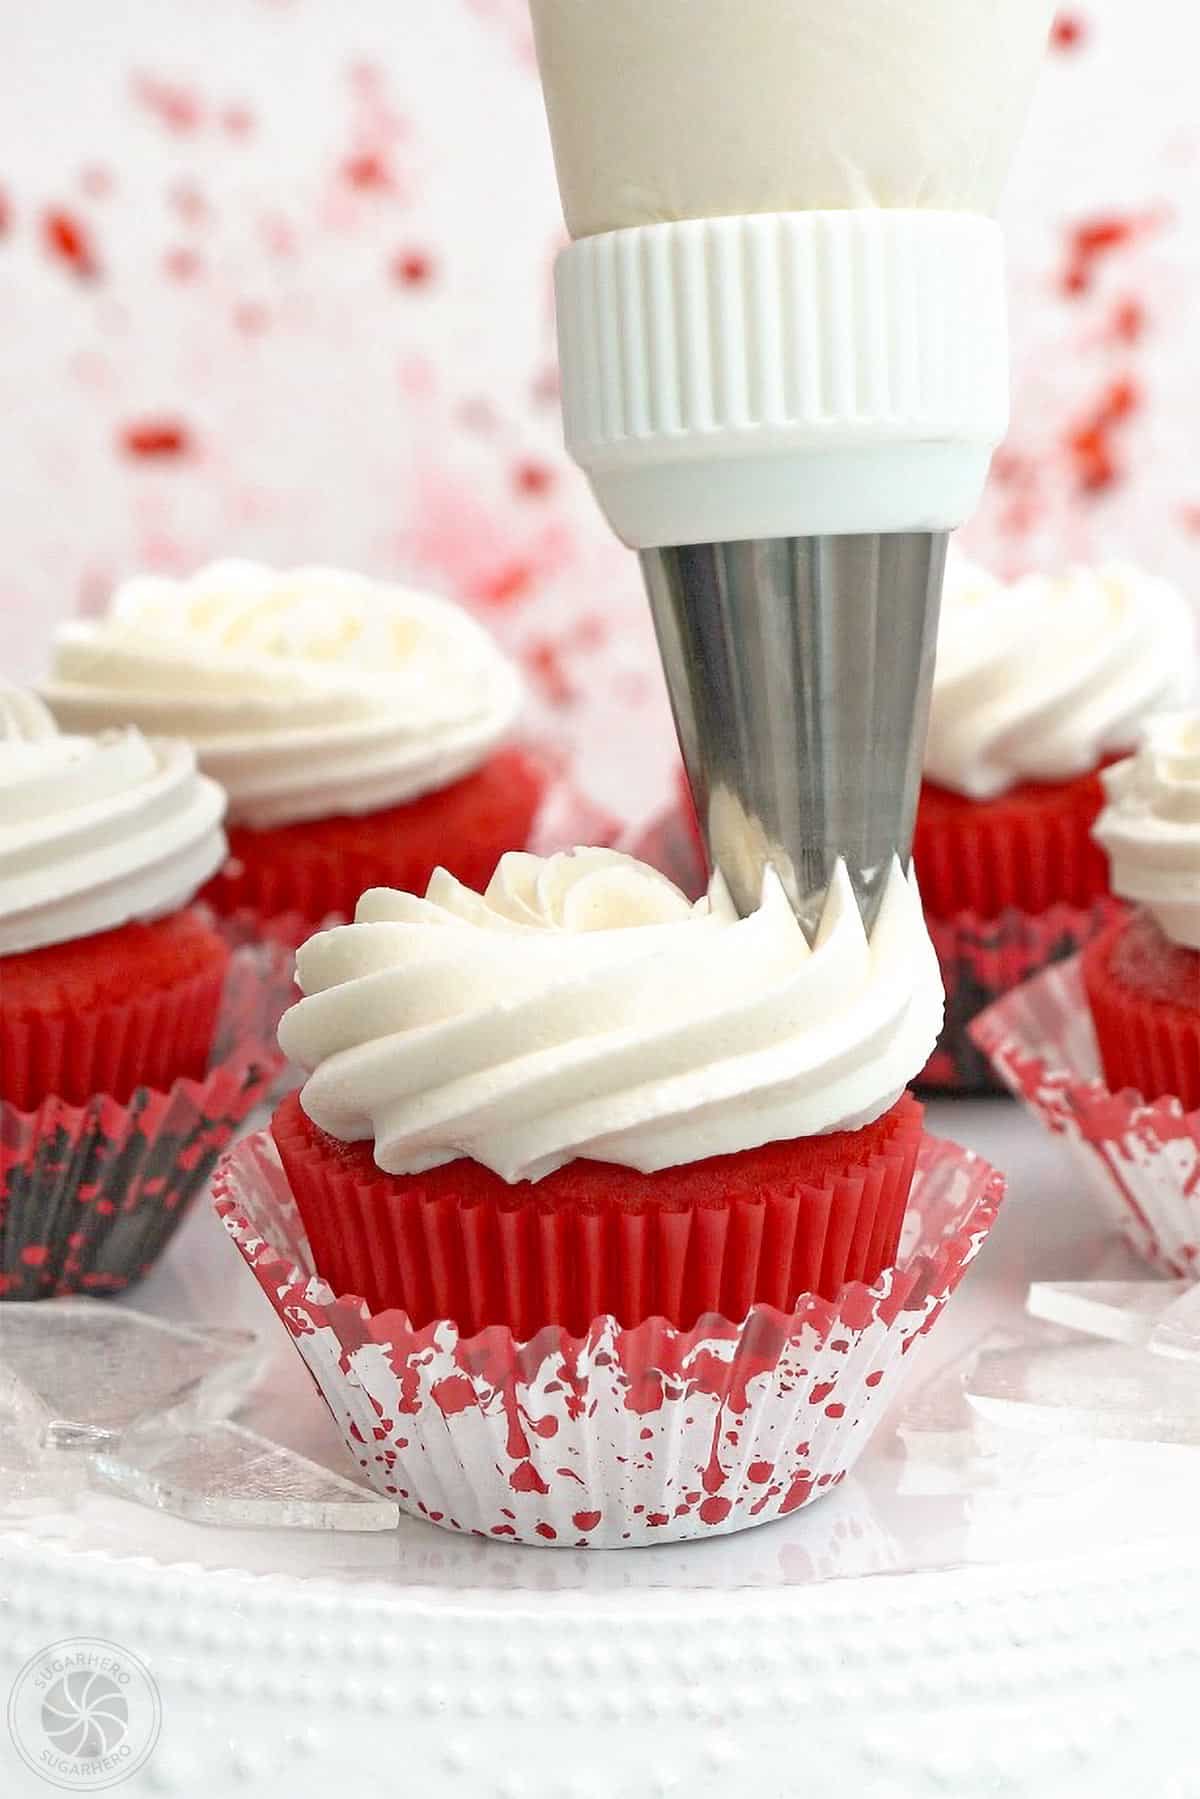
- Frost and top with shards: Pipe a swirl of white frosting on top of each cupcake, and insert a few shards of glass candy into the frosting, pointing in different directions.
- Drizzle topping: Then drizzle the blood topping over the glass shards so that it drips down and covers the top of each cupcake. Enjoy!
- Store: Store extras in an airtight container at room temperature for 2-3 days (the candy glass will become sticky the longer it sits in contact with the frosting).
- Make-ahead: If you want to make the cupcakes in advance, they can be prepped with the white frosting and then stored in the refrigerator in an airtight container for up to a week. Finish the cupcakes with glass shards and blood topping just before serving. Allow chilled cupcakes to come to room temperature for best taste and texture.
Notes
Measuring Tips
Our recipes are developed using weight measurements, and we highly recommend using a kitchen scale for baking whenever possible. However, if you prefer to use cups, volume measurements are provided as well. PLEASE NOTE: the adage “8 oz = 1 cup” is NOT true when speaking about weight, so don’t be concerned if the measurements don’t fit this formula.
Nutrition
📸 Photo Tutorial: How to Make Bloody Glass Cupcakes
Let the Halloween baking begin! Follow this photo tutorial to learn how to make your very own Bloody Glass Cupcakes. Printable instructions are included in the recipe card above.
Make the Candy Glass Shards
- Prepare baking sheet: Line a baking sheet with non-stick foil.
- Heat water, corn syrup, and sugar: In a medium saucepan, over medium-high heat, mix together water, corn syrup, and granulated sugar. Stir until sugar dissolves.
- Wipe pan with pastry brush: Once the mixture begins to simmer, brush down the inside walls of the pan with a wet pastry brush, and insert your candy thermometer.
- Cook without stirring: Cook the candy without stirring until it reads 290° F (143° C) on the thermometer. Watch the temperature carefully–being off by a few degrees can change the texture of the candy.
- Remove from heat, add flavoring: Once at the correct temperature, remove pan from heat and rest the candy until rapid bubbles stop breaking on the surface. Stir in the flavoring, if using.
- Pour candy to set: Pour the candy onto the baking sheet, and spread it in a thin layer to fully set.
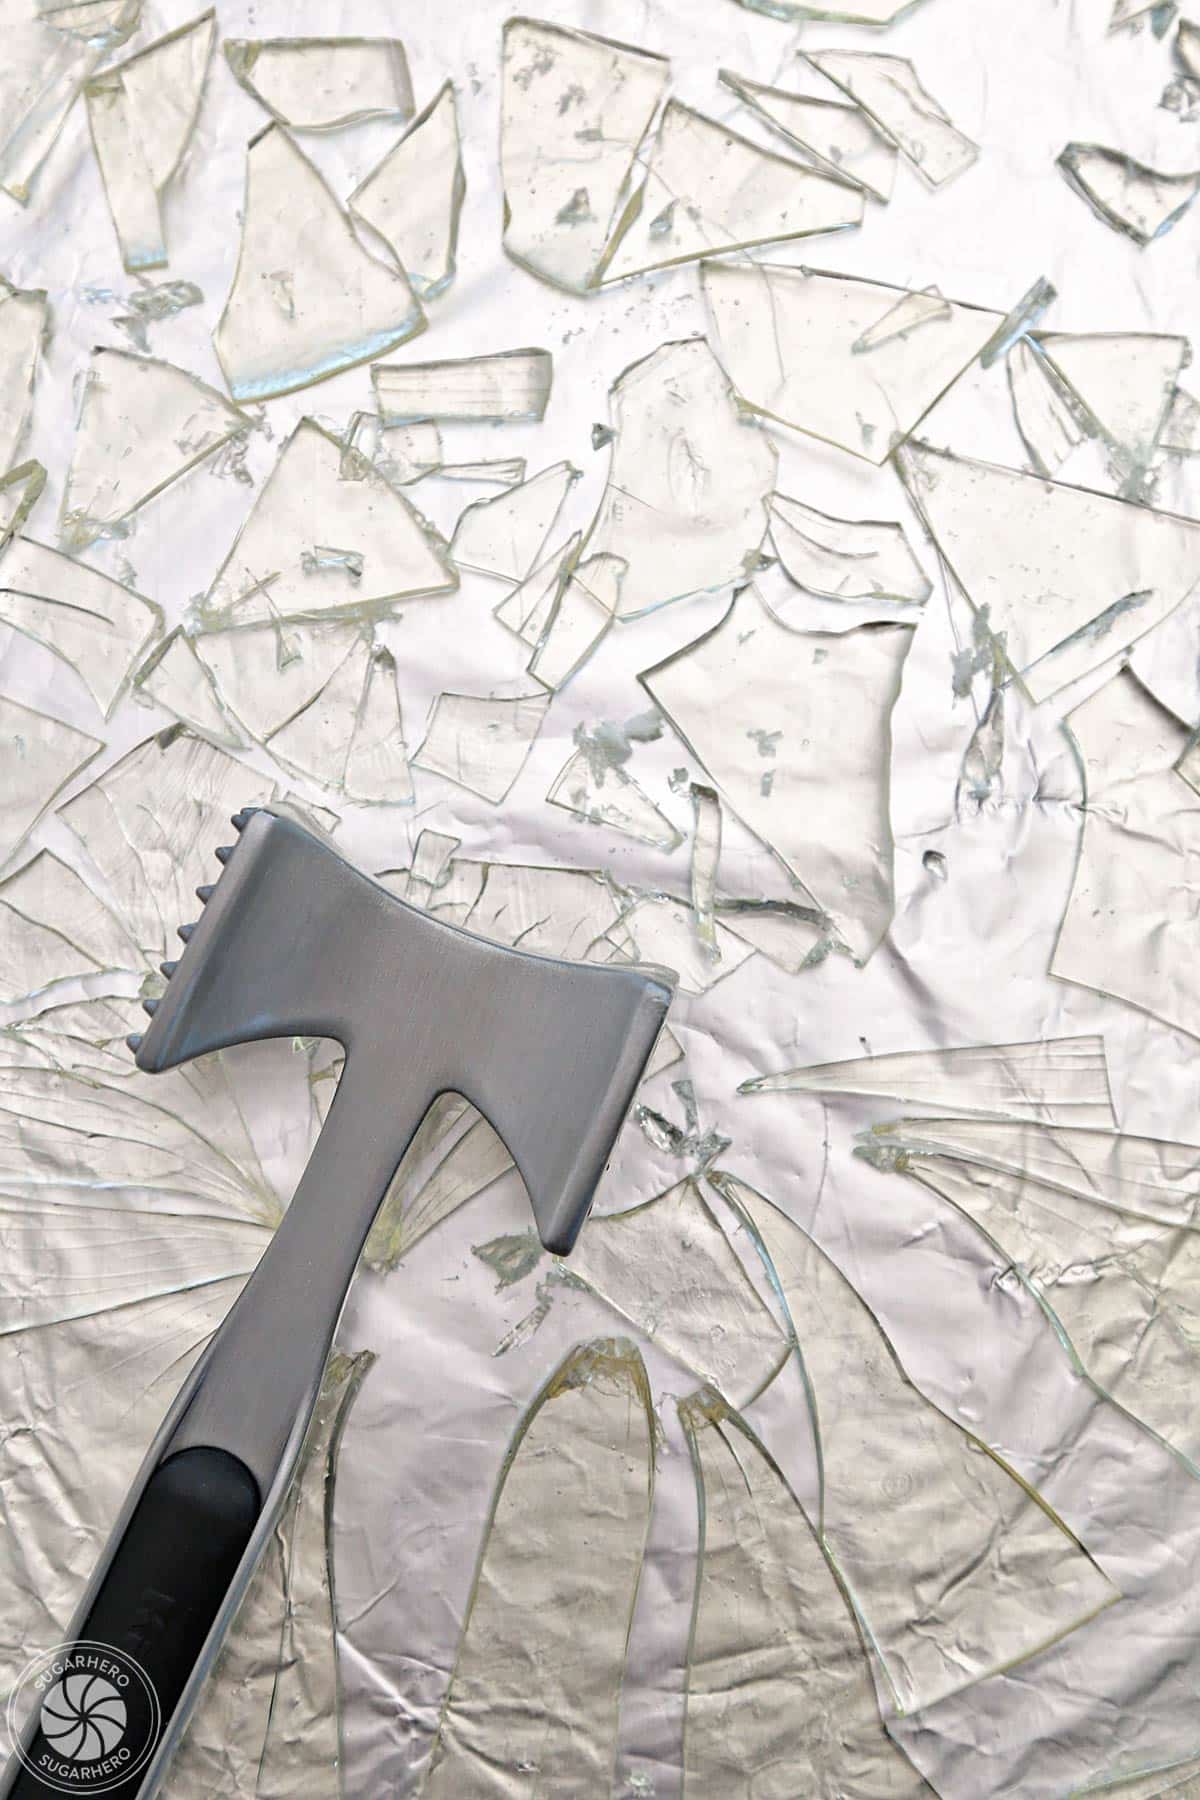
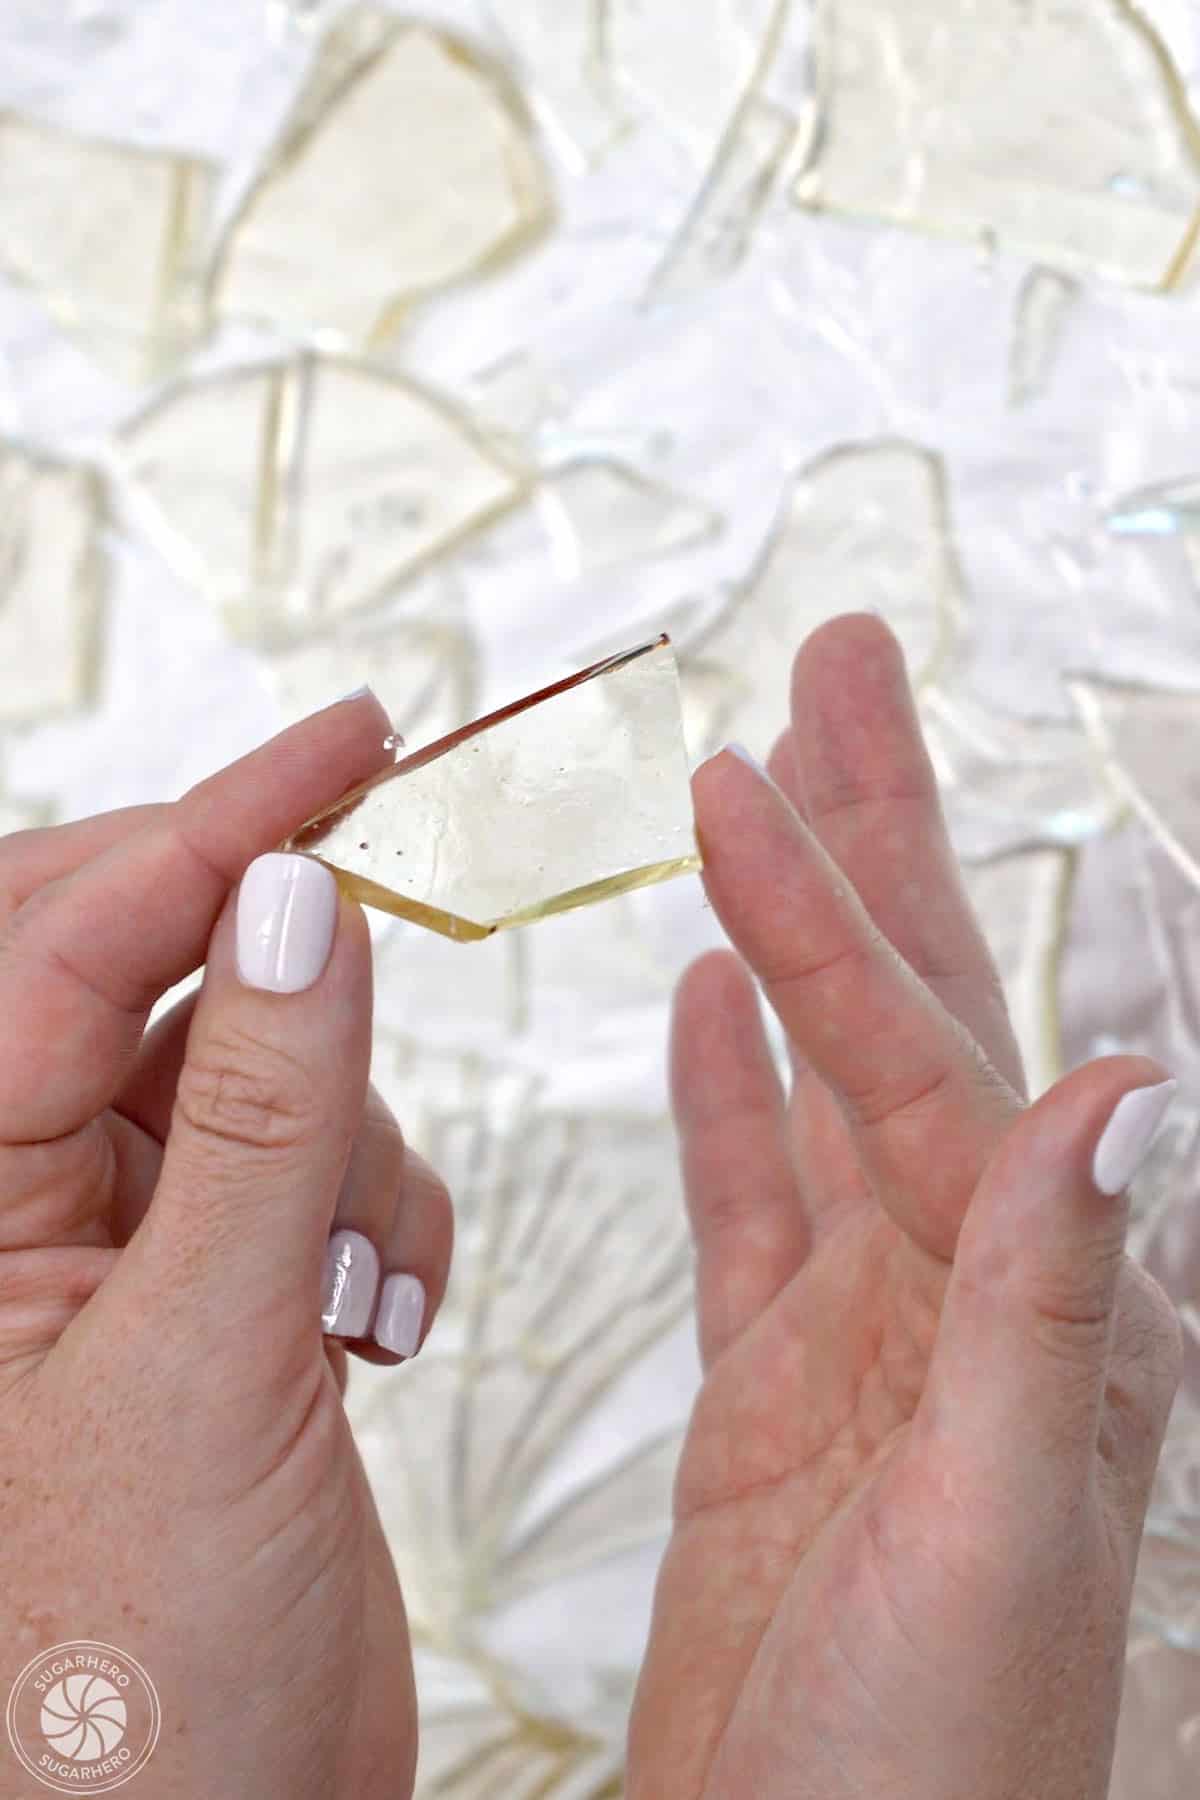
- Break: Once set, break the candy into jagged pieces with a kitchen mallet (or other kitchen tool).
Make the Edible Blood
- Combine sweetened condensed milk and coloring: Pour 1/2 cup of sweetened condensed milk into a bowl, then add a generous squirt of red gel food coloring.
- Stir together: Stir until the milk is a vivid red color. Add more coloring if desired, until you get a shade you like.

Decorate the cupcakes
- Prep piping bags: Fill a piping bag with a large closed star piping tip with white buttercream. Then fill another piping bag (or zip-top plastic bag) with the bloody topping.
- Frost and top with shards: Pipe a swirl of white frosting on each cupcake, and insert a few shards of glass candy.
- Drizzle topping: Snip a small hole in the tip of the piping bag. Drip the blood topping over the glass shards so that it covers the top of each cupcake. Enjoy!

🍬 Candy Making Tips
Candy making is part art, part science (and all delicious!). If you’re new to making candy and want more in-depth information about making edible glass, using a candy thermometer, or making candy at high altitudes, check out these helpful posts:


💡 FAQs
Try this easy hack if you don’t have piping bags and tips. Fill a Ziplock bag with frosting, and cut off one of the corners to pipe frosting through. The size of the corner you cut off will be in proportion to the size of the frosting stream you want to pipe. You won’t be able to get the same ridged effect you see in the pictures, but you can still make a nice big swirl!
Make the cupcakes and frosting in advance: If you want to make the cupcakes in advance, they can be topped with the white frosting and then stored in the refrigerator in an airtight container for up to a week. Finish the cupcakes with glass shards and blood topping just before serving. Allow chilled cupcakes to come to room temperature before serving for best taste and texture.
Make the glass candy in advance: The glass shards can also be made up to 7 days in advance and stored in an airtight container in a dry location at room temperature. The candy will become sticky in humid climates and might not store well for more than 2 or 3 days. Try placing silica gel packets in the container with the candy to help absorb excess moisture.
Store extras in an airtight container at room temperature for 2-3 days. Keep in mind that the candy glass will become sticky the longer it sits in contact with the frosting.
Edible Sugar Glass 30 Oct 2025 12:30 PM (7 months ago)
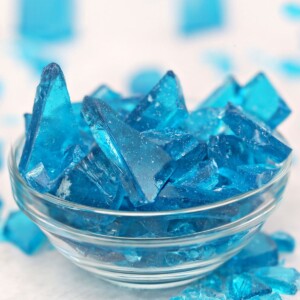
Create stunning edible decorations with this easy sugar glass recipe! Learn how to make clear, hard candy perfect for adding a unique touch to your desserts.
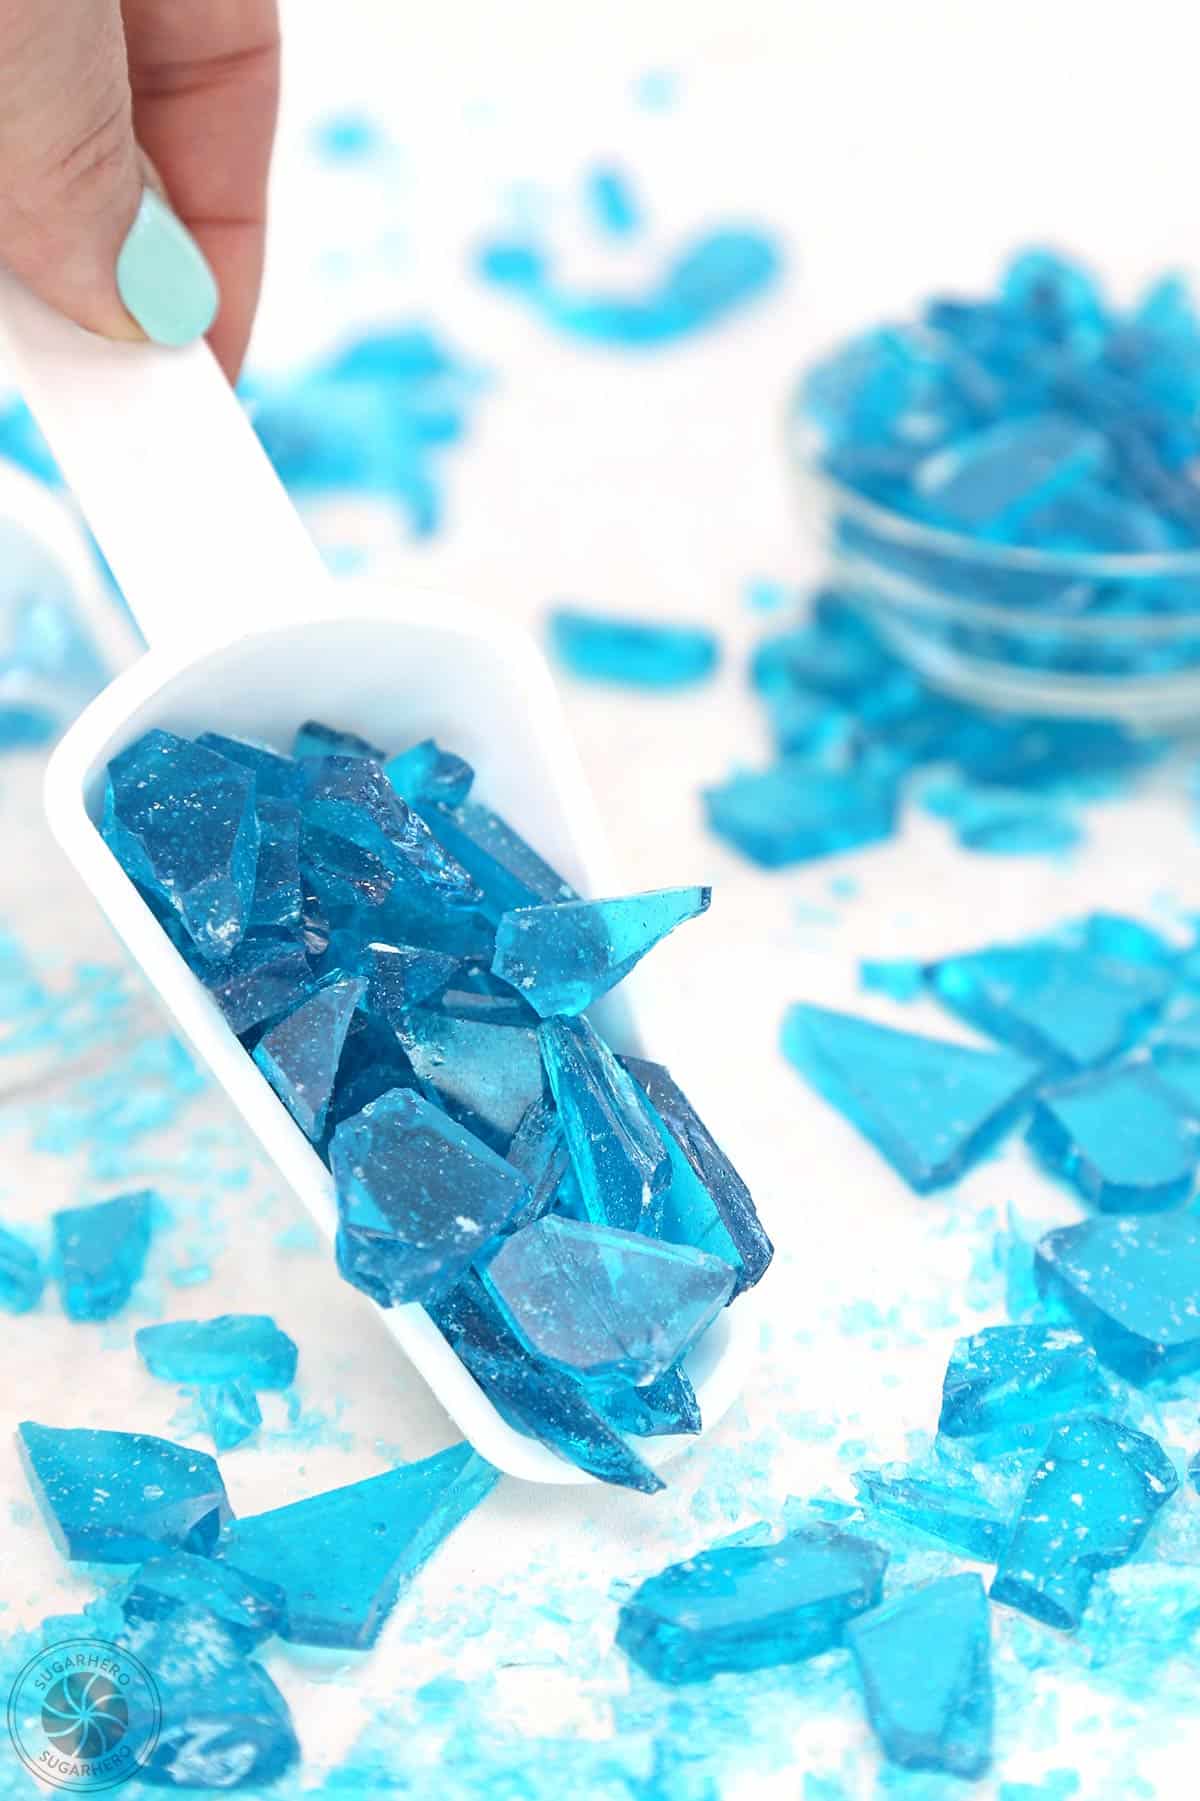
🪟 My Foolproof Glass Sugar Recipe
Have you ever been impressed and inspired by realistic looking desserts with candy windows or shards of glass? Yeah, me too!
This glass sugar recipe is my go-to when I want to make windows for gingerbread houses, creepy Halloween cupcakes with shards of broken glass, or even rock candy inspired by Breaking Bad. It’s an incredibly versatile recipe that can be colored and flavored in so many fun, beautiful, and tasty combinations!
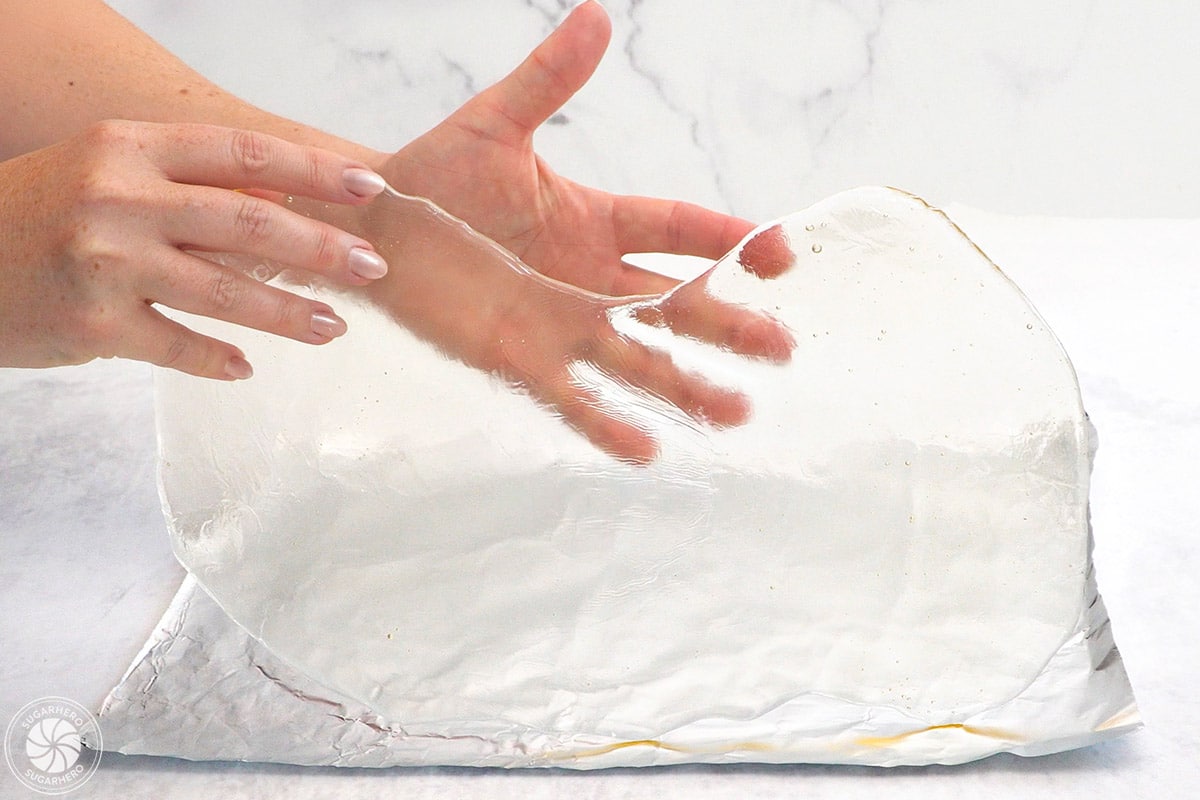
It can also be shaped to fit your project needs. Pour it onto a flat surface to break into smaller pieces, shape it in a mold, or pour it directly into cut-out cookies or gingerbread house panels to make windows. The possibilities are endless!
💎 How to Make Flawless Sugar Glass
The good news: making edible sugar glass is actually pretty easy to do with a little expert guidance — even for beginning candy makers! To be successful you’ll need to:
- Read the recipe before beginning. This probably sounds obvious, but you’d be surprised how many people forget to do this! When the candy hits a certain temperature you’ll need to move very fast. It’s critical to know what you need to do next, instead of getting stuck reading the next step.
- Use a candy thermometer. There will be more on this below, but this is your #1 tool for success.
- Avoid common mistakes: When people have trouble making glass candy, it is overwhelmingly caused by a few very common mistakes. Please take the time to read through the Tips for Success below to avoid them.
More Decoration inspiration
Getting to decorate cakes, cupcakes, and fancy desserts is one of the best parts of baking. Find all kinds of inspiration with our collection of Decorating Tutorials.
You’ll find fun and creative ideas like How to Make Chocolate Leaves, Giant Agate Candy, Fondant Roses, and so much more!
Table of Contents
🧾 What You’ll Need
Ingredients
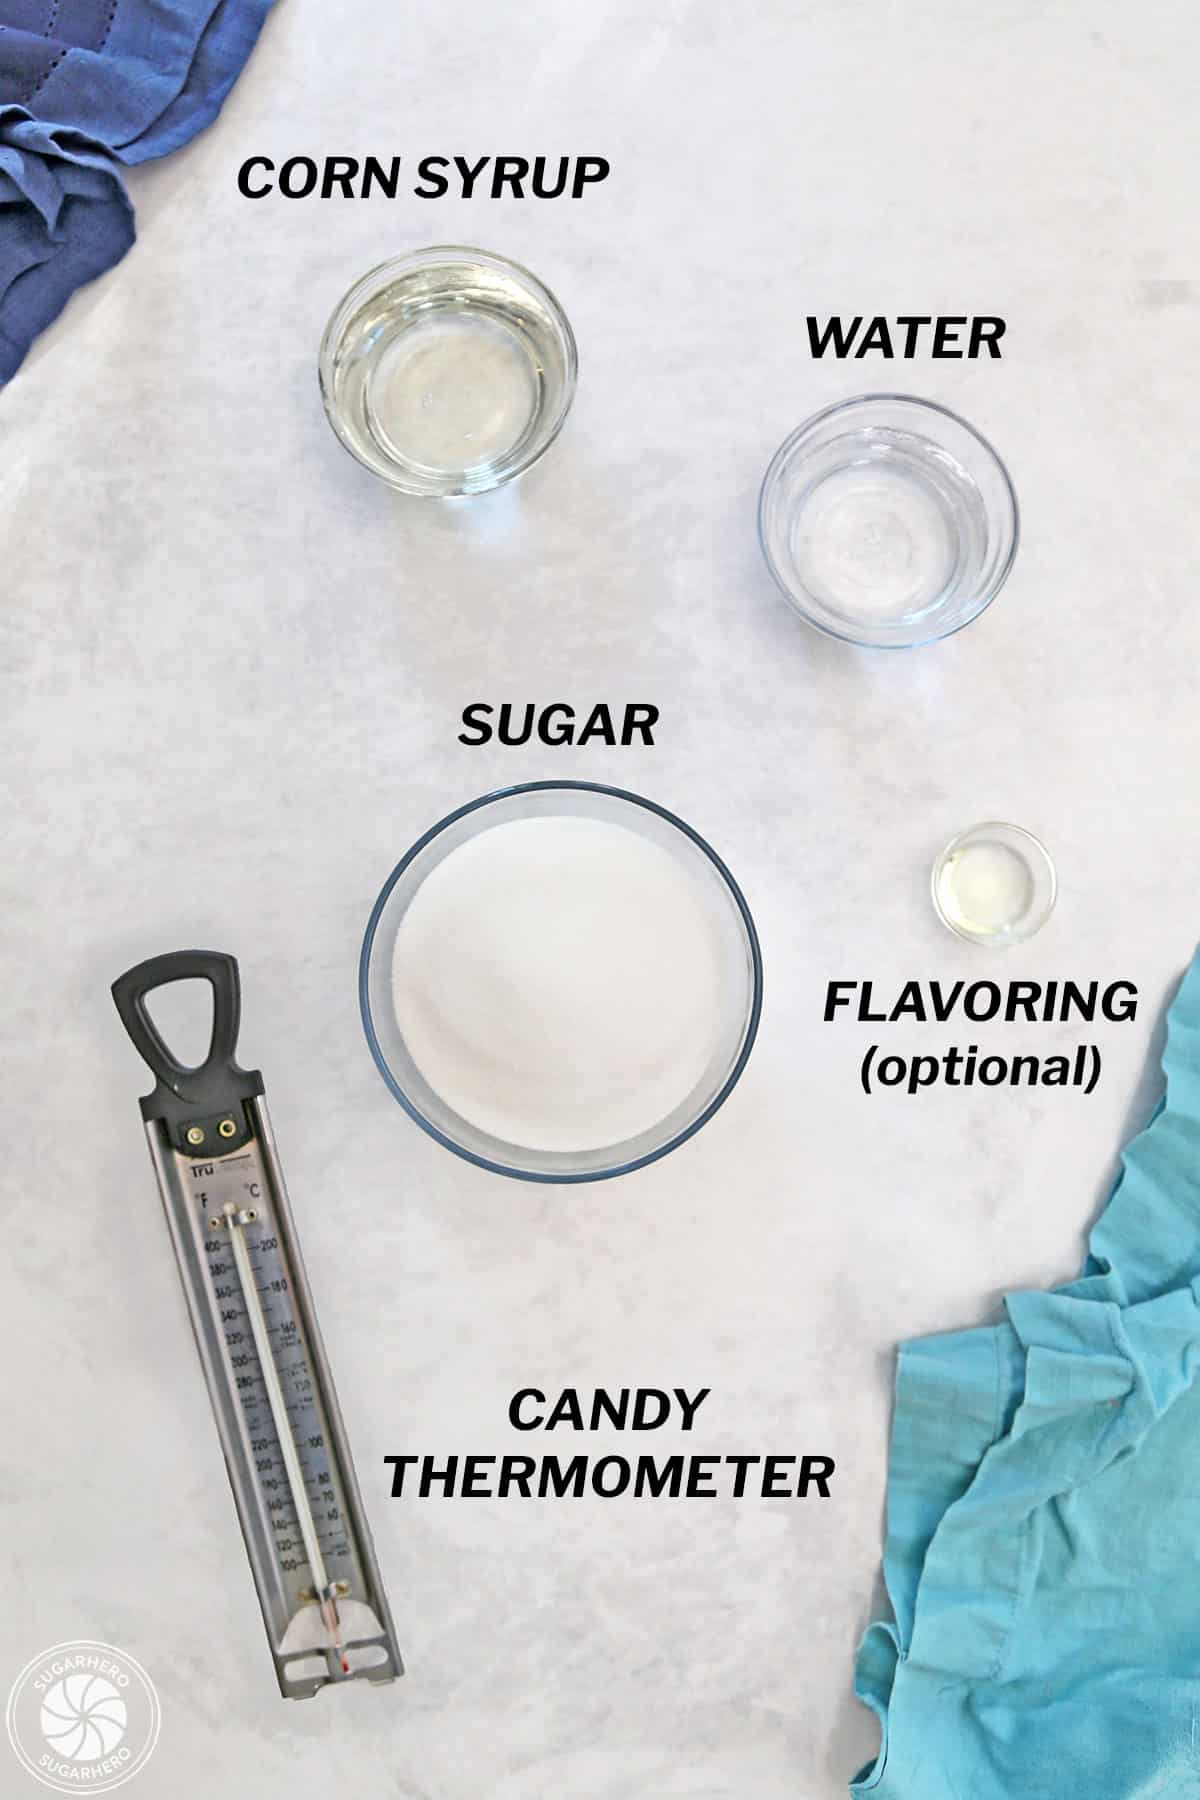
You’ll only a need a few ingredients to make beautiful edible sugar glass. Here’s a few tips to help you select the right items. Full ingredient amounts are listed in the recipe card. (Links are affiliate links and I earn a small commission from qualifying purchases.)
- Water
- Light corn syrup: Adding light corn syrup to the candy mixture helps prevent the sugar from crystallizing. You can also use golden syrup or glucose syrup if you can’t find it. Note: golden syrup has a yellow tinge and will influence the color of your candy.
- Granulated sugar: Surpisingly, not all sugar is created equal. Granulated sugar can be made from cane sugar or beets. I strongly prefer using 100% cane sugar — in my experience, it gives more reliable, consistent results. If your sugar package does not specify, it’s likely made from beet sugar or a mix of both.
- Flavoring extract: If your glass is just for show, don’t worry about adding flavoring. But if you think people might nibble on it, I recommend using a bit of clear extract when making your sugar glass. Here’s a few flavors to consider: Cool Crème de Menthe, Honey, Key Lime, Pineapple, Lemonade, and Wintergreen.
- Gel food coloring: If you plan to color your edible glass, it’s best to use gel food coloring because it’s highly concentrated. I love Americolor brand gel food coloring.
Equipment
You’ll likely have most of what you need in your home kitchen. Here’s a few tools to consider using for this project. (Links are affiliate links and I earn a small commission from qualifying purchases.)
- Baking sheet: Once the sugar syrup has come to the right temperature, it will be poured onto a flat surface like a standard baking sheet.
- Non-stick foil: To make removing the candy glass easy, make sure to line your baking sheet with non-stick foil or spray it well with non-stick spray.
- Medium saucepan: The sugar syrup will get very hot and will bubble up a bit. Use a medium saucepan (about 3-4 quarts) so that the syrup doesn’t boil over.
- Pastry brush: Make sure to have a pastry brush on hand so that you can wipe away sugar stuck to the sides of the pan. This is a really important step that helps to prevent crystallization.
- Candy thermometer: The most important tool for making this recipe is a candy thermometer. Getting the temperature correct for the sugar syrup will make or break your candy.
🌡️ Pro Candy Thermometer Tips 🌡️
- You can buy an inexpensive candy thermometer from the grocery store (like this model). If you will be making candy regularly, it’s worth investing in a nicer thermometer. I love my ChefAlarm, because it alerts me when I’m nearing my finished temperature.
- If you are just getting started with candy making and are new to culinary thermometers, head over to this step-by-step guide 👉 How to Use A Candy Thermometer. It’s got tons of pro tips!
- For those who are more familiar with using a candy thermometer, it might be time to do some maintenance! Check out 👉 How to Test and Calibrate a Thermometer so that your candy thermometer is in tip-top shape.
- Did you know your environment can impact the way your candy thermometer is read? If you live above sea level, it’s also super important to learn 👉 Essential Tips & Techniques for Candy Making at High Altitude.
Ready to Make This?
- Get the recipe below 👇👇
- Scroll below the recipe for step-by-step photos
- Read important FAQs and more
❤️ More Hard Candy Recipes

Leave a Review!
If you make this recipe, let us know! Leave a ⭐️⭐️⭐️⭐️⭐️ rating on the recipe below, and leave a comment, take a photo and tag me on Instagram @elabau, or use #sugarhero on IG!
Edible Sugar Glass
Ingredients
- 4 oz water (½ cup)
- 8.25 oz light corn syrup (3/4 cup)
- 14 oz granulated sugar (2 cups)
- 2 tsp clear flavoring extract if desired
- Gel food coloring optional, I use Americolor brand
- Candy thermometer
Instructions
- Prepare baking sheet: Line a baking sheet with foil and spray it with nonstick cooking spray, or use non-stick foil.
- Heat water, corn syrup, and sugar: In a medium saucepan, combine 4 fl oz (1/2 cup) water, 8.25 fl oz (3/4 cup) corn syrup, and 14 oz (2 cups) granulated sugar. Place the pan over medium-high heat, and stir until the sugar dissolves.
- Wipe pan with pastry brush: Once it comes to a simmer, brush down the inside walls of the pan with a wet pastry brush to prevent sugar crystals from forming. Insert a candy thermometer.
- Cook without stirring: Continue to cook the candy without stirring until it reads 290° F (143° C) on the thermometer. Watch the temperature carefully–a lower temperature might produce sticky candy, while a higher temperature runs the risk of producing green candy!
- Remove from heat: Once at 290°, take the pan off the heat and let it sit for a few moments, until rapid bubbles stop breaking on the surface.
- Add flavoring and coloring: Add 2 tsp clear flavoring and a drop or two of food coloring, and stir everything together.
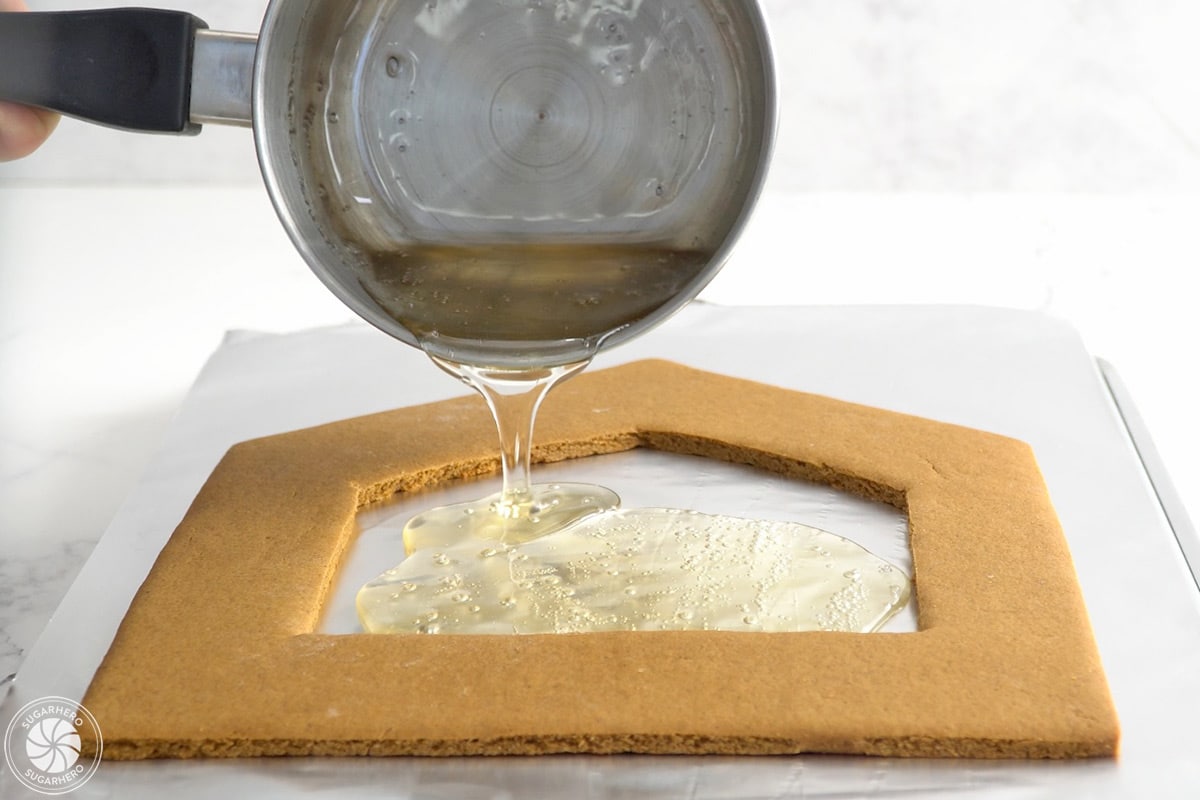
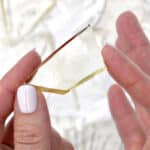
- Pour candy to set: Pour the candy onto the prepared baking sheet and spread it into a thin layer. Alternately, pour the candy into a mold or the center of a cookie where you'd like a window. Let it set completely at room temperature.
- Break: Once set, break it into small pieces, remove it from the candy molds, or gently move the filled cookies to finish your project. Enjoy!
- Store: Place edible glass candy in an airtight container in a dry location. Store at room temperature for up to 7 days. In humid climates, silica gel packs can be placed in the container with the candy to help absorp excess moisture.
Measuring Tips
Our recipes are developed using weight measurements, and we highly recommend using a kitchen scale for baking whenever possible. However, if you prefer to use cups, volume measurements are provided as well. PLEASE NOTE: the adage “8 oz = 1 cup” is NOT true when speaking about weight, so don’t be concerned if the measurements don’t fit this formula.
Nutrition
📸 Photo Tutorial: How to Make Edible Sugar Glass
With this helpful photo tutorial, learn how to easily make Edible Sugar Glass at home. You can print these instructions from the recipe card above.
- Combine water and corn syrup: Add 1/2 c water and 3/4 c corn syrup to a medium saucepan, and place the saucepan over medium-high heat.
- Add sugar: Pour in 2 c of granulated sugar, and stir until it fully dissolves. Bring the mixture to a simmer.
- Wipe pan with pastry brush: Once simmering, use a wet pastry brush to wipe down the inside walls of the pot. This helps prevent sugar crystals from forming on the sides of the pan and making the candy gritty.
- Cook without stirring: Insert a candy thermometer. Continue to cook the candy without stirring until it reads 290° F (143° C). Be precise with the temperature. Being off by a few degrees can make a big difference.
- Remove from heat: As soon as the mixture reaches 290° F, take the pan off the heat and wait until the rapid bubbles stop breaking on top of the syrup.
- Finish the candy: If desired, add the flavoring and a drop or two of food coloring. Stir to combine.
- Pour candy to set: Pour the candy onto a baking sheet lined with foil in a thin layer. Alternately, pour it into a mold or into the center of a cookie where you’d like a window. Let it sit at room temperature until completely set.
- Enjoy: Once set, break the candy glass into small pieces, pop out the candy molds, or gently move the filled cookies to finish your project. Enjoy!
💡FAQs for Success
Candy making is a precise art. These FAQs address the most common difficulties people have with making sugar glass. I recommend reading through the answers to these questions before getting started to give yourself a better chance of being successful right from the start.
If the candy is initially fine but later becomes sticky, the problem is probably humidity. Hard candy works best in a dry environment because sugar soaks up moisture from the air around it. You’ll notice that hard candy quickly becomes wet and sticky in humid environments. Don’t attempt to make glass candy on a humid or stormy day.
Edible glass candy should always be stored in an airtight container at room temperature, to keep it as dry as possible. You can also buy silica gel packets to store with your candy to absorb moisture and keep it from becoming sticky.
If the candy is too soft or won’t set, it has not been cooked long enough. If you used a candy thermometer and are still having problems, test the accuracy of your thermometer, and double-check that you used the correct ingredient quantities and cooking temperature.
If your glass candy is opaque instead of translucent, or crumbly/sandy instead of hard/crunchy, then it has crystallized during the cooking process. The candy is still edible and will taste fine, but the appearance and texture may not be what you want.
Crystallization happens when sugar crystals form during the cooking process. This can happen due to stirring too much while it cooks (once it comes to a boil, you should not be stirring it at all), or not wiping down the sides of the pan with a wet brush to remove the crystals, or just accidental stray sugar crystals on the candy thermometer, spatula, or pan. The corn syrup in the recipe helps prevent crystals from forming, so if you substitute other ingredients for the corn syrup, you might find that crystallization is more likely.
Sugar glass should be stored at room temperature in an airtight container for up to 7 days. I don’t recommend refrigerating or freezing edible glass because condensation can cause the candy to become sticky and gooey. If you live in a humid climate, you may find that the candy becomes sticky even at room temperature, in which case you should plan on eating it in 2-3 days. It can also be helpful to store the candy with silica gel packets in very humid climates to help absorb excess moisture.


3-Ingredient Pumpkin Chocolate Chip Cookies 23 Oct 2025 10:56 PM (7 months ago)
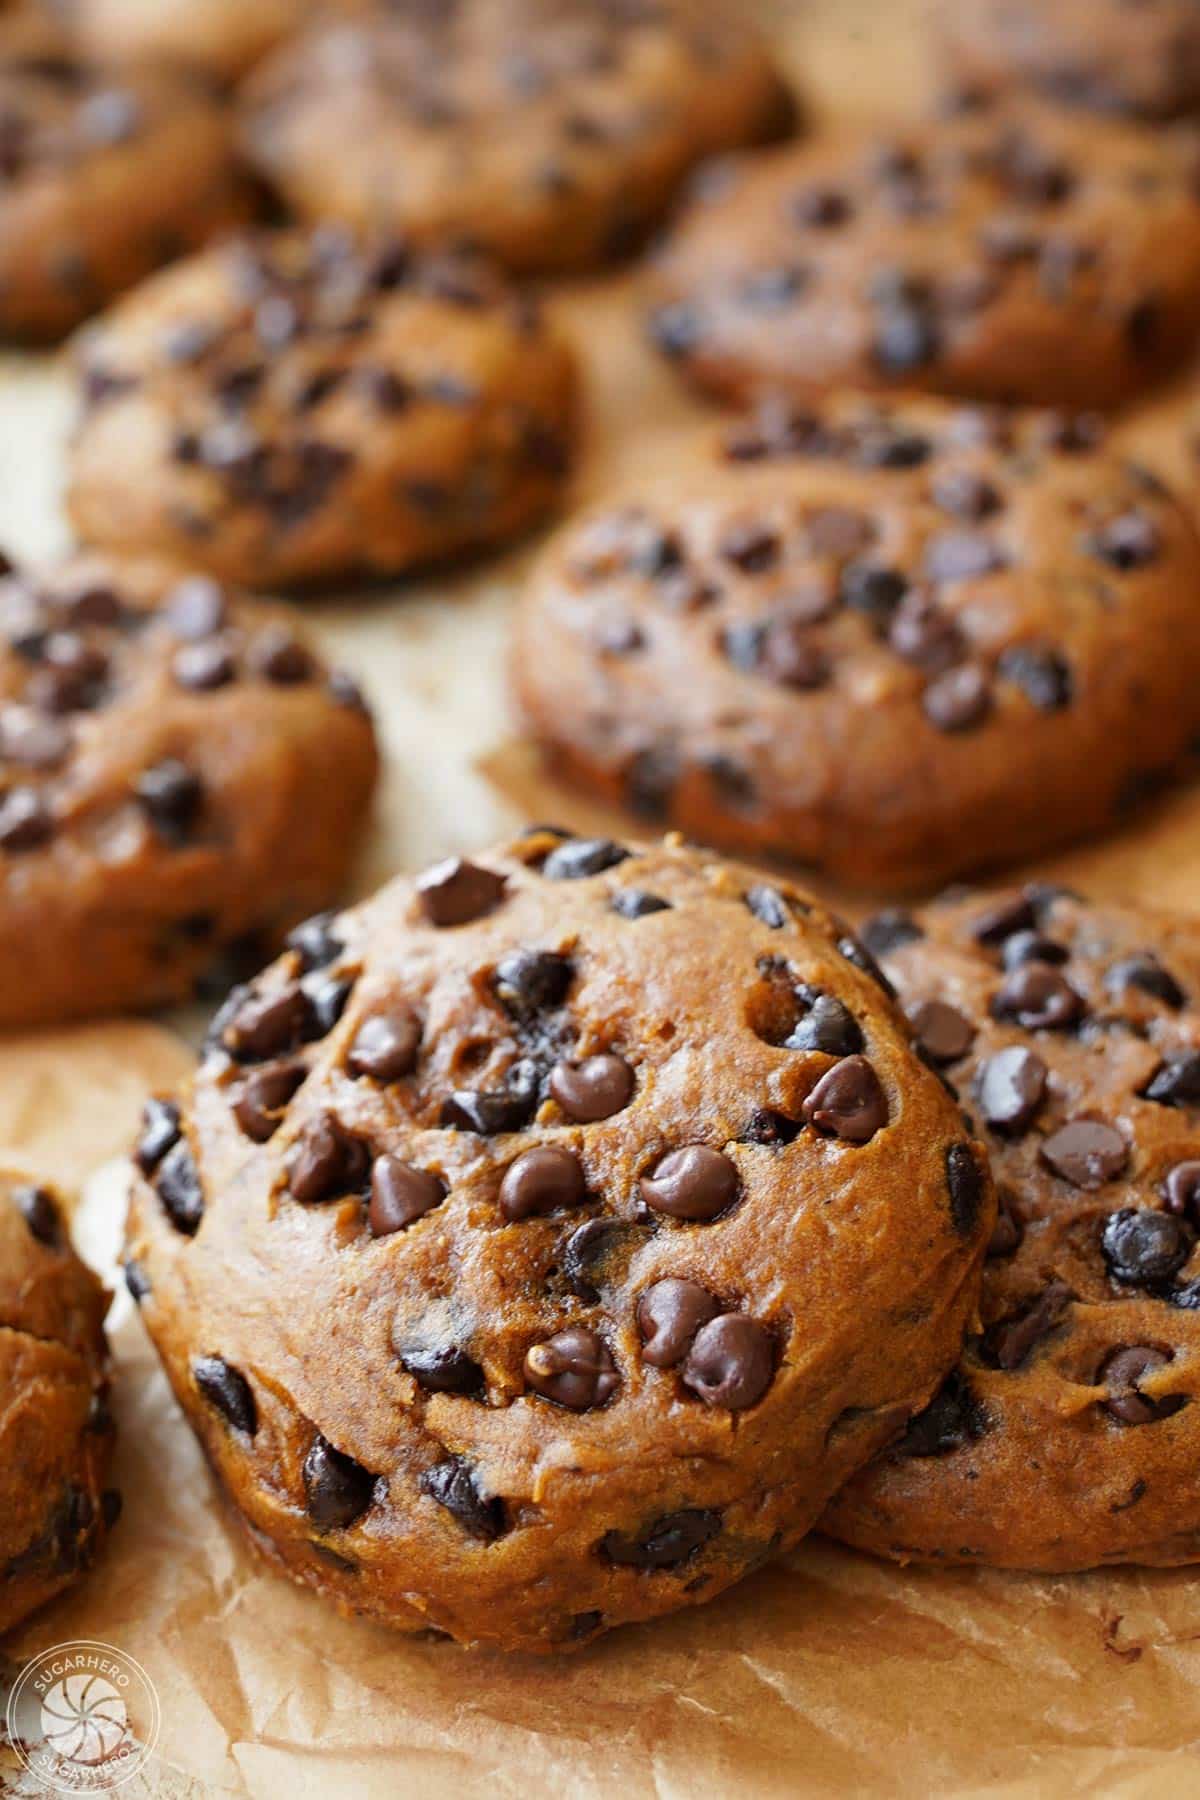
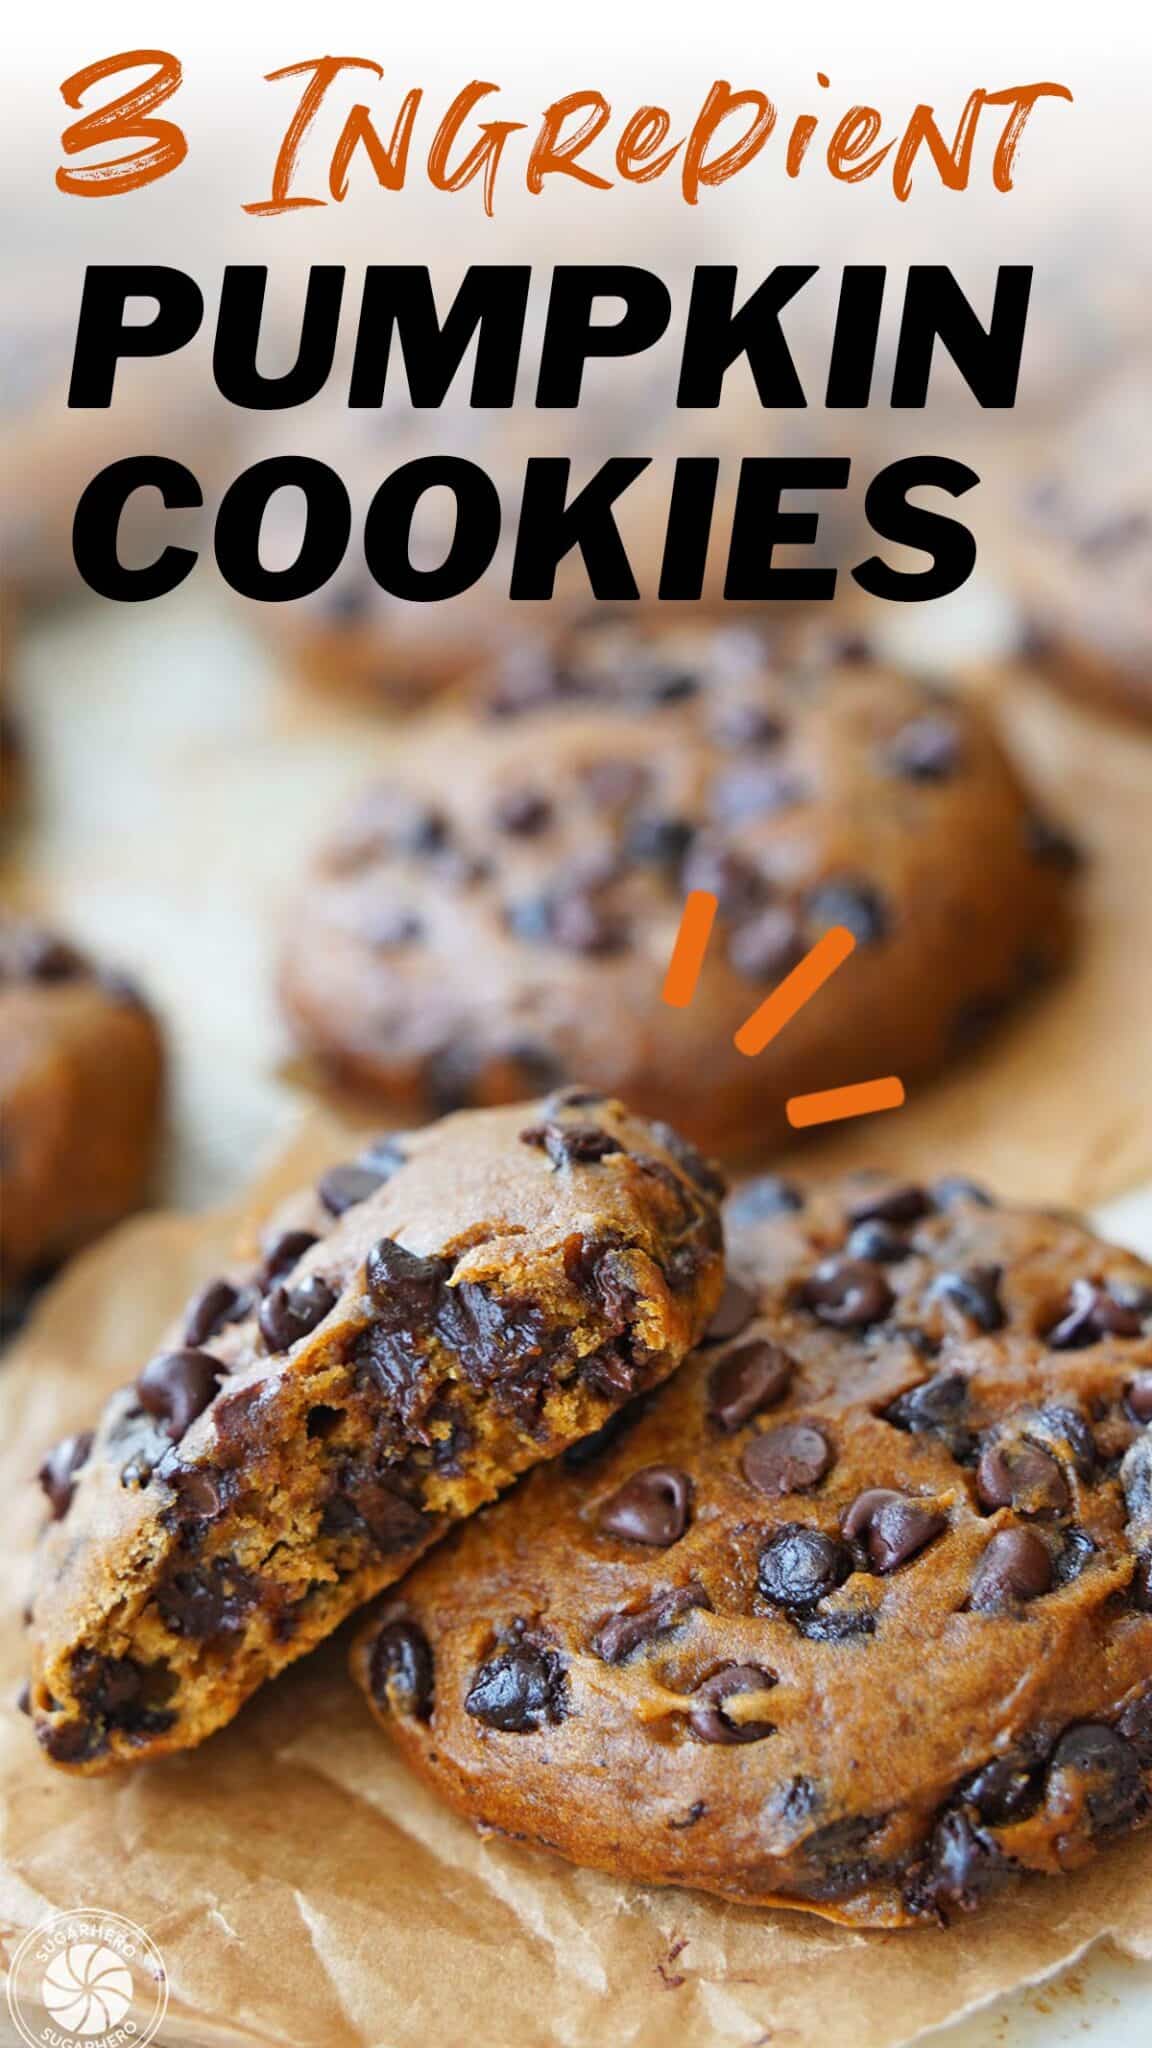
Looking for a quick and easy fall dessert? Look no further! 3-Ingredient Pumpkin Chocolate Chip Cookies require just 3 common pantry ingredients. You can whip these up in no time!

🍪 3-Ingredient Pumpkin Chocolate Chip Cookies With Cake Mix
Get your pumpkin spice fix in minutes with these ridiculously easy 3-ingredient cookies!
I love any and all kinds of pumpkin desserts, but these cookies hold a special place in my heart. They’re perfect because whenever a craving strikes, I can go from no cookies (sad face) to warm cookies fresh from the oven (ecstatic drooling face) using just 3 things:
- spice cake mix
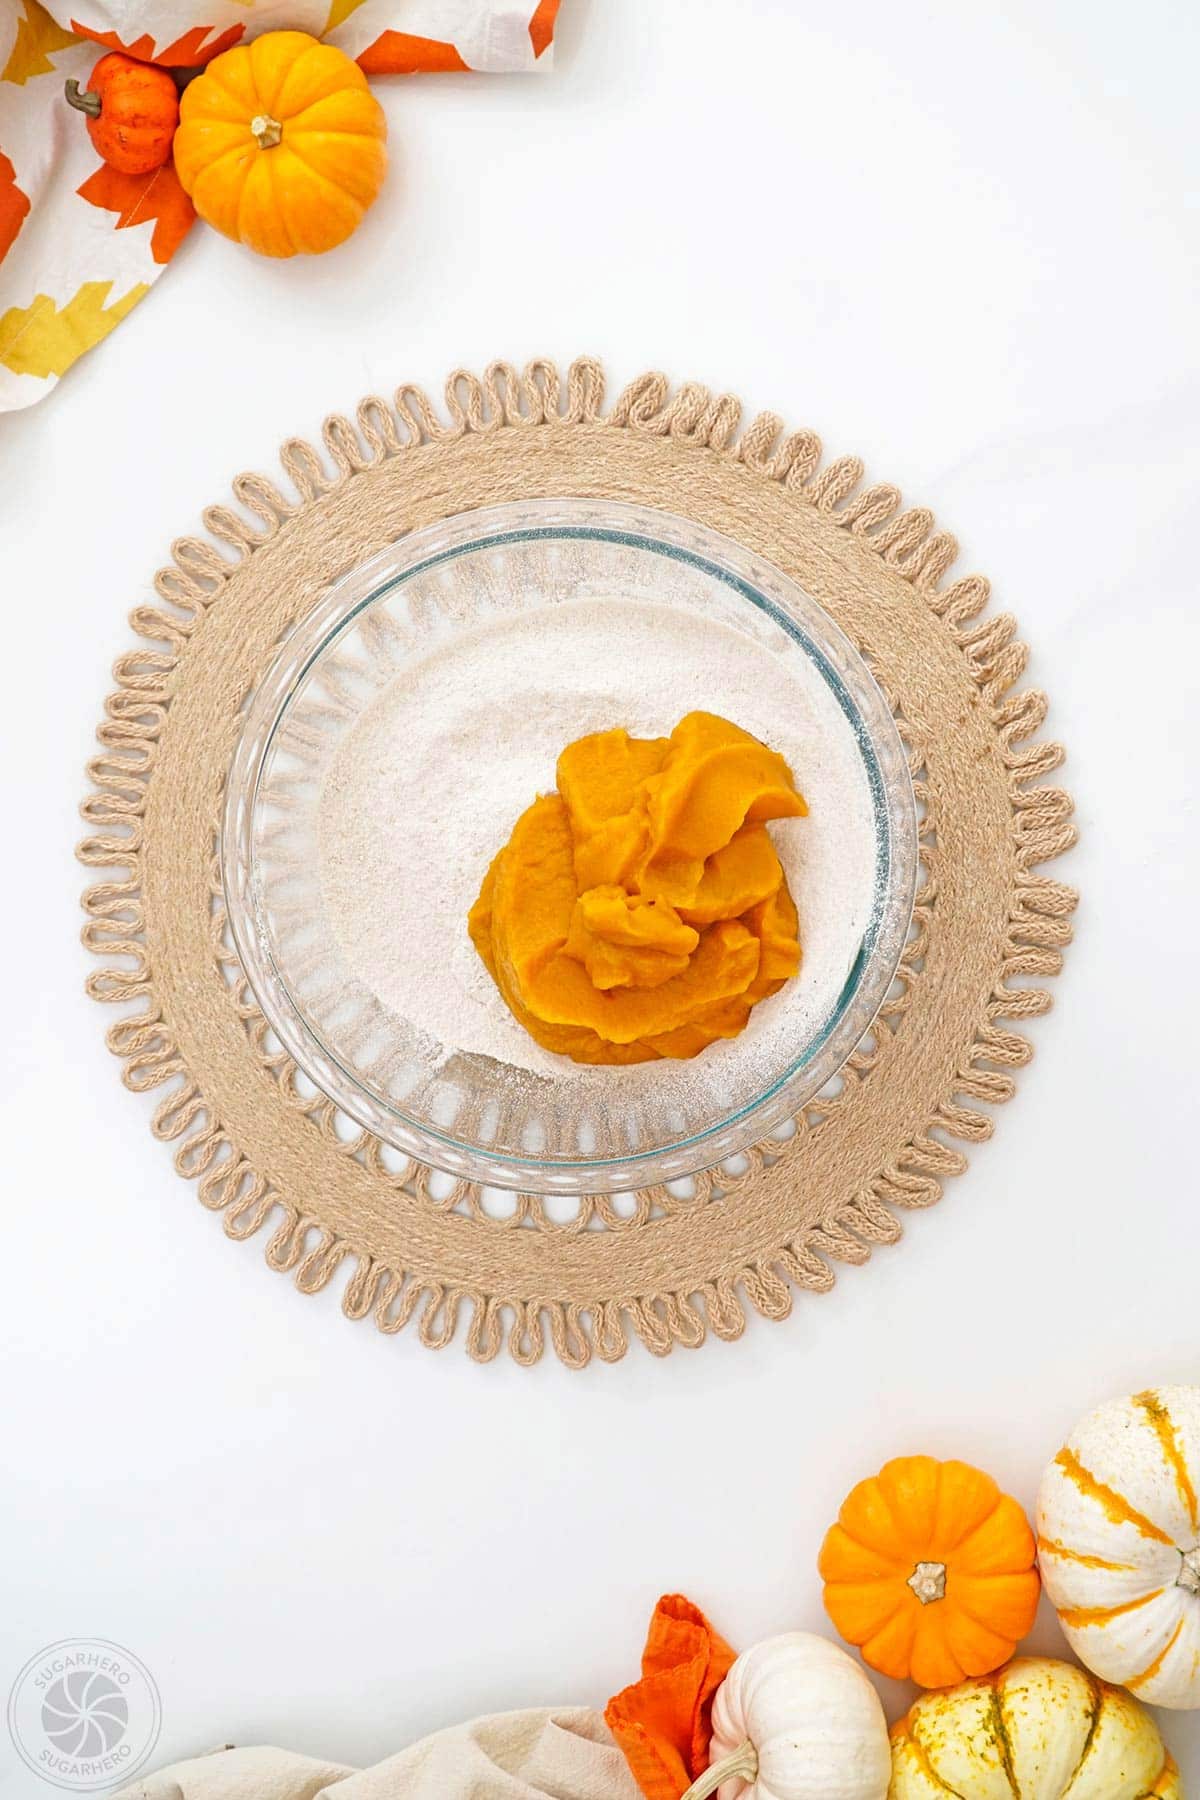
- pumpkin puree
- miniature chocolate chips
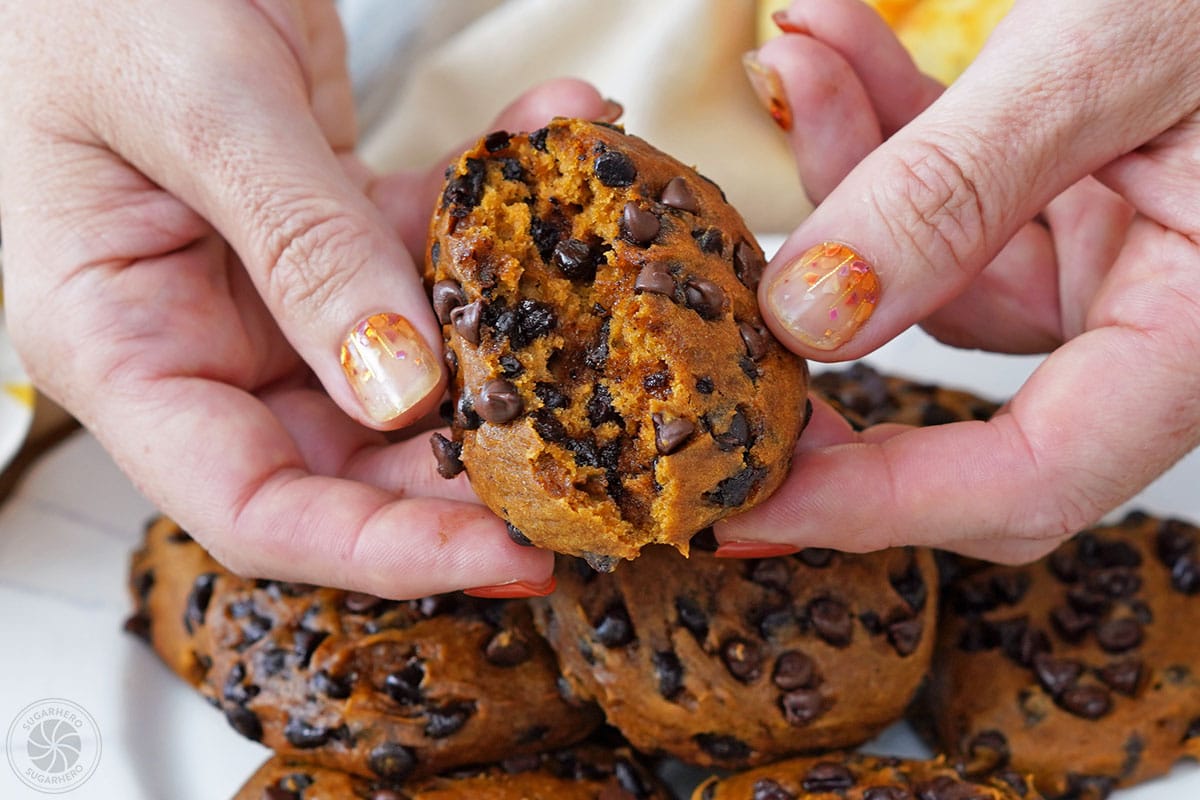
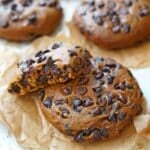
They Pumpkin Cake Mix Cookies have a strong pumpkin flavor, cozy fall spices, and the most perfect puffy cake-like texture. If you’re a fan of soft and tender cake cookies that are ready in less than 30 minutes, then this is the recipe for you!
More Pumpkin + Chocolate Treats
If you need more pumpkin chocolate chip inspiration, check out my Pumpkin Chocolate Chip Bread, Pumpkin Chocolate Chip Bars, traditional Pumpkin Chocolate Chip Cookies, and Pumpkin Chocolate Chip Cake!
Table of Contents
🧾What You’ll Need

Ingredients
It should come as no surprise that the ingredient list is verrrry short. Here’s what you need to know! And remember, full ingredient amounts can be found below in the recipe card.
(Links are affiliate links and I earn a small commission from qualifying purchases.)
- Spice cake mix: I most often use Duncan Hines Spice Cake Mix for these cookies because that’s what’s easily available to me, but you can use another brand or even another flavor. Check the FAQ section for Variations.
- Pumpkin puree: Make sure to check the label! You need pure pumpkin puree, not pumpkin pie filling. I’ve used Libby’s, various store brands, and organic options from Trader Joe’s and Whole Foods, and all have worked out fine.
- Mini semi-sweet chocolate chips: For these cookies, mini chocolate chips work best. You’ll have lots of tiny bits of chocolate in each bite, and they help break up the cakey parts of the cookie. You can definitely substitute regular chocolate chips, if that’s what you’ve got.
Allergy-Friendly Cookie
“These are a favorite for our kid with an egg allergy! So easy to make and freeze.”
-Amanda
Tip: Adjust the recipe to be dairy-free and/or gluten-free with specialty baking chips and cake mixes! Keep in mind that the cookie texture may be altered with some gluten-free cake mixes, and you might need to experiment to make the cookies just right.
Equipment
The equipment needed for these cookies is almost as easy as the ingredients. You’ll likely have these items in your kitchen, but here’s a few tips to consider. (Links are affiliate links and I earn a small commission from qualifying purchases.)
- Baking sheets and parchment paper: Use good-quality aluminium baking sheets to help your cookies bake evenly, and line them with parchment paper for zero clean-up.
- Cookie scoop: I like to use a medium cookie scoop (size #40, to make sure all my cookies turn out the same size.
Ready to Make These?
- Get the recipe below 👇👇
- Scroll below the recipe for step-by-step photos
- Read important FAQs and more
🧡 More Pumpkin Desserts

Leave a Review!
If you make this recipe, let us know! Leave a ⭐️⭐️⭐️⭐️⭐️ rating on the recipe below, and leave a comment, take a photo and tag me on Instagram @elabau, or use #sugarhero on IG!
3-Ingredient Pumpkin Chocolate Chip Cookies
Ingredients
- 1 box spice cake mix or other flavor, see Note
- 15 oz canned pumpkin puree not pumpkin pie filling
- 12 oz miniature chocolate chips or regular semi-sweet chocolate chips
Instructions
- Prepare to bake: Preheat the oven to 350° F, and line your baking sheets with parchment paper.
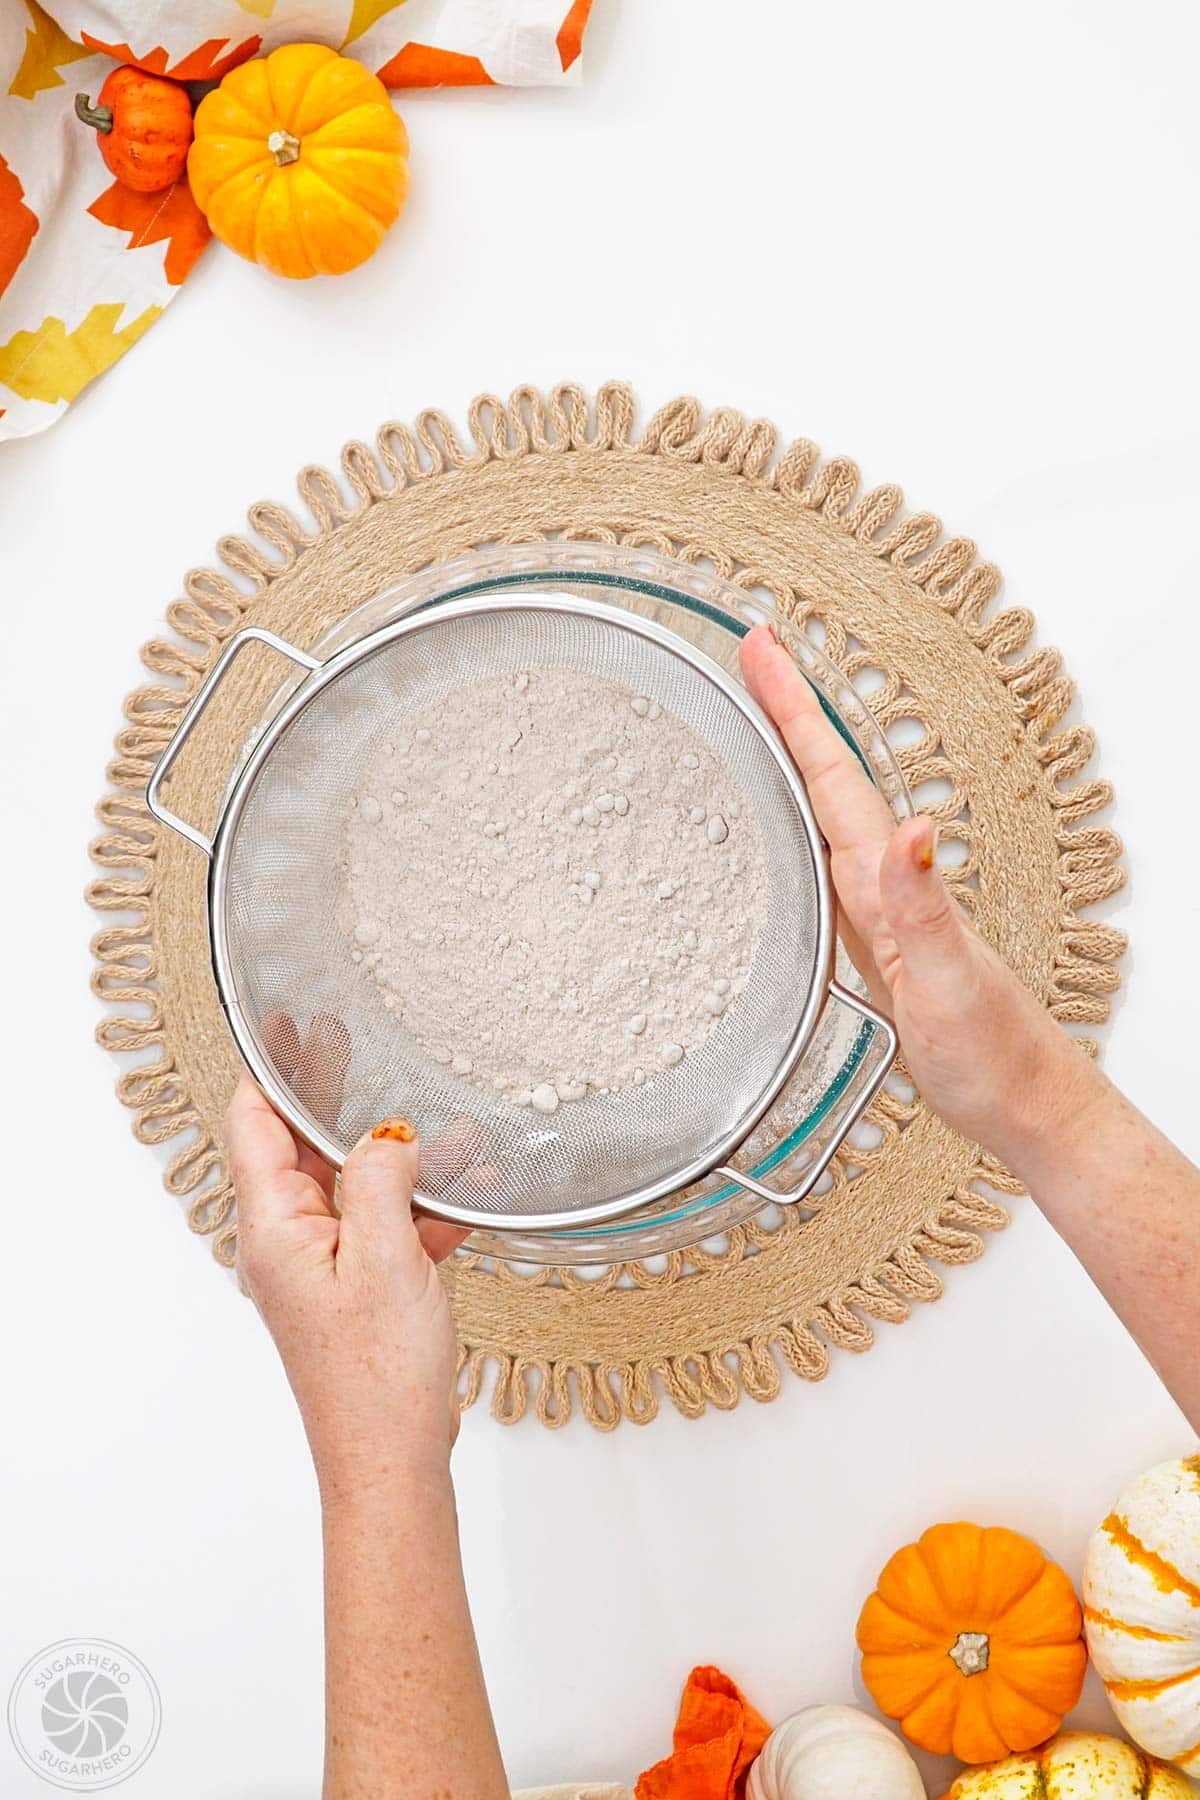
- Add cake mix: Sift the cake mix into a large bowl.
- Mix in pumpkin puree: Add the can of pumpkin puree, and stir well with a spatula until the cake mix is moistened and there are no small flour lumps left in the dough.
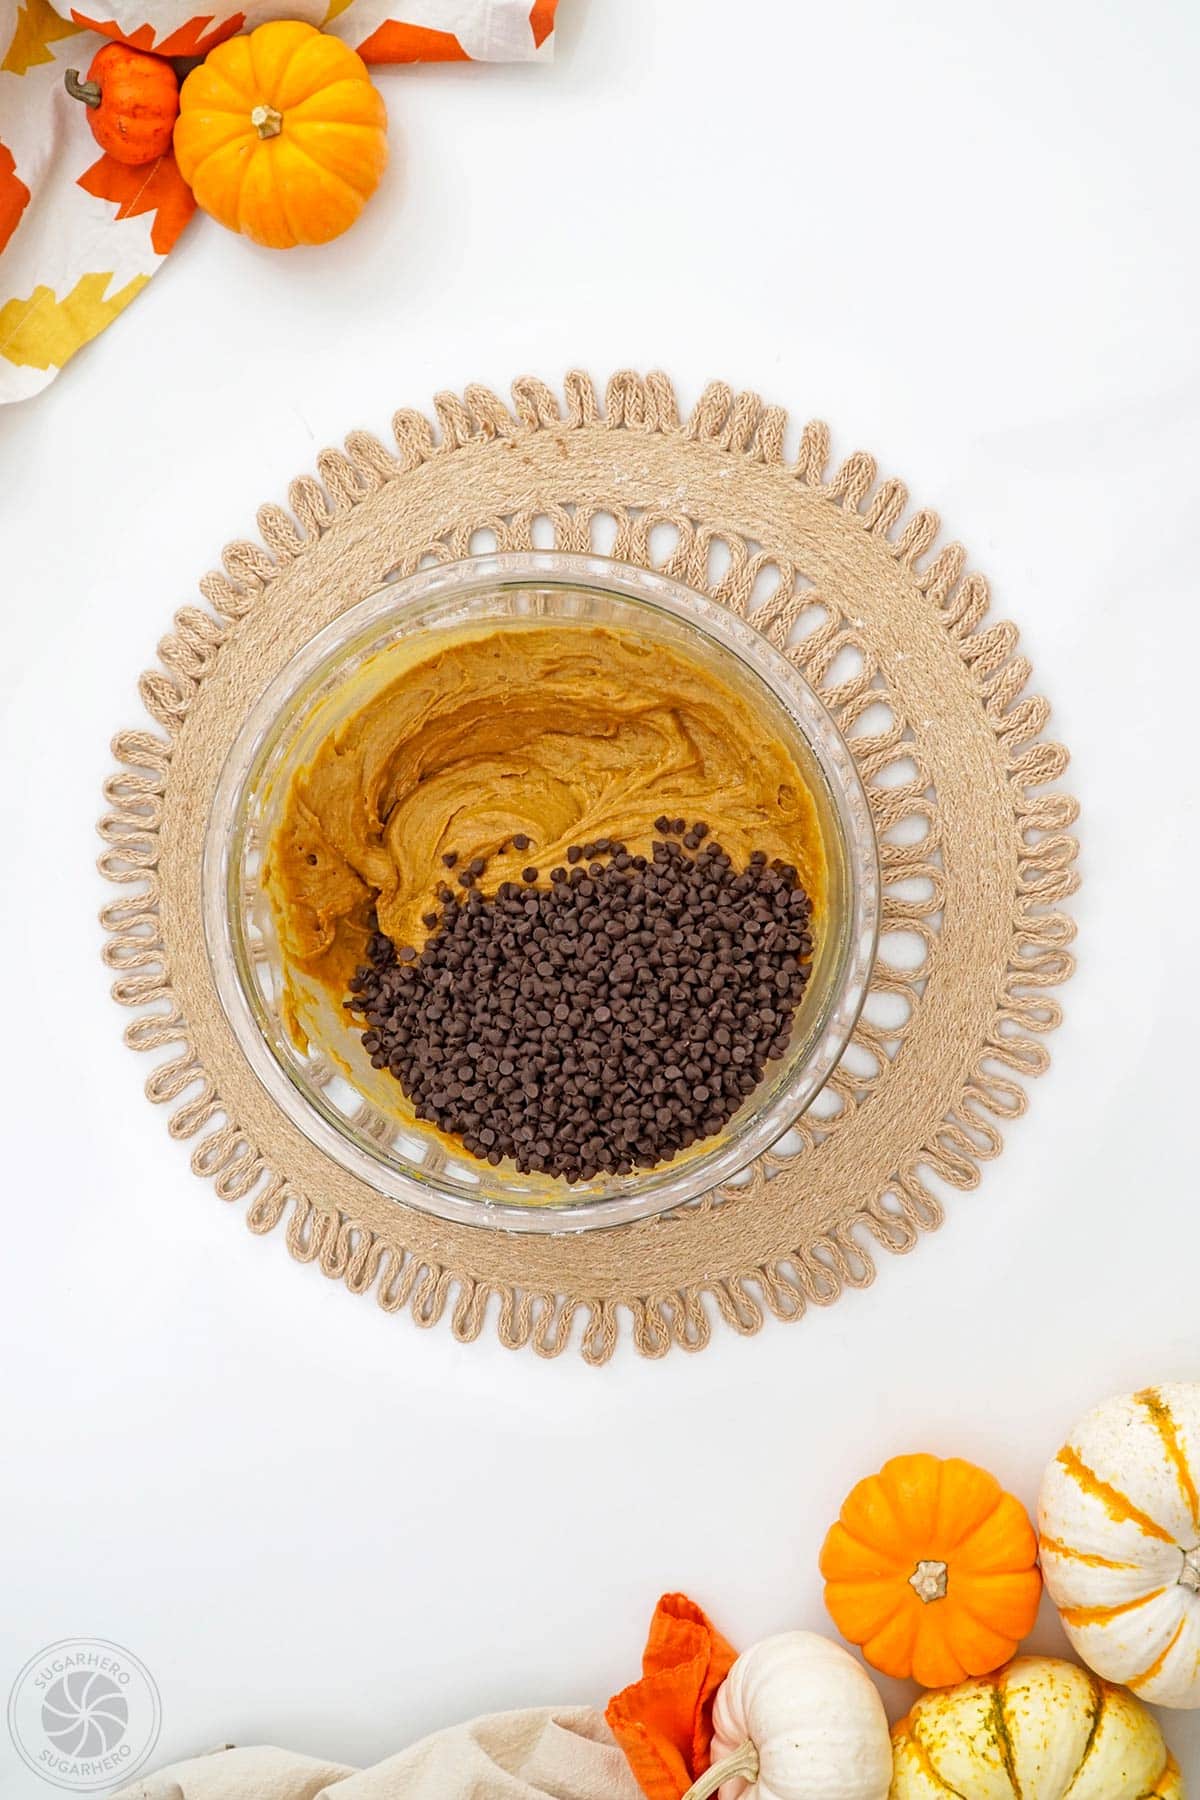
- Stir in mini chips: Set aside a few tablespoons of chips. Add the remaining mini chocolate chips to the pumpkin dough and stir them in well.
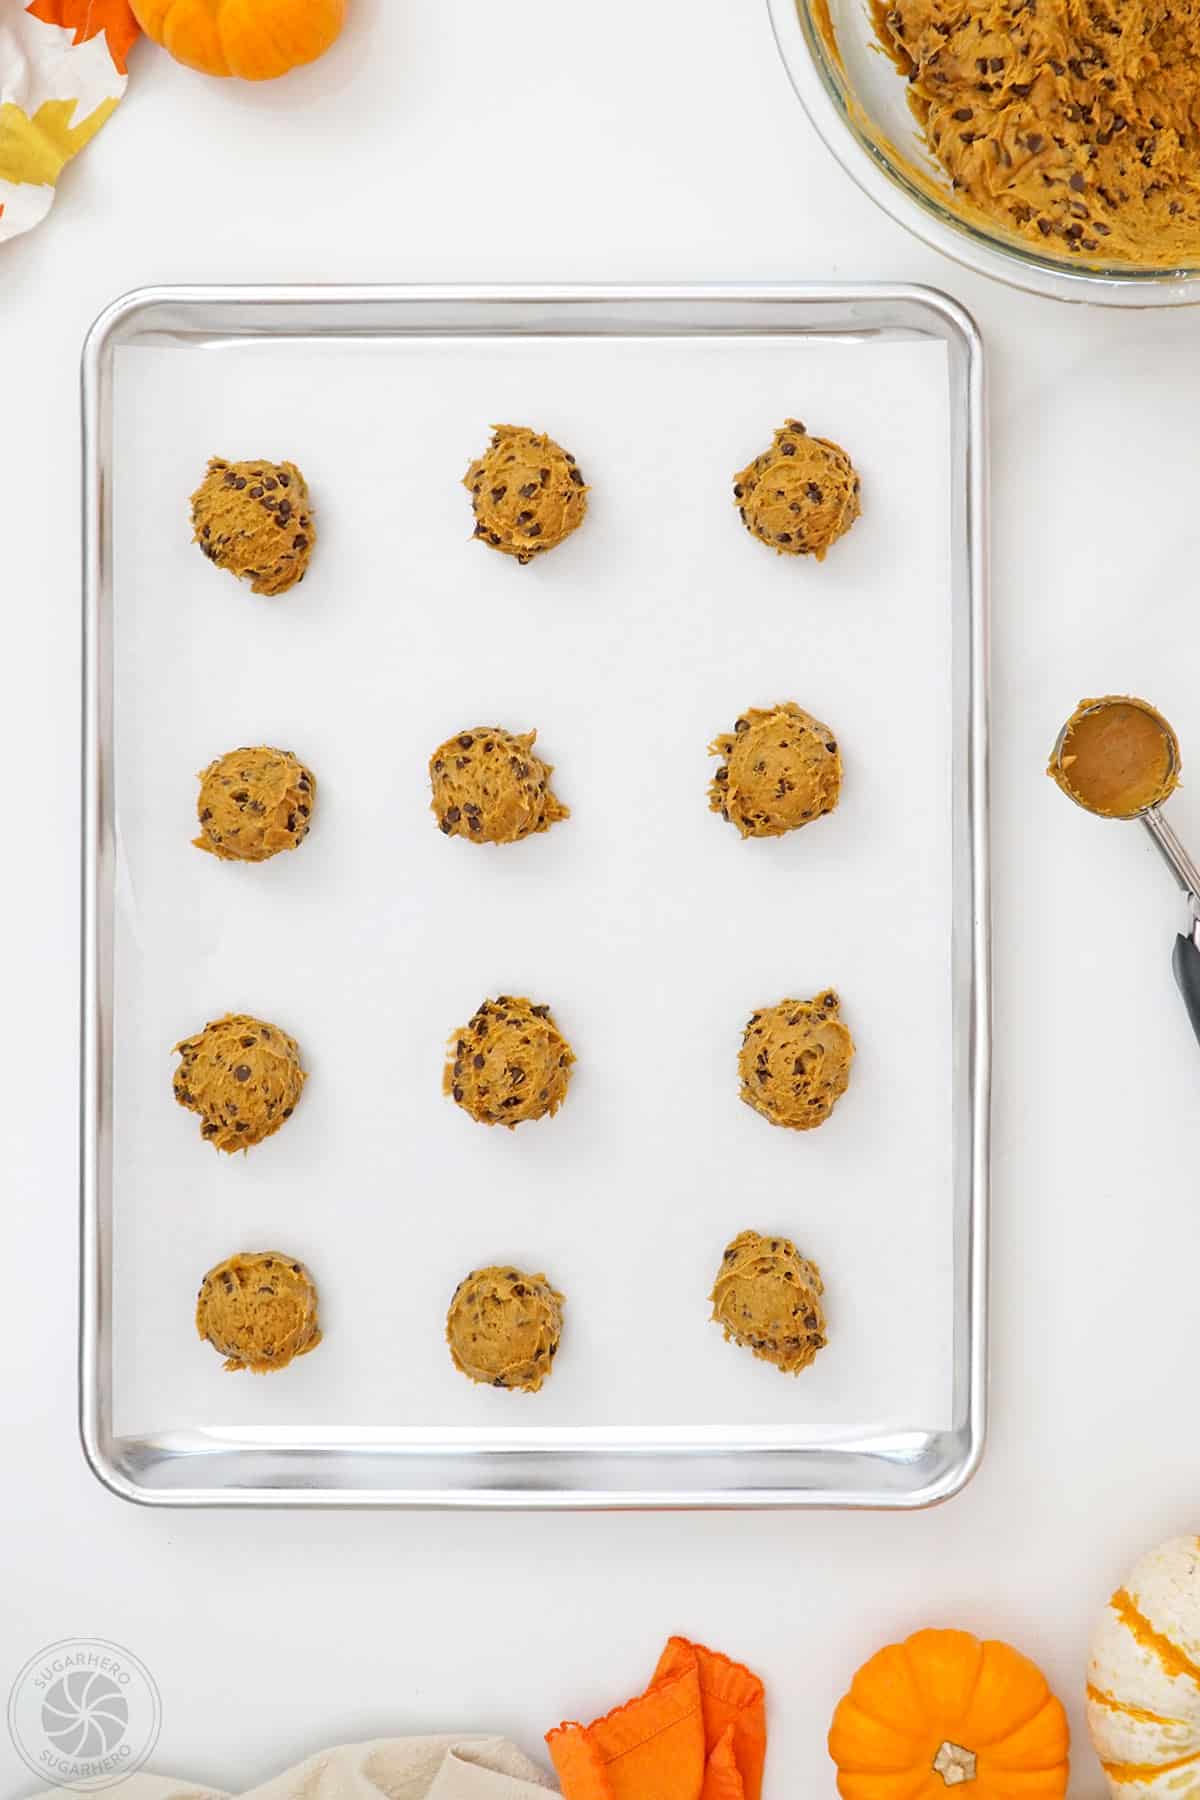
- Make cookie dough balls: Use a medium cookie scoop or spoon to scoop the dough out onto the baking sheets.
- Finish the cookie dough balls: Press a few of the reserved mini chocolate chips on top of each cookie dough ball. Then wet your fingers slightly, and smooth out the top and sides of the cookies. (This step is completely optional, but does make the cookies look prettier once they are baked.)
- Bake: Bake the cookies at 350° F for 15-17 minutes, until they’ve puffed, lost the raw shine in the center, and when you press them gently, you get a little soft resistance.
- Cool: Cool completely on a wire rack, then serve!
- Storage: Store at room temperature in an airtight container for 3-4 days, or in the refrigerator for up to a week. Separate stacks of cookies between parchment paper. Or, wrap well and freeze for up to 3 months. Thaw cookies in the fridge before bringing them to room temperature.
Video
Notes
Whoopie Pies: Omit the chocolate chips and use the dough to make whoopie pies. Fill them with Cinnamon Cream Cheese Frosting from our Zucchini Whoopie Pies. Mix-In Ideas: Add 1/2 cup – 1 cup of different mix-ins such as: nuts, butterscotch chips, toffee pieces, chopped candy bars, white chocolate chips, etc.
Measuring Tips
Our recipes are developed using weight measurements, and we highly recommend using a kitchen scale for baking whenever possible. However, if you prefer to use cups, volume measurements are provided as well. PLEASE NOTE: the adage “8 oz = 1 cup” is NOT true when speaking about weight, so don’t be concerned if the measurements don’t fit this formula.
Nutrition
📸Photo Tutorial: How to Make Cakey Pumpkin Chocolate Chip Cookies
This EASY photo tutorial will help you make perfect pumpkin cookies! Full instructions are included in the recipe card above.
- Prepare to bake: Set your oven to 350° F, and prep your baking sheets with parchment paper.
- Add cake mix: Sift the cake mix into a large bowl to break up larger clumps of flour.
- Add pumpkin: Scoop the pumpkin puree into the bowl.
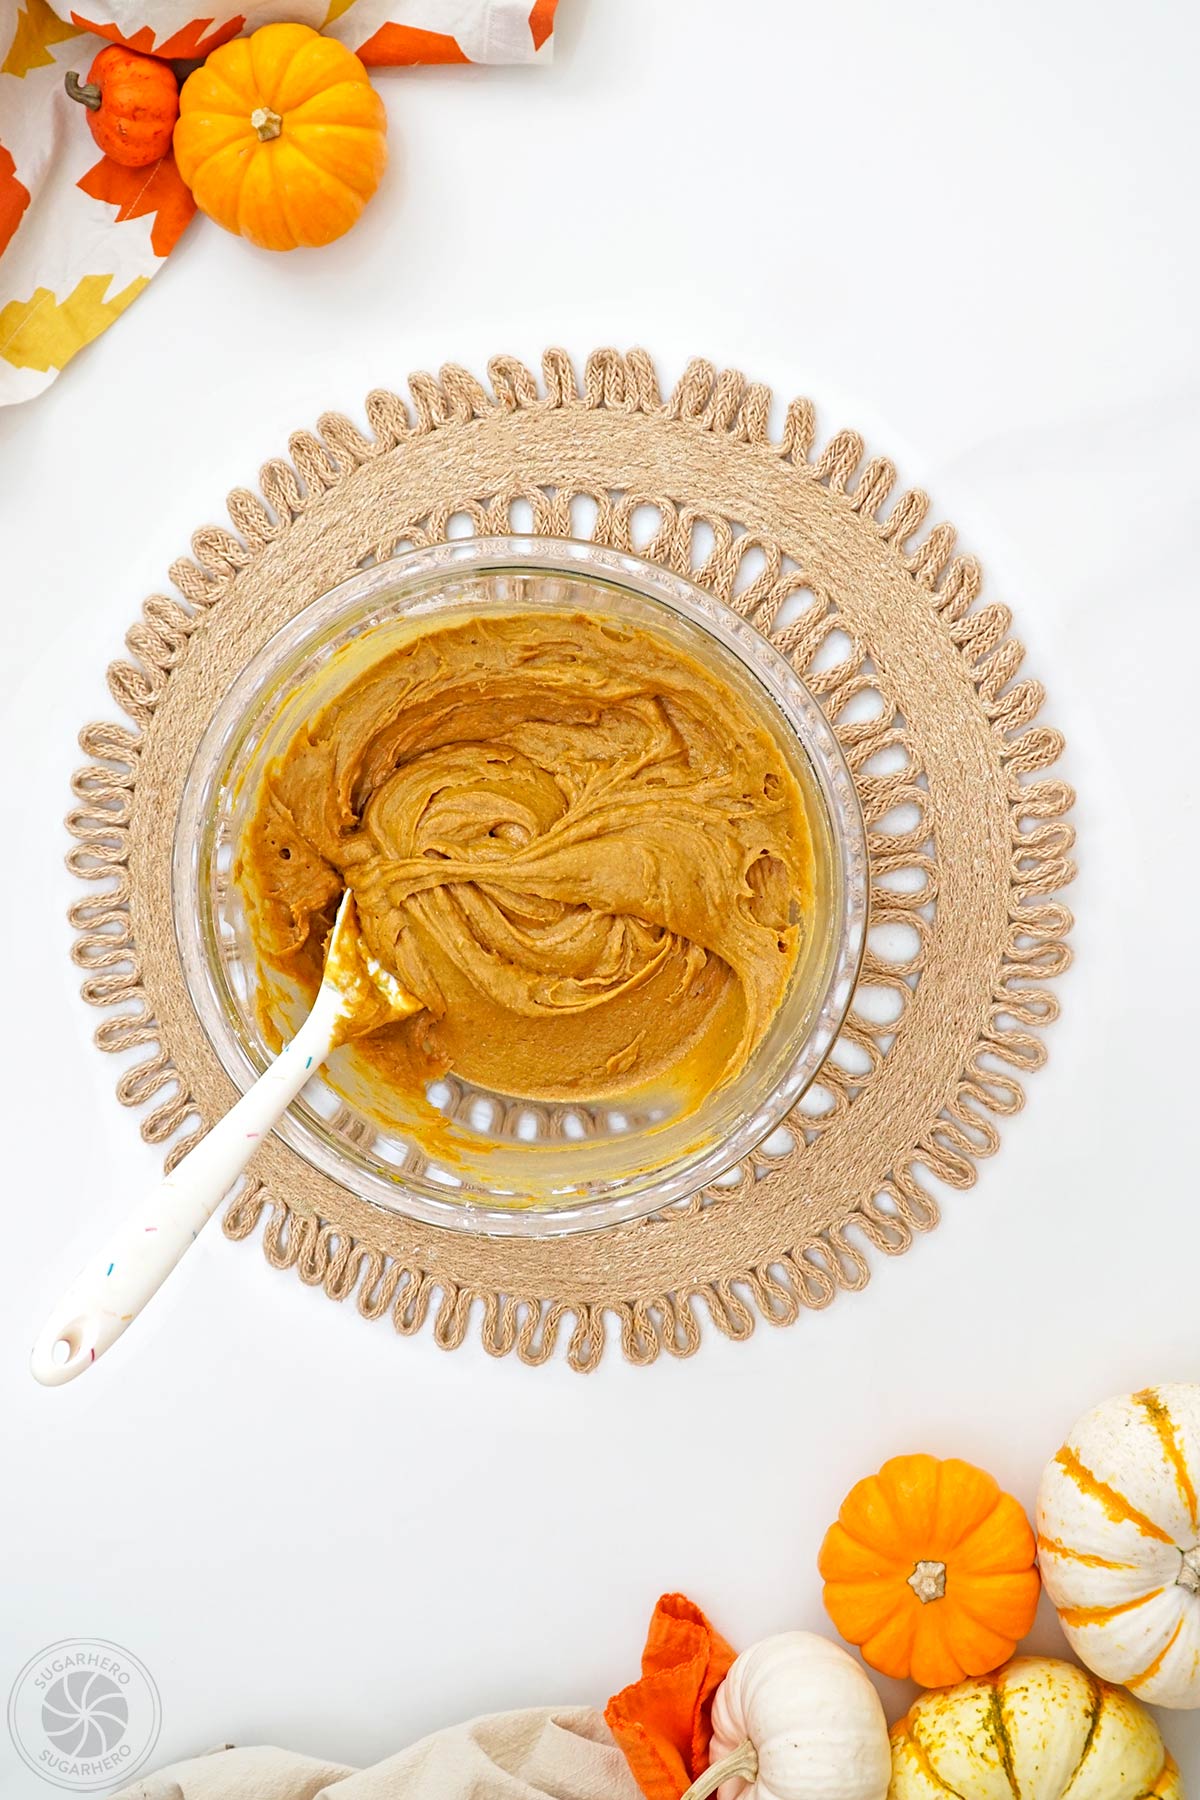
- Stir: Combine the cake mix and pumpkin until all the flour has been incorporated, forming a thick, sticky dough.
- Add mini chips: Set aside a few tablespoons of mini chocolate chips, and add the remaining chips to the pumpkin cookie dough.
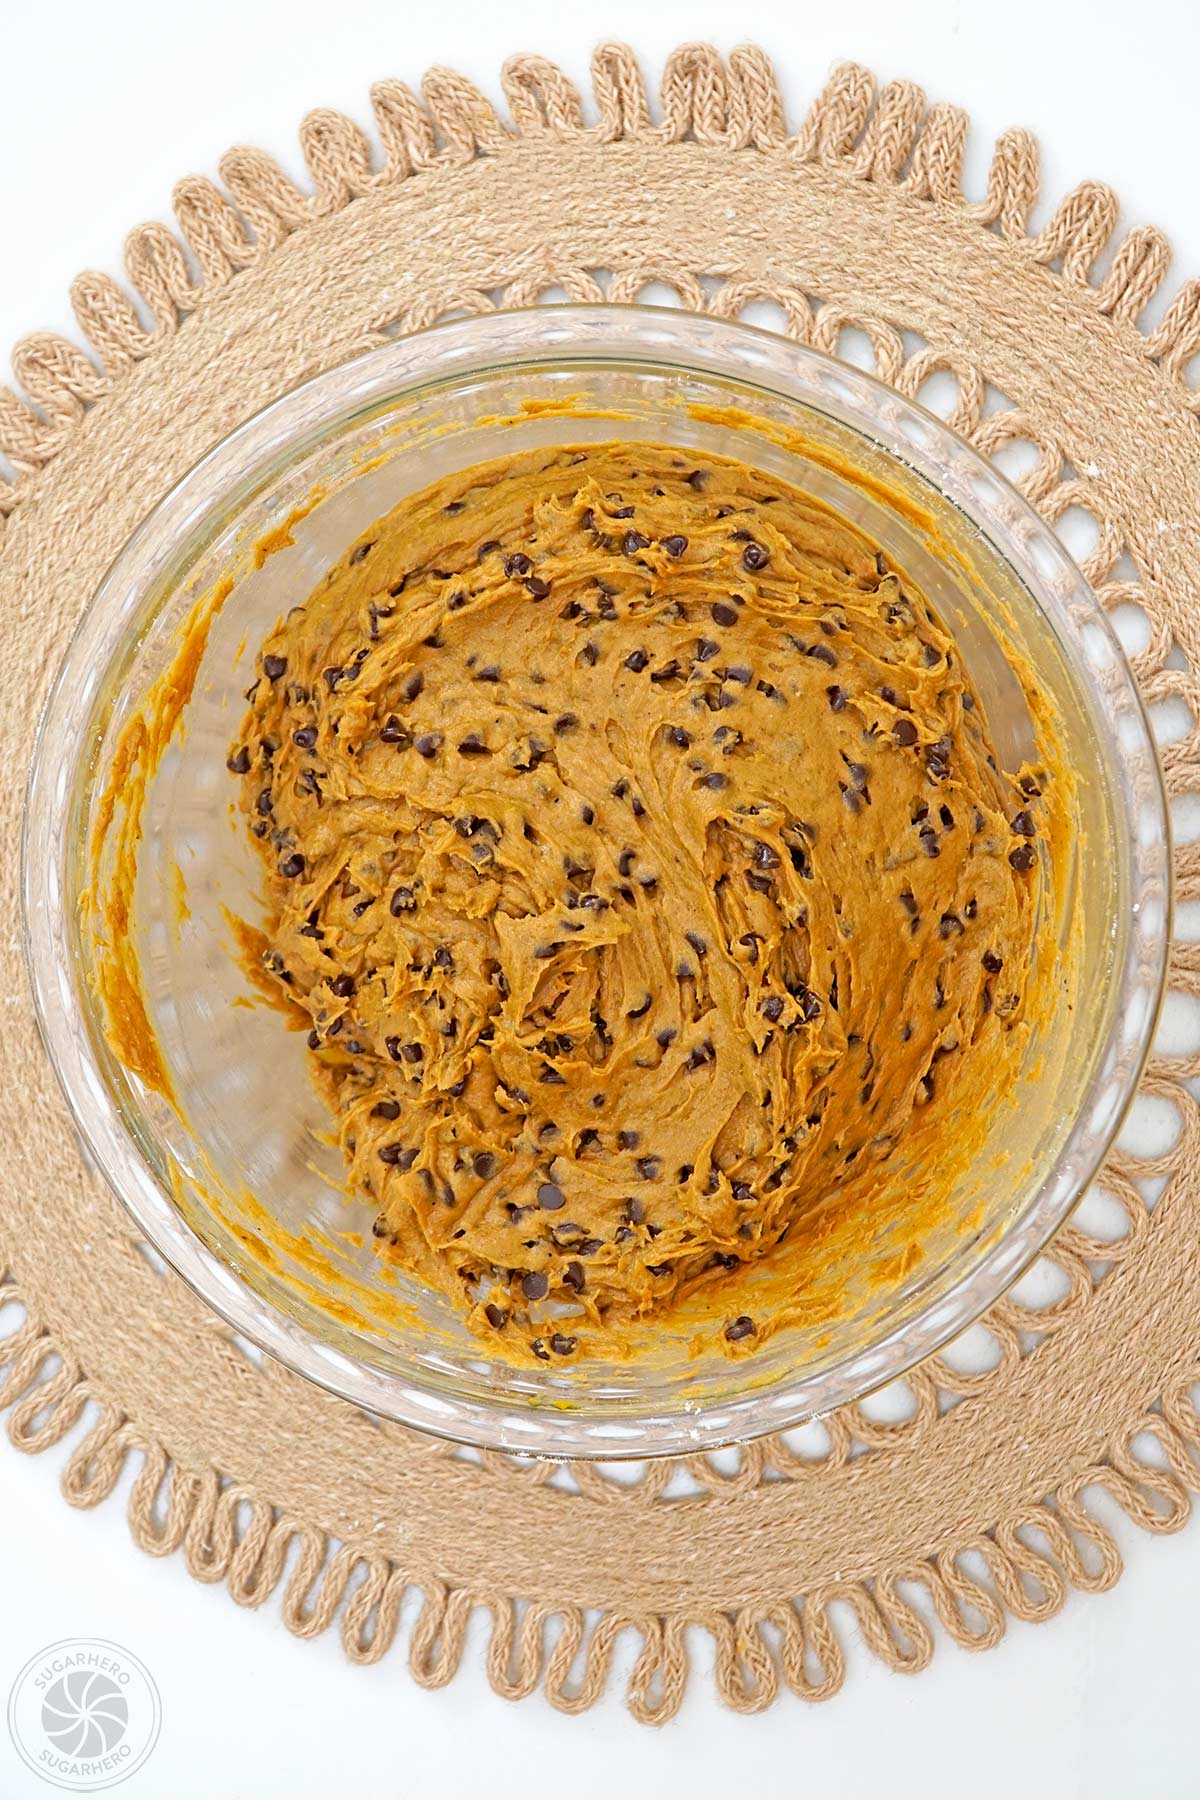
- Stir: Mix the dough until the chips are stirred in well.
- Make cookie dough balls: Scoop generous spoonfuls of dough onto the baking sheets, leaving a few inches in between.
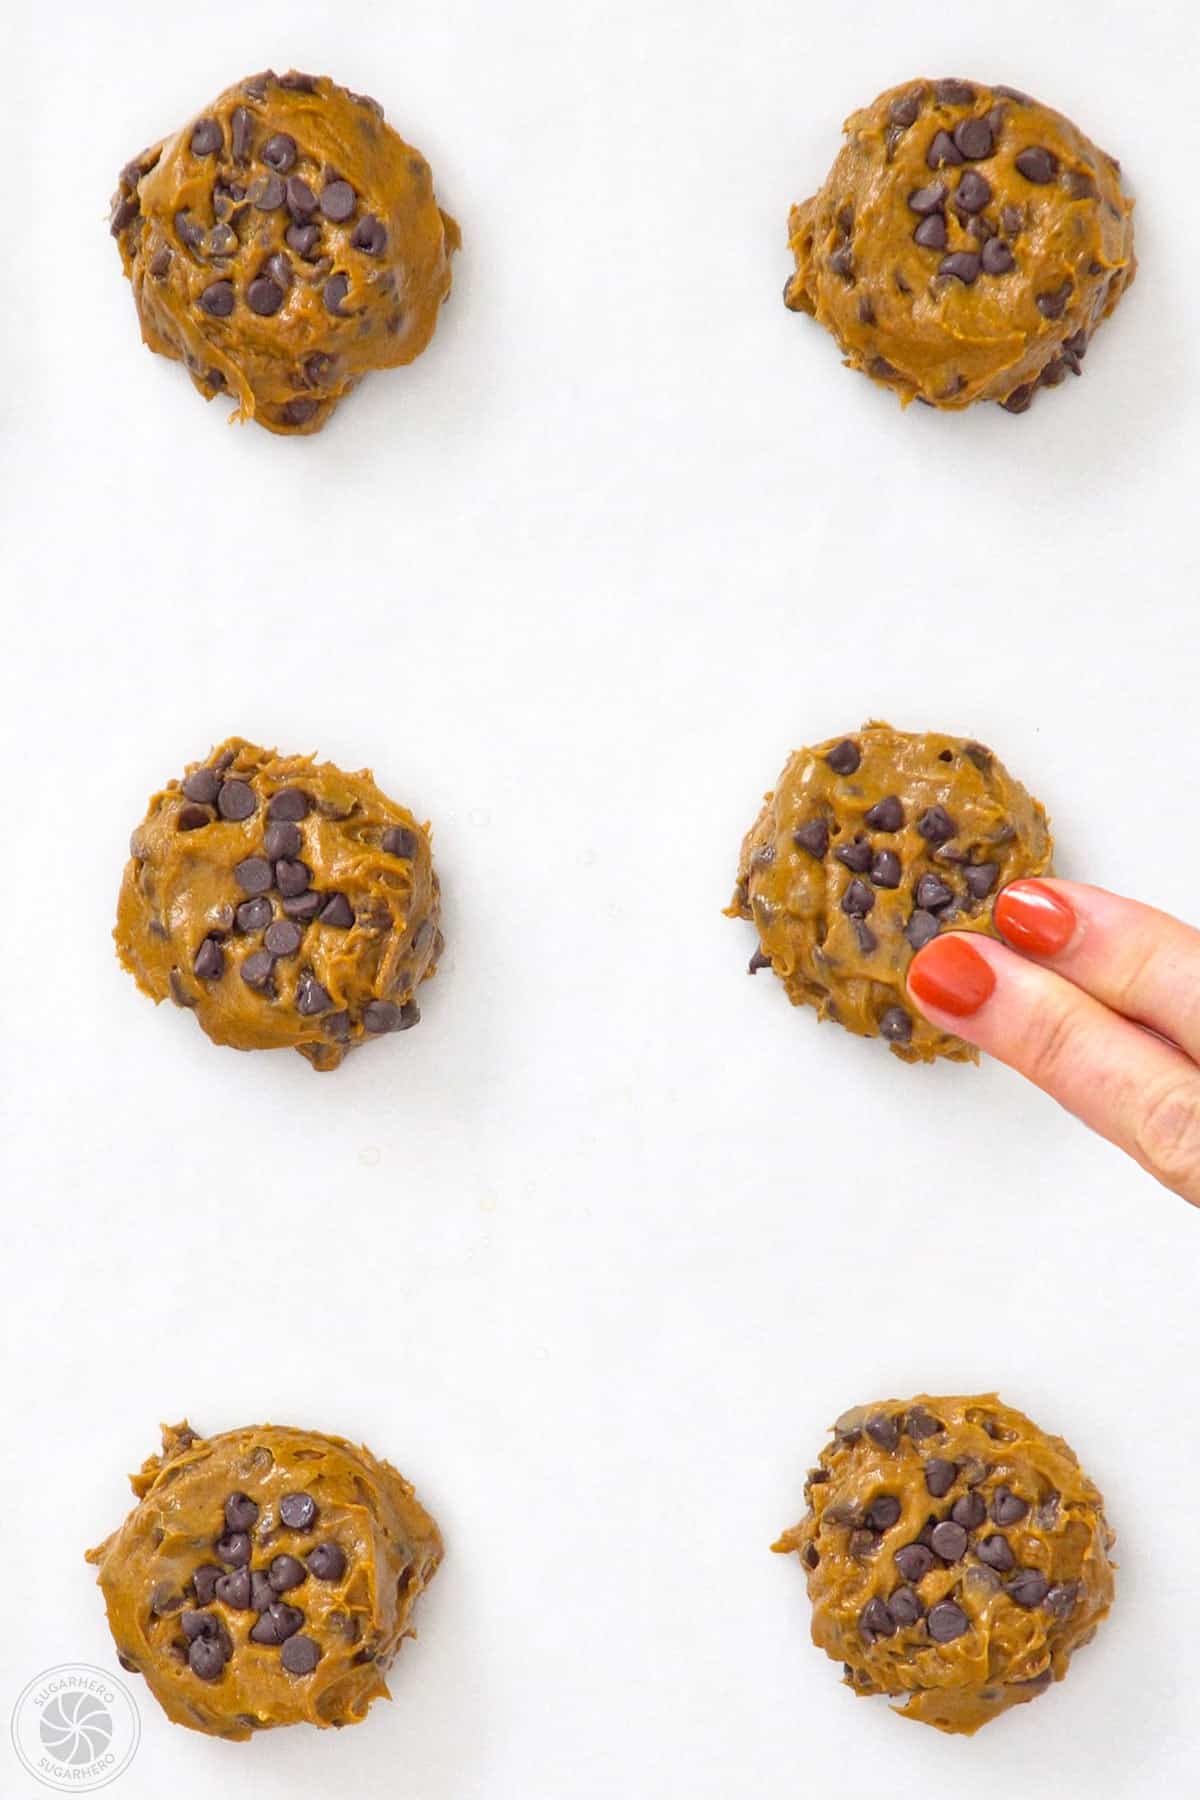

- Finish the cookie dough balls: Press a pinch of mini chocolate chips on top of each cookie ball, pressing down a bit to flatten out the dough. Smooth out the top of each cookie ball with moistened fingers. (This is optional, but it helps the cookies bake up rounder and prettier.)
- Bake: Bake the cookies at 350° F for 15-17 minutes, until they’ve puffed, lost the raw shine in the center, and when you press them gently, you get a little soft resistance.
- Cool: Cool completely on a wire rack, then serve!

💡Tips and FAQs for Success
Cake mixes often develop clumps as they sit in the box, and if you don’t sift the mix before getting started, it’s going to take a lot of stirring to get the little lumps of floury mix to integrate into the dough. Save yourself some time and just sift it first!
There are so many ways you can play with this recipe!
Cookie Bars: Instead of cookies, scrape the dough into a 9×13 pan and make pumpkin chocolate chip cookie bars. Bake at 350° F and watch for signs of doneness (firm around the edges, starting to crack a little and no longer shiney in the center of the pan.
Whoopie Pies: Or omit the chocolate chips and use the dough to make whoopie pies! The Cinnamon Cream Cheese Frosting in our Zucchini Whoopie Pies would taste divine!
Mix-In Ideas: You can also experiment with adding 1/2 cup – 1 cup of different mix-ins, like nuts, butterscotch chips, toffee pieces, chopped candy bars, white chocolate chips, and much more!
These cookies are best stored at room temperature in an airtight container for up to one week. If you plan to stack the cookies, use parchment paper to separate them. Or, make the cookies in advance and freeze for up to 3 months. Allow the cookies to thaw in the fridge before bringing them to room temperature.

Pumpkin Dessert RECIPES 🎃
We’ve rounded up over 50 deliciously cozy pumpkin dessert recipes to help you make the most of fall baking. Click here to get all the recipes!
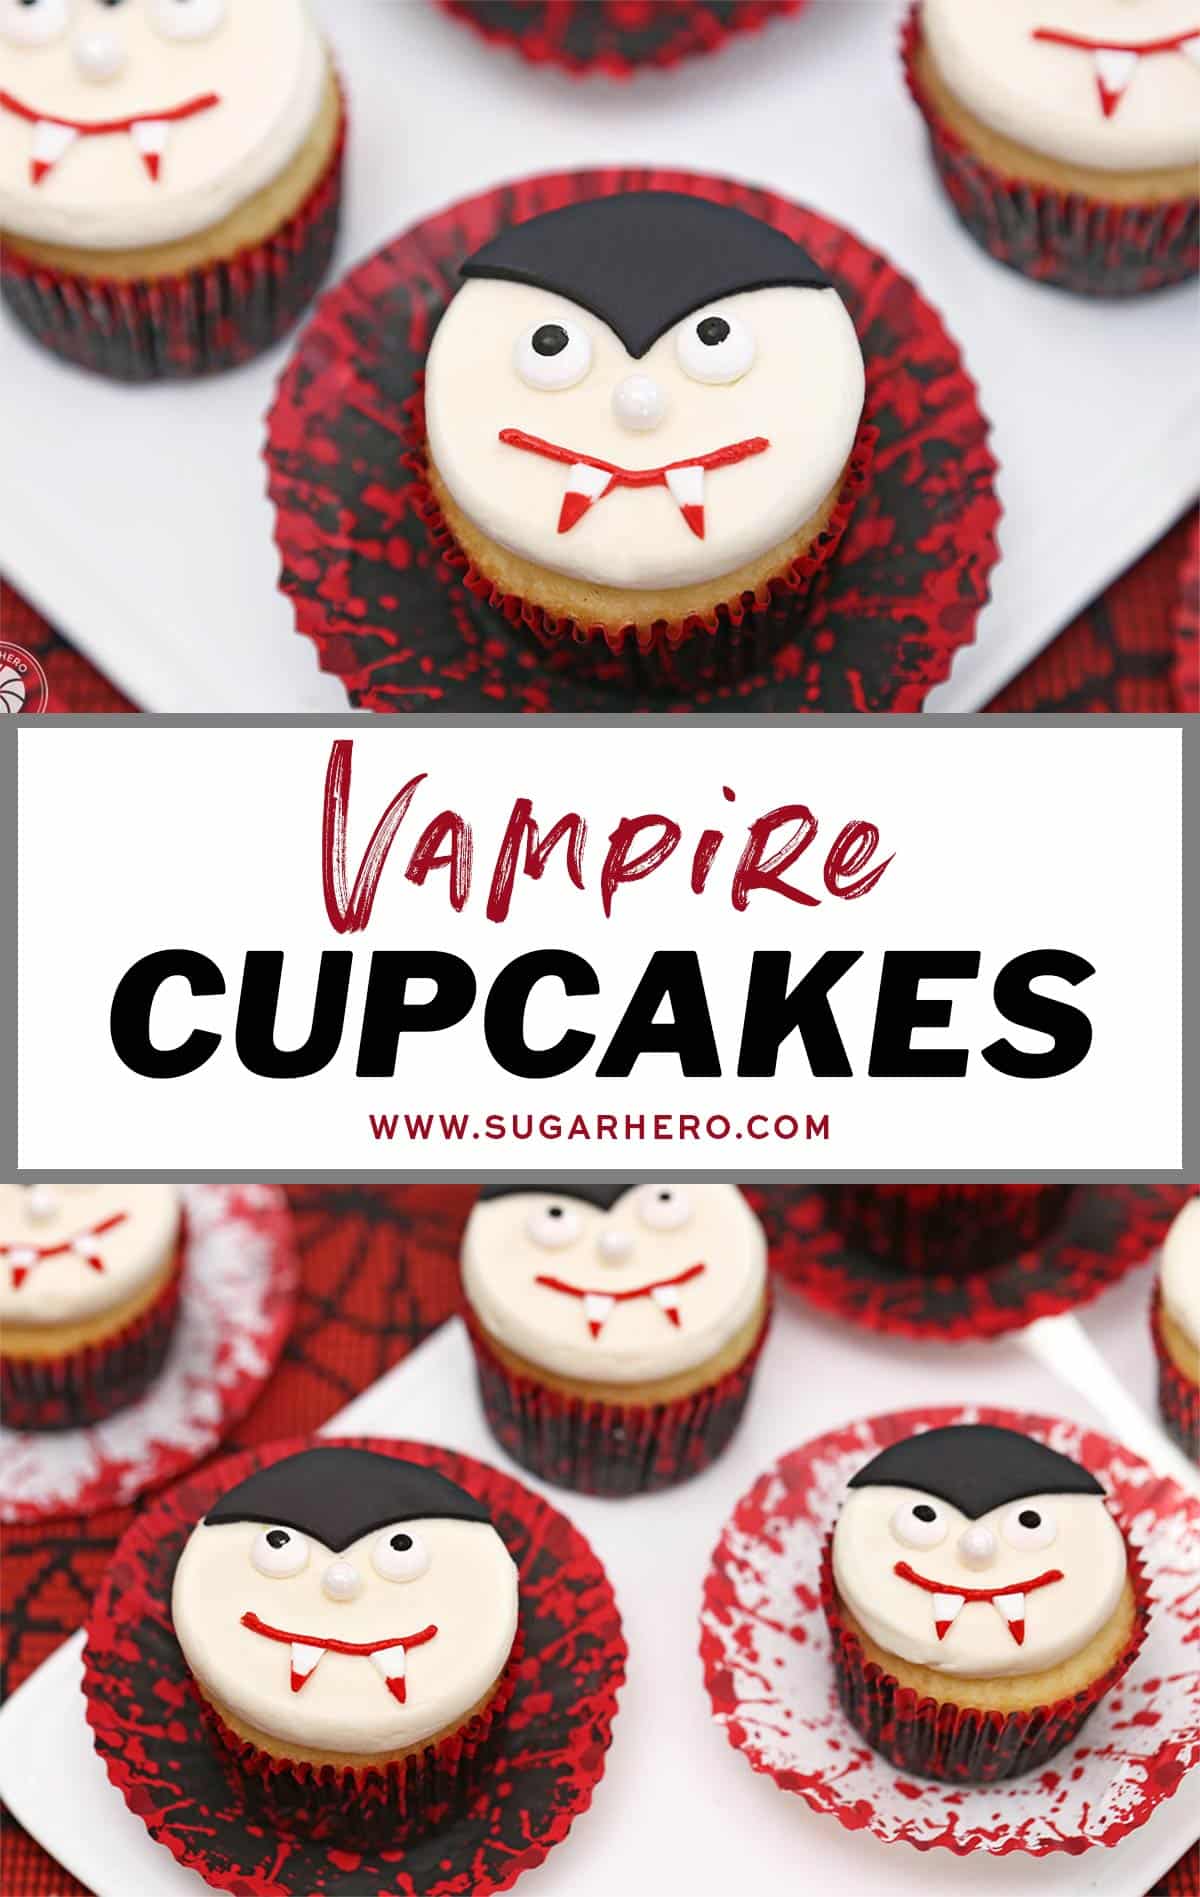
Vampire Bite Cupcakes 16 Oct 2025 1:00 PM (7 months ago)
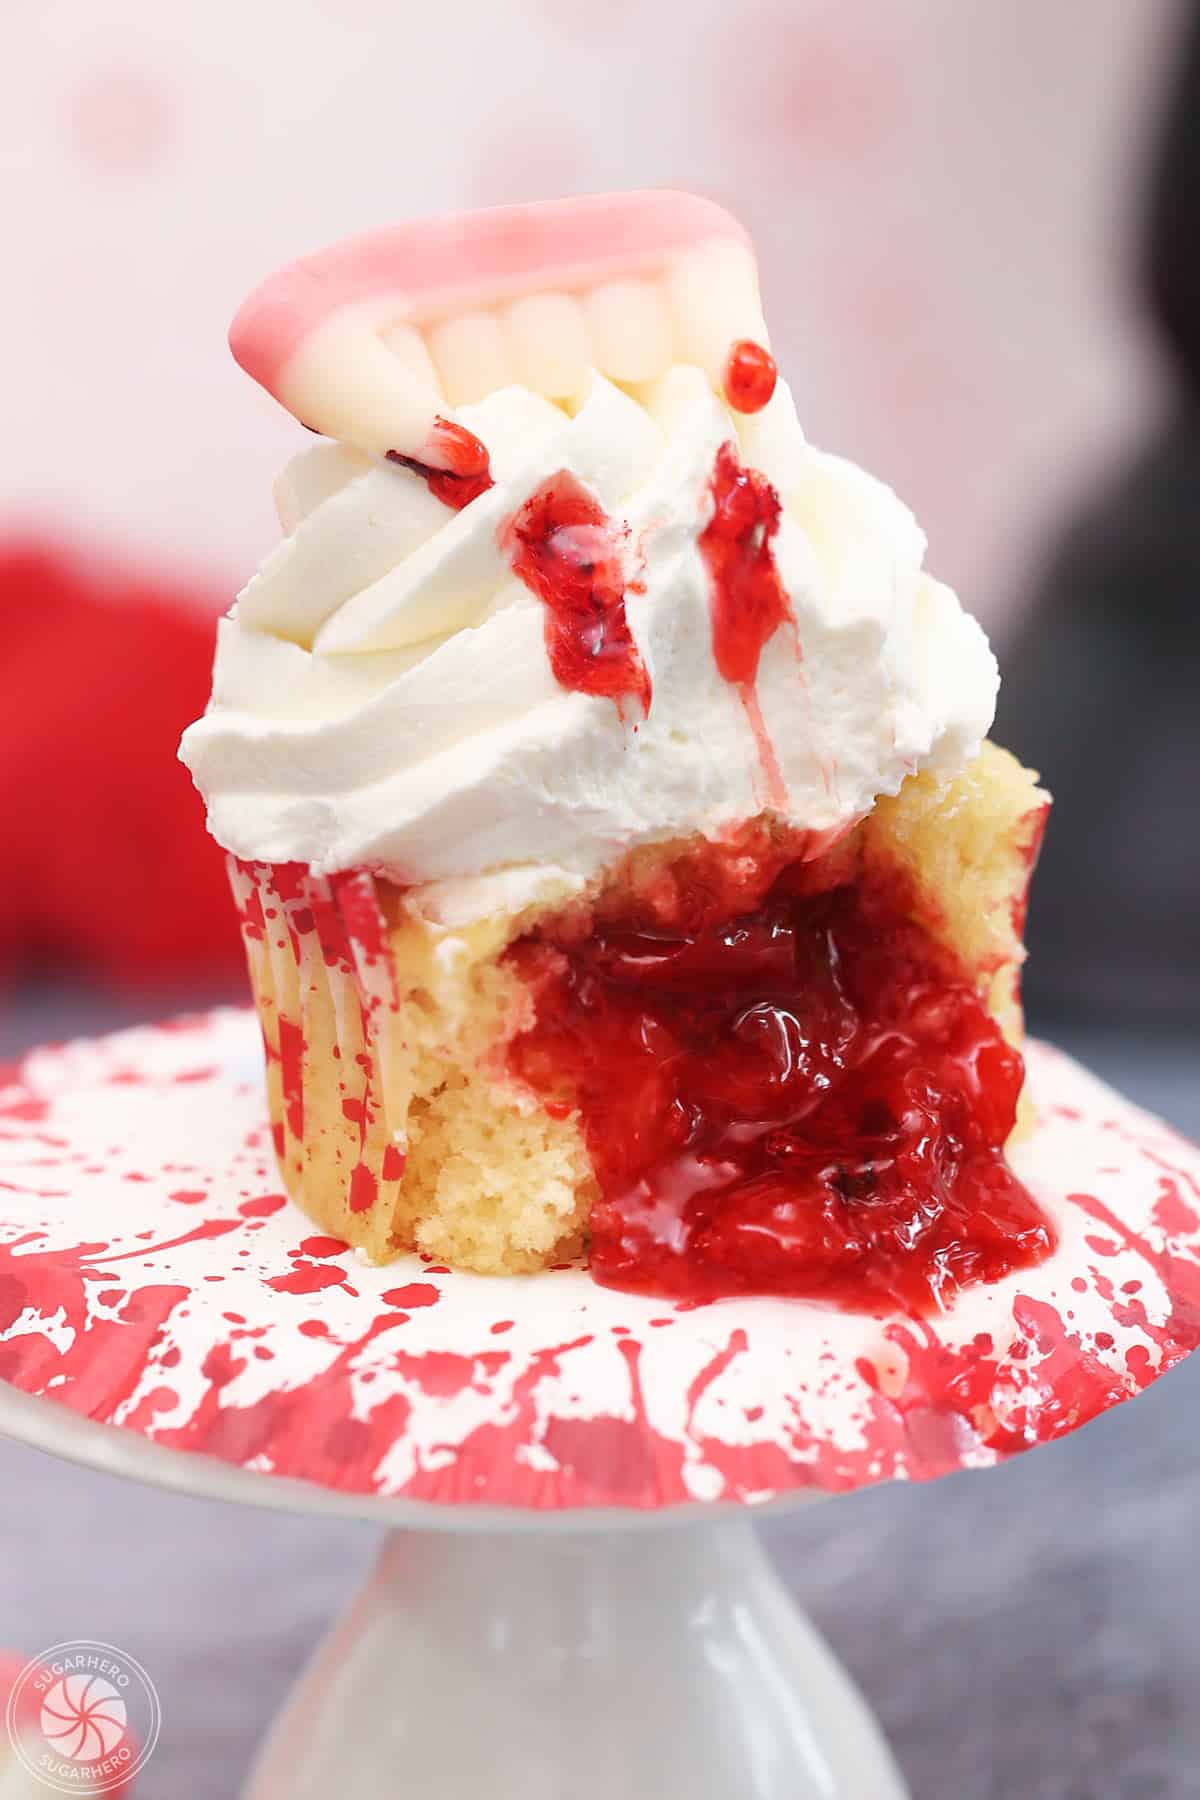
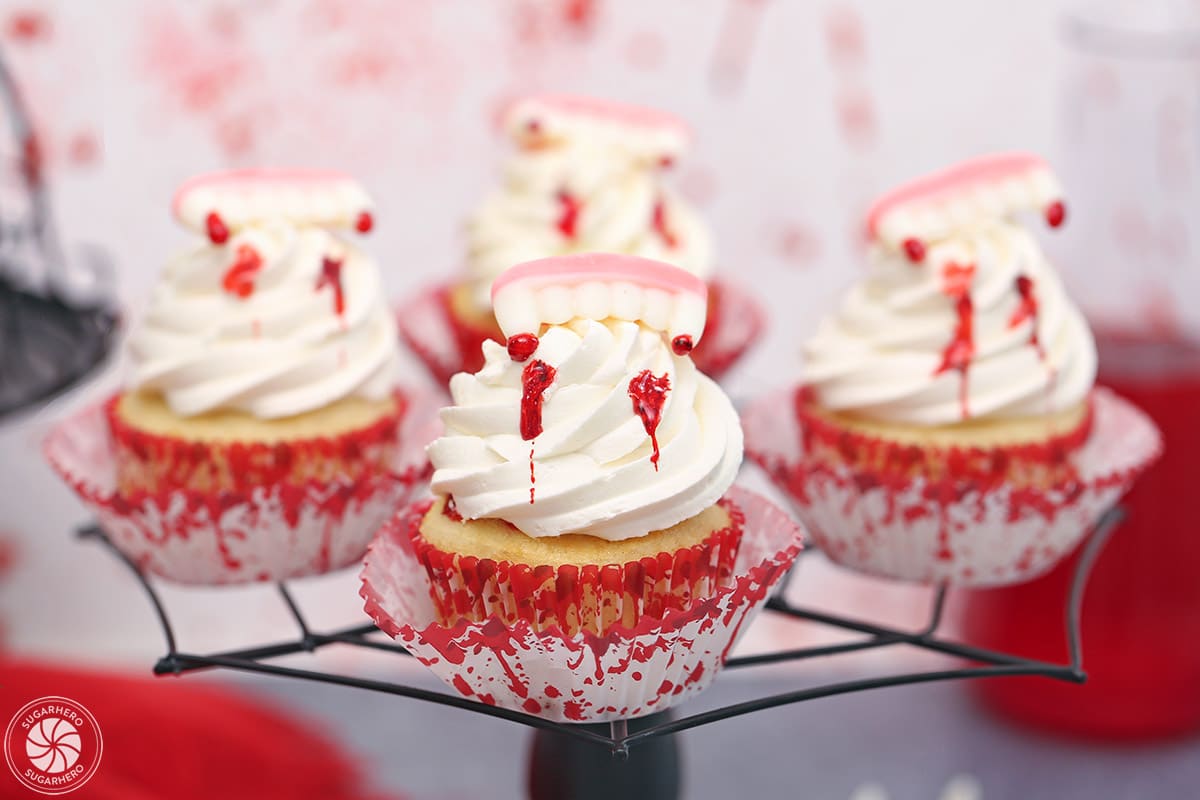
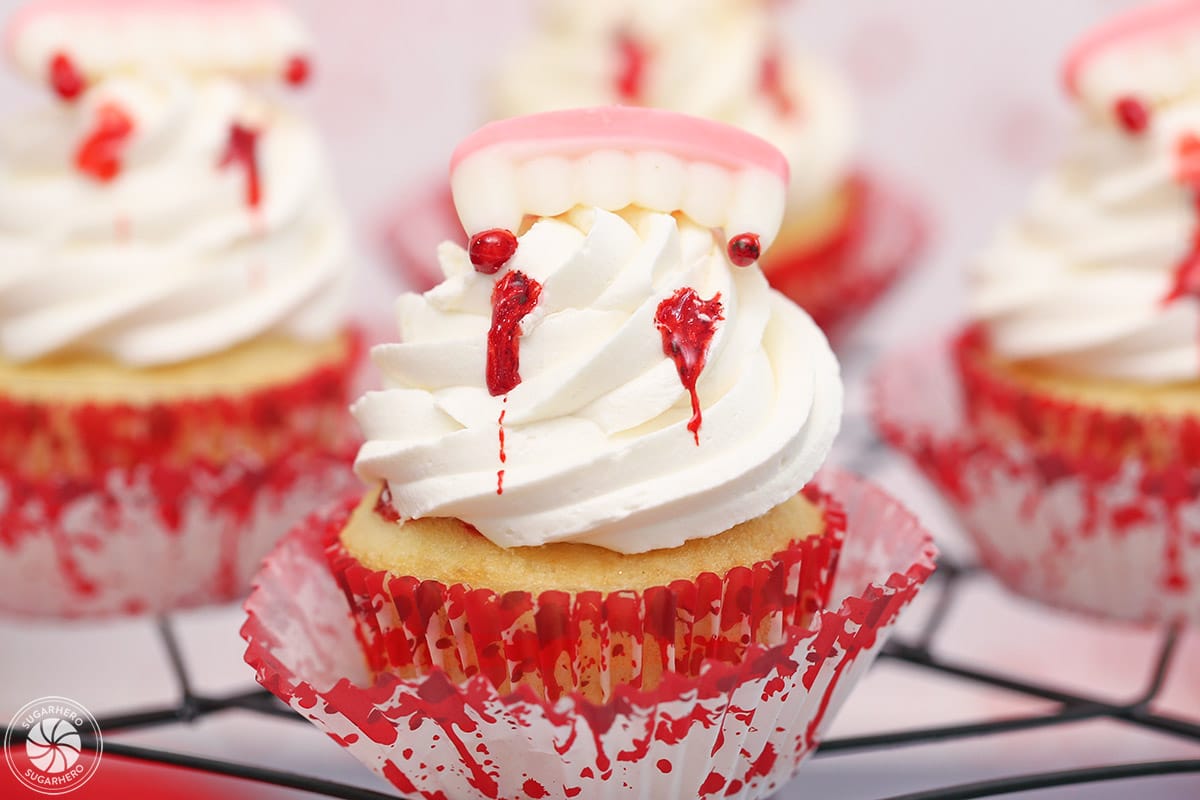
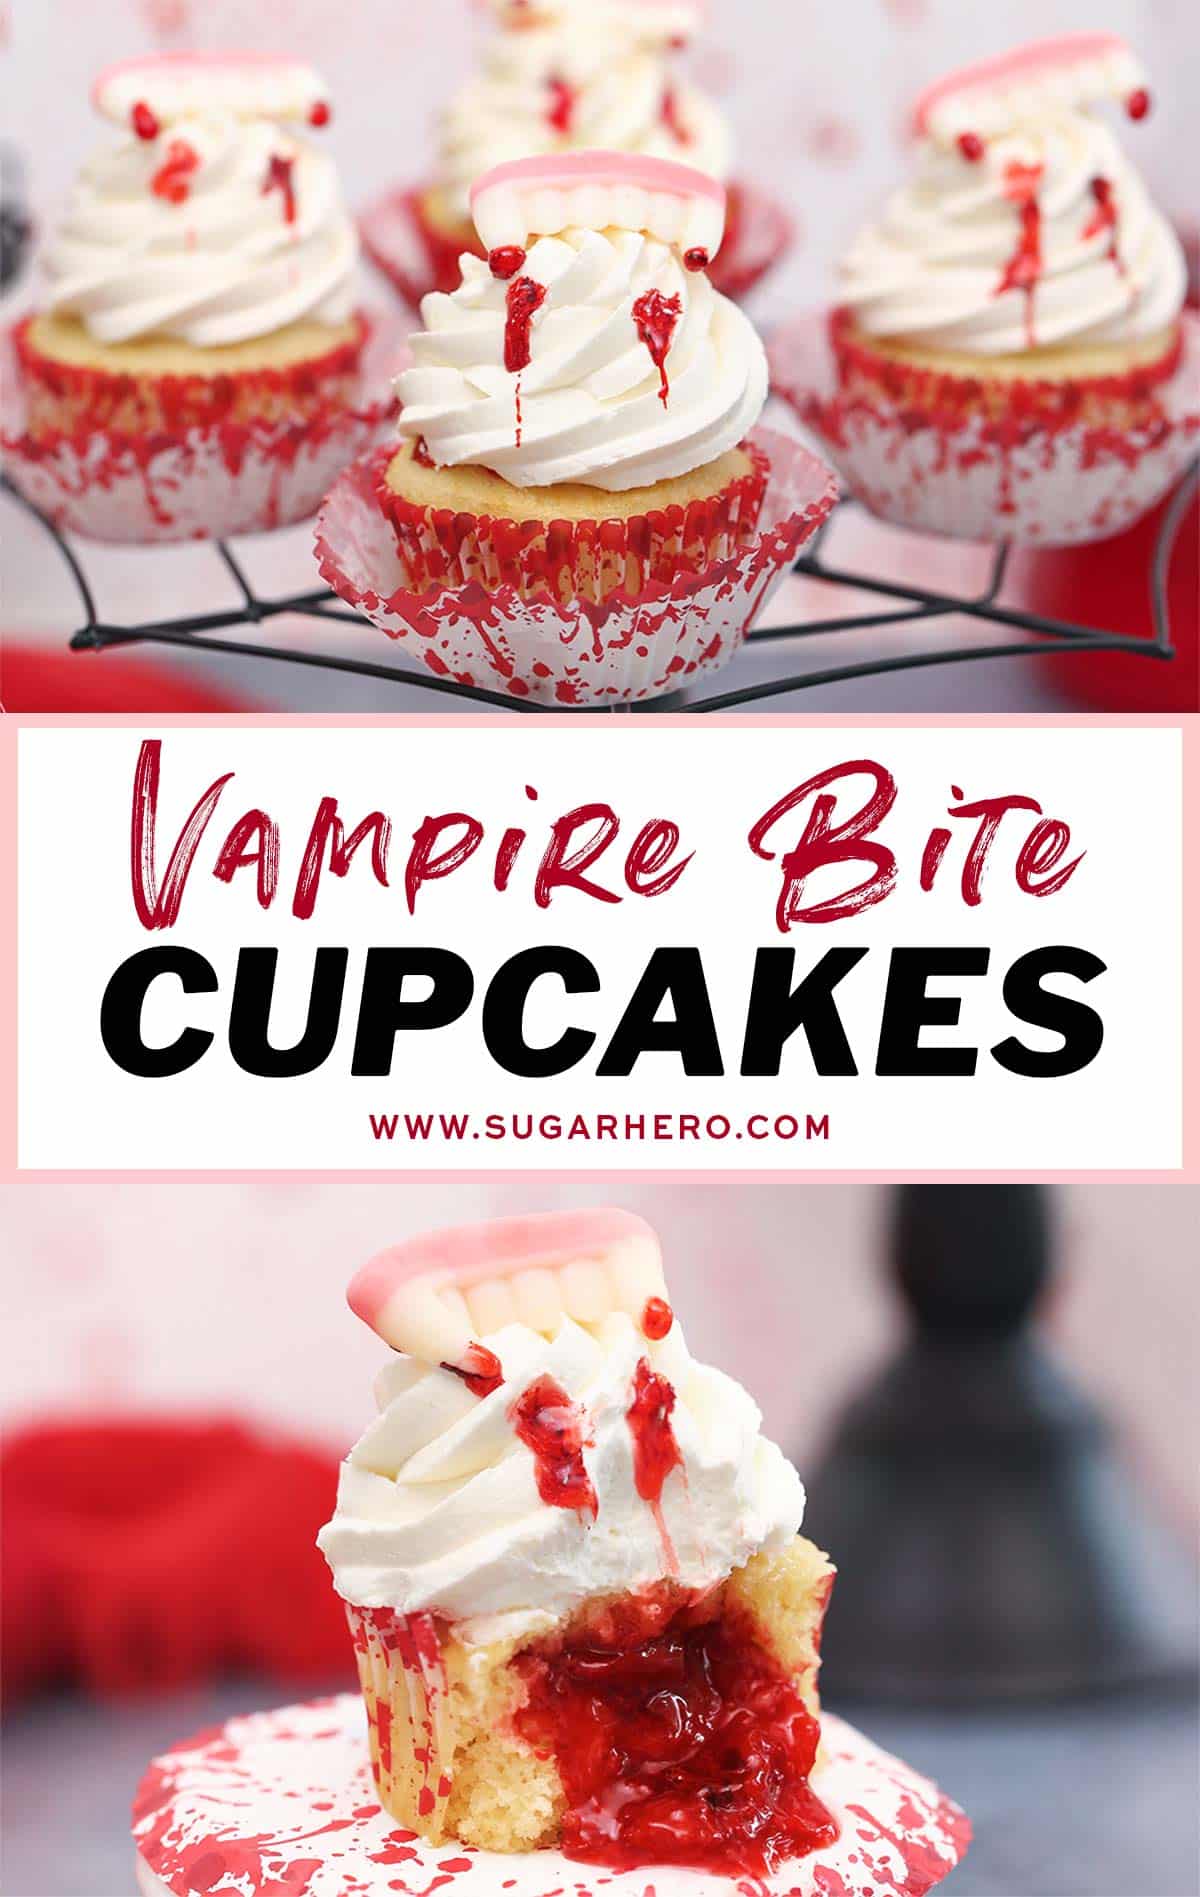
Experience love at first bite with these bloody Vampire Bite Cupcakes! They’re stuffed with oozing cherry filling for a chilling Halloween surprise. Use the cupcakes of your choice and simple decorations to make this bloody good cupcake.
🧛🏼♂️ Scary Halloween Cupcakes
When it’s time to have a haunted Halloween you’re going to need more than cutesy treats like Candy Corn Cupcakes and Slice and Bake Halloween Cookies. Nope, when it’s a scary Halloween you’re after, you need to go all-out with spooky sweets decked in edible gore.
In my professional opinion, there’s nothing creepier than an oozing “blood-filled” cupcake to get the Halloween chills and thrills started off right.
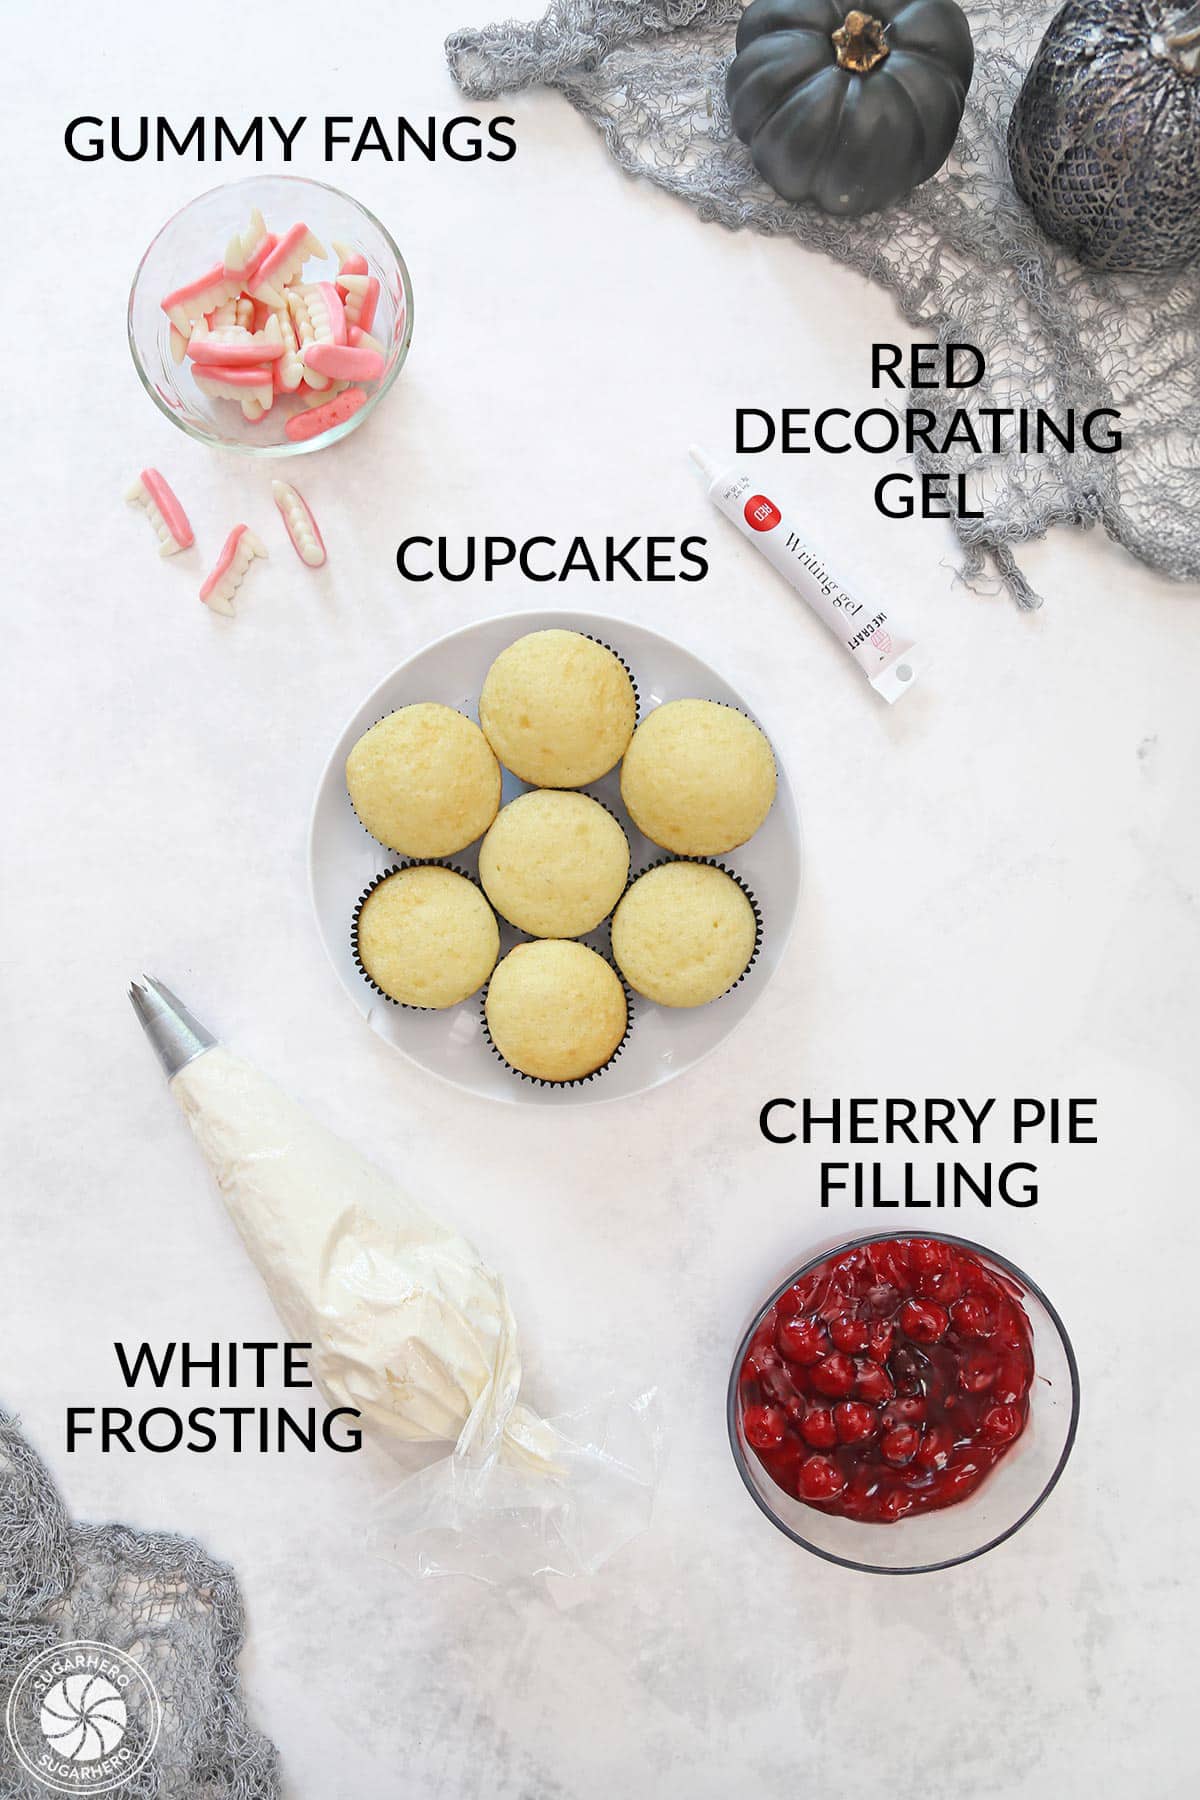
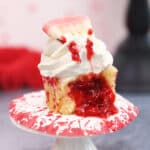
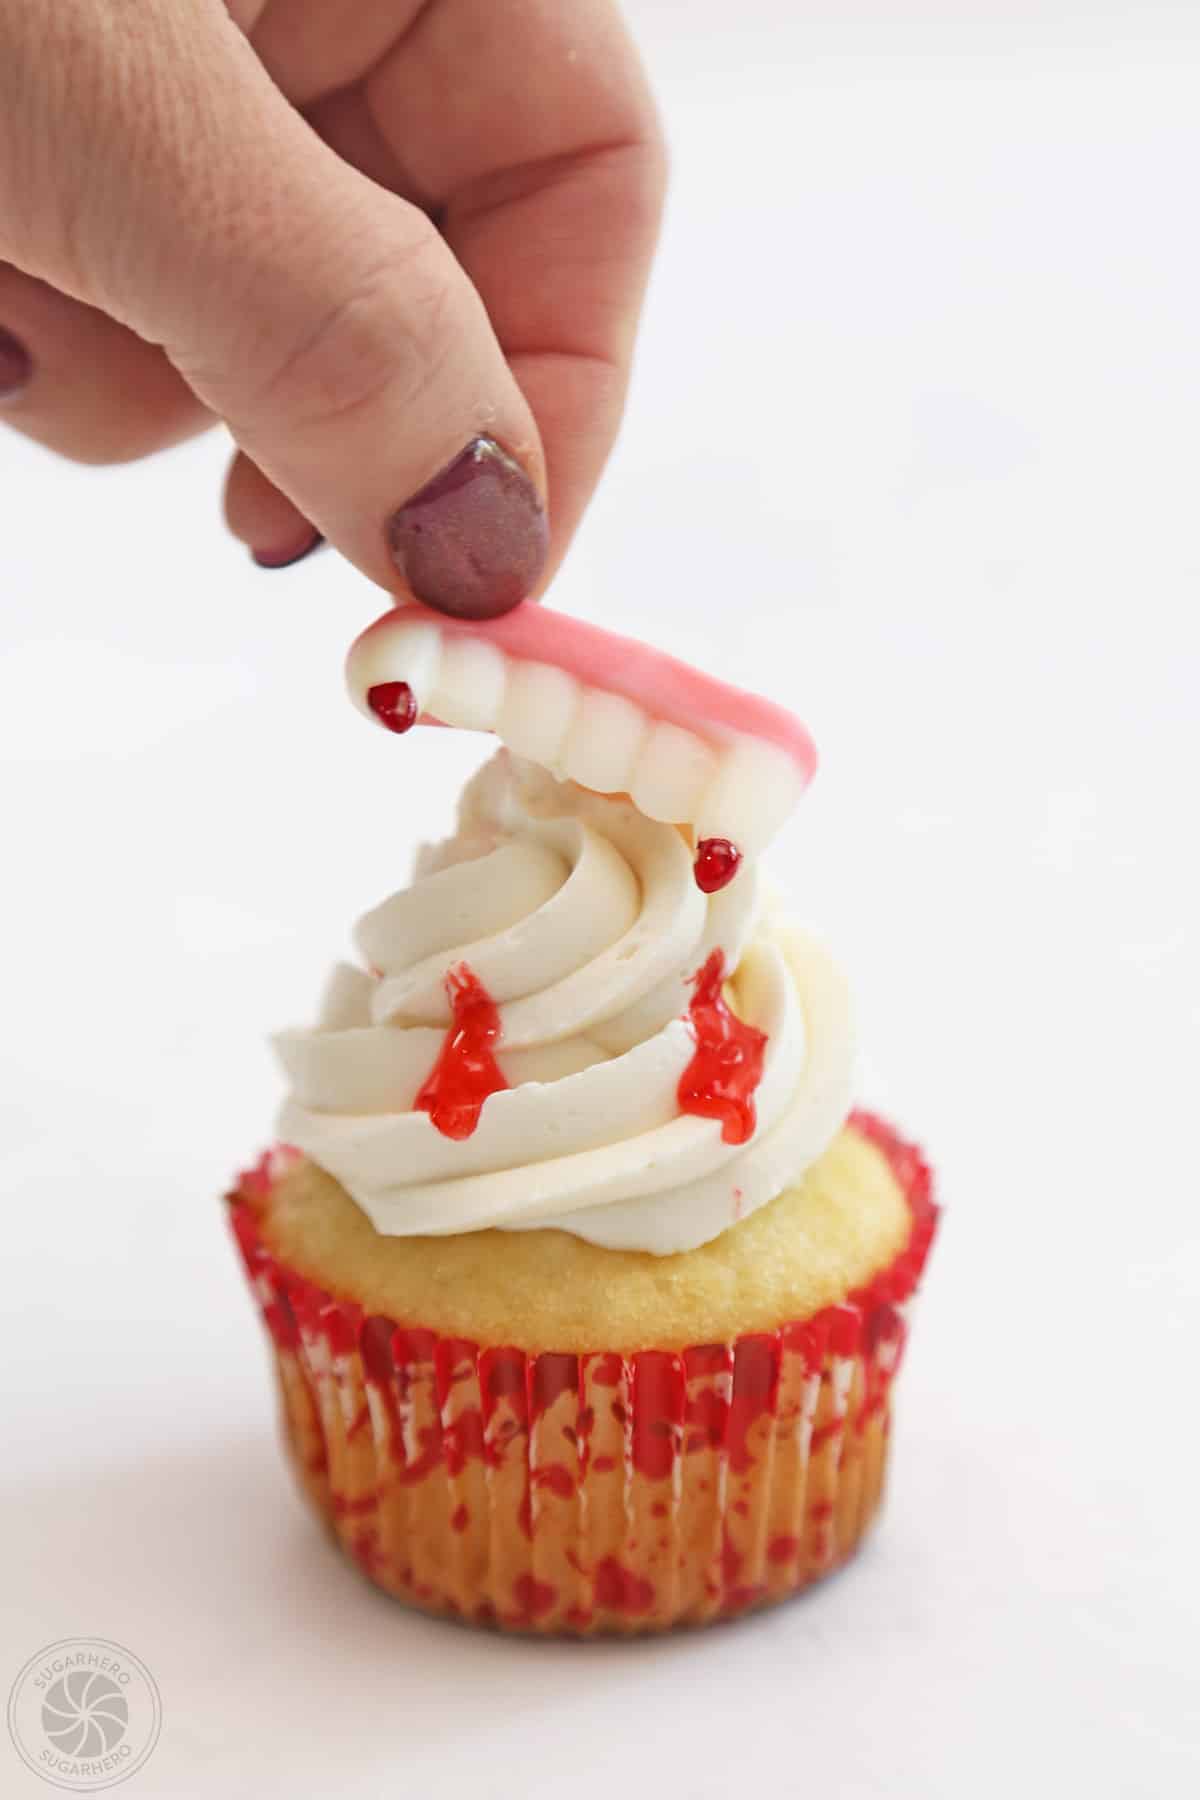
We’ve already made Vampire Cupcakes, but what about cupcakes that look like they’ve been bitten by Dracula himself? These “Vampire Bite” cupcakes have blood-tinged gummy fangs on top, and are filled with cherry pie filling for the illusion of blood as you sink your teeth in. It’s a fun and creepy surprise that will have you going back for seconds!
More Gory goodies
Make the most haunted dessert table this October with creepy-cool Halloween treats!
Check out some of our most popular recipes for the holiday: Donut Hole Eyeballs, Bloody Halloween Cake Balls, Melting Chocolate Skulls, and Red Velvet Hot Chocolate.
Table of Contents
🧾What You’ll Need
Ingredients
Review these helpful ingredient tips so you can find everything you’ll need. Full ingredient amounts can be found in the recipe card. (Links are affiliate links and I earn a small commission from qualifying purchases.)
For the Cupcakes and Frosting
- Cupcakes: You’ll need 24 baked and cooled cupcakes. Either make them from scratch or from your favorite boxed mix.
- Unsalted butter and salt: For smooth, lump-free frosting allow your butter to come to cool room temperature. It’s ok to use salted butter in place of unsalted butter, but omit the extra salt.
- Milk: Helps to thin the frosting to the right consistency. You can substitute water if desired.
- Vanilla extract: My favorite flavorful vanilla extract is made by Nielsen Massey!
- Powdered sugar: This frosting recipe is an American Buttercream, which is powdered sugar-based. You’ll want to measure the sugar with a scale if possible and then sift it into the mixture.
For the decorations
- Cherry pie filling: One standard can of cherry pie filling will be plenty, and you’ll have extra left over for another use. Alternately, you could use a red fruit jam instead.
- Red decorating gel: To give the appearance of a vampire bite, you’ll need some red decorating gel.
- Fang candy: I used gummy vampire teeth, but you could use another fang candy or vampire decoration.
Equipment
- Immersion blender: I found it helpful (and slightly more gory) to roughly chop the cherry pie filling with an immersion stick blender.
- Mixer: You can use a stand mixer or hand mixer to make the buttercream.
- Piping bags and coupler: To easily swirl frosting onto the cupcakes, have a piping bag and coupler handy.
- Piping tip: I recommend using a large closed star piping tip, like Ateco #849, to make the buttercream swirls.
- Cupcake liners: If you are looking to give your cupcakes some extra Halloween oomph, try baking them in blood-splattered cupcake liners.
Ready to Make These?
- Get the recipe below 👇👇
- Scroll below the recipe for step-by-step photos
- Read important FAQs and more
🩸 Bloody Good Desserts
Leave a Review!
If you make this recipe, let us know! Leave a ⭐️⭐️⭐️⭐️⭐️ rating on the recipe below, and leave a comment, take a photo and tag me on Instagram @elabau, or use #sugarhero on IG!
Vampire Bite Cupcakes
Ingredients
- 24 baked and cooled cupcakes from scratch or your favorite mix, I used white cupcakes
For the frosting:
- 1 lb unsalted butter (4 sticks), sat cool room temperature
- 2 TBSP milk can substitute water
- ½ tsp salt
- 1 TBSP vanilla extract
- 28 oz powdered sugar (7 cups), sifted after measuring
To decorate:
- Red decorating gel
- Gummy fangs or other fang candy/decoration
- 1 can cherry pie filling about 20 oz
Instructions
To Make the Frosting:
- Beat butter: Place the butter in the bowl of a large stand mixer. Beat on medium speed with a paddle attachment until very white and pale, about 3-4 minutes.
- Add milk, salt, and vanilla: Turn the speed lower, and add 1 tablespoon of milk, the salt, and the vanilla extract. Mix until everything is well incorporated with the butter.
- Slowly add powdered sugar: With the mixer running on low, slowly add the powdered sugar. Once all of it is added, stop and scrape down the bottom and sides of the mixing bowl, then mix the buttercream on medium speed for 30 seconds.
- Adjust the consistency: If the buttercream is too stiff for your needs, add the remaining tablespoon of milk and mix it in well.
- You can use the frosting right away, or store it for up to a week – see the Notes below.
To Decorate:
- Blend cherry filling: Pour the cherry filling into a small bowl and use an immersion blender to roughly chop the cherries into smaller pieces.
- Fill cupcakes: Cut a cone-shaped hole in the top of each cupcake, and fill the hole with cherry filling, leaving a small gap at the top. Cut the bottom of the cone pieces off, so you're left with just the tops. Add the cupcake tops
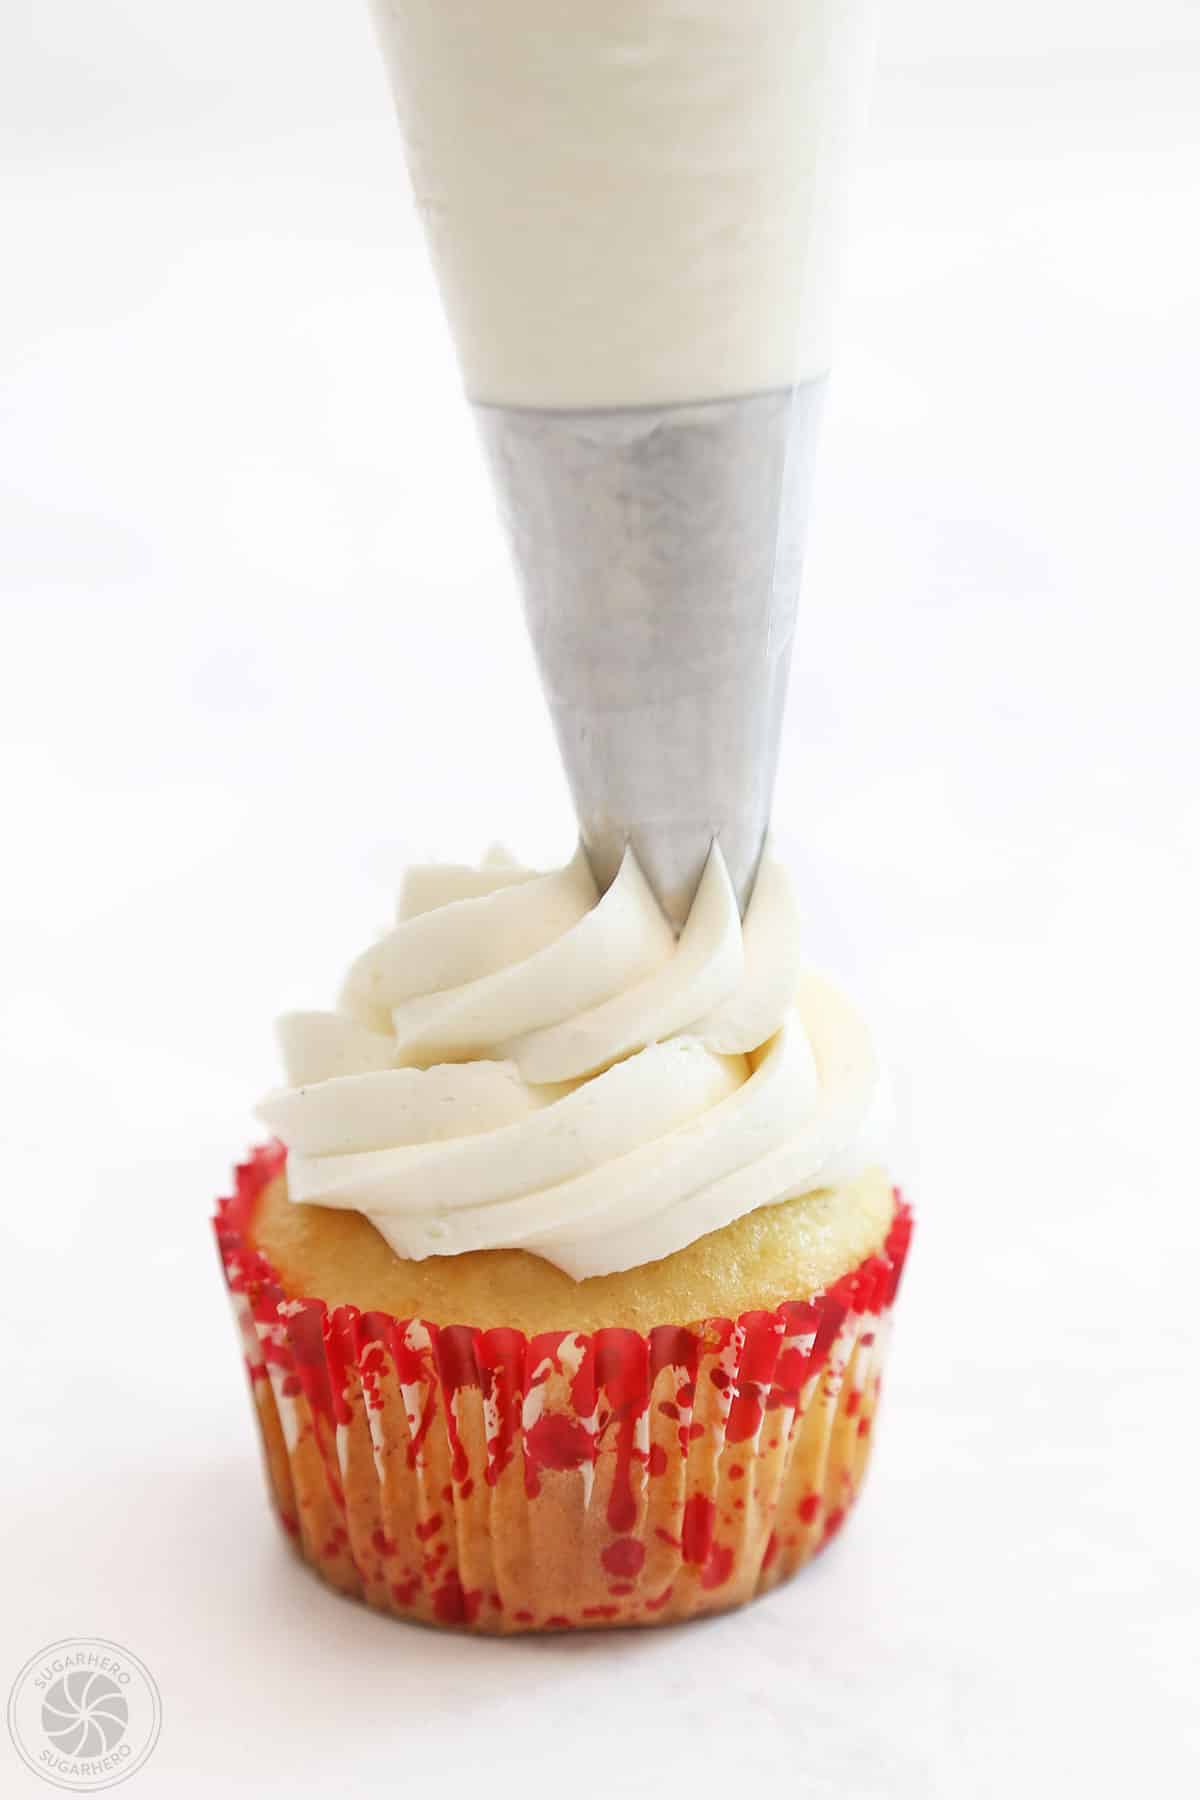
- Pipe on frosting: Place the prepared frosting into a piping bag fitted with a large star tip, such as Ateco #849. Pipe a swirl of white frosting on top of a cupcake. Repeat with remaining cupcakes.
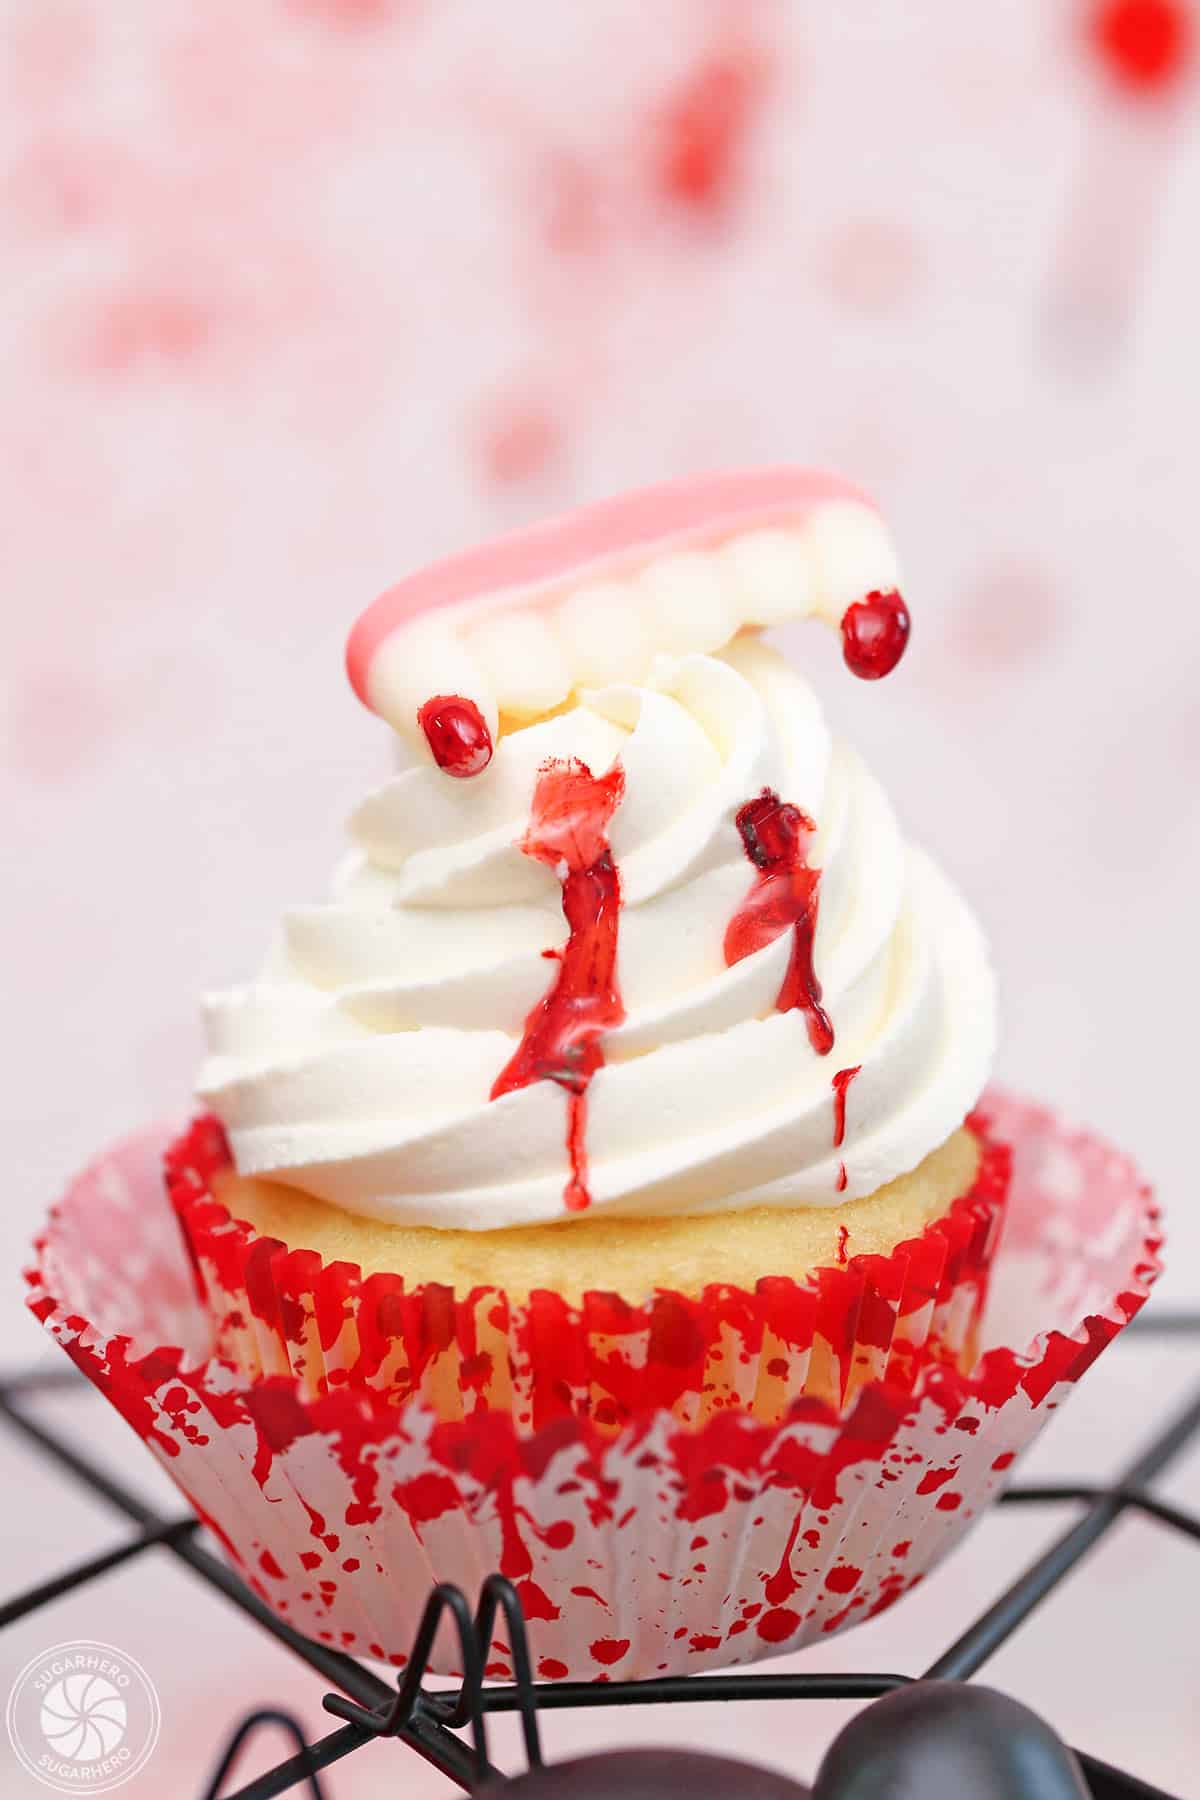
- Finish cupcakes: Dab two dots of red gel on the cupcake to look like pokes from two pointy teeth. Top each cupcake with gummy vampire teeth. Enjoy!
- Storage: Store extras in an airtight container at room temperature for 2-3 days, or in the refrigerator for up to a week. If they have been chilled, allow them to come to room temperature before serving for the best taste and texture.
Notes
Measuring Tips
Our recipes are developed using weight measurements, and we highly recommend using a kitchen scale for baking whenever possible. However, if you prefer to use cups, volume measurements are provided as well. PLEASE NOTE: the adage “8 oz = 1 cup” is NOT true when speaking about weight, so don’t be concerned if the measurements don’t fit this formula.
Nutrition
📸 Photo Tutorial: How to Make Vampire Bite Cupcakes
Once your cupcakes and frosting are ready, it’s time to decorate. Use this step-by-step tutorial to help you make creepy Vampire Bite Cupcakes. Full instructions are included in the recipe card above.
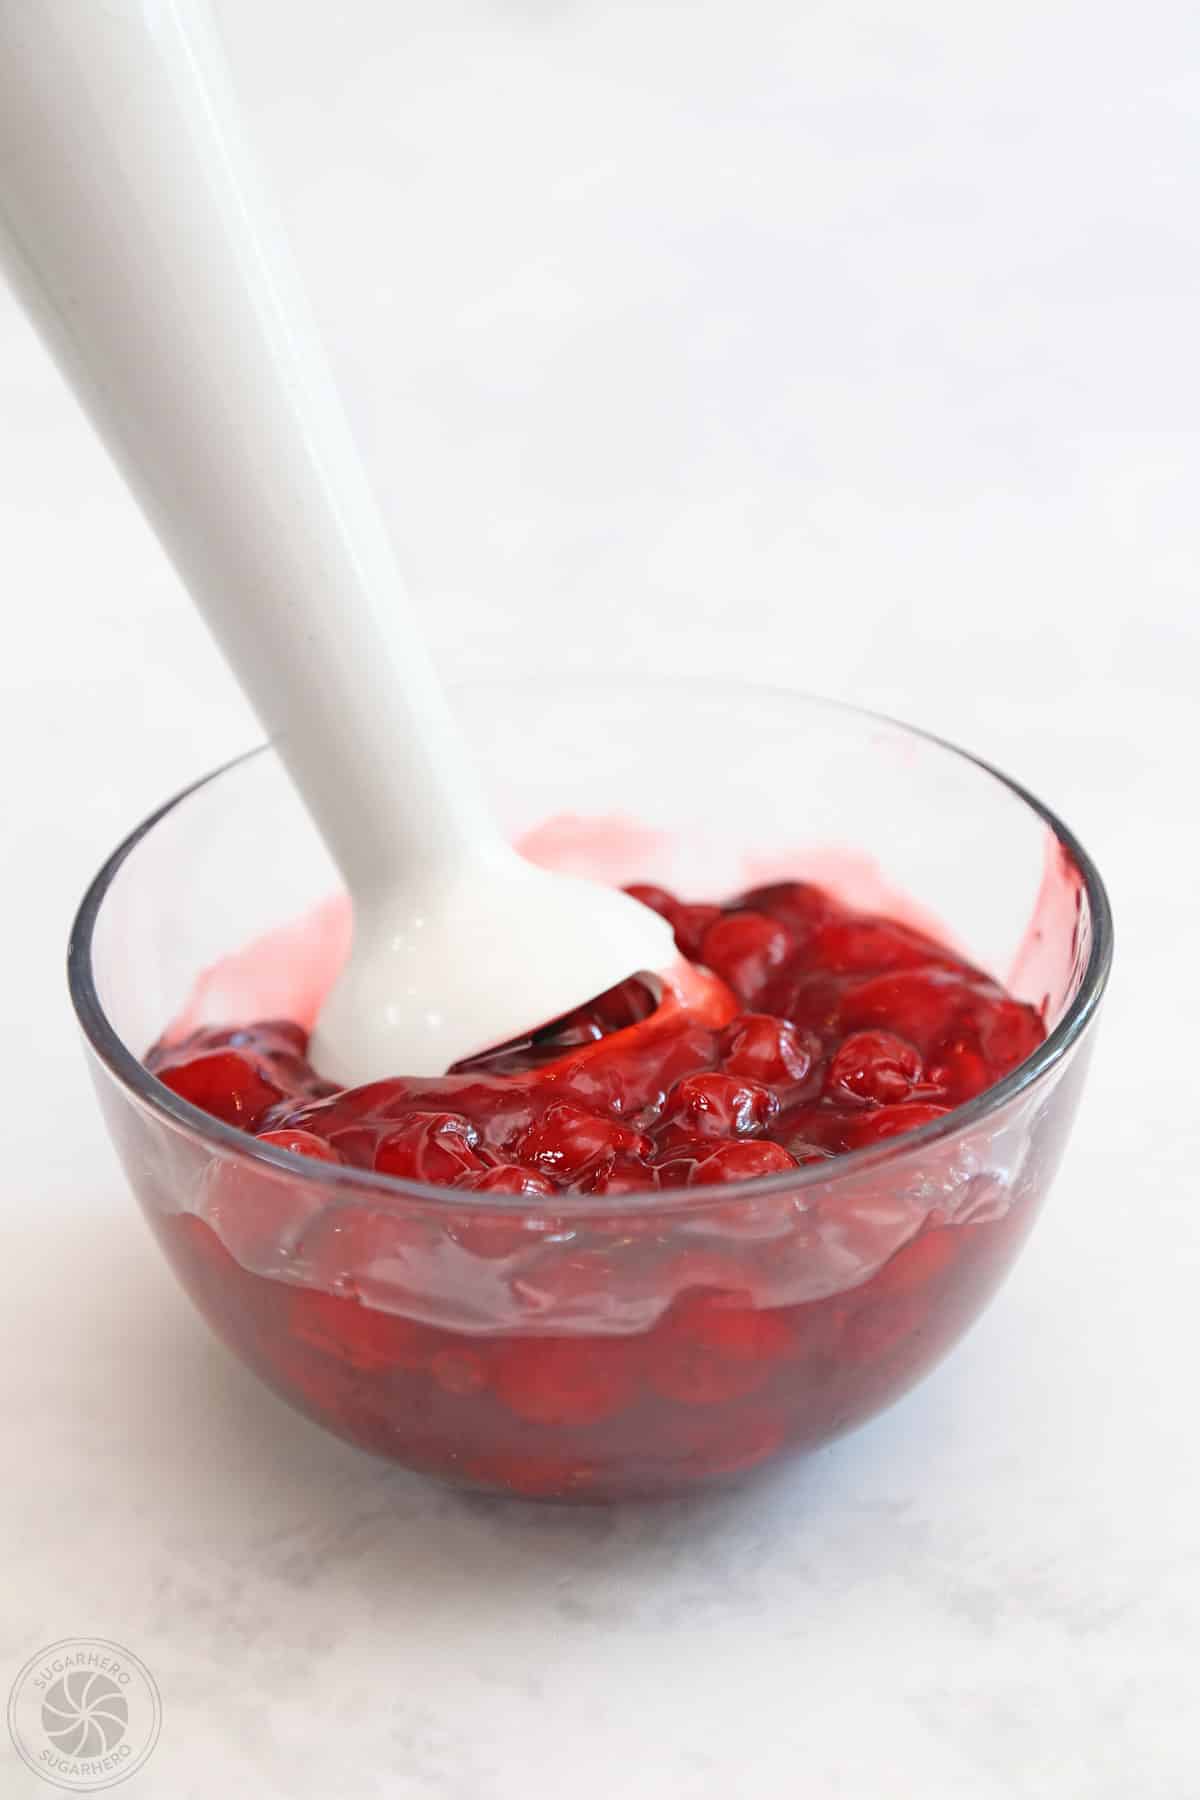

- Chop cherry filling: Use a stick blender to coarsely chop the cherries into smaller pieces. You can use a knife instead if you prefer.
- Cut cupcake tops: Use a small knife to make a small cone-shaped hole on the top of each cupcake. Cut the bottom of the cone pieces off, so you’re left with just a thin top.
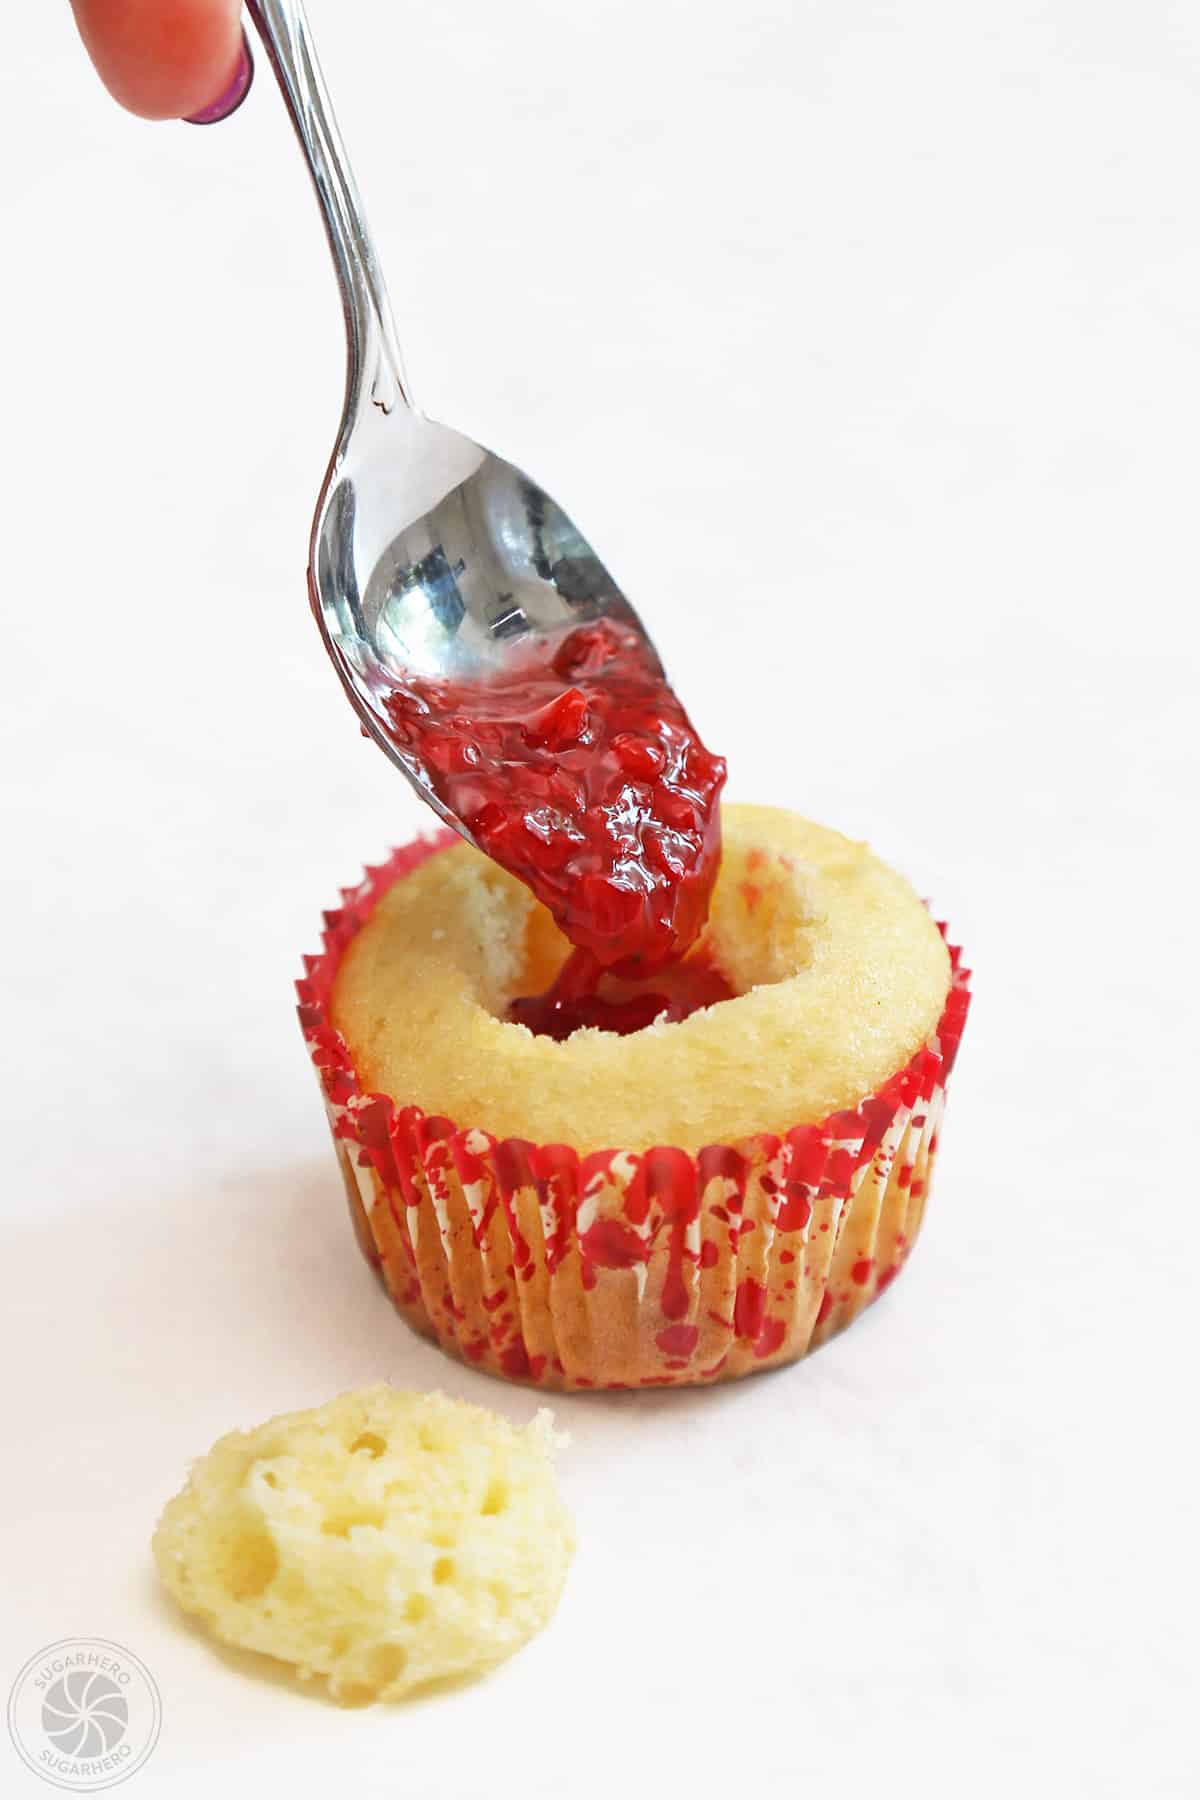
- Add filling: Fill each cupcake hole with cherry filling. Place the cupcake top back on the filling.
- Top with frosting: Fill a piping bag fitted with a large closed star tip with the prepared frosting. Pipe a large swirl on top of each cupcake.
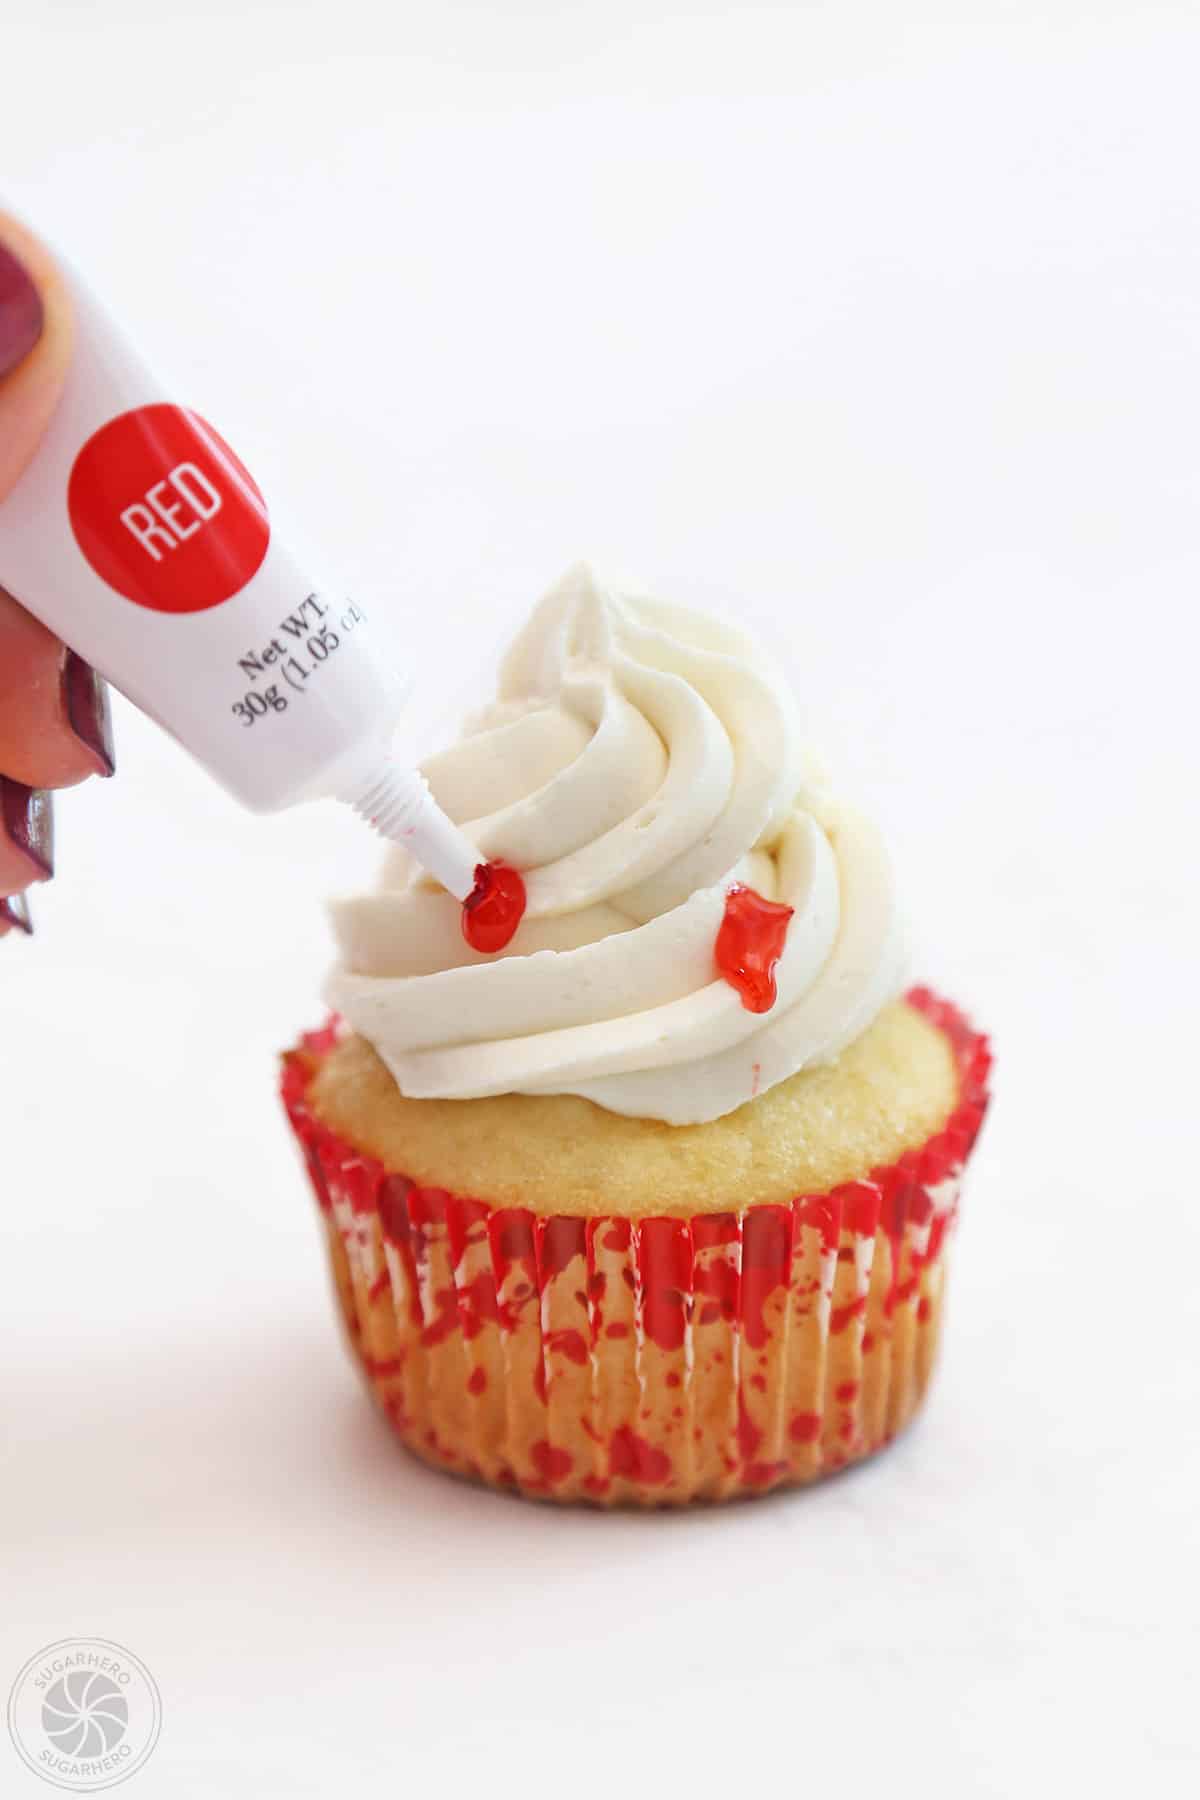
- Dab with gel: Squeeze two dots of red decorating gel on each cupcake to look like pokes from vampire fangs.
- Finish: Place gummy vampire teeth on top of the cupcakes and enjoy!
💡Tips and FAQs for Success
- Frosting consistency: So many factors can impact frosting texture, including the brand and temperature of the butter, and the temperature of your kitchen — don’t be afraid to play around at the end to get a texture you’re happy with.
If you don’t have piping bags and tips on hand, you can use a Ziplock bag, and cut a small hole in one of the corners to pipe frosting through. You won’t get the same ridged effect as from a star tip, but you can still pipe a swirl on top of the cupcakes.
Both components of these cupcakes can be made in advance and used later.
Frosting: The frosting can be made up to a week in advance. Place the frosting in an airtight container and press a layer of cling wrap directly on top of the frosting to prevent a crust from forming. Store the frosting in the refrigerator. When you’re ready to use it, let it come to room temperature on the counter, then whip it on medium speed until it regains its light, creamy texture.
Cupcakes: Baked and cooled cupcakes can be frozen in airtight containers. Let them defrosting in their container on the countertop before decorating.
Store extra cupcakes in an airtight container at room temperature for 2-3 days, or in the refrigerator for up to a week. If they have been chilled, allow them to come to room temperature before serving for the best taste and texture.
Skull Cupcakes 1 Oct 2025 3:14 PM (8 months ago)
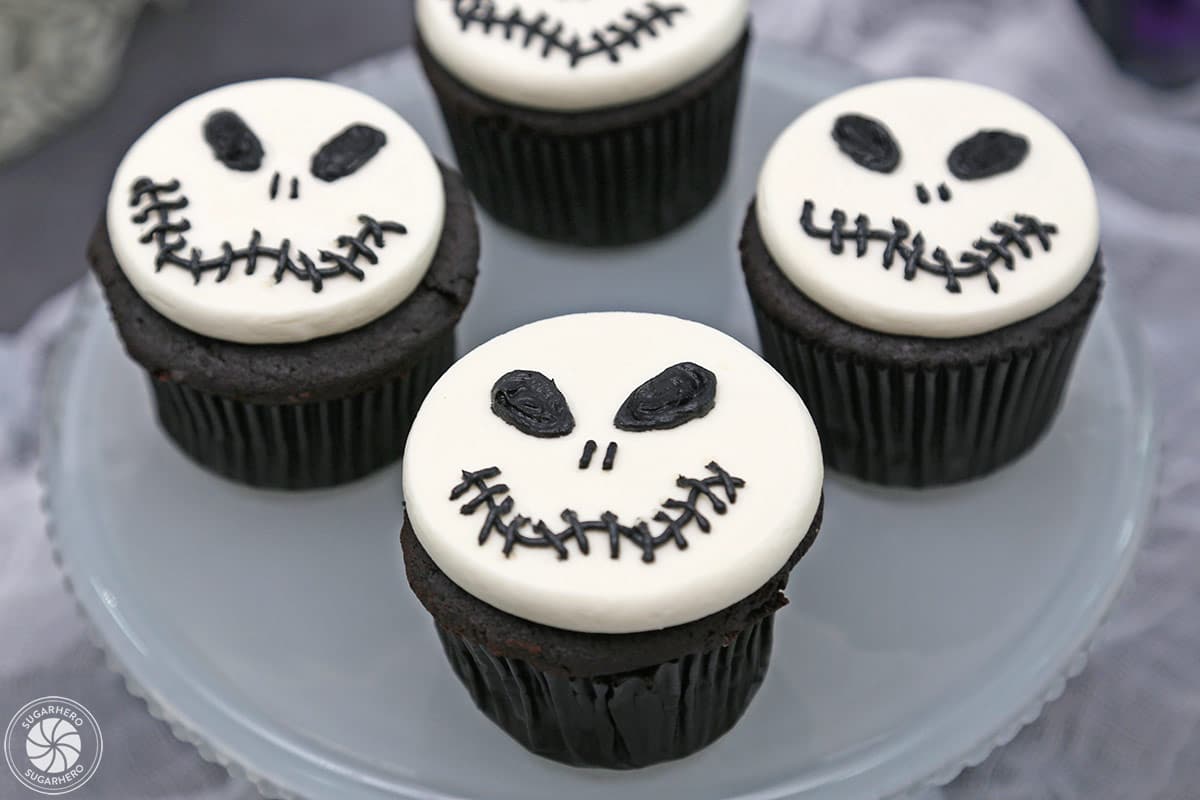
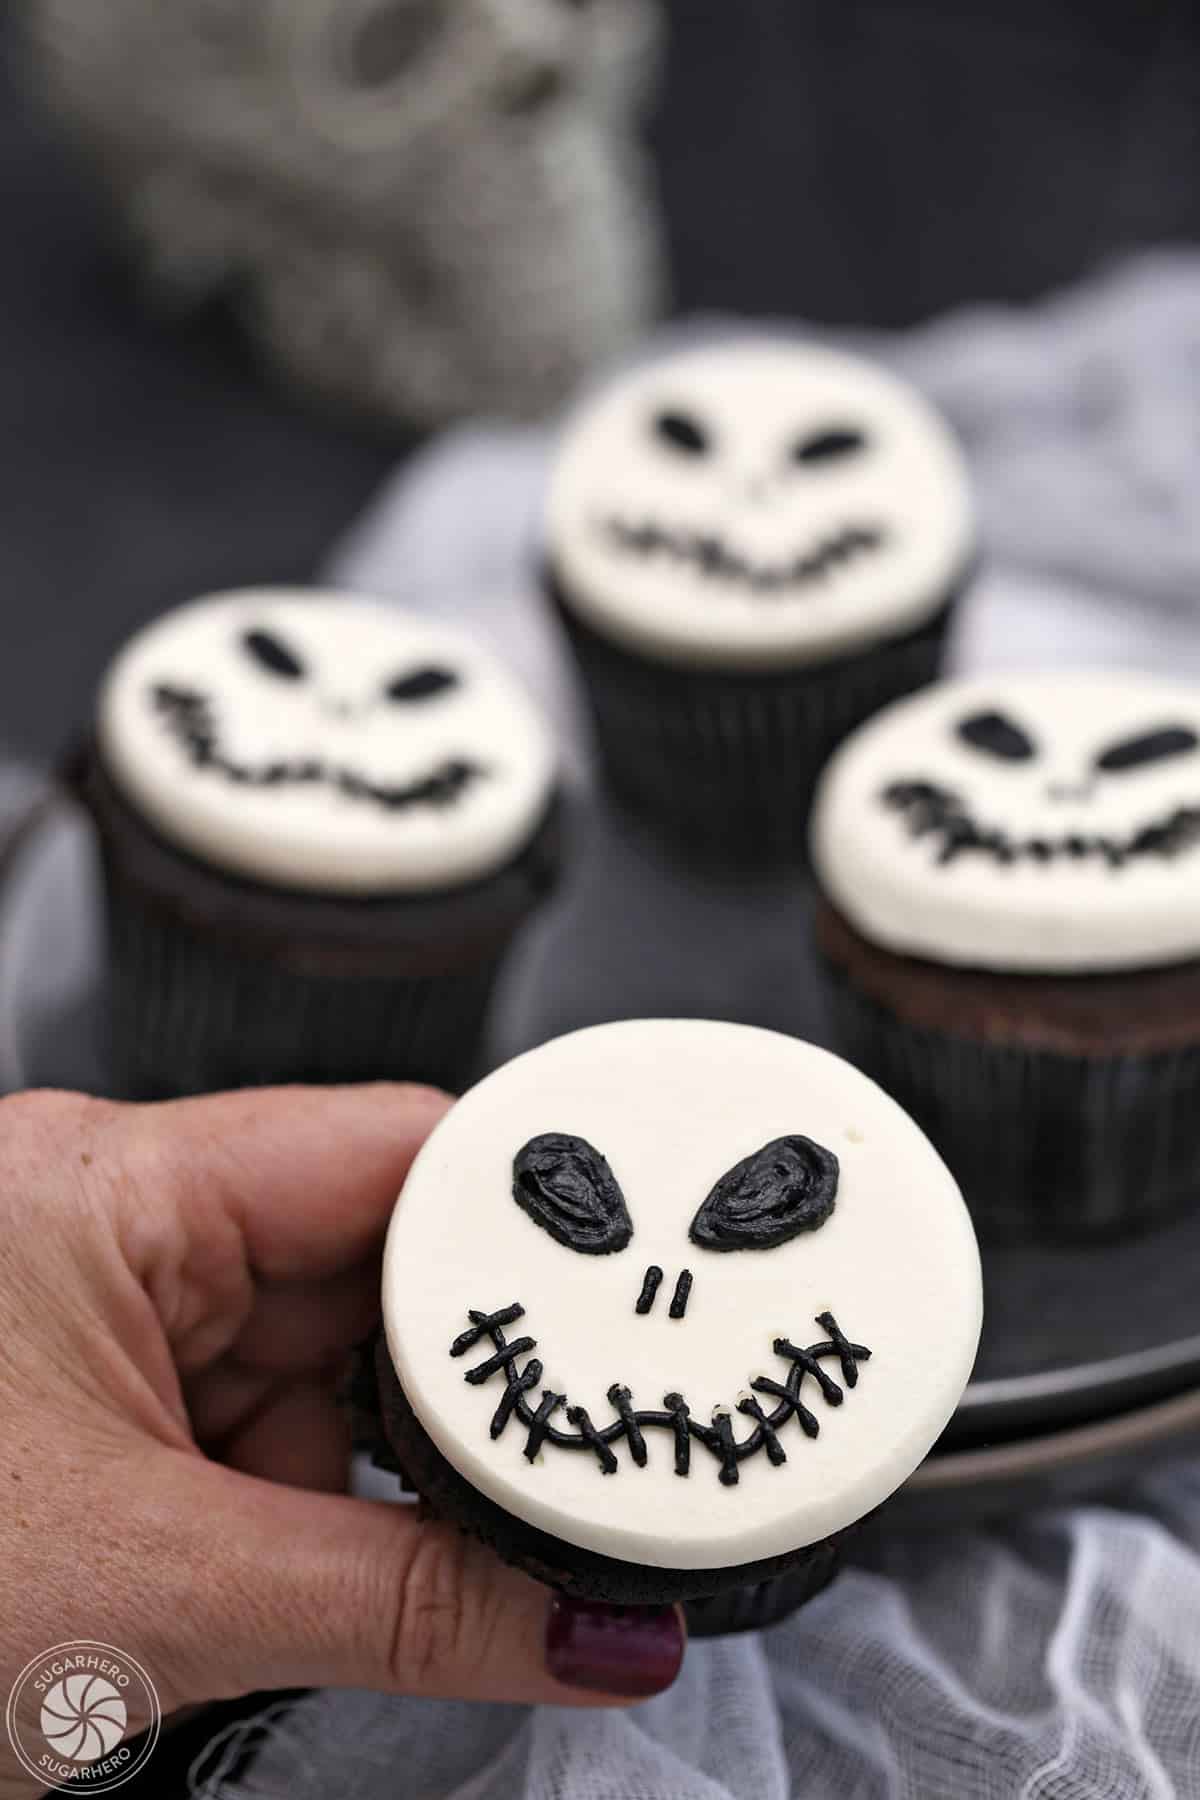
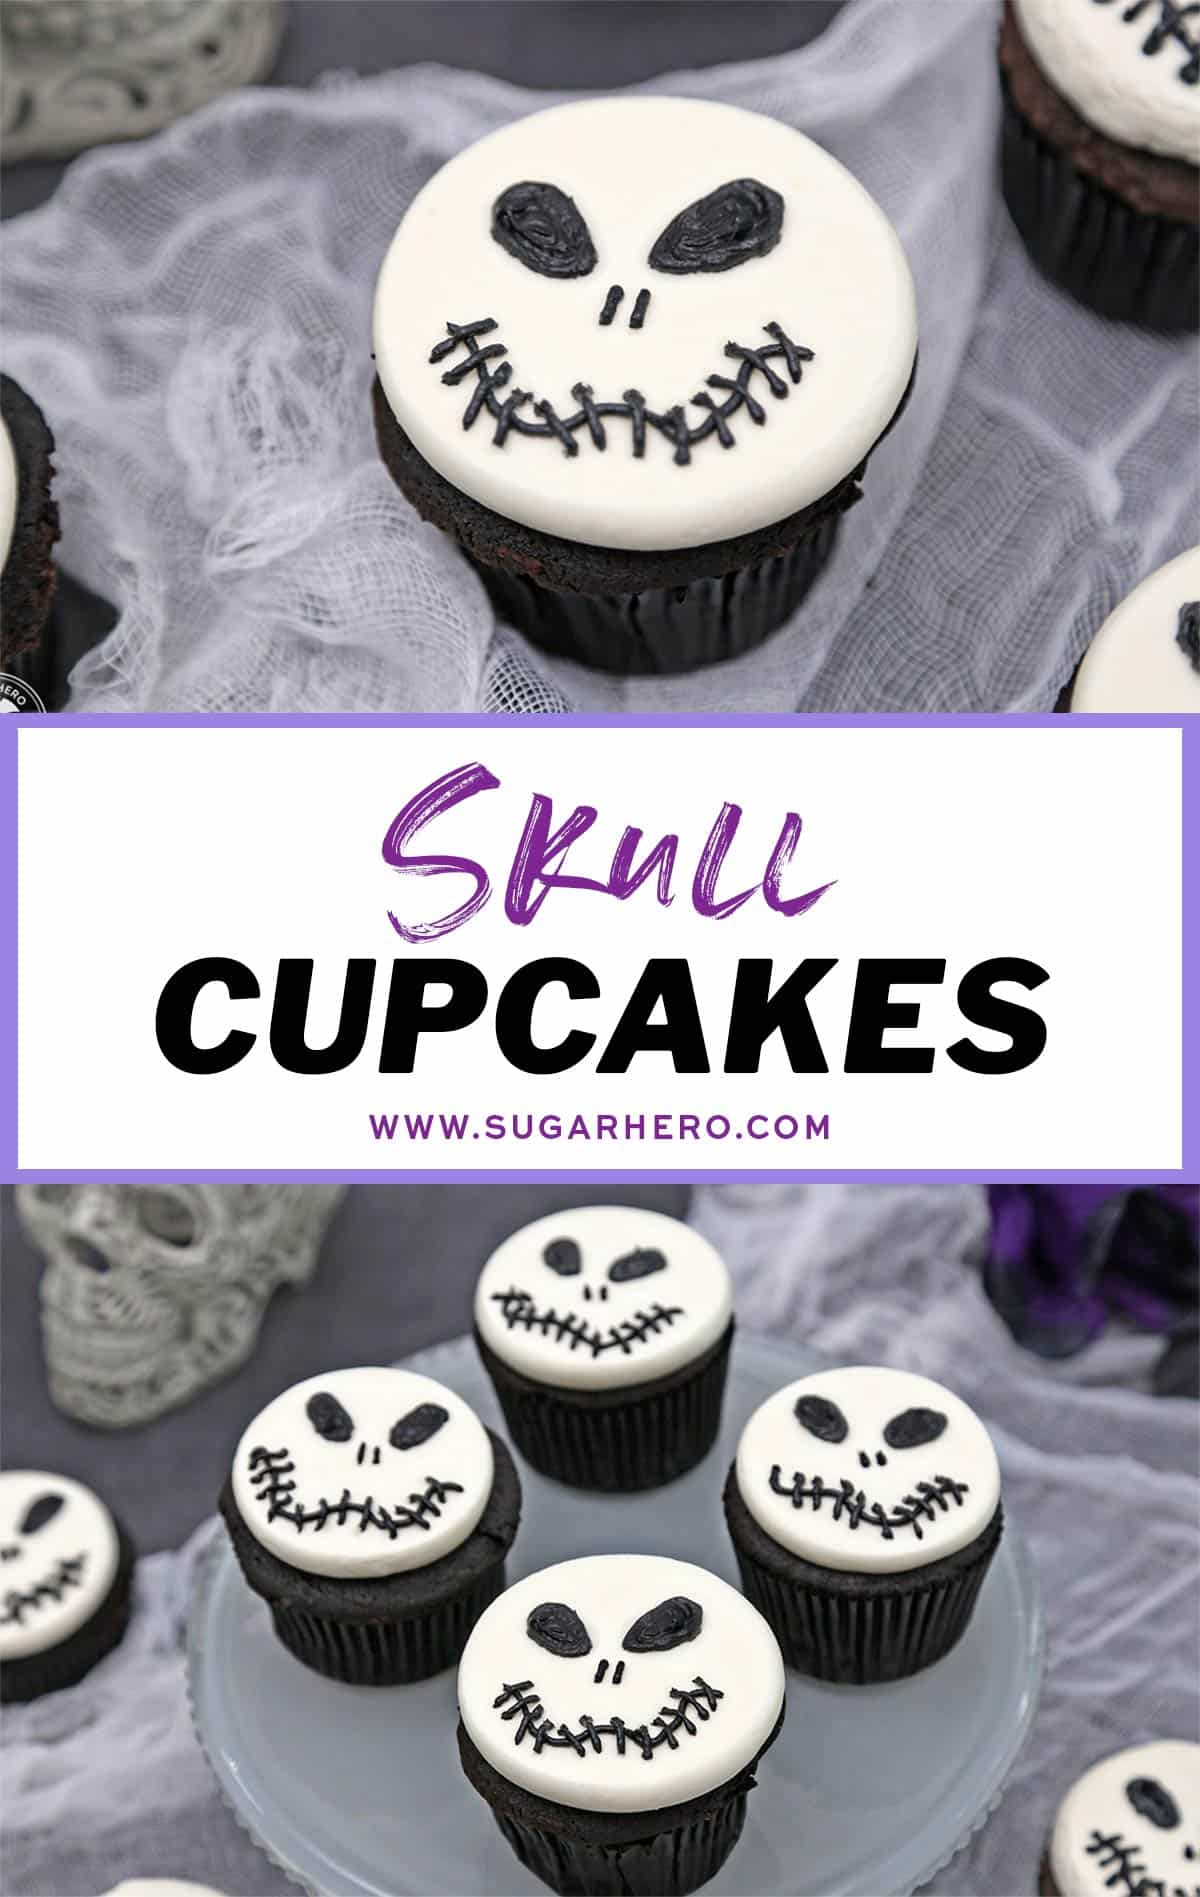
Making these creepy-cute Skull Cupcakes is easier than you think. Learn how to create a simple skull design out of buttercream for Halloween – complete with a photo tutorial. Bone-appetit!
☠️ How to Make Skull Cupcakes for Halloween
Celebrating spooky season in style just got a little easier!
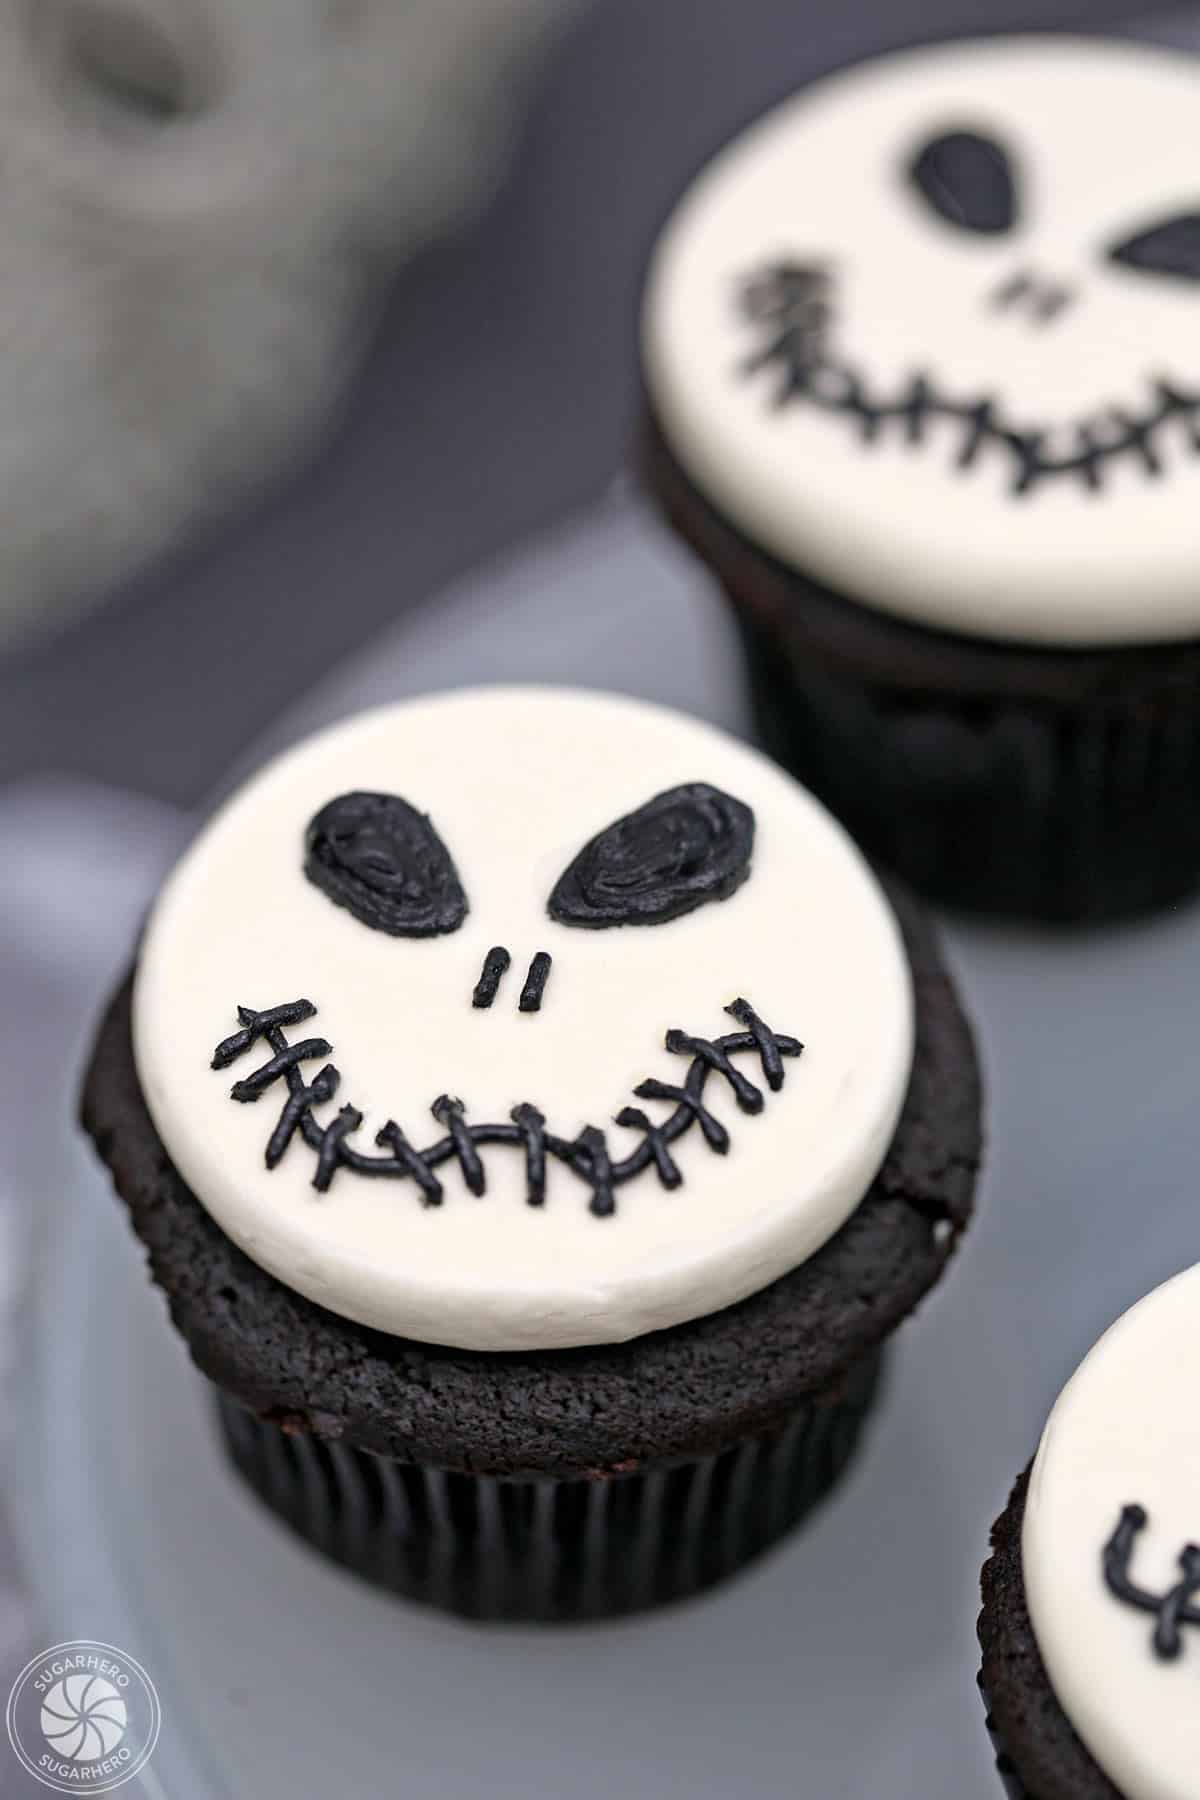
No complicated Halloween treats here – these Skull Cupcakes are surprisingly simple, and 100% adorable. (Can you call something decorated like a skull adorable?? Maybe I should say they’re to die for instead.)
All you need are baked cupcakes and two colors of buttercream to make these Jack Skellington-inspired faces. You’re welcome to take a shortcut and use your favorite cake mix for these cupcakes. But if you’re looking for some homemade inspiration, browse our list of cupcake recipes here.
Find the recipe and full photo tutorial below, to guide you through every step of decorating. Have fun!
🎃 More Spooky Sweets
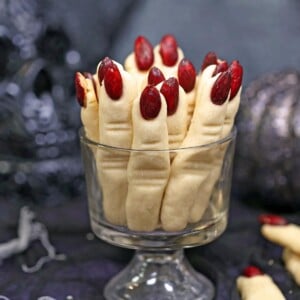
If you like to put the “treat” in “trick or treat,” check out all of our fun Halloween dessert recipes, like Witch’s Brew Halloween Punch, Red Velvet Marshmallow Spiderweb Cake, and Witch Finger Cookies.
Table of Contents
🧾 What You’ll Need
Ingredients
It doesn’t take much to make these cupcakes! Take a look at these ingredient tips as you gather what you’ll need. (Links are affiliate links and I earn a small commission from qualifying purchases.)
- Cupcakes: You’ll need 24 baked and cooled cupcakes in the flavor of your choice. Make cupcakes from scratch or use your favorite mix!
- Unsalted butter and salt: I like to use unsalted butter so that I can control the amount of salt in my frosting. If you don’t have unsalted butter, use salted butter and omit the added salt. Give the butter time to soften to cool room temperature.
- Milk: Use milk or water to adjust the consistency of the frosting.
- Vanilla extract: My favorite brand of vanilla extract is made by Nielsen-Massey.
- Powdered sugar: This frosting recipe is an American Buttercream, which is powdered sugar-based. You’ll want to measure the sugar with a scale if possible and then sift it into the mixture.
- Black gel food coloring: I love the Americolor brand of gel food coloring. It’s highly concentrated so you only need a little to achieve deep coloring. I used super black to dye the frosting for the facial details. Check the Tips below for more information about making deep black frosting.
Equipment
All you’ll need are some piping tools to create the look of these Skull Cupcakes! (Links are affiliate links and I earn a small commission from qualifying purchases.)
- Piping bags and couplers: I like these piping bags because they are washable and can be reused. You’ll also need a few standard couplers. If you don’t have these items, you can make your own piping bags from plastic zip-top bags (see the Tips section below!). If you go this route you won’t need couplers or a piping tip, either.
- Piping tip: I’d recommend using a small round tip like Wilton Tip #1 to pipe on the facial details.
- Cupcake liners: I used plain black cupcake liners for these cupcakes. However, as a totally optional and fun upgrade, you can dress your cupcakes in solid colored rainbow liners or Halloween cupcake liners.
Ready to Make These?
- Get the recipe below 👇👇
- Scroll below the recipe for step-by-step photos
- Read important FAQs and more
💀 More Skull Treats
Leave a Review!
If you make this recipe, let us know! Leave a ⭐️⭐️⭐️⭐️⭐️ rating on the recipe below, and leave a comment, take a photo and tag me on Instagram @elabau, or use #sugarhero on IG!
Skull Cupcakes
Ingredients
For the Cupcakes
- 24 baked and cooled cupcakes from scratch or your favorite mix, I used chocolate cupcakes
For the Frosting
- 1 lb unsalted butter at cool room temperature
- 2 TBSP milk can substitute water
- ½ tsp salt
- 1 TBSP vanilla extract
- 28 oz powdered sugar (7 cups), sifted after measuring
- Black gel food coloring I used Americolor Super Black
Instructions
Make the Frosting
- Place the butter in the bowl of a large stand mixer. Beat on medium speed with a paddle attachment until very white and pale, about 3-4 minutes.
- Turn the speed lower, and add 1 tablespoon of milk, the salt, and the vanilla extract. Mix until everything is well incorporated with the butter.
- With the mixer running on low, slowly add the powdered sugar. Once all of it is added, stop and scrape down the bottom and sides of the mixing bowl, then mix the buttercream on medium speed for 30 seconds.
- If the buttercream is too stiff for your needs, add the remaining tablespoon of milk and mix it in well. You can adjust the final texture by adding more powdered sugar or milk until you like the consistency.
- Separate out about a quarter of the frosting. Dye the smaller portion black, using good-quality gel or powder food coloring. (If you don’t mind some chocolate flavor, you can also add black cocoa powder (about ¼ cup) to it so you won’t need to use as much food coloring). You can use the colored frosting right away, but it’s best to chill it for at least 1 hour before use. See Note below.
Frost the Cupcakes
- When you are ready to begin decorating, place the white frosting in a piping bag fitted with a plain coupler, and the black frosting in a piping bag fitted with a small round tip, like Wilton #1.
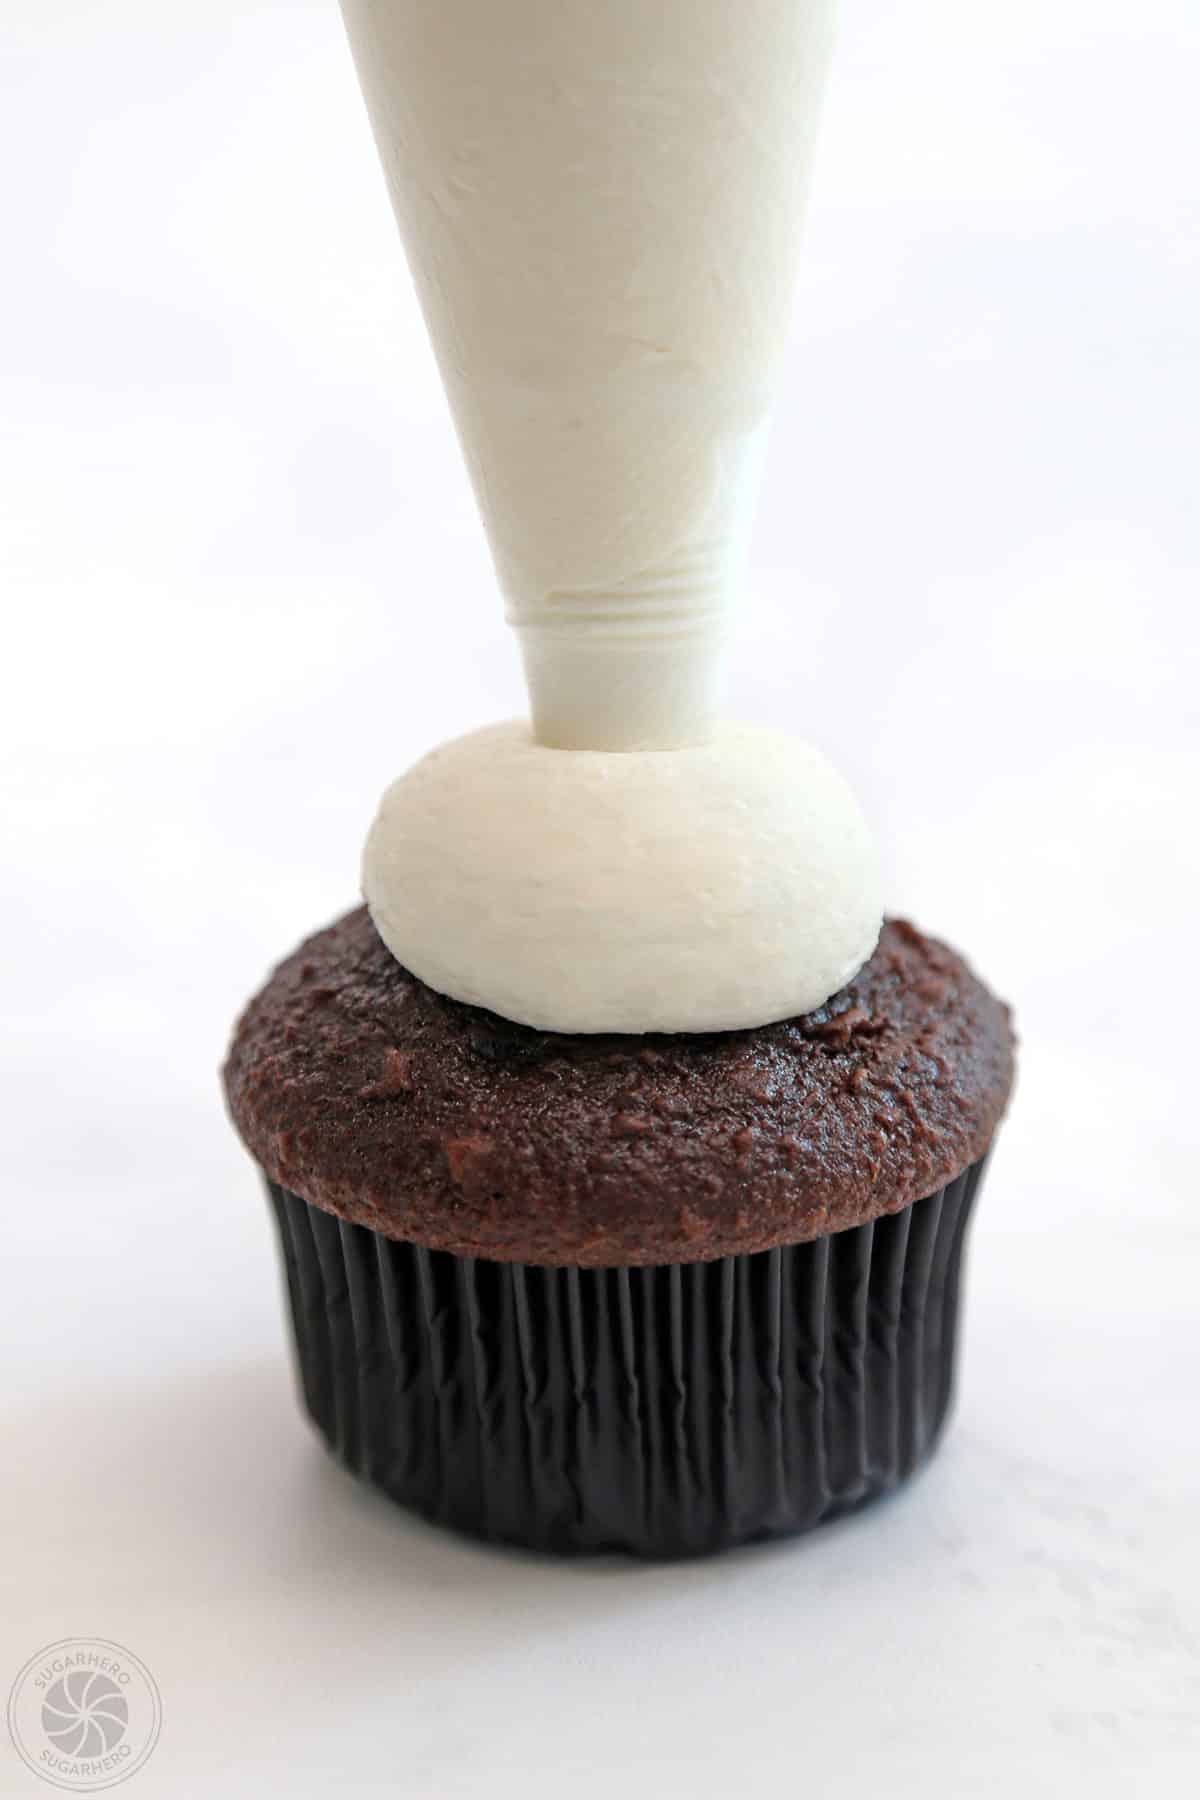
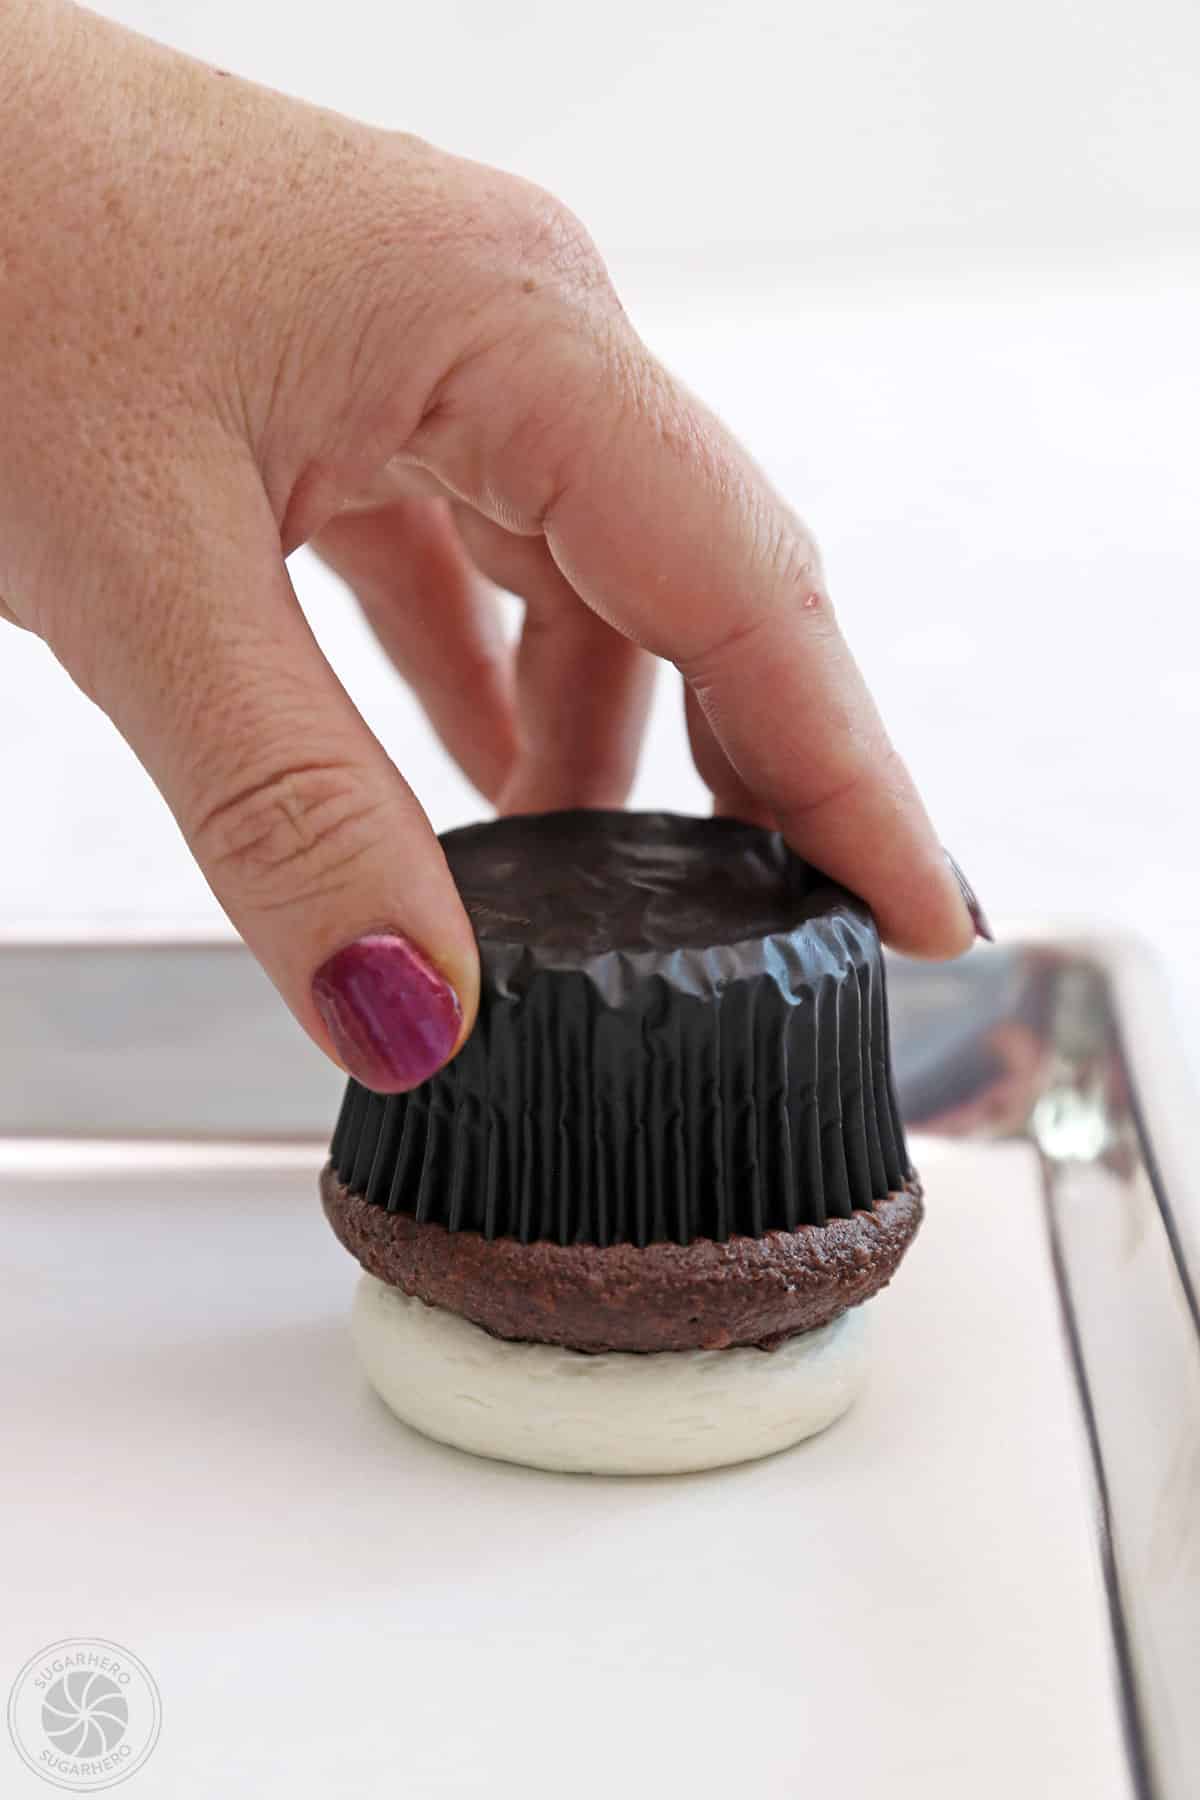
- Cover two baking sheets with parchment paper. Pipe a large round ball of white frosting on top of a cupcake (approximately 3 TBSP). Invert the cupcake and gently press it onto one of the lined baking sheets so that the frosting spreads evenly and covers the top of the cupcake. Repeat with remaining cupcakes.
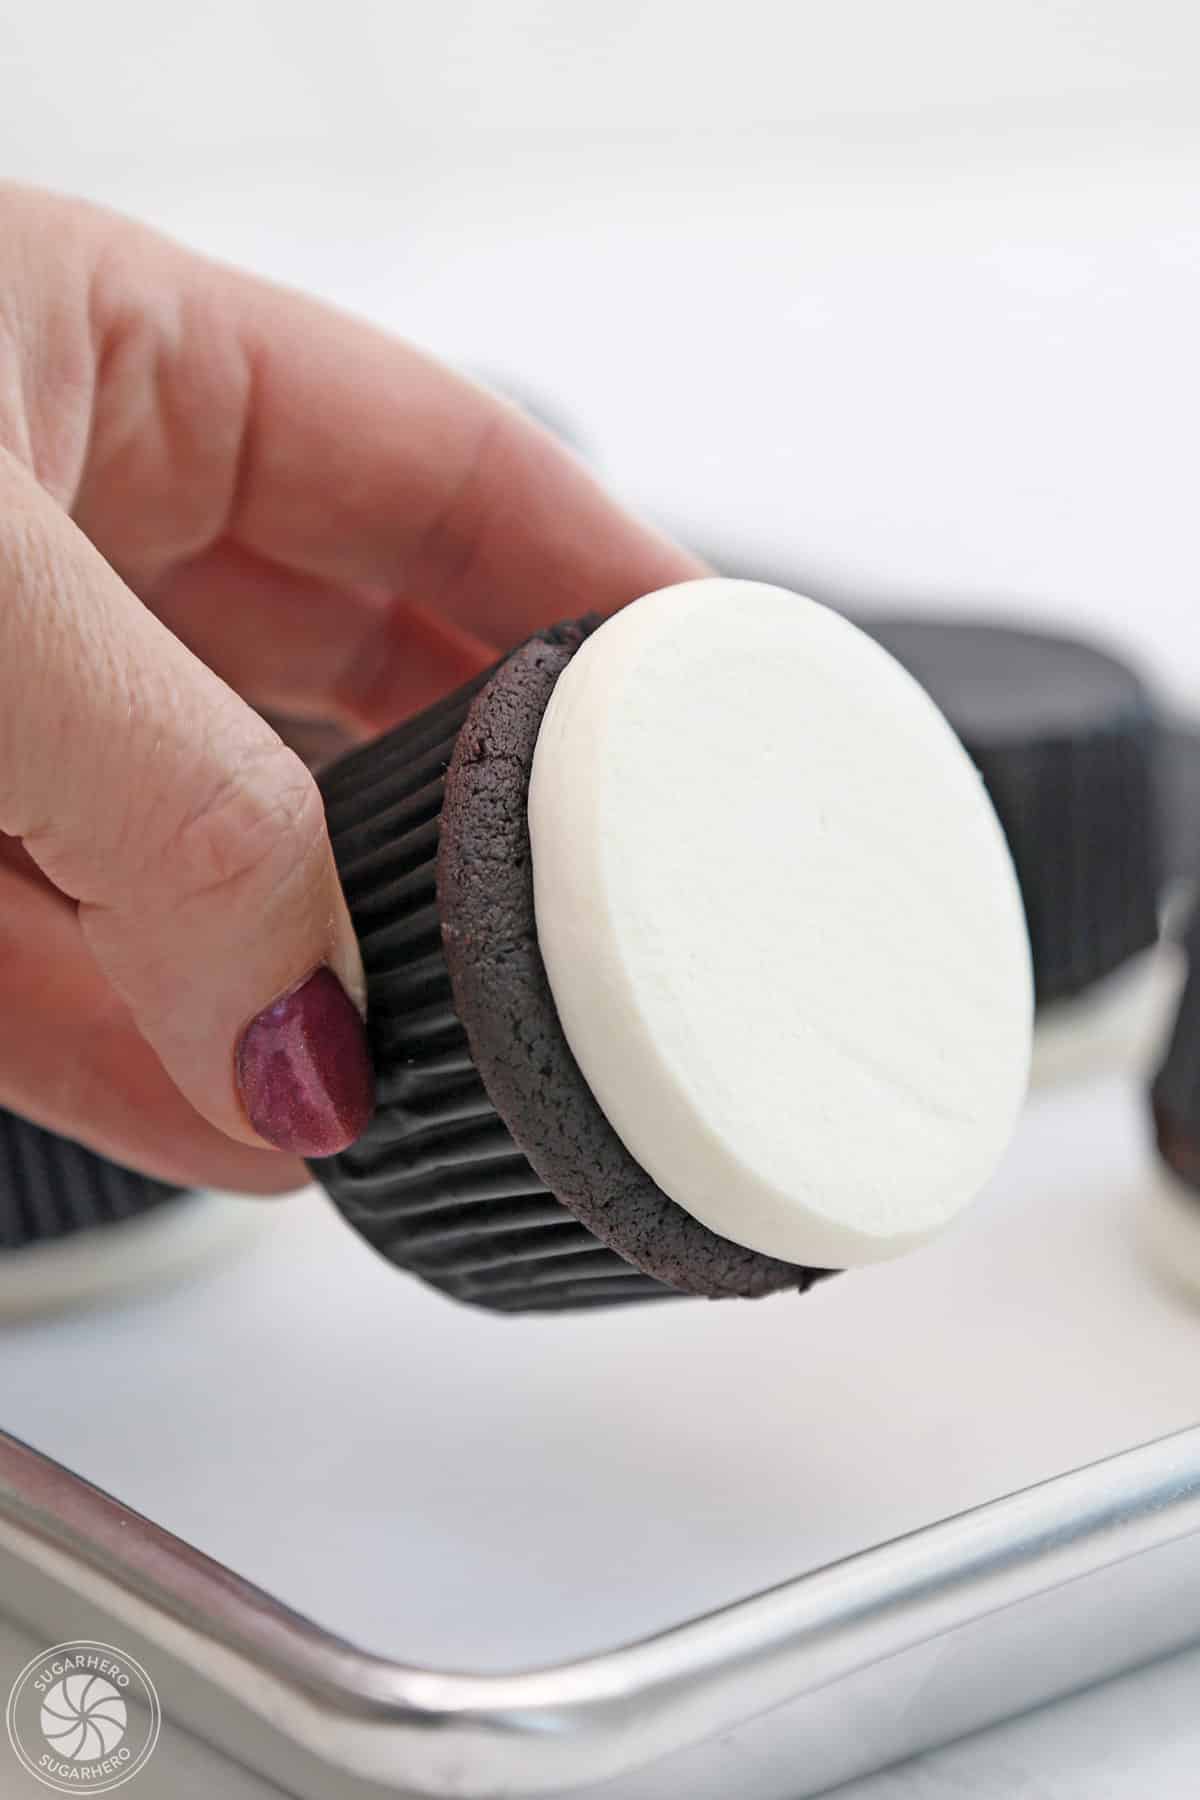
- Chill the cupcakes in the refrigerator for about an hour, until the buttercream is very firm. Peel the cupcakes off the parchment, revealing a completely flat buttercream layer on top.
Decorate the Cupcakes
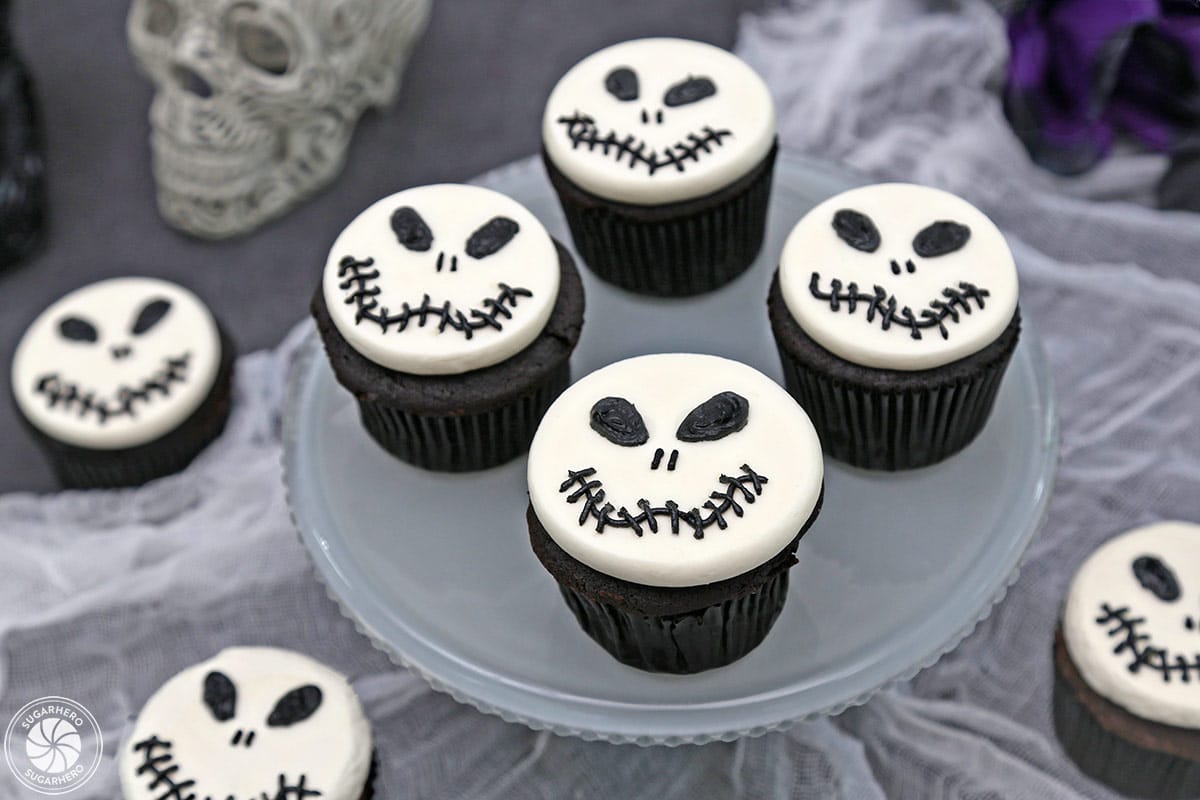
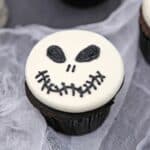
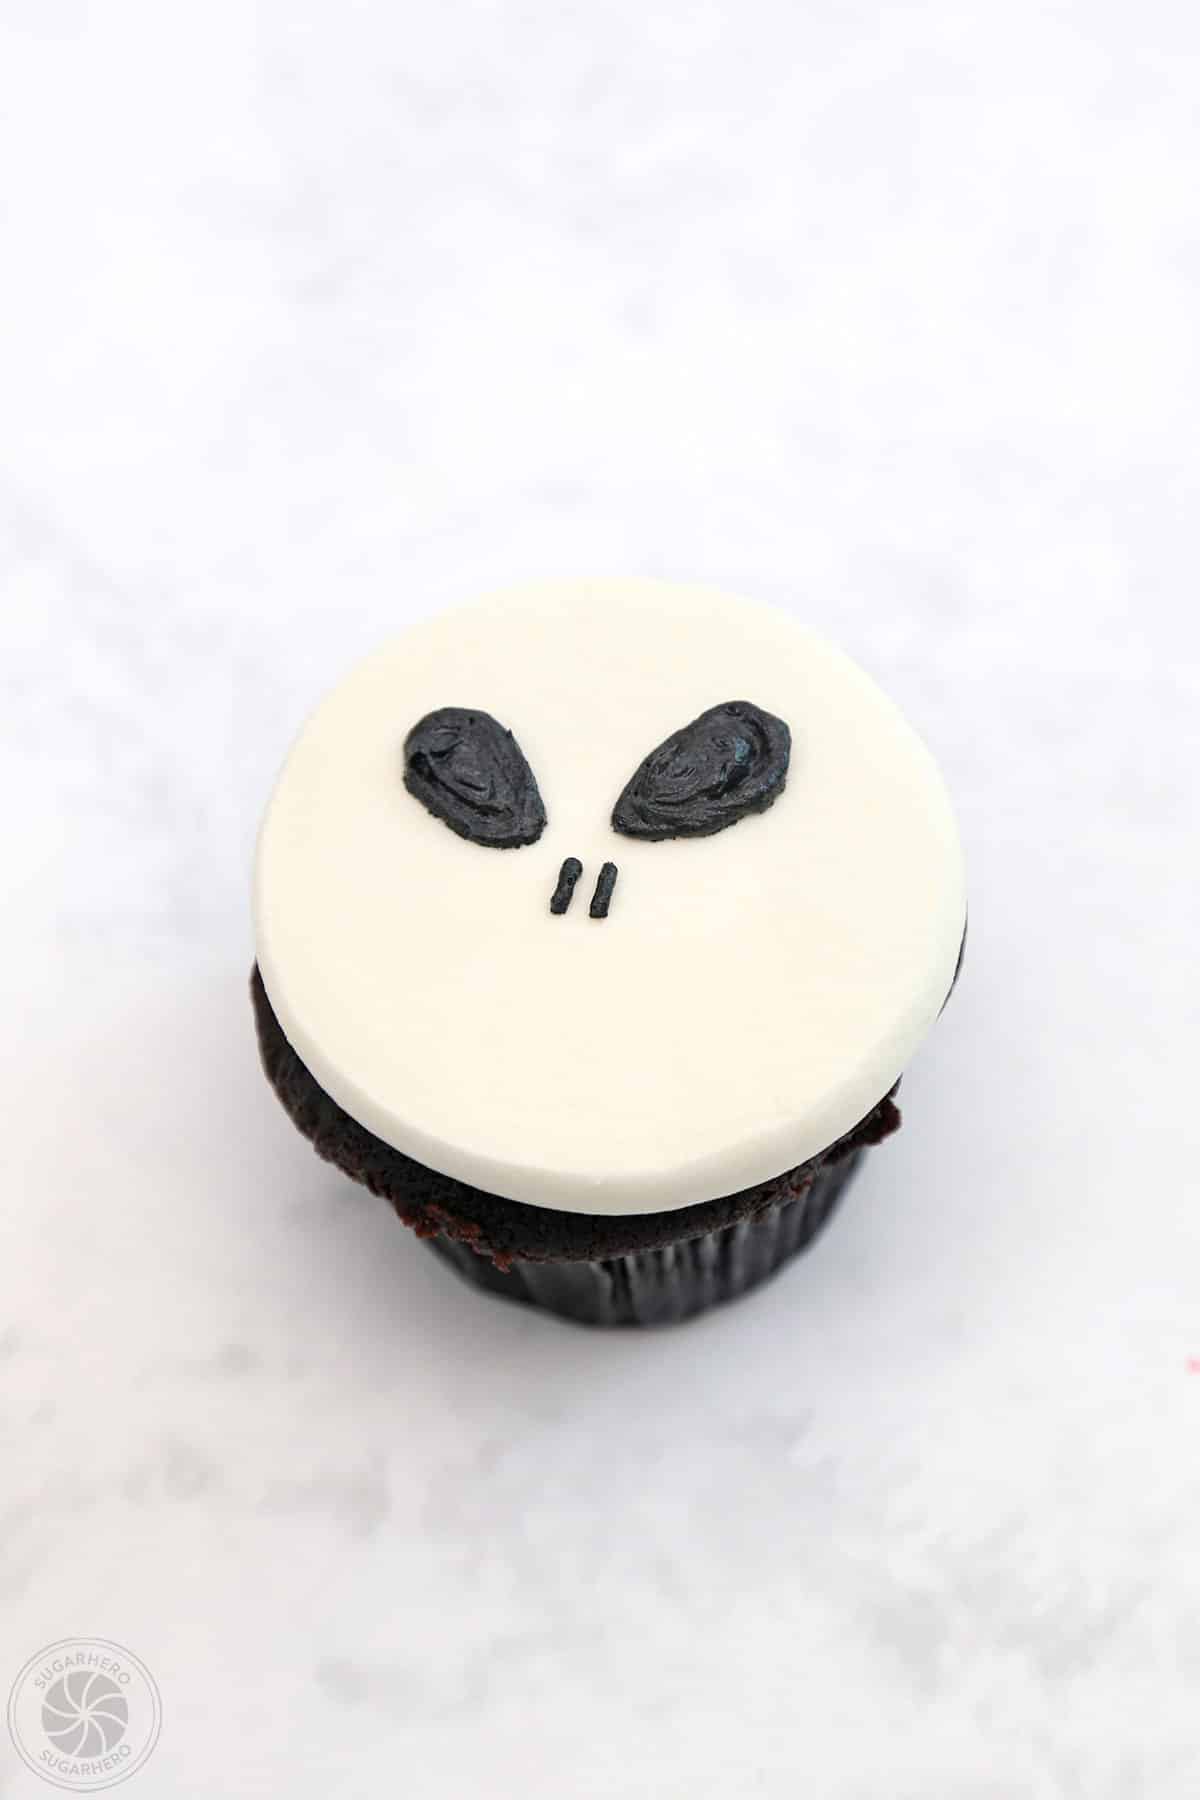
- Take the piping bag with black buttercream and pipe the skull face. Give it two ovals for eyes, two small lines for a nose, and a long mouth with stitches across it. Repeat until all of the cupcakes are decorated.
- Store extras in an airtight container at room temperature for 2-3 days, or in the refrigerator for up to a week. If they have been chilled, allow them to come to room temperature before serving for the best taste and texture.
Notes
Measuring Tips
Our recipes are developed using weight measurements, and we highly recommend using a kitchen scale for baking whenever possible. However, if you prefer to use cups, volume measurements are provided as well. PLEASE NOTE: the adage “8 oz = 1 cup” is NOT true when speaking about weight, so don’t be concerned if the measurements don’t fit this formula.
Nutrition
📸 Photo Tutorial: How to Make Skull Cupcakes
Decorate with me! Here’s a step-by-step overview of how to decorate Skull Cupcakes from start to finish. Full instructions are included in the recipe card above.
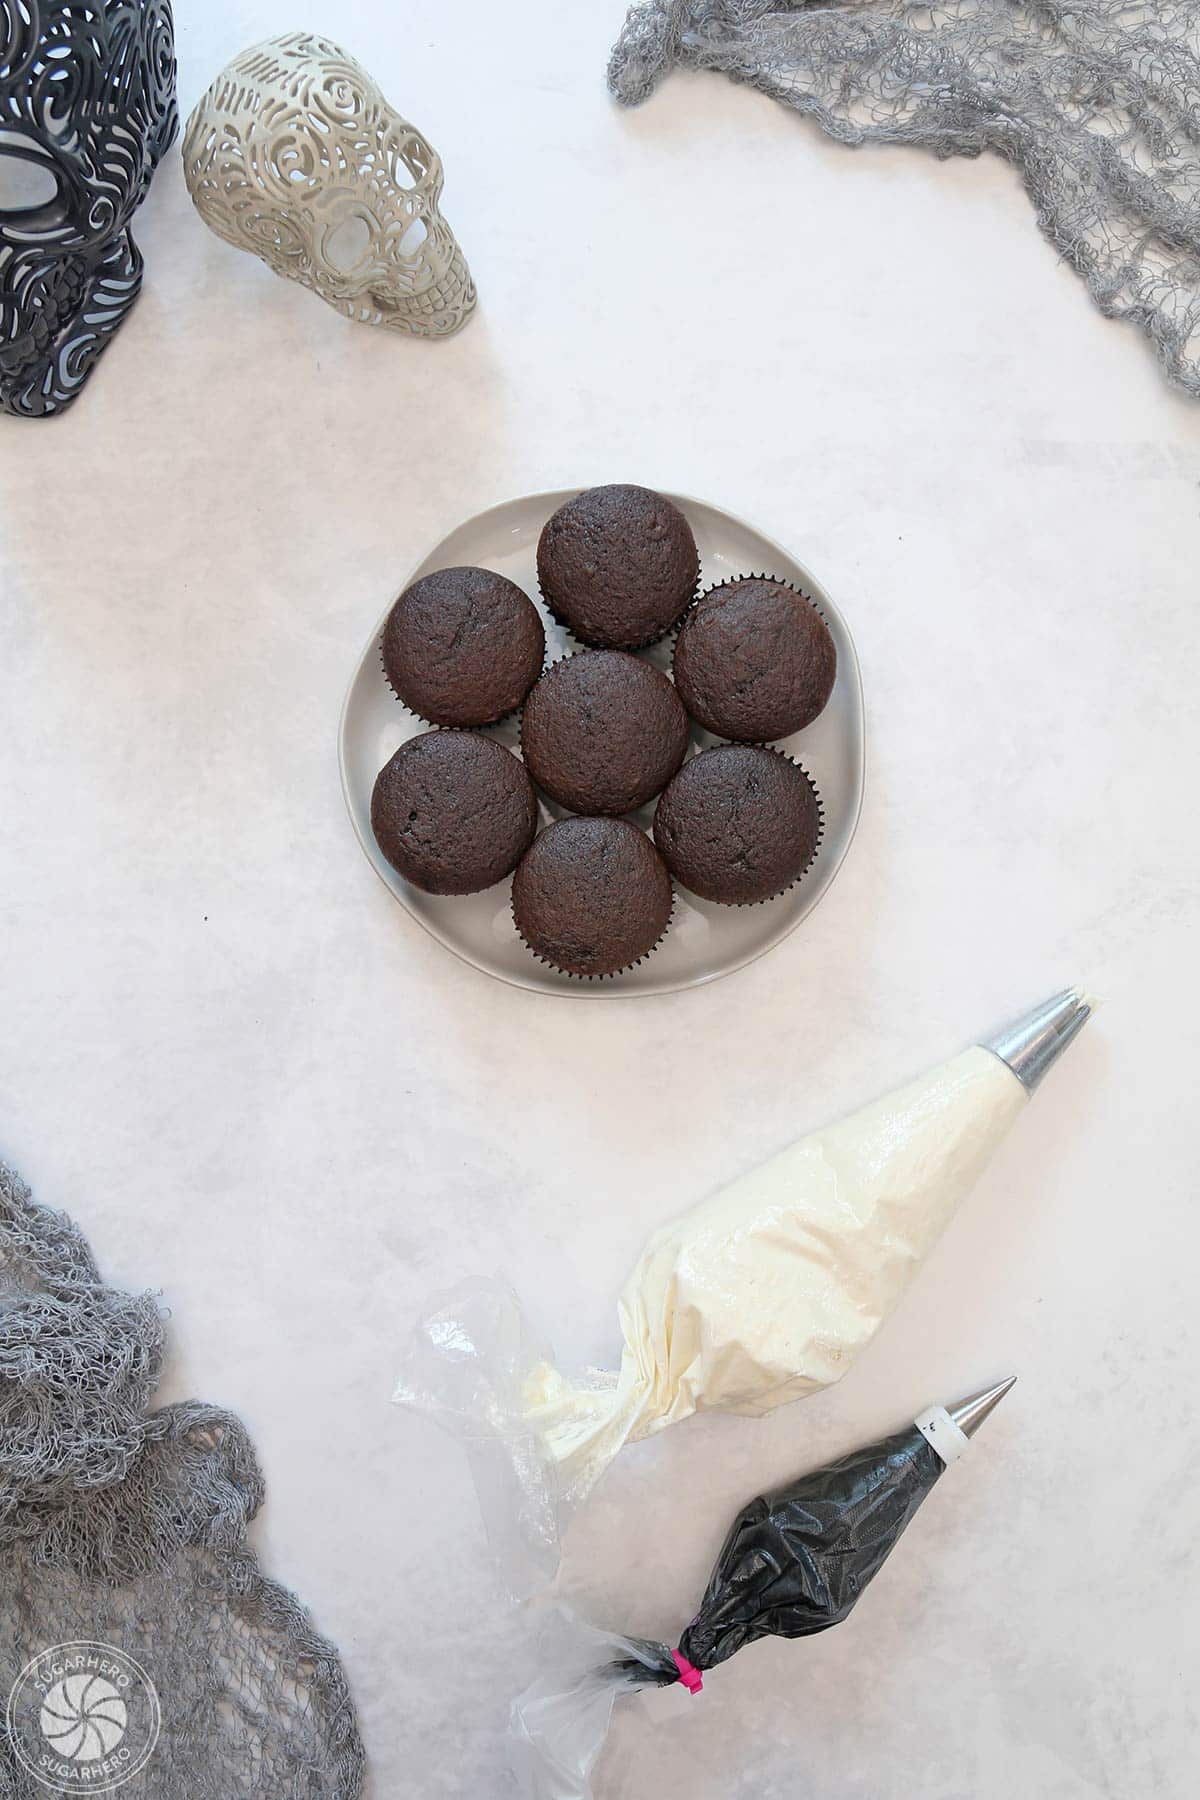
Frost cupcakes
- Prepare to decorate. Fill 2 piping bags: fit one with a plain coupler and fill it with white frosting, and fit the other with a small round tip, like Wilton #1, and fill it with black frosting. Cover two baking sheets with parchment paper and set aside.
- Frost. Pipe a ball of white frosting on top of a cupcake (about 3 TBSP). Turn the cupcake upside down and gently press it onto one of the lined baking sheets until the frosting spreads evenly, covering the top of the cupcake. Repeat with remaining cupcakes.
- Chill. Chill the cupcakes in the refrigerator until the buttercream is very firm (about an hour).
Decorate Cupcakes
- Remove from parchment. Once the frosting is firm, peel the cupcakes off the parchment, revealing completely flat buttercream tops.
- Pipe eyes and nose. Start piping the faces with the black buttercream. Give each cupcake two slanted oval eyes and two small lines for a nose.

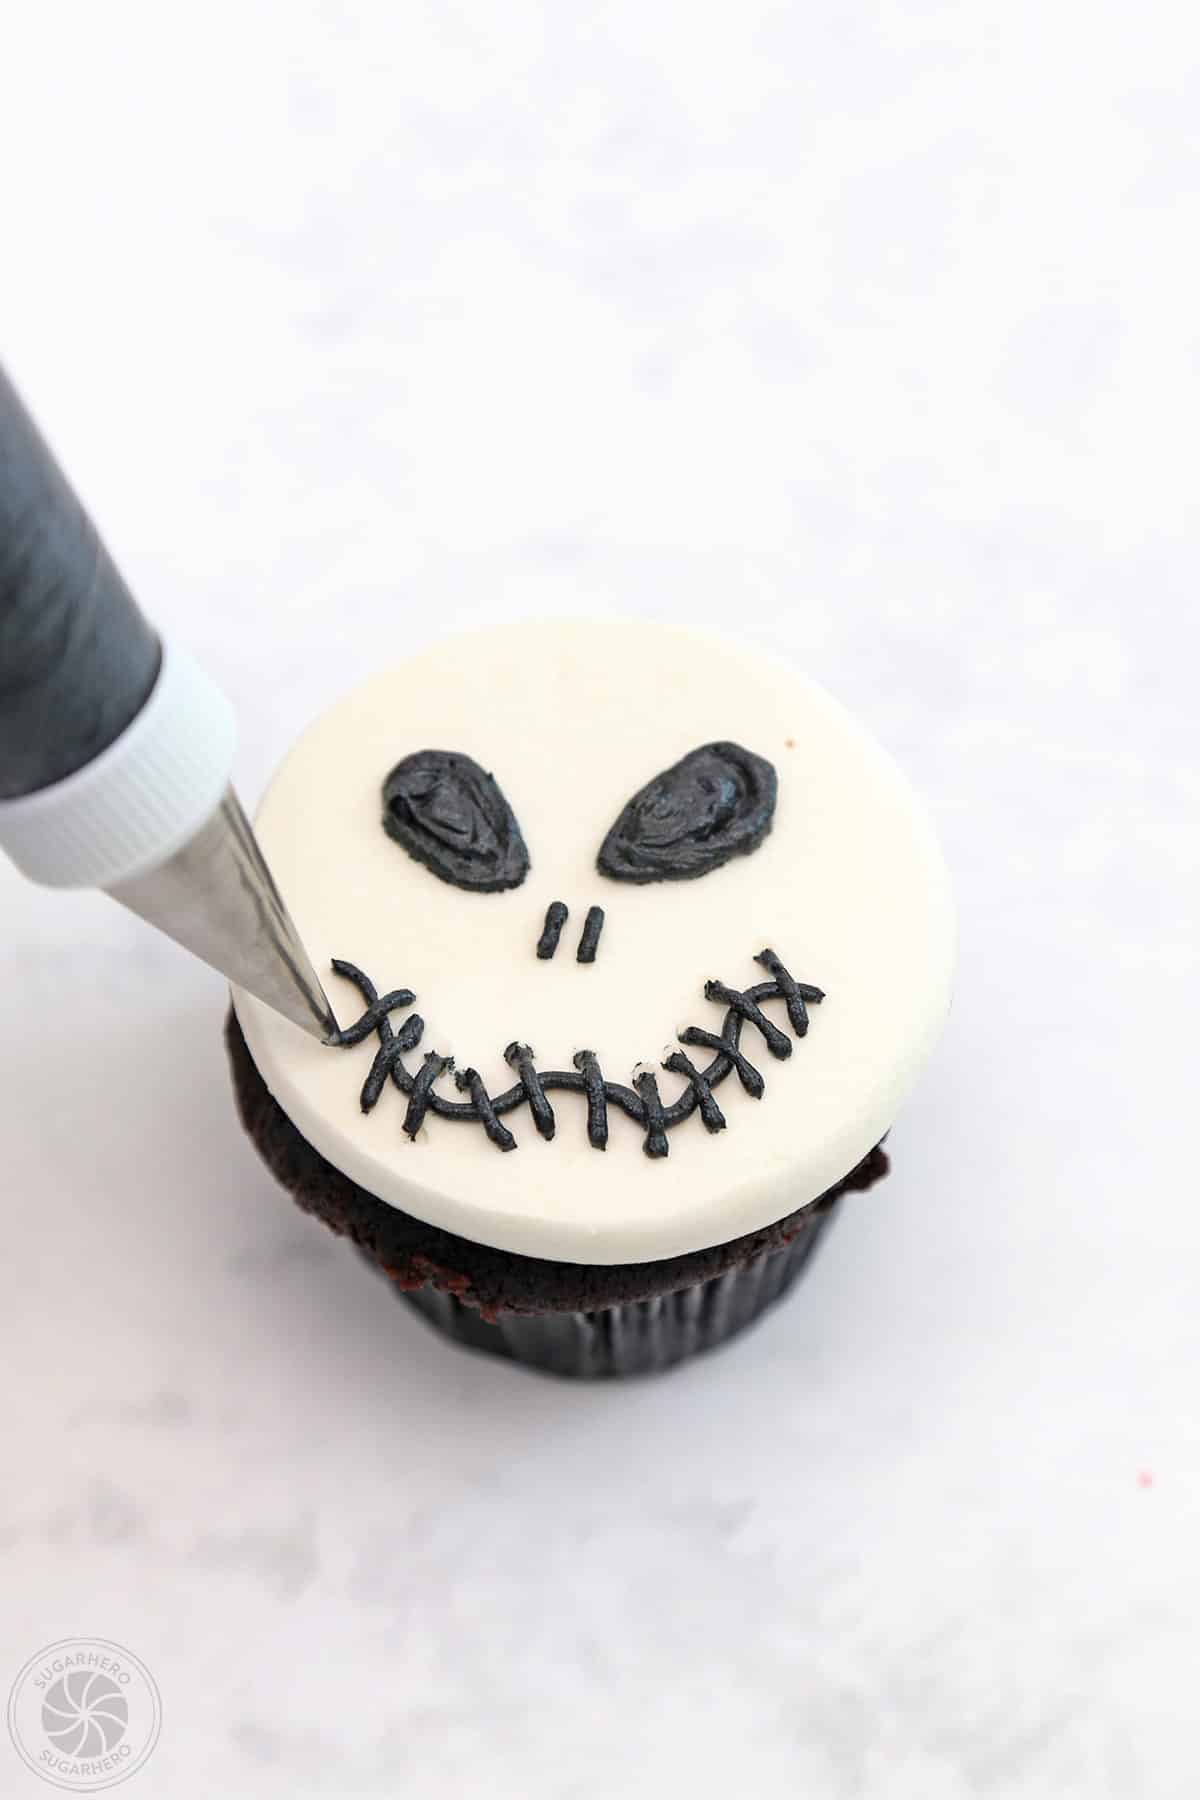
- Finish cupcakes. Make the mouth by piping a long, wavy line of frosting and then cross it with stitches. Repeat until all of the cupcakes are decorated.
- Enjoy!
💡Tips and FAQs
Make the best Halloween cupcakes with a few simple suggestions!
If you don’t have piping bags and tips on hand, you can use Ziplock bags, and cut a small hole in one of the corners to pipe frosting through.
If you’ve ever tried to make black frosting, you’ll agree that it is one of the most difficult colors to make. Your best chance of success is to use a high-quality gel or powdered food coloring, and to make the frosting at least a day in advance.
I use and recommend Americolor Ultra Black food coloring, but other gel and powdered options will also work. Just avoid liquid color, which is not as strong and will require a LOT of coloring to get your desired shade.
After mixing in the coloring, it’s ESSENTIAL to give it time to sit and deepen. This extra time allows the color to fully develop and makes a more vibrant black. I recommend making and coloring the buttercream a day before you want to use it.
And, if you don’t mind some chocolate flavor, you can also add 2-3 TBSP black cocoa powder to the frosting to reduce the amount of food coloring needed.
Both components of these cupcakes can be made in advance and used later.
Frosting: The frosting can be made up to a week in advance. Place the frosting in an airtight container and press a layer of cling wrap directly on top of the frosting to prevent a crust from forming. Store the frosting in the refrigerator. When you’re ready to use it, let it come to room temperature on the counter, then whip it on medium speed until it regains its light, creamy texture.
Cupcakes: Baked and cooled cupcakes can be frozen in airtight containers. Let them defrosting in their container on the countertop before decorating.
Store extra cupcakes in an airtight container at room temperature for 2-3 days, or in the refrigerator for up to a week. If they have been chilled, allow them to come to room temperature before serving for the best taste and texture.
Vampire Cupcakes 23 Sep 2025 1:23 PM (8 months ago)
Don’t wait to sink your teeth into these Vampire Cupcakes! Use buttercream, fondant and candy to turn your cupcakes into cute (and spooky!) vampires for Halloween.

🧛🏼♂️ Spooky Vampire Cupcakes
The secret to a killer Halloween? Desserts that are both cute and creepy, like these easy Vampire Cupcakes.
Today I’m sharing my decorating tricks to make these bloody cute Vampire Cupcakes. You’ll start with prepared cupcakes of your choice, easy homemade frosting, fondant, and a few candy decorations. Just follow the simple step-by-step directions, and you’ll be ready to party vampire-style in no time!
Because we’re all about the decorating, I encourage you to take a shortcut and use your favorite cake mix for these cupcakes. But if you’re looking for some homemade inspiration, browse our list of cupcake recipes here.
🎃 More Spooky Sweets
If you like to put the “treat” in “trick or treat,” check out all of our fun Halloween dessert recipes, like Witch’s Brew Halloween Punch, Red Velvet Marshmallow Spiderweb Cake, and Witch Finger Cookies.
Table of Contents
🧾 What You’ll Need

Ingredients
You’ll only need a few things to make and decorate these cupcakes. Don’t miss these important ingredient tips. Full ingredient amounts can be found in the recipe card below. (Links are affiliate links and I earn a small commission from qualifying purchases.)
For the Cupcakes and Frosting
- Cupcakes: You’ll need 24 baked and cooled cupcakes. Make cupcakes from scratch or use your favorite mix! I used white cupcakes for these little bloodsuckers, but you can make any flavor you like.
- Unsalted butter and salt: I like to control the amount of salt in my frosting. I used cool room temperature unsalted butter and then added salt. If you don’t have unsalted butter, you can use salted butter and omit the salt.
- Milk: Use milk or water to adjust the consistency of the frosting.
- Vanilla extract: I like to use Nielssen-Massey Madagascar vanilla extract because it has amazing flavor. You can use any brand you like.
- Powdered sugar: This frosting recipe is an American Buttercream, which is powdered sugar-based. You’ll want to measure the sugar with a scale if possible and then sift it into the mixture.
For the Decorations
- Fondant: To make the vampire hair and teeth, you’ll need some black fondant and white fondant.
- Candy for the eyes and nose: I used small candy eyeballs and white candy pearls for the nose. Feel free to substitute other types of candy.
- Red gel food coloring: I recommend using Americolor red gel food coloring. It’s highly concentrated, so you’ll only need a little to make a deep shade of red frosting for the mouth. You’ll also use it to add a bit of ‘blood’ to the vampire teeth.
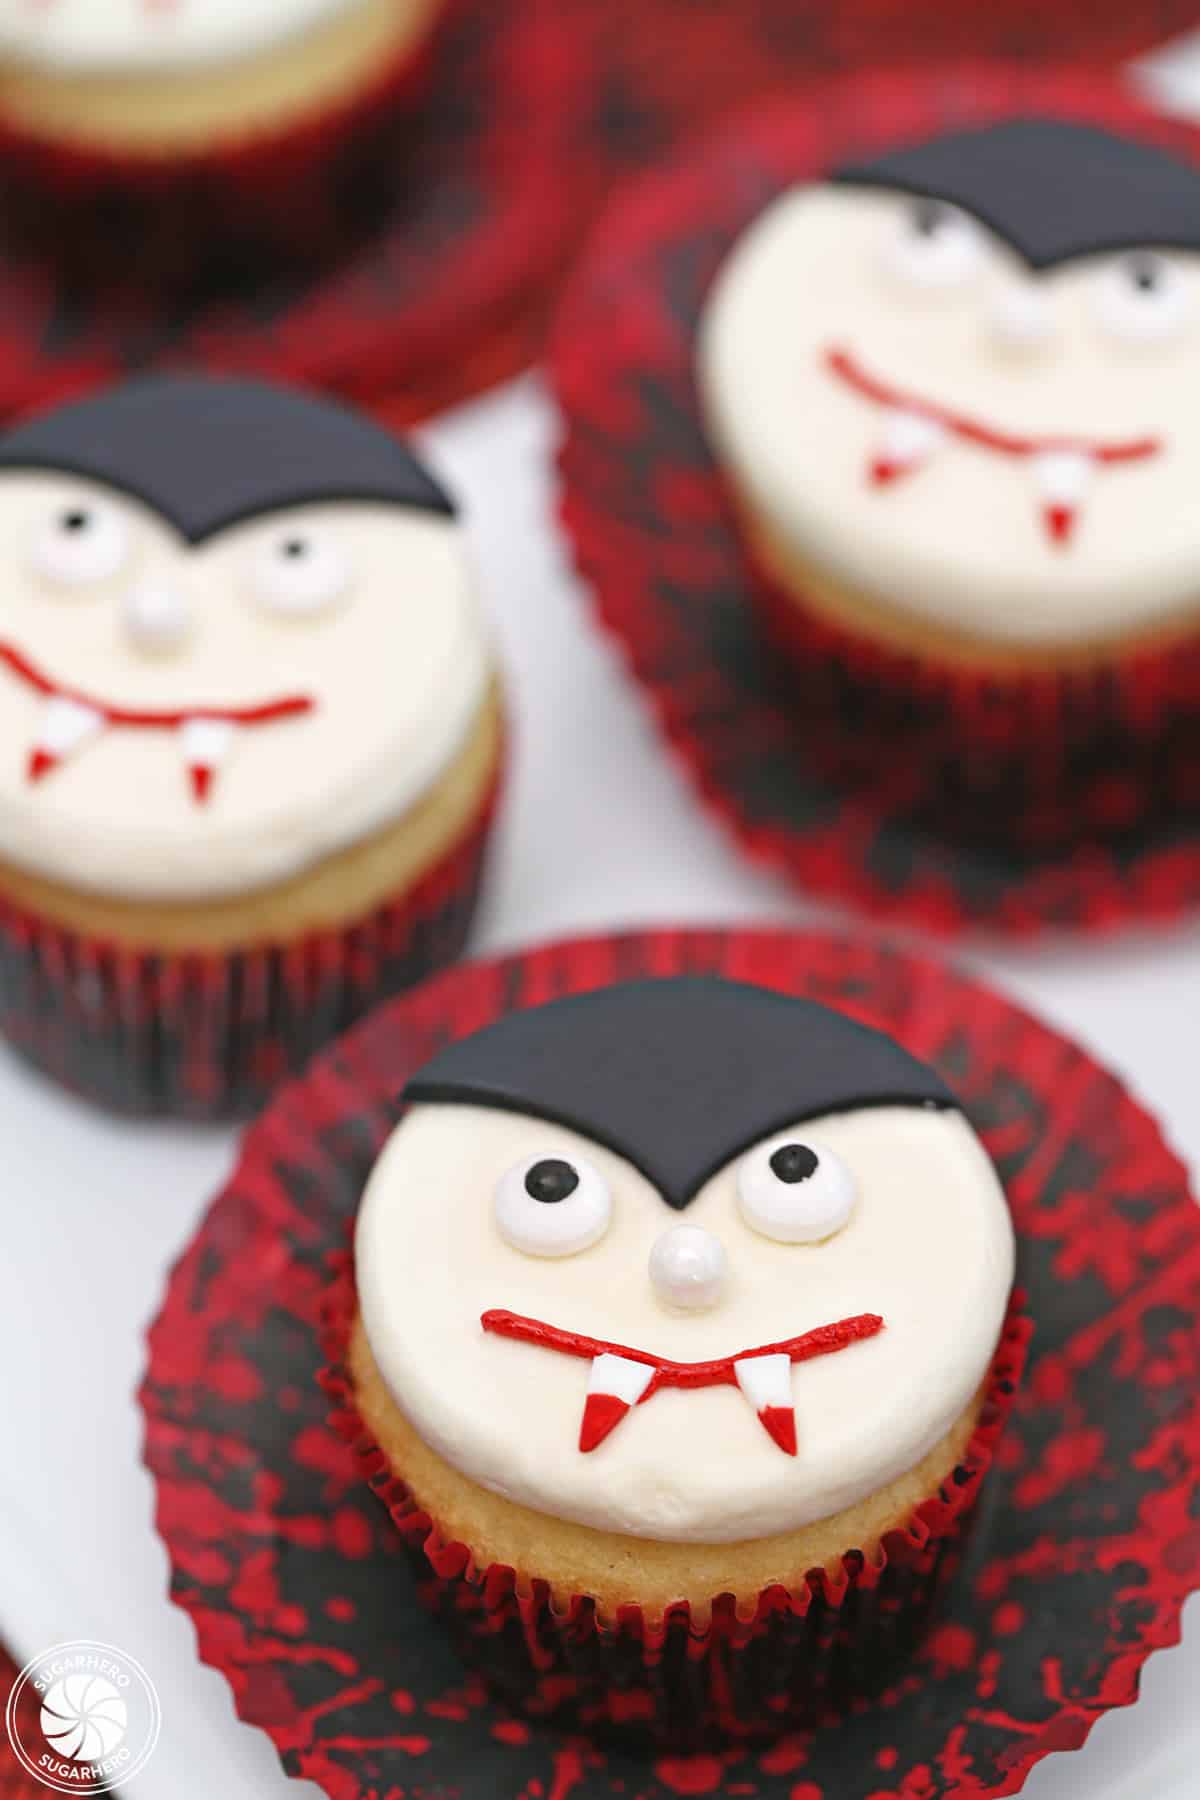
Equipment
Although optional, getting a few decorating tools will make the process of creating these cupcakes even eaiser. (Links are affiliate links and I earn a small commission from qualifying purchases.)
- Piping bag and couplers: I like these piping bags because they are washable and reusable. You’ll also need some couplers. You can also make your own piping bags from plastic zipper bags. If you go this route you won’t need couplers or tips, either.
- Piping tips: I’d recommend using a small round tip, like Ateco tip #3, for the mouth.
- Cupcake liners: I used some fun red, black and white cupcake liners when I baked my cupcakes. You could also dress them in solid colored rainbow liners or Halloween cupcake liners.
- Fondant tools: A small fondant roller will help you to make the fondant smooth and even.
- Round cutter: And last but not least, you’ll need a round cutter with a 2.5-inch diameter.
Ready to Make These?
- Get the recipe below 👇👇
- Scroll below the recipe for step-by-step photos
- Read important FAQs and more
🎃 More Halloween Desserts
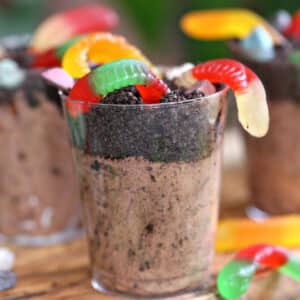
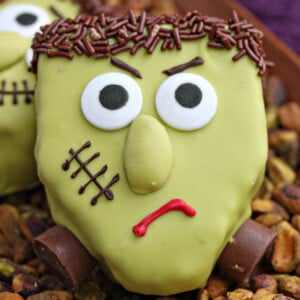
Leave a Review!
If you make this recipe, let us know! Leave a ⭐️⭐️⭐️⭐️⭐️ rating on the recipe below, and leave a comment, take a photo and tag me on Instagram @elabau, or use #sugarhero on IG!
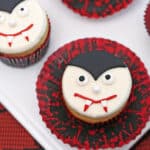
Vampire Cupcakes
Ingredients
- 24 cupcakes from scratch or your favorite mix, I used white cupcakes
For Frosting
- 1 lb unsalted butter at cool room temperature
- 2 TBSP milk can substitute water
- ½ tsp salt
- 1 TBSP vanilla extract
- 28 oz powdered sugar (7 cups), sifted after measuring
For Decorating
- 8 oz black fondant
- 2 oz white fondant
- 48 candy eyeballs
- 24 candy pearls
- Red gel food coloring I used Americolor Super Red
Instructions
To Make the Frosting
- Beat the butter: Place the butter in the bowl of a large stand mixer. Beat on medium speed with a paddle attachment until very white and pale, about 3-4 minutes.
- Add milk, salt, and vanilla: Turn the speed lower, and add 1 tablespoon of milk, the salt, and the vanilla extract. Mix until everything is well incorporated with the butter.
- Slowly add powdered sugar: With the mixer running on low, slowly add the powdered sugar. Once all of it is added, stop and scrape down the bottom and sides of the mixing bowl, then mix the buttercream on medium speed for 30 seconds.
- Adjust consistency: If the buttercream is too stiff for your needs, add the remaining tablespoon of milk and mix it in well. You can adjust the final texture by adding more powdered sugar or milk. See Note below.
- Chill: You can use the frosting right away, but you’ll get the best results chilling it for about 1 hour before use.
- Use or store: If you want to make it several days in advance, place the frosting in an airtight container and press a layer of cling wrap directly on top of the frosting. When you’re ready to use it, let it come to room temperature on the counter, then beat it on medium speed until it regains its light, creamy texture.
To Frost the Cupcakes
- Prep piping bag: When you are ready to begin decorating, place the white frosting into a piping bag fitted with a plain coupler or large round tip like Ateco tip #809.
- Frost cupcakes: Cover two baking sheets with parchment paper. Pipe a large round ball of white frosting on top of a cupcake (approximately 3 TBSP). Invert the cupcake and gently press it onto one of the lined baking sheets so that the frosting spreads evenly and covers the top of the cupcake. Repeat with remaining cupcakes.
- Chill: Chill the cupcakes in the refrigerator for about an hour, until the buttercream is very firm. Peel the cupcakes off the parchment, revealing a completely flat buttercream layer on top.
To Decorate the Cupcakes
- Make black fondant circles: While the cupcakes chill, prepare your decorations. Roll out the black fondant until it’s about 1/8-inch thick. Use a circular cutter (about 2.5 inches wide) to cut out a black circle.
- Cut fondant: Use the cutter to shape the black circle into vampire hair. Place the top of the cutter over the center of a black circle of fondant. Press down to cut away an eye-shaped piece of the circle.
- Finish vampire hair: Then use the cutter to cut the remaining moon-shaped piece of fondant in half. Take the symmetrical piece of fondant and set it aside to use for vampire hair. Unused pieces of the fondant can be reincorporated into the main block of fondant and rolled out again. Roll, cut and shape fondant circles until you have 24 pieces of black fondant vampire hair.
- Make vampire teeth: Roll out the white fondant until it’s about 1/8-inch thick thick. Cut the fondant in a strip that is approximately 1/2-inch wide. Cut in a diagonal line across the width of the white fondant strip to cut a pointy white vampire tooth. Continue cutting triangular shapes off of the strip of fondant until you have 48 fondant vampire teeth.
- Dip teeth: If desired, lay out a piece of parchment paper and fill a small bowl with a few drops of red gel food coloring. Dip the tip of each fondant tooth into the red gel food coloring and then set them on the parchment paper to dry.
- Top cupcake with vampire hair: Remove the chilled cupcakes from the refrigerator and place a piece of black fondant vampire hair on the top of the cupcake.
- Make eyes and nose: Just below the hairline, press two candy eyes and a candy nose gently into the buttercream.
- Make mouth: Fill a piping bag with red frosting and a small piping tip (I used Ateco #3). Pipe a red line for the mouth and place two vampire teeth on top. Press them into the buttercream gently so they stick.
- Finish cupcakes: Repeat the process of making a vampire face on each of your cupcakes. Enjoy!
- Store: Store extras in an airtight container at room temperature for 2-3 days, or in the refrigerator for up to a week. If they have been chilled, allow them to come to room temperature before serving for the best taste and texture.
Notes
Measuring Tips
Our recipes are developed using weight measurements, and we highly recommend using a kitchen scale for baking whenever possible. However, if you prefer to use cups, volume measurements are provided as well. PLEASE NOTE: the adage “8 oz = 1 cup” is NOT true when speaking about weight, so don’t be concerned if the measurements don’t fit this formula.
Nutrition
📸 Photo Tutorial: How to Make Vampire Cupcakes
Whoever said “there’s no such thing as love at first bite” never tried these cupcakes! Follow this step-by-step tutorial to find out what I mean! Full instructions are included in the recipe card above.
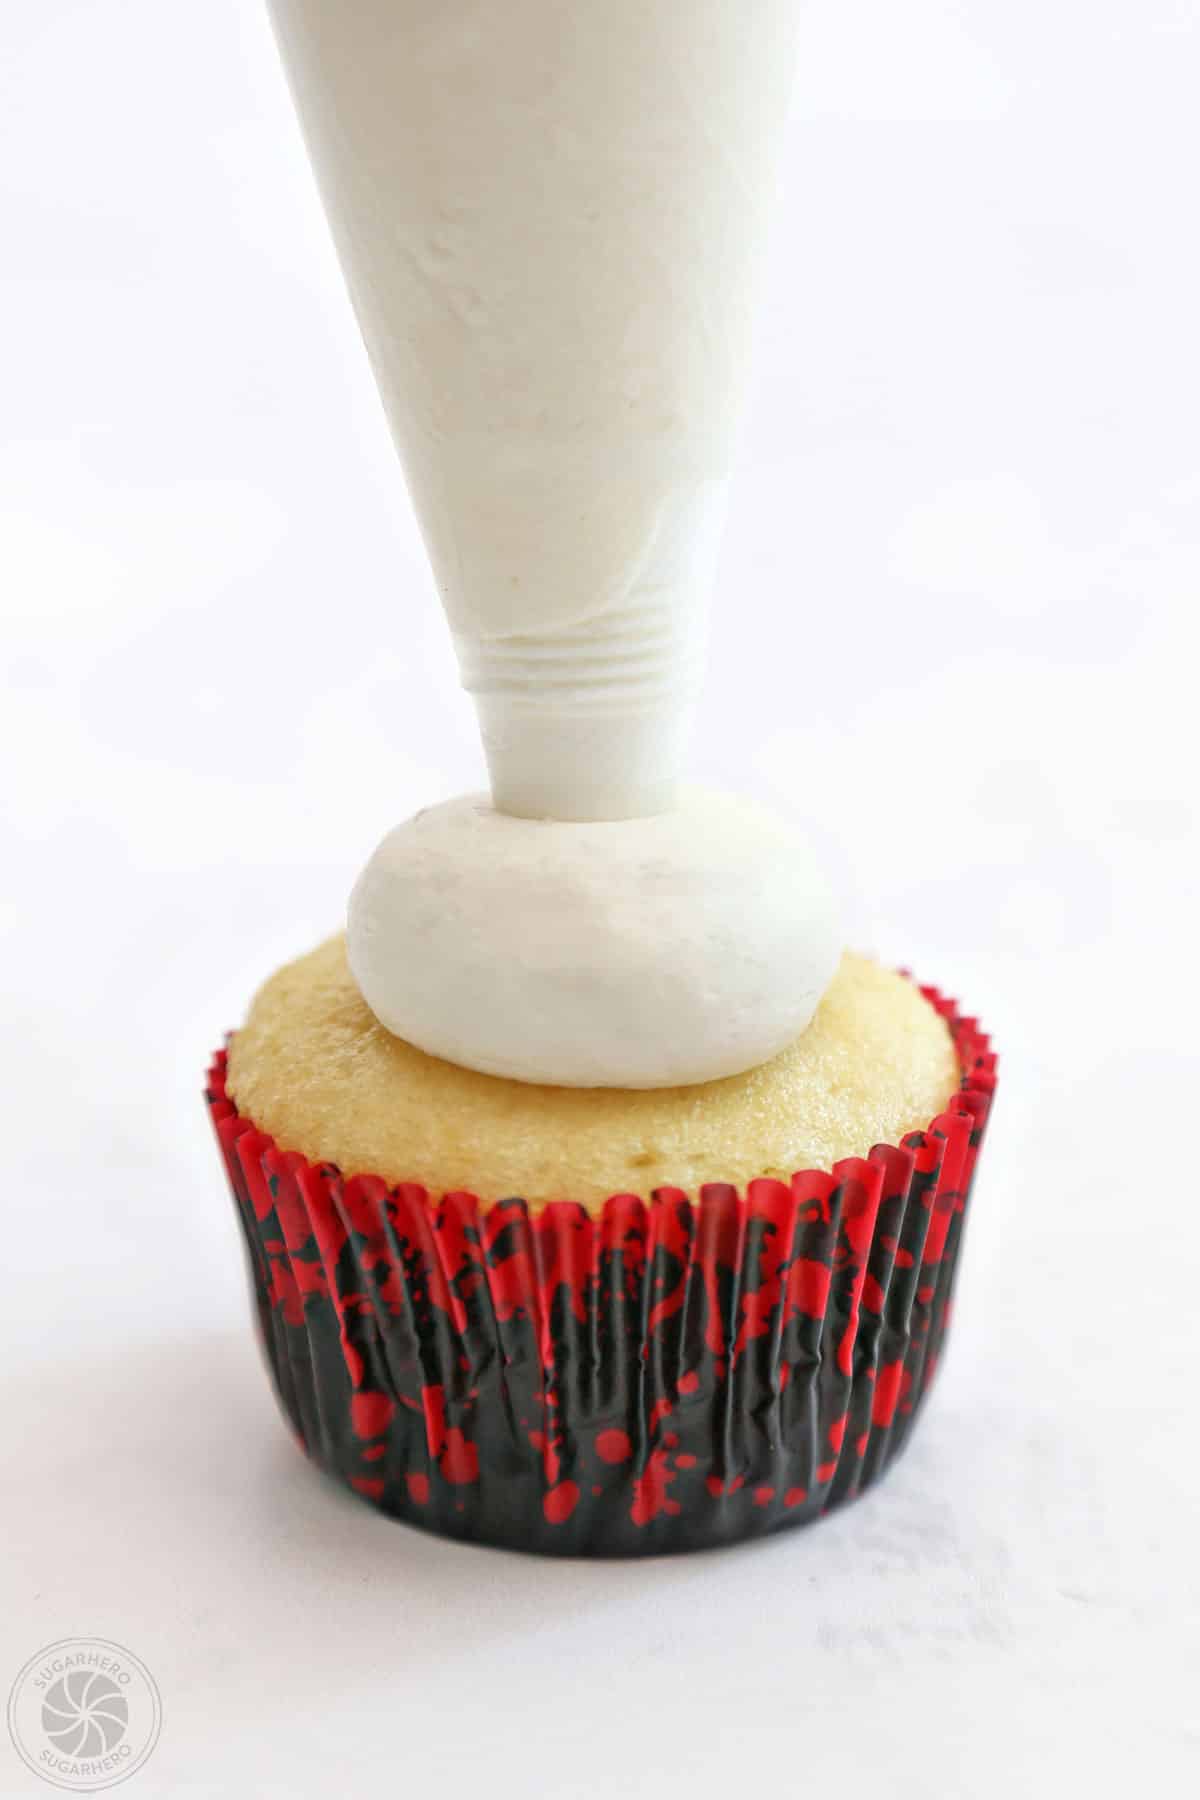
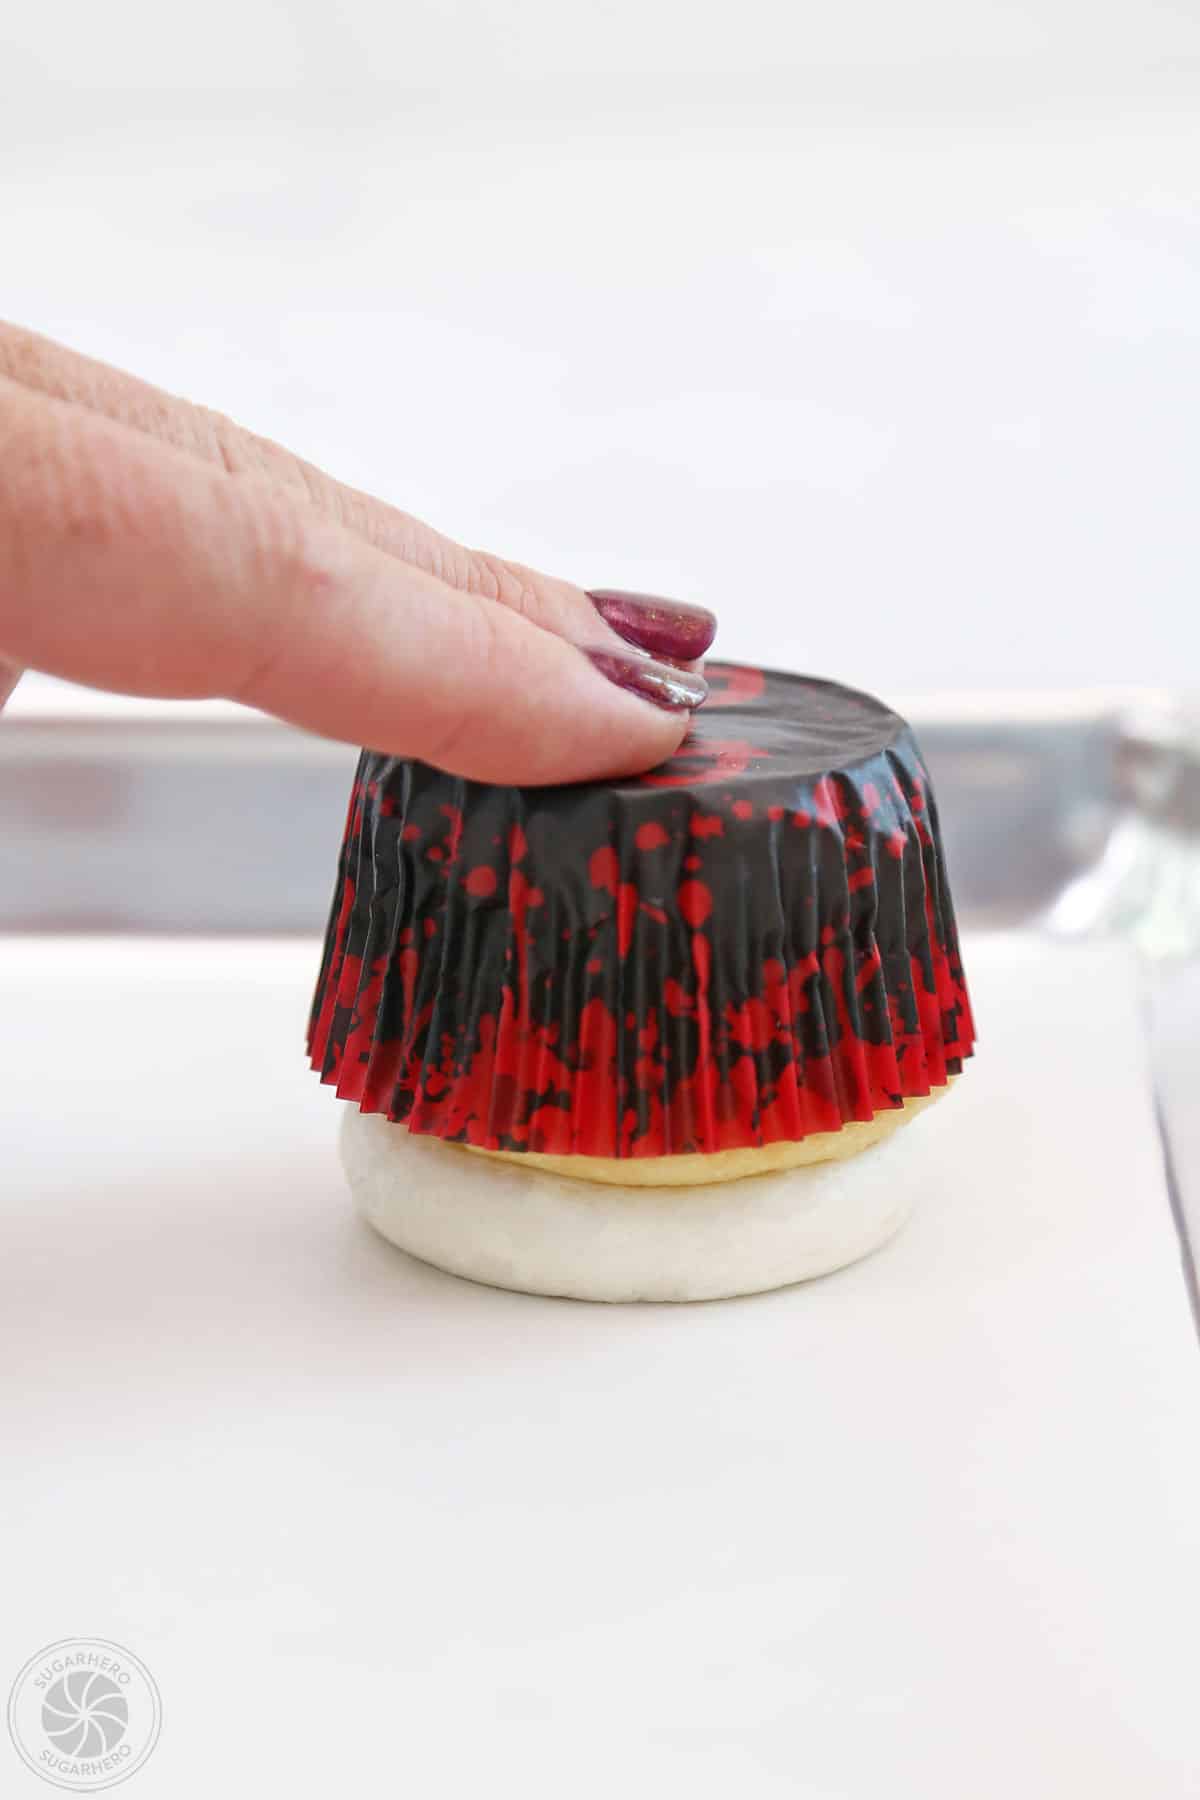
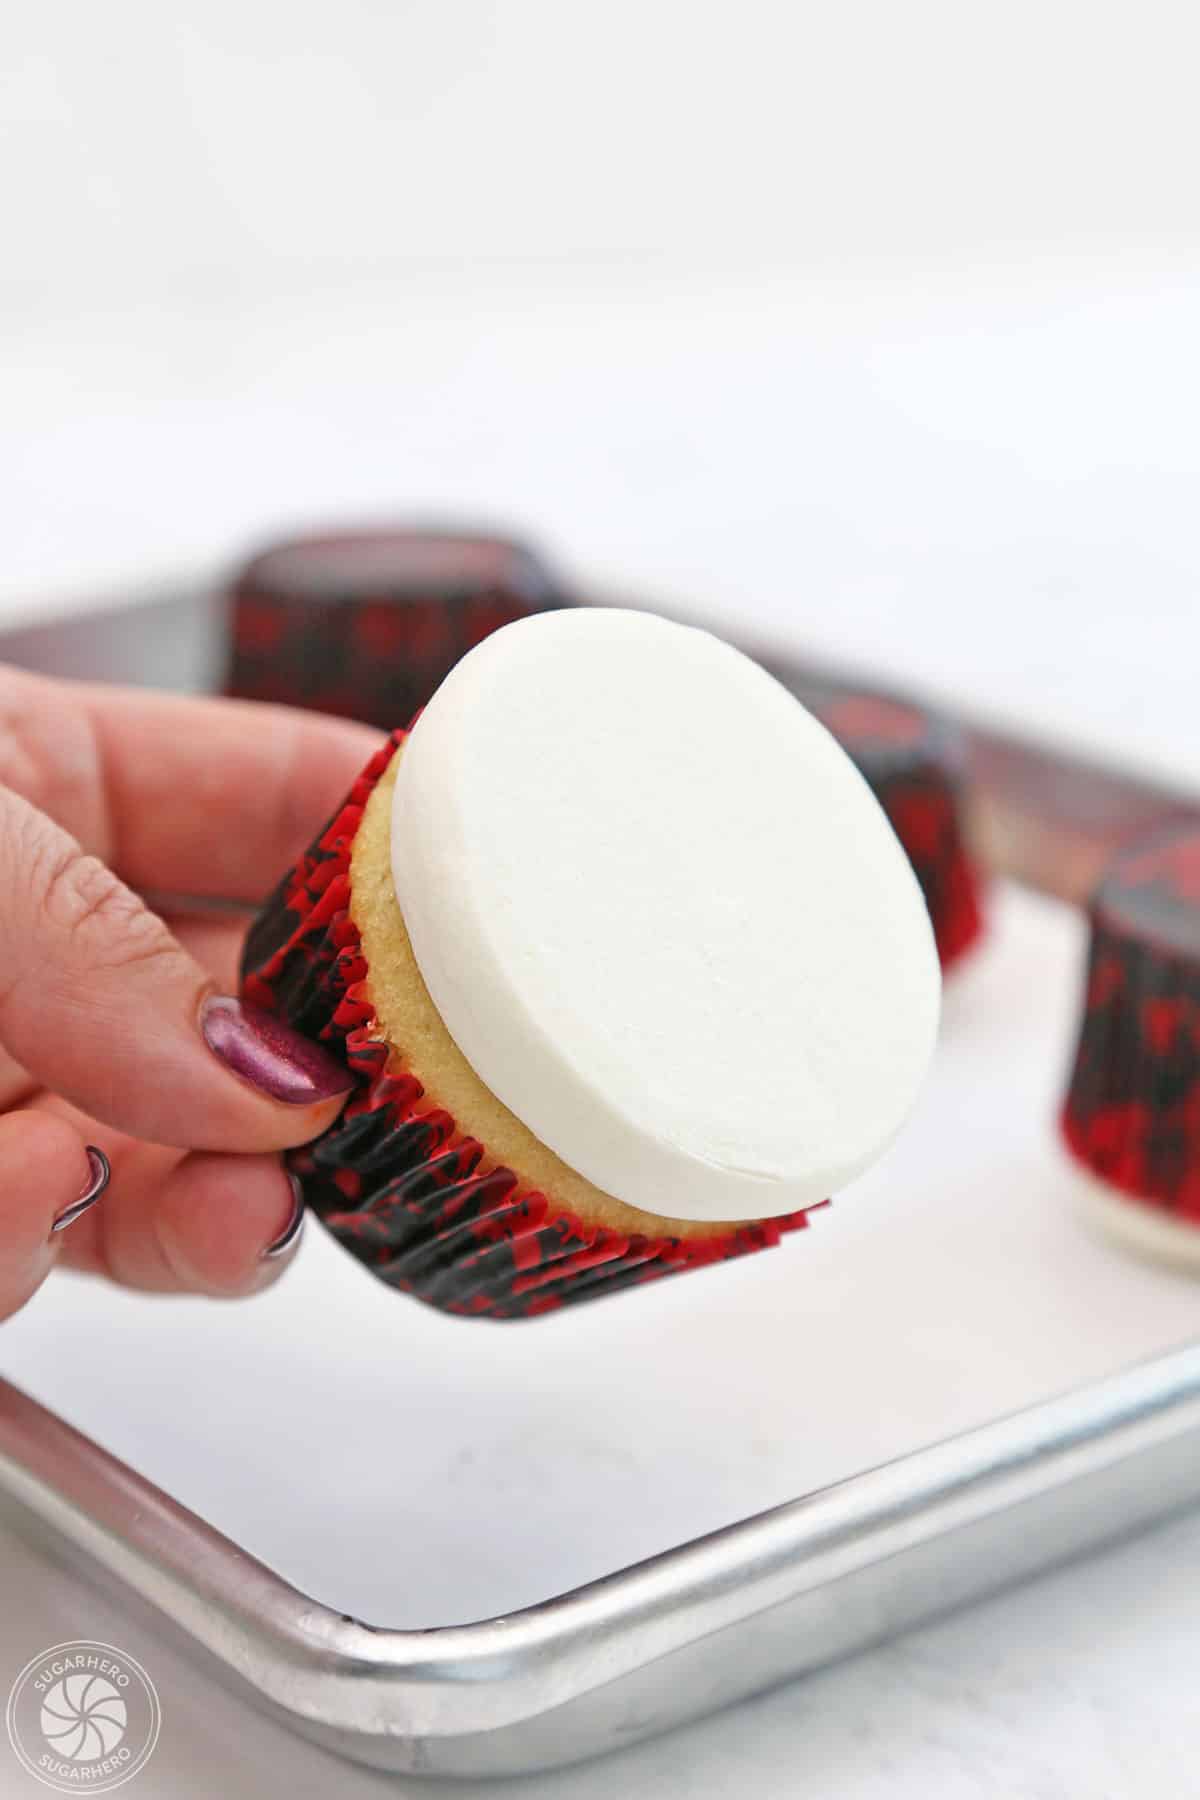
Frost the Cupcakes
- Prepare to frost. Place the white frosting into a piping bag fitted with a plain coupler. Cover two baking sheets with parchment paper.
- Pipe frosting ball. Pipe a large round ball of white frosting on top of a cupcake (approximately 3 TBSP).
- Flatten frosting. Invert the cupcake and gently press it onto one of the lined baking sheets so that the frosting spreads evenly and covers the top of the cupcake. Repeat with the remaining cupcakes.
- Freeze. Chill the cupcakes in the refrigerator for about 60 minutes or in the freezer for 30 min, until the buttercream is very firm.
- Remove from parchment. Peel the cupcakes off the parchment, revealing a completely flat buttercream layer on top.
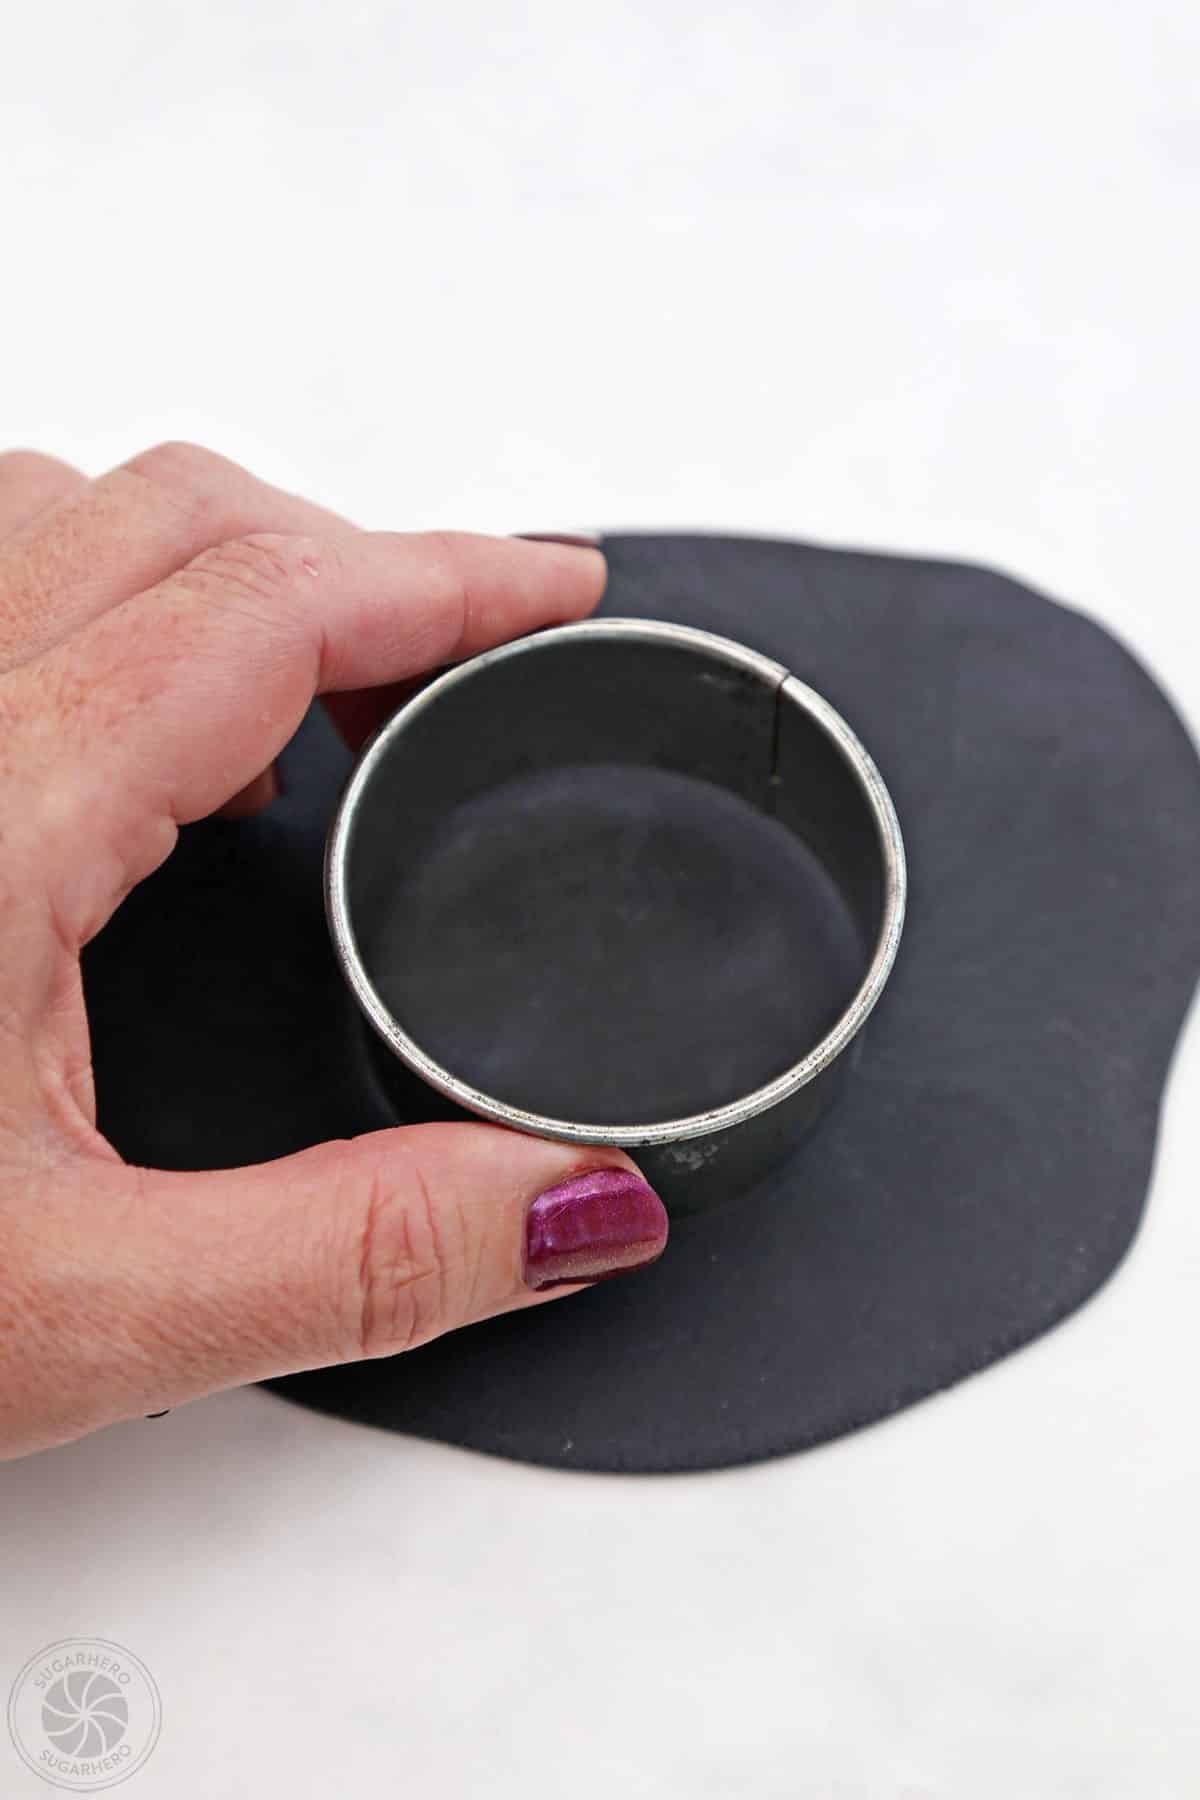
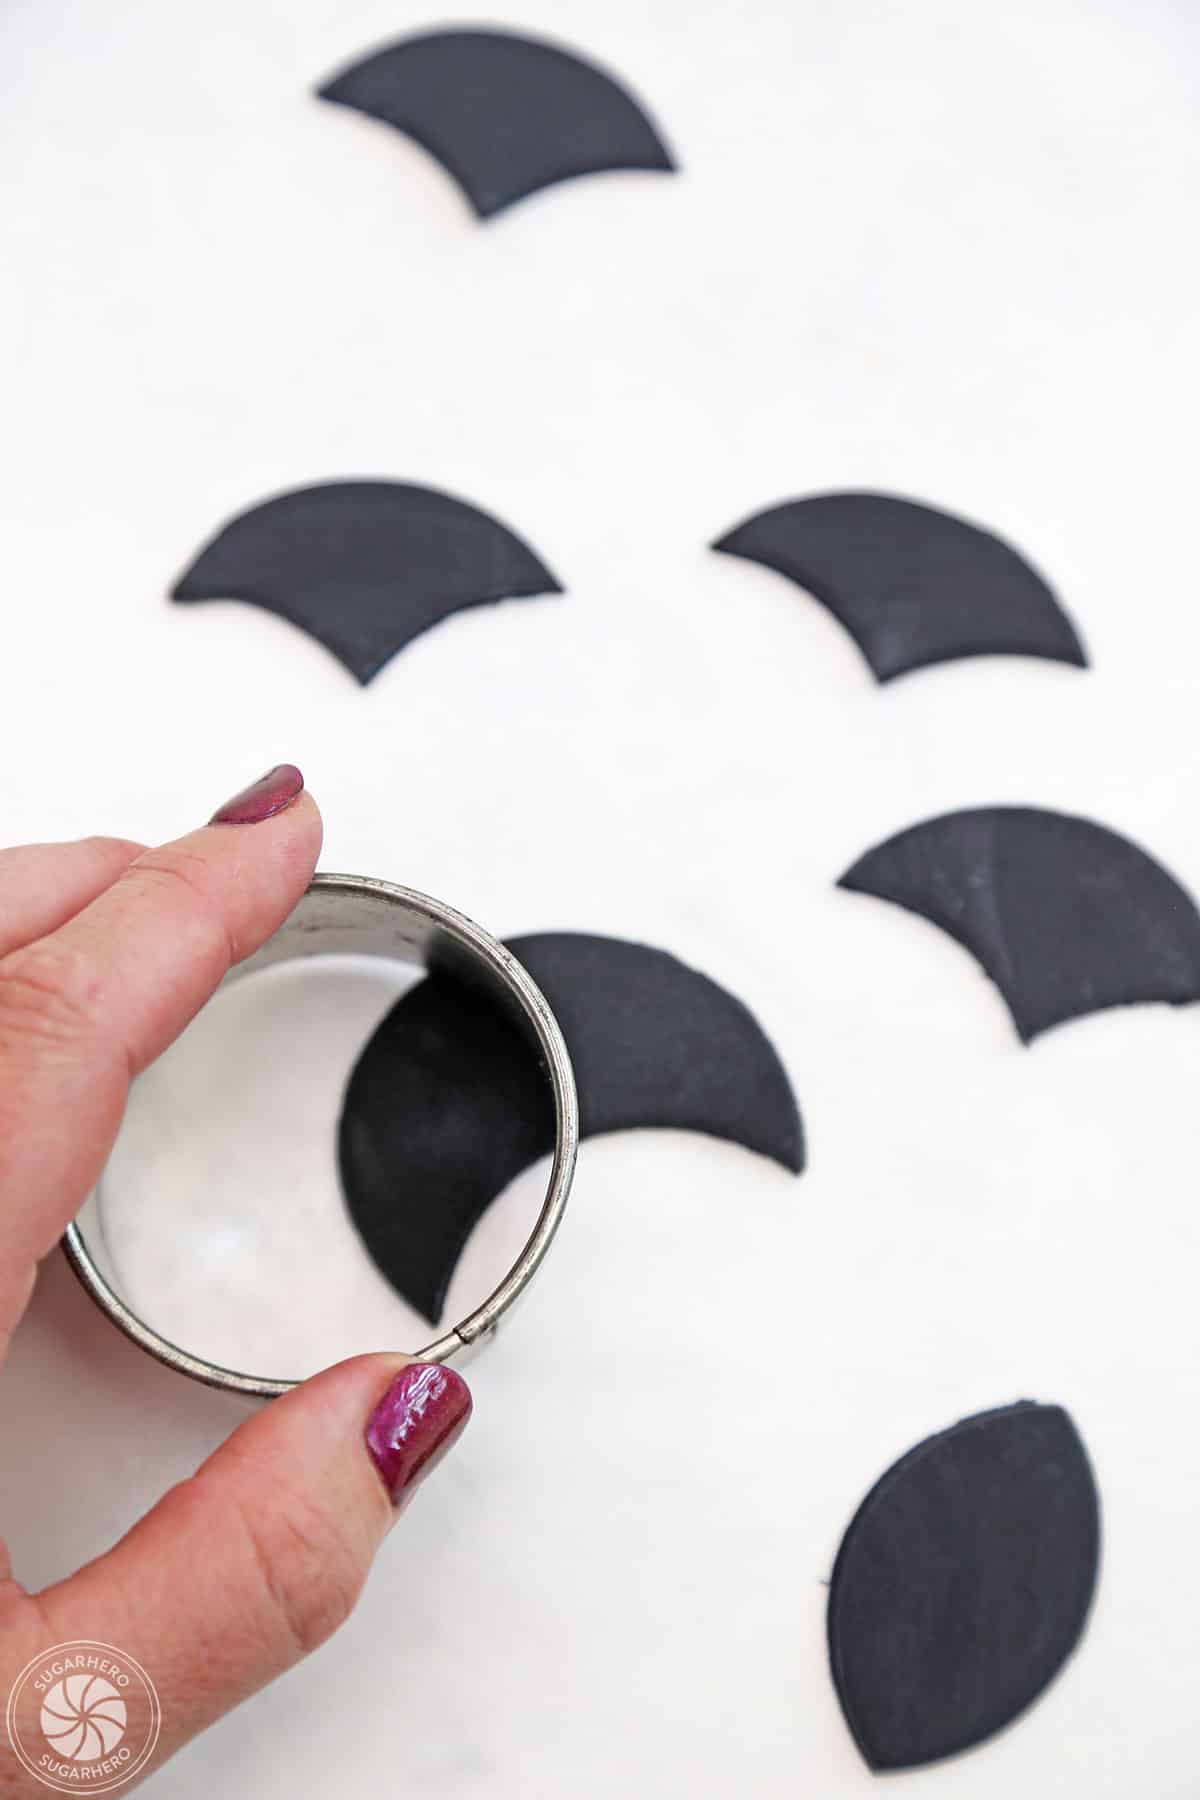
Make the Vampire Hair
While the cupcakes chill, prepare the fondant hair and teeth. First, for the hair:
- Cut a black fondant circle. Roll out the black fondant until it’s about 1/8-inch thick. Use a circular cutter (about 2.5 inches wide) to cut out a black circle.
- Cut the circle twice. Position the cutter about halfway up the fondant circle, press down to cut away the bottom half of the circle, leaving you a crescent-shaped piece. Then, use the cutter to cut that crescent in half. This is your vampire’s hair.
- Make 24 vampire hair pieces. Continue to roll and cut the fondant until you have 24 pieces of black fondant vampire hair. You can re-roll the fondant as many times as necessary.
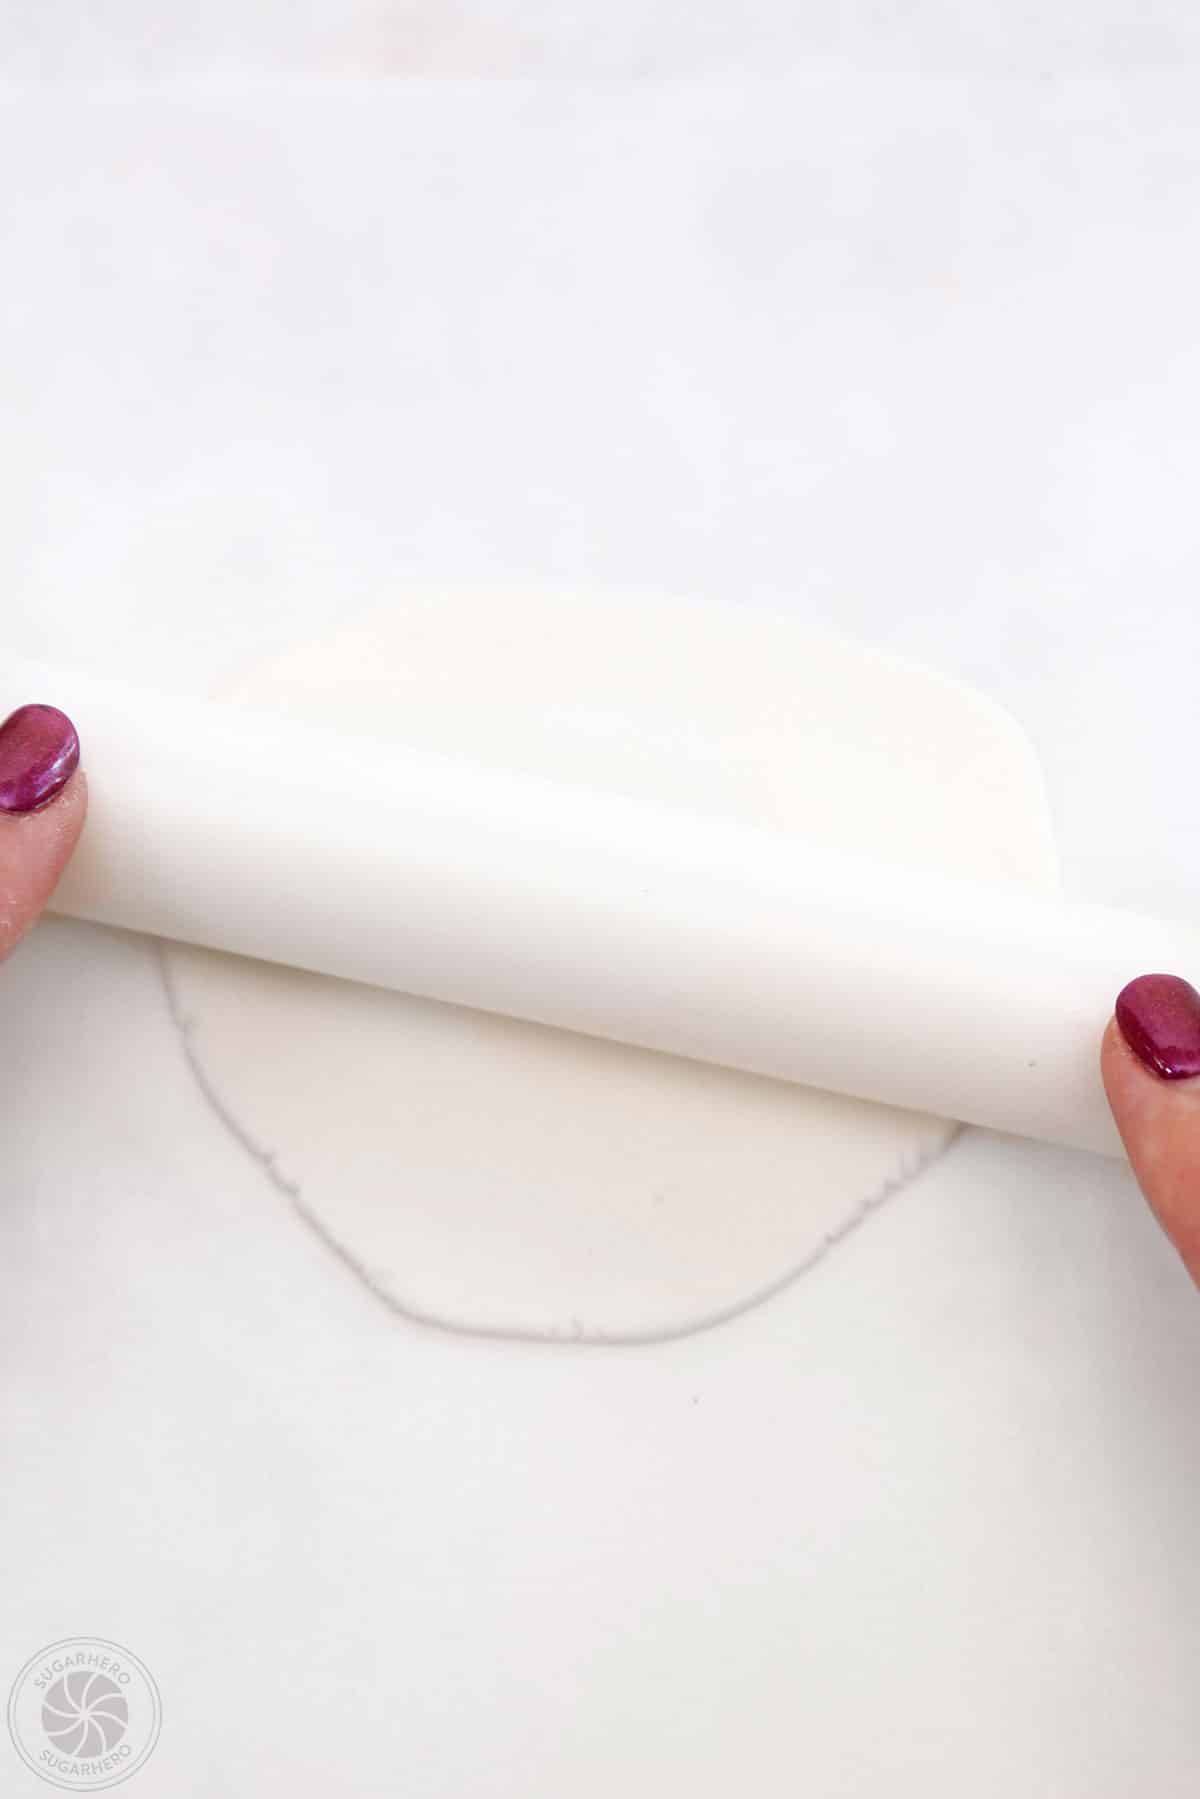
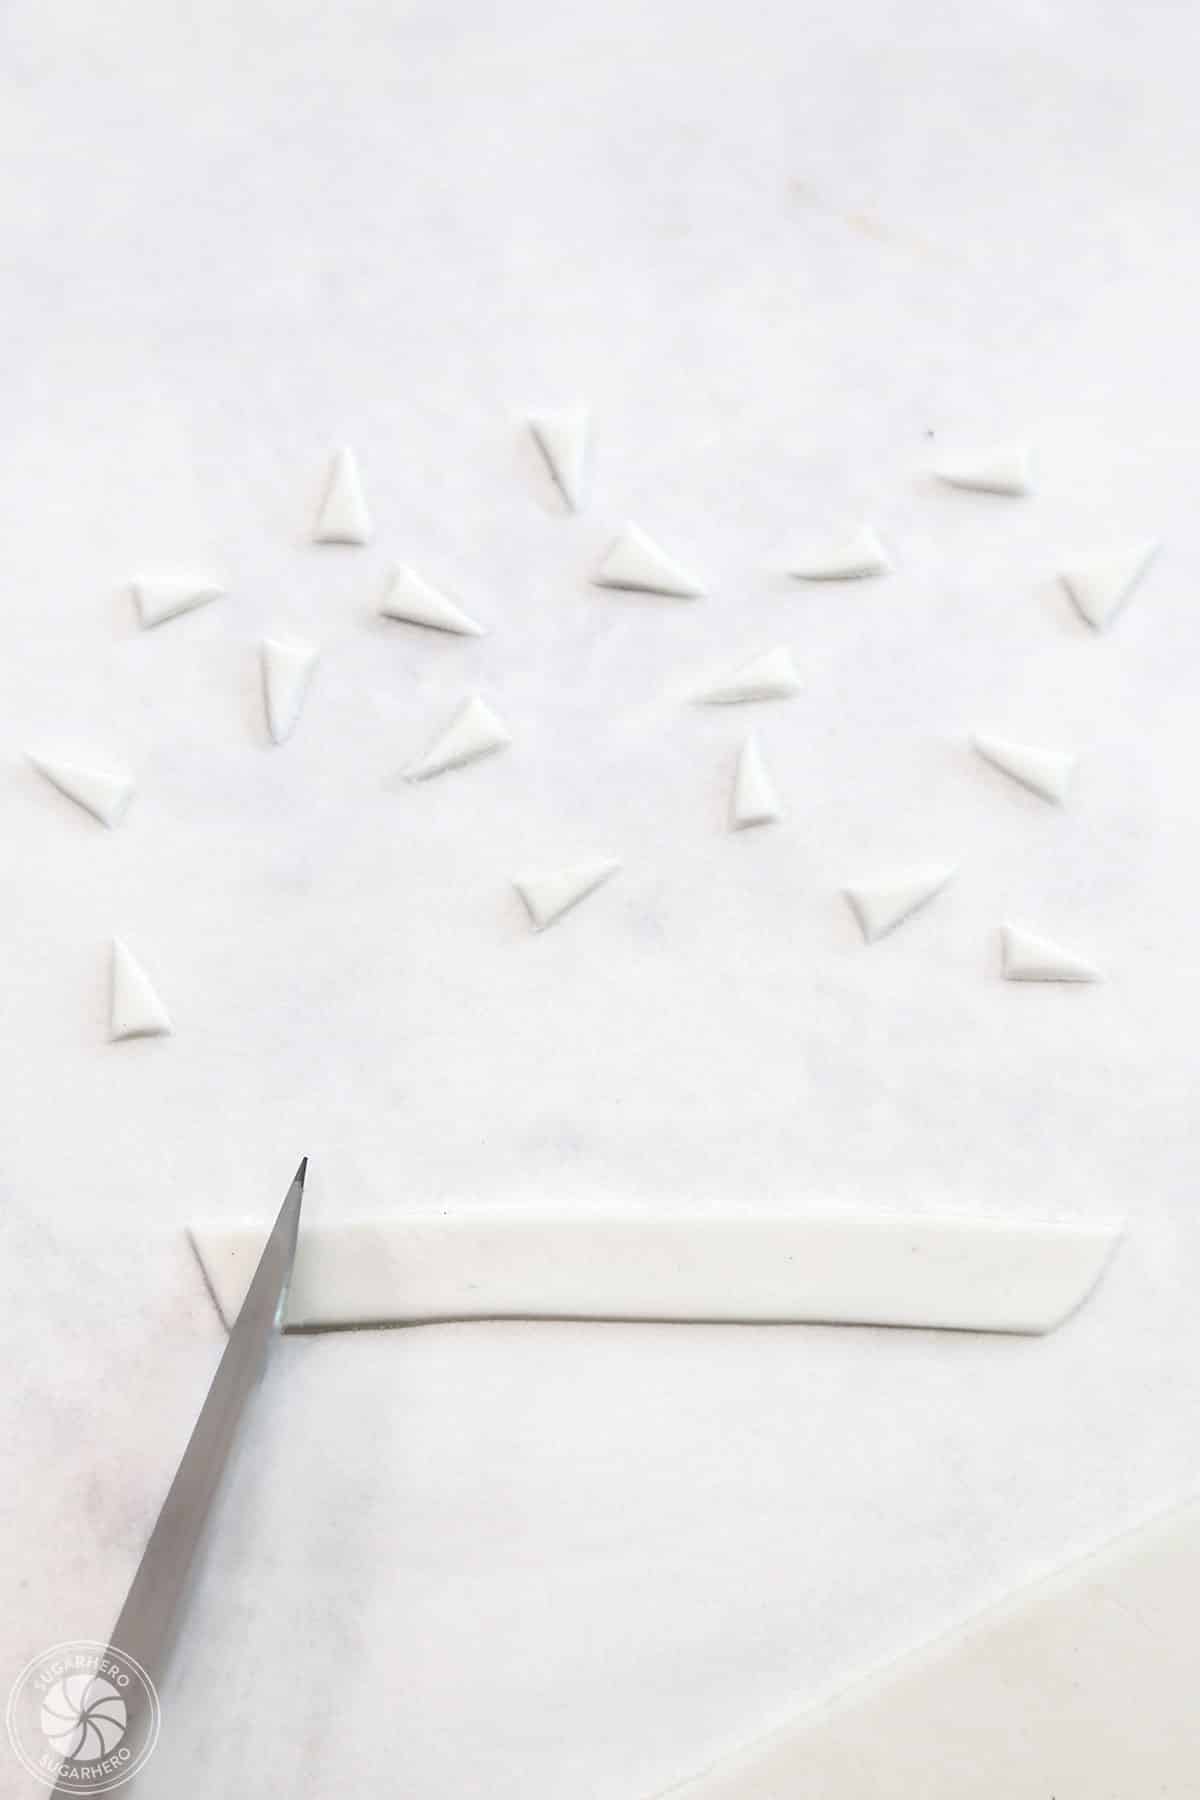
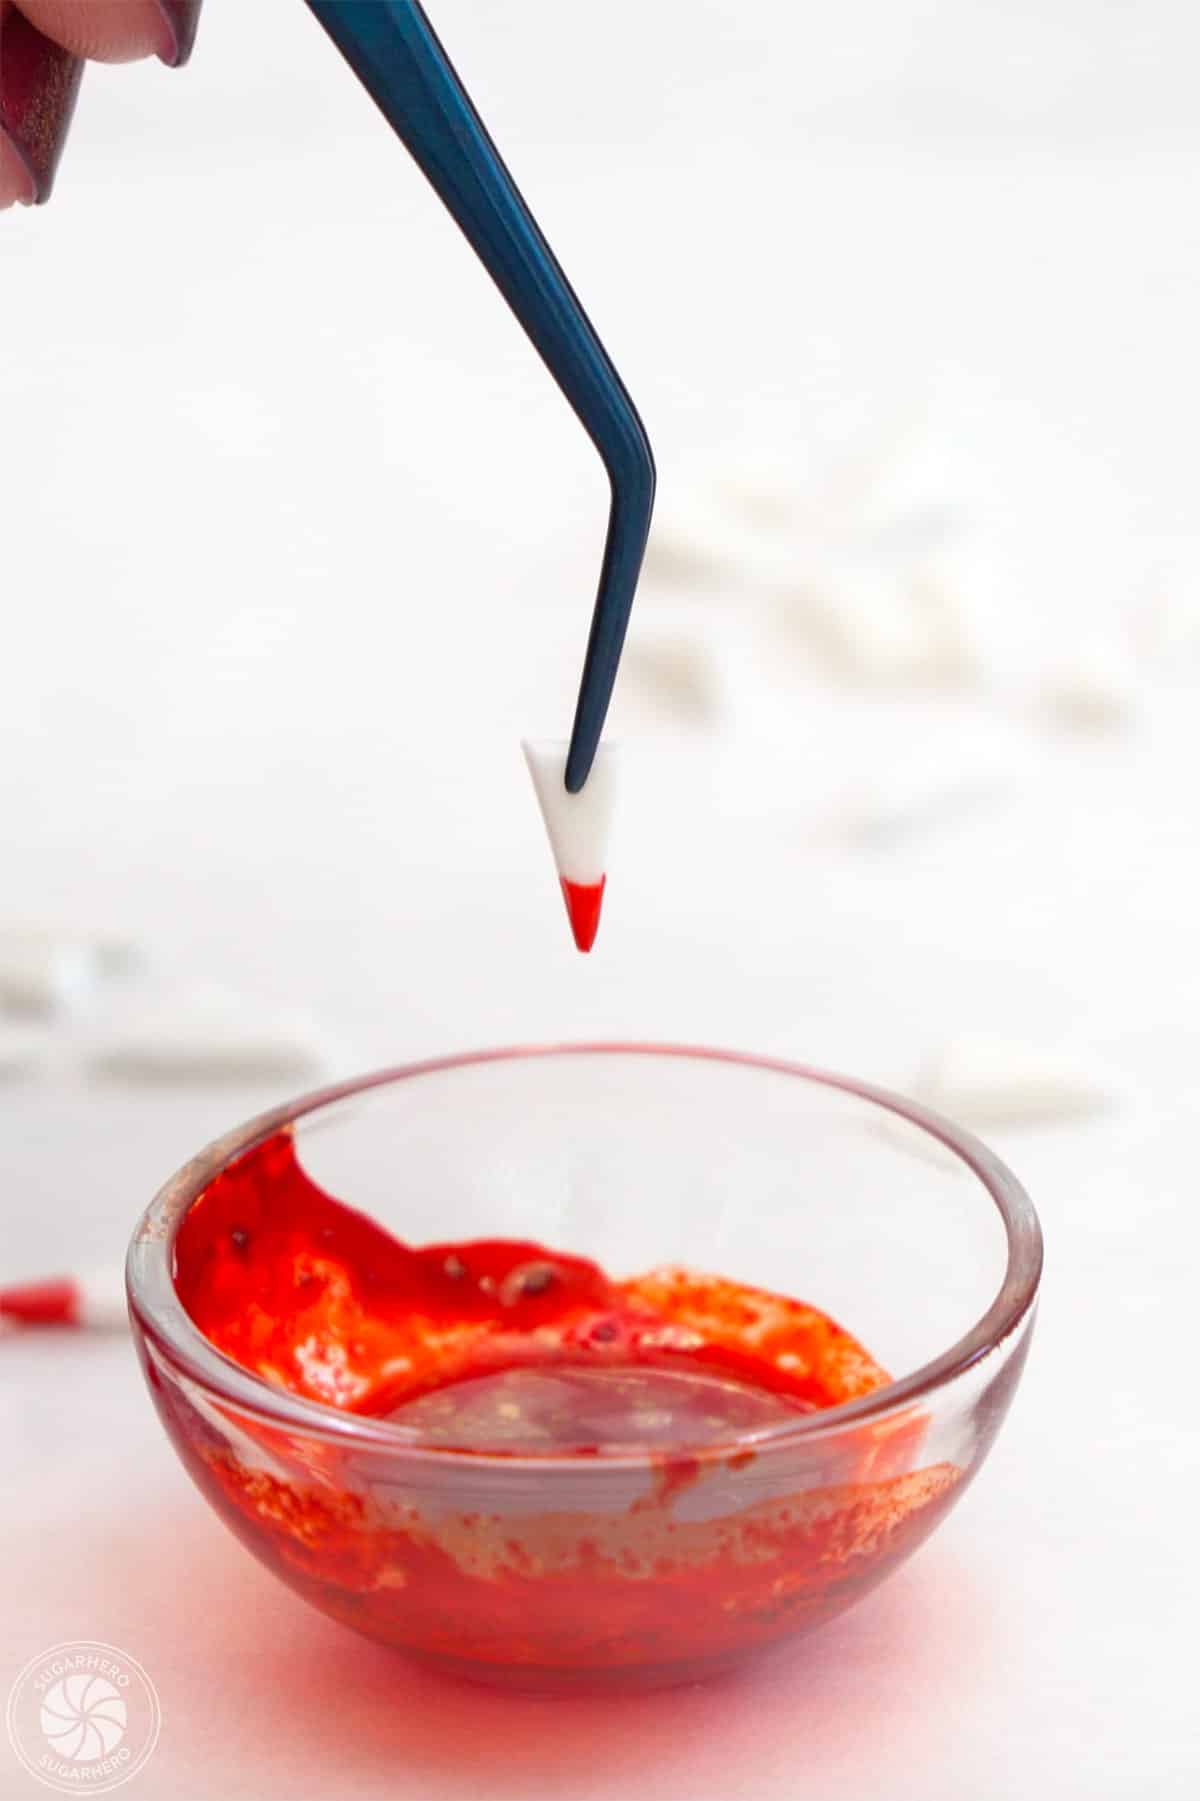
Make the Vampire Teeth
- Cut a white fondant strip. Roll out the white fondant until it’s about 1/8-inch thick. Cut the fondant into a 1/2-inch wide strip.
- Cut pointy teeth. Cut in a diagonal line across the width of the white fondant strip to create a pointy white vampire tooth. Continue cutting triangular shapes off of the strip of fondant until you have 48 fondant vampire teeth.
- Color teeth tips red. If you want to make your teeth bloodstained, lay out a piece of parchment paper and fill a small bowl with a few drops of red gel food coloring. Dip the tip of each fondant tooth into the red gel food coloring and set them on the parchment paper to dry. Tip: this step is much easier (and less messy!) if you use tweezers to hold the teeth.
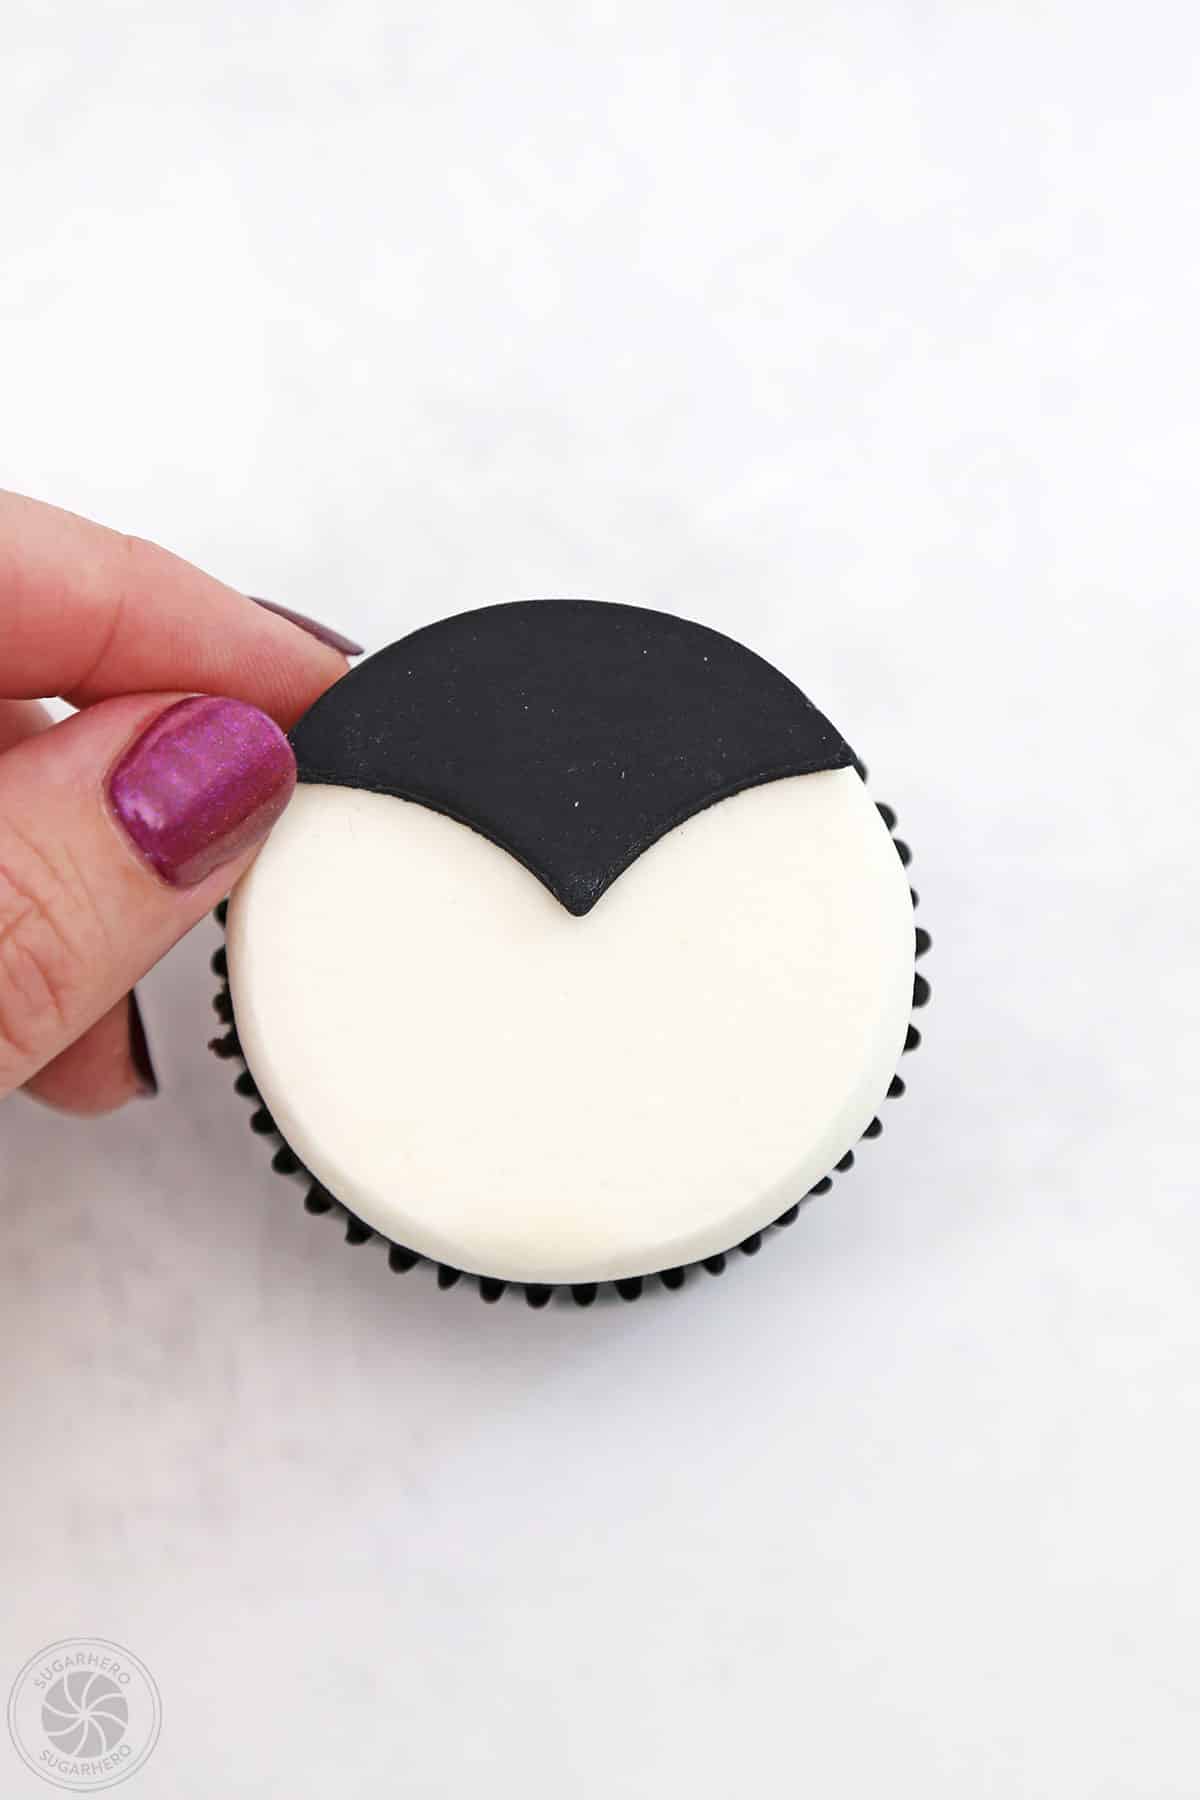
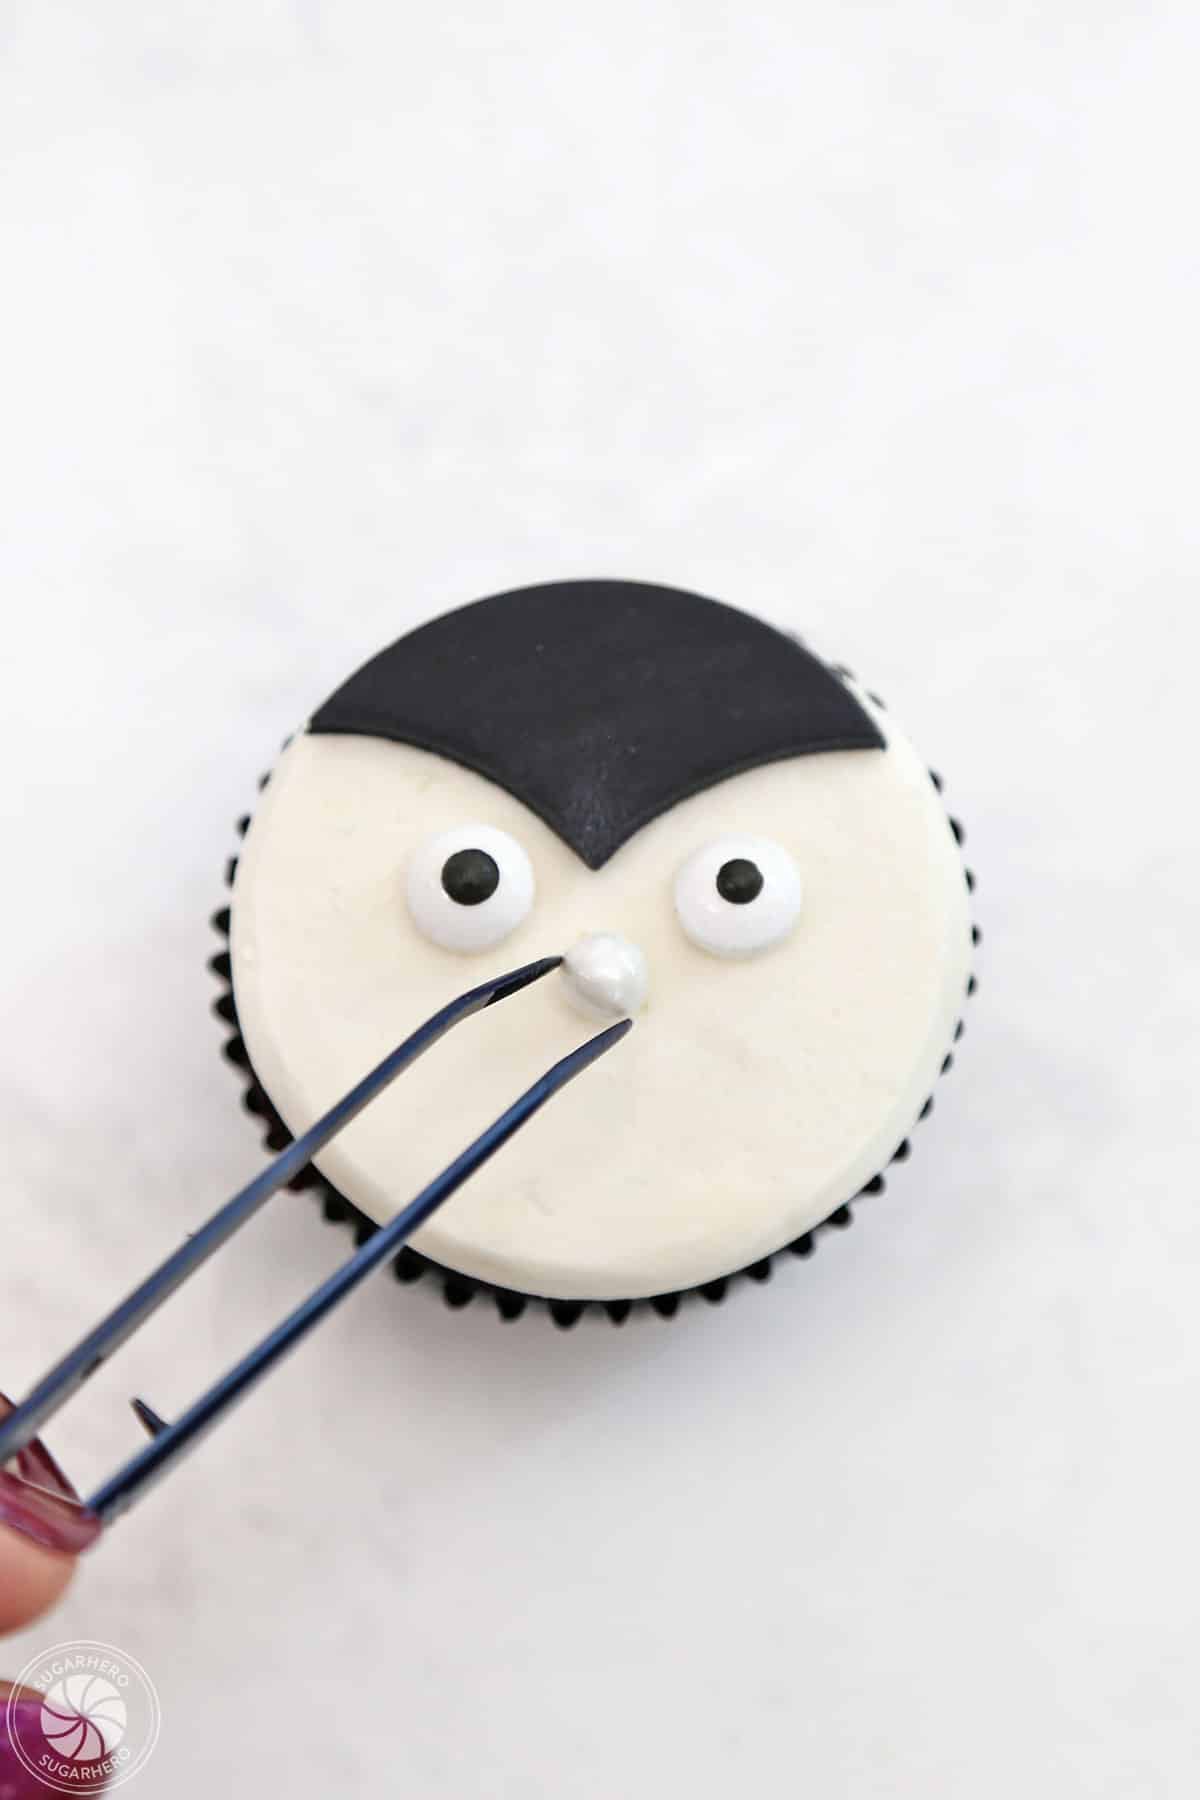
Decorate the Cupcakes
Time to put it all together and decorate!
- Add the hair. Place a piece of black fondant vampire hair on the top of the cupcake. It should stick fine, but if it doesn’t, a thin brushing of corn syrup on the back of the fondant will help.
- Add the eyes and nose. Just below the hairline, press two candy eyes and a candy nose gently into the buttercream.
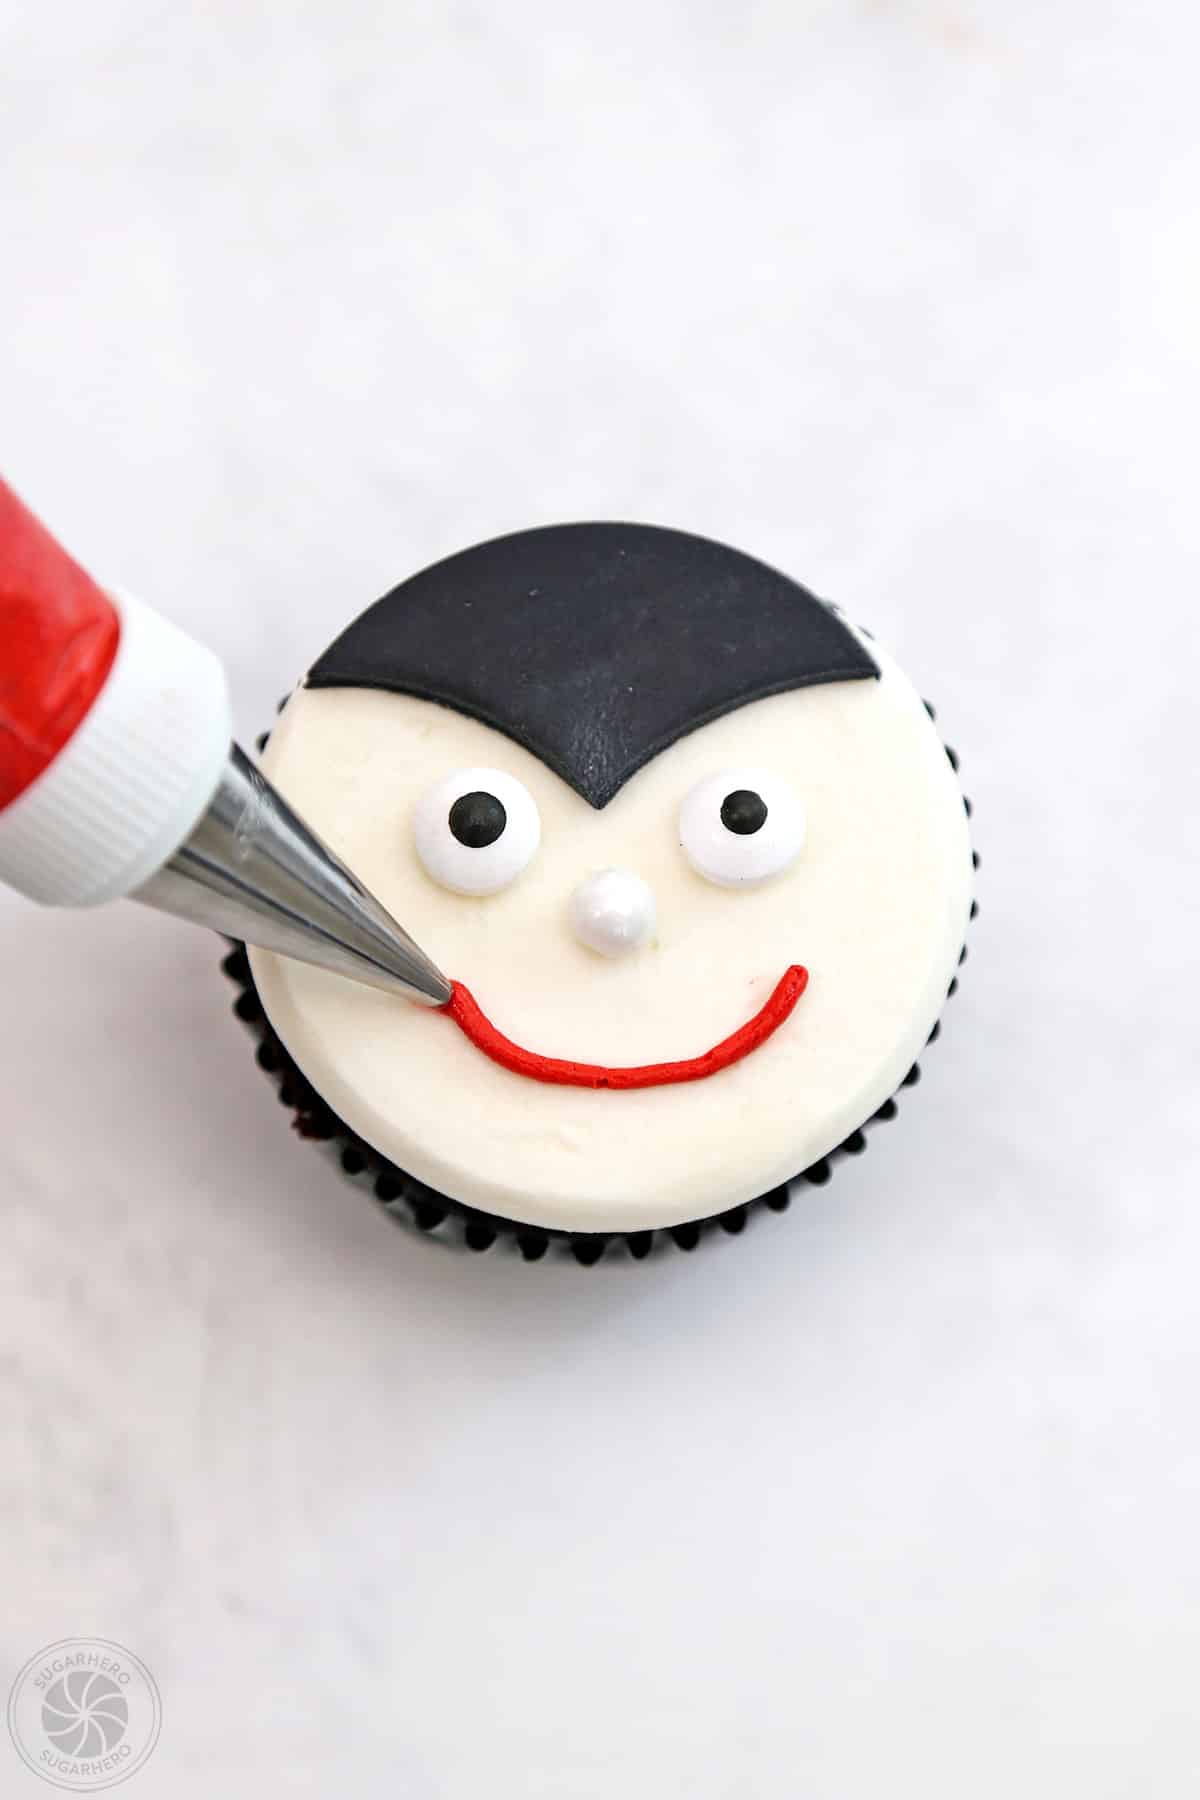
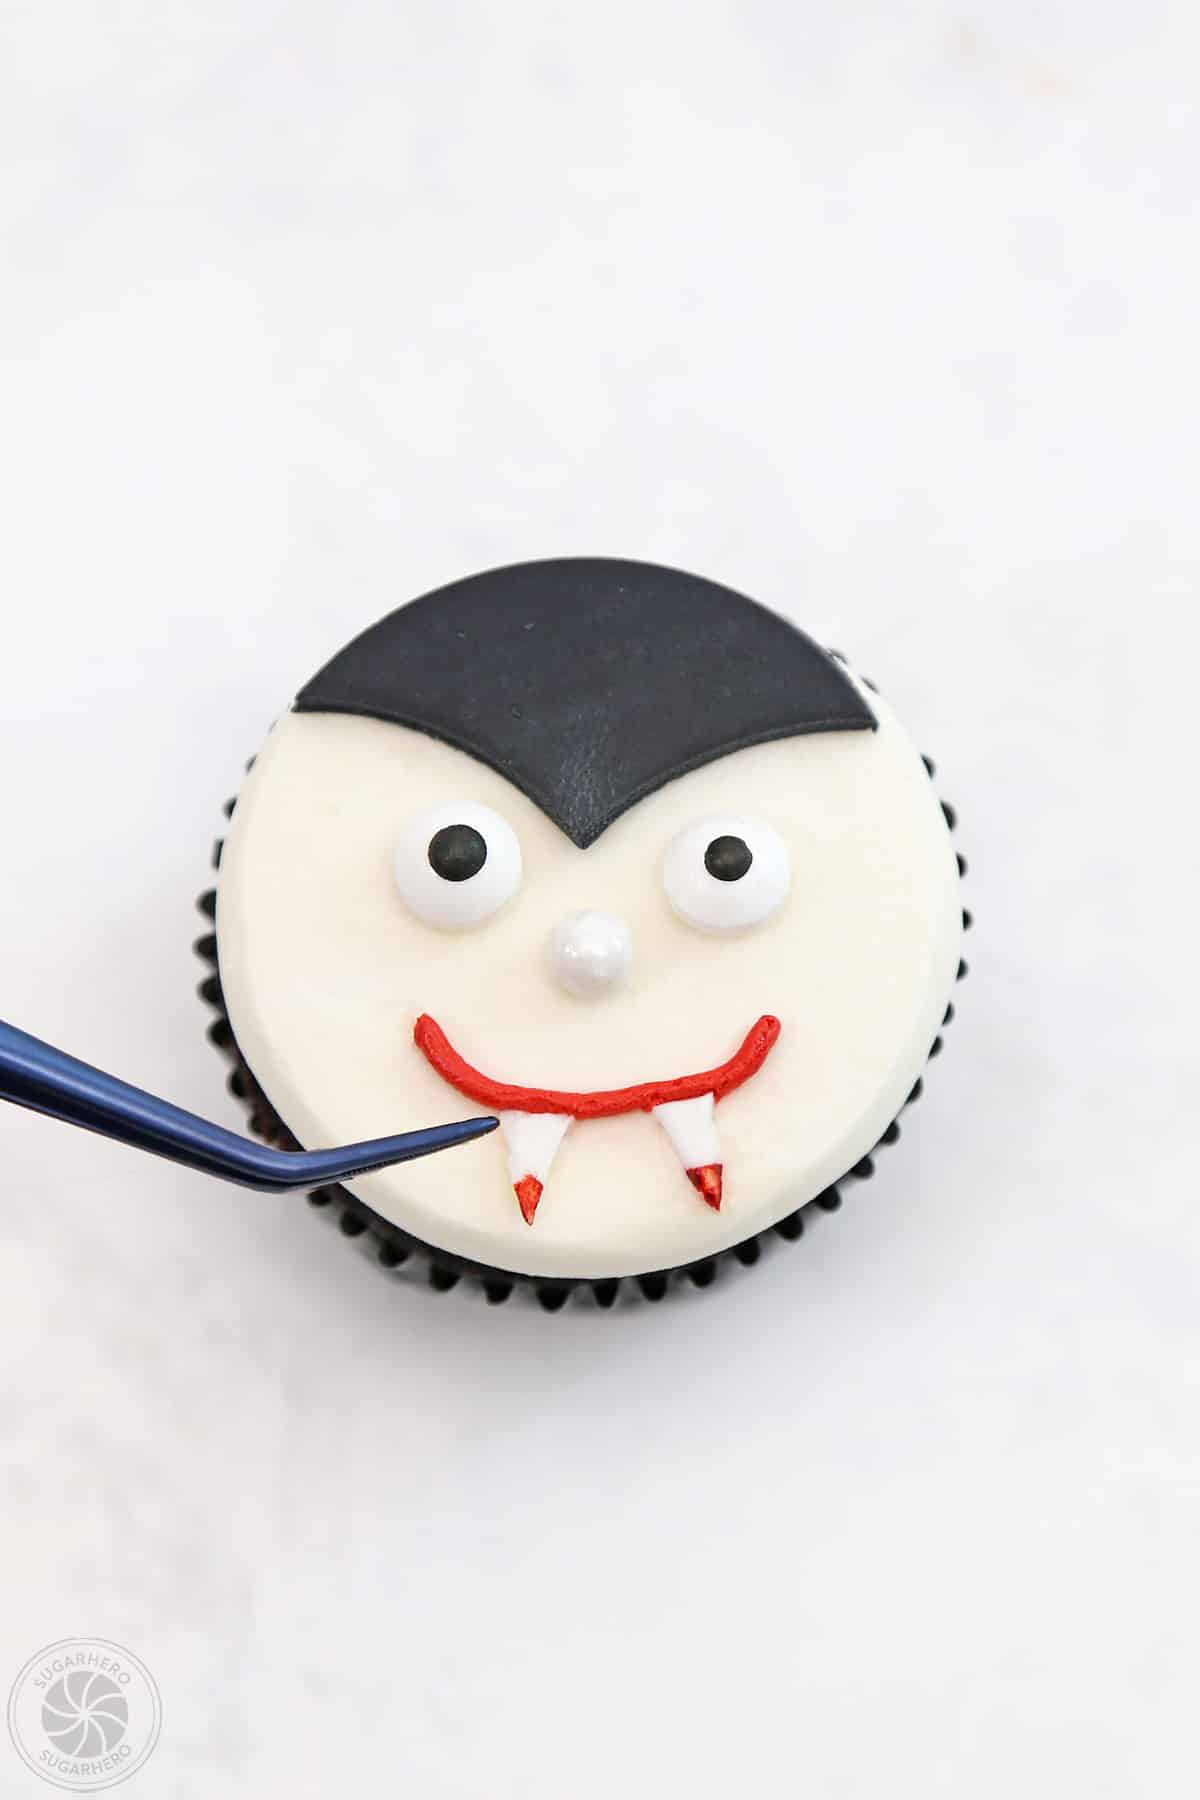
- Make the mouth and add teeth. Pipe a red line for the mouth and place two vampire teeth on top. Press them into the buttercream gently so they stick.
- Finish cupcakes. Repeat the process of making a vampire face on each of your cupcakes. Enjoy!
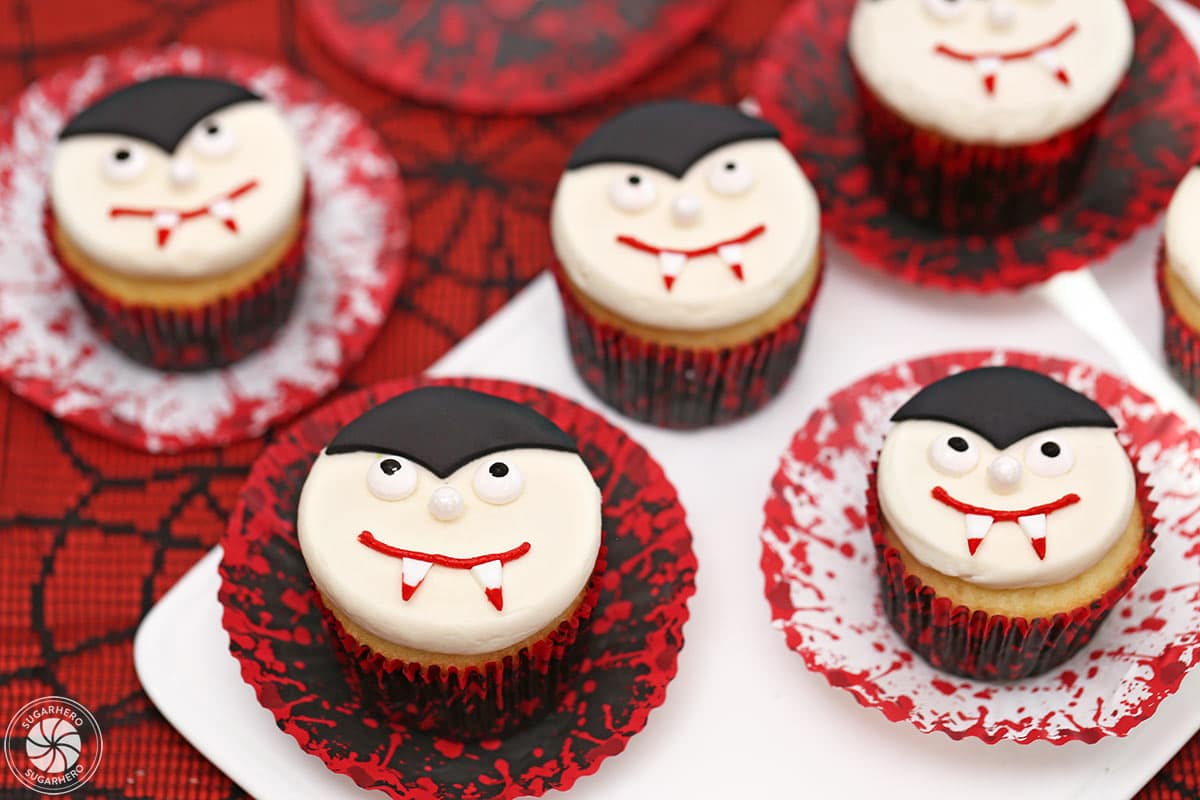
💡 Tips and FAQs
First time making these cupcakes? Here’s a couple of tips to make sure they turn out well.
Many factors affect frosting texture, including the brand and temperature of the butter, and the temperature of your kitchen. So, don’t be afraid to play around at the end to get a texture you’re happy with. If you want it thinner/looser, add a bit of milk or water. If you want it thicker, add extra powdered sugar bit by bit.
If you don’t have piping bags and tips on hand, you can use Ziplock bags, and cut a small hole in one of the corners to pipe frosting through.
Both components of these cupcakes can be made in advance and used later.
Frosting: The frosting can be made up to a week in advance. Place the frosting in an airtight container and press a layer of cling wrap directly on top of the frosting to prevent a crust from forming. Store the frosting in the refrigerator. When you’re ready to use it, let it come to room temperature on the counter, then whip it on medium speed until it regains its light, creamy texture.
Cupcakes: Baked and cooled cupcakes can be frozen in airtight containers. Let them defrosting in their container on the countertop before decorating.
Store extra cupcakes in an airtight container at room temperature for 2-3 days, or in the refrigerator for up to a week. If they have been chilled, allow them to come to room temperature before serving for the best taste and texture.