Crispy Baked Pork Chops 6:00 AM (17 hours ago)

Crispy Baked Pork Chops are juicy, flavorful, and coated in a golden, crunchy crust then oven-baked for an easy, no fuss dinner!
A TENDER, JUICY PORK RECIPE
These Crispy Baked Pork Chops deliver all the crunch and flavor of fried pork chops—without the mess! With just a few simple ingredients and no frying required, this easy recipe is perfect for a quick, delicious dinner the whole family will enjoy. If you are like me and always trying to figure out what to make with pork chops – I got you covered! I think you are really going to love this one!

FREQUENTLY ASKED QUESTIONS:
If using enhanced pork, pork that has already been seasoned in a brine solution, it will be noted on the packaging, you can skip the brine to prevent the meat from being too salty.
Be sure the pork is patted dry before breading. Doing so will help guarantee each dredge step does its job. Leaving the meat overly wet will result in a coating that comes off and does not stick to the meat after baking.
These chops do not do well if assembled too long before baking. The bread can become wet and soggy from the egg mixture. The breadcrumb topping can be made and stored in an airtight container at room temperature for up to 3 days before using. But I wouldn’t bread the chops too early.
Freshly made breadcrumbs make these chops extra crunchy. If using premade breadcrumbs, substitute panko for a similar crunch. Traditional breadcrumbs can be used but will not result in a similar crunchy coating.
I think brining is actually great for pork chops because it is such a lean meat and so many people have trouble with their pork chops during out. So, I would definitely recommend NOT skipping it, even if you were just making these with a shake and bake mix. Honestly, I think I may start brining more of our pork chops that way with the brining step to help keep everything nice and moist.
I served these pork chops with my Ranch Roasted Potatoes that you’ll see in my pictures. I think they would also be great with other potatoes like Baked Potatoes, Ranch Smashed Potatoes, or French Fries. They’d pair nicely with Maple Glazed Carrots, peas, broccoli, amid a delicious Brussels Sprouts Caesar Salad.
Pork chops can be stored in the refrigerator in an airtight container for up to 5 days.
To reheat chops, place them in a 350F-degree oven for 10-15 minutes or until heated through.

INGREDIENTS NEEDED: (SEE RECIPE CARD BELOW FOR THE FULL RECIPE)
- pork– This recipe uses a center cut boneless pork loin, at least ¾ inch thick. If using a thinner cut of meat, baking time will be reduced, cook until the internal temperature reaches 155 degrees.
- bread– This recipe used a classic white artisanal sandwich bread, but any bread you have on hand could be used. White bread, Italian, or French bread could be used, you will need about 2 ½ cups of breadcrumbs.
- shallots and garlic– Shallot and garlic add an aromatic flavor. A couple tablespoons of minced onion can be substituted for the shallot. If using dry garlic, substitute ½ teaspoon and add after browning the breadcrumbs.
- parmesan cheese– Parmesan cheese adds an additional depth of flavor and a slight saltiness to the crumb topping. Romano or Asiago cheese can be substituted for parmesan if preferred.
- thyme and parsley– Herbs add flavor and complement the garlic flavor in the crumb coating.
- egg- A couple eggs mixed with flour help to act as a glue for the breadcrumb topping.
- salt and pepper– Lean pork loin benefits from a short brine, helping to lock in moisture making for a more tender and juicier chop. Season with a little bit of pepper right before breading.

HOW TO MAKE CRISPY BAKED PORK CHOPS
In a bowl, dissolve 3 Tablespoons of salt in 4-5 cups of cold water. Place chops in brine solution, cover and refrigerate for 30 minutes. Preheat oven to 425F degrees, line a rimmed baking sheet with a wire baking rack, set aside. Tear bread into large pieces and add to the bowl of a food processor, pulse 10-15 times, or until cut into fine crumbs. In a 10-inch skillet over medium-high heat, add the breadcrumbs, vegetable oil, minced shallot, minced garlic, and ½ teaspoon of salt. Cook for a few minutes, or until the bread is lightly toasted, stirring often so it doesn’t burn. Remove from the heat to cool.

Prepare the three plates for dredging. To the first bowl add ¼ cup of all-purpose flour. To the second bowl, add the two eggs and ¼ cup of all-purpose flour, stirring to combine. In the third plate, add the cooled breadcrumb mixer, parmesan cheese, parsley, and thyme. Remove pork from the brine, pat chops dry with paper towels. Season with pepper, a scant 1/8 teaspoon for each side.

Coat chops in breading. First, dredge in flour, allowing any excess to shake off, next dip in the egg mixture, allowing any excess to drip off. Finally, coat in the breadcrumb mixture, pressing gently to help crumbs adhere to all sides.

Place the coated pork chops on the prepared baking tray. Repeat the process with the remaining three chops. Bake for 18-20 minutes, or until the internal temperature reaches 145F degrees.

Remove the pan from oven, serve warm.

CRAVING MORE RECIPES?
- Shake and Bake Pork Chops
- Country Fried Pork Chops
- Honey Garlic Pork Chops
- Ritz Cracker Pork Chops
- Air Fryer Pork Chops
- Crock Pot BBQ Pork Chops
- Crock Pot Mississippi Pork Chops
- Crock Pot Ranch Pork Chops
- Pan Fried Pork Chops
- Crock Pot Pork Chops
- Baked Pork Chops and Rice
- Grilled Pork Chops
- Grilled Balsamic Pork Chops
- Smothered Pork Chops
- French Onion Pork Chops
- Crock Pot Pork Chops and Potatoes For Two

Crispy Baked Pork Chops
Ingredients
For the brine:
- 3 Tablespoons salt
- 4-5 cups cold water
For the pork chops:
- 4 center cut boneless pork chops (¾ – 1 inch thick)
- 4 slices sandwich bread
- 2 Tablespoons vegetable oil
- 1 small shallot, minced (about 2 Tablespoons)
- 3 garlic cloves, minced (about 3 teaspoons)
- ½ teaspoon salt
- ½ cup all-purpose flour (divided use)
- 2 eggs
- 2 Tablespoons grated parmesan cheese
- 2 Tablespoons minced fresh parsley
- 1 teaspoon minced fresh thyme
- black pepper (to taste)
Instructions
- In a large bowl, dissolve 3 Tablespoons salt in 4-5 cups cold water. Place 4 center cut boneless pork chops in brine solution, cover and refrigerate for 30 minutes.

- Preheat oven to 425F degrees, line a rimmed baking sheet with a wire baking rack, set aside.
- Tear 4 slices sandwich bread into large pieces and add to the bowl of a food processor, pulse 10-15 times, or until cut into fine crumbs.

- In a 10-inch skillet over medium-high heat, add 2 Tablespoons vegetable oil, breadcrumbs, 1 small shallot, minced, 3 garlic cloves, minced and 1/2 teaspoon salt. Cook until the bread is lightly toasted, stirring regularly so it doesn't burn. Remove from the heat to cool.

- Prepare the three plates for dredging. To the first bowl add ¼ cup of all-purpose flour.
- To the second bowl, add the 2 eggs and ¼ cup of all-purpose flour, stirring to combine.

- On the third plate, add the cooled breadcrumb mixture, 2 Tablespoons grated parmesan cheese, 2 Tablespoons minced fresh parsley and 1 teaspoon minced fresh thyme.

- Remove pork from the brine, pat chops dry with paper towels. Season with black pepper (about 1/8 teaspoon for each side).

- Coat chops in breading. First, dredge in flour, allowing any excess to shake off

- Next dip in the egg mixture, allowing any excess to drip off.

- Finally, coat in the breadcrumb mixture, pressing gently to help crumbs adhere to all sides

- Place coated chop on the prepared baking tray. Repeat the process with the remaining three chops.

- Bake on the middle rack for about 18-20 minutes, or until the internal temperature reaches 145F degrees. Be sure not to overcook pork chops or the can dry out – always go by internal temperature for doneness.

- Remove the pan from oven, serve warm.

Notes
- Please refer to my FAQ’s (Frequently Asked Questions) and ingredient list above for other substitutions or for the answers to the most common questions.
Nutrition


%20100vw,%201024px%22%20/%3ECrispy%20Baked%20Pork%20Chops%20are%20juicy,%20flavorful,%20and%20coated%20in%20a%20golden,%20crunchy%20crust%20then%20oven-baked%20for%20an%20easy,%20no%20fuss%20dinner!%20A%20TENDER,%20JUICY%20PORK%20RECIPE%20These%26%23160;Crispy%20Baked%20Pork%20Chops%26%23160;deliver%20all%20the%20crunch%20and%20flavor%20of%20fried%20pork%20chops%26%238212;without%20the%20mess!%20With%20just%20a%20few%20simple%20ingredients%20and%20no%20frying%20required,%20this%20easy%20recipe...)


Sloppy Joe Cornbread Casserole 3 May 6:00 AM (yesterday, 6:00 am)

Sloppy Joe Cornbread Casserole combines saucy, savory sloppy joe filling with golden cornbread for an easy, hearty comfort food dinner recipe!
AN EASY GROUND BEEF CASSEROLE
When I’m looking for an easy, quick dinner, this dish is always one that comes to mind (and is always a hit even with the picky eaters!). It’s a simple meal that’s great for busy weeknights. I love using cornbread as a base for a lot of recipes like my Cornbread Taco Bake, Cheesy Beefy Cornbread Casserole, Cornbread Chicken Casserole and Cornbread Pizza (honorable mention to my Cornbread Waffles with Chili and Fixins‘!). It really is a fun twist and makes it a really filling meal!

FREQUENTLY ASKED QUESTIONS:
I know you might be thinking “but every other recipe for this has the cornbread on top.” Well, my friends, this isn’t every other recipe out there lol, it is BETTER! I like to do it this way because I think it makes it easier to slice and serve.
A box of Jiffy cornbread mix works absolutely perfect for this recipe. You could also pick up a bag of cornbread mix. Martha White makes a few good ones. I think those are only about 7 ounces but they would still work, the cornbread layer would just be a little bit thinner. No other changes need to be made.
I think you could use a larger box of cornbread mix and be ok (15 ounce) but i just haven’t tested it. I’d probably just increase the milk to about ⅔ cups and you may need to increase baking time. If you give it a try, please let me know how it turns out for you!
I would lean towards a steamed veggie (the steamed veggie bags are great, like broccoli, cauliflower, etc.) and/or a salad. I also think these sides would work nicely:
– Honey Glazed Carrots
– Fried Corn
– Green Bean Salad
– Bacon Garlic Green Beans
This will be good in the fridge for up to 3 days, but can go 5 days. The cornbread may get a little soggy after 3 days. It can be frozen for up to 3 months.

INGREDIENTS NEEDED: (SEE RECIPE CARD BELOW FOR THE FULL RECIPE)
- shredded cheddar cheese – you can swap this shredded cheese out for other options. If you want a little heat, try some Pepper Jack.
- can of cream-style sweet corn
- Jiffy cornbread mix – see my Frequently Asked Questions above for other suggestions.
- milk
- eggs
- lean ground beef– no ground beef? No problem! You can use ground turkey, pork or chicken instead.
- yellow onion
- green bell pepper– If you don’t like bell pepper, just leave it out.
- Manwich sloppy joe sauce – If you don’t like the canned stuff, you can make it homemade. See my recipe for Crock Pot Sloppy Joes for a homemade version.

HOW TO MAKE SLOPPY JOE CORNBREAD CASSEROLE
Preheat the oven to 400° F. Oil a 9×13-inch baking dish with olive oil (or spray with nonstick cooking spray). Set aside. To a bowl add 1 cup shredded cheddar cheese, cream style corn, cornbread mix, milk, eggs, and sugar. Mix until combined.

Transfer the batter to the greased baking dish. Bake for 20 minutes.

While this is baking to a saute pan add the ground beef, onion, and bell pepper. Cook for 7 minutes or until the beef is no longer pink. Drain any excess grease.

Add the Manwich. Simmer for 5 minutes or until the liquid has reduced.

Remove the baking dish from the oven once it has baked for 20 minutes. Top the cornbread with the Manwich.

Top the Manwich with the remainder of the cheese. Cover the dish with aluminum foil and bake for an additional 20 minutes.

Remove from the oven. Sprinkle the parsley on top.

CRAVING MORE RECIPES?
- Texas Toast Sloppy Joes
- Crock Pot Sloppy Joe Hash Brown Casserole
- Sloppy Joe Casserole
- Big Mac Sloppy Joes
- Crock Pot Sloppy Joes
- Dr Pepper Sloppy Joes
- Crock Pot Taco Sloppy Joes
- Italian Sloppy Joes
- Sloppy Joe Cups
- Sloppy Joe Bubble Up
- BBQ Beef Biscuit Cups

Sloppy Joe Cornbread Casserole
Ingredients
- 1 teaspoon oil (or nonstick cooking spray)
- 3 cups shredded cheddar cheese (divided use, see notes below)
- 14.75 can cream-style sweet corn
- 8.5 ounce box Jiffy cornbread mix
- ½ cup milk
- 2 eggs
- 1 teaspoon white granulated sugar (optional)
- 1 pound lean ground beef
- ½ cup finely chopped yellow onion
- ½ cup finely chopped green bell pepper
- 15 ounce can Manwich sloppy joe sauce
- 2 Tablespoons chopped parsley (optional or dried parsley flakes)
Instructions
- Preheat the oven to 400° F.
- Oil a 9×13-inch baking dish with olive oil (or spray with nonstick cooking spray). Set aside.

- To a medium bowl add 1 cup shredded cheddar cheese, 14.75 can cream-style sweet corn, 8.5 ounce box Jiffy cornbread mix, 1/2 cup milk, 2 eggs and 1 teaspoon white granulated sugar (if using.) Mix until combined.

- Transfer the batter to the greased baking dish.

- Bake for 20 minutes.

- While this is baking, to a large sauté pan add 1 pound lean ground beef, 1/2 cup finely chopped yellow onion, and 1/2 cup finely chopped green bell pepper. Cook and crumble until the beef is browned and no longer pink. Drain any excess grease.

- Add 15 ounce can Manwich sloppy joe sauce. Simmer for about 5 minutes or until the liquid has reduced.

- Remove the baking dish from the oven once it has baked for 20 minutes.
- Top the baked cornbread with the Manwich mixture.

- Top the Manwich with the remainder 2 cups shredded cheddar cheese.

- Cover the dish with aluminum foil and bake for an additional 20 minutes.

- Remove from the oven. Optional: sprinkle 2 Tablespoons chopped parsley on top (or dried parsley flakes.)

Notes
- Please refer to my FAQ’s (Frequently Asked Questions) and ingredient list above for other substitutions or for the answers to the most common questions.
- A lot of store bought shredded cheese comes packaged with 2 cups of shredded cheese. This recipe calls for 3 cups. You can certainly just use 2 cups of shredded cheese for this recipe. It will work out just fine!
Nutrition
%20100vw,%201024px%22%20/%3ESloppy%20Joe%20Cornbread%20Casserole%20combines%20saucy,%20savory%20sloppy%20joe%20filling%20with%20golden%20cornbread%20for%20an%20easy,%20hearty%20comfort%20food%20dinner%20recipe!%20AN%20EASY%20GROUND%20BEEF%20CASSEROLE%20When%20I%26%238217;m%20looking%20for%20an%20easy,%20quick%20dinner,%20this%20dish%20is%20always%20one%20that%20comes%20to%20mind%20(and%20is%20always%20a%20hit%20even%20with%20the%20picky%20eaters!).%20It%26%238217;s%20a...)
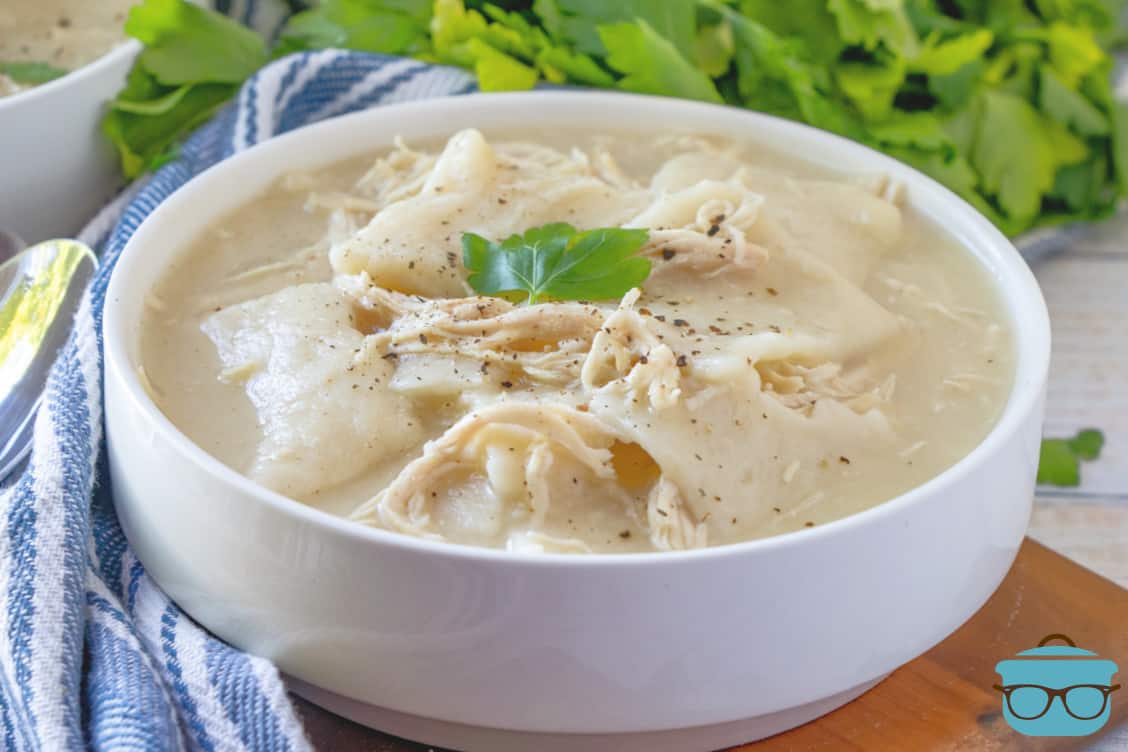
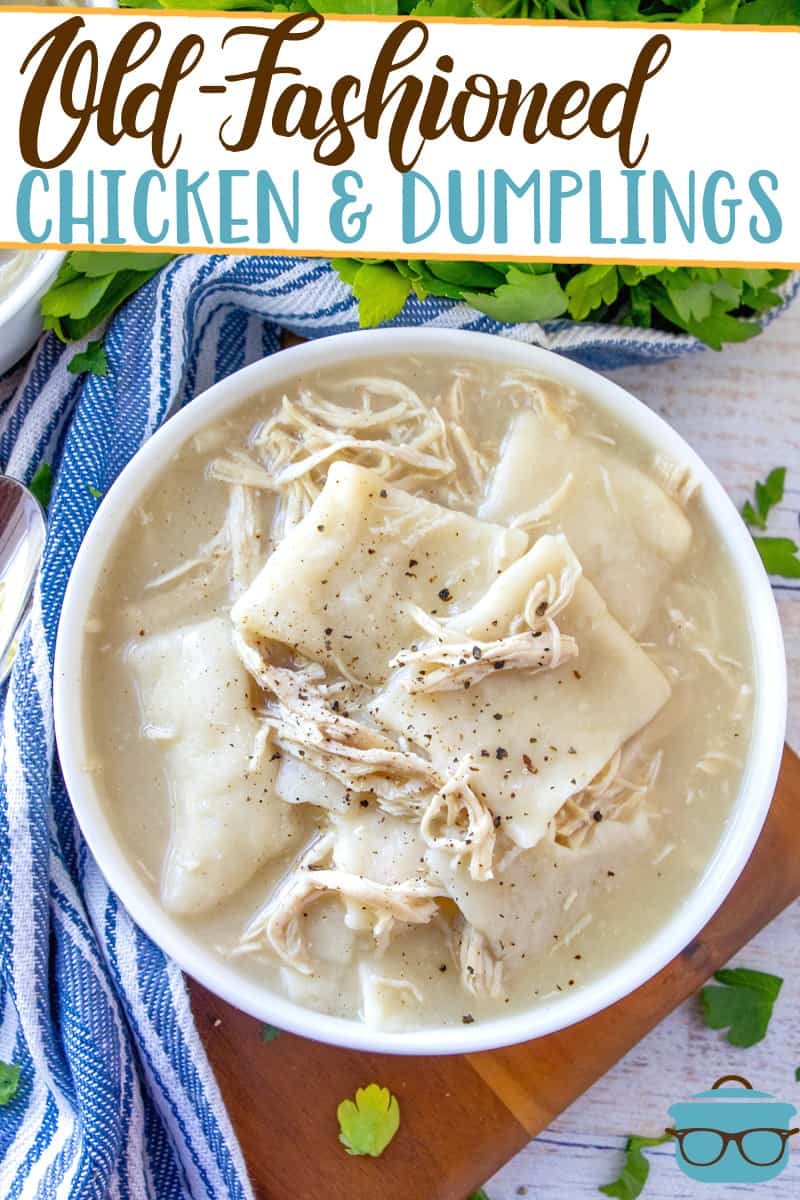
Chicken and Dumplings 2 May 5:00 AM (2 days ago)
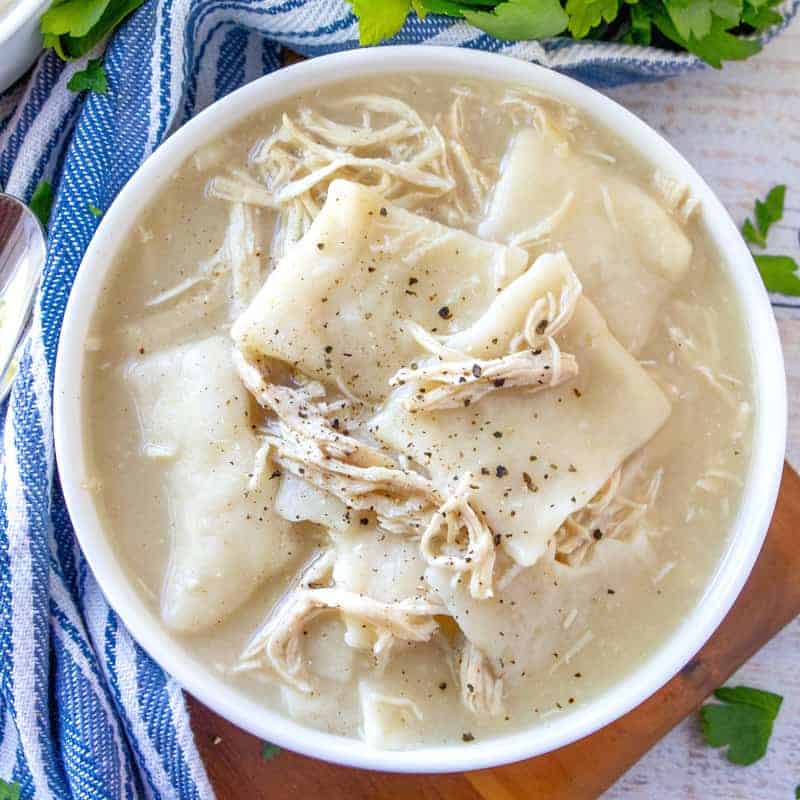
Old-Fashioned Chicken and Dumplings is a super simple recipe. Flat strips of dough simmered in a yummy broth with tender chicken.
AN OLD-FASHIONED SOUTHERN STYLE RECIPE
There really is no other recipe that screams comfort food quite like chicken and dumplings. This meal will warm up and comfort any soul on a cold winter’s day! Want an easier version, be sure to check out my Crock Pot Chicken and Dumplings.
FREQUENTLY ASKED QUESTIONS:
Absolutely! Use whatever cut of chicken you and your family enjoy! You could even purchase a store-bought rotisserie chicken to make this a little faster to prepare.
Personally, I like to serve with some sort of French Bread or Biscuits. If you want some more veggies with your meal, you could serve with a side salad or Green Beans.
For those of you who didn’t grow up eating this style of Chicken and Dumplings – then you may have eaten it at a place like Cracker Barrel. A lot of us grew up eating Chicken & Drop Dumplings. Flat dumplings are very basic and are meant to soak up the flavors of the broth. It’s an easy, comforting homestyle meal.
You certainly could. This particular version of chicken and dumplings usually does not have any vegetables added but you certainly could throw in some peas and carrots if you prefer.
Absolutely, instead of roasting the chicken breasts, you can pick up a store bought rotisserie chicken.
You sure can! You can boil the chicken directly in the chicken broth if you prefer. You can even do this the old school way and boil a whole chicken in water to create its own broth (see my post on how to make Homemade Chicken Broth on how to do that.)
Chicken and Dumplings are best eaten the day they are made. You can store it in a covered container in the fridge; however, the dumplings will continue to soak up the broth and can turn gummy over time.
INGREDIENTS NEEDED: (SEE RECIPE CARD BELOW FOR THE FULL RECIPE)
- chicken breasts – you can use bone in or boneless or even chicken thighs
- chicken broth – if you have any sensitivity to sodium, you can get the low or no sodium option. Alternatively, if you really want to kick up the flavor, try making Homemade Chicken Broth.
- all purpose flour – my favorite brand of flour is White Lily but any brand of all purpose flour will work here.
- baking powder – it’s super important you make sure your baking powder is fresh. If it isn’t the dumplings won’t puff up at all.
- salted butter – it needs to be real butter and not margarine.
- milk – whole milk is best if you have it.

HOW TO MAKE OLD-FASHIONED CHICKEN AND DUMPLINGS:
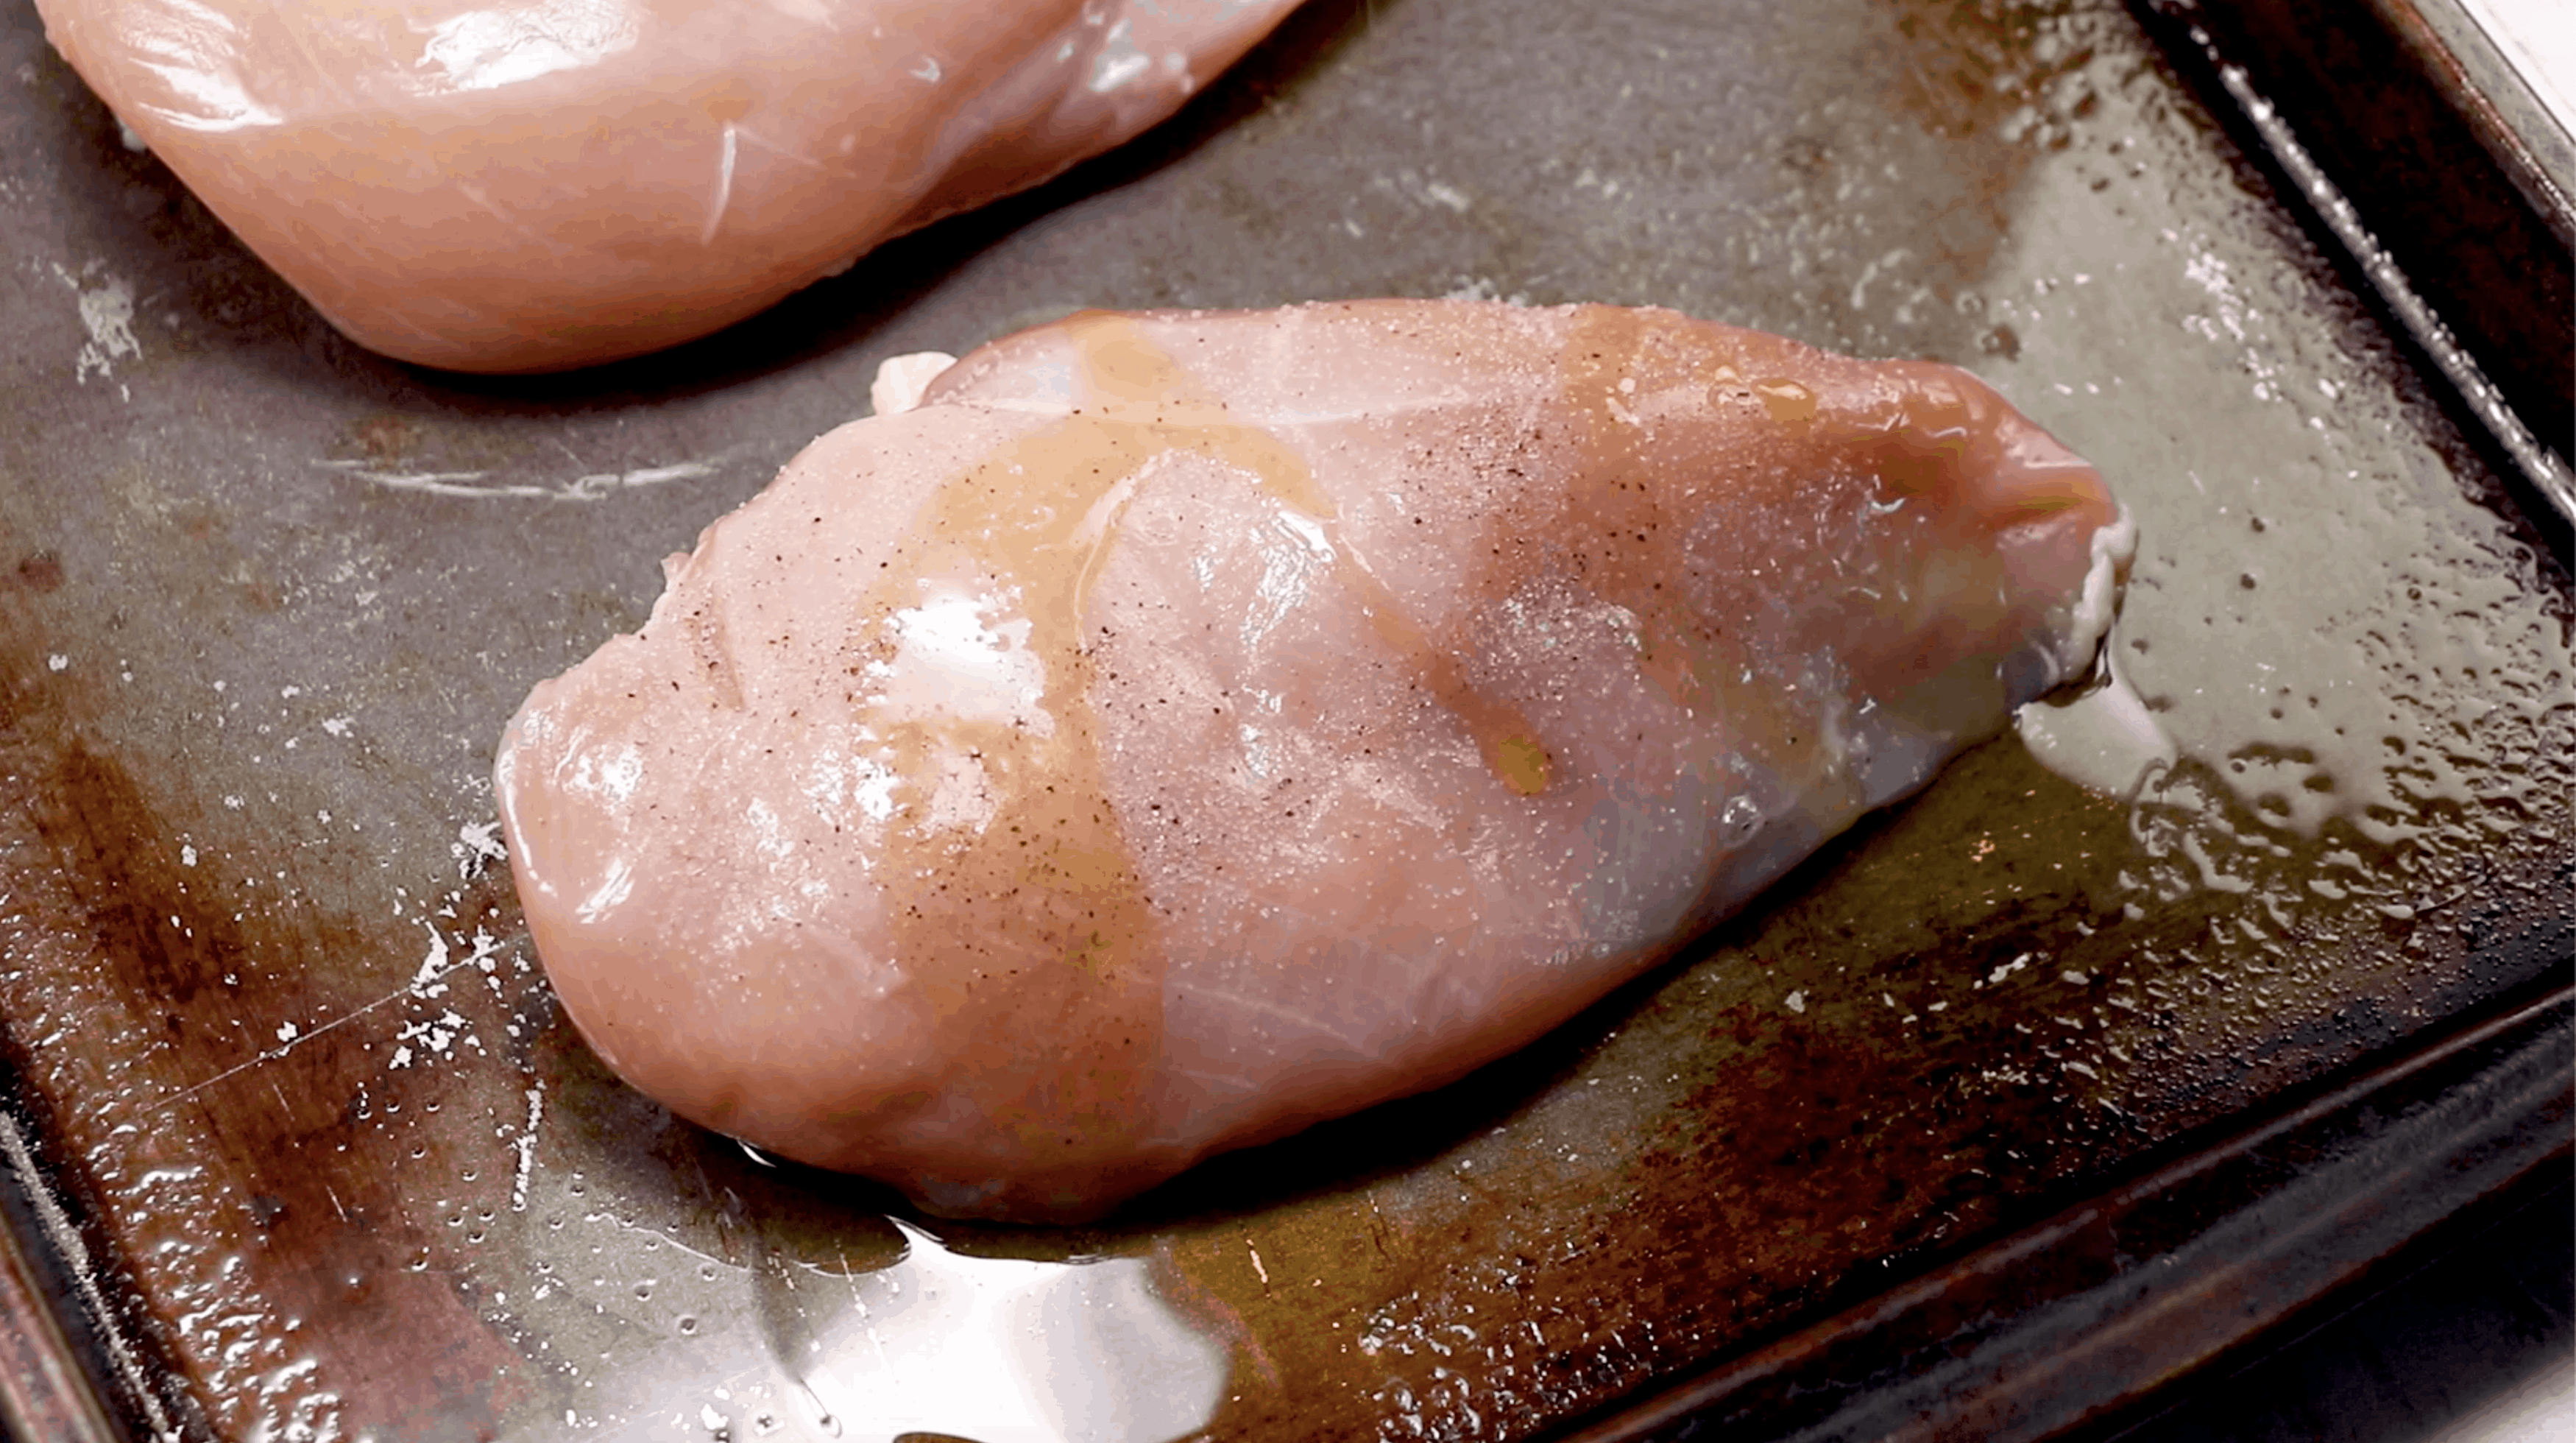
Preheat oven to 350F degrees. Spray a baking sheet with nonstick cooking spray. Drizzle a little olive oil on the 2-3 chicken breasts and season with salt and pepper. Bake for about 45 minutes. Chicken will reach an internal temperature of 165F degrees when fully cooked.
Once the chicken is cooked, shred it with two forks. Or, you can put it into a stand mixer and have it do the work for you. Pour 2 quarts of chicken stock or broth into a large pot and start warming it up on the stovetop while you make the dumplings. In a medium bowl, combine flour and baking powder. Then add in cold cubed butter.
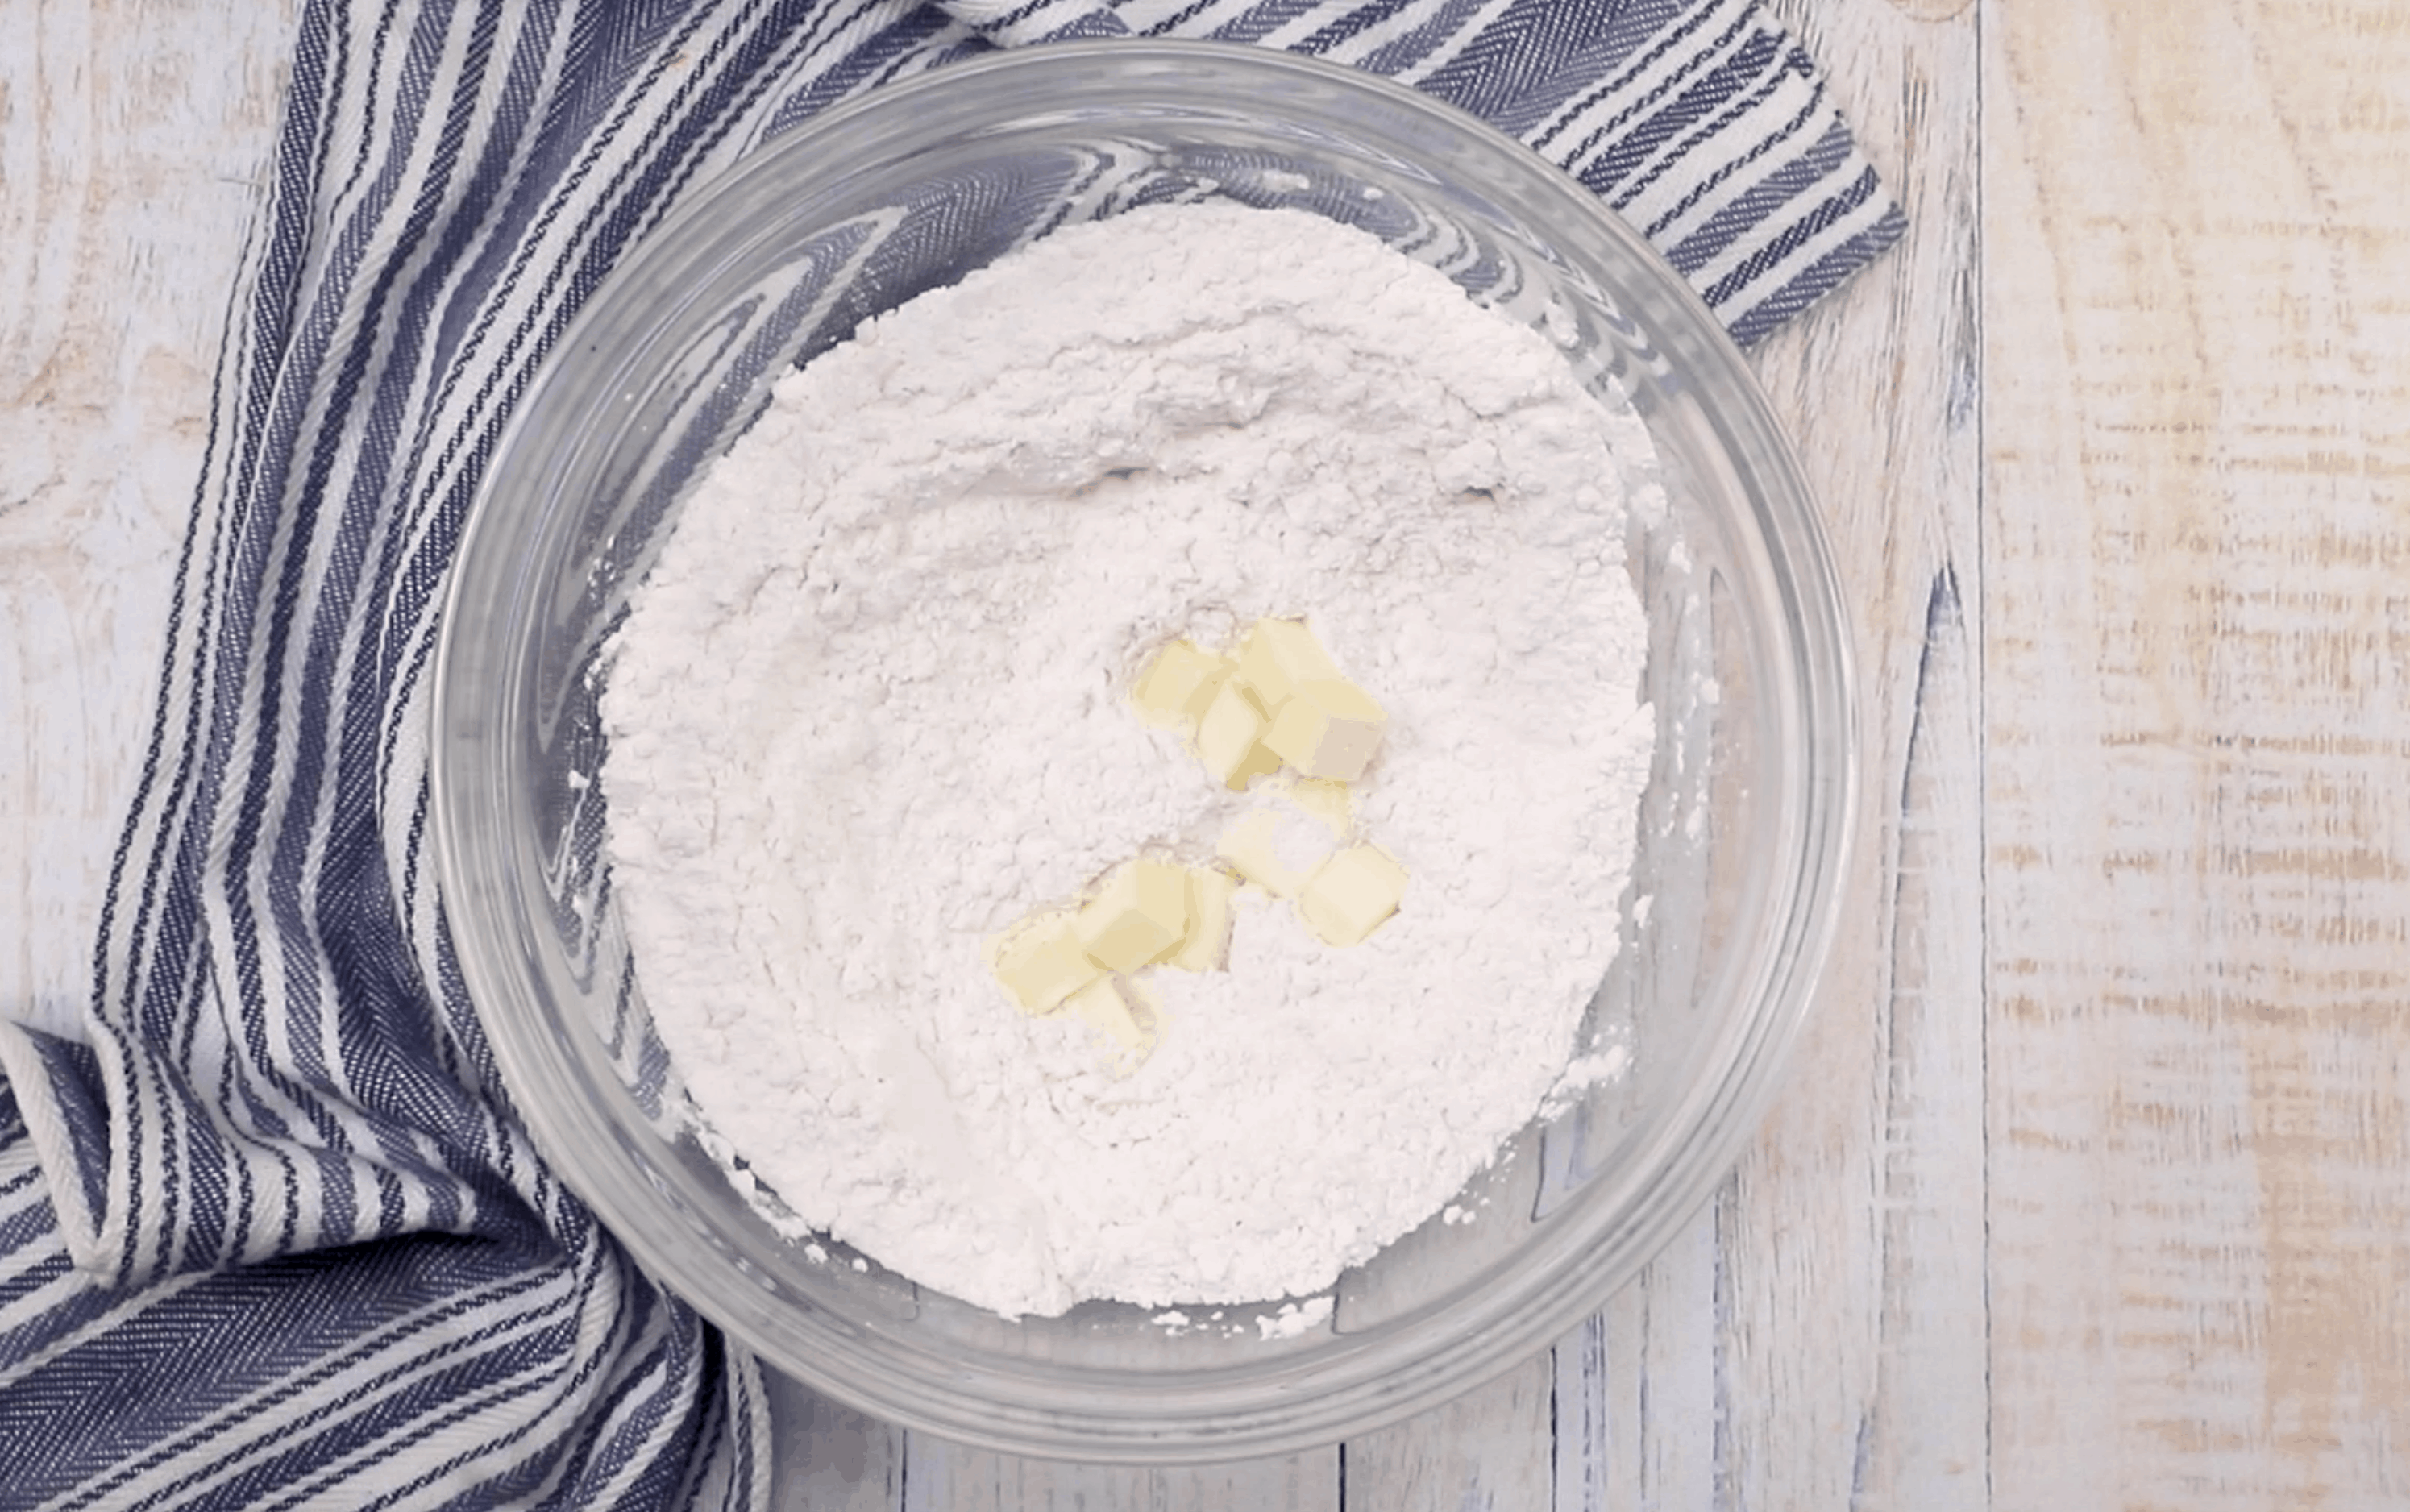
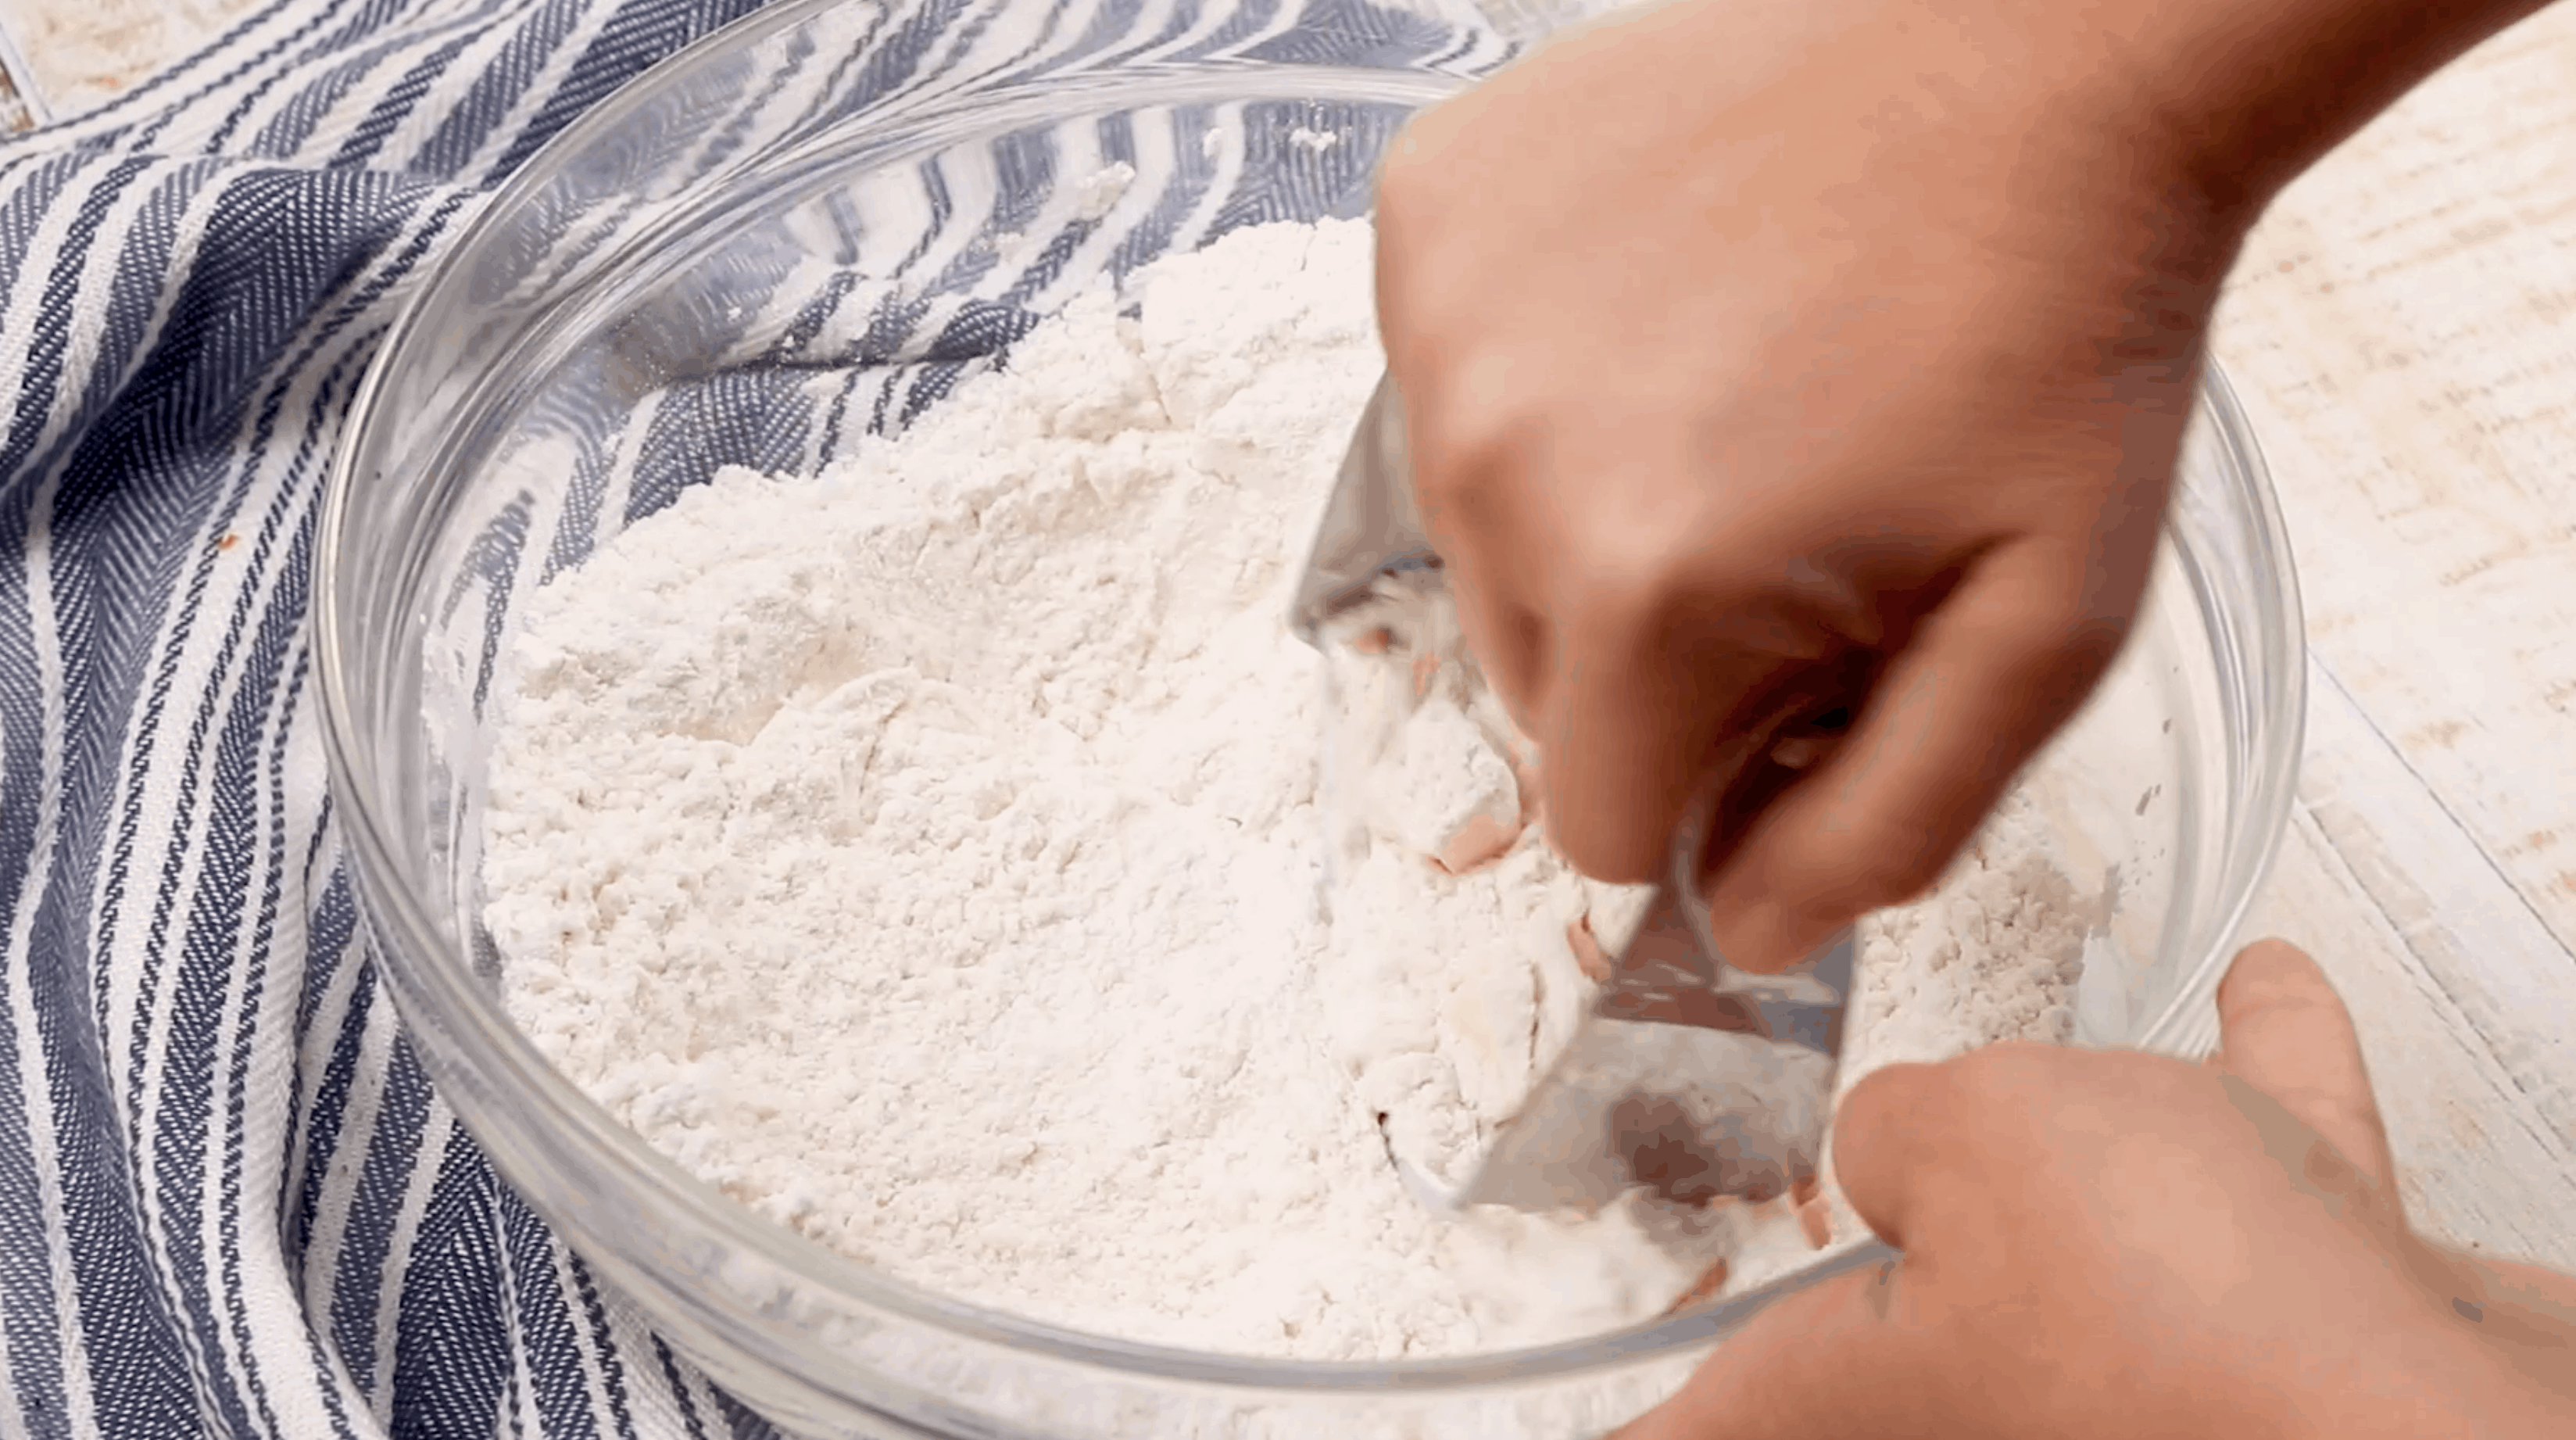
You can combine it all using a fork or a pastry cutter or your fingers. Just smoosh the butter between your fingers while you gradually mix it in with the flour mixture.
Now pour in the milk. Mix it all together. Dust your counter with a generous amount of flour. Place your dumpling dough on the counter and dust it with more flour.

With a rolling pin, roll the dough out to about 1/4″ thickness. Be sure to add flour as necessary to keep it from sticking underneath or to your rolling pin.
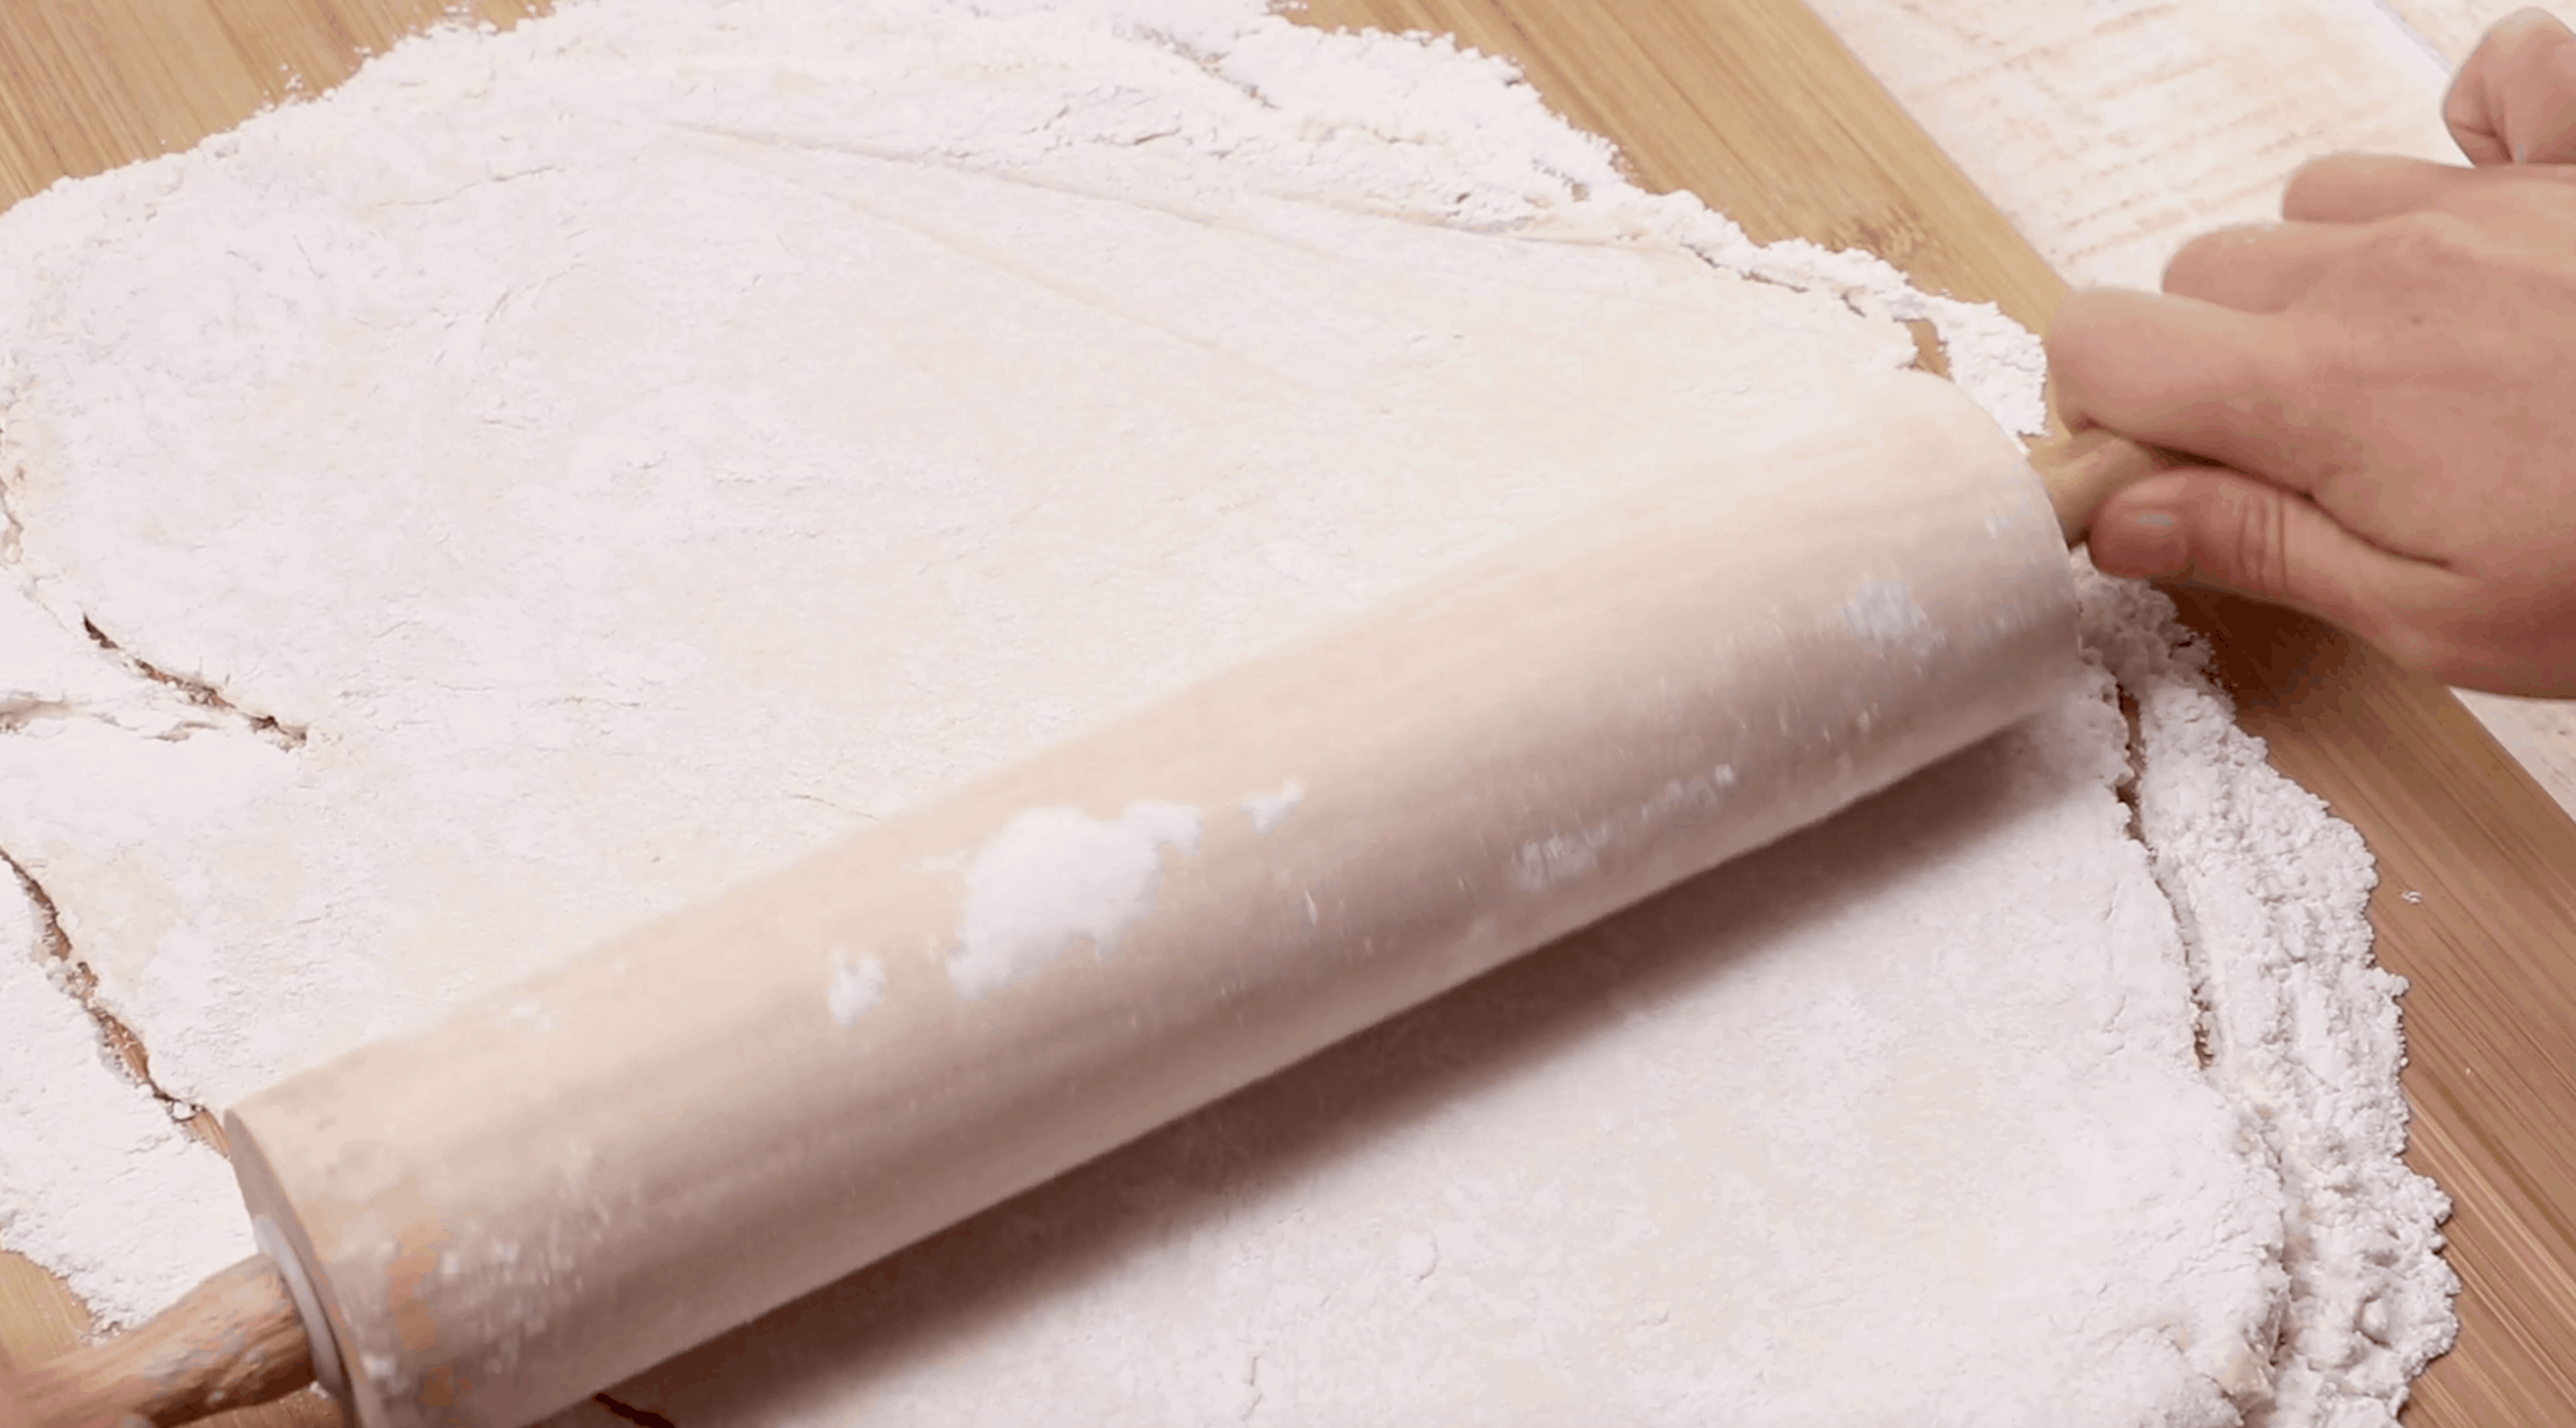
Using a knife or a pizza cutter, start cutting out your dumplings into squares. They don’t need to be perfectly shaped. Remember, this dish is rustic and homemade so it should look like it. Dust your dumplings with a bit more flour. The extra flour is all gonna help keep them from sticking but will also thicken your chicken broth some as well when you add them to the pot.

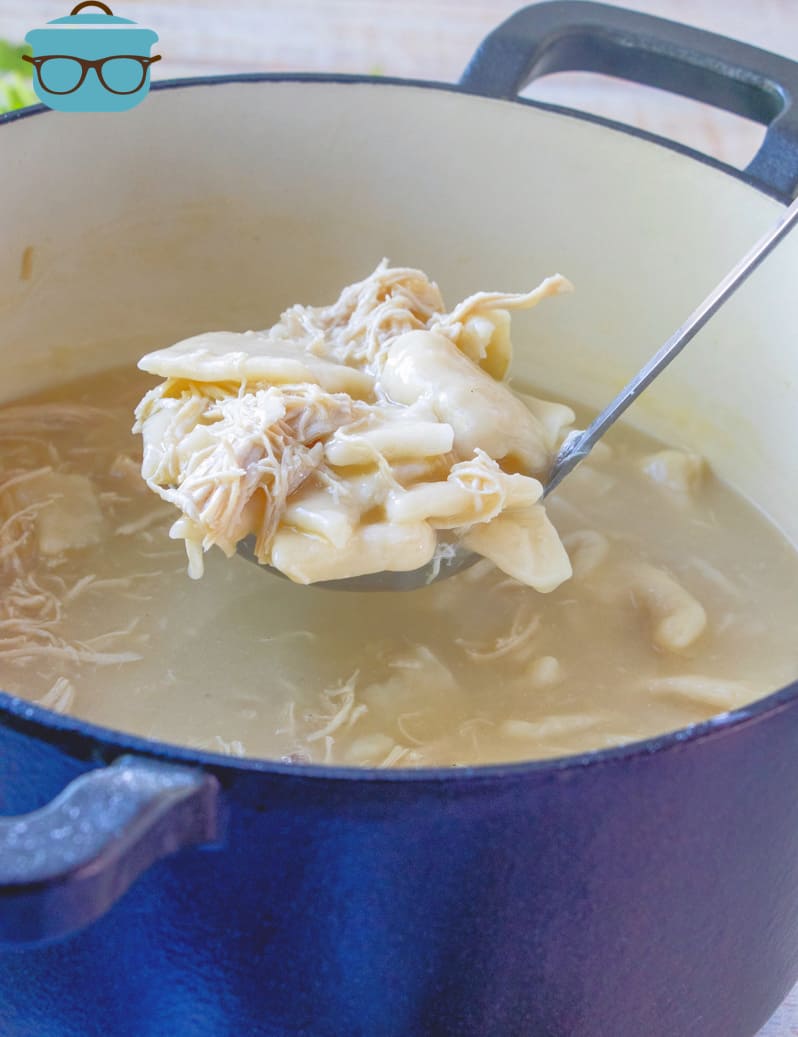
Bring the chicken broth up to a boil. Add in the shredded chicken and stir.
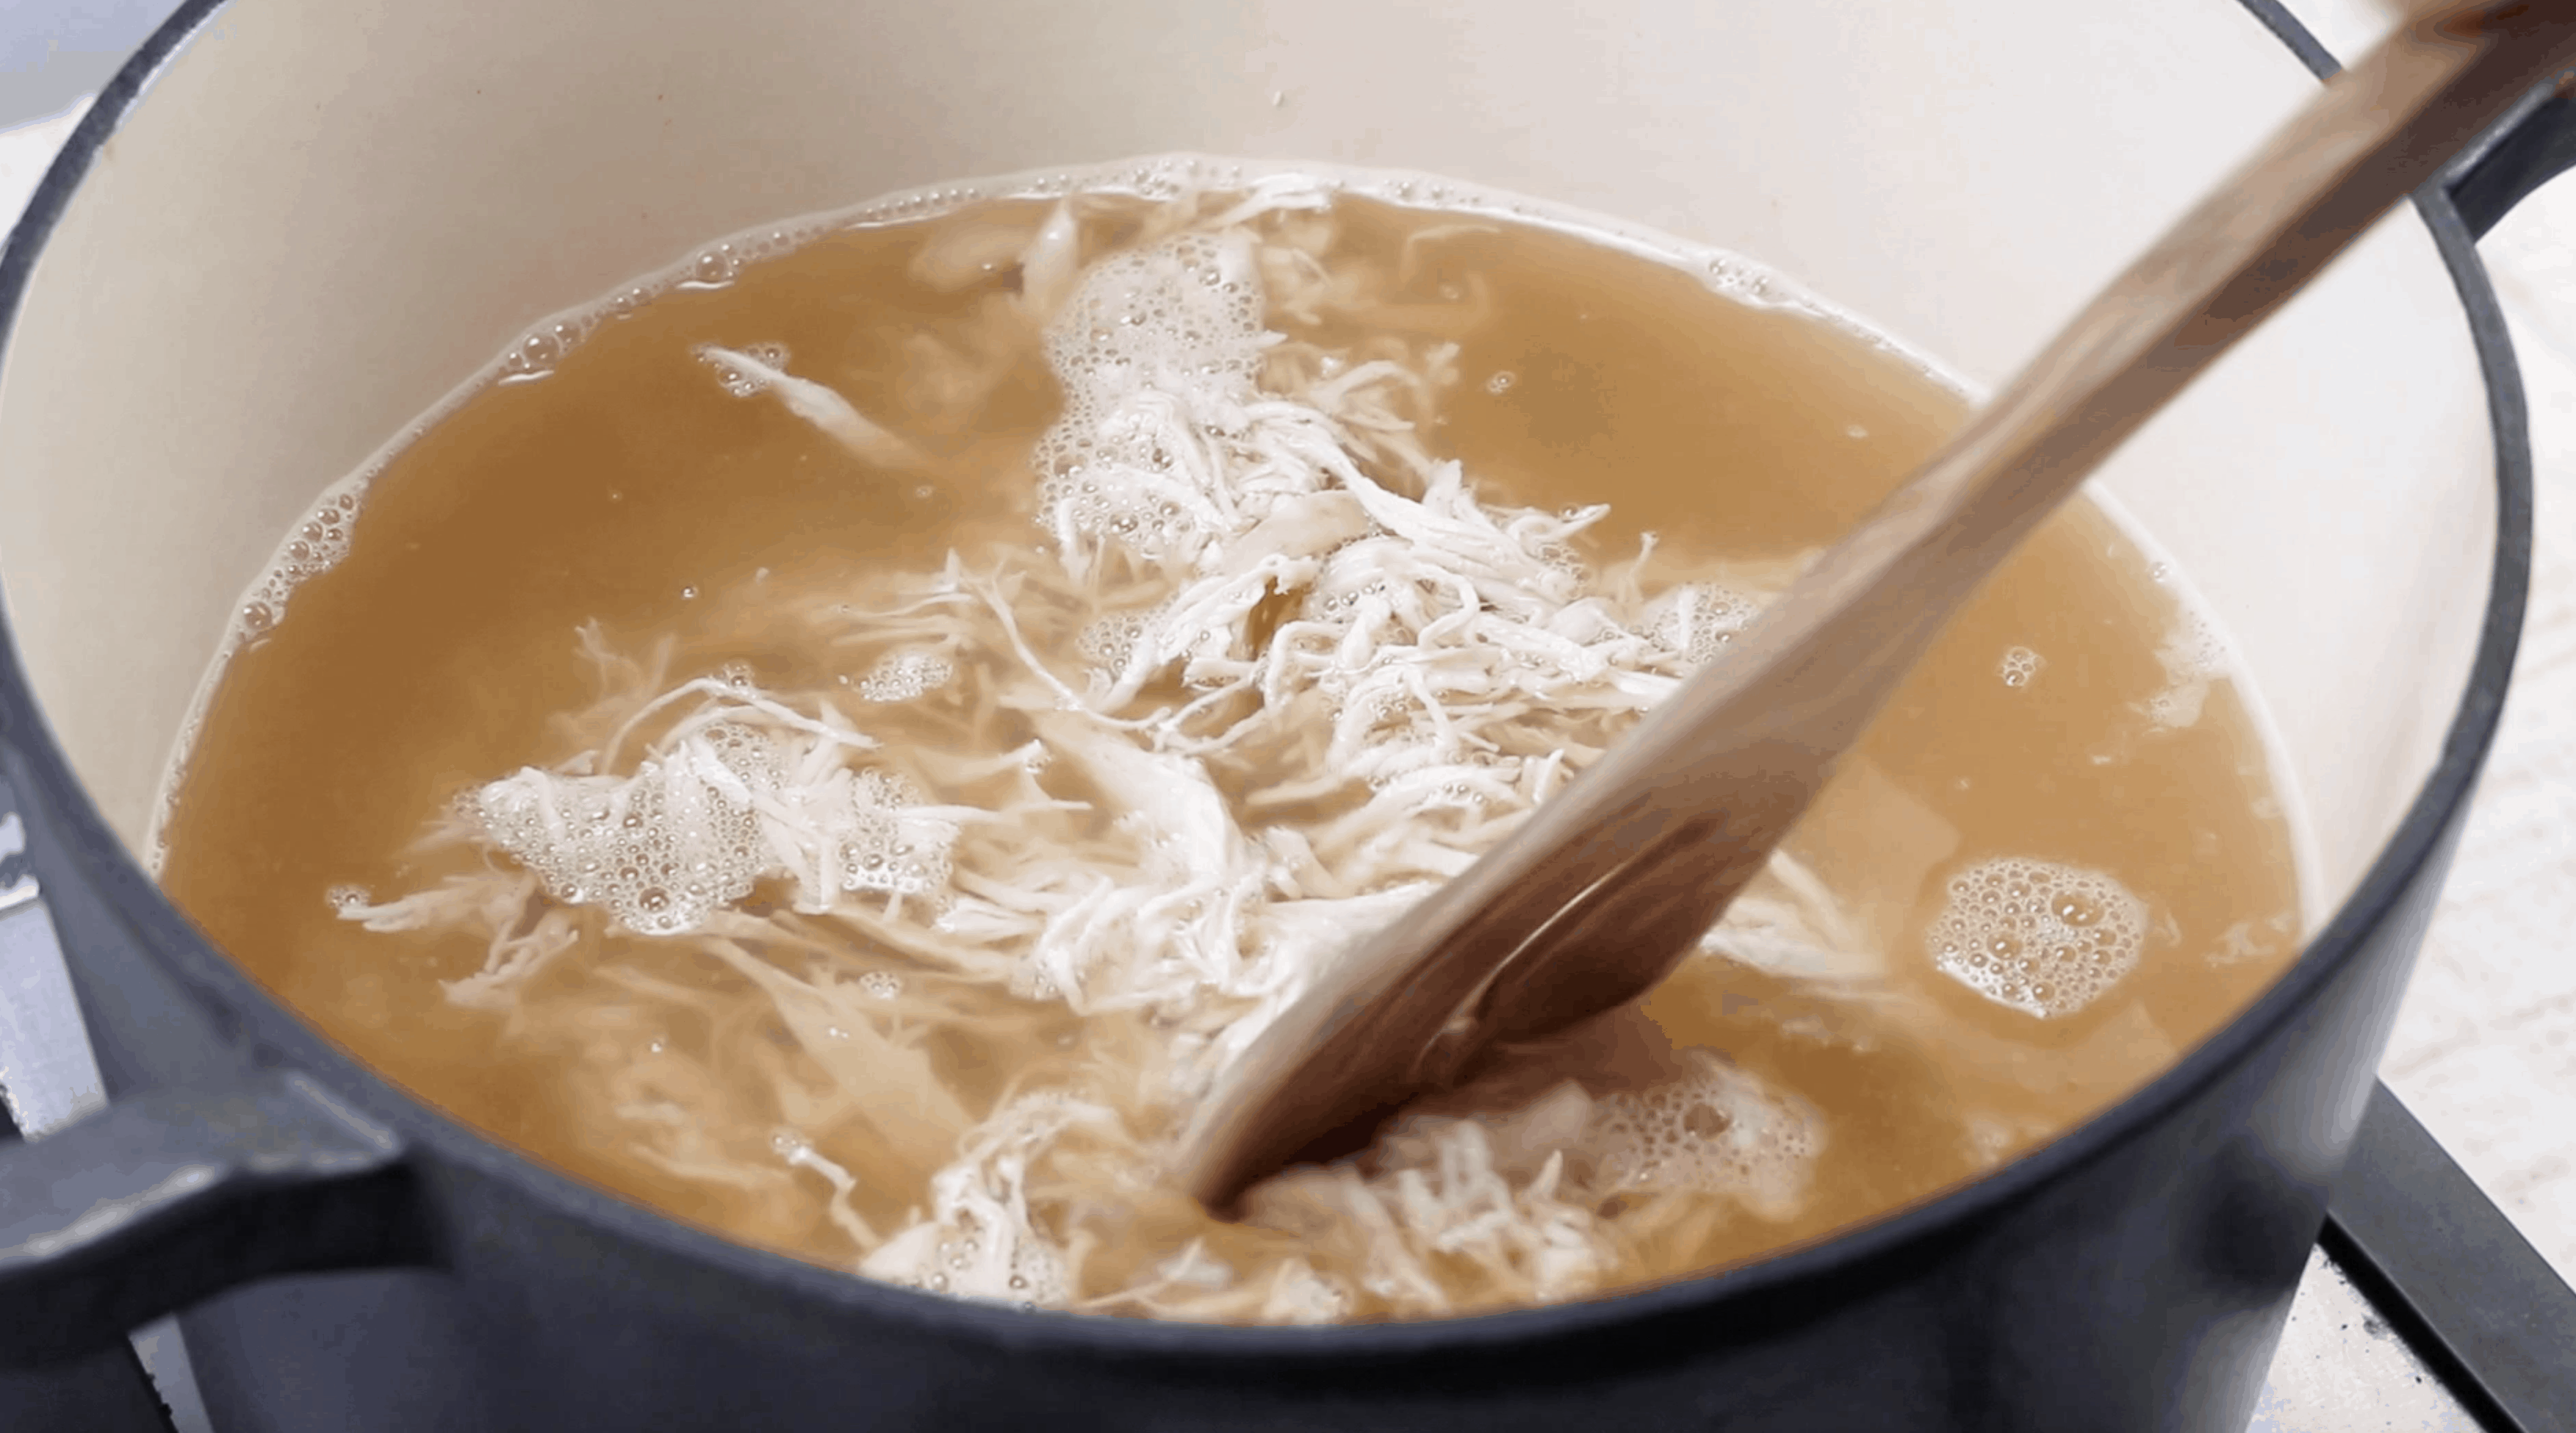
Begin adding dumplings one at a time so they don’t all stick together. Stir frequently while adding them.
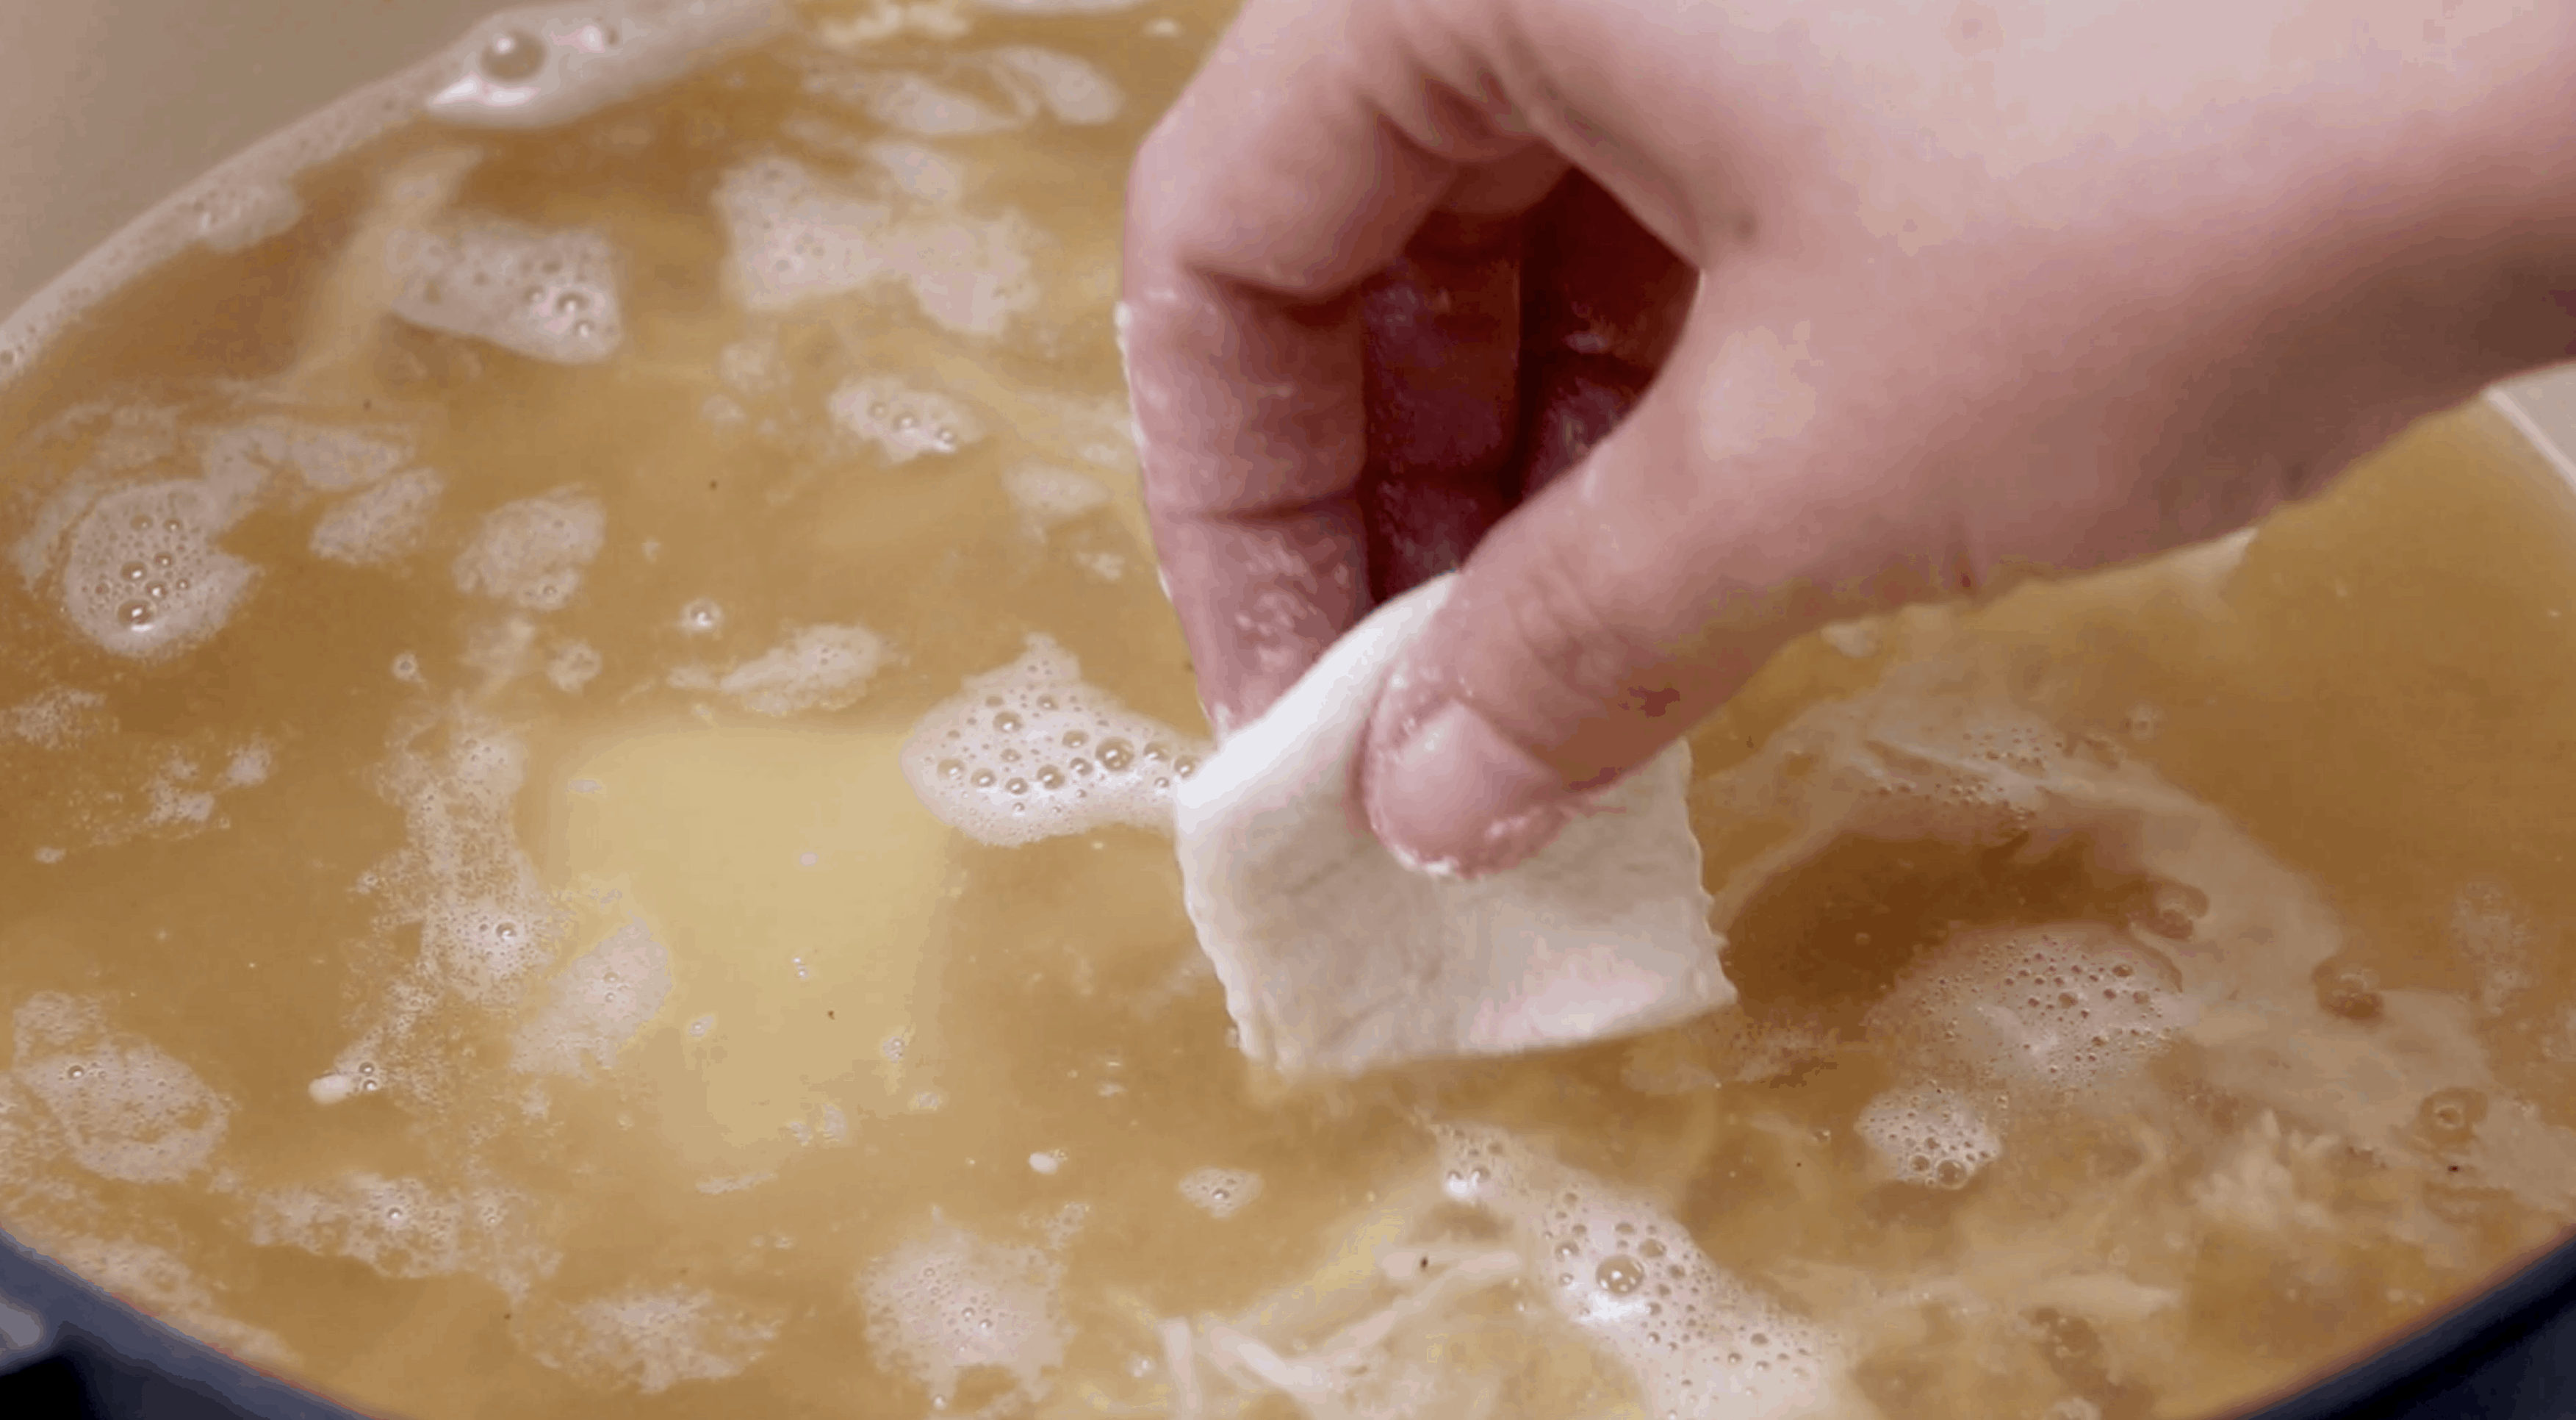
Allow dumplings to cook for about 15-20 minutes. You should notice your broth starting to thicken (from the extra flour) and your dumplings may start to sink a little to the bottom because they are soaking up the broth. Take one out and taste test it. It shouldn’t have a doughy taste anymore.
CRAVING MORE RECIPES?
- Southern Fried Chicken
- Chicken & Dumplings Casserole
- Crock Pot Chicken & Dumplings
- Crock Pot Chicken & Cheese Dumplings
- White Chicken Chili with Cornbread Dumplings
Originally published: April 2012
Updated photos and republished: May 2025

Chicken and Dumplings (+Video)
Ingredients
- 2-3 chicken breasts (about 3 cups of cooked chicken)
- 2 Tablespoons oil (avocado or olive oil)
- salt and pepper (to taste)
- 2 quarts chicken broth
- 2 cups all-purpose flour
- ½ teaspoon baking powder
- 2 Tablespoons cold salted butter, cubed
- 1 cup milk
- all purpose flour (for your counter and for rolling out the dumplings)
Instructions
- Preheat oven to 350F degrees. Spray a baking sheet with nonstick cooking spray.
- Place 2-3 chicken breasts on the baking sheet. Drizzle 2 Tablespoons oil on the chicken and season with salt and pepper

- Bake chicken for about 45 minutes. Chicken will reach an internal temperature of 165F degrees when fully cooked. Once the chicken is cooked, shred it with two forks.
- Pour 2 quarts chicken broth into a large pot and start warming it up on the stove top while you make the dumplings.
- In a medium bowl, combine 2 cups all-purpose flour and 1/2 teaspoon baking powder. Then add in 2 Tablespoons cold salted butter, cubed.

- Combine using your fingers, fork or pastry cutter. The butter should resemble tiny pebbles when combined well.

- Pour in 1 cup milk. Mix it all together.
- Dust your counter with a generous amount of all purpose flour. Place dumpling dough on the counter and dust it with more flour.

- With a rolling pin, roll the dough out to about 1/4" thickness. Be sure to add more flour as necessary to keep it from sticking underneath or to your rolling pin.

- Using a knife or a pizza cutter, start cutting out your dumplings into squares.

- Dust dumplings with a bit more flour. The extra flour is gonna help keep them from sticking but will also thicken your chicken broth some as well when you add them to the pot.
- Bring chicken broth up to a boil. Add in shredded chicken and stir.

- Begin adding dumplings one at a time so they don’t all stick together. Stir frequently while adding them.

- Allow dumplings to cook for about 15-20 minutes. You should notice your broth starting to thicken (from the extra flour) and your dumplings may start to sink a little to the bottom because they are soaking up the broth.

- Take one out and taste test it. It shouldn't have a doughy taste anymore. Then serve!

Video
Notes
- Please refer to my FAQ’s (Frequently Asked Questions) and ingredient list above for other substitutions or for the answers to the most common questions.
- This particular version of chicken and dumplings usually does not have any vegetables added but you certainly could throw in some (like peas and carrots) if you prefer.
Nutrition
%20100vw,%20800px%22%20/%3EOld-Fashioned%20Chicken%20and%20Dumplings%20is%20a%20super%20simple%20recipe.%20Flat%20strips%20of%20dough%20simmered%20in%20a%20yummy%20broth%20with%20tender%20chicken.%20AN%20OLD-FASHIONED%20SOUTHERN%20STYLE%20RECIPE%20There%20really%20is%20no%20other%20recipe%20that%20screams%20comfort%20food%20quite%20like%20chicken%20and%20dumplings.%20This%20meal%20will%20warm%20up%20and%20comfort%20any%20soul%20on%20a%20cold%20winter%26%238217;s%20day!...)
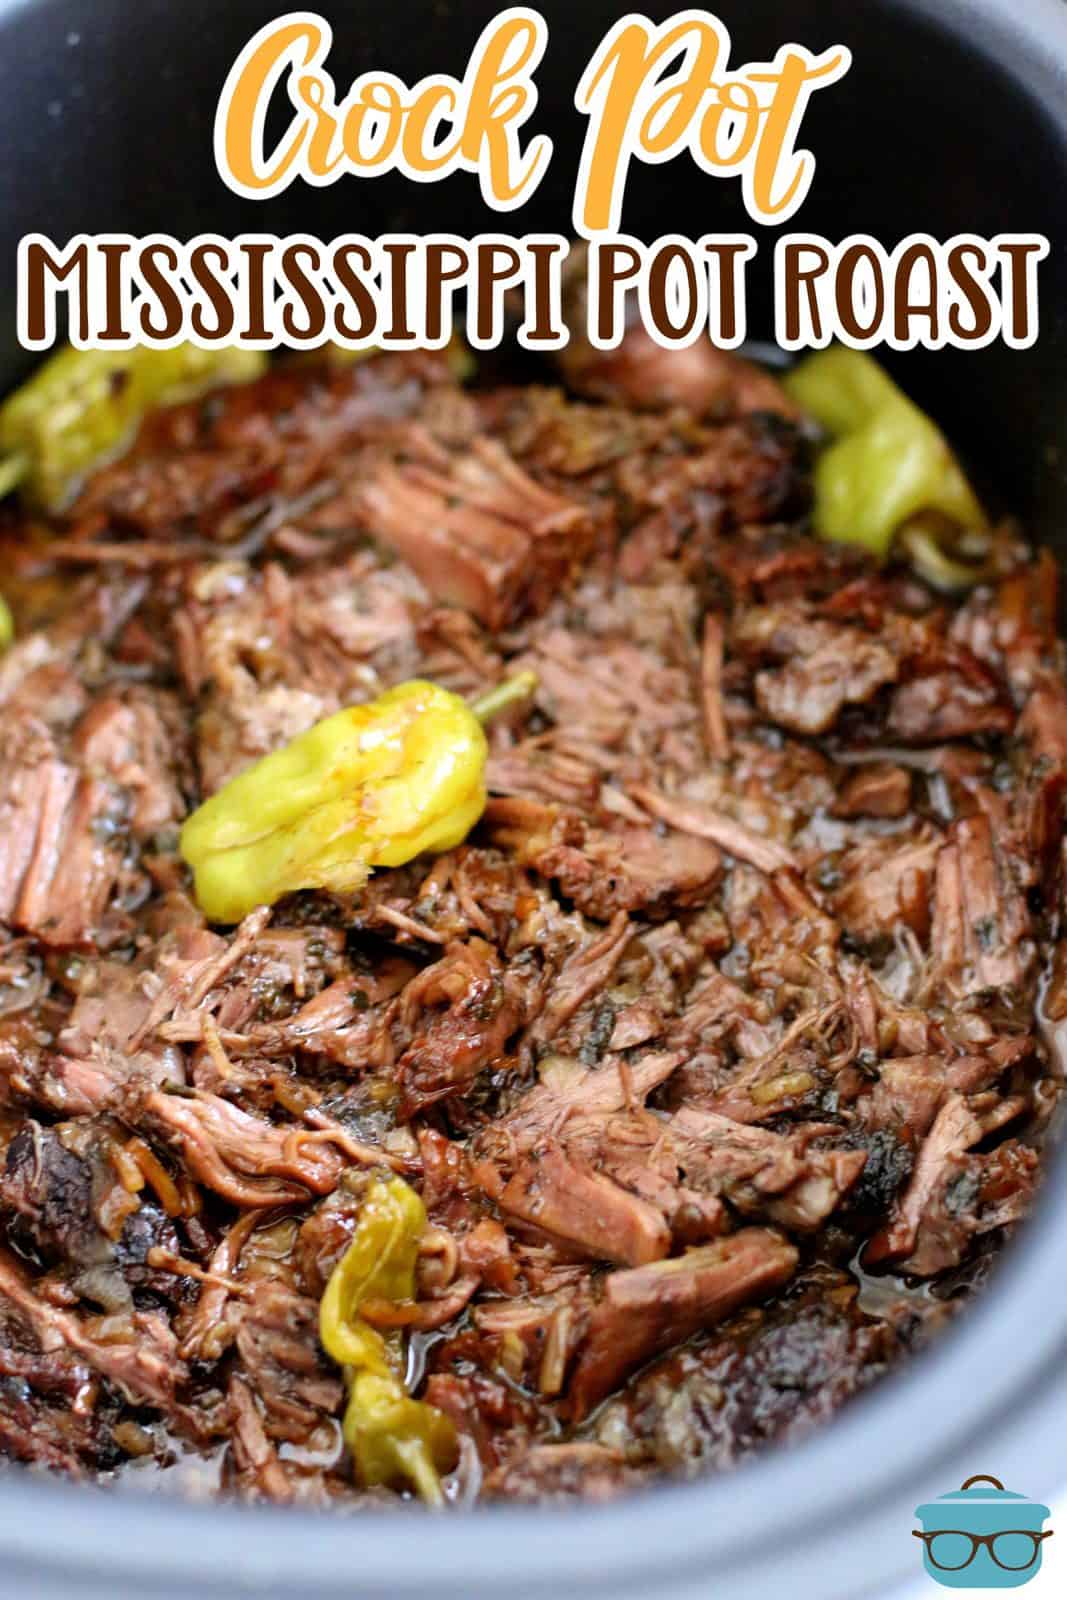
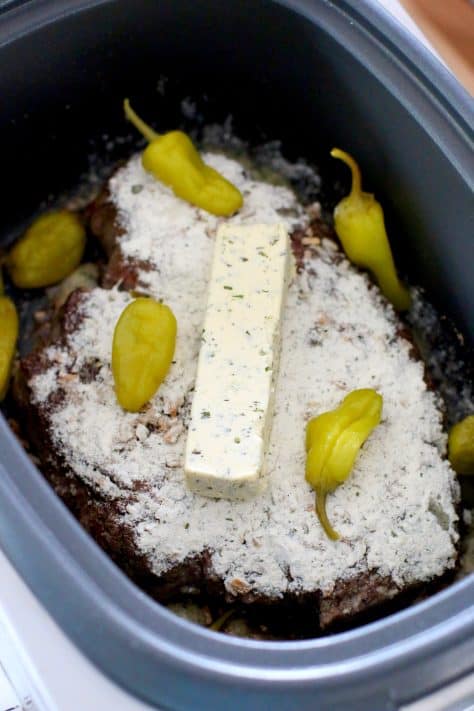
Mississippi Pot Roast 2 May 4:00 AM (2 days ago)
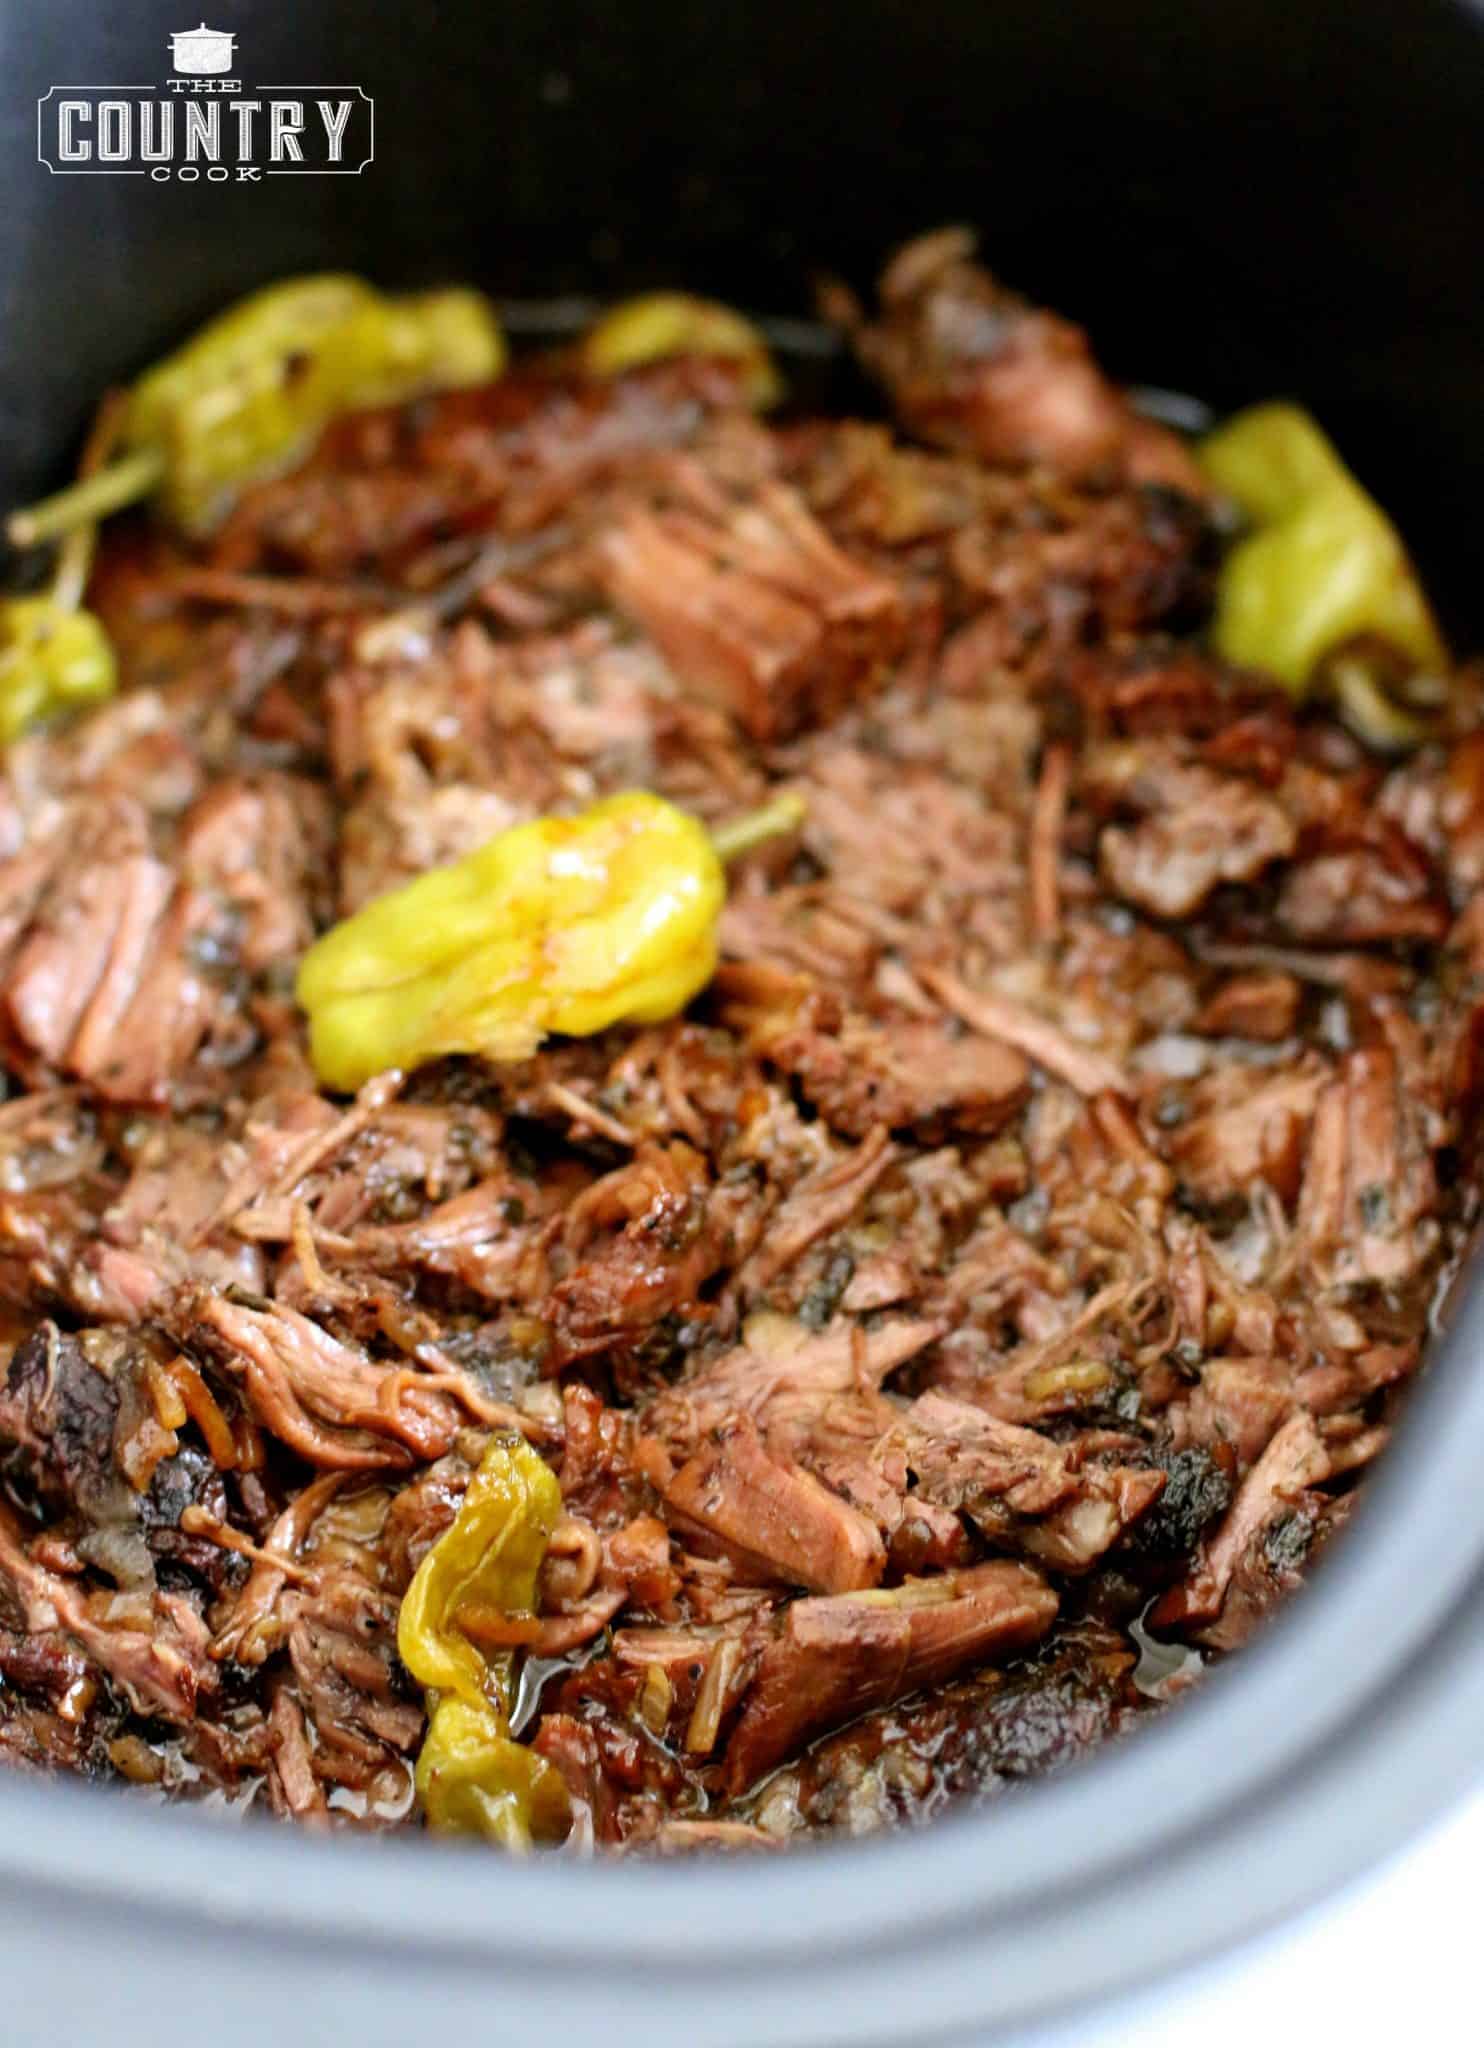
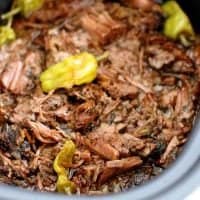
Mississippi pot roast is a classic slow cooker recipe that is made with beef chuck roast, ranch dressing mix, onion soup mix, butter, and peperoncini peppers.
AN EASY, FLAVORFUL POT ROAST RECIPE
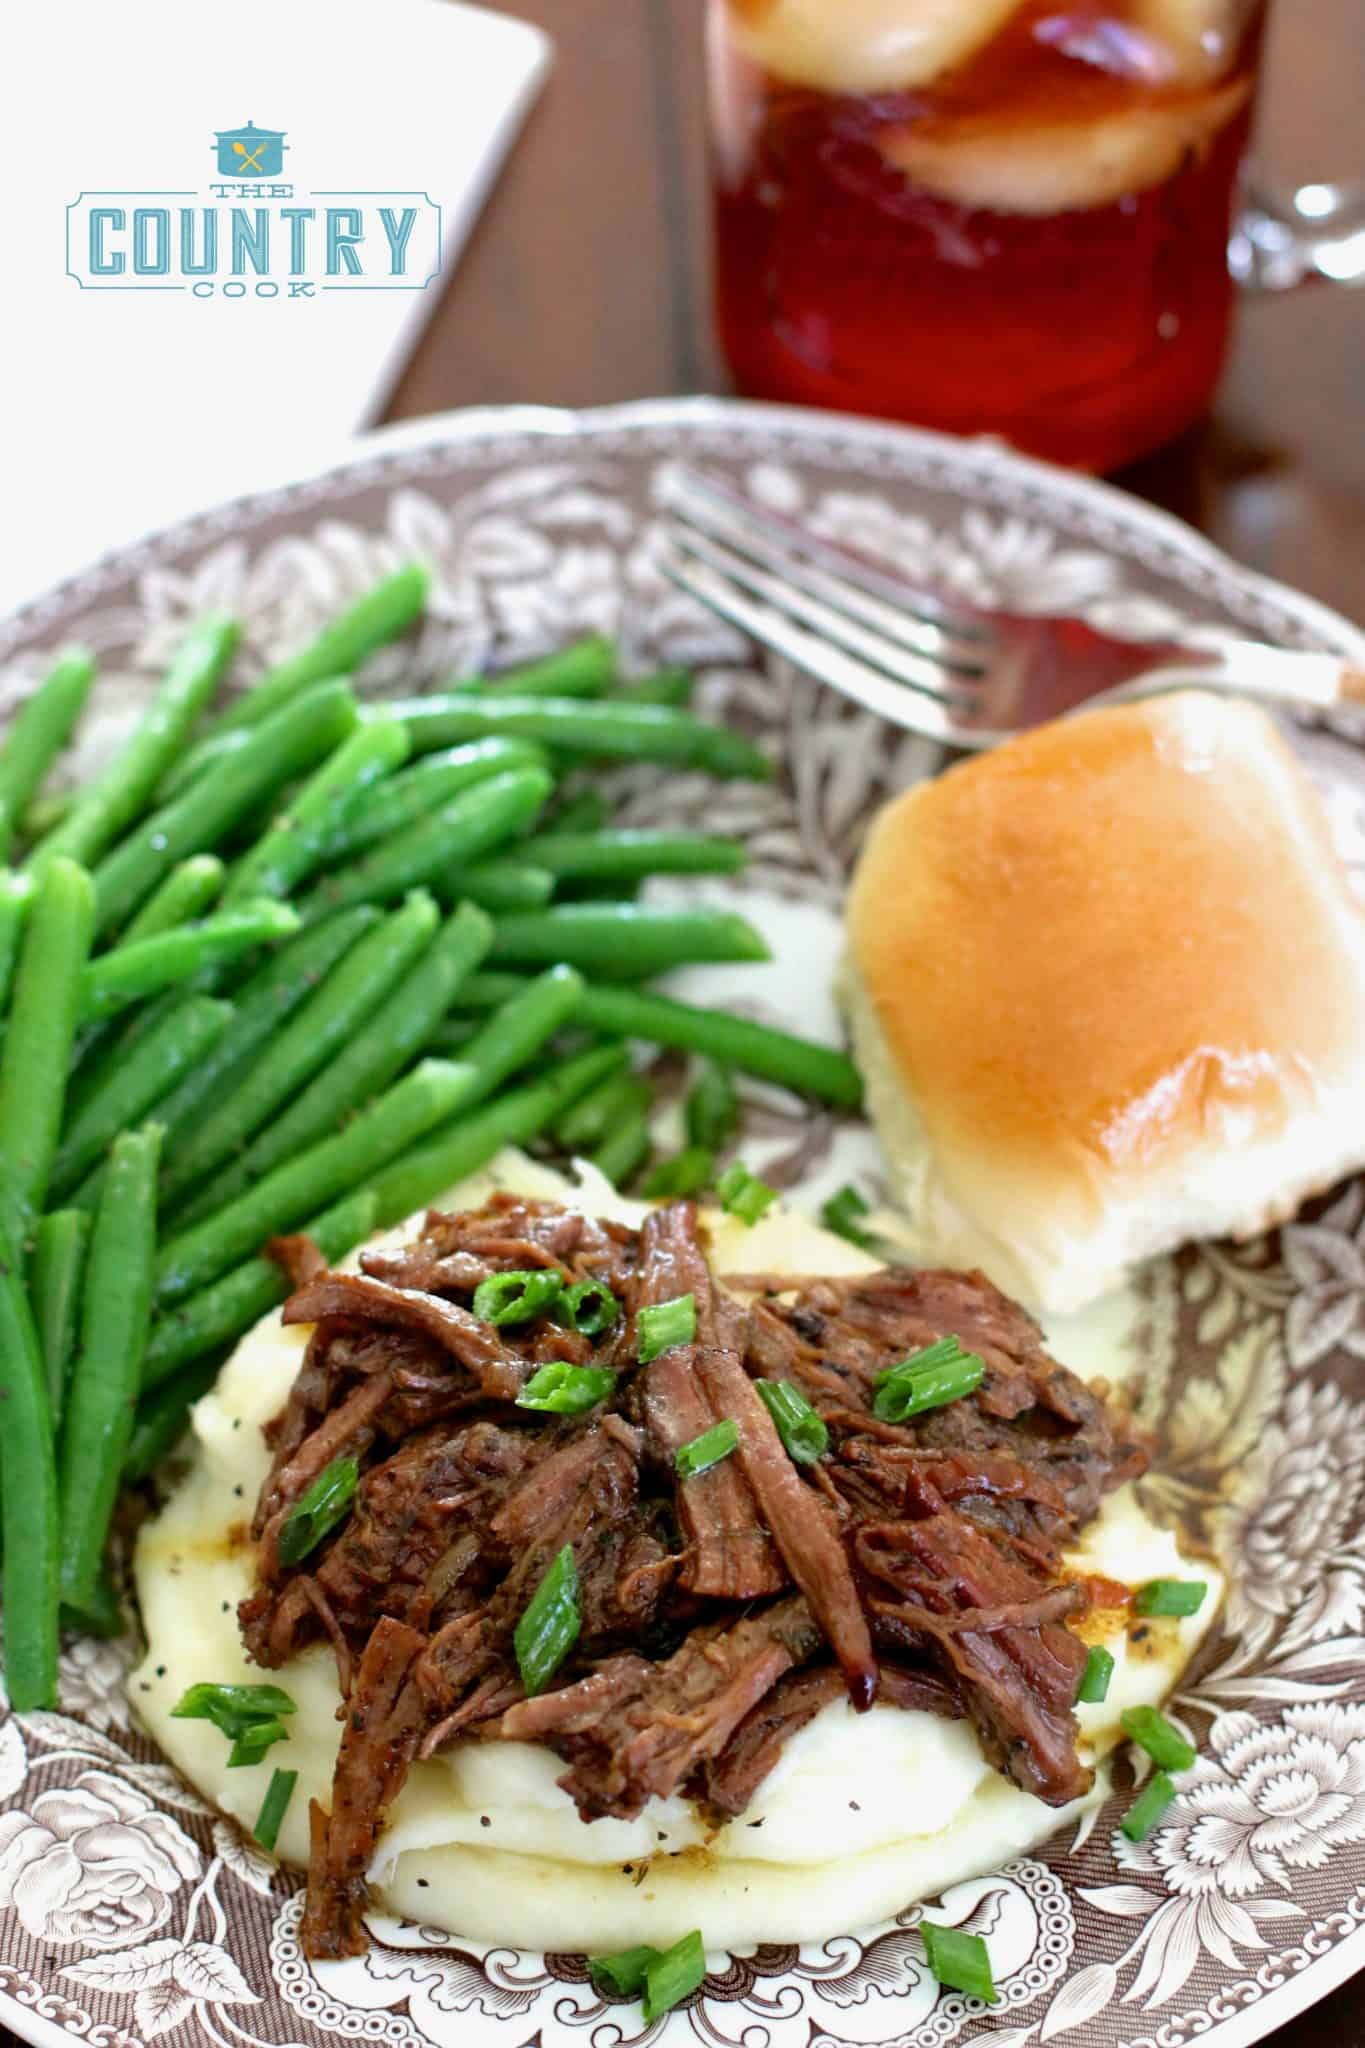
This Mississippi pot roast recipe might be the best pot roast recipe you ever try! If you haven’t made this yet, you absolutely must give it a chance. The meat comes out so tender and incredibly flavorful! Over the years, it has become my family’s go-to pot roast recipe! If you are looking for a serious comfort meal, then this Mississippi Pot Roast is for you. It really is a warm, belly-filling meal that even the pickiest pot roast eaters love!
FREQUENTLY ASKED QUESTIONS:
No. The meat comes out so tender and buttery by cooking it low and slow in the crock pot. Cooking it too quickly will result in a tough cut of meat that does not shred easily. Also, keep the lid on while cooking. Don’t keep lifting it and messing with the meat. This will result in tough meat that is hard to shred.
Of course not! Try making your own Homemade Ranch Seasoning and your own Homemade Dry Onion Soup Mix. You’ll need about 2 Tablespoons of the ranch seasoning and about 3 Tablespoons of the onion soup mix for this recipe. This will also help you control the amount of sodium in the recipe as well.
It’s not recommended. The butter adds a lot of flavor to this. Margarine is basically oil. Use the real stuff here.
Mississippi pot roast is delicious served with Crock Pot Mashed Potatoes, rice, pasta, or vegetables like carrots, green beans, or broccoli. You can also serve it with a side of crusty bread, Butter Swim Biscuits or rolls to sop up the flavorful cooking juices.
A sirloin tip or rump roast will work. You want a cut of meat that will shred after it is finished cooking.
They really add a lot of flavor to this dish so I wouldn’t skip them. It doesn’t add spiciness like you think it would. If you absolutely insist on substituting you can try using some dill pickles and a bit of pickle juice.
No. Do not add additional liquids. The meat itself along with peperoncini and the melted butter will produce enough juices.
Yes, you can add them in at the start of cooking.
It hasn’t cooked long enough or you opened the lid while cooking. Refer to my answer above about cooking this low and slow. Trust me, you just cannot rush this or you’ll be severely disappointed. And do not open the lid while cooking as this also disrupts the cooking process.
Leftovers can be frozen. Just place in a freezer safe bag and remove all of the air. It will keep frozen for up to 2 months.
INGREDIENTS NEEDED: (SEE RECIPE CARD BELOW FOR THE FULL RECIPE)
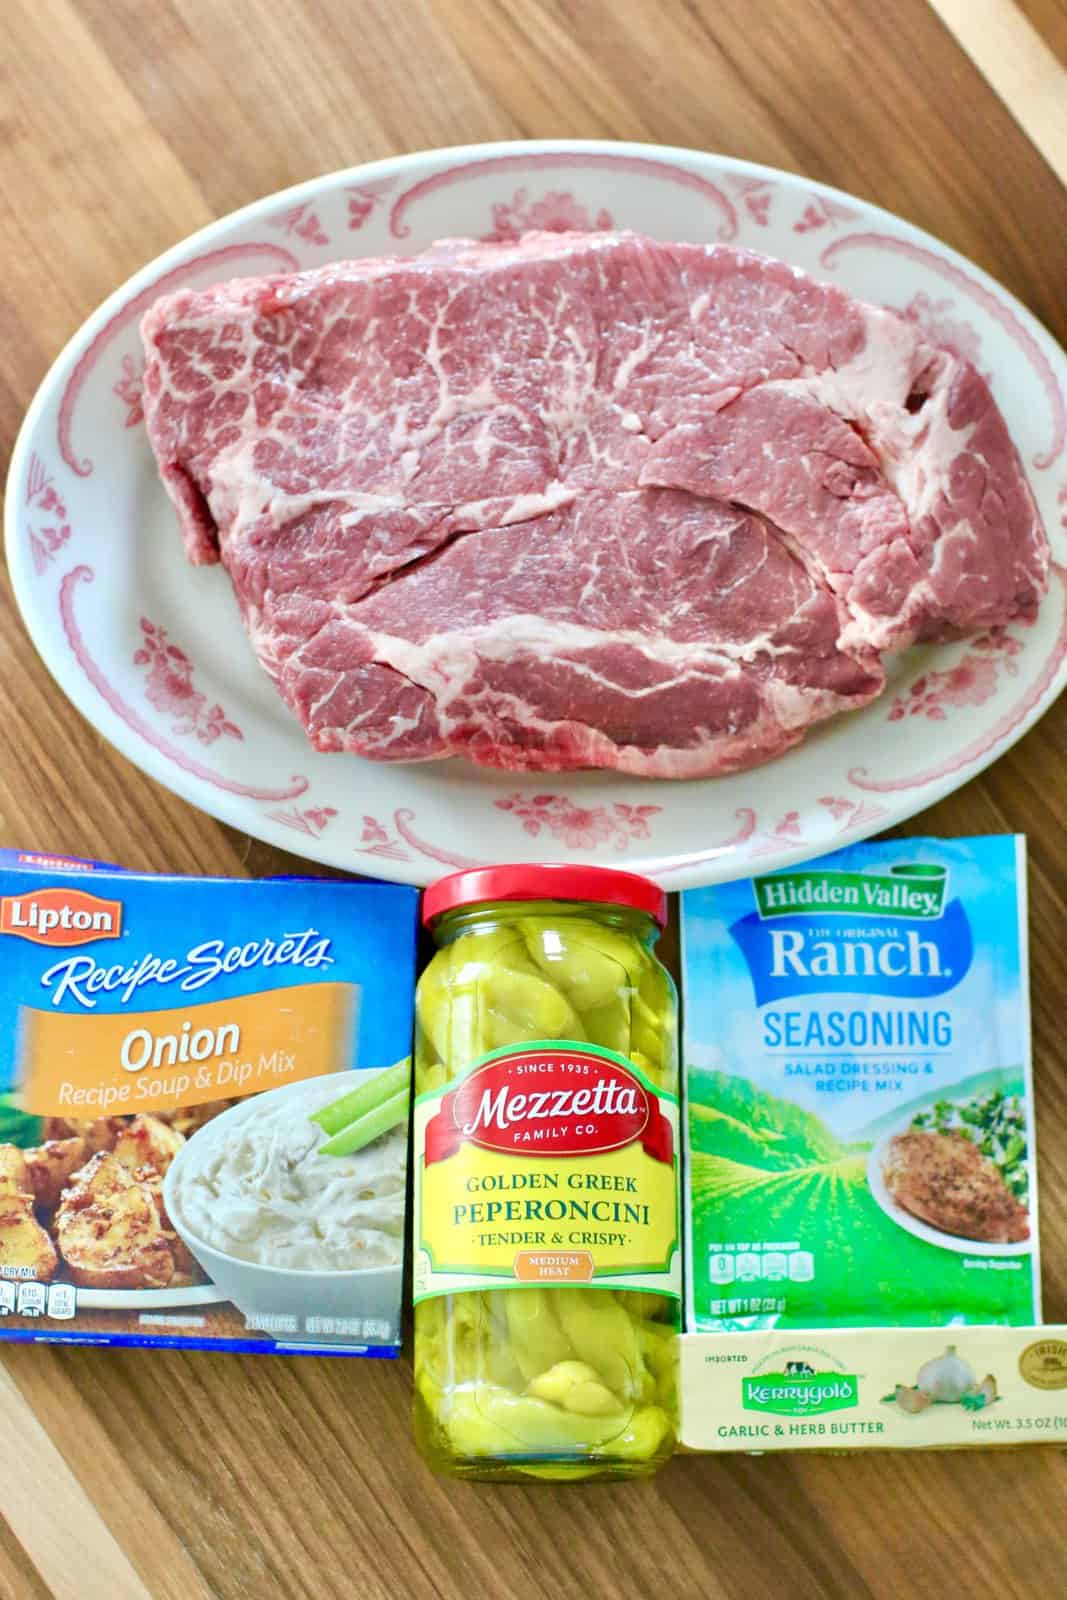
- chuck roast – the chuck roast needs to be fresh and not frozen. So if yours is frozen, you will need to defrost it first.
- salt and pepper – I will leave this up to your tastebuds. I lightly season both sides but if you don’t like the additional salt then leave it out.
- ranch dressing mix – if you are sensitive to salt or have dietary concerns about sodium, use a lower sodium option. If you really want to have full control over the salt levels, try making the Homemade Ranch Dressing Mix.
- onion soup mix (or au jus gravy mix) – the same applies for this mix. Go for a lower sodium option if necessary. You can also make Homemade Onion Soup Mix so you can control the amount of salt.
- salted butter – unsalted butter can be used. If you can find the Kerrygold garlic and herb butter, give that it try, it adds even more flavor. Do not use margarine – it has to be real butter.
- peperoncini peppers – these do not add spice, just flavor. If you want a bit of a kick of heat, try adding a bit of the juice from the peppers.
HOW TO MAKE MISSISSIPPI POT ROAST:
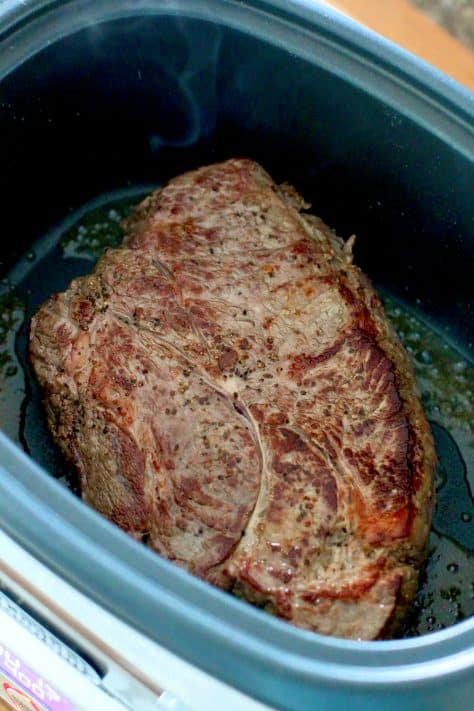
Heat up a large skillet on high. Add oil to hot skillet. You want it really hot here to brown or “sear” the beef quickly. Note: I have one of the Ninja slow cookers that has a “stovetop” option, which means I can brown the meat all right in my crock pot and not dirty up any other dishes. However, if you are in a rush, just skip the browning step altogether.
Take a paper towel and make sure you dry both sides of the pot roast (drying the meat helps it brown easier.) Then season with a little bit of salt and pepper. Once the skillet is nice and hot, add the roast. Allow the roast to cook for about 2-3 minutes until it is golden brown. The browning of the outside of the meat just adds flavor. Using tongs, flip the meat over and sear the other side of the roast for another 2-3 minutes.
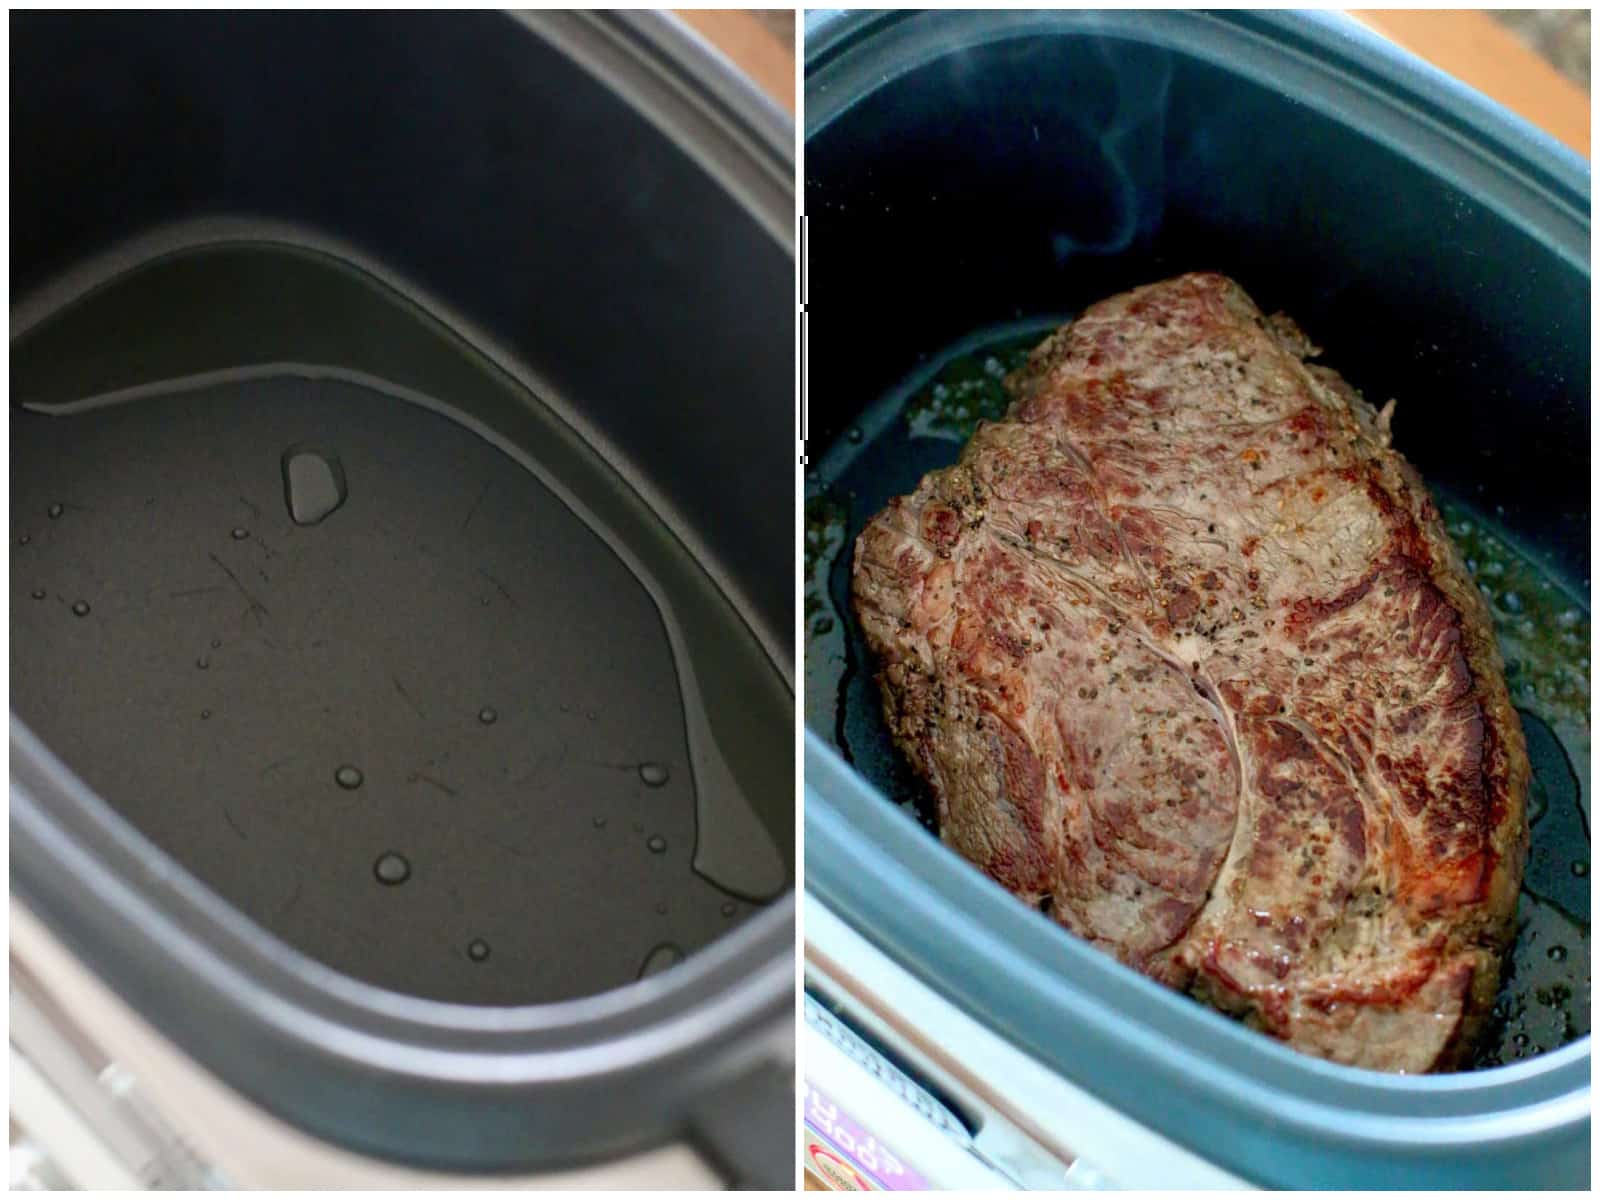
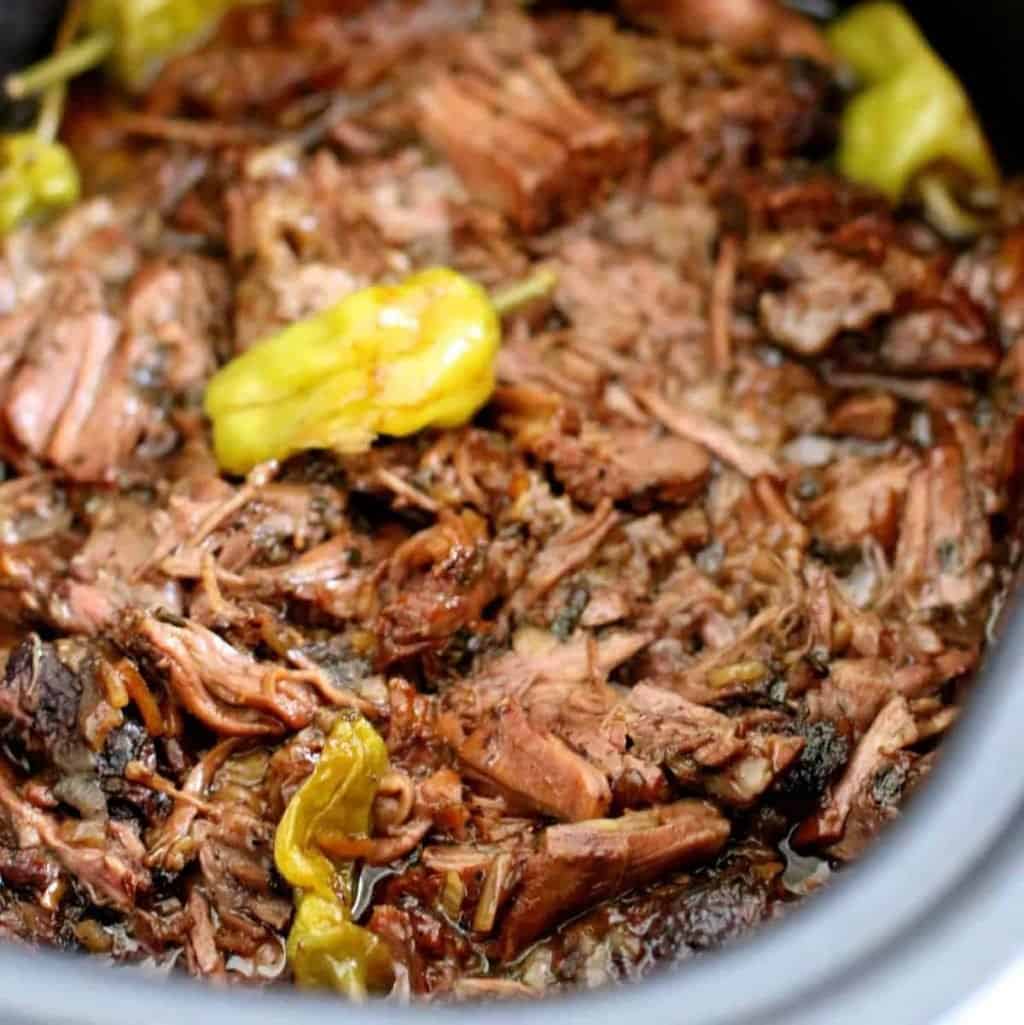
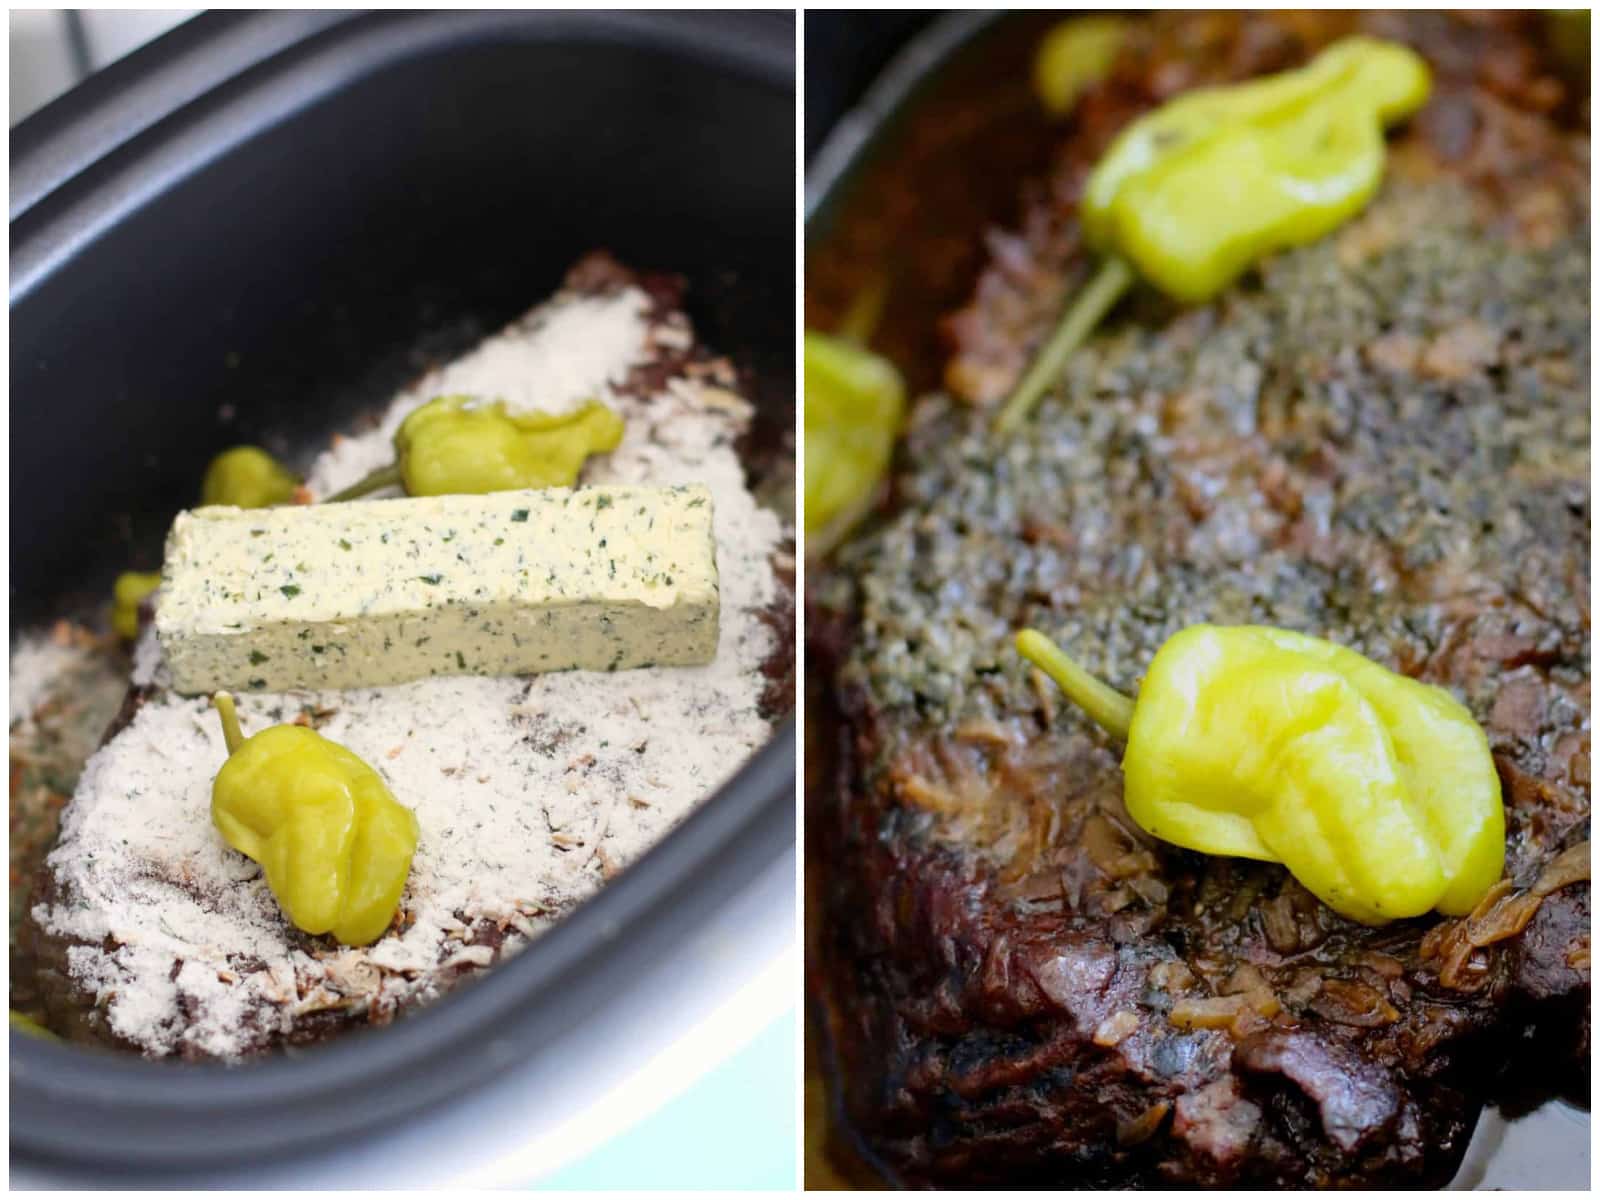
Transfer meat to slow cooker. Sprinkle packets of dry ranch dressing and onion soup mixes over pot roast. Top with a stick of butter. Then place peppers on and around roast.
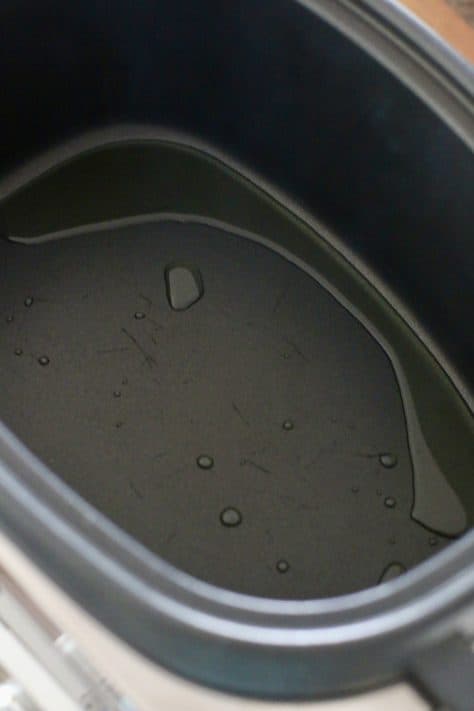
Note: This butter is a Kerrygold garlic & herb butter. The sticks were on sale at Kroger so I had picked up a bunch. But a regular stick of salted butter (not margarine) will still work perfectly in this. Cover and cook on low for 8 hours. You don’t add any other liquid to this. The meat will create it’s own juices at it cooks. DO NOT remove the lid while cooking.
Now all you need to do is take two forks and start shredding the meat. Discard any big fatty pieces. If you want, you can cut up the peppers and stir those into the meat mixture. I ate mine with the peppers but didn’t cut them up into the meat to serve. Serve on mashed potatoes, rice or on a roll with a slice of provolone or mozzarella cheese.
CRAVING MORE DELICIOUS RECIPES?
- Crock Pot Mississippi Meatloaf
- Crock Pot Mississippi Pork Roast
- Crock Pot Mississippi Turkey Breast
- Crock Pot Mississippi Whole Roast Chicken
- Crock Pot Mississippi Country Style Ribs
- Crock Pot Mississippi Chicken
- Crock Pot Mississippi Pork Chops
- Crock Pot Mississippi Meatballs
- Crock Pot Mississippi Lit’l Smokies
- Crock Pot Mississippi Kielbasa
- Crock Pot Chicken & Gravy
- Crock Pot Beef Tips & Gravy
- Crock Pot Corned Beef
- Crock Pot Lasagna
- Crock Pot Mac and Cheese
- Crock Pot Pork Chops and Gravy
Originally published: April 2015
Updated photos & republished: May 2025
Mississippi Pot Roast (+ Video)
Equipment
- 4-6 quart slow cooker
Ingredients
- 2 Tablespoons olive oil (or vegetable oil)
- 2-3 pound chuck roast
- salt and pepper (to taste)
- 1 packet ranch dressing mix
- 1 packet dry onion soup mix (or au jus gravy mix)
- ½ cup (1 stick) salted butter
- 8 peperoncini peppers
Instructions
- Heat up a large skillet on high. Add 2 Tablespoons olive oil to hot skillet. You want it really hot here to brown or "sear" the beef quickly. This can also be done in your slow cooker if you have the sear or saute option.
- Take a paper towel and make sure you dry both sides of the 2-3 pound chuck roast. Season with a little bit of salt and pepper. Once the skillet is nice and hot, add the roast. Using tongs, flip the meat over and sear the other side of the roast for another 2-3 minutes.
- Transfer meat to slow cooker. Sprinkle 1 packet ranch dressing mix and 1 packet dry onion soup mix over pot roast. Top with 1/2 cup (1 stick) salted butter then place 8 peperoncini peppers on and around the roast.
- Cover and cook on low for 8 hours. DO NOT open the lid. It’s tempting but leave it alone unless you want tough meat.
- After it has cooked, take two forks and start shredding the meat. Discard any big fatty pieces. Then serve.

Video
Notes
- Please refer to my FAQ’s (Frequently Asked Questions) and ingredient list above for other substitutions or for the answers to the most common questions.
- Do not rush this recipe. Do not cook on high. This will only work when cooked slowly on low. And definitely do not open the lid (trust me, this makes a difference!)
Nutrition
%20100vw,%201024px%22%20/%3ECrock%20Pot%20Mississippi%20Pot%20Roast%20is%20slow%20cooker%20goodness!%20Chuck%20roast%20combined%20with%20ranch%20dressing%20mix,%20onion%20soup%20mix,%20butter%20and%20peperoncini.)
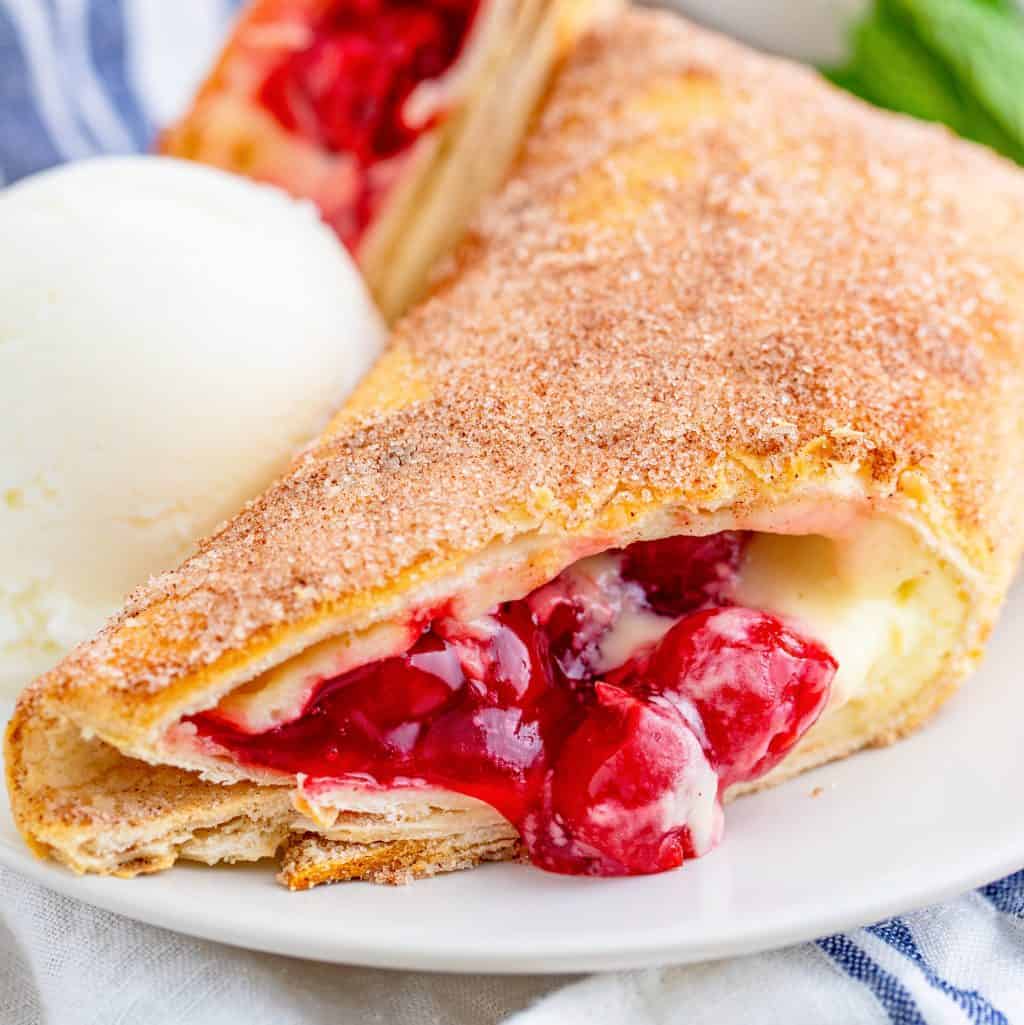
Kentucky Derby Pie Bars – Weekend Potluck #680 2 May 3:00 AM (2 days ago)

KENTUCKY DERBY PIE BARS
Our most popular recipe from the last Weekend Potluck were these Kentucky Derby Pie Bars from No Plate Like Home! Our other featured recipes include: Ground Beef Baked Tacos from The Recipe Life, Biscuit Donuts from Recipes My Mom Gave Me and Mary is gearing us up for grilling season with her recipe for Lime Garlic Chicken Marinade!

HOW DO I GET TO THE RECIPES? PLEASE READ THIS!
Just click on any of the photos below to take you to the full recipes! Also, when you scroll down to the bottom of this post, you’ll see a bunch of little thumbnail photos of recipes that your favorite food bloggers are sharing right now!
THE RECIPE WITH THE MOST CLICKS:

Kentucky Derby Pie Bars by No Plate Like Home
RECIPES THAT CAUGHT OUR ATTENTION

Ground Beef Baked Tacos by The Recipe Life

Biscuit Donuts by Recipes My Mom Gave Me
FEATURED HOSTESS RECIPE:
")
Lime Garlic Chicken Marinade (4 Ingredients) by Sweet Little Bluebird
YOUR HOSTESSES:
Sweet Little Bluebird~ Mary
The Country Cook~ Brandie
South Your Mouth~ Mandy
You are invited to the Inlinkz link party!
%20100vw,%201024px%22%20/%3EKENTUCKY%20DERBY%20PIE%20BARS%20Our%20most%20popular%20recipe%20from%20the%20last%20Weekend%20Potluck%20were%20these%20Kentucky%20Derby%20Pie%20Bars%20from%20No%20Plate%20Like%20Home!%20Our%20other%20featured%20recipes%20include:%20Ground%20Beef%20Baked%20Tacos%20from%20The%20Recipe%20Life,%20Biscuit%20Donuts%20from%20Recipes%20My%20Mom%20Gave%20Me%20and%20Mary%20is%20gearing%20us%20up%20for%20grilling%20season%20with...)
KFC Strawberry Parfaits 1 May 6:00 AM (3 days ago)

This copycat KFC Strawberry Parfait is creamy, fruity, and layered with fresh strawberry sauce, whipped topping, and graham cracker crumbs!
A FAST PARFAIT RECIPE
If you’ve seen the other “Little Bucke”t desserts (KFC Chocolate Parfait and KFC Lemon Creme Parfaits) that I have shared and have been anxiously awaiting my copycat version of the KFC Strawberry Parfaits, it’s finally here. If you have not been following along with my story with these desserts, this strawberry parfait is my personal favorite. Many moons ago when my husband and I were first dating, we didn’t have a ton of extra spending money for date nights, so fast food was a common place for us. My husband always got the chocolate parfait and I always got the strawberry one. Perfect when you want a little sweet treat after dinner but nothing too heavy!

FREQUENTLY ASKED QUESTIONS:
Instead of making the strawberry filling, you can use a can of strawberry pie filling. Additionally, you could use a different flavored pie filling to make a different kind of parfait if desired.
Instead of the graham cracker crumbs, you can make this a bit more like a strawberry shortcake parfait and use a store bought pound cake (or the little vanilla cake dessert shells they sell this time of year for strawberry shortcake) that has been cut into small pieces and crumbled and put into the bottom of each cup. If you want something different, try using some Golden Oreos and crumble them the same way you do the graham crackers.
I tossed a few extra graham cracker crumbs on top, but you could add some diced strawberries on top, rainbow sprinkles or a drizzle of strawberry jam or chocolate sauce for a fun twist.
I used these little plastic cups (paid affiliate link), but any plastic cup, or small serving cup will work or glass will work. You want to use an 8 or 9 ounce glass or cup.
Yes, these can be made up to a day in advance.
Personally, I think these are best the day that you make them. However, leftovers can be stored in the fridge for up to 3 days. I would not recommend trying to freeze these.

INGREDIENTS NEEDED: (SEE RECIPE CARD BELOW FOR THE FULL RECIPE)
- graham cracker sheets – if using store-bought graham cracker crumbs, you will need about a cup.
- unsalted butter– salted butter can be used. There is so little salt in salted butter that it won’t make much of a difference in taste and can help balance out the sweetness some if you are concerned about these being overly sweet.
- whole milk
- instant chocolate pudding– be sure to grab the instant pudding kind, not the Cook N Serve kind. They’re usually by each other on the grocery store aisle.
- whipped topping – Cool Whip or Reddi Whip.

HOW TO MAKE KFC STRAWBERRY PARFAITS:
To a pot add the strawberries, water, and sugar. Simmer over medium heat for 7 minutes or until the strawberries are soft and you have a thick sauce. Set aside.

In a food processor add the graham crackers. Pulse for 30 seconds or until you have crumbs.

Add the butter to the mixer. Pulse for 30 seconds or until combined.

Transfer the crumbs to 4 parfait cups. Reserve 4 teaspoons of crumbs for the topping. Gently press the crumbs until slightly compacted. Transfer the strawberry puree to the cups. Top with whipped cream. Sprinkle the remainder of the crumbs on top.

Serve and enjoy.

CRAVING MORE RECIPES?
- KFC Chocolate Parfaits
- KFC Lemon Creme Parfaits
- Strawberry Shortcake in a Jar
- Strawberry Cheesecake Parfaits (No-Bake)
- Strawberry Jell-O Parfaits
- Dirt Cups
- Banana Pudding Cups
- Yogurt Parfaits
- Creme Brûlée Trifles
- Strawberry Fluff
- Strawberry Angel Dessert
- Strawberry Pie
- Strawberries and Cream Bars
- Punch Bowl Cake
- KFC Mac and Cheese
- KFC Gravy

KFC Strawberry Parfaits
Ingredients
- 1 pint strawberries, husked and halved (or cut smaller if the strawberries are large)
- ⅛ cup water
- ⅛ cup granulated sugar
- 7 graham cracker sheets (about one cup of crumbs, see notes below)
- ¼ cup (1/2 stick) unsalted butter, melted (can use salted)
- 2 cups whipped topping (Cool Whip or Reddi Whip)
Instructions
- To a pot add 1 pint strawberries, husked and halved, 1/8 cup water and 1/8 cup granulated sugar. Simmer over medium heat for about 6-7 minutes or until the strawberries are soft and you have a thick sauce. Set aside to cool.

- In a food processor add 7 graham cracker sheets. Pulse for 30 seconds or until you have crumbs.

- Add 1/4 cup (1/2 stick) unsalted butter, melted to the mixer. Pulse for 30 seconds or until combined (it should look like wet sand.)

- Transfer the crumbs to 4 parfait cups. Reserve 2 teaspoons of crumbs for the topping. Gently press the crumbs until slightly compacted.

- Transfer the strawberry puree to all the cups.

- Top each cup with whipped topping.
- Sprinkle the reserved graham cracker crumbs on top (1/2 teaspoon for each cup.)

- Serve and enjoy.

Notes
- Please refer to my FAQ’s (Frequently Asked Questions) and ingredient list above for other substitutions or for the answers to the most common questions.
- Instead of bread crumbs, try making this like a strawberry shortcake. Use finely chopped pound cake or those little vanilla shortcake cups.
Nutrition
%20100vw,%201024px%22%20/%3EThis%20copycat%20KFC%20Strawberry%20Parfait%20is%20creamy,%20fruity,%20and%20layered%20with%20fresh%20strawberry%20sauce,%20whipped%20topping,%20and%20graham%20cracker%20crumbs!%20A%20FAST%20PARFAIT%20RECIPE%20If%20you%26%238217;ve%20seen%20the%20other%20%26%238220;Little%20Bucke%26%238221;t%20desserts%20(KFC%20Chocolate%20Parfait%20and%20KFC%20Lemon%20Creme%20Parfaits)%20that%20I%20have%20shared%20and%20have%20been%20anxiously%20awaiting%20my%20copycat%20version%20of%20the%20KFC...)
KFC Lemon Creme Parfaits 30 Apr 6:00 AM (4 days ago)

These KFC Lemon Creme Parfaits are a fun, nostalgic, layered dessert with a graham cracker crumbs layer, lemon pudding, and whipped cream.
A LAYERED 5 INGREDIENT DESSERT
Today, I’m bringing back a classic favorite with this KFC Lemon Parfait recipe! Way back in the day when my hubs and I were first dating, we’d hit up the local KFC for dinner and enjoy some of these layered desserts for a sweet treat to end the night with. You can’t go wrong with these Little Bucket parfait desserts. I recently shared the KFC Chocolate Parfaits and KFC Strawberry Parfaits. I think those were one of the last parfaits KFC got rid of before completely removing them from the menu. With layers of lemon pudding, whipped topping and graham cracker crumbs, these parfaits make for a light, no-bake dessert perfect for anytime!

FREQUENTLY ASKED QUESTIONS:
KFC also made a Chocolate Parfait and Strawberry Parfaits, but I don’t see why you couldn’t use any other pudding flavor.
I think you can make these up to a day in advance. I would wait to add the crumb topping until serving so they don’t get soggy while sitting in the whipped topping.
You could crumble some Golden Oreos or Lemon Oreos to add on top of the whipped topping.
I used these plastic cups (paid affiliate link). Small orange juice glasses work well. It doesn’t have to be a specific shape, as long as you think it would work. Generally you would want an 8 or 9 ounce glass.
You can keep these Lemon Parfaits in the fridge, covered, for up to 3 days.

INGREDIENTS NEEDED: (SEE RECIPE CARD BELOW FOR THE FULL RECIPE)
- graham cracker sheets – if using store-bought graham cracker crumbs, you’ll need about a cup. You could also use a shortbread style cookie like Lorna Doone!
- unsalted butter– You can use salted butter. There is so little salt in salted butter that it won’t make a huge difference here.
- whole milk– this helps the pudding set up properly. I don’t recommend using skim milk or a milk alternative unless you’ve made it before using it successfully.
- instant lemon pudding– When you’re grabbing a box of this from the store, check which type of pudding you are getting. For this recipe, I use the instant pudding type where you just add milk and stir. Many brands also make a Cook N Serve type of pudding. If you grab this kind, you’ll need to cook it according to the directions on the back of the box because if you just add milk to the mix, it won’t set up properly.
- whipped cream– Cool Whip or Reddi Whip. Store brand whipped topping can be used.

HOW TO MAKE KFC LEMON CRÈME PARFAITS:
In a food processor add the graham crackers. Pulse for 30 seconds or until you have crumbs.

Add the butter to the mixer. Pulse for 10-15 seconds or until combined. Set aside.

In a bowl combine the milk and pudding. Mix with whisk until combined. Set aside.

Transfer the crumbs to 4 parfait cups. Reserve 2 teaspoons of crumbs for the topping. Gently press the crumbs until slightly compacted. Pour the pudding evenly into the cups on top of the crumbs. Finish by adding a layer of whipped topping on top of the pudding.

Sprinkle 1 teaspoon of graham cracker crumbs on top of each parfait.

CRAVING MORE RECIPES?
- KFC Chocolate Parfaits
- KFC Strawberry Parfait
- Strawberry Cheesecake Parfaits (No-Bake)
- Strawberry Jell-O Parfaits
- Strawberry Shortcake in a Jar
- Dirt Cups
- Banana Pudding Cups
- Yogurt Parfaits
- Creme Brûlée Trifles
- Lemon Delight
- Lemon Magic Cake
- Classic Lemon Bars
- Lemonade Pie
- Lemon Poke Cake
- Starbuck’s Lemon Loaf
- Creamy Lemon Squares
- Punch Bowl Cake
- KFC Mac and Cheese
- KFC Gravy

KFC Lemon Crème Parfaits
Ingredients
- 7 graham cracker sheets (about one cup crumbs, see notes below)
- ¼ cup (1/2 stick) unsalted butter, melted (can use salted butter)
- 2 cups whole milk
- 3.4 ounce box instant lemon pudding
- 2 cups whipped topping (Cool Whip or Reddi Whip)
Instructions
- In a food processor add 7 graham cracker sheets. Pulse for 30 seconds or until you have crumbs.

- Add 1/4 cup (1/2 stick) unsalted butter, melted to the mixer. Pulse for 10-15 seconds or until combined. Set aside.

- In a bowl combine 2 cups whole milk and 3.4 ounce box instant lemon pudding. Mix with whisk until combined and starting to thicken. Set aside.

- Transfer the crumbs to 4 parfait cups. Reserve 2 teaspoons of crumbs for the topping. Gently press the crumbs until slightly compacted.

- Pour the pudding evenly into the cups on top of the crumbs.

- Finish by adding a layer of whipped cream on top of the pudding.
- Sprinkle 1/2 teaspoon of graham cracker crumbs on top of each parfait.

Notes
- Please refer to my FAQ’s (Frequently Asked Questions) and ingredient list above for other substitutions or for the answers to the most common questions.
- These would also be delicious made with a shortbread type cookie, like Lorna Doone (you’d need about a cup of crumbs.)
Nutrition
%20100vw,%201024px%22%20/%3EThese%20KFC%20Lemon%20Creme%20Parfaits%20are%20a%20fun,%20nostalgic,%20layered%20dessert%20with%20a%20graham%20cracker%20crumbs%20layer,%20lemon%20pudding,%20and%20whipped%20cream.%20A%20LAYERED%205%20INGREDIENT%20DESSERT%20Today,%20I%26%238217;m%20bringing%20back%20a%20classic%20favorite%20with%20this%20KFC%20Lemon%20Parfait%26%23160;recipe!%20Way%20back%20in%20the%20day%20when%20my%20hubs%20and%20I%20were%20first%20dating,%20we%26%238217;d%20hit%20up...)
KFC Chocolate Parfaits 29 Apr 6:00 AM (5 days ago)

This copycat KFC Chocolate Parfait is a rich, creamy, and layered no bake dessert made with pudding, whipped topping, and graham cracker crumbs, just like the original!
A NOSTALGIC DESSERT RECIPE
Who remembers the KFC Little Bucket Parfaits? Back in 1993 when my husband and I first started dating, and didn’t have a bunch of extra date night spending money, fast food was a popular option for us. I would order the strawberry parfait and he ordered this chocolate version. I don’t know why KFC stopped serving this layered dessert! I know we can’t be the only ones who still think of them, so I knew I needed to share a homemade version of those chocolate Little Bucket parfaits (and be sure to come back because I am also sharing the KFC Strawberry Parfaits and the KFC Lemon Creme Parfaits too!)

FREQUENTLY ASKED QUESTIONS:
You certainly can and if you weren’t aware, KFC used to make a Strawberry Parfait and Lemon Parfait as well. Don’t worry, they’ll be hitting the site shortly too!
Yes, you can. Just know homemade whipped cream usually isn’t as stable as the store bought stuff so it may deflate faster with these type of desserts. To make your own homemade whipped cream, you will need
1 cup heavy cream, 2 Tablespoons powdered sugar and 1/2 teaspoon vanilla extract. Add everything to the mixing bowl and whip on medium speed until stiff peaks form and use immediately.
I used these little plastic cups (paid affiliate link), but any plastic cup, or small serving cup will work or glass will work. You want to use an 8 or 9 ounce glass or cup.
Yes, of course. You can use your favorite chocolate pudding recipe, or make my Vanilla Pudding recipe and add some unsweetened cocoa powder until it gets to the intensity of chocolate flavor you prefer.
These could definitely be made a day in advance. I would just keep each one covered with plastic wrap and wait to add the sprinkles until just before serving (so the chocolate doesn’t bleed onto the whipped cream). When making these on the day of, they can be served immediately or chilled for up to 2 hours.
In place of the chocolate sprinkles, you could try rainbow sprinkles, chocolate shavings or crushed chocolate candies or candy bars on top.
You can keep the parfaits in the fridge for up to 3 days. Best served after it is chilled for 2 hours.

INGREDIENTS NEEDED: (SEE RECIPE CARD BELOW FOR THE FULL RECIPE)
- graham cracker sheets – this will end up being about one cup of graham cracker crumbs.
- unsalted butter– salted butter can be used. There is so little salt in salted butter that it won’t make a huge difference here.
- whole milk – I really prefer whole milk to give this the richness like the original.
- instant chocolate pudding– be sure to grab the instant pudding kind, not the Cook N Serve kind. They’re usually by each other on the grocery store aisle, so be sure to check the packaging before purchasing. If you accidentally grab the wrong kind, don’t fret because you can still make this dessert. It’s just going to take a bit longer. You’ll need to make sure to actually cook it using the directions on the box and then let it set up and cool. Once you’ve done that then prepare the parfaits as written.
- whipped topping– Cool Whip or Reddi Whip. And, of course, you can use the store brand versions.
- chocolate sprinkles

HOW TO MAKE KFC CHOCOLATE PARFAITS:
In a food processor add the graham crackers. Pulse for 30 seconds or until you have crumbs.

Add the butter to the mixer. Pulse for 10-15 seconds or until combined. Set aside.

In a bowl combine the milk and pudding. Mix with whisk until combined. Set aside.

Transfer the crumbs to 4 parfait cups. Reserve 2 teaspoons of crumbs for the topping. Gently press the crumbs until slightly compacted. Pour the pudding evenly into each of the cups on top of the crumbs.

Finish by adding a layer of whipped cream on top of the pudding. Sprinkle one teaspoon of the chocolate sprinkles onto each parfait to finish.

Serve and enjoy these parfaits.

CRAVING MORE RECIPES?
- KFC Lemon Creme Parfaits
- KFC Strawberry Parfaits
- Strawberry Cheesecake Parfaits (No-Bake)
- Strawberry Jell-O Parfaits
- Dirt Cups
- Banana Pudding Cups
- Yogurt Parfaits
- Strawberry Shortcake in a Jar
- Creme Brûlée Trifles
- Chocolate Cobbler
- Punch Bowl Cake
- KFC Mac and Cheese
- KFC Gravy

KFC Chocolate Parfaits
Ingredients
- 7 graham cracker sheets (see notes below)
- ¼ cup (1/2 stick) unsalted butter, melted
- 2 cups whole milk
- 3.9 ounce box instant chocolate pudding
- 2 cups whipped topping (Cool Whip or Reddi Whip)
- ⅛ cup chocolate sprinkles (divided use)
Instructions
- In a food processor add 7 graham cracker sheets. Pulse for 30 seconds or until you have crumbs.

- Add 1/4 cup (1/2 stick) unsalted butter, melted to the mixer. Pulse for 10-15 seconds or until combined. Set aside.

- In a bowl combine 2 cups whole milk and 3.9 ounce box instant chocolate pudding. Whisk together until fully combine and starts to thicken. Set aside.

- Transfer the crumbs to 4 parfait cups. Reserve 2 teaspoons of crumbs for the topping. Gently press the crumbs into the bottom until slightly compacted.

- Pour the pudding evenly into the cups on top of the crumbs.

- Finish by adding a layer of whipped cream on top of the pudding.

- Sprinkle one teaspoon of the chocolate sprinkles onto each parfait to finish.

Notes
- Please refer to my FAQ’s (Frequently Asked Questions) and ingredient list above for other substitutions or for the answers to the most common questions.
- 7 graham cracker sheets is about one cup of crumbs.
Nutrition
%20100vw,%201024px%22%20/%3EThis%20copycat%20KFC%20Chocolate%20Parfait%20is%20a%20rich,%20creamy,%20and%20layered%20no%20bake%20dessert%20made%20with%20pudding,%20whipped%20topping,%20and%20graham%20cracker%20crumbs,%20just%20like%20the%20original!%20A%20NOSTALGIC%20DESSERT%20RECIPE%20Who%20remembers%20the%20KFC%20Little%20Bucket%20Parfaits?%20Back%20in%201993%20when%20my%20husband%20and%20I%20first%20started%20dating,%20and%20didn%26%238217;t%20have%20a%20bunch%20of...)
Air Fryer Pizza Bombs 28 Apr 6:00 AM (6 days ago)

Air Fryer Pizza Bombs are quick little bites made with biscuits that are cheesy and packed with pizza flavor – ready in minutes!
READY IN UNDER 15 MINUTES
Made with refrigerated biscuit dough, mozzarella cheese, pizza sauce and pepperoni, these Air Fryer Pizza Bombs come together in just a few minutes. I love making these when I have friends over and want a fun snack that doesn’t take forever to make or when I want a simple dinner that I know everyone will love. They’re also perfect for game day snacks too!

FREQUENTLY ASKED QUESTIONS:
All of my Air Fryer recipes are tested using a 6 quart Air Fryer basket since that is the most commonly owned Air Fryer. Depending on the style and size of your Air Fryer, the timing can vary. Any style or size should work, but the Pizza Bombs may need more or less time and you may need to work in batches.
It’s always recommended that either avocado oil spray or olive oil spray be used in an air fryer. This keeps it from gunking up over time. I think they even make a special spray for air fryers now.
You bet. You could use Homemade Pizza Dough or store-bought. Depending on what you use in your homemade dough, you may need to adjust the cooking time. I haven’t personally tested it so you may have to play with the time a bit.
I added cheese in layers to the pizza bomb to ensure there was cheese evenly distributed throughout.
Air Fryers vary widely so you may need to experiment with the amount of cooking time. Start with 5 minutes and check for doneness and add more time as needed. Some Air Fryer types take a lot longer to bake through. Just keep cooking until it’s no longer doughy.
These pizza bombs are extremely versatile, and you can truly add any of your favorite pizza toppings to create your own personal pizza bomb! You may need to sauté or cook other toppings before adding them to the dough so they soften up enough. I think mushrooms, bell peppers, diced onion, sausage, ham, etc would all be good additions.
Personally, I feel like these are the best the first day that you make them. But you can keep leftover Pizza Bombs if you want. Leftovers will keep if properly stored in an airtight container or zip top bag in the fridge for up to 3-4 days (or freeze for up to 3 months.) Reheat them in the Air Fryer or oven.

INGREDIENTS NEEDED: (SEE RECIPE CARD BELOW FOR THE FULL RECIPE)
- Southern Homestyle Buttermilk Biscuits– you could swap these biscuits out for homemade pizza dough or some store bought dough, I shared more on this above in the FAQ (Frequently Asked Question) area.
- pizza sauce– use whatever canned pizza sauce you enjoy from the store or use some Homemade Pizza Sauce.
- mini pepperoni slices– if you can’t find mini pepperoni slices, you can use full size, regular pepperonis and cut them up into smaller pieces to stuff inside.
- mozzarella string cheese sticks– cut the string cheese into fourths, then sliced again vertically. Each cheese stick will be divided into 8 pieces. I used mozzarella sticks since it makes things easier, but you could use shredded cheese if that is what you prefer.
- unsalted butter– melted. Salted butter can be used.
- garlic powder
- Italian seasoning
- grated Parmesan

HOW TO MAKE AIR FRYER PIZZA BOMBS:
Remove the biscuits from the can and with a rolling pin, flatten a biscuit into a circle approximately the size of a large grapefruit. About 1/8” thick. Add one Tablespoon of pizza sauce to the center of the biscuit circle.

Add 2 pieces of cheese sticks to top of the pizza sauce. Then add 1 Tablespoon of mini pepperonis to the top of the cheese.

Then add two more pieces of mozzarella sticks. Grab the edges of the circle and pinch to close. Try not to have a large amount of dough in the pinch as it’ll be harder to make sure it is cooked through without overcooking the rest of it.

Continue this process with the remaining biscuits. Preheat your air fryer to 350F degrees. Generously grease the bottom of the basket with nonstick spray. Add the pizza bombs to the basket, seam side down, giving them plenty of space for airflow. You may need to do this in batches. Spray the pizza bombs with nonstick spray and cook for 6-8 minutes or until dark golden brown and cooked through on the bottom. While cooking, add the butter, garlic powder, Italian seasoning and grated Parmesan cheese to a small bowl.

Melt in the microwave and stir to combine. Once the bombs are cooked through, remove them from the Air Fryer and brush with the melted garlic butter. Sprinkle with minced parsley and serve with additional pizza sauce!

CRAVING MORE RECIPES?
- Biscuits and Gravy Bombs
- Air Fryer Mozzarella Sticks
- Air Fryer Halloumi
- Air Fryer Mac and Cheese Bites
- Air Fryer Potato Skins
- Air Fryer Meatballs
- Air Fryer Garlic Cheese Bread
- Air Fryer Jalapeno Poppers
- Texas Toast Pizza

Air Fryer Pizza Bombs
Ingredients
- 16.3 ounce (8 count) Southern Homestyle Buttermilk Biscuits
- 1 cup pizza sauce (divided use, plus more for serving)
- ½ cup mini pepperoni slices
- 4 mozzarella string cheese sticks (cut into fourths, then slice again vertically. Each cheese stick will be divided into 8 pieces.)
- ¼ cup unsalted butter (can use salted)
- ¼ teaspoon garlic powder
- ¼ teaspoon Italian seasoning
- 2 Tablespoons grated Parmesan
- fresh minced or dried parsley flakes (for garnish, optional
Instructions
- Remove the biscuits from the can and with a rolling pin, flatten each biscuit into a circle approximately the size of a large grapefruit. About 1/8” thick.

- Add one Tablespoon pizza sauce to the center of the biscuit circle.

- Add 2 pieces mozzarella cheese sticks to top of the pizza sauce.

- Then add 1 Tablespoon mini pepperonis to the top of the cheese.

- Then add two more pieces mozzarella sticks.

- Grab the edges of the circle and pinch to close. Try not to have a large amount of dough in the pinch as it’ll be harder to make sure it is cooked through without overcooking the rest of it.

- Continue this process with the remaining biscuits.
- Preheat a 6-8 quart air fryer to 350F degrees. Generously spray the bottom of the basket with nonstick spray.
- Add the pizza bombs to the basket, seam side down, giving them plenty of space for airflow. You may need to do this in batches.

- Spray the pizza bombs with nonstick spray and cook for 6-8 minutes or until dark golden brown and cooked through on the bottom. NOTE: You will want to check to make sure so you don't end up with a doughy middle. Keep cooking until thoroughly cooked.
- While cooking, add ¼ cup unsalted butter, ¼ teaspoon garlic powder, ¼ teaspoon Italian seasoning and 2 Tablespoons grated Parmesan to a small bowl.

- Melt in the microwave (I usually do 15-30 second intervals until melted.) Stir to combine.
- Once the pizza bombs are cooked through, remove them from the Air Fryer and brush with the melted garlic butter.

- Sprinkle with fresh minced or dried parsley flakes and serve with more pizza sauce if you prefer.

Notes
- Please refer to my FAQ’s (Frequently Asked Questions) and ingredient list above for other substitutions or for the answers to the most common questions.
Nutrition
%20100vw,%201024px%22%20/%3EAir%20Fryer%20Pizza%20Bombs%20are%20quick%20little%20bites%20made%20with%20biscuits%20that%20are%20cheesy%20and%20packed%20with%20pizza%20flavor%20%26%238211;%20ready%20in%20minutes!%20READY%20IN%20UNDER%2015%20MINUTES%20Made%20with%20refrigerated%20biscuit%20dough,%20mozzarella%20cheese,%20pizza%20sauce%20and%20pepperoni,%20these%20Air%20Fryer%20Pizza%20Bombs%20come%20together%20in%20just%20a%20few%20minutes.%20I%20love%20making%20these...)
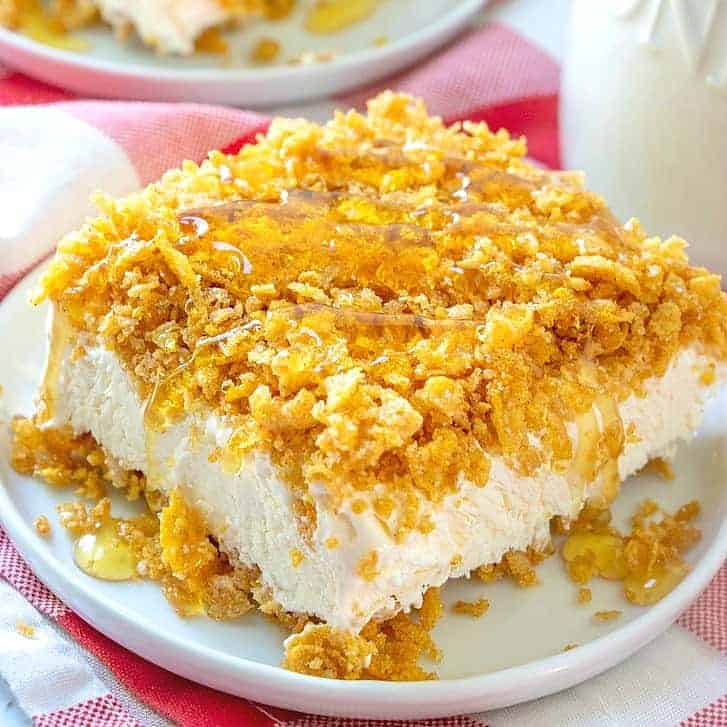
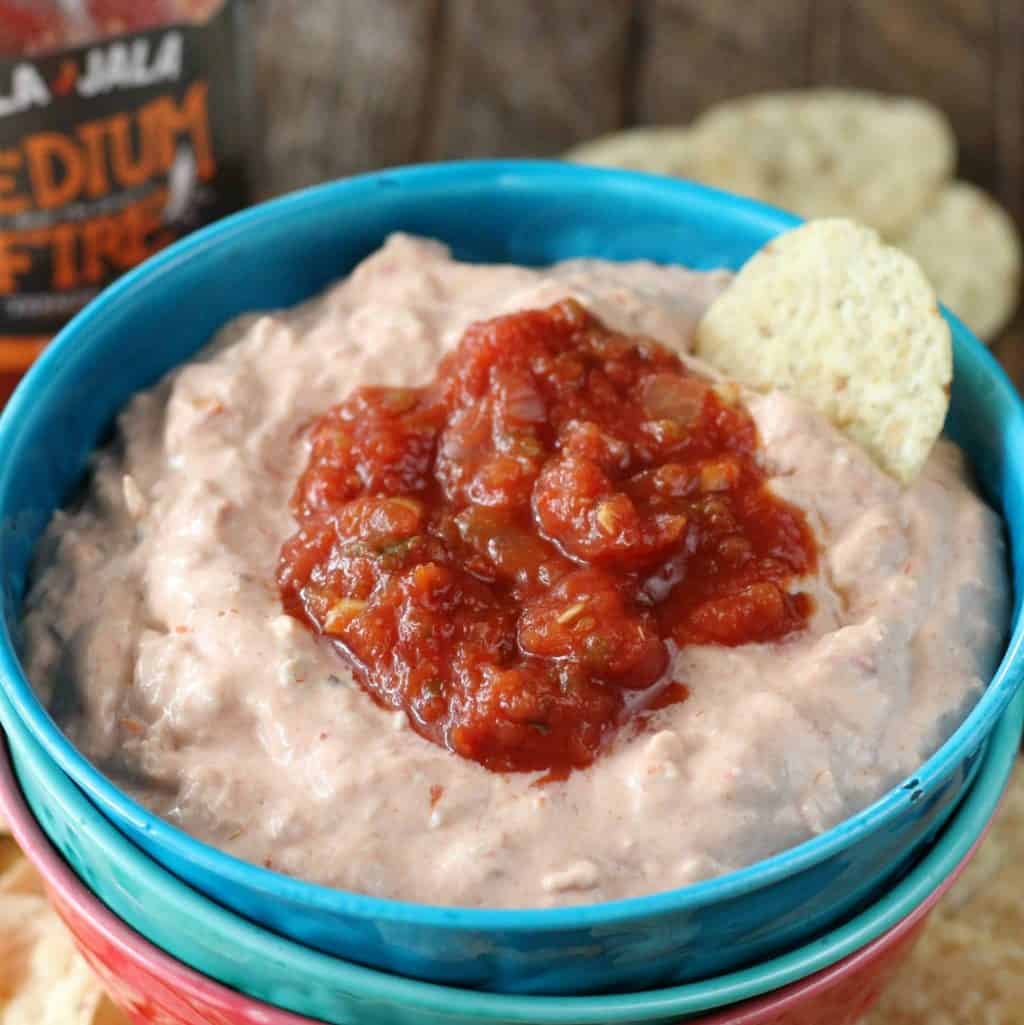
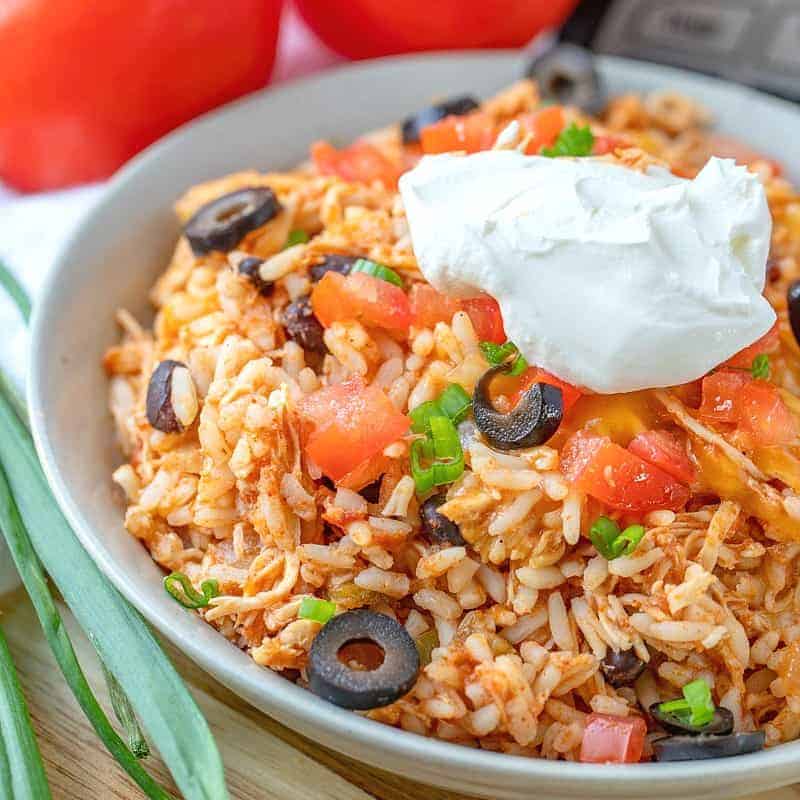
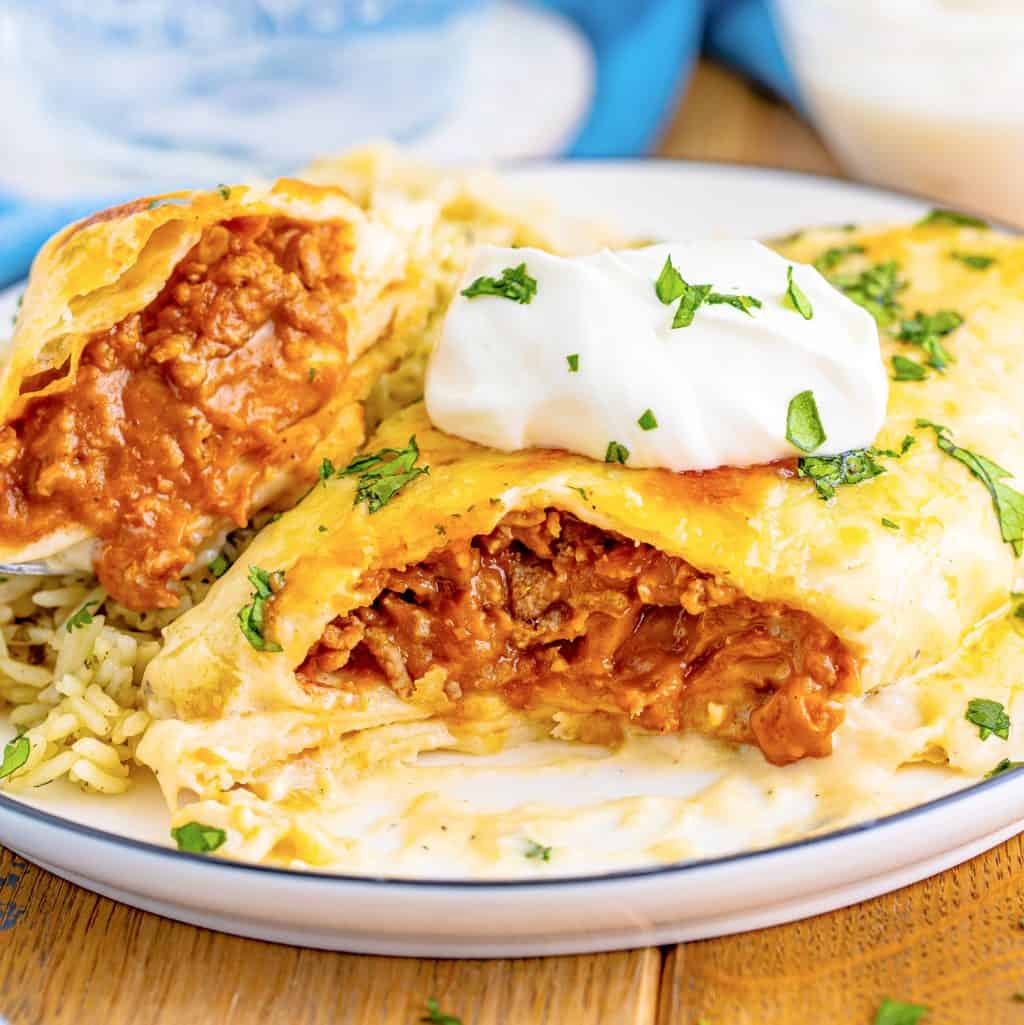
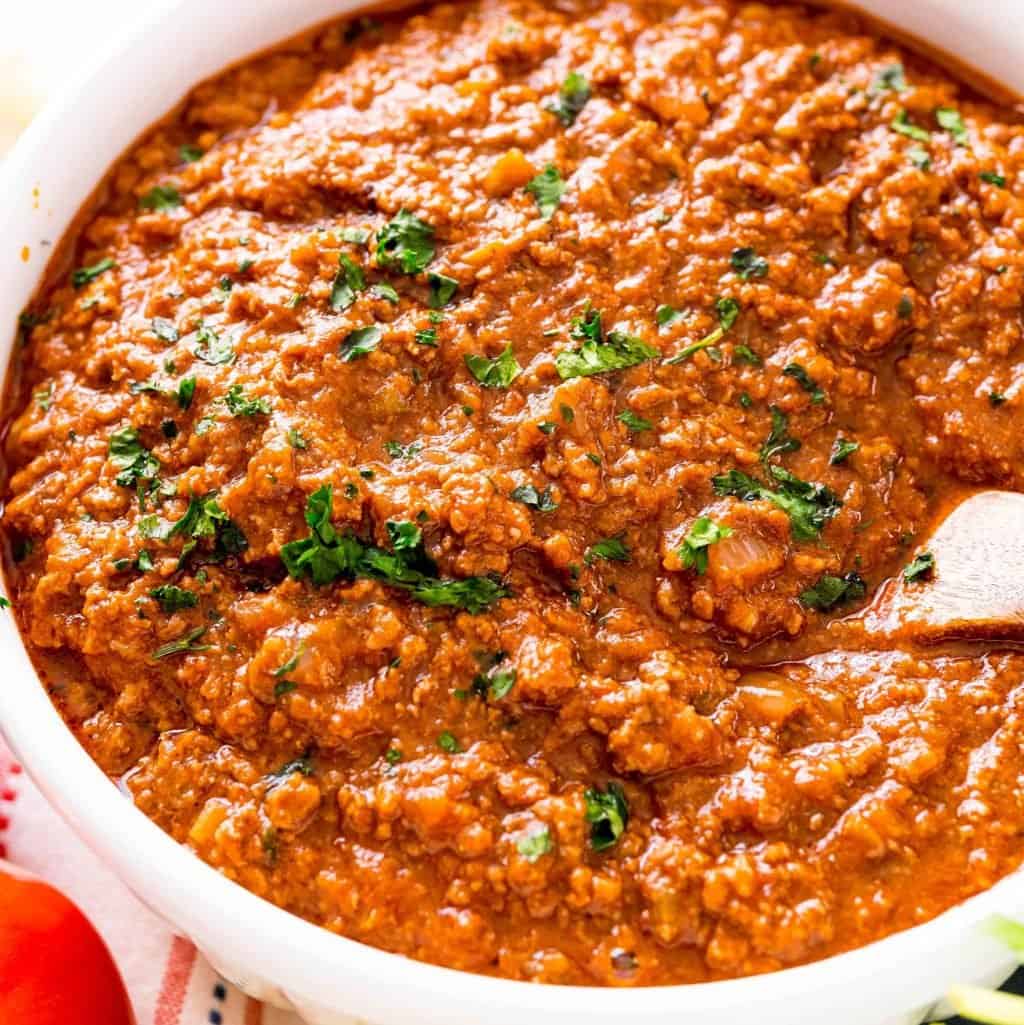
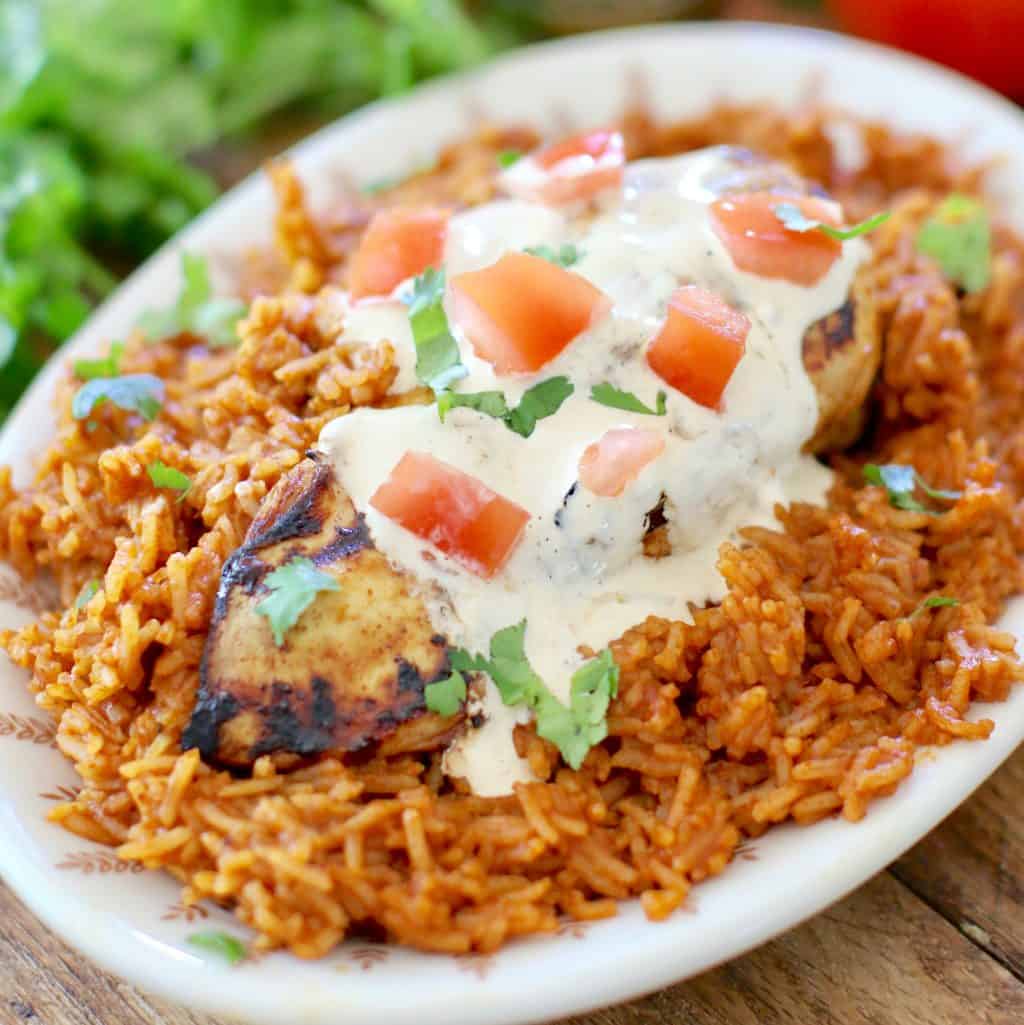
64 Cinco De Mayo Recipes 28 Apr 5:00 AM (6 days ago)

All the best Cinco de Mayo recipes all in one spot! Sopapilla Cheesecake, Enchiladas, Mexican Rice, Fried Ice Cream Cake, Rice Pudding and much more to celebrate the occasion!
EASY CINCO DE MAYO DRINKS, DINNERS, APPETIZERS AND DESSERTS
I love a good Cinco de Mayo gathering! Any excuse to eat tacos is alright by me! I’ve gathered up a few of my favorite recipes to make. You’ll find all kinds of ideas that are bound to fit your tastes (and your budget!) And I think you’ll also find some new favorites in this list that will become part of your regular menu rotation! Let’s get to it!
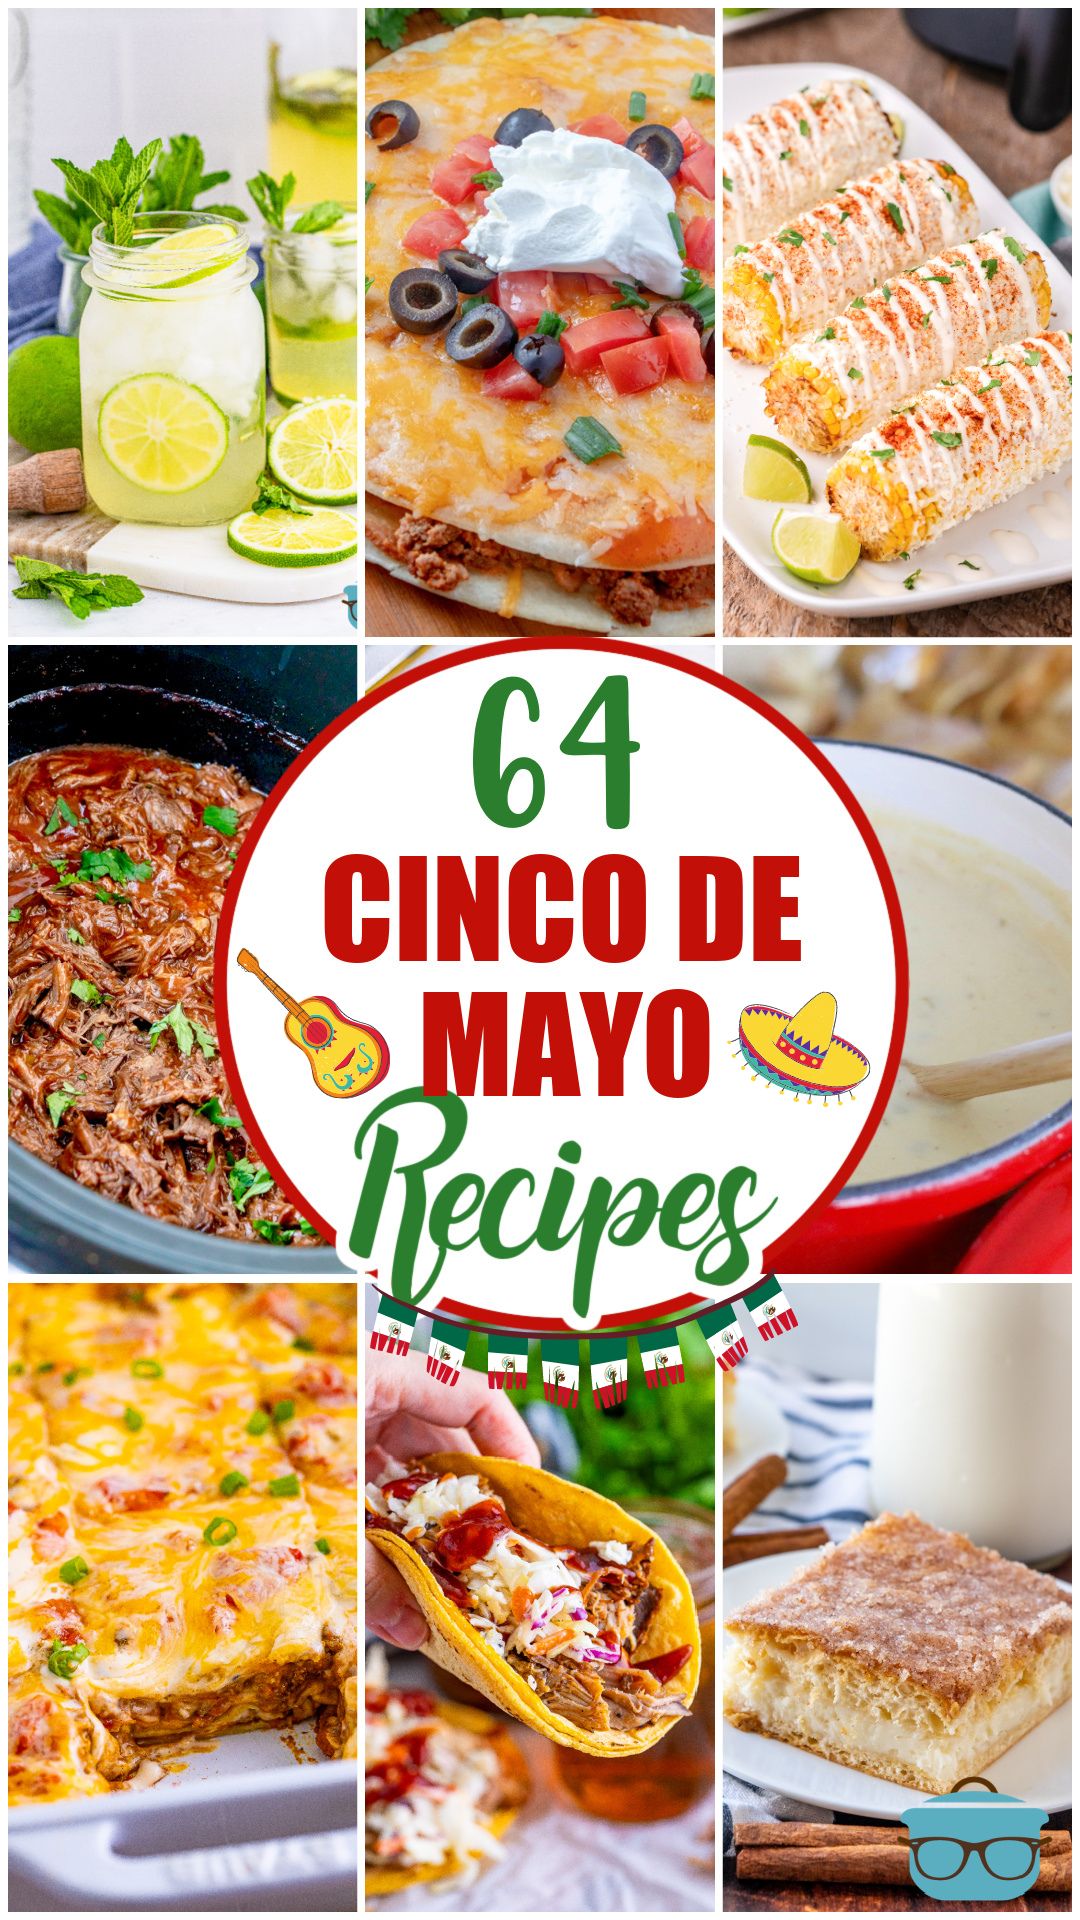
Each recipe has step-by-step photos and all the tips and tricks to make each recipe come out perfect every single time! Click on any image or button below to take you to the recipe. Note: I may end up adding more recipes here over time so it will end up with more than 64.

Strawberry Margaritas
A deliciously easy summertime drink, these Strawberry Margaritas are a breeze to whip up. Minimal ingredients, super flavorful and perfect for any occasion!

Pitcher Mojitos
A perfect combination of mint, rum, lime and club soda, these pitcher Summer Mojitos cocktails have all the flavors you enjoy and are so incredibly tasty!
Easy Sopapilla Cheesecake Bars (+Video)
Easy Sopapilla Cheesecake is made with crescent roll dough, cream cheese, sugar, cinnamon and melted butter. A deliciously easy dessert!
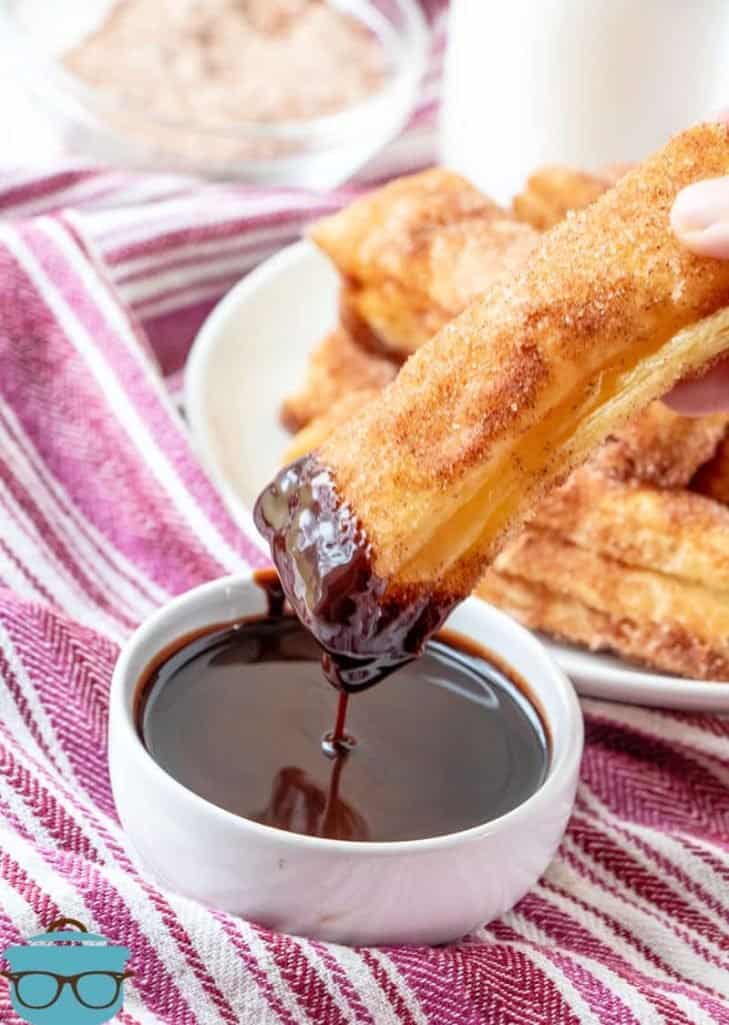
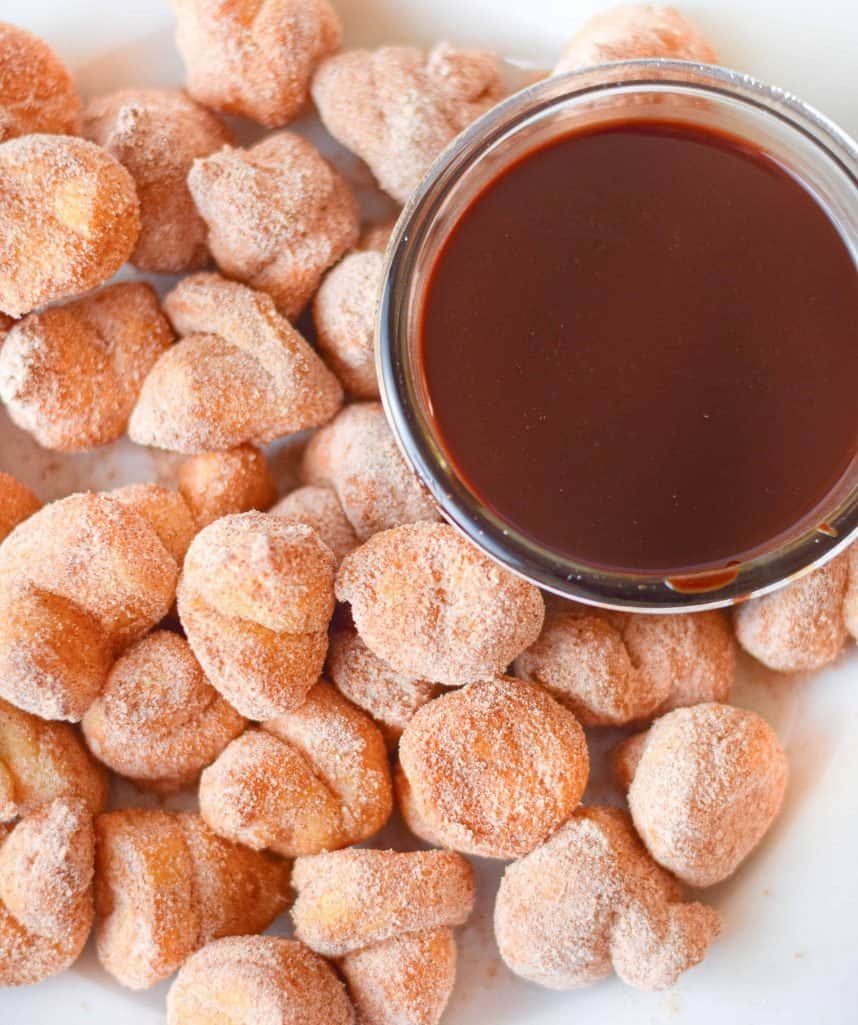
Easy Baked Churros (+Video)
Easy Baked Churros require no oil, no frying and no messy dough and still tastes amazing! Puff pastry, butter and cinnamon sugar are all you need!

Homemade Churros (+Video)
A fun and tasty Mexican treat, these Homemade Churros are quick to put together, are so delicious and make the perfect snack or dessert!
Air Fryer Cheesecake Chimichangas
If you love your air fryer and you love cheesecake then you'll go crazy for these simple Air Fryer Cheesecake Chimichangas! Fun, flavorful and perfect for the whole family.
Fried Ice Cream Cake
Fried Ice Cream Cake is made with softened ice cream, whipped topping, crushed corn flakes, cinnamon and drizzled with honey and chocolate.
Air Fryer Churro Bites
These homemade Air Fryer Churro Bites are absolutely divine! An easy-to-make dough that creates sweet and tasty bites of cinnamon sugar goodness!
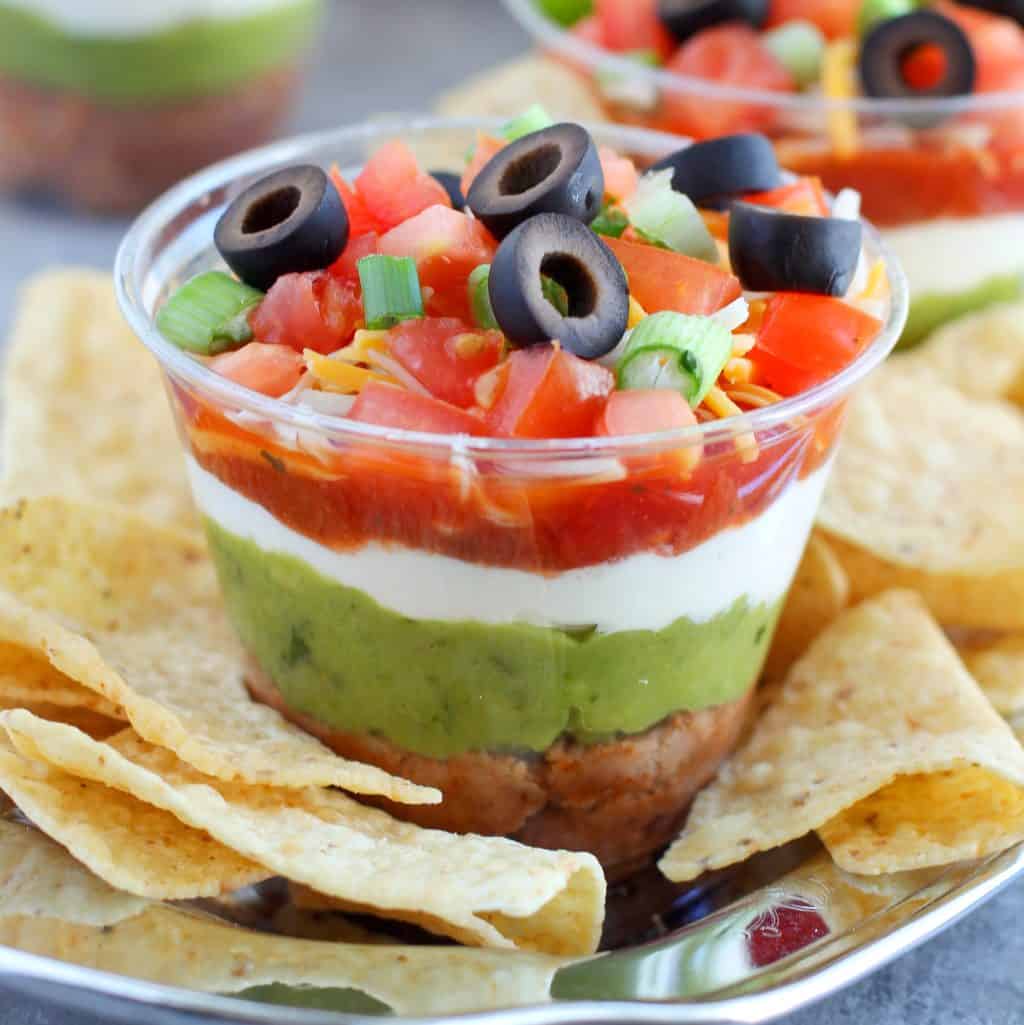
7 Layer Dip Cups
These 7 layer dip cups are the perfect way to make sure that everyone gets their own serving of their favorite party dip in a cup!
Refried Bean Dip
This easy Refried Bean Dip is made with canned refried beans, shredded cheese, taco seasoning and topped with melted cheese!
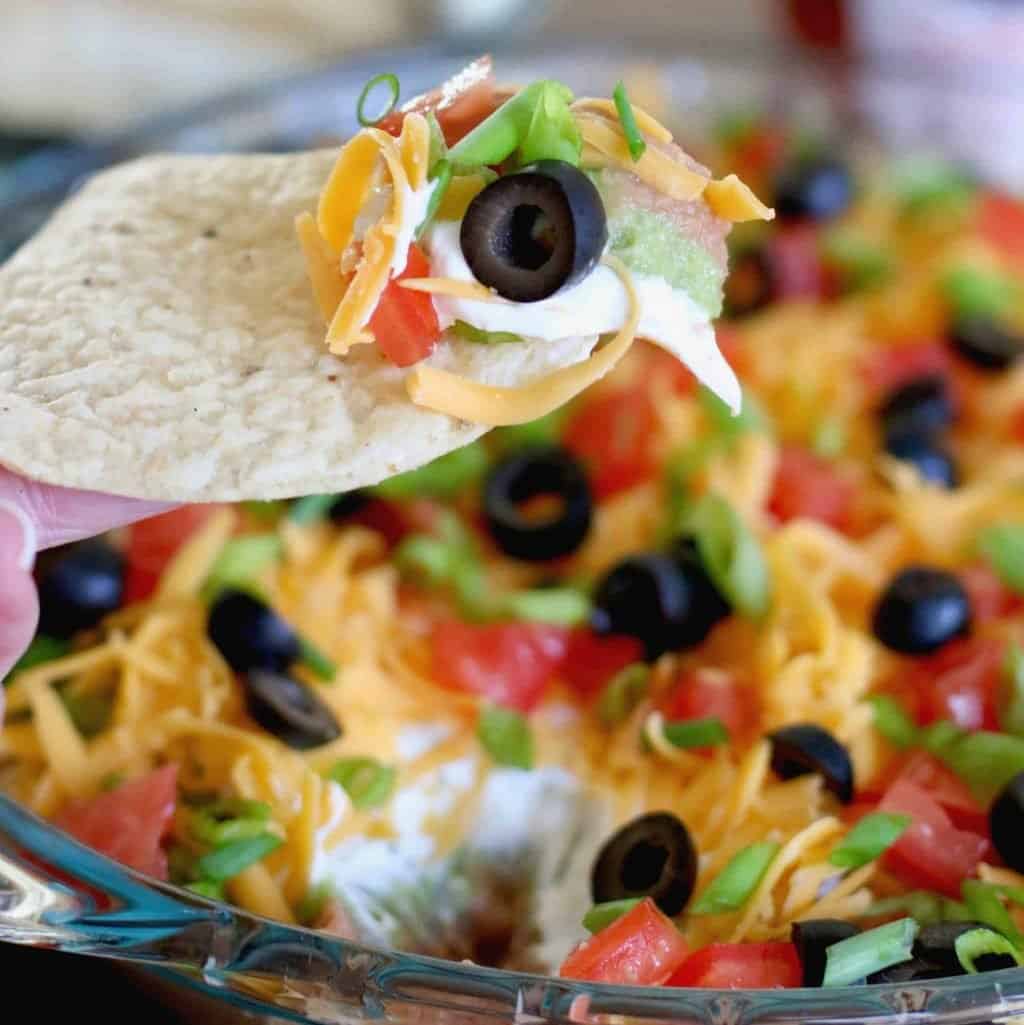
The Best 7-Layer Dip
The Best 7-Layer Dip recipe is a must-have at any gathering or Cinco de Mayo celebration. This one has a slight twist that everyone loves!

Creamy Taco Dip
You only need a few ingredients to make this Taco Dip that is so creamy! It's also a quick appetizer to make since it doesn't need to be heated!
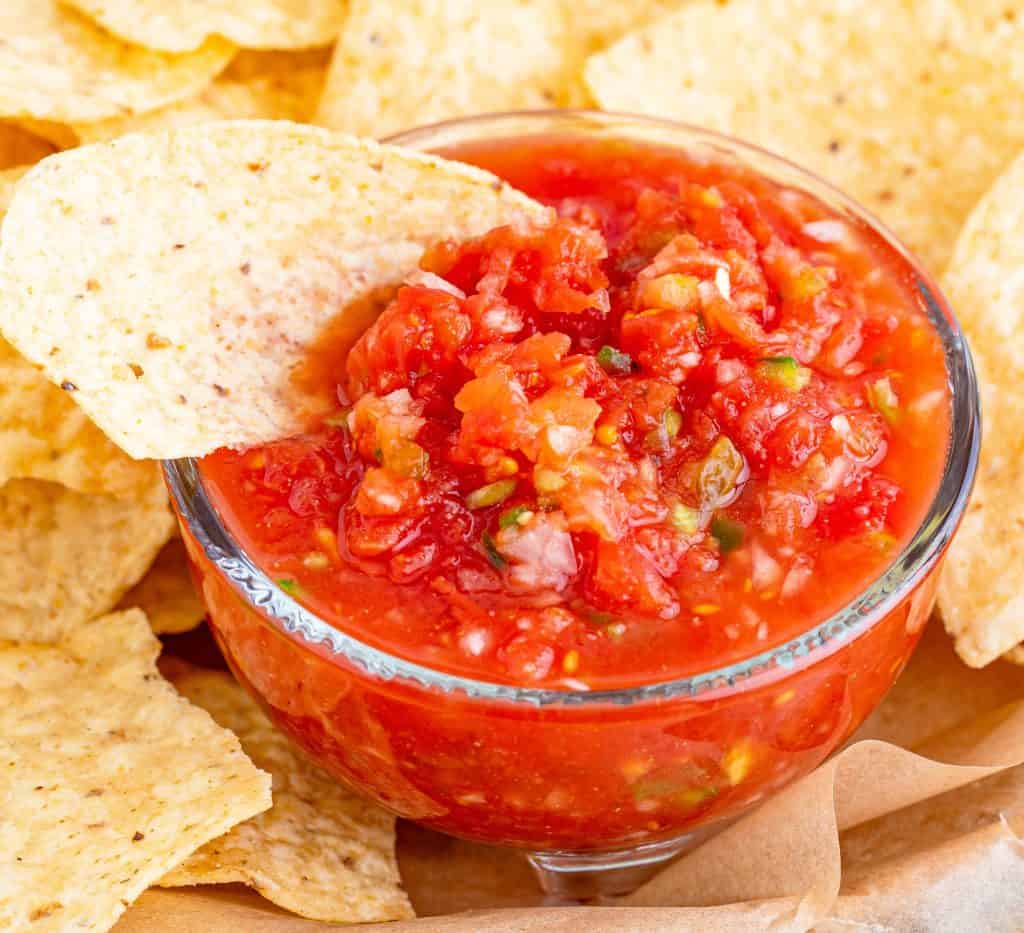
Copycat Chili’s Salsa (+Video)
This Super Simple Copycat Chili's Salsa whips up in five minutes. Whole tomatoes, special blend of seasonings, onion and jalapeño. The best!
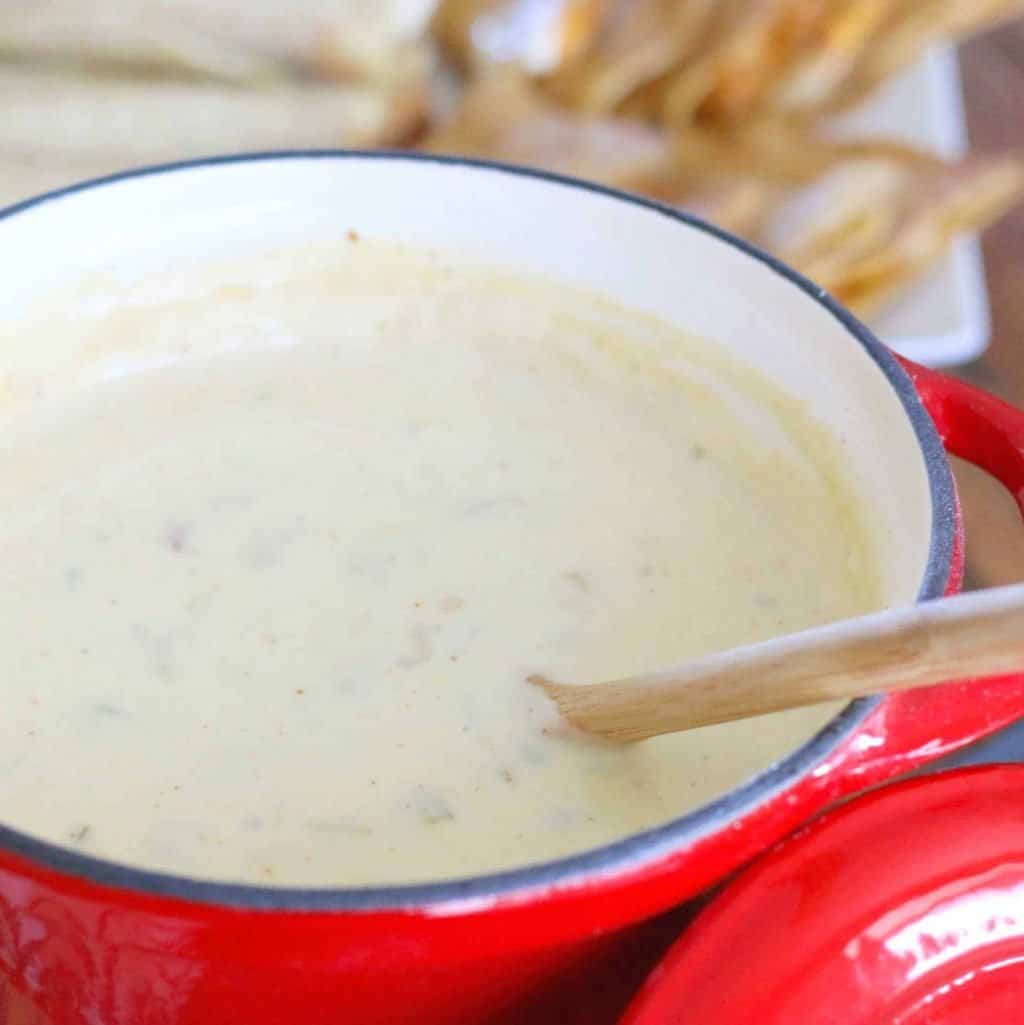
Crock Pot Queso Dip (+Video)
Indulge in a rich and flavorful Crock Pot Queso Dip that's easy to make and perfect for any gathering or game day spread!
Creamy Salsa Chicken Dip
Salsa Chicken Dip is a super easy scrumptious dip with only three ingredients: chicken, cream cheese and salsa! It’s best served warm with tortilla chips!
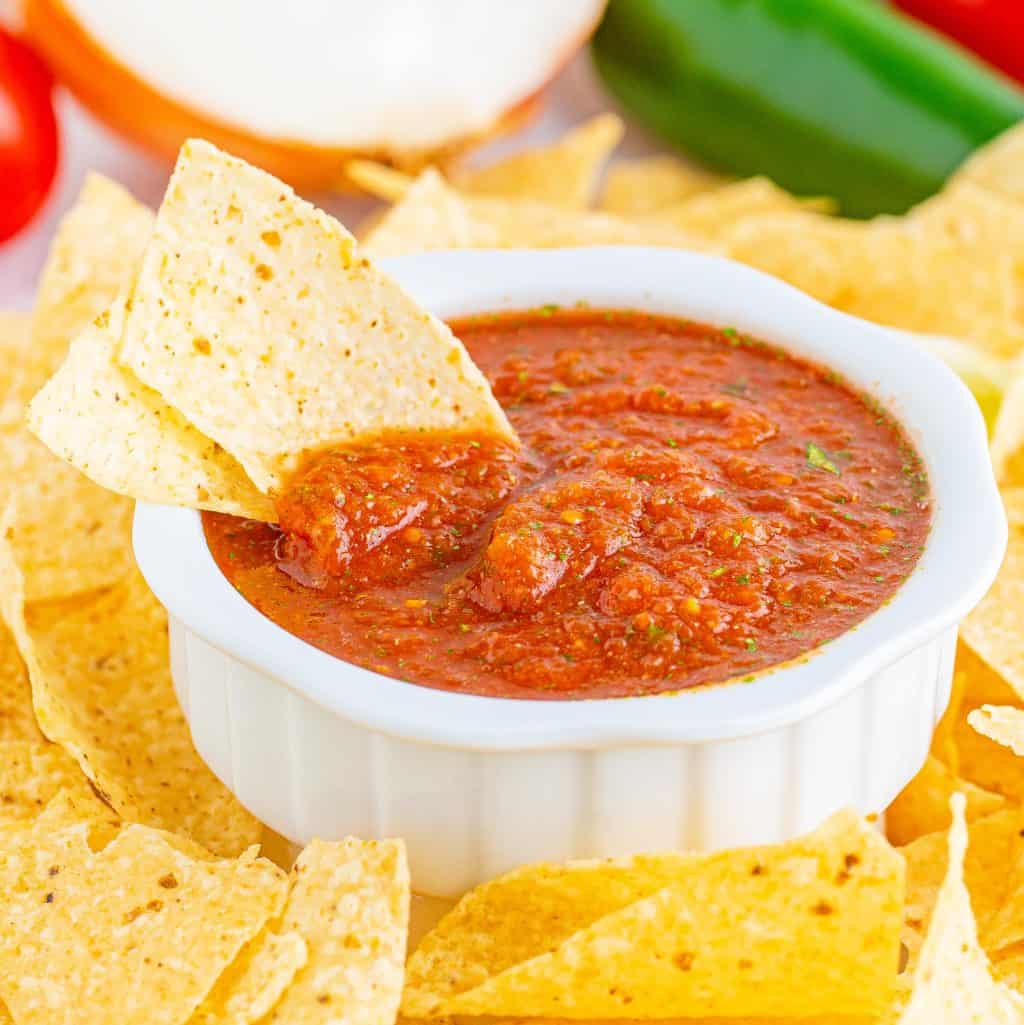
Blender Salsa
A quick and easy recipe, this Blender Salsa is absolutely delicious and done in 5 minutes! The perfect appetizer or snack!

3-Ingredient Mexican Rice
If you're searching for a quick and tasty side dish to pair with your next Mexican-inspired meal, this 15-minute Mexican rice recipe is just what you need!
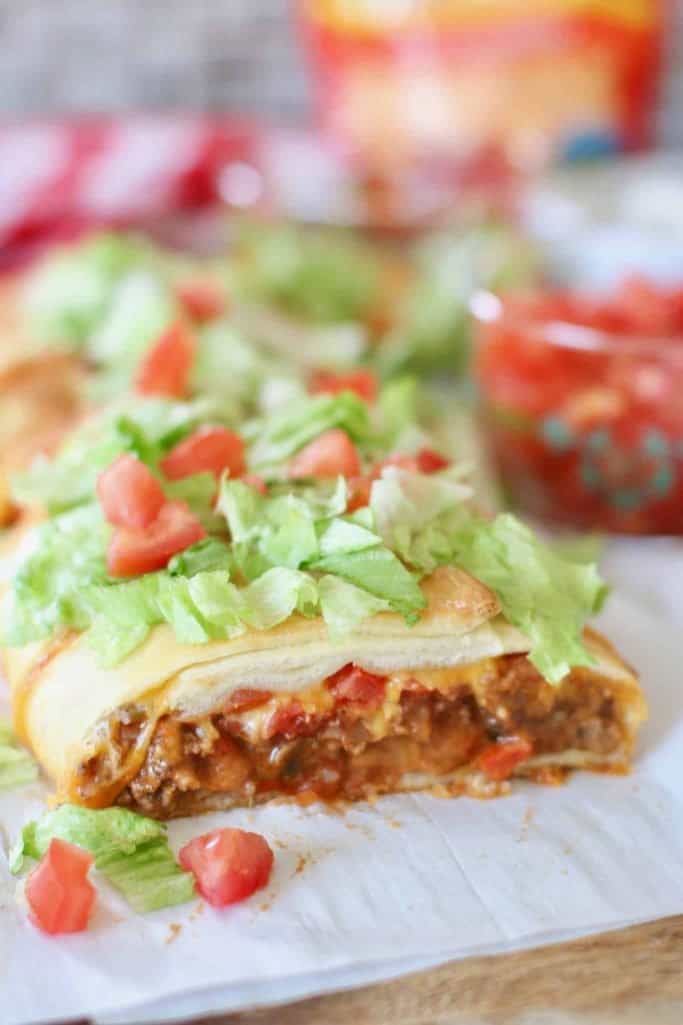
Taco Braid
This Easy Taco Braid uses pizza dough, seasoned taco beef, refried beans, cheese and salsa to create the most delicious family dinner!

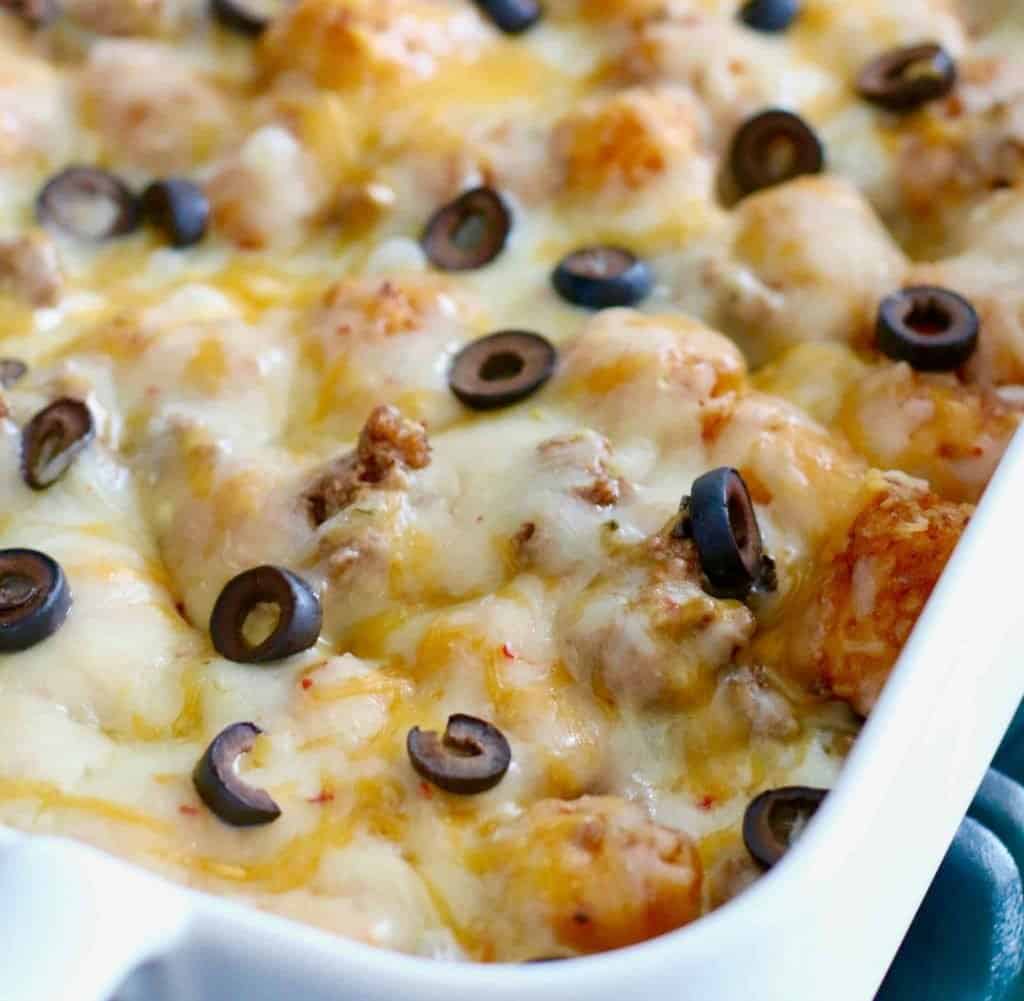
Tater Tot Enchilada Bake
This Tater Tot Enchilada Bake is a family favorite dinner (that isn't spicy hot.) It's like a tater tot taco! Simple and easy ingredients!

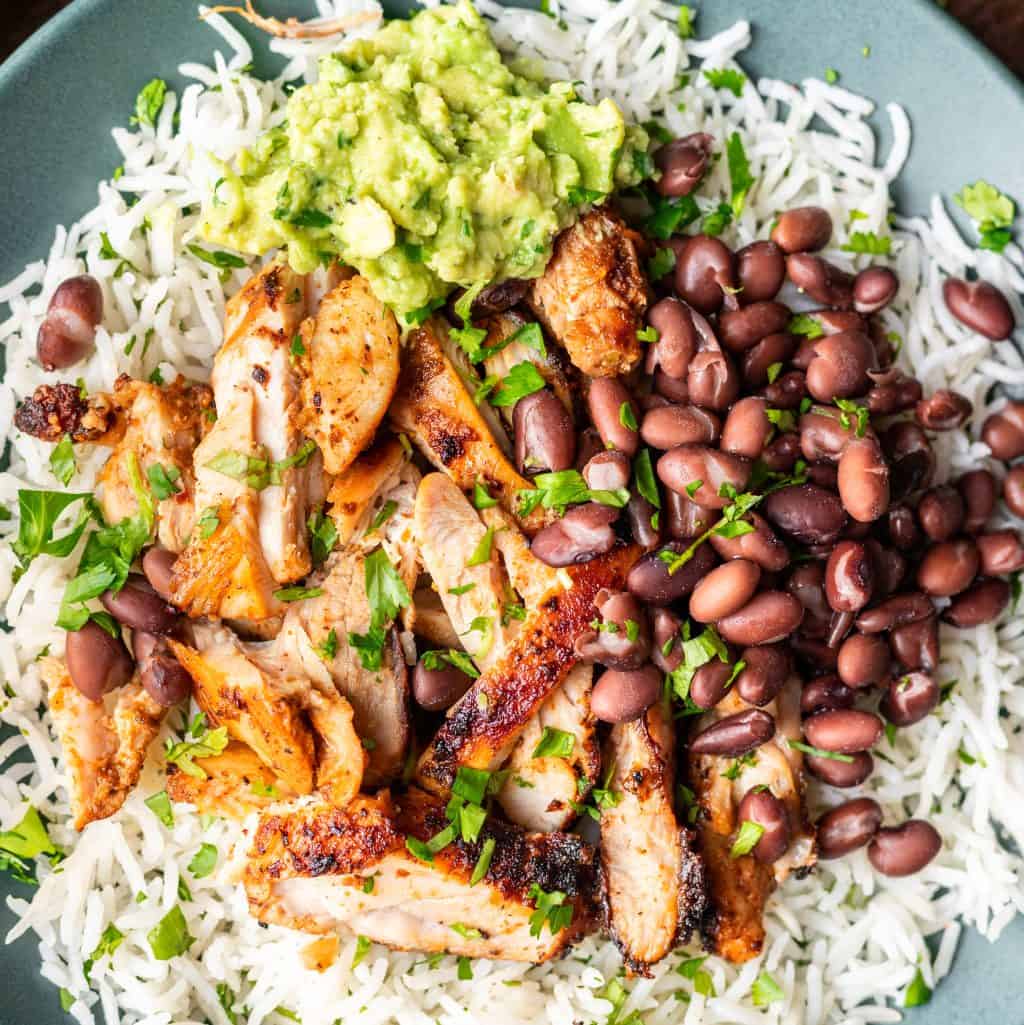
Easy Arroz con Pollo
Ready in 20 minutes, this Arroz con Pollo is a Mexican restaurant classic that is made with a mix of seasoned chicken, rice, veggies and topped with creamy queso!
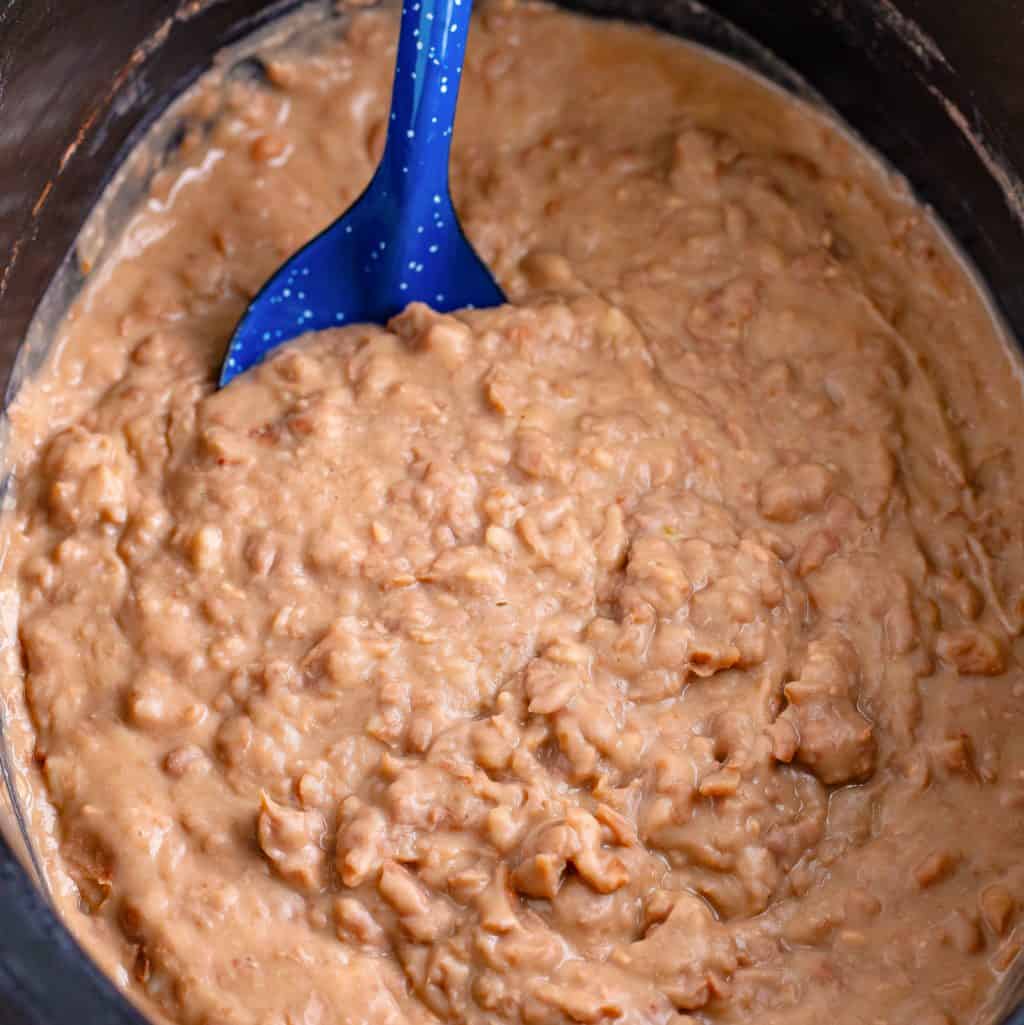
Slow Cooker Refried Beans
If you've never tried to make your own refried beans before then now is the time! They are so simple and flavorful that you may never go back to the canned stuff again!

Chicken Chimichangas
These Chicken Chimichangas are made with a deliciously seasoned chicken, cheese and refried bean filling all wrapped in a crispy flour tortilla!
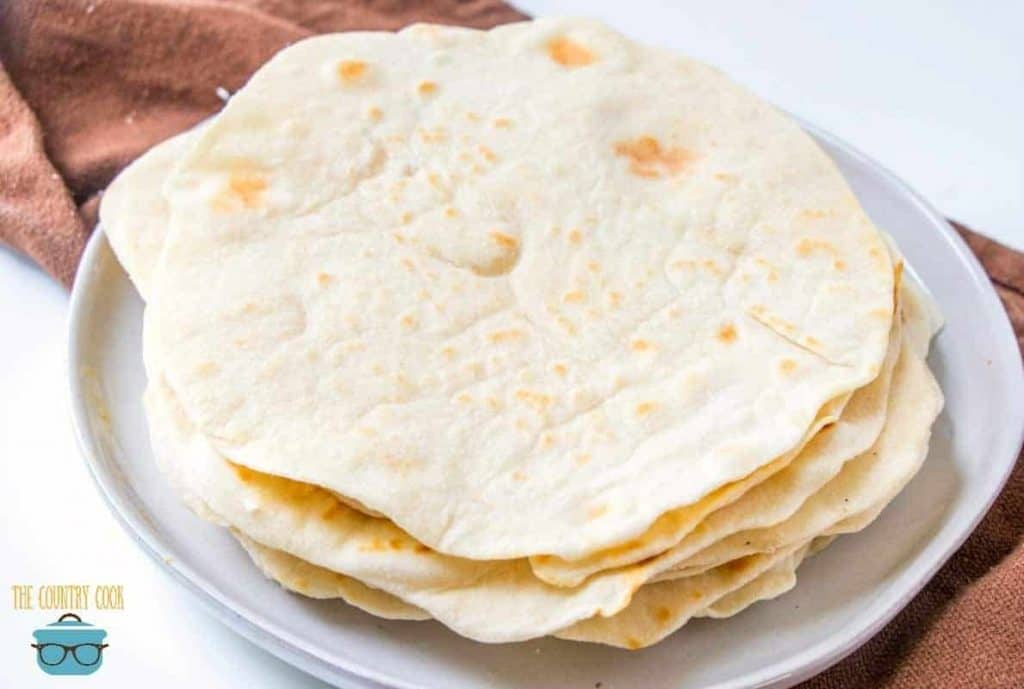
Homemade Flour Tortillas (+Video)
Homemade Flour Tortillas are very easy to make! Just a small amount of ingredients and no special equipment are needed! So tender and soft!
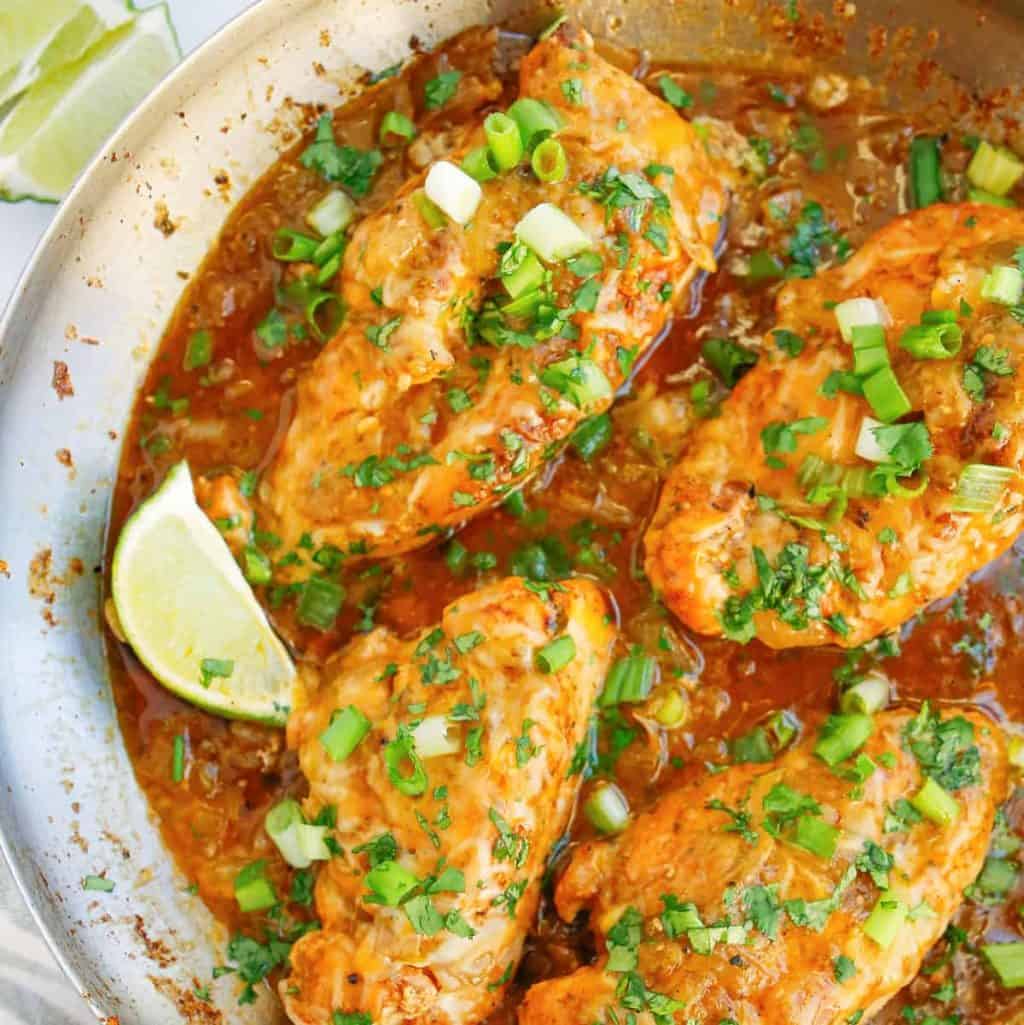
Salsa Verde Chicken
This Salsa Verde Chicken combines delicious spices and salsa and is a quick and tasty dinner recipe. You will want to put this one on repeat!

Chicken Taco Pizza (with Secret Sauce)
Get two meals out of one preparation! The most amazing chicken pizza with a secret sauce and a second meal for Chicken Tacos!
Copycat Chipotle Chicken
Enjoy your favorite dish at home with this tasty Copycat Chipotle Chicken recipe. All your favorite flavors together!
Crock Pot Chicken and Rice Burrito Bowl
This Crock Pot Chicken and Rice Burrito Bowl has tons of flavor thanks to salsa and seasoning and only takes a few minutes of prep time. So easy!
Smothered Beef Burritos
Cheesy, beefy and covered in a delicious white sauce, these Smothered Beef Burritos are an easy weeknight dinner that the whole family will devour!
Crock Pot Taco Meat
This Crock Pot Taco Meat has just 3 ingredients and makes the perfect base to all of your taco flavored recipes! Easy and so flavorful!
Grilled Pollo Loco
Fire up the grill and prepare to go loco for this sizzling hot Pollo Loco recipe that's bursting with flavor and sure to be a crowd-pleaser!
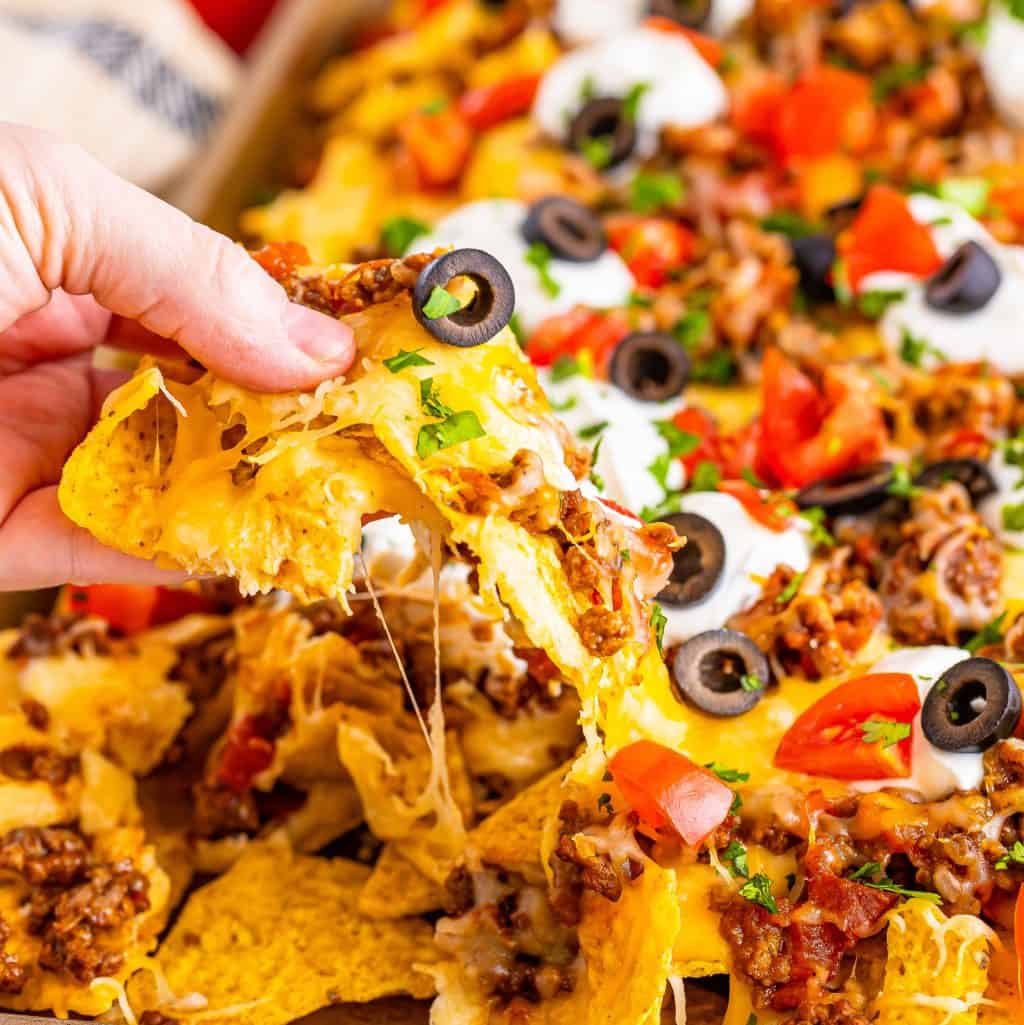
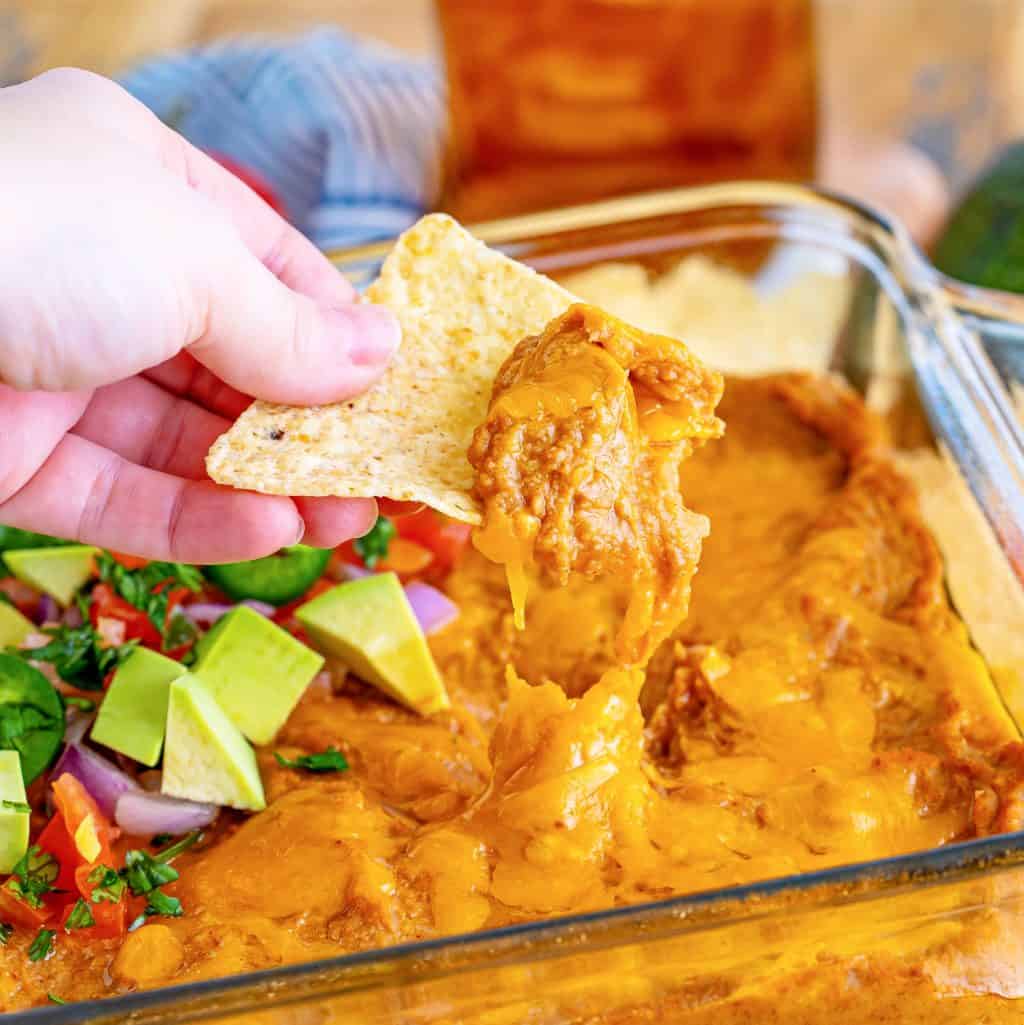
Sheet Pan Nachos
Made with a homemade cheese sauce and layered with your favorite nacho toppings, these Sheet Pan Nachos come together in no time, so easily!

Crock Pot Chicken Fajitas (+Video)
This Crock Pot Chicken Fajitas recipe is super simple, flavorful and makes the most tender and delicious chicken fajitas!
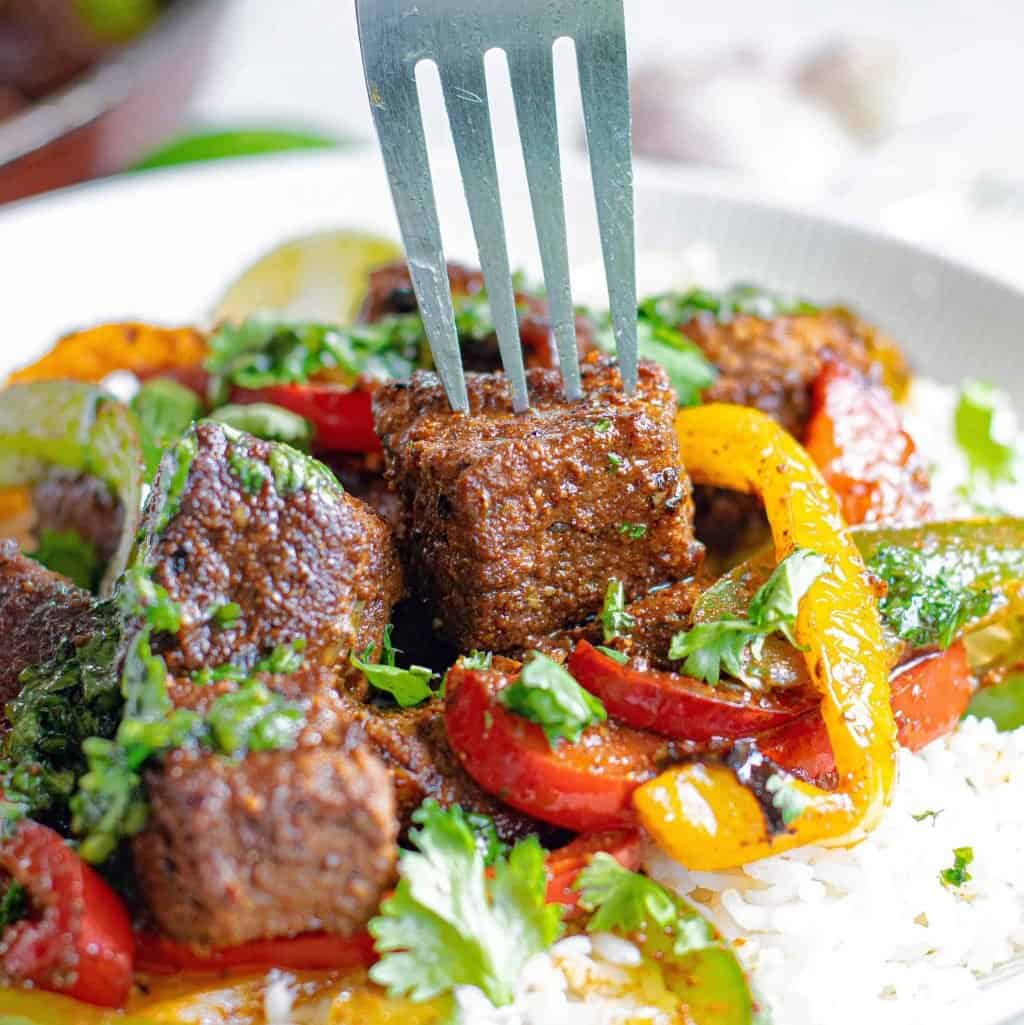
Steak Bite Fajita Bowls
Steak Bite Fajita Bowls are so flavorful, easy and the perfect weeknight dinner that can be served in so many ways! This meal can be whipped up quickly and with minimal ingredients!
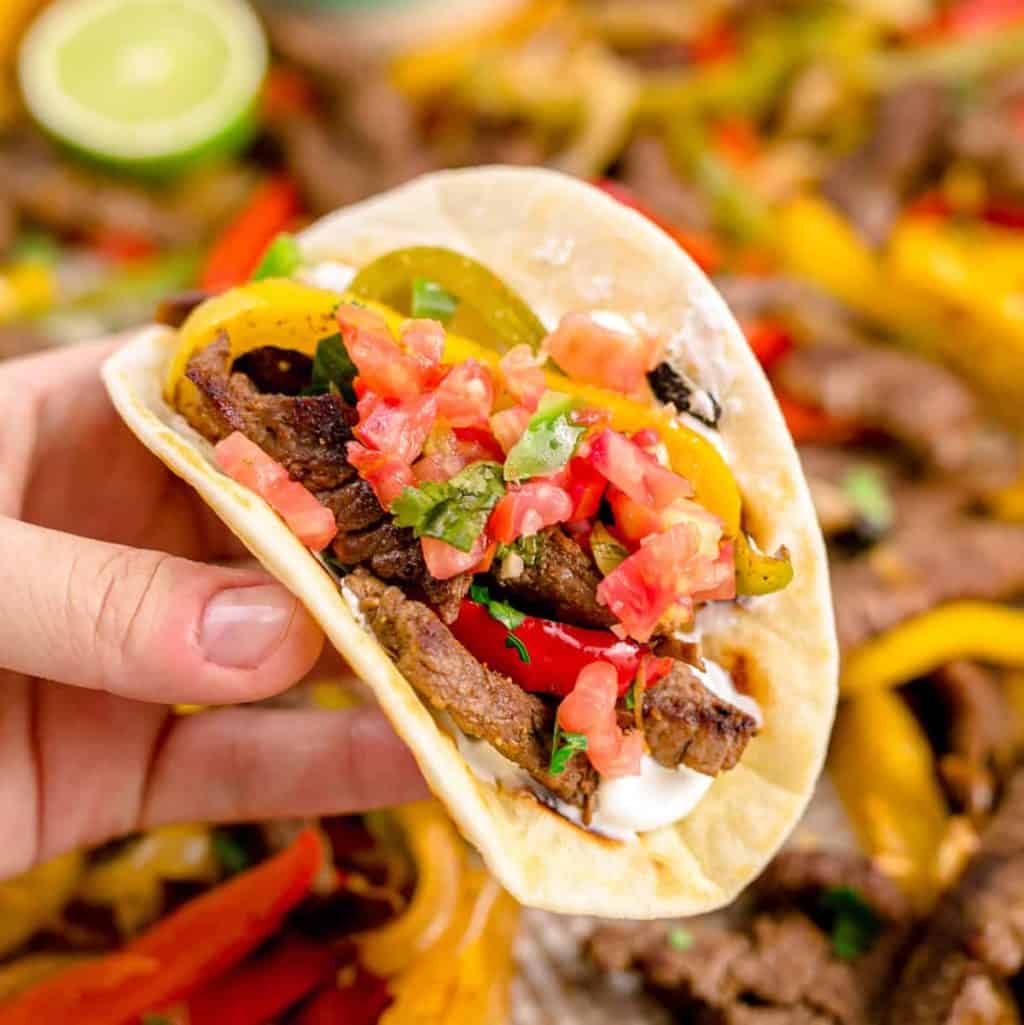
Sheet Pan Beef Fajitas
Taco night just got easier with these Sheet Pan Beef Fajitas! Tasty, simple and easily customizable for the whole family!
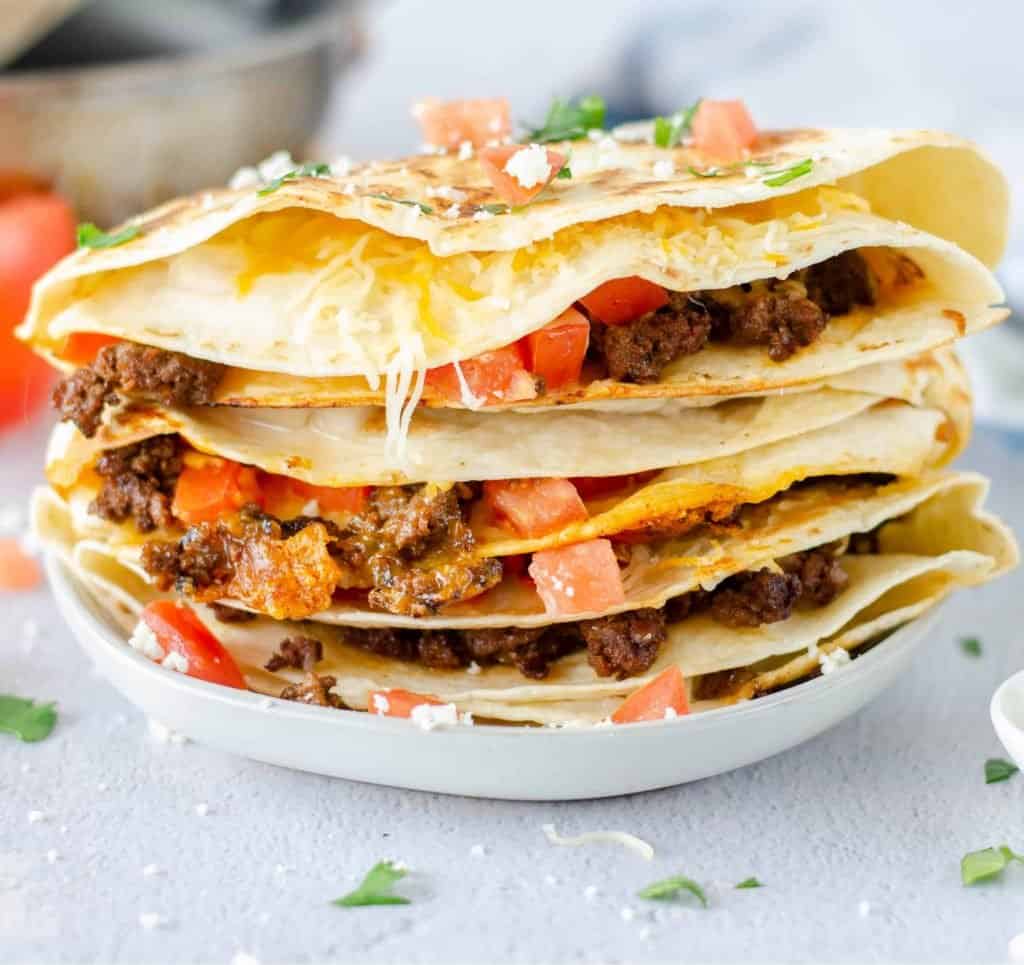
Taco Quesadillas
Have fun with your tortillas and make this twist on Taco Quesadillas! Easy ingredients help this folded hack come together easily. Flavorful and fun!
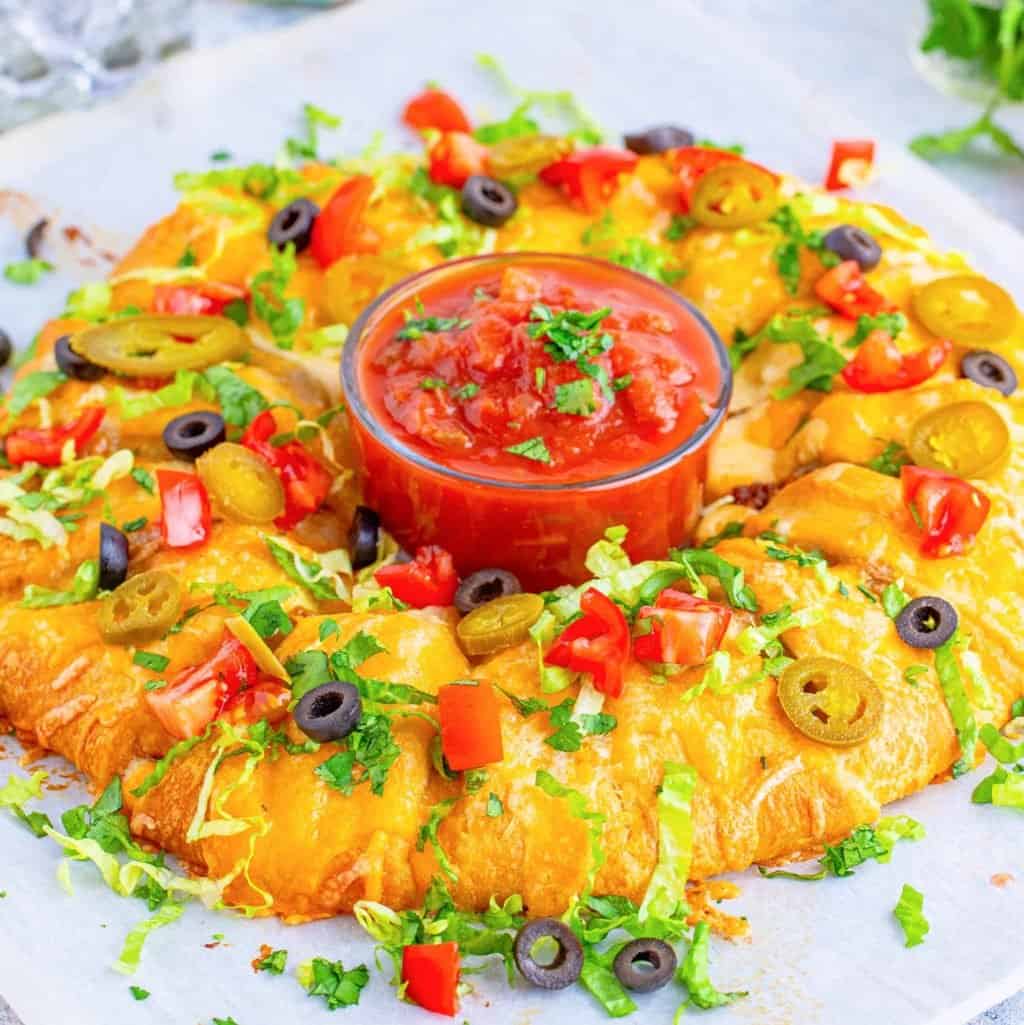
Taco Crescent Ring
This Taco Crescent Ring is so versatile and always a favorite with friends and family! It uses simple ingredients all wrapped up in crescent rolls making it a fun appetizer or main dish!
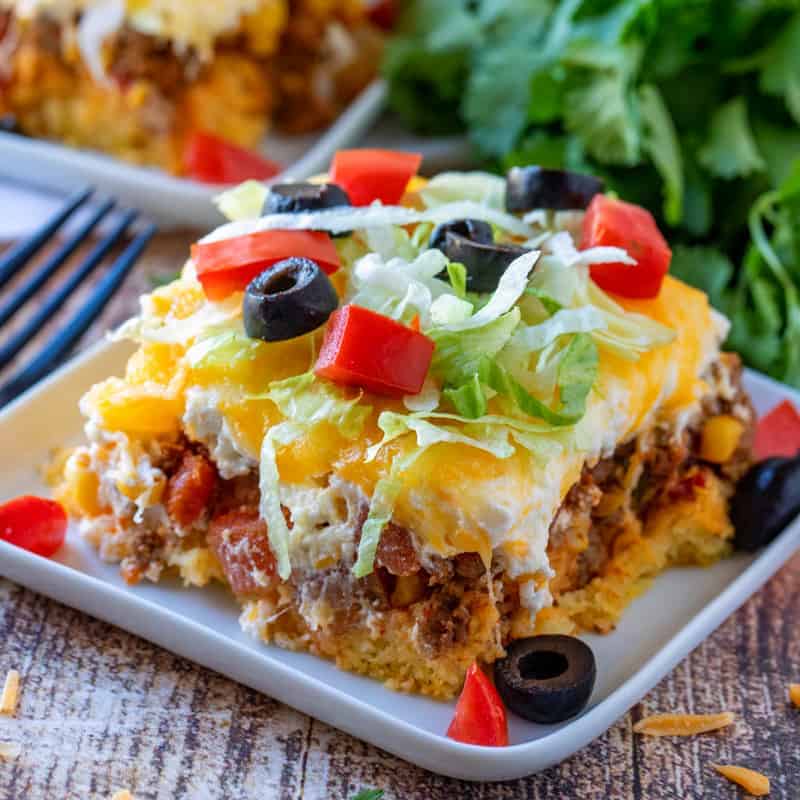
Easy Layered Taco Bake
This layered Taco Bake is a simple and quick weeknight meal with layers of tortillas, ground beef and salsa con queso!
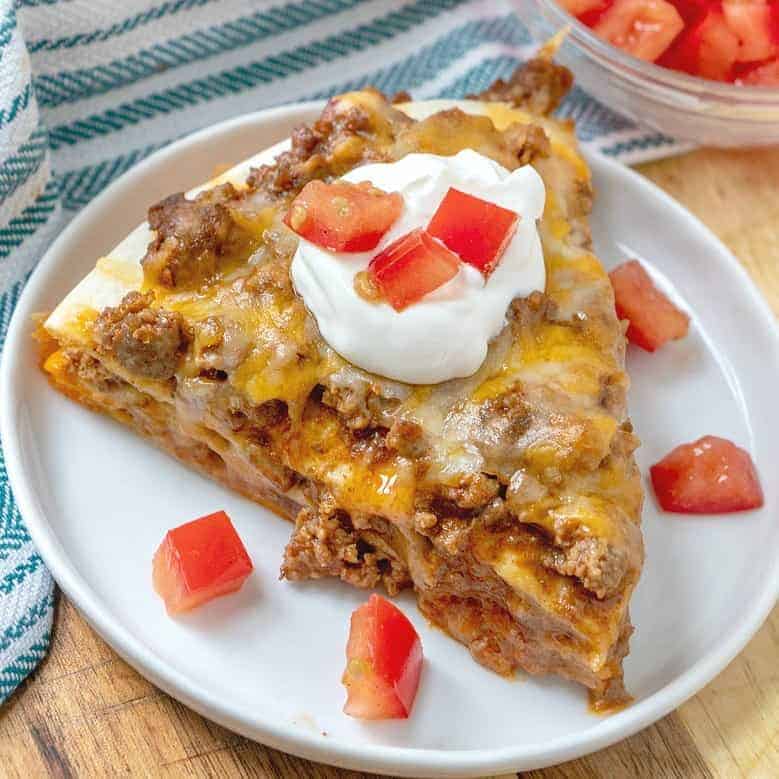
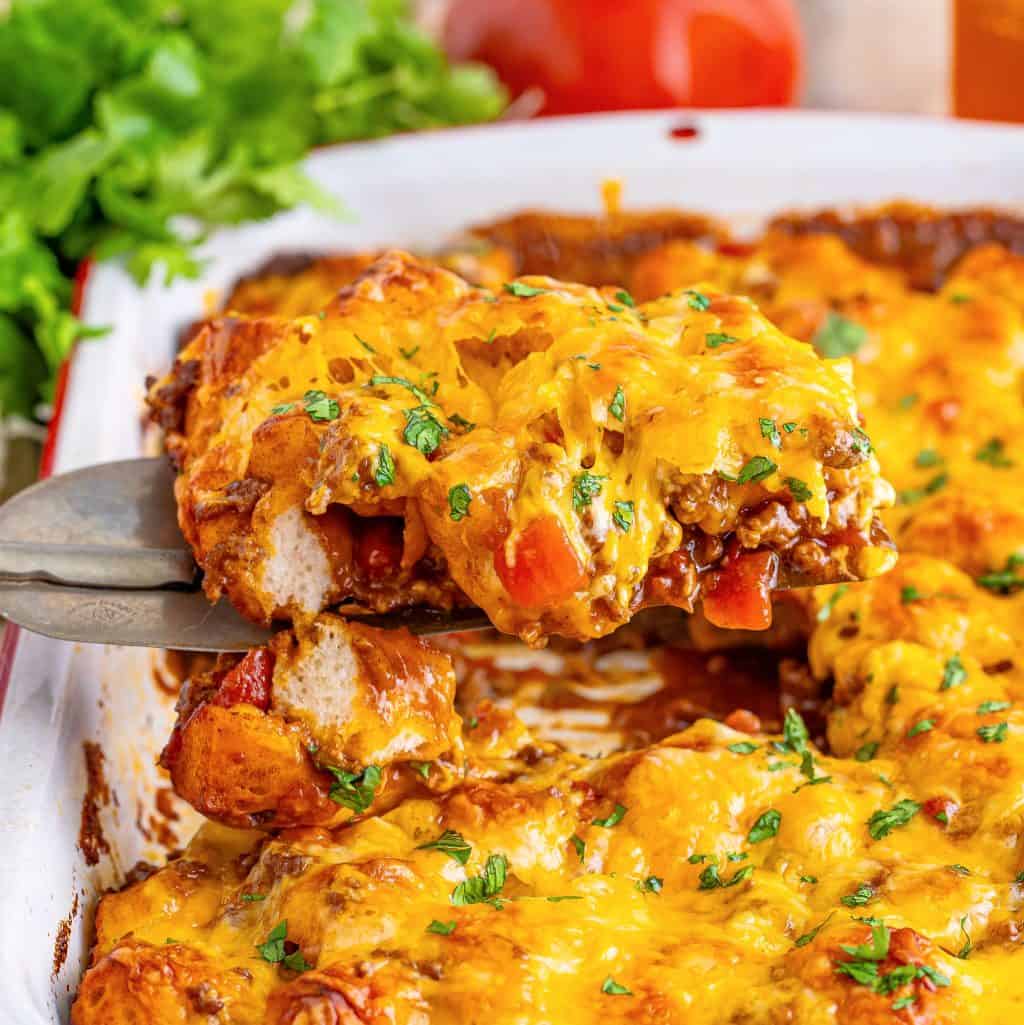
Cornbread Taco Bake (+Video)
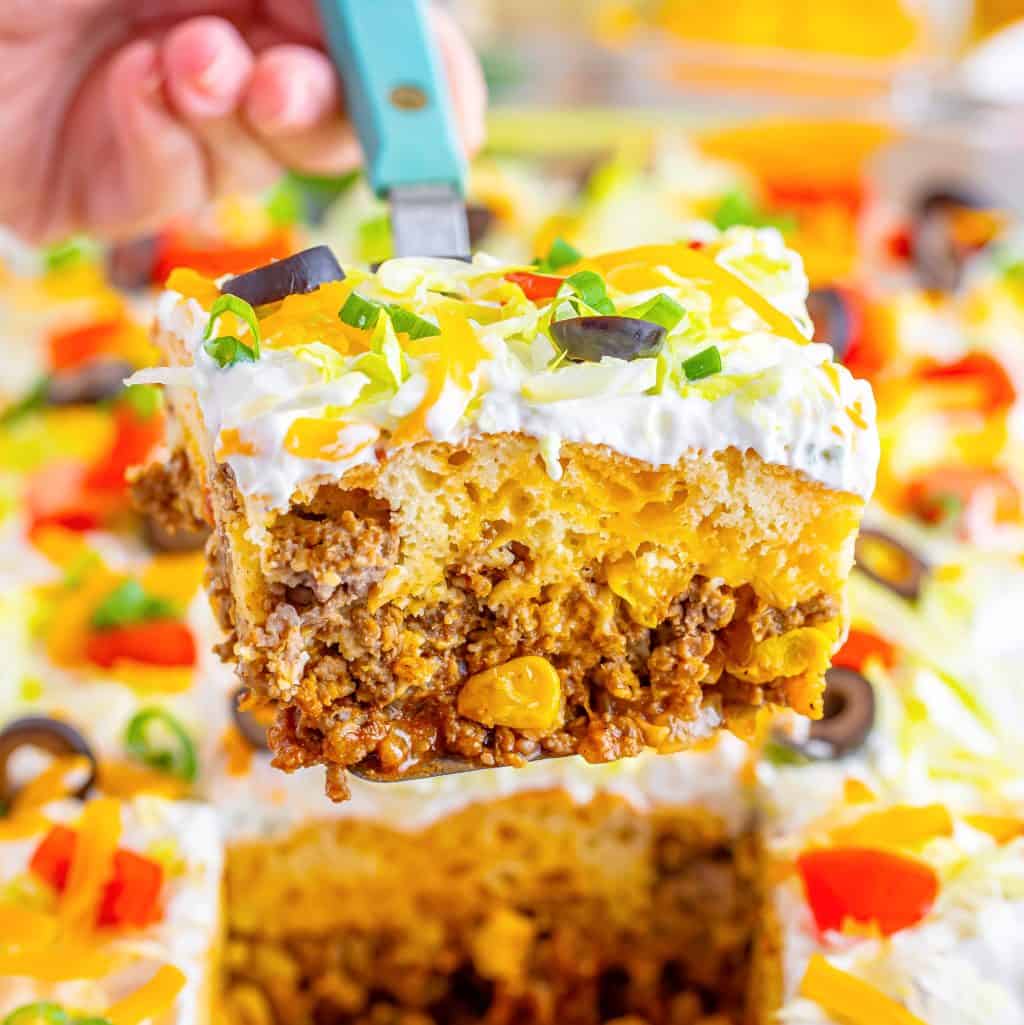
Cornbread Taco Bake is a cornbread base topped with seasoned ground beef, a creamy filling and topped with melted cheese! So good!
Bisquick Taco Casserole
All your favorite taco flavors topped with a cheesy, fluffy layer of Bisquick to craft the ultimate comfort food, Bisquick Taco Casserole! Easy and quick to make!
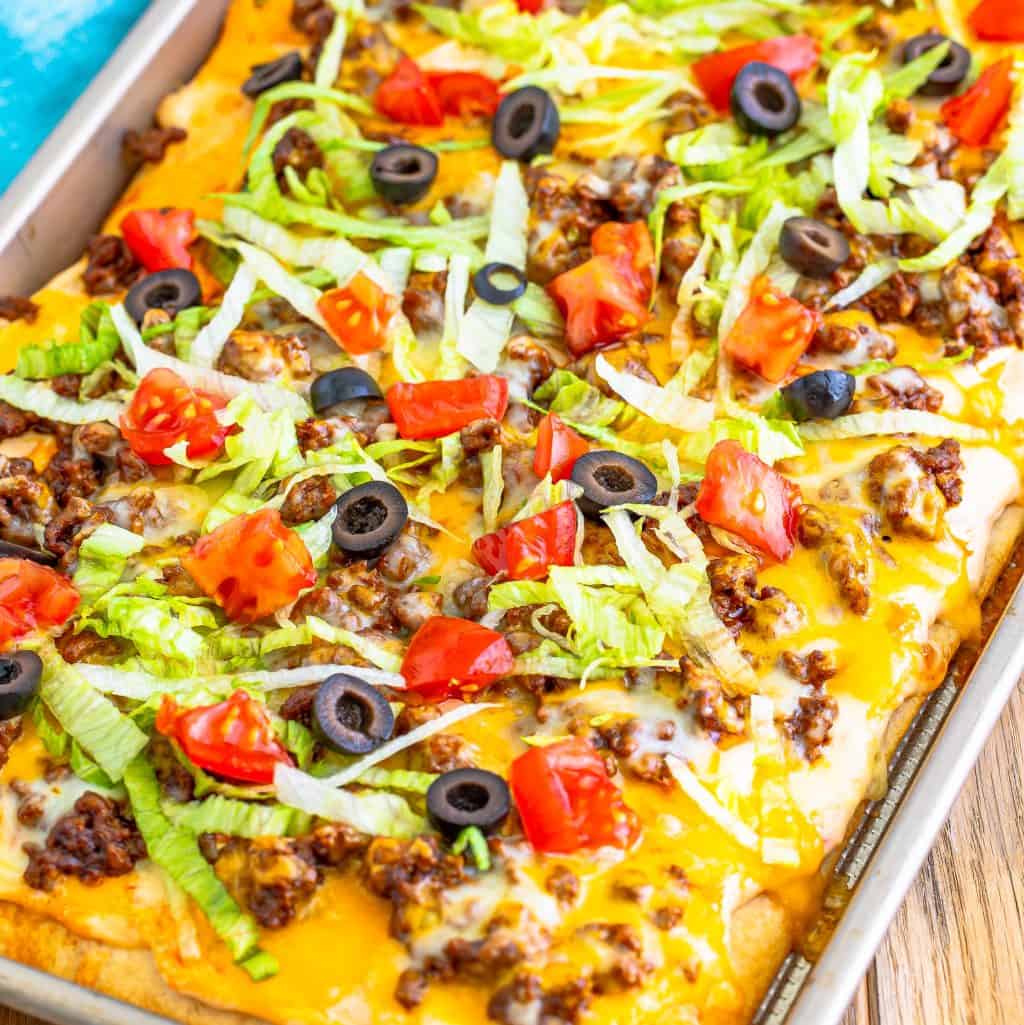
Taco Pizza
Make it a fun Taco Tuesday dinner with this extremely easy and crowd-pleasing Taco Pizza! Simple ingredients with flavor bursting in every bite!
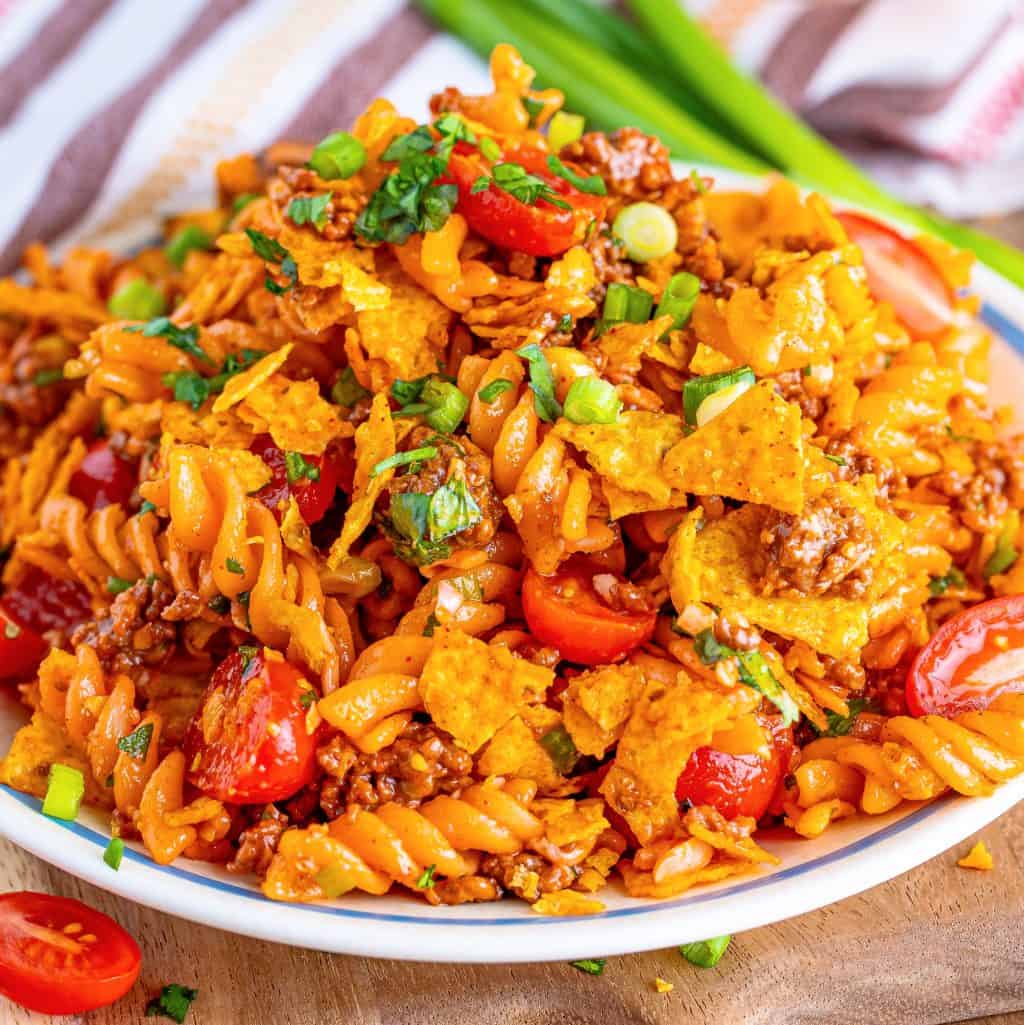
Taco Pasta Salad
This flavorful Taco Pasta Salad is simple to make and so delicious! It has all the best parts of a taco but served as a pasta salad instead and topped with Doritos!
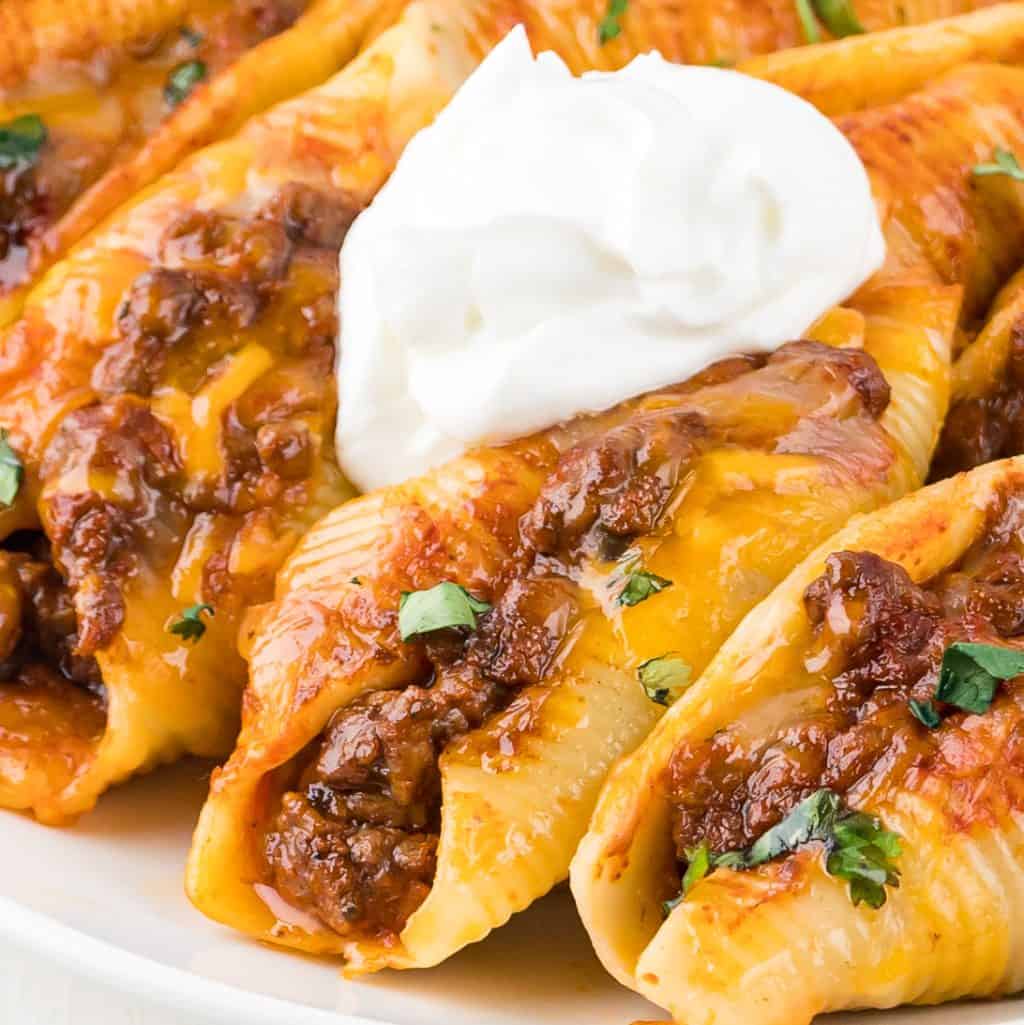
Taco Stuffed Shells
These taco stuffed shells are literally oozing with the best taco flavors and are ready in under an hour!
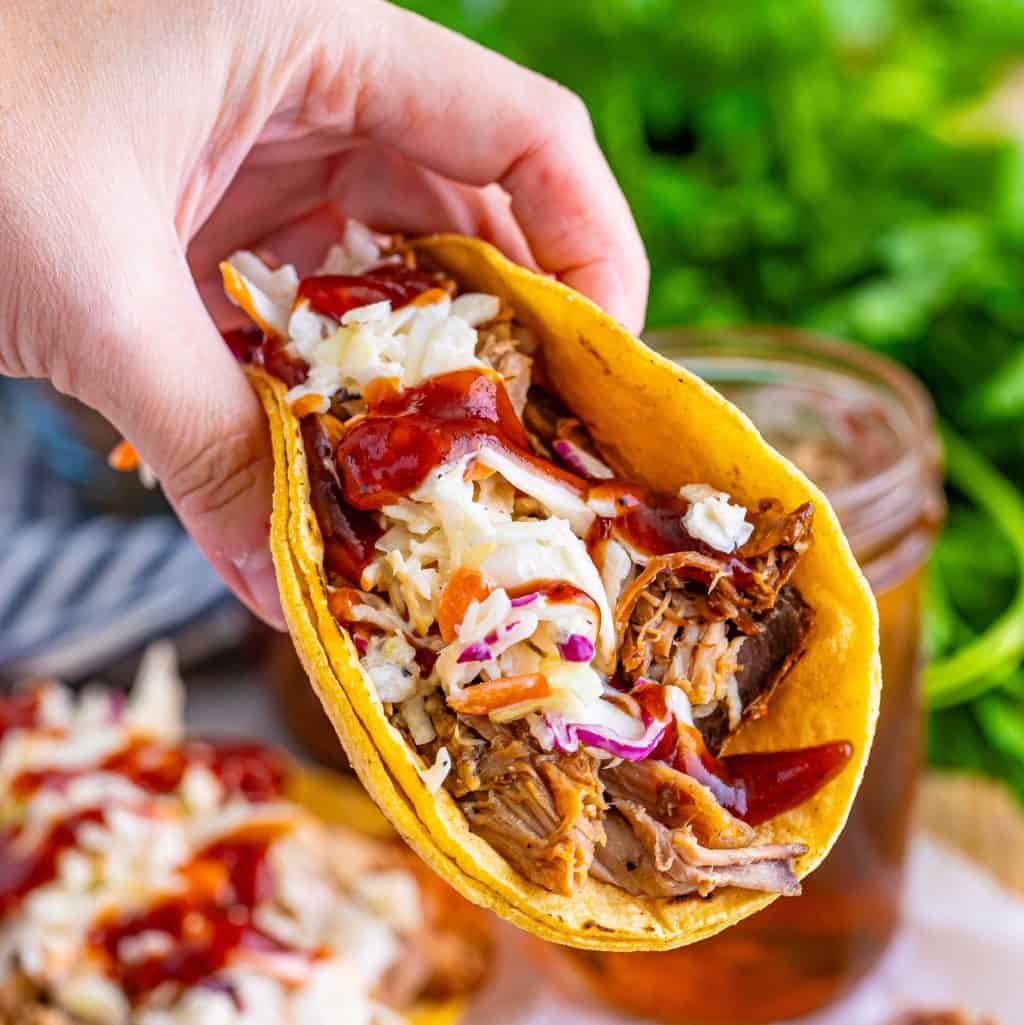
Hillbilly Tacos
Hillbilly Tacos are pulled pork tacos, topped with a creamy cole slaw all stuffed into a corn tortilla. Have a little fun on taco night with this delicious twist on the classic taco!
Taco Bubble Up (+Video)
Taco Bubble Up uses ground beef, cheese, biscuits, and your favorite taco flavors to make a quick casserole for dinner in 40 minutes!

Crock Pot Shredded Chicken for Tacos
This Crock Pot Shredded Chicken for Tacos is a creamy chicken taco filling made with chicken breasts, salsa, taco seasoning, cream of chicken and sour cream!
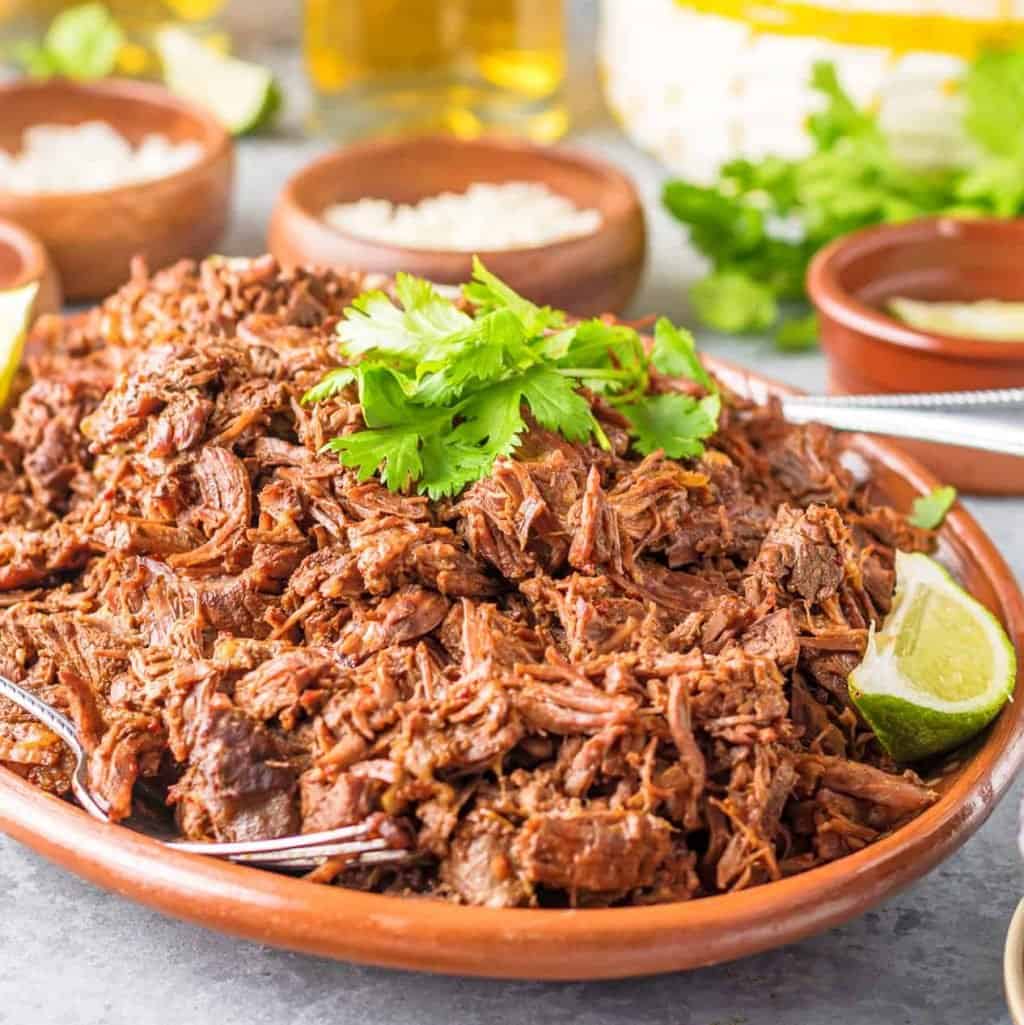
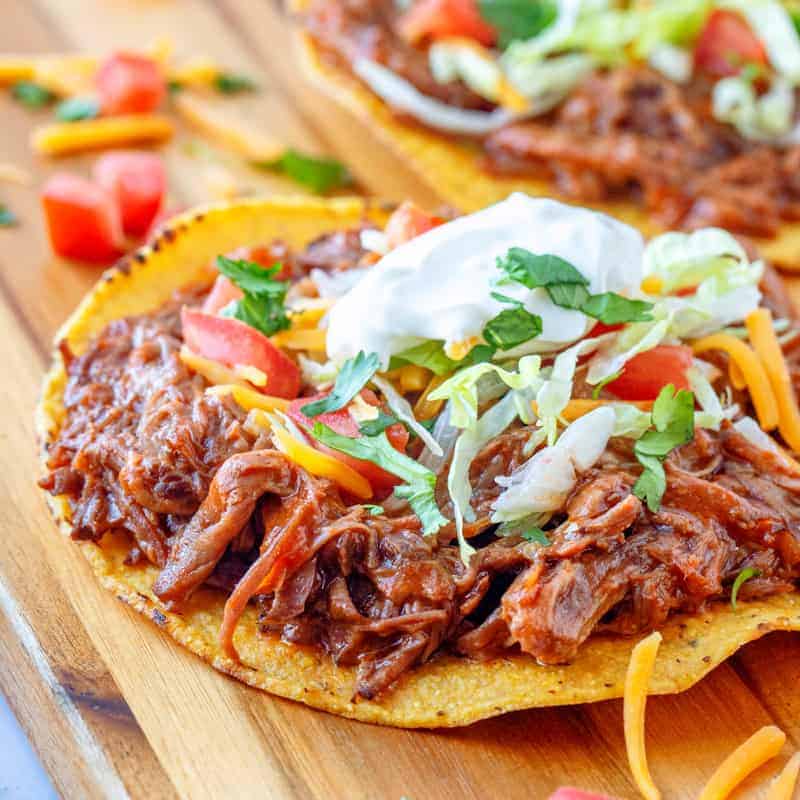
Instant Pot Barbacoa
This Instant Pot Barbacoa is tender, juicy beef cooked in a delicious medley of chilis and spices. Perfect in so many different dishes such as tacos, bowls and burritos!

Creamy Shrimp Enchiladas
These Creamy Shrimp Enchiladas are tortillas filled with cilantro lime rice, creole shrimp filling, pico de gallo, topped with cheese sauce.
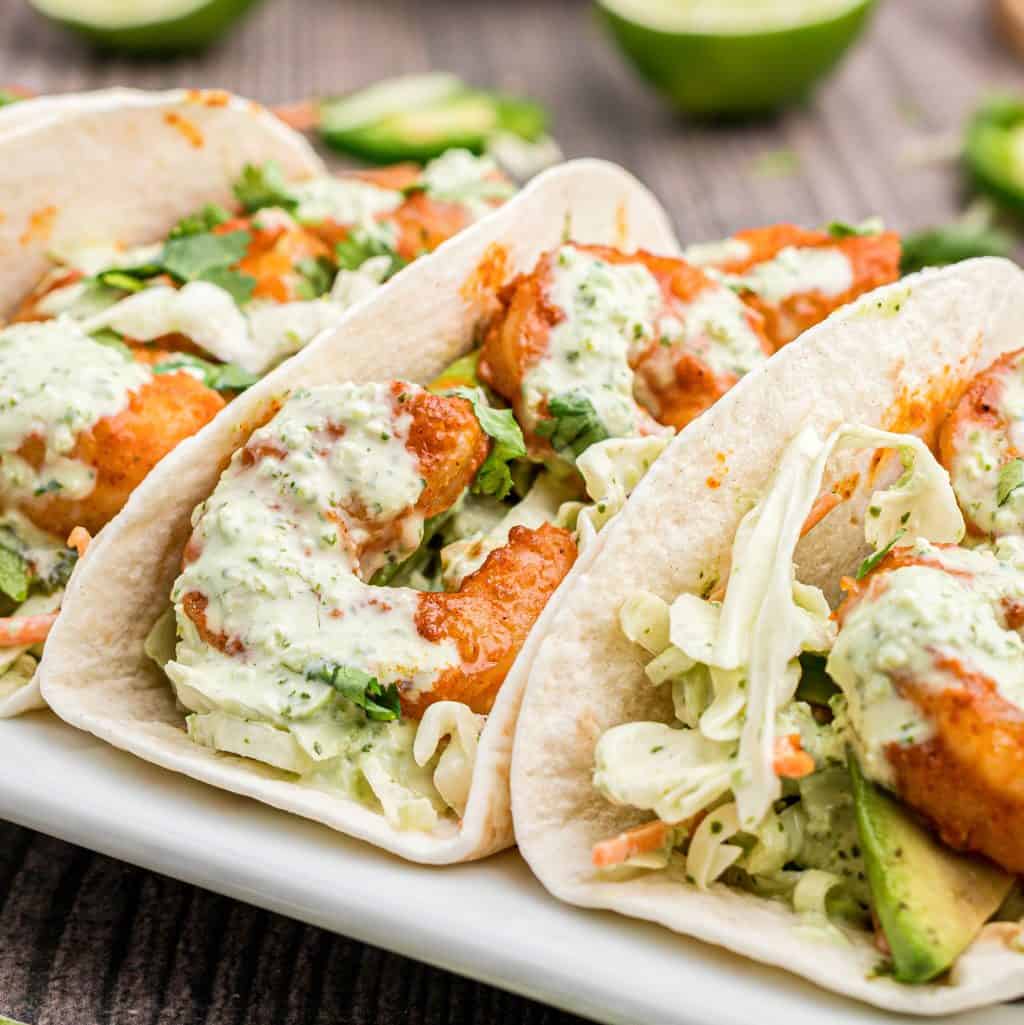
Shrimp Tacos
Fresh, flavorful and hearty, these Shrimp Tacos are made with perfectly seasoned shrimp and covered with a creamy sauce and homemade coleslaw!
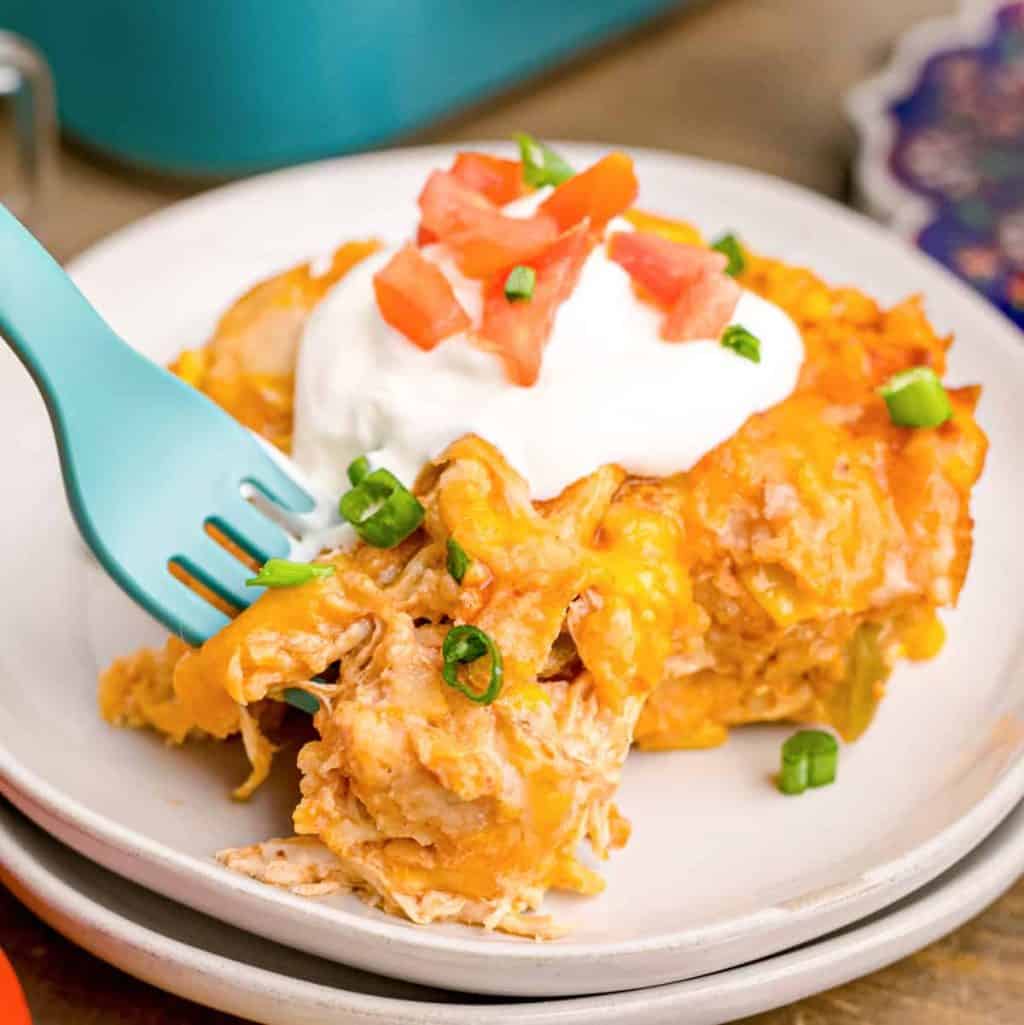
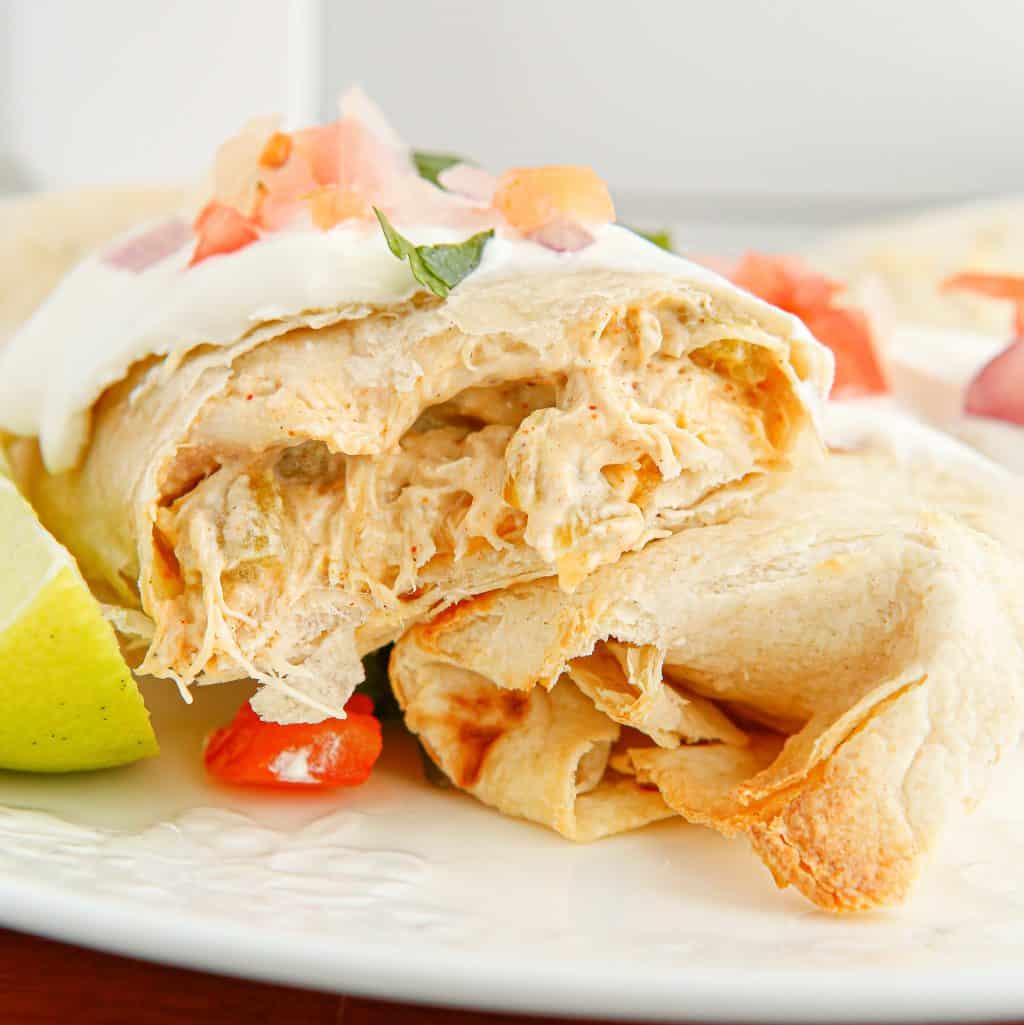
Lazy Chicken Enchiladas
If you love enchiladas (but don't love all the work) then you have to try these Lazy Chicken Enchiladas! All the flavor, but so much easier!
Ground Beef Enchiladas
These simple Ground Beef Enchiladas only have a few ingredients and make the perfect dinnertime meal everyone will love!

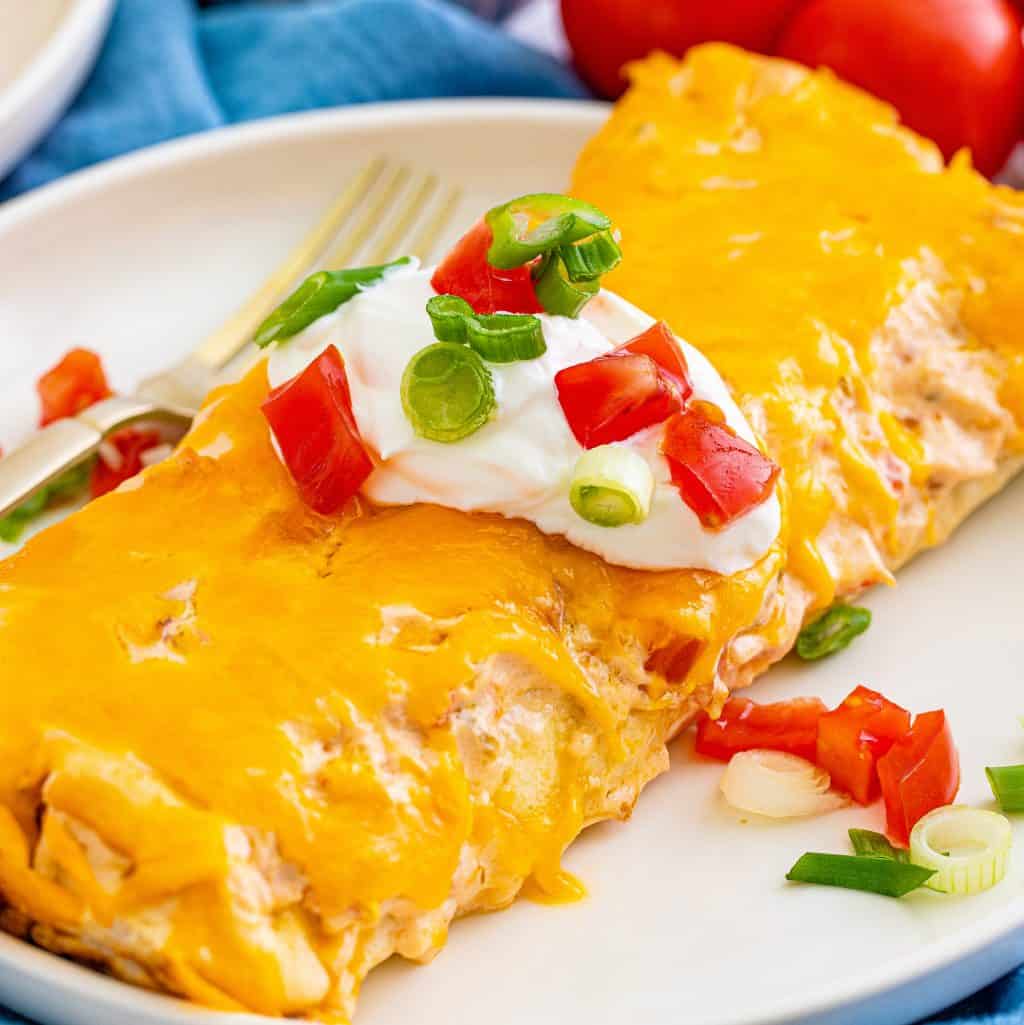
Creamy White Chicken Enchiladas
This recipe for creamy White Chicken Enchiladas is made with flour tortillas, shredded chicken, cheese, green chiles and a delicious creamy white sauce!
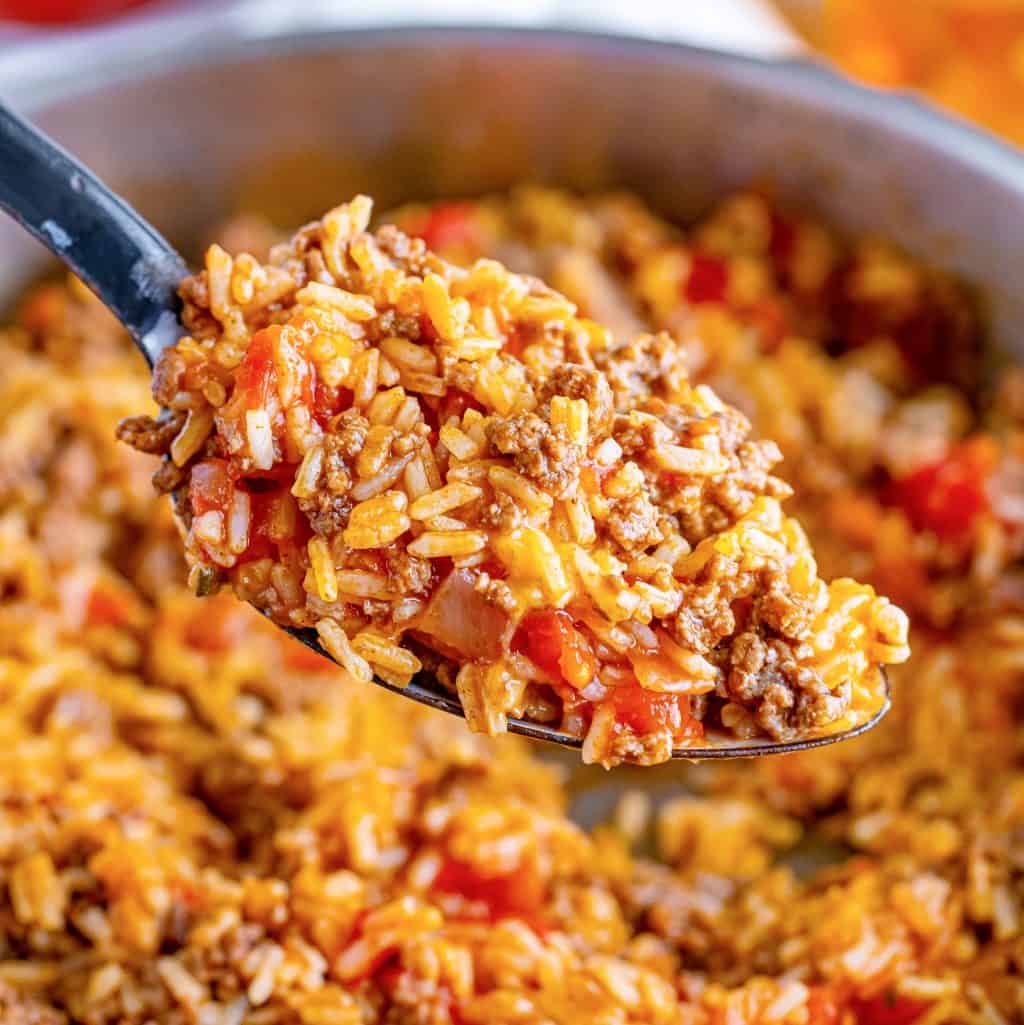
Taco Rice
This easy, one pan Taco Rice recipe is a whole meal in one. Ground beef, taco seasonings, salsa, rice and cheese. A family favorite meal!

Swiss Enchiladas (Enchiladas Suizas)
These Creamy Swiss Enchiladas are made with corn tortillas stuffed with a creamy chicken mixture and topped a cream cheese sauce.
Air Fryer Chicken Chimichangas
A quick and easy recipe done under 20 minutes, these Air Fryer Chicken Chimichangas are a flavorful and easy dinner time recipe!
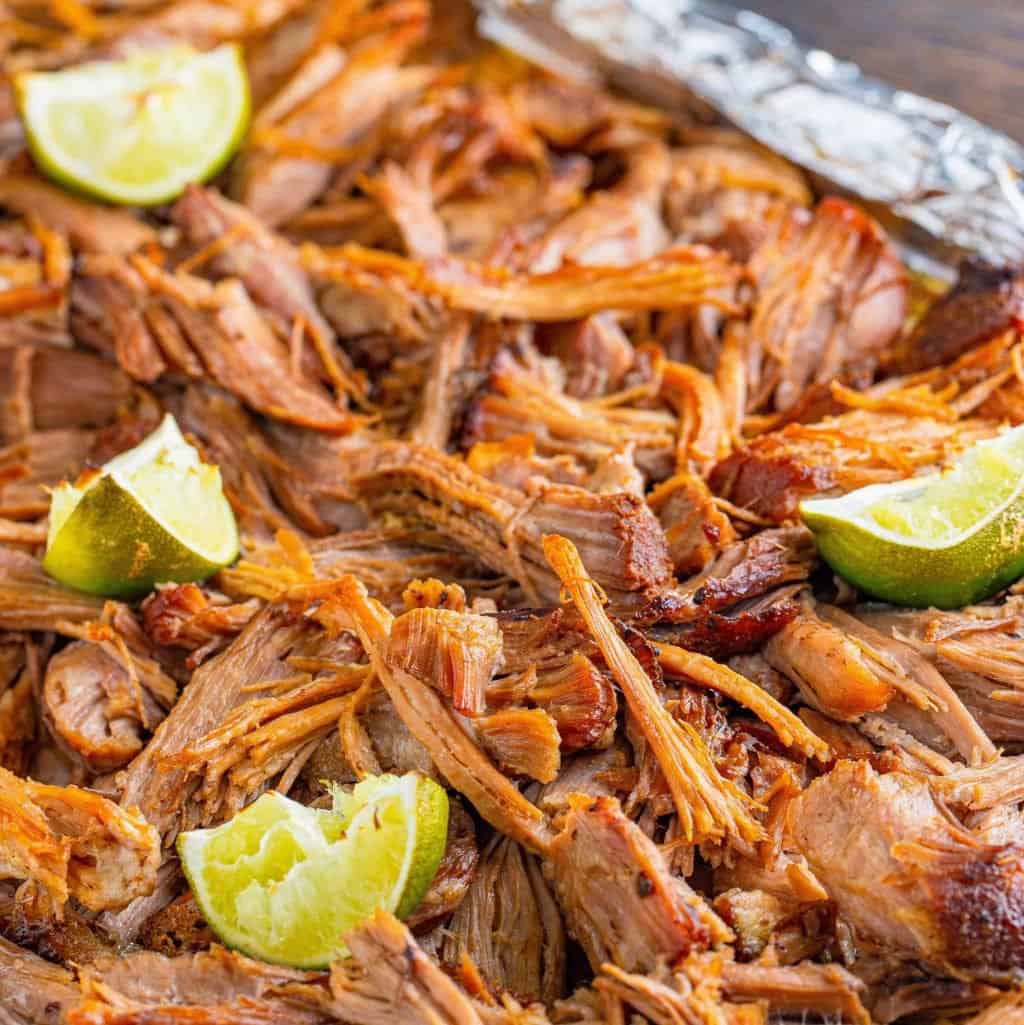
Crock Pot Pork Carnitas
These Crock Pot Pork Carnitas only require a handful of ingredients and are full of flavor. Perfectly seasoned pork and a trick to help the meat stay tender with crispy edges!
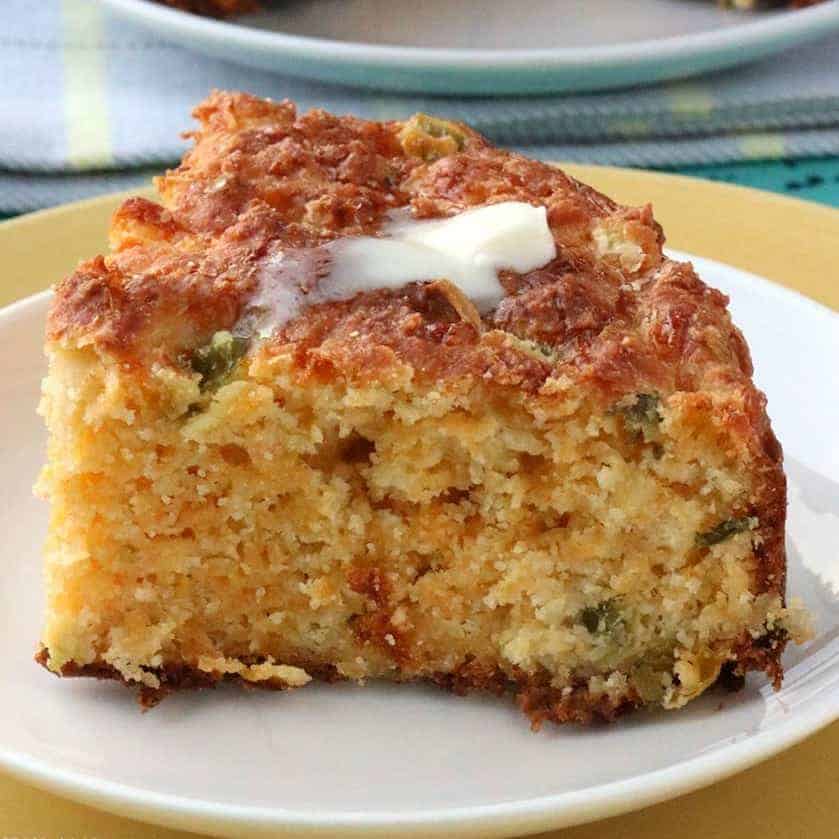
Mexican Cornbread
This Mexican Cornbread is an easy homemade recipe made with cornmeal, flour, cheddar cheese, cream corn, green onions, and peppers!
Crock Pot Mexican Shredded Beef (+Video)
This Crock Pot Mexican-Style Shredded Beef is perfect for taco night! Chuck roast, salsa, taco seasoning and sauce are all that's needed!
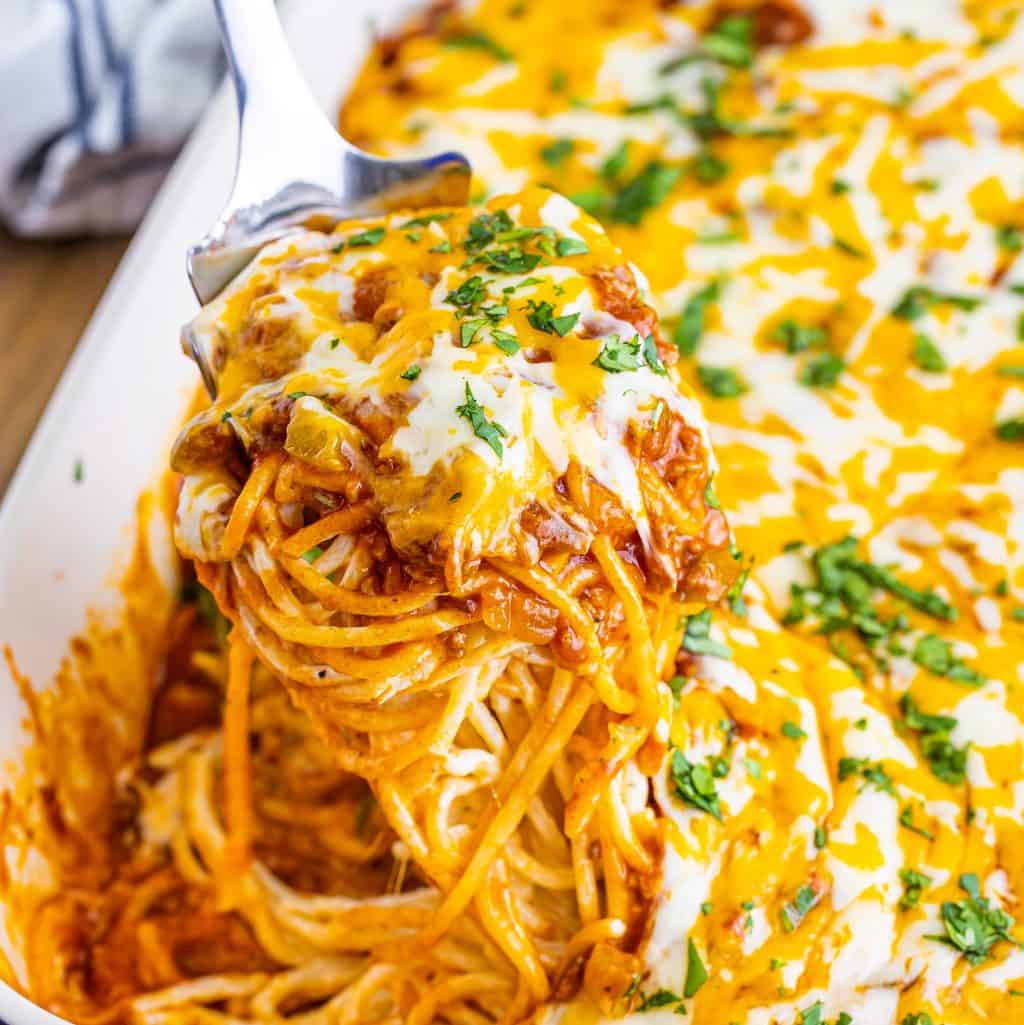
Mexican Million Dollar Spaghetti
All your favorite flavors are in this Mexican Million Dollar Spaghetti. Cheesy, taco flavored pasta!
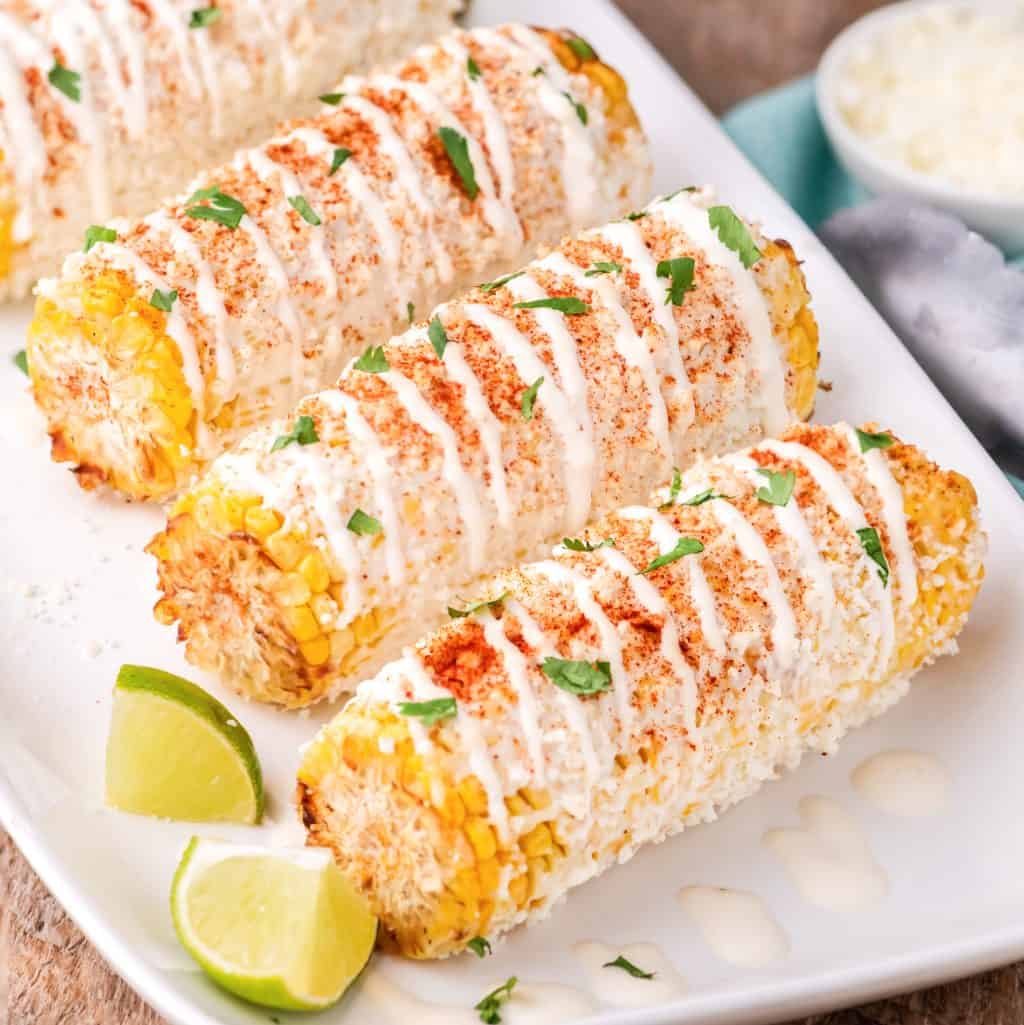
Air Fryer Mexican Street Corn
Enjoy your favorite Mexican Street Corn with this super easy Air Fryer recipe!
Taco Bell Mexican Pizza
This Taco Bell Mexican Pizza recipe is made with fried tortillas, refried beans, seasoned ground beef, enchilada sauce, and melted cheese!
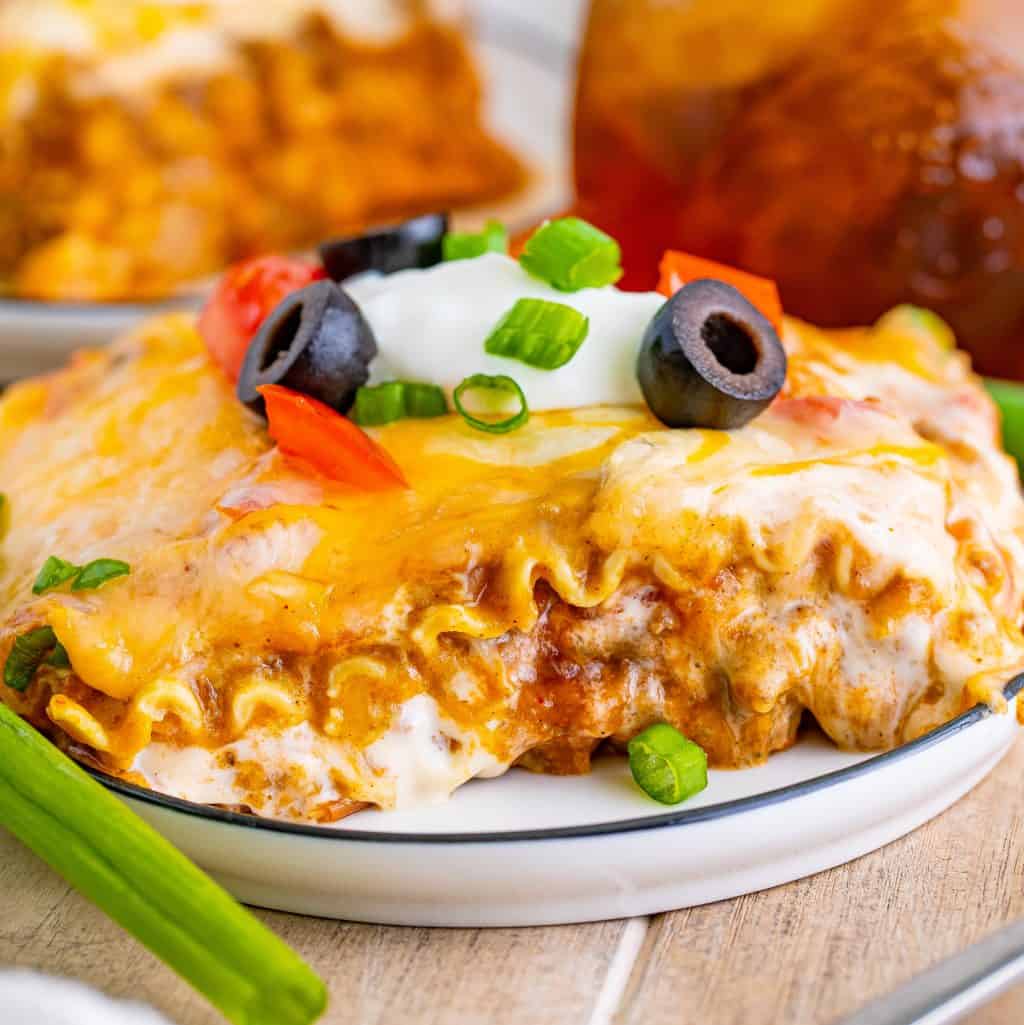
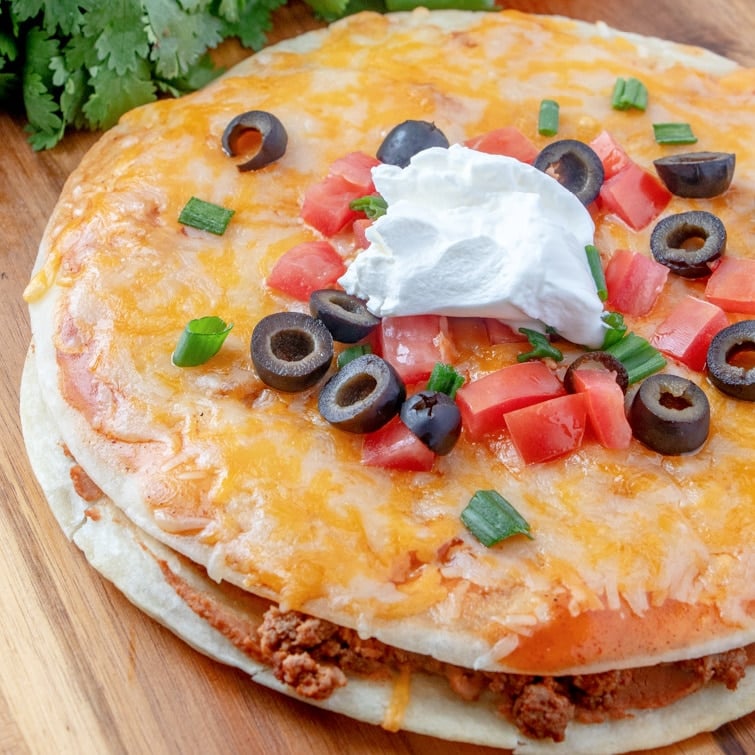
Mexican Lasagna
The Best Mexican Lasagna recipe is made with layers of pasta, ground beef, refried beans, shredded cheese and alfredo sauce. A family favorite dinner!
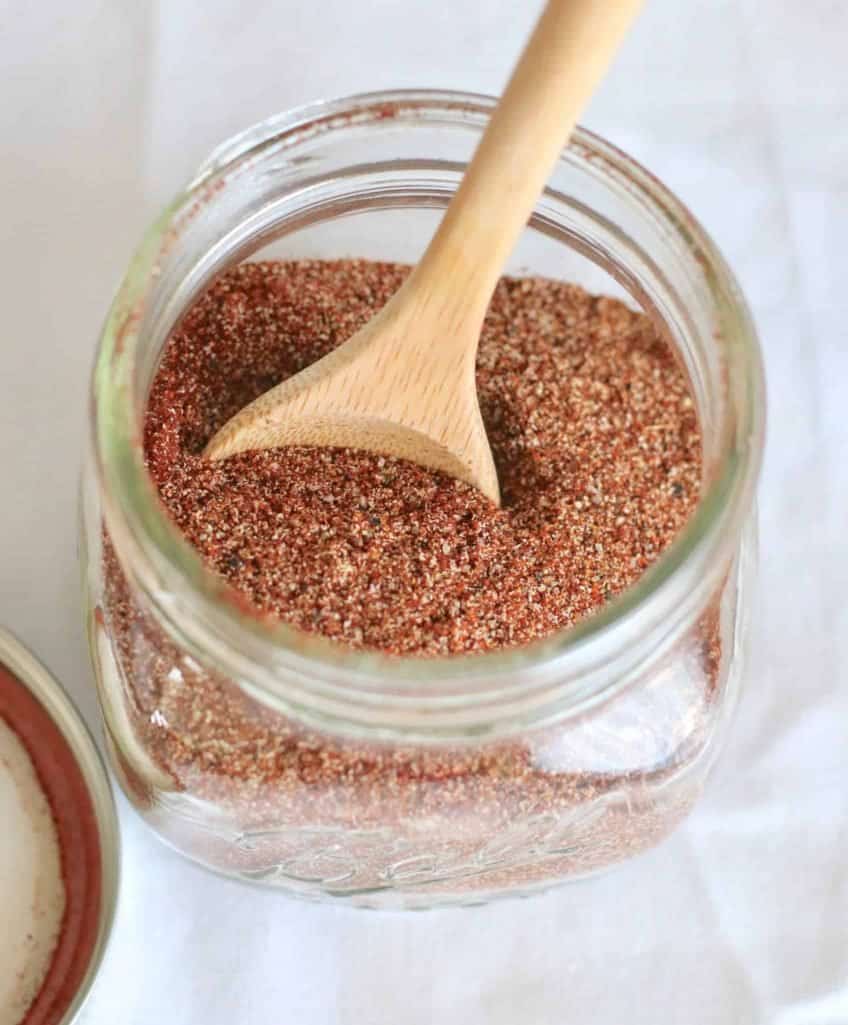
Homemade Taco Seasoning
This gluten-free Homemade Taco Seasoning recipe is the perfect balance of flavors. Control what goes into your food with this easy and mild seasoning.

Homemade Fajita Seasoning
A blend of seasonings to create a homemade blend of fajita seasonings.
%20100vw,%201024px%22%20/%3EAll%20the%20best%20Cinco%20de%20Mayo%20recipes%20all%20in%20one%20spot!%20Sopapilla%20Cheesecake,%20Enchiladas,%20Mexican%20Rice,%20Fried%20Ice%20Cream%20Cake,%20Rice%20Pudding%20and%20much%20more%20to%20celebrate%20the%20occasion!%20EASY%20CINCO%20DE%20MAYO%20DRINKS,%20DINNERS,%20APPETIZERS%20AND%20DESSERTS%20I%20love%20a%20good%20Cinco%20de%20Mayo%20gathering!%20Any%20excuse%20to%20eat%20tacos%20is%20alright%20by%20me!...)